Use RPI Monitor to Control Your Squeezelite Players Using Friends
by onehandclappin in Circuits > Raspberry Pi
1046 Views, 2 Favorites, 0 Comments
Use RPI Monitor to Control Your Squeezelite Players Using Friends
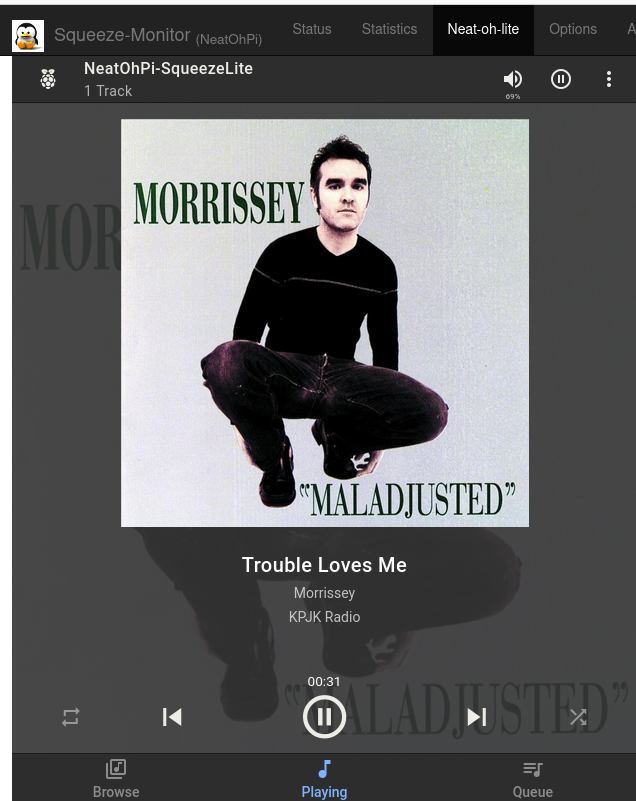
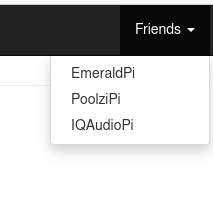
Control your squeezelite players using a web interface that serves as an integration point - and at the same time, monitor each Pi's diagnostics using RPI Monitor.
Long ago, when Squeeze Players were sold by Logitech, they were highly regarded as quality audio devices. The code has been opened up and is being supported and developed by a highly skilled set of developers and hobbyists. Logitech Media Server (the back end) can run on most operating systems including windows, linux etc. It has the advantages of being tested and seasoned, durable and very stable. What were once called Slim devices are now called Squeezelite players and Squeezelite is maintained by the same set of developers, designed to provide a front end for the end user. There are many features we wont get into, and many extensions and addons you can customize to suit your personal preference. With many players in force (think whole home audio), a need for an integration point becomes a necessity.
Enter RPI Monitor. While not designed for audio enthusiats or purposes, it acts as a monitoring device for your raspberry pi, and provides a simple web interface. There are 2 notable features of RPI Monitor that I have exploited for the purpose of this instructable: The ability customize addons as menu items, and the ability to use the "Friends" feature to toggle to other Squeezelite players. Like squeezelite, RPI Monitor is open source and is available on github, or even better: it can be installed along with Squeezelite on Dietpi Operating System with one click. We'll see how easy this can be.
Supplies
Logitech Media Server installed on a network device and accessible over wifi (various options)
Material Skin installed on LMS (you only have to install on server once)
Raspberry Pi's as the players (operating headless)
For Each Player:
- Soundcard or Dac HATS (recommended )
- Ample power supply
- Amplification, speakers and wiring, including 3.5mm input jack
- Micro SD Card
Network Connectivity
The ability to download Dietpi OS to a temporary host (can be any pc) for install to each pi
The ability to obtain an IP address on network devices such as Fing
A little patience as some things never seem to go right the first time, and some knowledge of basic linux commands such as scp to move files, cp to copy, nano to edit etc. A little creativity and humor will make this an enjoyable experience to your ears, and we may learn a thing or two along the way.
Download and Install Dietpi OS
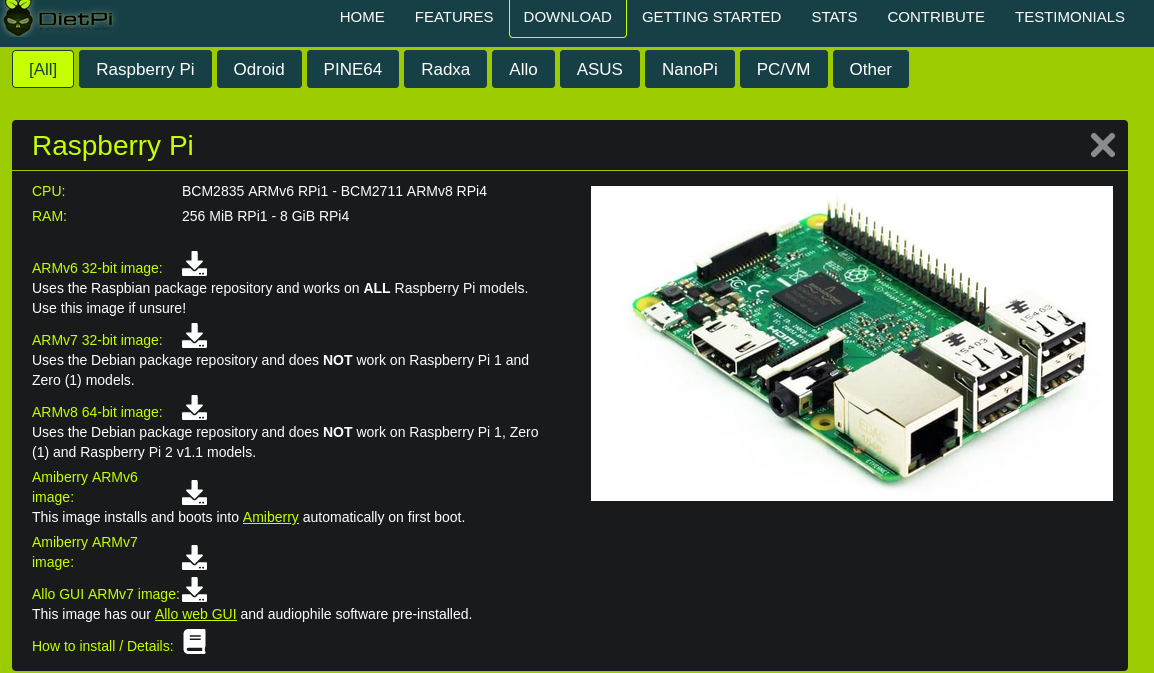
This should be straightforward, especially if you have installed OS's on raspberry pi's in the past. If not the bare bone instructions are to download Dietpi from their website. You have several options depending on whether you want a 64 or 32 bit os, Depending on which pi (or which SBC if not using a pi) you own.
From here, extract the zipped file into a temp folder, and using Balena Etcher or a similar image burning software, write the image to a clean formatted SD card of at least 8gb in size.
The process will take a few minutes to flash and validate. Personally, I have done this so many times that I immediately configure the wifi in the dietpi wifi.txt files and everything else in the dietpi.txt files before I eject the card. This saves me the next step of having to configure through the GUI, but if you feel hesitant or would rather use the Dietpi-Config GUI, that is probably a safe bet.
Safely eject the SD Card and install it on our headless pi (player).
First boot will take a few minutes as the file system expands, and I believe the first boot automatically runs an update as well, so allow a few minutes if you don't see your screen flickering after you installed Dietpi.
For more on DietPi - https://dietpi.com/
Configure Dietpi Wifi and Stuff
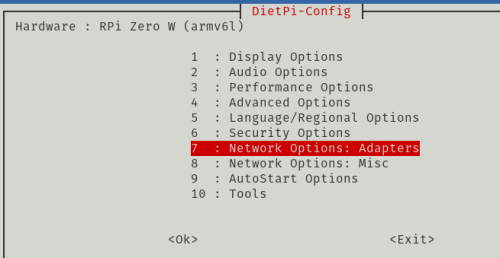
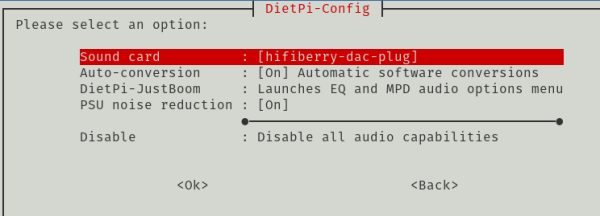
If we did not do this by editing the dietpi-wifi.txt file or the dietpi.txt file before we ejected the SD card, now is the time to make some hardware configurations.
If we ssh to our player, or even if we connect the pi to a keyboard and monitor temporarily, we still need to configure a few things. On the command line, type :
sudo dietpi-config
First, let's setup our wifi by choosing #7 Network Options Adapters, and setup our wifi.
Secondly, let's regionalize our pi by choosing #5: Language/Regional options and establishing our Local language preference, timezone, Wifi country and keyboard layout.
Next, if not already done so, option #6 will allow us to change our password (a good idea) and our host name. The hostname will only change the pi on the network, we will have to repeat this step for squeezelite later on inside the squeezelite configuration. More on that later.
Almost forgot: Option #8 - Network Options - Misc. - "Wait for Network on Boot" should be toggled ON.
Finally, let's configure our audio options by choosing option #2 Audio Options. Let's turn ON the auto conversion and PSU noise reduction (who wants noise?) and select our sound card from the drop down choice. There is a good chance we may be prompted here to install Alsa Utilities, and if given a prompt, choose "Yes".
After making our configuration changes we can exit the Dietpi-Configuration Menu.
If prompted to reboot, please do so before returning to the command line....
Install Required Software
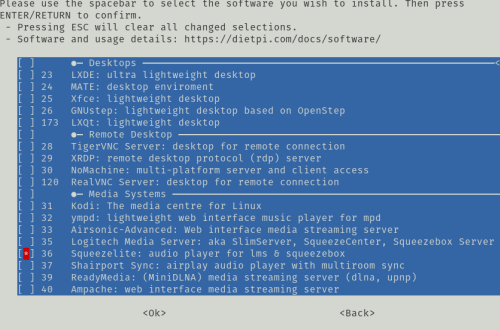
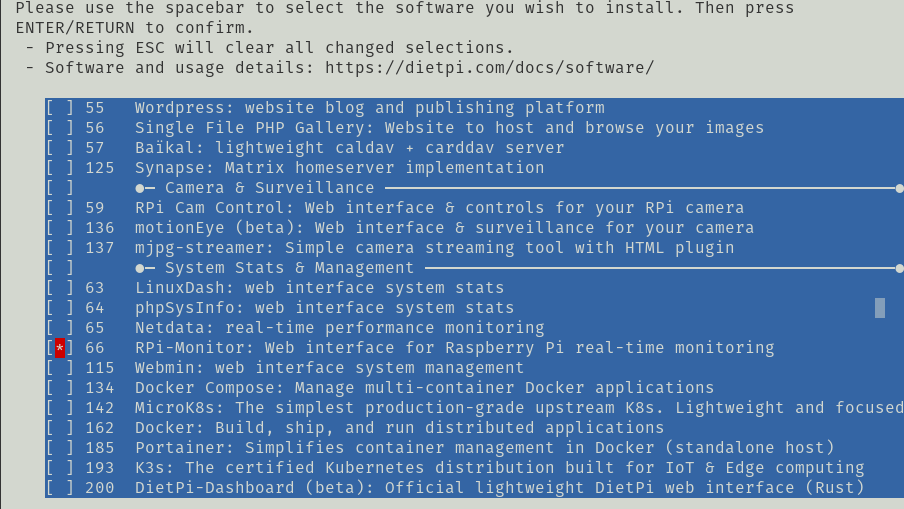
... to immediately enter the Dietpi Software menu:
sudo dietpi-software
We will want to Browse Software.
This step will take a good bit of time so for the sake of simplicity I recommend only installing 2: Squeezelite and RPI Monitor. If we were not prompted to install Alsa Utilities in the previous step, we would want to also select Alsa Utilities.
After putting a * (spacebar) in each option as pictured above, click Done, and then Install from the next menu. The software may take a few minutes to install, but on the bright side, both RPI Monitor and Squeezelite will setup automatically to run at boot.
Grab a cup of coffee, it will let us know when the software has finished installing.
Make Directory for Squeezelite Files
Once the software has successfully installed, let's do another reboot.
sudo reboot now
Upon reboot (and re-ssh if needed) we need to create a directory for our squeezelite addon:
sudo mkdir /usr/share/rpimonitor/web/addons/squeezelite
That was easy. You may be tempted to name the directory something unique, but since we can be doing this series of steps many times, its better to keep the name squeezelite. You'll be amazed how fast you can type that string of characters after doing this several times. We will copy some files into this directory later.
Change Our Hostname - Squeezelite

Freshly installed Squeezelite will refer to our host as "Dietpi - Host", and we don't want a bunch of players all named Dietpi - Host, so here is good chance to provide a unique name for each Squeezelite player. Later on, when we look at a menu of available players this will make more sense. For now:
sudo nano /lib/systemd/system/squeezelite.service
Underneath Service, in single quotes, let's insert our unique name. Feel free to use Neat-Oh-Pi, but I am pretty confident you can do better. Don't make any other changes to the config file, and ctrl-x Y to safely save and exit the file.
for good measure, let's restart the service:
sudo systemctl daemon-reload
sudo dietpi-services restart
Copy Squeezelite Html, Css and Js Files
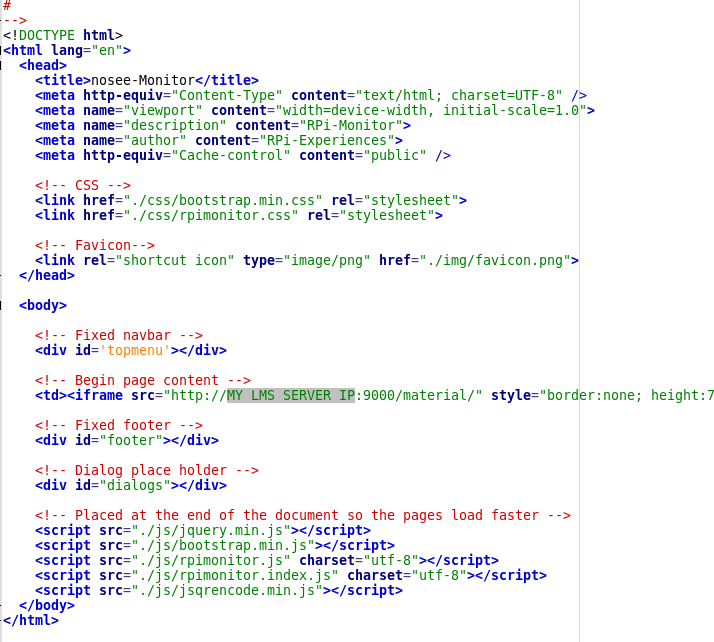
Save the text file below as /usr/share/rpimonitor/web/addons/squeezelite.html - point squeezelite html file to our LMS Server IP address as in the pic above: (use the real ip address and port 9000 of your LMS server instead of the placeholder)
->
<!DOCTYPE html>
<html lang="en">
  <head>
    <title>nosee-Monitor</title>
    <meta http-equiv="Content-Type" content="text/html; charset=UTF-8" />
    <meta name="viewport" content="width=device-width, initial-scale=1.0">
    <meta name="description" content="RPi-Monitor">
    <meta name="author" content="RPi-Experiences">
    <meta http-equiv="Cache-control" content="public" />

    <!-- CSS -->
    <link href="./css/bootstrap.min.css" rel="stylesheet">
    <link href="./css/rpimonitor.css" rel="stylesheet">

    <!-- Favicon-->
    <link rel="shortcut icon" type="image/png" href="./img/favicon.png">
  </head>

  <body>

    <!-- Fixed navbar -->
    <div id='topmenu'></div>

    <!-- Begin page content -->
    <td><iframe src="http://MY_LMS_SERVER_IP:9000/material/" style="border:none; height:750px; width:625px;" title="squeezebox"></iframe></td>

    <!-- Fixed footer -->
    <div id="footer"></div>

    <!-- Dialog place holder -->
    <div id="dialogs"></div>

    <!-- Placed at the end of the document so the pages load faster -->
    <script src="./js/jquery.min.js"></script>
    <script src="./js/bootstrap.min.js"></script>
    <script src="./js/rpimonitor.js" charset="utf-8"></script>
    <script src="./js/rpimonitor.index.js" charset="utf-8"></script>
    <script src="./js/jsqrencode.min.js"></script>
  </body>
</html>
Also in the /usr/share/rpimonitor/web/addons/squeezelite directory, Save the two below files without the .txt extension. Instead use the .js and .css extension. Thank you very little Instructables Engineers for making the most important step so unnecessarily difficult.
Configure RPI Monitor Data.conf
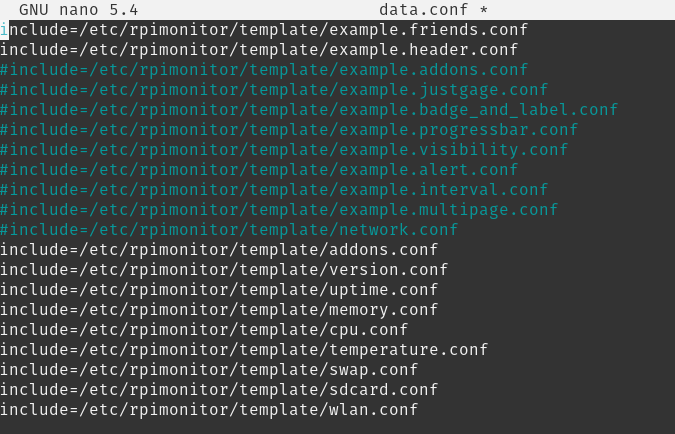
If we installed RPI Monitor from the Dietpi repository (and we did), our data.conf file is almost ready to go out of the box. Really the only thing we need to consider is what Monitor chicklets suit our liking, and which ones we can do without. Personally, I don't need the network, so I comment that line out using the # preface, and uncomment (remove the #) the Wlan config options. There is a little "gotcha" here though. You may notice that we have a file named ...example.friends.conf option. If we uncomment that line, In our next step we have to ensure we modify the...example.friends.conf file for consistency. The order in the config file will dictate the order of screen appearance, so adjust the distribution of chicklets accordingly to your preference.
Note: if not using Dietpi (ie Raspbian OS), you can still install from RPI Monitor and Squeezelite from the repositories using sudo apt-get install *, but your data.conf file will be completely different. One is not better than the other, but Dietpi involves more menu options and less command lines. Six of one, 1/4 of 2 dozen for the other.
Make Some Friends
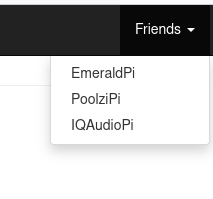
This step is rather simple on the surface. Each Player on the network will be our friend. Since we can't be our own friend, we only need to list the other players on the network in our friends.conf file. From the /etc/rpimonitor directory:
sudo nano template/example.friends.conf
The step is straightforward, two lines for each friend, a line for the name and a line for the ip address of each friend. Go wild naming your "friends".
After editing and saving the file, you should be able to restart RPI Monitor
sudo systemctl stop rpimonitor
sudo systemctl restart rpimonitor
click on the status menu option to allow a quick page update, and off on the right hand side should be a list of our friends. Using this path, we can safely navigate to each of our players on the network. There can be a bit of confusion since all the screens will look alike, and it's easy to forget where you are on the network. If we gave each Addon it's unique menu name in step 5, we should know where we are. Also, if you feel up to the challenge, don't be afraid to edit the headers.conf file should the host name not display properly in the upper left corner.
Downloads
Configure Our Addon
Open the addons.conf file by entering in the command line:
sudo nano /etc/rpimonitor/template/addons.conf
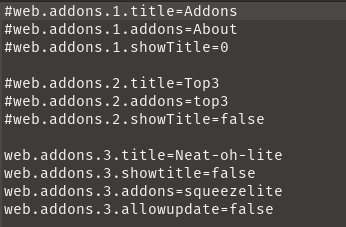
If you want to start with just one squeezelite addon, you can use below as an example. But there's no reason more addons can't be added later. Each Addon will need a unique identifier (number) however. I have commented out the About Addon and the Top3 addon in the example below to keep things simple. Any line beginning with # will be ignored, but it's useful to see how to configure addons if needed. The attached text file can be renamed as addons.conf if you want to save it. Note that the addon is still referencing squeezelite, where the directory resides, but it is titled "Neat-oh-lite". This is how it will appear as a menu item on the screen.
#web.addons.1.title=Addons
#web.addons.1.addons=About
#web.addons.1.showTitle=0

#web.addons.2.title=Top3
#web.addons.2.addons=top3
#web.addons.2.showTitle=false

web.addons.3.title=Neat-oh-lite
web.addons.3.showtitle=false
web.addons.3.addons=squeezelite
web.addons.3.allowupdate=false
As you can see, the only Addon that will be read will be my #3 Addon, or the squeezelite addon.
Downloads
Further Customization of RPI Monitor
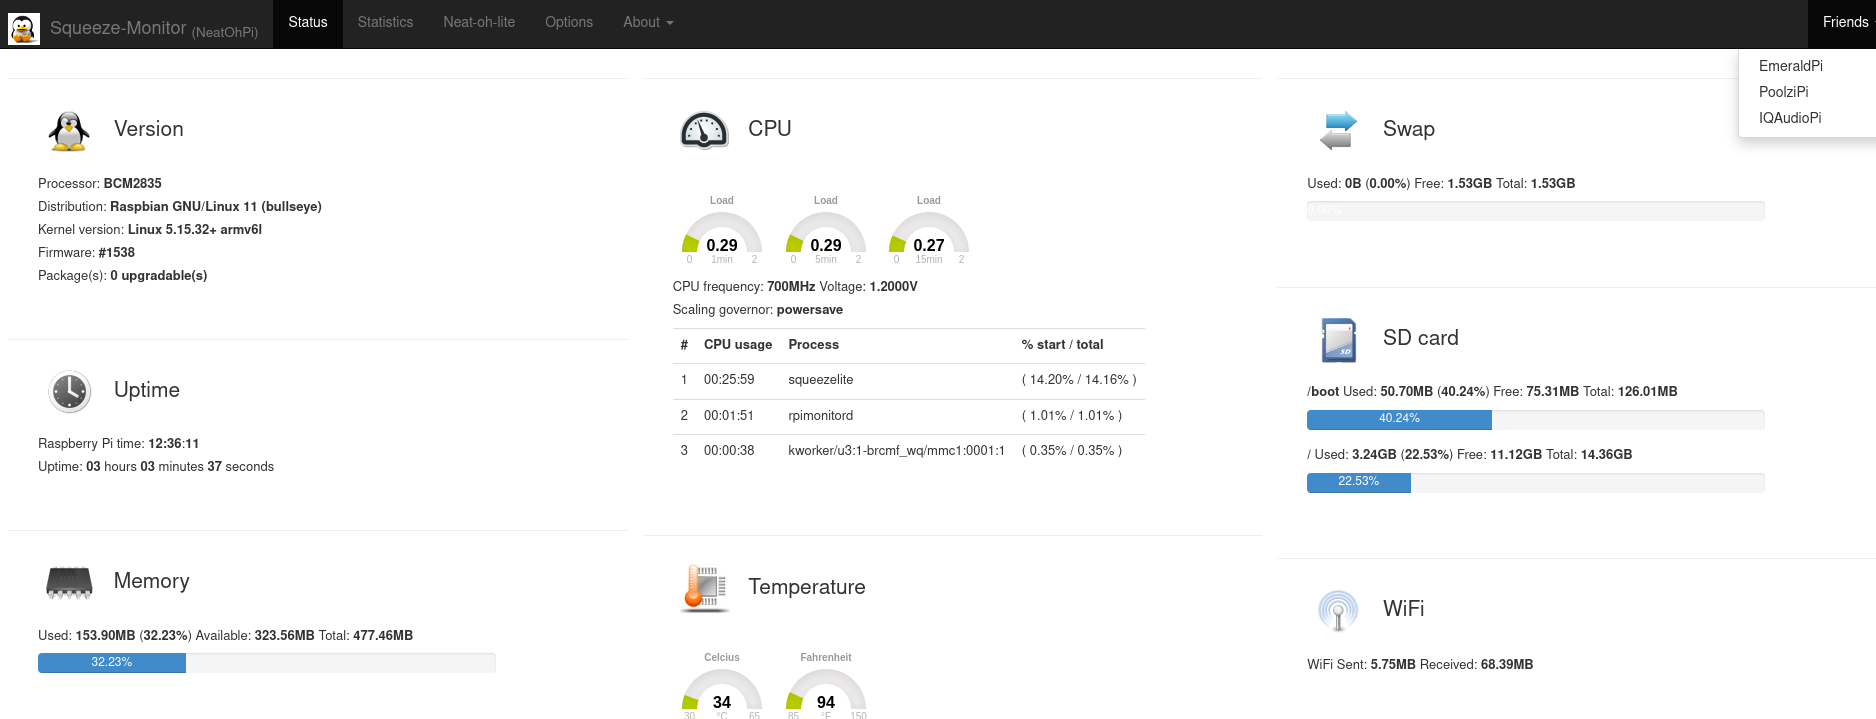
I am not much of a scroller, so I purposely keep things to a minimum. There's a lot to build into this if you feel courageous. In the past, I have also included an addon for Volume Control, Streaming internet radio, and Mopidy. I couldn't change the volume, but at least I could see if volume was set to 100 before I played anything which saved my ears once or twice. There is really no end to what you can do here. If you want to learn more, feel free to play around.
Repeat Again and Again
Well, that concludes setting up RPI Monitor and squeezelite on 1 Raspberry pi player. Now it's a matter of rinse and repeat, or as Robert Smith once said, "Again and Again and Again and Again....."
Conclusion
Sure, there are other ways of building a whole house audio, and there's some well documented methods of using synchronization to have two squeezelite players both playing the same song at the same time. That's a feature of LMS, and is very possible here as well, just beyond the scope of this exercise. I thought that by tying together two applications into one, and being able to control multiple squeezelite players using a web browser was very possible. I hope you find this somewhat intuitive and please enjoy your music.
....Or the Easy Way....
If the configuration of the addons is a little more than you want to sign up for, you can avoid addons alltogether: Simply use the Friends Configuration as a link to your LMS Server / Port / skin, and you can control all your players using the LMS server player manager there! It will be a direct link - not a subpage of RPI Monitor, but your whole screen will be devoted to Squeezelite. You can always use your browser's back button to return to RPI Monitor if needed.