Use Palm Infrared Keyboard With Android Devices
by arpruss in Circuits > Mobile
26023 Views, 20 Favorites, 0 Comments
Use Palm Infrared Keyboard With Android Devices
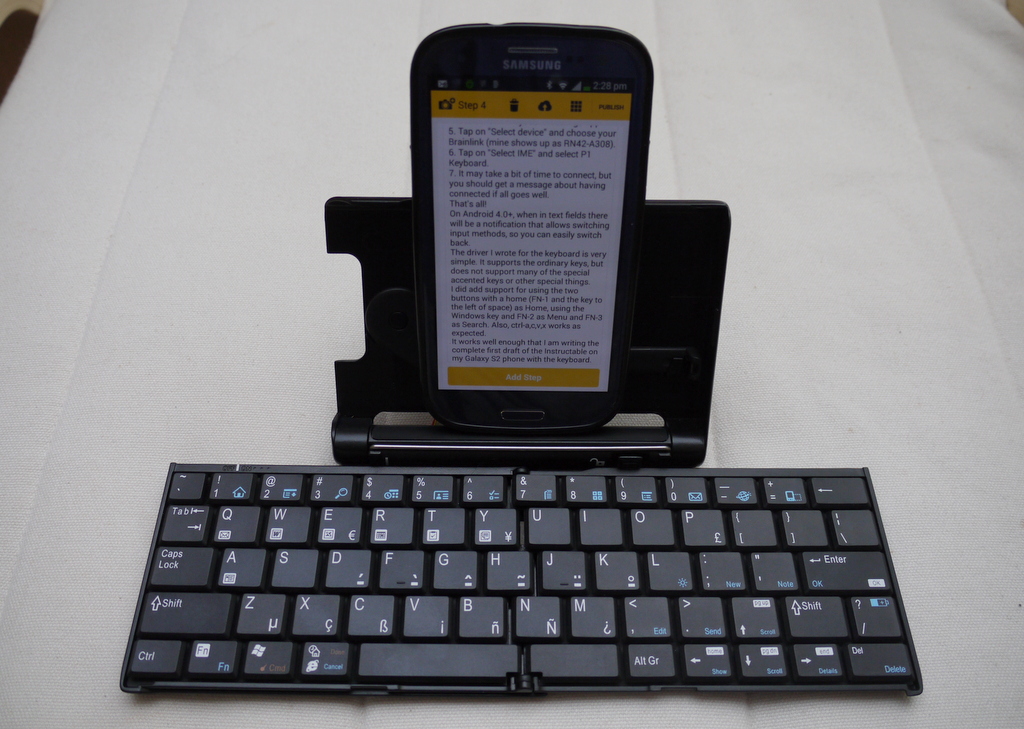
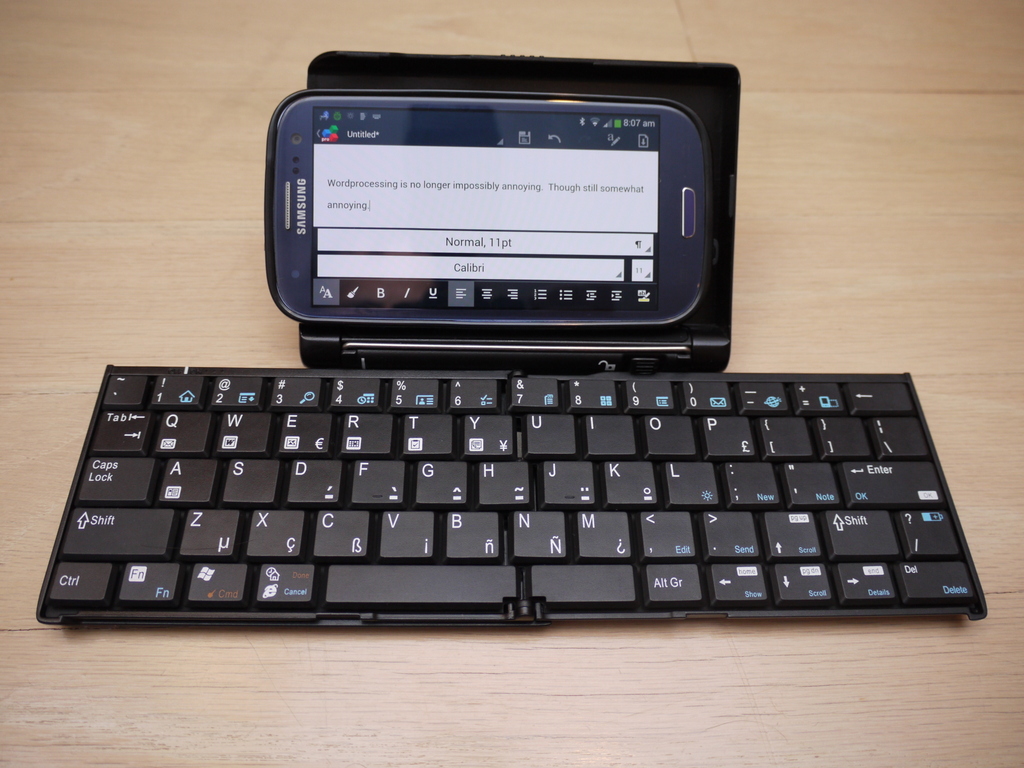
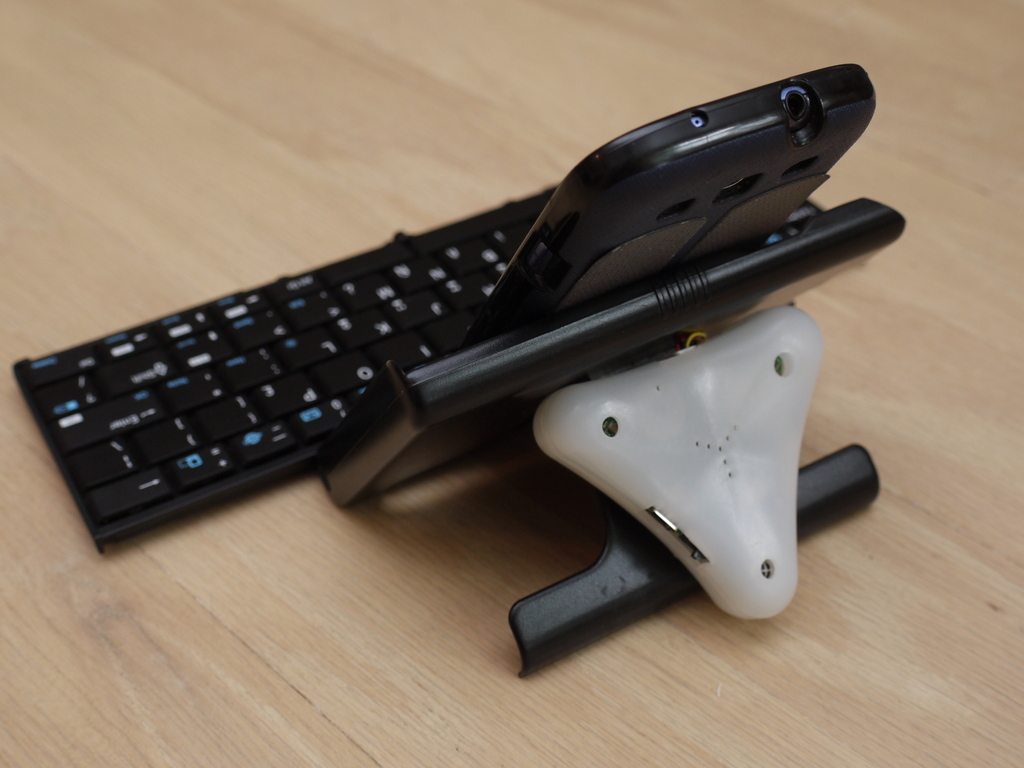
I had a PalmOne Wireless Keyboard sitting around and I wanted to have a Bluetooth keyboard for my phone. The only problem was that the PalmOne keyboard was infrared-based.
I also had a Brainlink device. This is a rather cute little device for mediating between different devices. It's got an atxmega16 processor, a rechargeable battery, some sensors, a Bluetooth radio, a bunch of ports, a case and some upgradable firmware for controlling it all. The Brainlink is discontinued but SurplusShed has it for $39, and they have periodic 30-50% off sales on everything. I got it for $20. You could also use your own atxmega plus Bluetooth board (schematics here), but your costs might be no lower.
Anyway, after identifying where the signal line on the keyboard is, making a firmware upgrade for the Brainlink and writing an Android driver for the keyboard, it works pretty well. Since most of the work was investigating and software, now that that's done it's quite an easy project for anybody who has a Brainlink. You need:
- PalmOne Wireless Keyboard
- Brainlink
- A 3- or 8-pin tether for the Brainlink (1.25mm pitch JST-style connector); you can use the 8-pin tether included with the Brainlink but you'll want to order more for other projects
- Solder and iron
- Electrical tape
- Optional: Hook and loop fastener
In the past I've used the Brainlink to connect to a Mindflex EEG headset and to a Roomba. It's really great for serial-to-Bluetooth bridging tasks. I just make different connectors for different devices, and can move the Brainlink between them.
Background
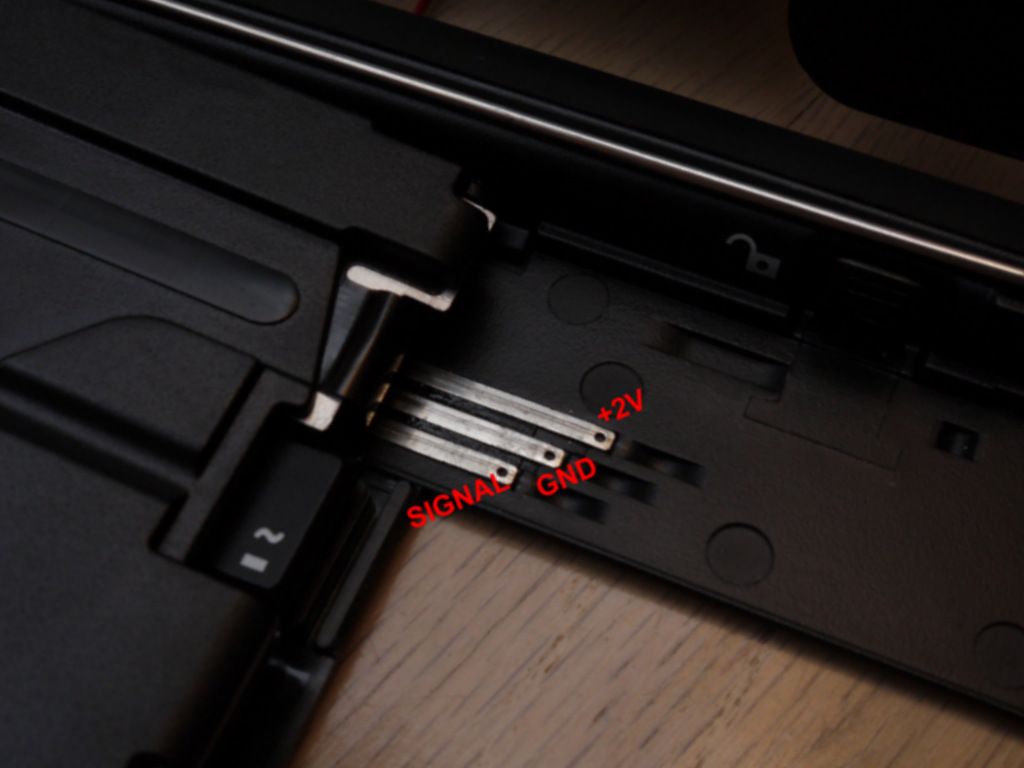
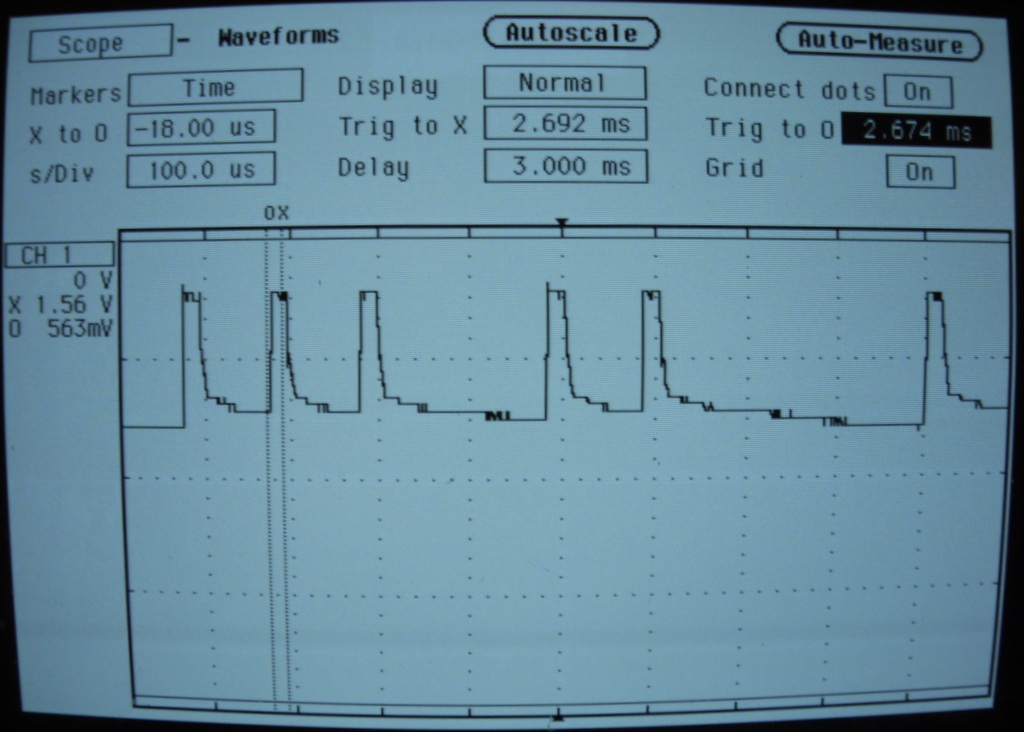
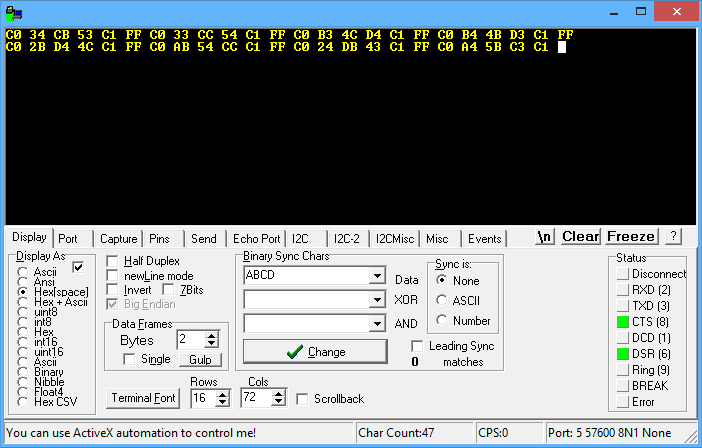
Feel free to skip this background description.
The PalmOne Wireless Keyboard sends its data through an IR LED on a stalk, using IrDA. While one could use an IR detector to decode the data, there is an easier way. If you half-fold the keyboard, three copper strips are exposed. The middle one is ground and the bottom one is a transmit line. Putting them to an oscilloscope verifies that the signal on the transmit line is encoded in at approximately 9600 (more precisely: 9760) 8 N 2, with the high level around 1.56V, and with irDA pulse shaping: 1 is high, and positive pulses take 3/16 of the bit time.
Unfortunately, all this means we can't just plug this into a simple Bluetooth module (at least not without making custom firmware for it), like I did in my Mindflex project. Fortunately, the atxmega in the Brainlink has an irDA mode for its UART. It's simple to add a bit of code to the Brainlink firmware allowing a "J1" code to switch it to IrDA mode. I expected the 1.56V high level to be insufficient for the atxmega, but I was pleasantly surprised when I connected the copper strips to GND and UART Receive on the Brainlink and viewed the results in Realterm: I was getting nice six byte sequences from the keyboard.
It turned out that the six byte sequence is only packaging for a single byte scan code (with high bit marking release). Specifically, the sequence is FF C0 xx yy zz C1, where xx is the scan code, yy is xx xor'ed with FF, and zz is xx xor'ed with 67. (In effect, the scan code is transmitted three times: once clear and twice encoded. I am guessing this is because irDA is prone to corruption, and so you can use majority-decoding to get the byte.)
After that, the only hardware difficulty was finding a place to solder a connector on the keyboard. And that wasn't hard.
On the software side, while maybe I could perhaps switch the RN-42 Bluetooth module in the Brainlink to HID mode, that had bricking potential, since if the module didn't switch back to SPP, I wouldn't be able to talk to the Brainlink over its Bluetooth protocol.
The easier thing to do was just to take the open source BluezIME keyboard app that allows various Bluetooth gamepads to function as Android controllers and add a mode for the Palm One Wireless Keyboard's six-byte sequences. The resulting app is the free P1 Keyboard in Google Play now (source code on github).
Upgrading Brainklink Firmware
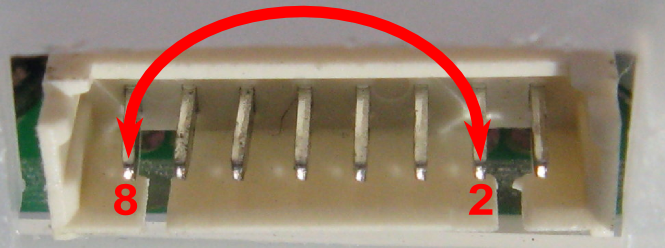
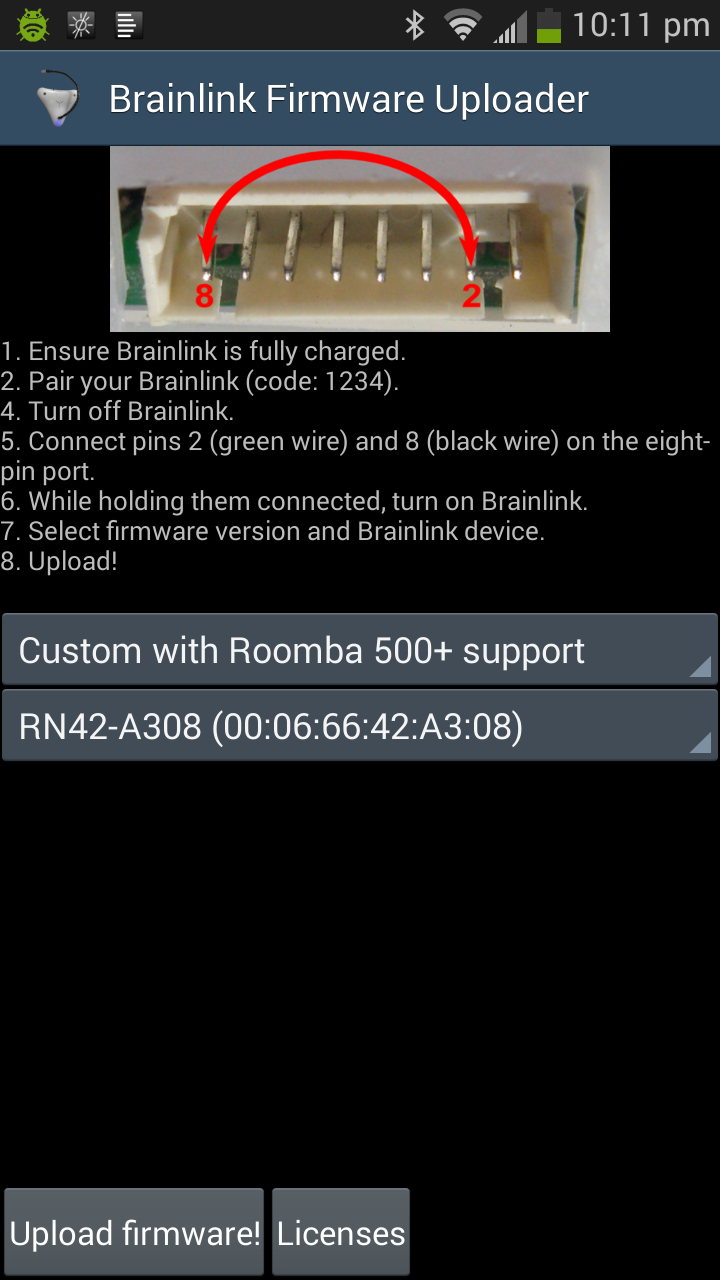
To enable IrDA-format serial data support on the Brainlink, you need to load my custom firmware. It's easy with an Android device and a firmware uploader I wrote (by the way, you can modify the uploader to be a general purpose atmega/atxmega AVR109 flash uploader).
- Pair the Brainlink (PIN 1234) with an Android device--you'll have to do that anyway to connect the keyboard
- Download my Brainlink Firmware Uploader from Google Play (source for uploader and firmware on github).
- Turn off Brainlink and connect pins 8 and 2 (strangely, pin 8 is the leftmost pin, and pin 1 is on the right) on the 8-pin port.
- Holding the pins connected, turn on the Brainlink. Its LED should turn blue.
- Select the custom firmware you want (if you have a Roomba, one of the firmwares works better with newer Roombas and the other with older ones), and press "Upload".
- That should be it, though if you have connection difficulties you may need to try more than once.
Your Brainlink is now smarter: it not only supports reading data from some IrDA devices (once you locate an unmodulated signal), but also functions as a standard Roomba-to-Bluetooth link, and can capture data from a Mindflex EEG headset. And the firmware is backwards compatible.
Connecting Brainlink to Keyboard
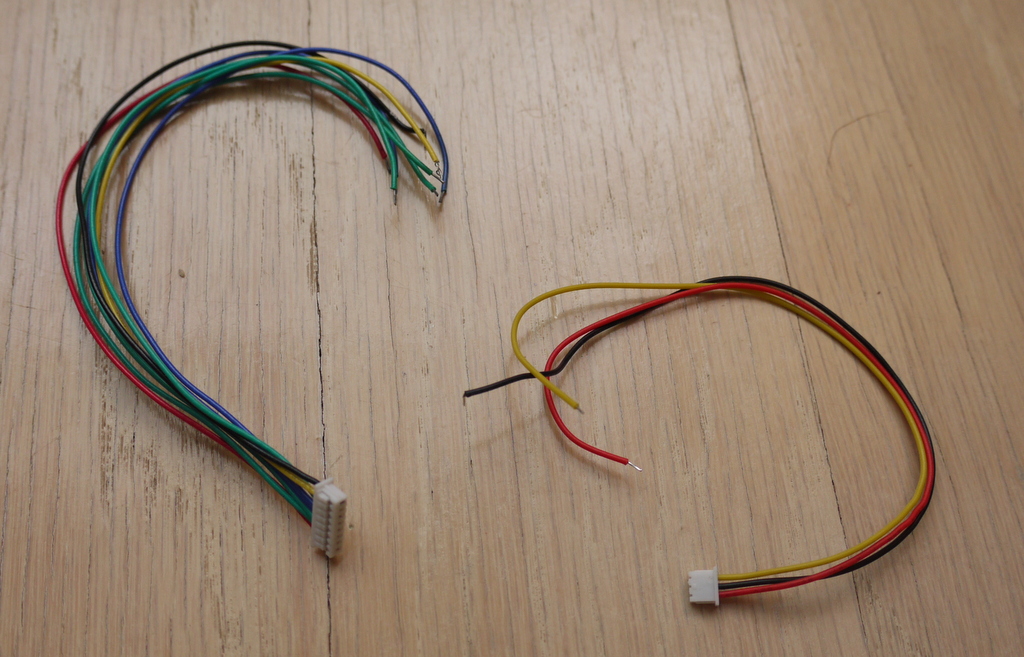
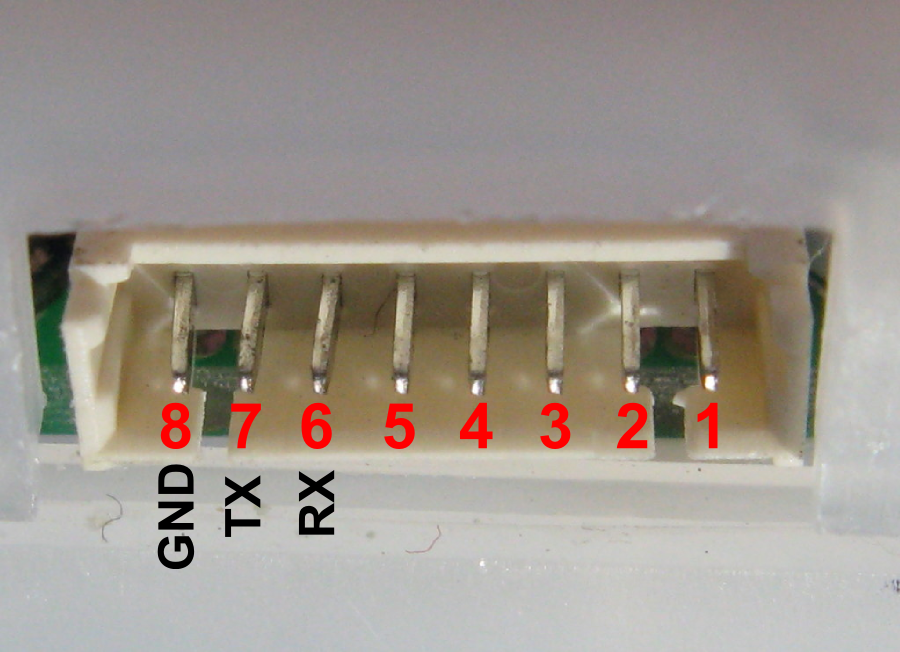
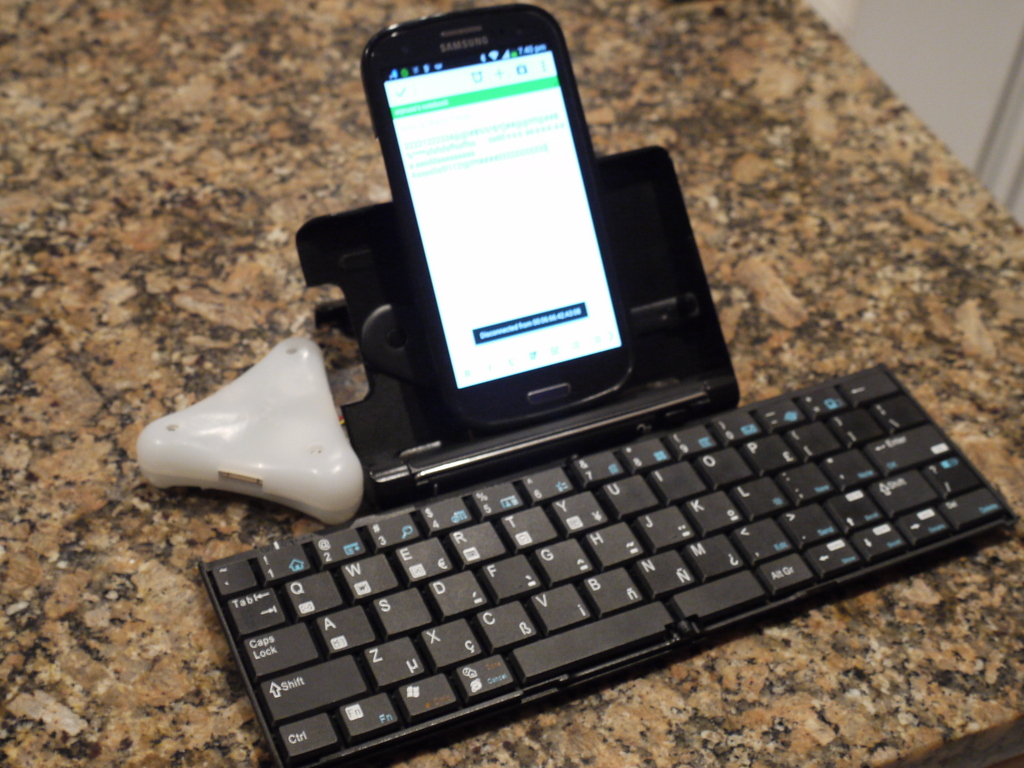
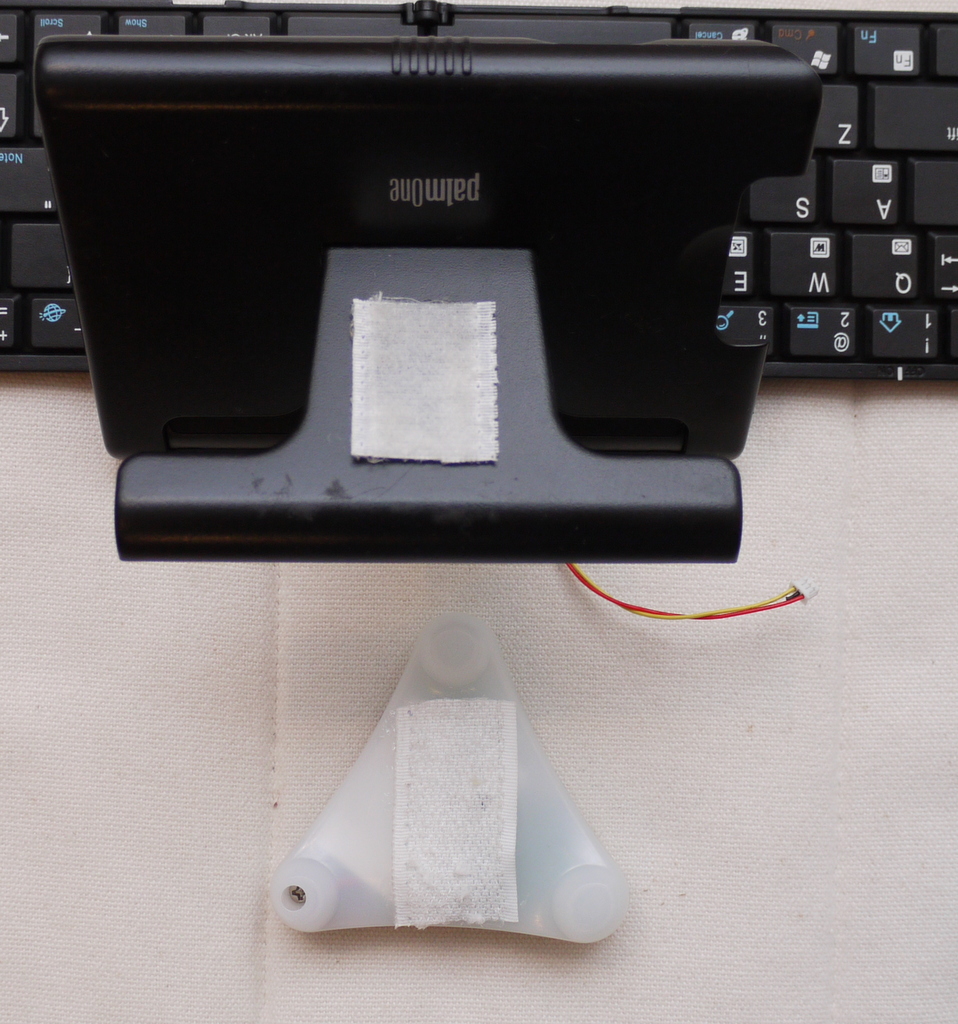
You will need a tether connector that fits the three leftmost pins on the Brainlink's 8-pin port. These are JST-style connectors with 1.25mm pin spacing. You can use a three-pin connector (my choice) or an 8-pin connector. You can use the 8-pin connector that comes with the Brainlink, but then you'll want to order more of them (I found 3- and 8-pin connectors cheap on ebay).
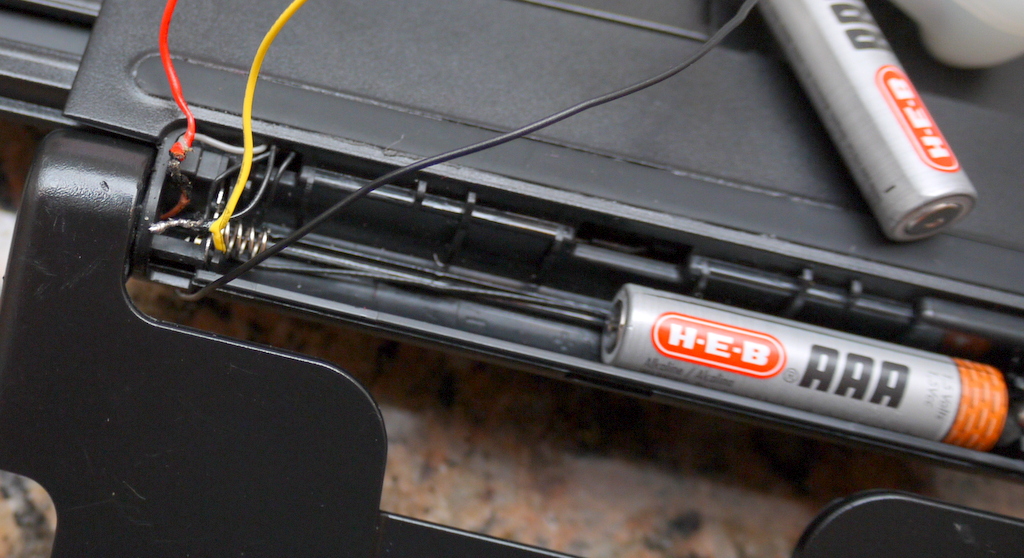
Open the battery bay of the keyboard and remove the batteries. Near the minus side of the batteries, you'll find two pairs of wires connected together via a JST-style connector. If your colors are like mine, the black wires are ground (you can just check resistance between that and the minus terminal on the battery) and the other colors (brown and gray) are the signal.
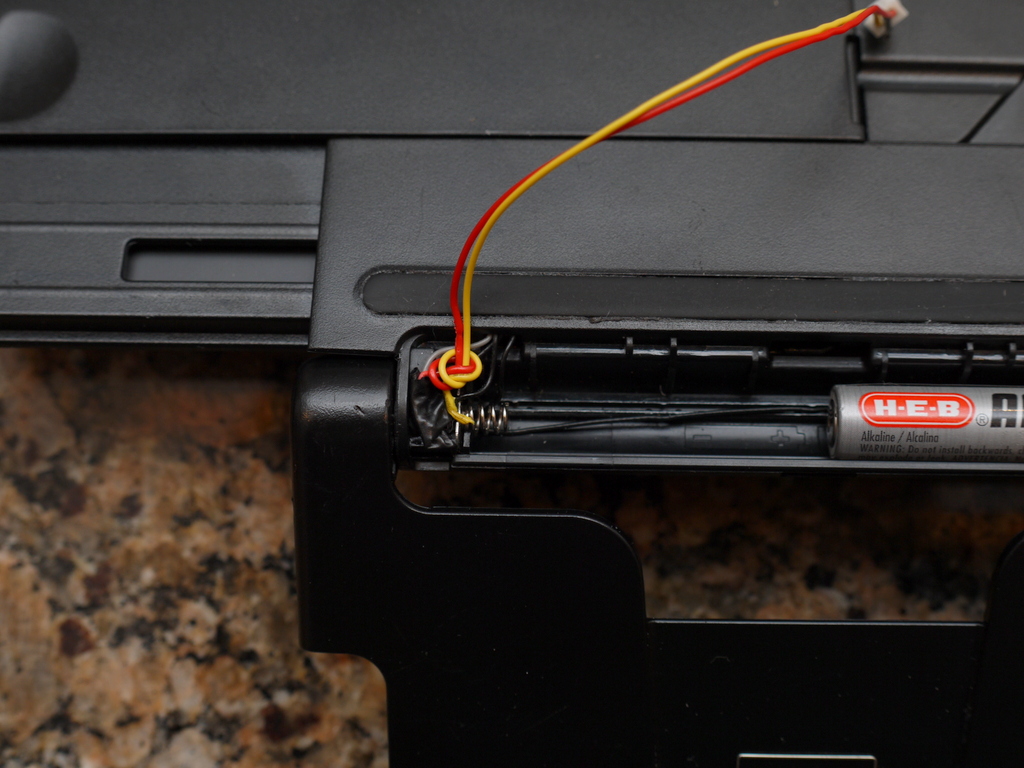
On your Brainlink 8-pin port, the leftmost connection is ground (leftmost pin of 8-pin port) and the third pin from the left is serial receive. Solder the ground wire on your Brainlink connector to the ground line on the keyboard, and the receive wire on the Brainlink to the signal line.You may find that there is no space in the keyboard area for the solder connection and the JST-style connector that was inside the keyboard. If so, just remove the JST-style connector, and solder both trios of relevant wires (two keyboard ground wires and one Brainlink ground wire; two keyboard signal wires and one Brainlink receive wire).
It is tempting to disconnect the IR LED side of the JST-style connector to save battery life. Don't do it. The signal falls apart if you do that. I checked with my oscilloscope.
Make a hole on the lip of the battery cover for the wires of the Brainlink tether to go through, use electrical tape to keep the two connections isolated, and tie a small tension-relief knot.
Finally, when all is done, either cover up irrelevant contacts on the Brainlink tether or just cut off the irrelevant wires.
You may also want to glue on some Velcro on the Brainlink and the keyboard for keeping the Brainlink in place.
Using With Android Device
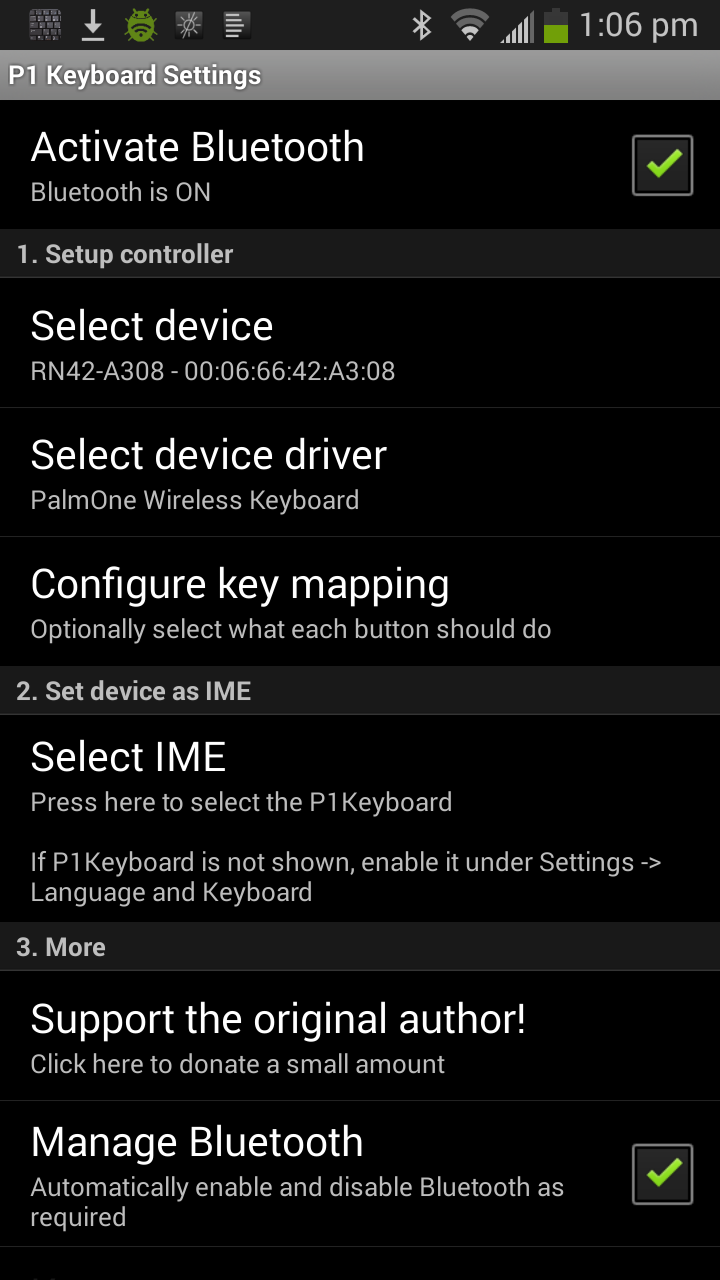
- Pair the Brainlink with your Android device (PIN 1234).
- Install my P1 Keyboard app.
- Launch P1 Keyboard Settings (an icon for it should be in your launcher).
- Enable P1 Keyboard in Android input method settings. On newer Android versions, you can enable the P1 Keyboard by choosing "Select IME" in P1 Keyboard Settings, and tapping on "Set up input methods." (You'll get a warning that the keyboard sees all your passwords, etc. That's a standard Android warning: of course, a keyboard driver sees everything you type. If you're scared, look at the source code of the keyboard and build your own.)
- Tap on "Select device" and choose your Brainlink (mine shows up as RN42-A308).
- Tap on "Select IME" in the P1 Keyboard Settings and select P1 Keyboard.
- It may take a bit of time to connect, but you should get a message about having connected if all goes well
And you're done! Feel free to donate to the author of BluezIME on which P1 Keyboard is based.
On Android 4.0+, when in text fields there will be a notification that allows switching input methods, so you can easily switch back to another input method.
The driver I wrote for the keyboard is very simple. It supports the ordinary keys, but does not support many of the special accented keys or other special things.I did add support for using the two buttons with a home (FN-1 and the key to the left of space) as Home, using the Windows key and FN-2 as Menu and FN-3 as Search. Also, ctrl-a,c,v,x works as expected.
It works well enough that I wrote the complete first draft of this Instructable on my Galaxy S2 phone with the keyboard.
Other Keyboards
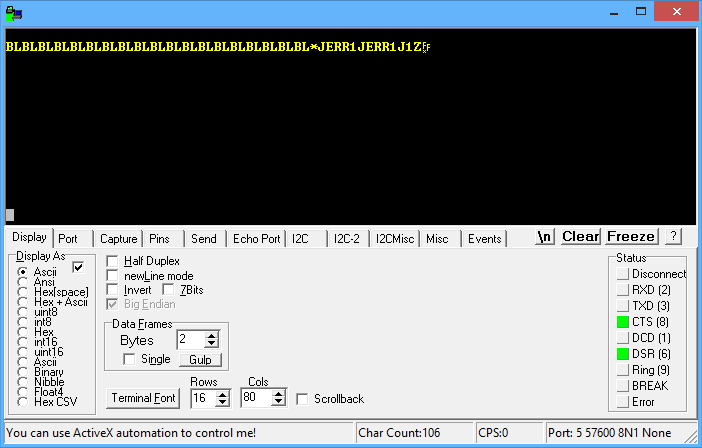
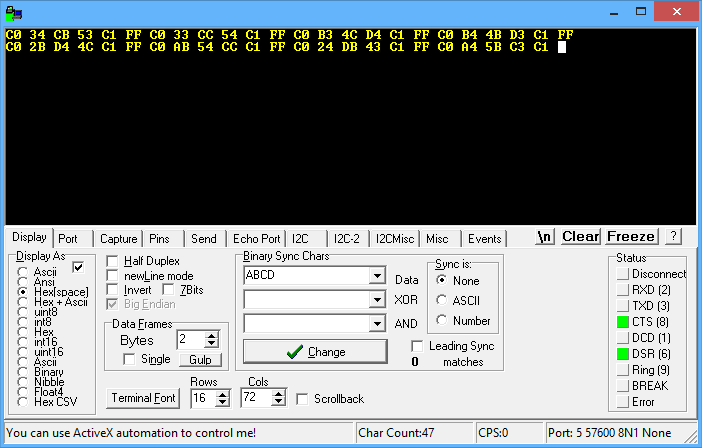
If you want to experiment with other infrared keyboards, you'll have to figure out what signals they send and at what baud rate. With the Brainlink updated to the IrDA-compatible software, you can connect with RealTerm to the Brainlink. When you see the repeating "BL" signal that is the signature of the Brainlink, type:
*J1Z
The asterisk asks for attention, J1 switches to 9600 baud IrDA (just must type the 1 quickly after the J or you get an error). The Z is for serial-to-Bluetooth bridge mode.
Switch RealTerm to display hex codes, and press keys on the keyboard and see if you can make sense of it.
To exit serial bridge mode, powercycle the Brainlink.
I am guessing 9600 baud is the right baud rate. Failing that, you can change the Brainlink's baud rate. I'd start by trying 57600 baud:
*J1u57Z
and then 1200 baud:
*J1u12Z
Once you've figured out how the keyboard sends its data, just modify the code of my driver. Probably just changing the numbers in PalmOneWirelessKeyboard.java is enough.