Use Cortana to Control Your LinkIt One!
by jckelley in Circuits > Microsoft
895 Views, 6 Favorites, 0 Comments
Use Cortana to Control Your LinkIt One!
Introduction
There is new technology all around us and only more coming every day. Our micro controllers are getting faster, are phones getting smarter, and the cloud is becoming stronger. With all this new technology everyone is asking themselves: How can I utilize it all?
Well, today we will do just that. This guide will walk you through using a LinkIt One Device, MeditaTek Cloud Sandbox (MSC) and Cortana on Windows Phone to automate your house hold. Did you forget to turn the lights off when you left for work? No problem. Want to turn on the Slow-Cooker a few hours before you get home? Consider it done. We can leverage the power of Internet of Things and Cortana to control our home in an entire new way!
This guide is an extension of a previous guide I wrote. The previous guide had a Raspberry Pi and used Microsoft Azure. With rapidly changing technologies, I have decided to rewrite another one dealing with the LinkIt ONE and MediaTek's Cloud Sandbox as they are both much more friendly toward your average 'Maker'. I would highly suggest you check out my other guide for a full in-depth coding tutorial.
Requirements
Knowledge Requirements
I have tried to make this guide as 'friendly' as possible to the general audience, but in order for us to move quickly and condense the guide down from a three hour epic to a 1 hour project, we have to assume you know a little something before hand.
1. C++ Basics
Basic programming knowledge will be needed. We’ll be using some basic C++ for our LinkIt One device, so if you are familiar with that or with an Arduino, you should be all set.
2. General App Development Knowledge (Windows Phone a Plus!)
Obviously since we are going to use Cortana we will be building a Windows Phone app. While setting up the project isn't too difficult, and we really won't be doing anything too complicated, it's a good idea to have a basic understanding of the application files and what they do. The code logic versus the design logic, the application manifest, etc. If all these buzzwords are second nature to you, then don't worry. Otherwise, make sure to read up on the resources provided in that section of the guide.
Hardware Requirements
What would a project be without some sweet hardware behind it? This project will actually be pretty bare in the hardware department and instead focus a lot on the software. We'll walk through how to install the specific software packages right before they are needed in an effort to make that process easier.
· A Windows 8 or 10 Computer
· Windows Phone with 8.1 software update (Must have Cortana!)
· LinkIt One Development Board
Set Up Your MediaTek Cloud Sandbox Account
MediaTek Cloud Sandbox
Because we’re using the LinkIt One we have easy access to the MediaTek Cloud Sandbox. This is MediaTek’s handy online cloud portal that was especially built for internet of things devices and comes loaded with features that make it very easy to connect things.
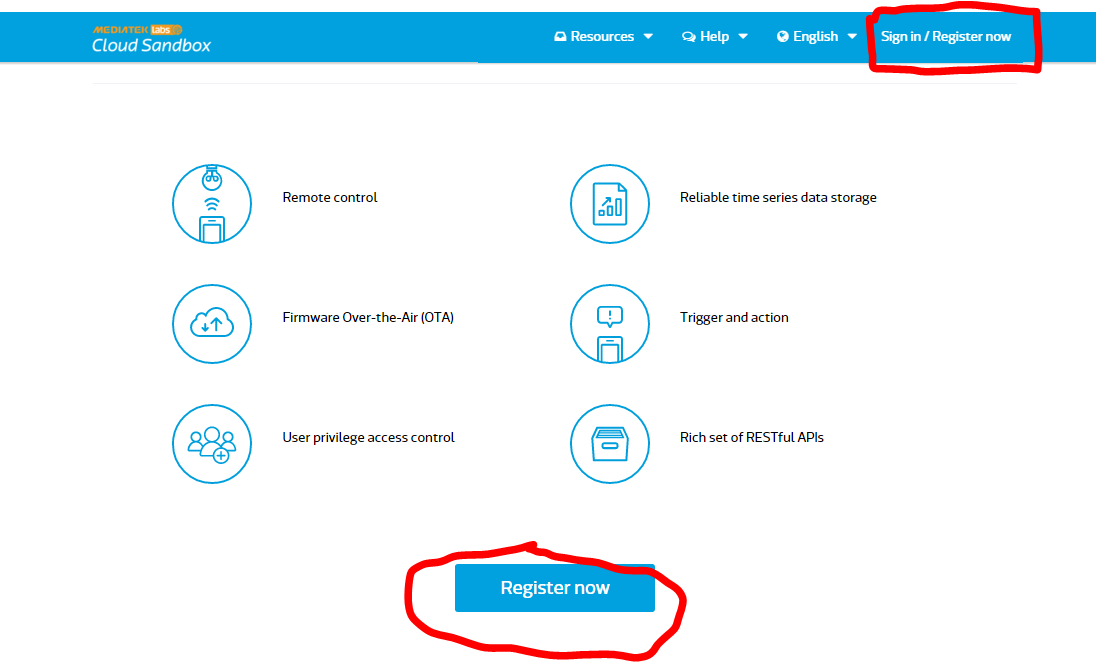
Go ahead and head over to the MCS website and create an account.
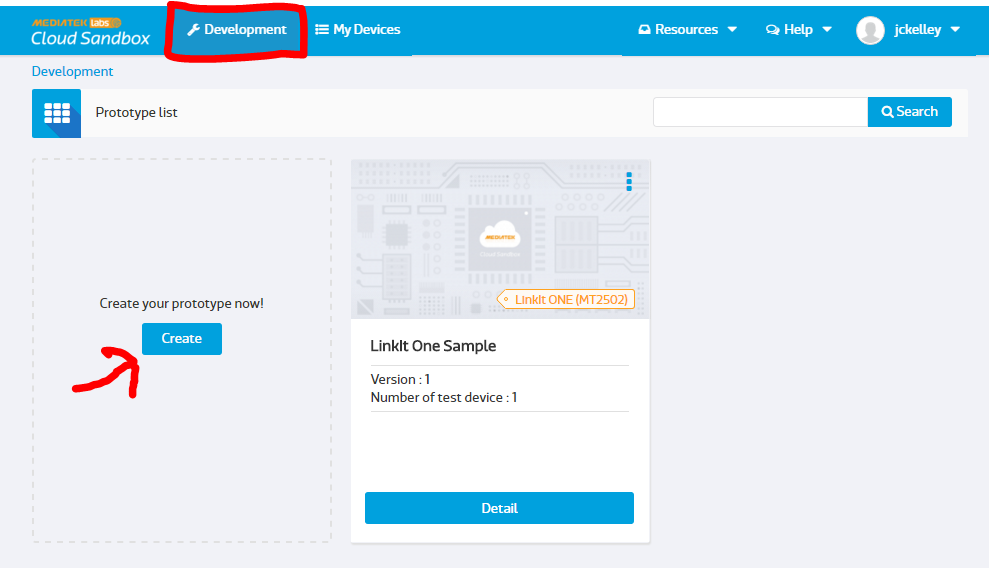
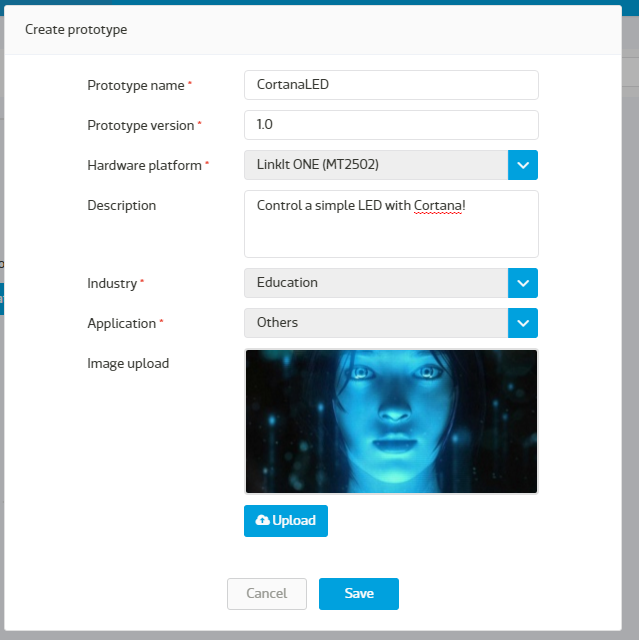
After you have created your account, you’ll want to head over to the ‘Development’ tab and click on ‘Create’ so that we can create a new prototype!
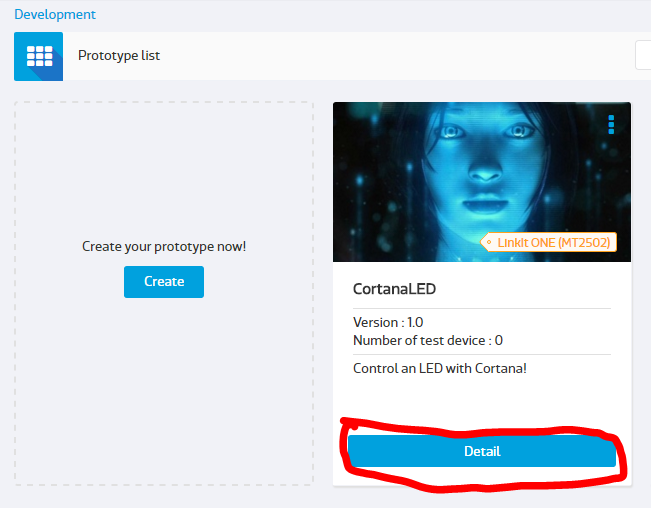
You’ll want to enter in some basic info to create your prototype. I’ve named my prototype ‘CortanaLED’ and decided to put a picture of Cortana I found up there with it. You don’t need to include a picture if you don’t want to.
Go ahead and hit ‘Save’ and now you should see your new Prototype in your general Prototype list. Go ahead and click on ‘Detail’ and we will start configuring things.
Configure the Controls in Your MCS Account
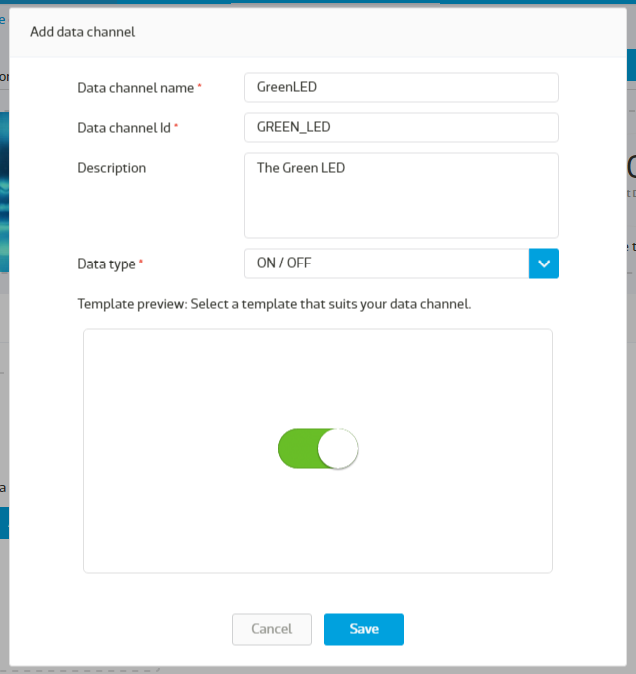
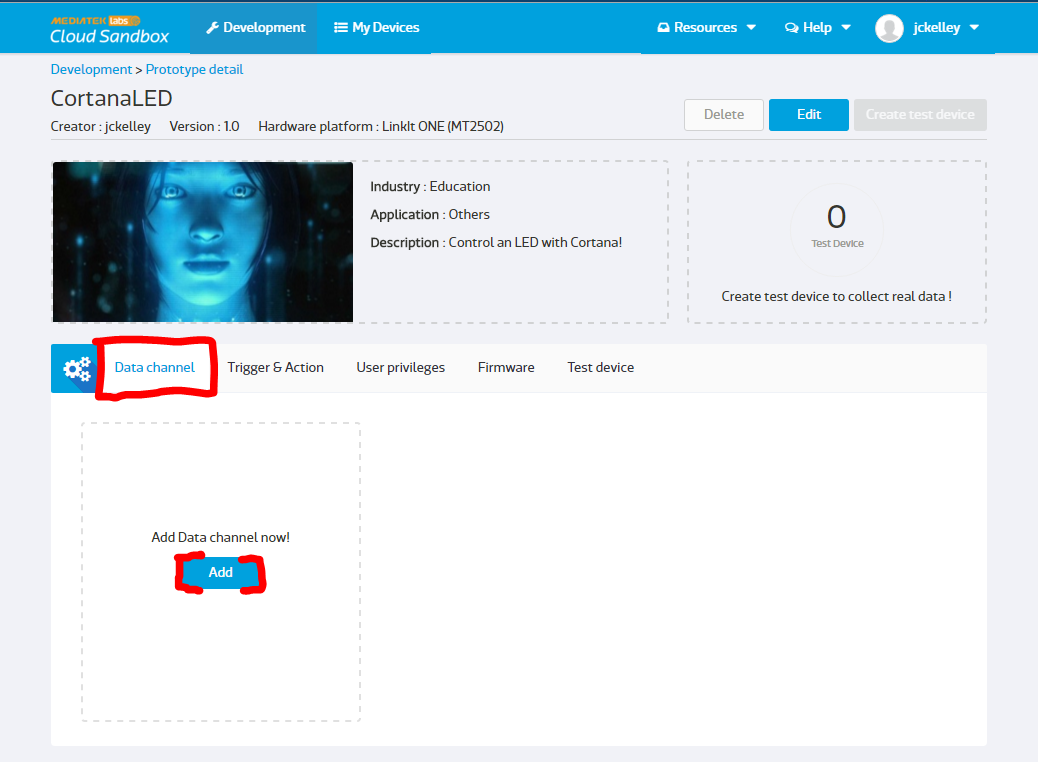
We are going to want to add a new controller to turn the light on and off.
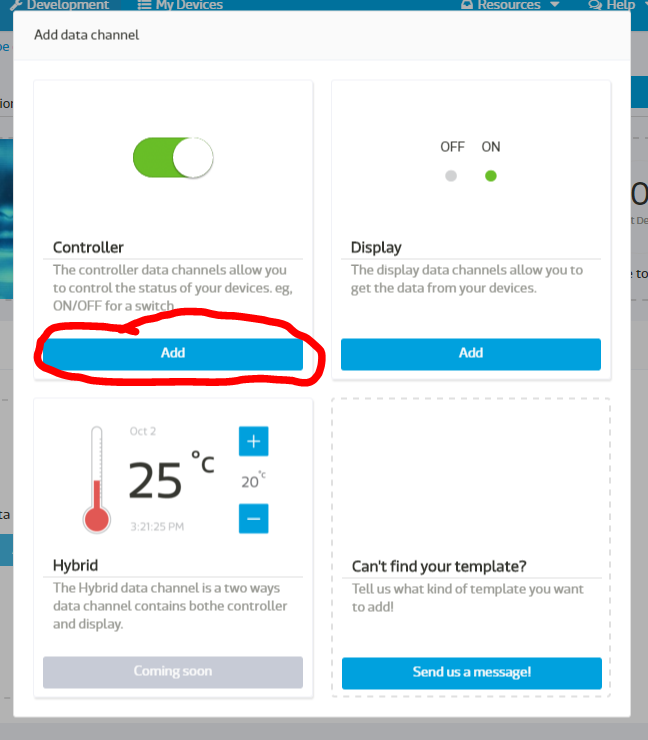
Next, we’ll add the configuration of this new controller.
We want to configure this controller with a ‘ON/OFF’ datatype. This is because we’re essentially just pushing two commands “Light on” or “light off”. You can do a ton more (like display objects to tell if the light is on or not) but we won’t get into that now.
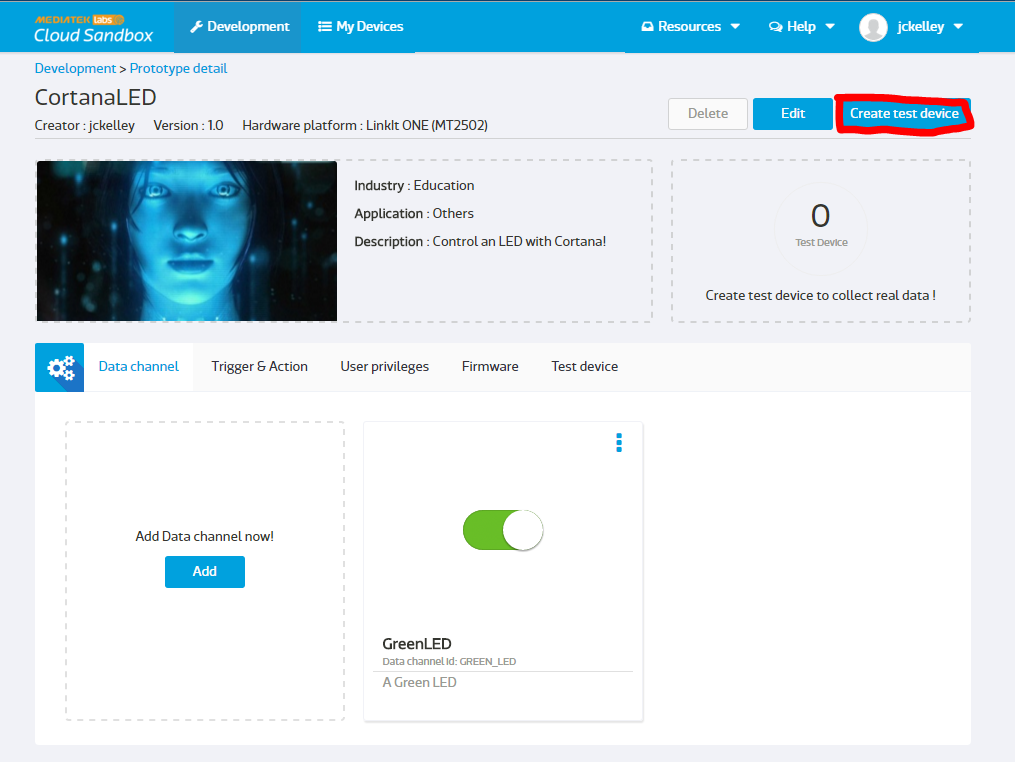
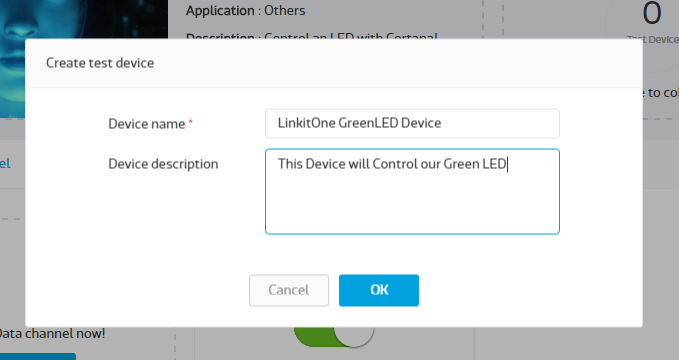
Next, we’ll want to create a new test device to set up the device interaction.
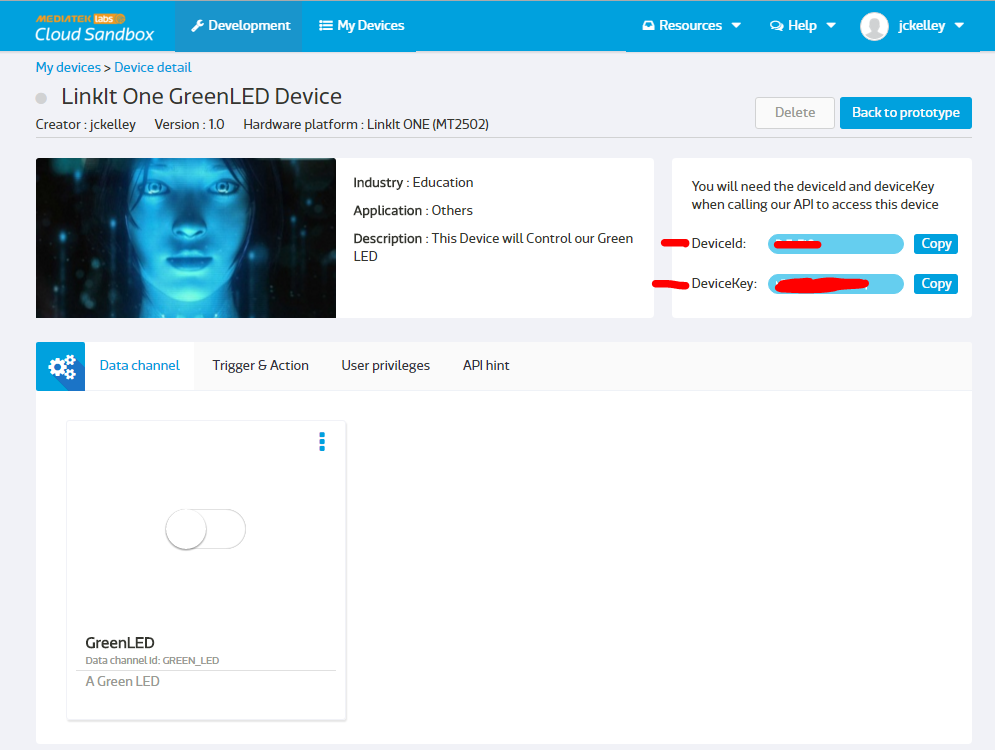
Next, we’ll click on the ‘Details’ pane so we can see our device details. Within that dashboard you will see two attributes: DeviceId, and DeviceKey. These are unique attributes generated just for your particular device and allow you to communicate with your device. I have crossed them out on my screen since they are unique to me. You’ll want to copy down your ID and KEY somewhere as we will be using it later.
And that’s it! Our MCS service is all set up and ready to communicate with our LinkIt One device! Next, we will implement the code to have our device interact with the web service.
Configure LinkIt One Device
Now we’ll download some template code directly from Mediatek Cloud’s website to hook up our LinkIt one to our new cloud server. Lucky for us, they have taken care of just about 99% of the coding on the device side. In later guides I will talk about how to navigate this code and customize it to our liking, but for now let’s just get a working prototype working.
Download the code from this link, making sure to also install the http library if you haven’t done so already.
The only real step left in our device phase is to enter
in your custom WiFi network credentials along with your unique KEY and ID from the cloud sandbox. Look near the top of the code file for these variables and change them.
#define WIFI_AP "IT Portable Hotspot" #Insert your WiFi SSID here
#define WIFI_PASSWORD "12345678" #Insert you WiFi's password here
#define WIFI_AUTH LWIFI_WPA // choose from LWIFI_OPEN, LWIFI_WPA, or LWIFI_WEP.
#define per 50
#define per1 3
#define DEVICEID "********" // Input your deviceId
#define DEVICEKEY "***************" // Input your deviceKey
Once that is done, compile your code and deploy it to your device! Great! We've now got a device that is synced with the cloud. The last step is to implement Cortana!
Setting Up Cortana on Windows Phone 8.1
For those of you that follow my other blogs and tutorials, you'll know I already have quite a lot of information on how to set up a Cortana app on Windows Phone 8.1. In the interest of just not copying and pasting an entire Instructable, I would suggest you go check out the latter steps of the linked Instructable to get a quick crash course in Windows Phone 8.1 app creation and Cortana.
Once you've done that, all you have to do is rewrite the SendSBMessage Function to the following:
<p>private static void SendSBMessage(string message)<br>		{
			try
			{
				</p><p>				string baseUri = "https://api.mediatek.com/mcs/v2/devices/InsertDevicIDHere!/datapoints";</p><p>				using (System.Net.Http.HttpClient client = new System.Net.Http.HttpClient())
				{
					client.BaseAddress = new Uri(baseUri);
					client.DefaultRequestHeaders.Accept.Clear();


					string json = JsonConvert.SerializeObject("GREEN_LED,,"+message);
					HttpContent content = new StringContent(json, Encoding.UTF8);
					content.Headers.ContentType = new MediaTypeHeaderValue("application/json");</p><p>					content.Headers.Add("deviceKey", "Insert Your Device Key Here!");</p><p></p><p><br>
					string path = "";</p><p>					var response = client.PostAsync(path, content).Result;
					if (response.IsSuccessStatusCode)
					{
						// Do something
						Debug.WriteLine("Success!");
					}
					else
					{
						Debug.WriteLine("Failure!" + response);
					}</p><p>				}</p><p>			}
			catch (Exception ex)
			{
				Debug.WriteLine("ERORR!" + ex.ToString());
			}
		}</p>
Deploy and Explore!
That's it! Once you deploy the windows phone with the updated function call, you are now able to control your LinkIt One device with Cortana on your Windows Phone!