Upgrading Firmware-Over-the-Air on LinkIt 7688 Using MediaTek Cloud Sandbox
by AngieChiu in Circuits > Arduino
2386 Views, 3 Favorites, 0 Comments
Upgrading Firmware-Over-the-Air on LinkIt 7688 Using MediaTek Cloud Sandbox

Hello Everyone! This is my first post on instructables and I'd like to share with you various applications on LinkIt Smart 7688 using MediaTek Cloud Sandbox.
Today, I'd like to start with how to upgrading the firmware on your LinkIt Smart 7688 development board. LinkIt Smart 7688 development board is very easy to start with, it supports Node.js, Pytho, C and Arduino.
Ok now, let's start.
Items Needed

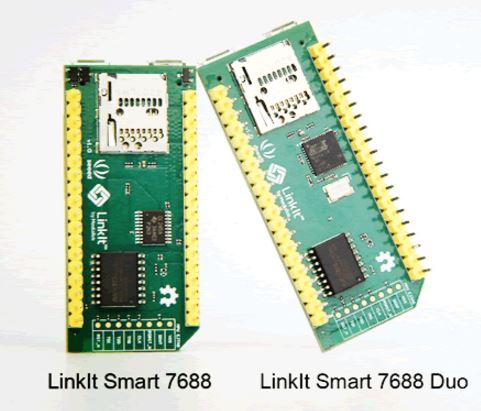
a. A LinkIt Smart 7688 or LinIt Smart 7688 Duo development board
b. A MediaTek Cloud Sandbox account. You can register here if you do not have it yet.
Prepare the Arduino Code for the Firmware Upgrade

Open the arduino IDE and start coding! After finished, click Sketch on the menu bar, and select Export compiled Binary to export the .hex file.
The exported firmeare file is going to be uploaded to MCS for Firmware-Over-The-Air (FOTA) upgrade.
Here are the two firmware files if you wish to use directly:
Create Your First Prototype on MCS

In Step 1, you've signed up to MCS, now log in to your account.
Click Development on the top menu bar, and click Prototype.
Enter the prototype information as you wished and Save.
Upload Firmware Files to MCS

Click Detail to enter the prototype dedail page, then click firmware tab.
Add two firmware files you've saved in Step 2.
Note: Select default setting when adding firmware.
Create a Test Device

After adding the firmware to MCS, now create a test device. This test device is just like your development board. When your development board is connected to MCS, you can received data from your development board and also give command to your device as well.
Here you need to keep the deviceId and deviceKey which is unique for each device. You will need them when calling MCS RESTful APIs in the code on your development board.
Prepare the LinkIt Smart 7688 Development Board
Make sure your LinkIt Smart 7688 development board is powered and connected.
Using the ssh tool to access your LinkIt Smart 7688 console.
Create a folder using the following command:
mkdir app && cd app
Install the following modules using the following commands:
npm install mcsjs<br>npm install superagent
Create app.js file to run the FOTA application on the development board by:
vim app.js
Type i and copy/paste the following code in the editor and type :wq to save and exit.
var mcs = require('mcsjs');
var spawn = require('child_process').spawn; var fs = require('fs'); var request = require('superagent'); var fwName = 'fw.hex';var myApp = mcs.register({ deviceId: 'Input your deviceID', deviceKey: 'Input your deviceKey', });
var download = function(url, dest, cb) { var file = fs.createWriteStream(dest); var sendReq = request.get(url); // verify response code sendReq.on('response', function(response) { if (response.statusCode !== 200) { return cb('Response status was ' + response.statusCode); } }); // check for request errors sendReq.on('error', function (err) { fs.unlink(dest); if (cb) { return cb(err.message); } }); sendReq.pipe(file); file.on('finish', function() { file.close(cb); // close() is async, call cb after close completes. }); file.on('error', function(err) { // Handle errors fs.unlink(dest); // Delete the file async. (But we don't check the result) if (cb) { return cb(err.message); } }); };
myApp.on('FOTA', function(data, time) { console.log(data); var Data = data.split(','); var firmwareUrl = Data[2]; download(firmwareUrl, fwName, function(){ var update = spawn('avrdude', ['-p', 'm32u4', '-c', 'linuxgpio', '-v', '-e', '-U', 'flash:w:/root/'+ fwName, '-U', 'lock:w:0x0f:m']); update.stdout.on('data', function(data) { console.log(data) }); update.stderr.on('data', function(data) { console.log(data.toString()) }); }); });
Run Your Application and Upgrading Firmware Using MCS

You are now ready to execute the Node.js program. In the system console, type the following command:
node app.js
Go back to MCS console, click Development on top menu bar, and click test device.
Go to the test device you just created.
You will see the light for the test device is turining green which means your device is connected and online.
Cick the firmware tab, and you will see the firmware files and you are able to Push the firmware to the development board.
MCS enables you to push the firmware to various development boards, however, it does not handle the firmware upgrade on the development board. You have to write your own code to deal with it.
Using the MCS, it is very convinient to have a platform to recieve and save the data from your developement board; also to control and upgade the firmware all at once.