Upgrade Your PS3's Hard Drive
by cornflake_81 in Living > Video Games
448168 Views, 98 Favorites, 0 Comments
Upgrade Your PS3's Hard Drive
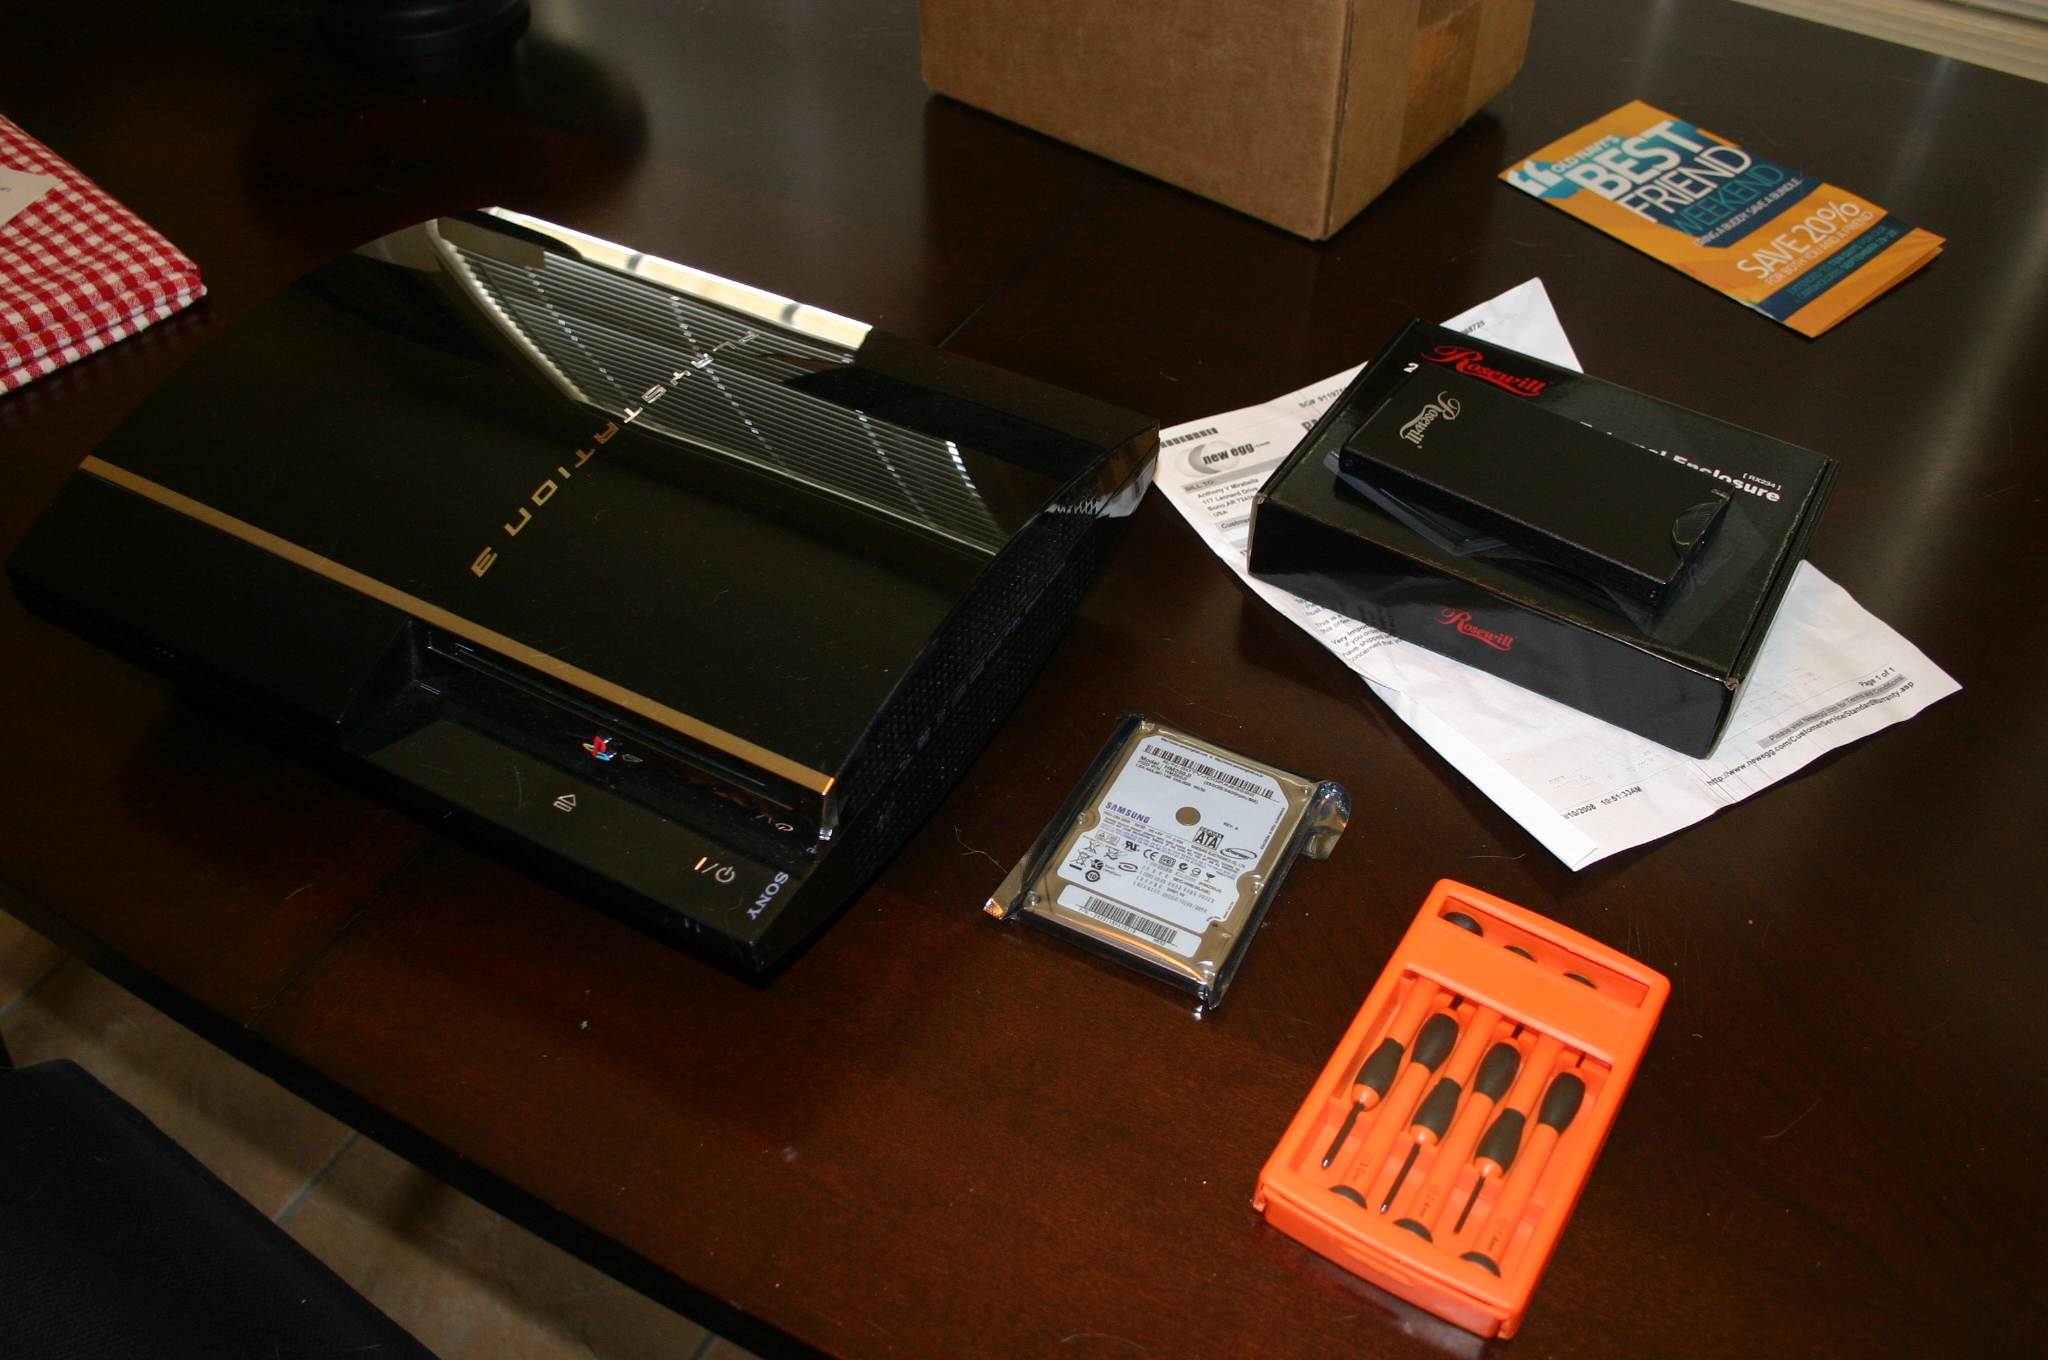
I'll go over the steps involved in replacing the stock hard drive in a Playstation 3 with a larger one. I avoided doing this for a long time because I was under the assumption that it would void my warranty. Surprisingly, Sony not only allows such modifications, they implore it.
The PS3, aside from being a game console, is also a pretty powerful media center. But a media center with limited memory would be pretty pointless, so I yanked that tawdry little 80gb drive and replaced it with a hulking 250gb drive. There are a few things to consider before moving forward...
The PS3, aside from being a game console, is also a pretty powerful media center. But a media center with limited memory would be pretty pointless, so I yanked that tawdry little 80gb drive and replaced it with a hulking 250gb drive. There are a few things to consider before moving forward...
A Few Things, First...
There are a few things to think about before jumping right in.
What about the stuff on my PS3? Can I keep it?
The PS3 has a back up function that will save everything on it...as long as you've got a storage device big enough to hold it all. An external hard drive makes things pretty easy. Before you upgrade, just plug in your hard drive via USB, select System Settings>Backup Utility>Back Up and follow the onscreen directions.
If, however, you're like me and don't have an external hard drive, you have to take a different approach. Just use a memory card or usb flash drive and save your game saves. Everything else can be easily re-acquired. Anything you download from the Playstation Store is infinitely available to re-download. Installed game data can be re-installed. Game patches and updates can be re-downloaded. Time consuming, but a viable option.
What kind of hard drive do I need?
Pretty much any 2.5" SATA hard drive will do. I picked up a 250gb drive for around $70. Hard drives have come down in price significantly, so a huge drive is pretty affordable. Its worth noting, all that you need is a drive capable of 5400rpm and 1.5gb/s. You could spend more money on a drive that's capable of 7200rpm and 3.0gb/s, but the PS3 will only utilize it at the aforementioned speeds, so its pretty useless.
Can this brick my PS3?!
Nope. All of the PS3's system data is stored away safe and sound, far away from your shaky, nervous hands. Of course, common sense is a prerequisite here. If you use the correct tools, take your time, and follow directions, it'll be fine. If you use a butter knife for a screwdriver and rush through it....yeah, you'll probably screw something up.
Stuff You Need...

Alright, you'll need:
A Playstation 3 - That's pretty self explanatory. Please don't try this on your toaster.
A New Hard Drive - As discussed in the last step.
Precision Screwdriver Set - Really, don't try to use that big screwdriver in the junk drawer. You can snag a set of precision screwdrivers for 5 bucks, and they're absolutely necessary for this.
And that's it. You'll notice an external hard drive enclosure in the picture below. You can pick one of these up from Newegg for around $20 and recycle your PS3's existing hard drive into a spiffy external hard drive. I spent about $90 bucks altogether and ended up with four times the hard drive space and a new external drive. Now that's value.
Crack It Open...
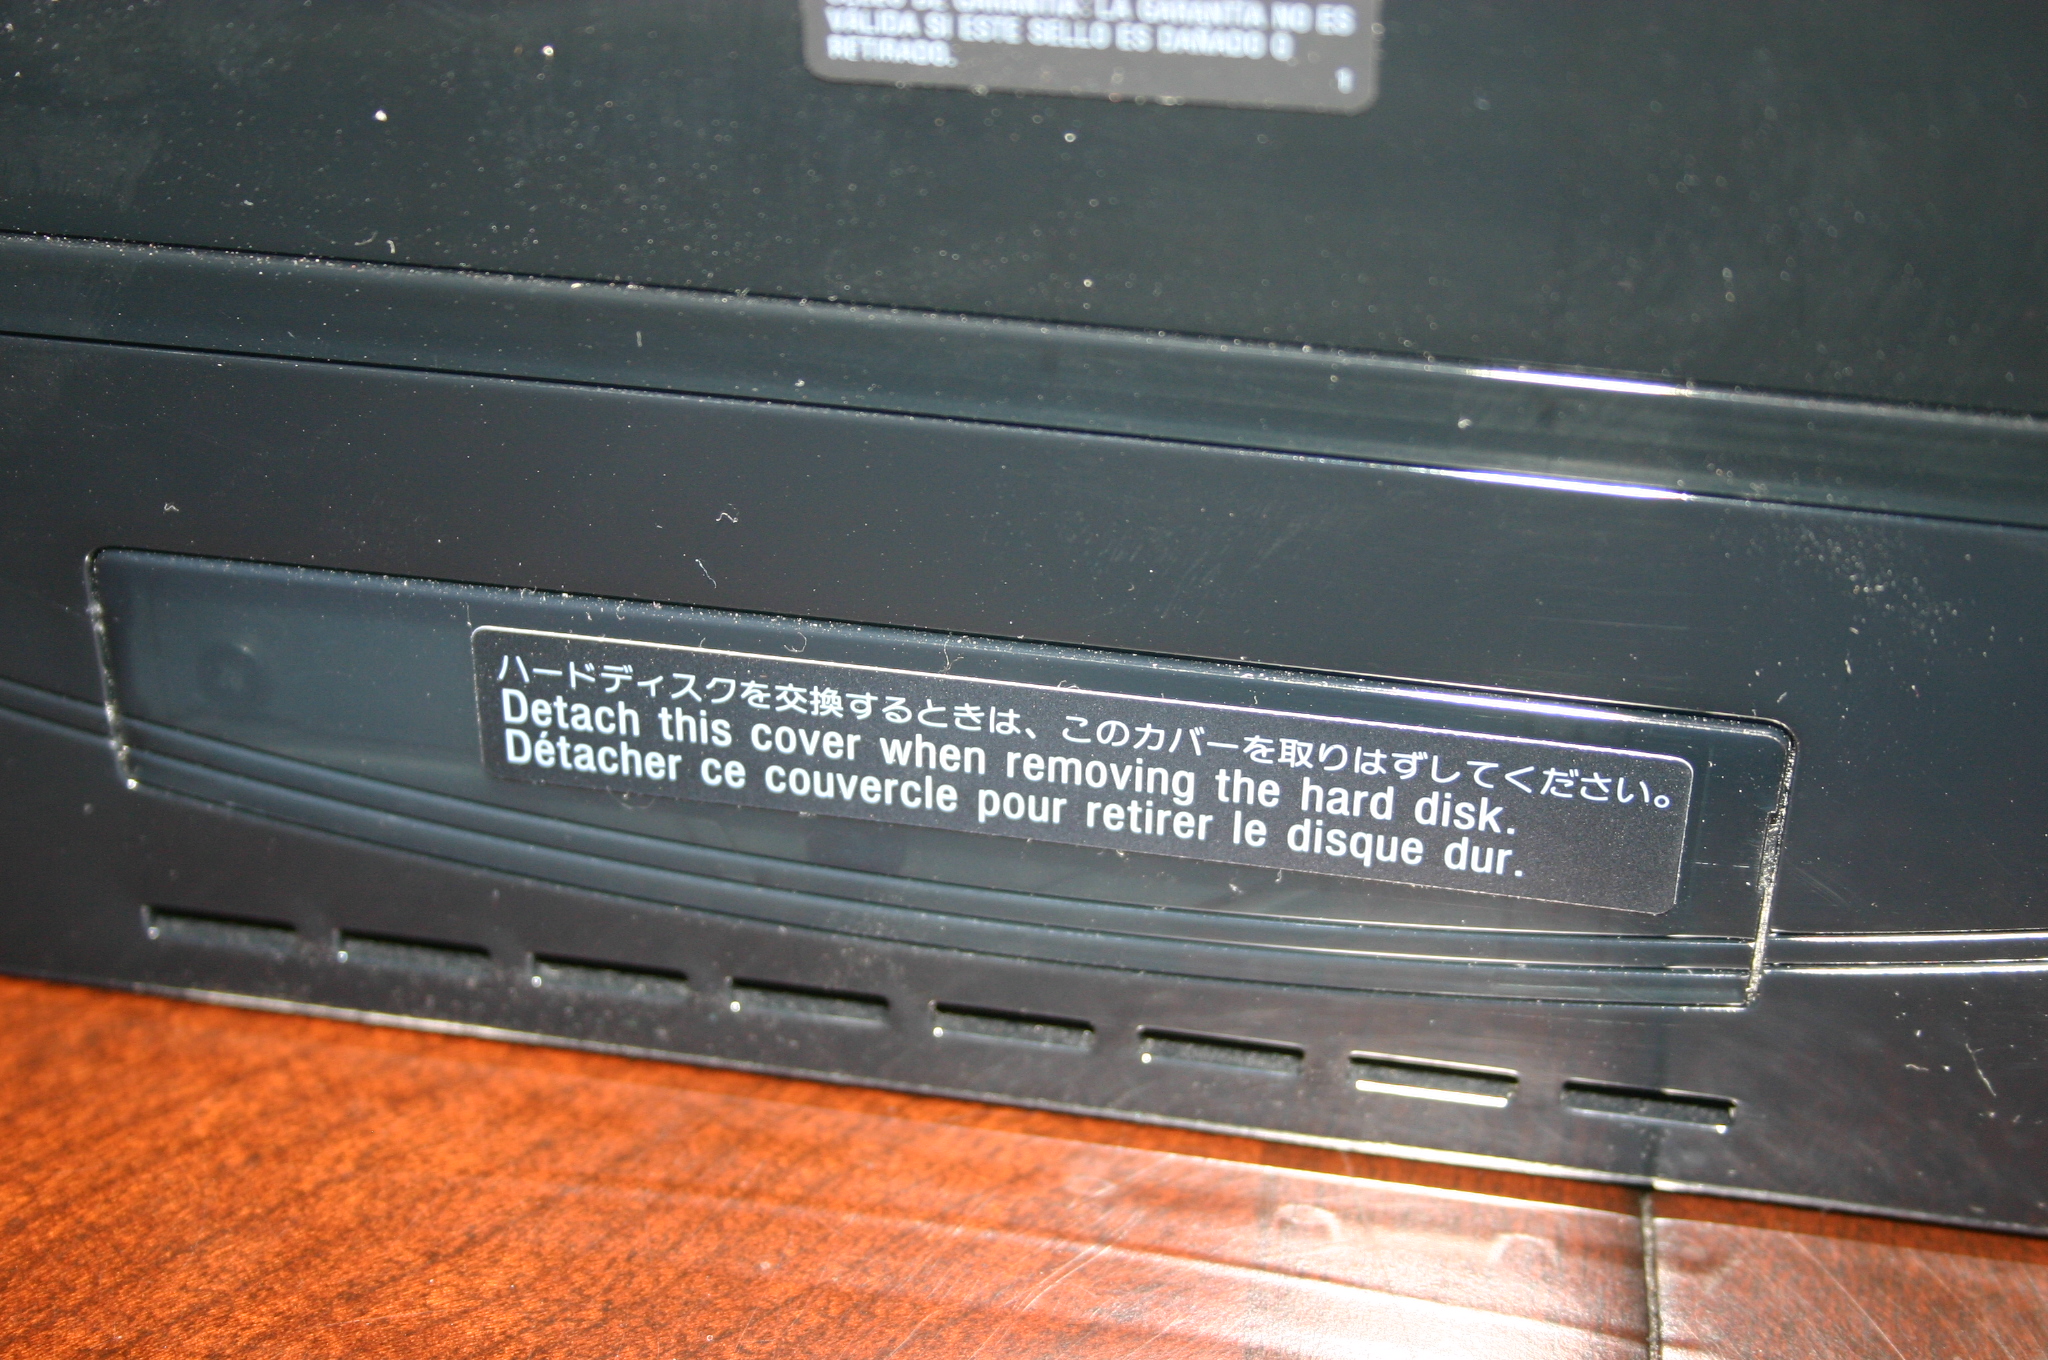
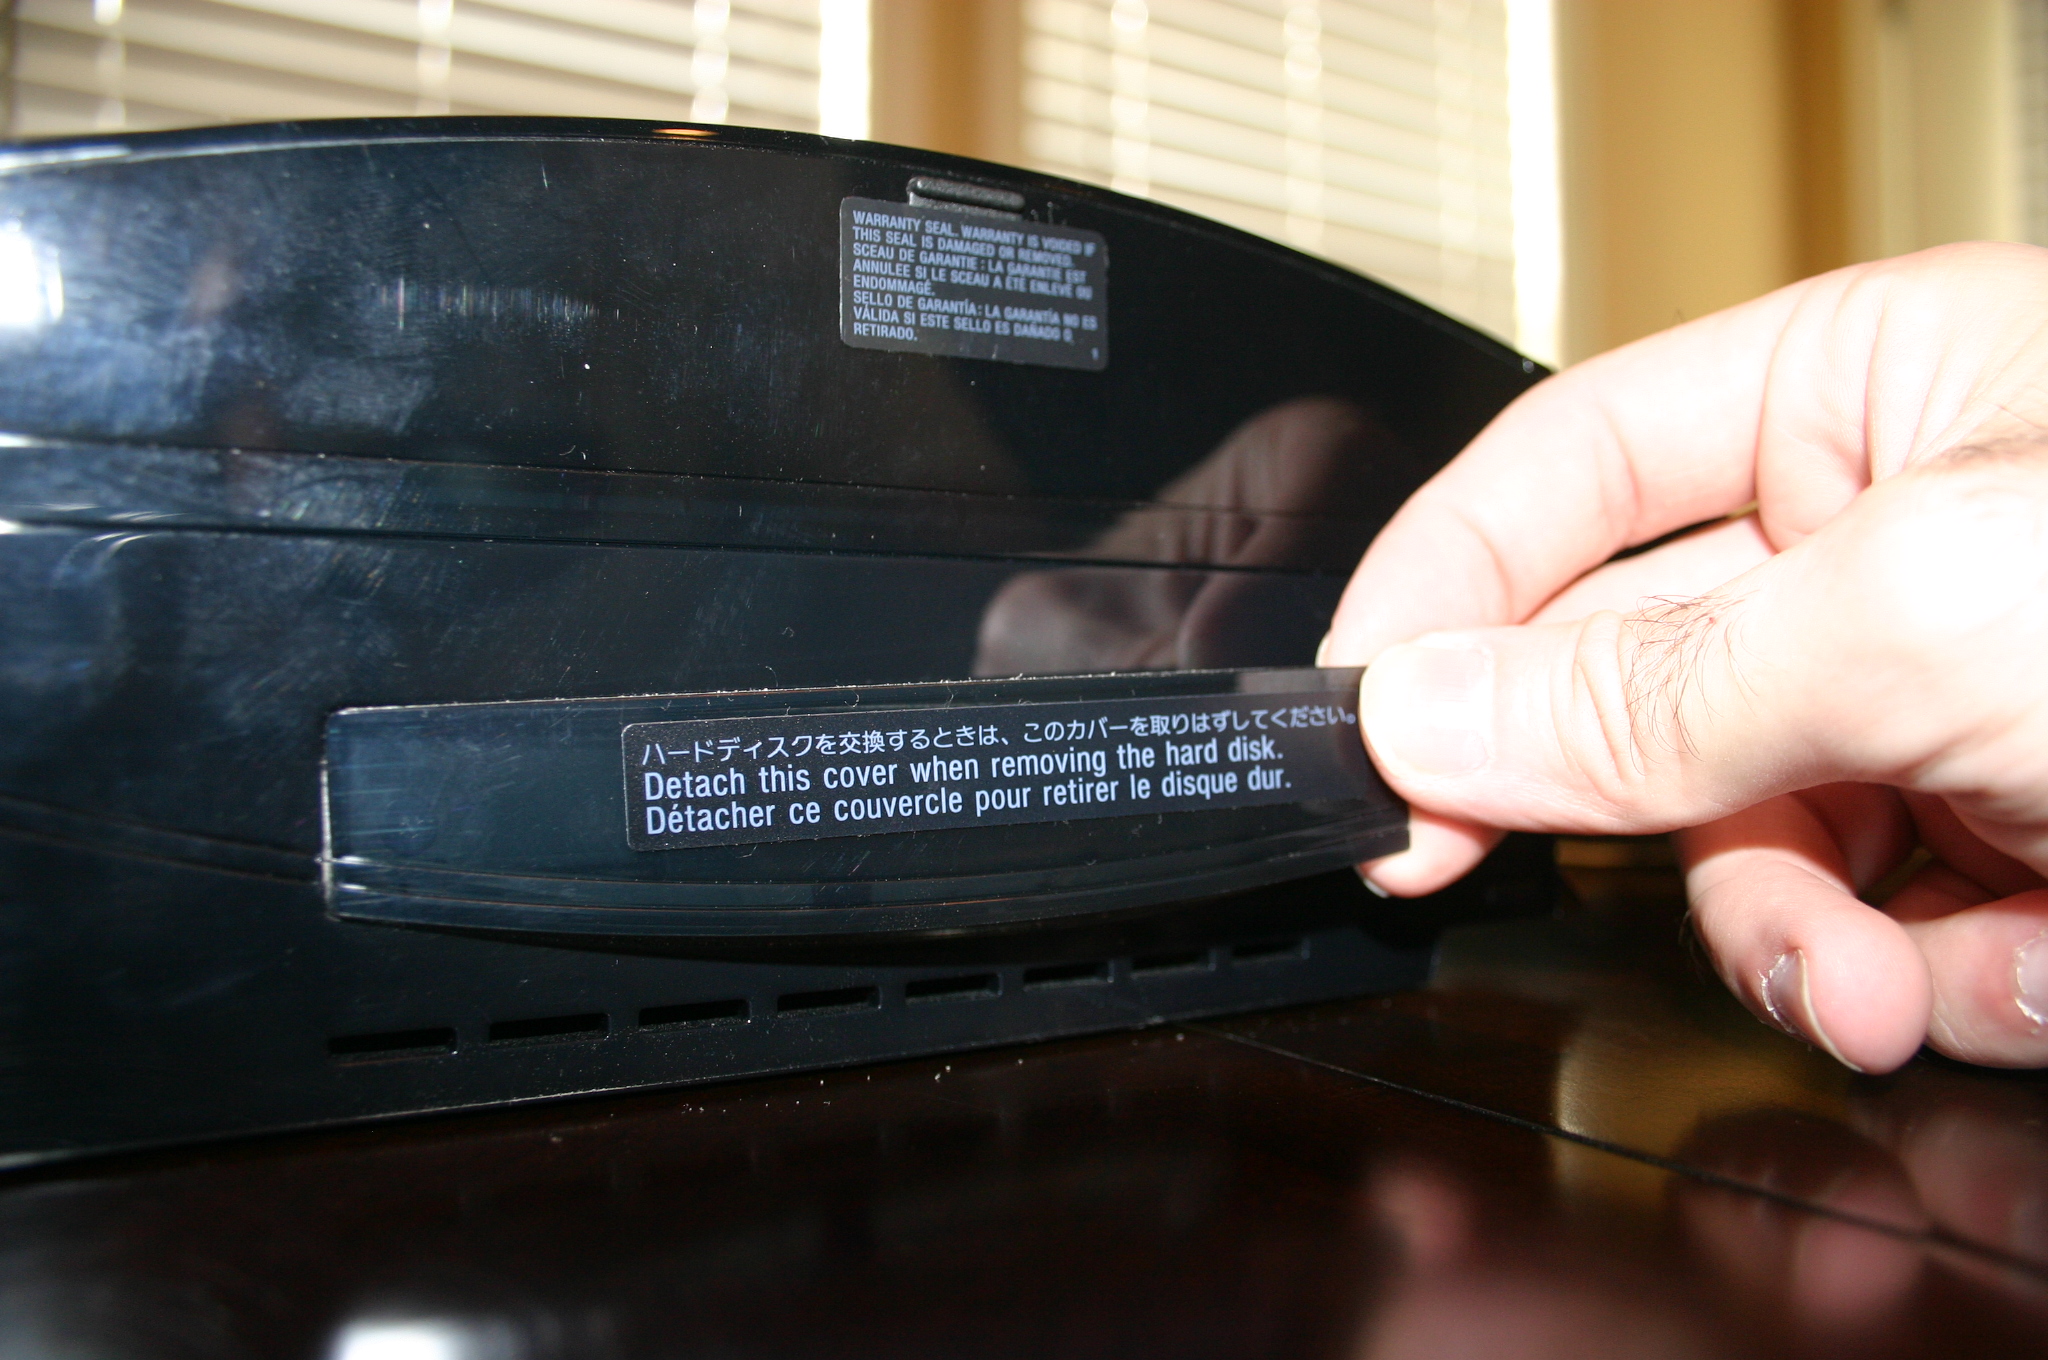
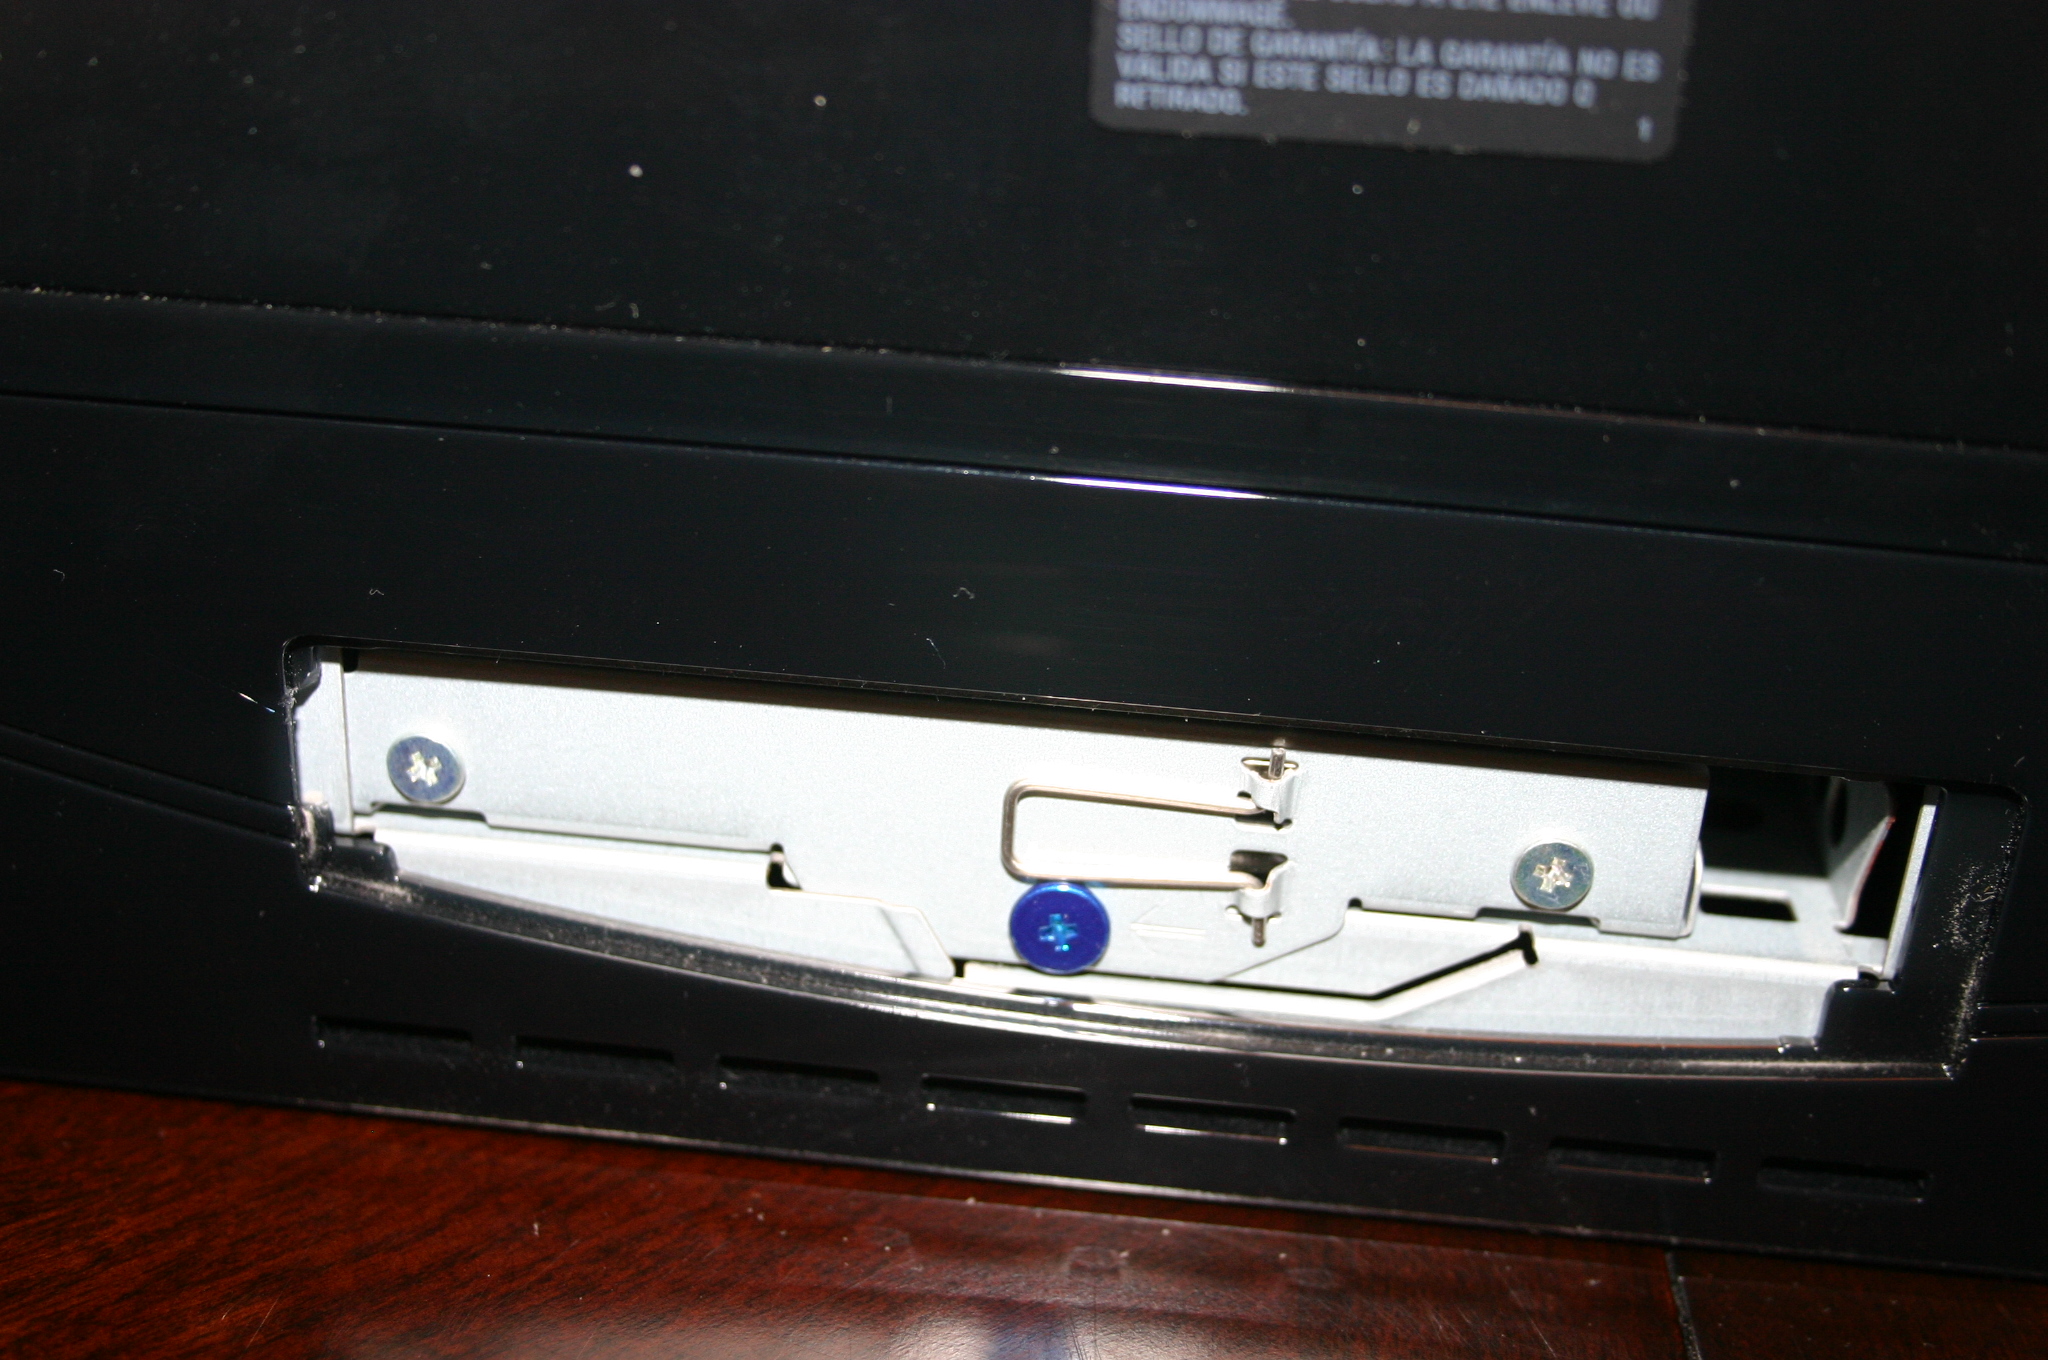
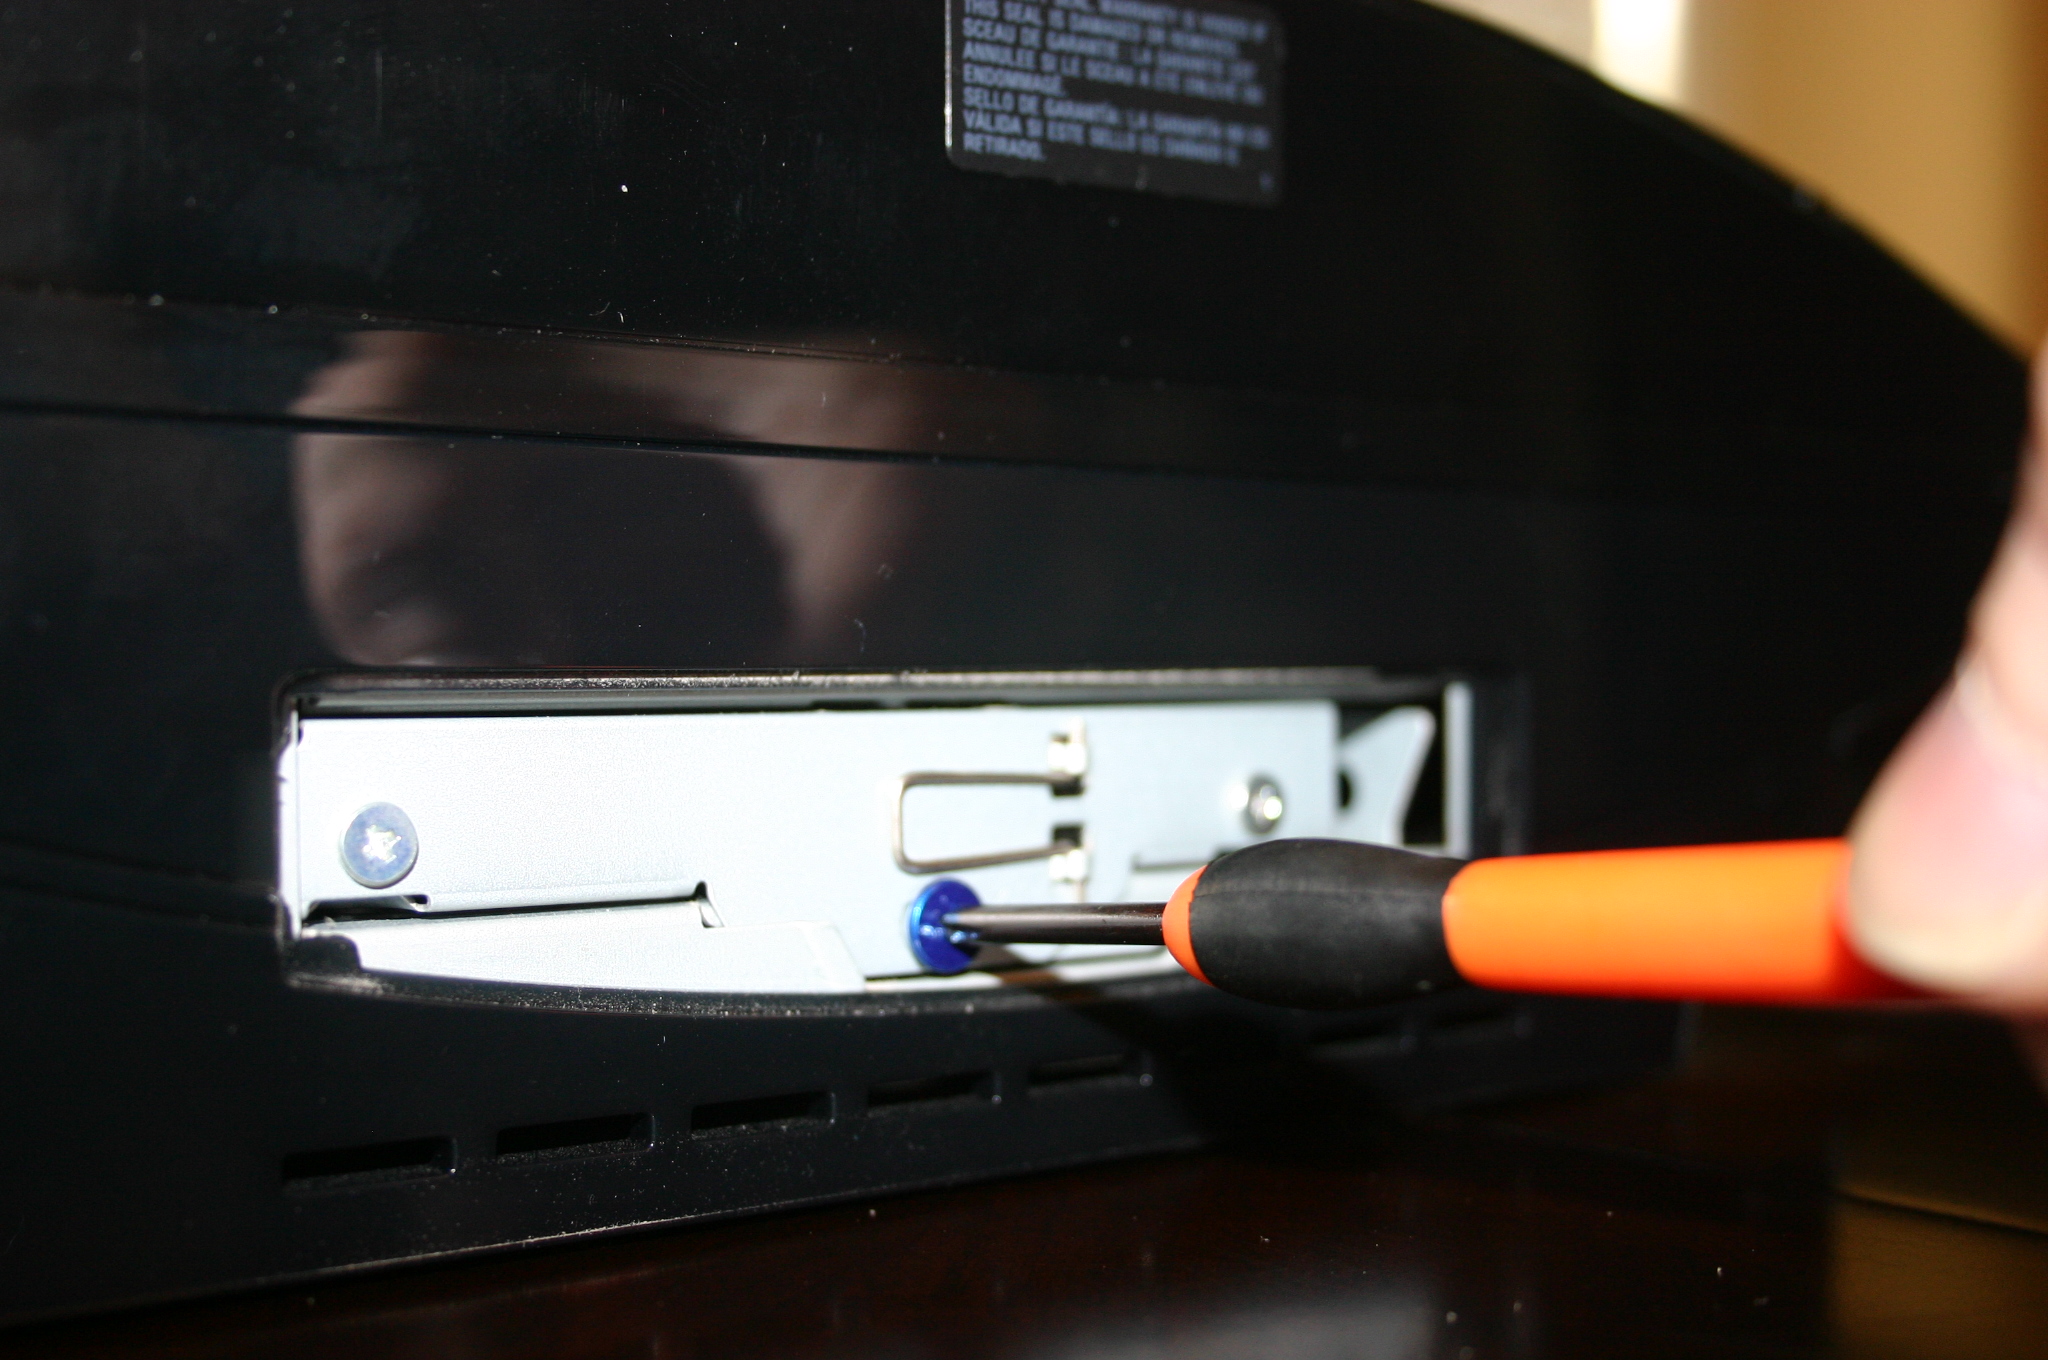
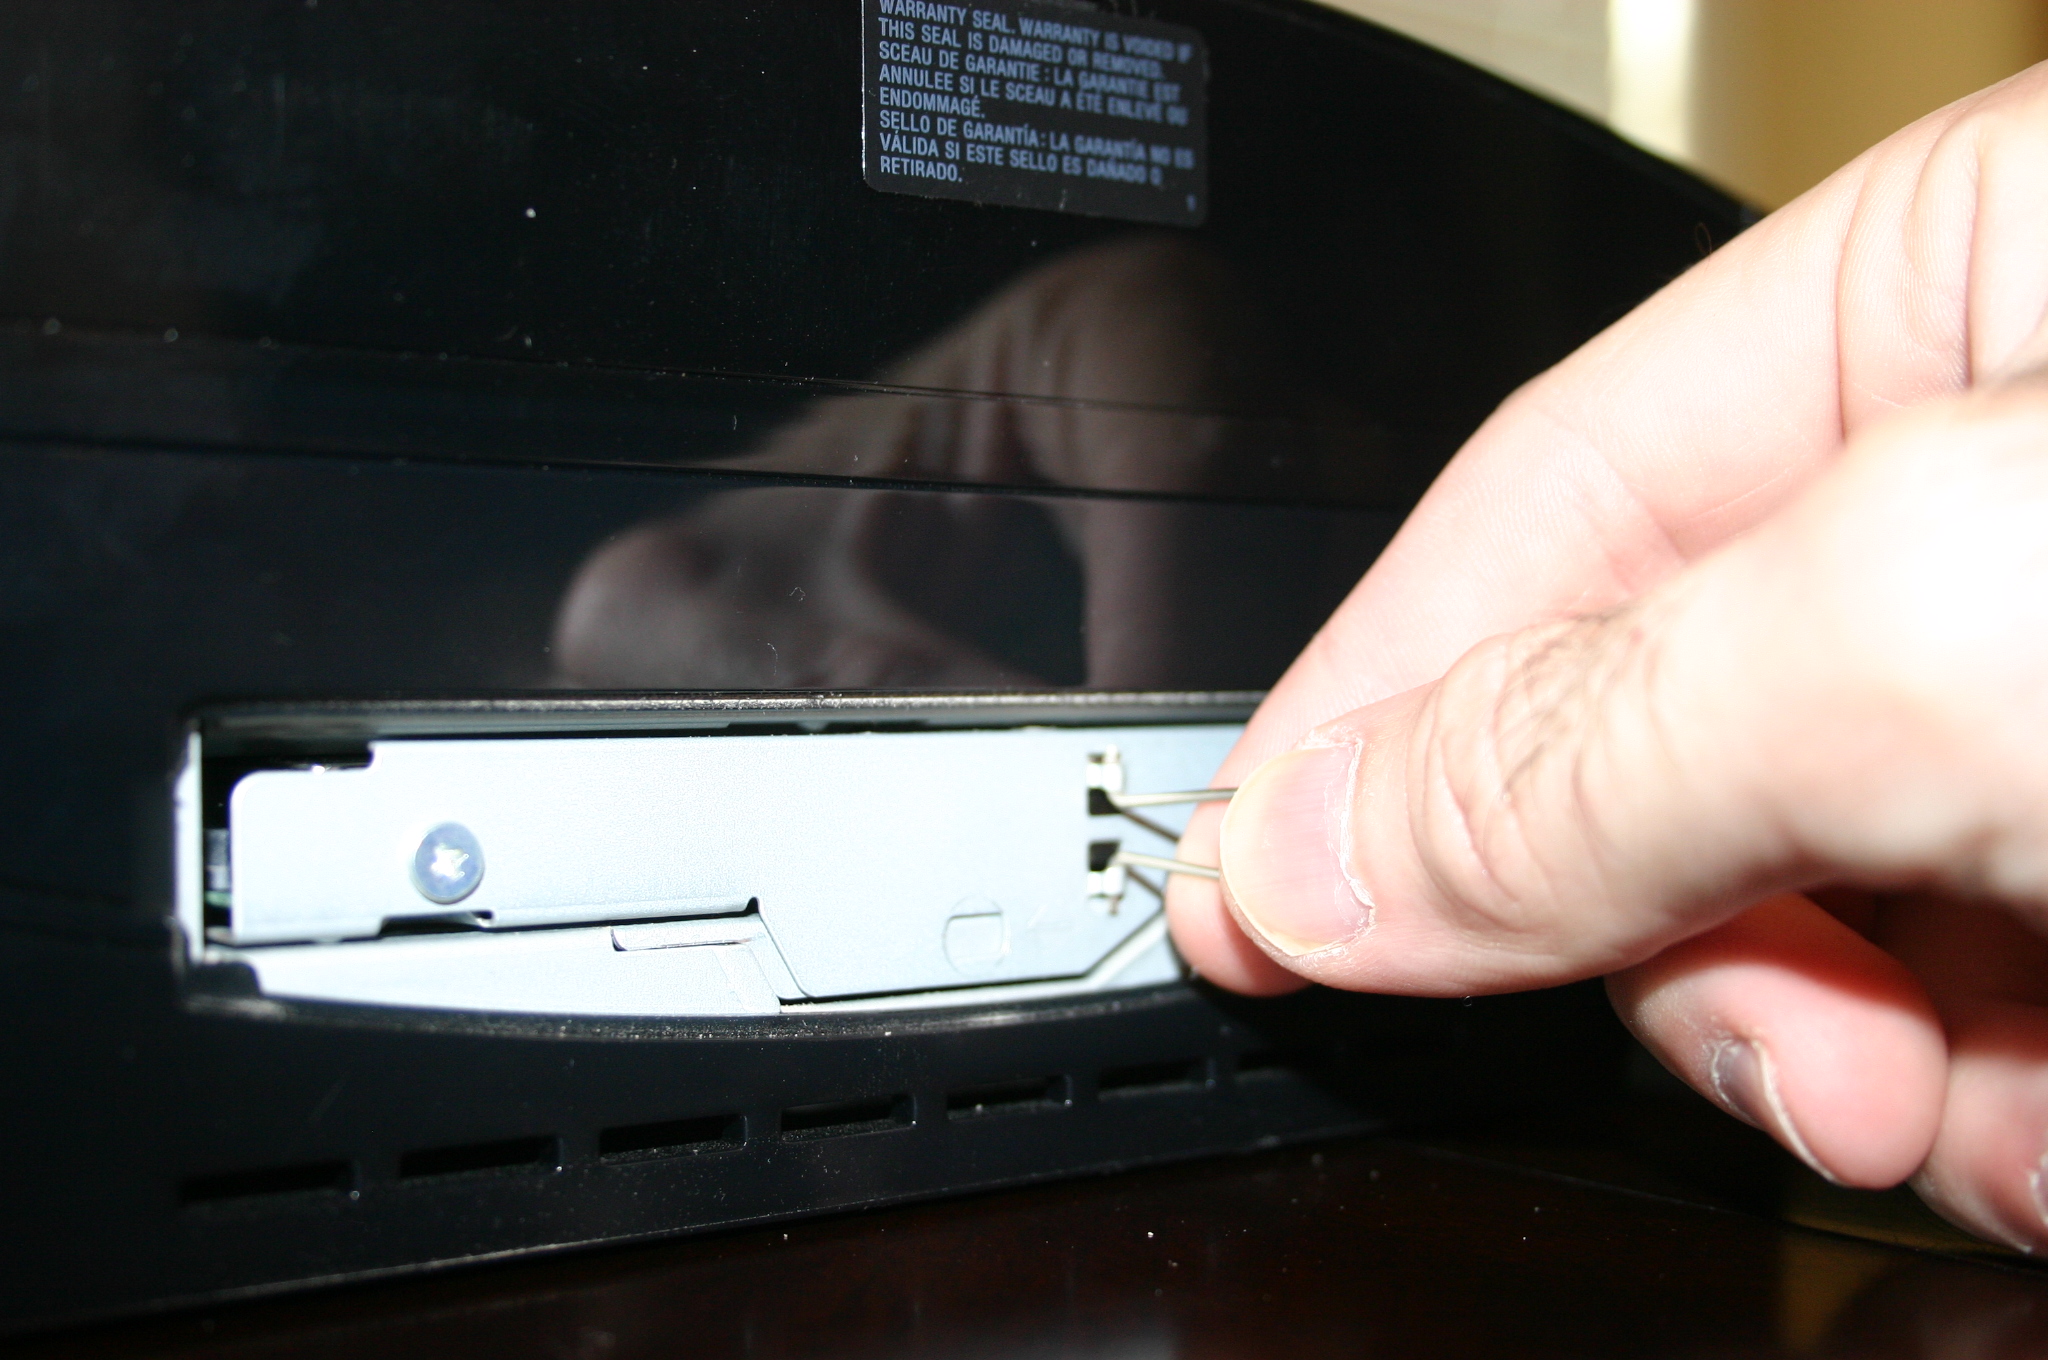
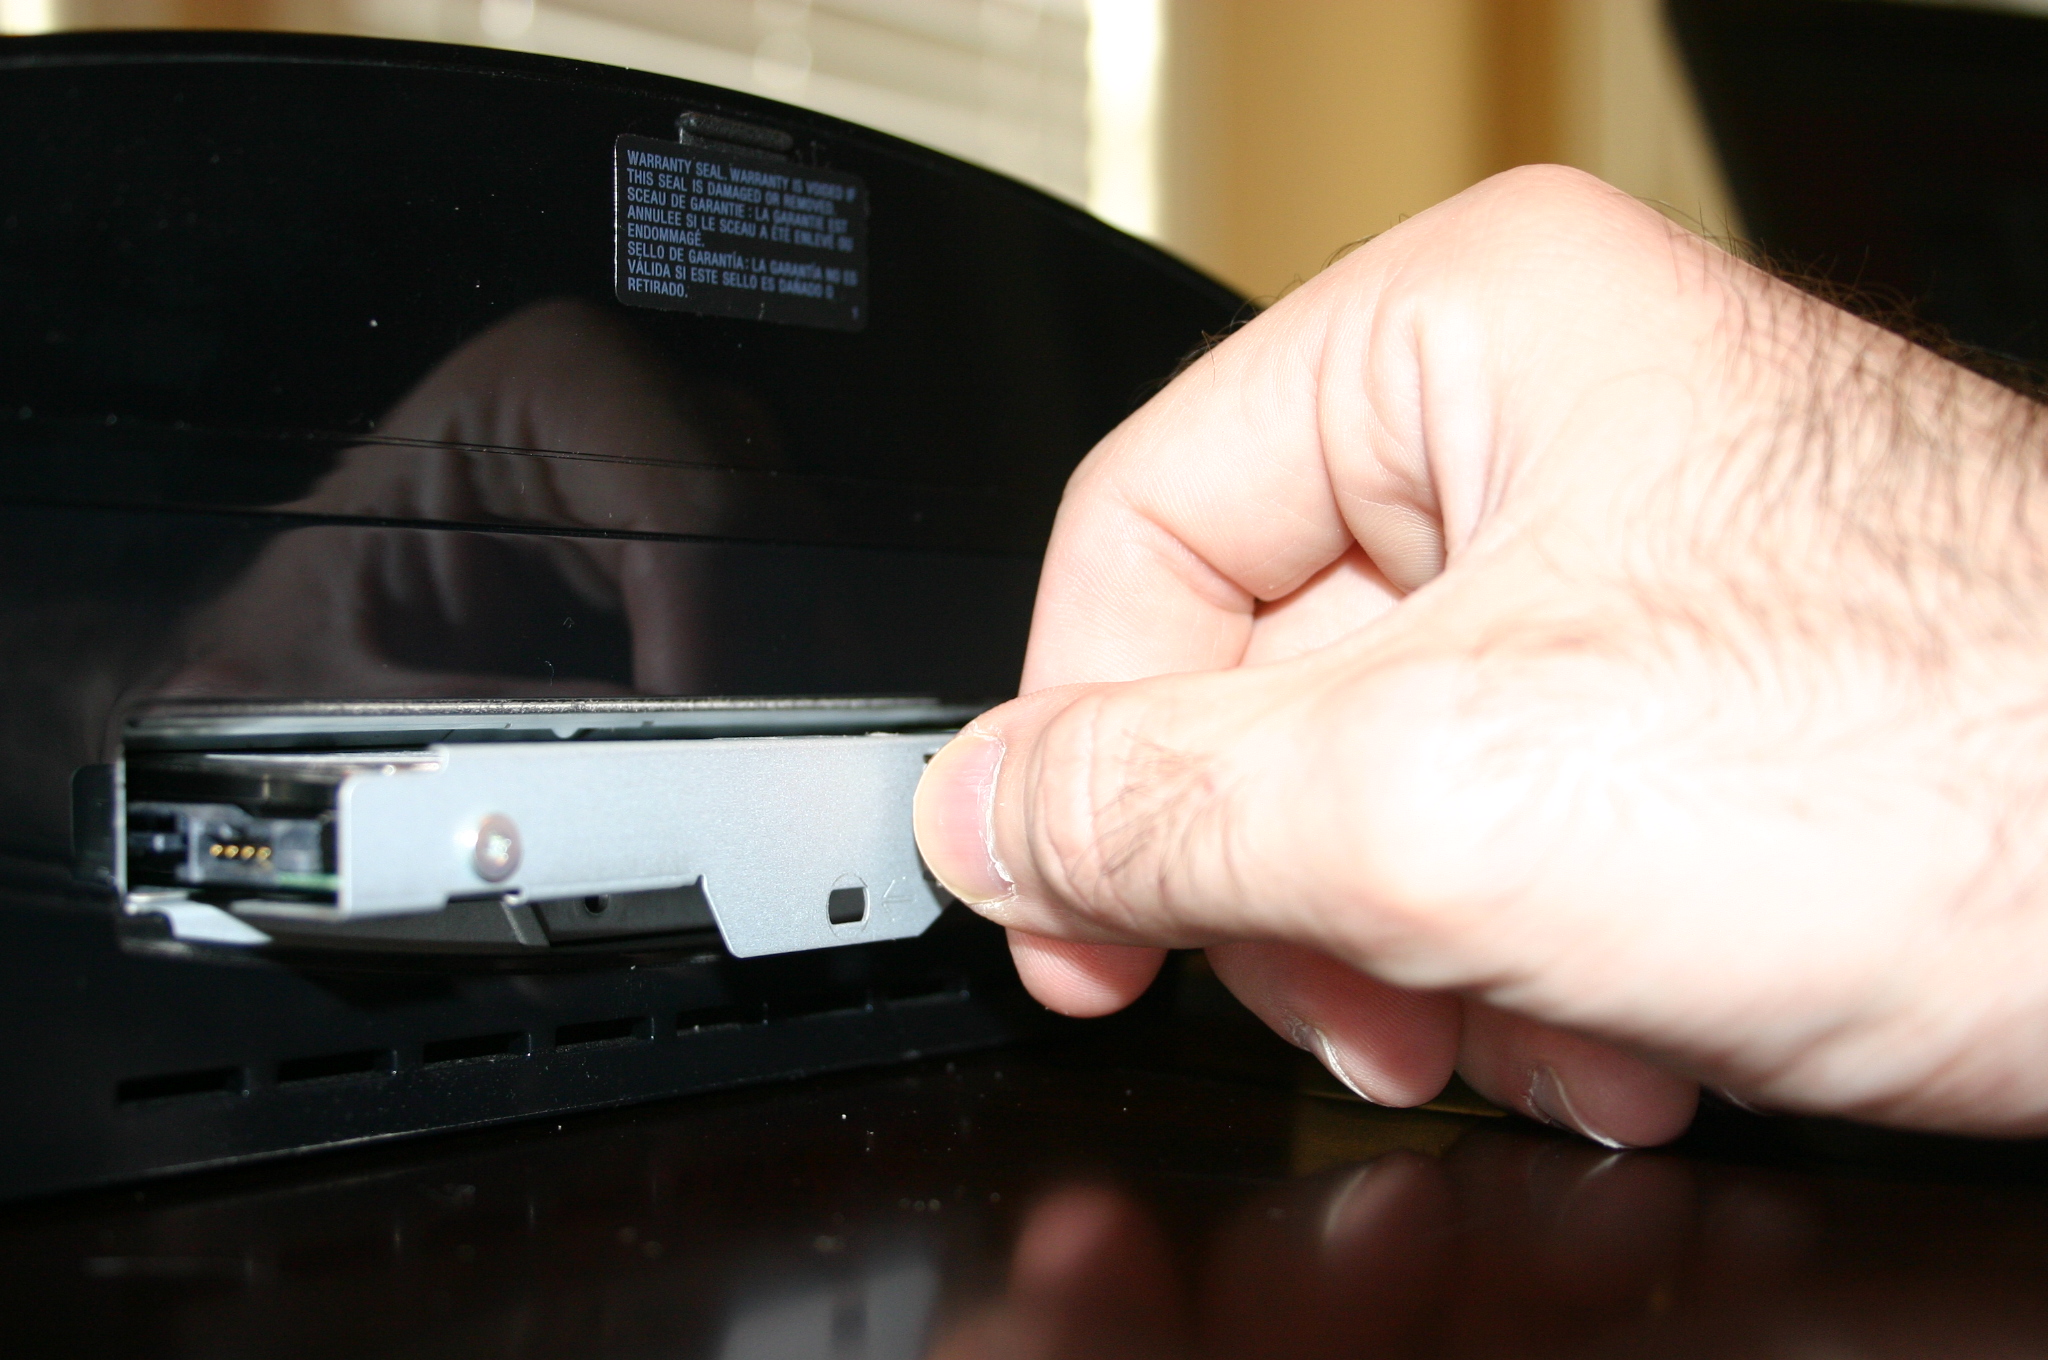
Now for the fun part, opening up this bad boy. On the left side of the machine there is a small hatch. Using your thumbnail or a small, flat head screwdriver, pop it off. What you're looking at now is the side of your hard drive.
Now turn your attention to the shiny, blue screw in the middle. That little guy is what's holding the hard drive tray in place. Carefully remove that screw and put it somewhere safe.
Next, fold out the little wire handle and use it to slide the entire hard drive tray to the right. Once its all the way to the right, pull it towards you and slide it out. Half way there.
Swap Out the Drive...
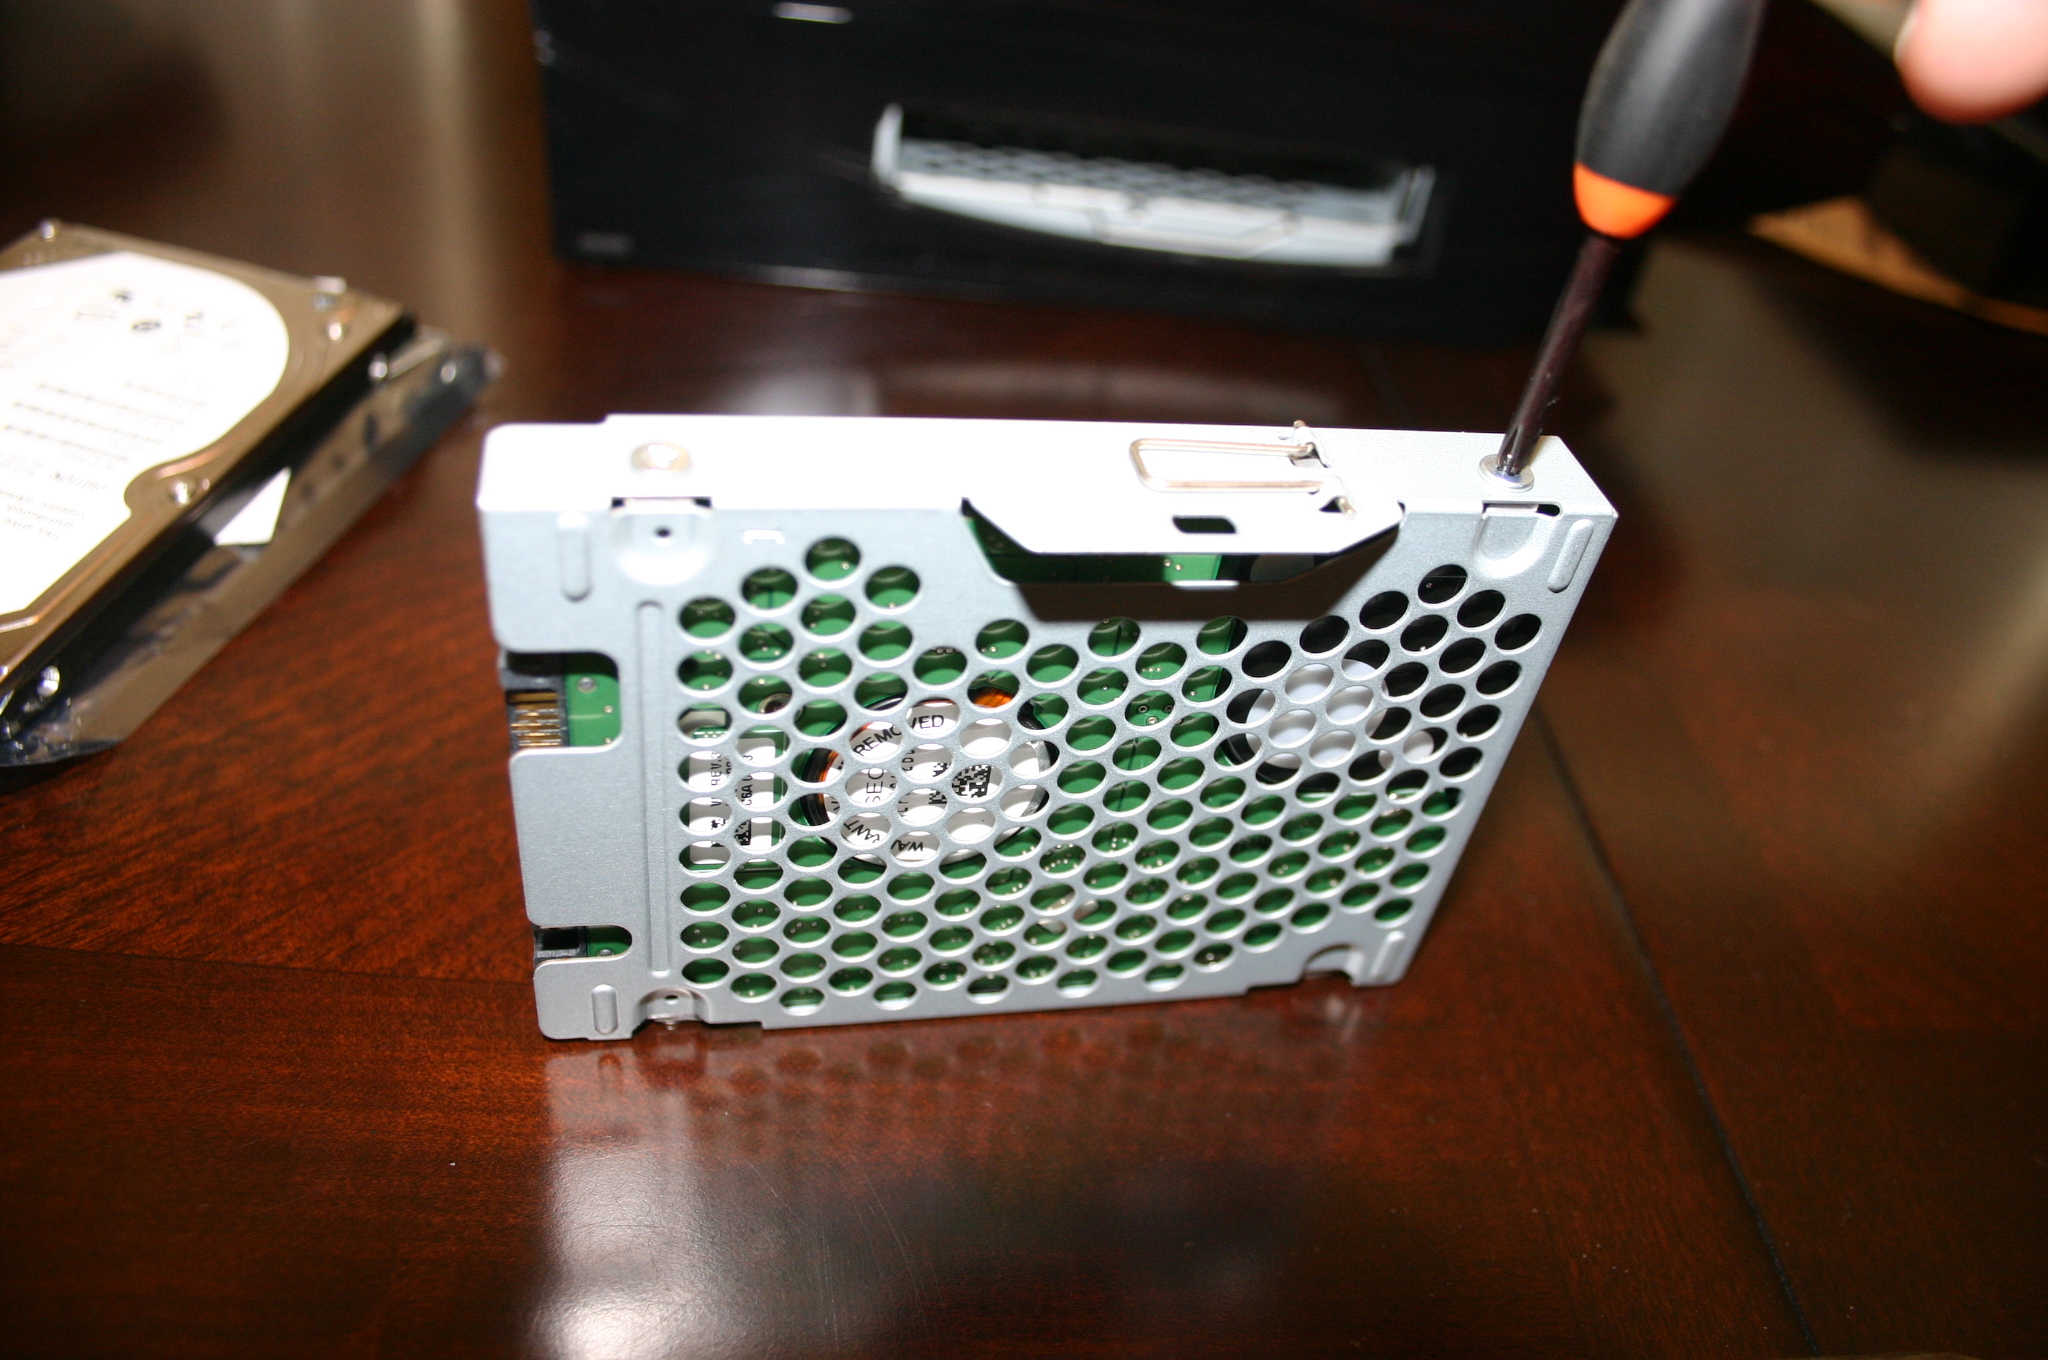
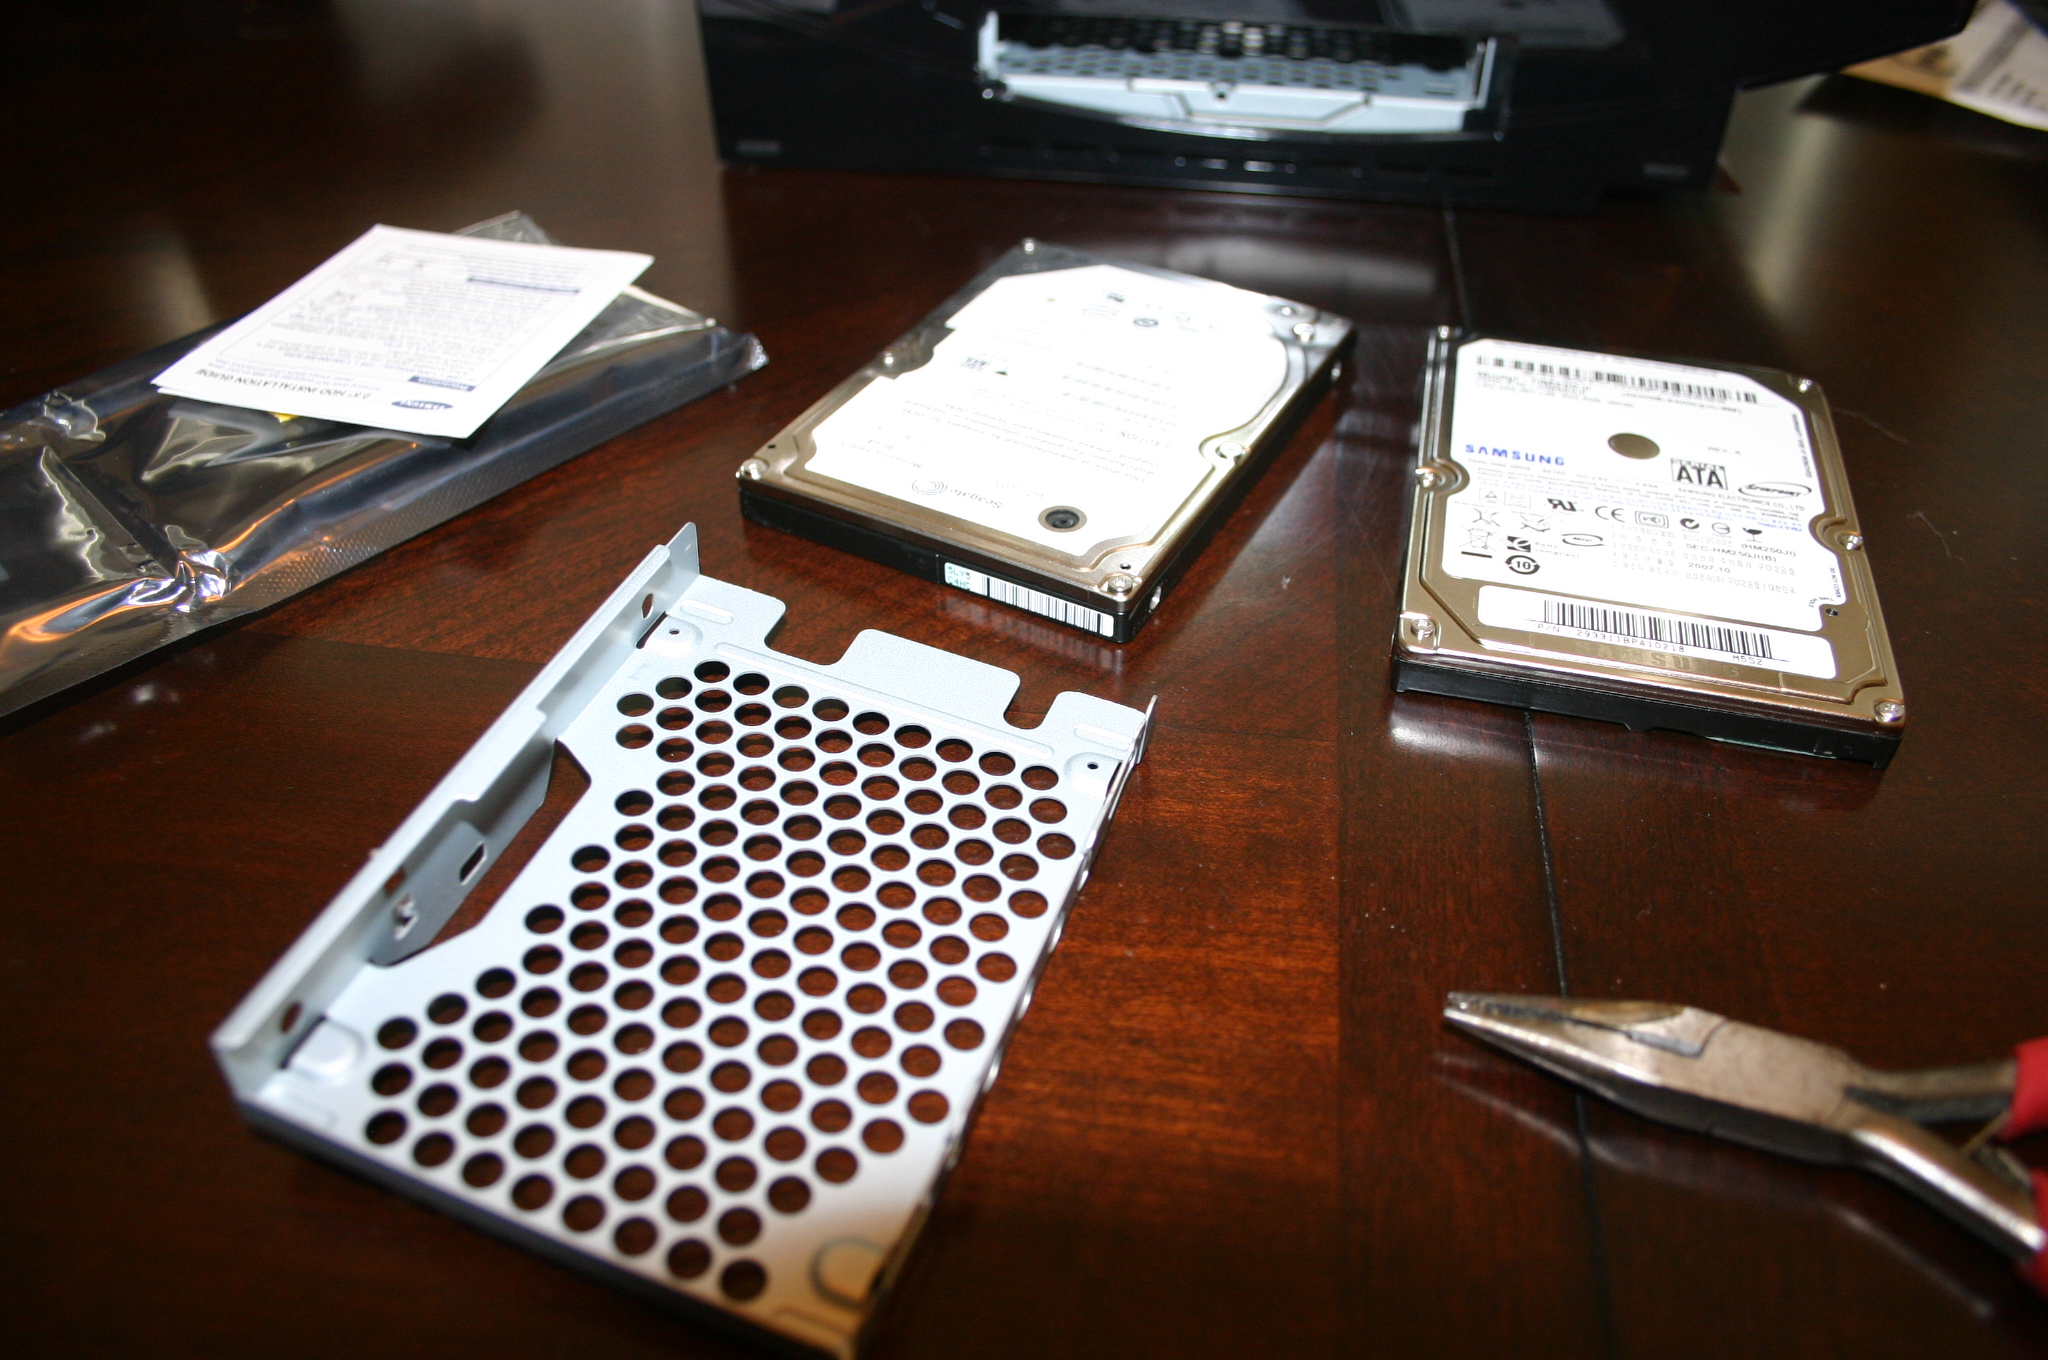
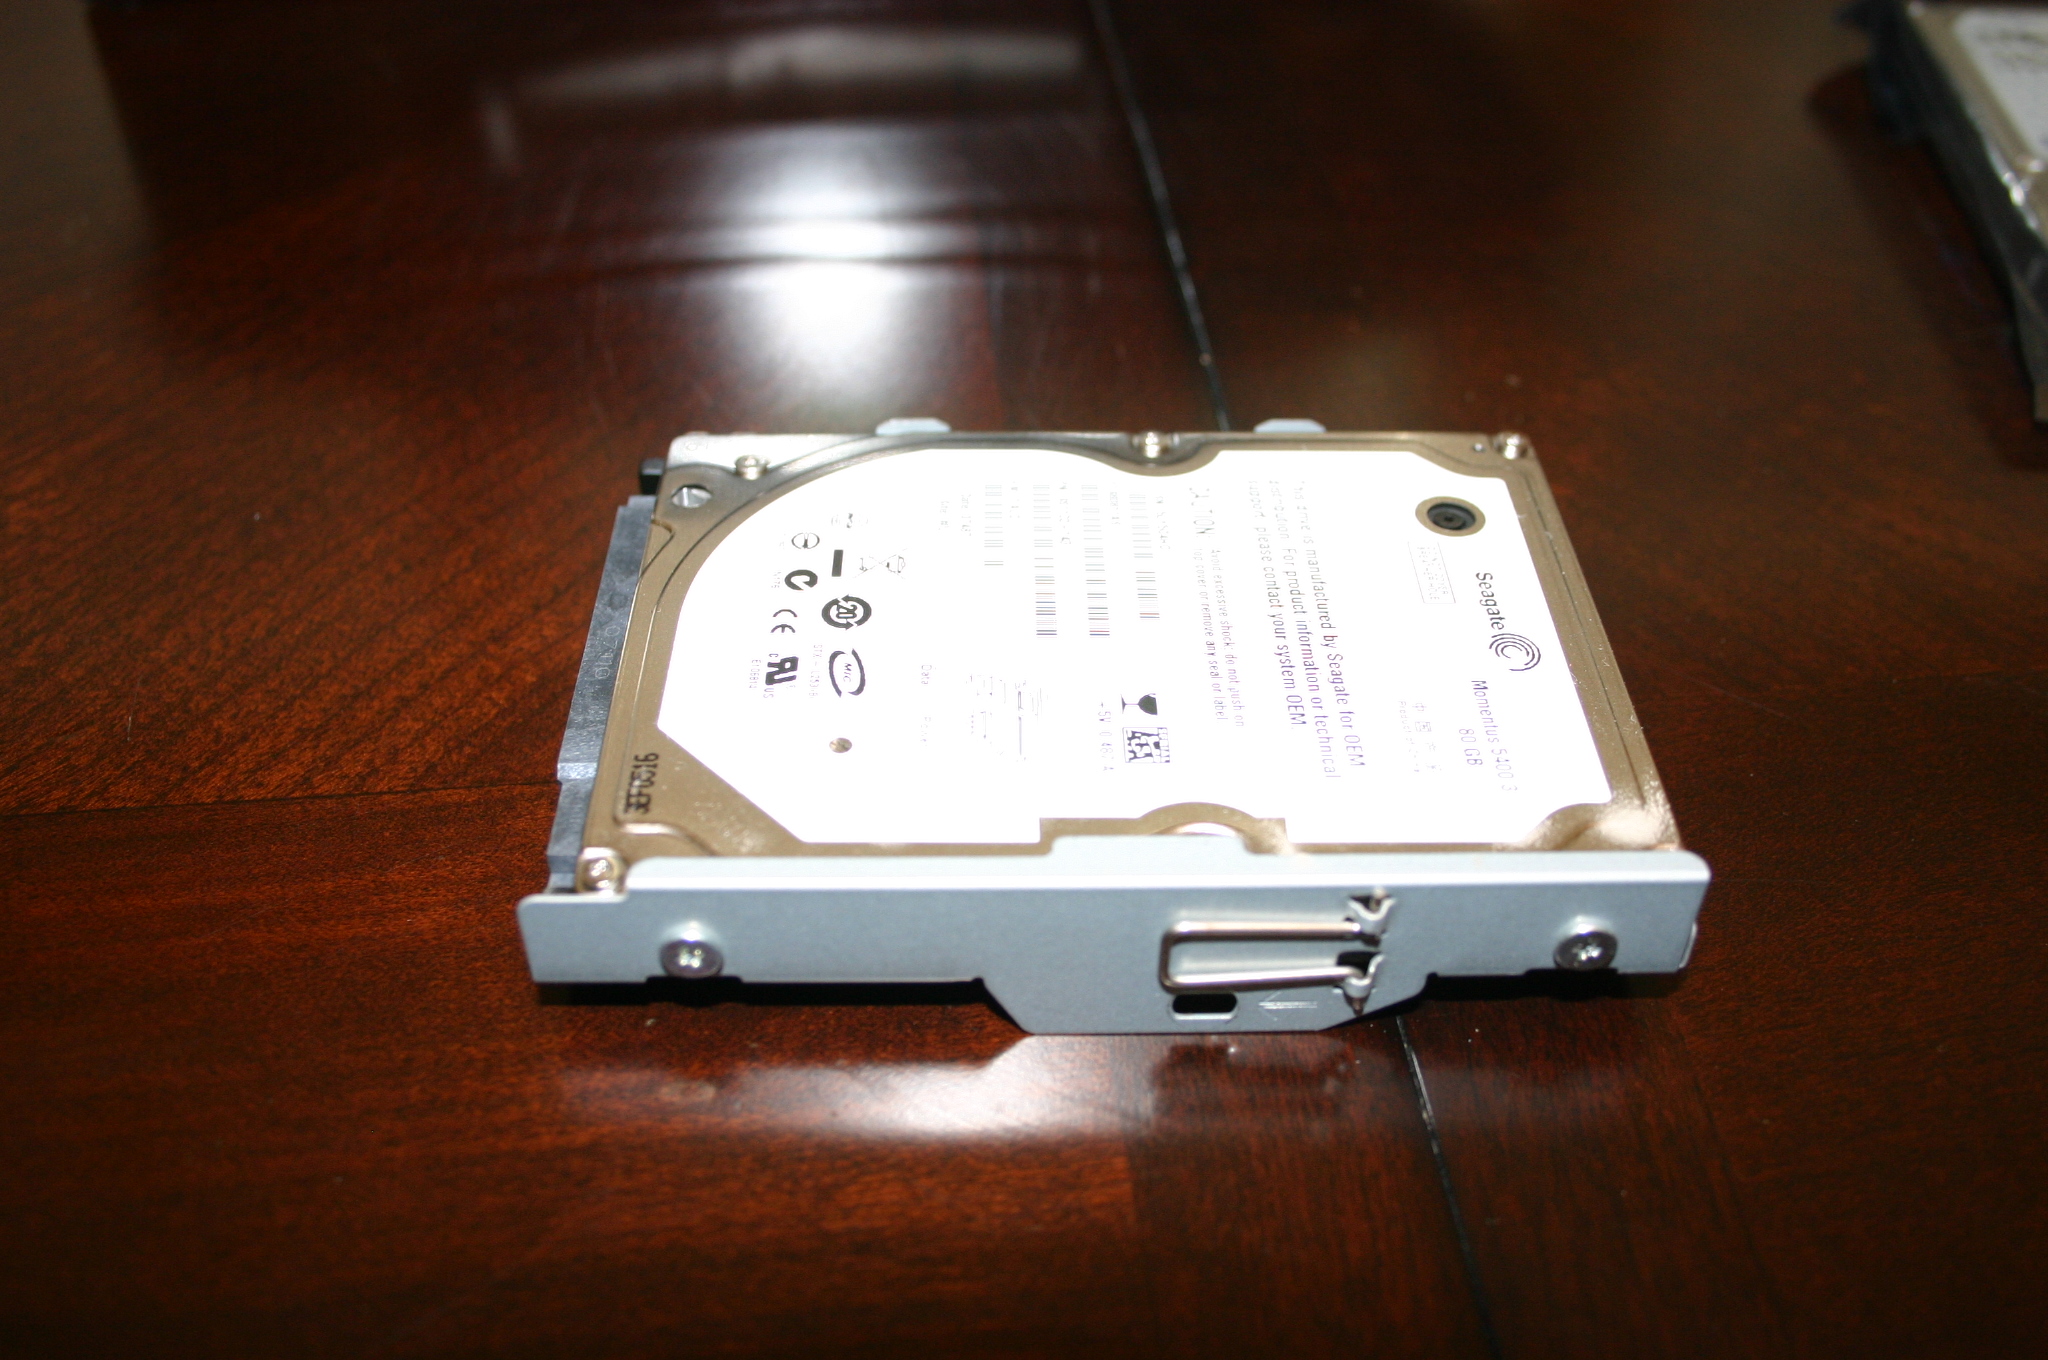
Now this part is crucial. There are four screws holding the actual hard drive in the tray. From what I can tell, these screws are made out of butter. If you breathe on them while taking them out, they will strip. I know this...because I stripped one. Just take your time and make sure your screwdriver matches up closely with the screw head. If, like me, you happen to strip one, don't fret. With a small pair of needle nose pliers and a little patience, you can turn the screw out. However, just save yourself the hassle and try not to strip one.
Once all the screws are out, just slide the old drive out of the tray and slide the new one in. Don't forget to bolt it back together.
Once all the screws are out, just slide the old drive out of the tray and slide the new one in. Don't forget to bolt it back together.
Back Into the Machine.


Now, just do step 3 backwards. Slide the tray into the machine and push it to the left until you feel it click into place. Its not a pronounced click, but its pretty obvious when its back in. Put that little blue screw back in place, replace the cover and your done!
And Finally...
Hook your machine back up and power on. A message will pop up telling you to format your new drive, just follow the onscreen instructions. If you backed up to an external hard drive beforehand, plug your drive in, go to System Settings>Backup Utility>Restore and follow the prompts. If you just copied your game saves (like me), just pop your memory card back in and copy them over.
I hope this will demystify the process for a few of you apprehensive PS3 owners out there. This is a really simple process that adds a lot of functionality and value to your machine. Plus, with all that extra space, it might be a good time to try out Yellow Dog Linux.
I hope this will demystify the process for a few of you apprehensive PS3 owners out there. This is a really simple process that adds a lot of functionality and value to your machine. Plus, with all that extra space, it might be a good time to try out Yellow Dog Linux.