Upcycling WD My Cloud Home

This instructables show how to fix a disk failured WD My Cloud Home, before you consider dispose it.
Supplies
- USB to Serial cable
- Spare Hard Disk
BACKUP DATA FIRST!!!
WARNING, this intructables are not show you how to recover the data from the disk. On the contrary, you probably lost all your data when you repurpose the disk. So if your disk still working, please backup your data first.
Why Upcycling?

There are many reasons you would consider disposal your WD My Cloud Home:
- Functions are not you expected
- Access to local personal data requires internet access
- Data transfer too slow
- From times go on:
- Some supporting software already faded out
- Outside maintenance period
- Disk failure and you cannot install official firmware to new replacement disk
The disk has limited lifetime, but the Case, board, CPU, RAM and chips should still working over years. We can give them a second life.
Proven Solution
I found many people on the web suffer from the above reason(s), including me. Some people find a way out, but the forum over 500 comments are very easy to get lost. So I recorded my proven working steps here.
Ref.:
https://community.wd.com/t/install-debian-on-wd-my-cloud-home/250061
Note: Someone reported latest WD firmware prohibit boot from USB so below solution may not working for the latest device.
What Is Open Media Vault?
openmediavault is the next generation network attached storage (NAS) solution based on Debian Linux. It contains services like SSH, (S)FTP, SMB/CIFS, RSync and many more ready to use. Thanks to the modular design of the framework it can be enhanced via plugins. openmediavault is primarily designed to be used in small offices or home offices, but is not limited to those scenarios. It is a simple and easy to use out-of-the-box solution that will allow everyone to install and administrate a Network Attached Storage without deeper knowledge.
Most forum solutions suggest replace official firmware by this open source solution. Below are the steps how to do it.
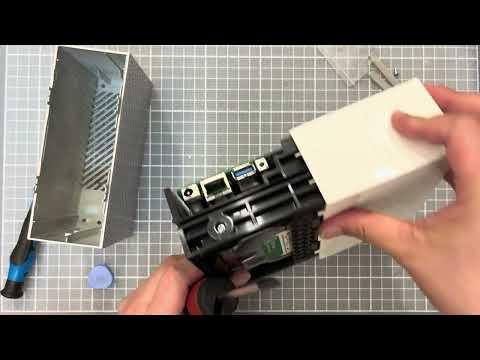
Teardown the Case

If the hard disk failure, you need replace a new one; If the hard disk still working, I recommend keep it and use another spare disk for this repurpose use. So the first step is teardown the case to replace the hard disk first.
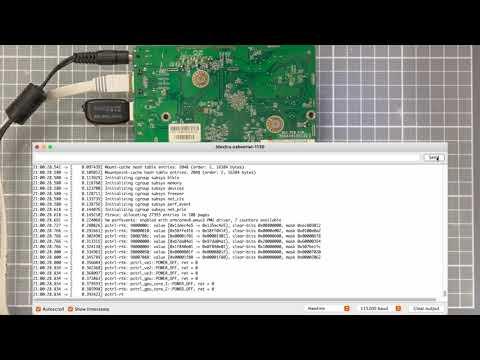
Serial Connection
Someone suggested a method that can use indirect observation method to check the firmware update finished. But since the case already teared off, use serial console will be much informative. Especially for the steps need to wait a while.
My Proven Working Method

There are many solutions someone reported work, but not all for me or not all for my generation of board.
I follow this forum post #321:
https://community.wd.com/t/install-debian-on-wd-my-cloud-home/250061/333
I recorded the full installation steps at the above video.
Here are steps summary:
- Download zip package the post provided
- Expand the zip files to a USB drive
- Connect USB to Serial cable
- Connect replacement hard disk
- Plug USB drive
- Connect network cable
- Open Serial Monitor
- Press and hold reset button and plug the power
- Keep holding reset button until the white LED stop blinking
- The Serial Monitor keep showing boot message
- Wait boot message finished and input: makepartshdd.sh
- This will alter some partition setting
- Wait alter partition message finished and input the reboot command the message provided
- Wait boot message finished and input: sgdisk /dev/sataa -p
- Check partition 20 should be 25.0 GB
- If partition size correct then input: installdebian11.sh
- Wait message finished and input the reboot command the message provided
- Wait boot message finished and login with root/root
- Install Open Media Vault (OMV) by input: /root/installomv6.sh
- Wait around 20 minutes for the installation and it will automatic reboot after that
- Login with root/root then change the root password by input: passwd
- The OMV installed and you can access the web UI by browse to: http://wdmch.local
- Login with admin/openmediavault
- Remember change the admin password
- Enjoy!
Enjoy Second Life!

After install OMV, the first most probably is mount the largest in file system and then install clamav plugin. I also recommend photoprism plugin for the photo solution.
You can find more openmediavault details at the official web page: https://www.openmediavault.org/