Universe Simulation Made on Your Laptop
by xenonic in Workshop > Science
3848 Views, 9 Favorites, 0 Comments
Universe Simulation Made on Your Laptop
Hey!
Welcome to this awesome instructable where we're going to make a simulation from the beginning of the universe on your simple laptop. The program we use is Adobe After Effects, and you easilly can download the free version of it.
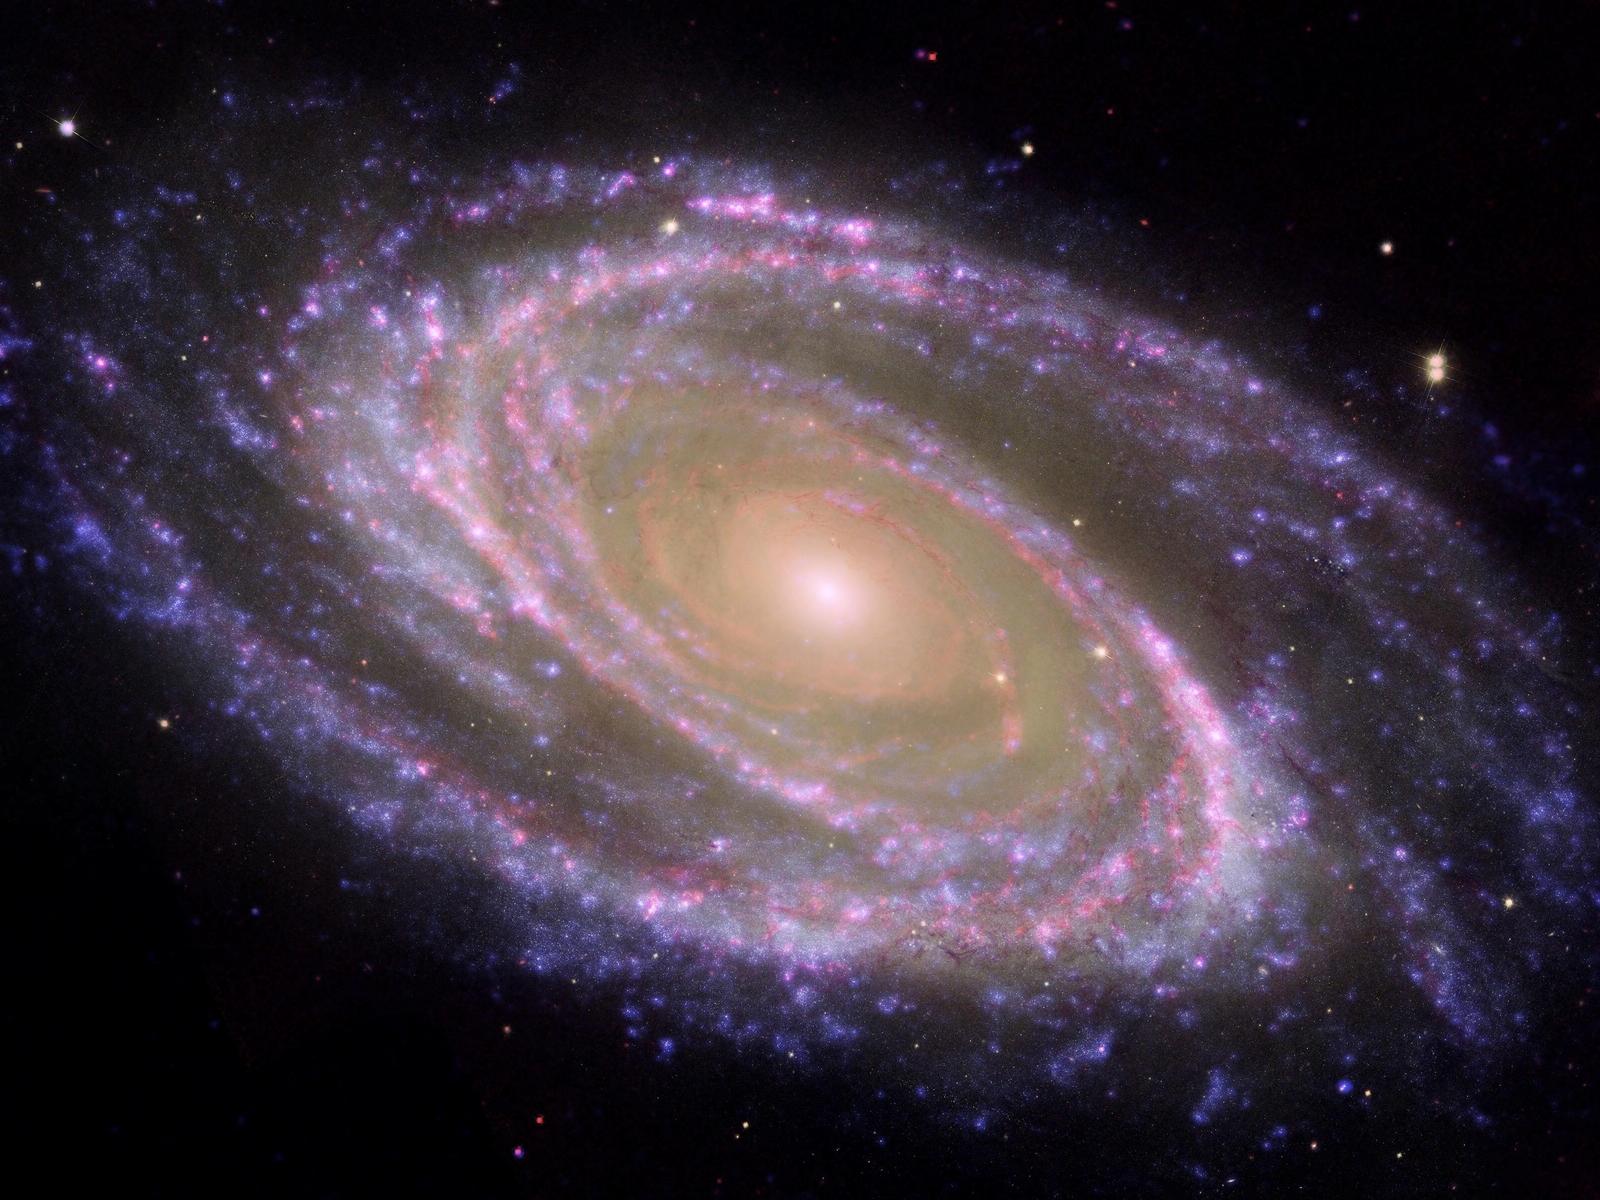
We're using Cosmic Background Microwave Radiation (CMBR). This is a picture from the universe how it was in the beginning. Here's a link to it.
http://imgur.com/XU9rl
I also want to say I'm Dutch, so mabe my English is not that good. So sorry for that.
Welcome to this awesome instructable where we're going to make a simulation from the beginning of the universe on your simple laptop. The program we use is Adobe After Effects, and you easilly can download the free version of it.
We're using Cosmic Background Microwave Radiation (CMBR). This is a picture from the universe how it was in the beginning. Here's a link to it.
http://imgur.com/XU9rl
I also want to say I'm Dutch, so mabe my English is not that good. So sorry for that.
Start
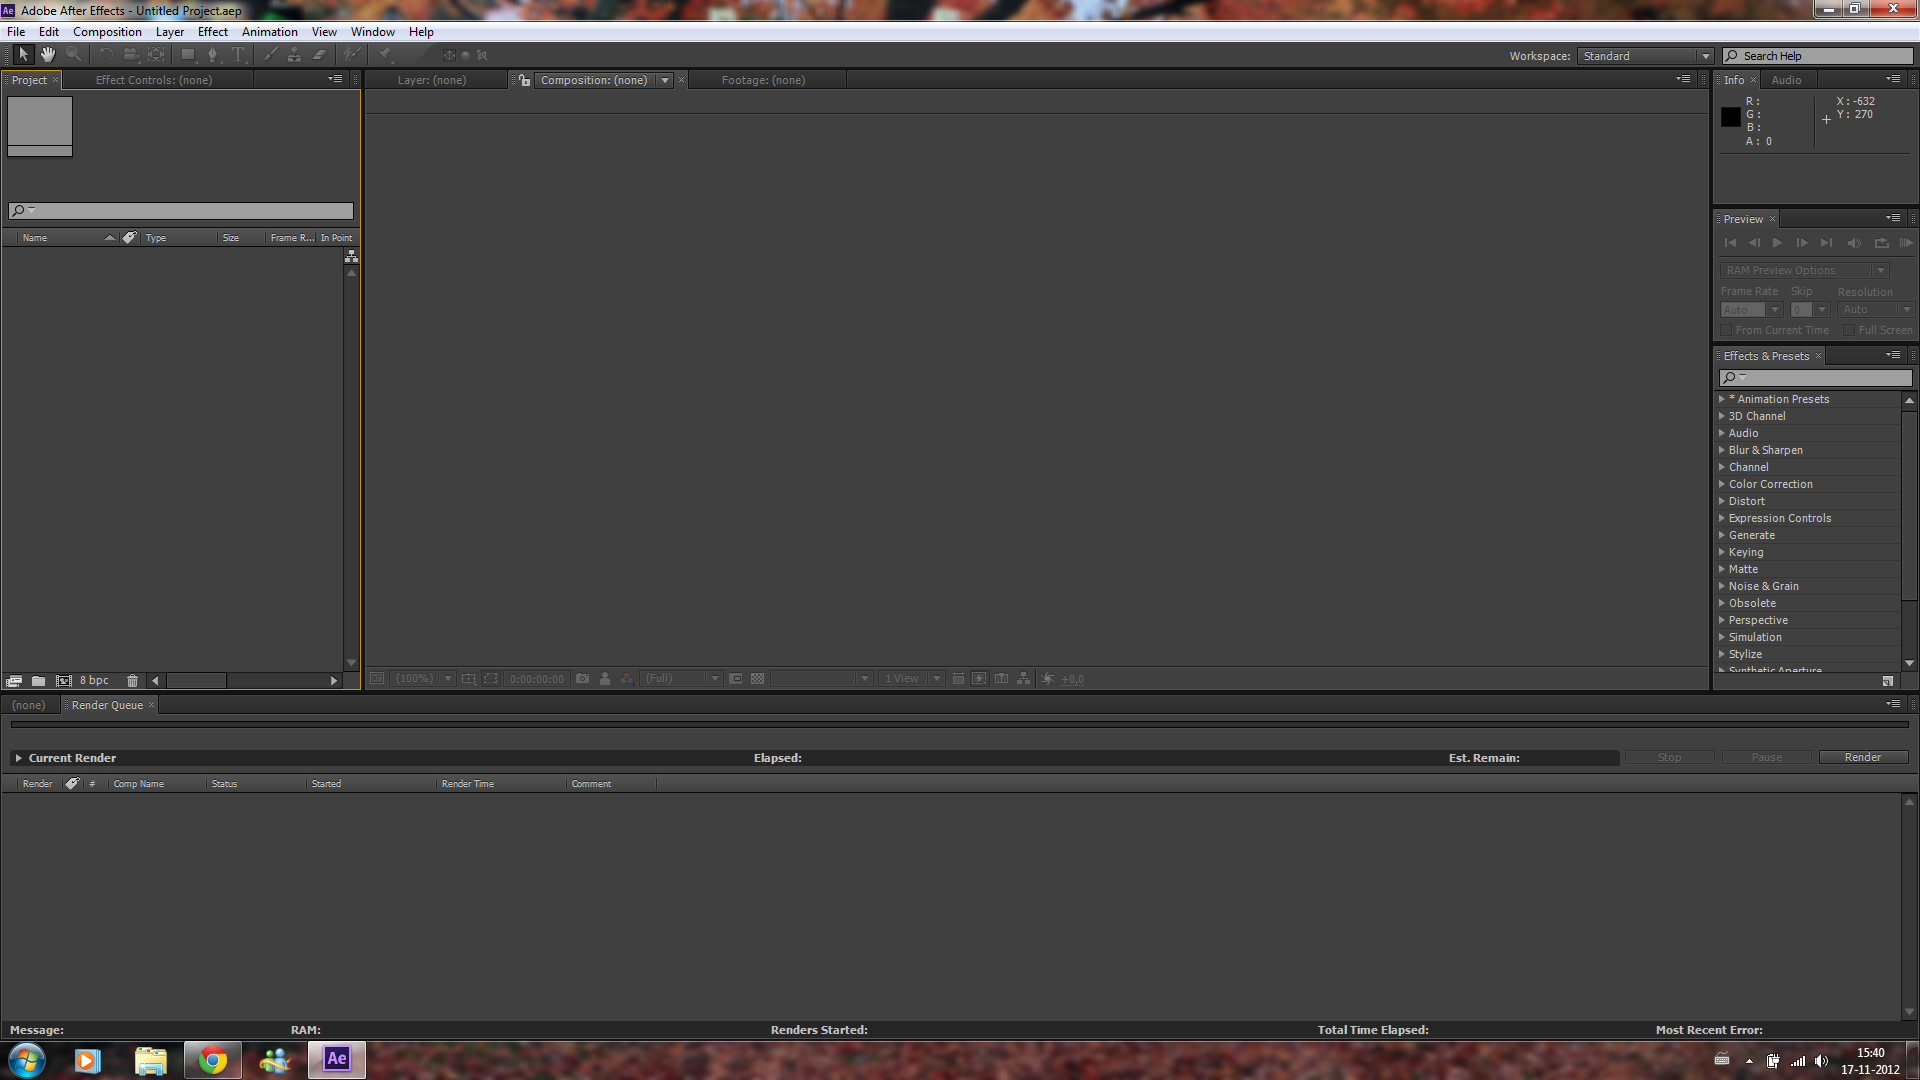
Okay, lets start and open Adobe After Effects.
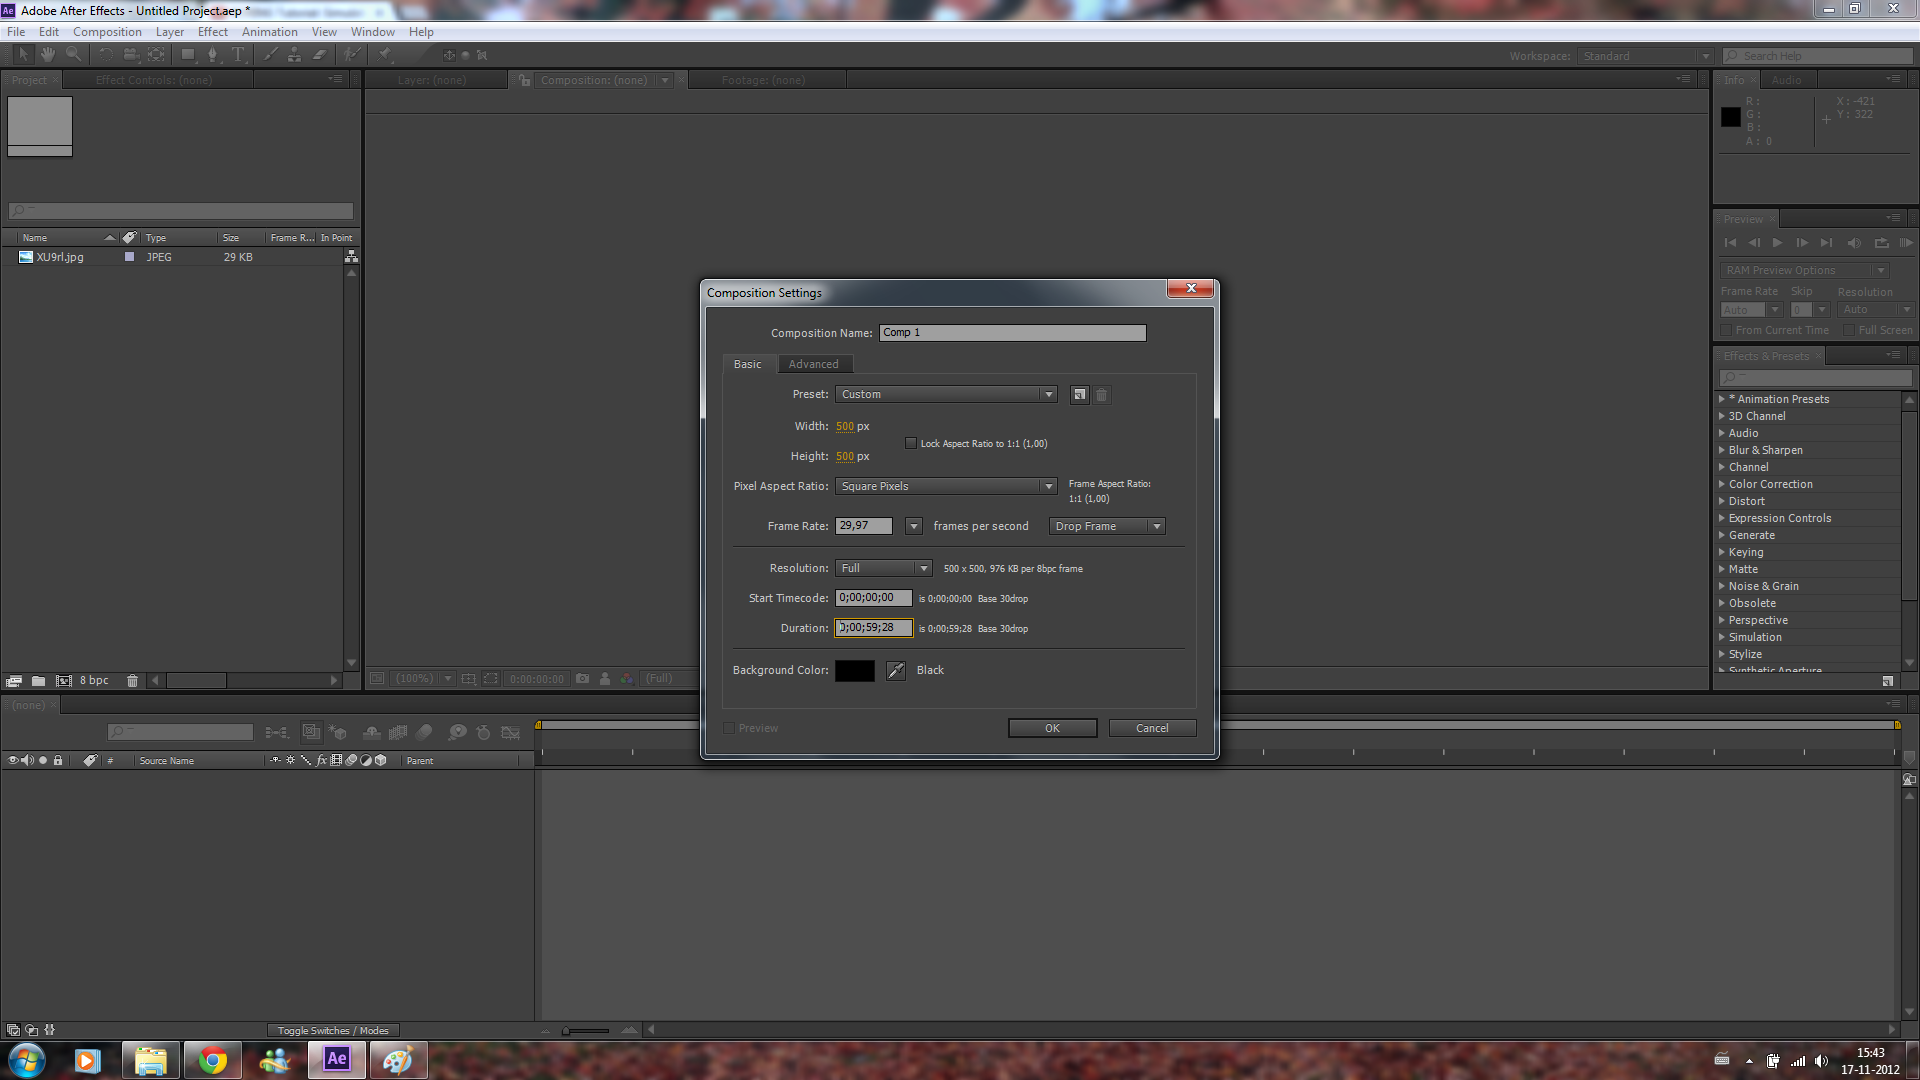
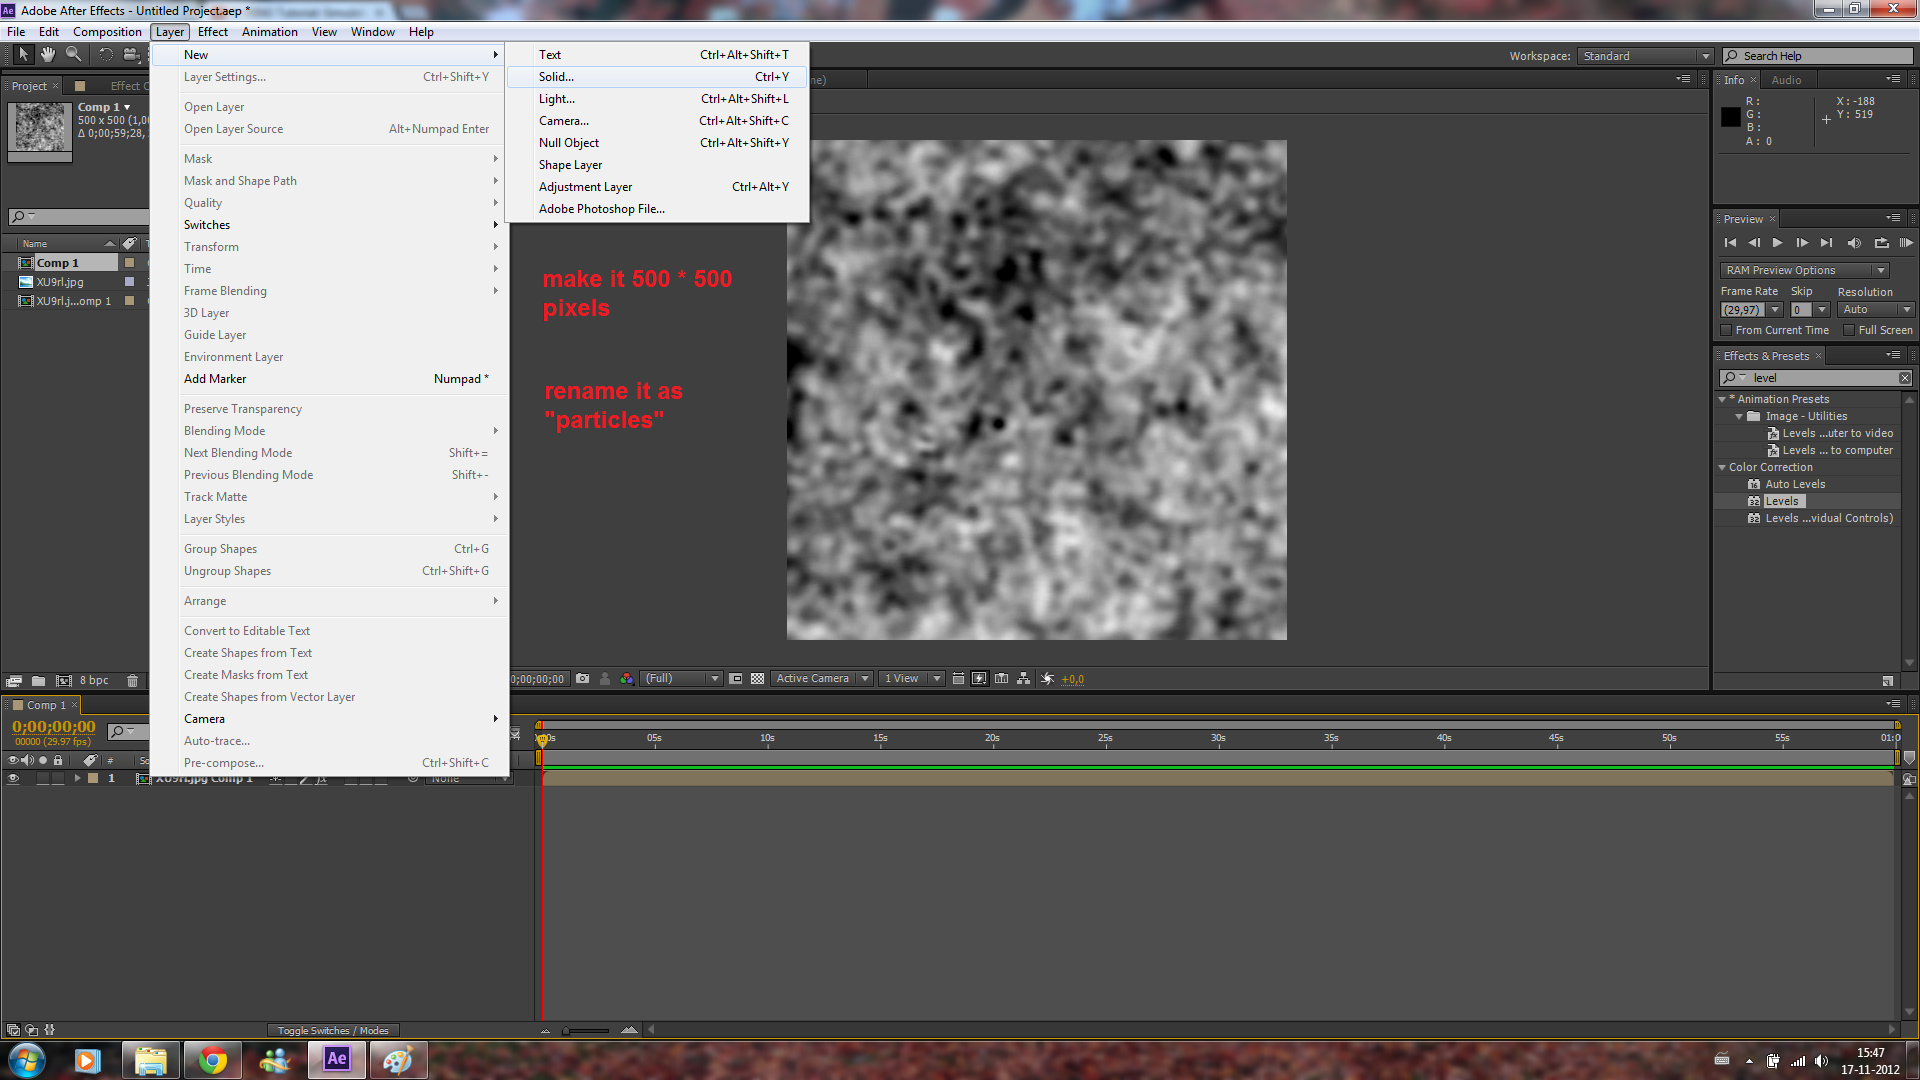
First drag the CMBR into the project, and create a new project. Give it the size 500 x 500, and a white color. You can also change the duration of the video, but keep in mind that 30 seconds of video take about 1,5 hours of rendering.
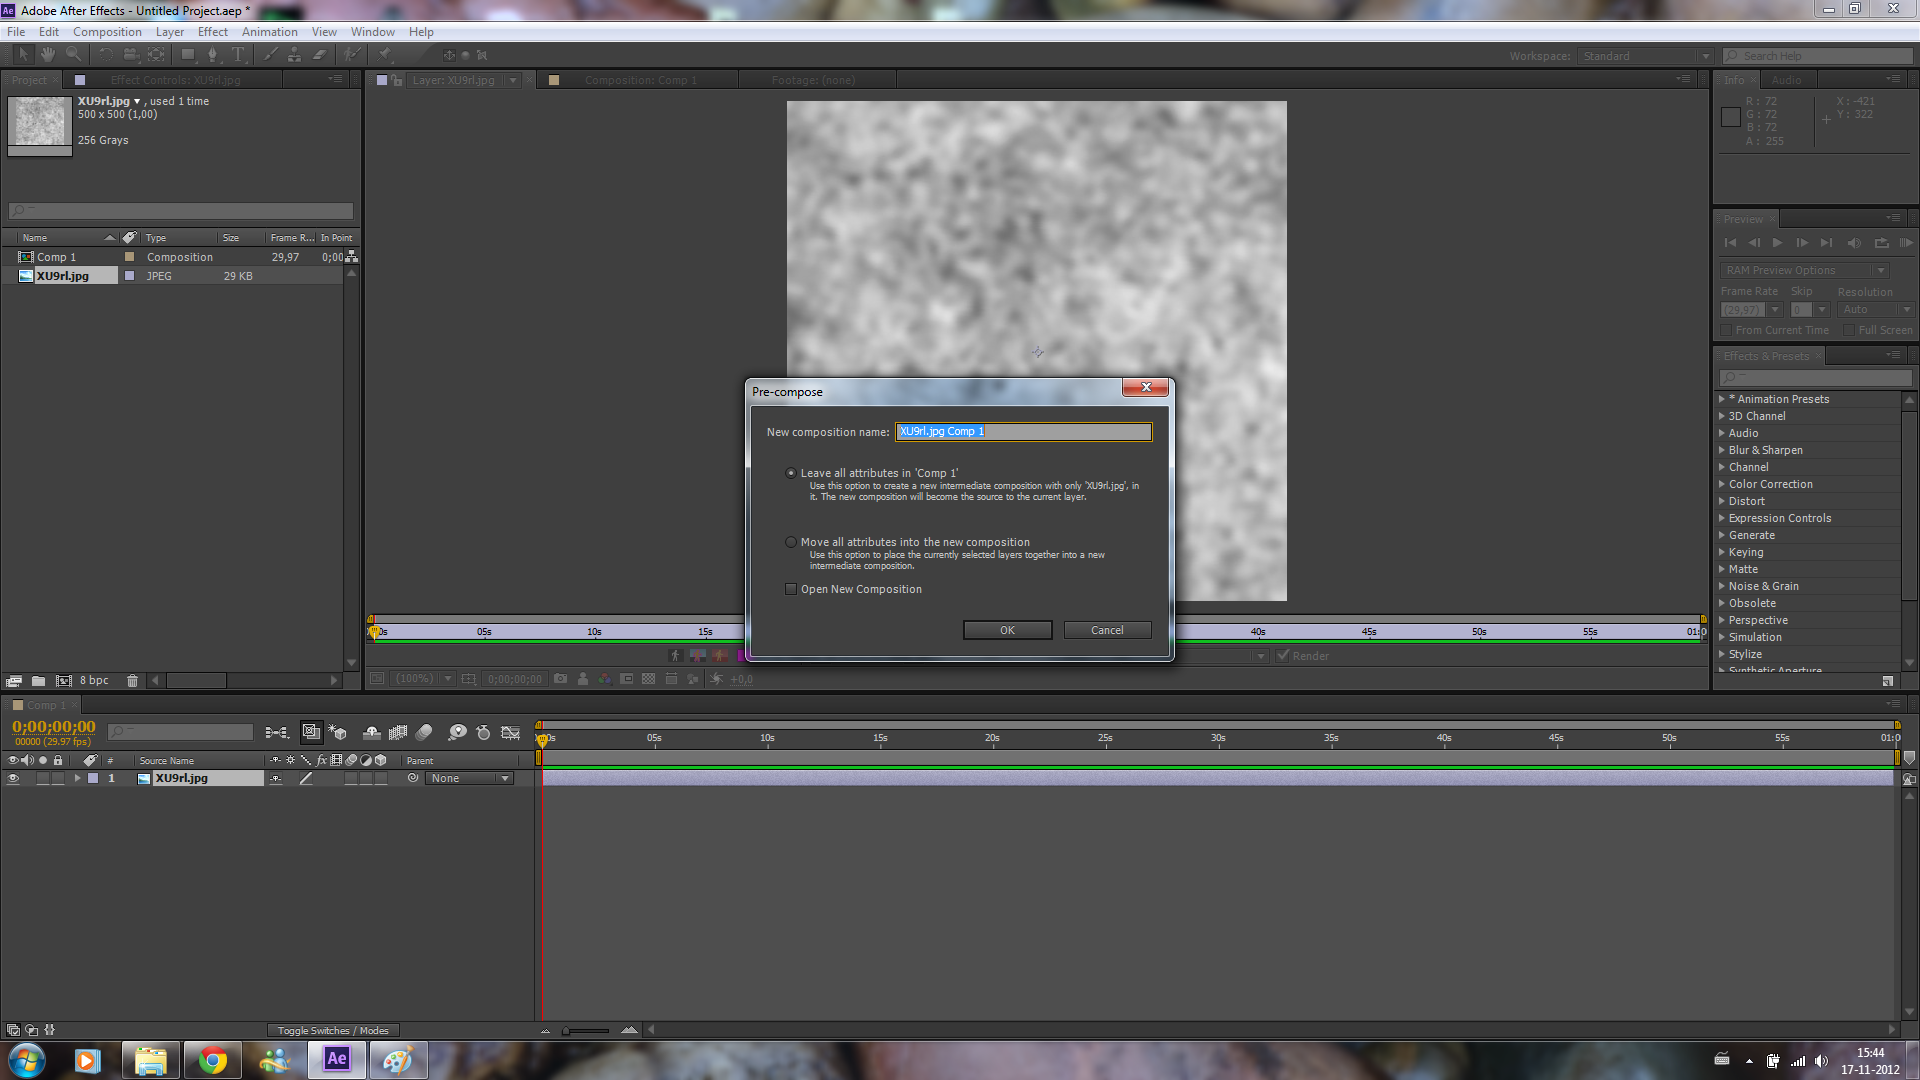
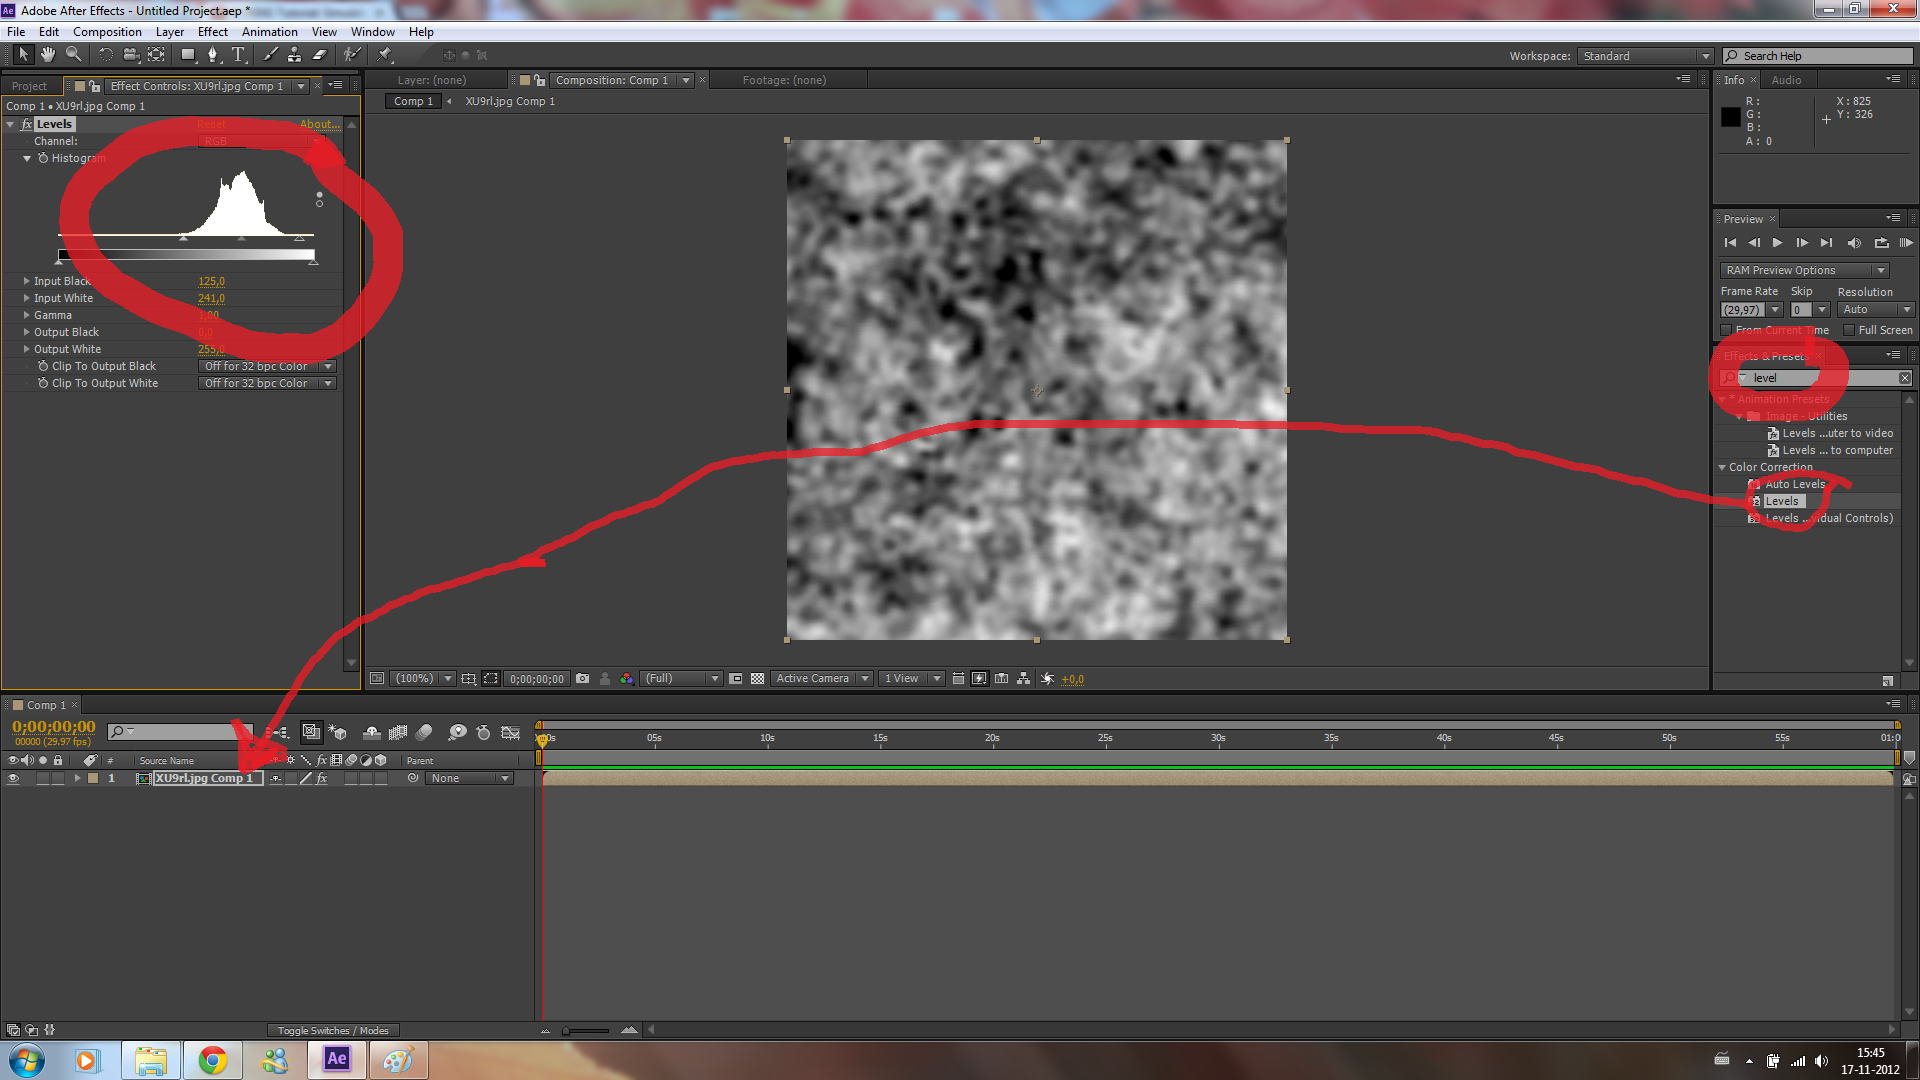
Now drag the CMBR data into the new project, and pre-compose it by clicking the image and do ctrl-shift-c.
Now add color level effect on the image, and change the picture so it's more darker.
Make a new white solid layer and name it particles. In the next step we're going to show you how to add the particles.
First drag the CMBR into the project, and create a new project. Give it the size 500 x 500, and a white color. You can also change the duration of the video, but keep in mind that 30 seconds of video take about 1,5 hours of rendering.
Now drag the CMBR data into the new project, and pre-compose it by clicking the image and do ctrl-shift-c.
Now add color level effect on the image, and change the picture so it's more darker.
Make a new white solid layer and name it particles. In the next step we're going to show you how to add the particles.
Add the Particles


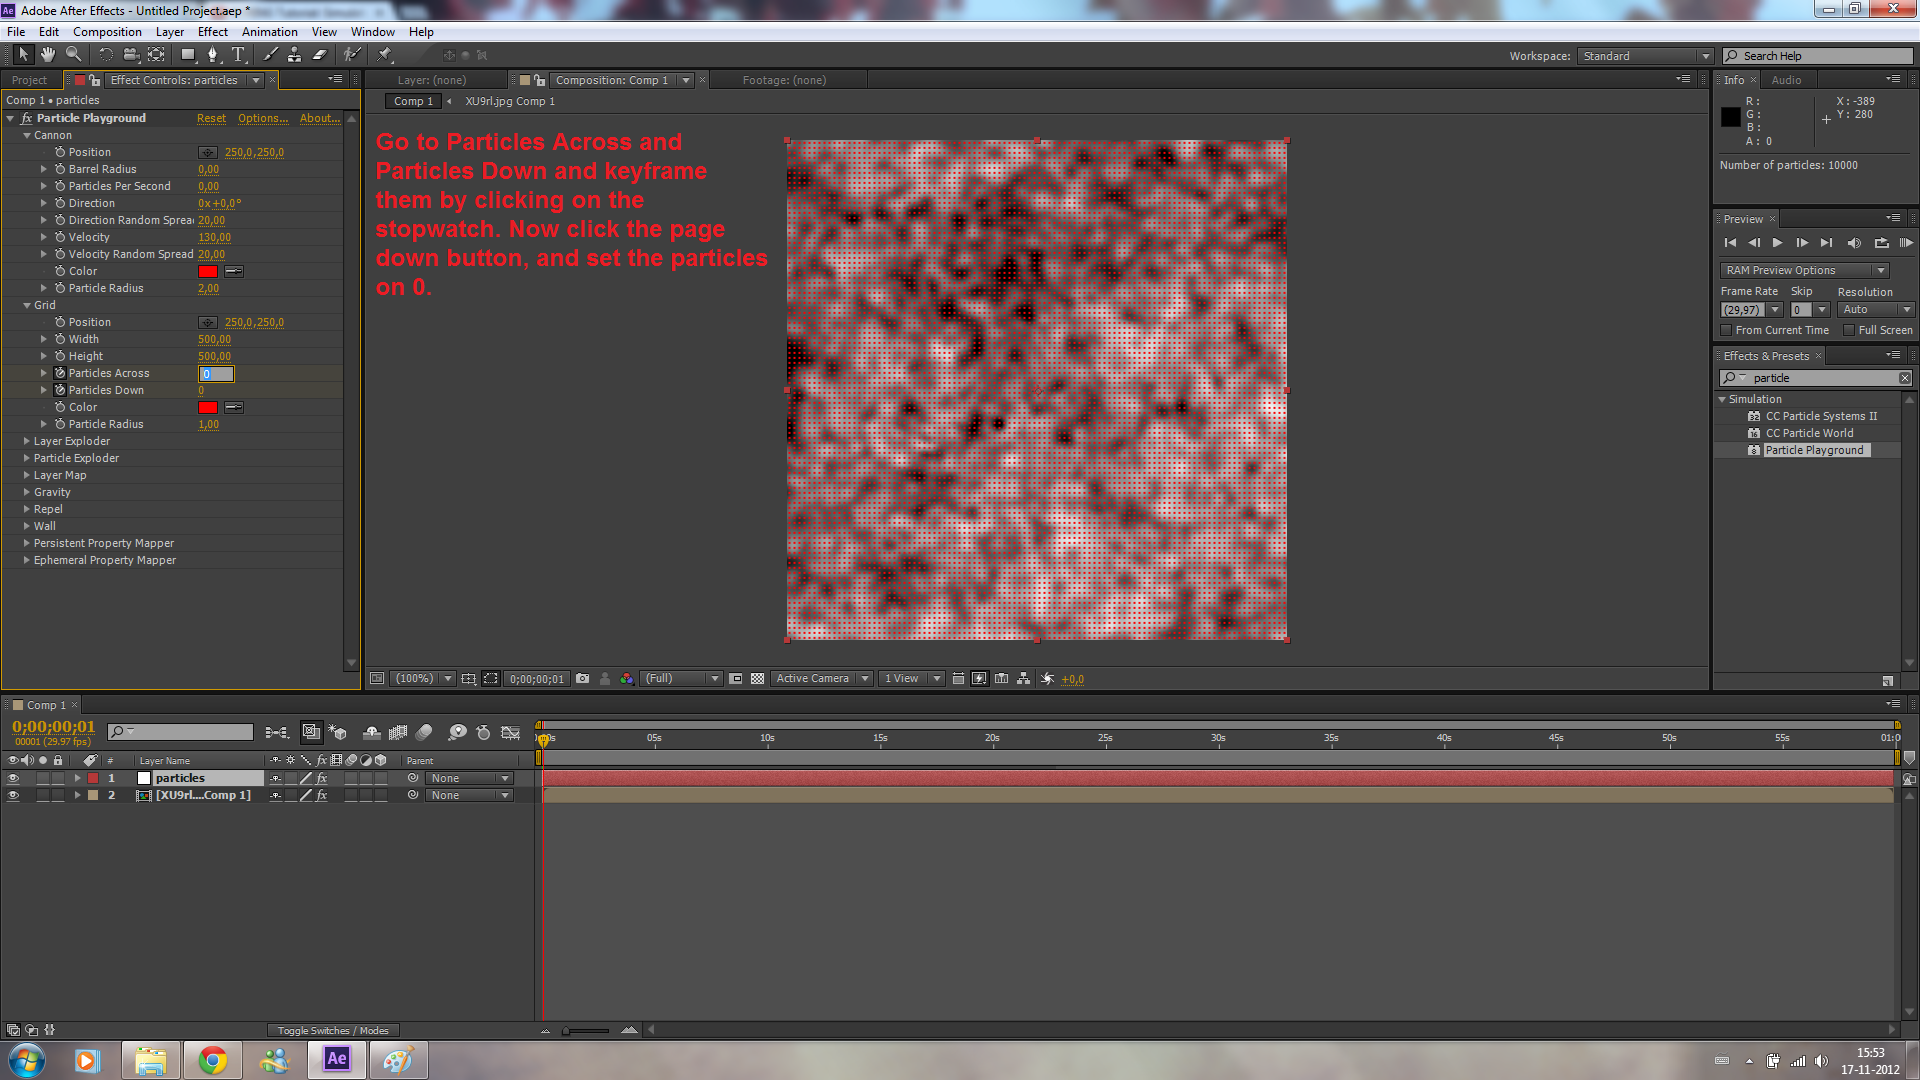
So now we made the new layer. To add particles, search for Particle Playground at the effects, and add it to the layer. Now when we play the video, it gives a cannon of particles. This is not what we want. So turn of the particles by clicking on cannon, and set the Particles per second to 0.
Open the grid, set across and height to 500 and particles across and down to 100. Now we have 10.000 particles in our project.
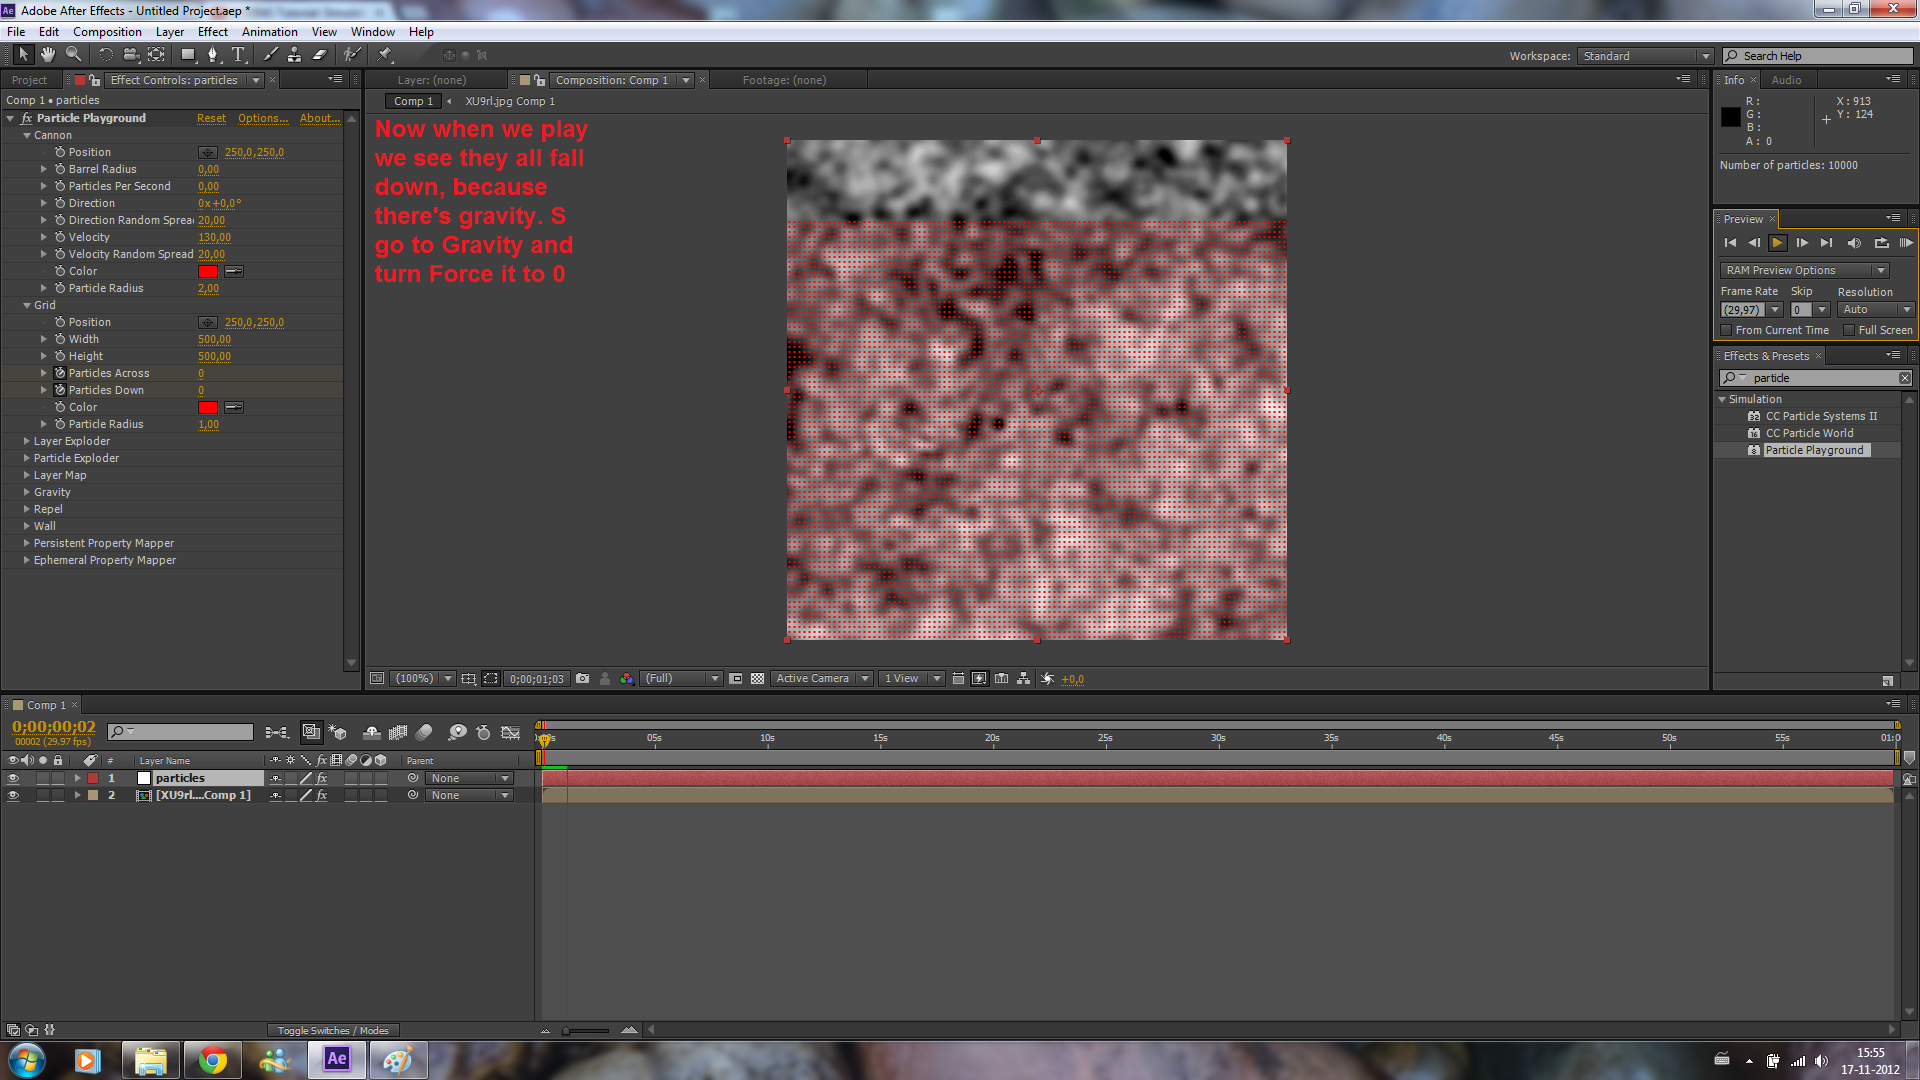
Go to particles across and particles down, click on the stopwatch to keyframe them, click on page down key on your keyboard and after you did that set the particles to 0. Now when you play the video, the particles fall down because there's gravity. So just go to Gravity and turn it off by setting the Force to 0.
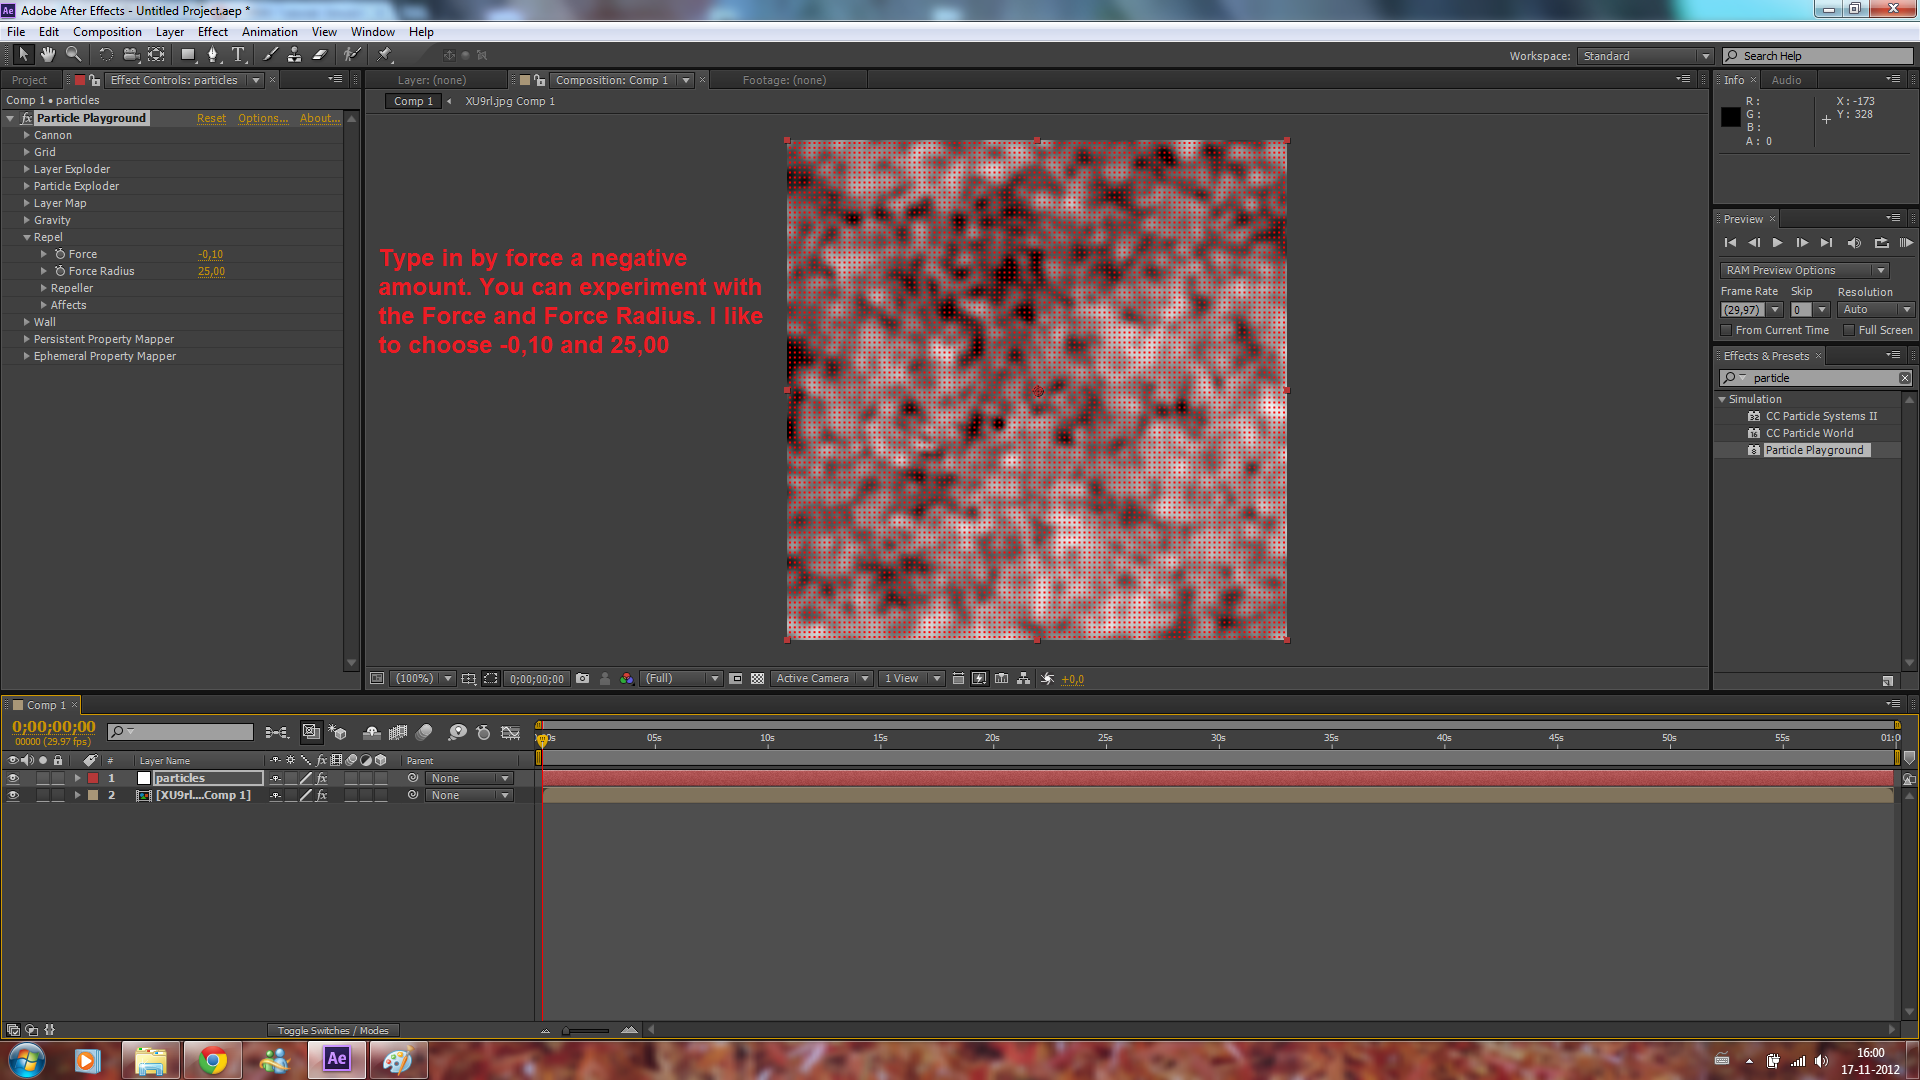
We also want the particles to attract eachother, so go to Repel, add a negative amount at the force, like -0,10, and set the Force Radius to 25.
Open the grid, set across and height to 500 and particles across and down to 100. Now we have 10.000 particles in our project.
Go to particles across and particles down, click on the stopwatch to keyframe them, click on page down key on your keyboard and after you did that set the particles to 0. Now when you play the video, the particles fall down because there's gravity. So just go to Gravity and turn it off by setting the Force to 0.
We also want the particles to attract eachother, so go to Repel, add a negative amount at the force, like -0,10, and set the Force Radius to 25.
Next Step
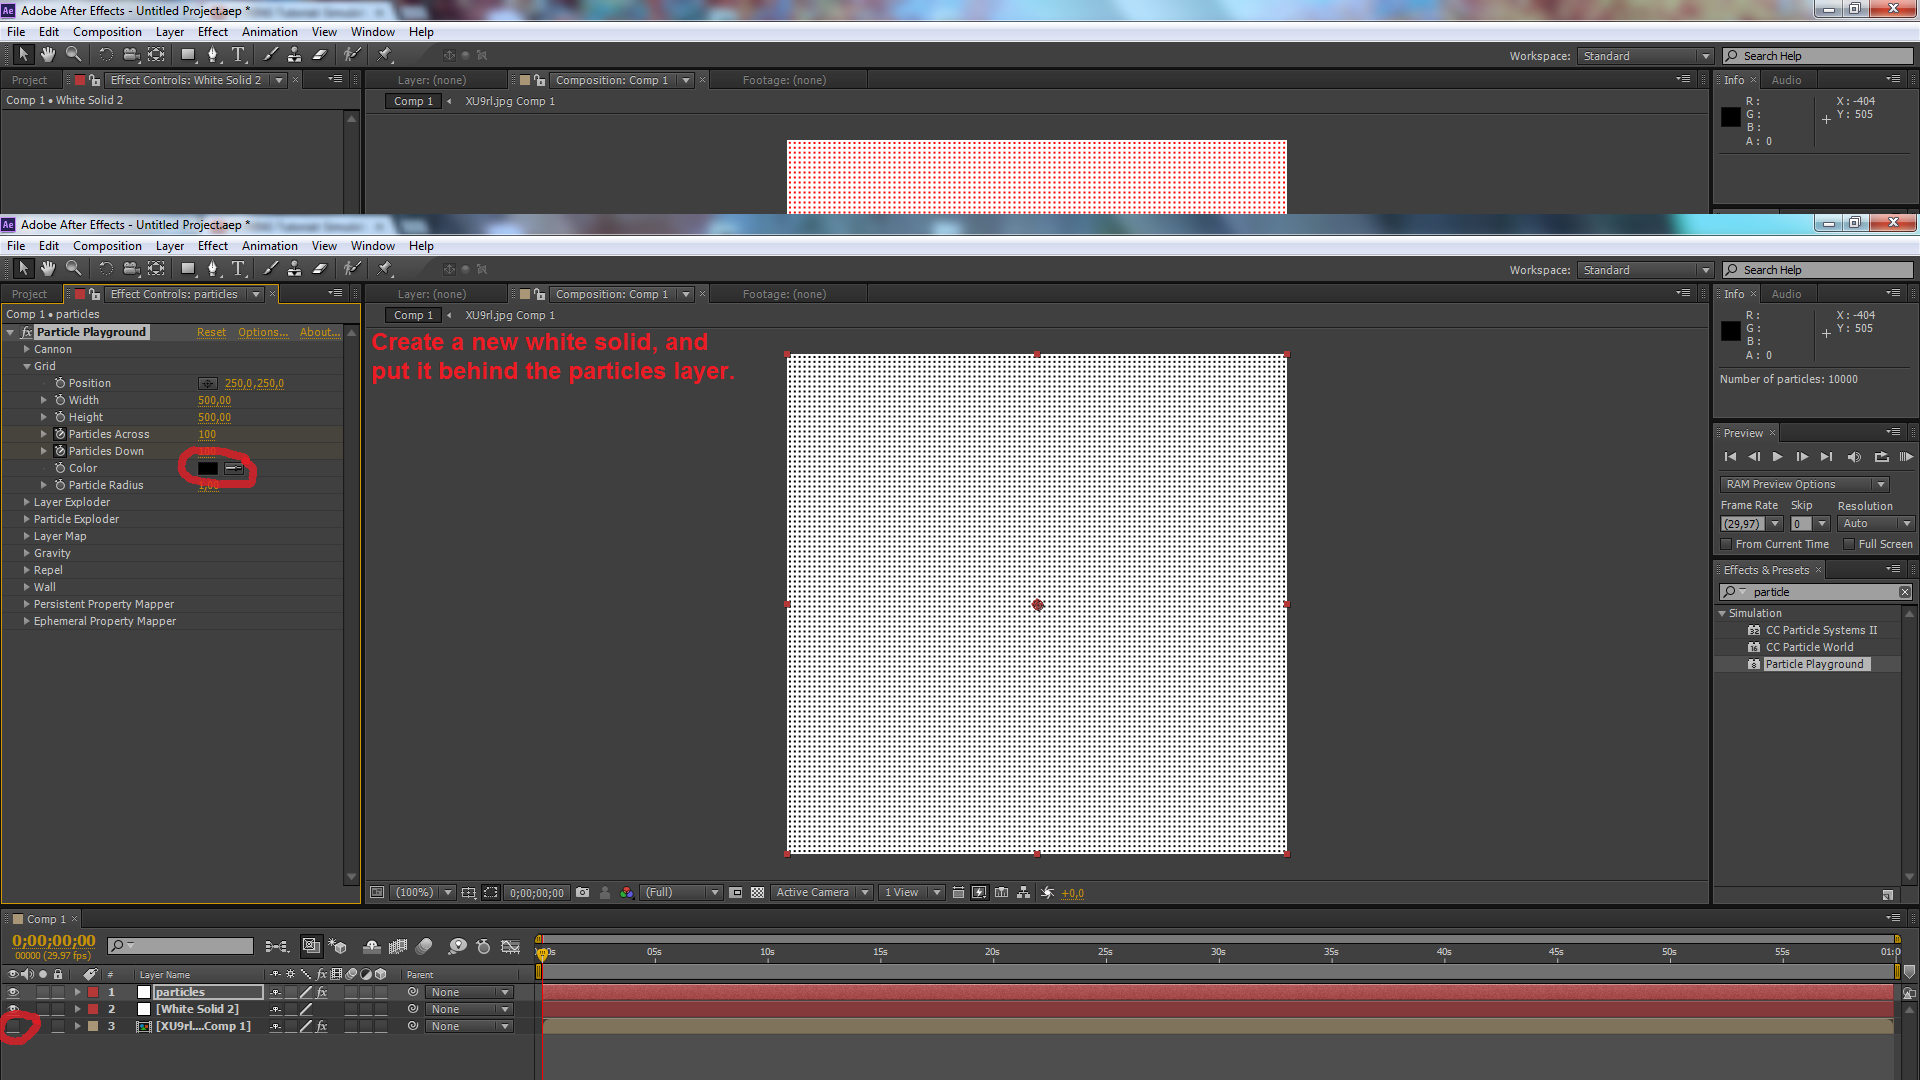

Now when we play, it gives a symmetrical shape, not what we want. Somehow my screenshots are a little bit weird right now, so i'm sorry for that. Create a new white solid, and place it behind the particles. Set the color of the particles to black. Also uncheck the CMBR data so you can't see it.
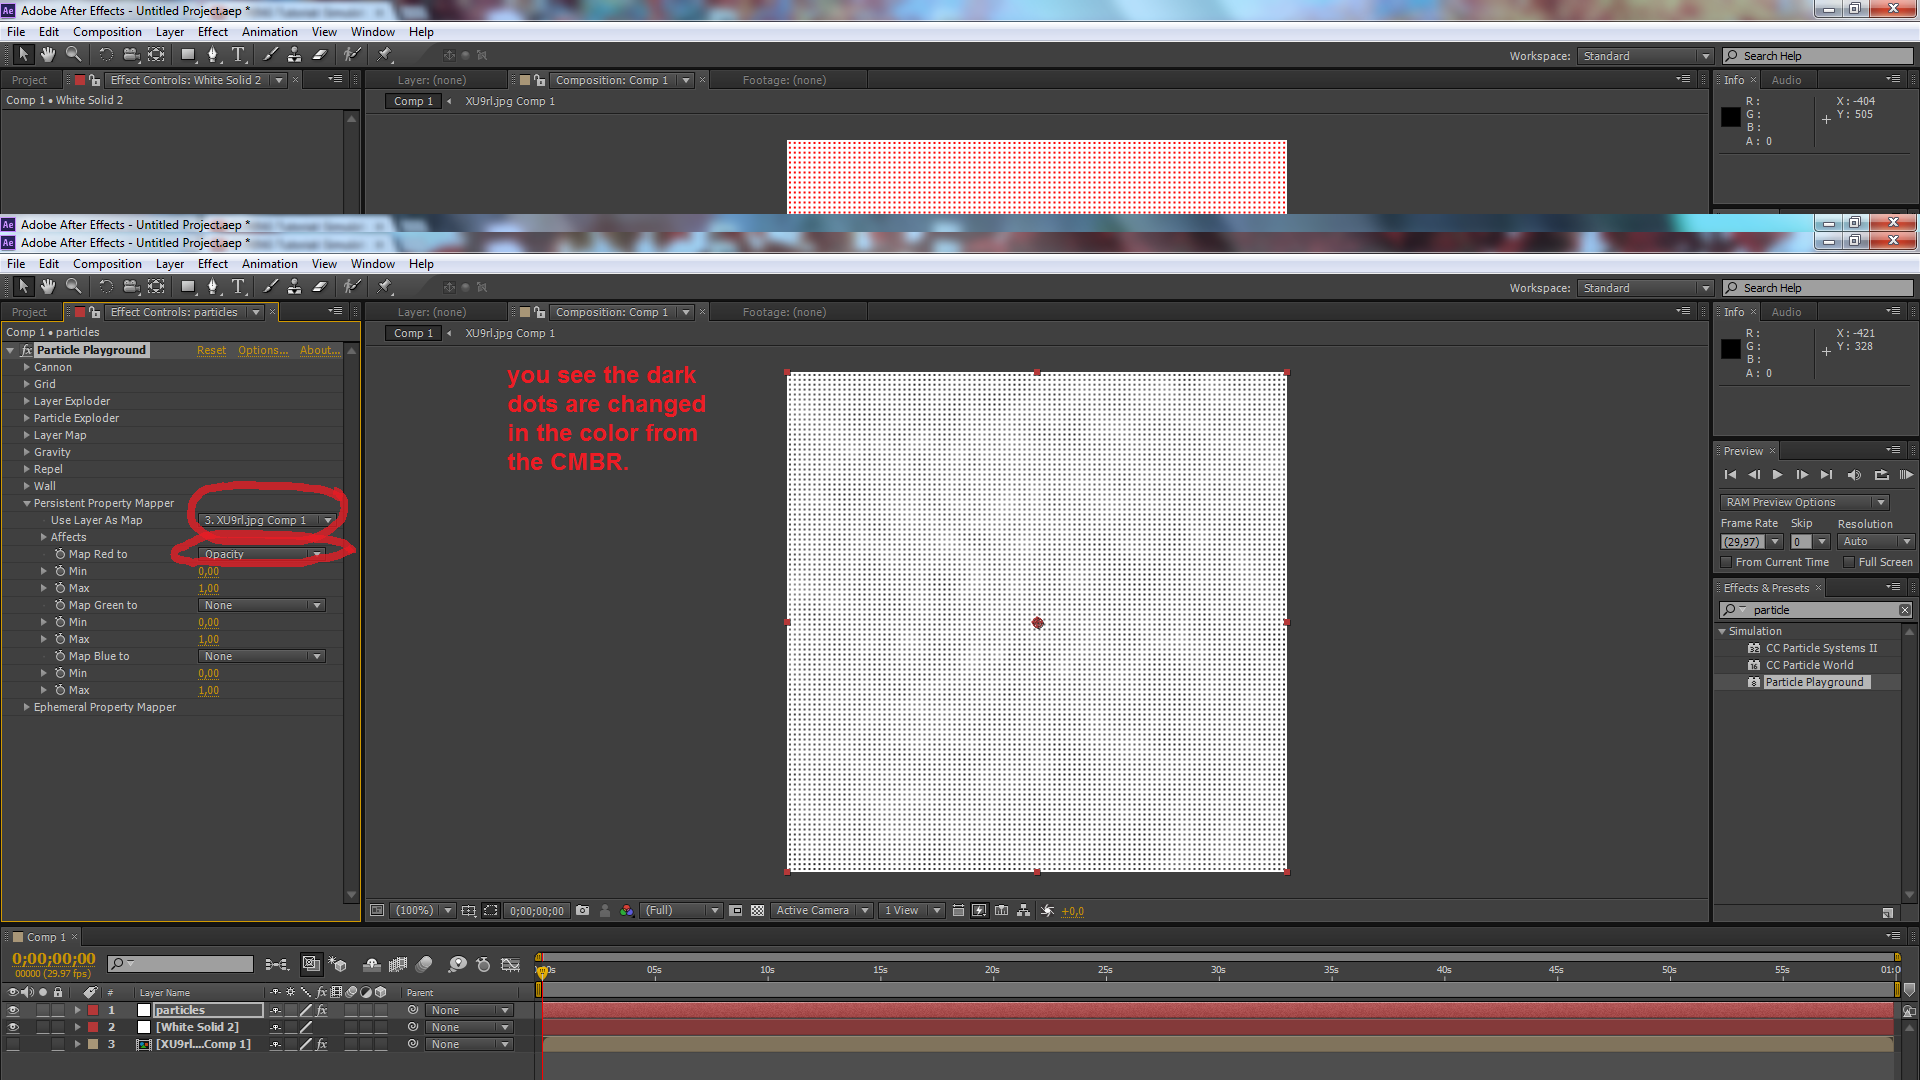
Go to Presistent Property Mapper, set the selection map to the CMBR, and change map Red to Opacity. Now where the CMBR data is brighter, the dots are brighter and darker are darker.
Go to Repel, Repeller and set the selection map into the CMBR data.
Now we want the particles are brigher where more particles are and less brighter if there's less friction or collision.
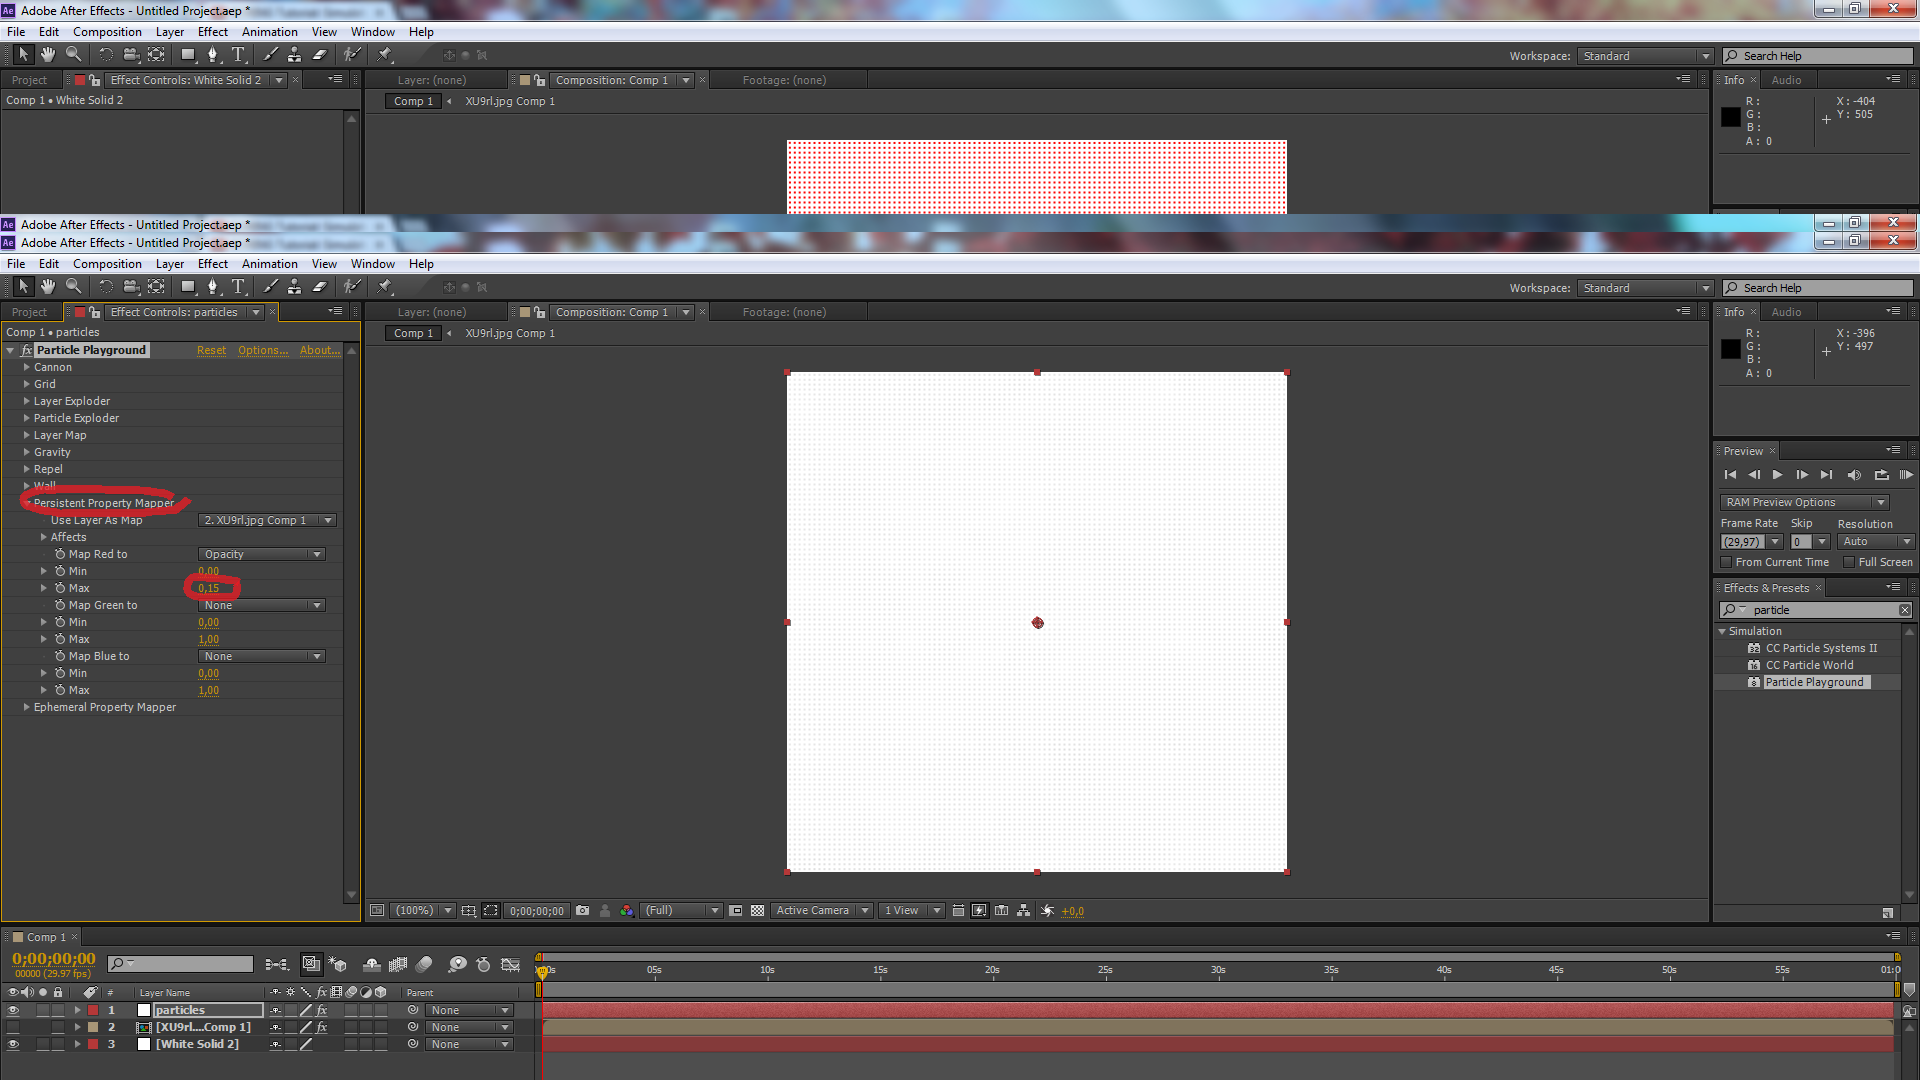
So go back to the presistent property mapper, and change the opacitys max to 0,15.
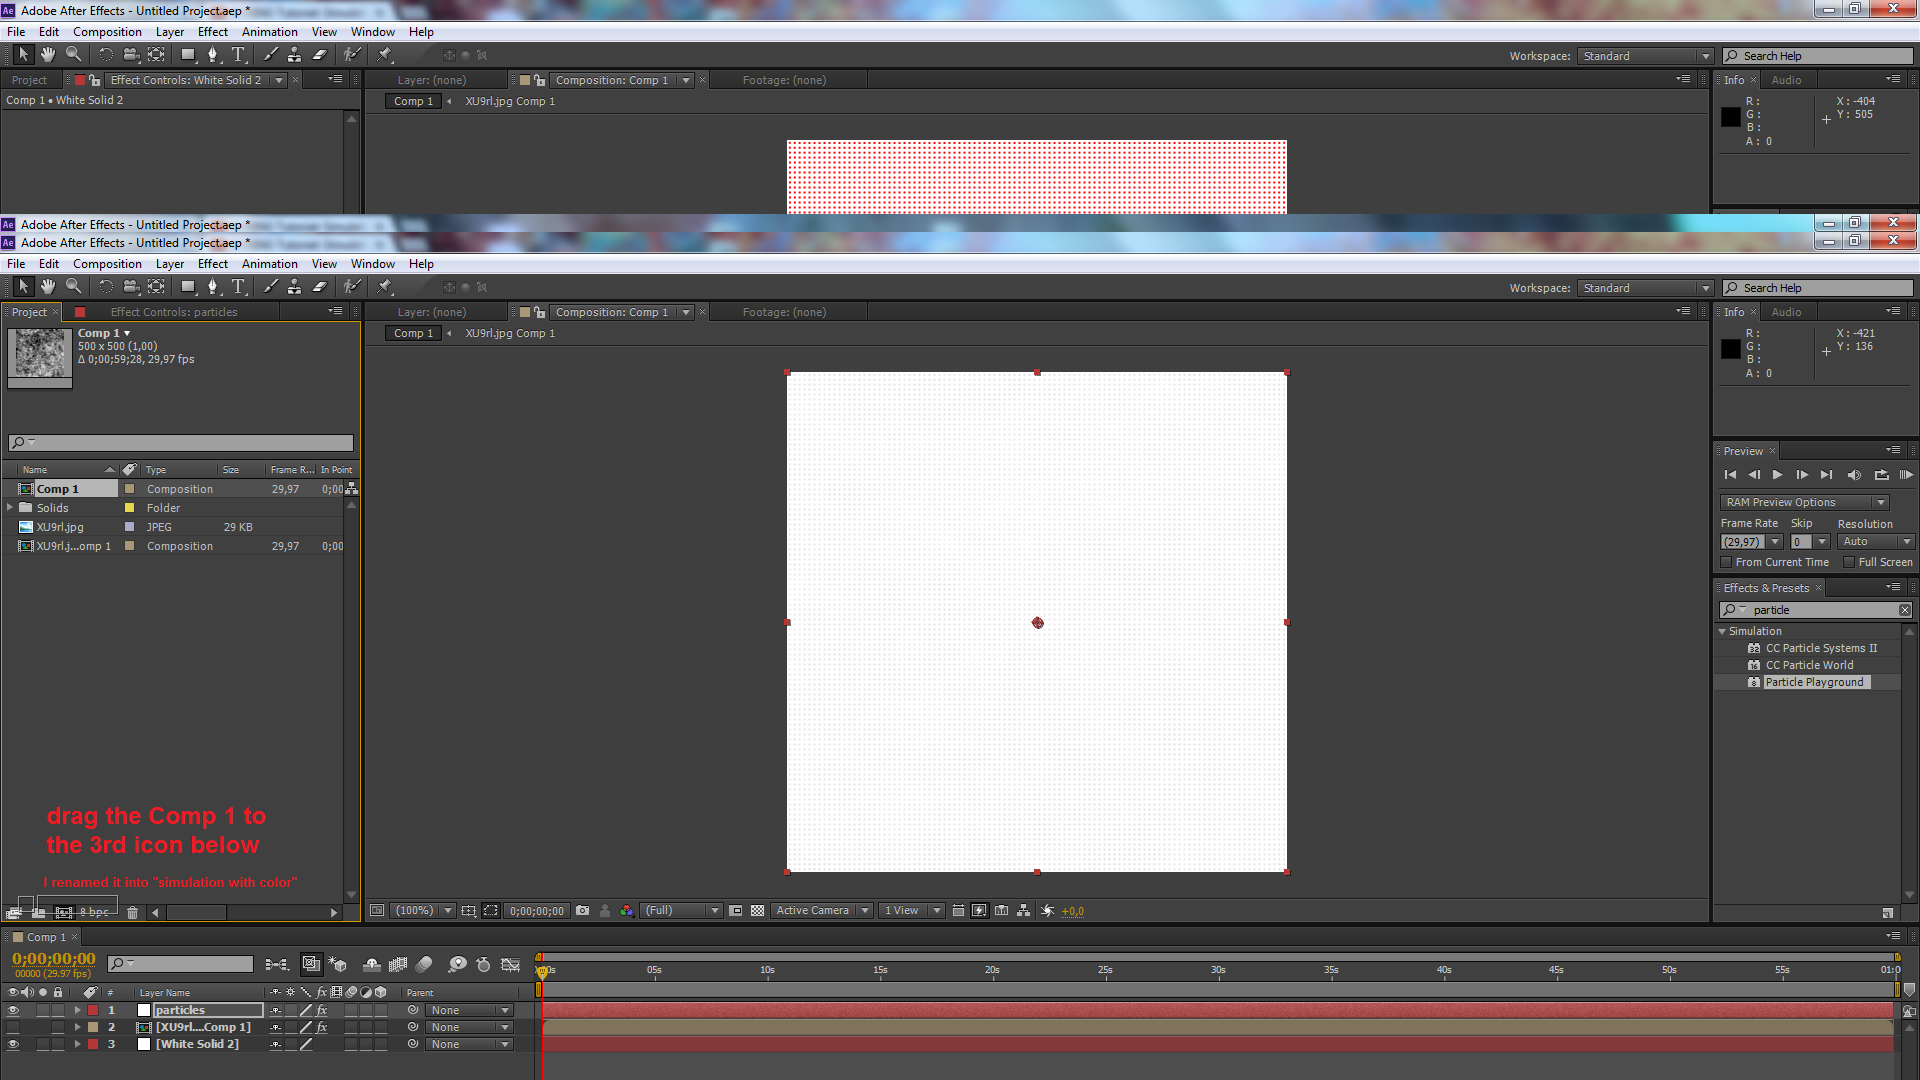
Now create a new composition by drag and drop the composition on the 3rd icon below.
Go to Presistent Property Mapper, set the selection map to the CMBR, and change map Red to Opacity. Now where the CMBR data is brighter, the dots are brighter and darker are darker.
Go to Repel, Repeller and set the selection map into the CMBR data.
Now we want the particles are brigher where more particles are and less brighter if there's less friction or collision.
So go back to the presistent property mapper, and change the opacitys max to 0,15.
Now create a new composition by drag and drop the composition on the 3rd icon below.
Add Color
Okay, now let's add color!
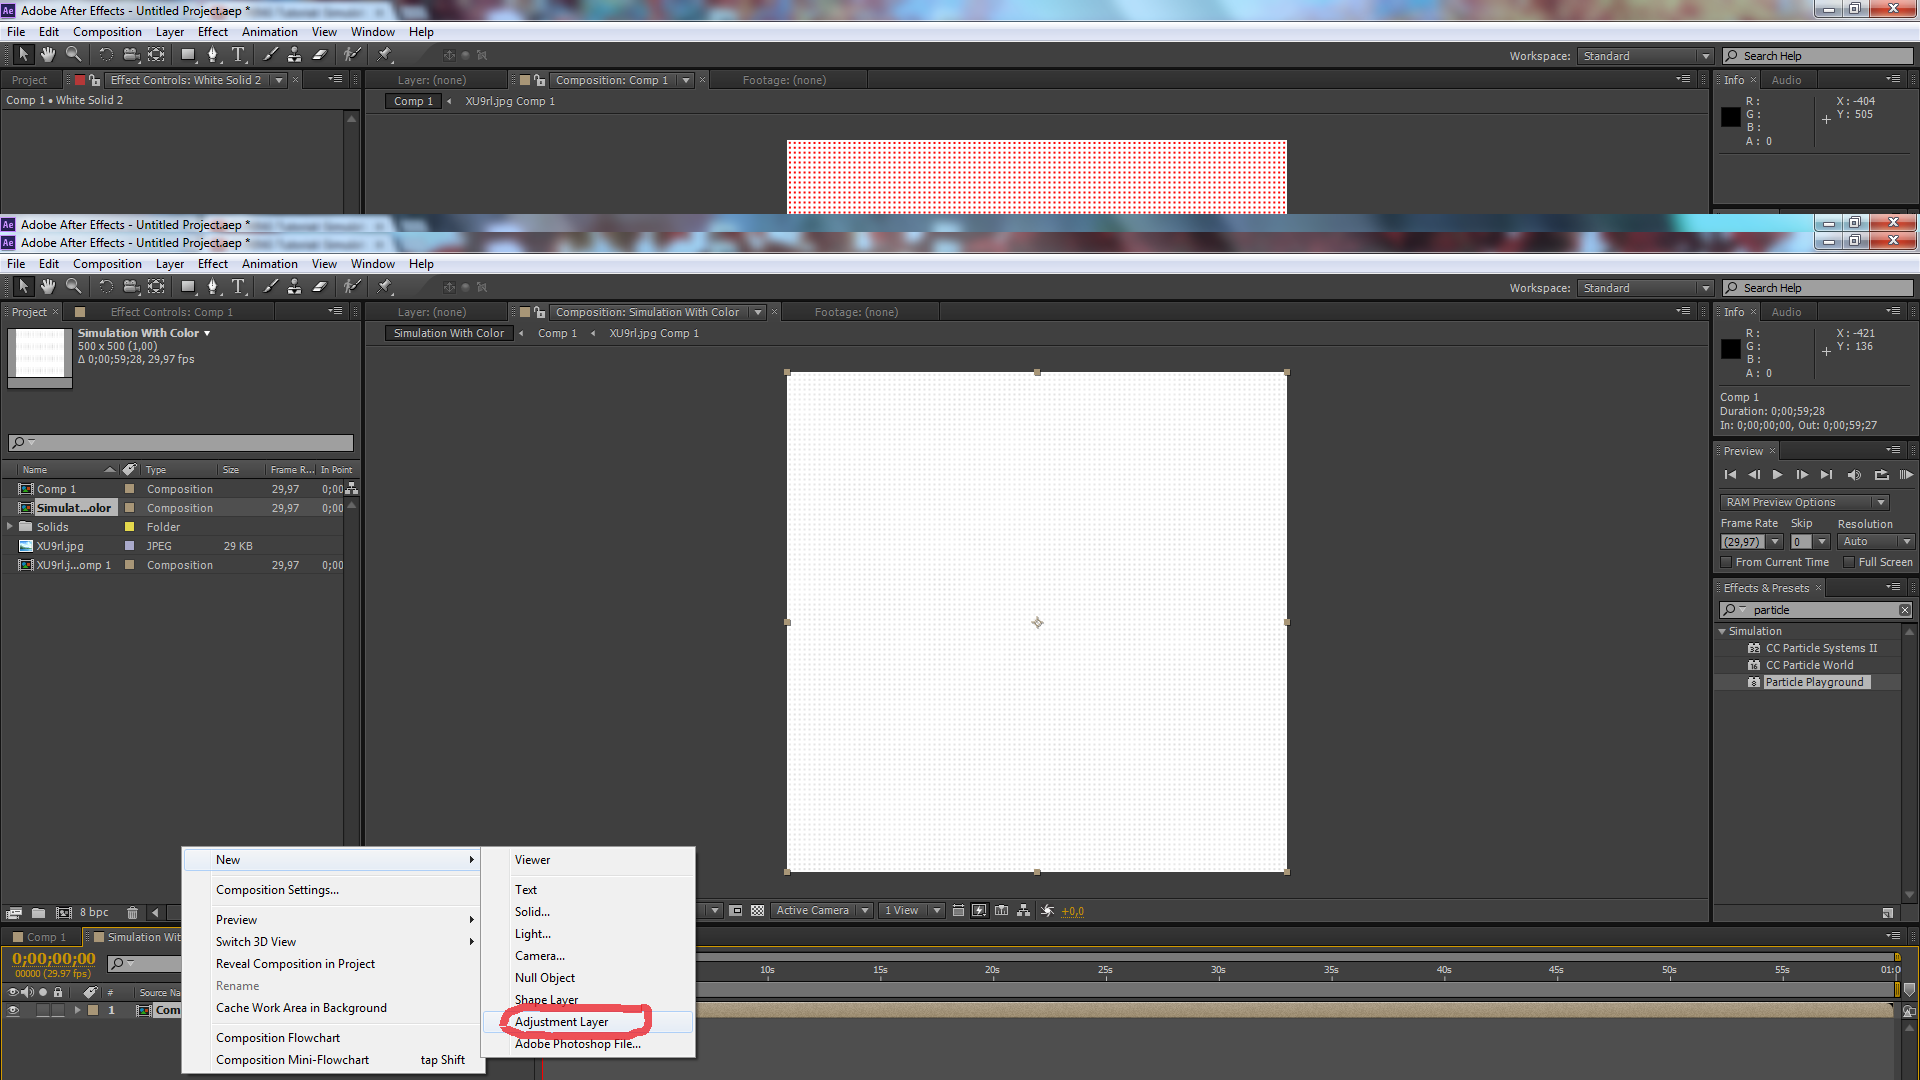
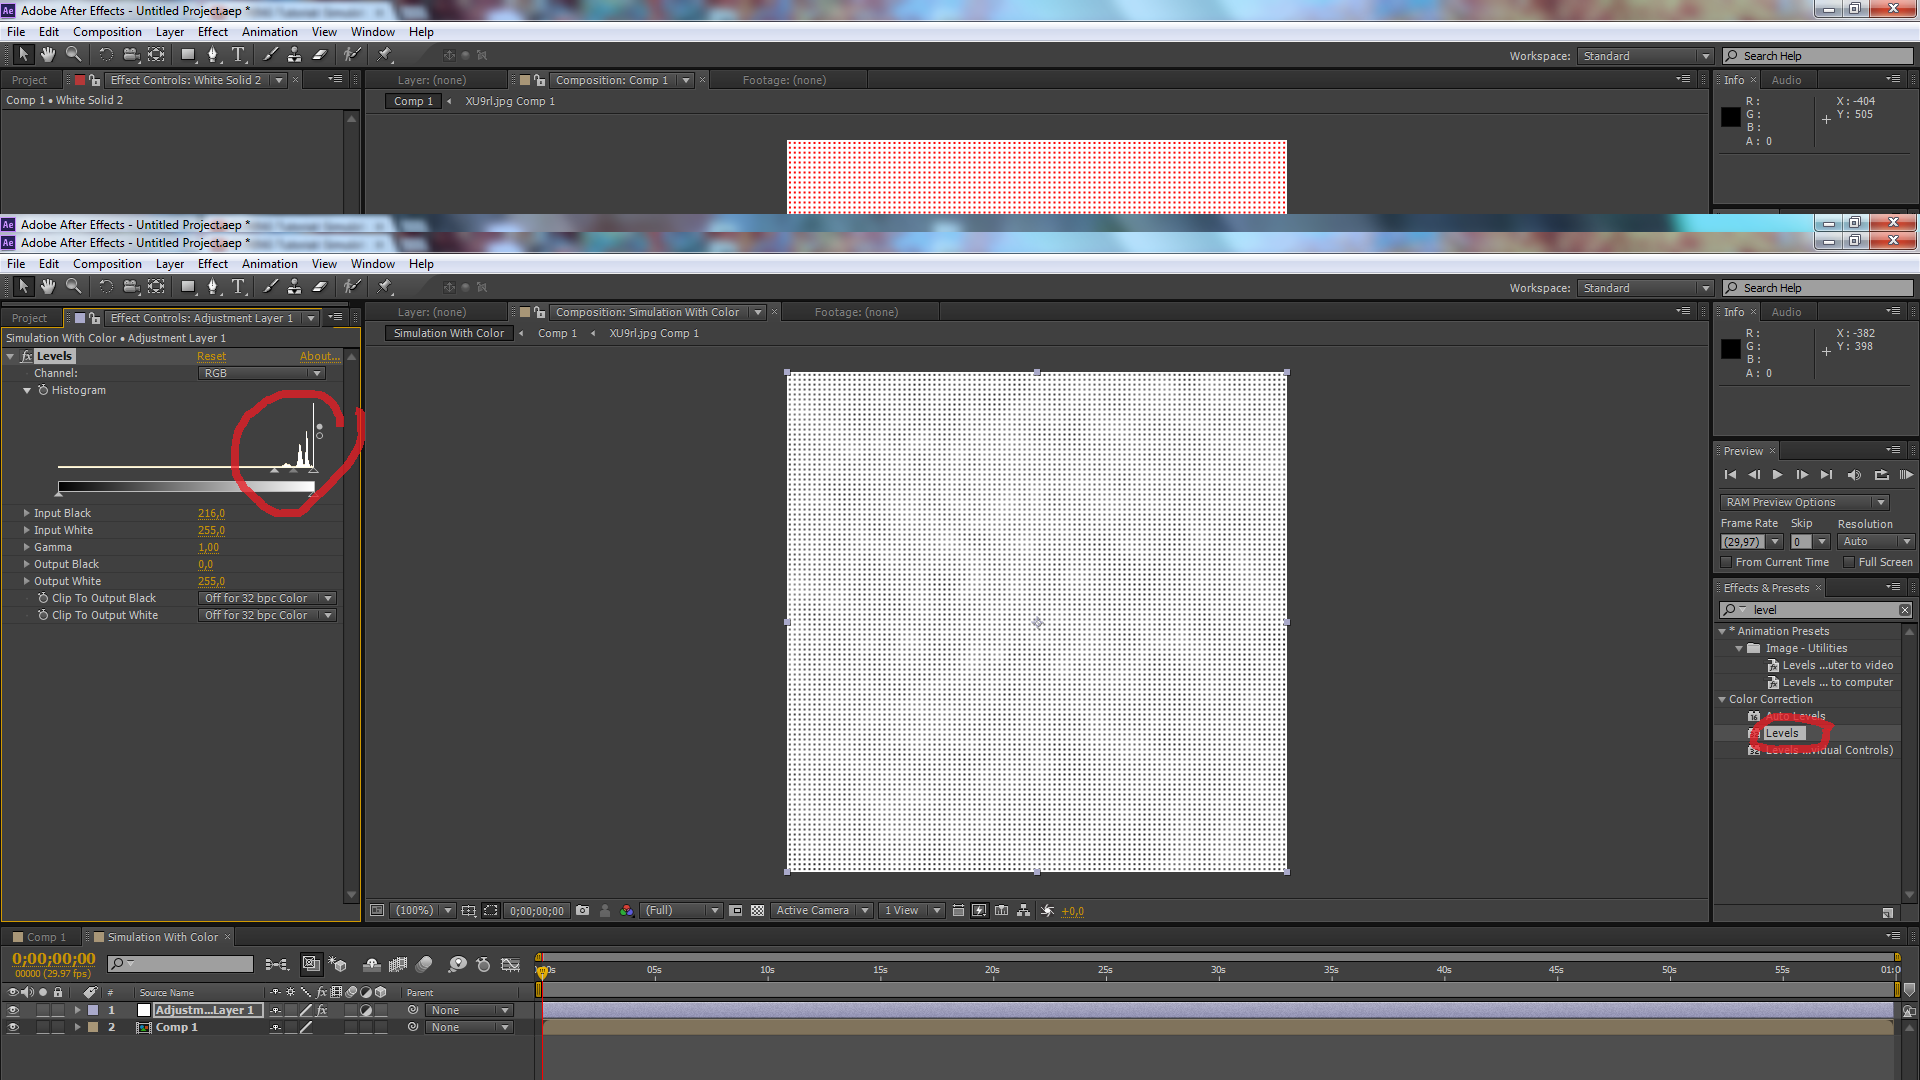
Create an adjustment layer, and give it the colorama effect. Change the histogram so you see the dots better.
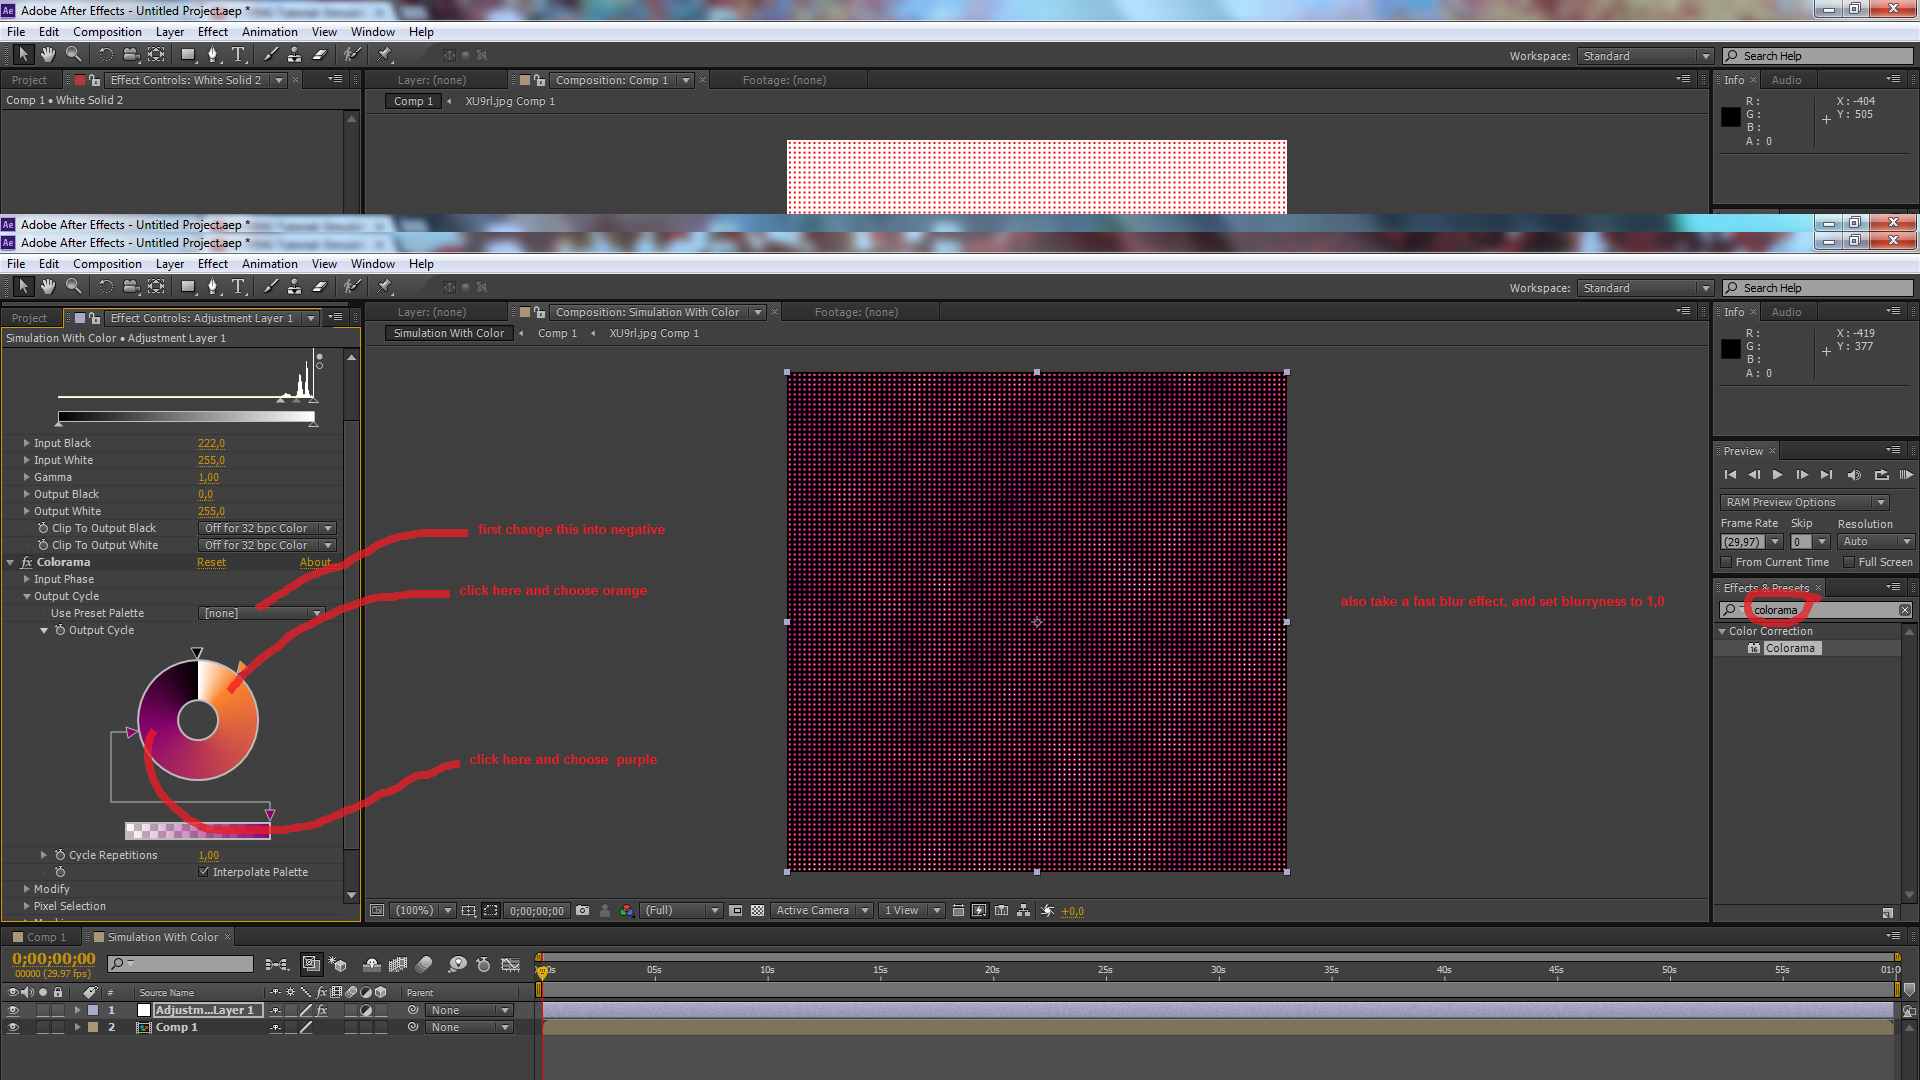
Now go to output cycle, and set Use Preset Palette to negative. Also change the output cycle like how I did it in the screen shot.
Also give it a fast blur with a blurryness of 1,00.
Now render your video and see the galaxies arise!
Here's the final result!
Please leave a comment if it worked, and that i not forgot a step.
Thanks for reading my instructable, and please give it 5 stars and like it!
Create an adjustment layer, and give it the colorama effect. Change the histogram so you see the dots better.
Now go to output cycle, and set Use Preset Palette to negative. Also change the output cycle like how I did it in the screen shot.
Also give it a fast blur with a blurryness of 1,00.
Now render your video and see the galaxies arise!
Here's the final result!
Please leave a comment if it worked, and that i not forgot a step.
Thanks for reading my instructable, and please give it 5 stars and like it!