United States Photo Map
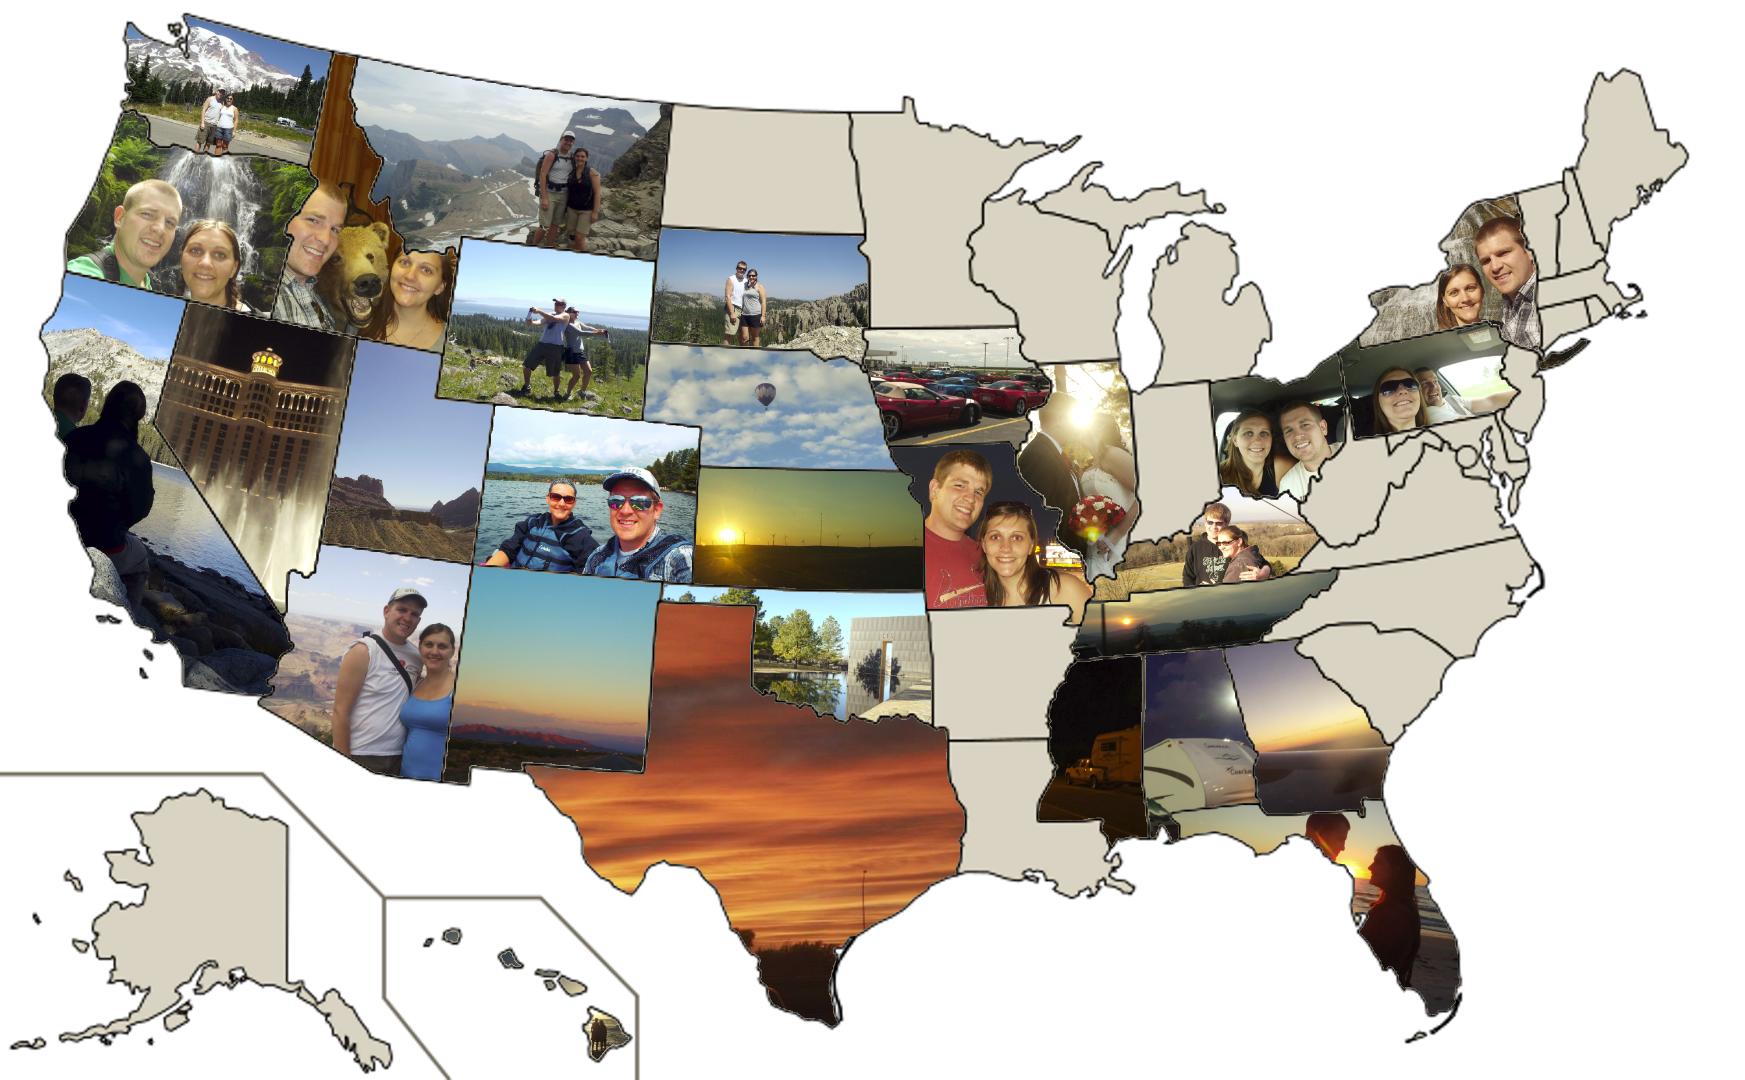
My wife and I travel a lot for work, and someone recently suggested that I make a map of the states we've visited with pictures from those states. I liked the idea and got started. Since people have shown interest in the map and how I made it, I thought I would make an Instructable so you can make one as well!
The process is really simple once you have the right tools. In the next few steps, I will explain what software I am using and give you a crash course of how it works.
Required Software
Image Editor
I am a huge fan of Paint.NET. This is a free imaging tool for Windows users. I use this program as my primary image editing tool. There are tons of free addons you can find online to increase the functionality, but for this instructable, we only need the standard installation.
The only bad thing about Paint.NET is the lack of support for other operating systems. There is an option for Mac and Linux users called Pinta, which is a sort of Paint.NET clone, but doesn't have the support or functionality. This program has the required tools for this guide, but I have had issues with it in the past when copying and pasting a lot in succession (which you will definitely be doing).
Other Tools
In addition to Paint.NET, I highly recommend the Windows Image Resizer tool. I don't use this tool directly in this Instructable; however, I always use it to reduce the size (resolution) of my pictures after I transfer them from my phone or camera to the computer. This saves significant amounts of disk space. There is typically no need to keep your photos in the enormous resolution that cameras commonly take them in - unless you regularly want prints the size of a billboard or need to zoom in considerably. In those cases, I will just keep a high res copy of my favorites in a special directory. For all other images, I resize to 2048 x 2048.
Paint.NET Primer - the Basics
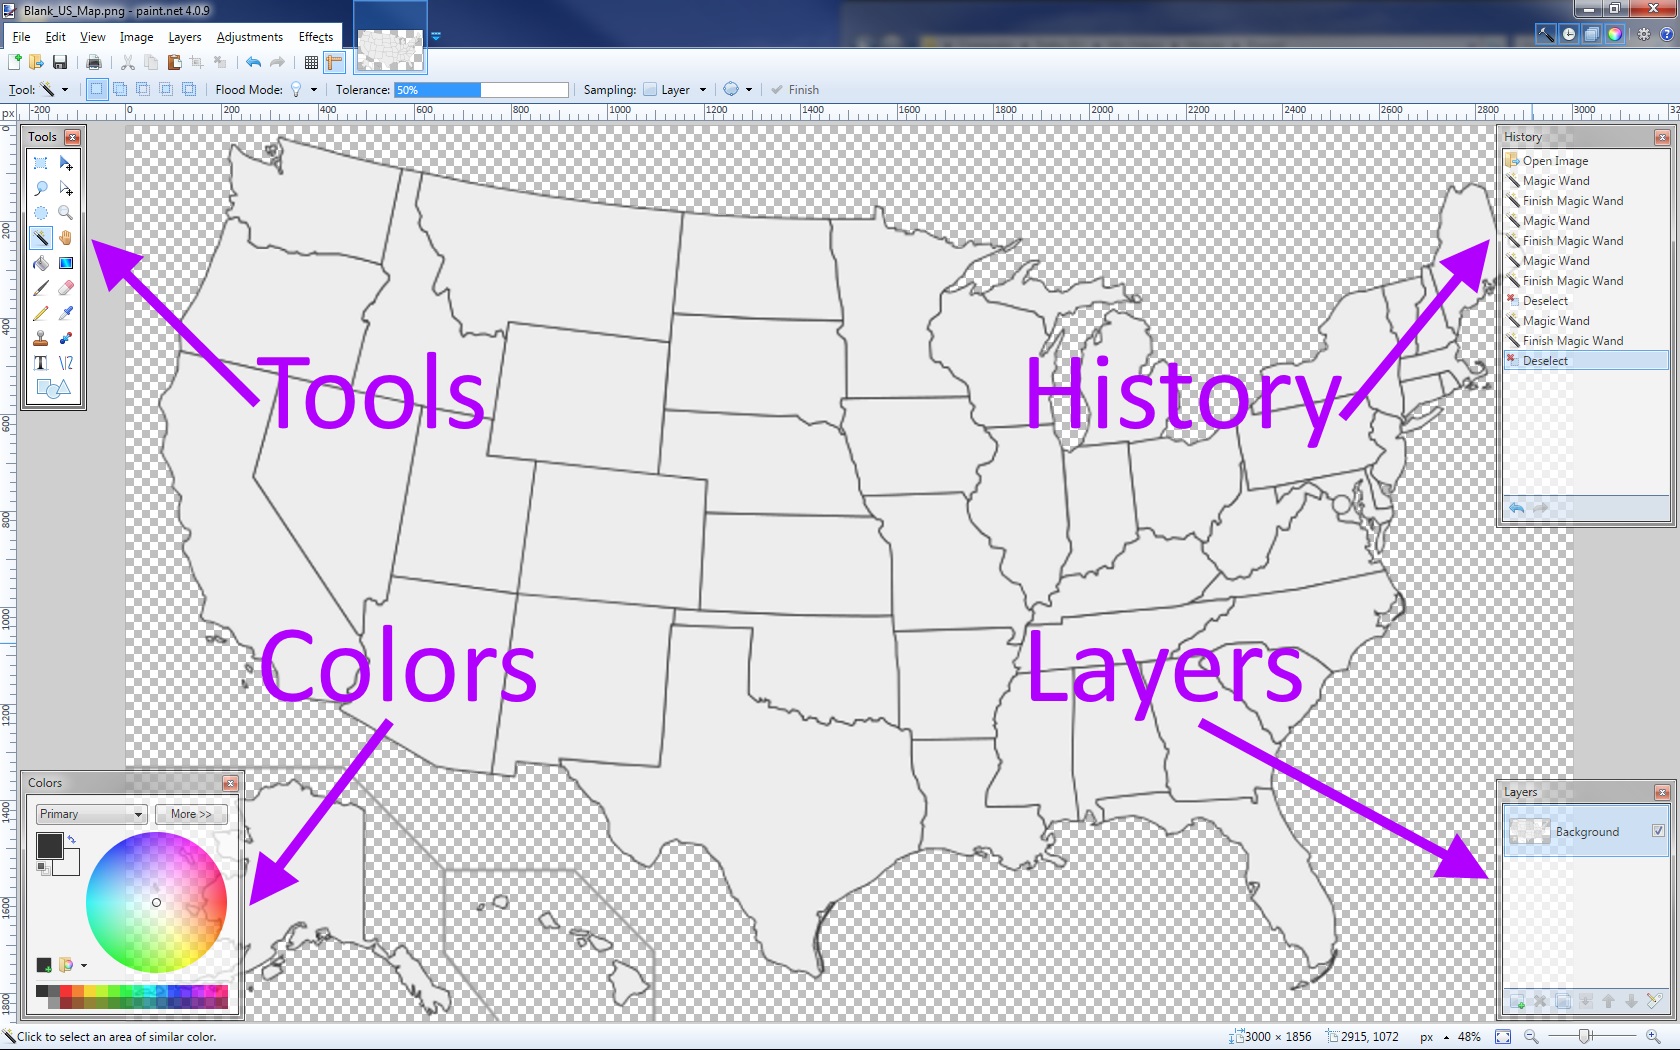
There are four primary tool boxes you will see when you open an image in Paint.NET:
- Tools - All of our painting tools, selection, text, etc
- Colors - Color wheel for painting (not needed for this guide)
- History - Keeps a history of your last operations and actions (not needed, unless you screw up!)
- Layers - This is the most important part. Consider a nice scenery picture with grass and sky. We could paste a cutout of a dog onto this image, but then we cannot easily move or remove the dog. So, we paste the dog into a new layer, independent of the background scenery image layer. The ability to use layers is the true power of any good imaging program (in my opinion...).
Paint.NET Primer - Magic Wand Tool
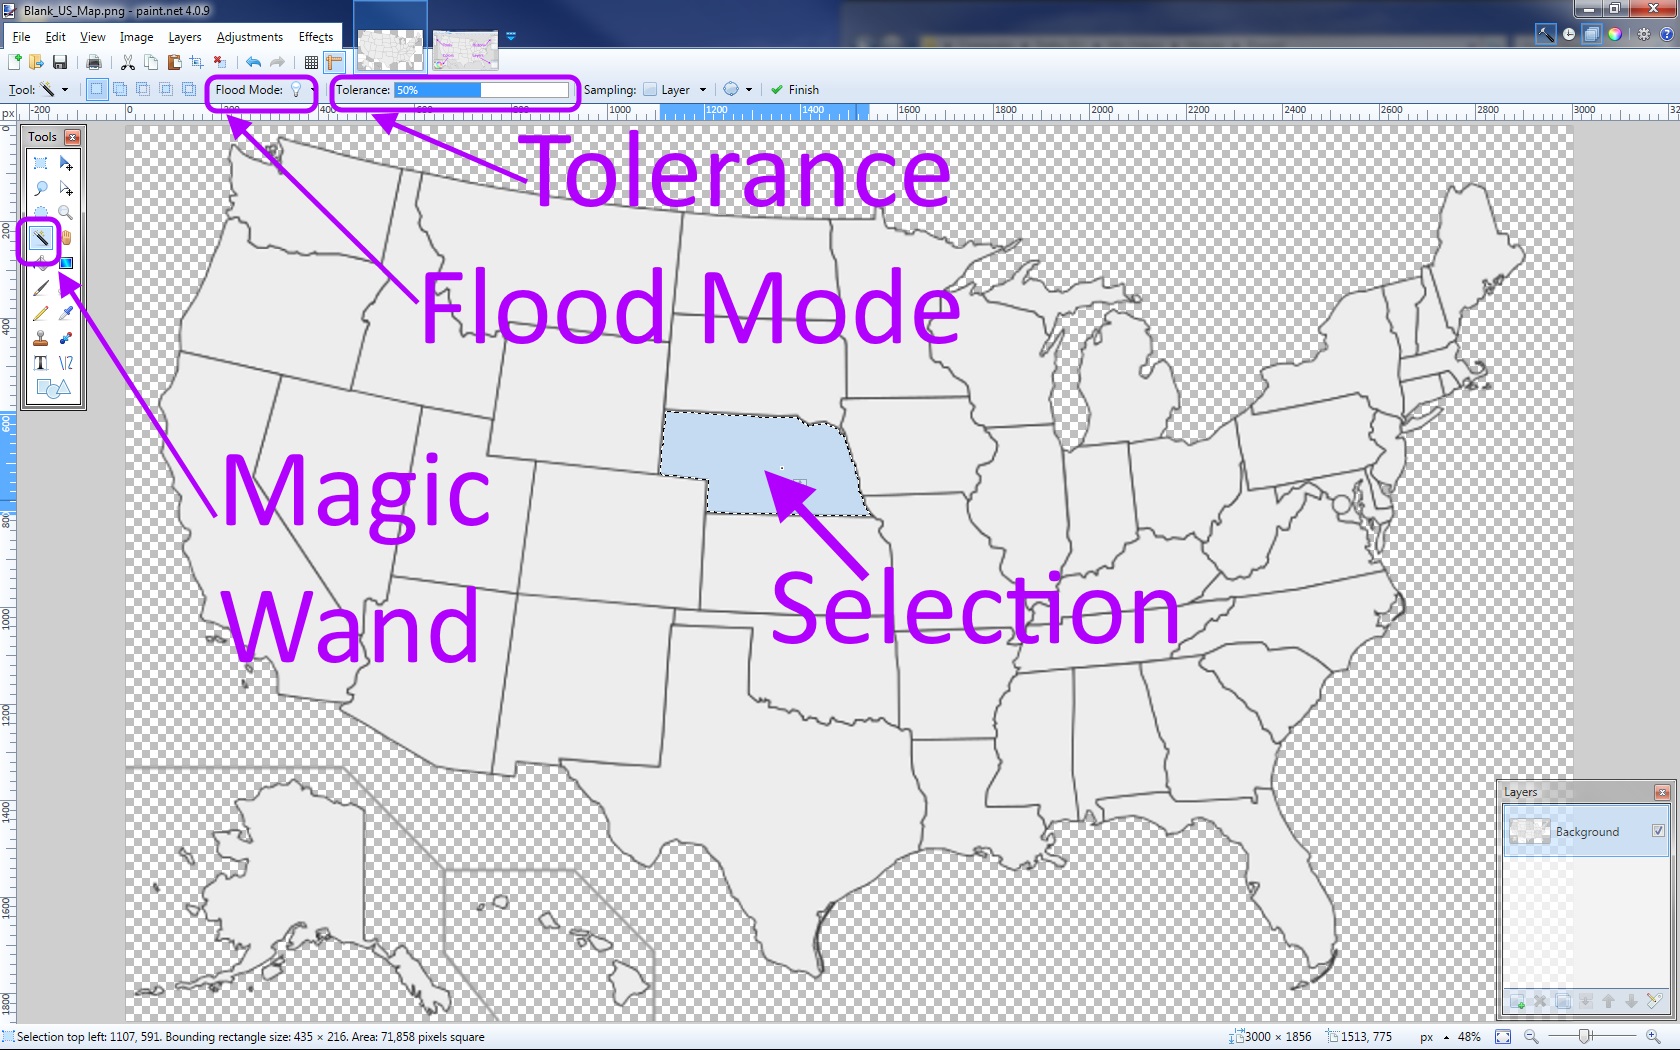
Of all of the tools available to us, the magic want tool is the most powerful, and (for this Instructable) the most important. The magic wand is a selection tool that allows you to select all of the area within a border, outside of a border, a particular color, etc. In the image, I have selected just the state of Nebraska by using the magic wand.
On the "Tools" menu on the left, the Magic Wand tool is the fourth tool down in the left column. It looks like a ... magic wand (black stick with a white tip and sparkles around it).
When you select the magic wand, new options are available to you on the horizontal tool bar. For this Instructable, you only need to worry about the "Flood Mode" and "Tolerance."
Flood Mode
- Contiguous - select only what is touching the point clicked
- Global - select every pixel in the entire image that meets the selection criteria, i.e., within the tolerance
Tolerance
This slider sets the selection tolerance level. The higher the number, the more tolerant the selection tool is. For example, at a low level, the selection tool will only select the exact color that is clicked on; however, at a very high level, if you click on green, all shades of green and even some blues might also be selected.
Paint.NET Primer - Shortcuts
As with all programs, there keyboard shortcuts for practically every action. Rather than tell you how to get to every operation I mention as I use them, I will list the operations now along with their shortcuts. Learn these shortcuts - they will save you an enormous amount of time.
- "m" Move Selected Pixels - the pointer tool, used to move selections (top right tool of "Tools" tool bar)
- "ctrl + c" Copy
- "ctrl + x" Cut
- "ctrl + p" Paste
- "ctrl + shift + v" Paste into new layer
- "ctrl + alt + v" Paste into new image
- "ctrl + a" Select All
- "ctrl + d" Deselect All
- "ctrl + r" Resize Image
- "ctrl + shift + r" Resize image canvas
- "delete" Delete selection
The "s" shortcut actually cycels through various selection tools (including the Magic Wand). You can use that, or just manually click on the Magic Wand when needed.
Get a Map
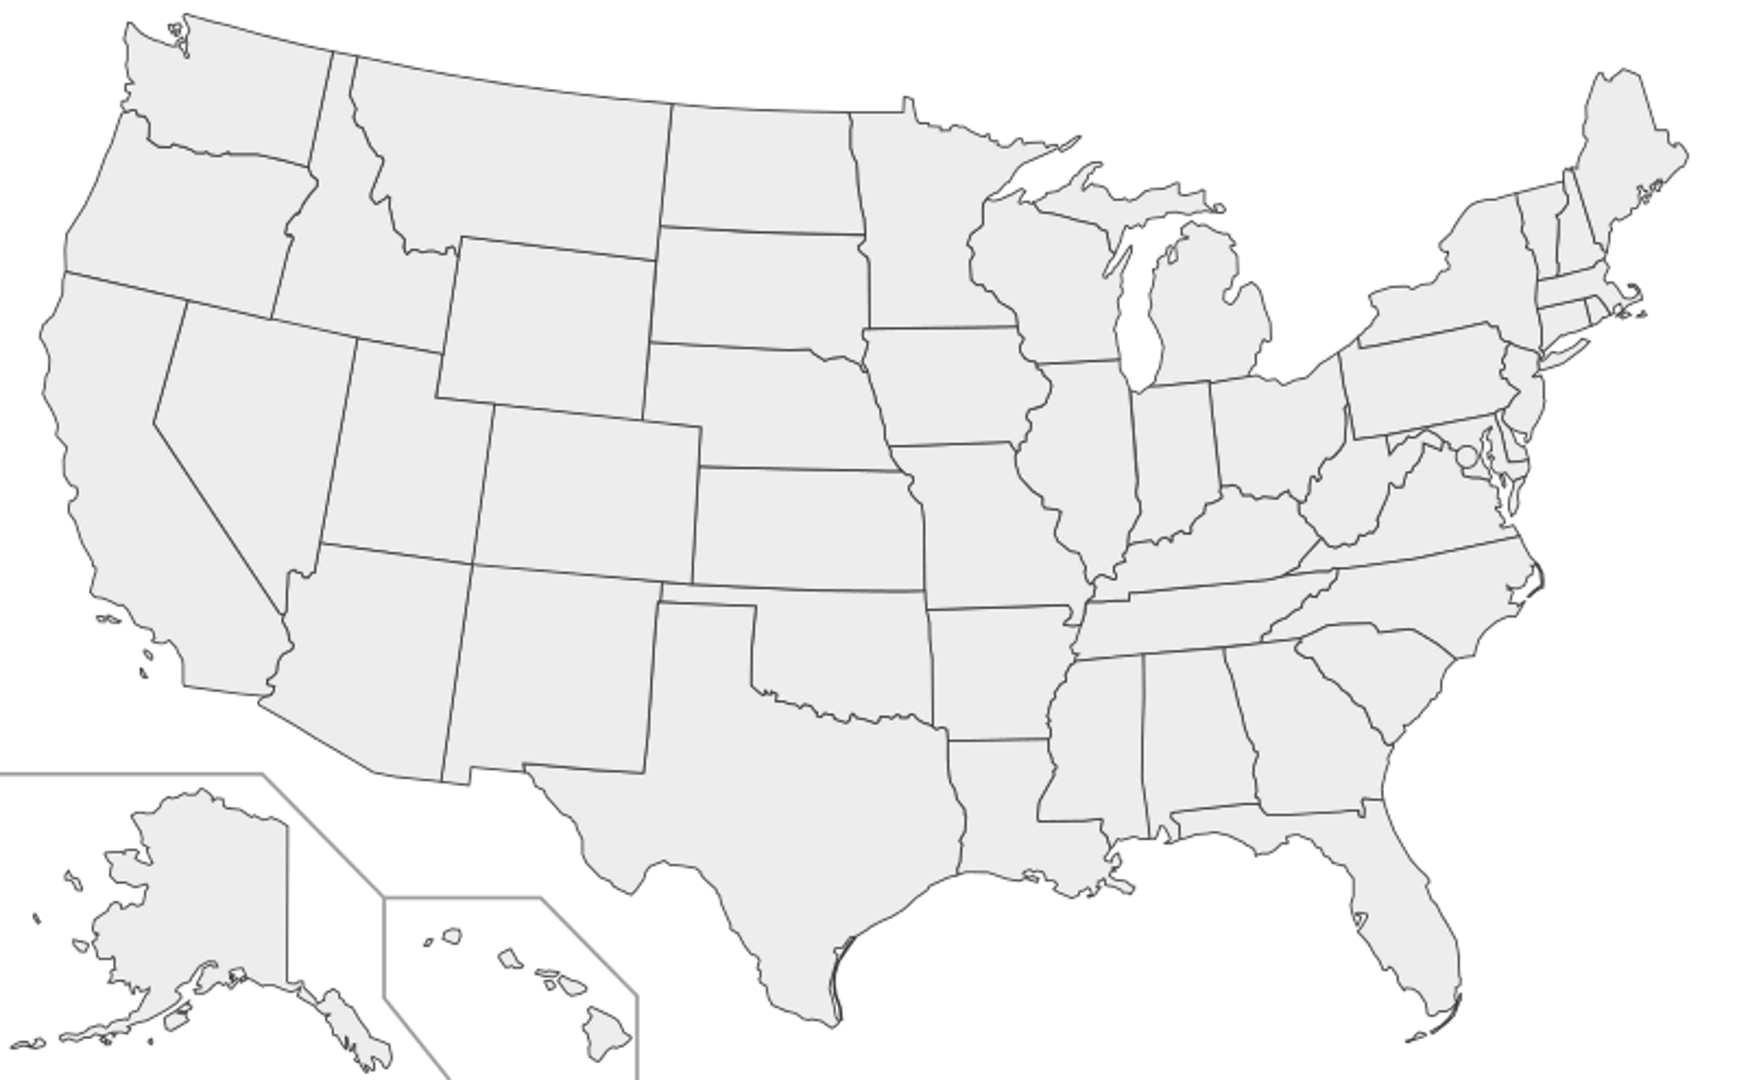
The first real step of this process is to obtain an image. I recommend a simple map, void of any text or colors. This will make your job a lot easier. It is also best to get an image with a very high resolution. I found this blank US map and increased the resolution a little bit to have a width of 3000 pixels.
Hopefully, this link will take you to a Google search of blank US maps. Find one you like that has a high resolution, download it, and open the map image in Paint.NET.
Select Your Images
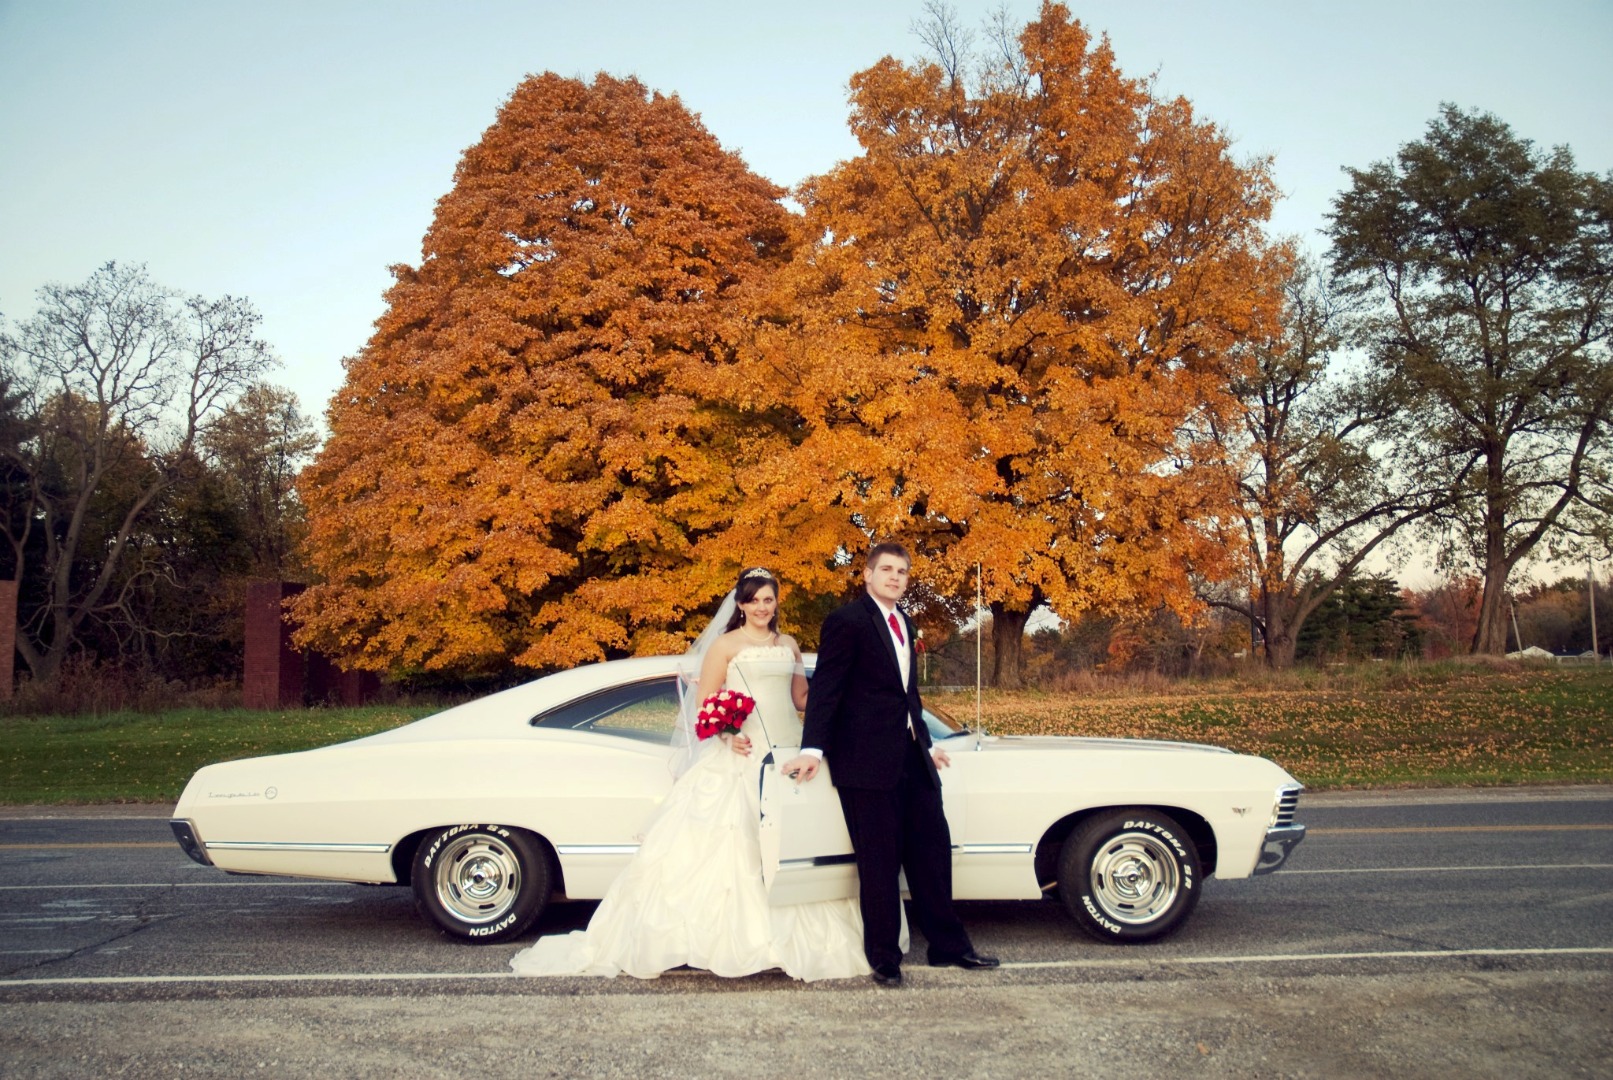
Once you have your map, then you need to select images for use in the map. I wanted to use pictures of us or scenery from each particular state, but you can use whatever image you want.
Choosing images for the map can be tricky because of the irregular shapes of the state boundaries. You might not be able to use your first choice if it doesn't fit well into the state boundary.
In this Instructable, I will be using this image of my wife and I on our wedding day with our 1967 Chevy Impala.
Select a State & Cut It
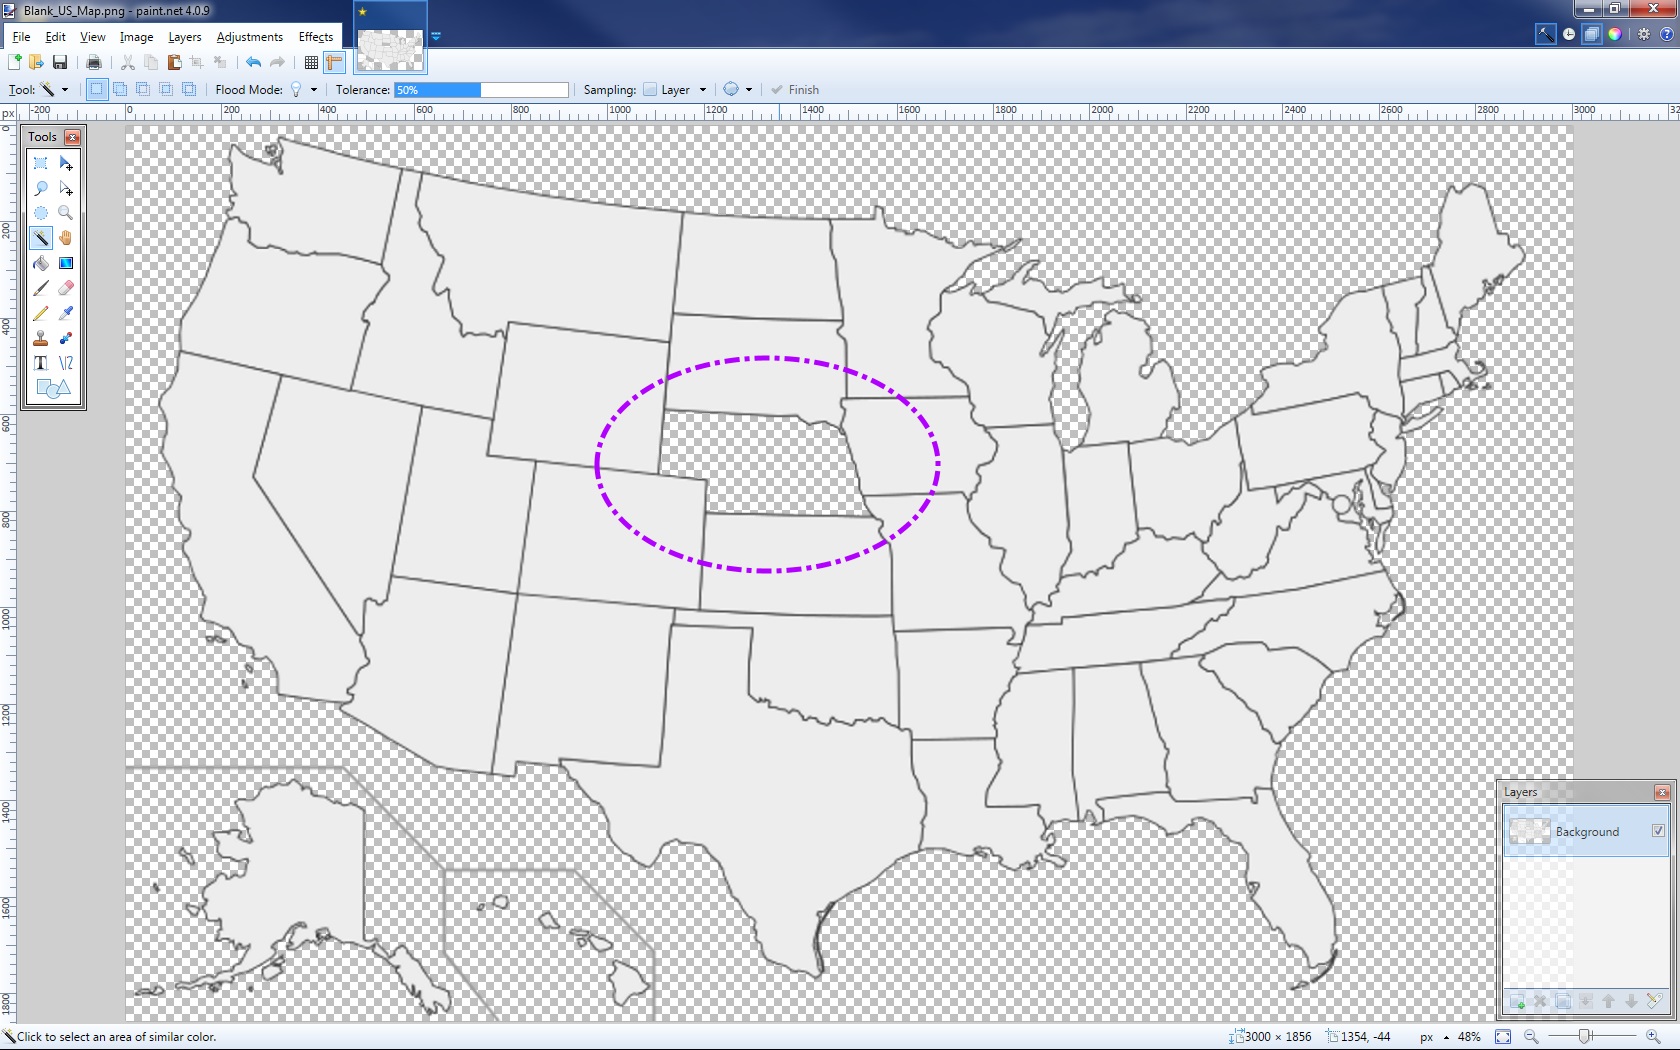
Use the Magic Wand tool to select a state for your first chosen image. If your map has simple colors, clicking anywhere within the state's borders should suffice; however, if you have issues, try adjusting the tolerance.
When you have selected the state, cut it (using "ctrl + x", remember?).
For this Instructable, I will be using the state of Nebraska. In the image, I have selected just this state and cut it. Notice that it is no longer visible in the map.
Paste the State Into a New Layer
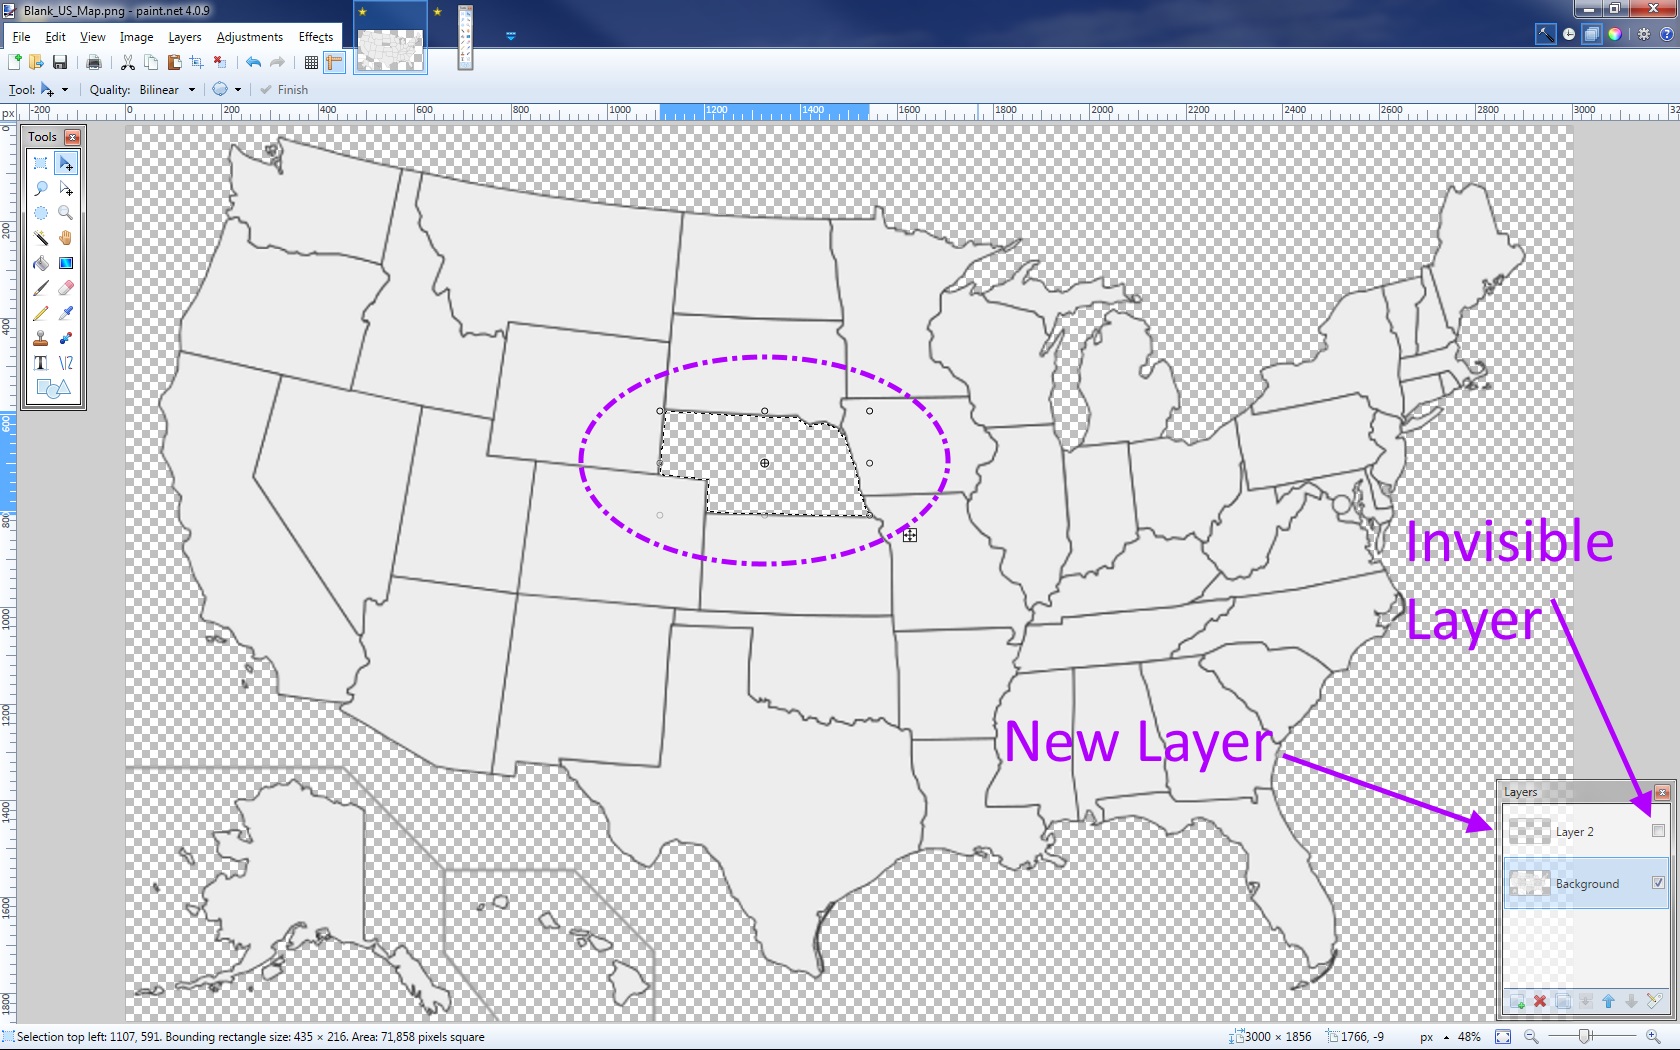
With Nebraska cut from the map, we need to paste it into a new layer (using "ctrl + shift + v"). It will look like Nebraska is still there, but it is pasted into a different layer than the rest of the map. You should notice a new layer is available in the "Layers" tool box.
We need to keep this Nebraska layer around, but we don't need to see it. Uncheck the small check box on the layer to make it invisible.
Open Your New State Image
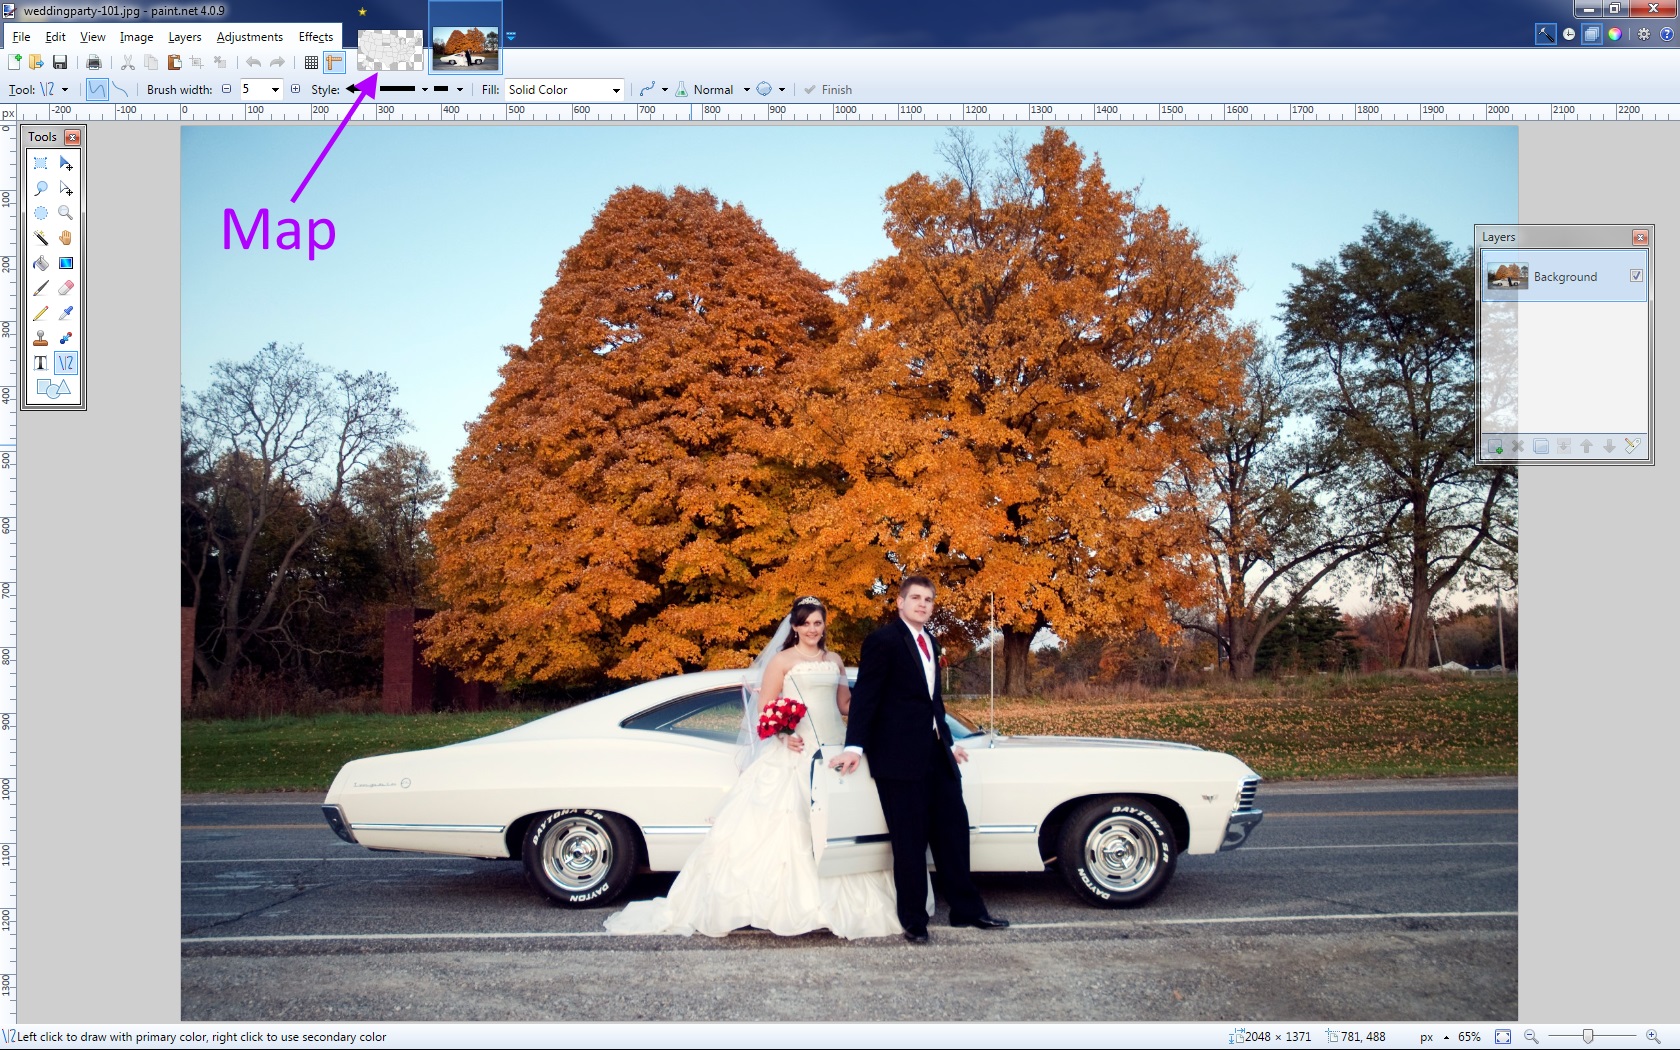
Paint.NET allows you to have numerous images open at once. Open your new image in Paint.NET. Notice in the attached photo that our map from the previous steps is still available. You can click here to easily switch between open files.
Resize & Copy the New Image
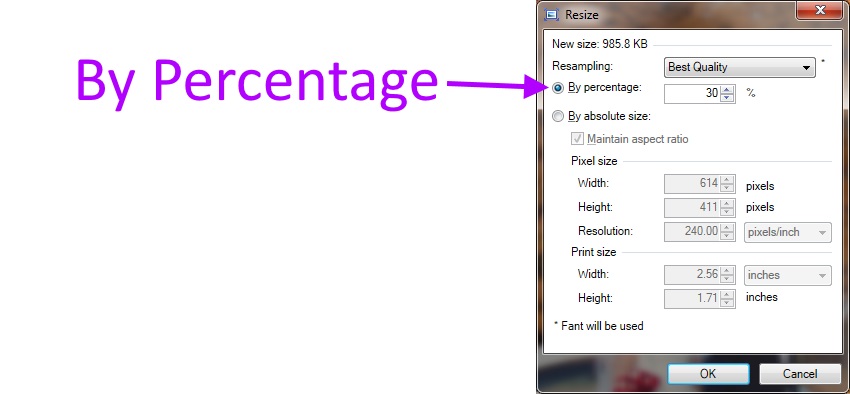
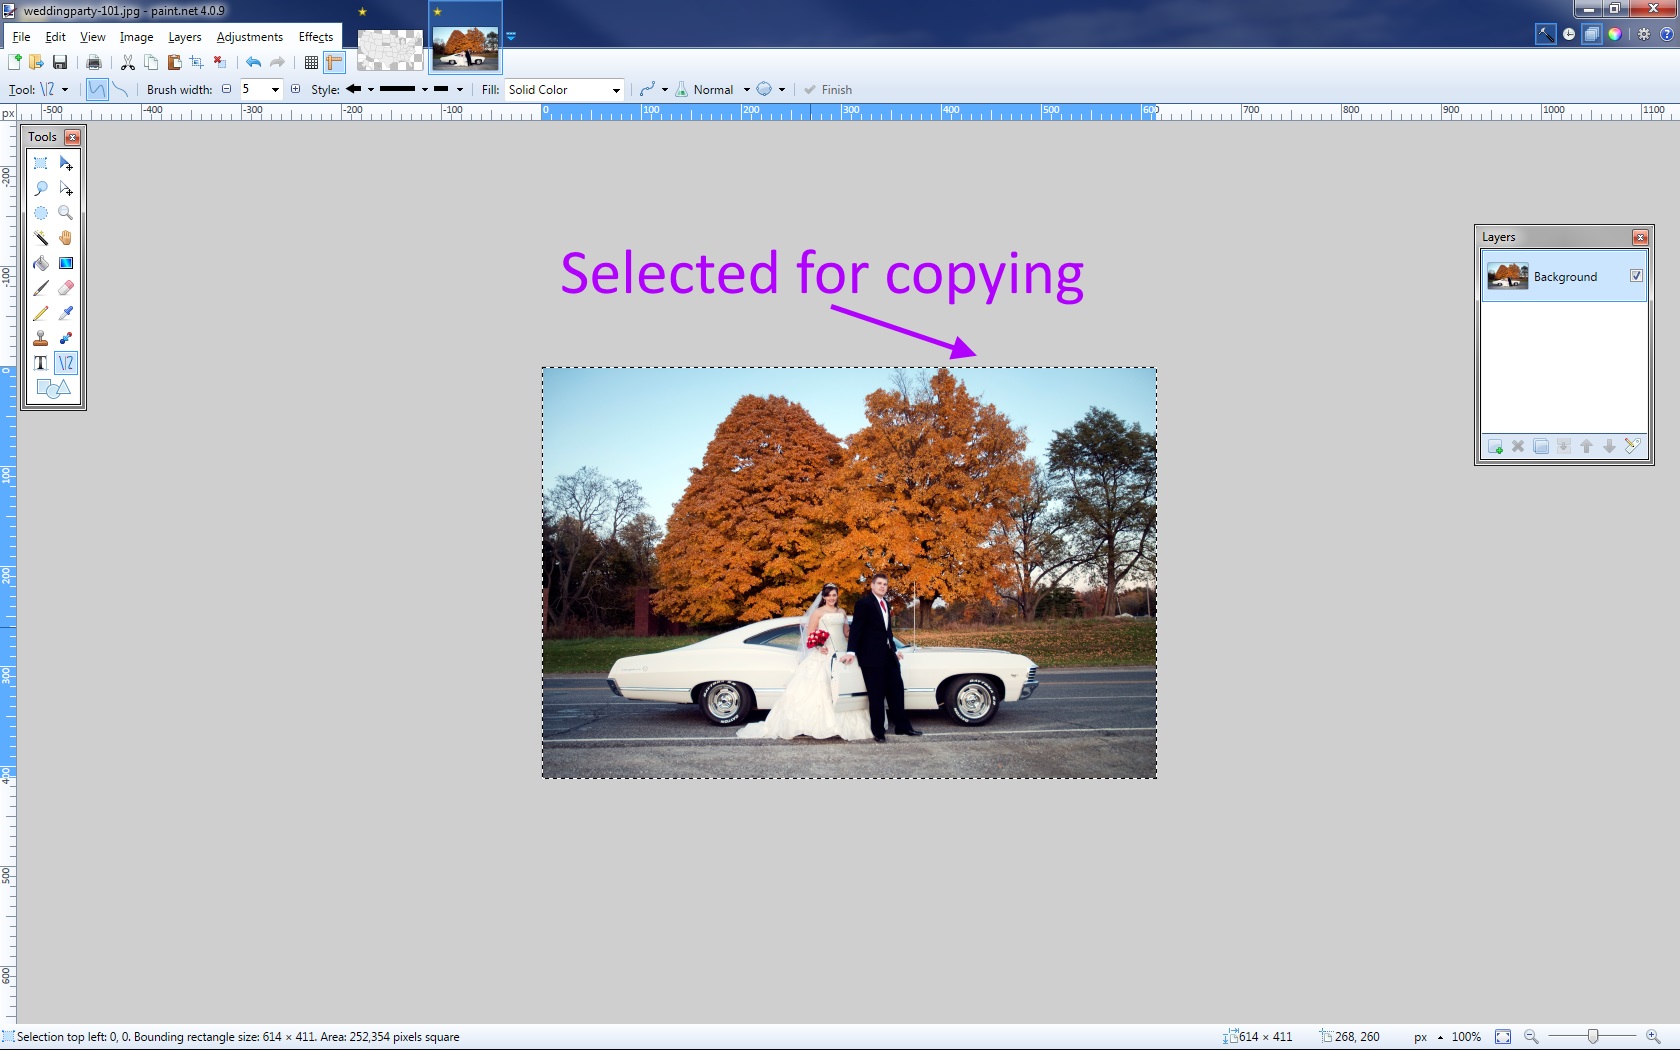
It is likely that this new image is very large, and we should reduce the size a bit before putting it into the map.
To quickly resize an image, press "ctrl + r". In the menu popup, select "By Percentage" and then enter a number in the box. 50% will make the new image roughly half of its current size. Of course, by size, I am talking about the pixel size, not the size of the picture on the screen. These are two very different things.
If your map image is around 3000 pixels in width, try to reduce your new state image to about 500 pixels. This will make it easier to move around. Of course, for huge states like Texas and California, you might want to keep this image a bit larger.
Once the image is a bit smaller, select the entire thing and copy it (using "ctrl + a" & "ctrl + c" ).
Paste the Image Into a New Layer
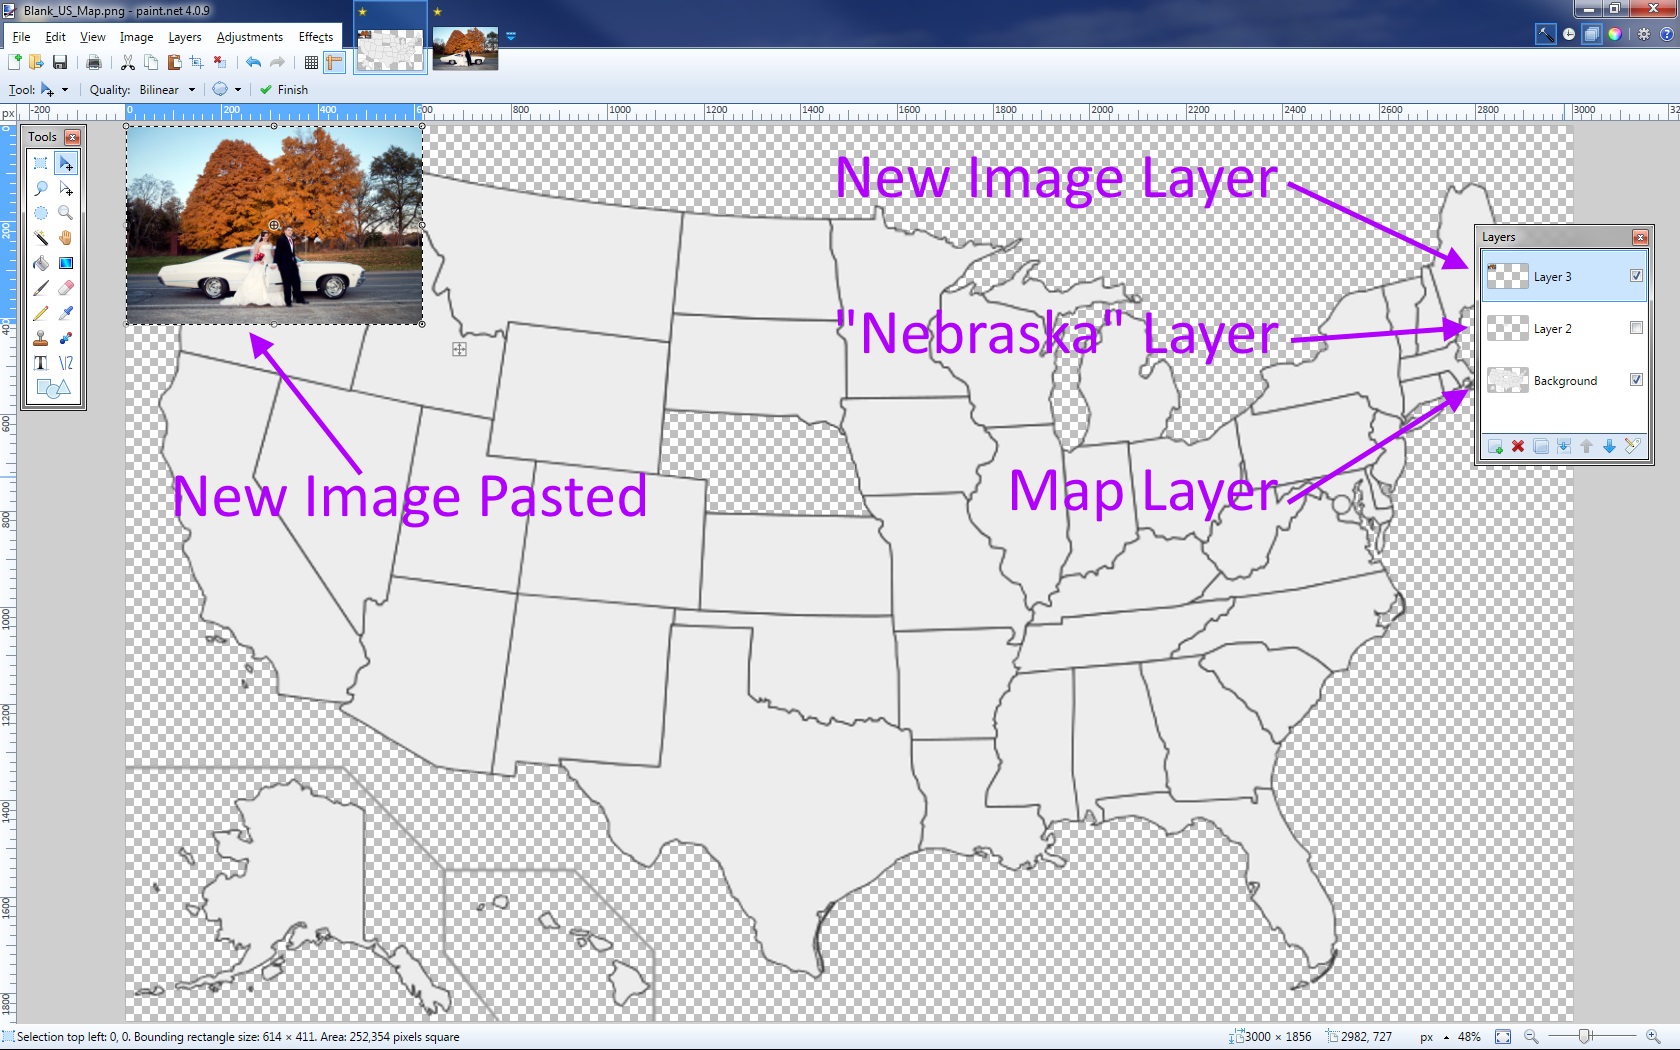
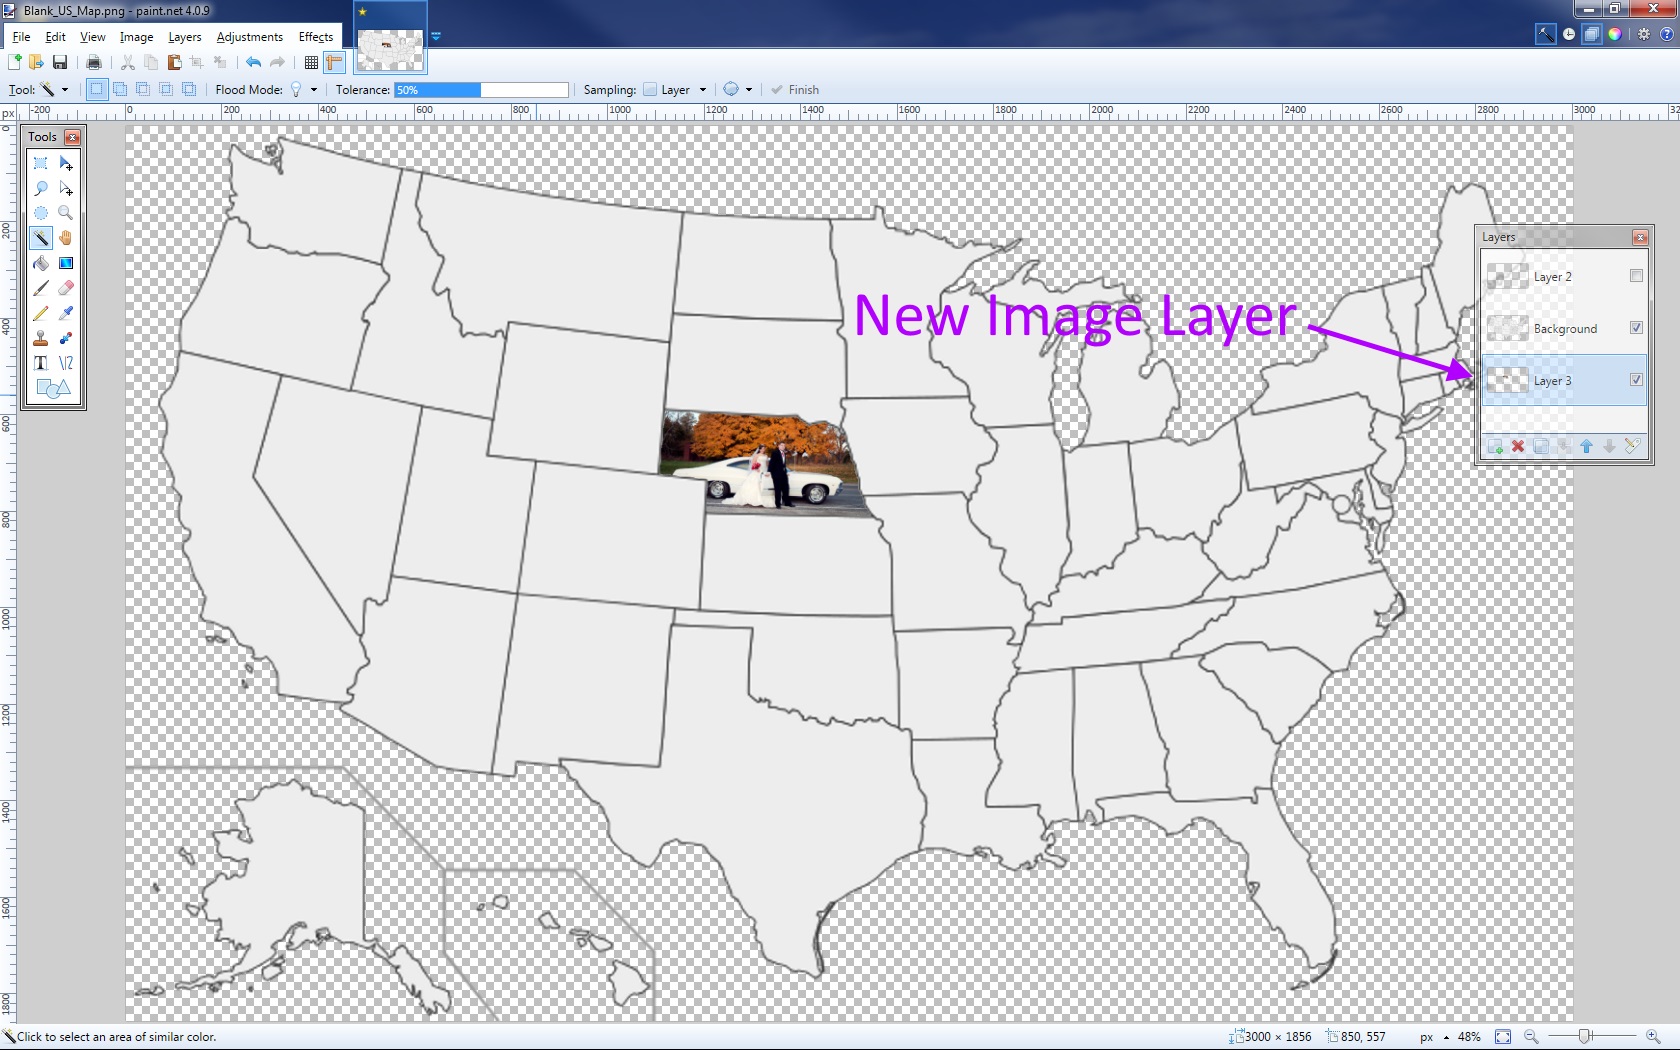
Back on the map, we want to paste our new image into a new layer with "ctrl + shift + v". It will appear on top of whatever level you currently have selected (the selected level is highlighted blue in the "Levels" tool box). You should now have 3 levels:
- New Image layer
- Invisible "Nebraska" state layer
- Background Map layer
Move the New Image Layer Down
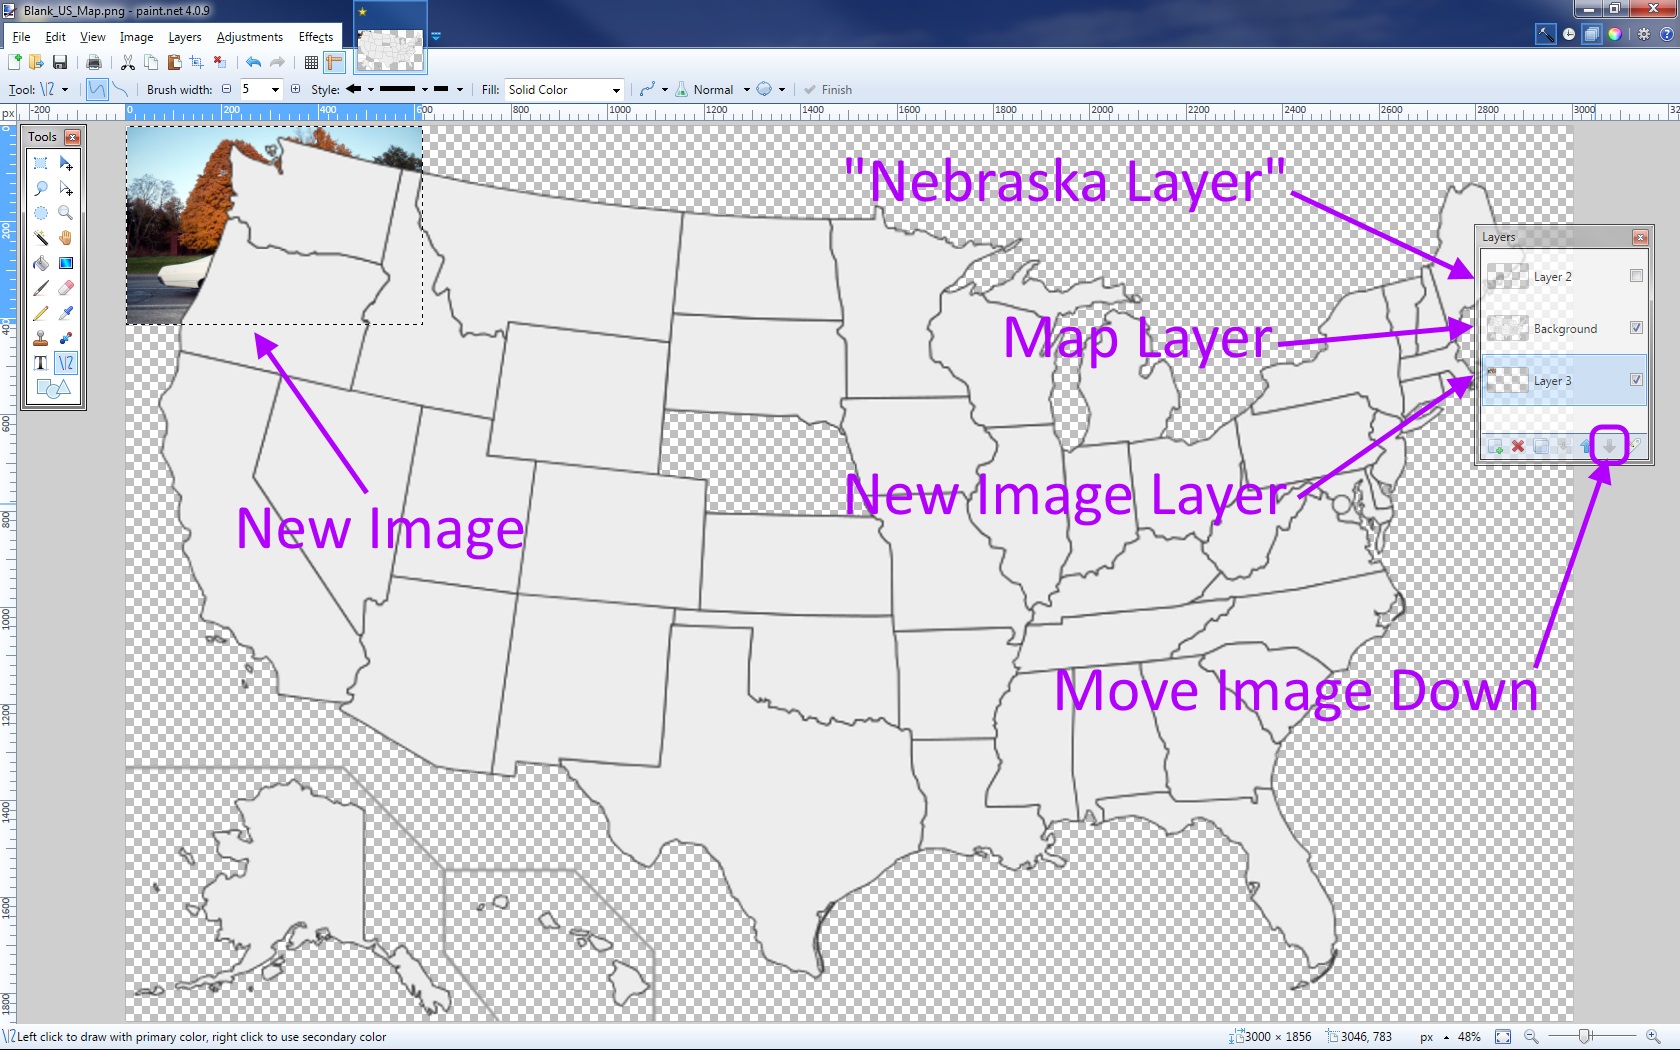
As mentioned in the last step, you will have pasted the new image into a layer on top of whatever layer was selected. Using the Down Arrow on the "Layers" tool box, move this new image down to the bottom of the list of layers (or at least, to just below the map layer).
Now, the map should be on top of the new image.
Move Image Into State Shaped Hole
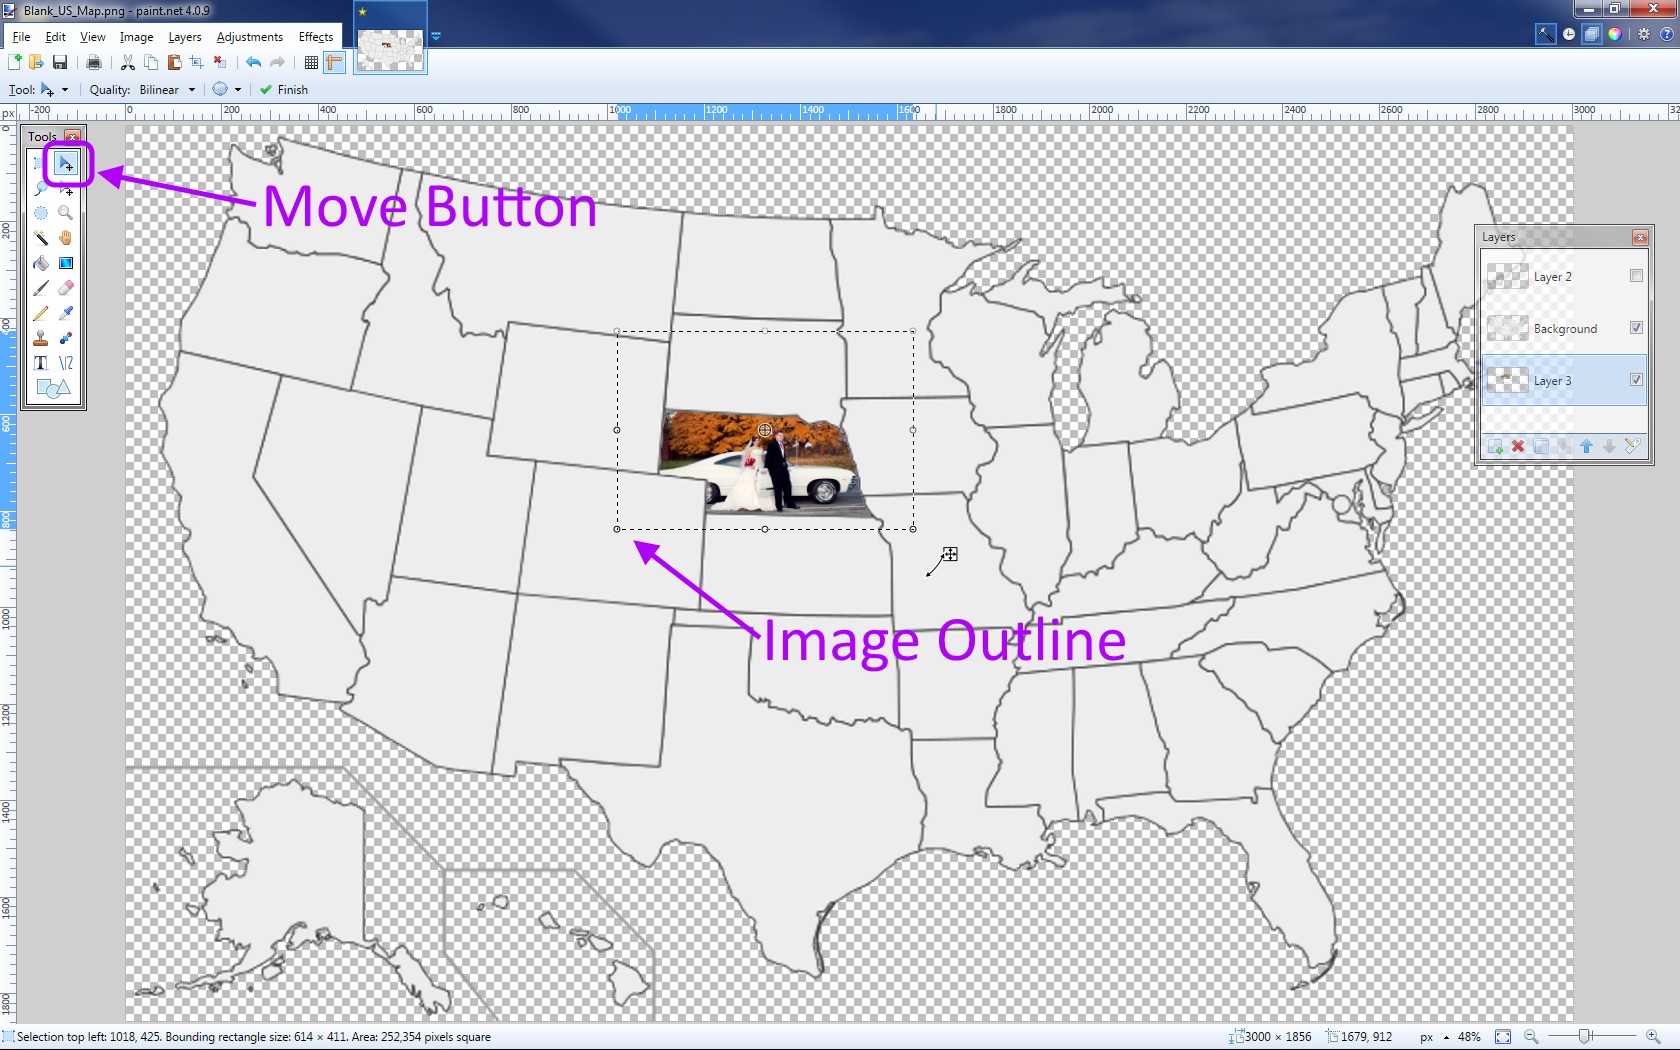
Make sure the new image layer is selected. It should be highlighted blue in the list of layers. If not, just click on that layer.
Using the Move Tool, move the image to the hole left behind from the cut out state. You can click most anywhere inside of the image borders, or the small arrow box in the bottom right corner of the image, to move it.
Adjust the Image
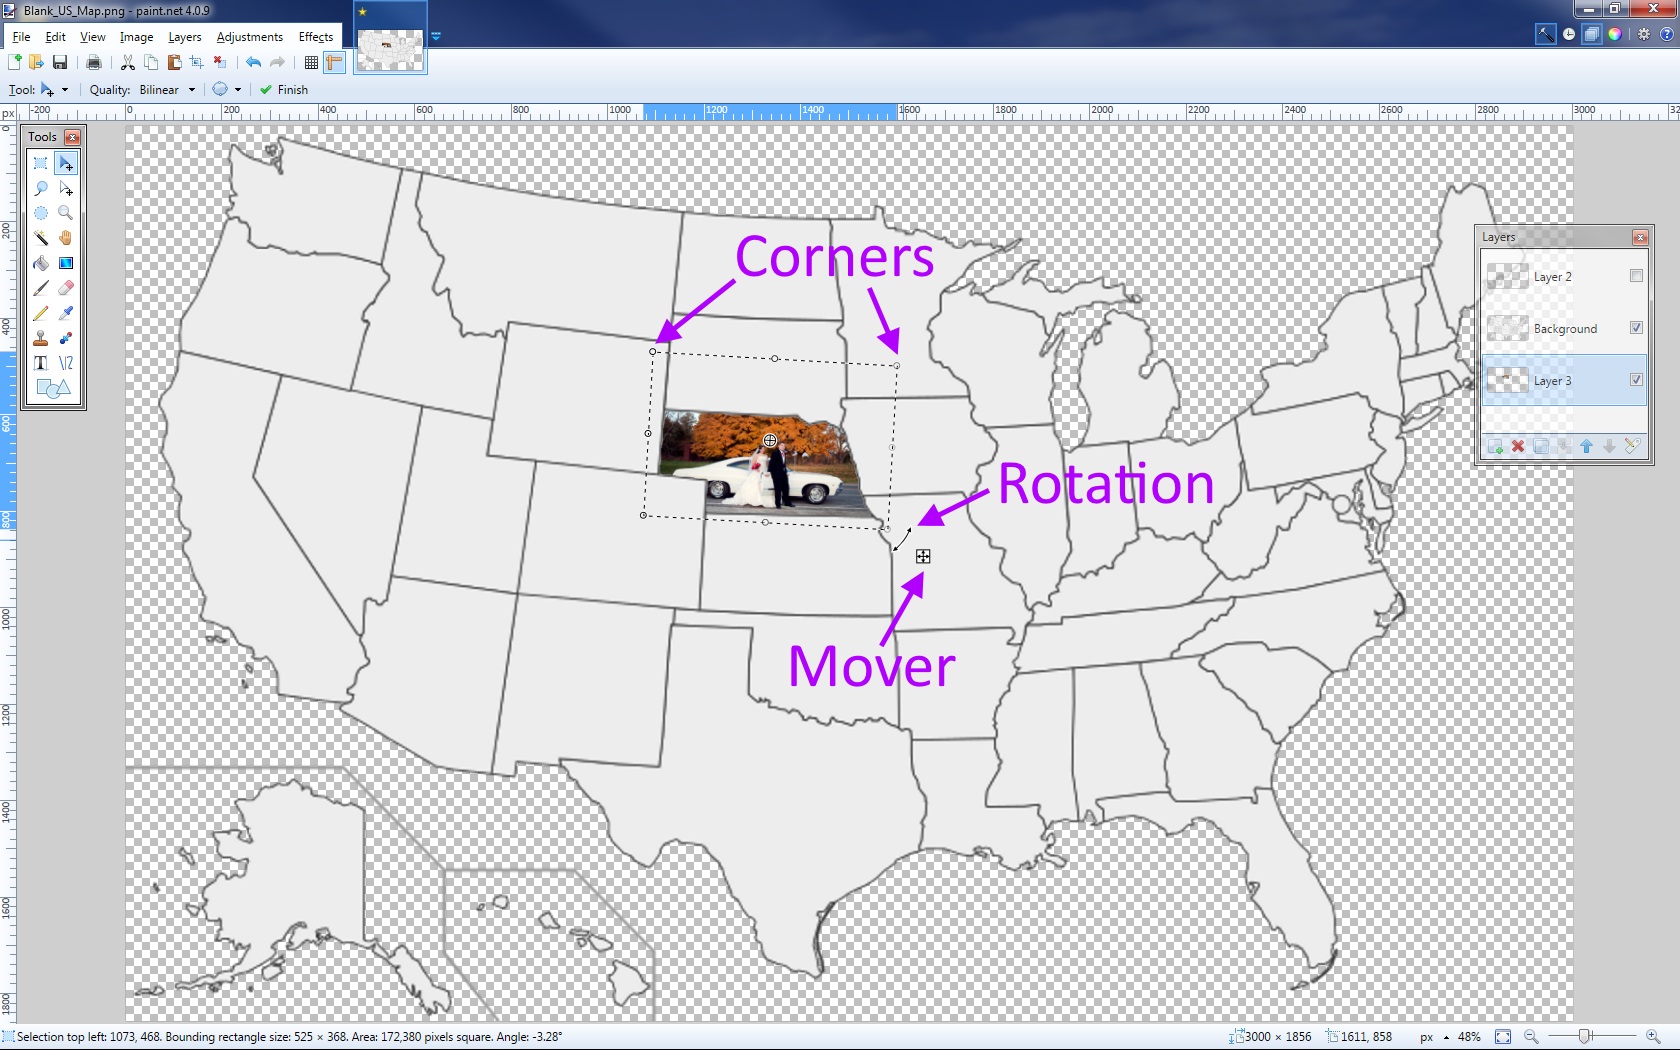
Resizing
You may now want to resize the image to fit better into the state shaped hole. This can be done by clicking on any of the corners of the image selection outline and dragging the box in or out. First, press and hold while you drag the image corner. This ensures the image aspect ratio (length by width) is maintained.
Rotating
You can also rotate the image to better fit or align with the state borders. To do this move your mouse to just outside the bottom right corner of the image until the pointer turns into a small curved-double arrow (as seen in the attached photo). When the mouse pointer looks like this, you can press and drag to rotate the image around the axis point (the small cross hairs that are likely in the center).
Select All BUT the State
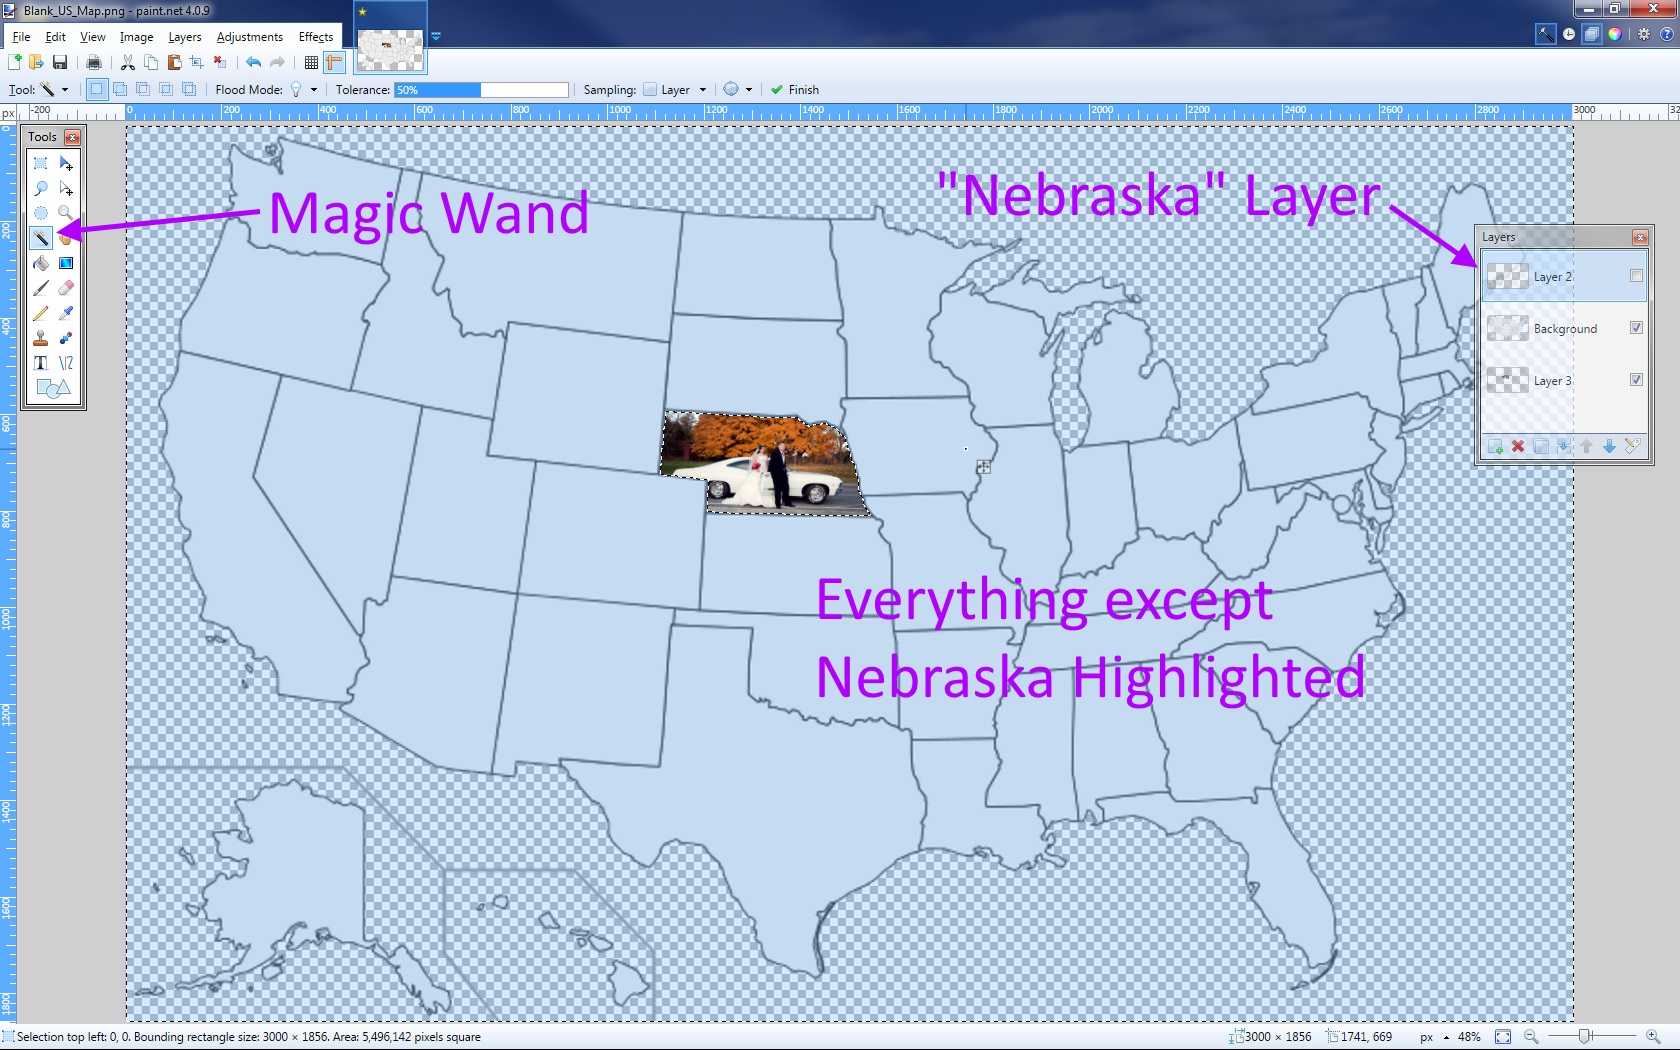
When you have the new image where you want it, it's time to trim the area outside of the state. This might not seem important just yet, but when you try to add images to the surrounding states, you will quickly understand why this matters.
Select the invisible state layer that we cut and pasted back in steps 7 and 8. Once again, use the amazing Magic Wand tool to select the entire image that is NOT the cut out state. Do this by clicking anywhere that is NOT that state. Simple enough...You should see the entire screen highlighted except for whatever state you are working on.
Delete All BUT the State
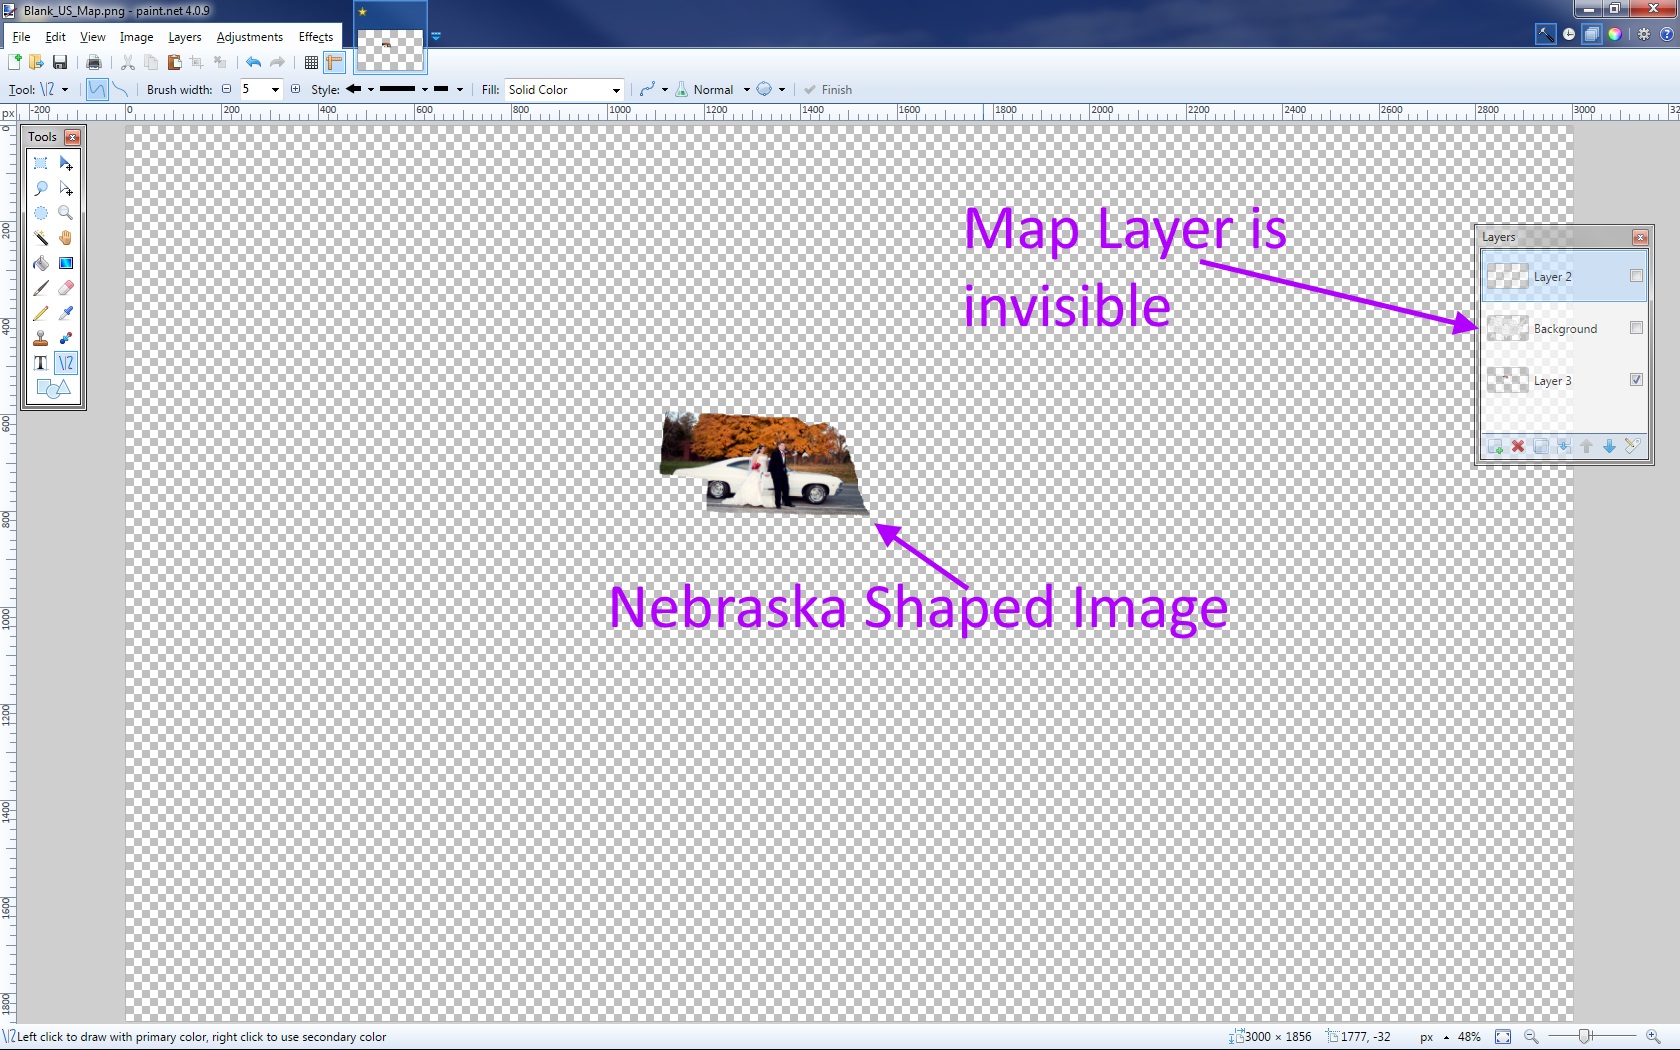
Go back to the new image layer (click on it from the "Layers" tool box) and press "delete". This will delete everything from that layer except what is not selected, which should just be the state in question.
You can verify this operation by unchecking the check box of the map layer. The only thing visible should be the state images you have added, and they should be in the shape of their respective states.
Delete Unnecessary State Layer
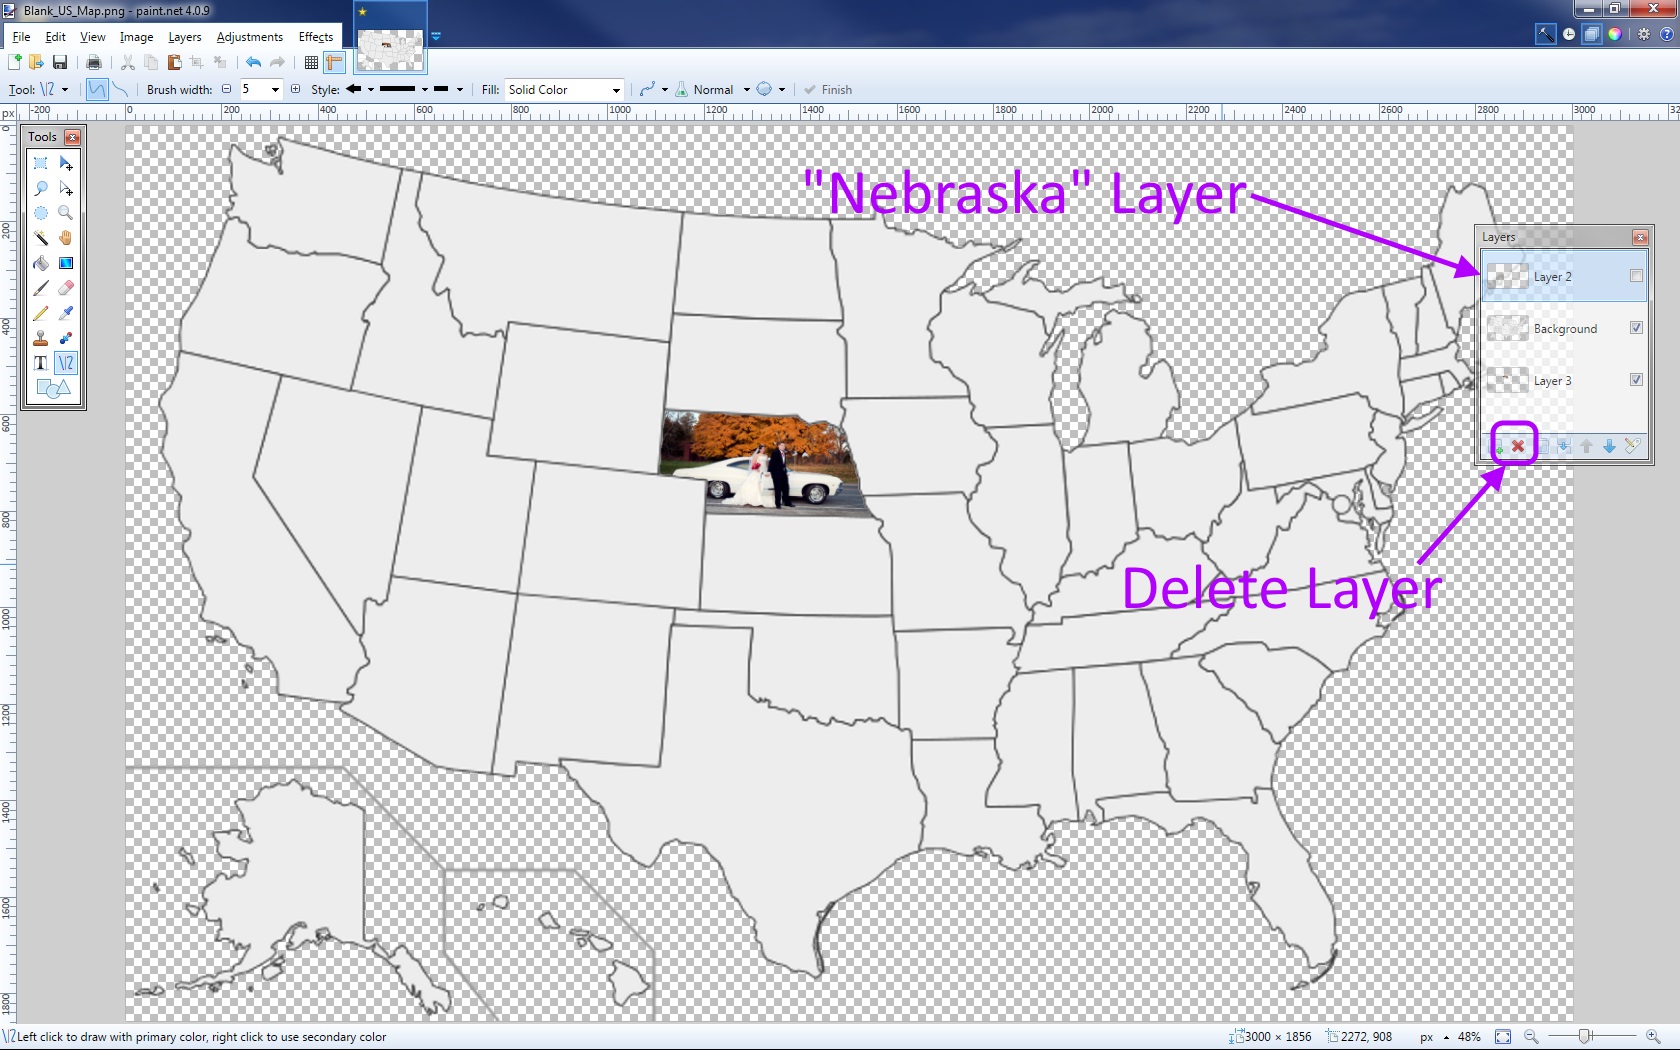
With the image in place, we no longer need the original state layer. Select it from the "Layers" tool box, and press the red "x" to delete that layer. If you accidentally delete the wrong layer, press "ctrl + z" to "undo the last action" and try again.
Rename New Layers
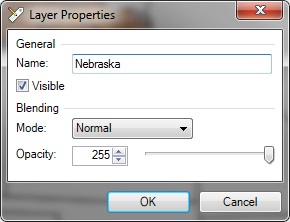
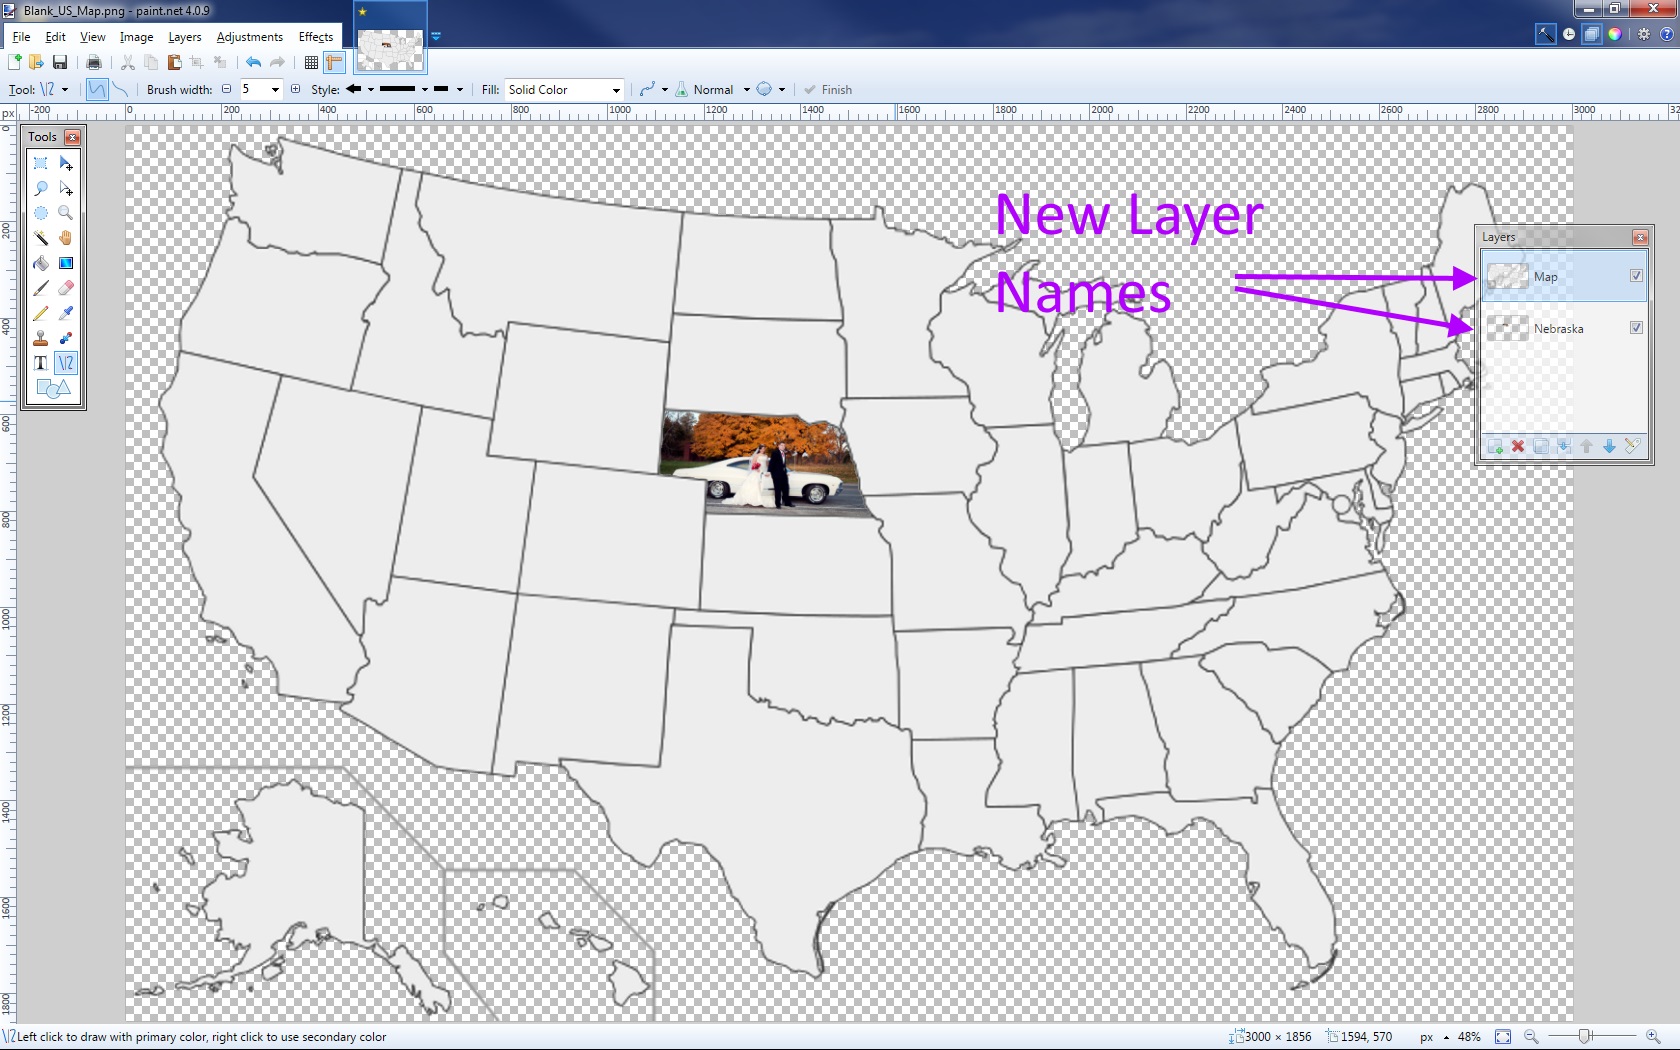
Double clicking on any layer will open a small properties dialog box. You can rename the layer something useful so you know what it is later. In the example, I have renamed the new image layer to be "Nebraska," the state is has replaced on the map. I also renamed the map layer "Map." Now that's original.
From here, repeat these steps for any other states or whatever borders and boundaries your particular map uses.
Save the Image
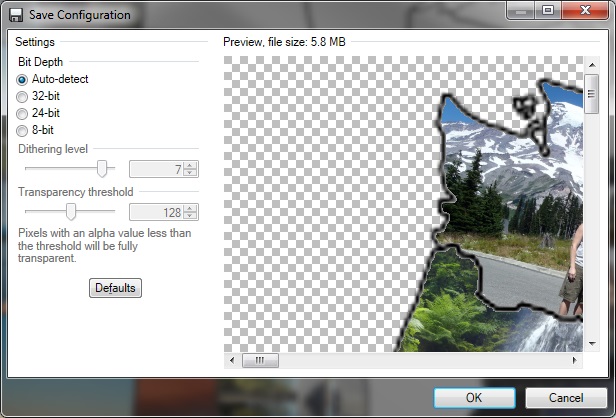
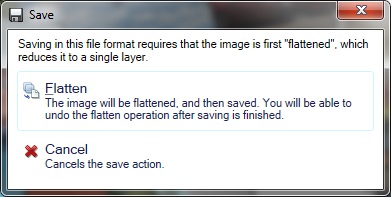
Paint.NET saves as a .pdn file. You should definitely save often! To save as an image, you will want to File >> Save As... Name the map image and choose "JPEG" or "PNG" from the drop down menu before clicking "Save."
- The first pop will have a few configuration options. Just leave everything as the default values and press "OK."
- The second pop up will warn you that the image will be "flattened." This just means that all of the layers will be flattened into one layer. This must be done to get a regular image file from the .pdn file.
You should now have your custom image map!