Unifi Controller on Google Cloud Platform (GCP)
by MallocArray in Circuits > Wireless
43531 Views, 10 Favorites, 0 Comments
Unifi Controller on Google Cloud Platform (GCP)

Ubiquity's Unifi Controller allows for web management of their Unifi products including wireless access points, routers, and switches. They have an excellent guide for setting up the controller on Amazon AWS using the free tier that gives a free VM for 12 months. Once the year is up, you must pay to continue using the VM.
Install a UniFi Cloud Controller on Amazon Web Services
Google Cloud Platform (GCP) also offers a free tier with a free micro VM forever with similar specs to the Amazon offer. The purpose of this guide is to document the steps to setup a Unifi Controller in GCP.
Note: Another user, Petri, has written an excellent guide plus a script that sets up additional features such as Let Encrypt certificates, Fail2Ban limits, and general maintenance. Check it out to supplement this instructable:
https://metis.fi/en/2018/02/unifi-on-gcp/
Register/Create Google Cloud Platform Account


- Navigate to: https://cloud.google.com/free/ and click the "Try Free" button to begin registering for an account
- Login with your account at: https://console.cloud.google.com
- Select the project you wish utilize for the Unifi Controller. If setting up a free account, you will have "My first project" selected.
- This can be renamed by going to Menu>IAM & admin>Settings and changing the Project name
Scripted Instance Creation
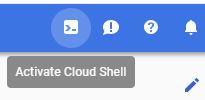
Rather than clicking through the GUI step by step to create the instance, Google provides Google Cloud Shell to build from a command line. This eliminates misconfiguration errors due to missed steps or mistypes.
Note: Free Tier is only available in the following Regions: us-east1, us-west1, and us-central1
If using this method with the script from Petri, no further steps are needed as everything else is automated on Debian. For those who want to build it manually or understand the nuts and bolts behind the scenes, the steps after this walk through the configuration.
Note: Due to Instructable formatting, sometimes copy/paste do not work as expected. Attached is a text file with all commands that should properly copy and paste and may be easier to make modifications for your specific bucket names, DNS names, and regions.
Final Note: As of 9/5/2018, the Unifi software still requires an earlier version of MongoDB than what is bundled with Ubuntu 18.04, requiring either a different OS, or some manual workarounds as described here. As a result, the commands below will use Debian 9
After logging into the console site, click the button in the upper right corner to Activate Cloud Shell. A black box will appear in the lower portion of the page with the Cloud Shell interface. Copy and paste the commands, replacing text as needed
Creating a storage bucket
A storage bucket will hold the backups in a separate location so we can destroy the controller and restore from a reasonably recent backup very quickly. Make sure to replace some-unique-name with a name of your choosing. Other regions are available in the free tier as long as they are in the US, excluding us-east4 (Check for details here: https://cloud.google.com/free/docs/always-free-usage-limits )
gsutil mb -c regional -l us-central1 gs://some-unique-name
Creating a static external IP
To prevent the external IP from changing over time, the IP can be reserved and remains free as long as it is attached to a running VM instance. If you destroy the instance without creating a replacement, or power it off for more than 1 hour, you may be charged for the static IP until you delete it.
gcloud compute addresses create unifi-external \
	--region us-central1
Create the Firewall Rules
This series of lines will create several firewall rules needed for the Unifi controller and add them to a tag named unifi-server that will also be assigned to the server instance
gcloud compute firewall-rules create "unifi-http" \
    --allow tcp:80,tcp:8443,tcp:8880,tcp:8843 \
    --description="Ports used for HTTP and HTTPS on non-standard ports" \
    --target-tags=unifi-server
gcloud compute firewall-rules create "unifi-inform" \
--allow tcp:8080 \
--description="Port for device and controller communication" \
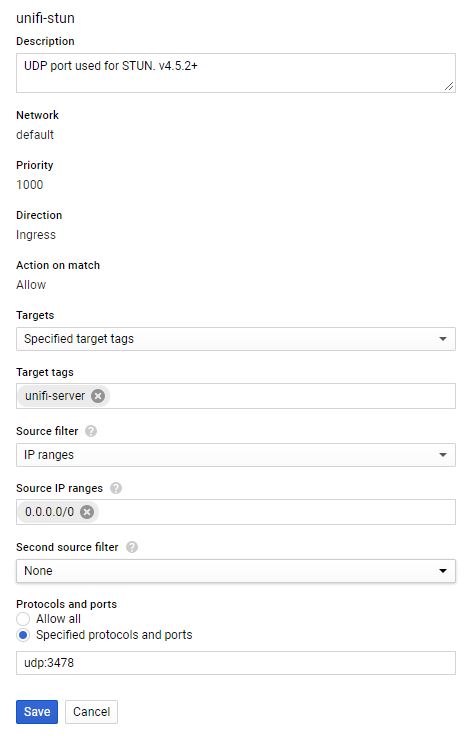
--target-tags=unifi-server gcloud compute firewall-rules create "unifi-stun" \
--allow udp:3478 \
--description="Port used for STUN" \
--target-tags=unifi-server gcloud compute firewall-rules create "unifi-throughput" \
--allow tcp:6789 \
--description="Port used for UniFi mobile speed test" \
--target-tags=unifi-serverCreating the VM Instance
This series of lines will create the instance within the free tier allowances. Edit the first line after create to change the name of the instance. If you do not want to use the automatic configuration script provided by Petri or want to include additional options, modify or eliminate the last line starting with --metadata. (Note: if you eliminate the line entirely, you may need to press Enter again after pasting to complete the action)
gcloud compute instances create unifi-controller \
	--machine-type f1-micro \
	--image-family debian-9 \
	--image-project debian-cloud \
	--boot-disk-type pd-standard \
	--boot-disk-size 25GB \
	--zone us-central1-c \
	--description "Unifi Controller" \
	--scopes=default,storage-rw \
	--tags unifi-server \
	--address unifi-external \
	--metadata=startup-script-url=gs://petri-unifi/startup.sh,timezone=US/Central,dns-name=your.domain.com,bucket=some-unique-name
If you wish to use other OS images, you can get the full list from the Cloud Shell using the following command
gcloud compute images list
Take note of the Family and the Project, in this case "debian-9" and "debian-cloud"
Downloads
Creating the VM Instance
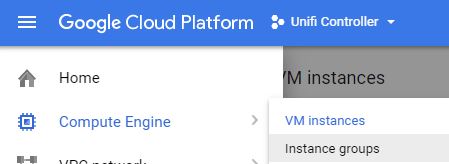
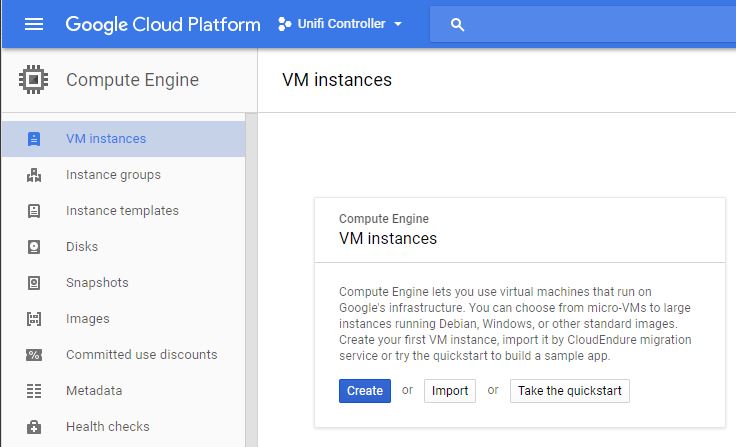

- From the Menu button in the upper left corner, select "Compute Engine" then "VM Instances"
- Wait for the Compute Engine to finish initializing if prompted.
- Under "VM Instances" on the left pane, click "Create" in the right pane.
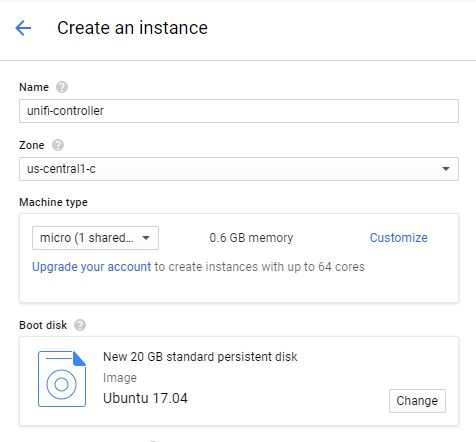
- Enter a name for your VM. In this case "unifi-controller"
- Select a Zone or leave on default
- Change Machine Type to "micro" if using the Free offering
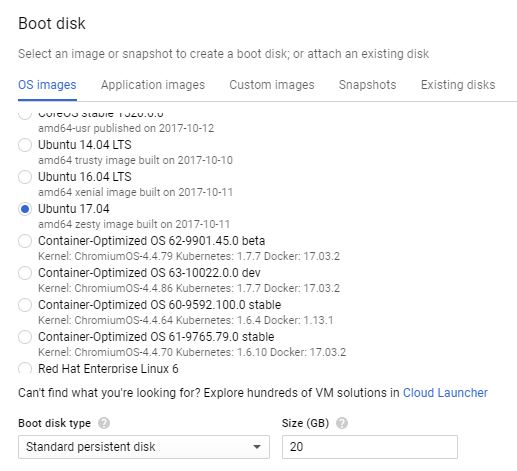
- Click "Change" on Boot disk. Select a Ubuntu image, such as "Ubuntu 16.04 LTS"
- Newer images of Ubuntu contain an incompatible version of MongoDB. Debian is another option.
- Increase the disk type to Standard Persistent Disk and size 25 GB
- Note: 30 GB may be required for proper operation of the controller software.The Cloud Shell consumes 5 GB and may go over the free limits unless this instance is sized to 25 GB
- Leave Firewall options unchecked. These will be configured later.
- If configuring backups as described later in this guide, under Access Scopes, select "Set access for each API" and change Storage to "Read Write"
- Click "Management, disks, networking, SSH key" link, then click the Networking tab. Under "Network tags" enter: unifi-server
- This will be used when creating firewall rules
- Click "Create" to begin the process
- Give a few minutes for the VM creation to complete. A green checkbox will appear to the left of the name when completed.
- Click the Google Cloud Platform Menu>Networking>VPC Network>Firewall rules
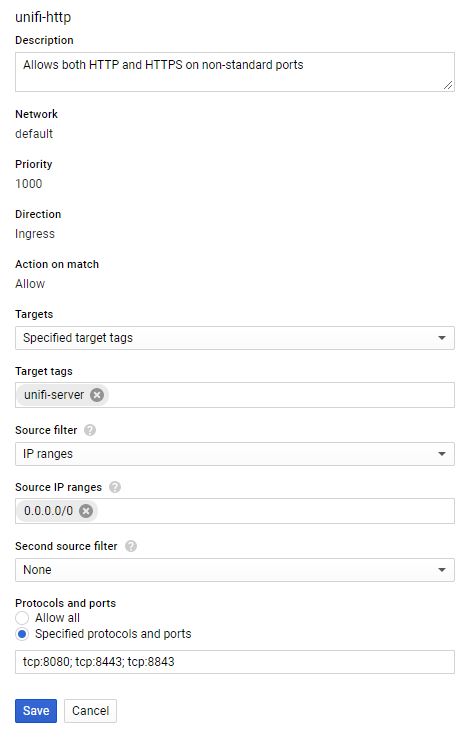
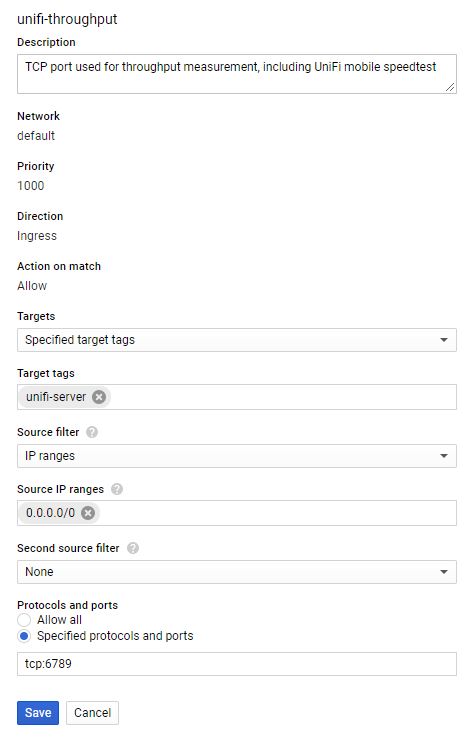
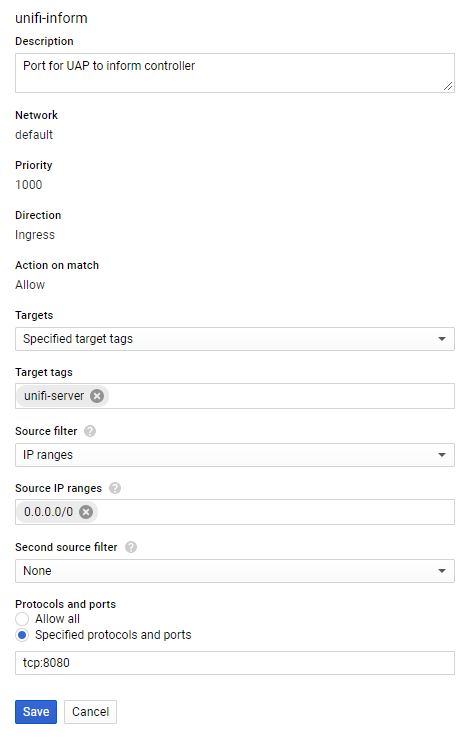
- Click "Create firewall rule" at the top of the page. Several rules will be needed. They can be broken out into individual rules, or one rule to include all needed ports. List of ports
- Name: unifi-ports
- Target tags: unifi-server
- Source IP ranges: 0.0.0.0/0
- Specified protocols and ports: tcp:80; tcp:8880; tcp:8443; tcp:8843; tcp:8080; tcp:6789; udp:3478
- Create
- Click "Create firewall rule" at the top of the page. Several rules will be needed. They can be broken out into individual rules, or one rule to include all needed ports. List of ports
- Click the Google Cloud Platform Menu>Networking>VPC Network>External IP Addresses
- Change the existing assignment from Ephemeral to Static to prevent the IP from changing over time.
- Note: If the instance is stopped, a charge of $0.01/hr per IP will be charged for static IPs
Configuring Swap on the VM
If using the f1-micro instance, it is quite possible that the VM will run out of the 600 MB ram and stop functioning. To help with this, configure a swap file. If using a larger VM, this may not be necessary. This article walks you through the steps for Ubuntu:
The following commands can be copied and pasted into the SSH session to your VM to create the swap file and make it permanent
sudo fallocate -l 1G /swapfile
sudo chmod 600 /swapfile
sudo mkswap /swapfile
sudo swapon /swapfile
sudo cp /etc/fstab /etc/fstab.bak
echo '/swapfile none swap sw 0 0' | sudo tee -a /etc/fstab
To verify how much memory is being used, both RAM and swap, use the following command
free -h
Installing Controller Software
- Click Menu>Compute Engine>VM Instances. On the line with the controller VM, click the SSH button. A new window will appear with and SSH session to the VM.
- Run the following commands to add the Ubiquity repository and add the GPG key. These can be copied and pasted into the SSH window:
echo "deb http://www.ubnt.com/downloads/unifi/debian stable ubiquiti" | sudo tee -a /etc/apt/sources.list
sudo apt-key adv --keyserver keyserver.ubuntu.com --recv 06E85760C0A52C50
- Note: After an upgrade to a new release, the source may be disabled. Edit the sources.list file to remove the # from the beginning of the ubnt line
- sudo nano /etc/apt/sources.list
- Run the following commands to update the servers repository and begin the Unifi install:
sudo apt-get update
sudo apt-get install unifi
- If prompted, press Y to continue to download any required packages and install
- To speed up initial startup time on the VM, install haveged for faster entropy generation. With haveged, the first startup of Unifi when the VM boots will take 6-10 minutes. Without it may take 20-25 minutes.
More information: https://www.digitalocean.com/community/tutorials/how-to-setup-additional-entropy-for-cloud-servers-using-haveged
sudo apt-get install haveged - When finished, type exit to close the SSH session
- In the VM Instances window, take note of the External IP of the VM
- Open a Web browser to https://External-IP:8443/
- replace External-IP with the External IP of your VM
- If a webpage appears, the controller setup is complete.
- Note: Step 2 will not discover any devices as the controller is not on the same subnet as the devices. See the Ubiquity article on Layer 3 Adoption
Configuring Backups
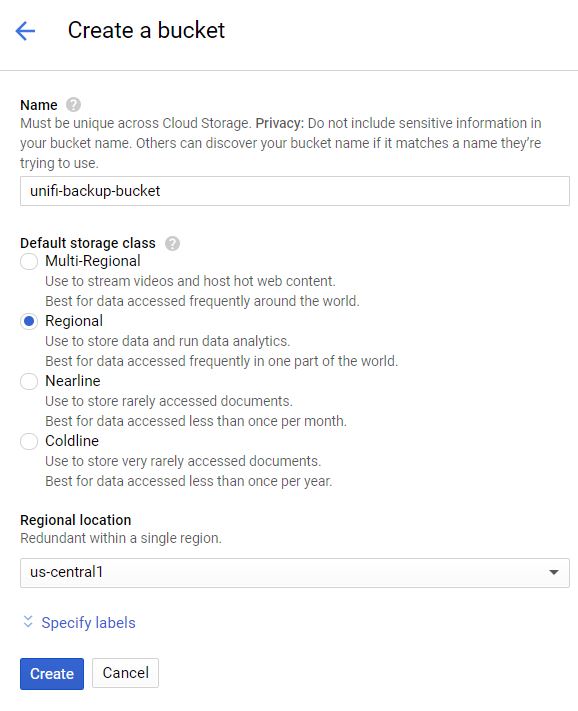
As part of the Google Free Tier, 5 GB of regional storage is included. By creating a storage bucket and configuring Unifi to copy backups to this bucket, the files are no longer only stored inside the compute engine, allowing for restores if the entire instance becomes unavailable.
Create a Google Cloud Storage Bucket
- In the GCP Console, click the Menu button in the upper left corner, select "Storage" under the Storage heading, then click Create Bucket
- Enter a name that is globally unique Create when finished Select a region.
- In the US, the free storage is available in the regions ending in 1 as noted here: https://cloud.google.com/storage/pricing
- Select Regional for the free tier
- Click Continue when finished
- In the GCP Console, click the Menu button in the upper left corner, select "Compute Engine", then click VM instances
- Stop the Unifi instance
- Click on the instance name, and select Edit Under "Access Scopes", select "Set Access for each API"
- Change "Storage" to Read Write
- Start the instance
Create a script to copy backups to the bucket daily
- Use the following commands to create the backup script, making sure to replace [name_of_storage_bucket] with the name you created above.
echo '#!/bin/sh' | sudo tee /etc/cron.daily/unifi-backup-to-bucket
echo sudo gsutil rsync -r -d /var/lib/unifi/backup gs://[name_of_storage_bucket] | sudo tee -a /etc/cron.daily/unifi-backup-to-bucket - Set the file as executable
sudo chmod +x /etc/cron.daily/unifi-backup-to-bucket - Backup files should now be copied to the storage bucket daily. You can view the files by going to Storage>Browser and clicking the bucket.
Note: I had some trouble with copying text from Instructables and pasting into the console not fully working. The text would copy, but the commands would not execute correctly. Manually typing them in corrected the issue.