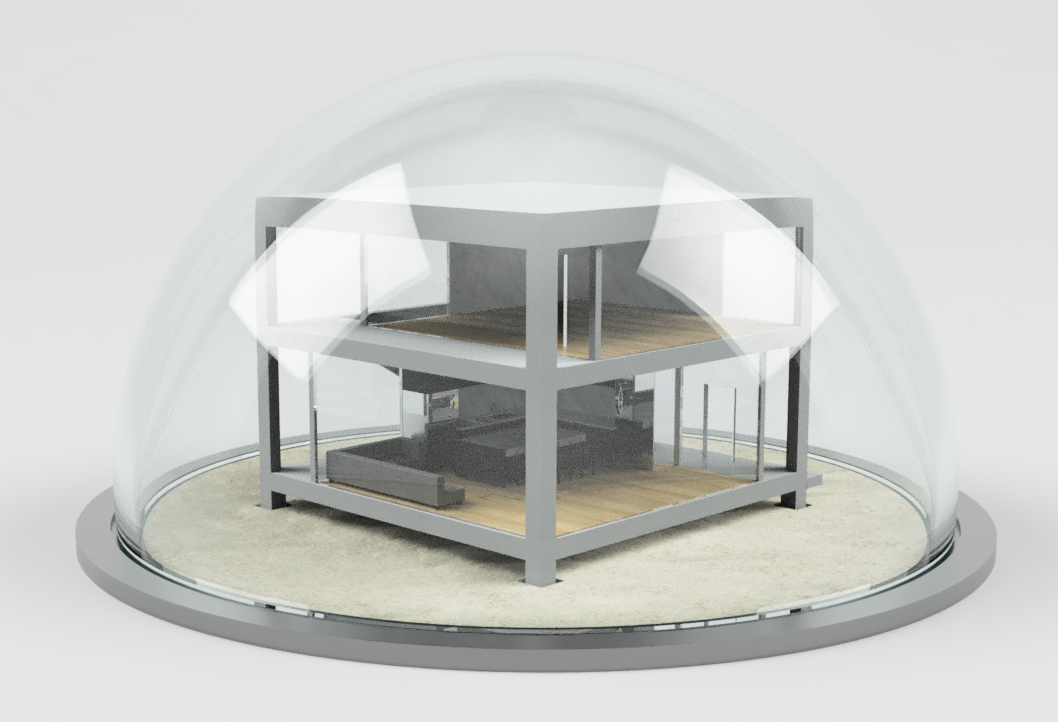
Underwater Dome & House


The idea of living underwater has always sparked curiosity and imagination, but with rising concerns about urban overcrowding and environmental sustainability, it feels more relevant than ever to rethink how and where we live. Traditional housing often overlooks the potential of the ocean as a living space, which inspired me to create a 3D model of an underwater house enclosed in a glass dome.
In this Instructible, I’ll walk you through how I designed this underwater house!
Supplies
To design the model, I used:
- Autodesk Fusion
- Bambu Lab (for printing)
If you want to print out the model:
- 3D Printer
- PLA Filaments
Inspiration


The idea of creating a 3D model for an underwater living space came from the underwater cities of Rapture in BioShock and Aegir in Arknights, which sparked my curiosity about what it would mean to truly live beneath the waves. I also couldn’t help but think of Sandy’s dome from SpongeBob SquarePants, which inspired the concept of enclosing the house within a protective glass dome.
Modelling the Base and the Dome


First, we start with modelling the base plate and the dome. It's important to plan out how big you dome will be, as they'll affect the size of the house we'll make on the inside.
Here, you can see the measurements I used in millimeters as I planned on 3D-printing the model later, but you can make yours whatever size you'd like!
In steps, here is what I did:
- Created a sphere with the Sphere tool
- Cut out empty space using a small sphere
- Sliced the sphere at halfway
- Sketched and extruded a base plate slightly wider than the dome
- Cut out a groove for the dome to fit into when printed
I've also cut out grooves for where the house will be to help the house slot in when assembling the printed product!
Modelling the House - Exterior


Next, we'll start modelling the house. The model I created will have two stories, and I placed the stairs on the outside as I wanted it to have a more 'outdoorsy' feel since it's already within a dome.
In steps, here is what I did:
- Sketched out the general shape, a square, on the base plate and extruded a rectangular prism
- Created sketches on the side and cut out where the two floors will be using the Extrude tool
- Using sketches and the Extrude tool, added walls and windows to create two large rooms
- Cut out where the stairs from the second floor will be using the Extrude tool
- Using sketches on the side of the house and the Extrude tool, modelled out the stairs
- Using sketches on the side of the house and the Extrude tool, cut out where the doors are
Modelling the House - Interior


After we have the exterior done, we can start working on the interior. I wanted the first floor to be where the living room and the kitchen is, so I planned out where everything will be on using the sketch tool:
- Kitchen area on the right side with an island counter in the middle
- Living room area with a couch on the left side
In steps, here is what I did after sketching out the floor:
- Kitchen:
- Using the Extrude tool on the floor plan sketch, modelled the kitchen counter.
- Using sketches and the Extrude tool, modelled out the oven and the microwave
- Detailed the oven and the microwave by cutting out windows and extruding the handles using the Fit Point Spline tool in Sketch and the Pipe tool
- Using sketches and the Extrude tool, cut out the sink
- Using the the Fit Point Spline tool in sketch and the Pipe tool, modelled out the faucet
- Using sketches and the Extrude tool, cut out a space for and modelled the electric countertop stove
- Using sketches and the Extrude tool, created circles to add details to the stove
- Using sketches and the Extrude tool, modelled out the fridge
- Detailed the fridge by using the Fillet tool to soften the corners and extruding the handle using the Fit Point Spline tool in Sketch
- Using the Extrude tool on the floor plan sketch, modelled out the island counter
- Using sketches on the side of the island counter, cut out leg spaces that will be needed for seats
- Using sketches and the Extrude tool, modelled out one chair
- Using the Rectangular Pattern tool and an axis that runs parallel to the island counter, duplicated two more chairs
- Living Room:
- Using the Extrude tool on the floor plan sketch, modelled out the couch legs
- Using the Extrude tool on the floor plan sketch, modelled out the couch seat
- Using sketches and the Extrude tool, modelled out mattresses
- Detailed the couch and mattresses by using the Fillet tool to soften the corners
As for the second floor, you can use the same tools to further detail the house, like adding a bedroom and a washroom!
Rendering

After I finished the design, I decided to render the model!
For this, I used the Render Workspace in Autodesk Fusion and the Soft Light environment (I couldn't find an underwater environment (˃̣̣̥ᯅ˂̣̣̥))
3D Printing


It is time to print out the model! (I kind of screwed up, but you can do better!!)
I printed out the base plate, the dome, and the house in three separate pieces.
The dome was printed with translucent filament, it turned out to not be clear at all...
If you have a big enough vacuum thermoformer, use that to make the dome in plastic!
As for the house, I printed it in a much smaller size without the interior.
You can also use acrylic for the windows.