Understanding String Arrays in Java
by GoldTeam in Circuits > Computers
1220 Views, 13 Favorites, 0 Comments
Understanding String Arrays in Java

In this Instructable, you will be creating a computer program written in the Java programming language. This Instructable will offer information on how to code in Java and will offer insight as to what strings and arrays are in Java. This program will demonstrate how to create a program that reads what you type into it as a string. After giving the program your input, it will ask for a number and tell you the character at that value in terms of an array.
To clarify more on the Java programming language; an array is basically a container that can hold a certain number of data. An array can only hold primitive data types, such as an integer or a single character. An integer is exactly what an integer is in mathematics, a positive or negative number, including 0. A character in Java is any single letter or symbol on the keyboard, such as an exclamation point ‘!’. From this explanation, a string in Java is an array of characters. So, a line of text could be considered a string. For example, “This is a string” would be a string in quotations, and would be an array of characters. To move through an array and access its data, we would select where in the array we want to access based on a numbering system. An array stores its values starting at 0 and counting up to the number of values stored in it minus 1. To continue my previous example, “This is a string” would have ‘T’ at its 0 position. It would also have ‘h’ at its 1 position, ‘i’ at its 2 position, and so on.
This Instructable is organized into warnings, equipment and materials required for the project, the steps necessary to complete the program, and the conclusion.
Warnings: Possible concerns regarding this project include: -the program crashing if the user enters a value outside of the range specified in step 25 -the program crashing if the user enters a value that is not an integer in step 25
Equipment/Materials: The equipment required for this project includes: a computer that is compatible with the Java Eclipse IDE, and Eclipse itself.
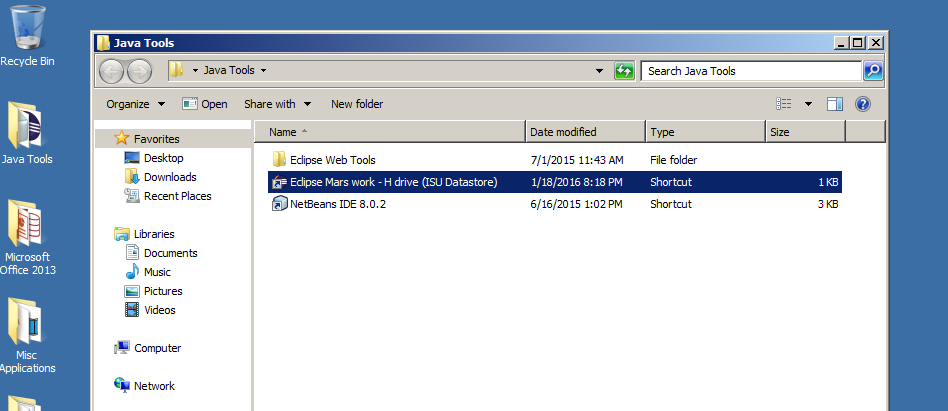
Open Java Eclipse IDE (Integrated Development Environment).
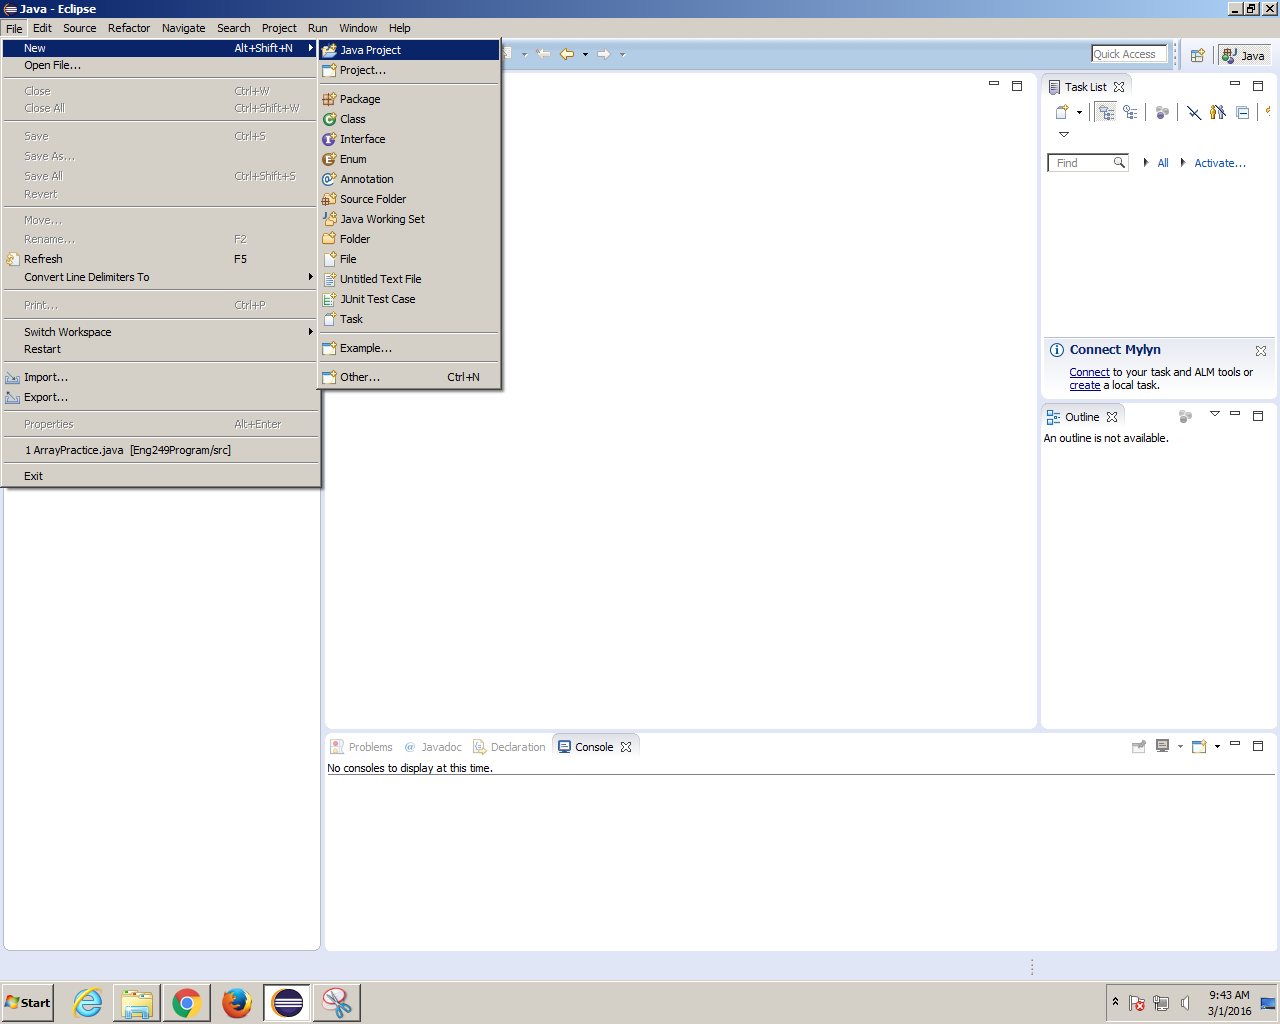
Click File⇒ New⇒ Java Project.
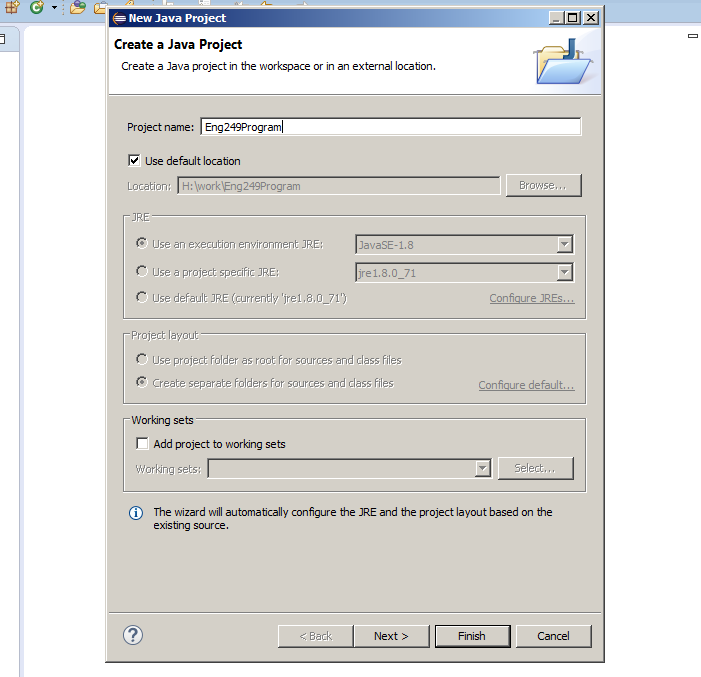
Name your project and click Finish.
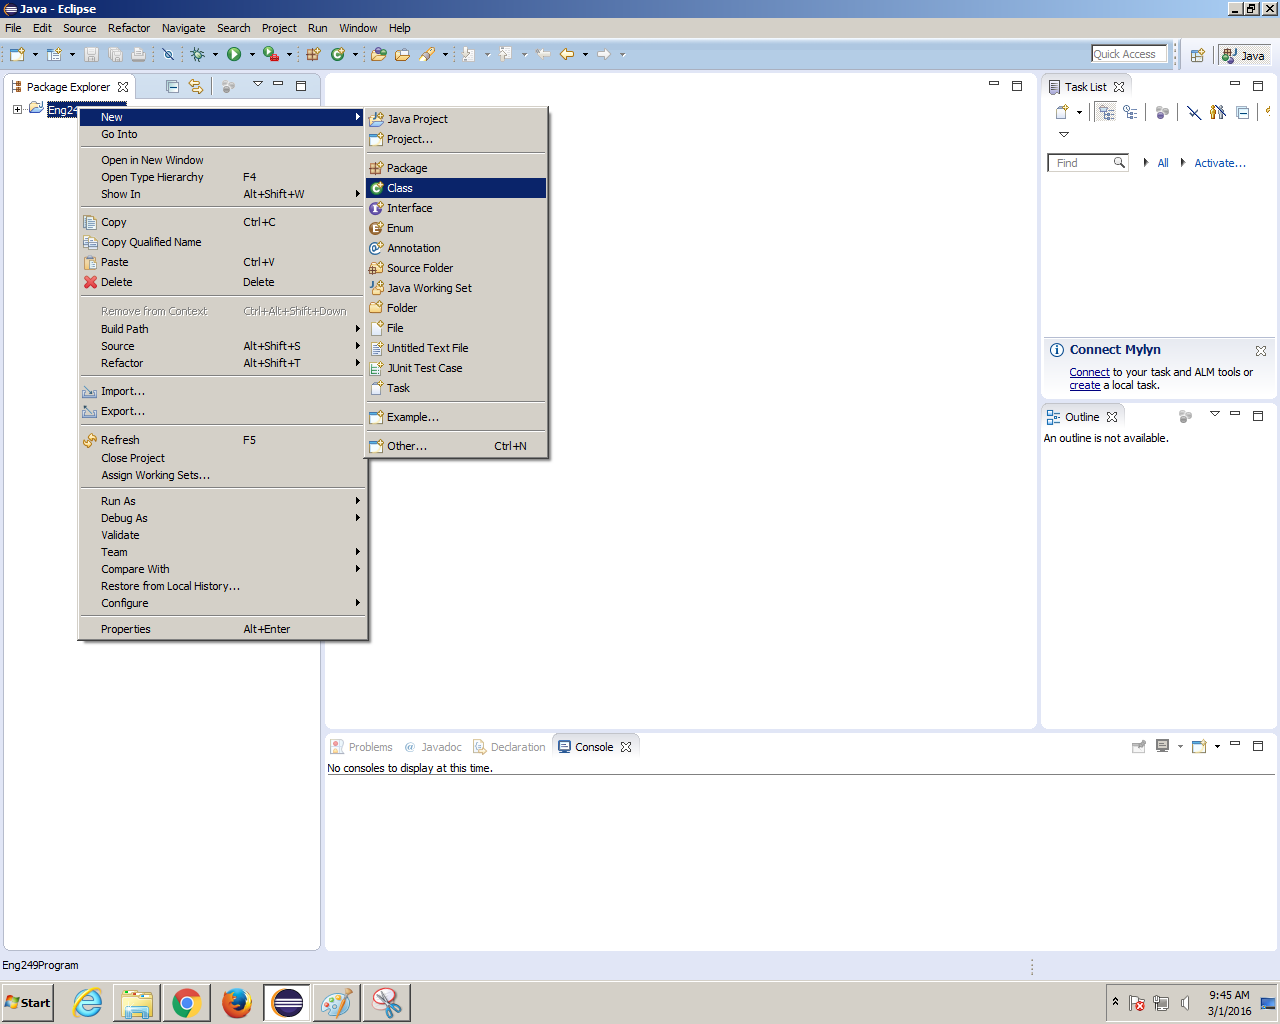
Right click on your program⇒ New ⇒Class
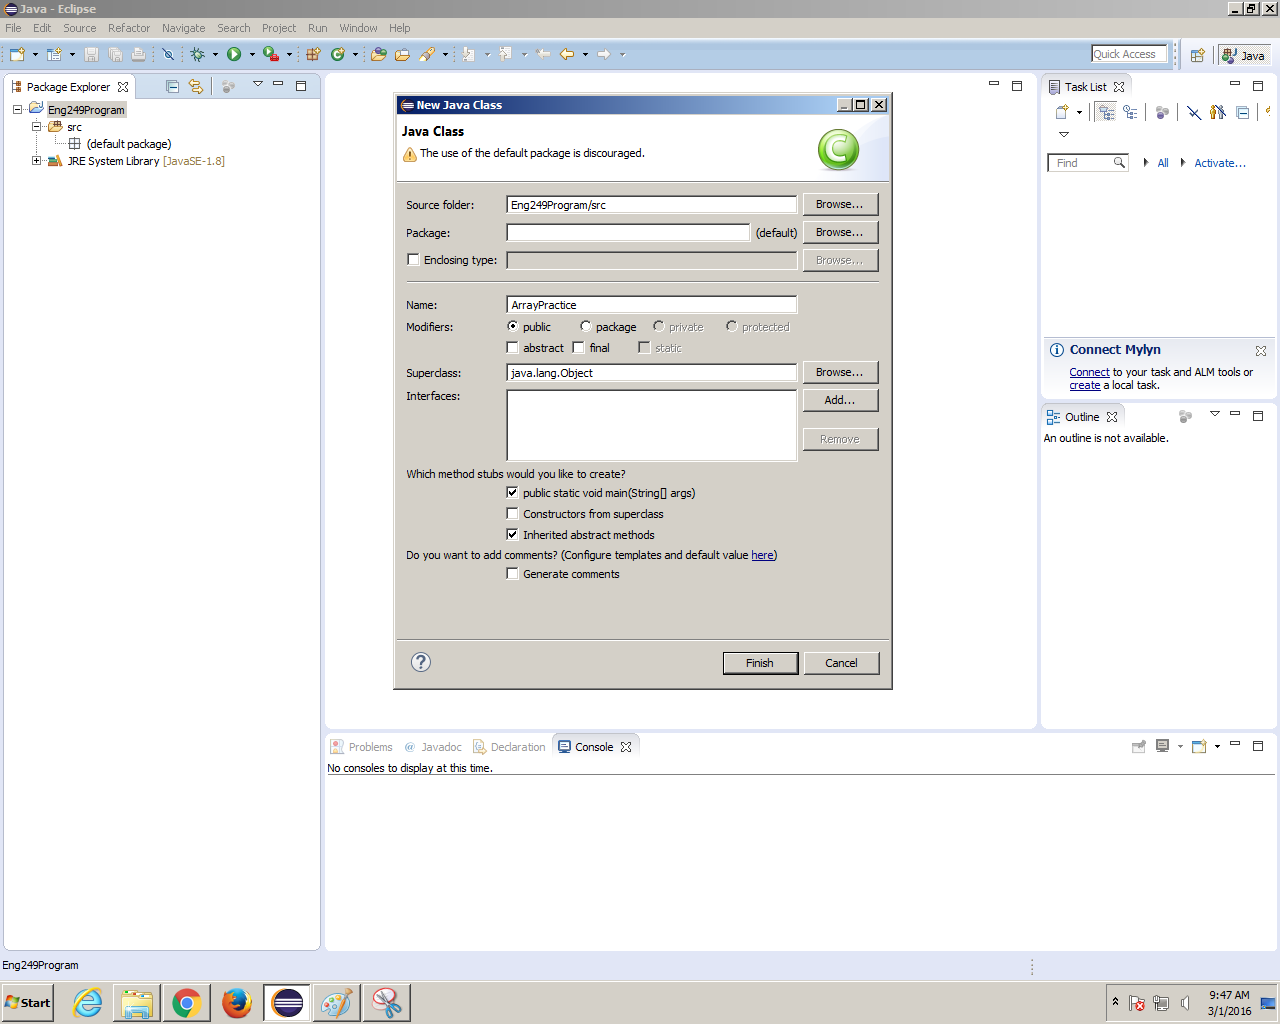
Name your new class⇒ Check box that says “public static void main (String[] args)" ⇒ Click Finish.

Type “import java.util.Scanner;” on the line above “public class”.

Type “int position;” within the brackets under “public static void main(String[] args)”.

Type “String data;” under the step 7 code.
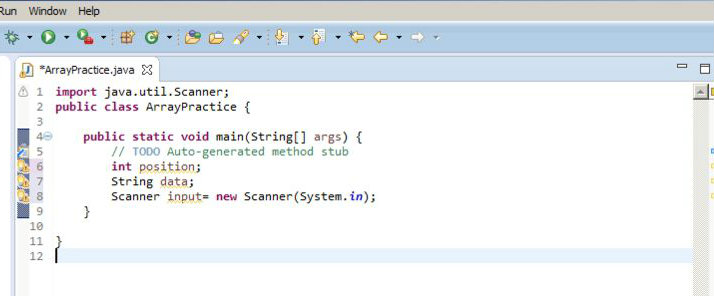
Type “Scanner input = new Scanner(System.in);” under the step 8 code.

Create a line of space under “Scanner input” for code clarity.

Type “System.out.println(“Please enter whatever you want: “);” after the step 10 space.

Type “data = input.nextLine();” under the code from step 11.

Type “System.out.println(“You have entered: “ + data);” under the code from step 12.
Add another line of space for code clarity.

Type “System.out.print(“Select a value to grab a character from within the range “);” under the space from step 14.
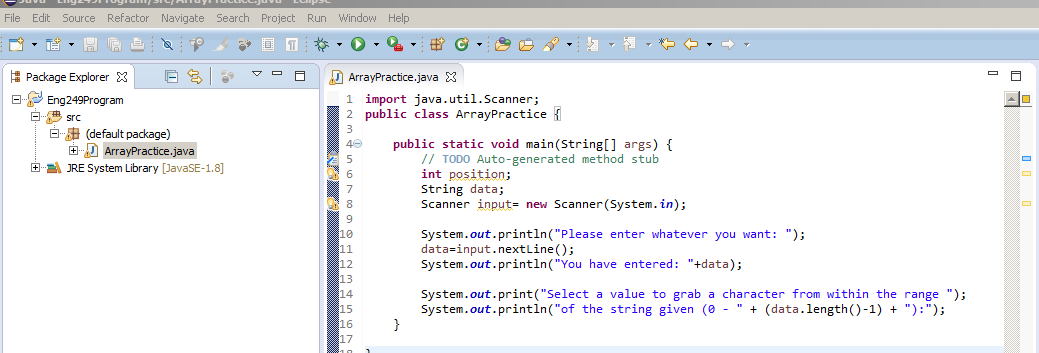
Type “System.out.println(“of the string given (0 - “ + (data.length()-1) + “): “);” under the code from step 15.
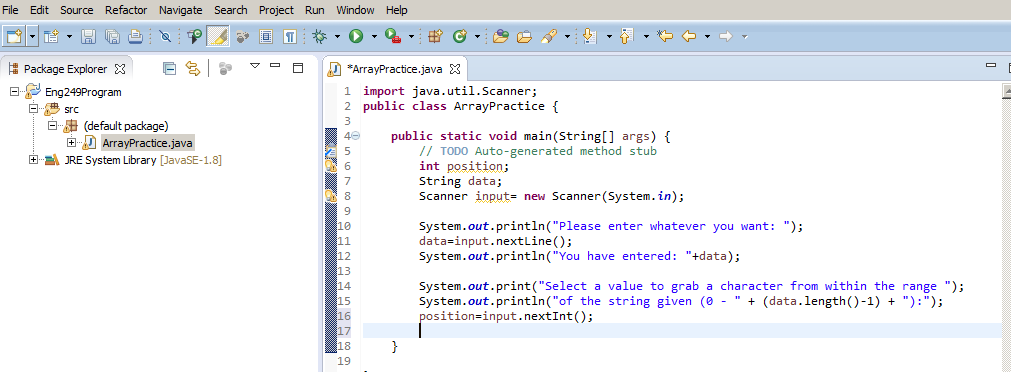
Type “position = input.nextInt();” under the code from step 16.
Add another line of space for code clarity.
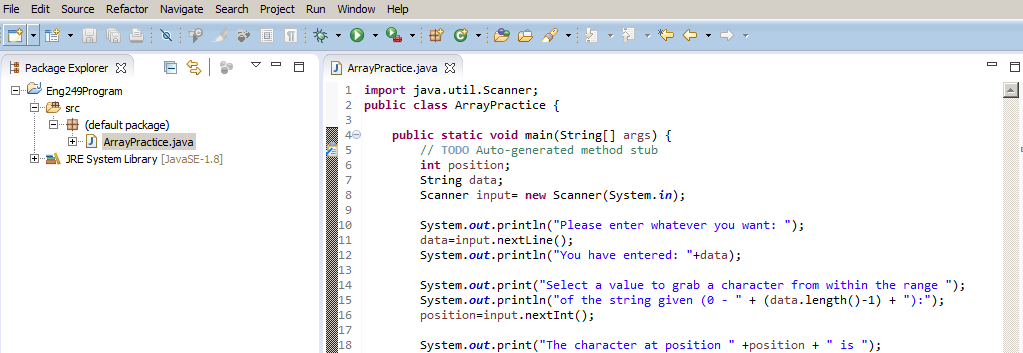
Type “System.out.print(“The character at position “ + position + “ is “);” under the space from step 18.
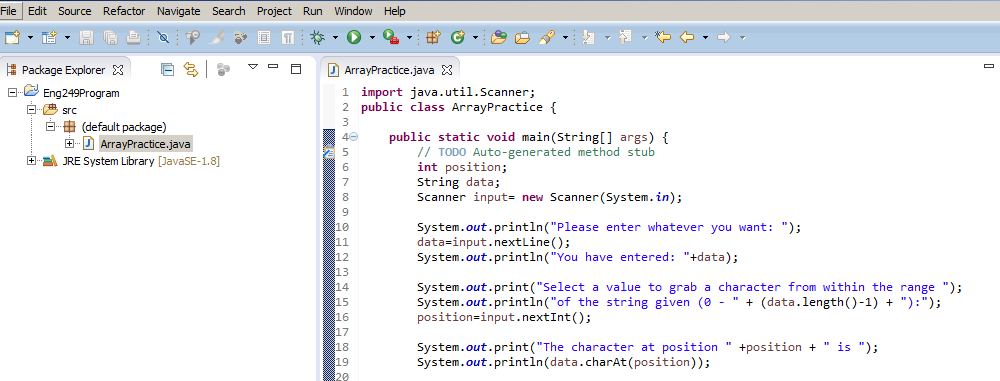
Type “System.out.println(data.charAt(position));” under the code from step 19.
Add a final line of space for code clarity.
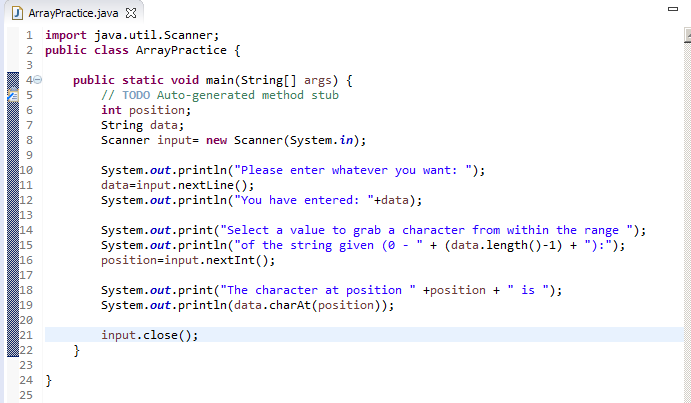
Type “input.close();” under the space from step 21.
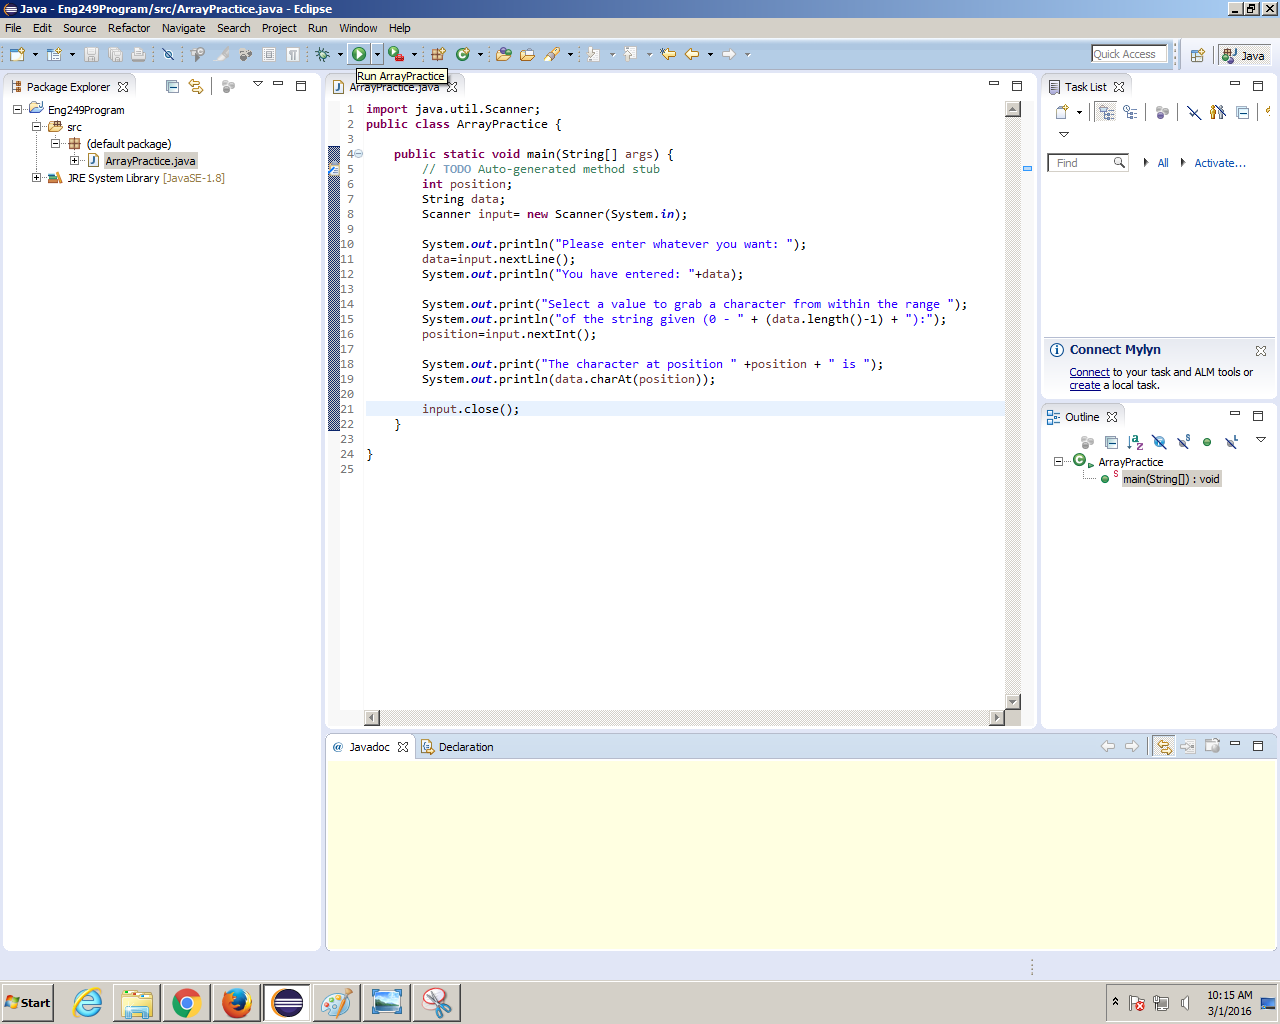
Click on the green arrow on the toolbar at the top of your screen to run the program.

Respond to the prompt at the bottom of your screen by typing keyboard input of your choice and pressing enter.

Respond to the next prompt you receive with a value that is within the range that is given to you and press enter. WARNING: Do NOT enter a value outside the accepted range or character type, as it will crash the program.
View the final output to make sure the position you entered is the character that is returned.
Conclusion
After creating this program, it is important to note that it will only continue to function as long as it is open, and only stays open until the user decides to close out of it manually. Otherwise, the program will close itself upon completion, and will not lead to any performance degradation of the computer as a result of this. As previously mentioned regarding running the program, make sure to only enter a value within the range specified by the program, or the program will crash and not function properly.