Ultrasonic Theremin With Scratch for Raspberry Pi
by jfaraudo in Circuits > Raspberry Pi
4848 Views, 15 Favorites, 0 Comments
Ultrasonic Theremin With Scratch for Raspberry Pi
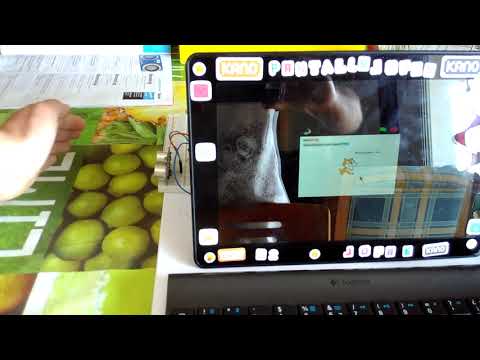
Control a ultrasonic distance sensor with Scratch for raspberry Pi and use in the ultrasonic theremin project of MagPi magazine (issue 58).
Note:
The project uses a Python program to send the sensor data to the Scratch program.
Build the Circuit.
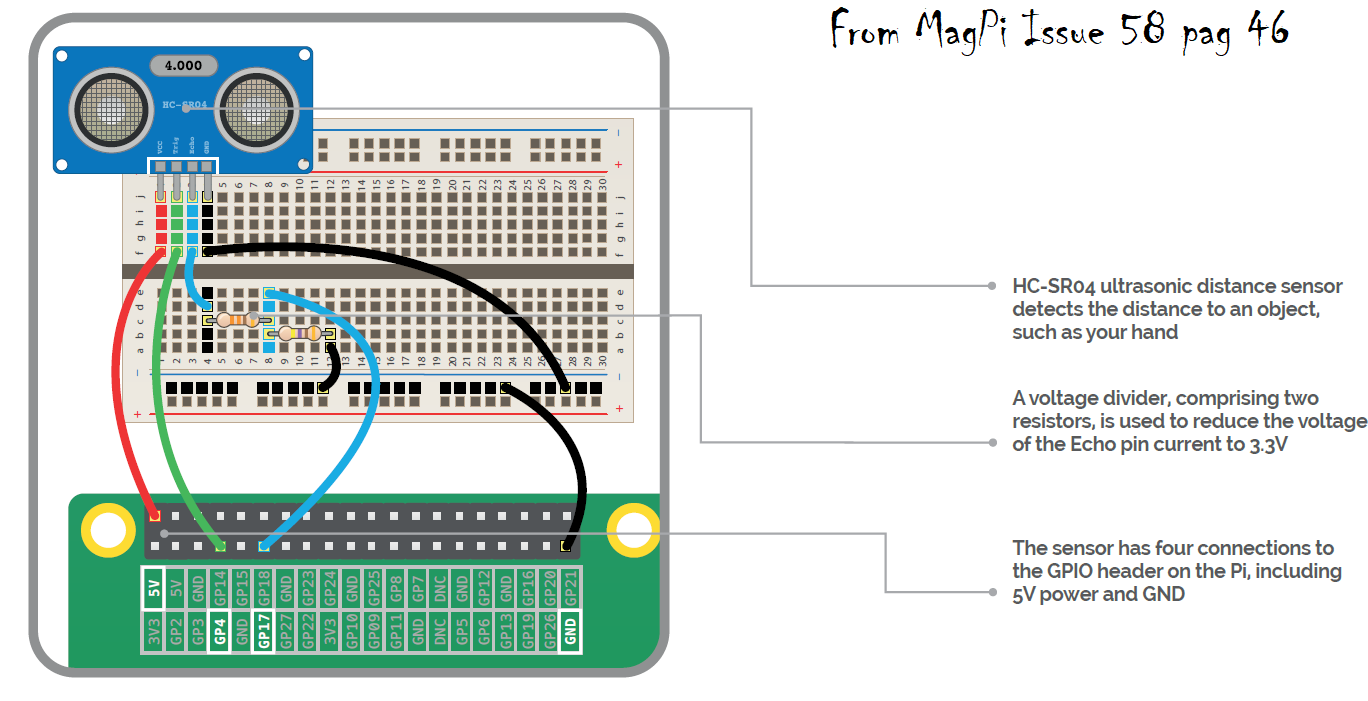
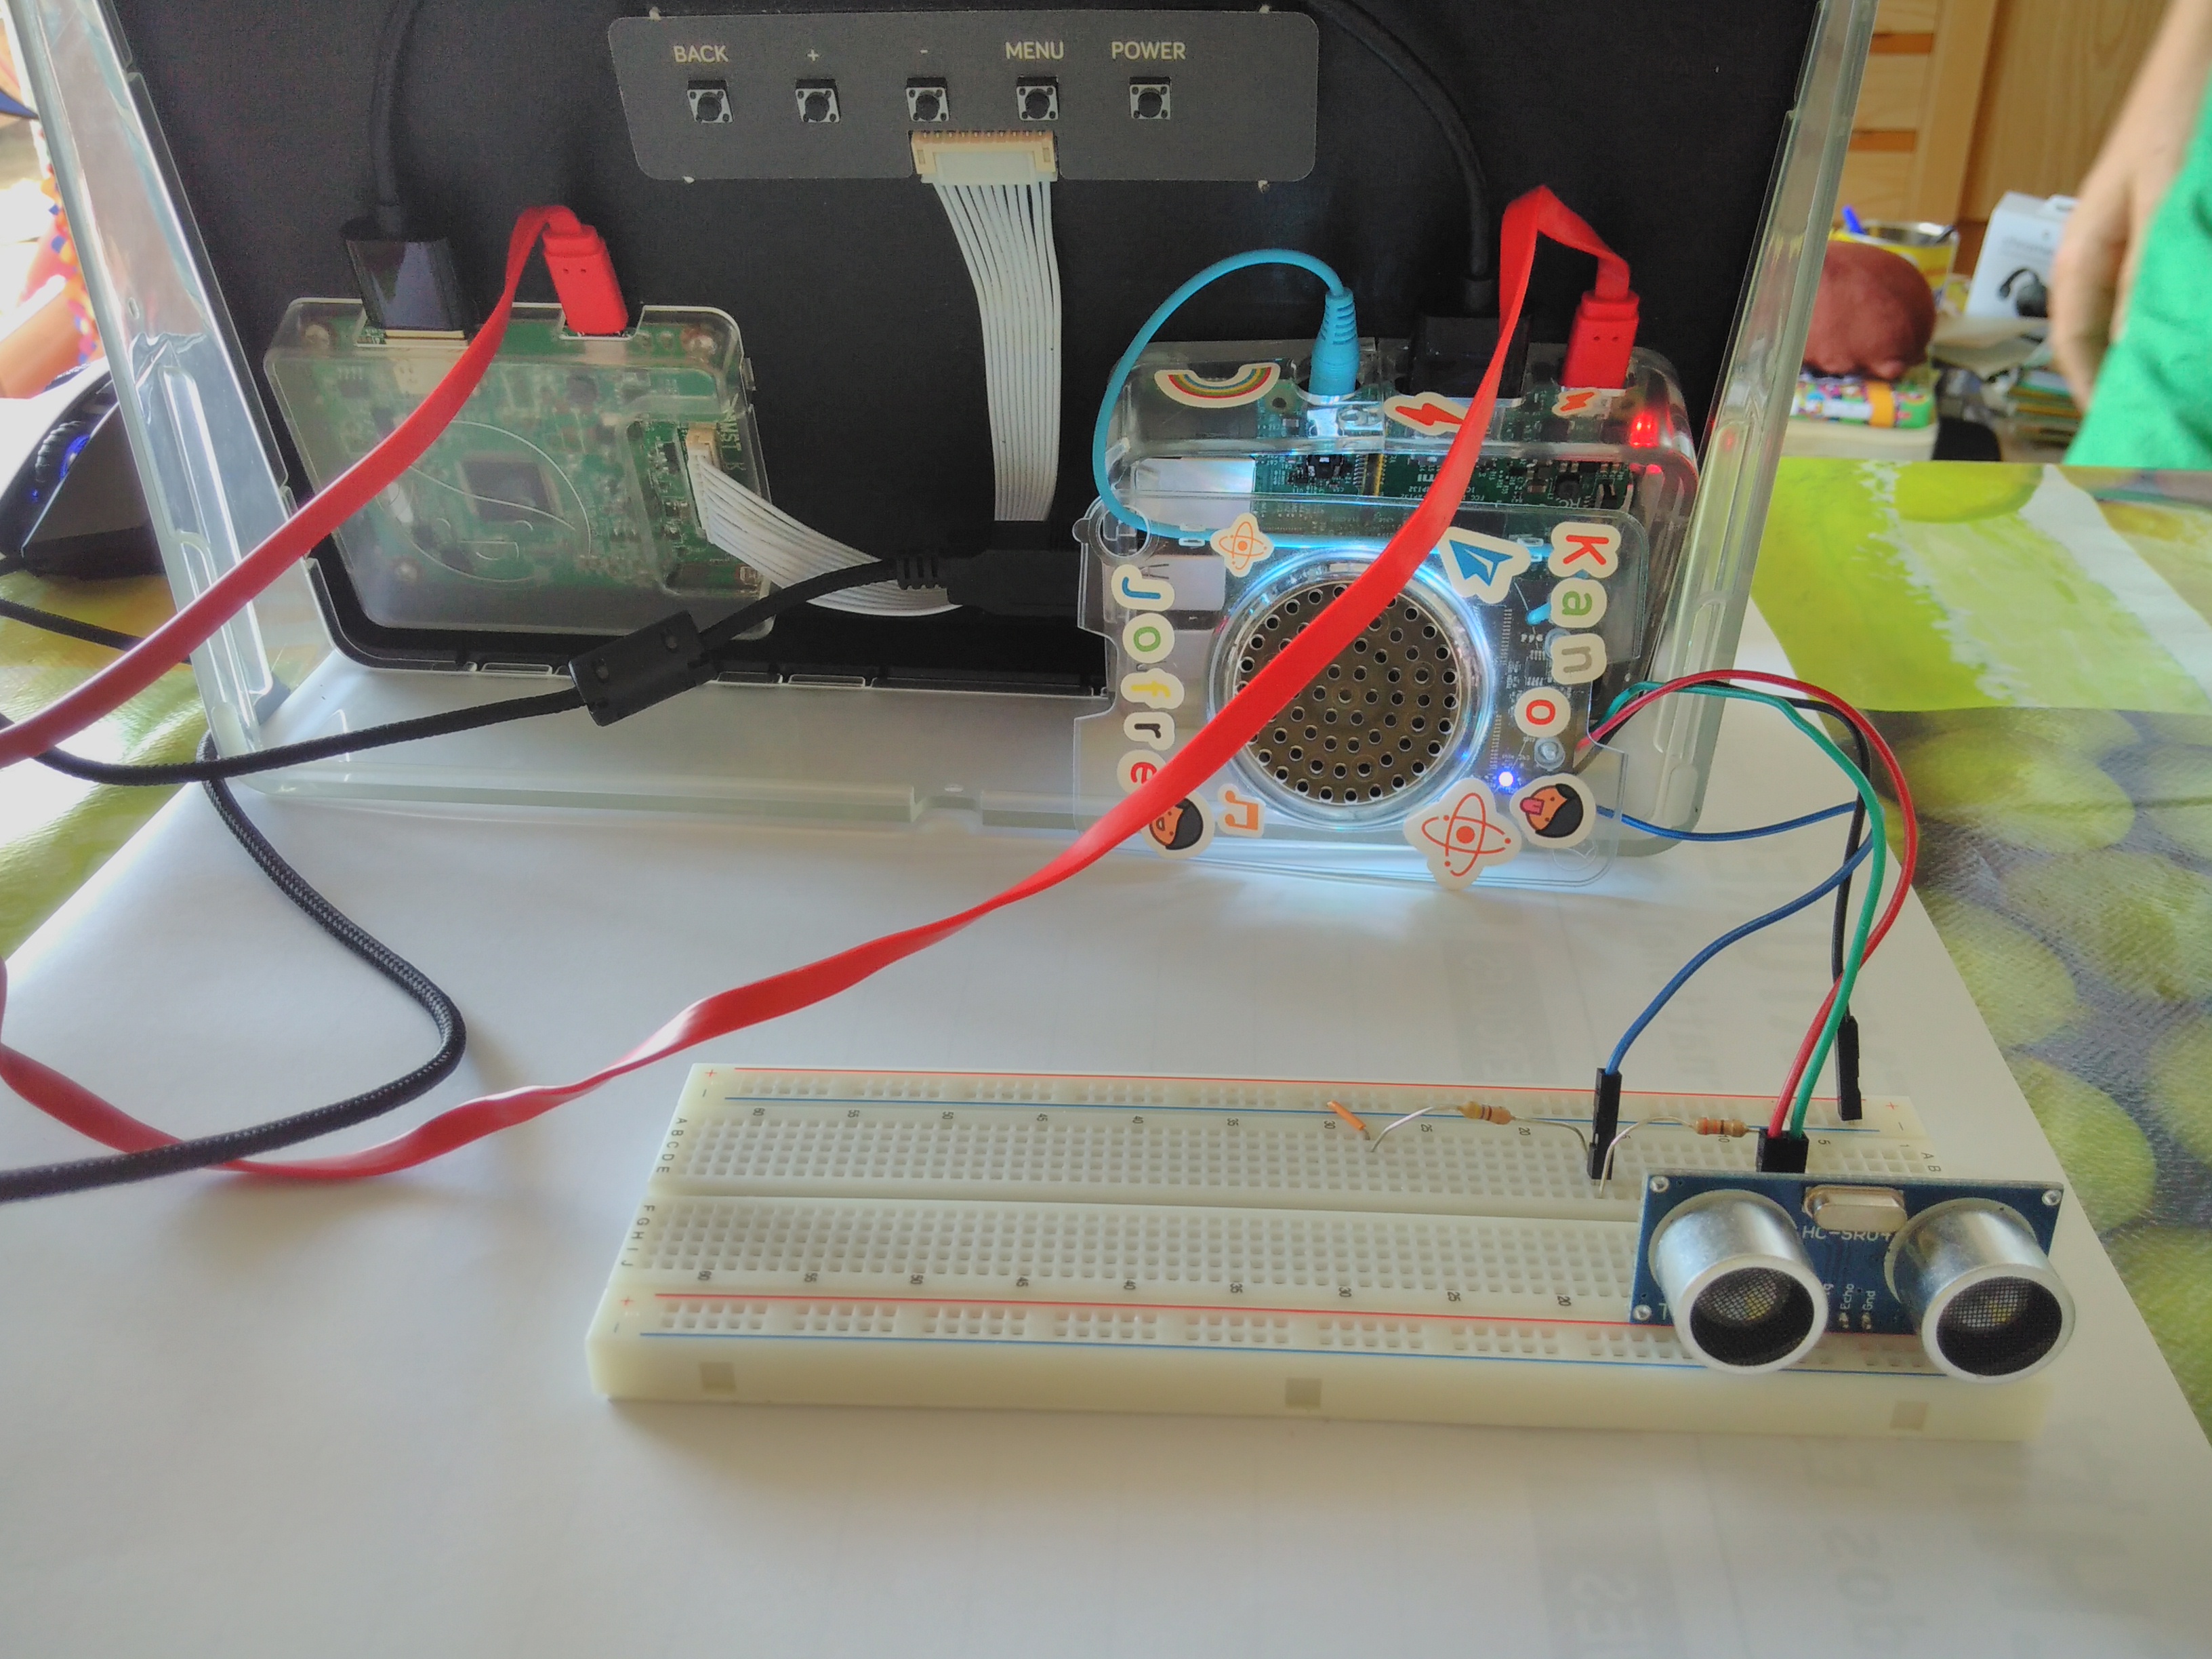
Build the circuit following this scheme.
Install Python Libraries and Make the Program
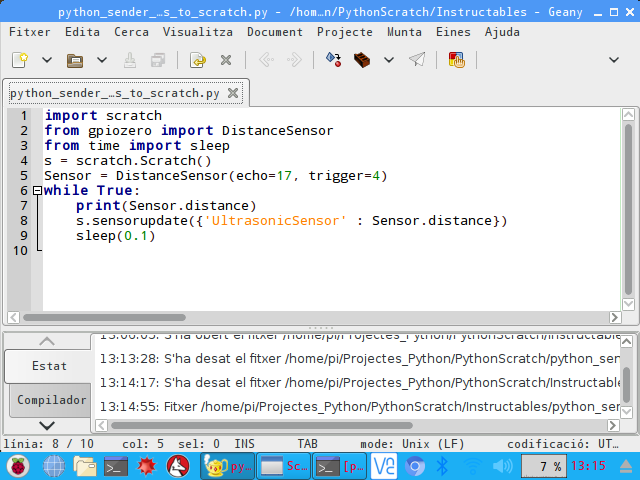
To communicate Python wtih Scratch we need Scratchpy library.
Go to the tenrminal and type:
sudo pip install scratchpy
You will need the gpiozero library (preinstalled in raspbian).
Download the Python program here.
Scratch Program I
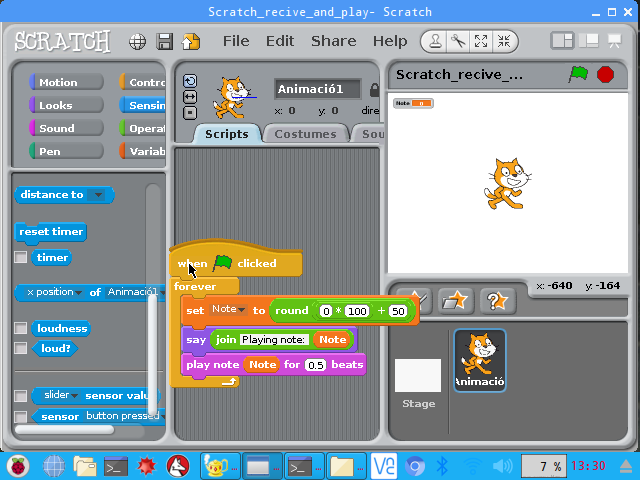
Now we write a Scratch program that converts the distance from the sensor to a MIDI musical note and plays it.
The distance of the sensor is given in meters, so we calculate the musical note by converting the distance into cm and adding a value of 50 (you can play with this value depending on your taste). The program shows the note that is playing with the cat sprite.
Adding the sensor value to the Scratch program is a bit tricky, so we do it in five steps.
The first step is to write a version of the program (see image) not using the sensor value (it uses a zero constant value as a distance).
Scratch Program Il
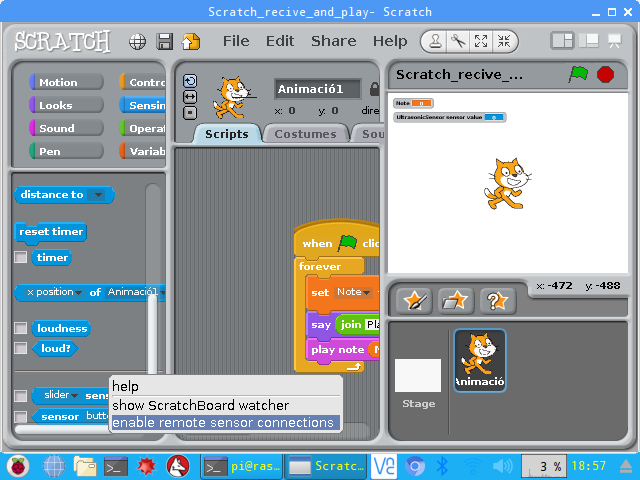
Click mouse right button on the "Sensor value" block, and select "Enable remote sensor connections".
Scratch Program Ill
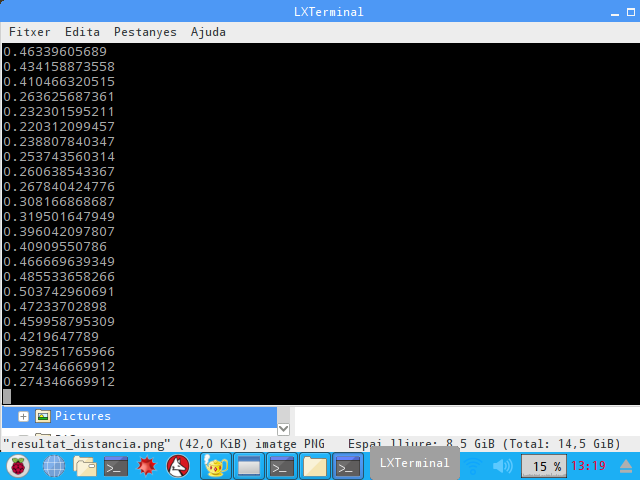
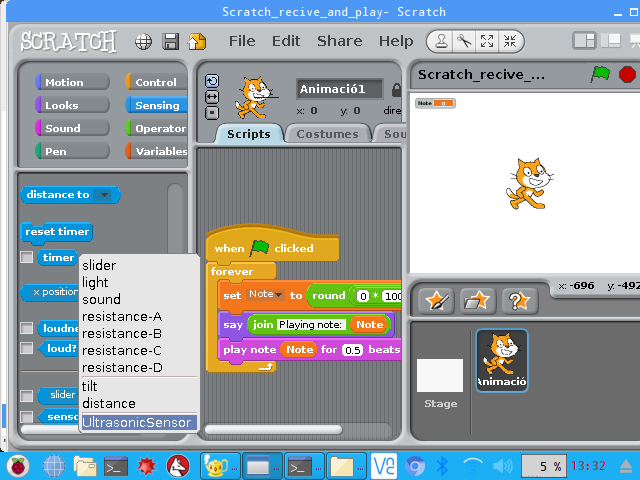
Now, we execute the python program from the terminal. It will show the
distance in meters at the terminal screen and it will send the data to the Scratch program (Like in the first image). Return to Scratch (be careful not to close the terminal, the Python program needs to be running) and go to the "Sensing" tray (light blue). We select "UltrasonicSensor", this is our sensor, as shown in the second image.
Scratch Program IV
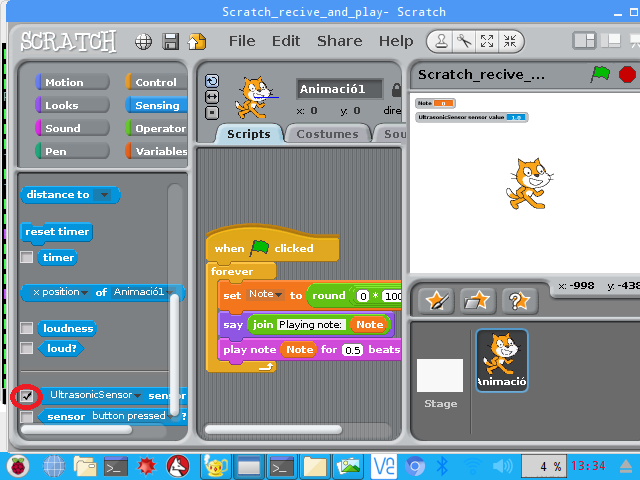
Next, we add a tick to the "Ultrasonic sensor sensor value" block, making a left click on the mouse, as shown in the image.
Scratch Program V
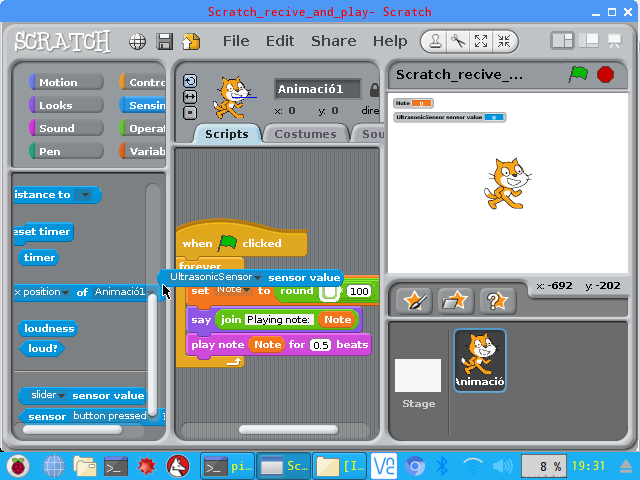
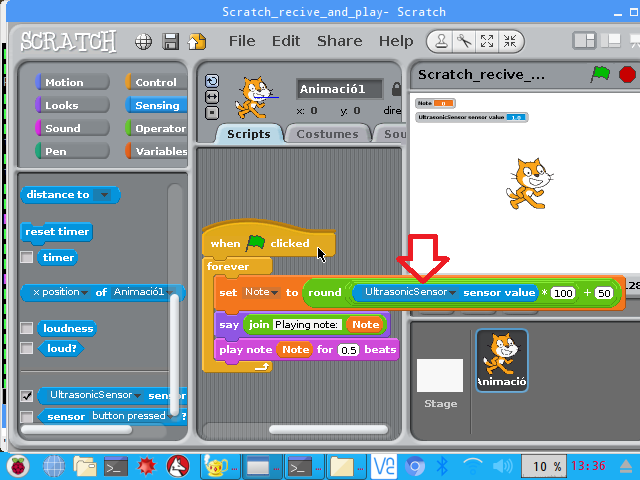
Now, add the "Ultrasonic sensor sensor value" block to the Scratch program, as in the images.
Run the Program...
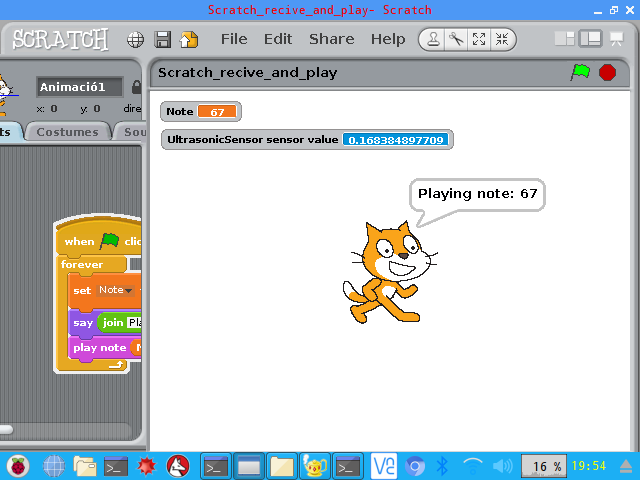
Now you can run the Scratch program, pressing the green flag.
You have to see the cat saying "Playing note <the note now is playing>" and a light blue and orange variables on the top (In orange the note, and in light blue the sensor value).