USB-Powered VMU Hack
Introduction:
So, you love your old Dreamcast VMU, but lately its been sat, collecting dust. It chomps through batteries, and slapping on a large 4x AA battery adapter doesn't solve that problem either.
What to do? Well, following these few, simple and easy-to-follow steps, your VMU will be resurrected thanks to the trusty USB port! You can now use your VMU in the office, at home or even on the move with your laptop!
What this tutorial is:
This tutorial will show you how to take a spare USB lead, and use it to power your VMU so you can use your VMU wherever you can find a USB port.
The same principles and techniques learned here can be applied to almost any device that can operate off the 5 volts a USB port provides. It works well with PC fans and similar, but there's no reason why this wouldn't work on flashlights/torches, or other things of that nature. It comes in real handy when you run out of batteries.
What this tutorial is not:
This tutorial will not allow your VMU (or any other device) to communicate with your PC. Your PC will not even realise this device is plugged in. This is simply to show the process to use the power supplied through a USB port to power a device. Nothing more.
It will also not save your VMU time and date settings. Not a biggie though.
Disclaimer:
Provided you carefully follow these steps, there is no reason why you won't unlock a wonder of possibilities for powering various devices. I've used this technique on PC fans, VMUs and other small peripherals for some time without problem.
That said, I cannot be held responsible for any damage or injury done to your equipment, devices, you or anyone else, to any extent. I do not guarantee that this is safe and if you follow these instructions you do so your own risk.
Be safe when playing with electricity and research anything and everything fully if you are unsure about any such aspect. If you are still unsure, do not continue.
Formalities over, let's see what we need...
Equipment
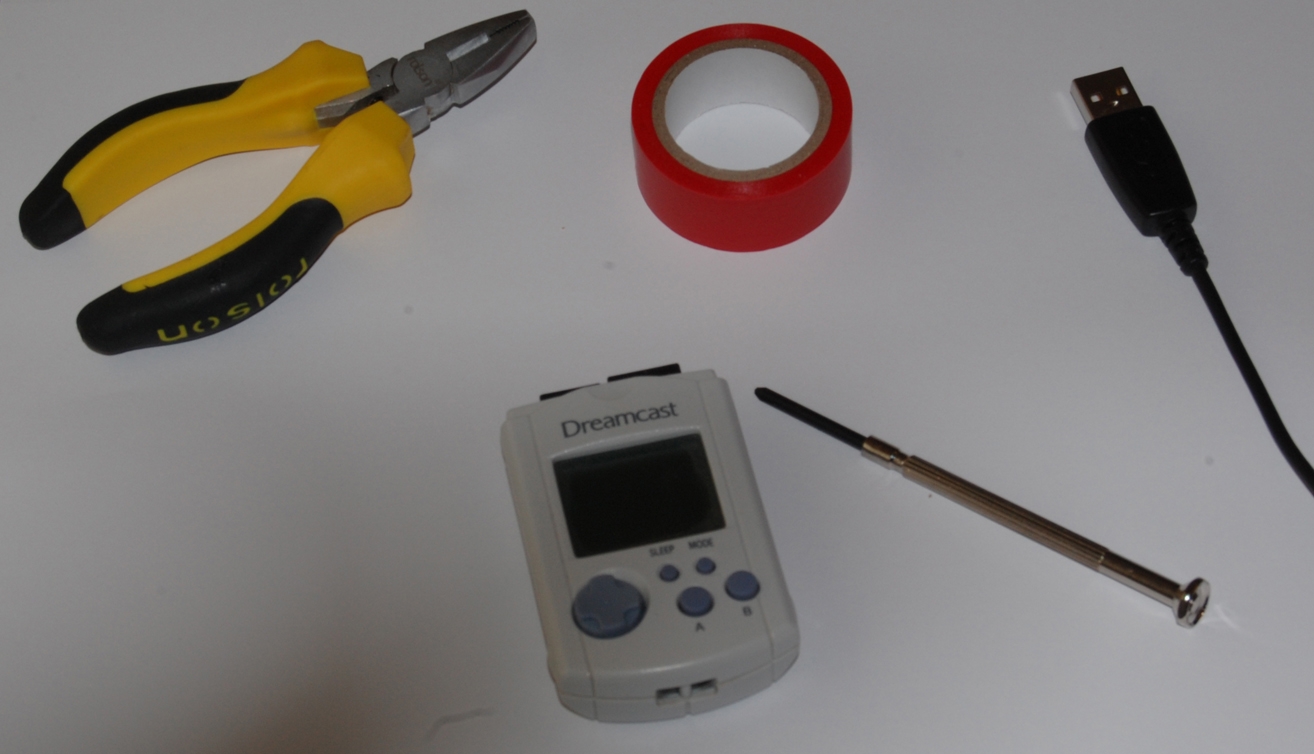
Checklist!!
For this Instructible, you will need:
Fire Resistant Electrical Insulation Tape.
Something to Cut/Strip wires - sharp scissors will do if you're careful.
A spare USB lead (just about any lead will do, I used one for an old cell/mobile phone that had a propietory end).
A VMU (or another device if you prefer that you want to power).
A screwdriver which fits the VMU battery compartment screw.
Open Up the VMU
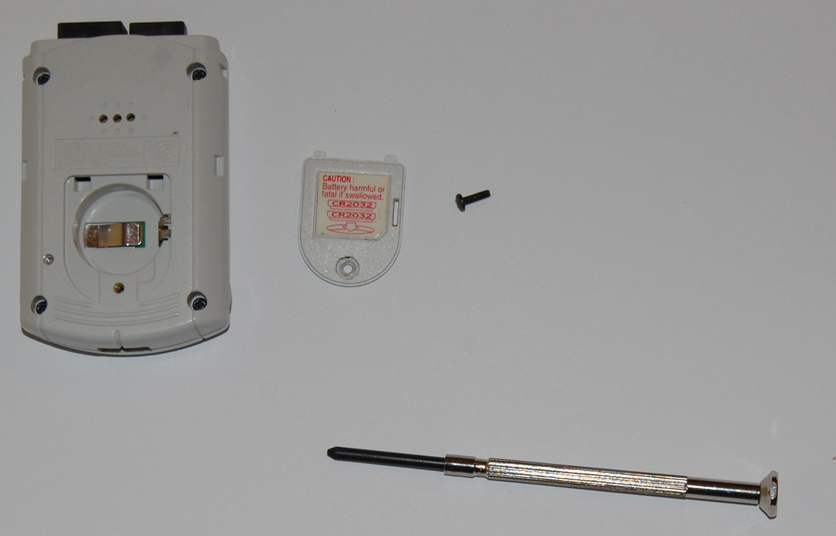
Lets keep things easy to start with.
Open up the VMU. On the left at the base of the battery compartment is the negative terminal. To the right is the positive end. Keep this in mind, as I've no idea what getting the polarity wrong will do, as I've never made that mistake!
If you're using something else, you'll need to open that up, or chop off the wire if it uses that instead of batteries (i.e. a case fan). When cutting wires, always cut near the end you won't need to give yourself maximum chordage!
The USB Cable
Right grab you wirecutters, scissors - whatever you fancy,
WAIT! Don't cut yet!
Make sure you cut off as close to the far end (far end is the end that you DON'T plug into the PC) as you can. You need as much cable as you can (in case you make mistakes, you can just cut off the mistake and start over).
Okay, now cut. - A small tip if using scissors: cut into the outer sheath enough to pierce it, then bend it where you've made the first cut. Keep bending and flexing it until it comes lose.
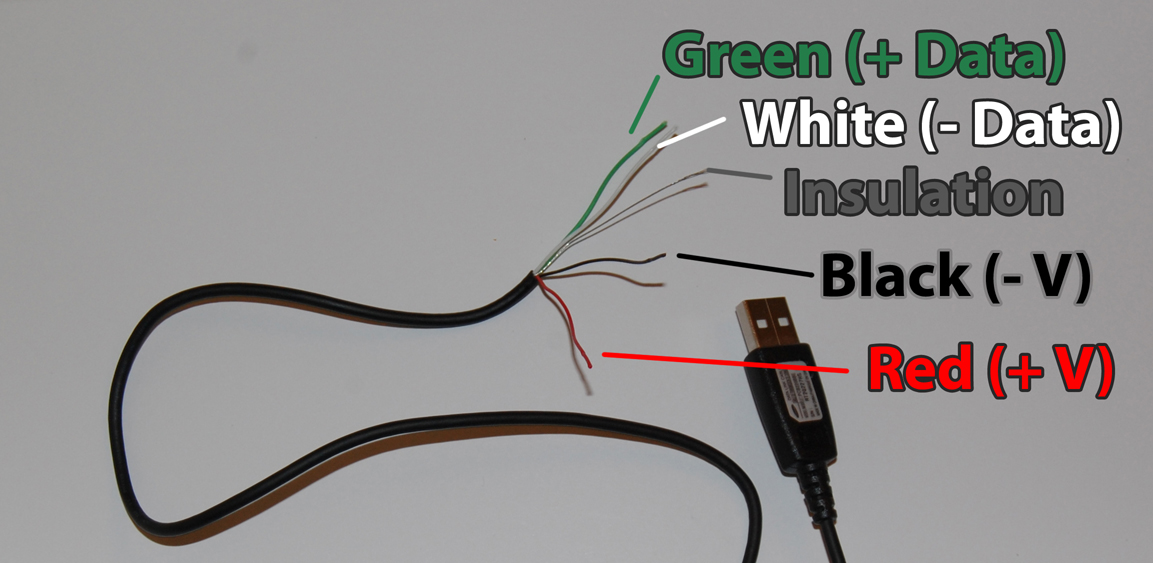
Now you're cut, strip off the outer shielding. You should come across 4 coloured wires, and maybe an extra insulation thread, as I have. See the picture.
USB cables typically use these colours, but yours may vary. Google if they're different or just get a new cable!
The green and white cables are the data cables. These carry the data for example when transferring a file on a USB stick, or wireless dongle.
The red and black cable carry the power to the device.
Cut Off Those Pesky Data Wires!
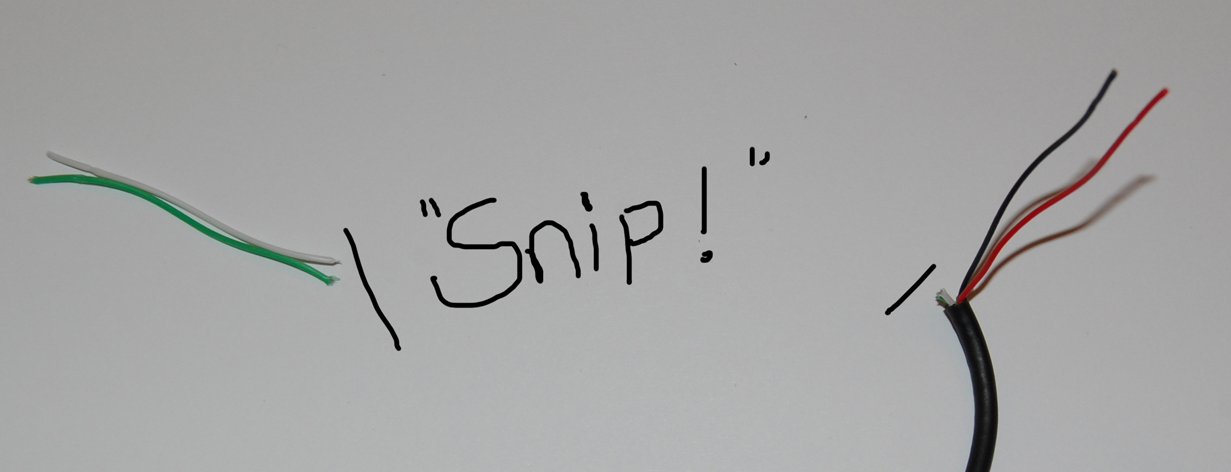
Go ahead and cut off those pesky data wires and any insulation you may find. Cut them to the base of the shielding that you cut, as per the picture.
:) Still following? We're almost ready to start sticking wires to stuff!
:) Still following? We're almost ready to start sticking wires to stuff!
Don't Get Frazzled!
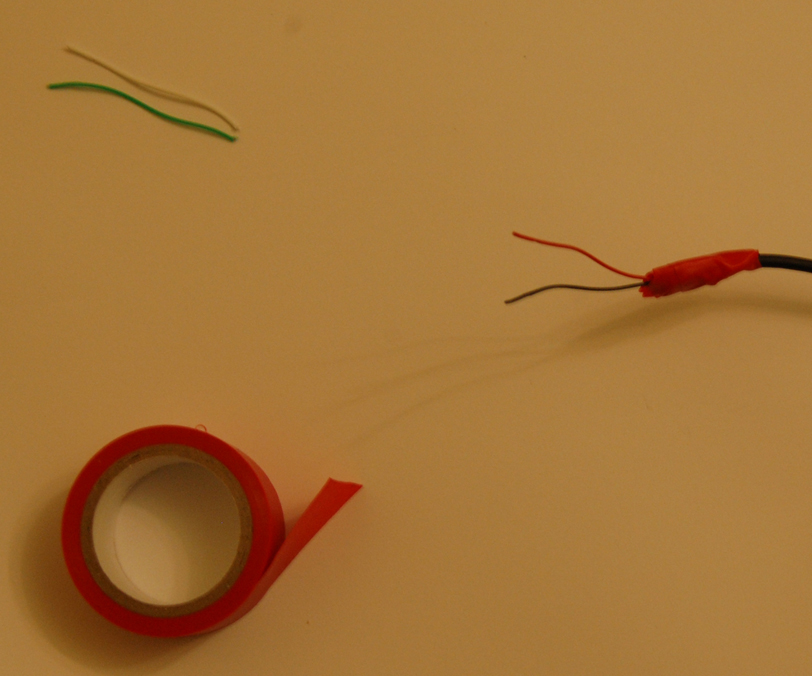
Now, we don't want these data wire causing any problems, or frying anyone or anything. So we're going to tape them up good!
First thing is to just push them away from each other so they're not going to touch once taped. It shouldn't cause any problems if not as that's the way the charge flows anyway, it's just to be sure.
Now wrap it up nice and good with that tape! You don't need as much as me :).
First thing is to just push them away from each other so they're not going to touch once taped. It shouldn't cause any problems if not as that's the way the charge flows anyway, it's just to be sure.
Now wrap it up nice and good with that tape! You don't need as much as me :).
Strip! ... Ew! No, the Wires, Not You...
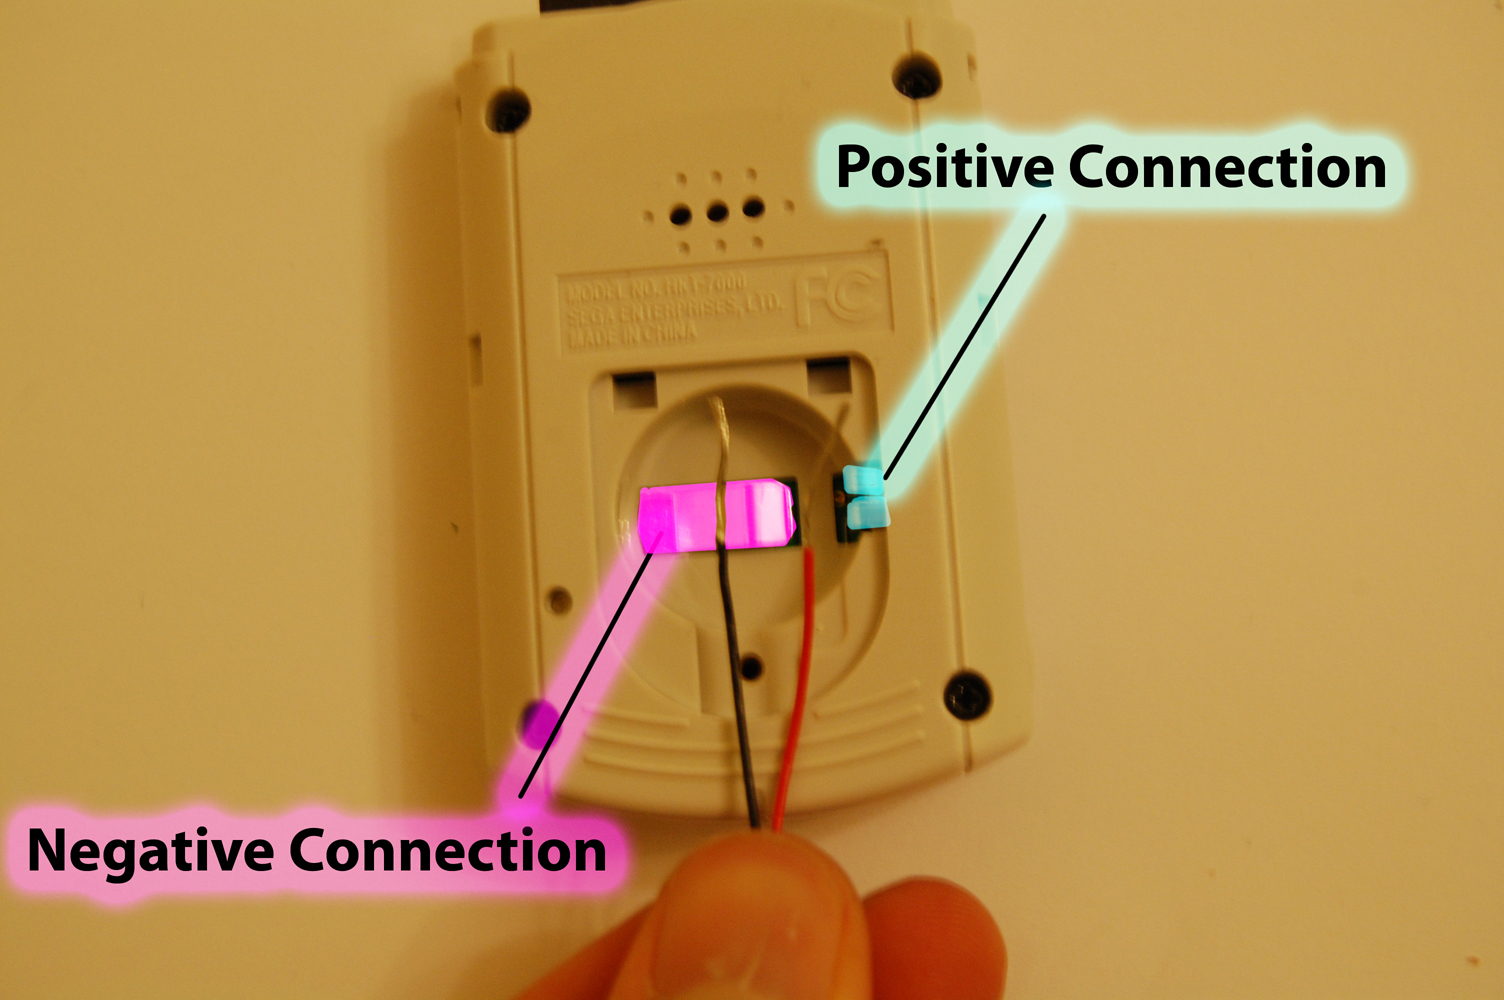
Now, carefully strip the red and black wires to expose the inner copper wires.
We're taping it down in the next step. The black wire goes to the negative connection, the red to the positive.
We're taping it down in the next step. The black wire goes to the negative connection, the red to the positive.
Tape It All In.
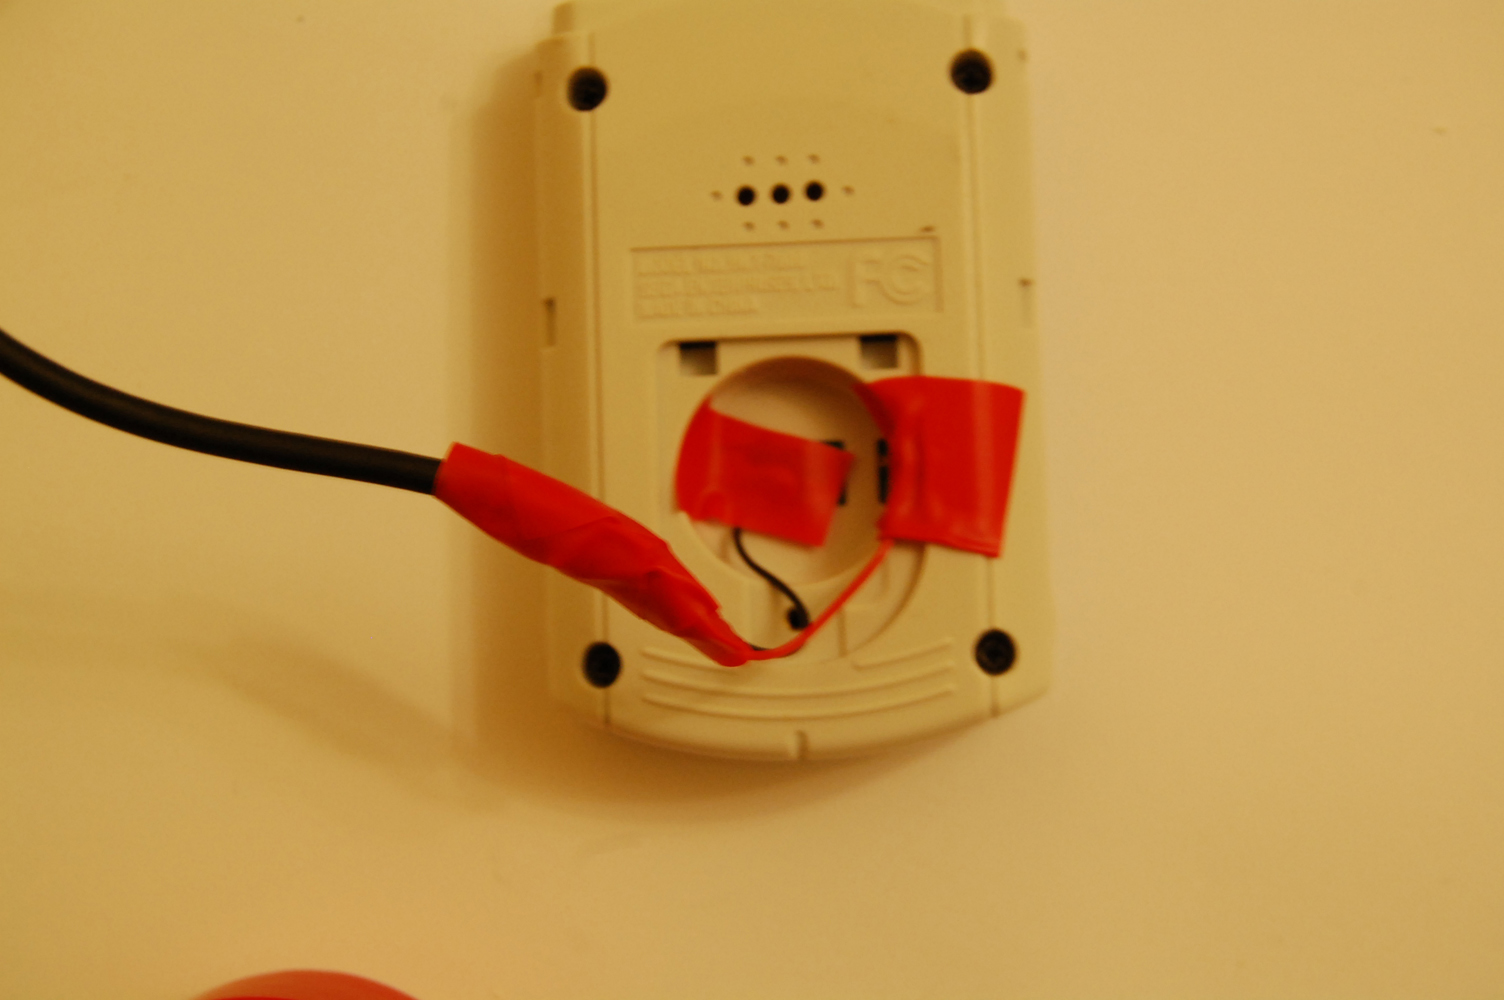
Now to tape it down.
Scrunch up the exposed ends to increase the surface area, which should make it easier to make contact with.
Tape them down. the positive connection can be tricky with the VMU. I suggest sticking it just underneath the connection.
Now is a good time to test. Again, I am not responsible if you break anything! But should be fine :).
When I tested mine, the positive wire wasn't quite making contact so it needed some adjusting.
Secure It All Down!
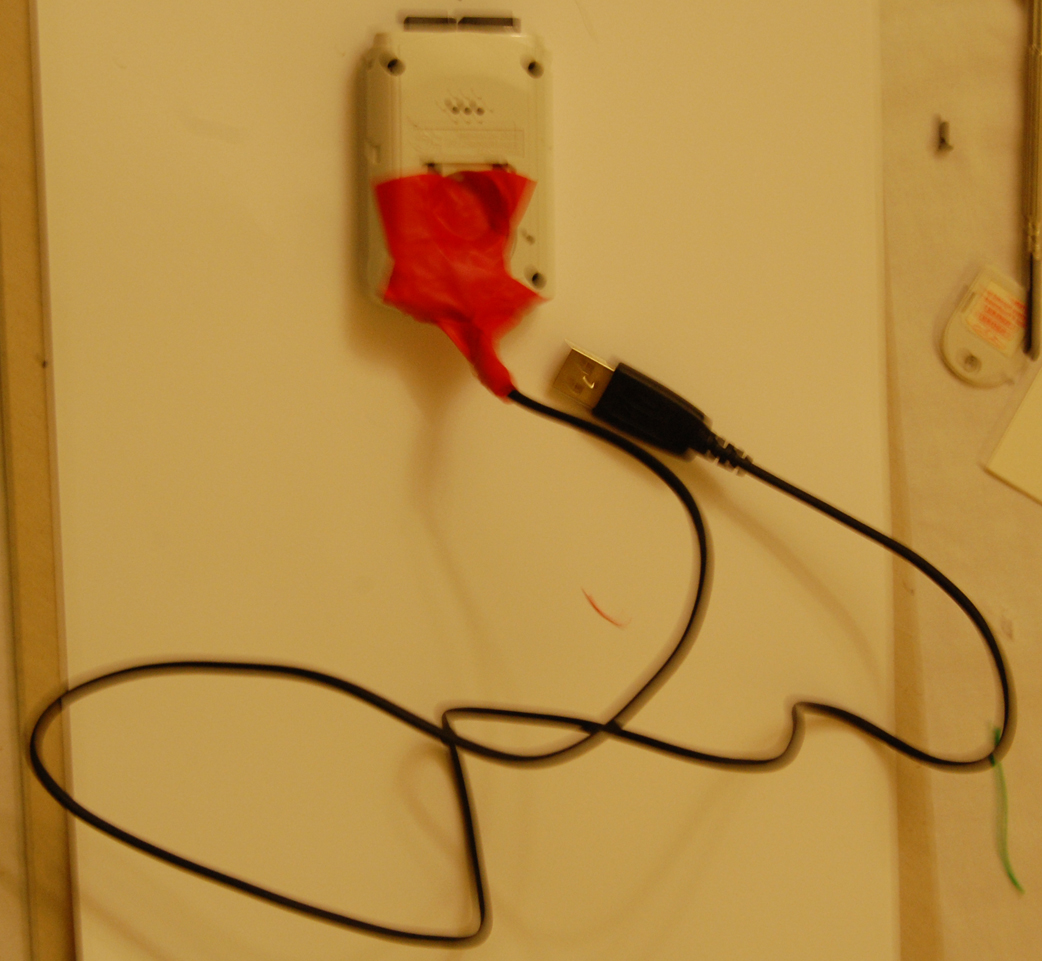
Now just secure everything down so it won't wiggle itself lose!
You can be slightly less messy than myself.
You can be slightly less messy than myself.
FrankenVMUstein!

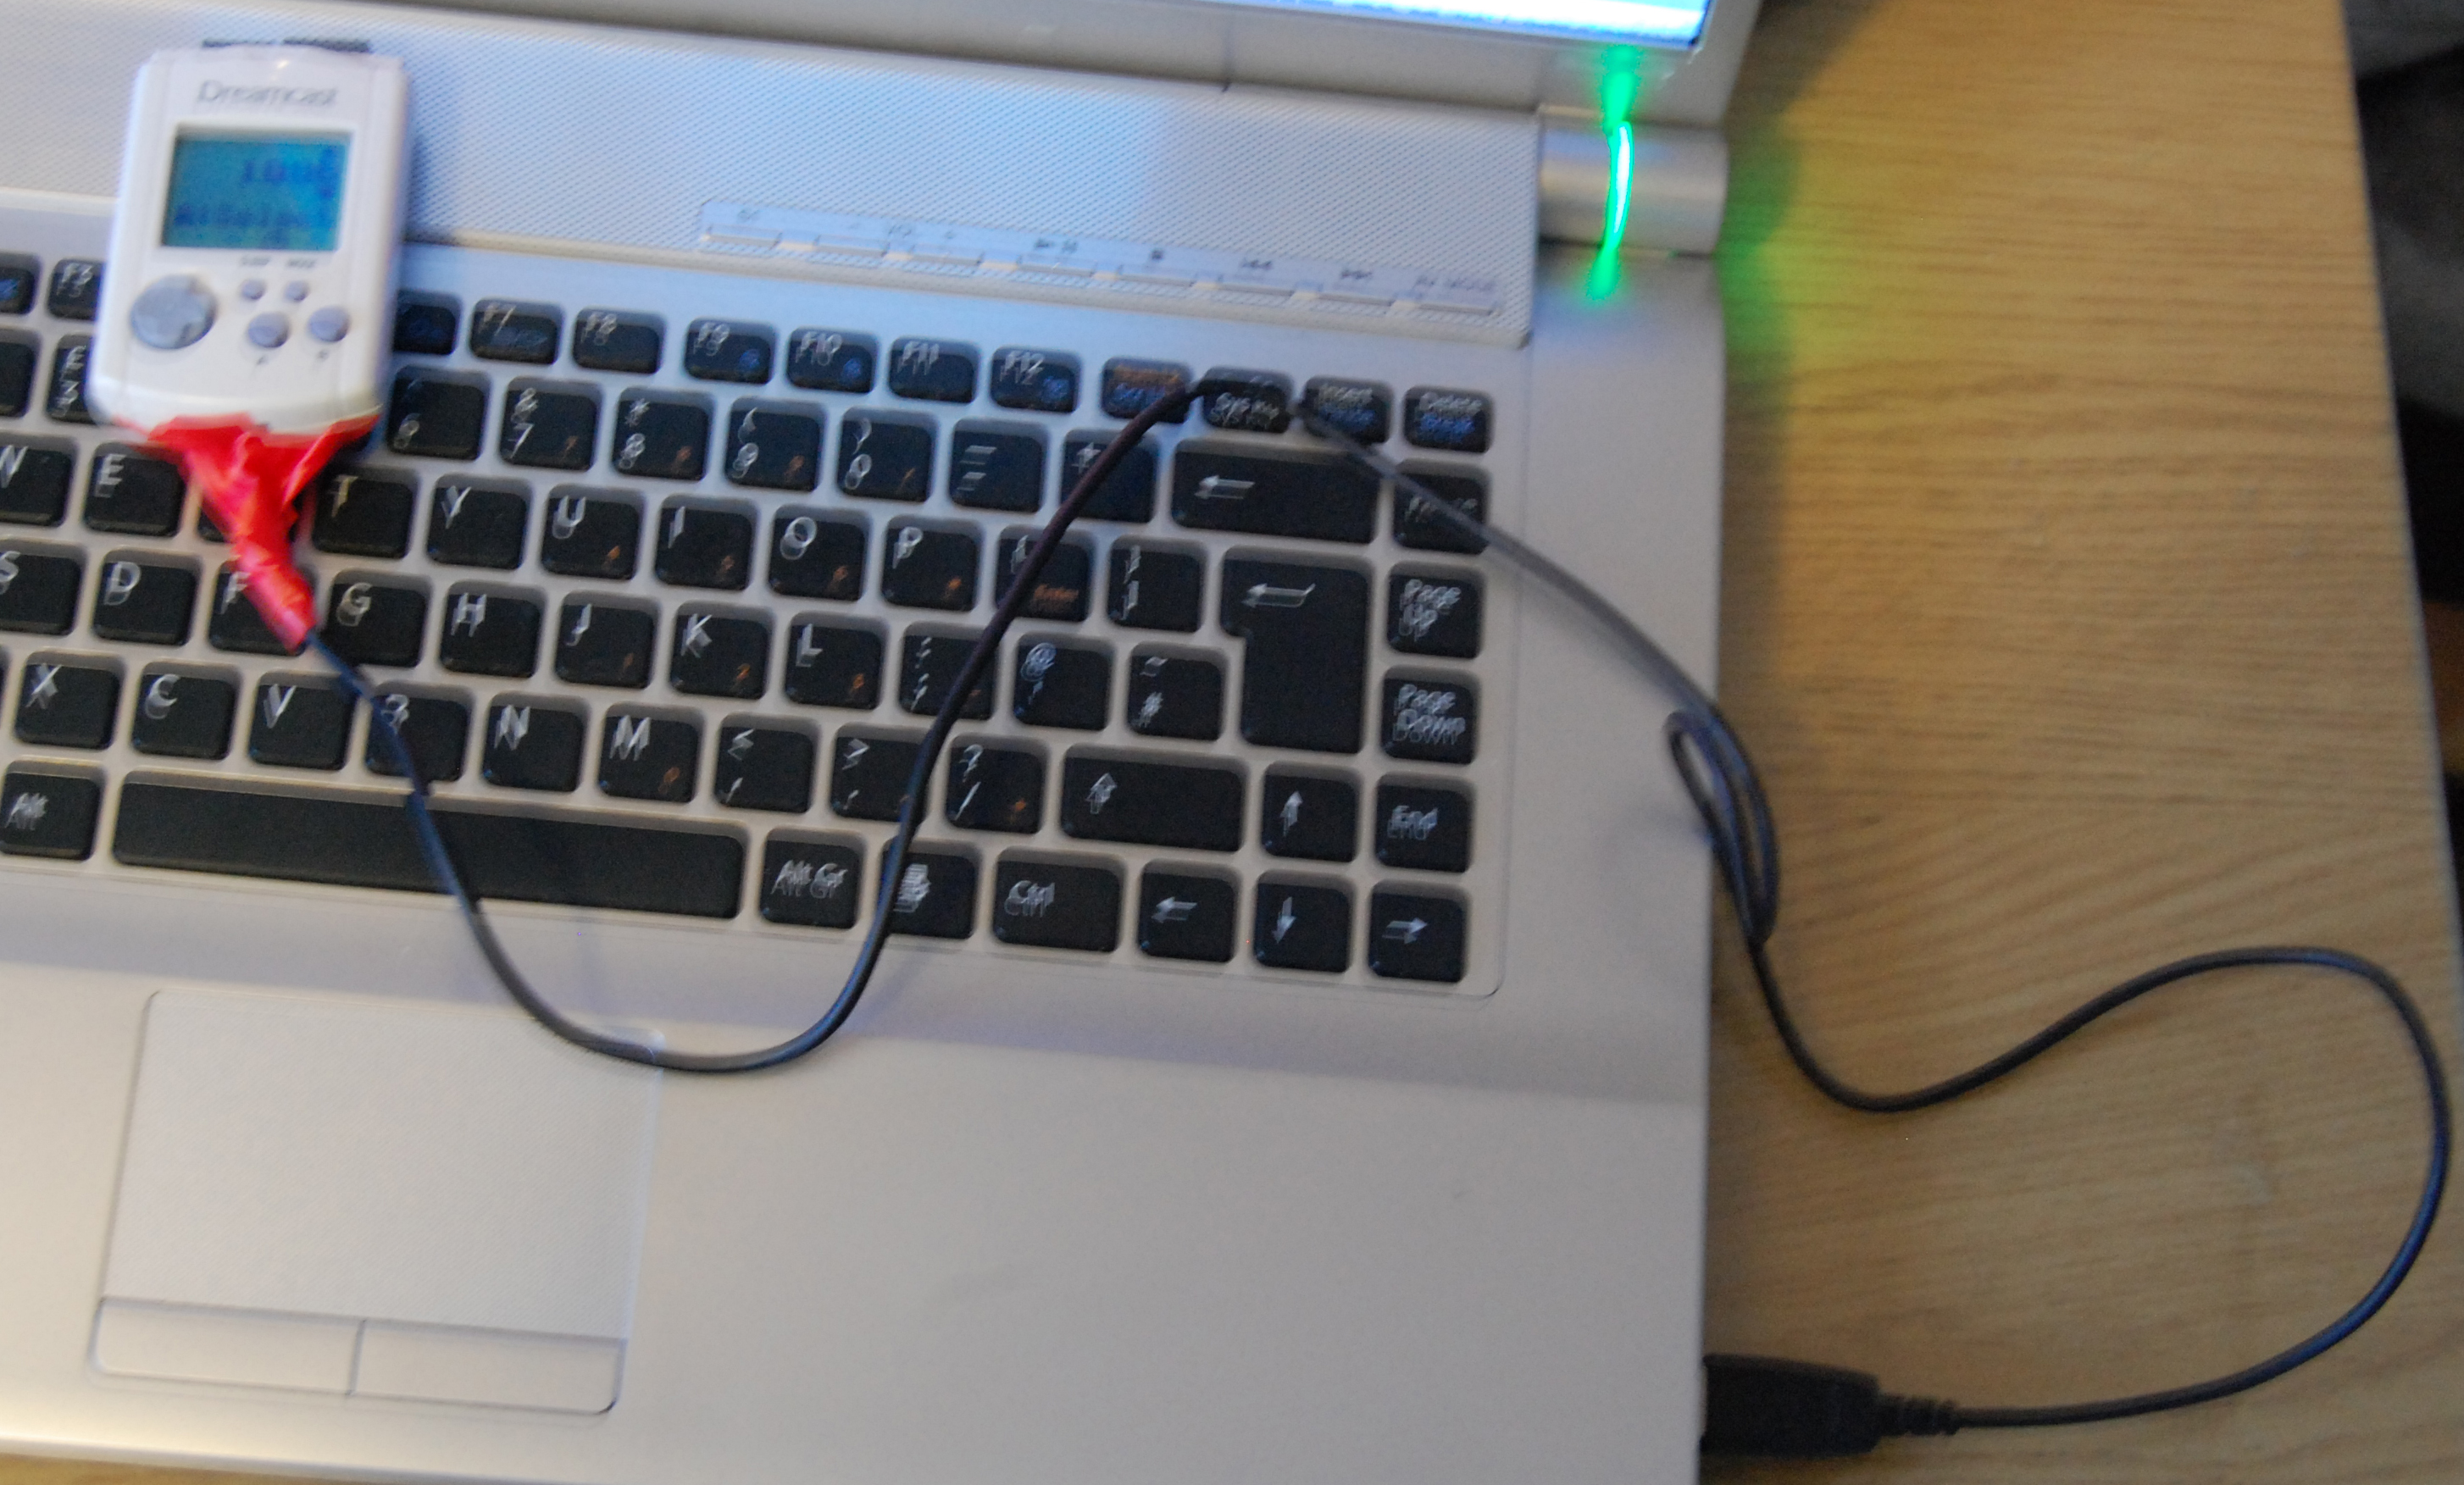
Plug it in, provided it's all secure down and you've made good contacts, your VMU should come back to life!
As I mentioned before, it'll ask for the date/time every time you plug it in, but not a big issue.
This process should work for all sorts of things, but check that it won't overload your USB port and your USB port will overload the device.
Good luck, I hope you've learned something from this rather basic tutorial! :)