USB Gold Chain W/ 50 Caliber Crystal Bullet Piece
by flowstyleliving in Craft > Fashion
694 Views, 2 Favorites, 0 Comments
USB Gold Chain W/ 50 Caliber Crystal Bullet Piece


An idea I had in 2014. I actually complete most of my sketched out ideas... it just takes some time //few more to come from the same journal!
To make this exact one:
Materials:
+ 50caliber round
+ Smokey quartz //1 side terminated
+ USB "gold chain" //Otium USB Type C Cable 3ft Braided Cable
+ Female USB port
+ Wire
Tools:
+ Drill Press // w. drill bits (duh)
+ Soldering Iron
+ GOOP
+ Pliers
+ Microfile
To make this exact one:
Materials:
+ 50caliber round
+ Smokey quartz //1 side terminated
+ USB "gold chain" //Otium USB Type C Cable 3ft Braided Cable
+ Female USB port
+ Wire
Tools:
+ Drill Press // w. drill bits (duh)
+ Soldering Iron
+ GOOP
+ Pliers
+ Microfile
Make the Crystal Bullet Piece!


1. Measure out how far you want the Crystal to be sticking out as the bullet
1.5. GOOP it up! giving it about a day to really set
2. Using a drill press or a drill with a good vice, drill the hole! making sure to use a drill bit big enough to fit the small end of the USB
3. Ta-Da!/Microfile it out
//You can also do it the other way around *shrugs*
1.5. GOOP it up! giving it about a day to really set
2. Using a drill press or a drill with a good vice, drill the hole! making sure to use a drill bit big enough to fit the small end of the USB
3. Ta-Da!/Microfile it out
//You can also do it the other way around *shrugs*
Make the "Chain Clasp"


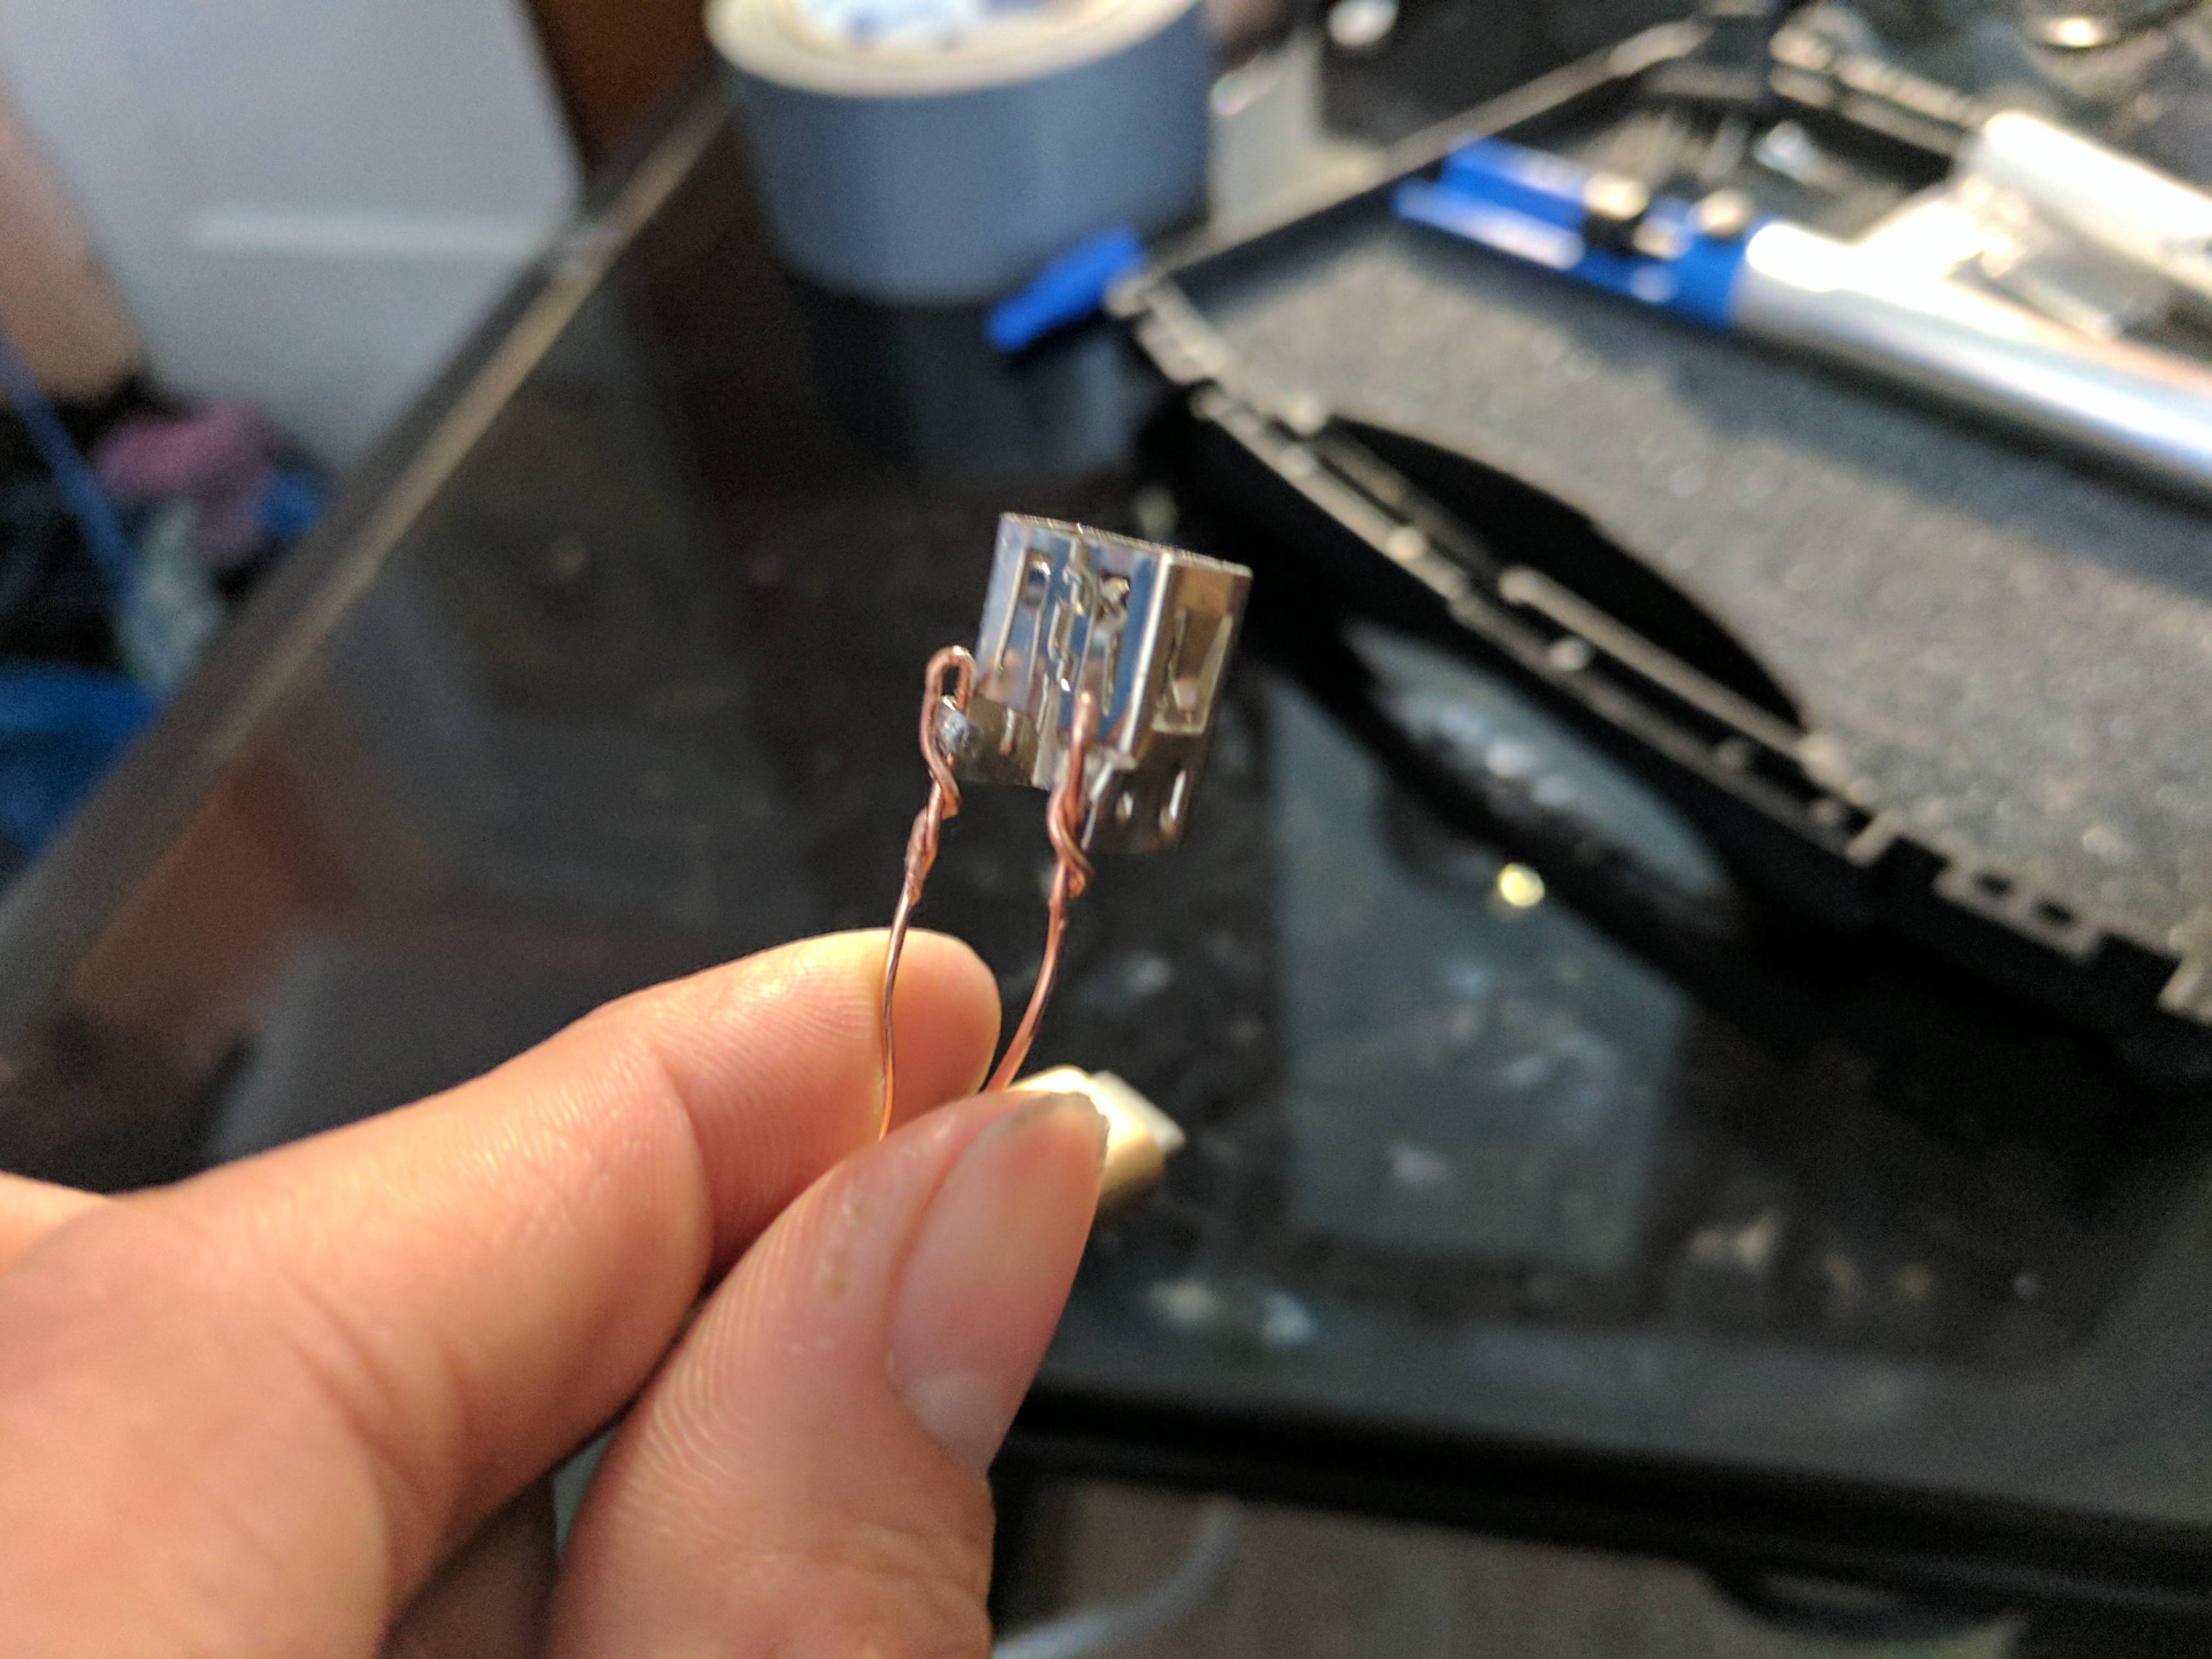
1. I took my female USB port from an old China iPhone power brick
2. Using a Soldering Iron, get that component outta there! //We're gonna use it again in just a bit, so don't unplug it.
3. I wanted to use the plastic piece to have everything fit nicely, but it came off the more I Dremmeled into it :x
4. Measure out about 3 inches and wind it around one of the crimps on the USB port component //We'll be more accurate and cut it later
Finish Up That CLASP!


1. Na-na-na-na-na Solder Time!
2. Remember: Iron first, THEN Solder //come on seriously guys, none of that wiping stuff.
3. Measure it off and tighten! //Pliers are your friend :D
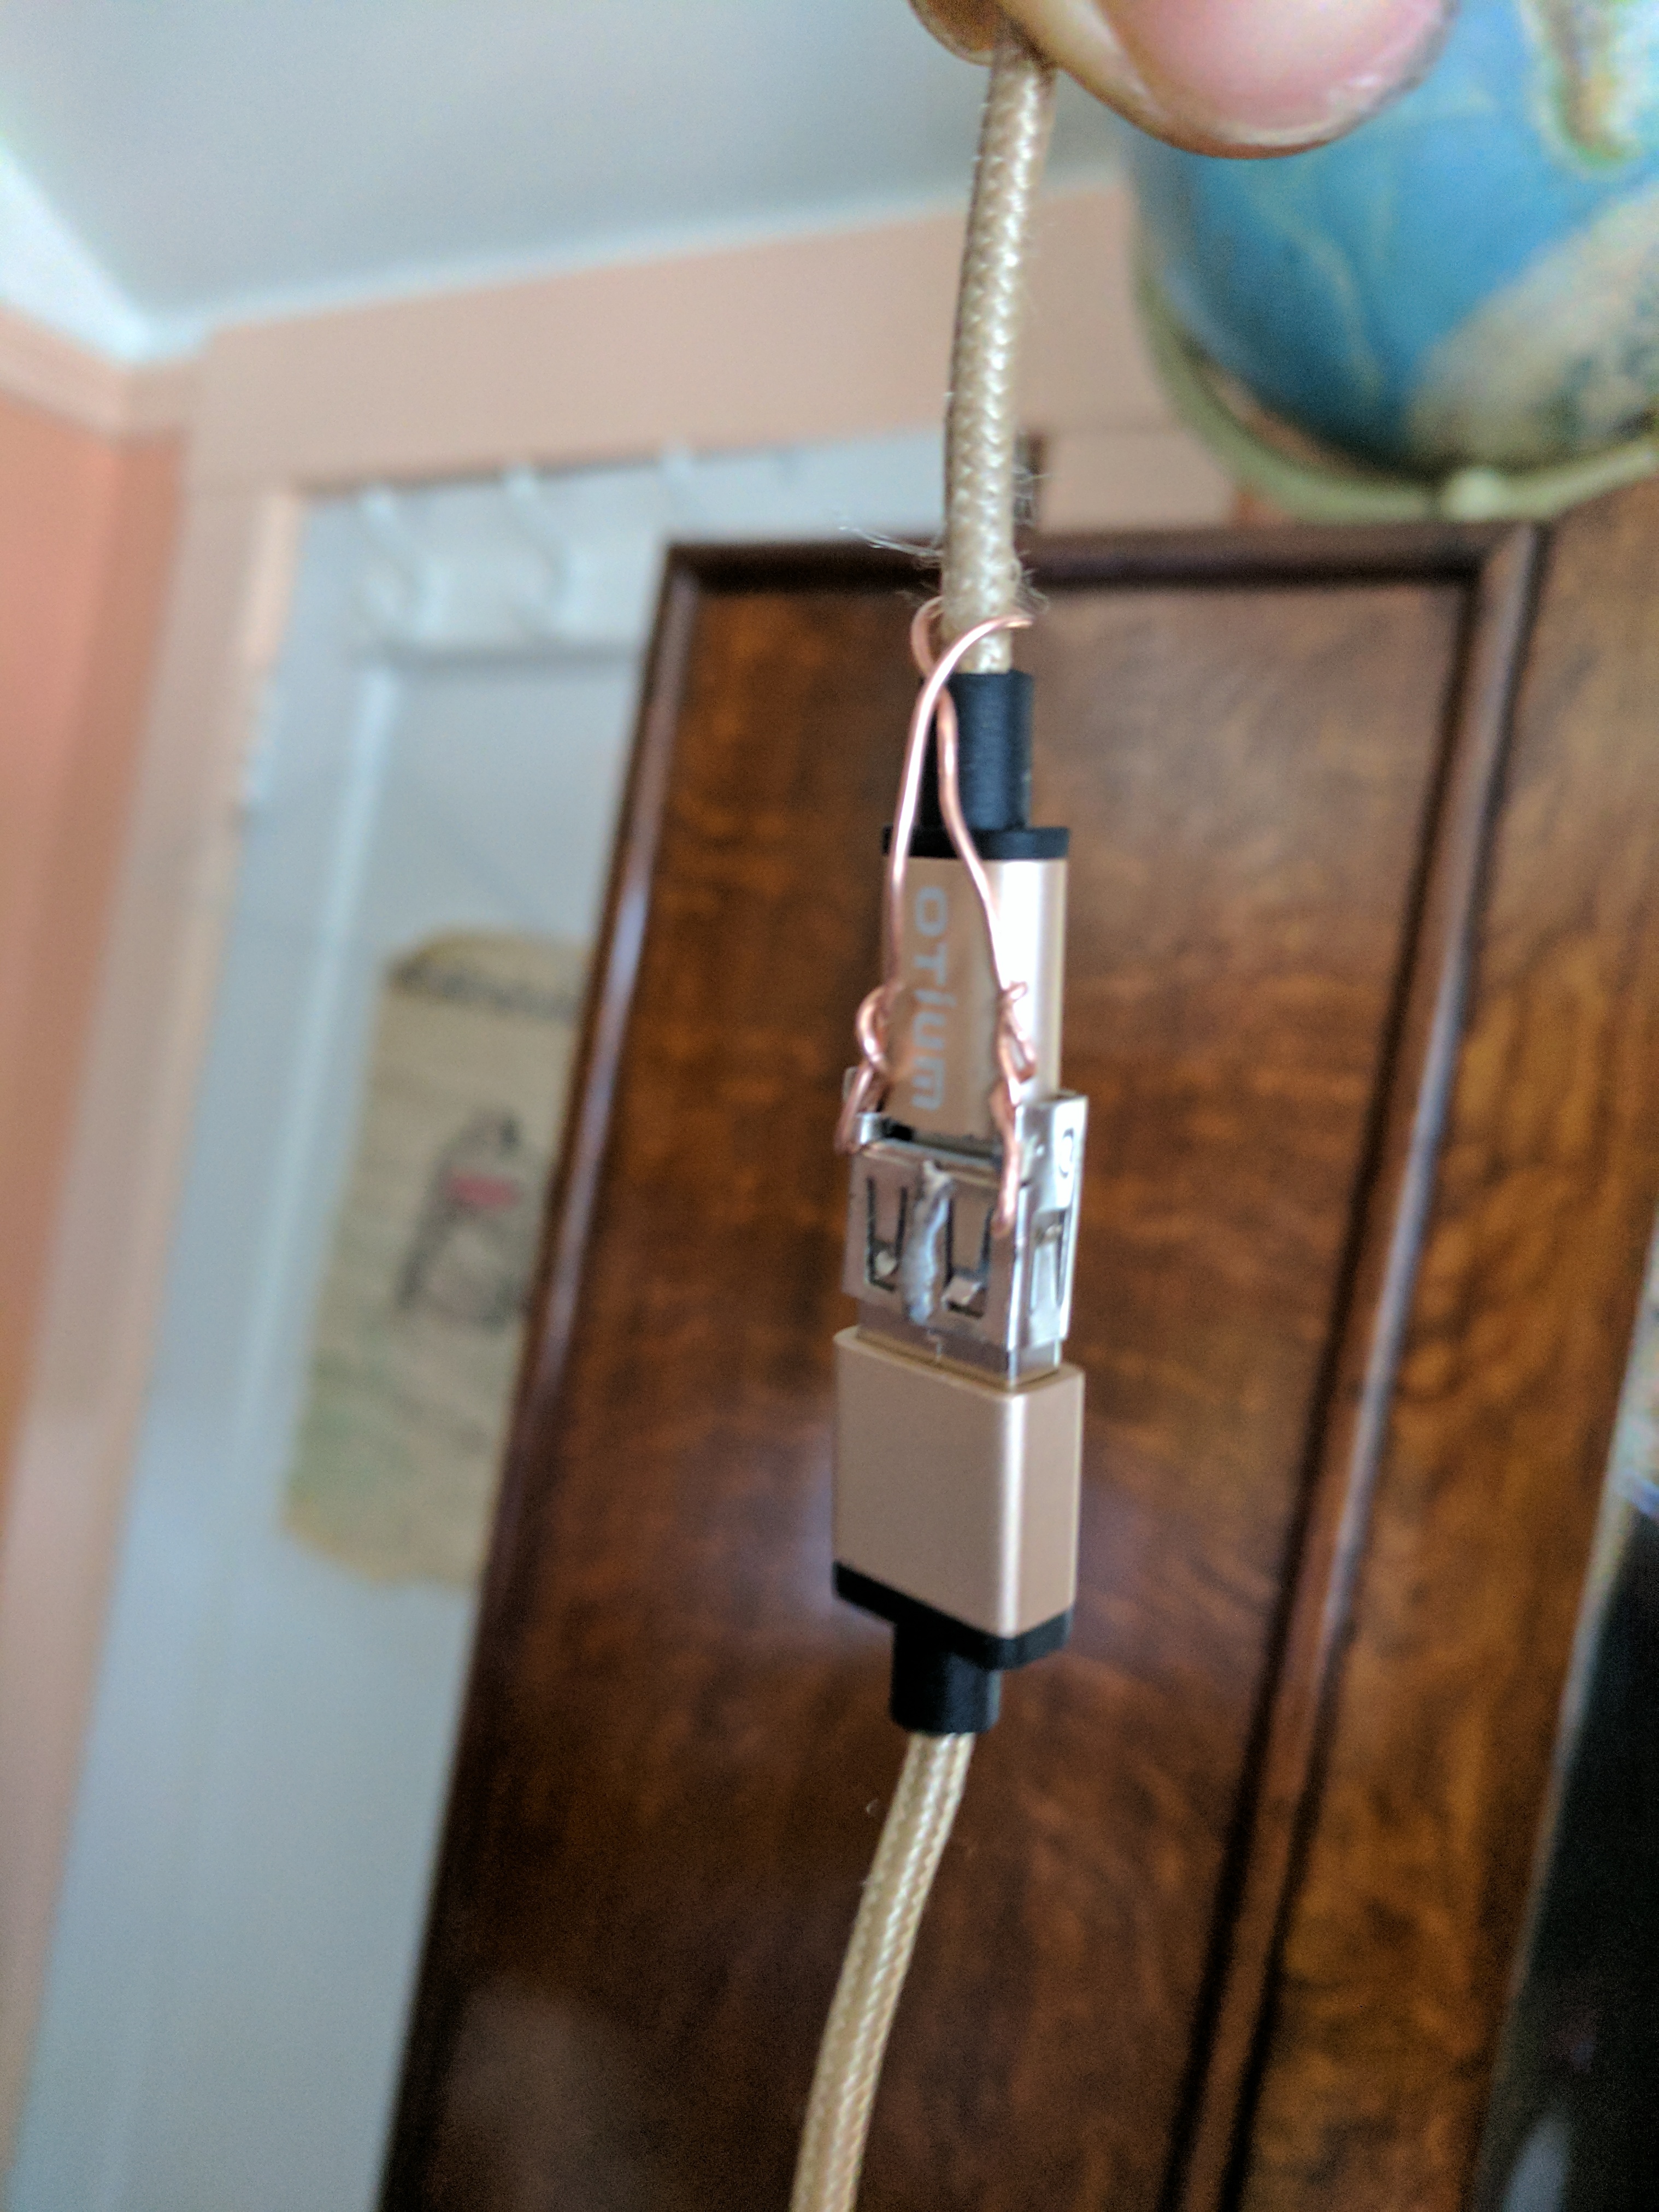
4. Yes, I am shoving the Type-C port into the A (Micro is possible, not sure about Mini)
5. As you can notice, there is a small bump to fit the whole Type-C port in... if you think of a better way to fit it in, let me know! ;D
Yessss!


1. There is some wear on the "chain" and some fraying from the Bullet Piece moving around //Was thinking of using a quick set plastic playdough around the rim of the through-holes. Also will be dusting it with some gold spray paint soon enough ;)
2. Pretty comfortable actually.
3. In action, using it now to write this Instructable actually.
4. People love it, then they get blown away by the USB feature ;D
Hope you enjoyed this!
Bless up!
Follow me on IG @se0hm!
HTTPS://www.instagram.com/se0hm
2. Pretty comfortable actually.
3. In action, using it now to write this Instructable actually.
4. People love it, then they get blown away by the USB feature ;D
Hope you enjoyed this!
Bless up!
Follow me on IG @se0hm!
HTTPS://www.instagram.com/se0hm