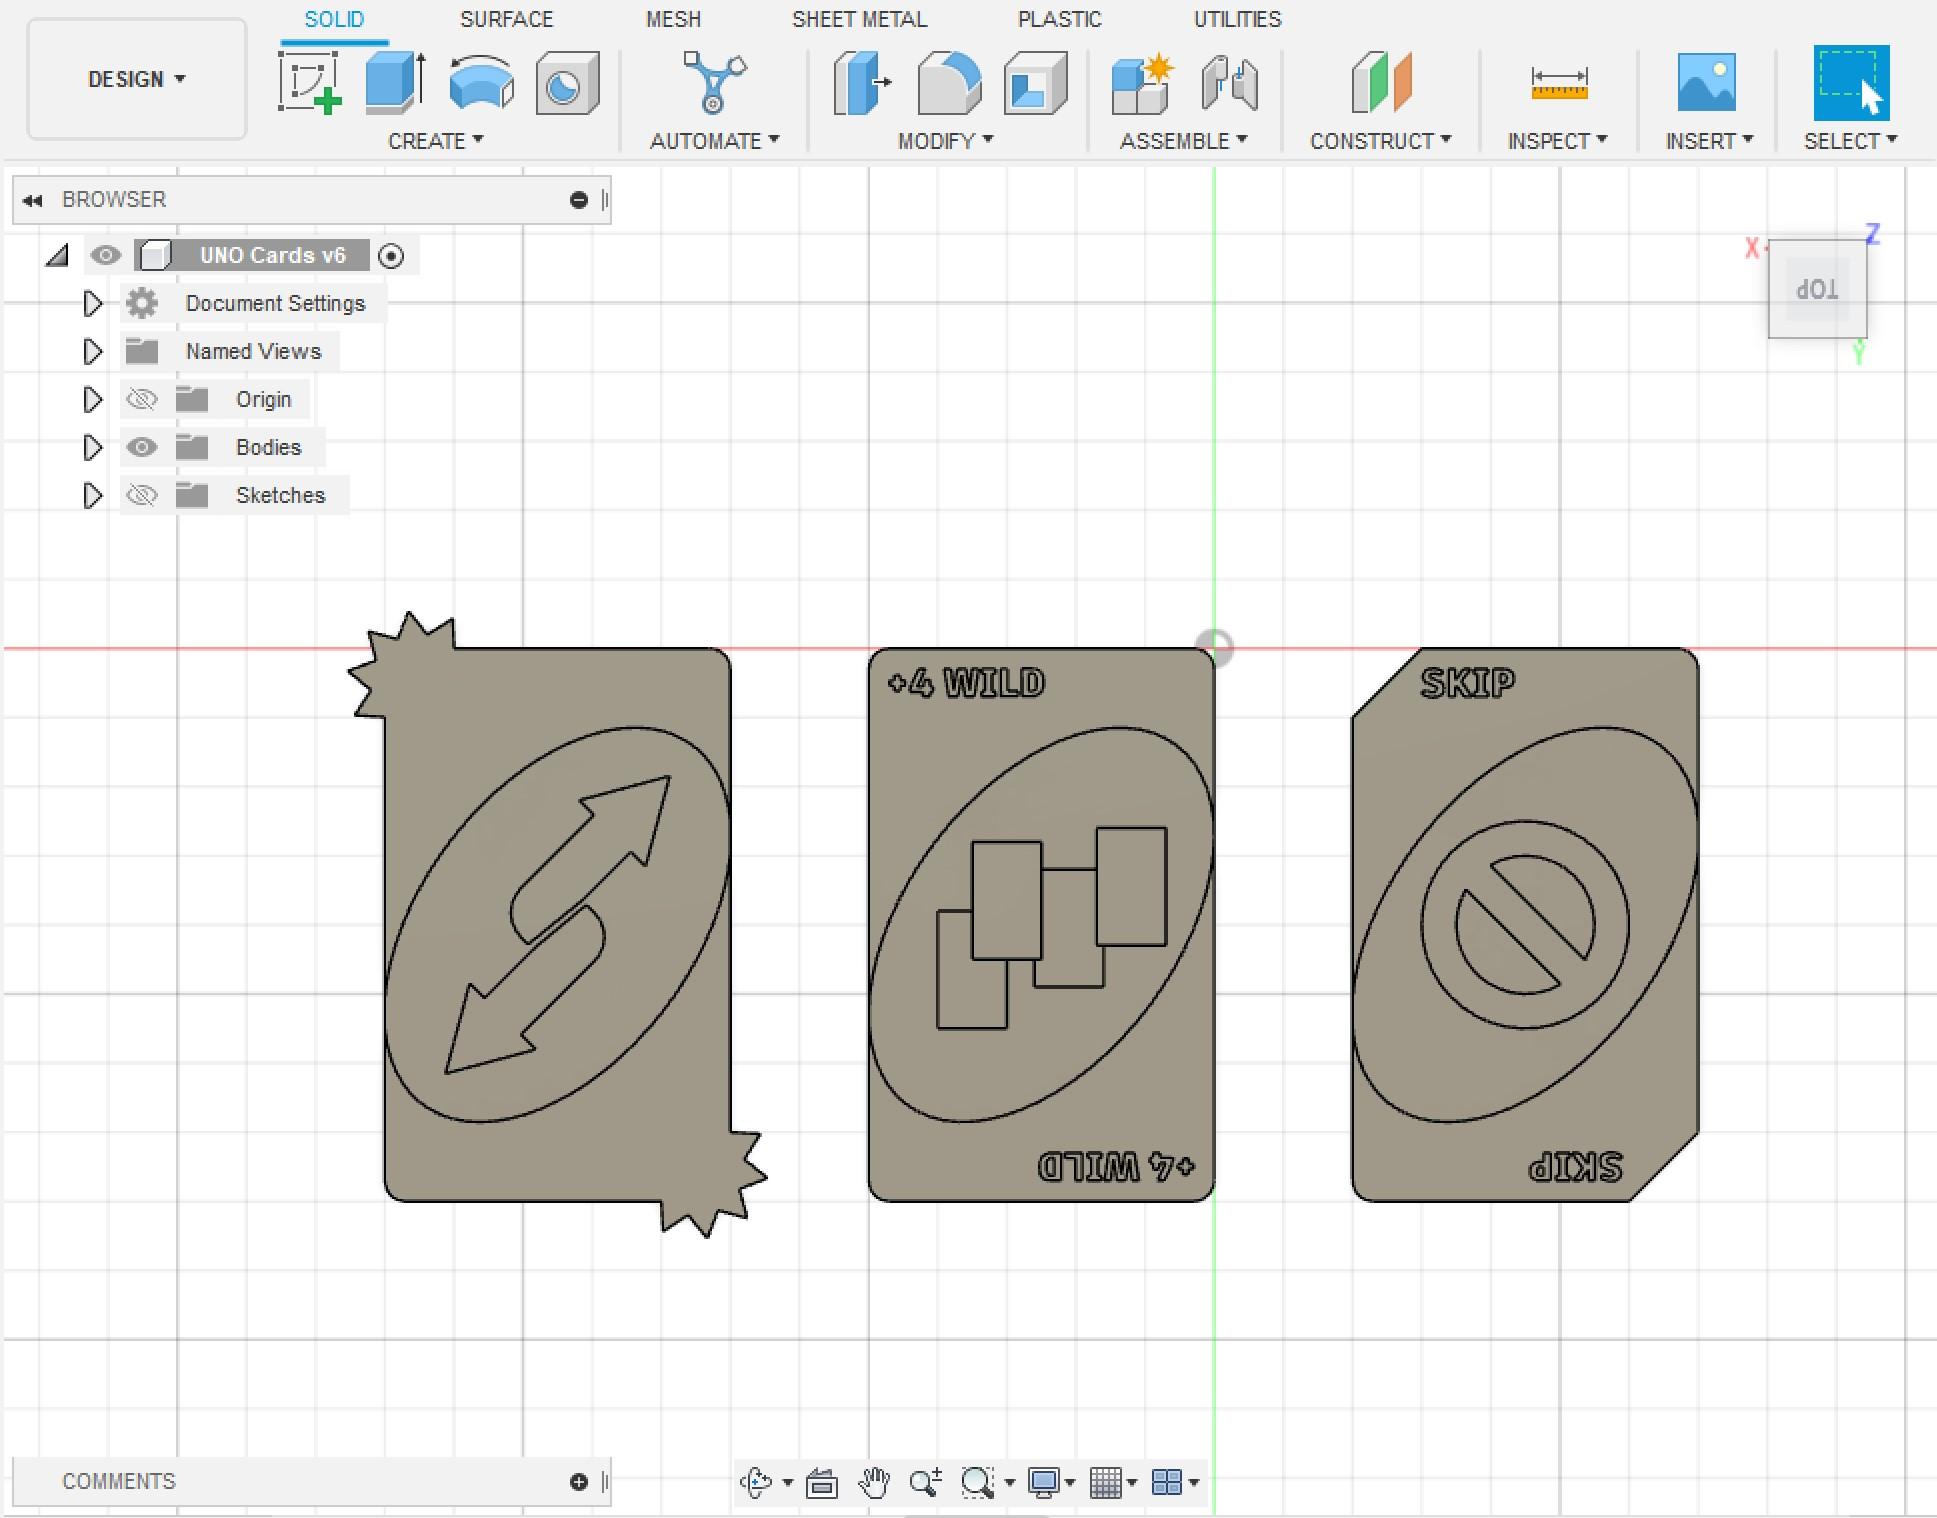
UNO Cards for the Visually Impaired and Friends
by cassidy_b in Living > Toys & Games
760 Views, 2 Favorites, 0 Comments
UNO Cards for the Visually Impaired and Friends
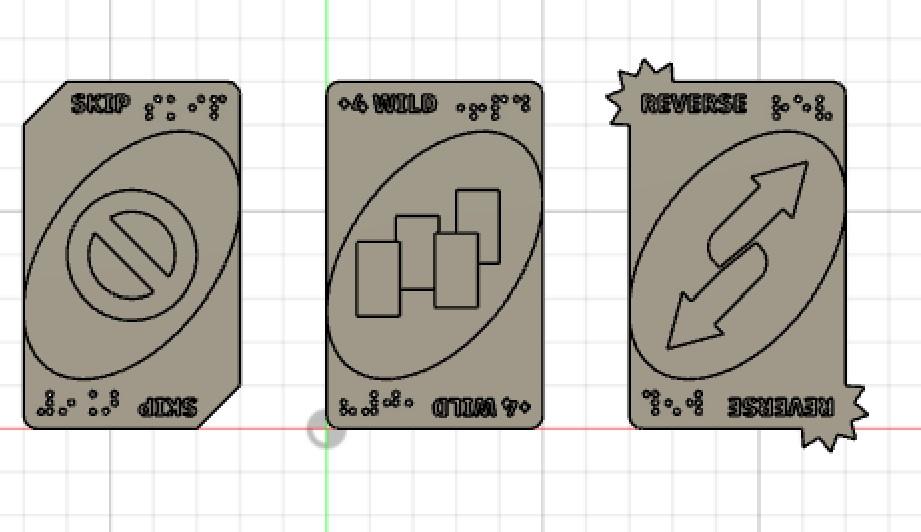

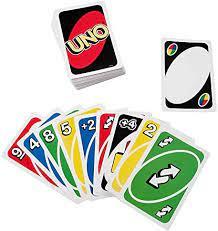
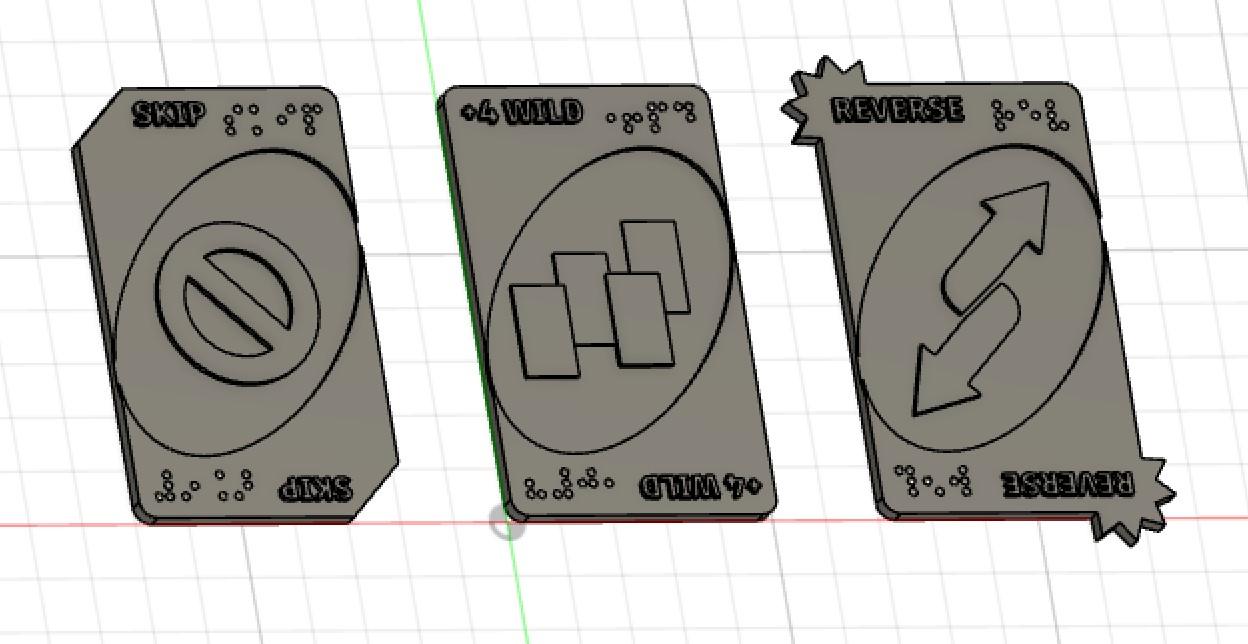
This is a project I made for my 3D Modeling and Prototyping class as part of Innovation Academy Charter School. My groupmate Sarah and I were prompted to make a "tactile game" meaning you can play by touching the game, rather than seeing it. We decided to modify the cards from the game of UNO, since this is something we both enjoy playing on the daily. We decided to add braille in addition to the word on the card, and instead of colors, we put different edges on the opposite corners to represent different groups of cards. For example, some cards are wavy, straight, or spiky on the corner. In addition, the pictures in the middle of the card are raised at a different level, so you can run your finger over it to feel the picture. From afar, these look like thick UNO cards, so the visually impaired are able to play with their seeing friends.
Supplies
For this project, I used Fusion 360 as part of its educational access, and theoretically you would need a 3D printer to be able to use the final product, though I don't plan on printing these out for me. You may also need a basic understanding of UNO to recreate the cards.
Create a Card

To start off the card, make a rectangle of your choice. For this part, we decided to make it 50mm by 80 mm, which fits the constraints of our 3D printer, but feel free to adjust this. We also wanted to round the corners, (you can do this by pressing "Fillet" and putting the radius as 3mm). This isn't necessary, but it makes the cards slightly safer to handle, without sharp edges.
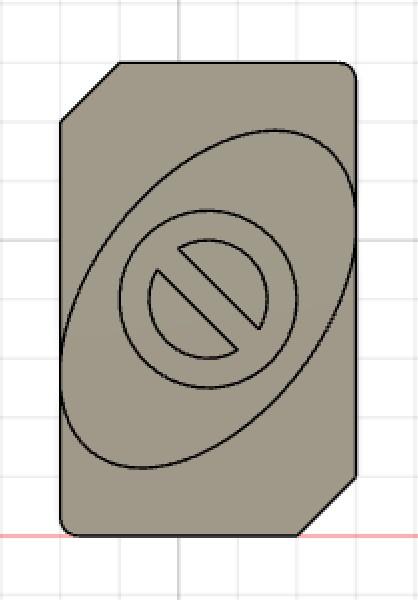
Make the Oval
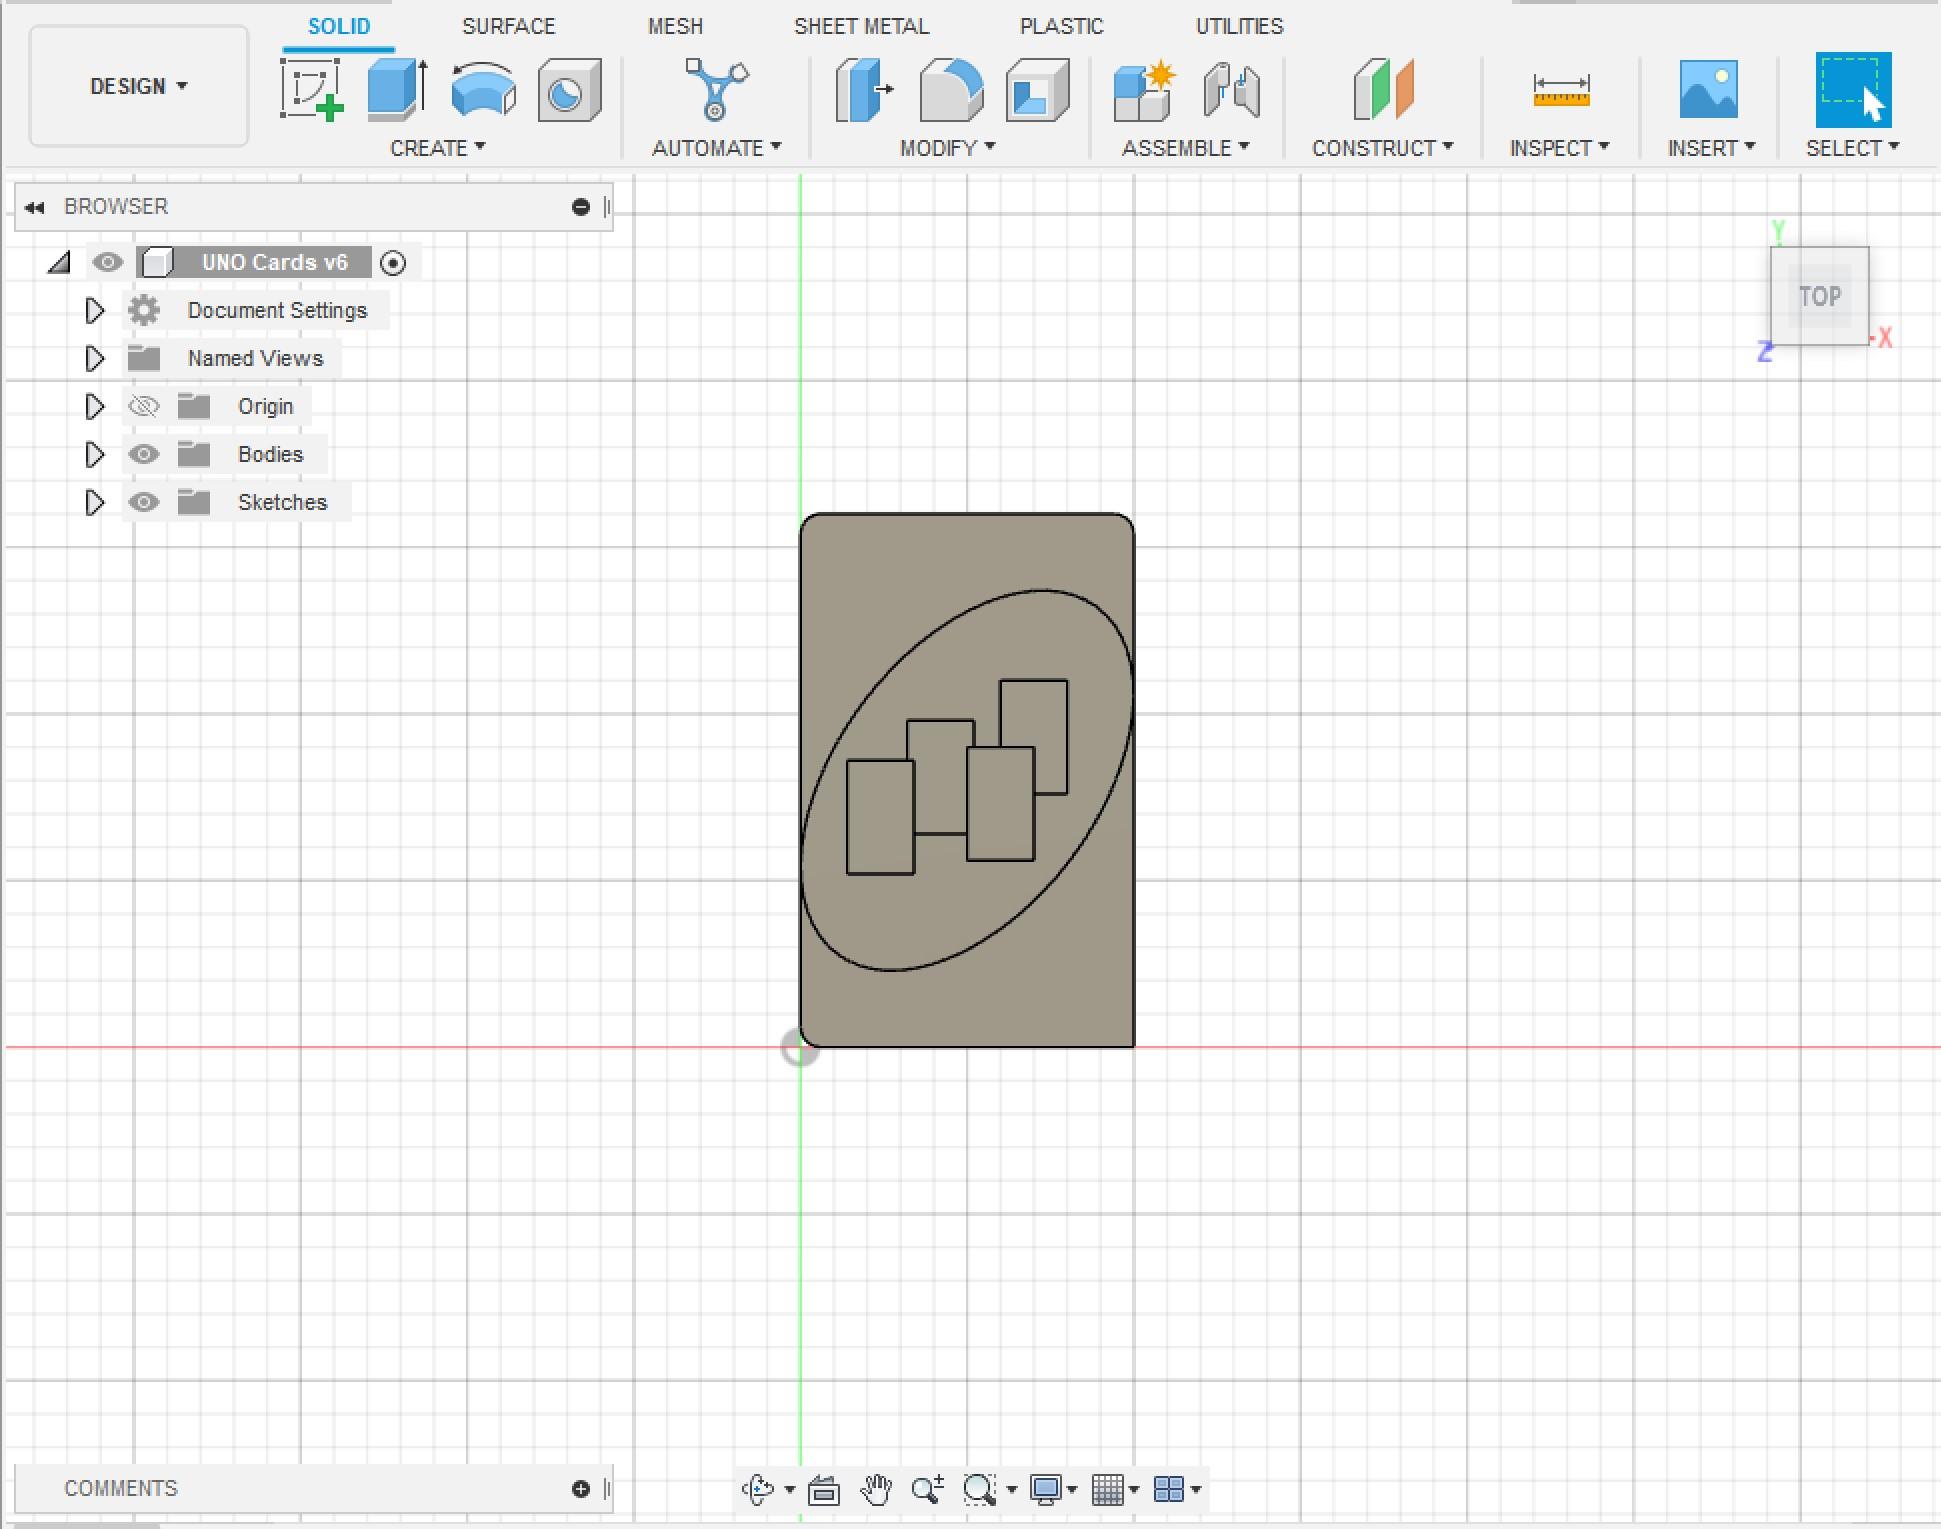
Second, you can fill in the middle with the design of your choice. I chose to make a +4 Wild card, so in the middle, I have an oval with the little cards, which is how it looks on most uno decks. To make the oval, you choose "Ellipse" and then my length was 64mm and the width was around 34mm or so, but I wasn't really measuring this part. Each of the cards in the middle is a different height, ranging from 0.25mm to 1mm tall. Most of the measurements here were not exact, so you can change this on your personal judgement of the size of the oval or the cards.
Center Picture
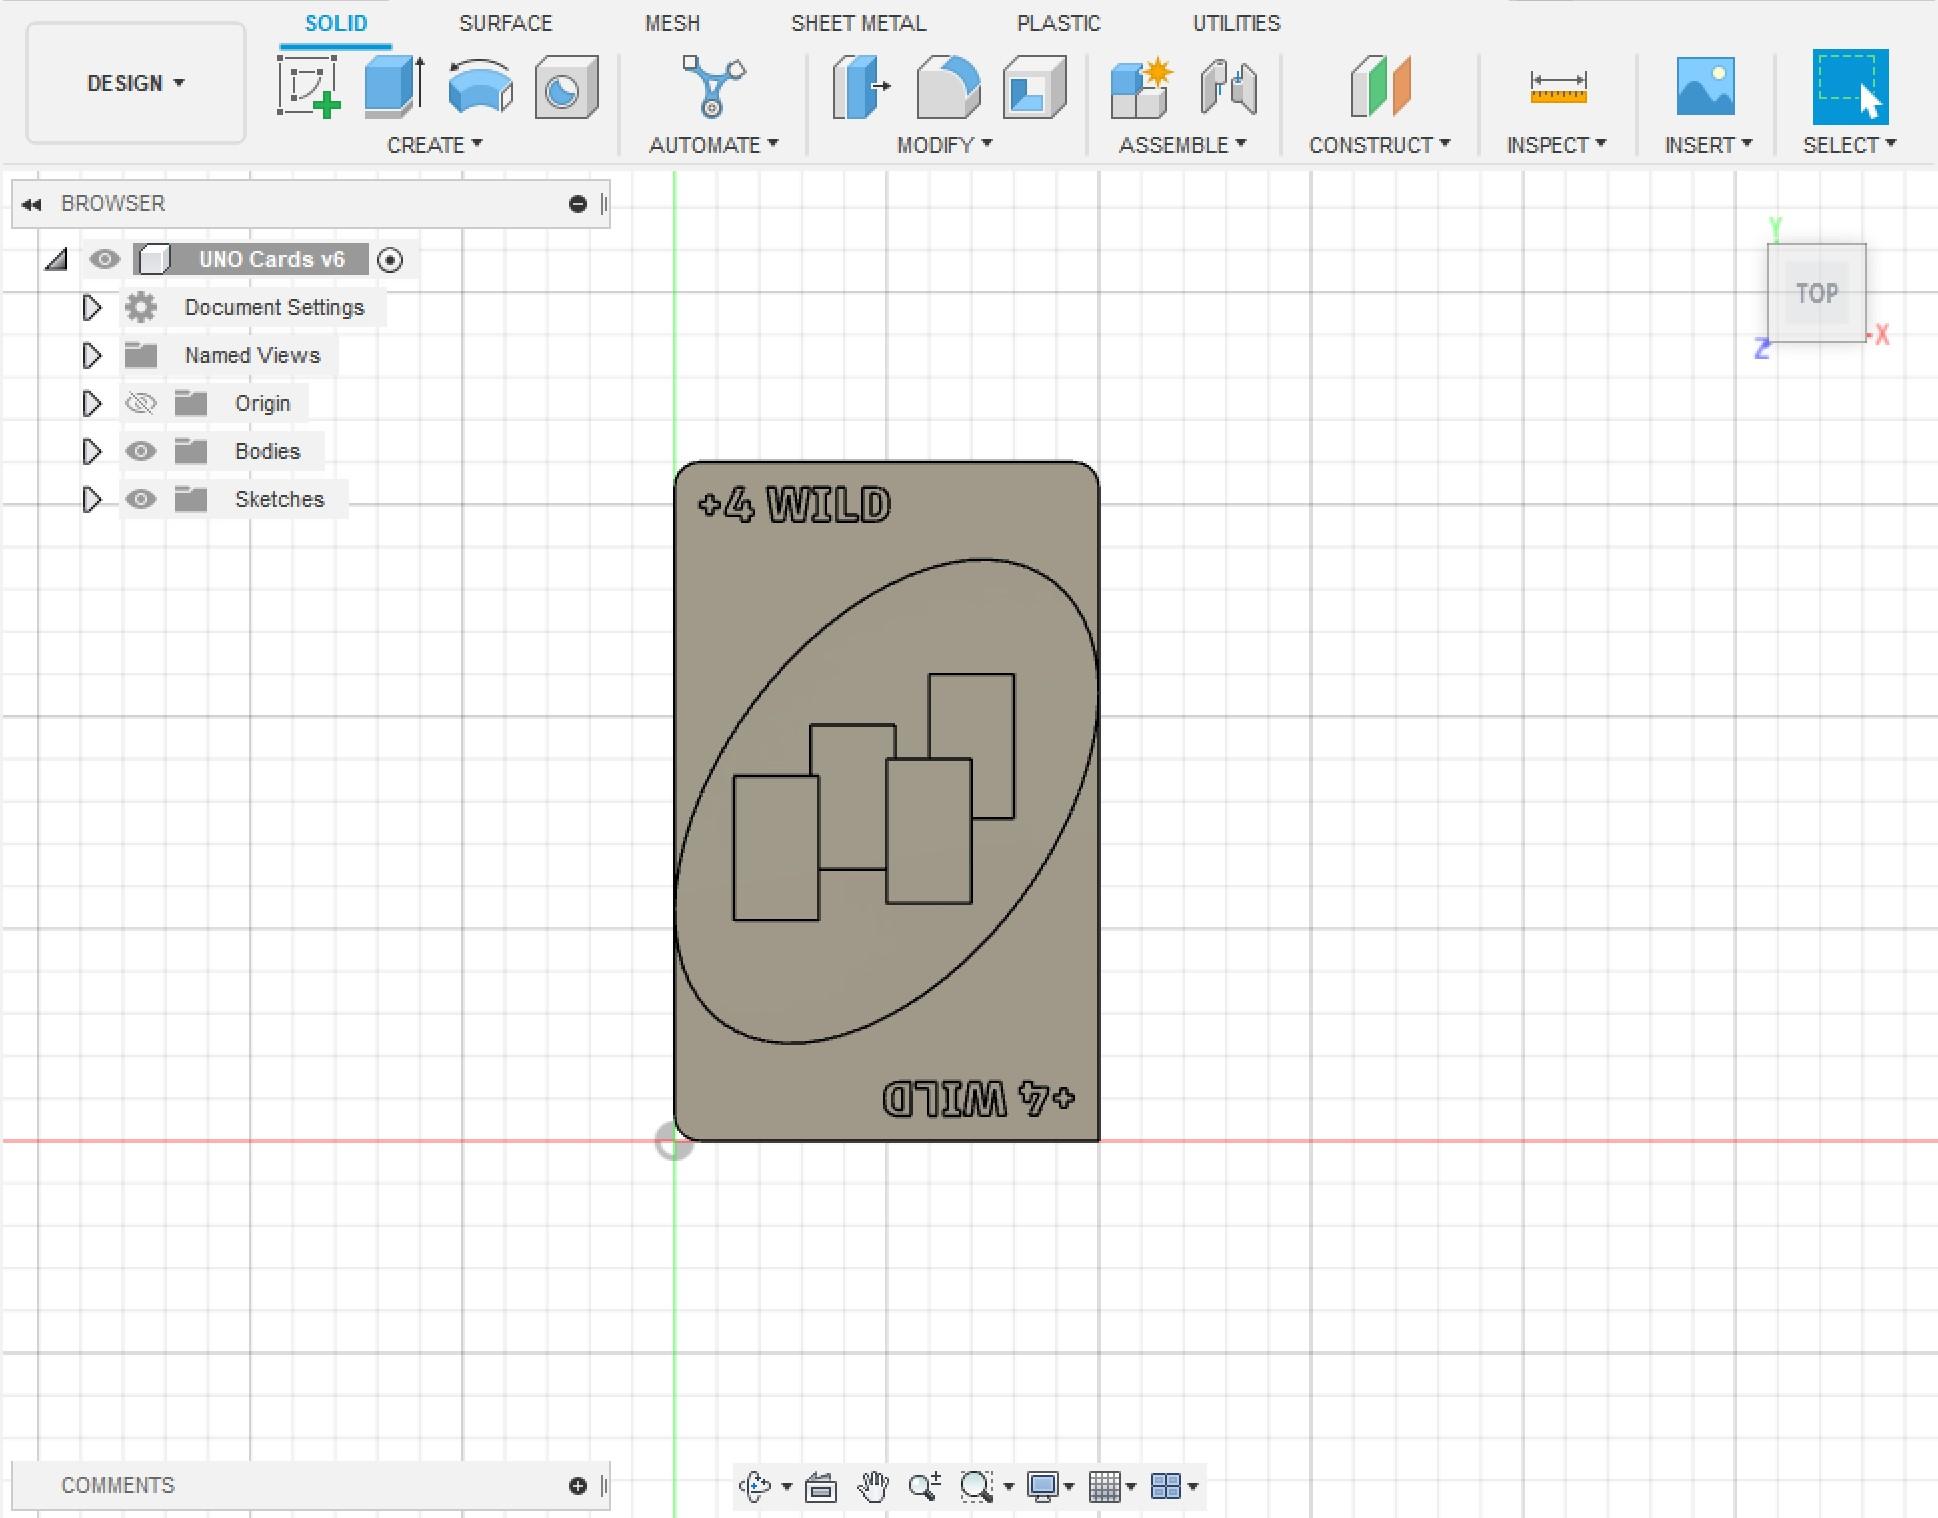
Third, I put the word on the card, for the people who are not yet UNO masters, and still need a reminder on what the card is. For this part, you can go to "Create Sketch" and then select where you want to words to be as the plane. Then, you go to the drop down menu and select "Text." Here you can put whatever you would like, but it would be most helpful to write what the card is. For example, "+4 Wild." Then, before pressing "Finish Sketch," switch the the "Solid" tab and hit "Extrude." This will raise the letters. Mine are only raised 1mm, but again, this is personal preference.
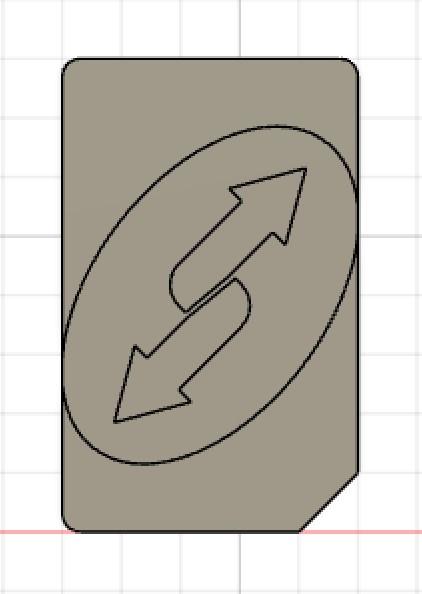
Make More Cards
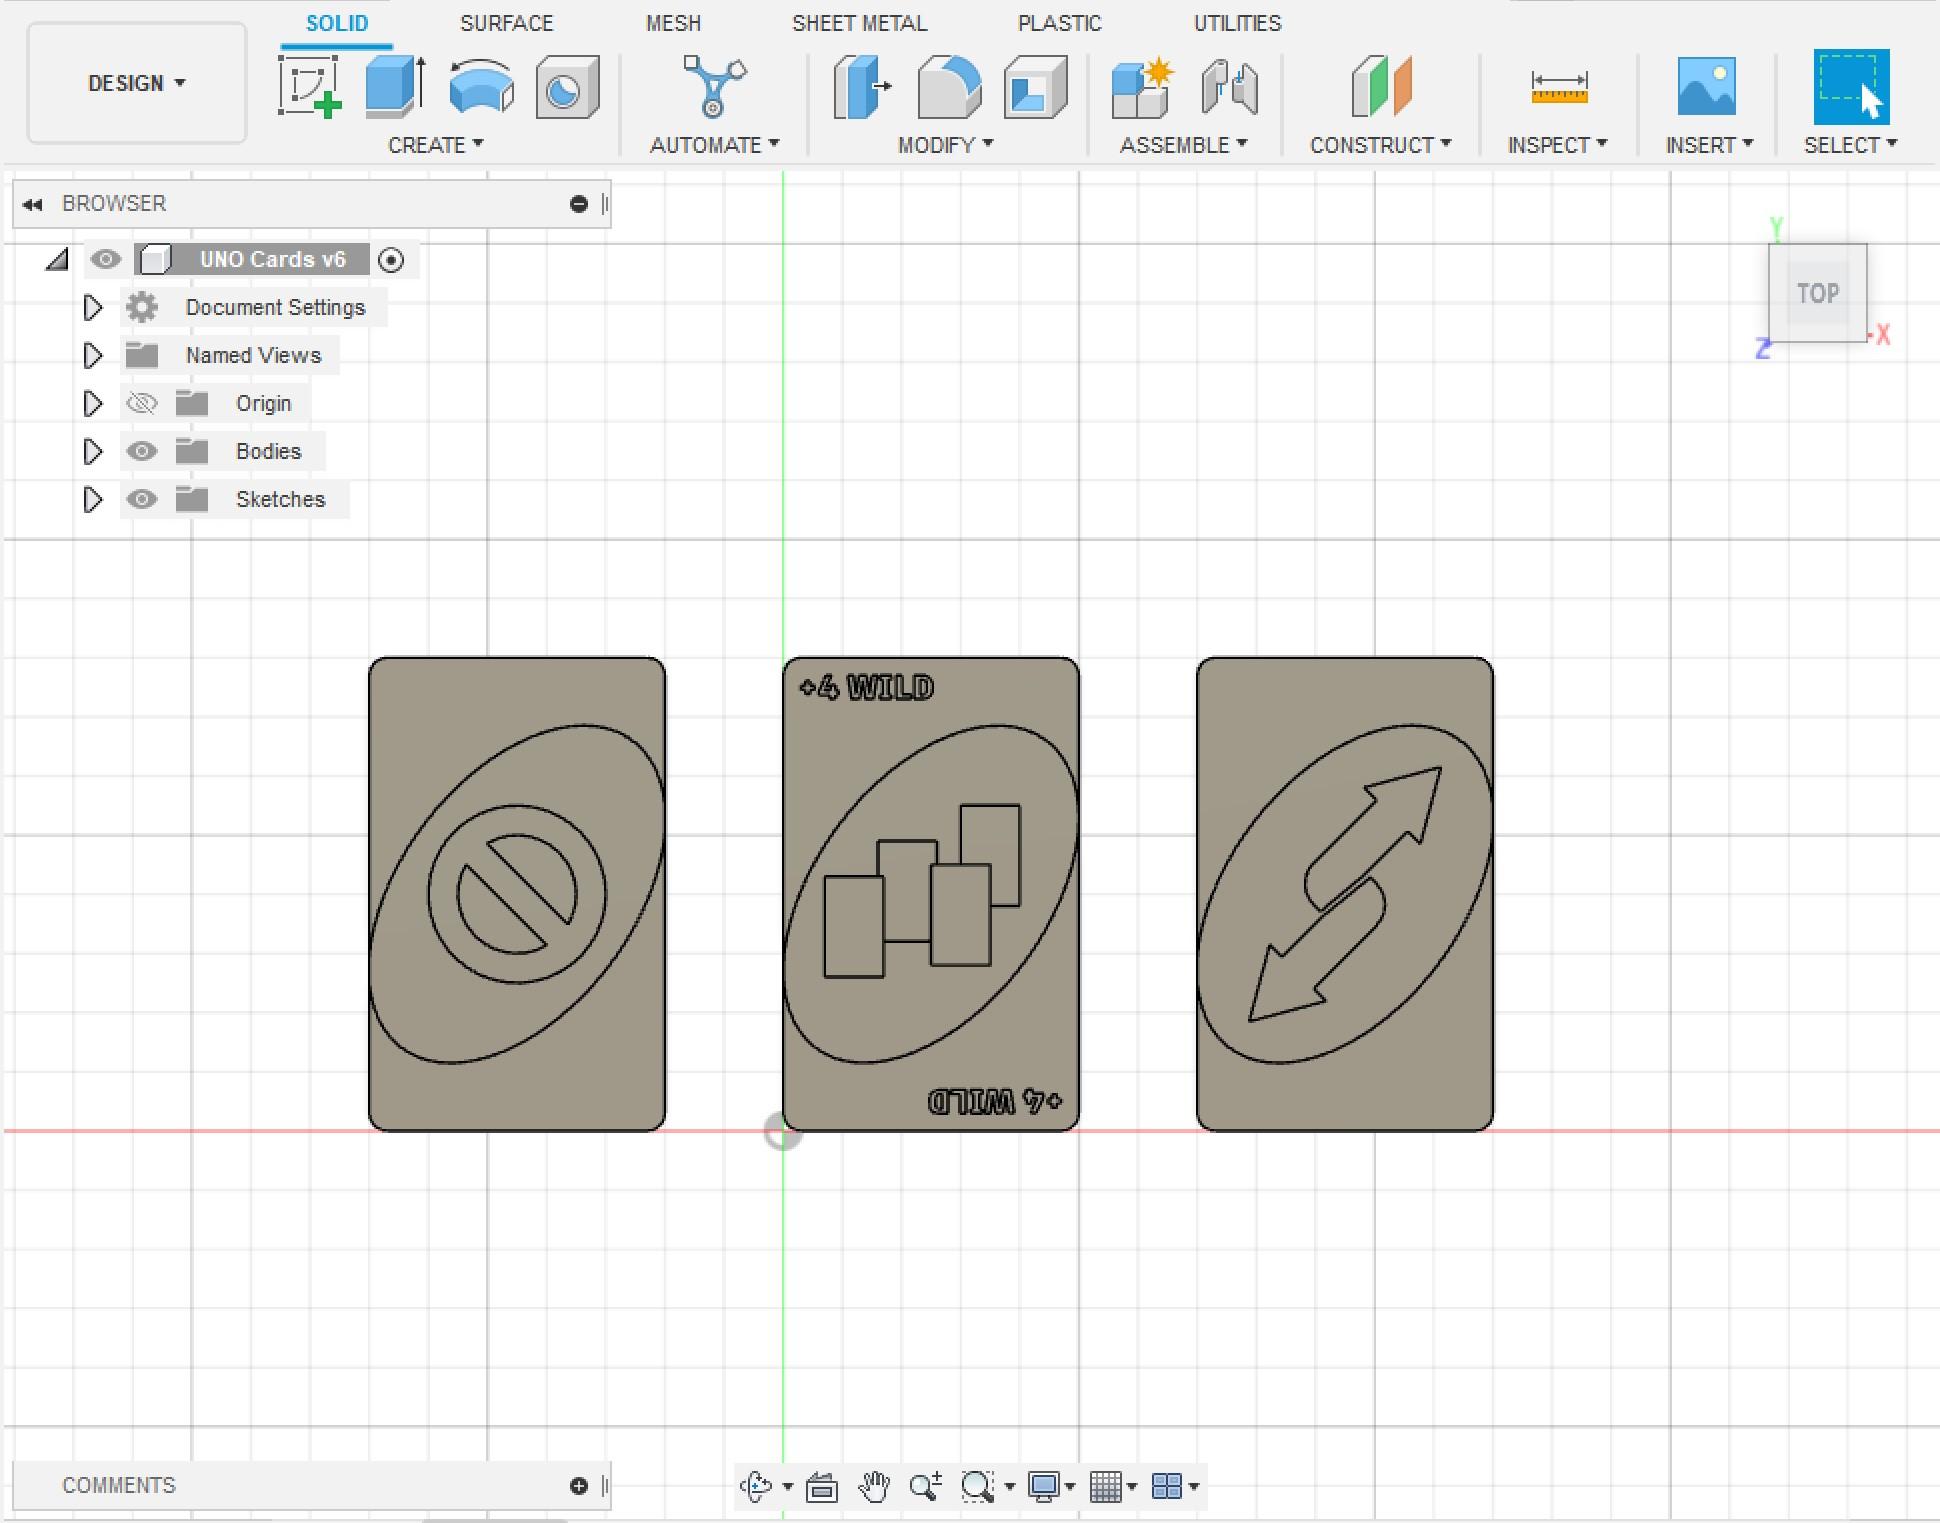
Congratulations! You've made it to step four! I went ahead and repeated pretty much the same thing on the two other cards I was responsible for making, which was a reverse card and a skip card. I was able to get the skip logo and reverse logo by using the "Create Sketch" and playing around with all the functions until I was happy with how it looked. I then used the "Extrude" button under the "Solid" tab to raise it 1mm.
Creating Corners
Here I have started to create the different corners, which were to solve the issue of not seeing colors. For the skip, I used the "Create Sketch" and used the "Line" button to draw a line across the corner. Then I extruded the corner negative thickness of the card. For example, my card was 3mm thick so I extruded it -3mm. I repeated this on the opposite corner.
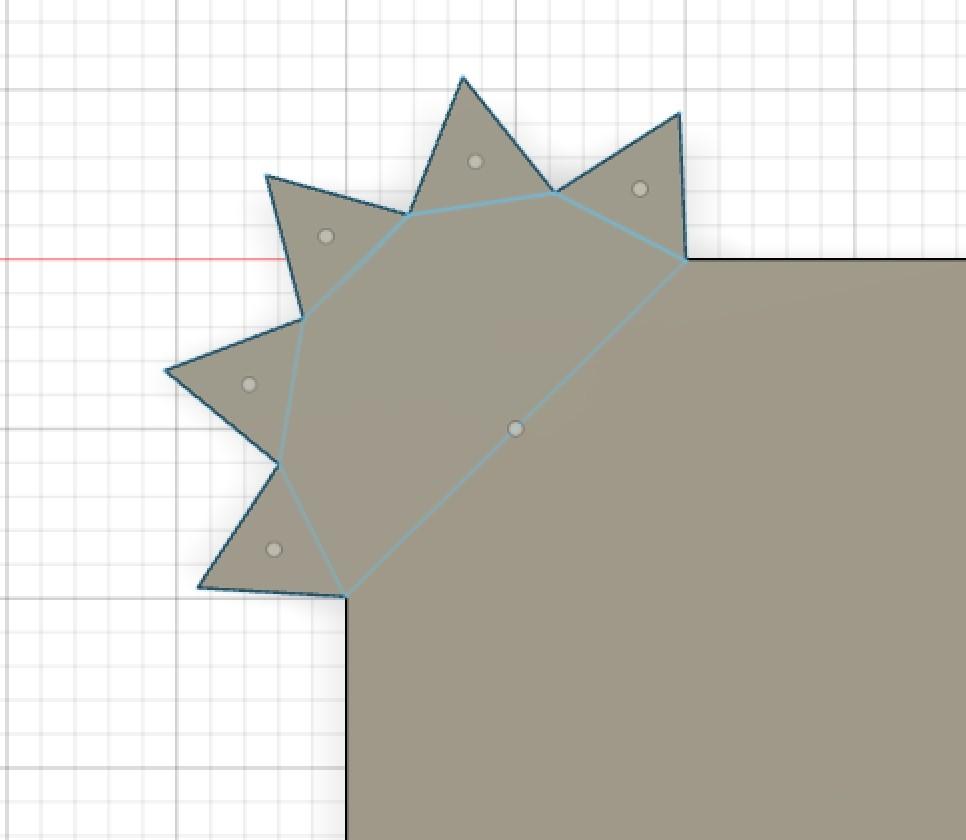
Then, I focused on the spiky edge for the reverse card. First, I used the same diagonal line as I used for the skip. Then, I used a "Circumscribed Polygon," found in the "Polygon" section in the drop down for Sketch. The center was at the center of the diagonal line and the edge went to the edge of the line. I made mine have ten sides. I used the "Trim" tool to delete the five sides that were in the existing card. Then, I used "Edge Polygon." Two of the corners lined up with the corners of the 10 sided polygon, and then I made it a 3 sides polygon, also known as a triangle. I repeated this for all the sides and then extruded the whole shape to the same height as the card, so it looked like the third image above.
Adding Braille
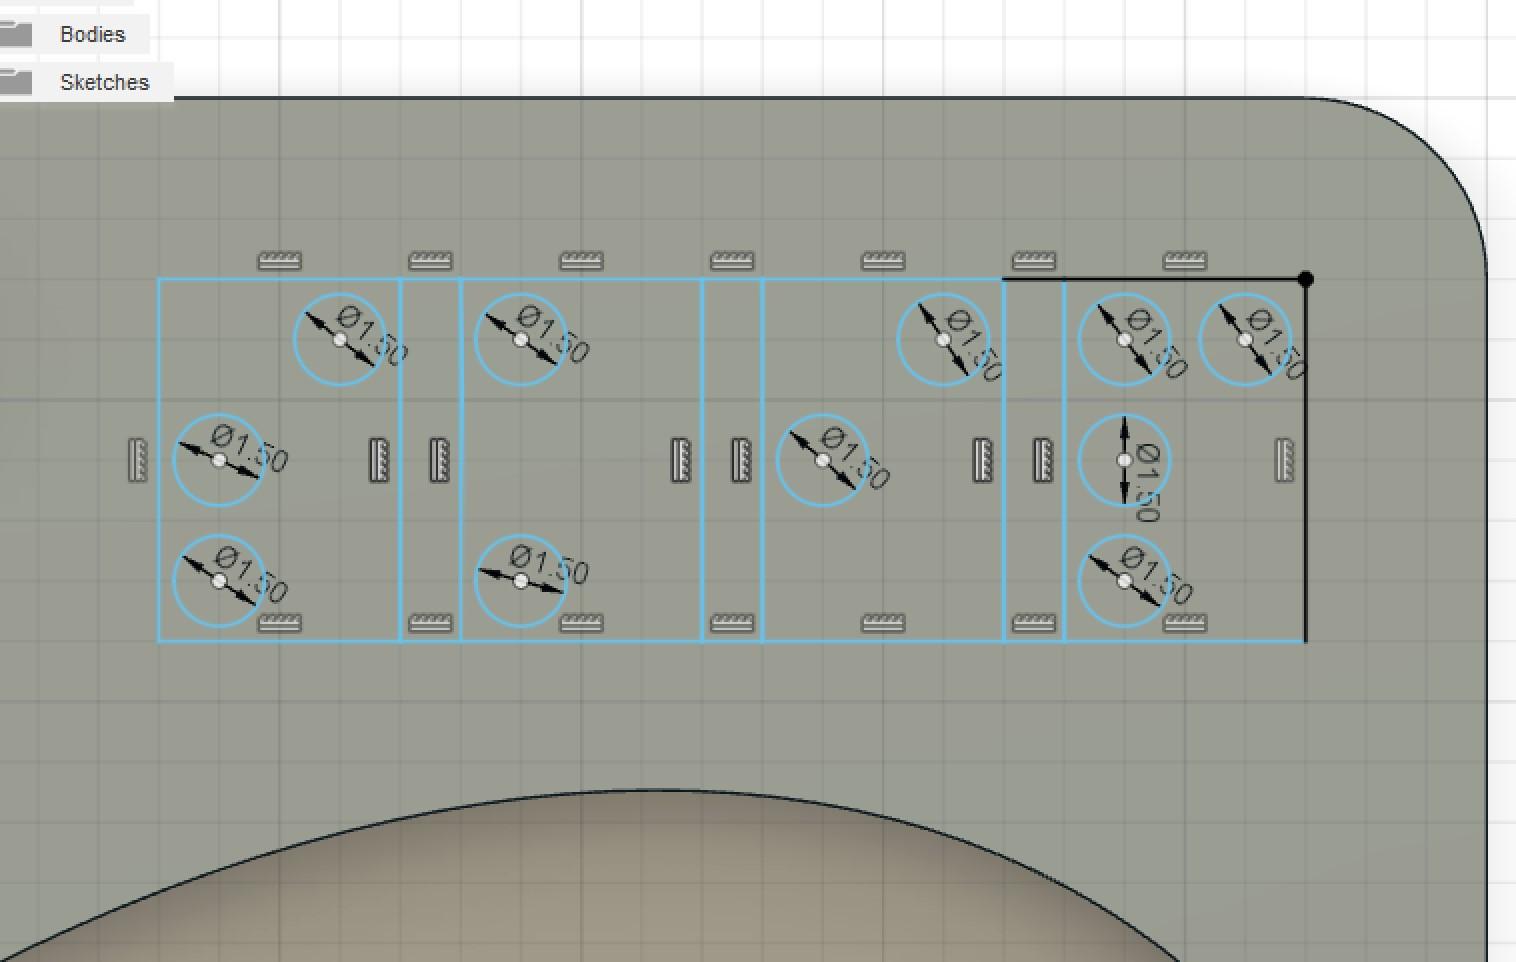
You're doing great right now, but the complicated part isn't over yet. I repeated the star corner on the other side and added words to the skip card, (we learned how to do this in step three). Now it is time for the braille. Since braille can be any combination of six dots, I decided to make spacing boxes that were 4mm by 6mm like the second image above. I think put circles as a guideline for the spheres I will put next. So now we can go to the "Solid" and click sphere. My spheres were 1.5mm in diameter.
This is a good link for the braille alphabet:
https://www.pharmabraille.com/pharmaceutical-braille/the-braille-alphabet/
You Did It!
Repeat the braille process and the raised words on the rest of your cards, and you're done! I was assigned to make these cards in specific, but the other UNO cards are made in a very similar way. If you want to continue making the rest of the deck, you need to make sure you have two more colors (edge squiggles) in addition to the ones above, as well as a Draw +2 card and some normal number cards.
Play!

This game functions just like a normal UNO game, with all the rules you usually play by. Have fun!