UAV
Hi , Most of people know UAV (unmanded Aerial vehicle) it is also called DRONE.
background story:
I see drone first time when i was 14 years old .that day onwards i am try to bluid a drone but i lost it many times because i don't know theory behind it. At that time i don't have any internet connection .later some month . i got internet connection in my school and got some lab facility to build a drone. but at that time there is a limitation for enter the lab . only seniors can enter . so i can't enter but i got other idea .i started to learning it first by asking question and doubts to seniors . that give more information behind theory etc.
i save money to buy drones parts .at last i did it. i don't have money to buy full parts
so i don't buy flight controller and use arduino instead of FC. but it program is very hard to me. but i did it also at last . but my PID value has many errors . i don't know how change or how it works. i go to near my ground and fly without correct the error of PID. my drone fly but it suddenly overshoot and it propeller was broken , i feel too sad because i don't except it. i take it and return to my home . my father and mom asked what happened my you are to sad . i don't tell . because it all of the drone material was new . so if it damaged on first use ,it is very shaming thing for me . But my mom got the reason for it . she tell to dad but they don't tell anything to me , they behave as normal . After few week , i am returing from school , i reached home , dad and mom was felt has very angry ,they tell we need to see you drone's propeller . i am shocked . they told take it from yourself fast.
i thing this is my end . when i open the self it was a surpise that there new propeller and new flight controller , i shocked again , it is very surmise to me . mom tell did you like it . i ran and hug them both . now i remembering those day. but the exam will start on next week and after all i started it again
.but the PID value was not coorect on that time also. so i learn it deeply at last i build it this week. because PID tuning is very hard , if we not get exact value of drone it will drift and overshoot. so let start our project
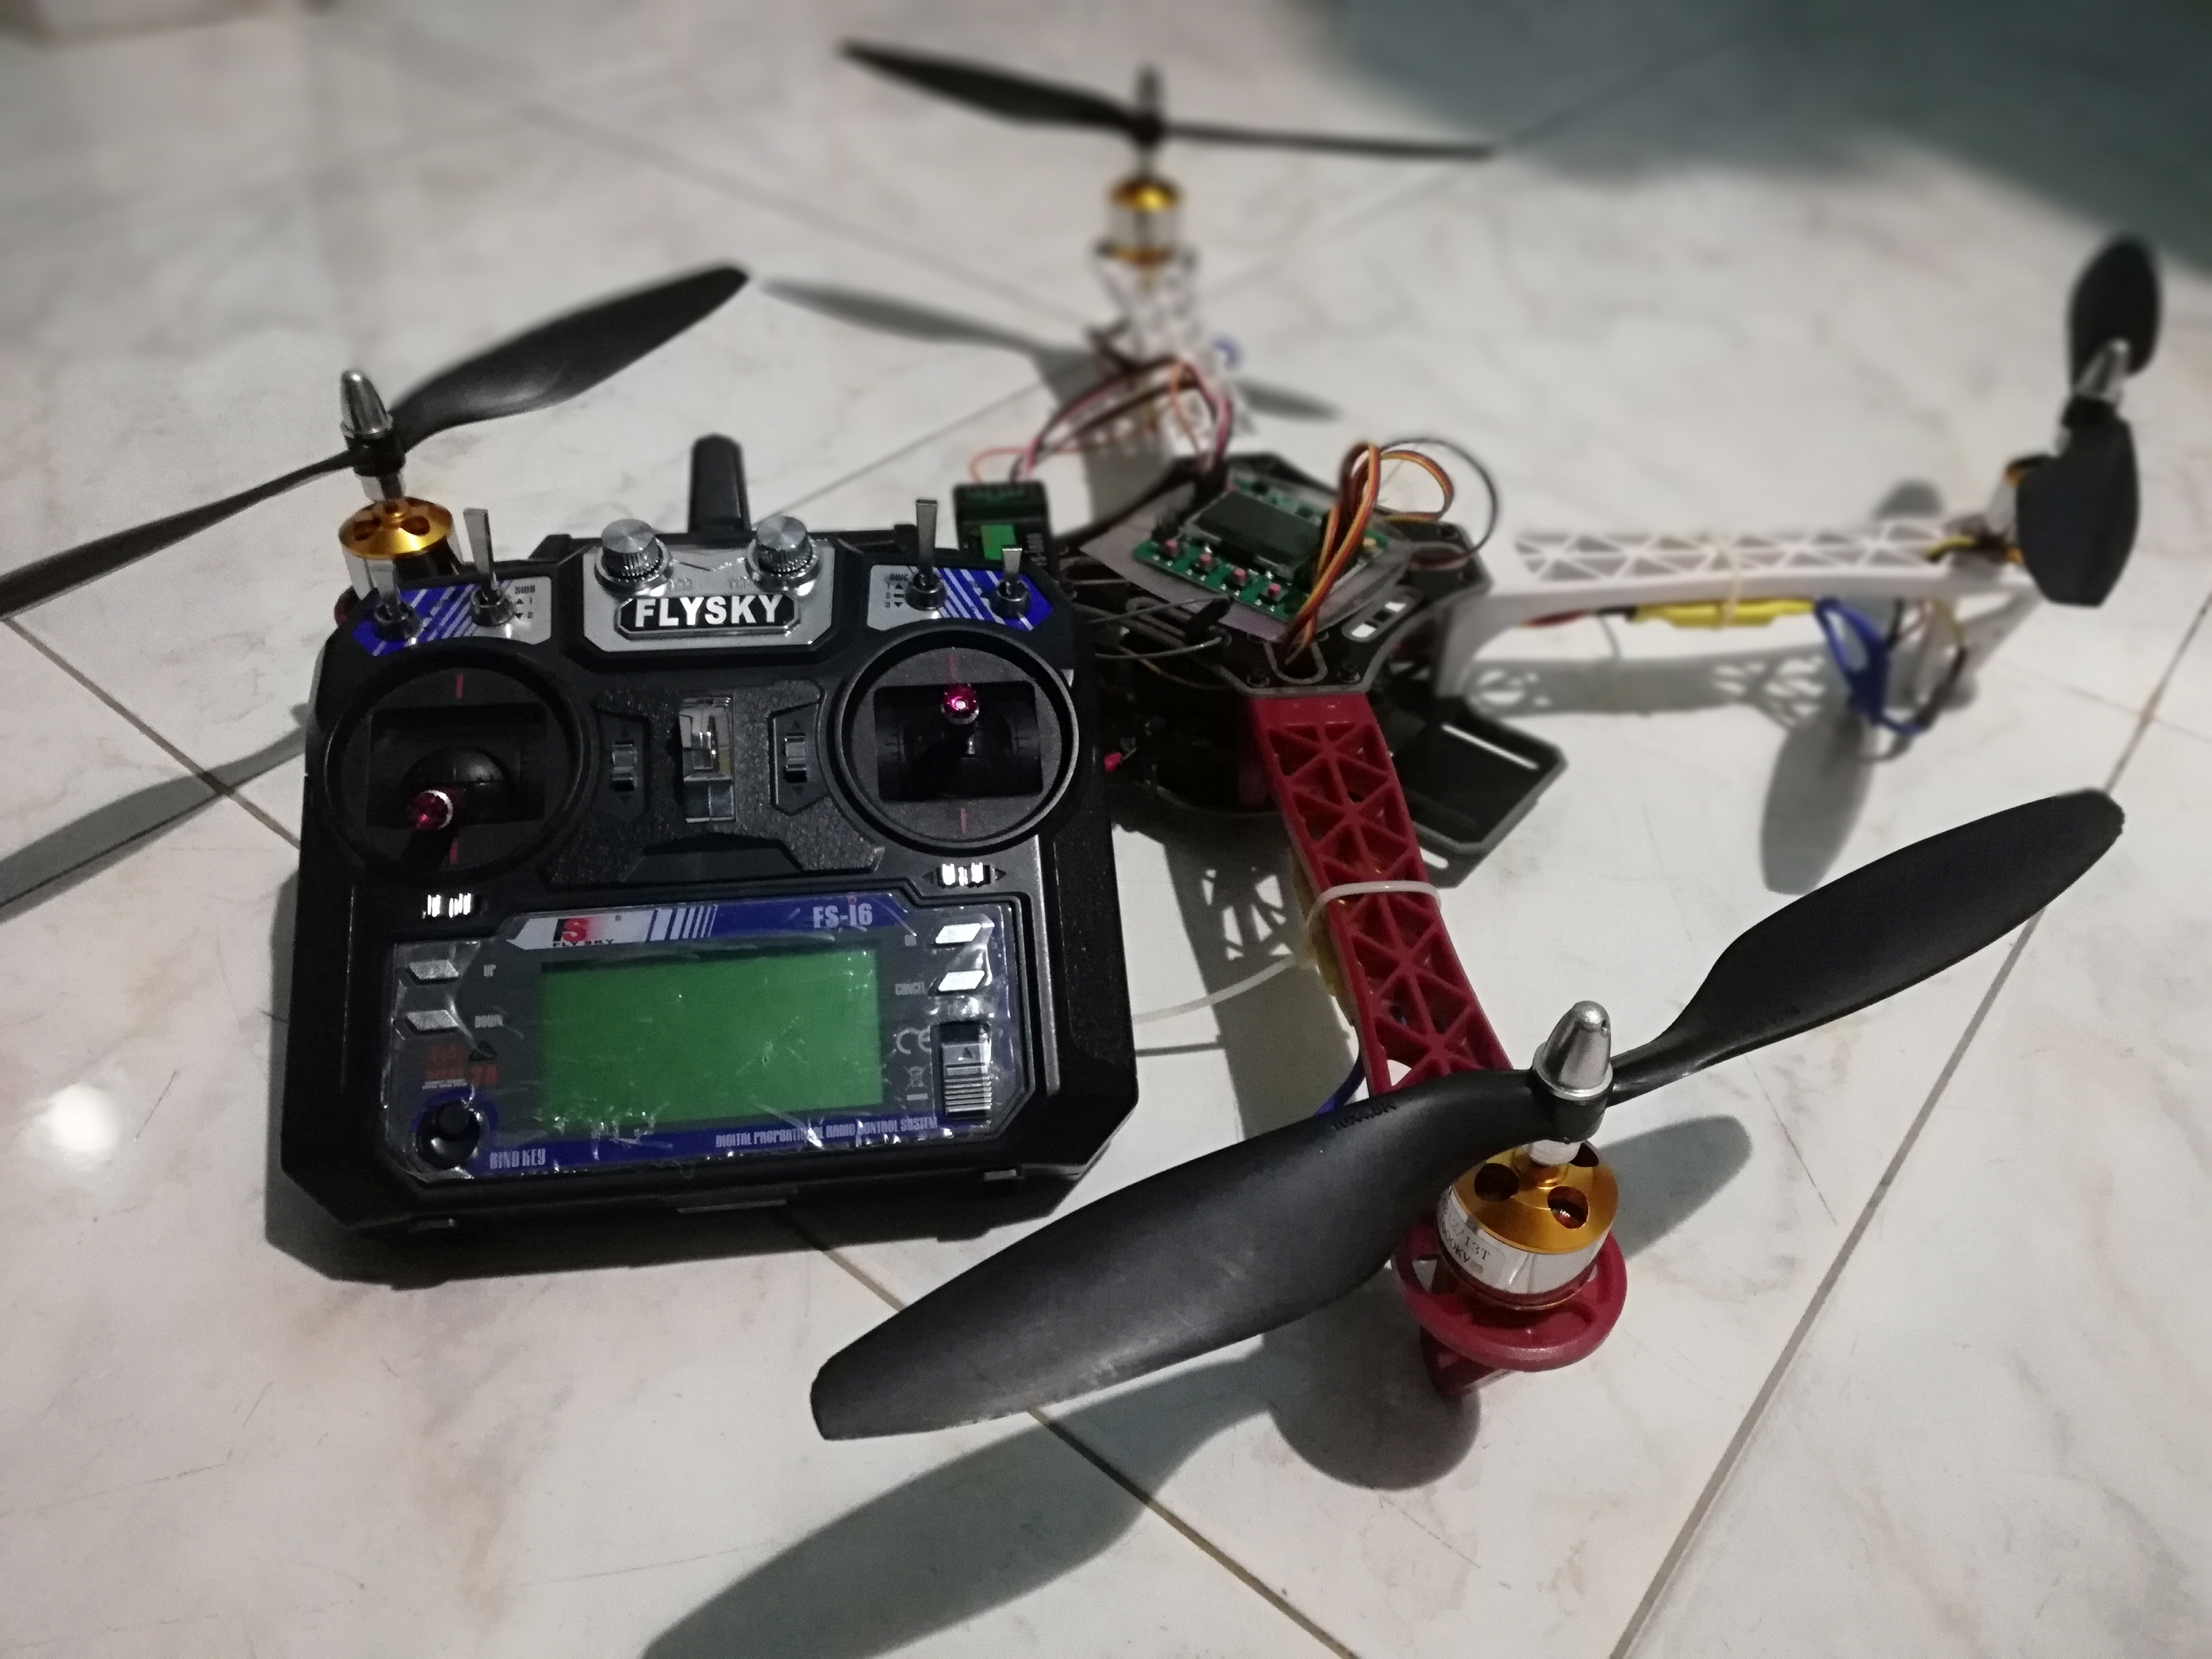
Supplies
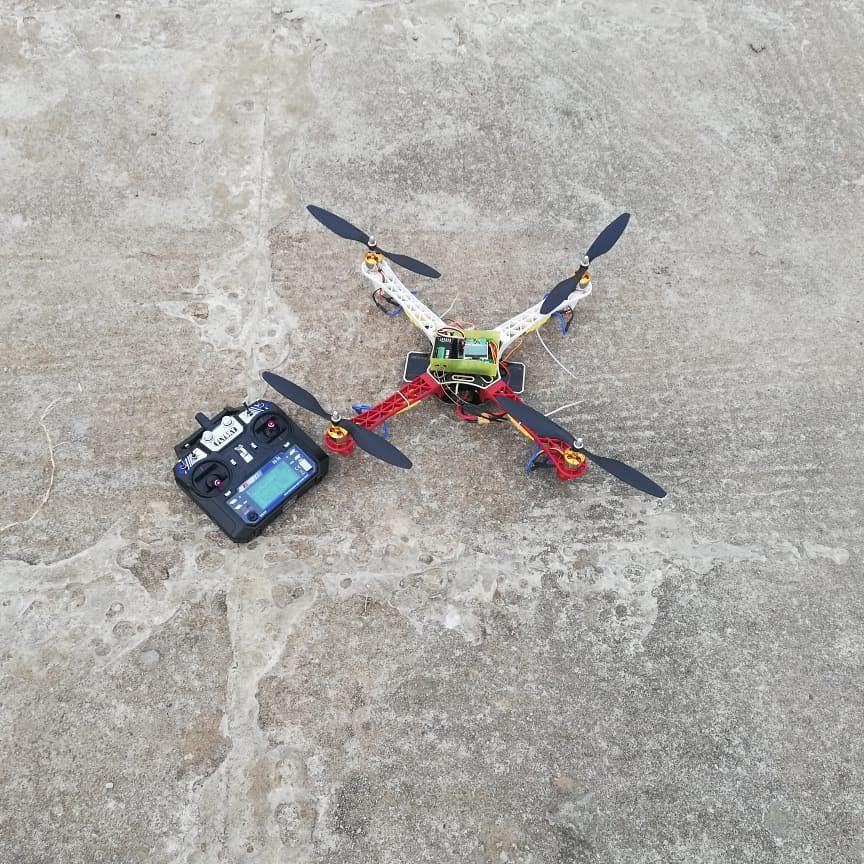
- frame( q450 )
- flight controller ( kk 2.1.5)
- transmitter and receiver ( fs-i6)
- brushless motor 1000kv
- propeller
- jumbing wire
- lipo battery 12v
- esc 30A
Assemble the Drone Parts
i don't explain it more . because it is very easy and know how to fix it.
Mount the Motor on Frame
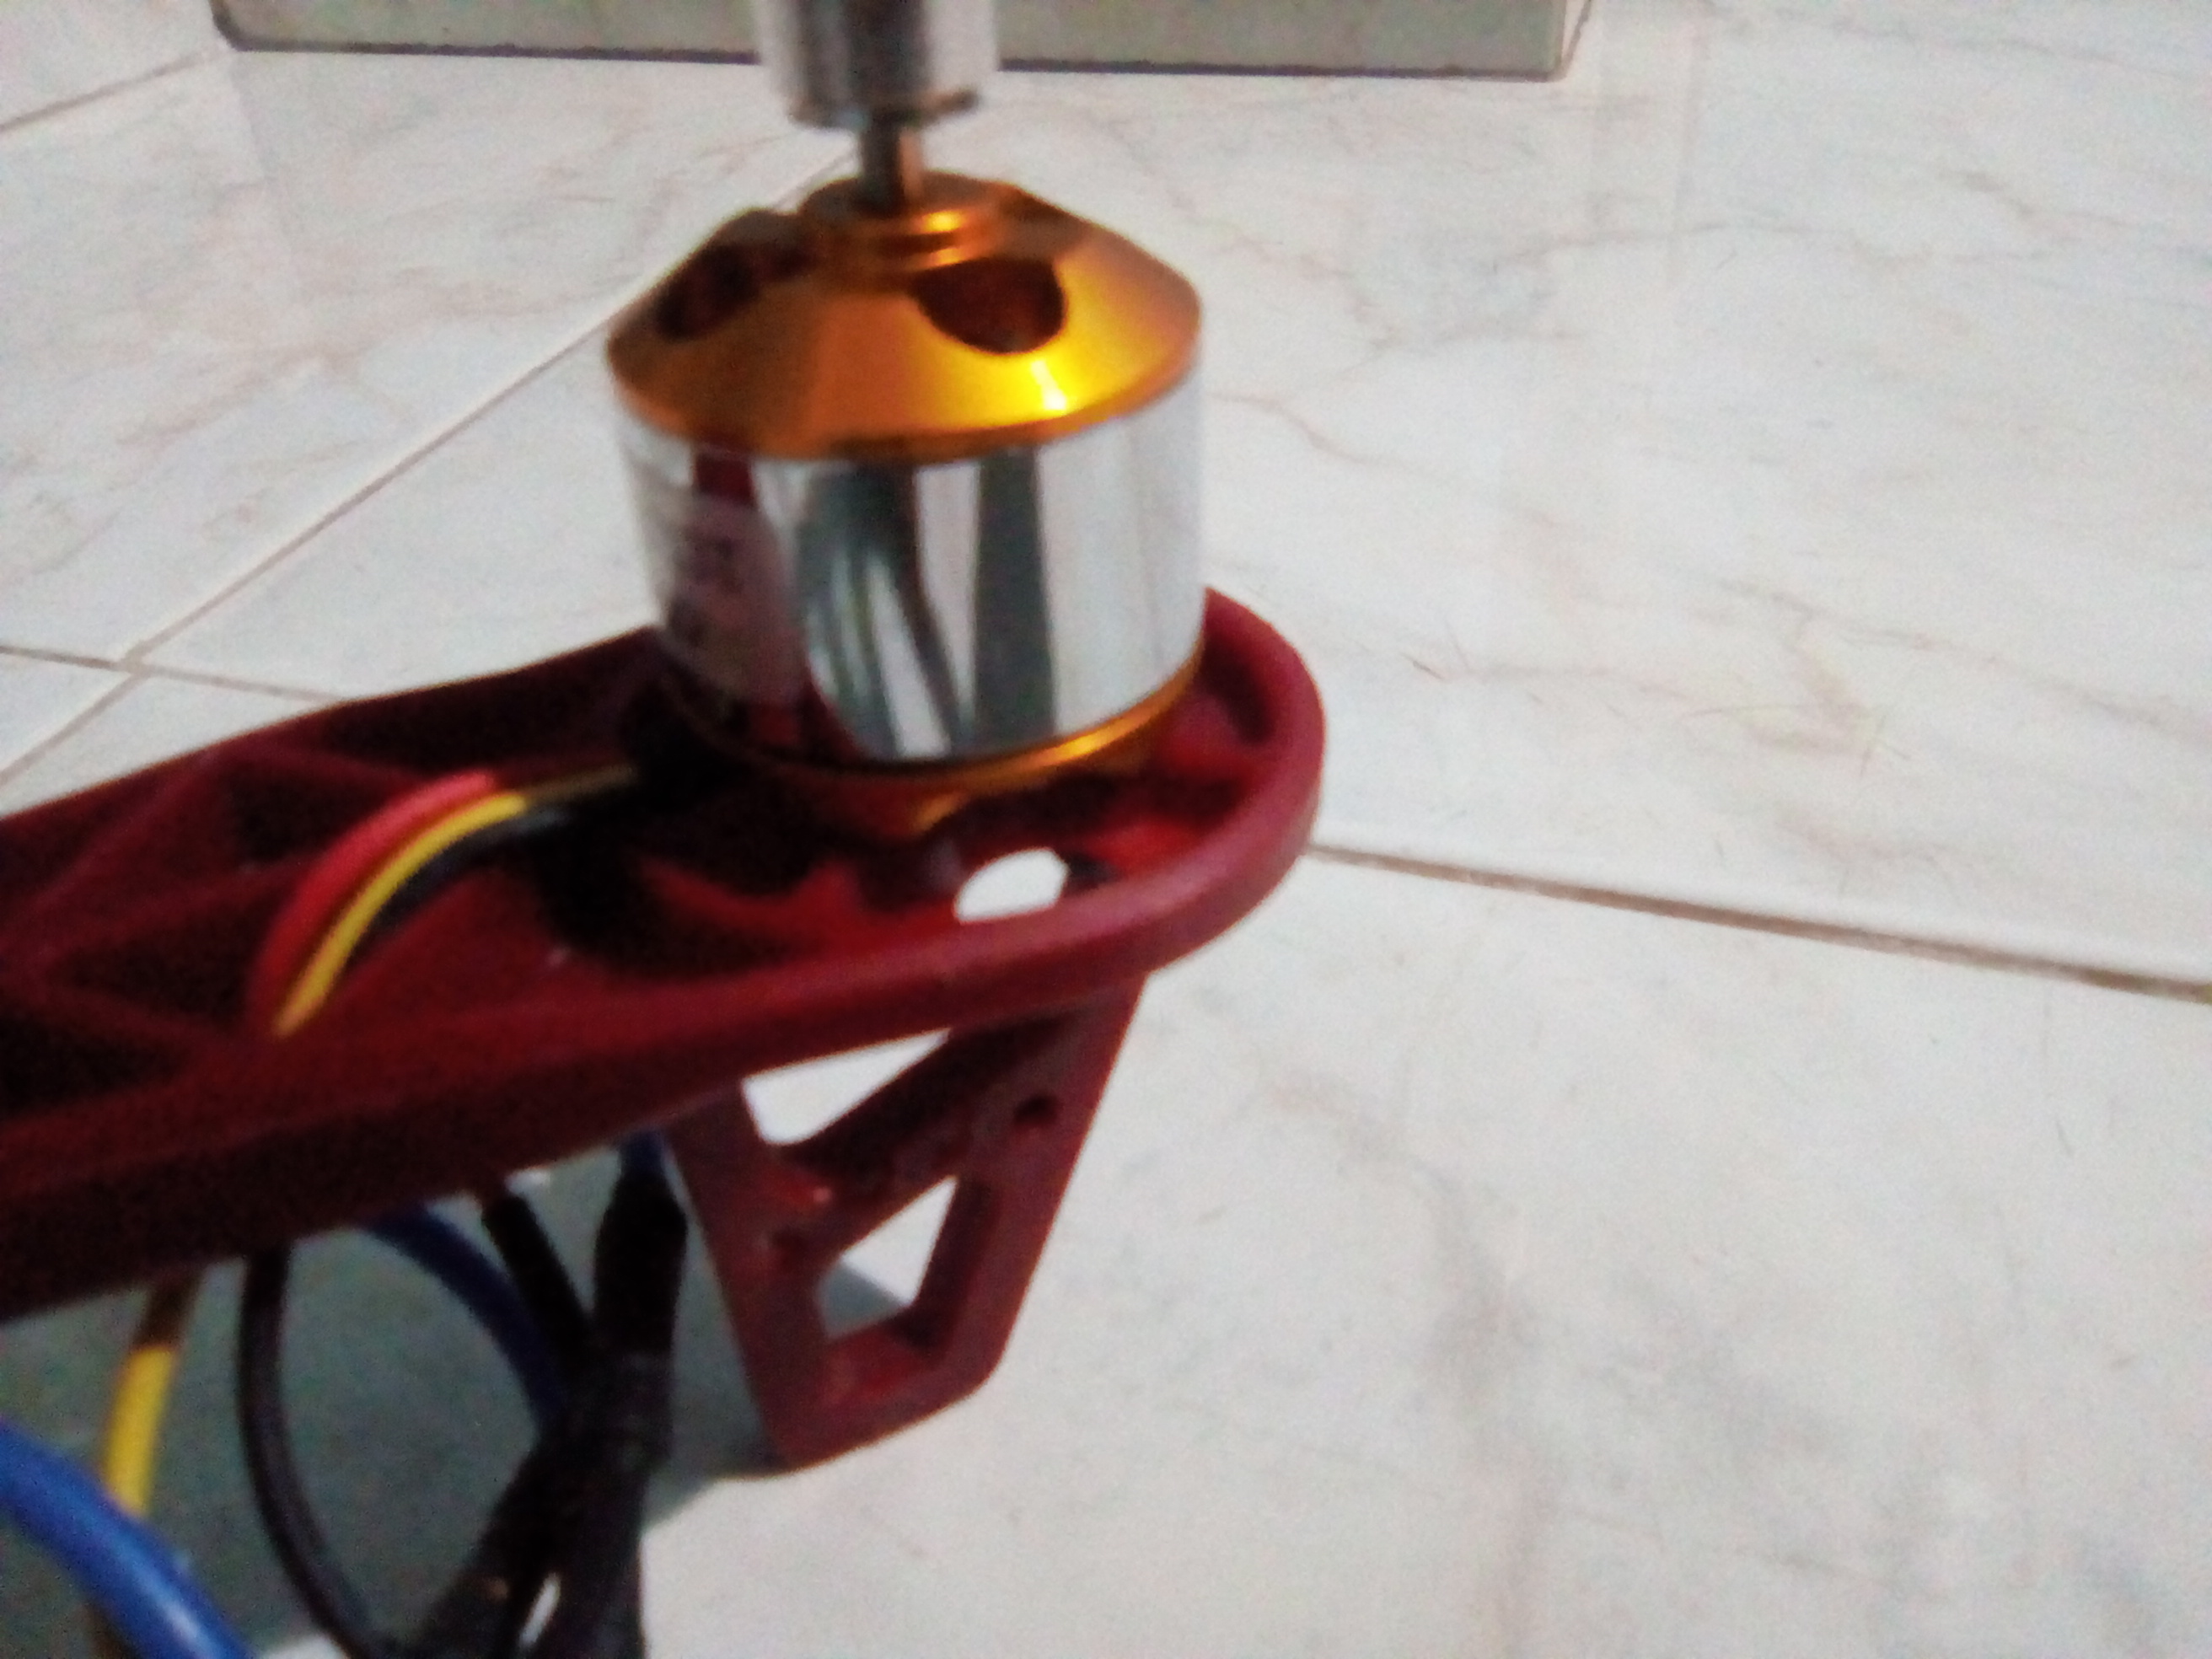
Fix the propellers . RIGHT PROPELLER MUST PUT ON CLOCKWISE ROTATING MOTOR AND LEFT PROPELLER ON ANTICLOCKWISE ROTATING MOTOR
FS I6 Setup
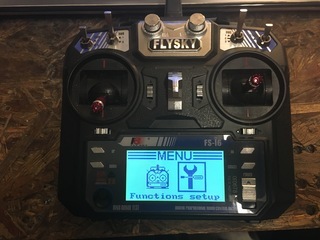
I figured I'd type up the instructions for setting up the FlySky FS-I6 flight mode switches for the manual.
You will use a 3 position switch (SWC) and a 2 position switch (in this case, SWD. You can use any of the 2 position switches, but it makes sense to use the one next to SWC for ease of reach). This will give you 3 SWC positions with SWD in it's first position and 3 SWC positions with SWD in it's second position, giving you a total of 6 positions for your 6 basic flight modes.
Click OK to move out of the home screen.
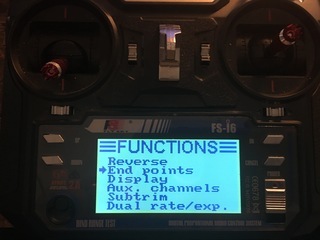
Now click your UP or DOWN button to move to SETUP.
Click OK to enter the SETUP MENU.
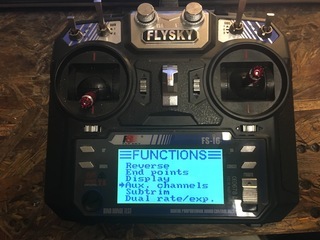
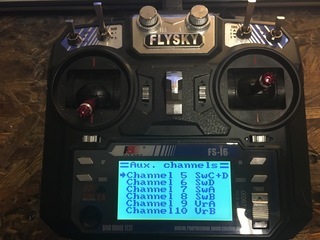
Click your DOWN button to move the selection arrow to AUX. CHANNELS.
Click OK to enter AUX. CHANNELS.
The selection arrow should be on CHANNEL 5. If not, click OK to cycle through and select CHANNEL 5.
Click your UP or DOWN button to cycle through the assignment options until CHANNEL 5 shows SWC + D (or SWC + whichever 2 position switch you wish to use).
Click OK to cycle down to CHANNEL 6.
Click your UP or DOWN button to change the assignment option to SWD (Or whichever 2 position switch you selected in the previous step).
Click OK to cycle down to CHANNEL 5.
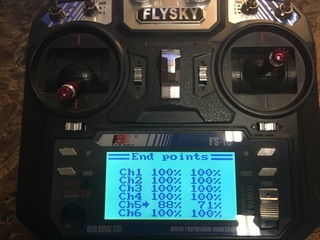
The arrow will be pointing at the low END POINT.
Use your UP or DOWN button to adjust this number.
click on cancel for few second to save it.
Kk 2.1.5 Setup

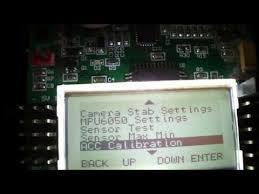.jpg)
- reset the board
- model type - x mode
- acc calibration
- esc calibration
- pid value
Default gains are set to 50/50/50 (roll/pitch/yaw) P-term, and 25, 25, 50 I-term.
Limits are used to set the maximum value of the available motor power to be used for correction, so for example 100 is 100%. The "I limit" value is also known as "anti wind-up" in PID theory. The use of Limits is most important on the yaw axis and to prevent a large yaw correction from saturating the motors (giving full or no throttle), causing no control of the roll/pitch axis. The default values permit 30% ("P Limit" 20 + "I limit" 10) of the motor power to be used to make a yaw correction, making 70% available for the roll/pitch axis, the most important ones. You can increase "Yaw P Limit" for faster Yaw response. You can also increase "Roll/Pitch/Yaw I Limit" for increased heading-hold "memory", that is how far it can deviate and still return to original attitude. Too large a ‘memory’ can cause problems if you have a "blow out" on one of the axis and the Flight Controller tries to correct it with opposite control input and then when the blow-out conditions disappear, the craft will try to return to an unknown attitude. It is recommended that unless you know what you are doing, to leave the limit values as default. Default values has no impact on The PI tuning process. Also leave the self-level "I gain" and "I limit" at zero.
Calibrate the ESC’s
1: Turn on the transmitter and set the throttle to max.
2: Press down button 1 and 4, keep pressing until last step. Releasing the buttons aborts the calibration.
3: Turn on power to the FC
4: Wait for the ESC to beep its full throttle calibrated signal. When You hear two short beeps put the throttle all the way down. Wait until you hear one short beep then release the buttons.The ESC’s are now calibrated
Choose how you want to turn on and off Self-Level mode. This is in Mode Settings, Self-Level. Choose Aux or Stick. If you choose Aux you can turn on and off Self-Level mode on your transmitter with a switch.If you choose Stick you turn on and off Self-Level mode by holding the aileron to the right when arming or disarming. Turn it of with left aileron. the Low Battery Alarm feature : setting for for the alarm which is in Misc. Settings, Alarm 1/10 Volts.
To Arm and Disarm the Flight Controller: Arm with right rudder and zero throttle. Disarm with left rudder and zero throttle.
Roll/Pitch Axis:
roll and pitch value is same
Pgain = 50
Plimit = 100
Igain = 25
Ilimit = 20
Yaw Axis:
Pgain = 50
Plimit = 20
Igain = 25
Ilimit = 10
this my drone pi value can use it , but i all drone this value is different . so you need to find you pi value
Our Drone Is Ready
when you fly it first time there would be some issue but when you practice it , we can solve it