UARM WITH VOICE CONTROL – EASYVR MODULE
by Ufactory in Circuits > Robots
4313 Views, 27 Favorites, 0 Comments
UARM WITH VOICE CONTROL – EASYVR MODULE
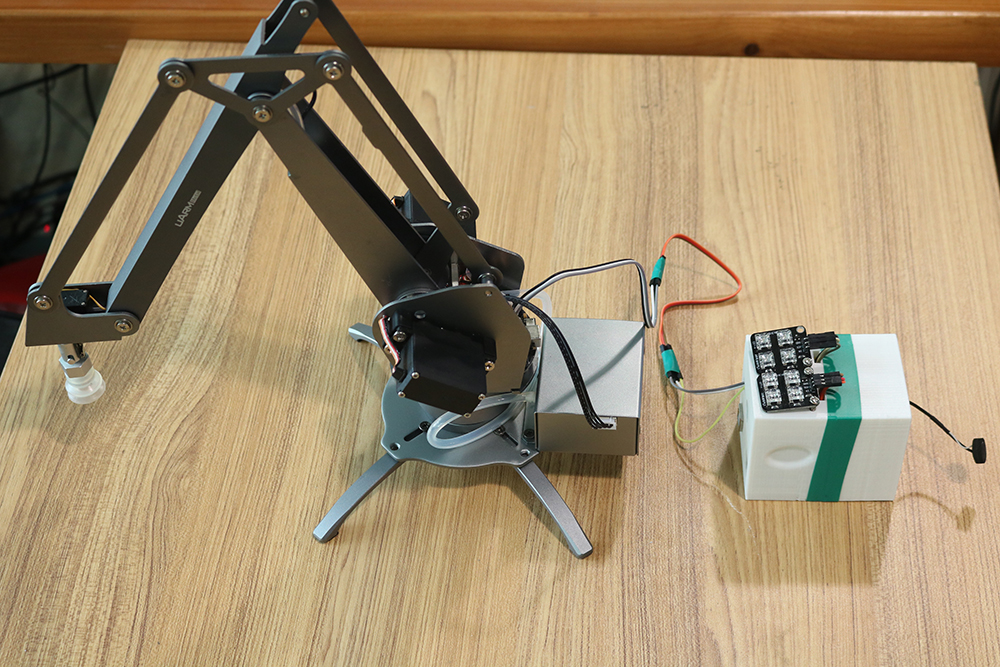
Makers, these days, we made another use-case which used EasyVR module to control uArm through Voice Recognition method.
In this video, I spoke 7 commands : Start, Right, Forward, Backward, Down, Home, Release. EasyVR module recognized my voice and send command to uArm through serial port RX/TX.
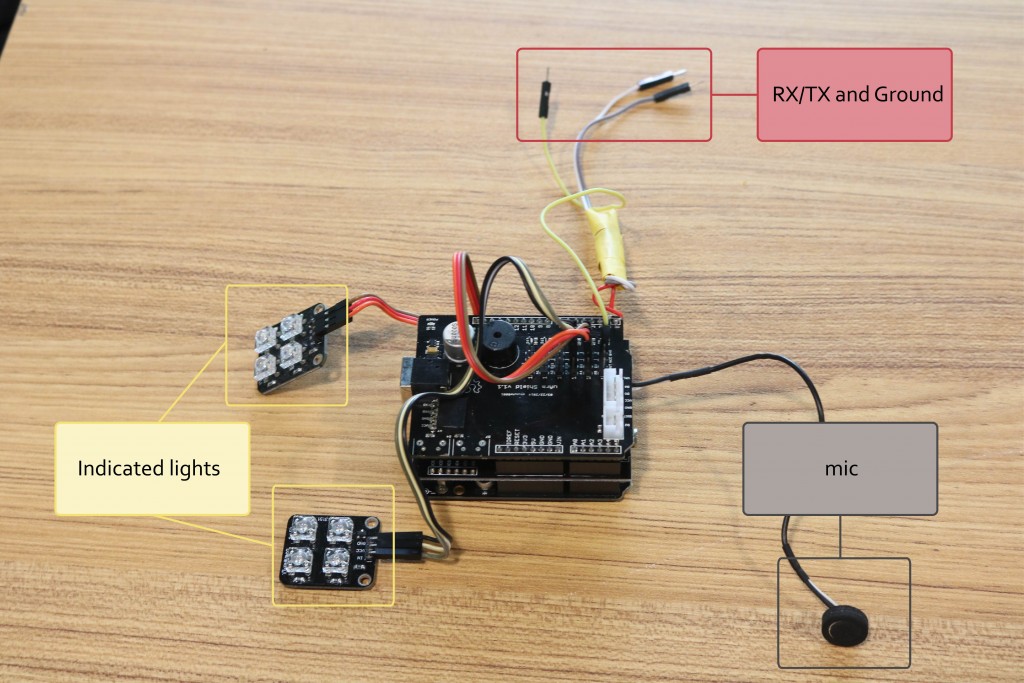
Here is the module:
There are one input power supply and three outputs : indicated lights, communication ports and a mic.
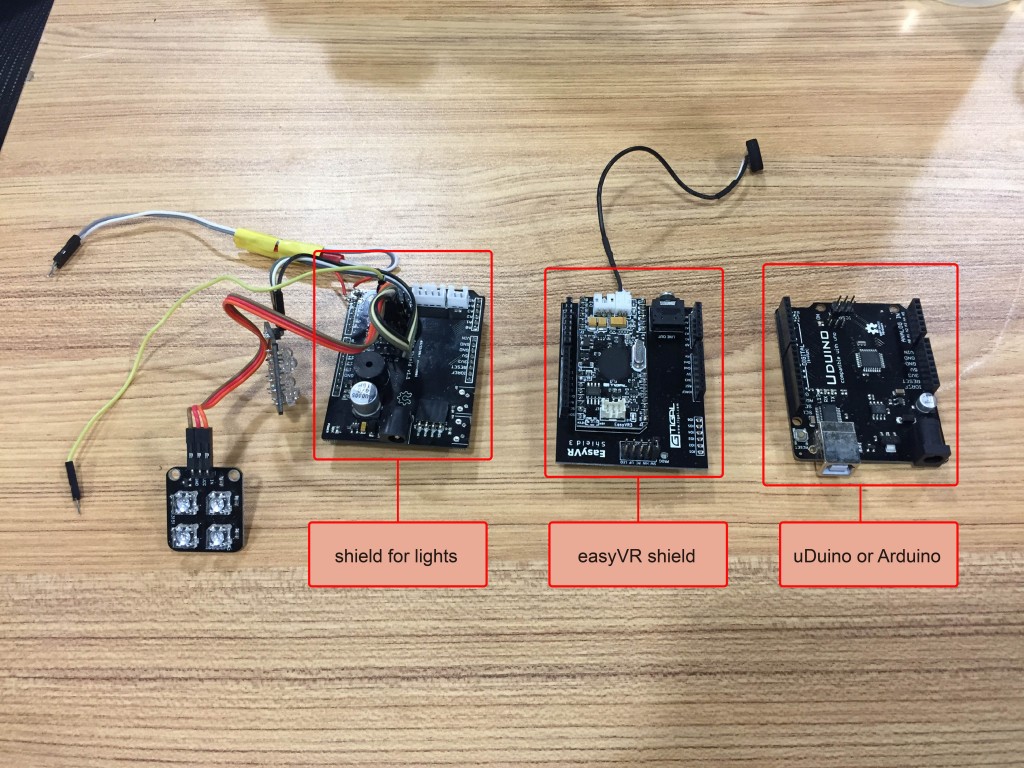
he whole board contains 3 parts, shield for lights, easyVR shield and uDuino or an Arduino micro-controller.
You can fellow the instruction below to re-do this project.
Find All Things You Need to Prepare:
uArm Metal version or Acrylic version (view our official website)
EasyVR shield. 2.0 version (http://www.veear.eu/products/old-products/easyvr/)
Additional uDoino or Arduino
Three Jumper wires
*optional a shield for lights and two 2*2 LED light
Train Your Voice in EasyVR Commander
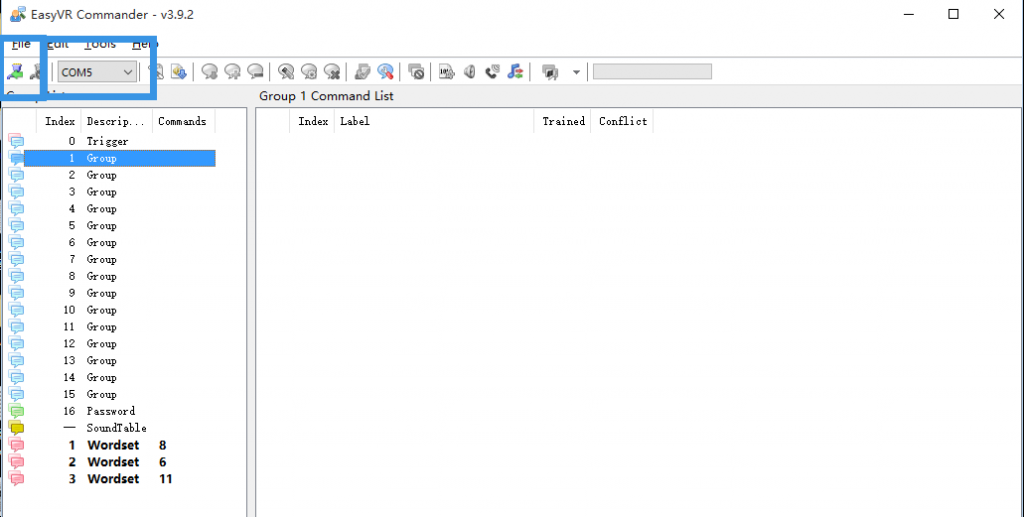
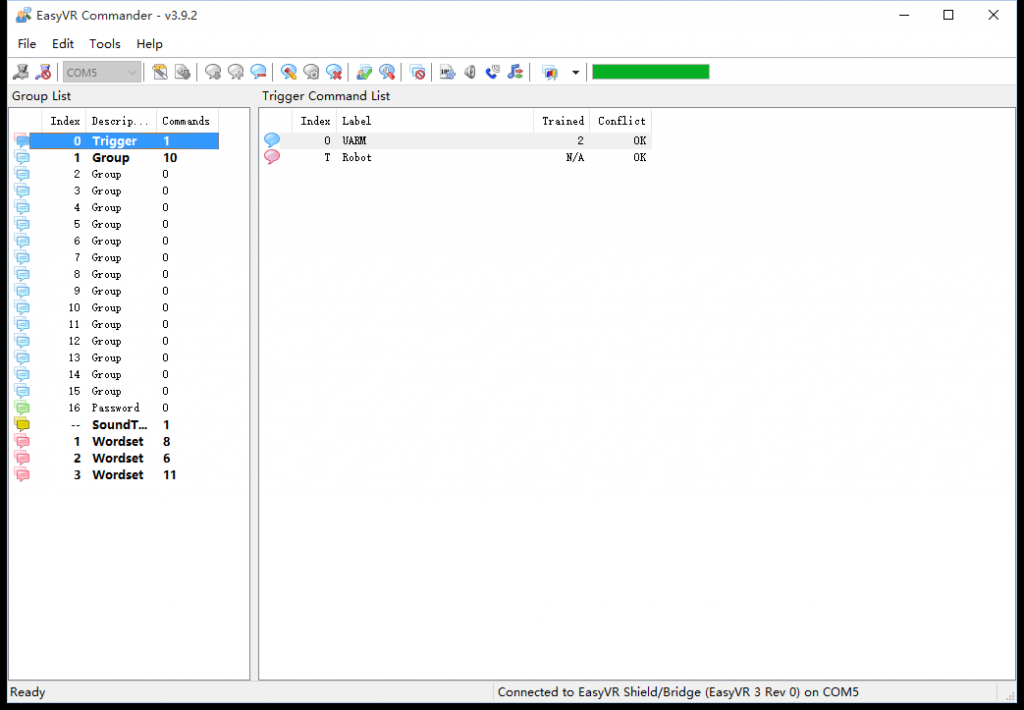
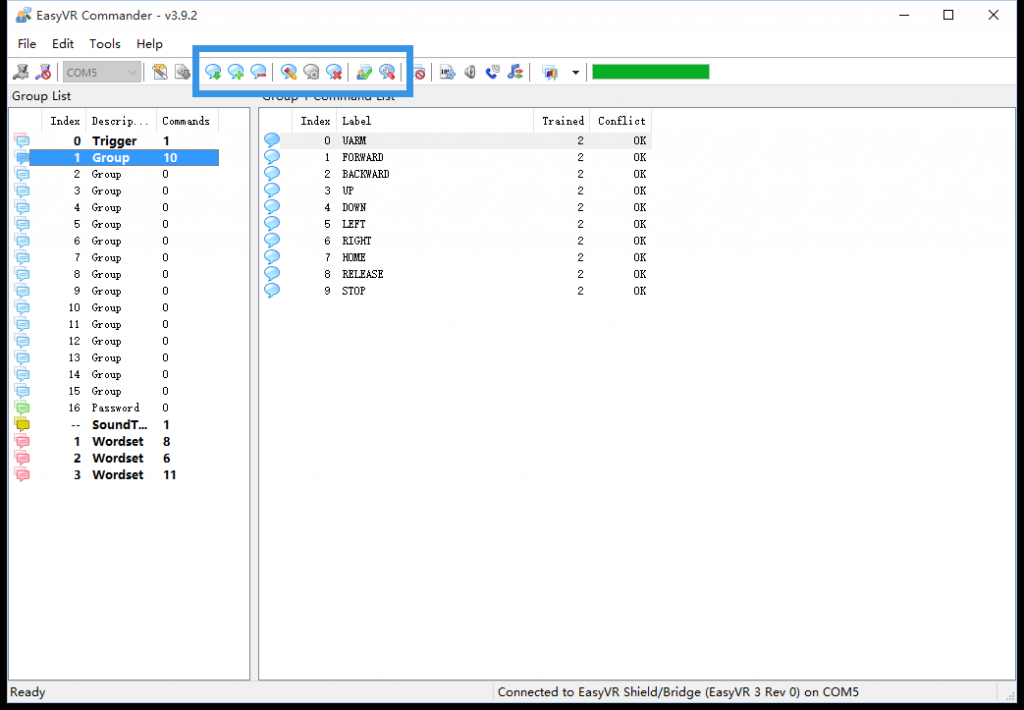
First, install EasyVR commander from easyVR official website http://www.veear.eu/downloads/.
Then, hook up EasyVR and its shield and stack EasyVR to arduino which can read signal from easyVR.
After that, open easyVR commander, find the serial port and connect.
In the trigger page, first train the trigger and rename the label.
Then in the group 1, rename all instructions and train them from your voice. Test them after that to ensure easyVR can recognize all data.
Recognize Your Voice in EasyVR Shields and Output the Data
In the easyVR side, download the code easyVRControl.zip into it and it will output the signal which indicates your voice index .
To indicate different status, we wire two LED lights on the top of the easyVR shield. Output the signal, we use Serial.print(easyvr.getCommand()).
Read the Input and Move UArm
In the uArm side, use char readSerial = Serial.read(); to read data from EasyVR shield through TX/RX ports. Remember also to wire ground pins to ensure the groud voltage.
For different input signal, uArm will execute different movement. All movements show below:
case 1: move forward
case 2: move backward
case 3: move upward
case 4: move downward
case 5: move leftward
case 6: move rightward
case 7: move to HOME, point (0,-20,15)
case 8: release uArm and detach all servos
Connect Wires and Ready to Go
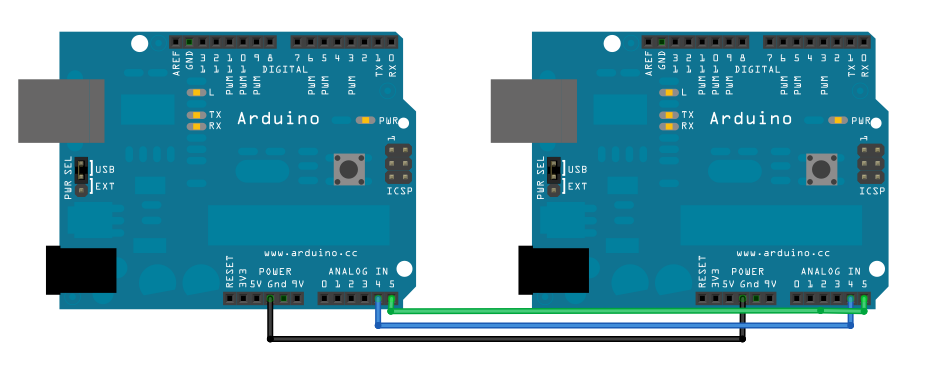
For connect two arduinos, you can follow the website https://www.arduino.cc/en/Tutorial/MasterWriter .
After all 5 steps, you can drive your uArm through voice control! Congratulations.
Hook Up With a 3D-print Case
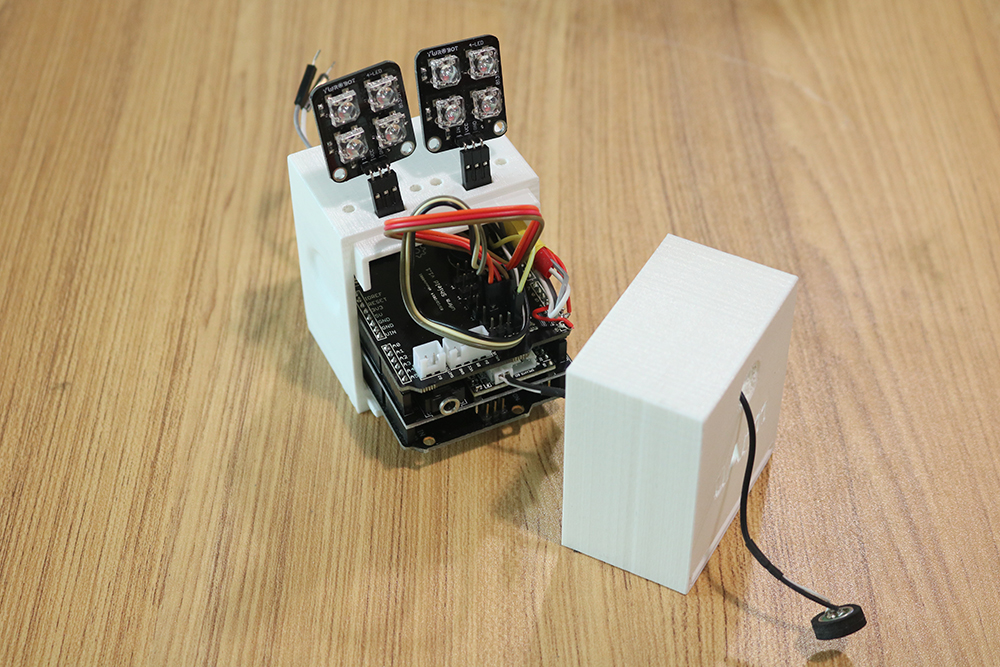
So we printed a 3d case to allow everything stay inside.
All code are free to download, checkout this link to download the
Source code:
https://github.com/uArm-Developer/UArmForArduino/r...
Install two different .ino files to easyVR and uArm respectively.
https://github.com/uArm-Developer/UArmForArduino/r...
You can also check our Youtube channel to see what are we doing now~
remember you have calibrated uArm in the latest way, check this website below to calibrate uArm and use all new APIs .
developer.evol.net