Two Word Text Stand
Have any cool items that deserve a stand? This text stand might be for you! In this instructable, you will learn how to model your own two-word stand to say whatever you want.
Downloads
Supplies
To make your own text stand, you will need:
- Fusion 360
- A 3D-printer and filament
Start Modeling in Fusion 360
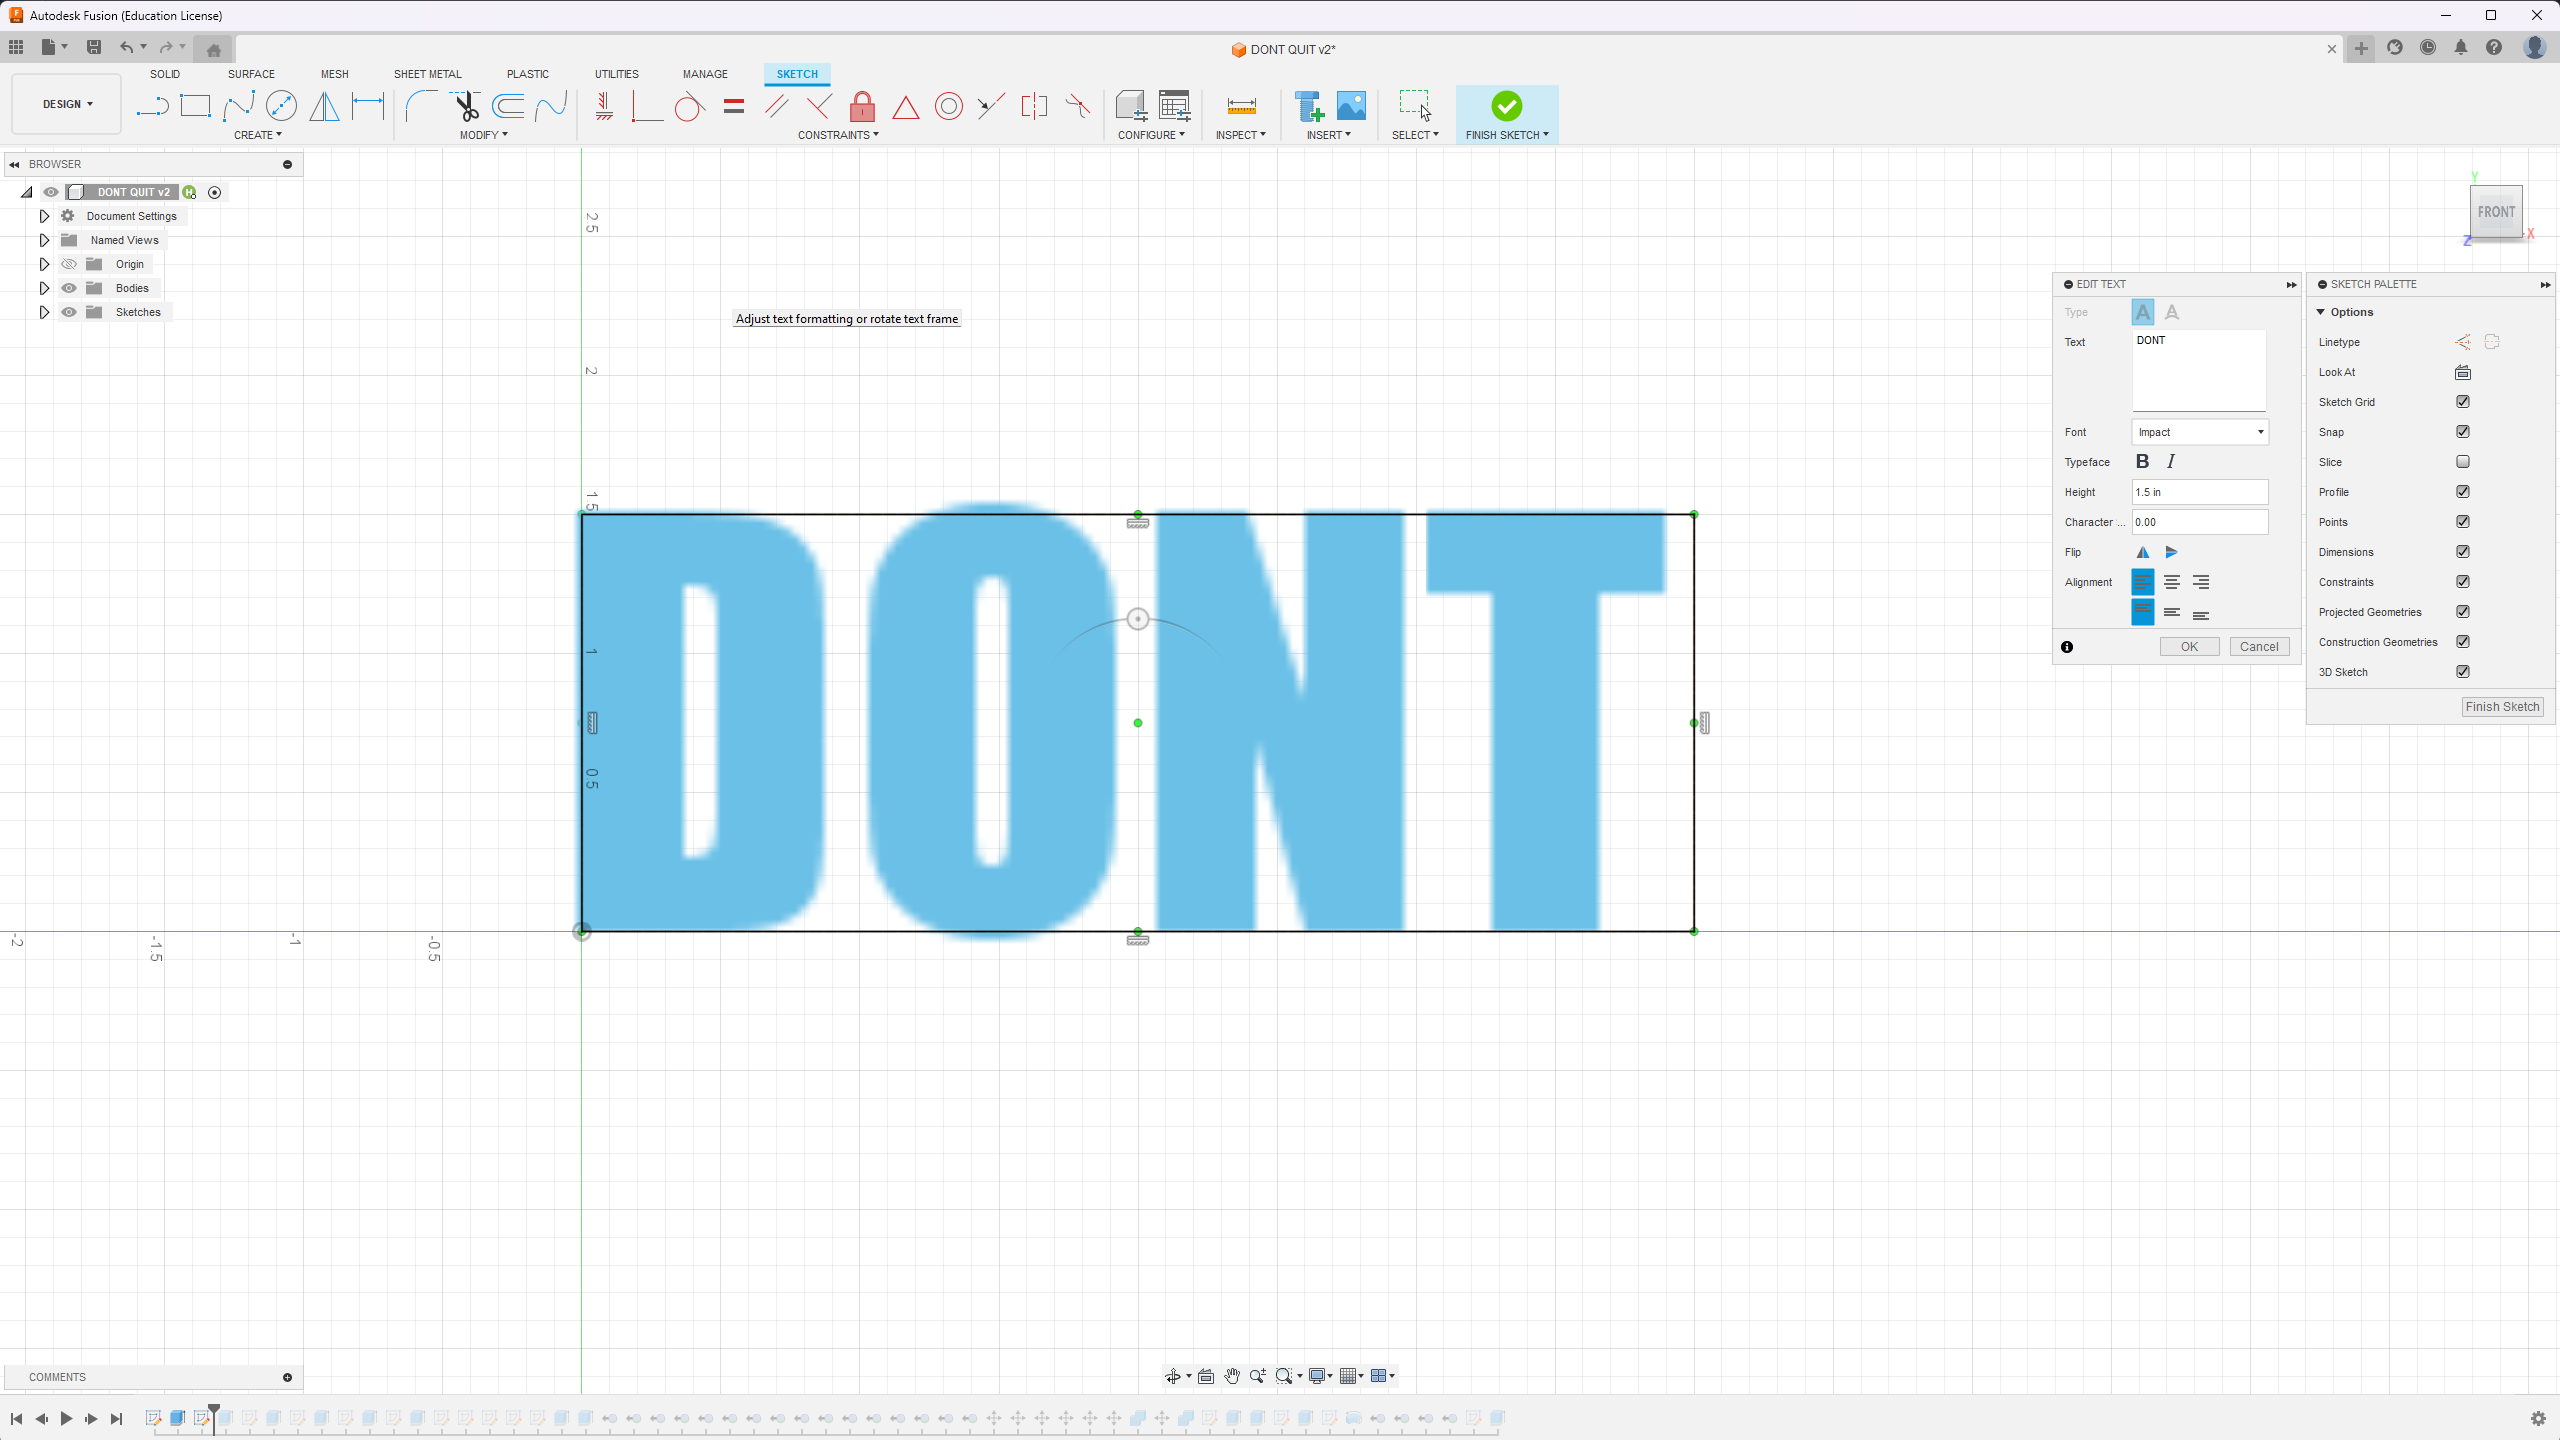
In the next few steps, I will teach you how to make your own text stand in Fusion 360 to read whatever you want. I'm not going to go over how to download and install Fusion 360, but it's a simple process there are plenty of tutorials to follow for that. The first step for making your own stand is to create a sketch on any plane and use the text tool to write out your first word. I suggest impact font but any really bold font will work. Also make sure to choose the correct text height. I chose 1.5" for my stand. Don't worry about the spacing in between the letters, we'll fix that later. Also try not to use any letters that stick down (q, p, g, j or y). Sometimes, it doesn't look bad and is still readable (see my stand with a 'q' in 'quit'). Finally, extrude the letters out by a few inches.
Add the Second Word
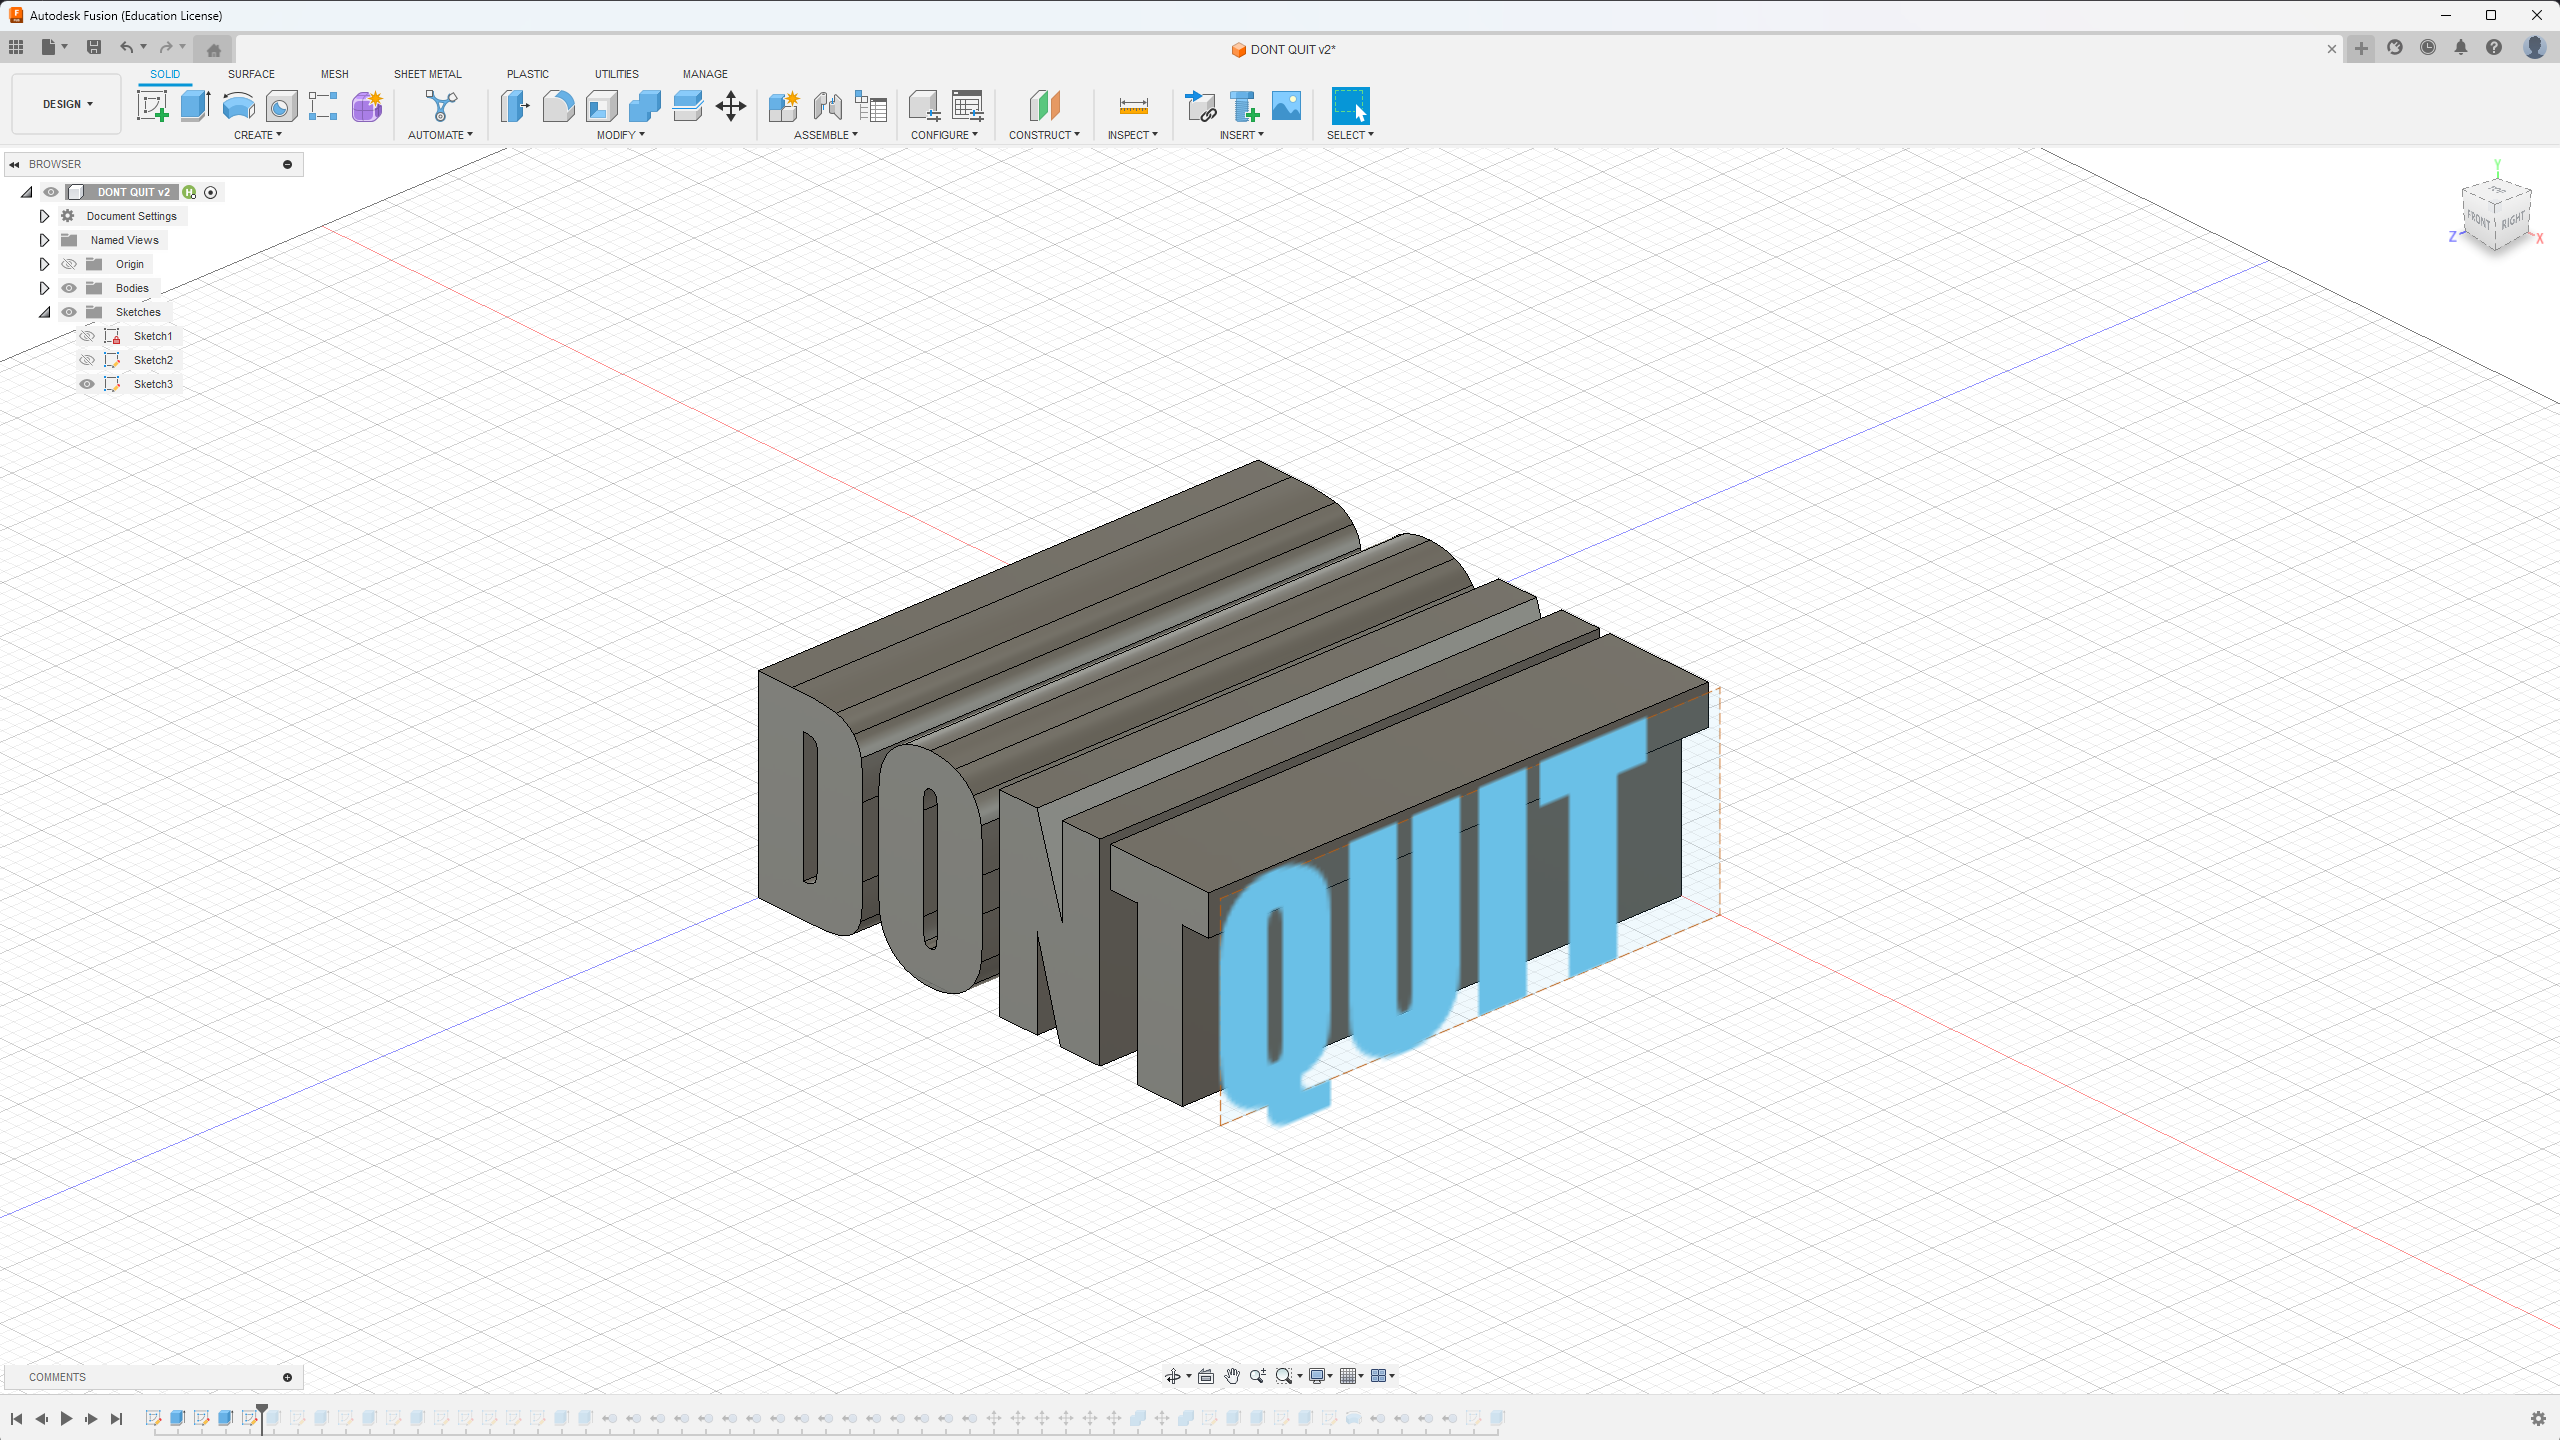
Next, you should select the face on the right of the final letter of your first word and create a sketch there. Again, write out your word, change the font, and change the text height to match the first word. If the second word hangs off the left or right edge of the first word, just extrude the first word to make room. Now, extrude the second word backward a little past the first word. Make sure that 'new body' is selected and not 'cut'.
Cut the Words Out
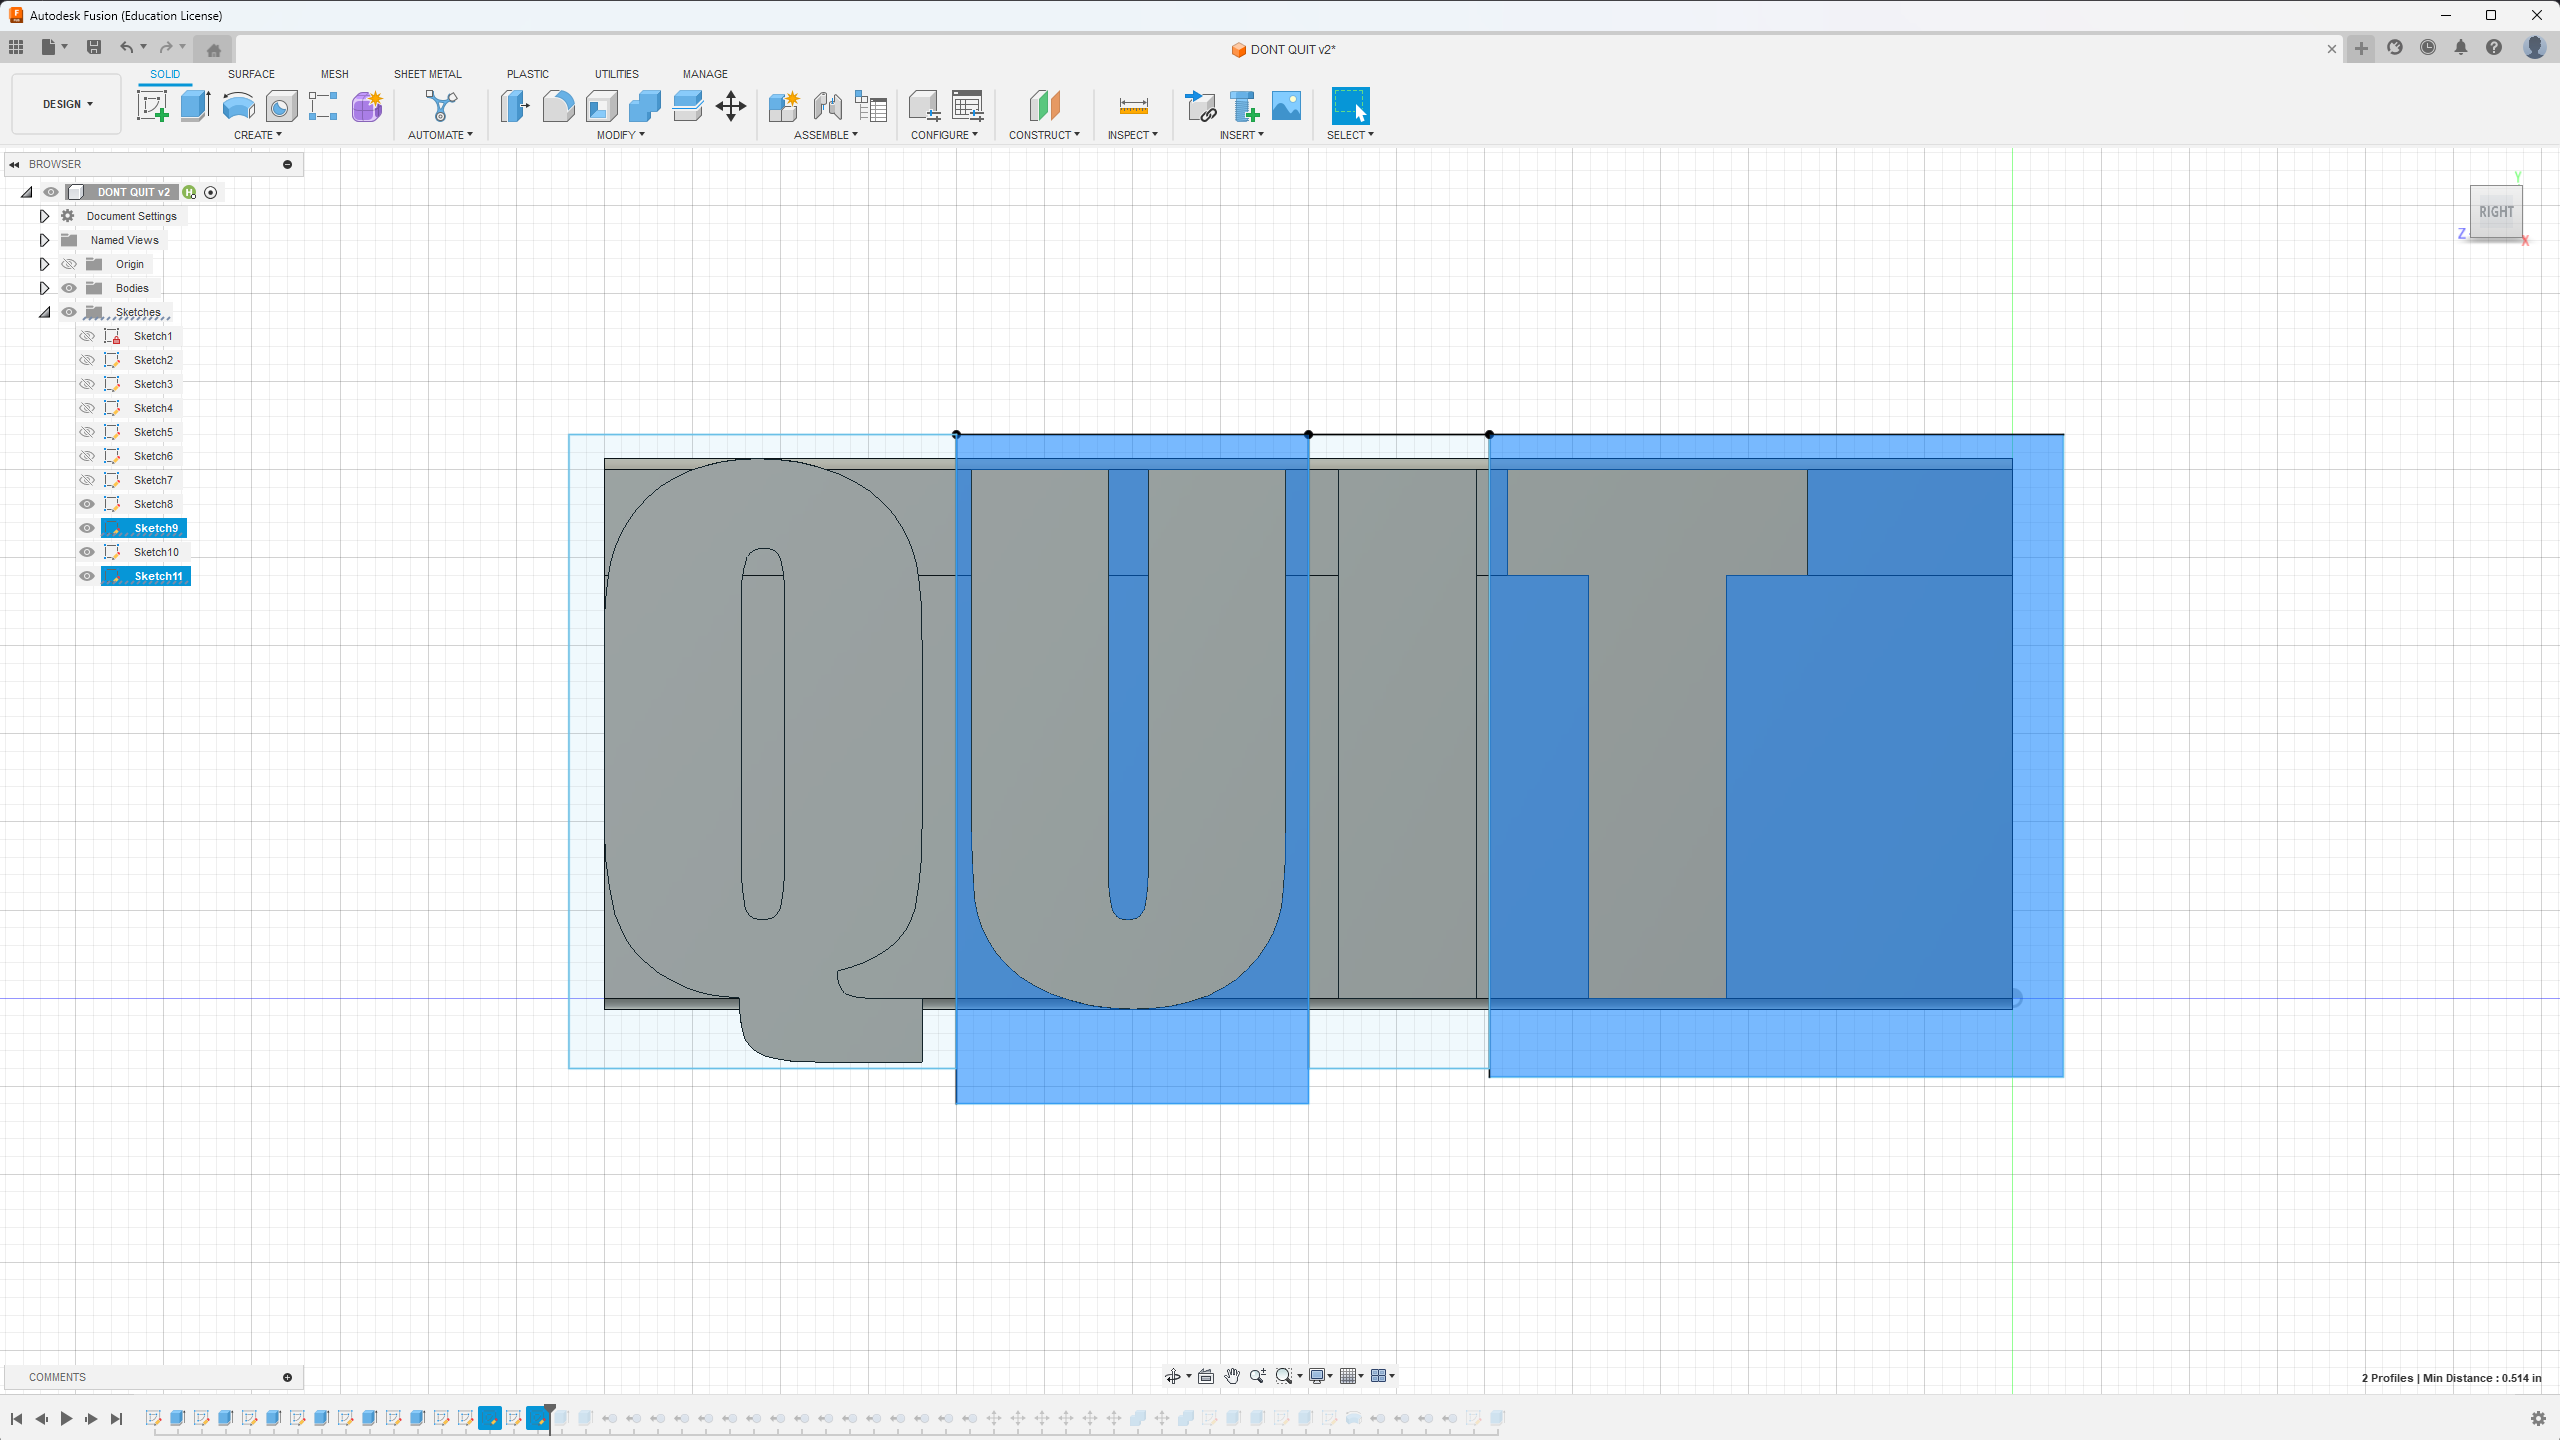
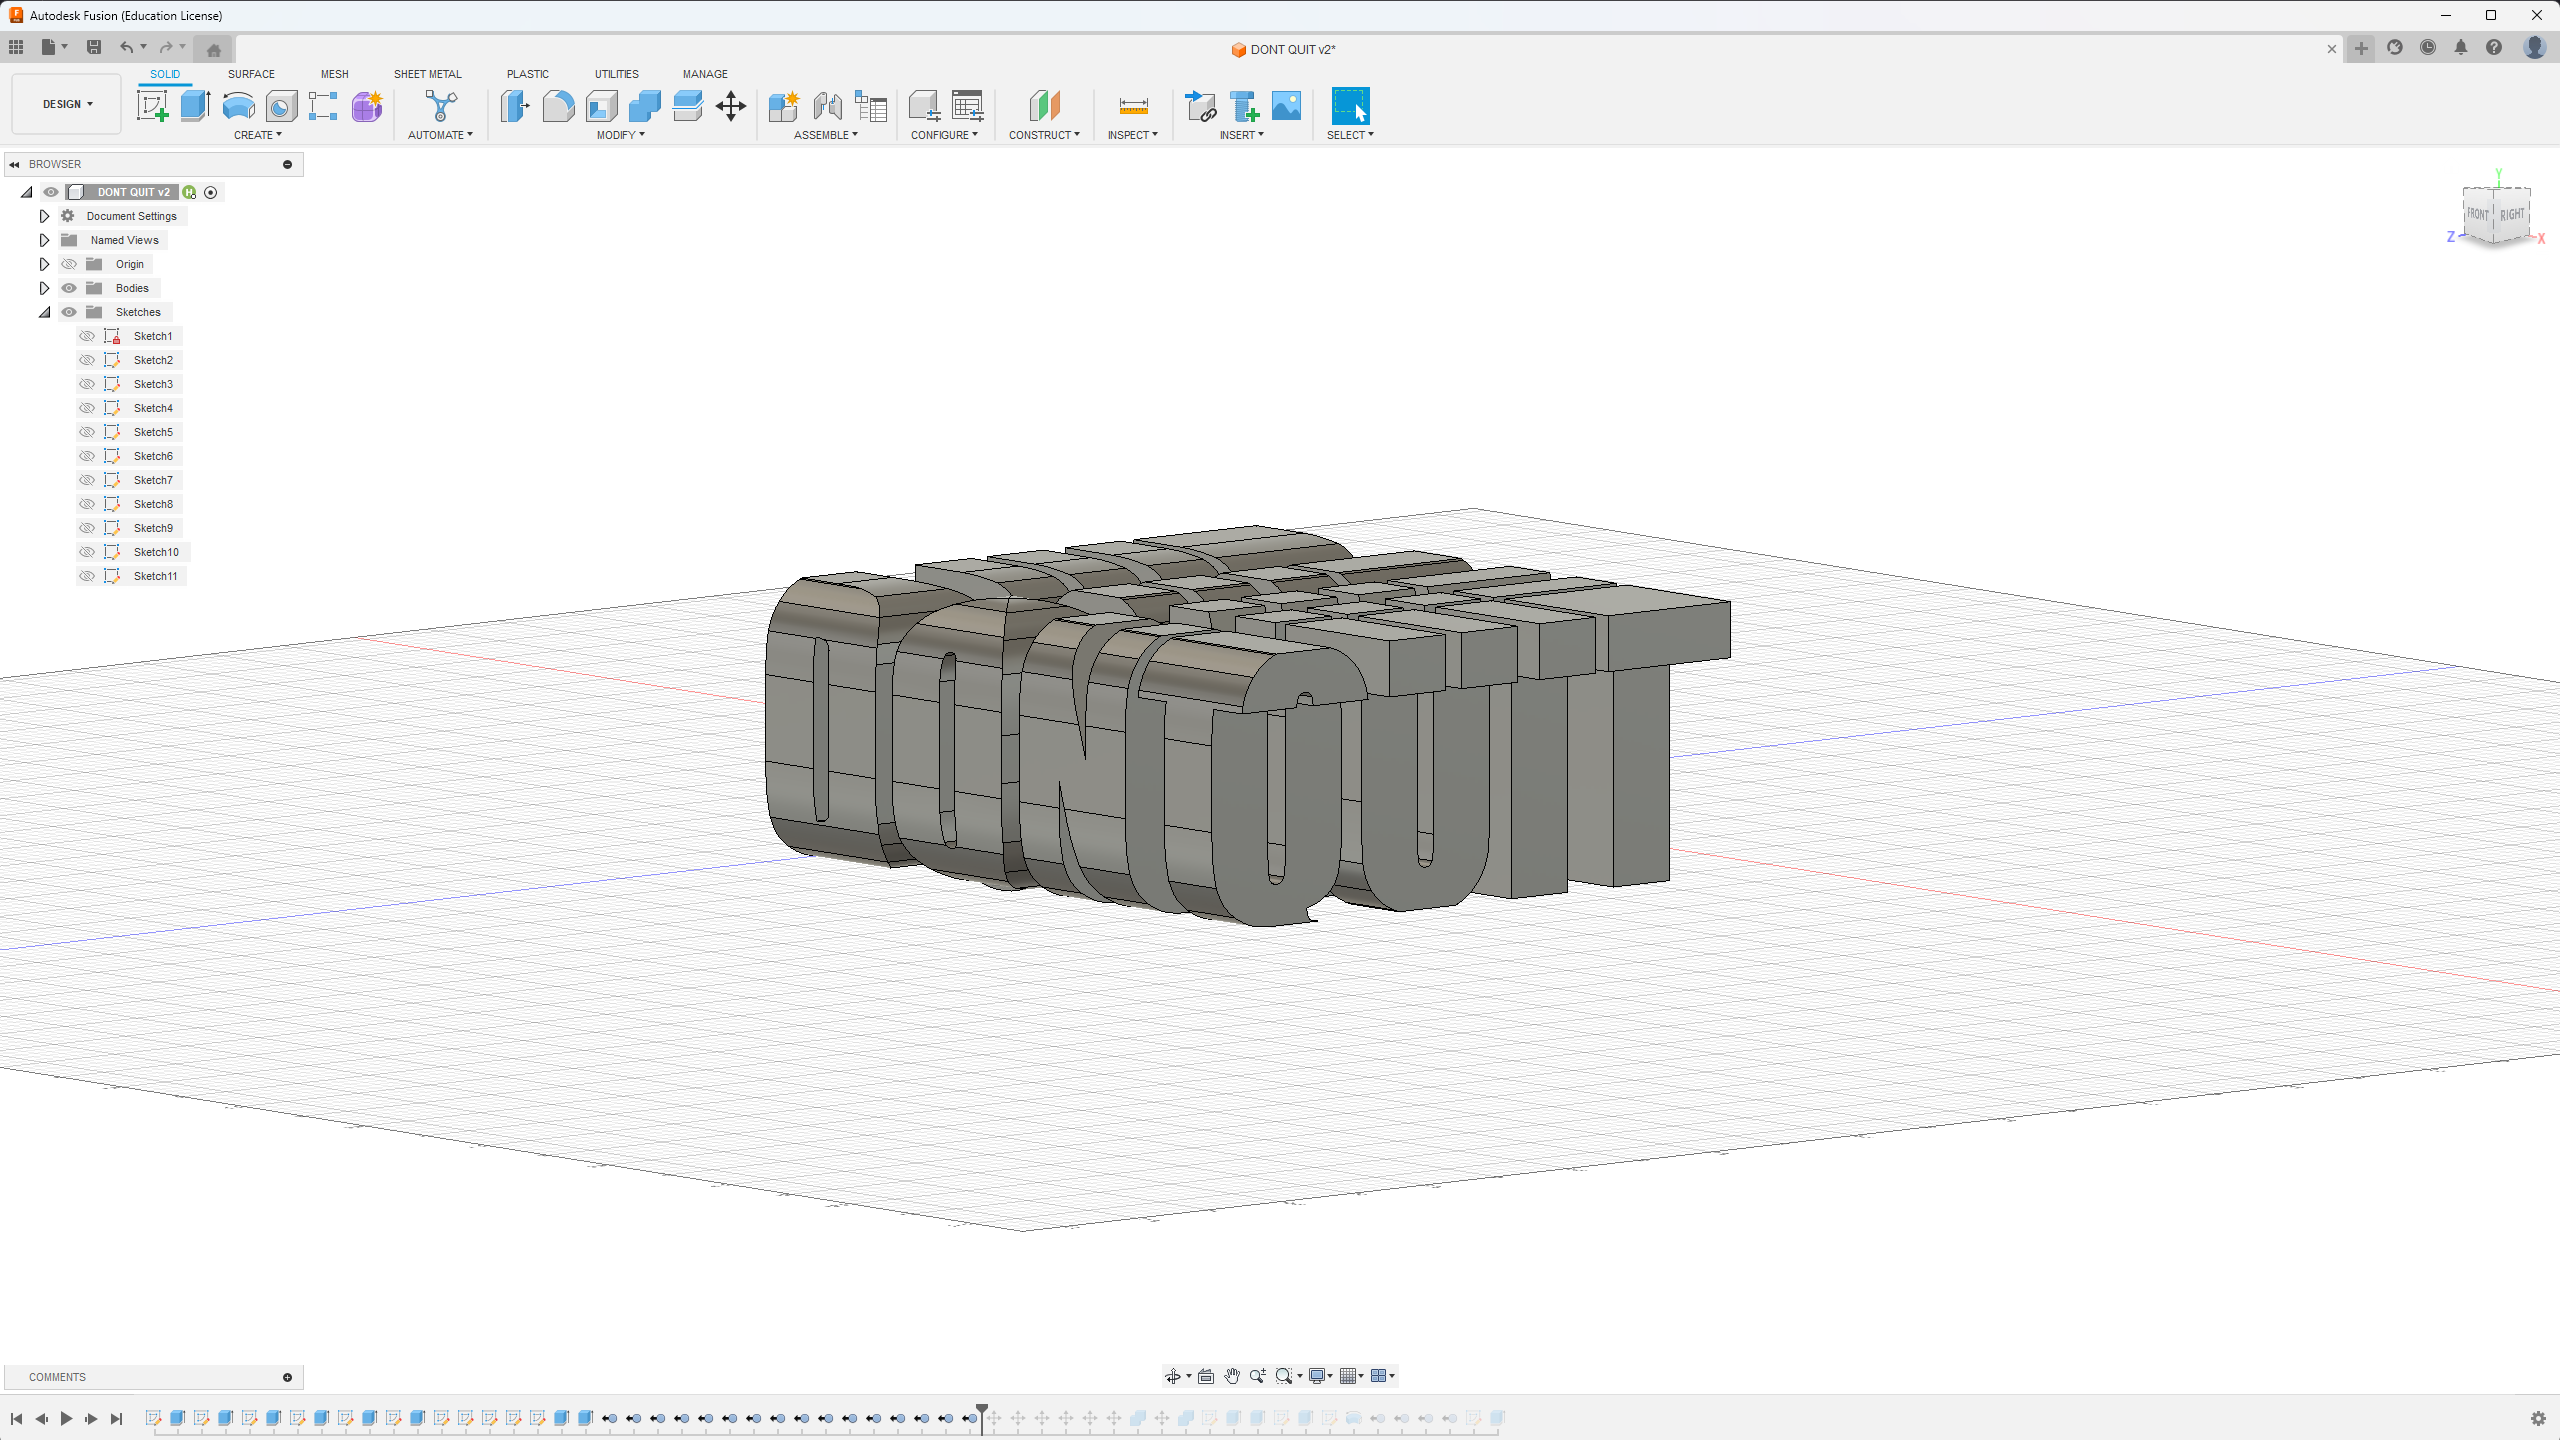
Now you will need to create sketches on each letter. Select its face and create a box around it. The box should include all overhangs (see the box around the 't') but not overlap with another letter. If you've done this correctly, you should be able to click the area around each letter like in the first picture. Do this for both words and then cut all these negative areas out using the extrude tool. The final result should resemble the second picture.
Fix the Letter Spacing
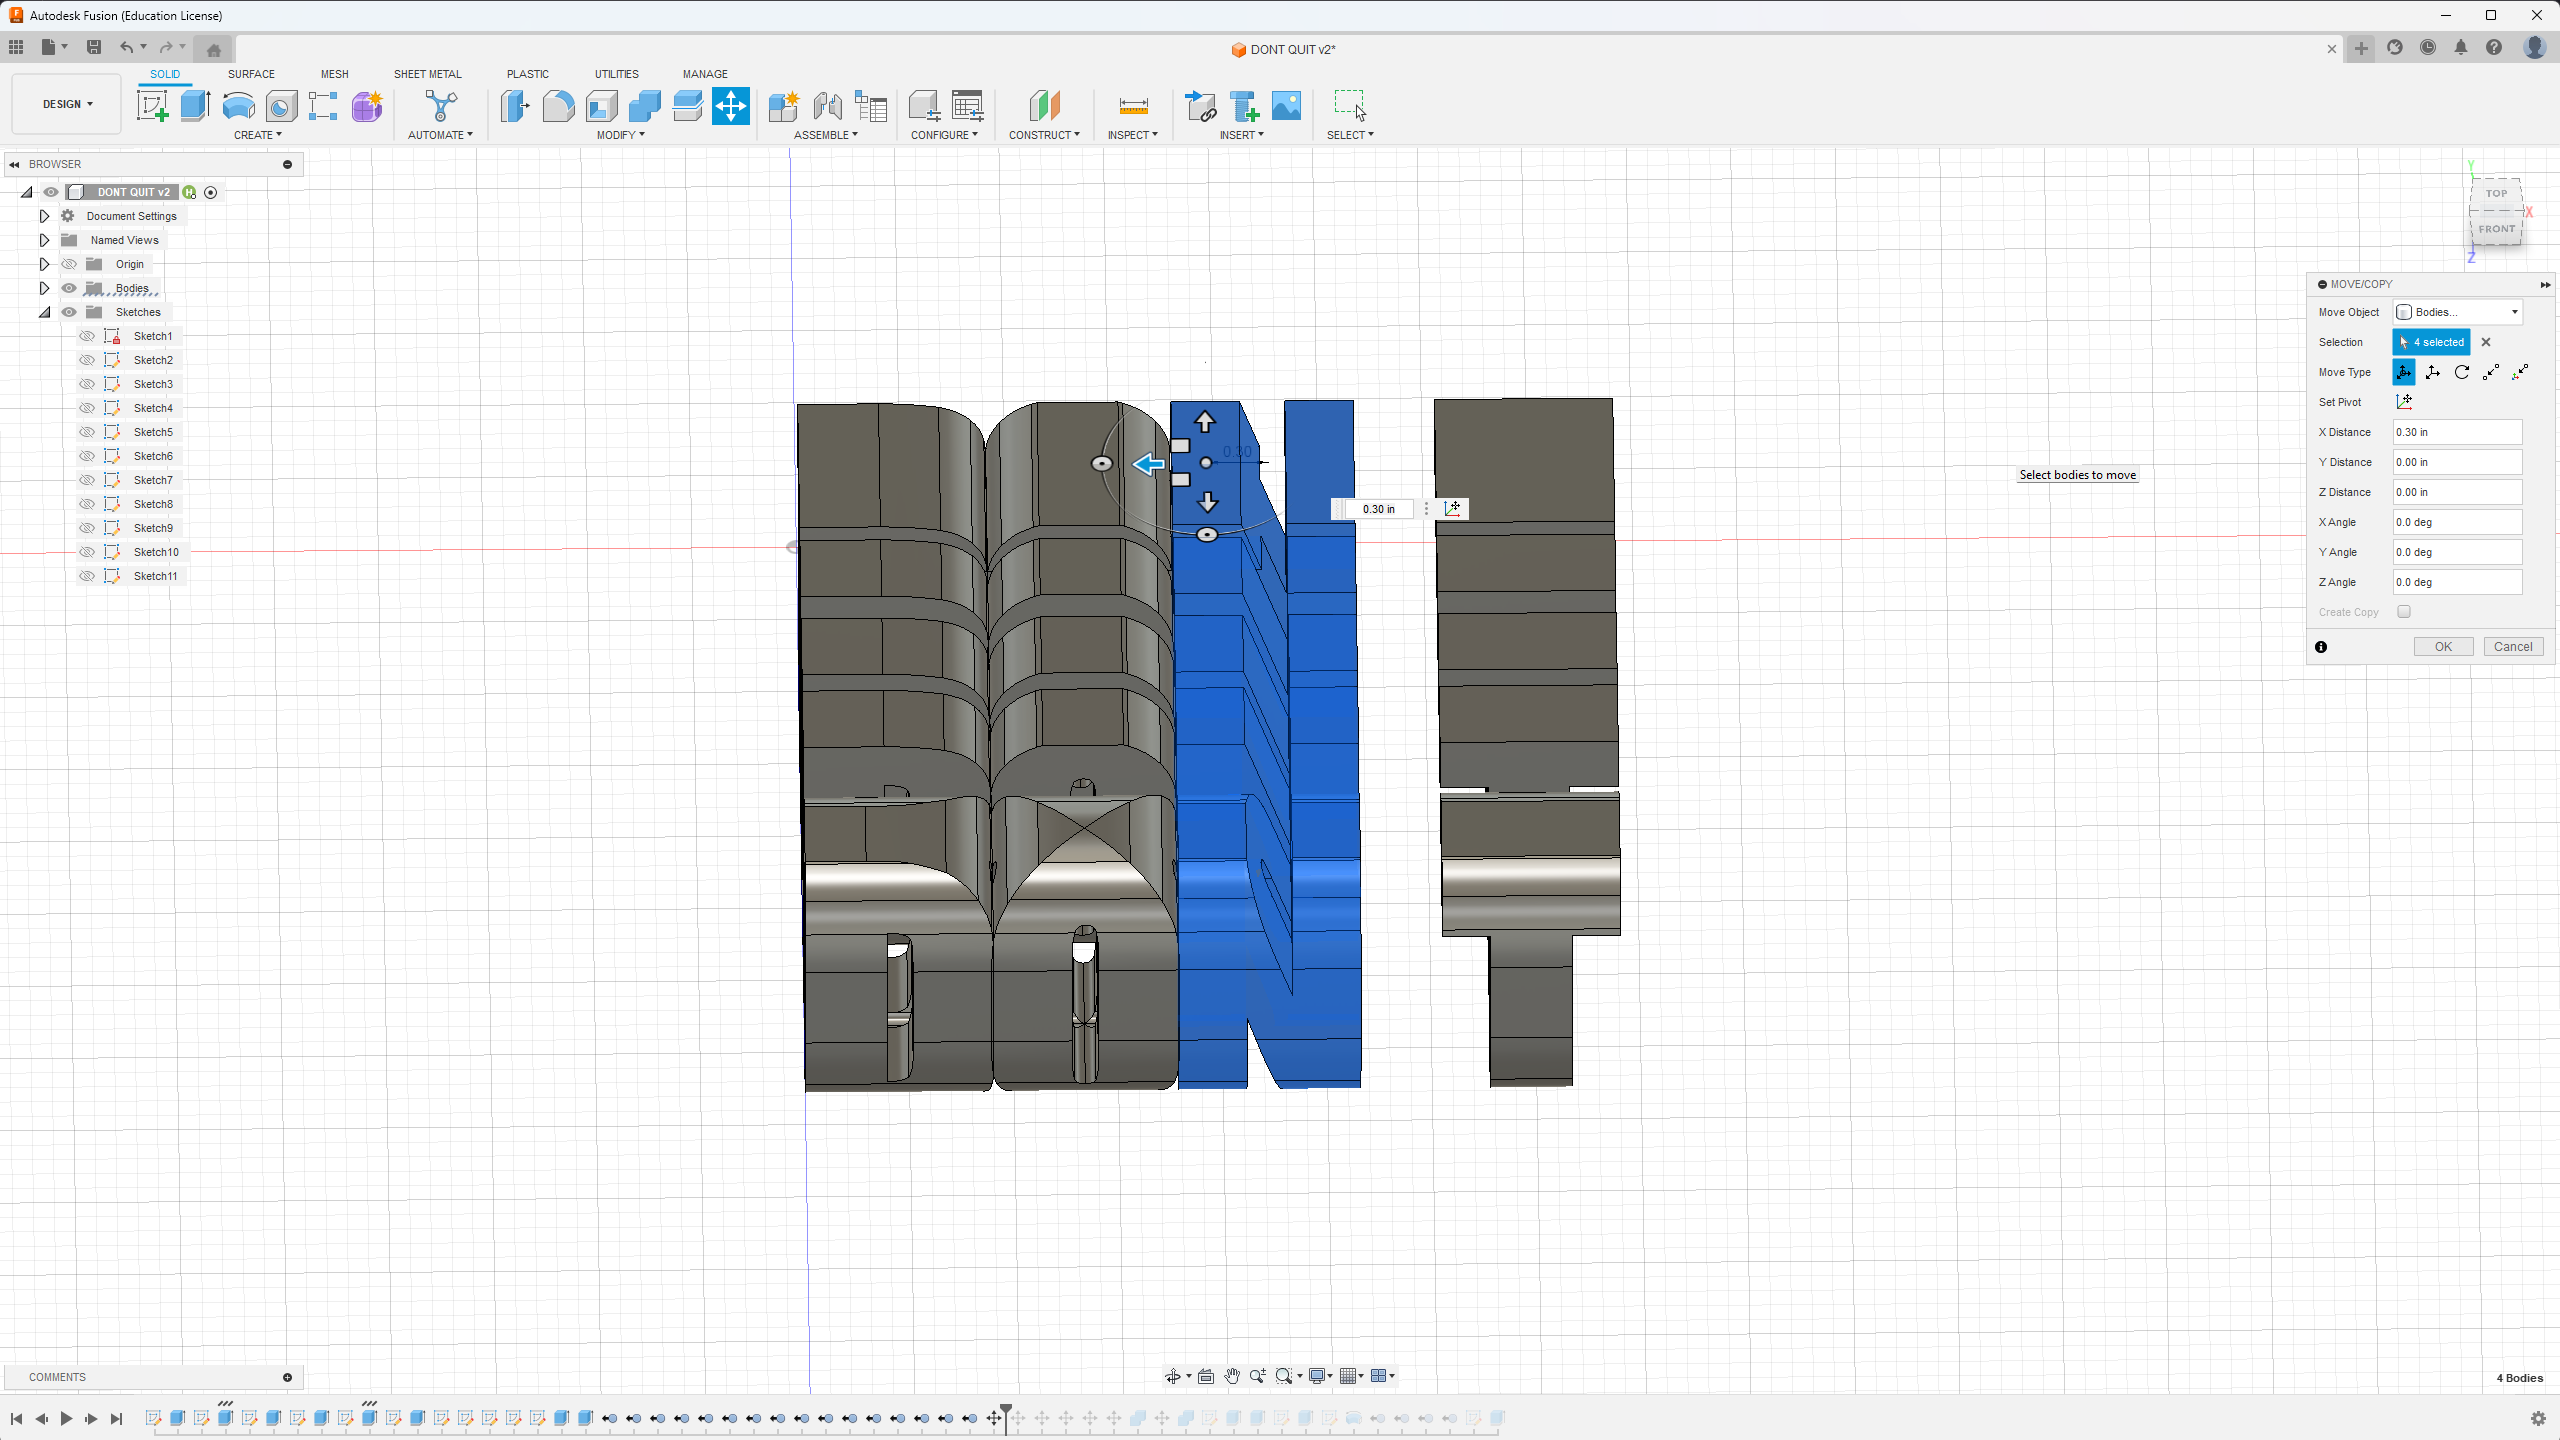
This step is pretty simple, all you need to do is use the move/copy tool to slide the letters to the left so that they slightly overlap. You can do whole rows at a time, you just need to do it for both words.
Make It Work for You
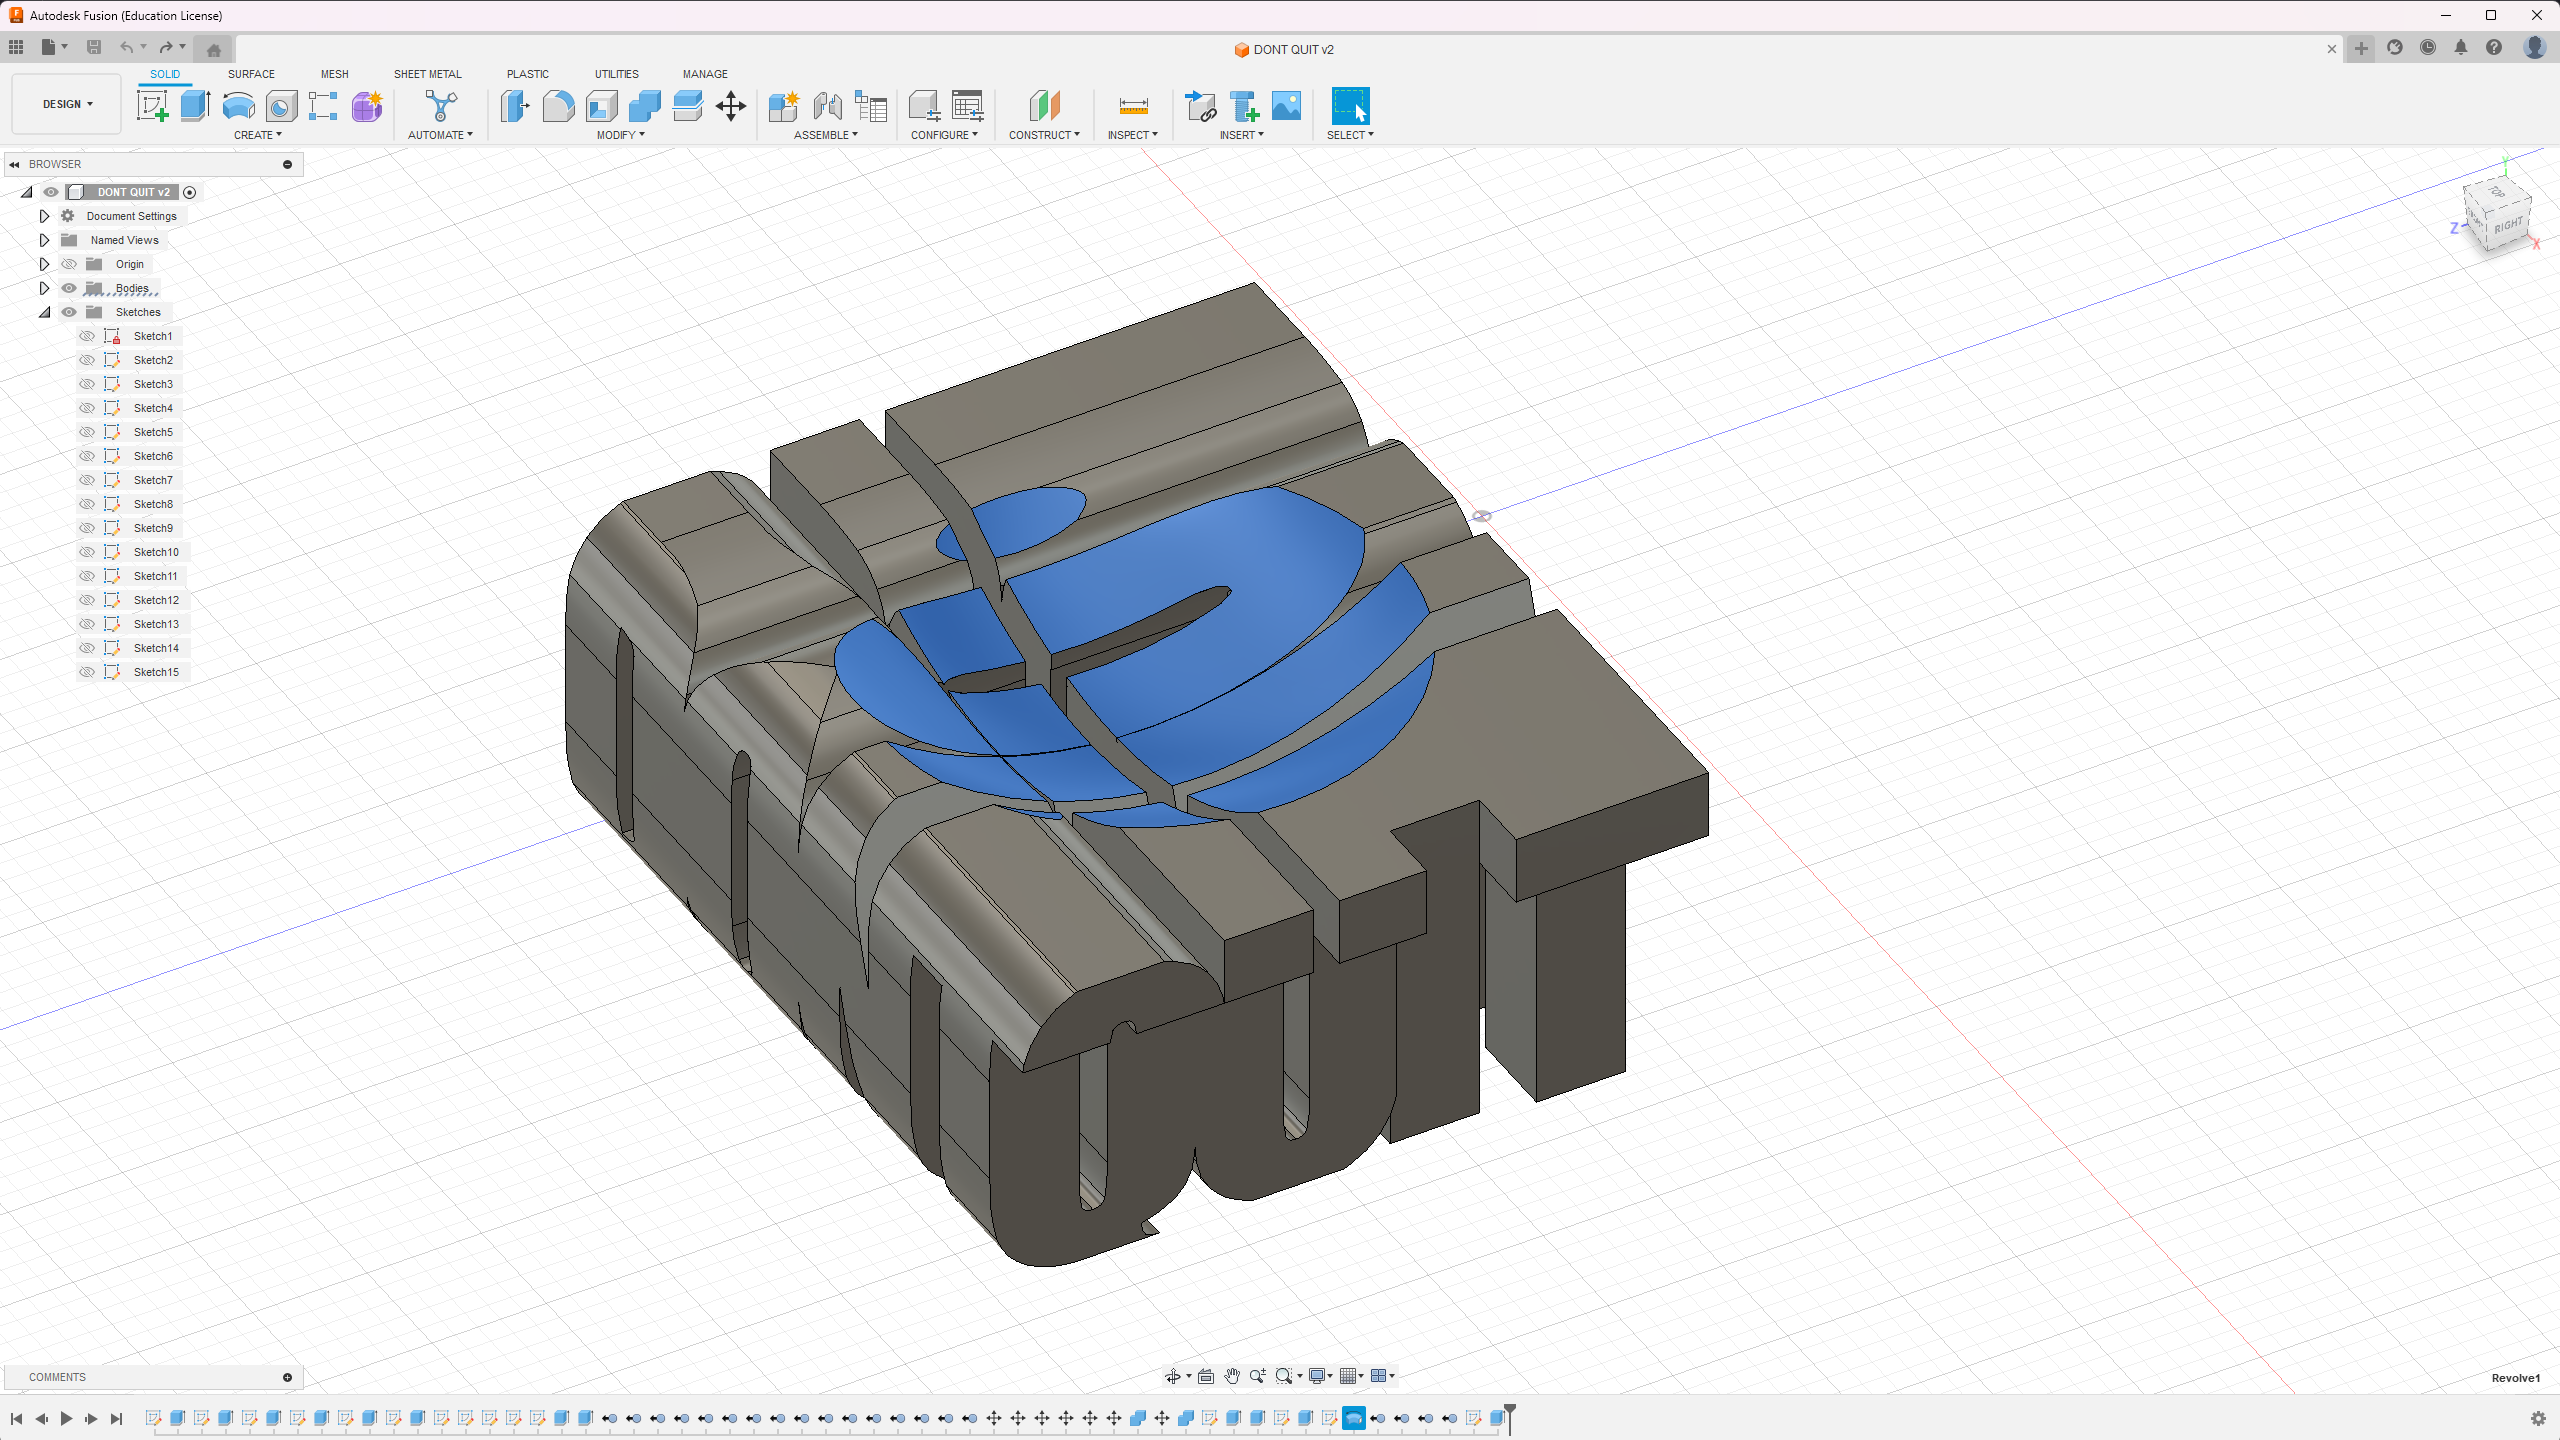
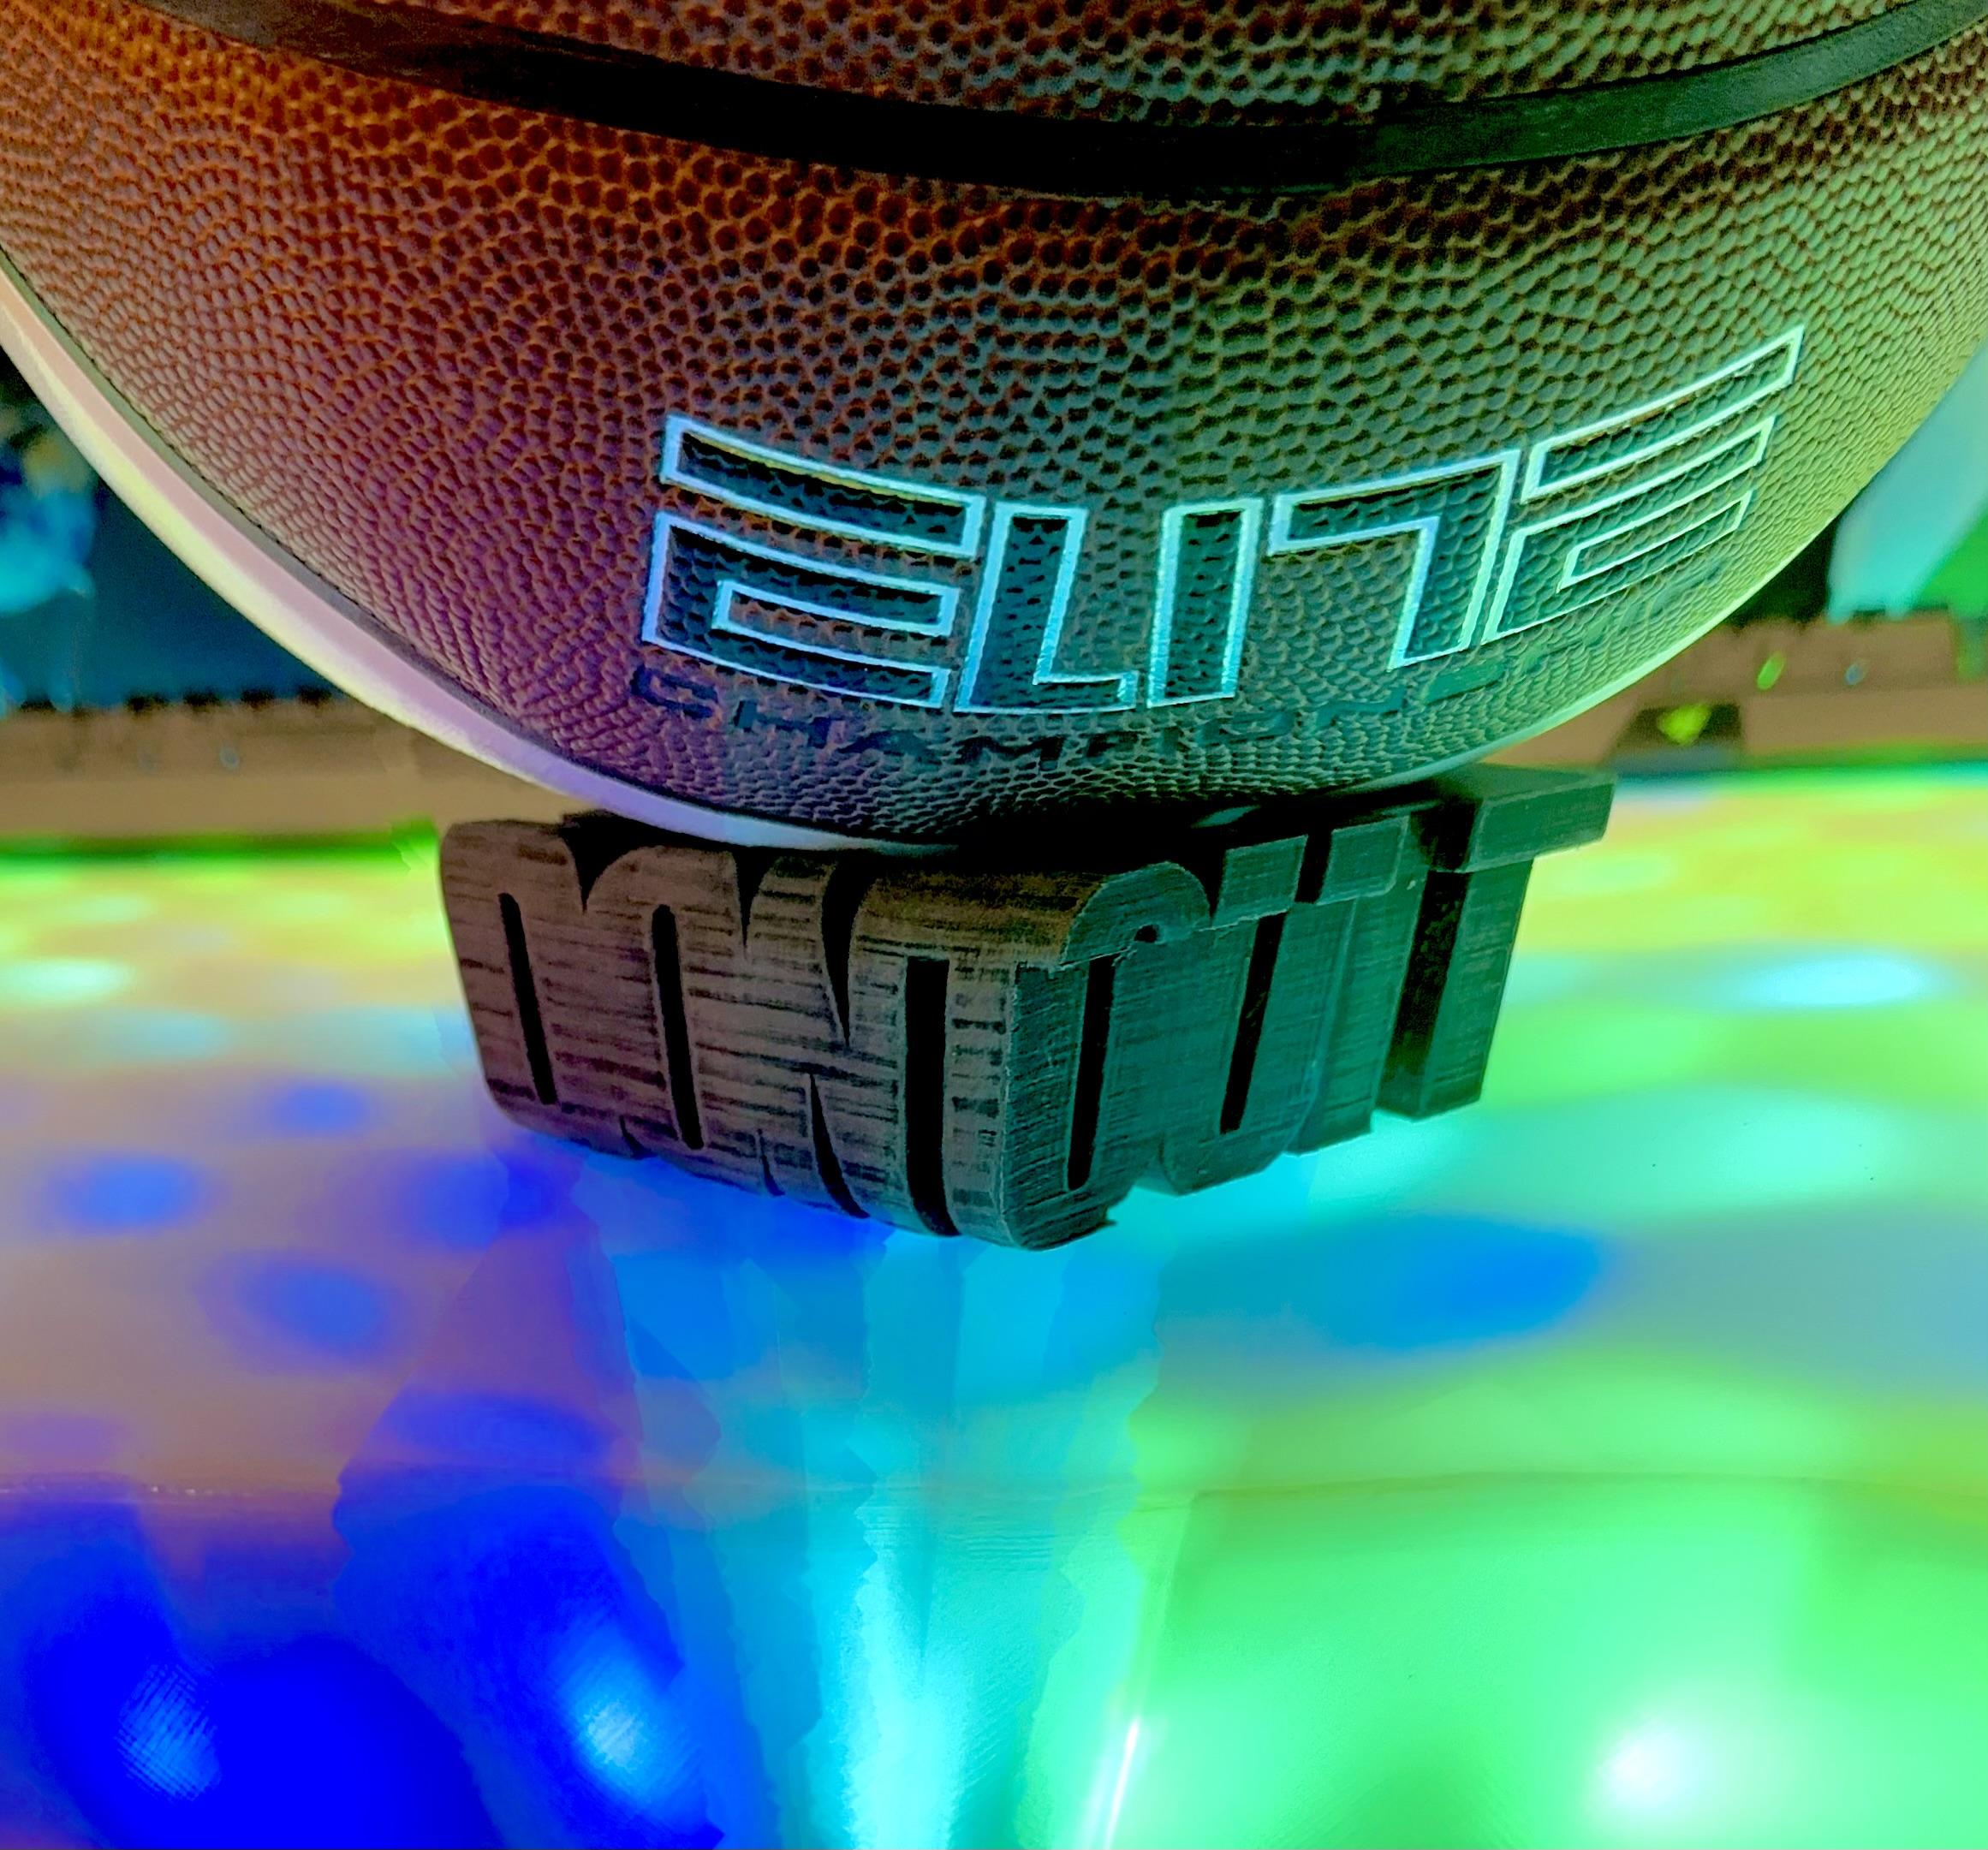
Finally you've got to make it hold whatever you're making the stand for. For me, it was a basketball. I just cut a sphere into the top from a few inches above. I also recommend going back and fixing any letters that don't look right. In my case, it was the 'i' in 'quit'. I extruded it back a bit to make it easier to read.
3D-print Your Model
Export your model as an .stl file, open it in your preferred slicer, and slice your model. I do not recommend supports as they are a huge pain to remove from all the holes in the print. You might need supports for side overhangs though. Finally, print your model, sand/paint if necessary, and enjoy!