Two-Way Audio Devices (static "walkie Talkies")
by LimitOS in Circuits > Raspberry Pi
403 Views, 4 Favorites, 0 Comments
Two-Way Audio Devices (static "walkie Talkies")
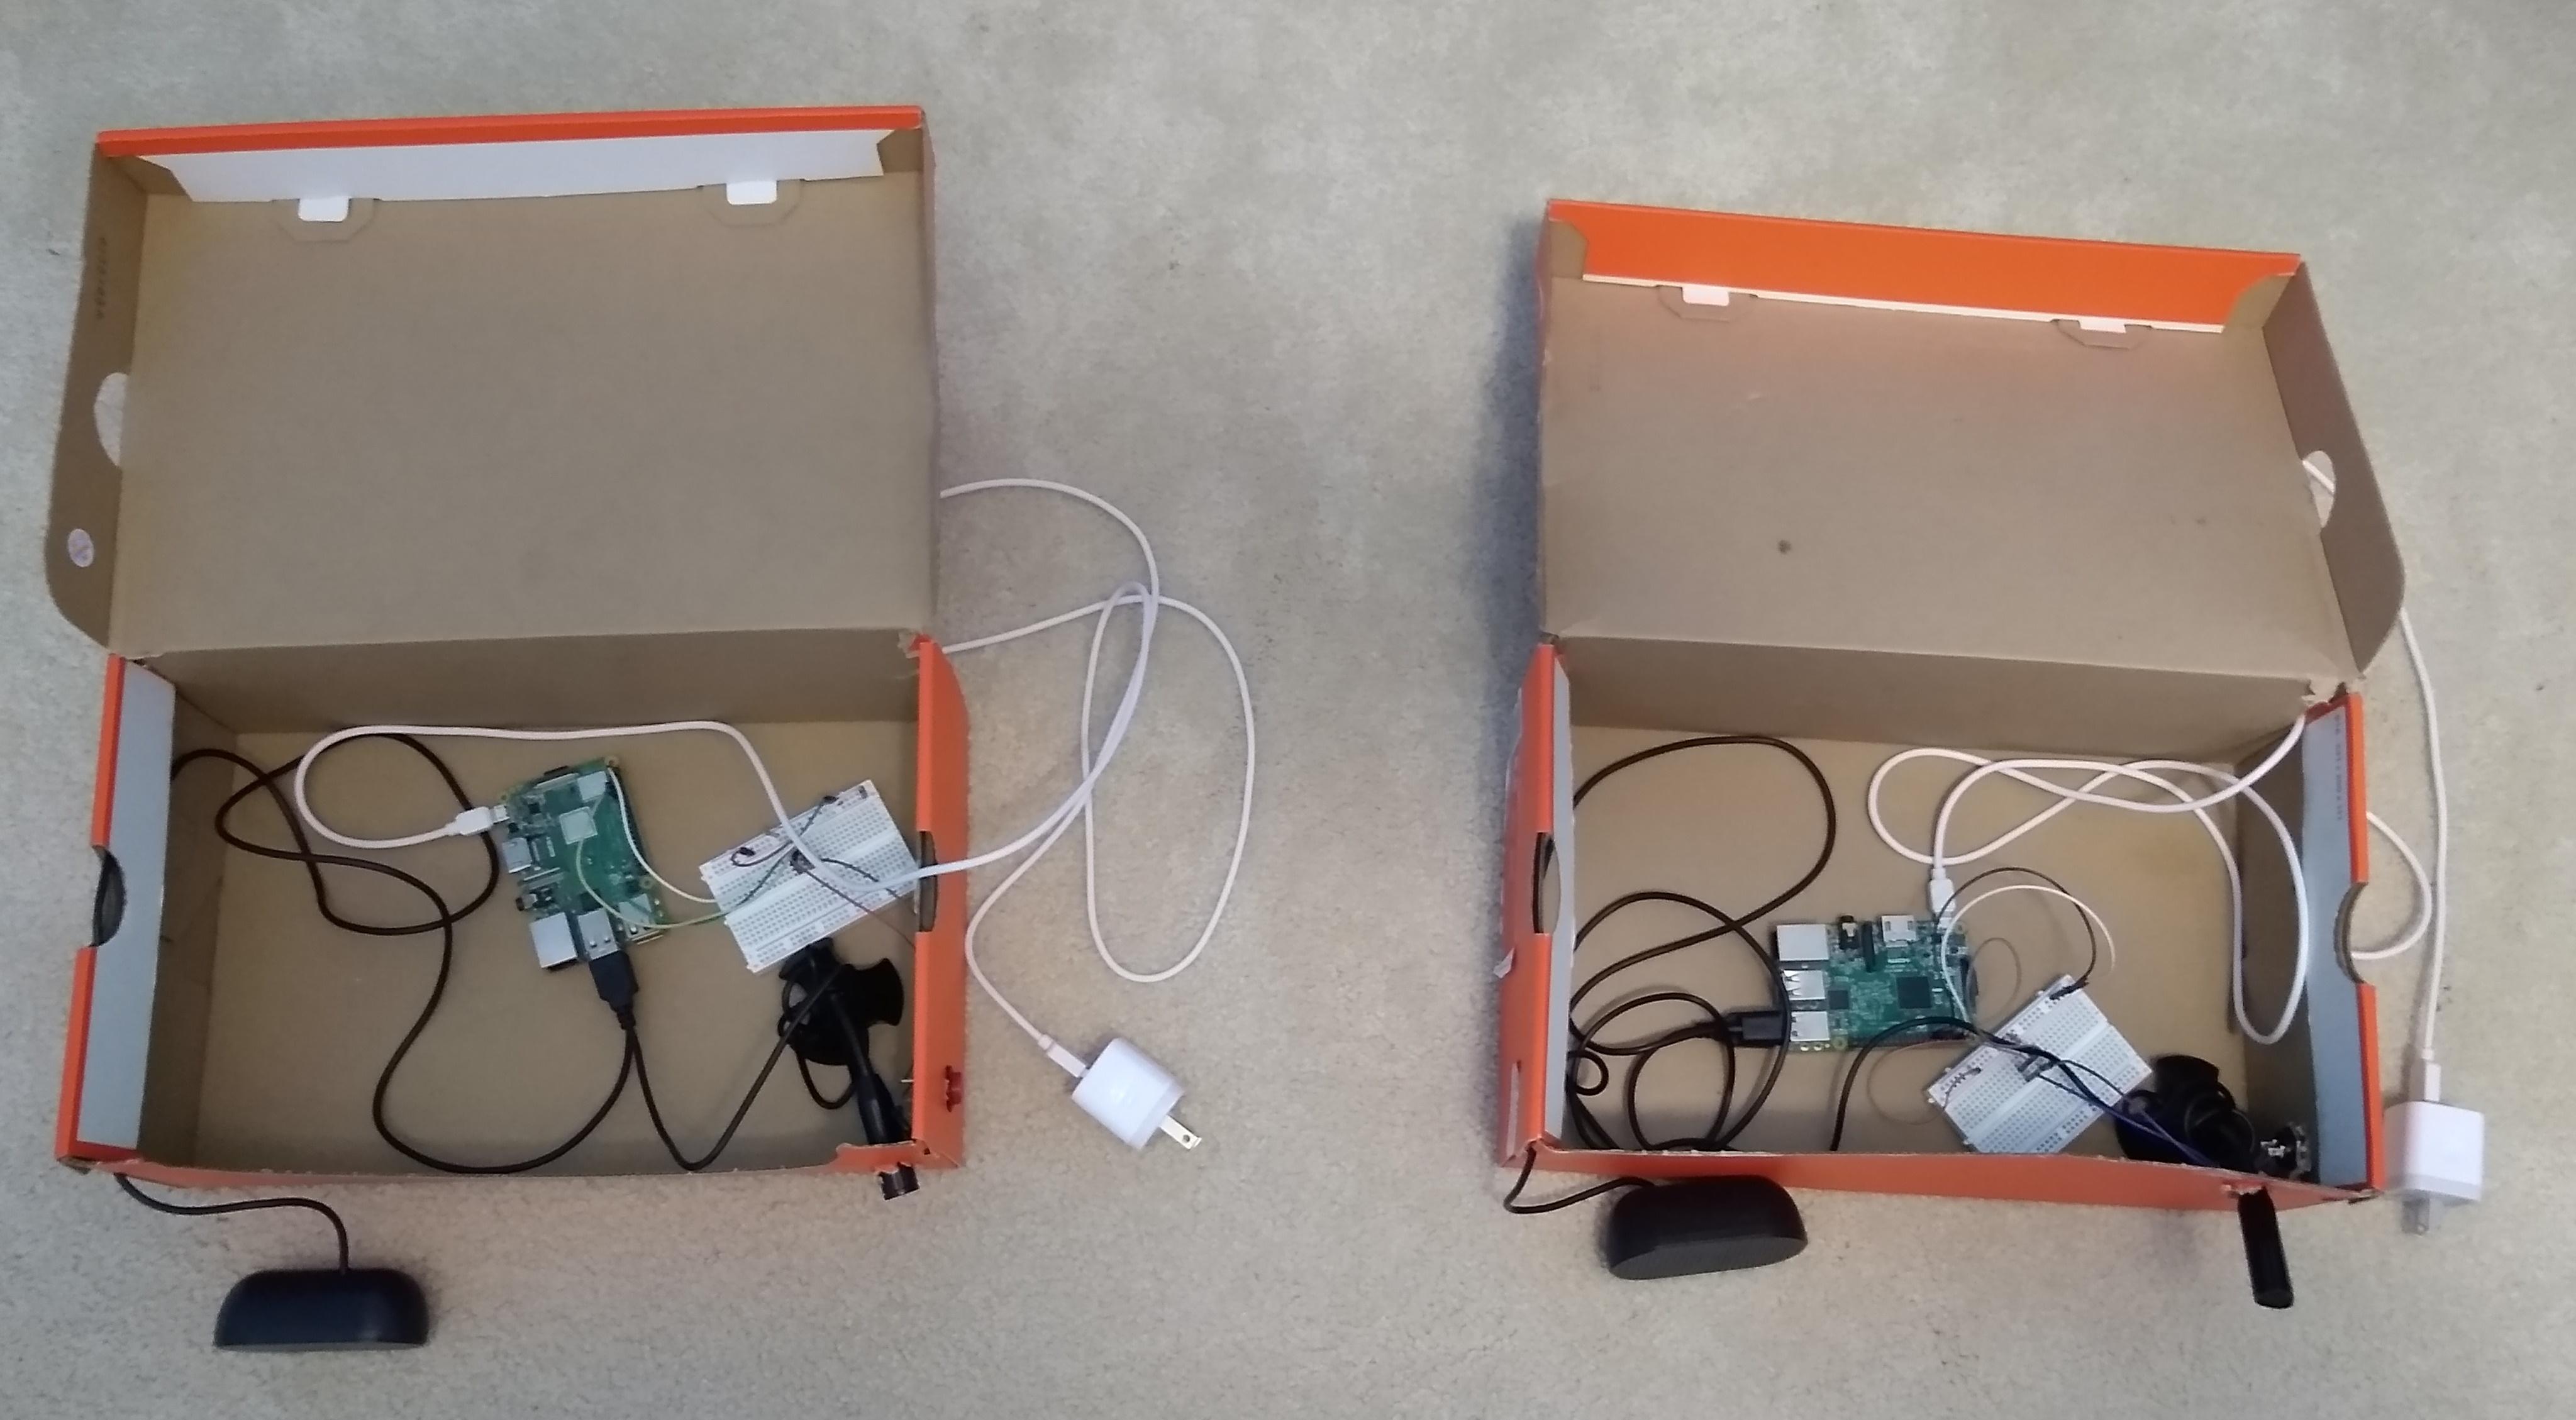
What you'll be building
This tutorial teaches you how to build two-way audio devices that can be placed in remote locations. By pushing a button, one person can talk to another via the internet and vice versa. You'll need to repeat steps 1-5 twice so that you end up with two audio devices.
Requirements and Materials
Two Raspberry Pis connected to the internet
Two USB microphones
Two USB speakers
Two boxes to house the components
Circuit materials: push button, breadboard, wires, 10k ohm resistor
Step 1: Set Up the Circuit
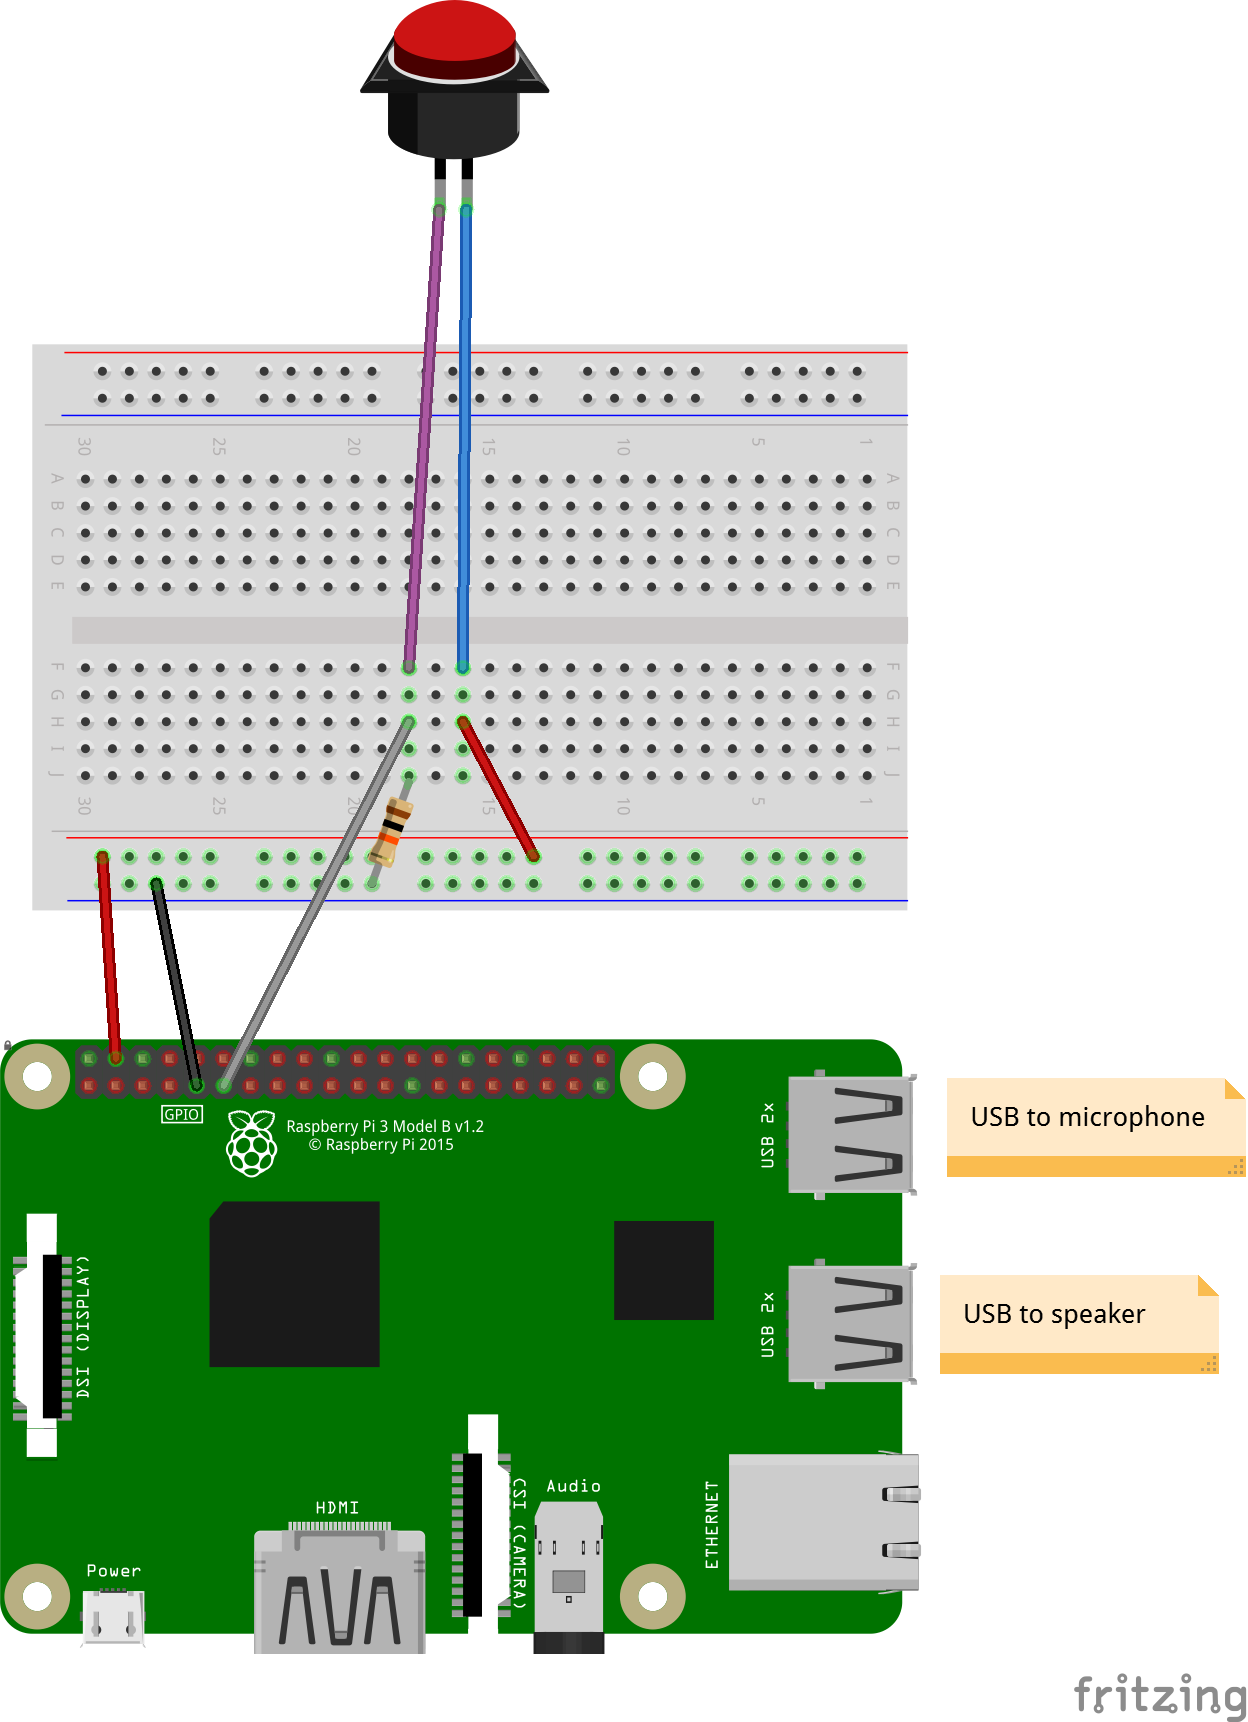
Connect the button to GPIO pin 17, and ground it using a 10k ohm resistor.
Step 2: Set Up Speaker and Microphone
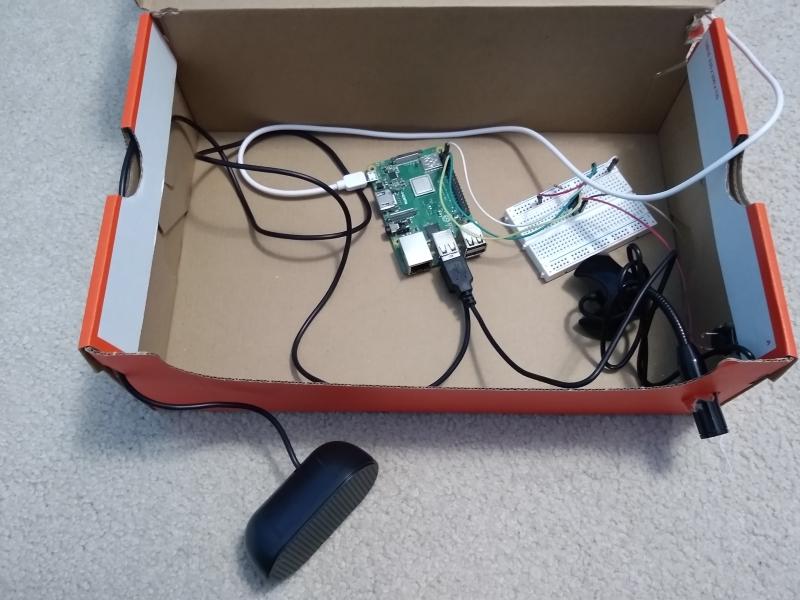
Connect the USB speaker and microphone, and make holes in the box for the speaker, microphone, power cable, and push button.
Step 3: Run LimitOS on the Raspberry Pi
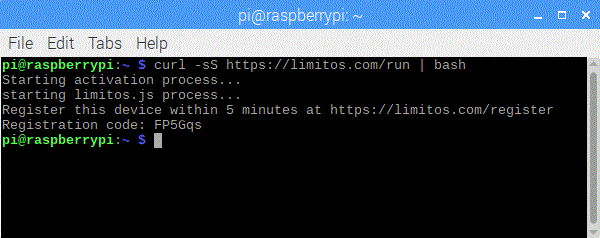
LimitOS runs alongside your existing operating system, and can be run via:
curl -sS https://limitos.com/run | bash
Follow the on-screen instructions to register the device afterwards.
Step 4: Configure Audio
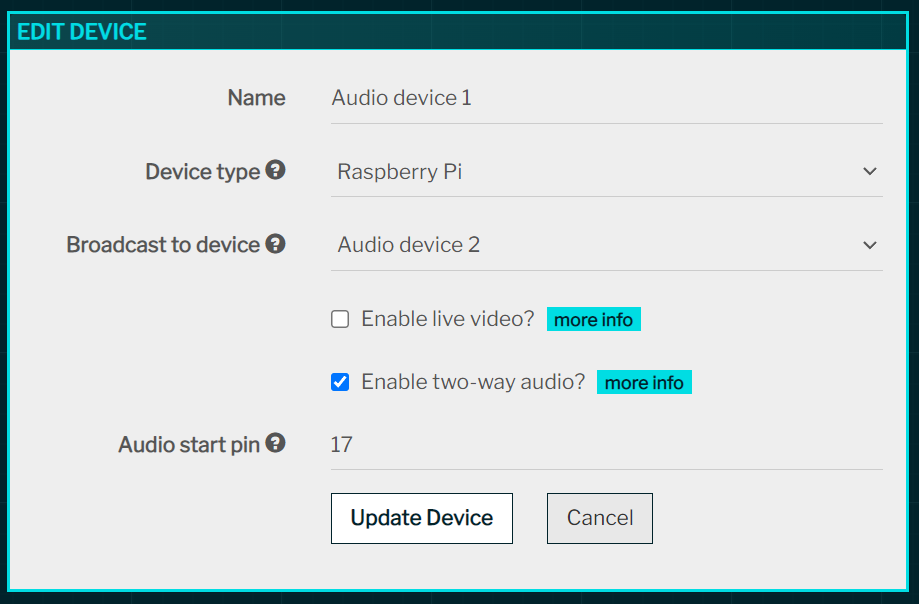
Using the Raspberry Pi OS user interface, change the audio output to the USB device via the speaker icon in the top right.
Then, using the LimitOS web interface:
- navigate to the device and click "Edit Device"
- in the "Broadcast to device" field, select the opposite audio device so that audio is output remotely
- check the "Enable two-way audio?" checkbox
- set the "Audio start pin" as pin 17
- click "Update Device" to save
Step 5: Test It Out
Make sure you've repeated steps 1-5 above for each device. Then, by holding down the button on one device, you should be able to speak in the microphone and hear it from the other device. You can then move the devices to remote locations with WiFi, and communicate remotely.