TwitterPi - Motion Alerts - Send Pics to Twitter - Send Commands From Twitter to Pi
by AlaskaRasPi in Circuits > Raspberry Pi
2918 Views, 55 Favorites, 0 Comments
TwitterPi - Motion Alerts - Send Pics to Twitter - Send Commands From Twitter to Pi
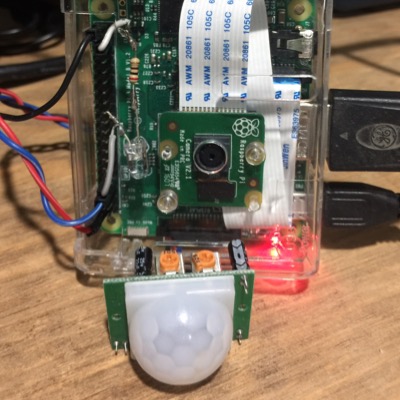

So, I have a new Raspberry Pi 3, a new Raspberry Pi Camera module and a Twitter account. What can we build from this? How about a Raspberry Pi that will search out a specific hashtag and when it finds it sends a tweet to the originator of the tweet with the hashtag. Now building on that, we would like to be able to send a command that the Pi will carry out when it reads it. Oh wait, I just found a PIR sensor in my toolbox. We can also use this Pi as a security monitor as well.
For a cut and paste version of this script, see the below address.
https://alaskaraspi.files.wordpress.com/2017/03/twitterpi1.pdf
Requirements and Shopping List
Let’s run down the requirements:
Only certain users can request a picture
Limited users can send a command to the Pi
Pi needs to run headless
Check for only new hashtag tweets
The security monitor must run as a separate thread from the main program
System must remember authorized users as well as the last tweet received
Camera needs to be able to flip via Tweet command
Shopping List:
Raspberry Pi (I used a Pi 3, but I think any internet connected Pi will work)
Standard 8G SD card with the latest Raspbian image
Power cord
Raspberry Pi Camera Module
Network connection either Wifi or Cat5 connection to the internet
Pyroelectric “Passive” InfraRed Sensor (PIR)
LED & resistor
5 GPIO connection wires
Setup Your Twitter API and Collect the Data
Now before we start any of this, we need to have a Twitter API set up. I decided to setup a separate Twitter account for listening for my chosen hashtag as well as replies to be sent. I could go into how to set this up, but there are already a number of others who have written this out very well, so I’ll let them walk you through it. Just go to your favorite search engine and search for “How to Register a Twitter App”. Basically, you will go to https://apps.twitter.com, sign in, click on “Create New App” answer a few questions and there you go. You will need to annotate the following information that will be used to connect your Python script to your twitter account.
CONSUMER_KEY _______________________________________
CONSUMER_SECRET _______________________________________
ACCESS_KEY _______________________________________
ACCESS_SECRET _______________________________________
Make Sure Your Pi Is Ready
Before you start you should ensure that your software is up to date.
sudo apt-get update
Now you are going to need PIP, a package management system used to install and manage software packages written in Python.
sudo apt-get install python-pip
Last install you need is tweepy with pip (http://tweepy.readthedocs.io/en/v3.5.0/index.html)
sudo pip install tweepy
Let’s start scripting. I will break down the script into chunks and describe what each section is doing. At the end, I will display the entire script so that you can use it to cut and paste into your PI. You will of course, need to modify some of the code that I will identify as we go. This isn’t a lesson on how to program, so I am assuming that you have some basic Python programing experience.
First off, my script is in the user pi’s home directory within a subdirectory of TwitterPi. The script itself is called twitterPi.py. In the TwitterPi directory, there will be 2 files that will accompany the script. We will identify those files when we get to them in the description.
Starting the Script and Imports
The first line of the script allows us to run the script without having to type in sudo python ./twitterPi.py. Once the script is complete, you will have to change the permissions on the script to allow it to be executable. chmod 550 twitterPi.py
#!/usr/bin/python
Next, we will import the libraries that we need to run the program.
tweepy – used to interface with Python and Twitter.
http://tweepy.readthedocs.io/en/v3.5.0/index.html
time – we will use this for pausing within the program.
https://docs.python.org/2/library/time.html
os – this allows us to interface with the Raspbian operating system.
https://docs.python.org/2/library/os.html
threading – Threading allows us to “split” off parts of the program to operate independently.
https://docs.python.org/2/library/threading.html
Picamera – Pulling in the PiCamera library gives us communication with the Pi camera.
http://picamera.readthedocs.io/en/release-1.0/
GPIO – GPIO gives us the ability to read information from the PIR as well as light up the LED.
https://pypi.python.org/pypi/RPi.GPIO
import tweepy , time, os, threading
from picamera import PiCamera
import RPi.GPIO as GPIO
First Function BlinkLED
Now we are going to get into the functions of the script. This first function will blink the LED for half a second and then turn it off for half a second. Now this function needs to be called with input the input will be a (0, 1) or a (1, 0). This allows us to turn the LED on then off or off then on. The first (0, 1) is used if we want to leave the LED on when we are done to take a picture. The (1, 0) is used for a normal half second blink. We also check to see if the BlinkLED is equal to 1. If it is set to 0 then there will be no blinking at all.
def BlinkLed(OnOff, OffOn):
   if BlinkLED == 1:
        GPIO.output(LED, OnOff)
        time.sleep(.5)
        GPIO.output(LED, OffOn)
        time.sleep(.5)
Setting Up the GPIO
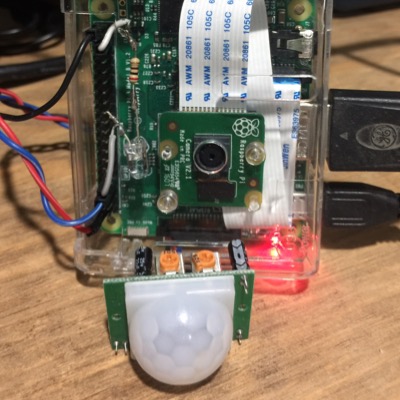
Imports done, we’ll move on to setting up the GPIOs. I am using GPIO 26 for my LED’s positive pin and any random ground for the negative pin. Connect the resistor between the Pi and either one of the pins on the LED. For the PIR, I decided to use GPIO 4 as the input or VCC. You will also connect the PIR ground as well as the source pin to one of the 5v pins on the Pi. I am using the GPIO mode of BCM that Identifies the GPIO numbers for the GPIO pins vice the physical location on the Pi. Then set up the PIR pin as an input, the LED pin as an output and set the LED to be turned off.
PIR = 4
LED = 26
GPIO.setup(PIR, GPIO.IN)
GPIO.setup(LED, GPIO.OUT)
GPIO.output(LED, GPIO.LOW)
Setting Up Some Variables
While I want to have a list of people that can request pictures to be taken by the Pi and sent to them via Twitter, I want to limit the people that can run commands on the Pi to an even smaller group. I am assigning the latter group to the list called SuperUser. You will swap out the YOURTWITTERID with the Twitter accounts you want to be able to control your Pi.
SuperUser = ['YOURTWITTERID']
Identify the working directory where the program lives as well as the directory in which files created by the program will be saved to.
WorkDir = "/home/pi/TwitterPi"
With the use of the Twitter commands you will be able to turn on/off the blinking LED if you don’t wish to have an LED flashing regularly. I personally like to have a “heart beat” blinking so that I know my script is still running. We will turn on the “heart beat” by setting the BlinkLED variable to 1. Setting this variable to 0 will deactivate the LED flashing.
BlinkLED = 1
Function TakePicture

This next function is used to snap the photo as requested. We will save the photo to the same file name each time. If we want to keep a copy, we can just download it from Twitter. We will blink the LED off/on 5 times, take the photo and then turn off the LED when we are done.
def TakePicture():
    PathToFile = WorkDir + "/mypic.JPG"
    for i in range(0,4):
        BlinkLed(0, 1) # Blink off then on
    camera.capture(PathToFile)
    GPIO.output(LED, 0) # led off
Function GetStringID
The GetStringID is used to read in the tweet ID number that we dealt with the last time we were running the program. If we do not find a file, then we are probably running the script for the first time and will start with the number 1.
def GetStringID():
    PathToFile = WorkDir + "/stringID.txt"
    try:
        file = open(PathToFile, "r")
        NUMBER = int(file.read())
        file.close()
    except IOError:
        NUMBER = 1
    return NUMBER
Function SaveNewStringID
This next function receives the latest tweet ID number found and saves it to our file so that we know what tweet ID to start looking at first.
def SaveNewStringID(id_string):
    PathToFile = WorkDir + "/stringID.txt"
    file = open(PathToFile, "w")
    file.write(id_string)
    file.close()
Function SendReply

After we find a tweet with our hashtag from an authorized user and have taken a picture, we will use this function to send out our tweet in reply with the photo we took.
def SendReply(user_name):
    PathToFile = WorkDir + "/mypic.JPG"
    tweet = "@" + user_name + " " + str(time.strftime("%c"))
    status = api.update_with_media(PathToFile, tweet)
Function SendStatus
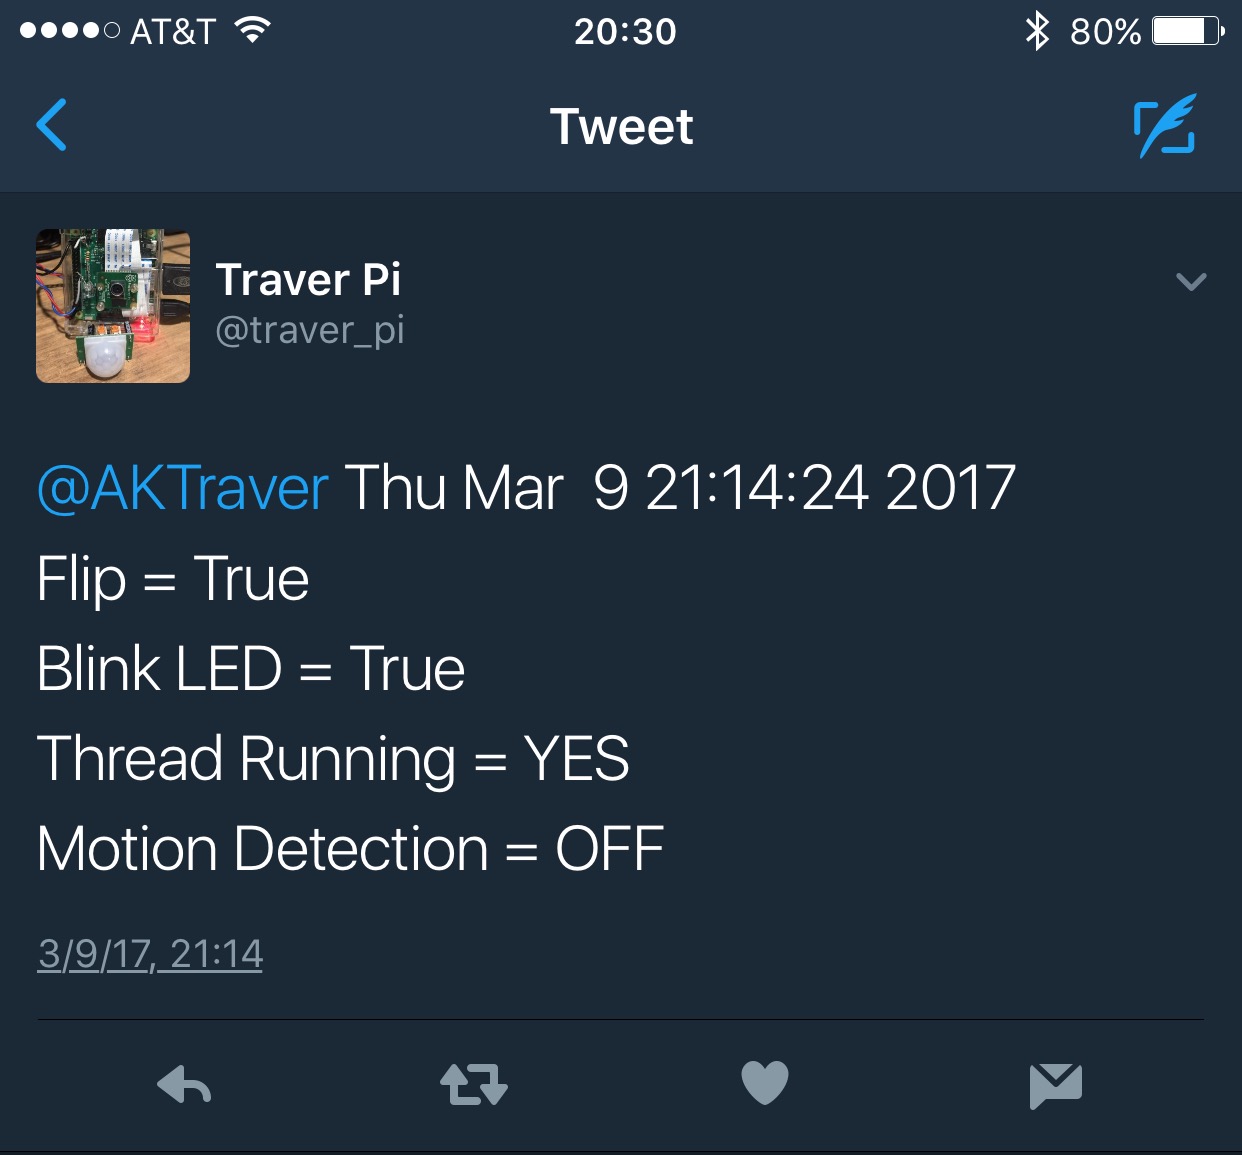
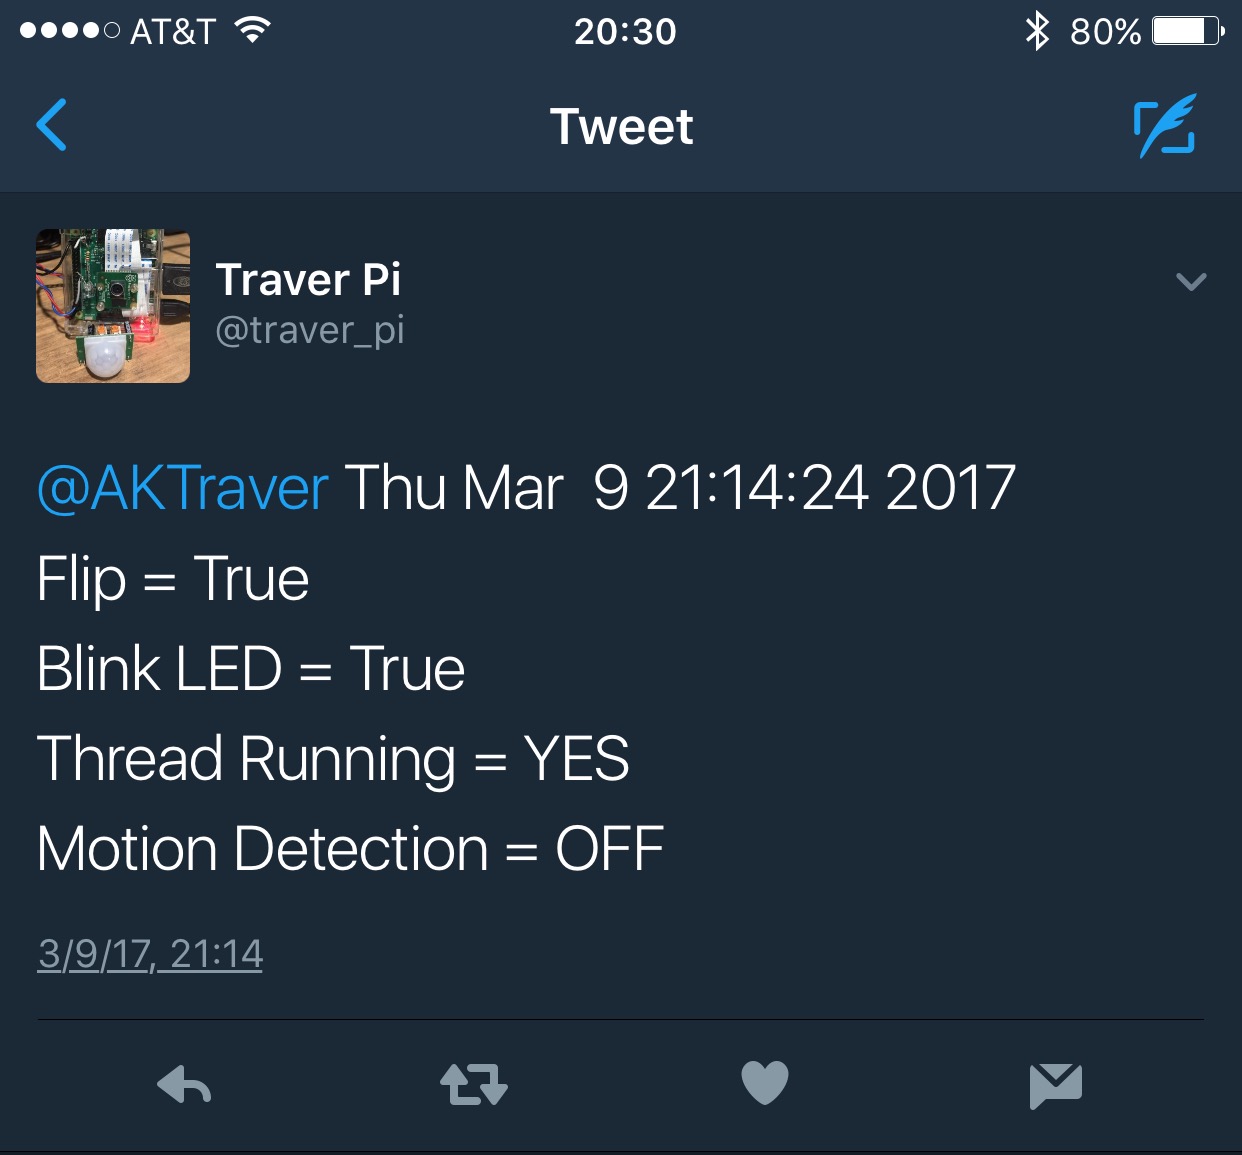
From time to time, we may want to find out what the current status of the program is. This function sends a reply to the SuperUser with the current setting for blinking the LED, whether the camera view is normal or flipped, verifies that the thread for the alarm system is still running and finally if the motion detection is active.
def SendStatus(user_name):
    if BlinkLED == 1:
        BLINK = "True"
    else:
        BLINK = "False"
    if motionDetection == 1:
        MD = "ON"
    else:
        MD = "OFF"
    tweet = "@" + user_name + " " + str(time.strftime("%c")) \
    + "\nFlip = " + str(camera.vflip) \
    + "\nBlink LED = " + BLINK \
    + "\nThread Running = " + ThreadRunning \
    + "\nMotion Detection = " + MD
    status = api.update_status(status=tweet)
Function UpdateUsers
From time to time, we may want to allow new users to be able to request a picture be sent via Twitter. This function is used when a SuperUser sends a command to add a new user to our list. We wipe out the current file, then add all of the users back in along with the new user given by the SuperUser.
def UpdateUsers(newUser):
    PathToFile = WorkDir + "/Authorized.txt"
    Authorized.append(newUser)
    file = open(PathToFile, "w")
    file.write("")
    file.close
    file = open(PathToFile, "a")
    for u in Authorized:
        file.write(u + "\n")
    file.close()
Function CamFlip
Depending on what position your camera is, you may need to flip the camera vertically. Since we didn’t want to have to modify the script if we move the camera this function will flip the camera via a twitter command.
def CamFlip():
    if camera.vflip == True:
        camera.vflip = False
    else:
        camera.vflip = True
Function CheckForCommands
This function is where we check for commands received via the tweet with our hashtag. The tweet will look something like this “cmd:COMMAND:extra #YOURHASHTAG”. Since we use this function to modify some variables from outside of the function, we need to identify those “global” variables at the beginning of the function. For this version of the script we have the following commands but more commands could always be added to this list.
cmd:adduser:TwitterID ADDS A USER TO THE AUTHORIZED LIST.
cmd:flip FLIP THE IMAGES CAPTURED VERTICALLY.
cmd:blinkoff DISABLE THE LED FROM BLINKING
cmd:blinkon ENABLE THE LED BLINKING.
cmd:alerton TURNS ON THE MOTION DETECTION
cmd:alertoff DISABLES THE MOTION DETECTION.
cmd:status SEND A TWEET TO SUPERUSER WITH STATUS
cmd:reboot WILL REBOOT YOUR PI
cmd:shutdown SHUTDOWN THE PI
cmd:stop HALTS THE PROGRAM
If the command is set to return a 1, then the program executes the command and will then take a picture and post it to twitter. If it returns a 0 then the command is executed, but no tweet will be sent. If no command is found in the tweet, then the function will return a 1 and a picture is taken and the tweet is sent to the requestor.
def CheckForCommands(commandString, user_name):
    global BlinkLED
    global motionDetection
    global stopThreads
    tmpList = commandString.split(" ")
    cmdString = tmpList[0]
    cmdList = cmdString.split(":")
    if "cmd" in cmdList:
        if "adduser" in cmdList:
            UpdateUsers(cmdList[2])
            return 0
        elif "flip" in cmdList:
            CamFlip()
            return 1
        elif "blinkoff" in cmdList:
            BlinkLED = 0
            return 0
        elif "blinkon" in cmdList:
             BlinkLED = 1
            return 0
        elif "alerton" in cmdList:
            BlinkLED = 0
            motionDetection = 1
            SendStatus(user_name)
            return 0
        elif "alertoff" in cmdList:
            BlinkLED = 1
          motionDetection = 0
            SendStatus(user_name)
            return 0
        elif "status" in cmdList:
            SendStatus(user_name)
            return 0
        elif "reboot" in cmdList:
            GPIO.cleanup()
           os.system("reboot")
        elif "shutdown" in cmdList:
            GPIO.cleanup()
            os.system("shutdown now")
        elif "stop" in cmdList:
            stopThreads = 1
            GPIO.cleanup()
            exit()
        else:
            return 0
    else:
        return 1
Function MonitorTweets


The MonitorTweets function is the main function of the program. It runs on a continuous while True loop. Searching out new tweets with the hashtag you identify in the search_text variable. Once the new tweet is found, the new tweet id number is saved and then the tweets user ID is verified against the Authorized list. If the user isn’t in the Authorized list then the tweet is ignored. If this is an Authorized user then we want to see if this is a SuperUser to see if we need to check for a command (cmd) tweet. If not a SuperUser, then we will just take a photo and tweet it at the authorized user. If this is a SuperUser, then we’ll pass the information to the CheckForCommands function. We also blink the LED during the sleep section. We only check for new tweets once a minute to ensure that we don’t surpass the maximum number of Twitter API interactions within a 15-minute period.
def MonitorTweets():
    global id_string
    while True:
        search_text = "#YOURHASHTAG"
        search_result = api.search(search_text, rpp=1, since_id=id_string)
        for i in search_result:
            id_string = i.id_str
            SaveNewStringID(id_string)
            tweet = api.get_status(id_string)
           user_name = tweet.user.screen_name
          if user_name in Authorized:
                if user_name in SuperUser:
                    check = (CheckForCommands(i.text,user_name))
                else:
                    check = 1
                if check == 1:
                    TakePicture()
                    SendReply(user_name)
        BlinkLed(1,0) # Blink on then off
        time.sleep(30)
        BlinkLed(1, 0)
        time.sleep(28)
Function SecurityAlert - Using the Motion Detector (PIR)
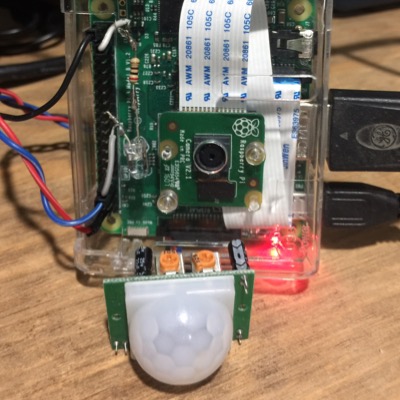
This is the function that reads the motion detector when the “alerton” command has been received. Because we don’t want to just check for motion once a minute, we need to run this in a separate thread from the rest of the program. Once the motion detection is active, we will constantly watch for motion. Once we capture motion, we will wait one second to allow the subject to get closer and then take a photo. The photo is then attached to a tweet and sent to the Twitter user ID identified in the function.
def SecurityAlert():
    global ThreadRunning
    while True:
        try:
            if stopThreads == 1:
                exit()
            if motionDetection == 1:
                if GPIO.input(PIR):
                    time.sleep(1)
                    TakePicture()
                    SendReply(SuperUser[0])
                    time.sleep(60)
        except:
            ThreadRunning = 'NO'
            SendReply(SuperUser[0])
            exit()
Setting Up the Twitter API
Done with the functions, we now set up the Twitter API information to allow tweepy to access Twitter. This is the section where you will plug in the information that you gathered when you set up your Twitter API on the Twitter web site. Once that information has been set, tweepy variables are used to finish setting up the tweepy configuration for access.
CONSUMER_KEY = 'YOUR CONSUMER KEY GOES HERE'
CONSUMER_SECRET = 'YOUR CONSUMER SECRET GOES HERE'
ACCESS_KEY = 'YOUR ACCESS KEY GOES HERE'
ACCESS_SECRET = 'YOUR ACCESS SECRET GOES HERE'

auth = tweepy.OAuthHandler(CONSUMER_KEY, CONSUMER_SECRET)
auth.set_access_token(ACCESS_KEY, ACCESS_SECRET)
api = tweepy.API(auth)
Setting the Camera Position
Now we are going to setup the PiCamera module. The normal position of my Pi and camera requires that I flip the camera so I am going to set my camera.vflip to True. Depending on the normal position of your PiCamera you may want to set this value to False. With the command tweets you can flip the camera if needed after the program is up and running regardless.
camera = PiCamera()
camera.vflip = True
Get the Last Tweet ID Number We Worked With
When the program first starts, we need to identify the last tweet ID number that we found the last time the program was running. This section pulls in that number from the GetStringID function.
id_string = GetStringID()
Let's See Who's Authorized Request Pictures
We don’t want everyone with a Twitter account to be given the ability to request a picture so we are going to build a list of Twitter user names that are allowed to request a picture be taken and sent to them via Twitter. If there aren’t any saved users, then the program will assume that only the SuperUser is authorized to request pictures
try:
    PathToFile = WorkDir + "/Authorized.txt"
    Authorized = []
    with open(PathToFile) as file:
        for line in file:
            line = line.strip()
            Authorized.append(line)
        file.close()
 except IOError:
     Authorized = [SuperUser]
Set the Last Variables and Start Running
By default, we don’t want to have the Pi set as a motion detecting security system we will set the motionDetection to 0. This can be changed while the program is running by sending an “alerton” command tweet.
motionDetection = 0
Had some issues the SecurityAlert thread dying without a notice so I have set up a variable that presents during a status request. If that thread dies, it will modify this variable to NO so we will know.
ThreadRunning = "YES"
Now that we are up and running for the most part, we want to send a status tweet to our primary Twitter address.
SendStatus(SuperUser[0])
Finally, we are going to start up our SecurityAlert thread and then start monitoring Twitter for our designated hashtag. The stopThreads is set to 0 to keep the thread running. If when we change stopThreads to 1 it will shutdown the SecurityAlert thread. This will happen when we Control C when running the program from the command line or if we send a command tweet to stop the program.
try:
    stopThreads = 0
    securityalert = threading.Thread(name='SecurtiyAlert', target=SecurityAlert)
    securityalert.start()
    MonitorTweets()
except KeyboardInterrupt:
    stopThreads = 1
    GPIO.cleanup()
    exit()
Find a Full Version of This Script Here in Pdf.
https://alaskaraspi.files.wordpress.com/2017/03/twitterpi1.pdf
You can cut and paste from this document.