Tweetbot - Twitter Connected Photo Booth
by msolonko in Circuits > Raspberry Pi
1835 Views, 20 Favorites, 0 Comments
Tweetbot - Twitter Connected Photo Booth

In this project, we will be making a Raspberry Pi-powered camera that can be used in a photo booth at parties. After the photo is taken, it can be posted to a designated Twitter account for everyone to view later. This tutorial will encompass the technology portion of this project, so that programming, setup, and some wiring. This allows you to completely customize your own photo booth based on the location you will set it up in and personal preferences.
Here is what you will need:
Raspberry Pi 3*: $34.49 (You can use other versions but this tutorial is based on 3)
HDMI Cable*: $6.99
Mouse: $5.49
Keyboard: $12.99
8GB microSD Card*: $7.32
Power Source for the Raspberry Pi*: $9.99
Case for the Raspberry Pi*: $6.98
PiCamera: $27.99
Breadboard: $6.86
1 Pushbutton: $7.68
2 Male-Female jumper cables: $4.99
Monitor for HDMI (You can use VNC or SSH if you prefer but I will not go over the setup here)
Items with an asterisk(*) can all be bought together here: $69.99
You likely have most of these already if you have ever used a Raspberry Pi before. Before we begin the tutorial, I will assume that you have the latest version of Raspbian on your Raspberry Pi. If you need help, go here .
Getting Ready to Program
Open the terminal on your Raspberry Pi (shortcut: Ctrl-Alt-T).
Run this line: sudo apt-get update and then sudo apt-get upgrade -y which will update your current packages and install some new ones.
Now, we will create a file where our Python program will reside. If you want to do this using the GUI, go to your desktop, right-click, and click Create New - Empty File. Name the file "booth.py". For now, leave it blank and save.
If you want to do that step using the terminal. Type in cd ~/Desktop and then sudo nano booth.py. Enter anything into it for now and do Ctrl-X and then Y and then Enter.
Now, we need to install a library "Twython" which we will use to post images to Twitter.
Type in the terminal: sudo pip3 install twython
Additionally, run sudo pip3 install twython --upgrade
Also, do sudo raspi-config and enable camera. After this, reboot.
You are now ready to start the programming portion!
Programming
Go to your booth.py file and paste the attached code into it. In the attached file, every line is commented so that you know exactly what is going on. In the next step, we will get the necessary tokens for the Twitter API to work.
We will be working with the pins defined in the code in a future step to wire the push buttons.
Hopefully, you understand how the code works through my comments!
Downloads
Twitter Setup and on Boot Setup
Here, I will assume that you have a Twitter Account that you will use. If not, create one now.
Go to apps.twitter.com
Create New App
Fill in the required fields, accept agreement, and continue
Check with an image above to see that you see the same screen as me.
Go to Keys and Access Tokens
Scroll down and click Create My Access Tokens
Now take the 4 tokens that you see and put them into booth.py.
ck: Consumer Key, cs: Consumer Secret, at: access token, ats: Access Token Secret
We want to be able to run the program when the Raspberry Pi boots by clicking the start button. We will wire the buttons later, but we will do the on boot step now. Go the the terminal and type sudo nano /etc/rc.local
Before exit 0, type python3 /home/pi/Desktop/booth.py
Save file
Now you are done setting up the raspberry pi program. Keep in mind that everything will only work in case of a Wifi Connection. Let's move on to the hardware section.
Hardware


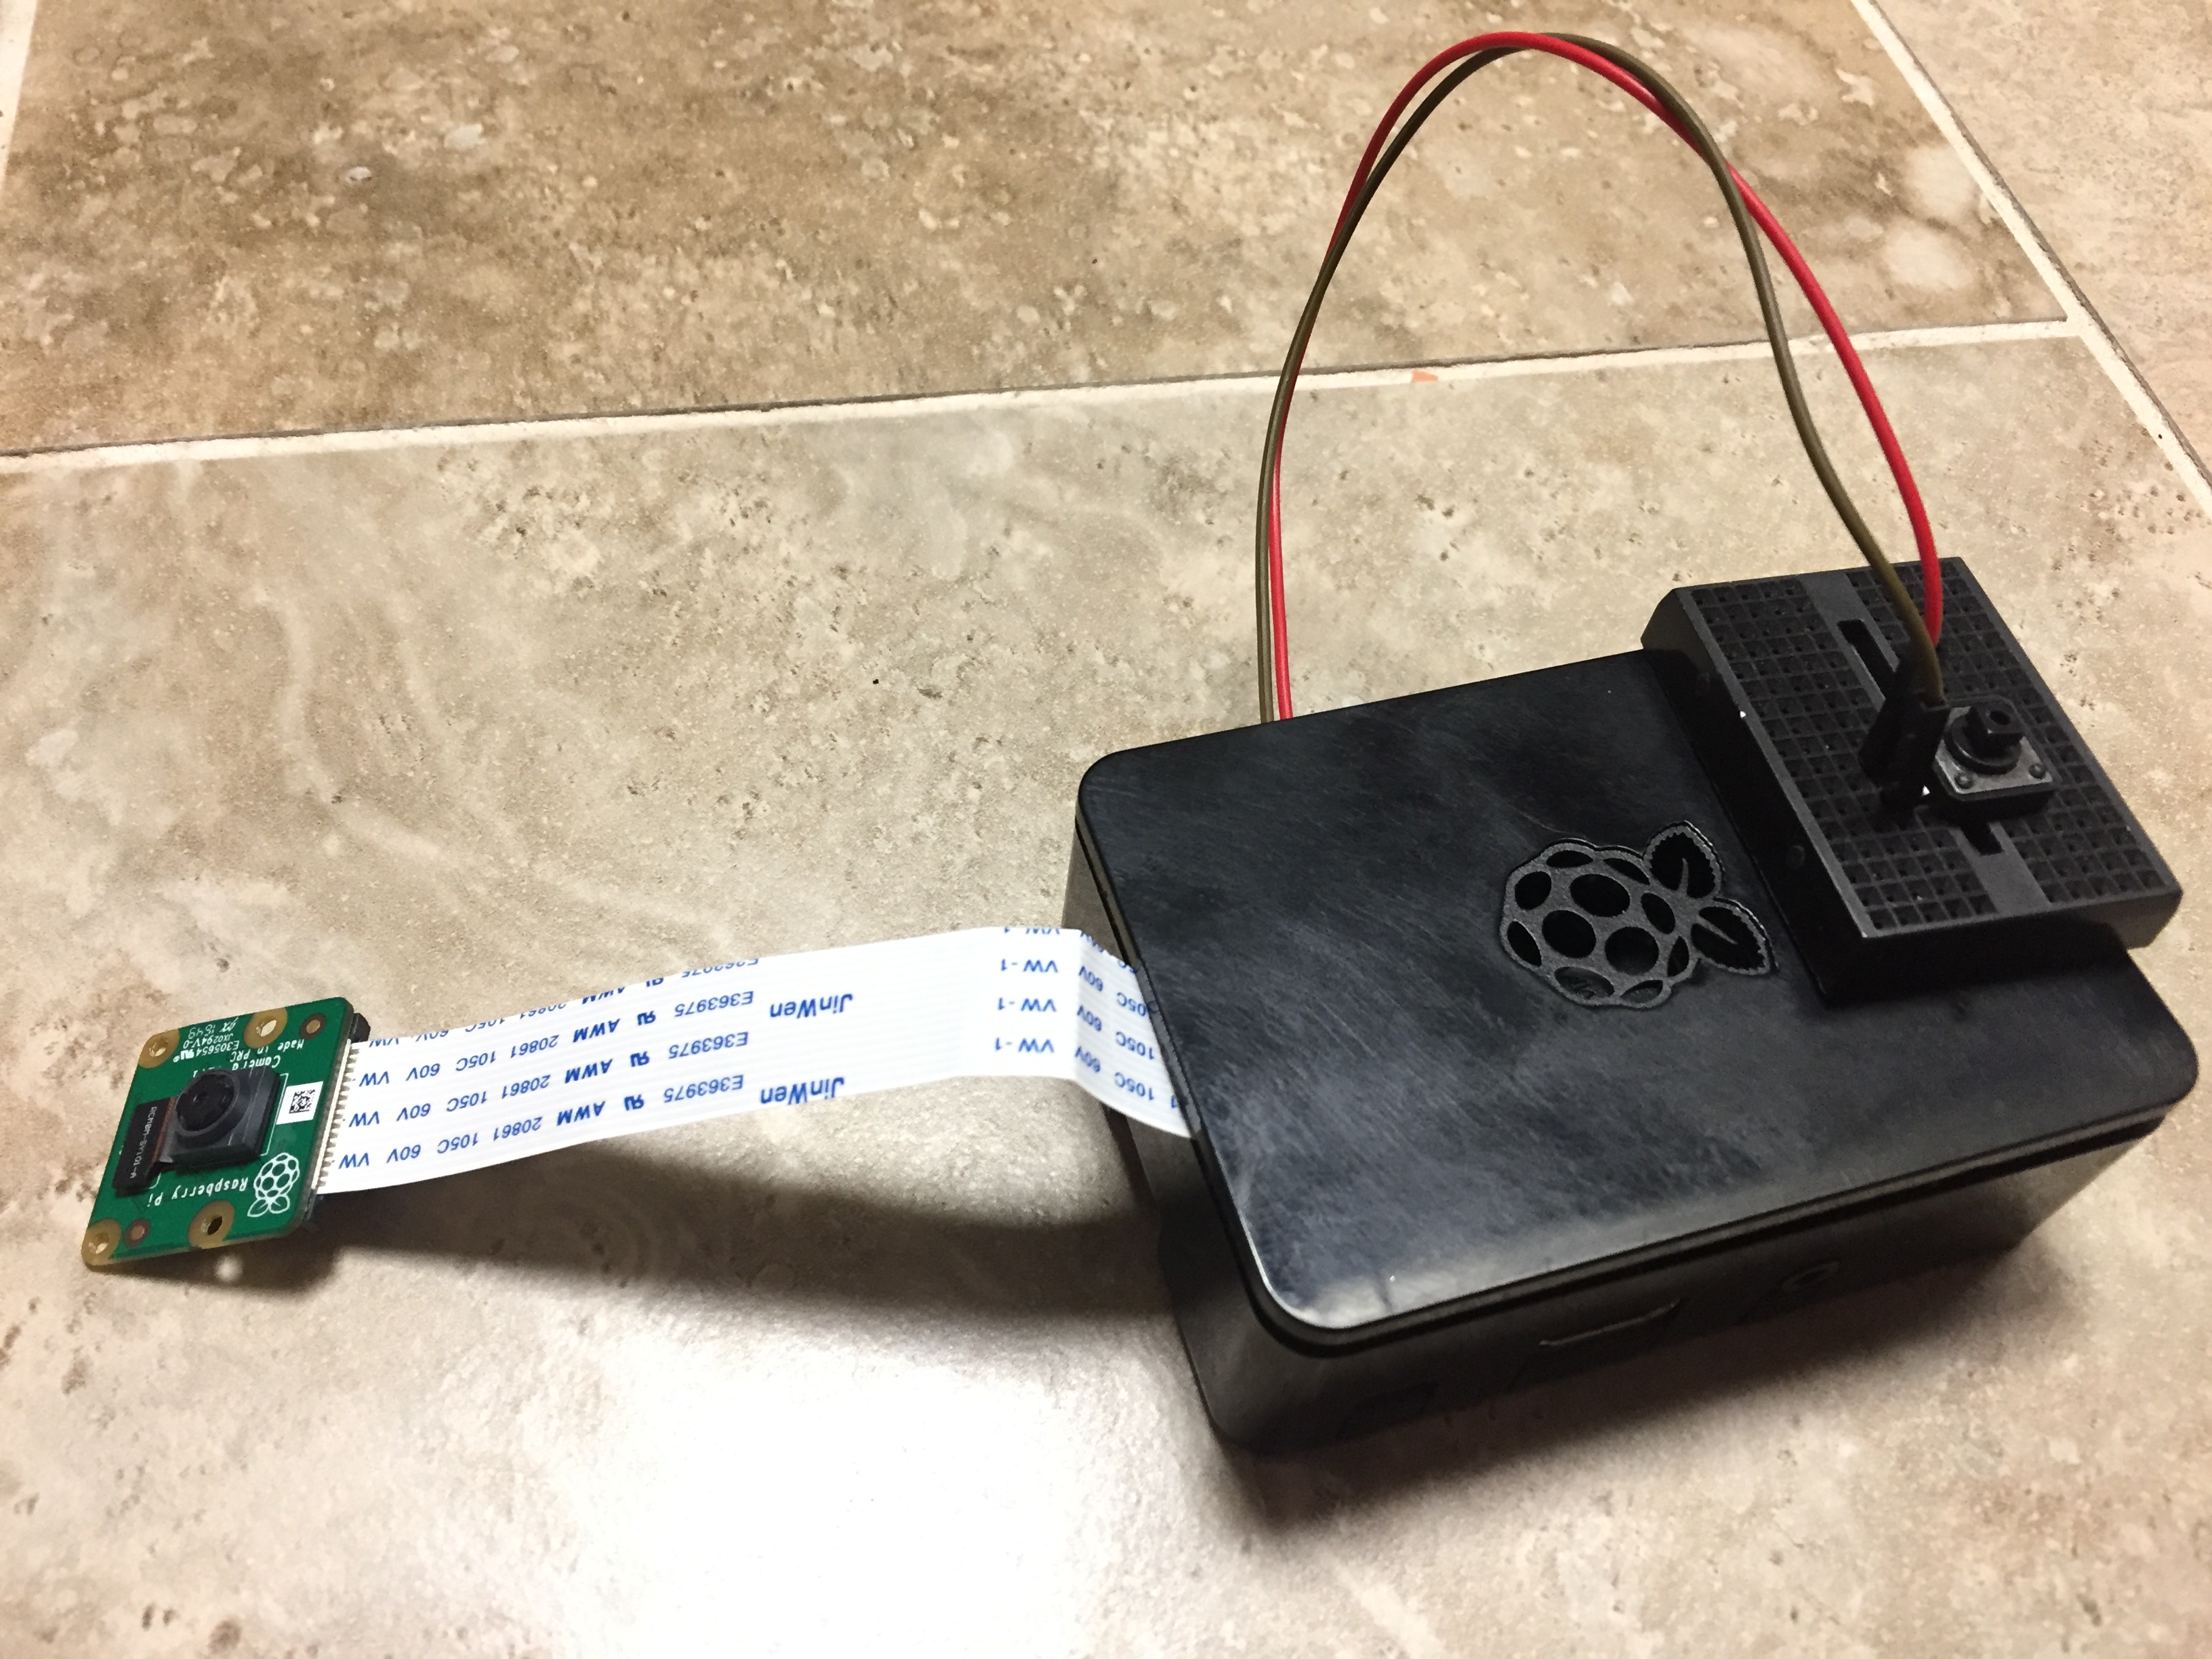
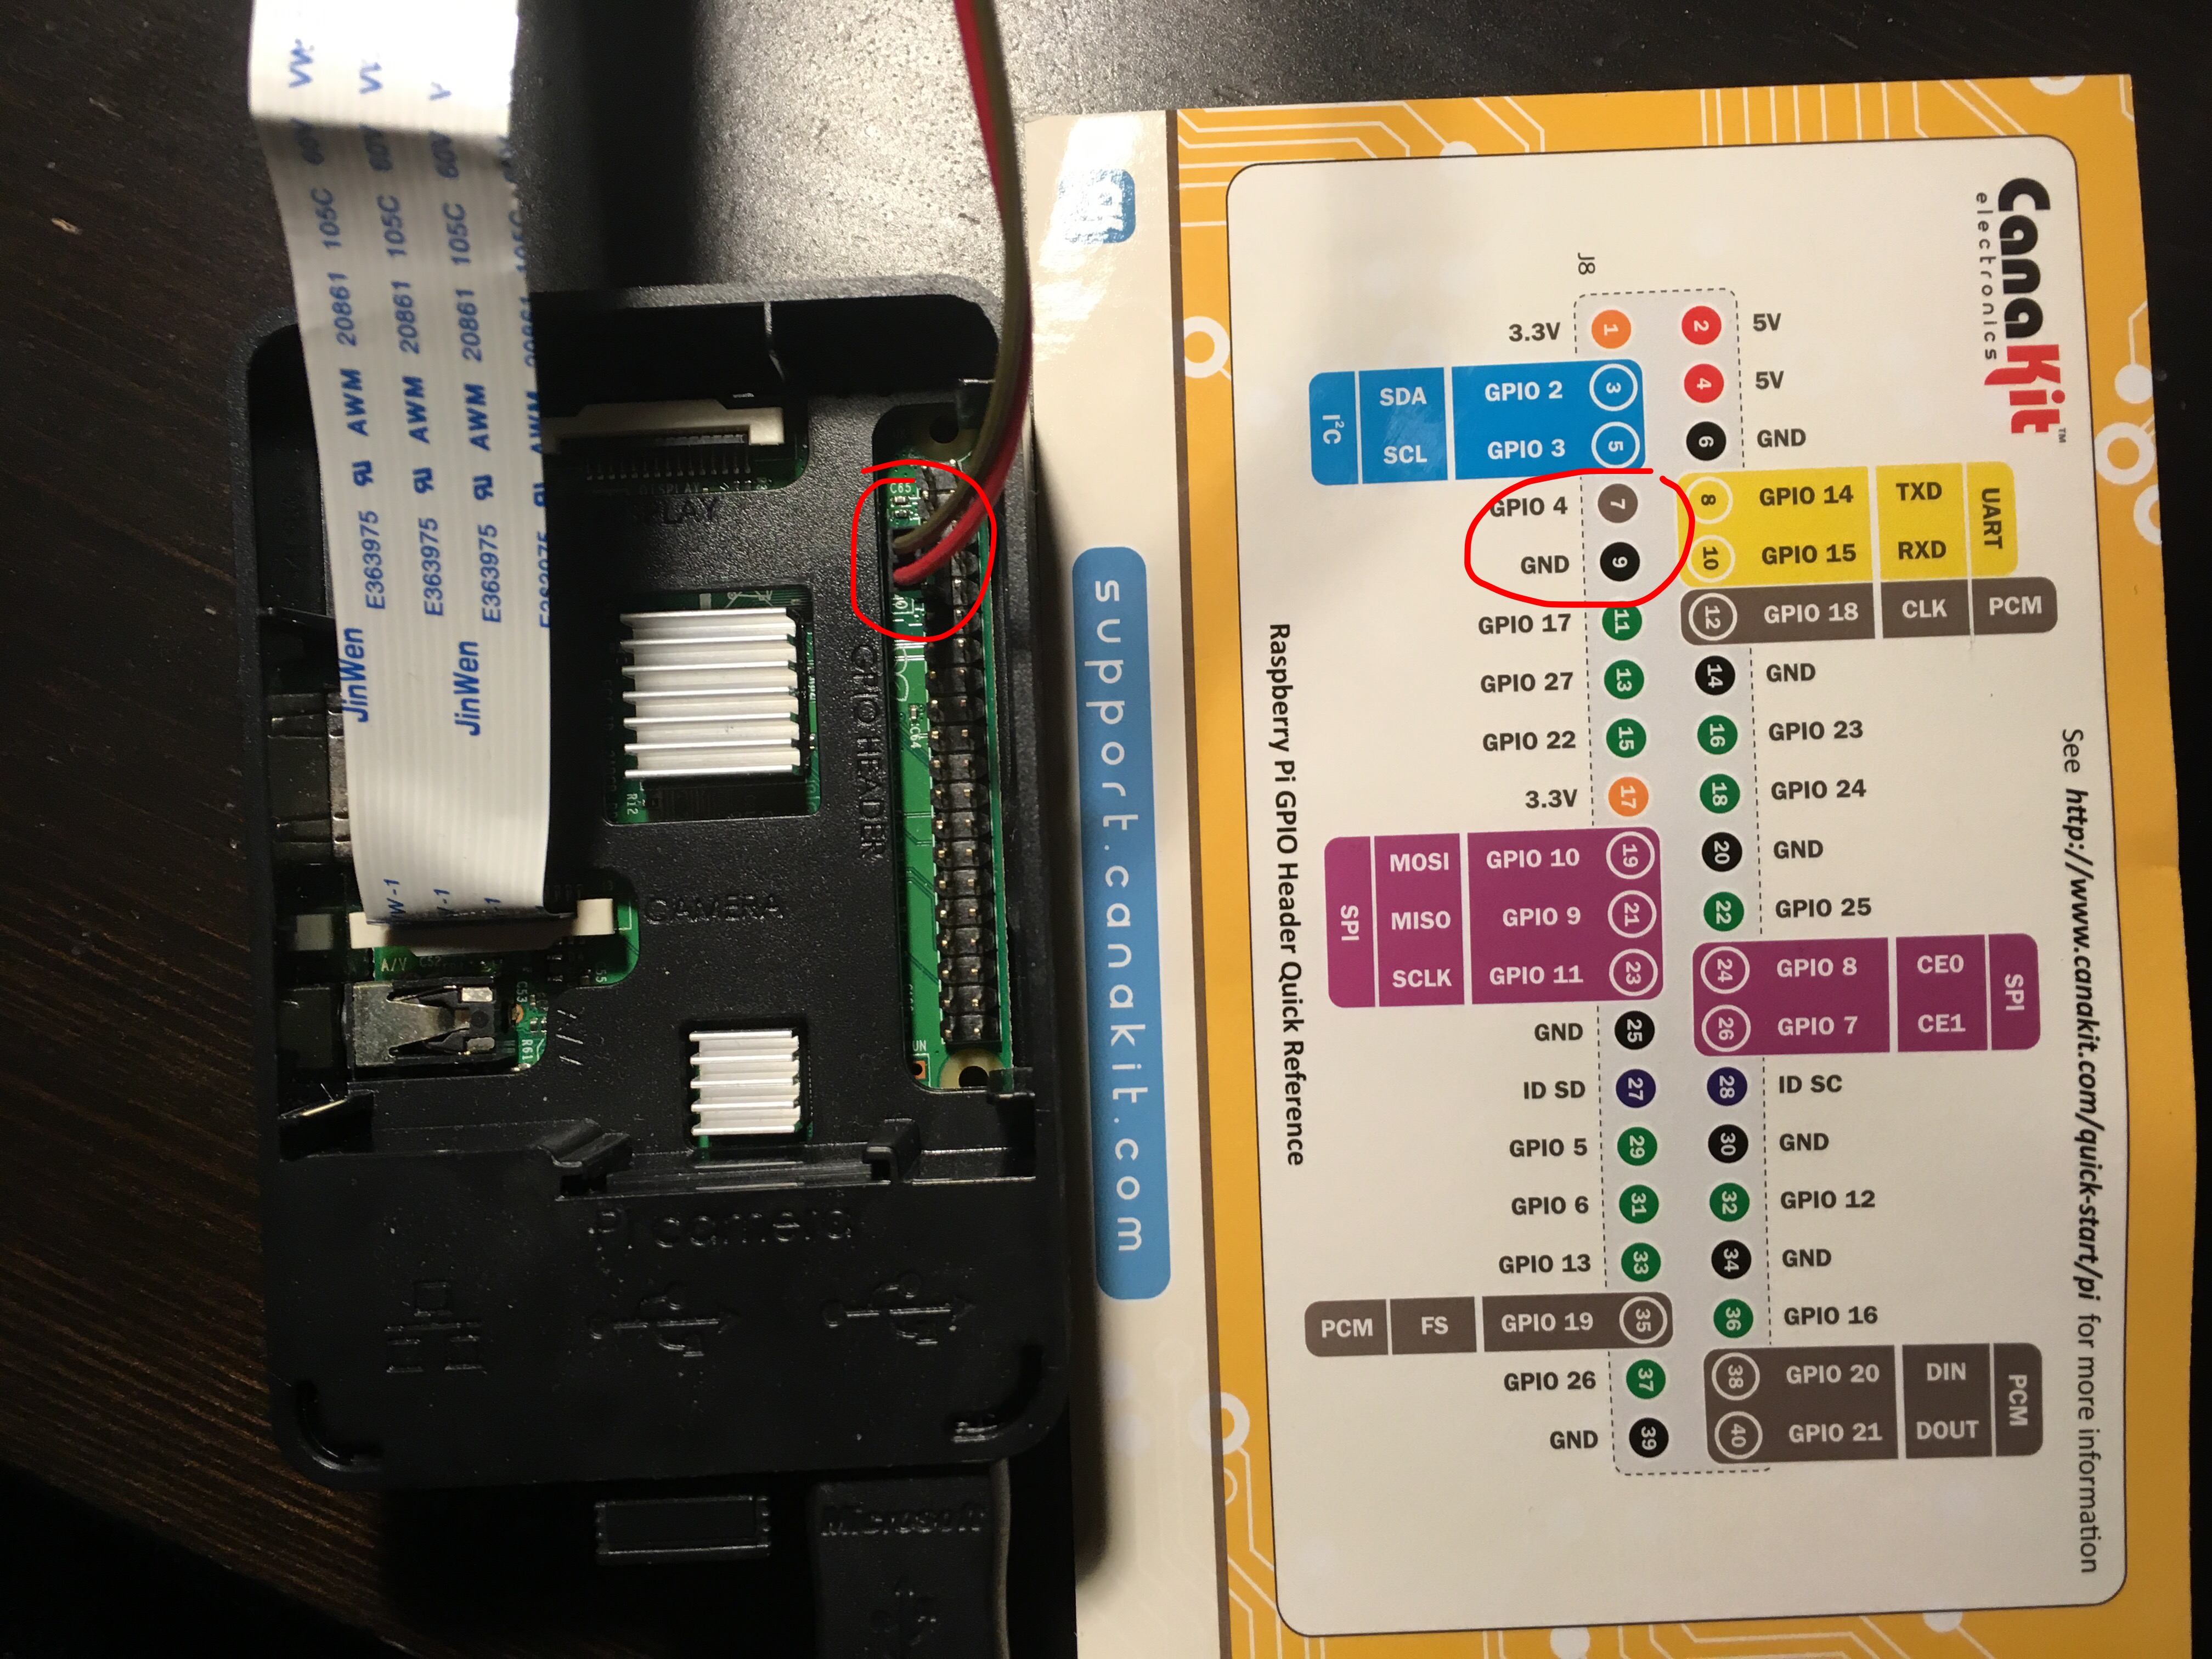
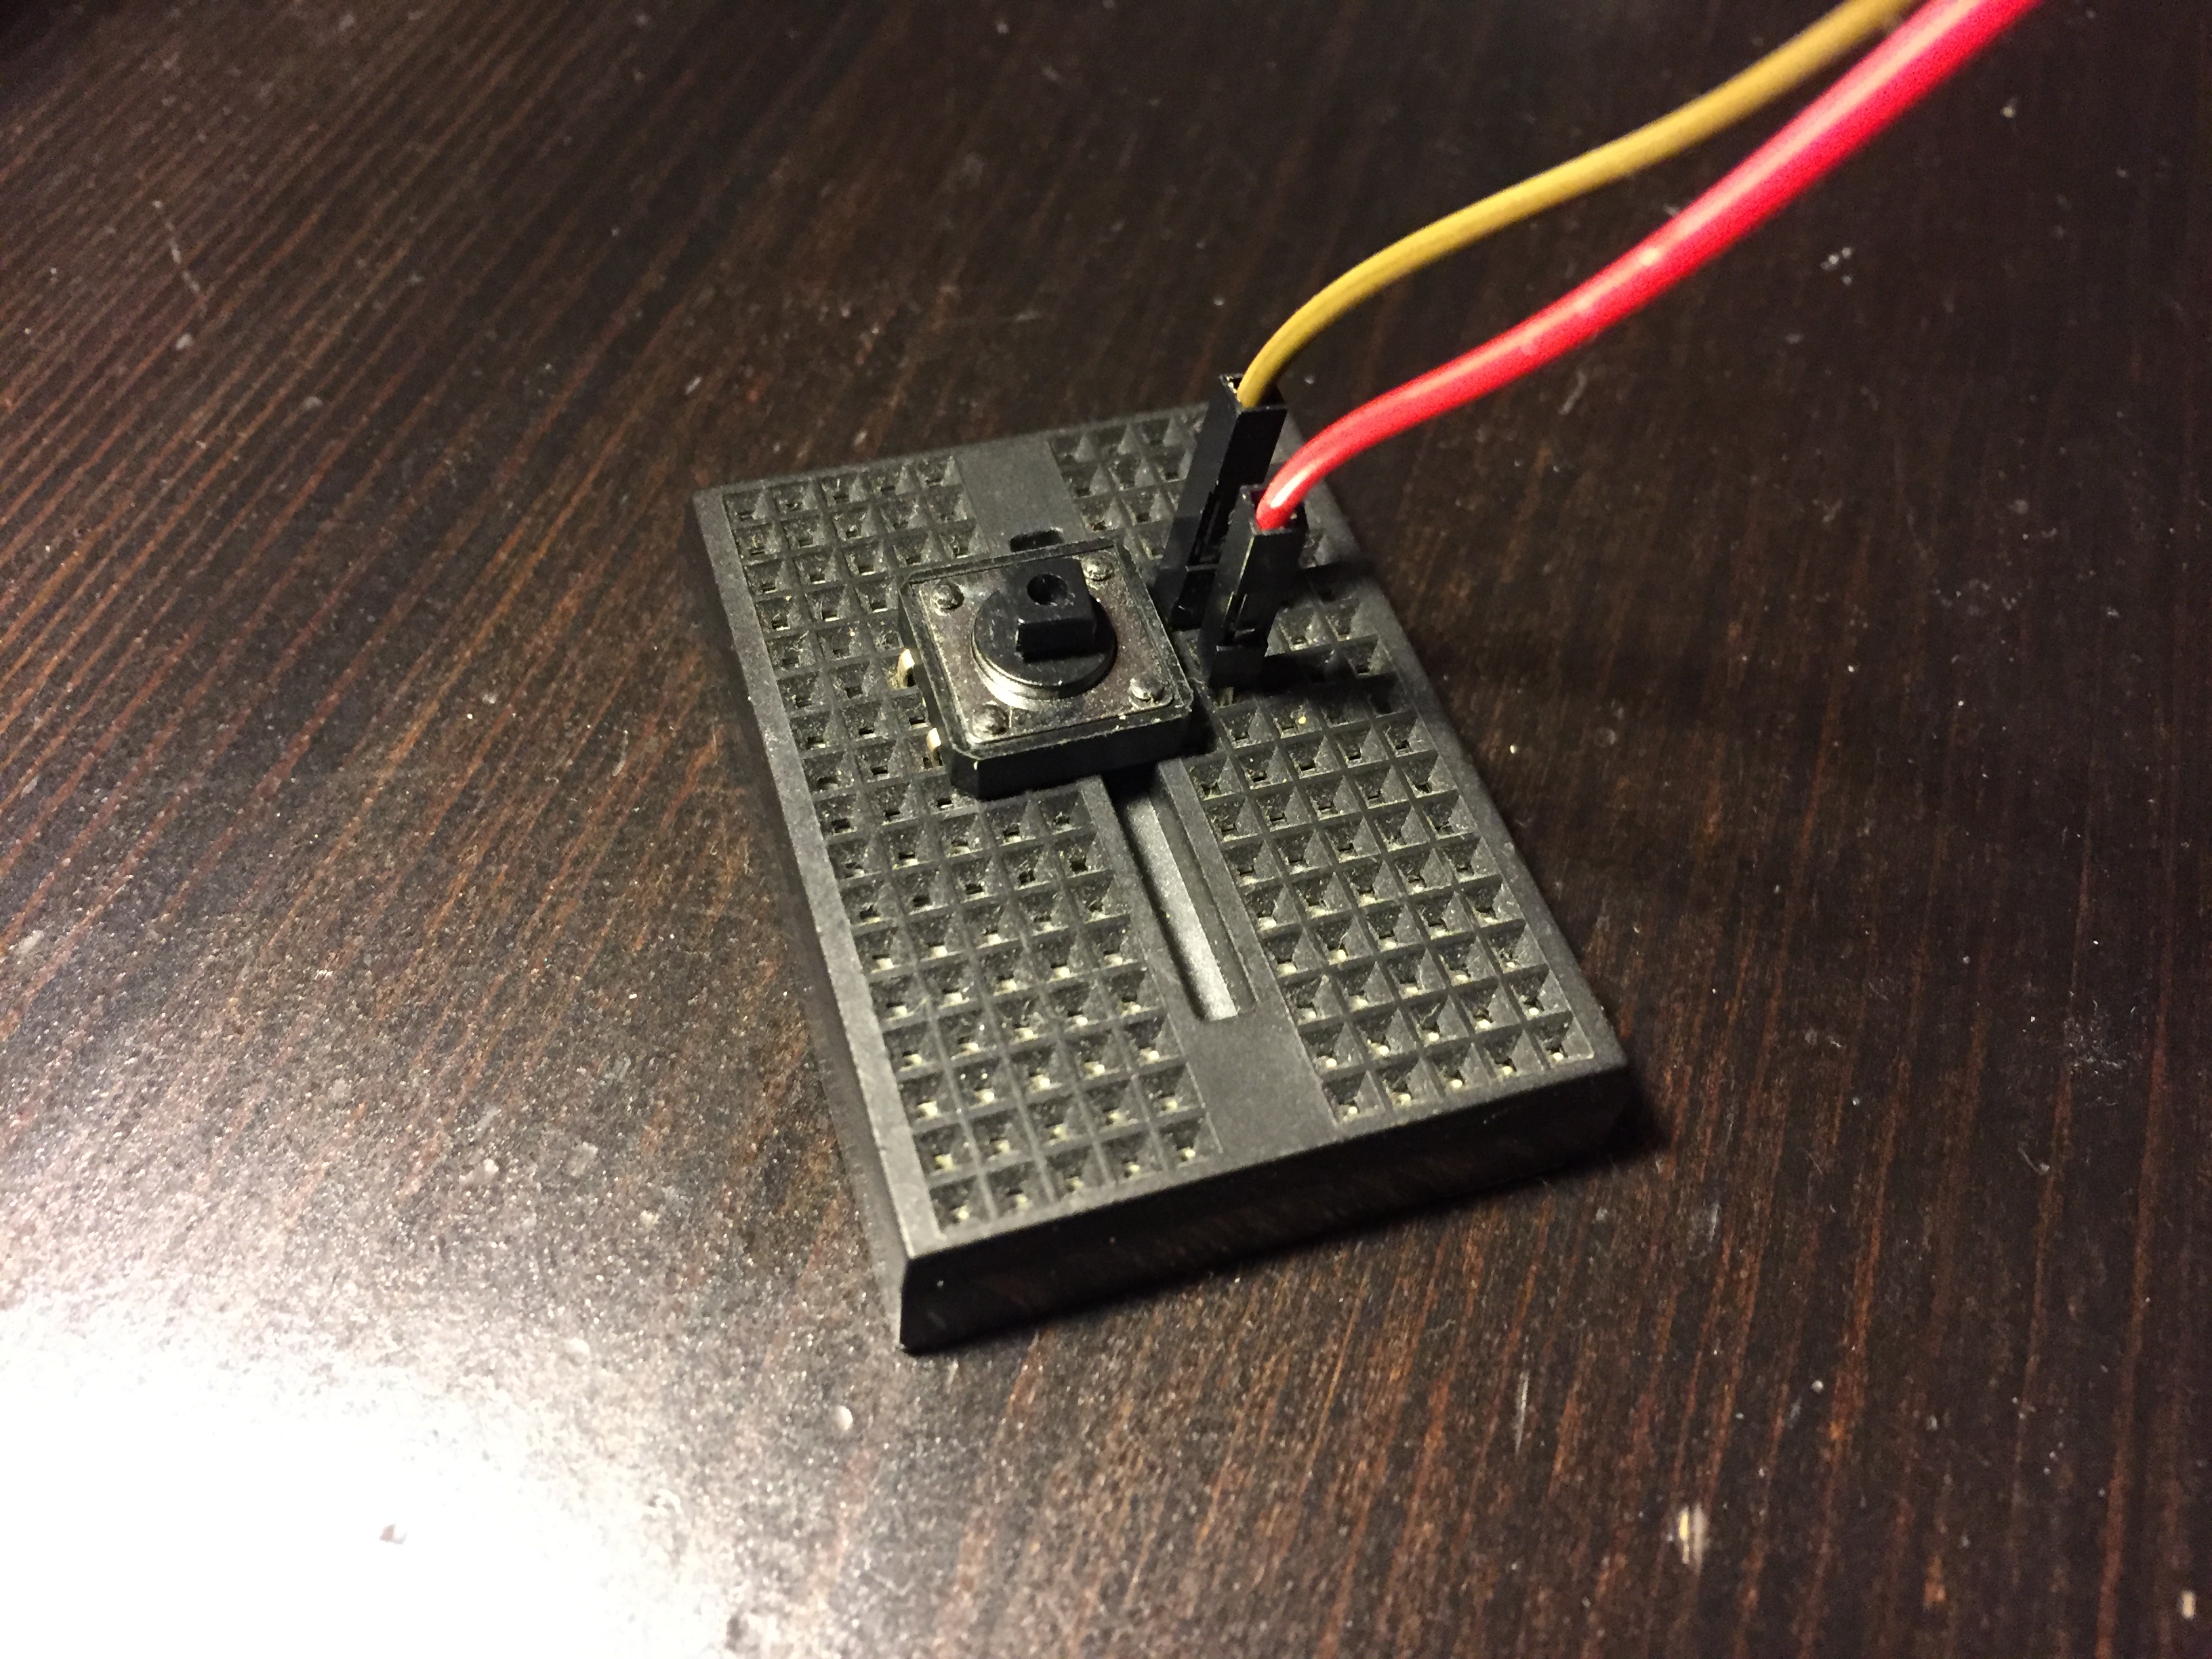
I am glad that you have made it this far! First, we need to connect the camera to our Raspberry Pi. This website shows you how to physically connect it. We also need to wire up the button that will control everything. You need 2 male-female cables, breadboard, and button. Place the button over the middle of the breadboard. Put two wire to two of the leads on one side of the button (see image). Connect the female end of one wire to Ground on the Raspberry Pi and the Other to GPIO 4. See image to see where to connect those two wires.
Now you are done! Here is how you use your new creation. Plug in the raspberry pi to power and wait for it to turn on. Press the button and release shortly after, and a picture will be taken and uploaded to Twitter. If you hold the button for 3 seconds or more, the Raspberry Pi will safely shut down (do not just unplug it). Try this out and see if everything works as described. Of course, if you have any questions or suggestions, leave them in the comments.
Check out my YouTube Channel - Tech Tribe - for more tutorials!