Tutorial for Mybotic MP3 Player
by mybotic in Circuits > Electronics
2538 Views, 8 Favorites, 0 Comments
Tutorial for Mybotic MP3 Player
Description
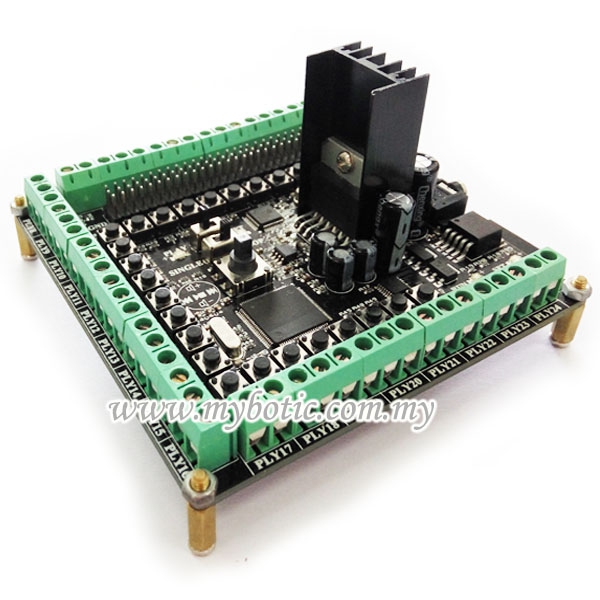
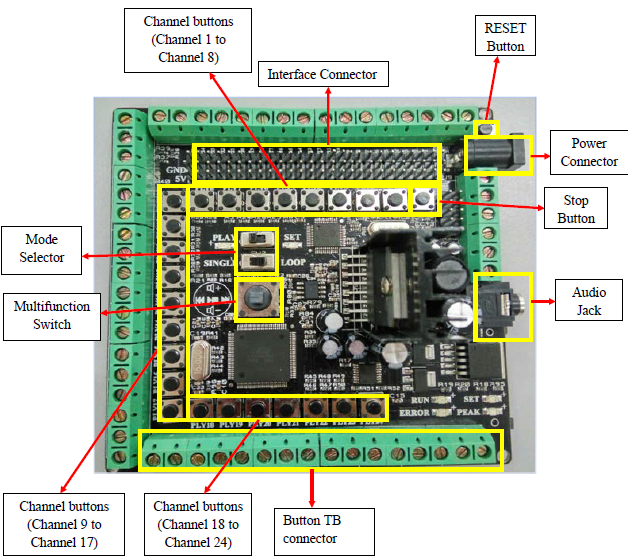
The Mybotic MP3 Player is a awesome MP3 Player that can interface with Active Low Sensors which allow user play the specific preset music or sounds when the sensor detect something or the channel button is pressed. This music player can install the Active Low sensors and external buttons up to 25 Channels. We can choose any songs from the SD card storage and set specific songs into each of the channels, thus giving you the ability to play the specific preset song or sound when the sensors detect something or the push buttons is pressed. This music player can play any MP3 Format Types of songs depending the storage of the SD card. Besides that , it also support up to 38W of loudspeaker. Simply plug in a battery or regulated power supply (8v to 22v), make sure the songs (MP3 format) are stored into the SD card, and put the SD card into the SD card sockets of the music player. At board of music player, it has two slide switches which are SW1 and SW2, one multifunction switch and 25 channel buttons and interface connectors’ pins. The two slide buttons are PLAY/SETand SINGLE/LOOP slide switches. Among the 25 channel buttons, 24 push buttons indicate the 24 channels which are used to store selected music and a STOP button is used to stop music. We can set up to 24 specific songs or sounds into the different channels that we prefer. Interface connectors of the music player board are used to interface with the sensors or microcontroller.
Specification
- Operate up to 25 channel buttons at a time
- Direct interface up to 25 active low sensors
- Can set the specific song into each channel up to 24 channels
- Wide range of input voltage: 8 to 22VDC
- Built-in ampllifier, able to direct attach two loud speakers up to 38W per each
- Support various type of filename (English, Chinese, Japanese, Korean and else)
- Support length of filename up to 100 words per file.
- Comes with 8GB memory card
- 2 Playing modes: Single or Loop
- Led indicator
- Size: 100mm*100mm
Pinout Details
Storing Song Into MP3
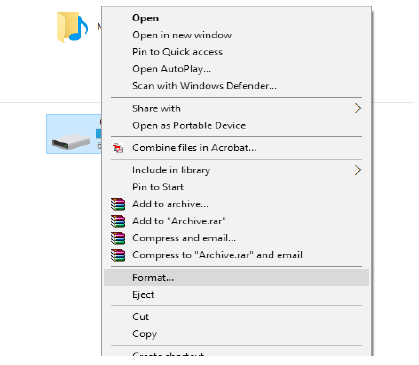
1. Plug in SD card reader or just using the SD card slot in your own computer to read SD card. Go to [My Computer] > Right Click [SD Card] disk > select [Format].
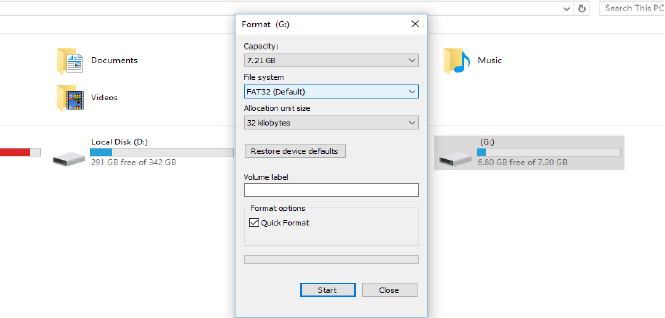
2. At the Format Window, choose FAT32 (default) and press Start. Note: the SD card must in FAT32 format.
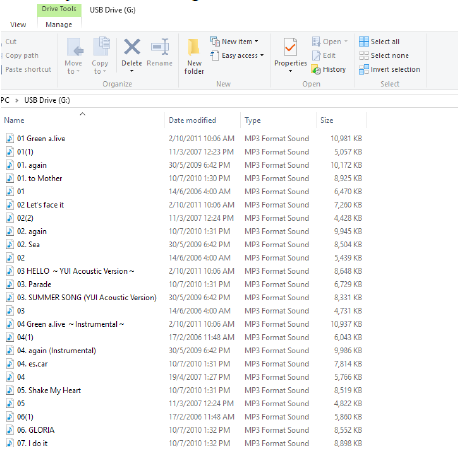
3. Stores any MP3 format songs/music into SD card.
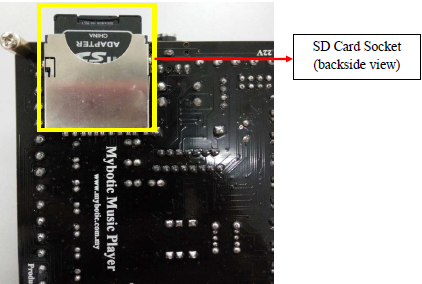
Insert SD Card
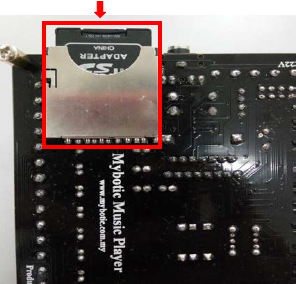
Insert SD card into SD card socket. Failure to do this, the green RUN LED and red ERROR LED will light up. Note: Do not remove the SD Memory Card when the board is running. It may cause error.
Connect Loudspeaker
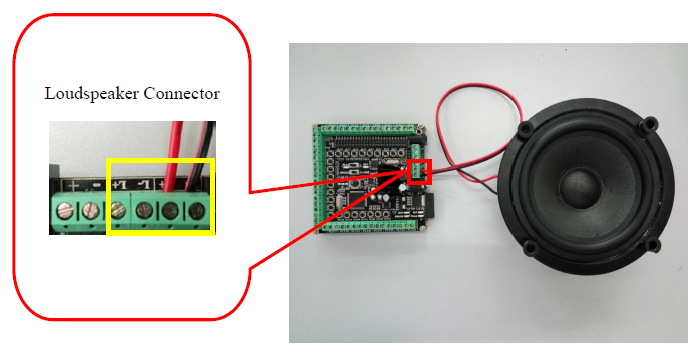
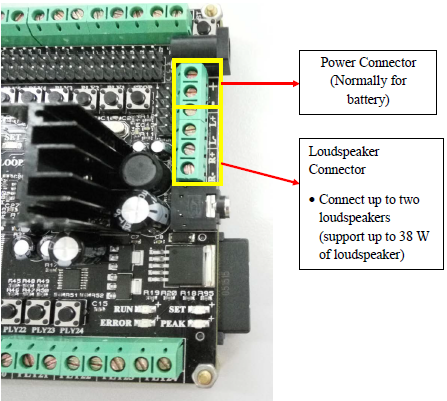
Connect your loudspeaker to the loudspeaker connector. Refer below picture.
Plug in Power
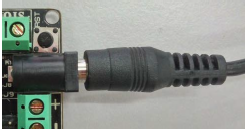

Plug in power supply via power jack connector or terminal block (TB) connector. Input power supply should in range: DC8V- 22V. Mybotic MP3 Player is now ON. RUN, SET, and Error LEDs will be light-up and then turn off indicate the initialization is completed.
Noted: The period of initialization is depending on the storage of MP3 files inside SD Card. It may be longer for large files inside SD Card.
SET Mode
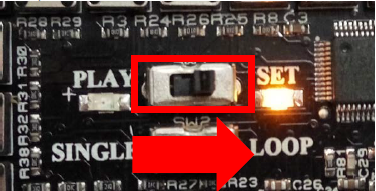
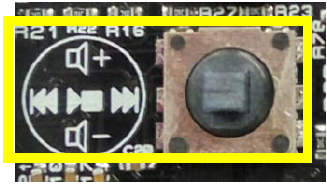
To switch to SET Mode, slide the SW1 to SET Mode and yellow LED will light-up. Now the board is ready to set any song in different channel. You can use the multifunction switch to do selection. See below explaination :
- Switch Left - skip to previous song
- Switch Right - skip to next song
- Switch Up - Volume up
- Switch Down - Volume Down
- Center - Play or Stop the MP3
Set Song's Channel
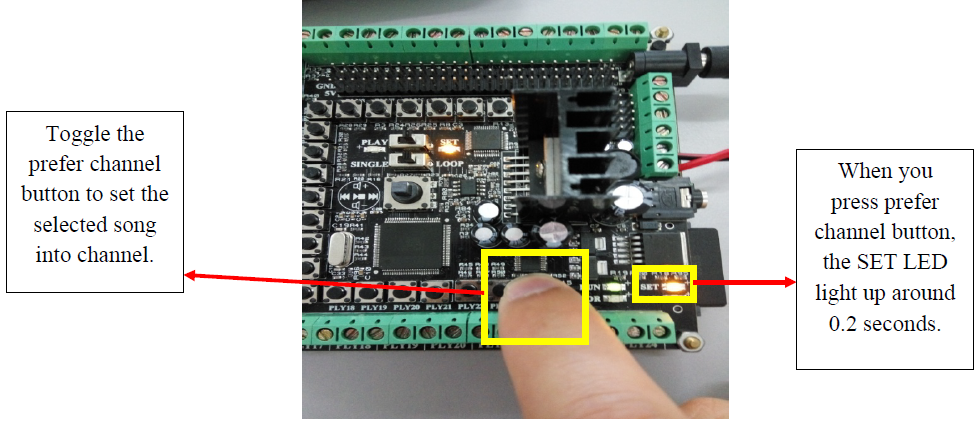
Once the song/music is selected. You can set the selected song into the desire channel by toggle your prefer channel button. In the picture above, channel button 24 was toggled to set the selected song.
SINGLE AND LOOP in SET Mode
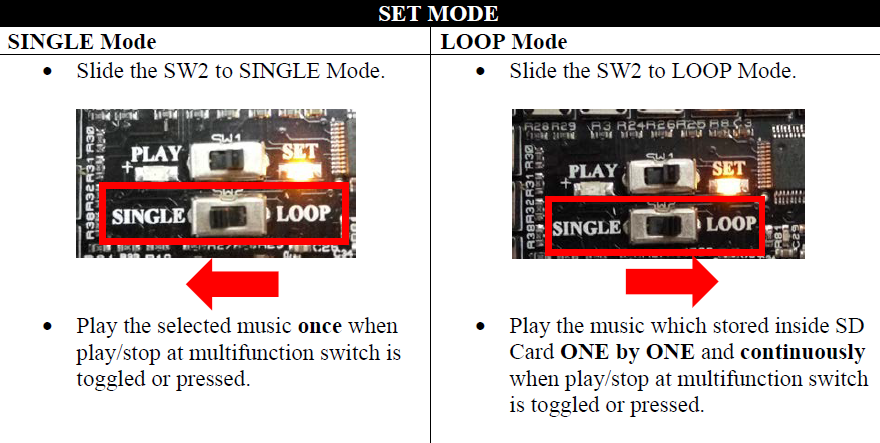
User is allow to select SINGLE or LOOP in SET Mode.
-
Slide the SW2 to SINGLE Mode. Play the selected music once when play/stop at multifunction switch is toggled or pressed.
-
Slide the SW2 to LOOP Mode. Play the music which stored inside SD Card ONE by ONE and continuously when play/stop at multifunction switch is toggled or pressed.
Play Mode
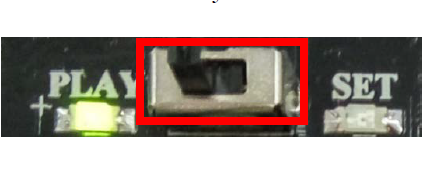
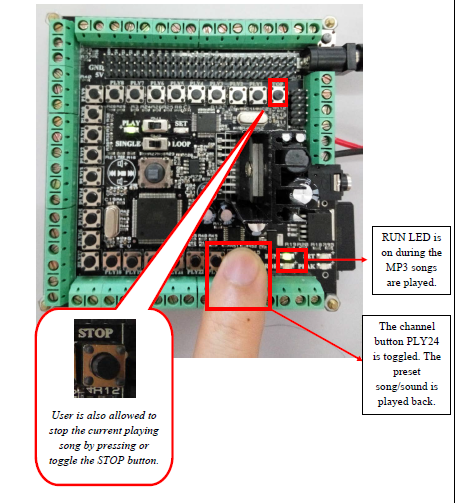
Now switch to Play Mode and toggle the preset channel button. The preset song/sound will be played back and user is also allowed to stop the current playing song by pressing or toggle the STOP button.
Note : RUN LED is on during the MP3 songs are played.
SINGLE or LOOP in PLAY Mode.
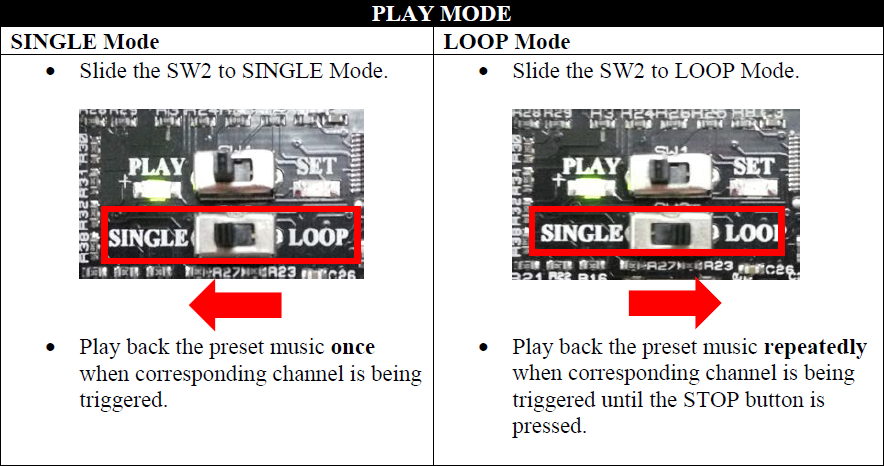
User is allowed to select SINGLE or LOOP in PLAY Mode.
- Slide the SW2 to SINGLE Mode. Play back the preset music once when corresponding channel is being triggered.
-
Slide the SW2 to LOOP Mode. Play back the preset music repeatedly when corresponding channel is being triggered until the STOP button is pressed.
External Button
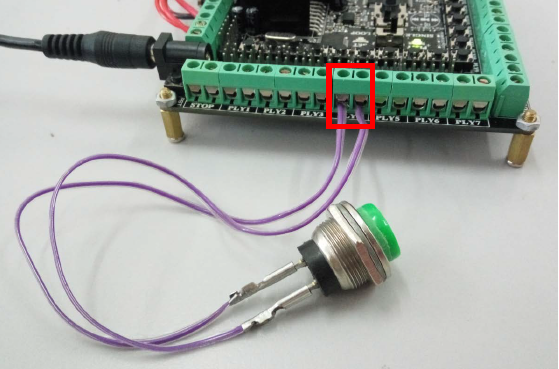
You can see PLY1 to PLY24 and one extra STOP button on the board. They are allowed to extend by connecting external buttons via the corresponding TB Connectors on the Mybotic MP3 Player. In this picture above, the external button is connected to PLY4 channel button. Therefore, the channel button PLY4 wills playback MP3 songs/sound when the external button is pressed
Input and Output Pin (Sensor and Controller Interface)
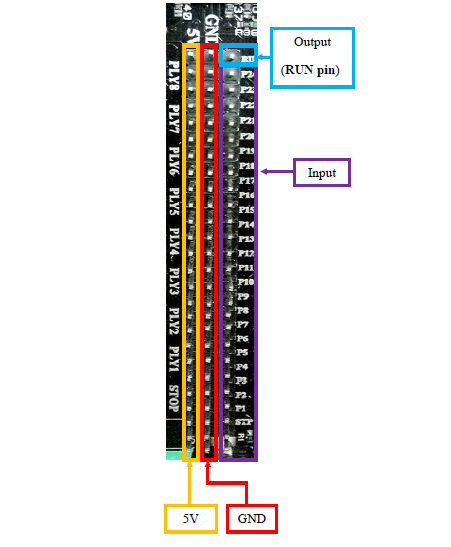
The board consists of 25 active LOW Input Pins and 1 active LOW Output Pin.
- As the INPUT pins are ACTIVE LOW, user can simply plug in the ACTIVE LOW sensor to on-board input’s pins. When the sensor detects the environment’s change, the board will activate and play back the corresponding MP3 song/sound. Note: Please turn off the board before install sensor to the board.
- The OUTPUT pin is ACTIVE LOW and it gives a LOW Logic during MP3 songs play back. It allows the ACTIVE LOW device or module plug in to run another load.
Back-up System
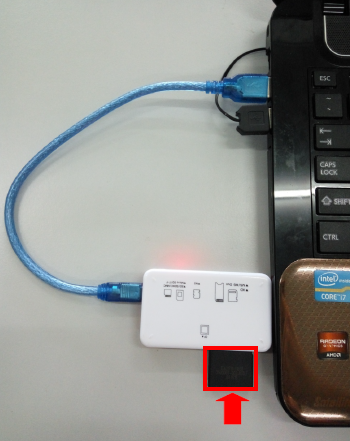
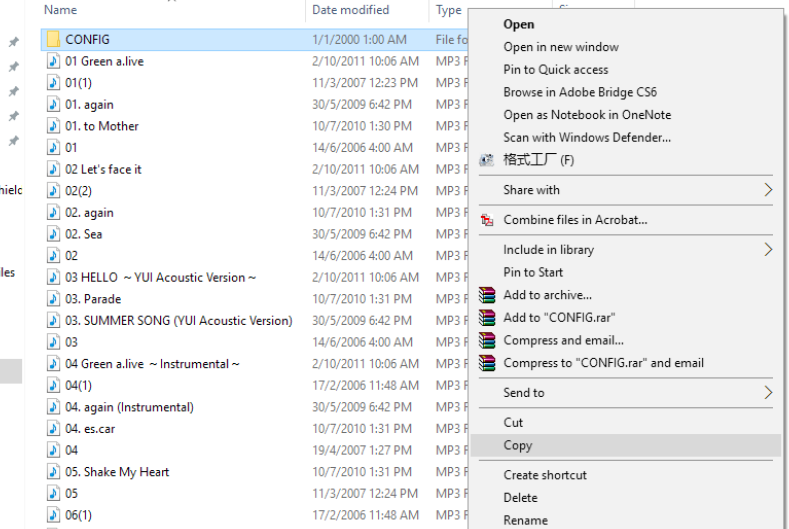
1. All the system’s configuration files are stored inside the SD Memory Card. It allows the preset MP3 song/sound to be backed-up.
2. To do the back-up, remove the SD Memory Card from board. And insert it into PC through Card Reader. Note: Please turn off the board before removing the SD Memory Card from the board.
4. To use back the previous back-up files, just copy the back-up files (From PC) and paste it into SD Memory Card. Lastly, insert back the SD Memory Card into SD Memory Card Socket on the board.
5. Now, the board able to playback the same preset setting as pervious back-up.
FOR MORE DETAILS, YOU CAN GO THROUGH HERE