Turning a Preexisting Image Into a Halloween Icon
307 Views, 0 Favorites, 0 Comments
Turning a Preexisting Image Into a Halloween Icon

Are you looking for a fun way to add some halloween spirit to your social media profiles? Well, you've come to the right place! You can mix and match these steps to get a fun icon which you can use on any social media platform! :D
Supplies
Any image that you want to edit, either drawn or a photograph
Any art software (Clip Studio Paint, Photoshop, Ibispaint, etc)
Ghost Icon


Step 1: Draw a sketch of the outline over your character, making it look like a sheet draped over them. Draw two circles over their eyes. It just has to cover the image fully.
Step 2: Draw lineart which follows the sketch.
Step 3: Color the lines in with white.
Zombie Icon


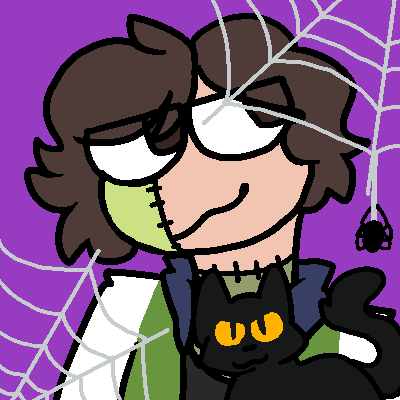
Step 1: Add lines for where stitches will go, you can add as many or as few as you want. You can make them shaped or just add lines cutting across different body parts.
Step 2: Color in a few of the sections with various shades of grey-green. Leave some skin color, to really add to the zombie look, but you can have as many patches as you want!
Spiderweb Icon

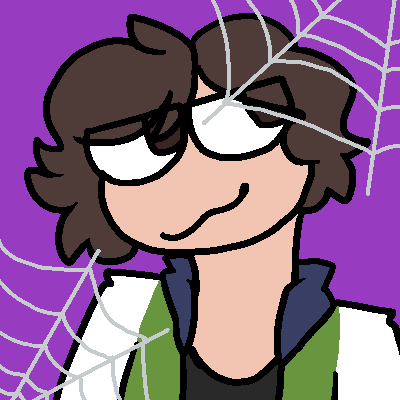

Step 1: Sketch out two lines from the corner to server as the base for the spiderweb. Add slightly curved lines connecting each line to the edges, and the other line.
Step 2: Draw over the sketch in light grey or white to make the webs look more spiderweb-y.
Step 3(Optional): Add a spider hanging down on a string! To draw the spider, draw a small black circle, and then add lines that attach to the web or a line hanging down.
Cat Icon
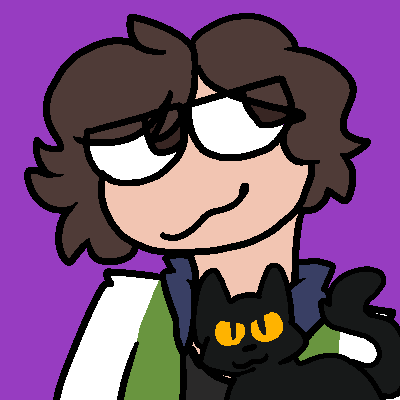
Step 1: Sketch out the shape of a cat, using a circle for the head and an oval for the body. The ears are sketches out as triangles, and the tail is made up of two lines connected by a half-circle at the end.
Step 2: Add smoother lineart for the cat.
Step 3: Color in the cat with whichever colors you want!
Knife Icon


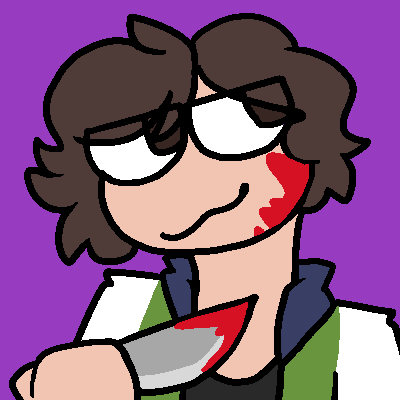
Step 1: Sketch out the shape of a hand holding a knife, and a triangle-like shape for the knife.
Step 2: Add lineart for the hand and the knife.
Step 3: Color in the hand and the knife!
Step 4 (Optional): Add blood dripping from the knife
Pumpkin Icon


Step 1: Sketch out the shape of the pumpkin
Step 2: Add lineart
Step 3: Color it in with orange, and the stem with brown.
Step 4(Optional): Add a face to the pumpkin, and include the knife from the knife walkthrough.
Final and Image Sizing
On most social media websites, a square icon works best! Typically, I find 400x400 pixels to be the best output size for them, though for most social media websites you can use any size you want. When possible, export your final image as a ".png" file, to avoid compression issues.
You can combine multiple sections of this tutorial into one icon, and layer the parts accordingly! Have fun with it! :D