Turn an Inexpensive Tote Into a Great Gift
by mjunger2005 in Craft > Embroidery
1413 Views, 3 Favorites, 0 Comments
Turn an Inexpensive Tote Into a Great Gift

In this instructable, I'm going to show you how to use a Brothers PE-780D embroidery machine and Embird2015 software to turn a plastic mesh tote into a great gift for friends and family members.
Choose a Colorful Tote to Embellish.

My wife found these totes at Target for $3, plus 75% off. She wants to send these to our sisters and moms.
We'll go with the pink tote this round.
Gather Your Supplies Together.

Here are the supplies we used for this instructable:
Plastic mesh tote from the Target store;
Brother PE-780D embroidery machine, with 5x7 hoop;
Embird 2015 base software, plus Embird Studio 2015, and Embird alphabet 38;
Basting spray (Walmart);
Washout Cloth Marker Blue pencil;
Tear-away stabilizer;
Scissors and other sewing accessories;
Long ruler;
Small clamps (Home Depot);
USB thumb drive;
Computer;
Embroidery thread (I like Gutermann and Sulky rayon)
Mark the Center of Your Tote's Target Embroidery Space
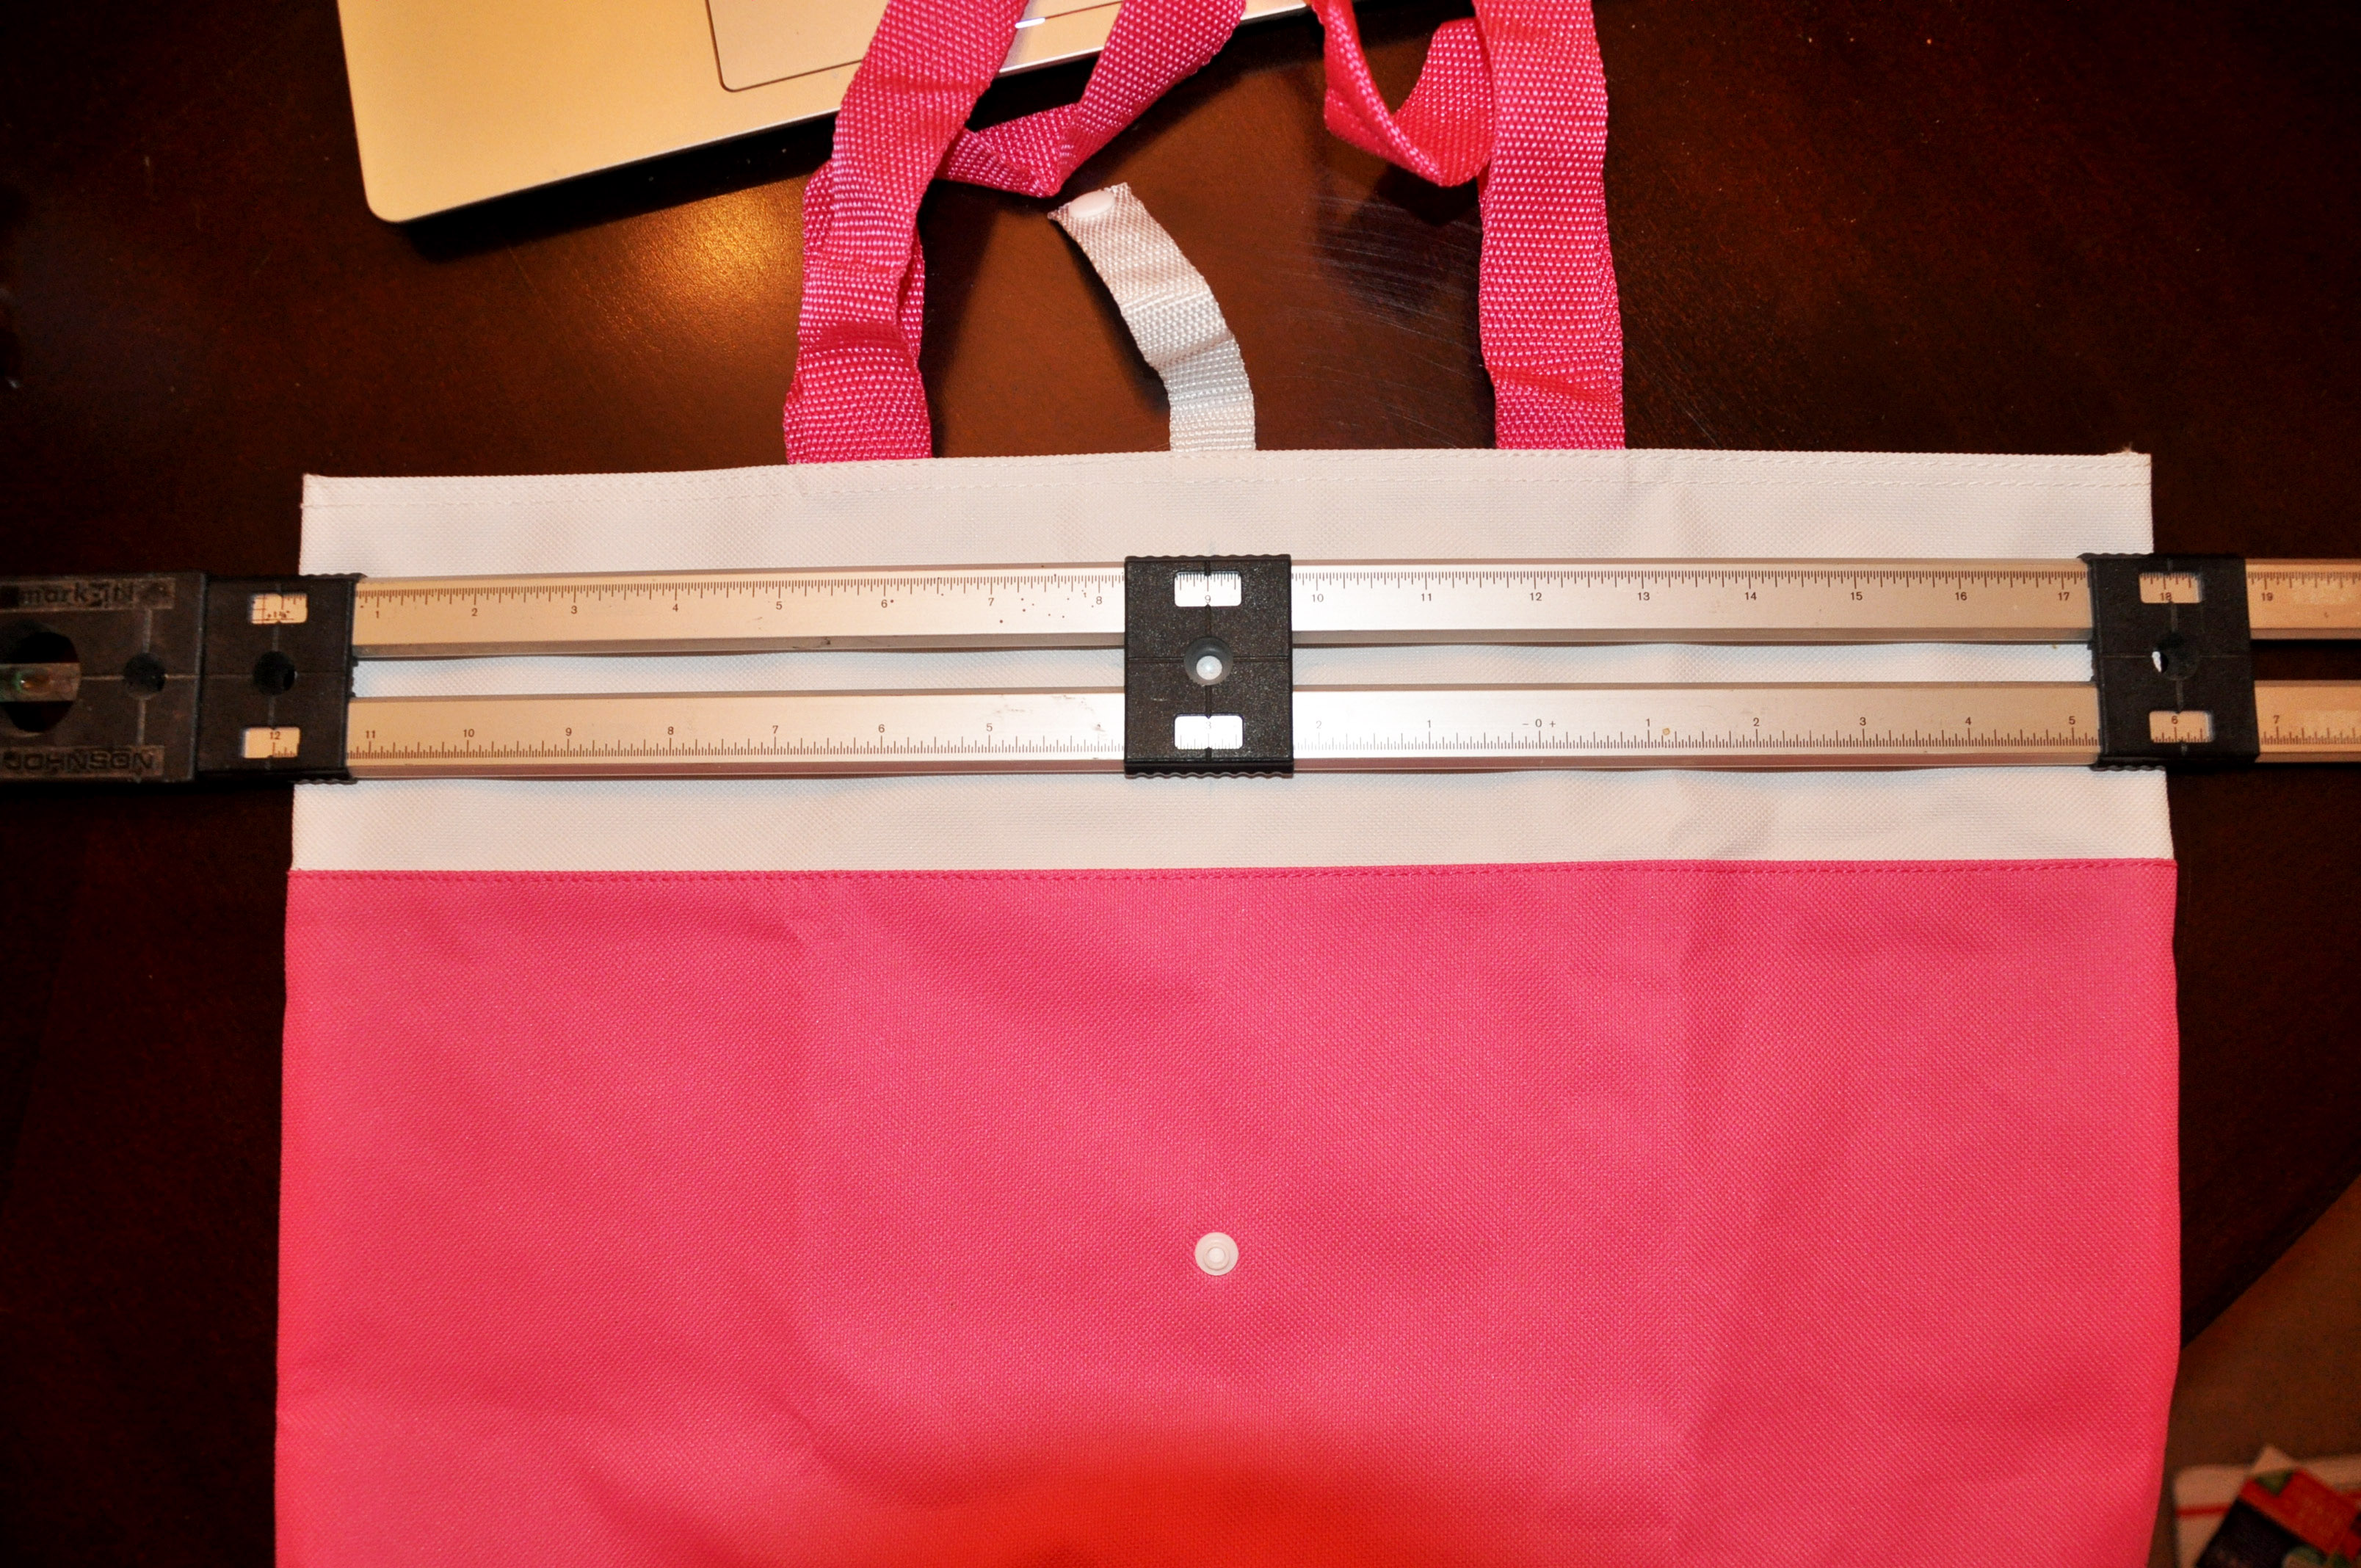
Place your tote on a flat surface (like a table top) and flatten it down.
Measure the area you want to embroider with a tape measure or ruler. For example, the white area shown in the picture is 18 inches x 4 inches (length x width).
Lightly mark the center of the embroidery area you just measured with a marking pencil.
Setup Your Embroidery Machine.


Ensure your top and bottom bobbins have enough thread spooled to do the job.
Insert the top and bottom bobbins into the machine.
Weave the top bobbin thread through the needle as instructed by the manufacture.
Install Stabilizer in the Embroidery Machine Hoop.


We’re using a 5” x 7” hoop.
Mark the Center of the 5x7 Hoop on the Stablizer.


Use the plastic template provided with your hoop to mark the center of the area on your stabilizer.
Set the hoop aside until later.
First Open Embird Editor; Then Open Embird Studio.


- Double-click the Embird2015 icon on your desktop; verify Embird Editor opens.
- Click on the Studio icon.; verify Embird Studio opens.
Define the Hoop Workspace in Studio.


- Click on the hoop icon.
- Select the hoop size (180 x 130 mm for a 7 x 5 inch hoop).
- Click hoop color button.
- Select hoop color.
- Click OK.
- Click Apply.
Insert Your Text And/or Patterns Onto the Hoop Workspace.


- Click the Insert text icon.
- Click inside the hoop workspace.
- Select the alphabet you own (Embird will sell you alphabet(s) in a font that you want for $15 or so; I have used Alphabet #38 for almost a year now and love it. They also sell an application that uses fonts; similar to how MS Word works.)
- Type in the text you want on your tote.
- Click the check mark on the title bar to finish the text.
- Click on a corner box and move cursor to resize the text; use the rulers as a guide (Embird will give you a warning message if your text is resized to overshoot the hoop size you chose earlier. This is very useful indeed.
- When satisfied with your text, right click the text.
- Select Generate Stitches.
Preview Your Text/pattern in 3D in Studio.

- Click the 3D tab to preview the design in 3D.
I should have noticed now that the "U" does not connect to the "n" like we write in cursive. Later, I used an Exacto knife to remove this thread.
Compile and Put Your Design Into Embird Editor.


- Select Compile and Put into Embird Editor.
- Save the file as requested.
- Check the Center in Hoop box.
- Verify the .PES format is checked.
- Click OK.
- Double-check your design in Embird Editor.
- Close Embird.
Spray Basting Adhesive on Your Hooped Stabilizer.

Go back and grab your hooped stabilizer.
Spray adhesive on your stabilizer using a box to shield everything from the sticky spray. You might want to go outside too, since the fumes are a tad noxious.
Align and Press the Sticky Hoop to the Inside of the Tote.


Press the tote onto the adhesive again.
Use clips to hold the tote more firmly to the hoop while you fold the excess tote material over (so the embroidery machine needle will not sew the tote together).
Remove a clip if it will interfere with the movement of the machine. Depending on the adhesive strength, and the firmness of the tote, you may be able to remove all the clips from the hoop/tote.
Attach the Hooped Tote to the Embroidery Machine.

Attach the hoop/tote to the embroidery machine, while making sure the excess tote material does not obstruct movement of the embroidery platform.
Copy the .pes and .edr Embroidery Files (for Your Project) From Your Computer to the Embroidery Machine..

- Insert a USB thumb drive into your computer’s USB port.
- Copy the .pes and .edr files you created to (the top level of) your USB drive.
- Safely remove your USB drive from the computer after the files have copied.
- Copy the image into the Embroidery Machine.
- Insert the USB drive into Embroidery Machine’s USB port.
Adjust How the Design Will Be Embroidered by Using the Embroidery Machine's Graphical User Interface (GUI).


Adjust the image shown on the Embroidery Machine’s GUI, if necessary, to place the image in the correct position. For us, we had to flip the pattern 180 degrees since the machine showed it to be embroidered upside down (you only have to click on 90 degrees since the machine knows it can only display the design either at 0 or 180).
Press the Magic Button to Begin Embroidering Your Text/pattern Onto Your Tote.


Embroider the text onto your tote.
When the machine is done embroidering your design, remove the tote from the stabilizer.
Then, remove the small bits of stabilizer still stuck to the lettering (inside the tote).
Admire Your Tote Before Wrapping It Up As a Fabulous Gift for Someone.

Done!
I still have 1 more to do for my wife's friend, but it's a fairly automatic process now.
If you want to see what else I make, please go to www.ClayClothMetalCraft.com
and take a look around. I just started this site, but I put more projects on it as the weeks go by. Once there, you can subscribe to my site and download my free guide "How to Make (Torch Braze) a Simple Wire Wheel.
Thanks for reviewing this Instructable...and my website; I hope you like what I provided.
Your friend, Mark