Turn a Photo Into an Embroidery
by Danger is my middle name in Craft > Embroidery
79249 Views, 245 Favorites, 0 Comments
Turn a Photo Into an Embroidery
Some friends and I did a handmade secret santa gift exchange recently, The friend I drew from the hat has this pretty phenomenal mustache so I knew I wanted to make something to highlight that. I decided to make an embroidered portrait of him.
Take a Picture and Run It Through Some Filters
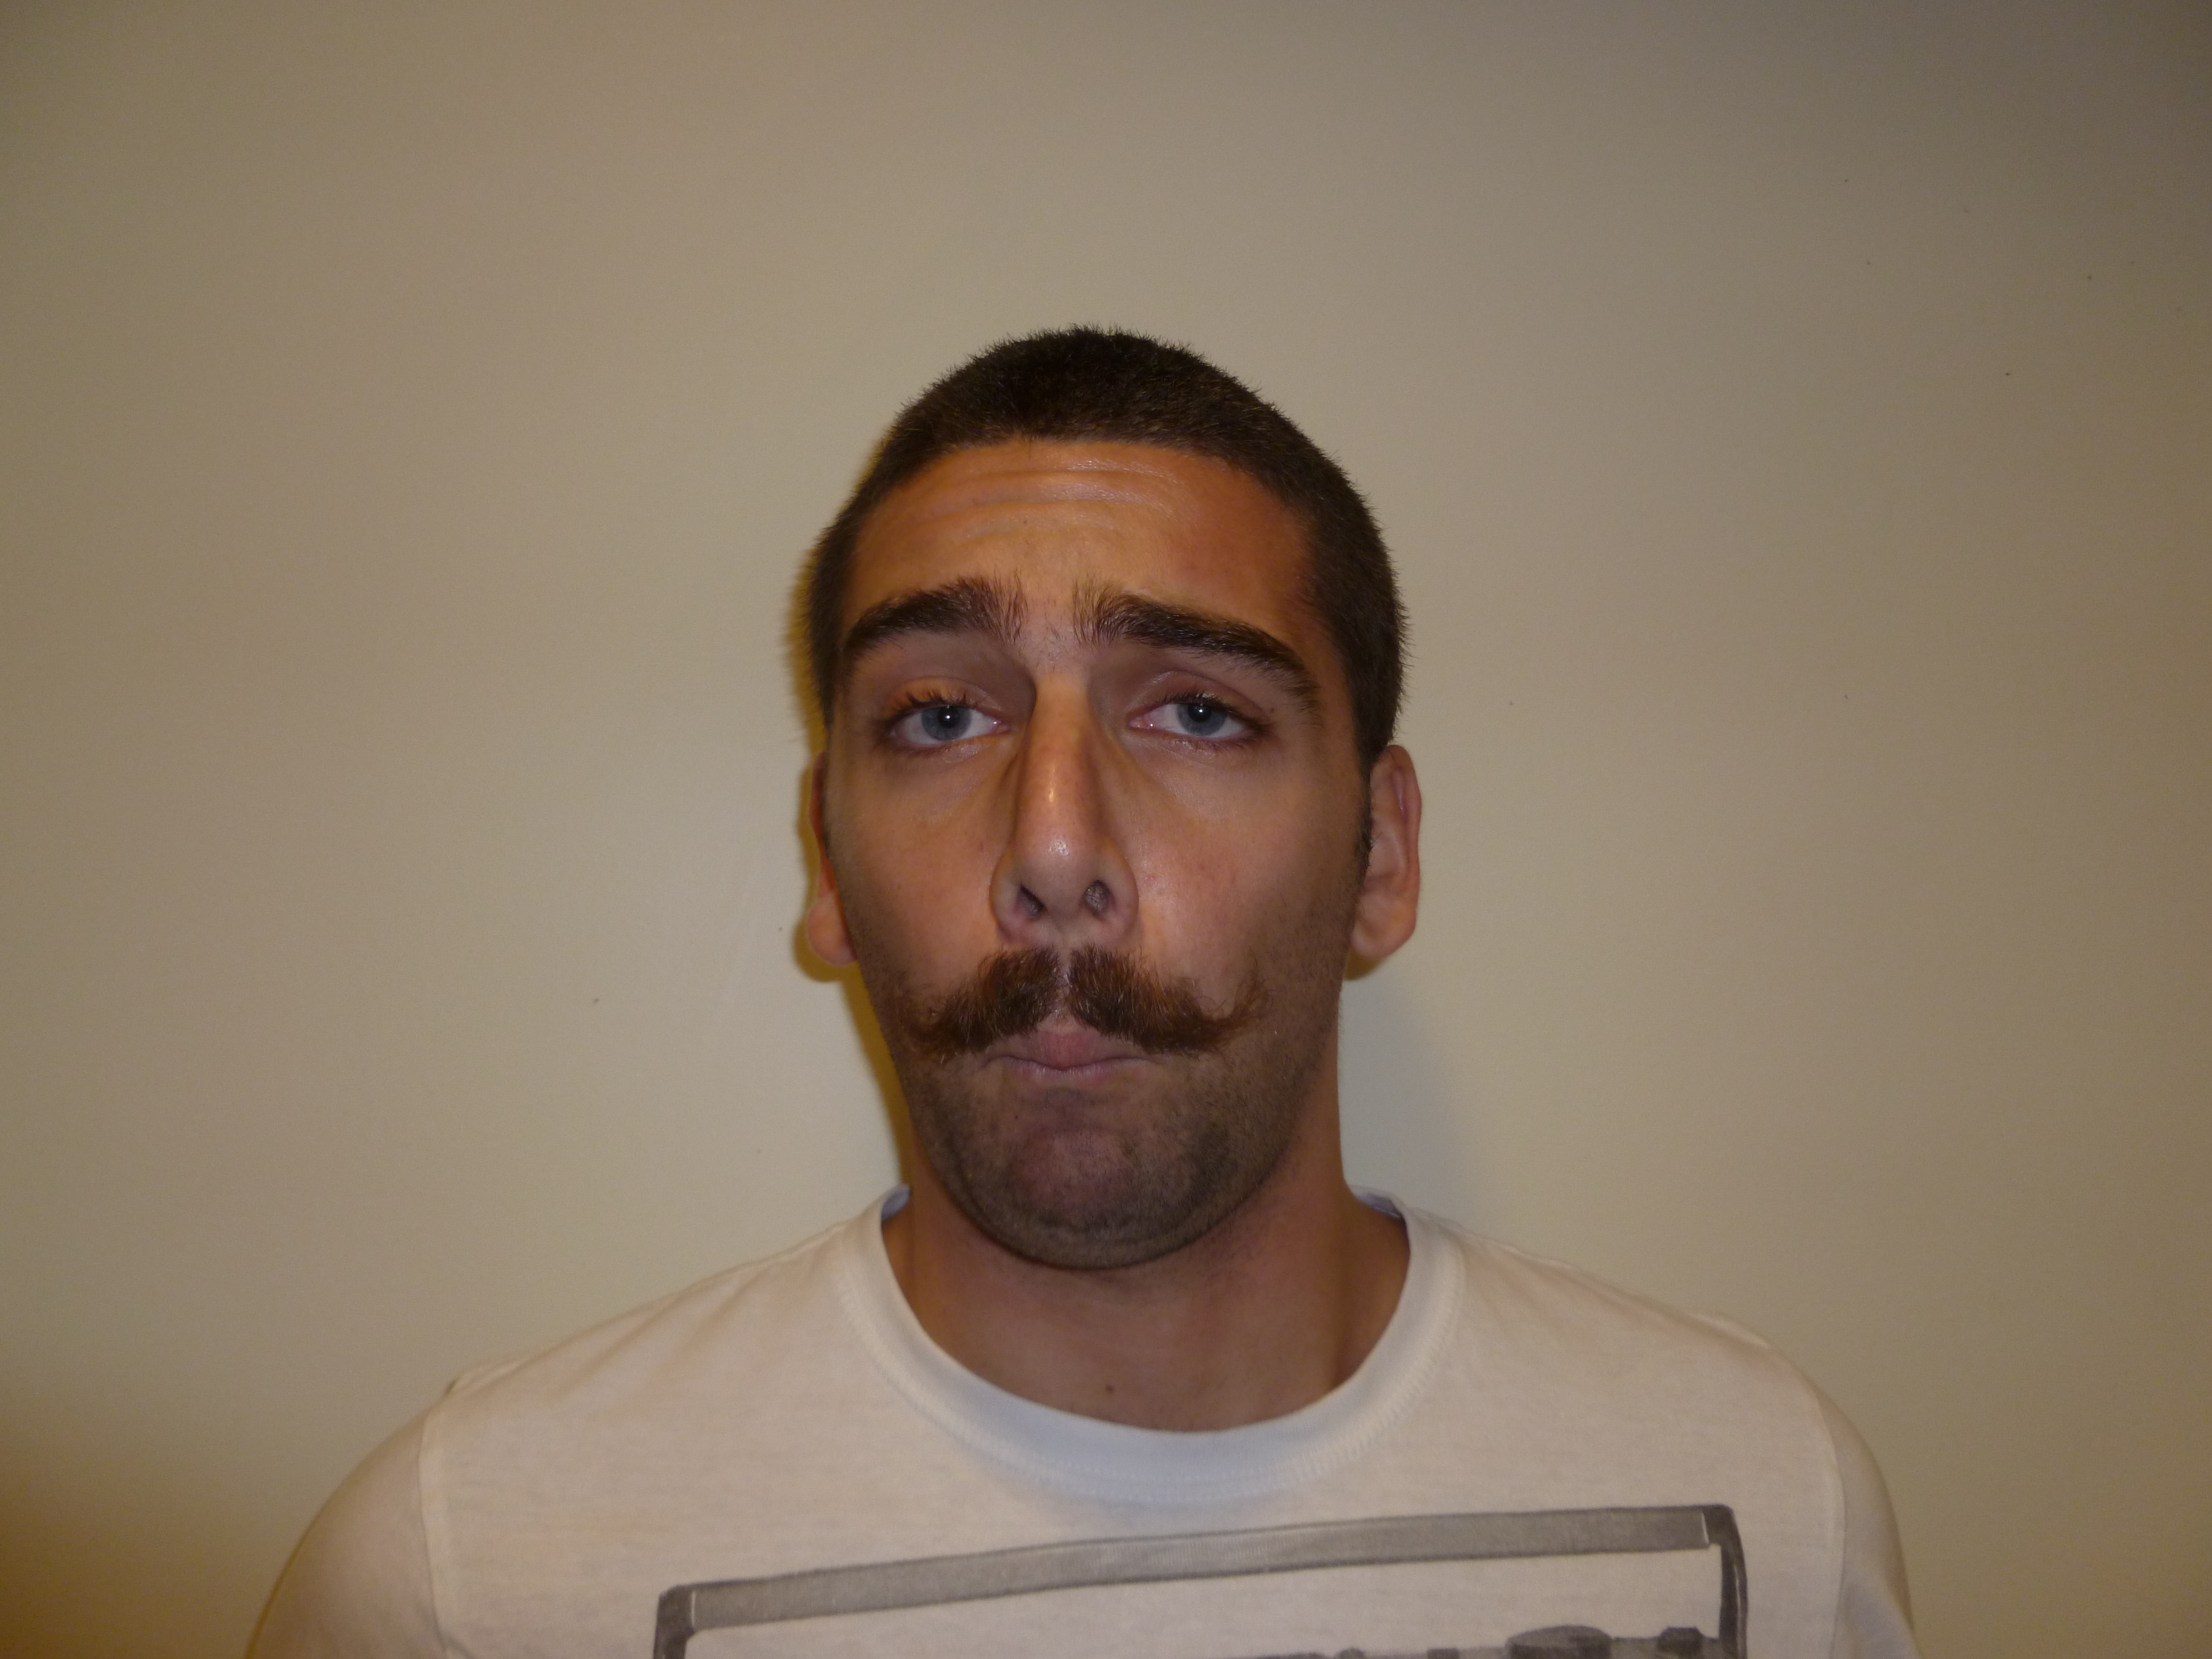
Have another friend take a few picture of your secret santa giftee so you don't give give away that you are his secret santa. Or just take the pictures yourself, if you're not doing this for a surprise, haha. High resolution pictures taken in good lighting against light or white backgrounds work best for making the pattern.
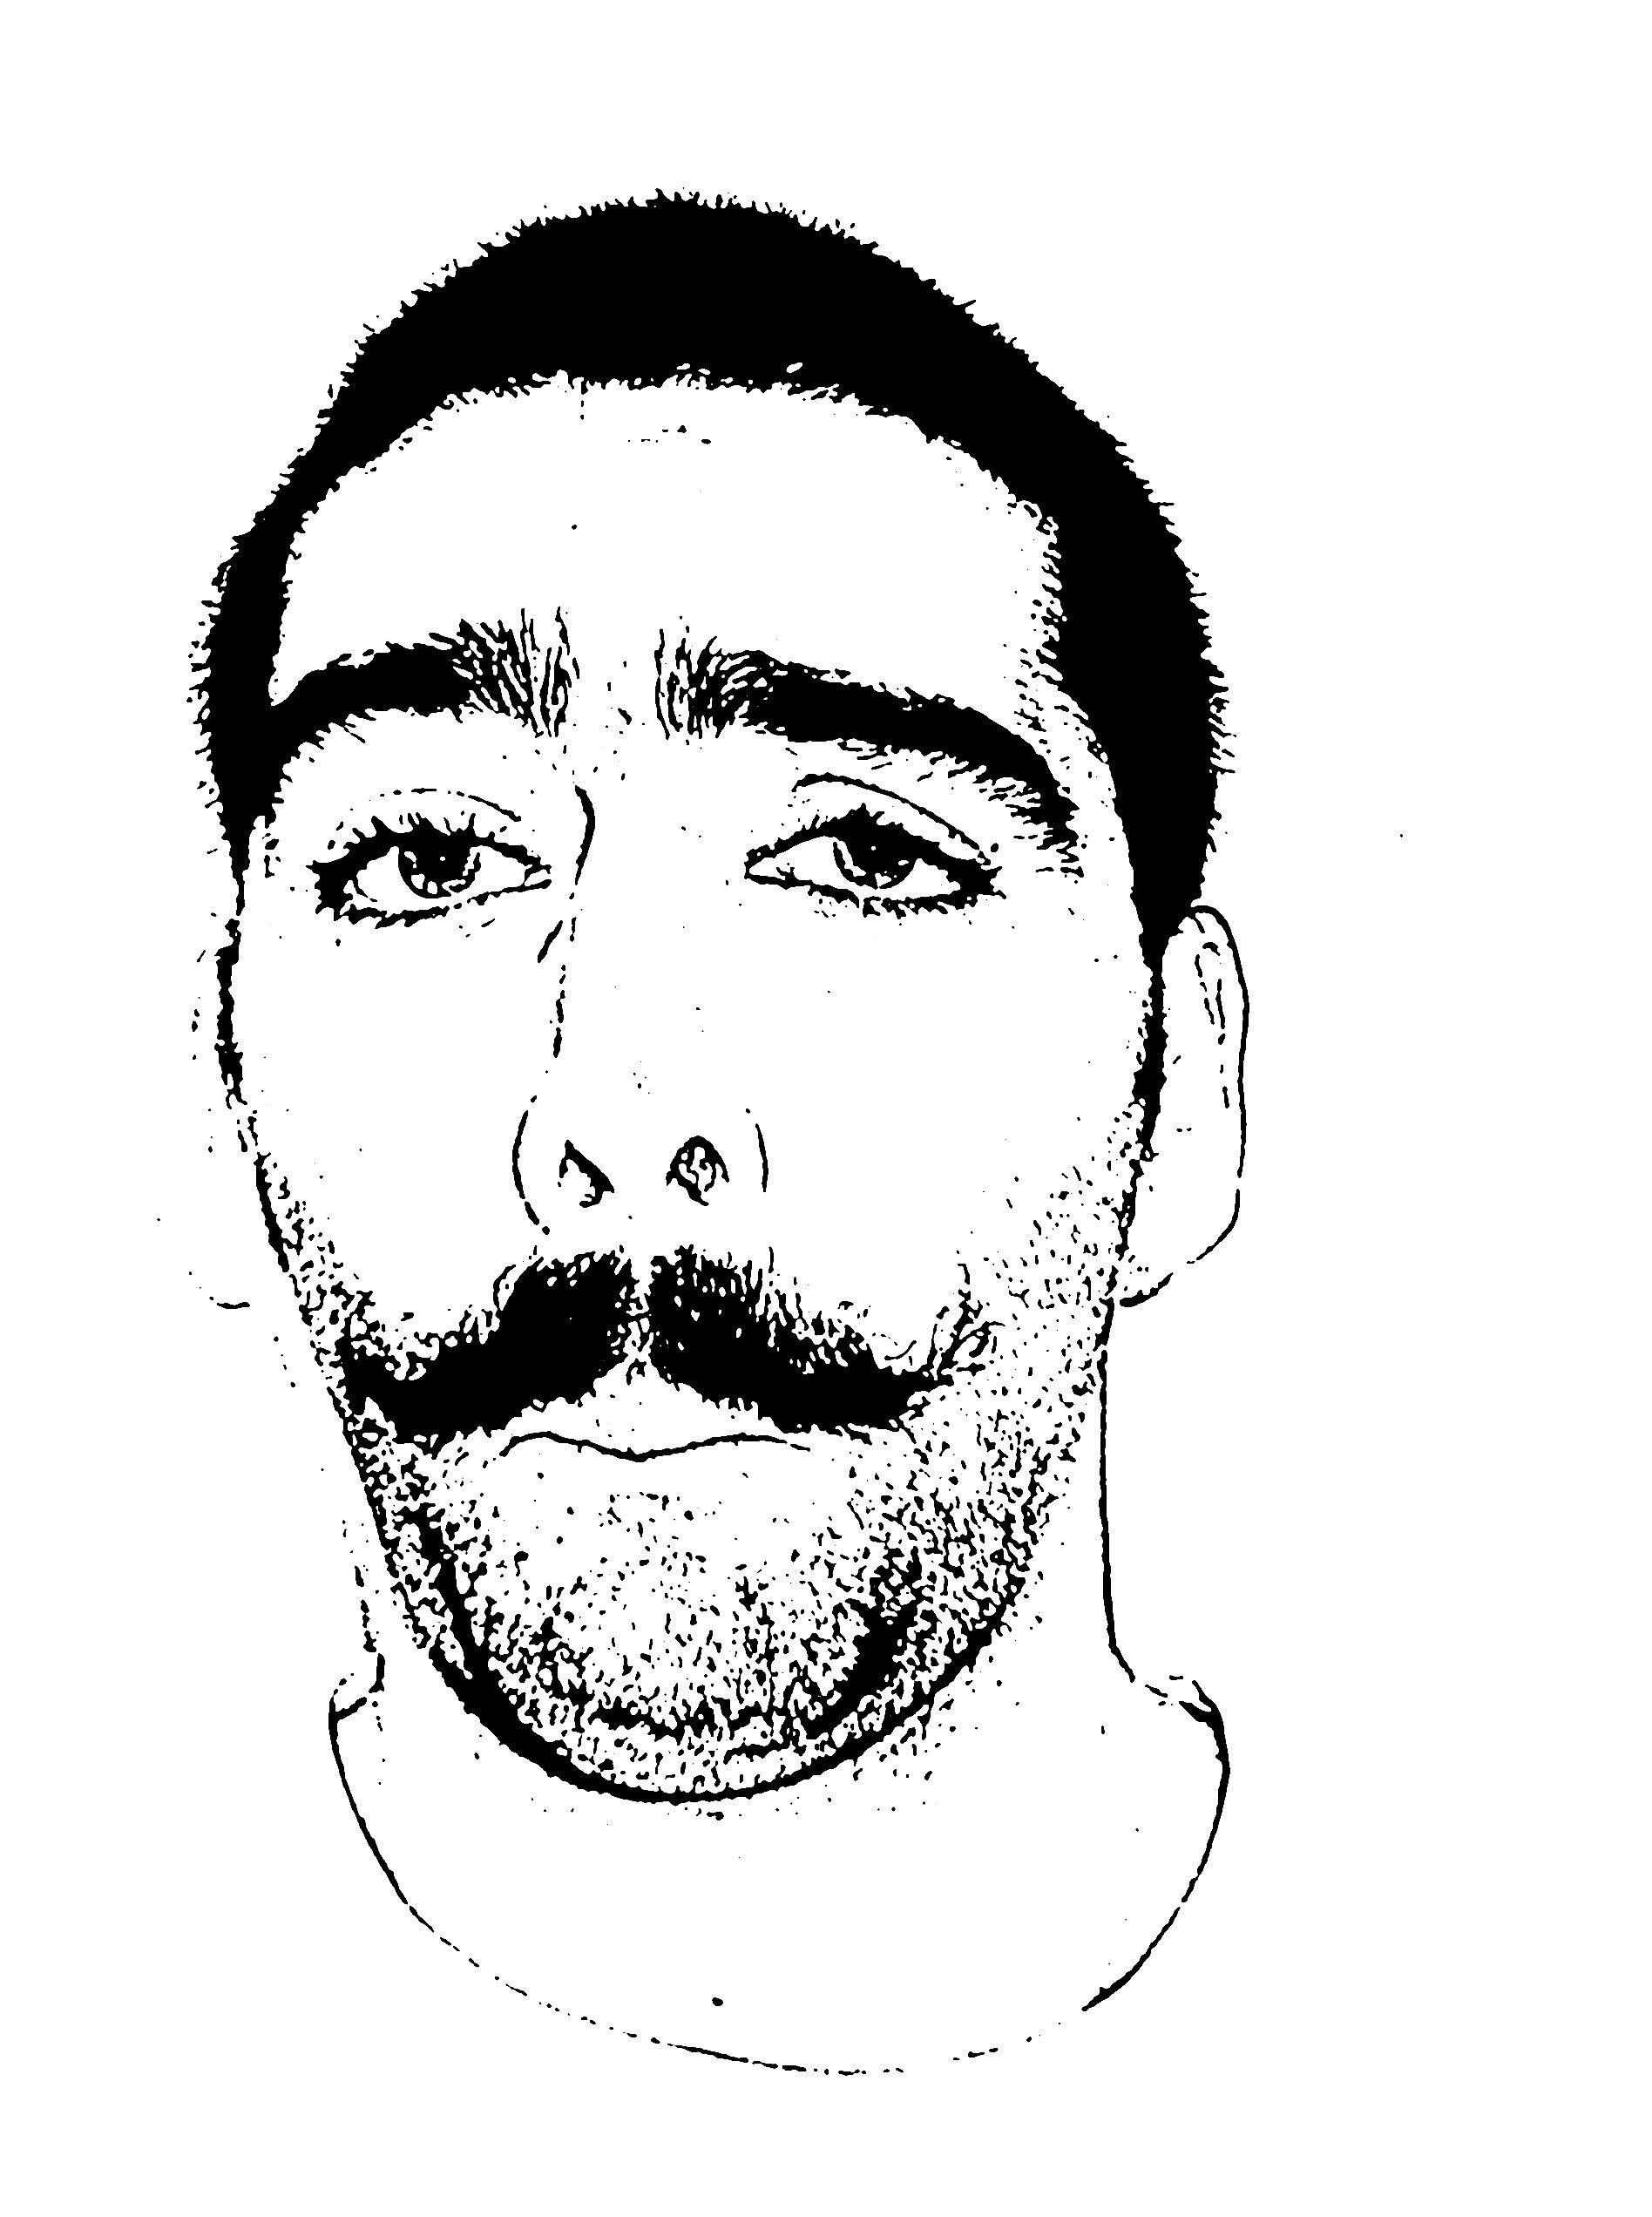
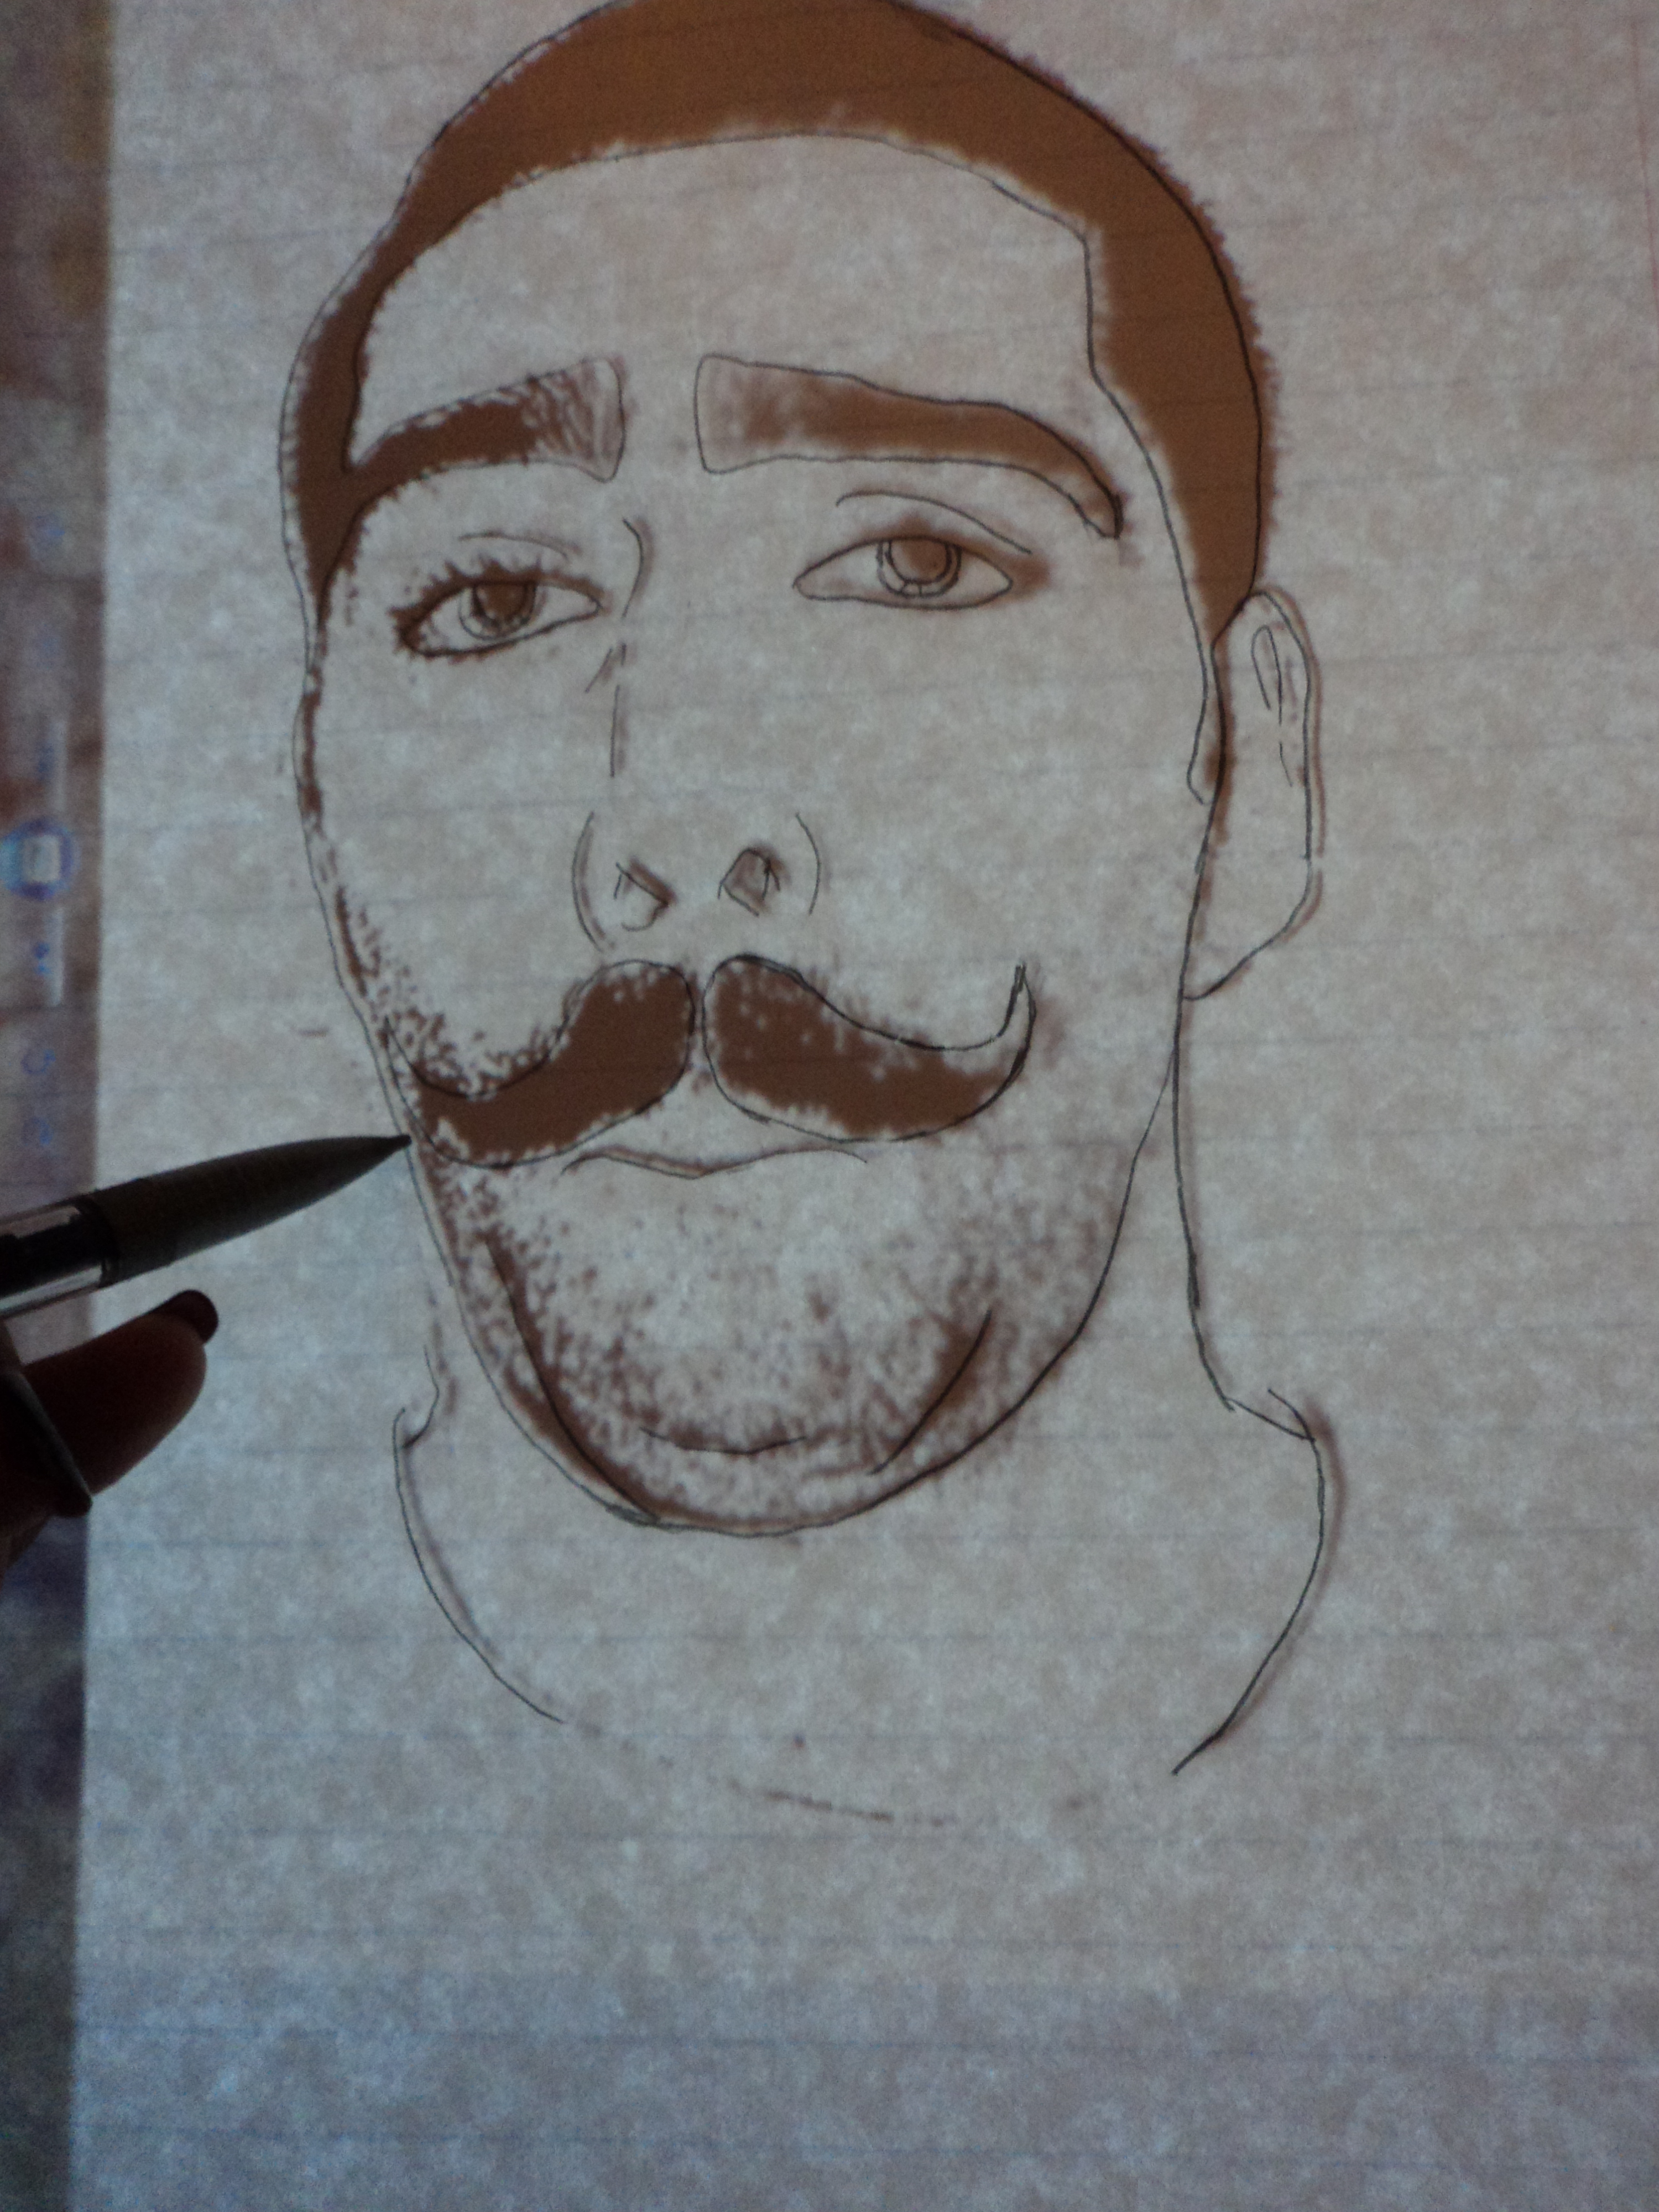
I had my friend take a few pictures and then made sure to choose the most embarrassing one. I used the "trace" tool in Adobe Illustrator to turn the picture into a more basic black and white picture to turn into the pattern. You could also use the "stamp" filter in photoshop. This is why it is good to have a well lighted picture against a light backdrop to make it easier to see what you are doing in the next step.
I had my friend take a few pictures and then made sure to choose the most embarrassing one. I used the "trace" tool in Adobe Illustrator to turn the picture into a more basic black and white picture to turn into the pattern. You could also use the "stamp" filter in photoshop. This is why it is good to have a well lighted picture against a light backdrop to make it easier to see what you are doing in the next step.
Make the Pattern
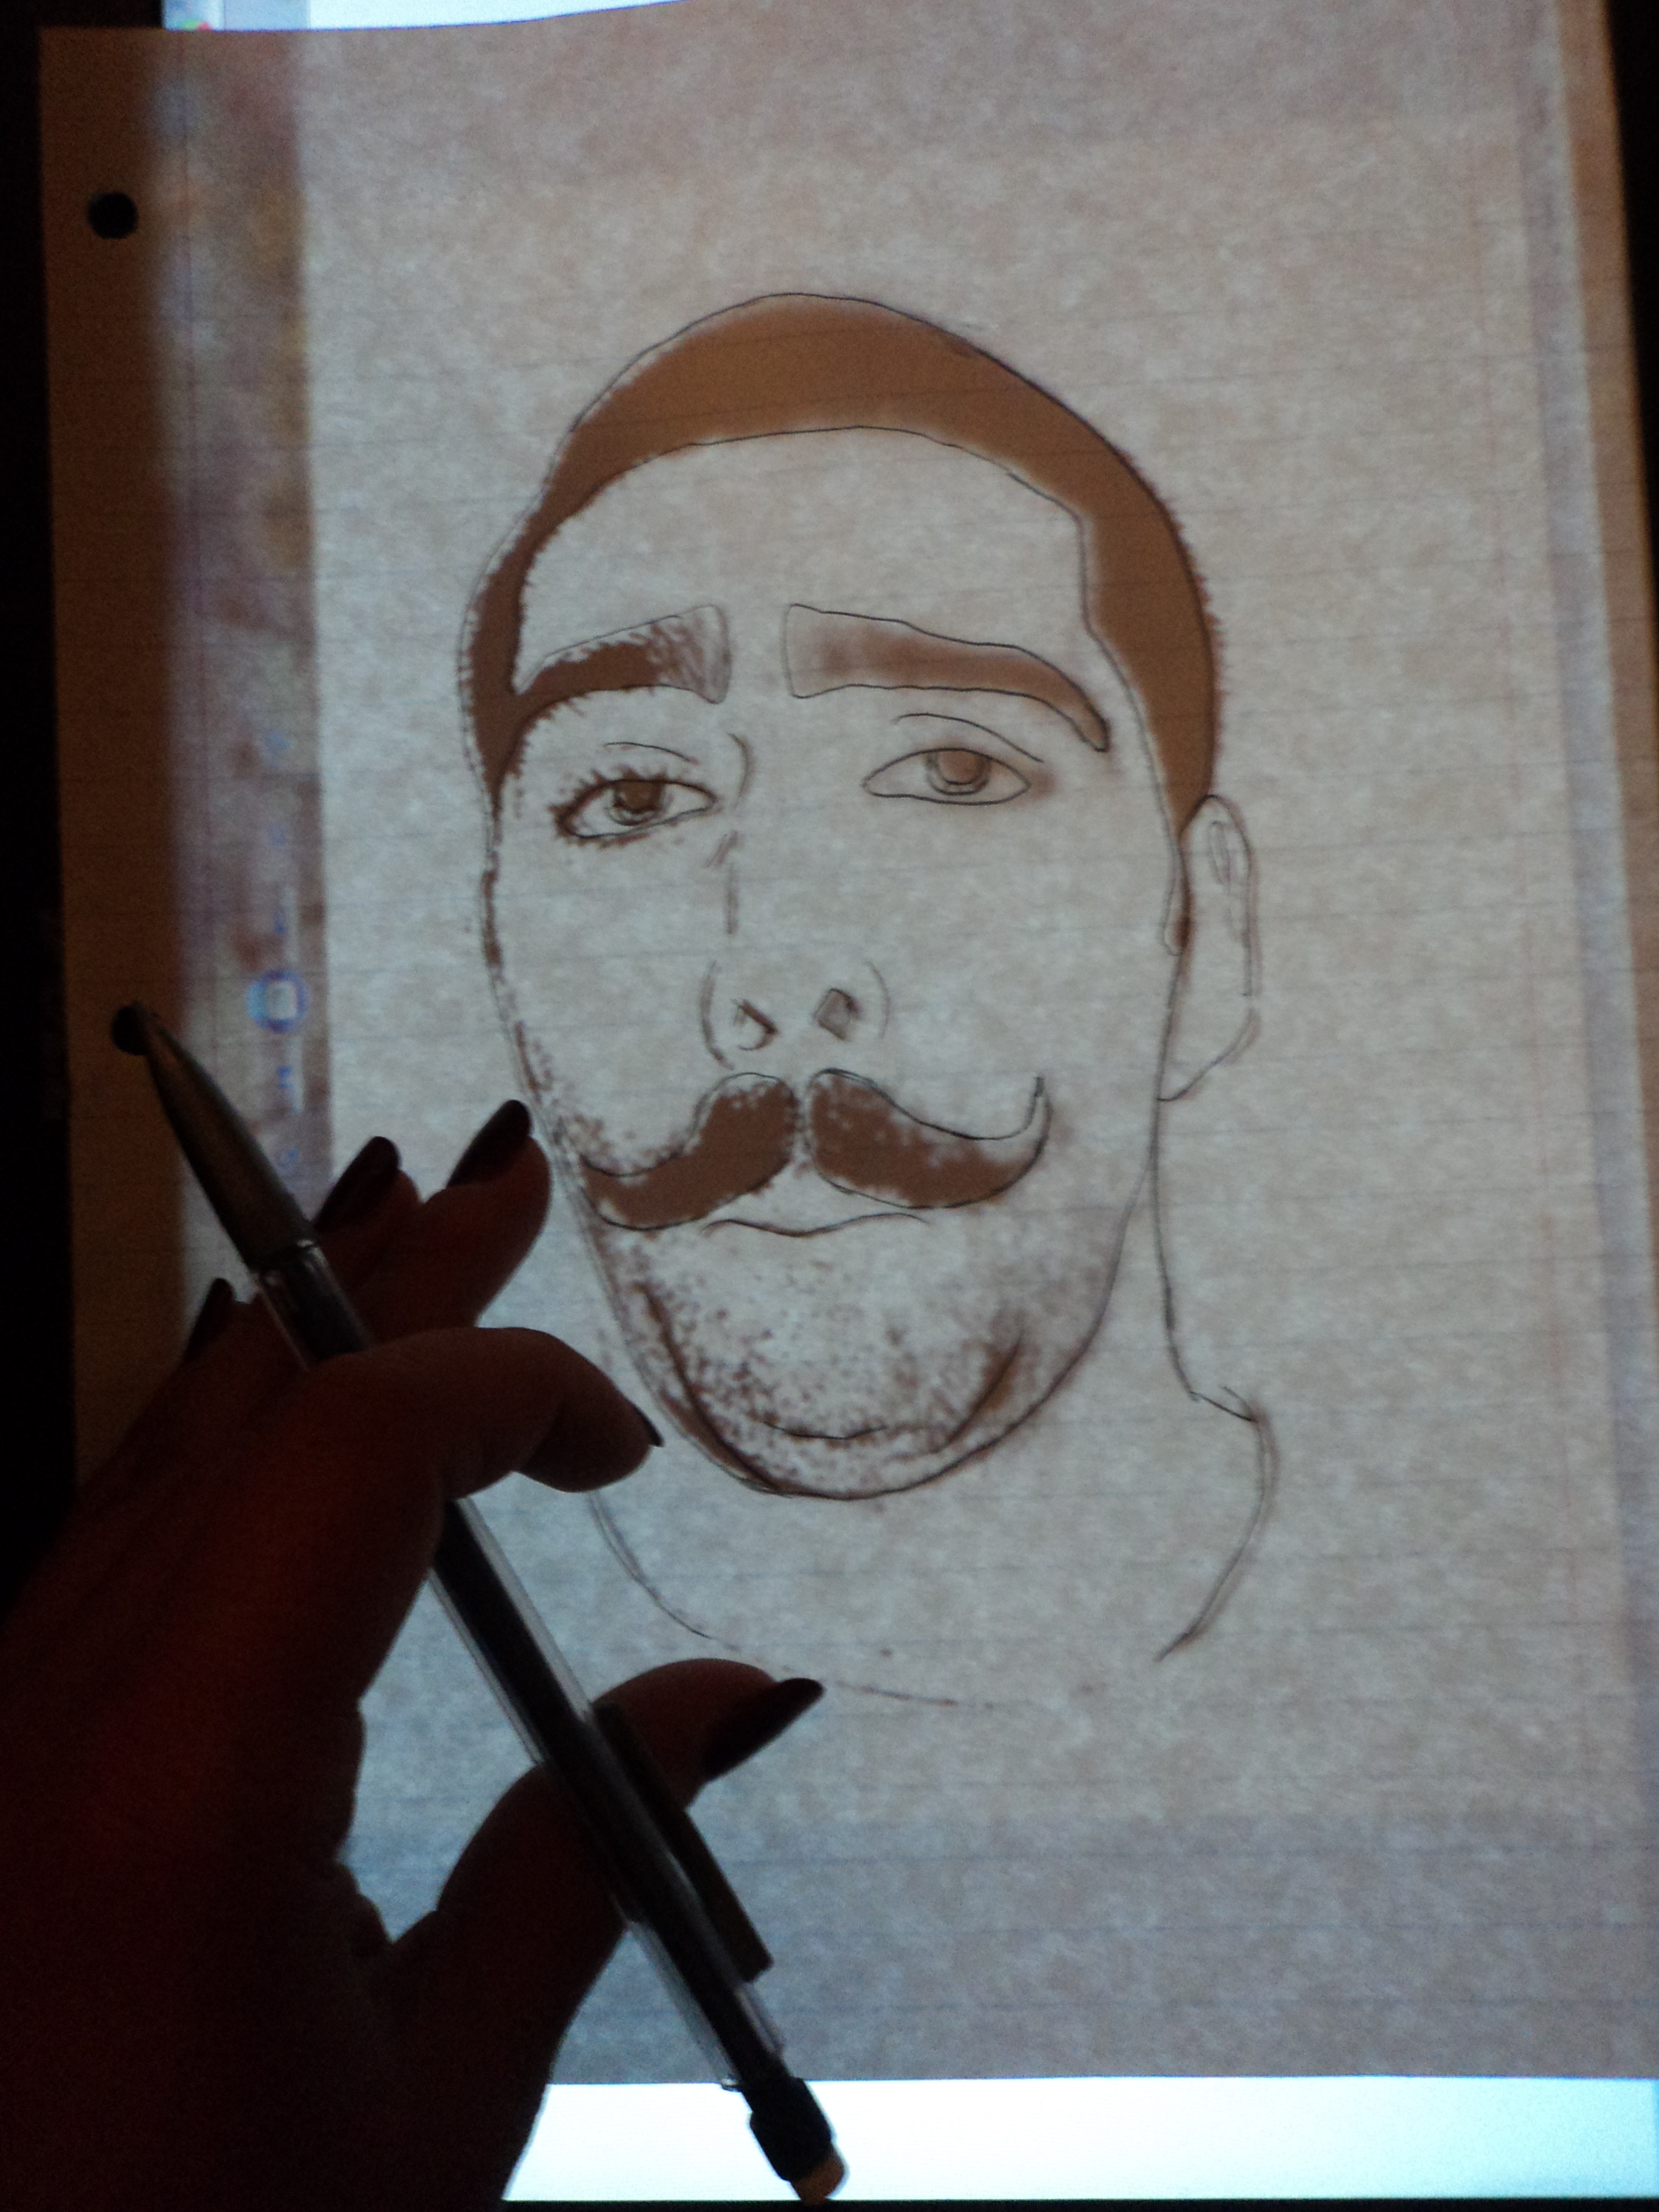
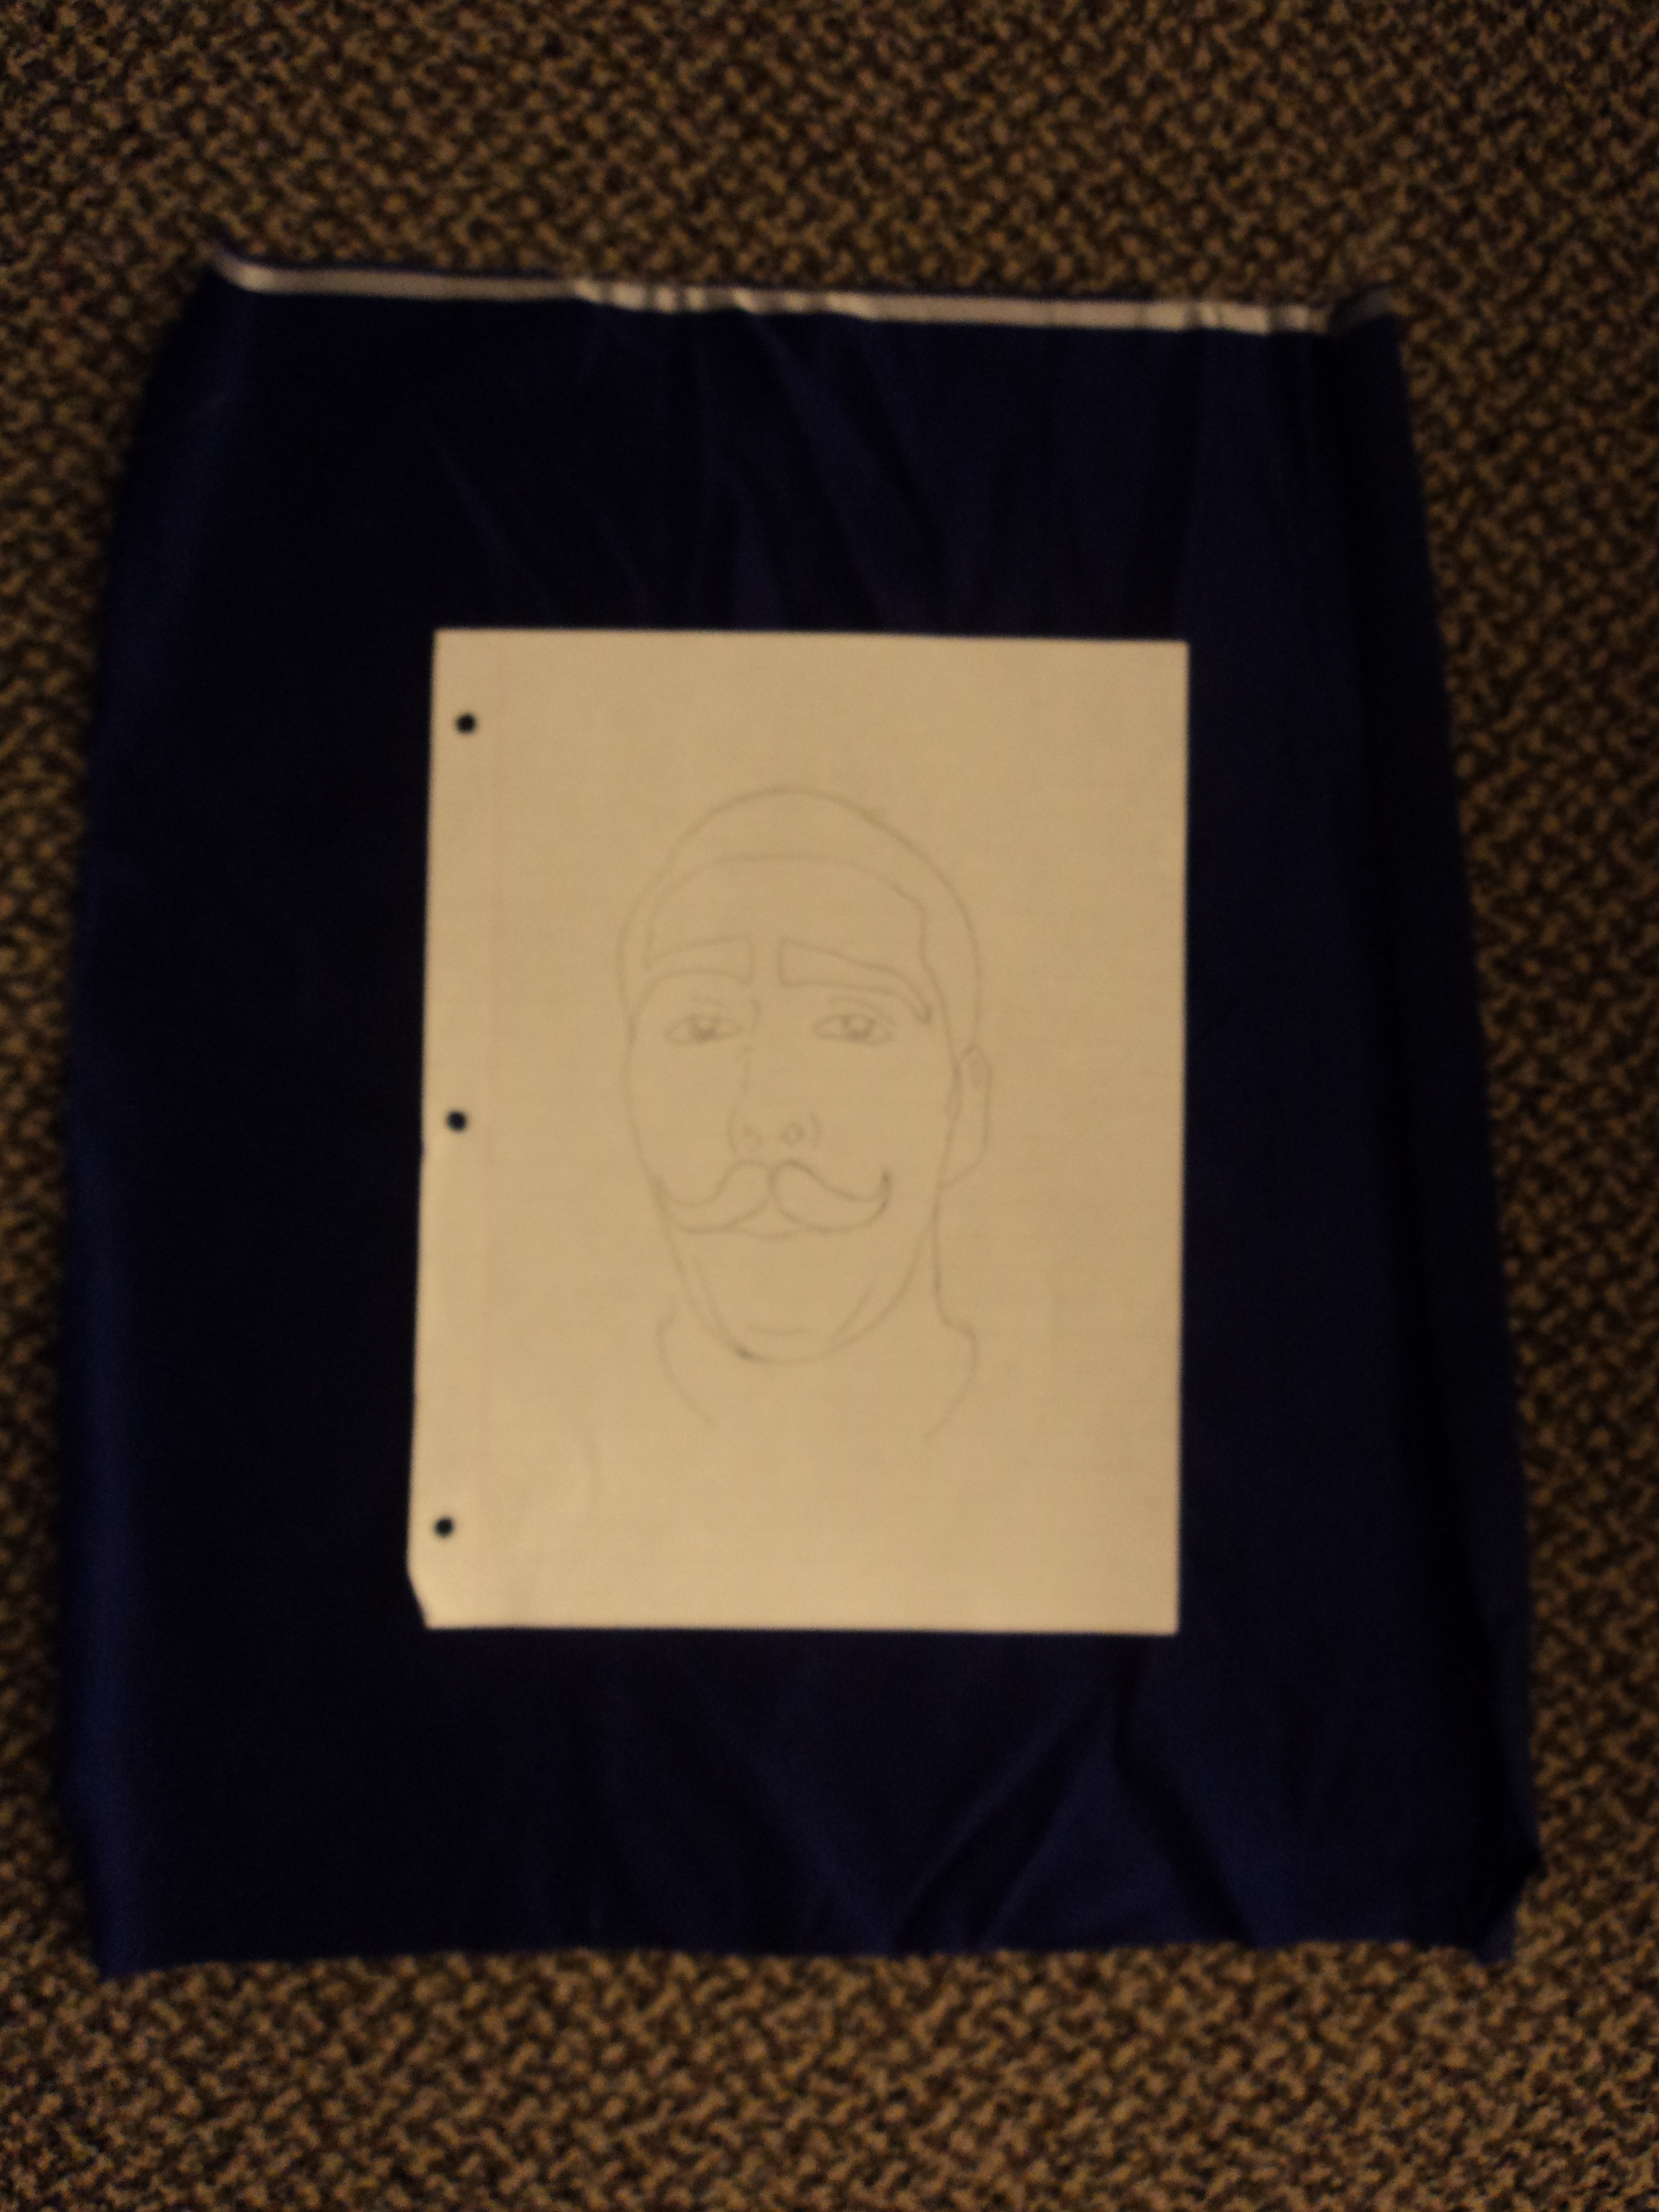
I used my laptop as a light box so I traced the image I had made onto a piece of regular binder paper from the computer screen. I simplified it to make it easier to embroider, but it is still recognizable. I had to do a few different tracings to figure out what looked the best. I also found it helpful to tape the paper to the computer screen so it stays in place while you are tracing.
Preparing to Embroider
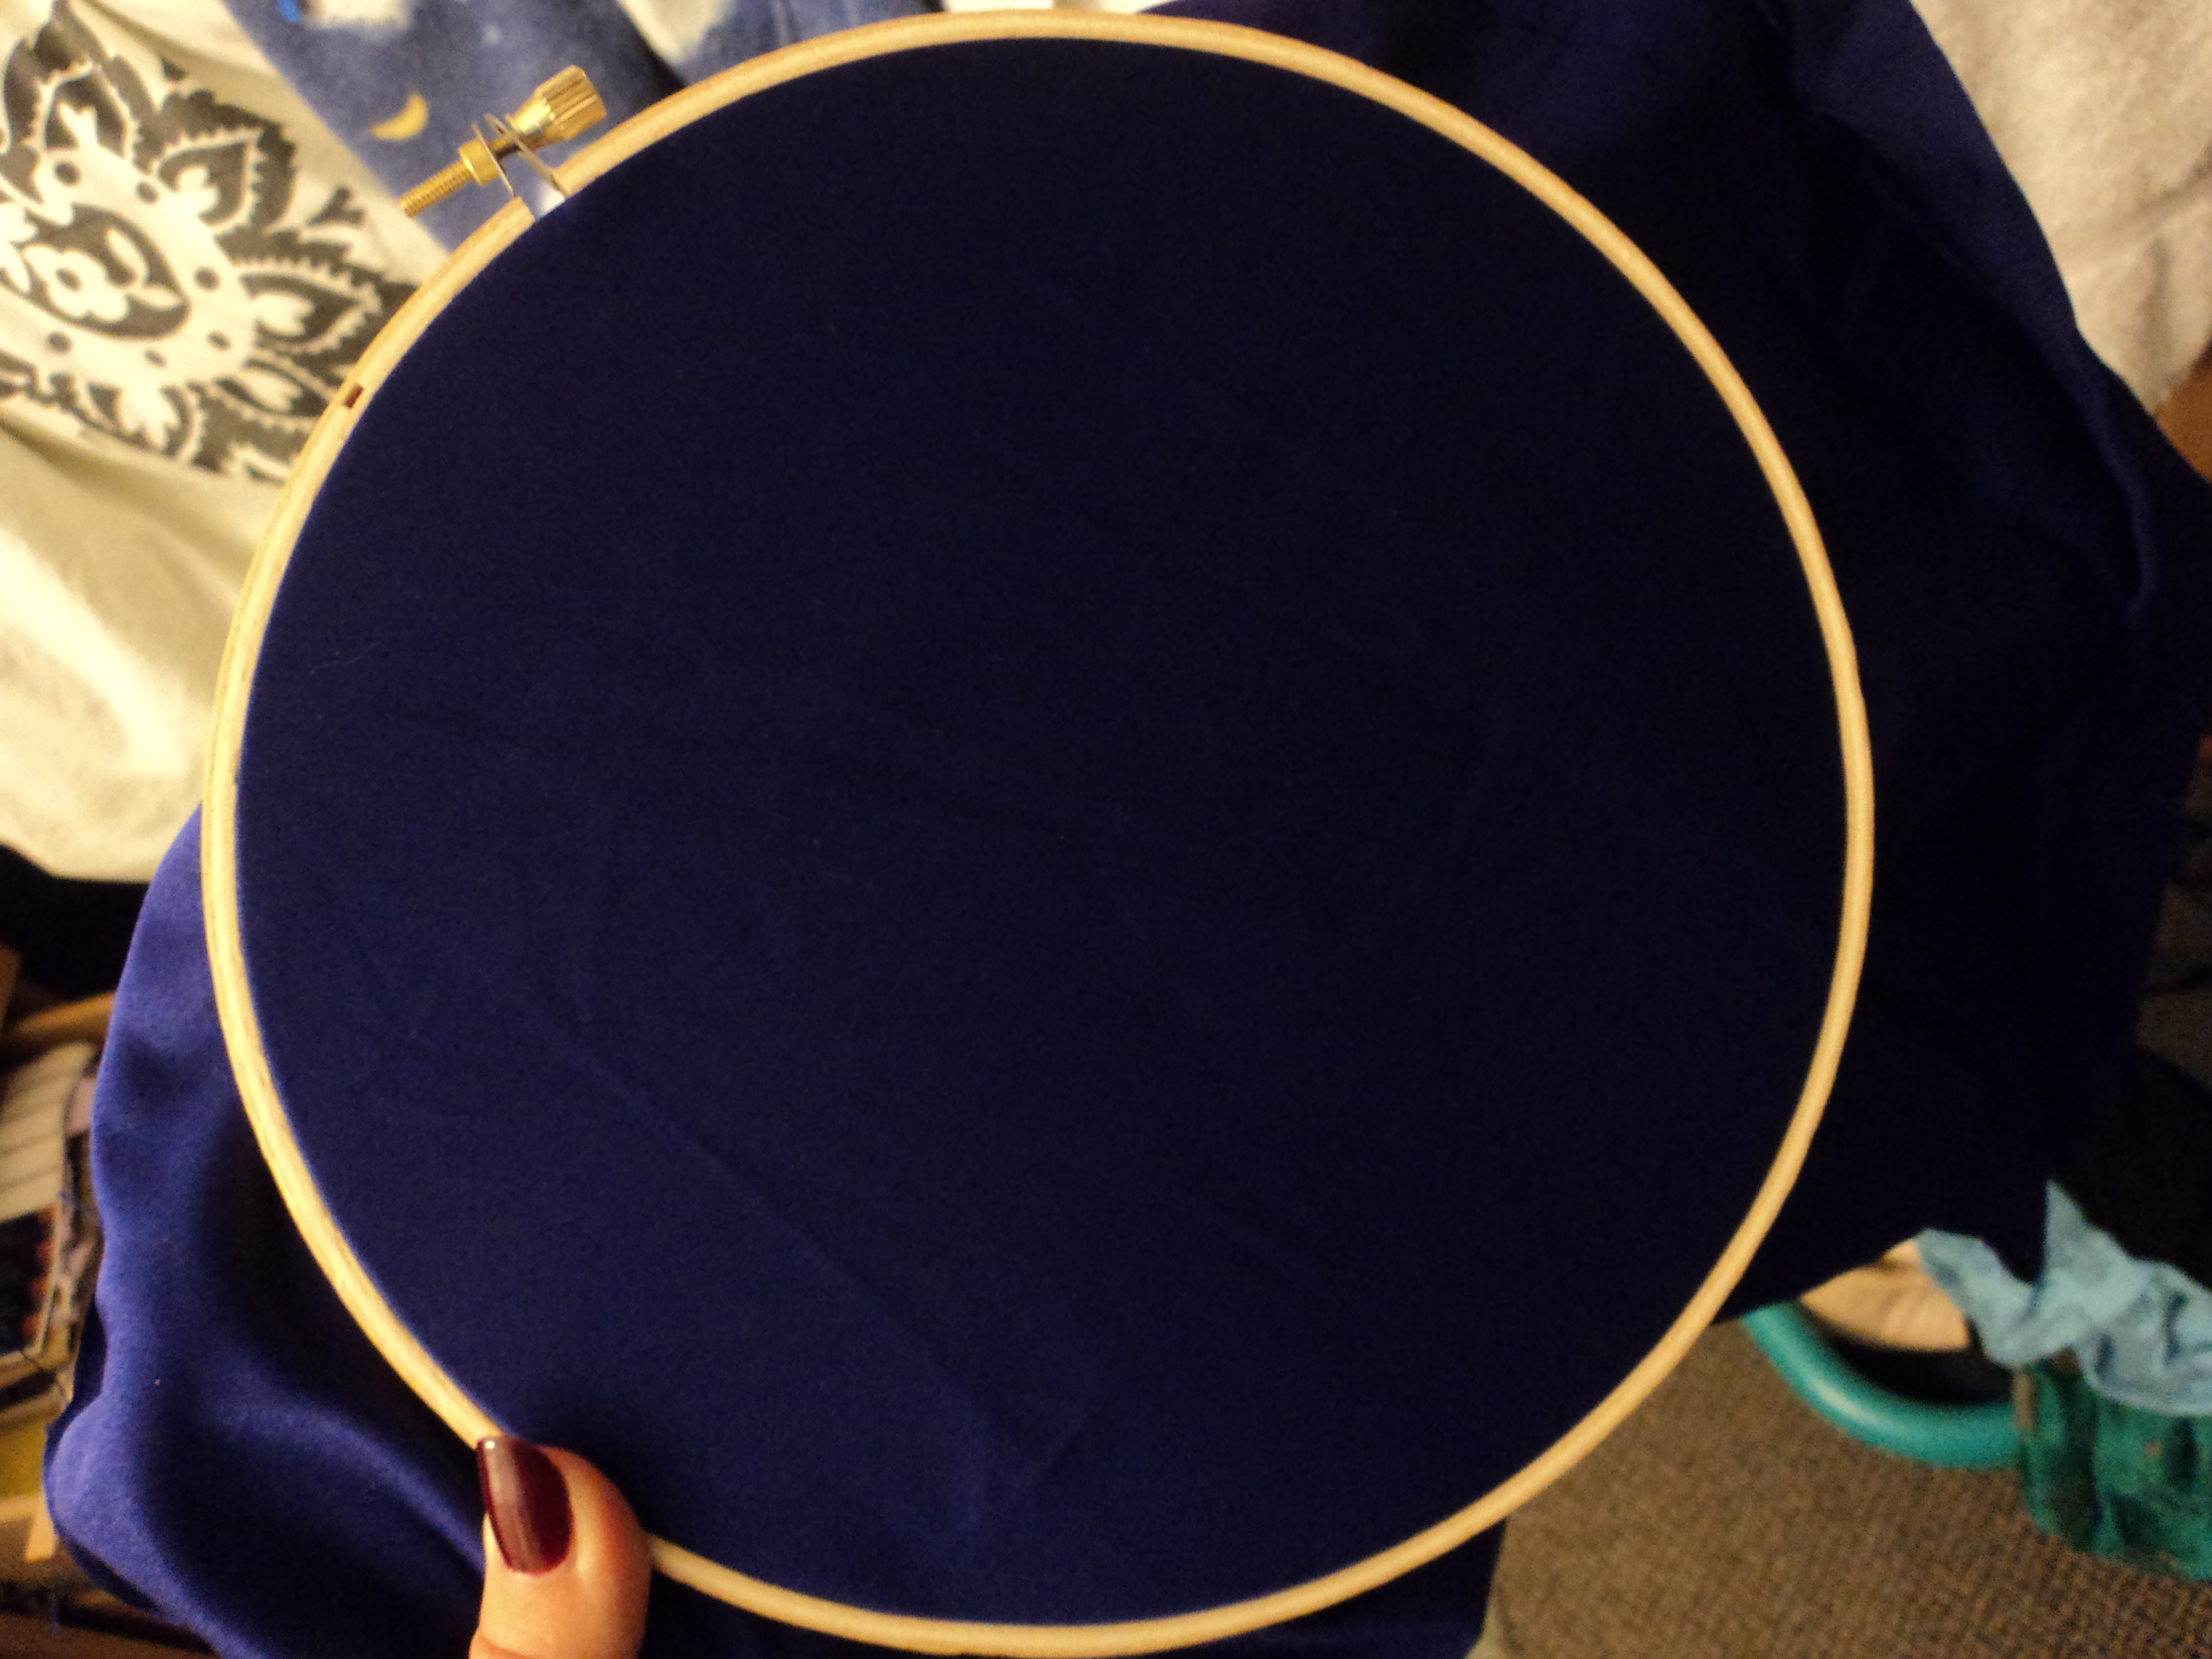
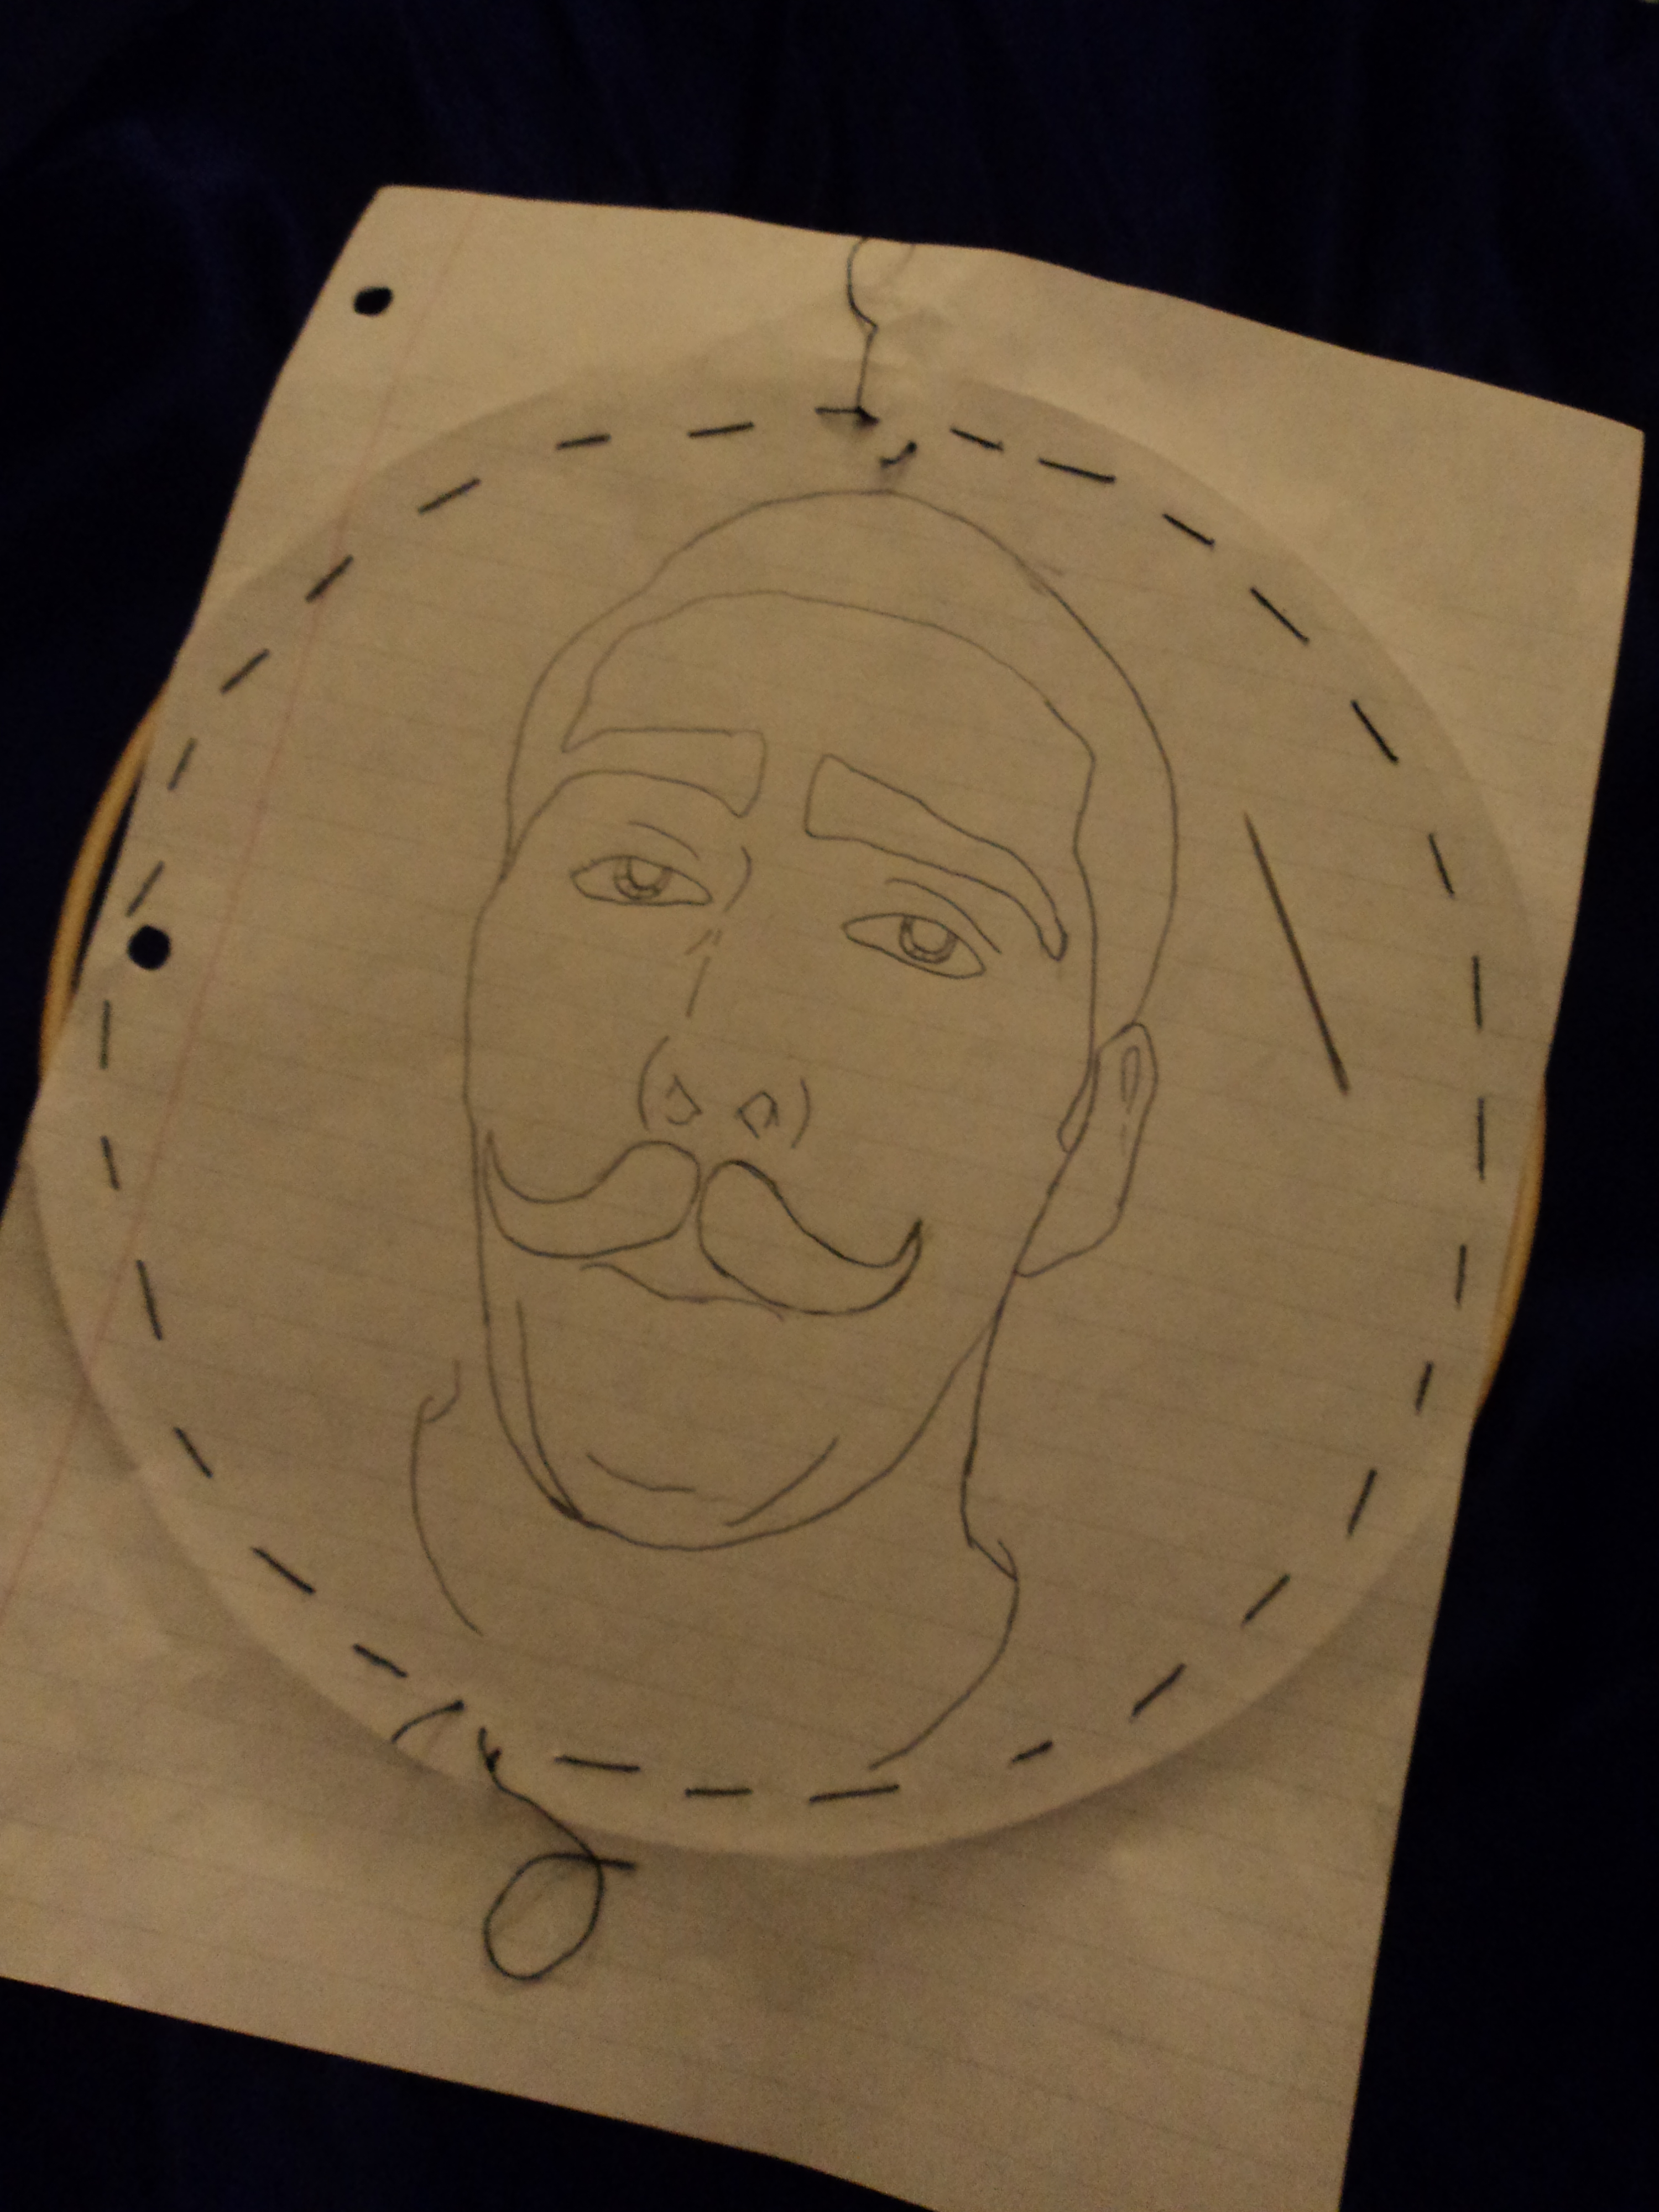
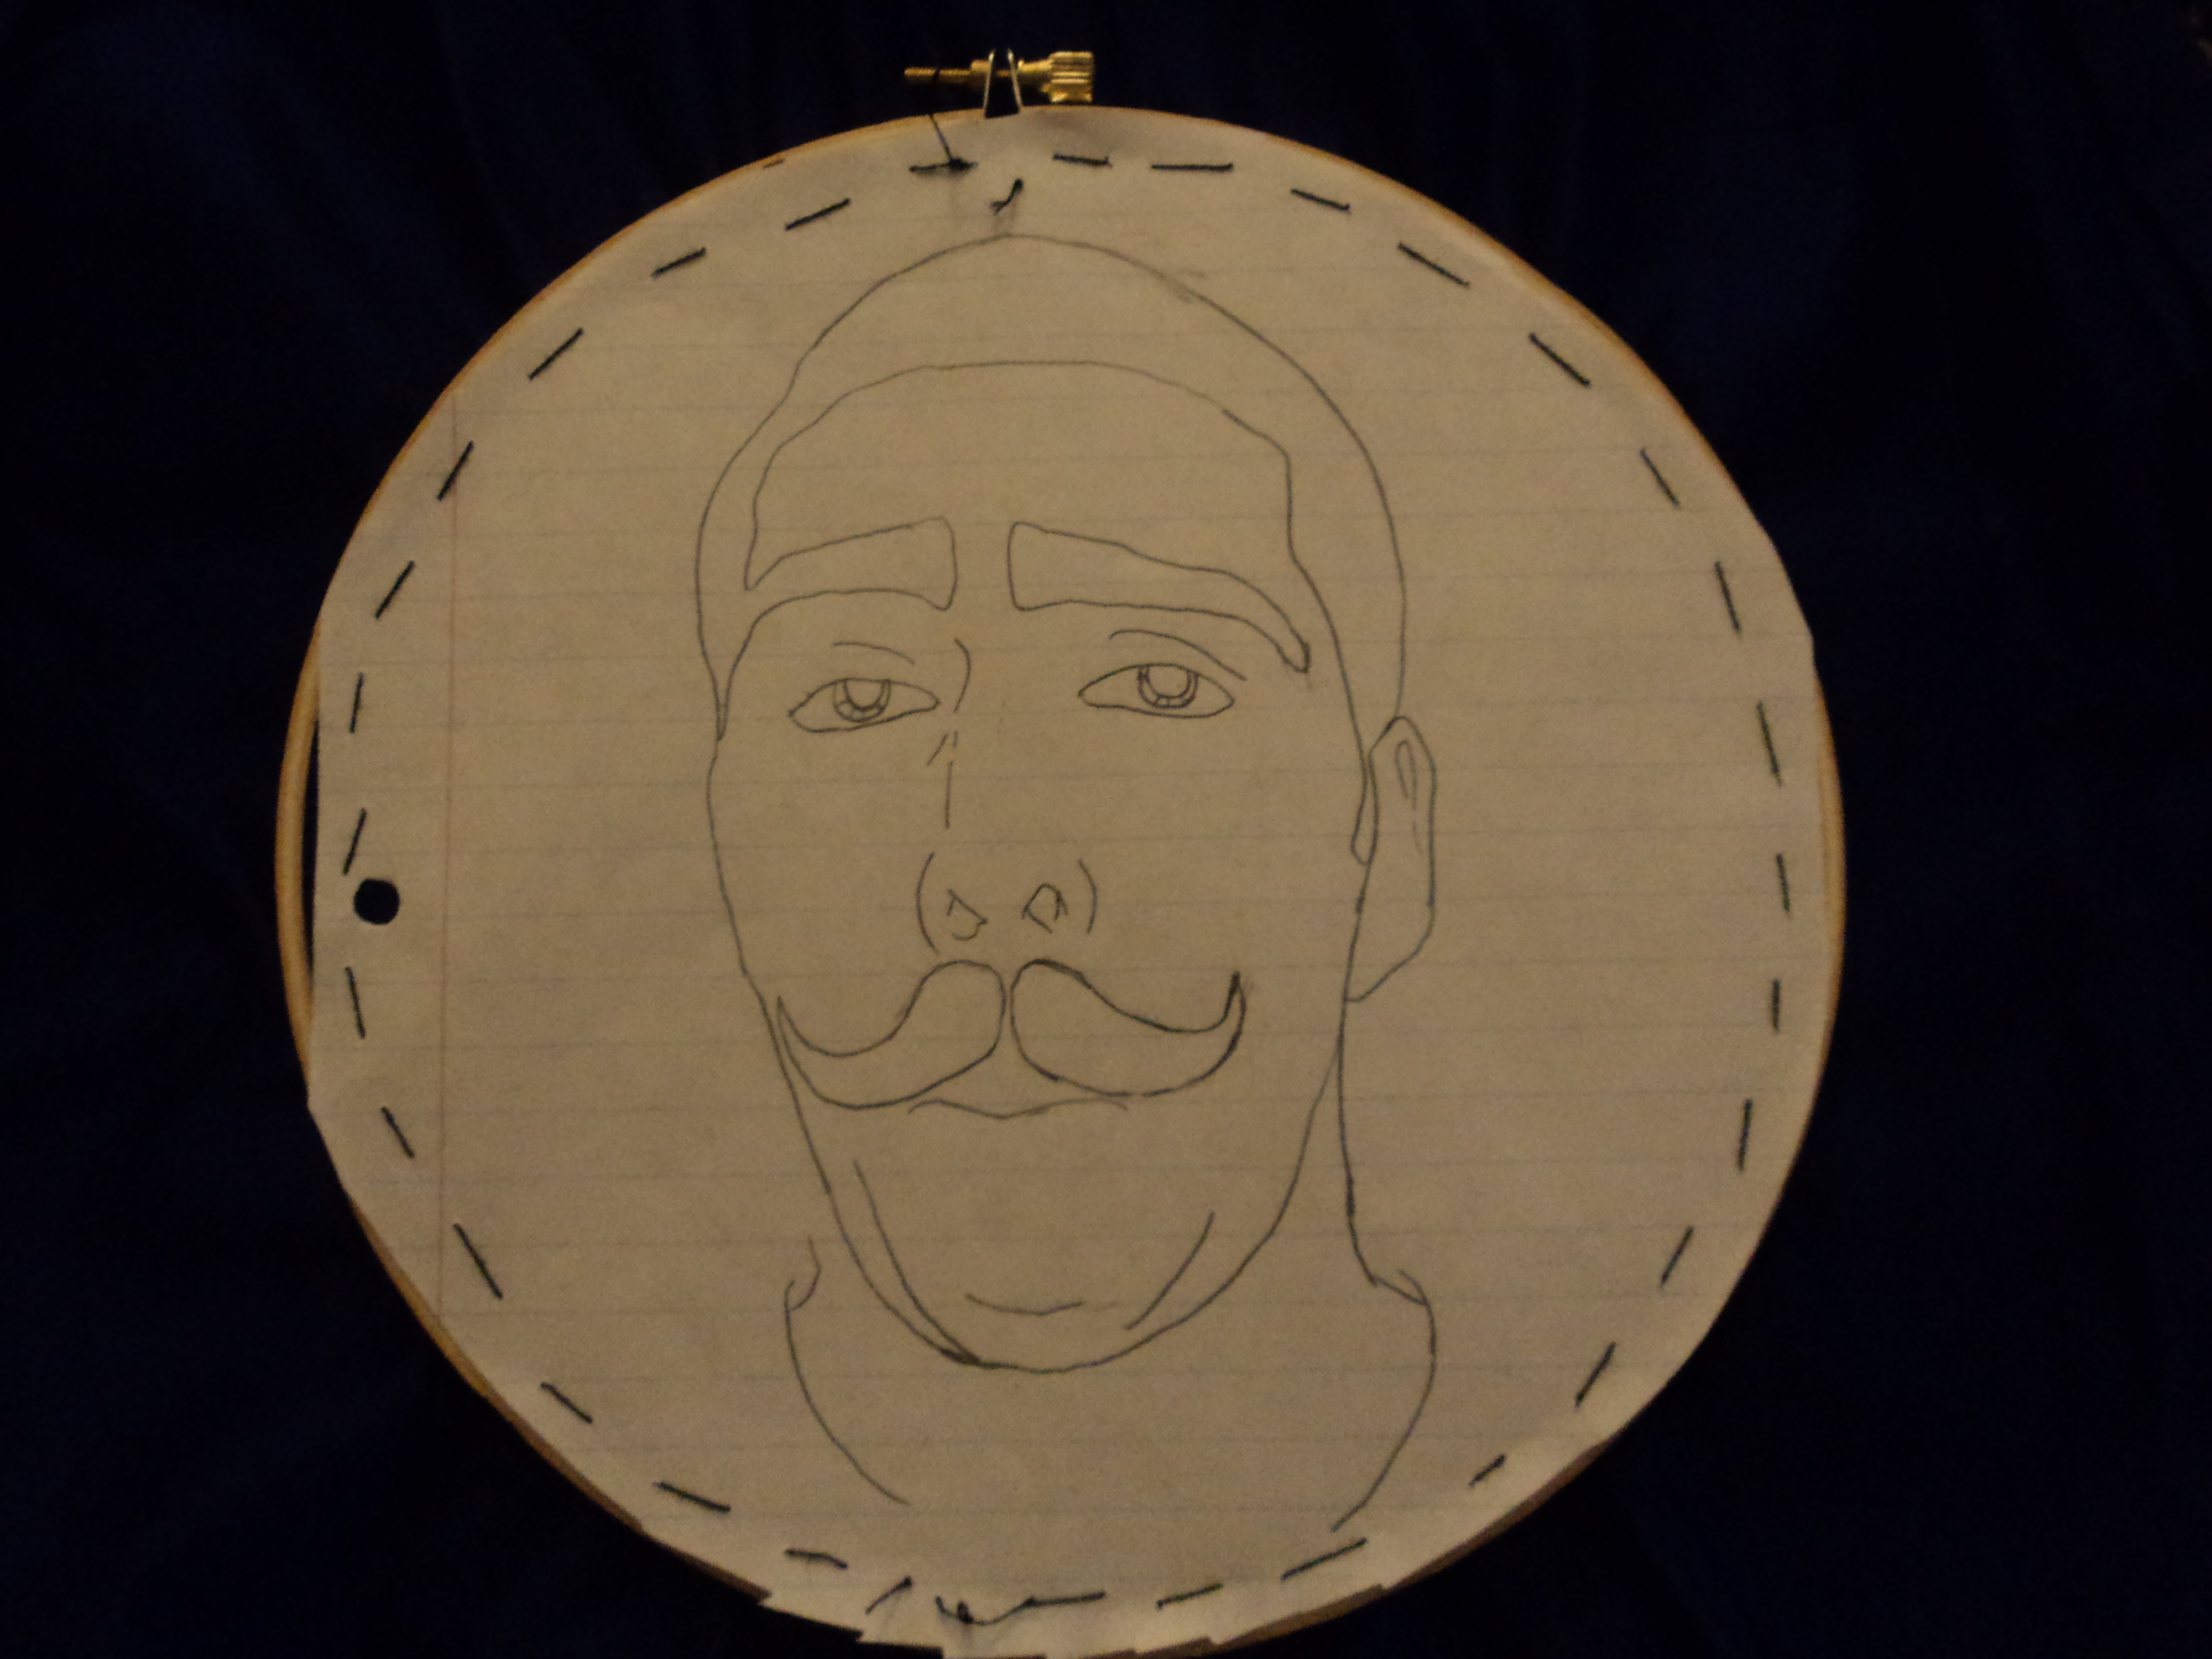
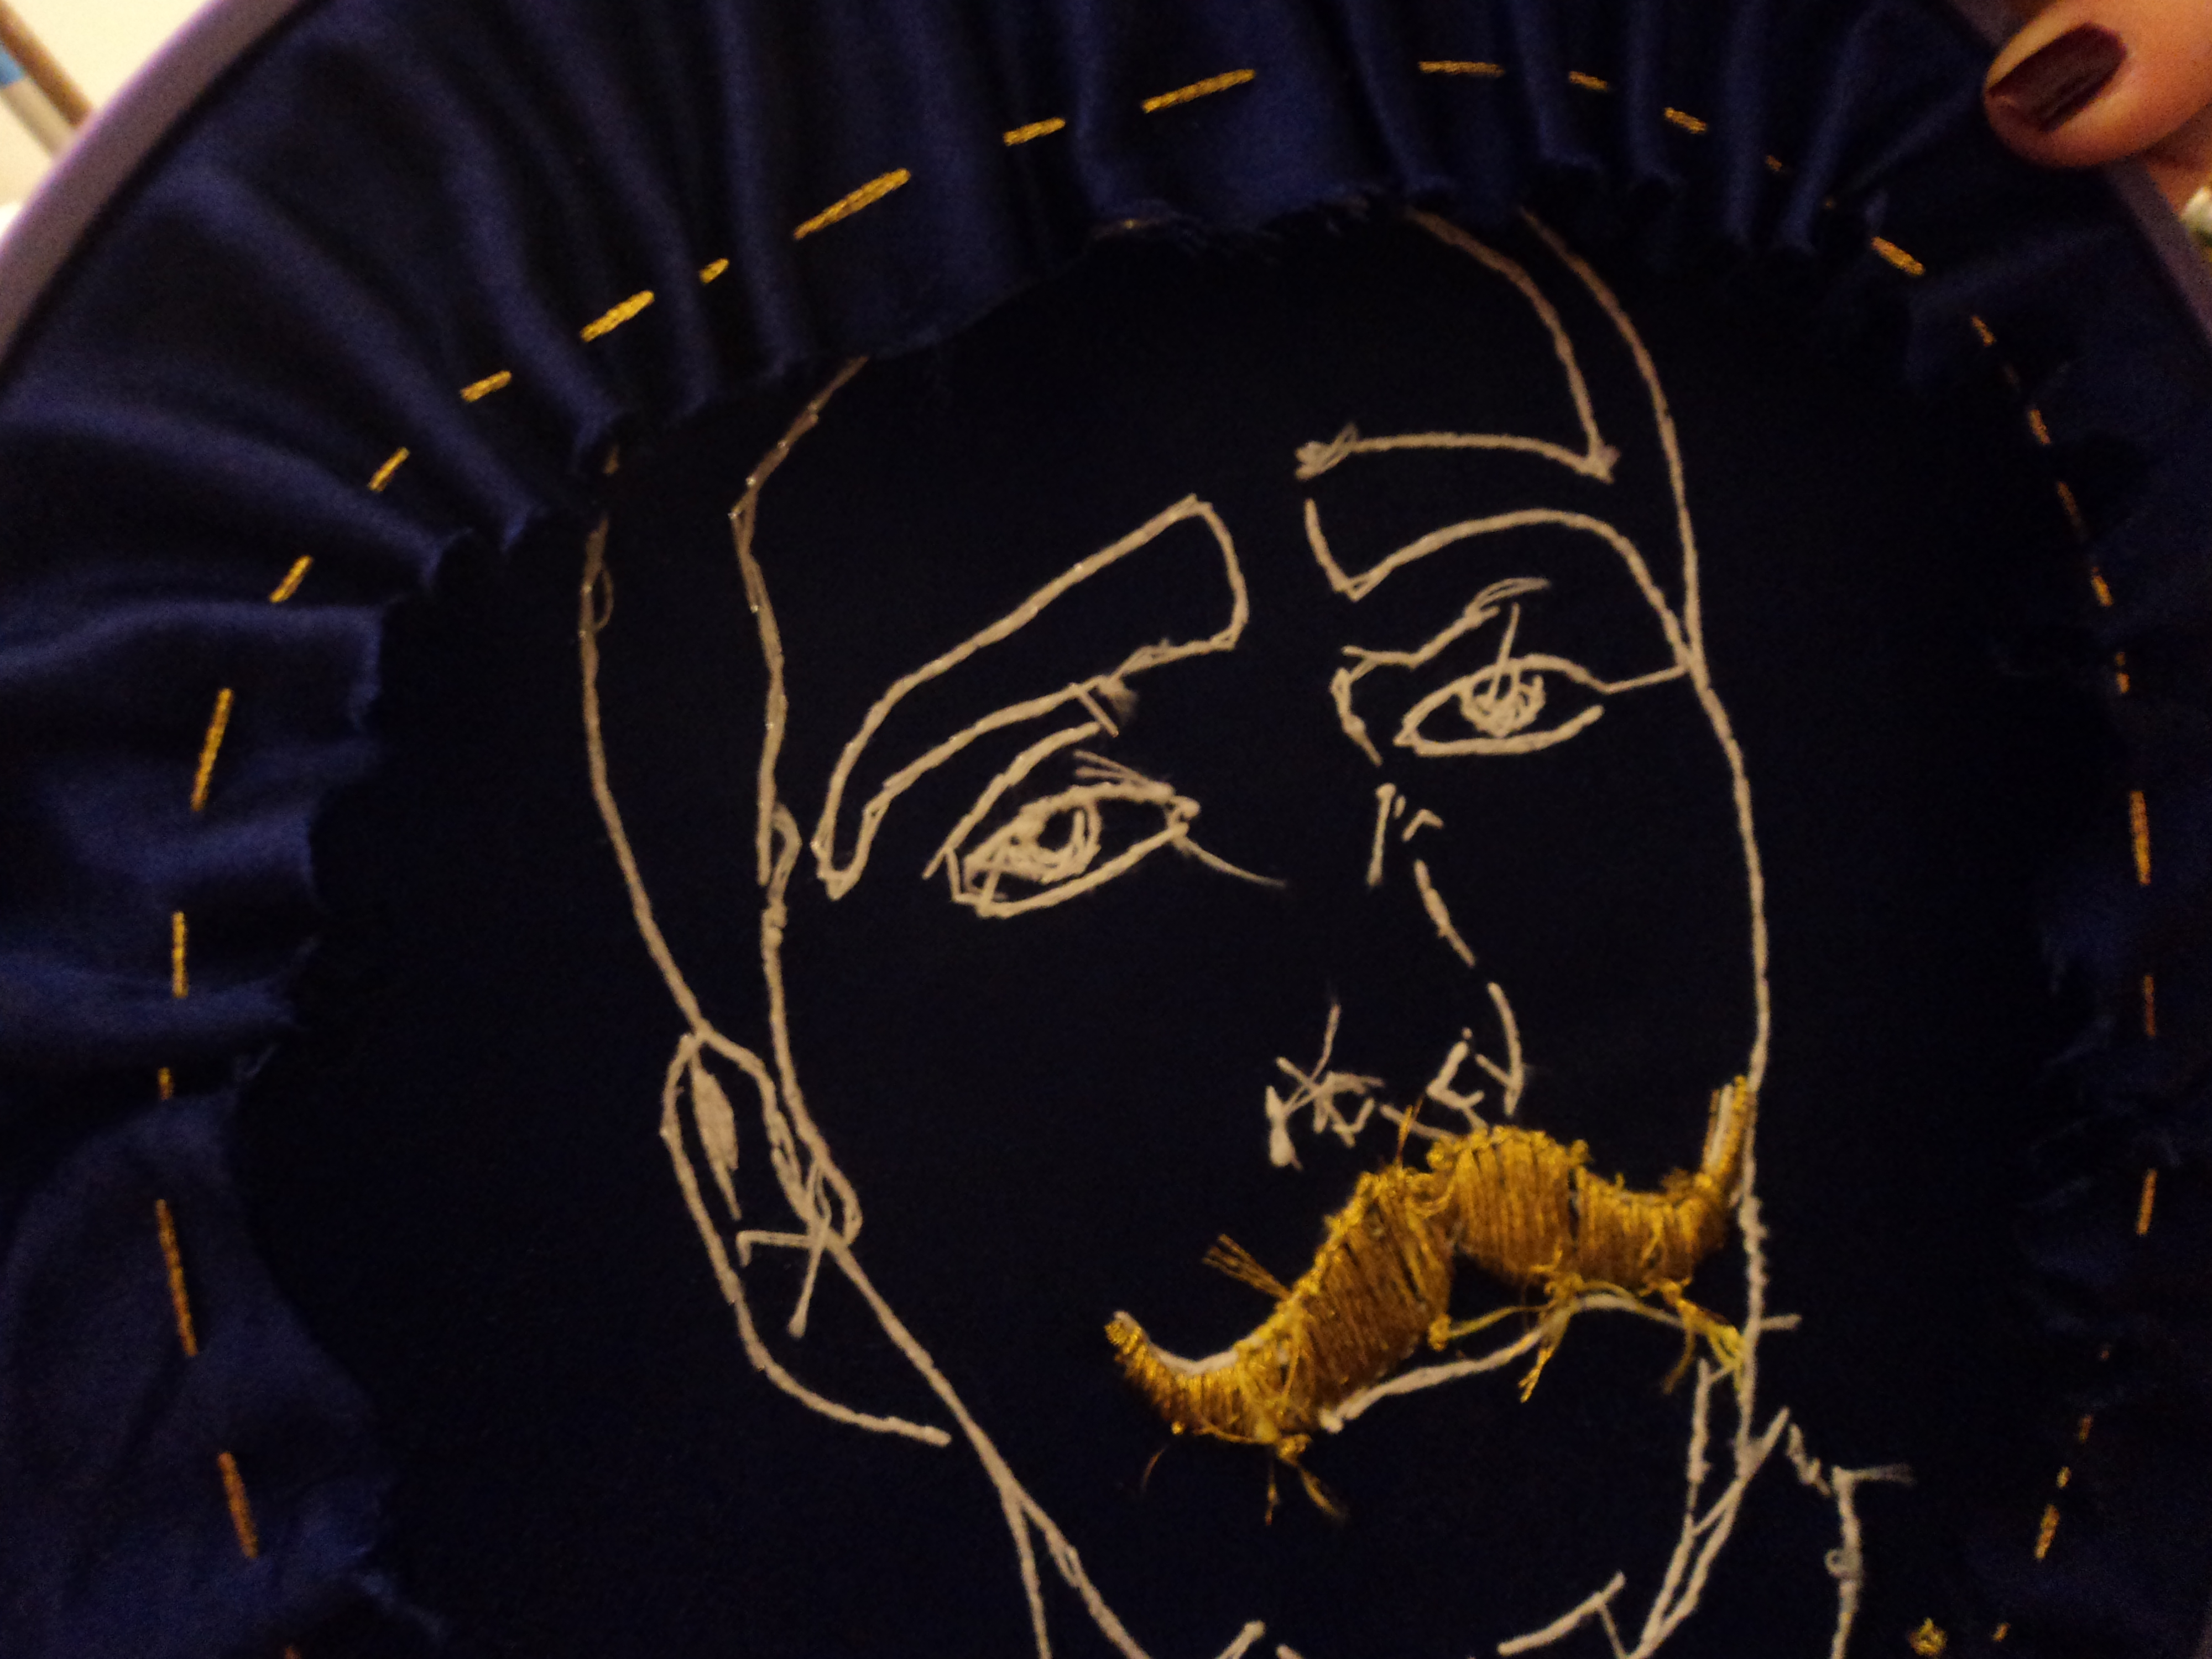
Cut out a piece of fabric that is bigger than your pattern and put it an embroidery hoop. The hoop I used was 8 inches, but you might need a different size. Because this was a dark, satin-y fabric, I didn't have a way to transfer a pattern onto the fabric. The fabric was too thick to trace the pattern onto it using a light box and it melted when I tried to iron it. Since I couldn't transfer the pattern in any of the usual ways, I tacked the paper directly to the fabric. Make sure you have your pattern centered in your hoop and attach it to the fabric, using big stitches around the edge of the hoop. Make sure there are no wrinkles in the paper and the stitches holding it to the fabric don't overlap with any lines on your pattern. Cut away any paper that's hanging off the edge of your hoop, it will make things so much easier.
Stitch!
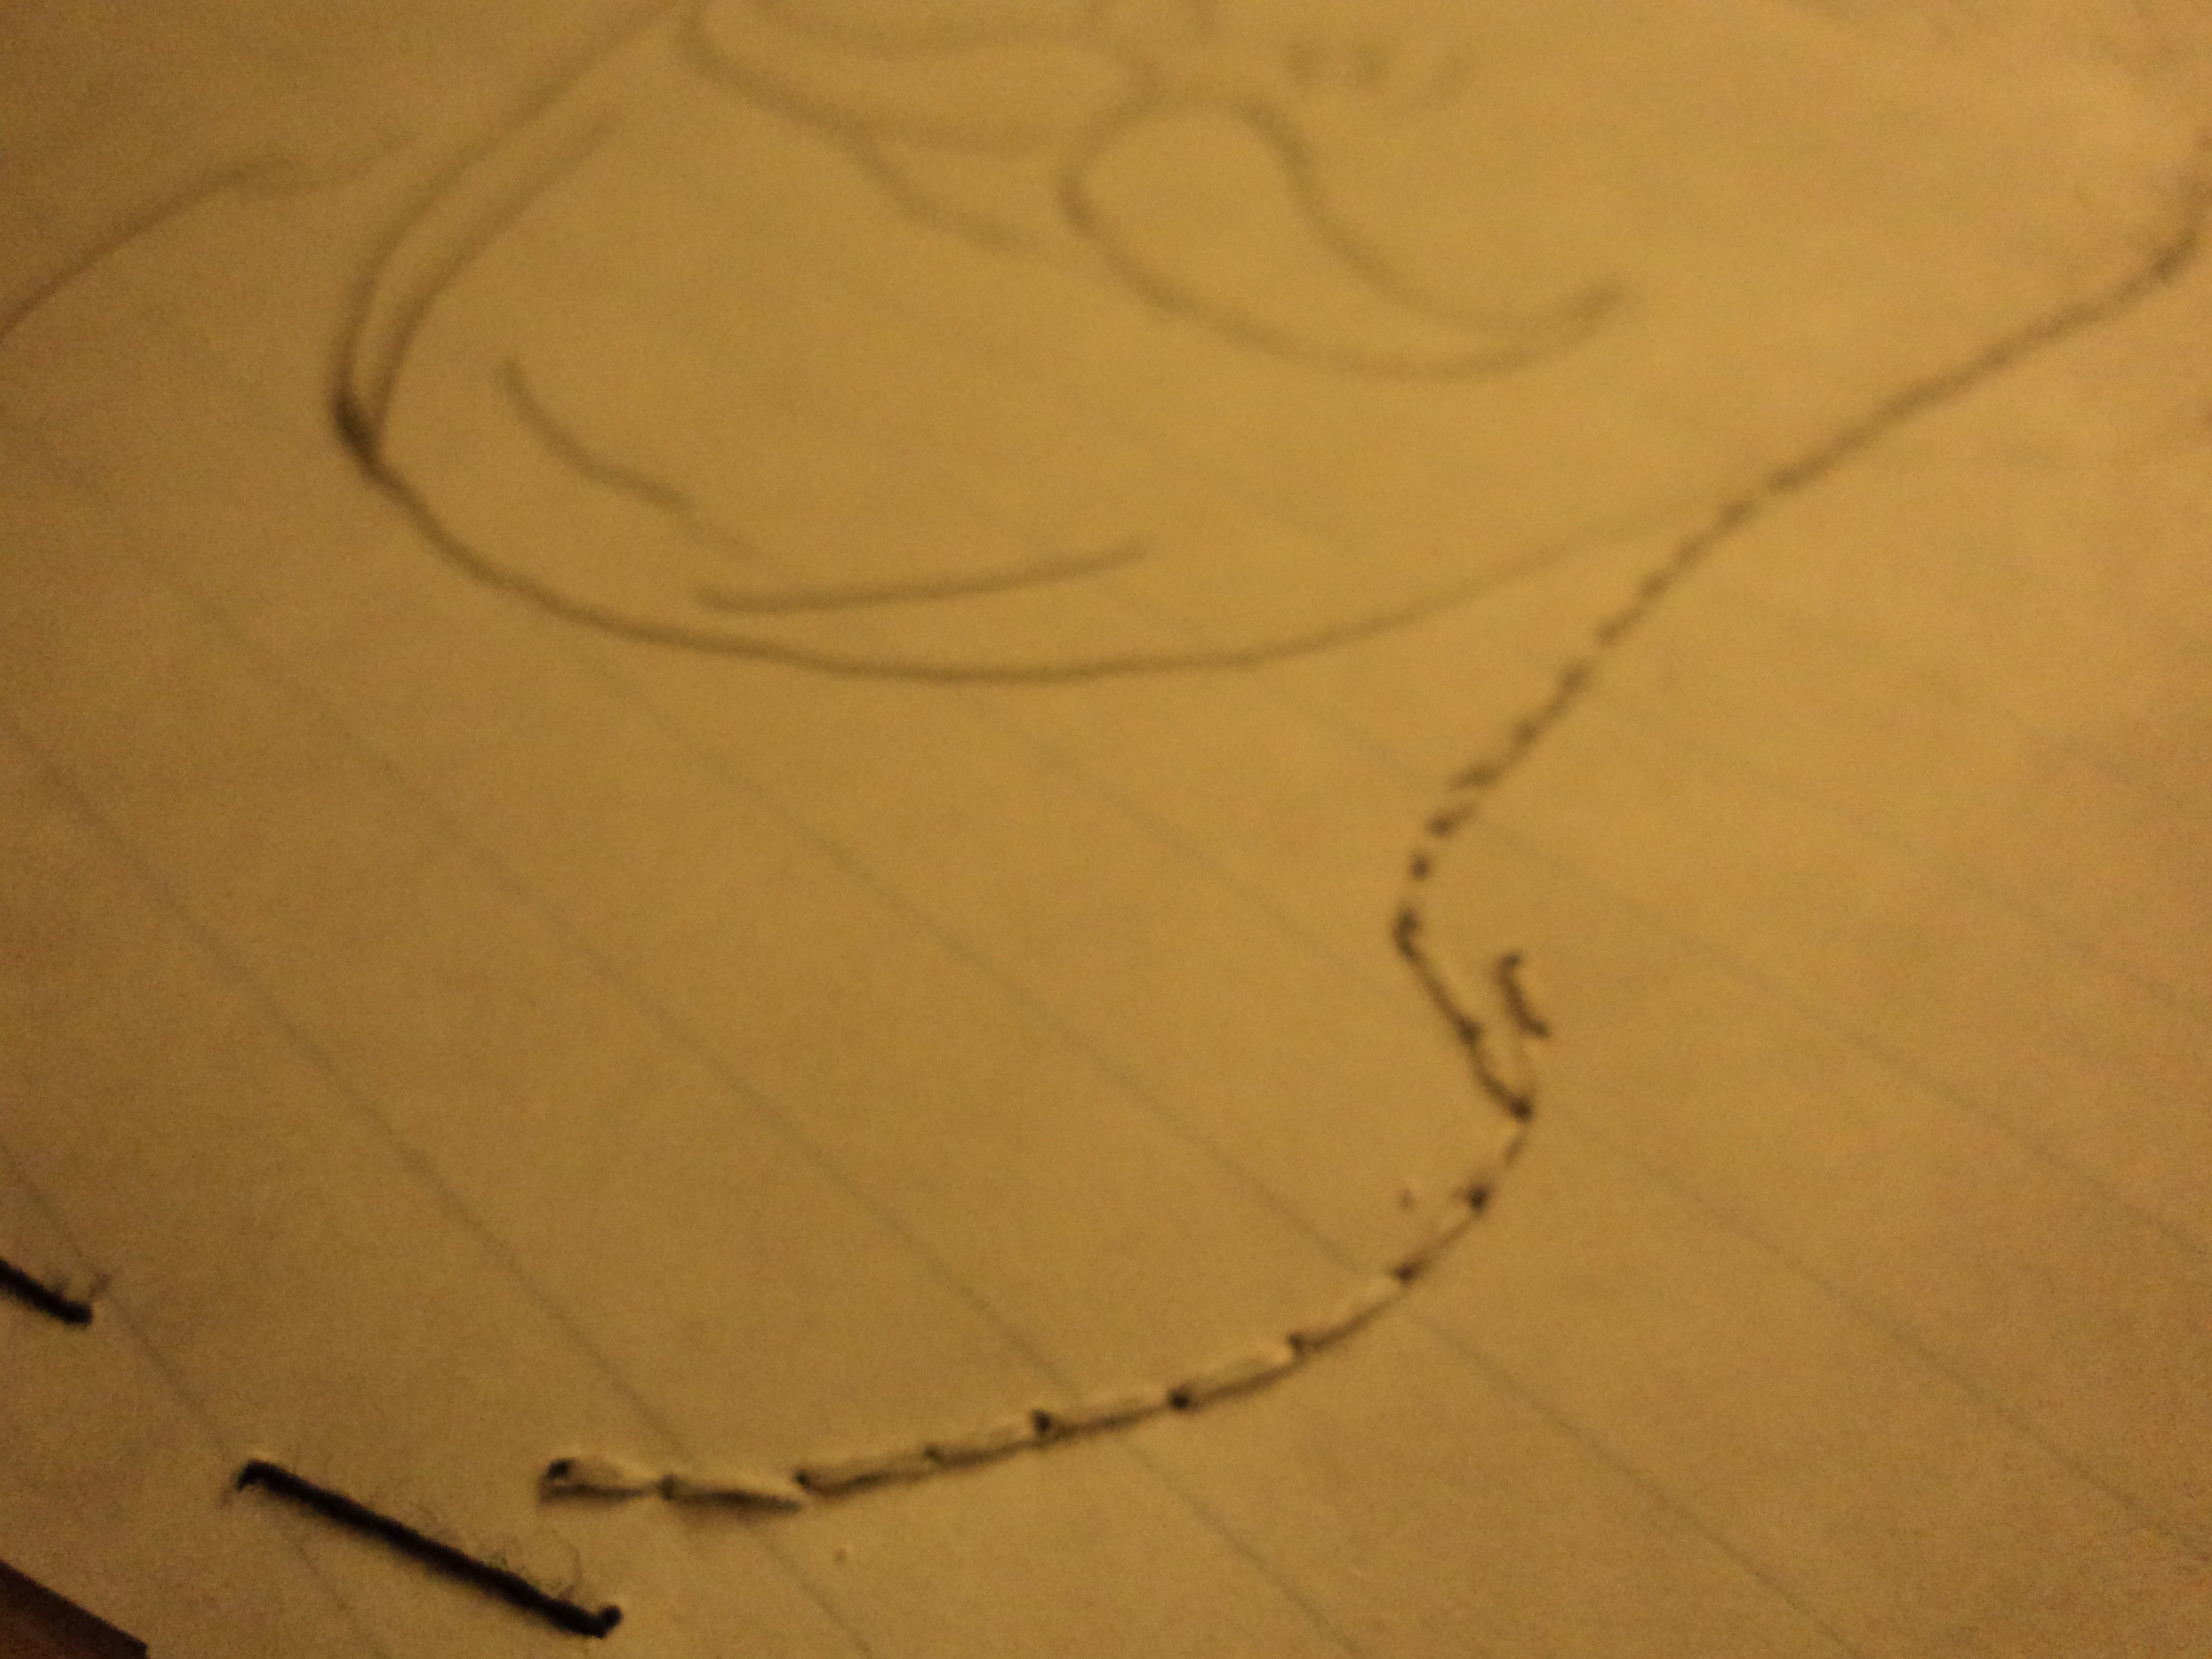
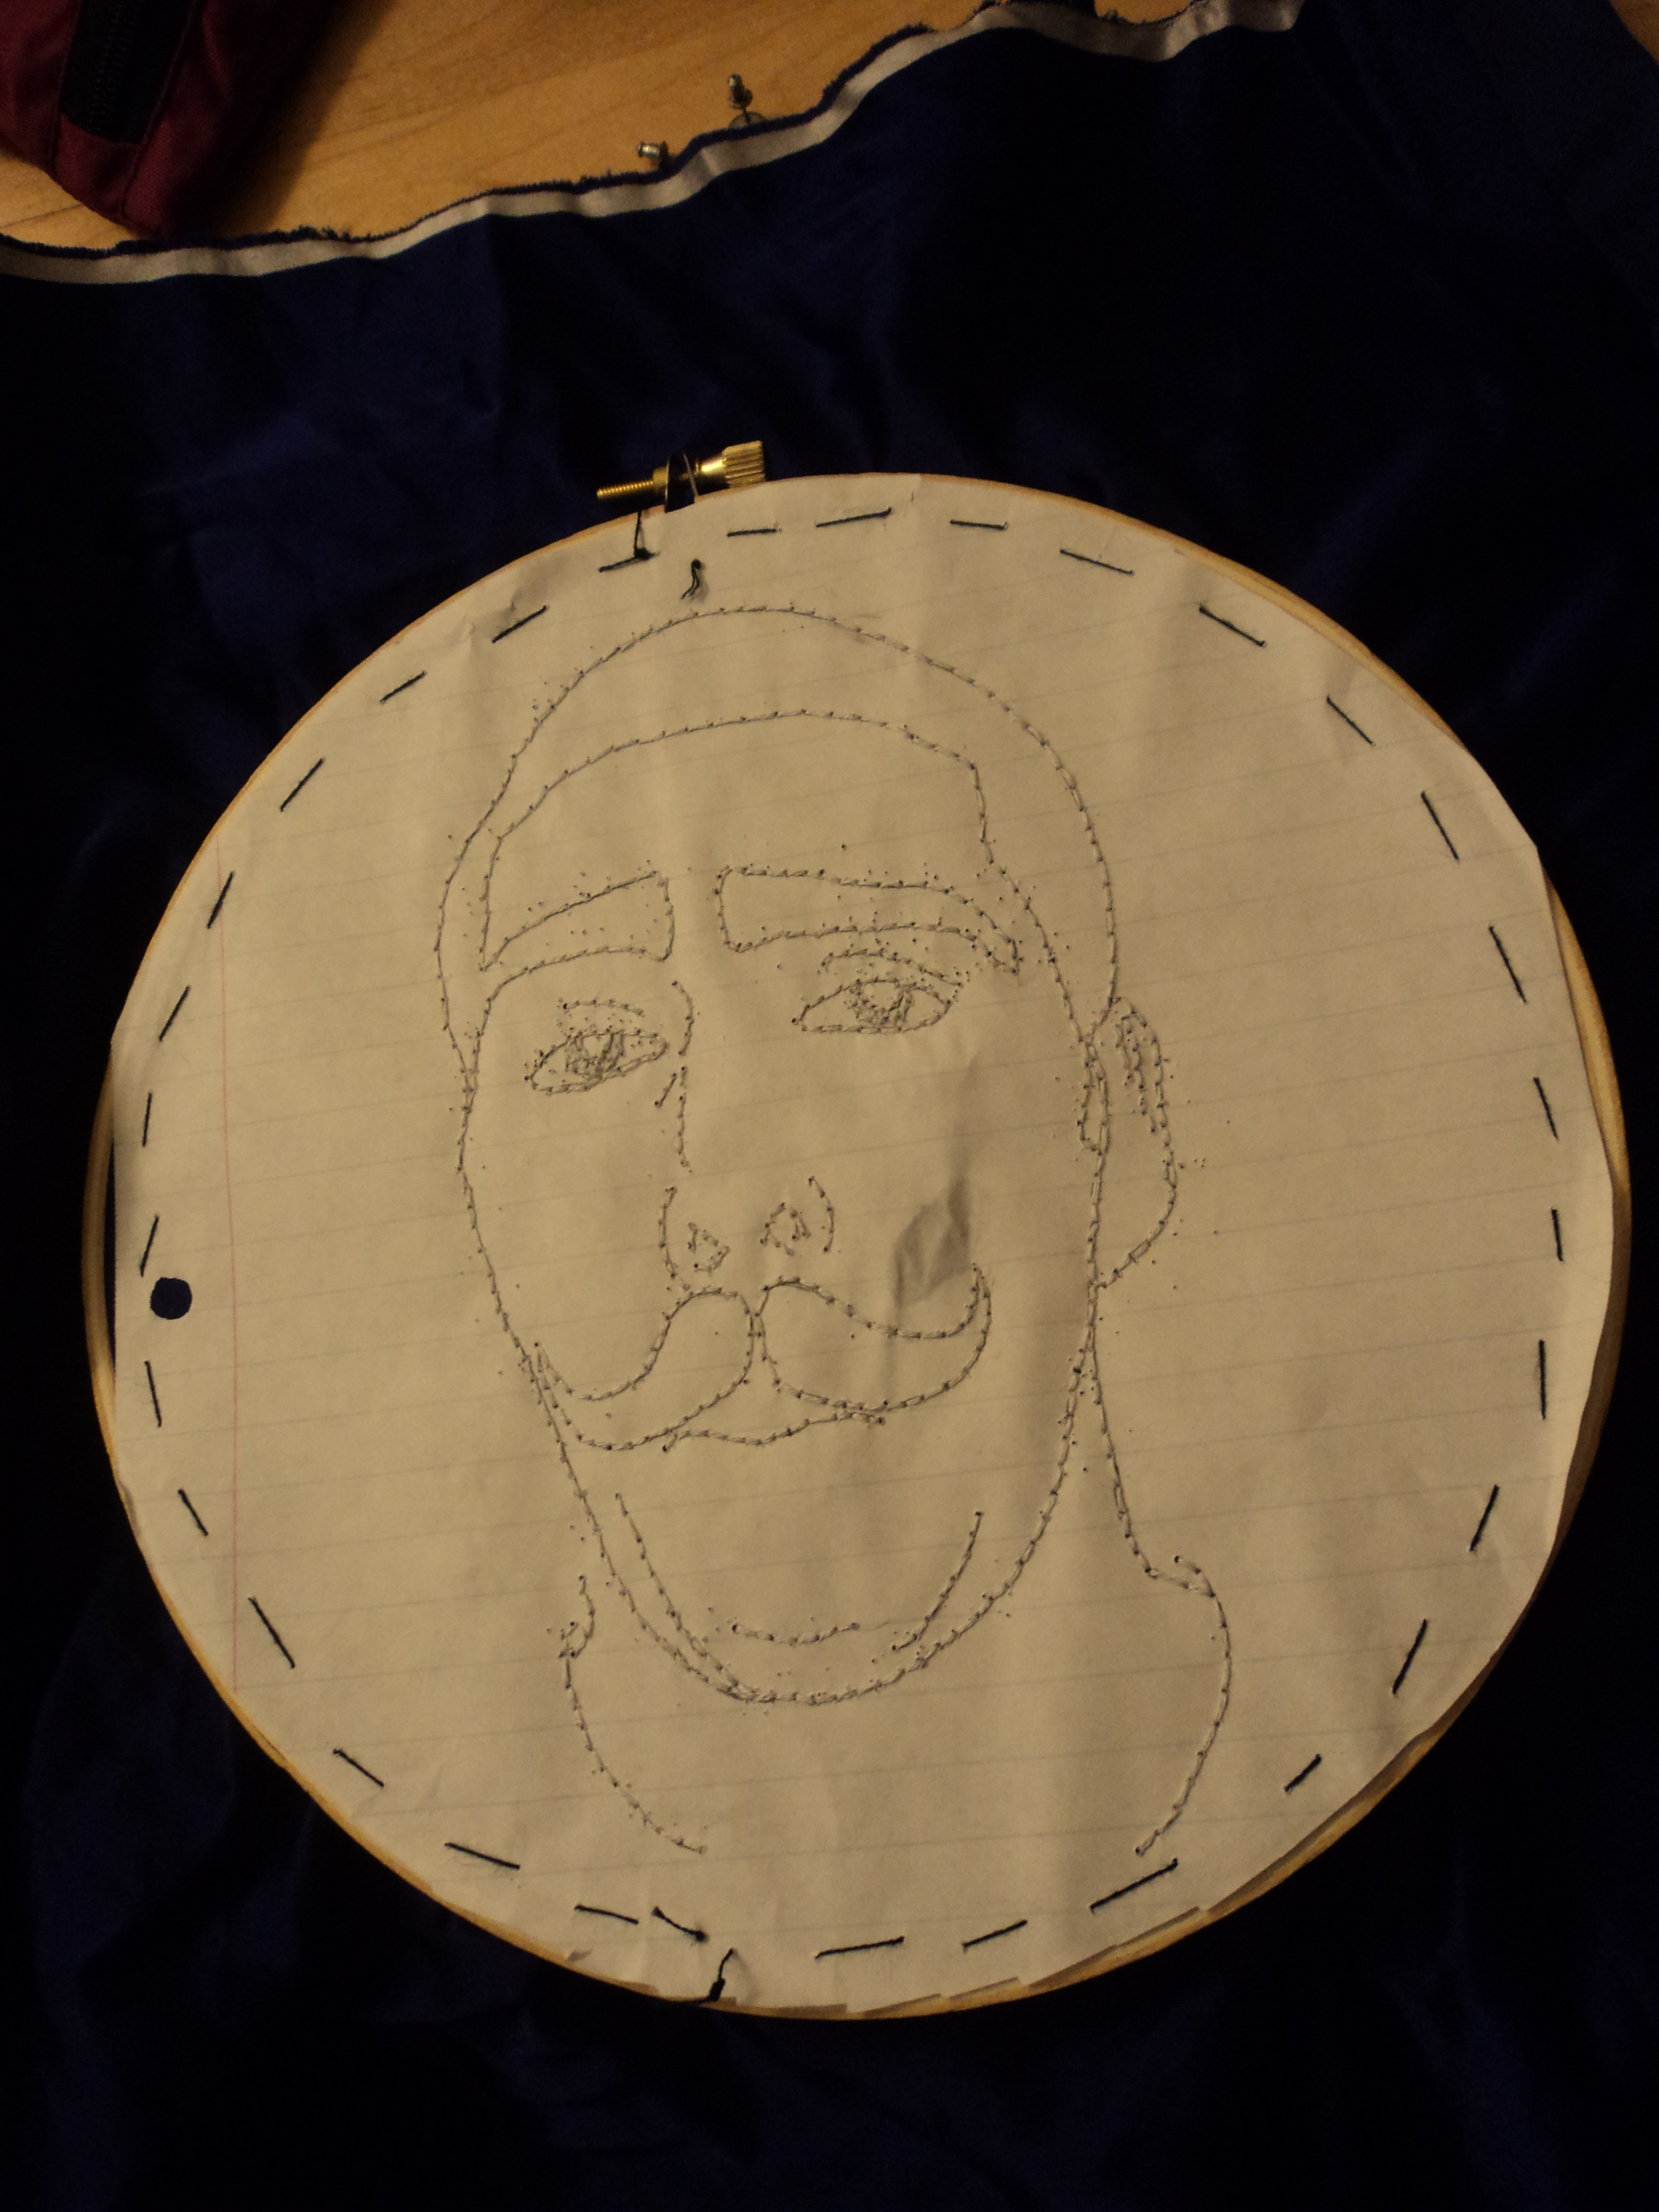
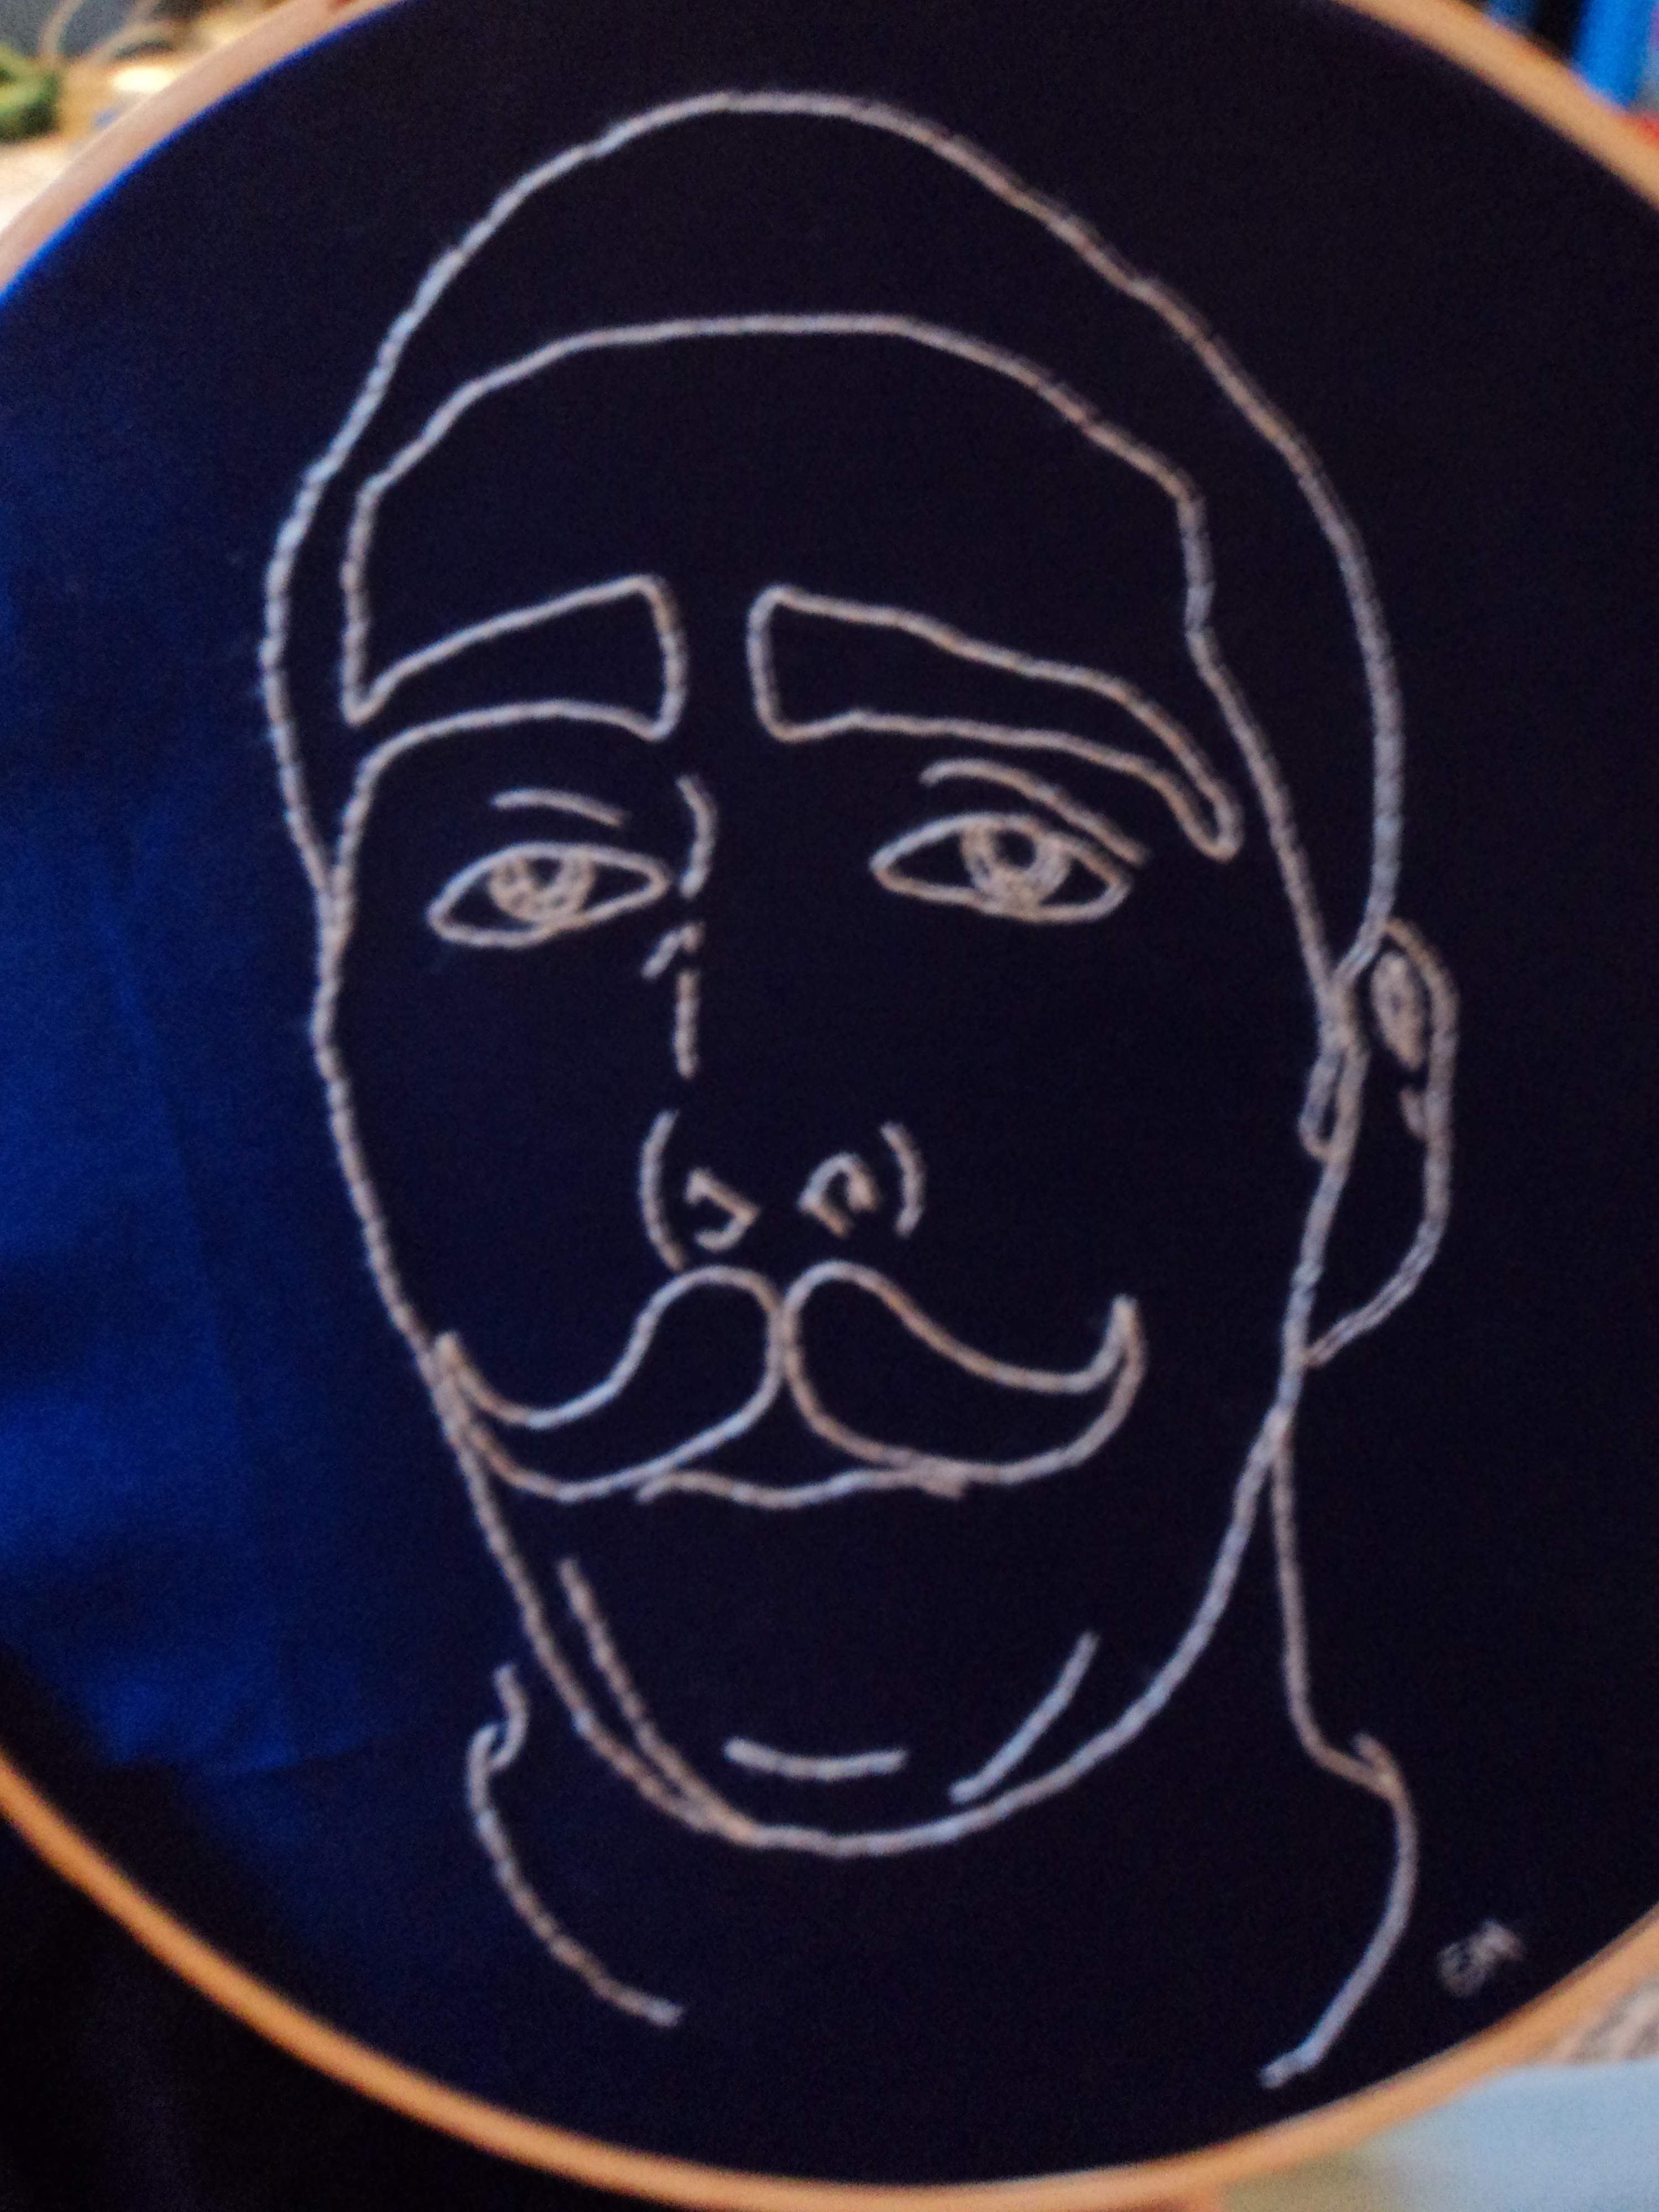
Following the lines on your pattern, making sure to stitch through the paper and the fabric. I used two strands from a 6 strand embroidery floss and just did a simple back stitch. If you need some embroidery basics, there are a lot of other good guides out there, like this one: https://www.instructables.com/id/Embroidery-101/step5/Backstitch/
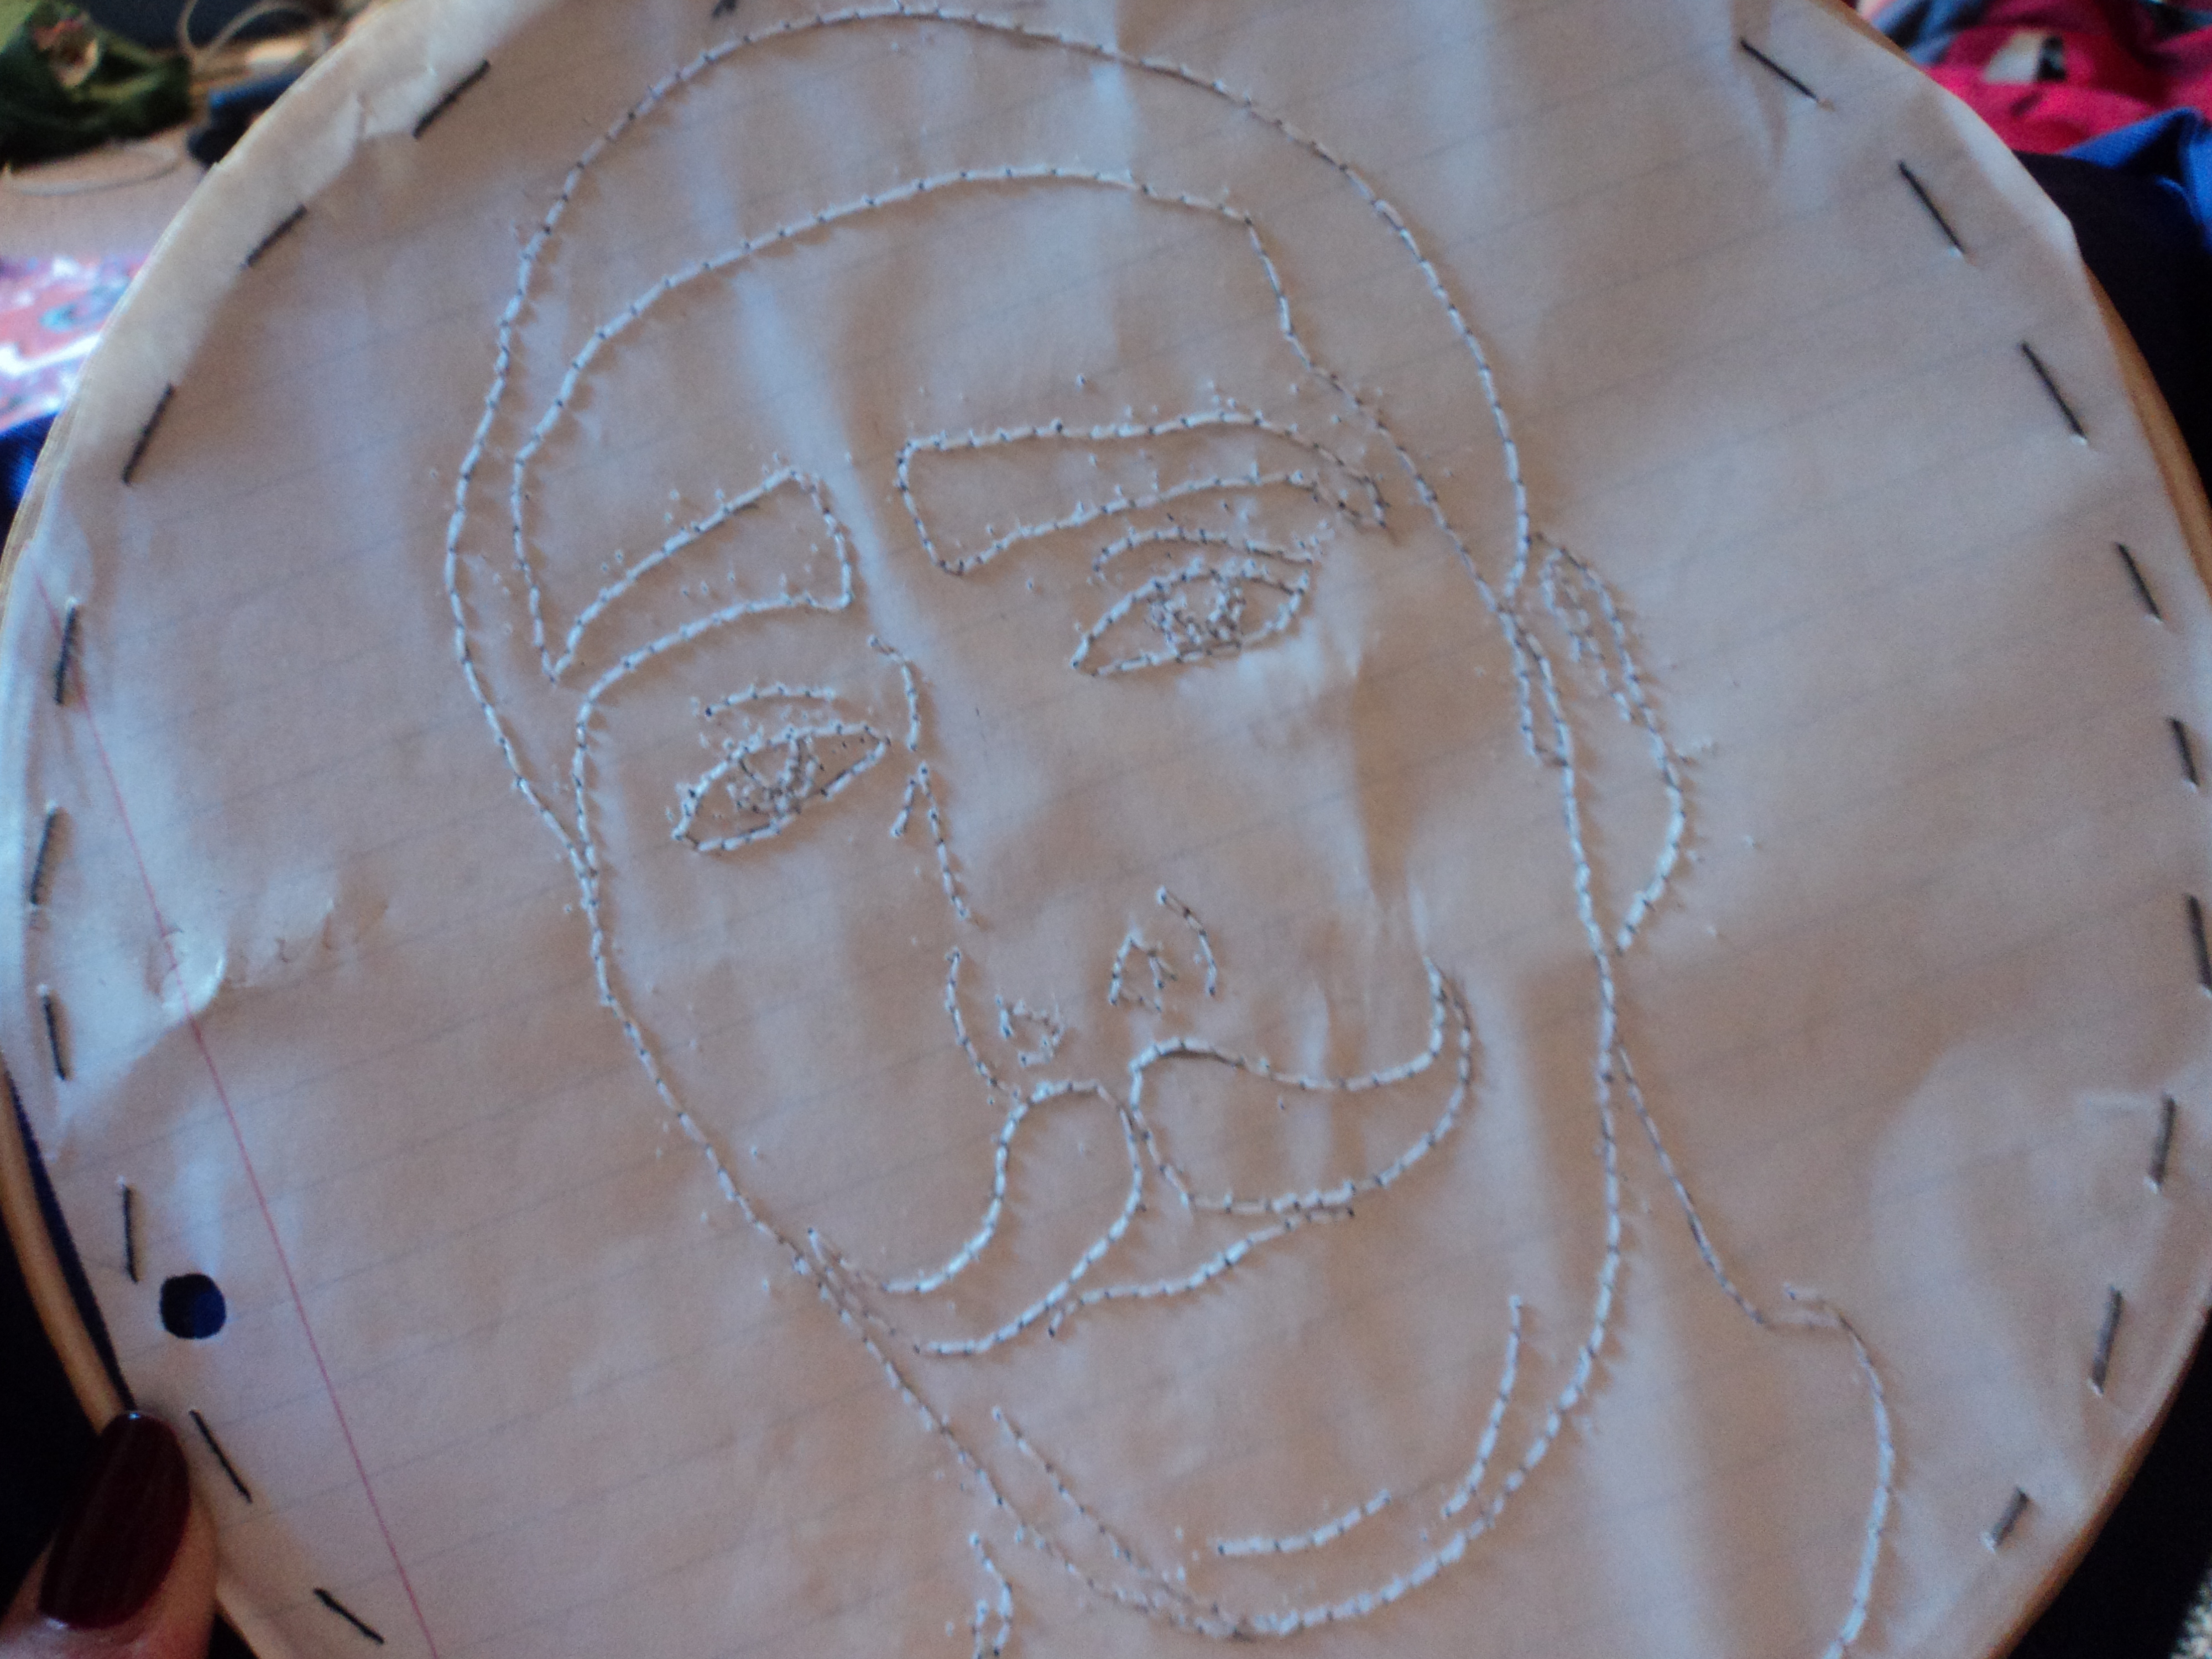
Remove Paper
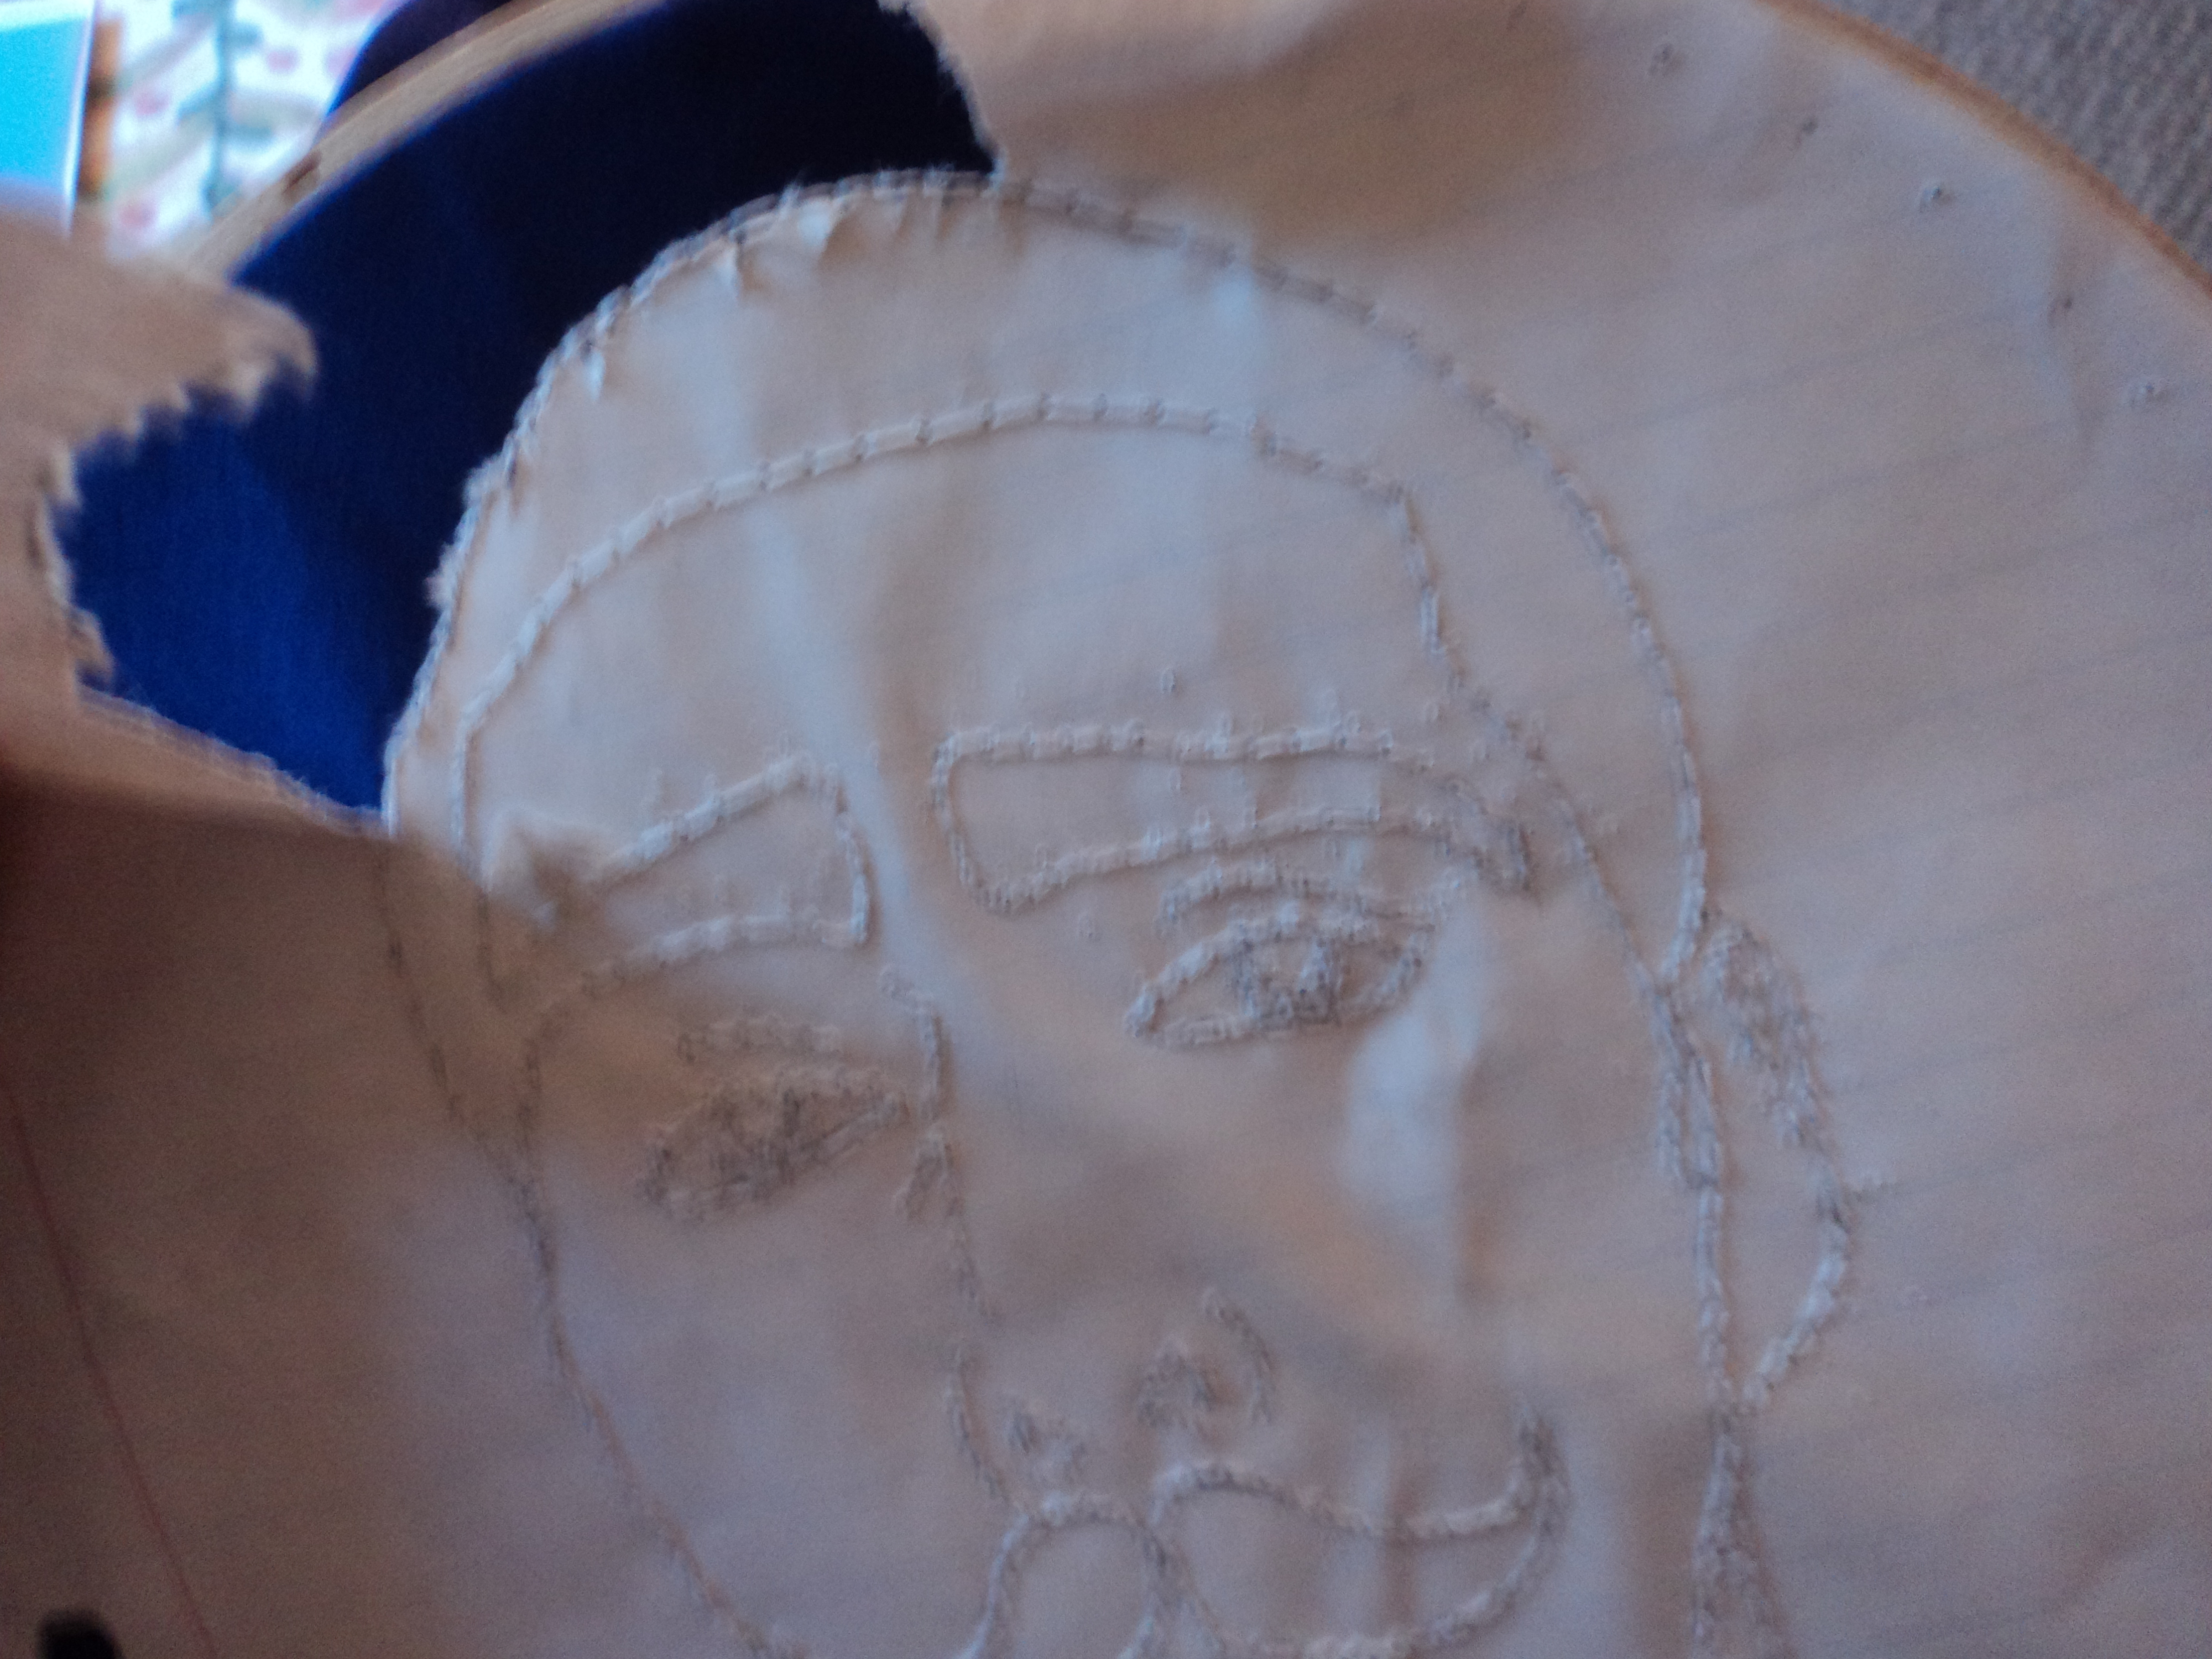

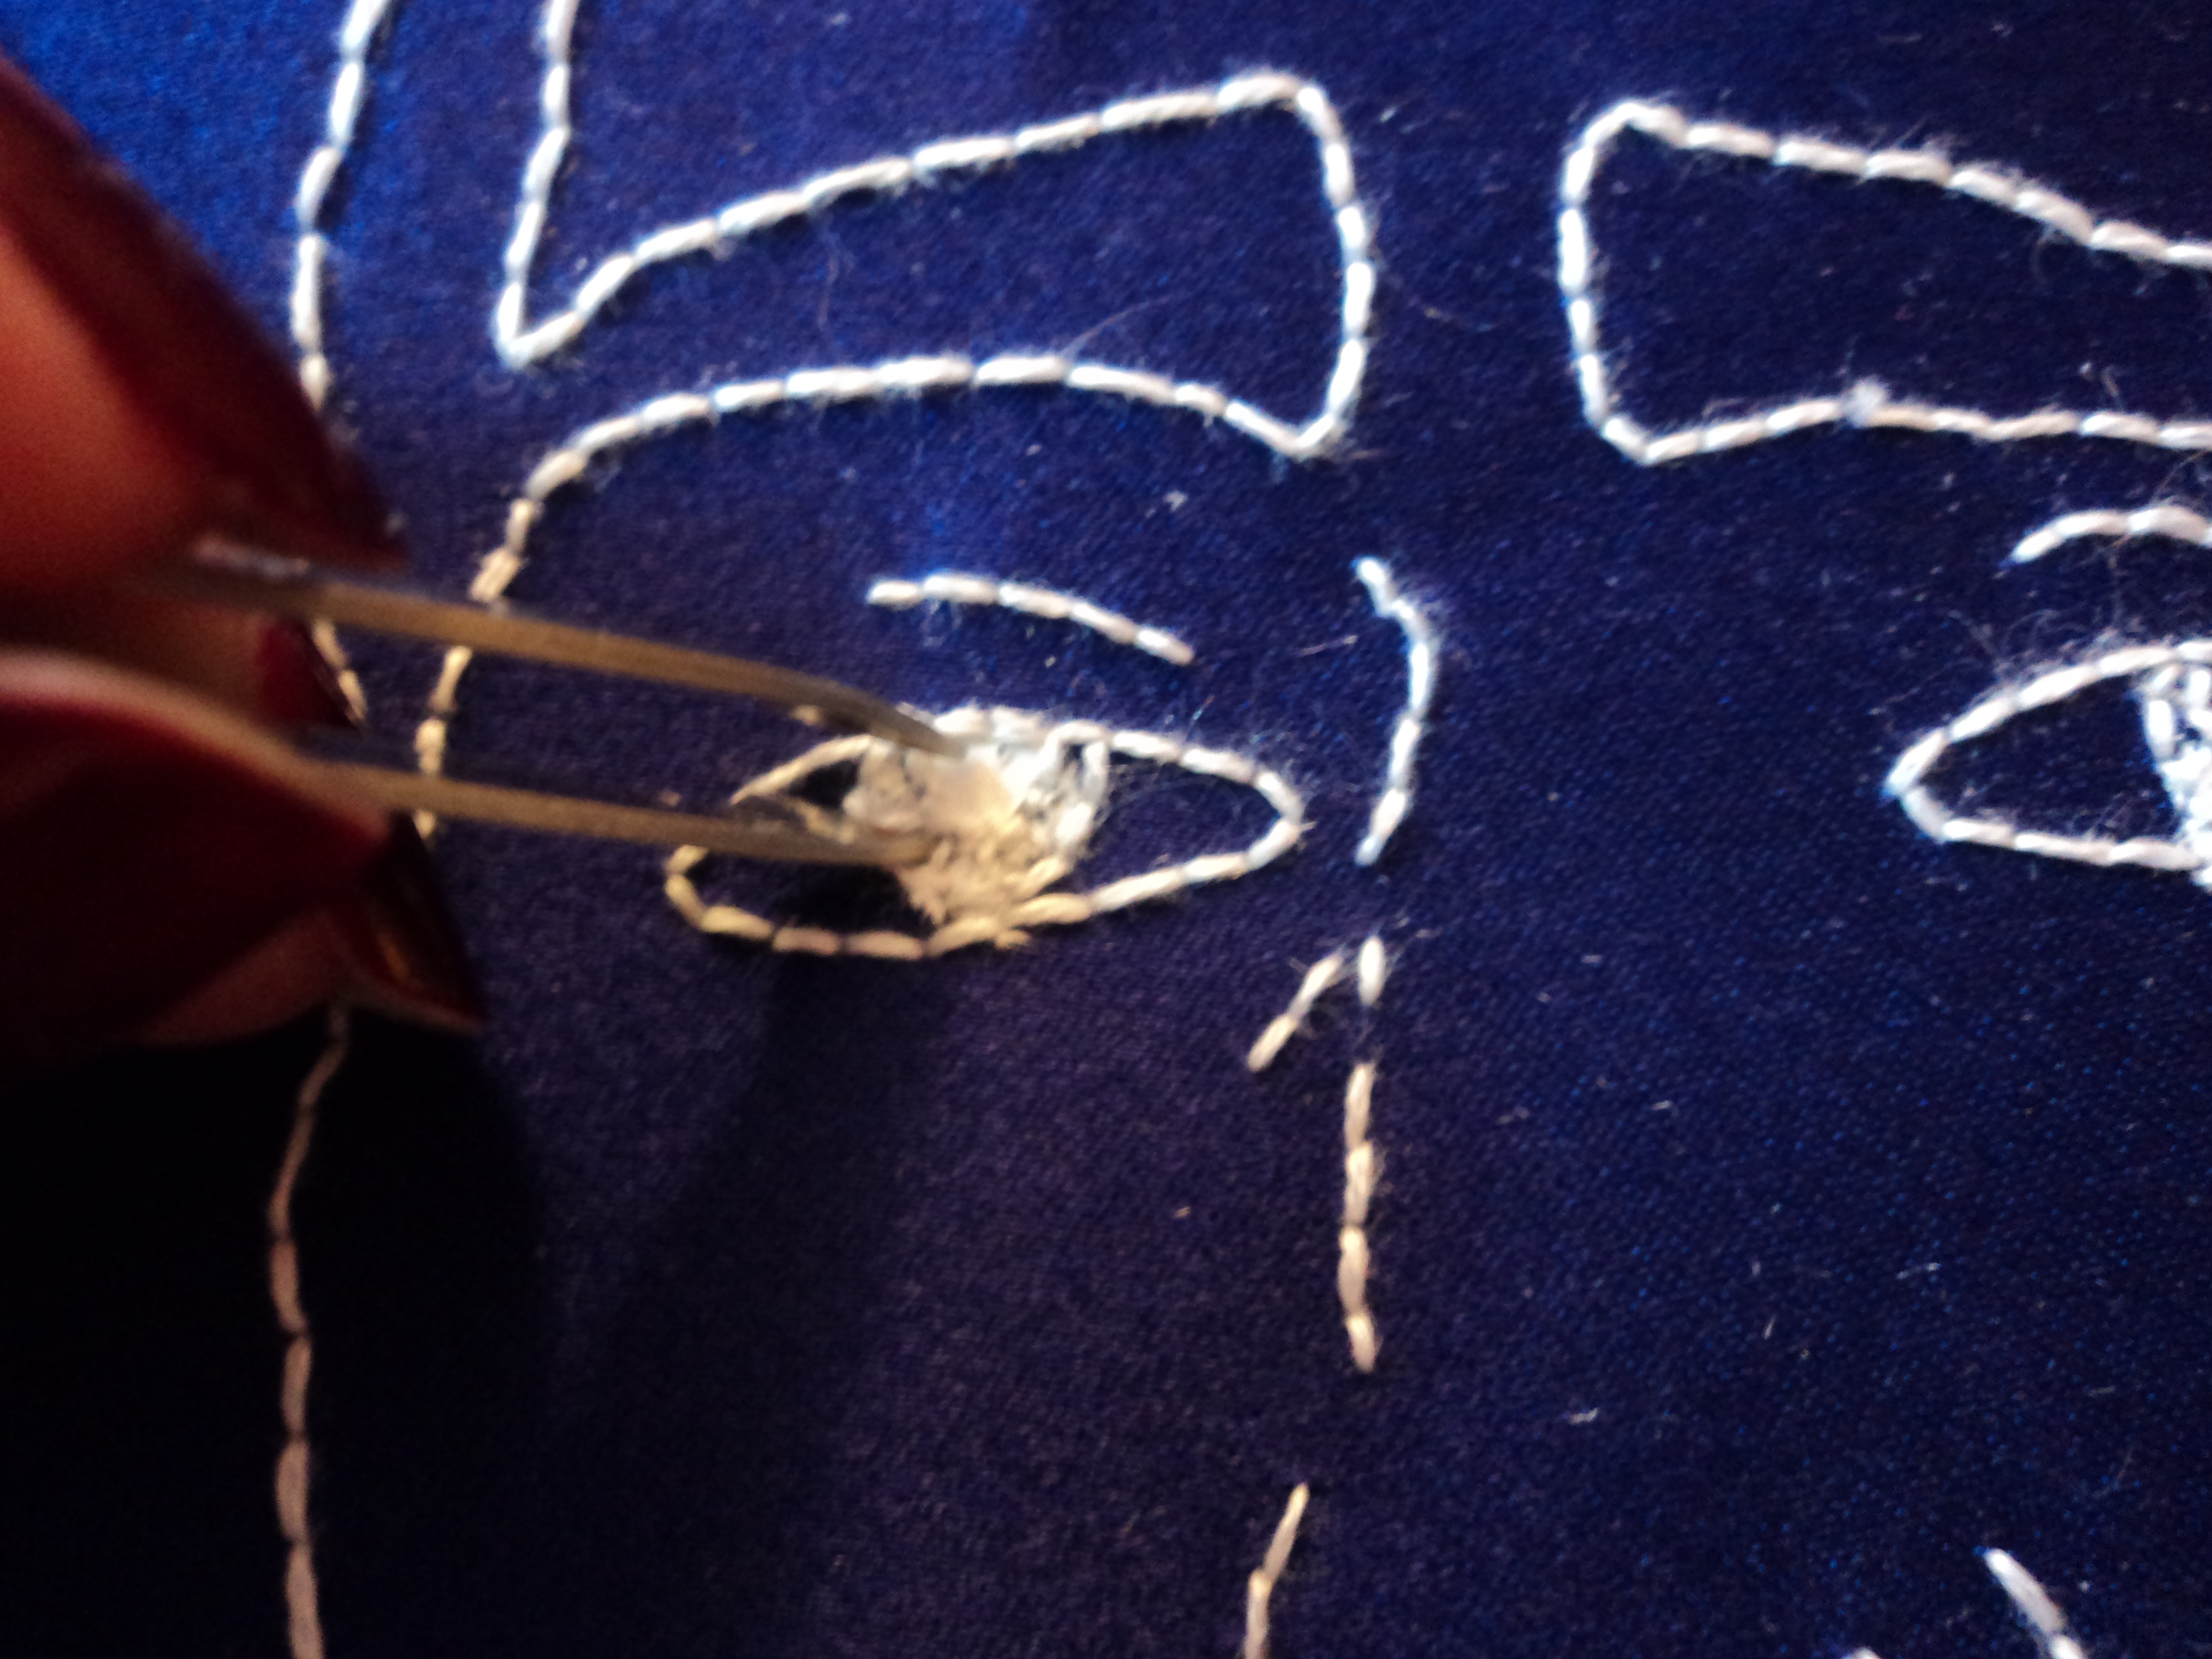
Once you have stitched over your entire pattern, take out the large stitches holding the paper to the fabric and then gently tear the paper away from the design you have stitched. Since the stitches have perforated the paper, you can tear it off pretty easily, but still be careful not to pull the stitches too much. For smaller areas you might need to use tweezers to get smaller pieces of paper out.
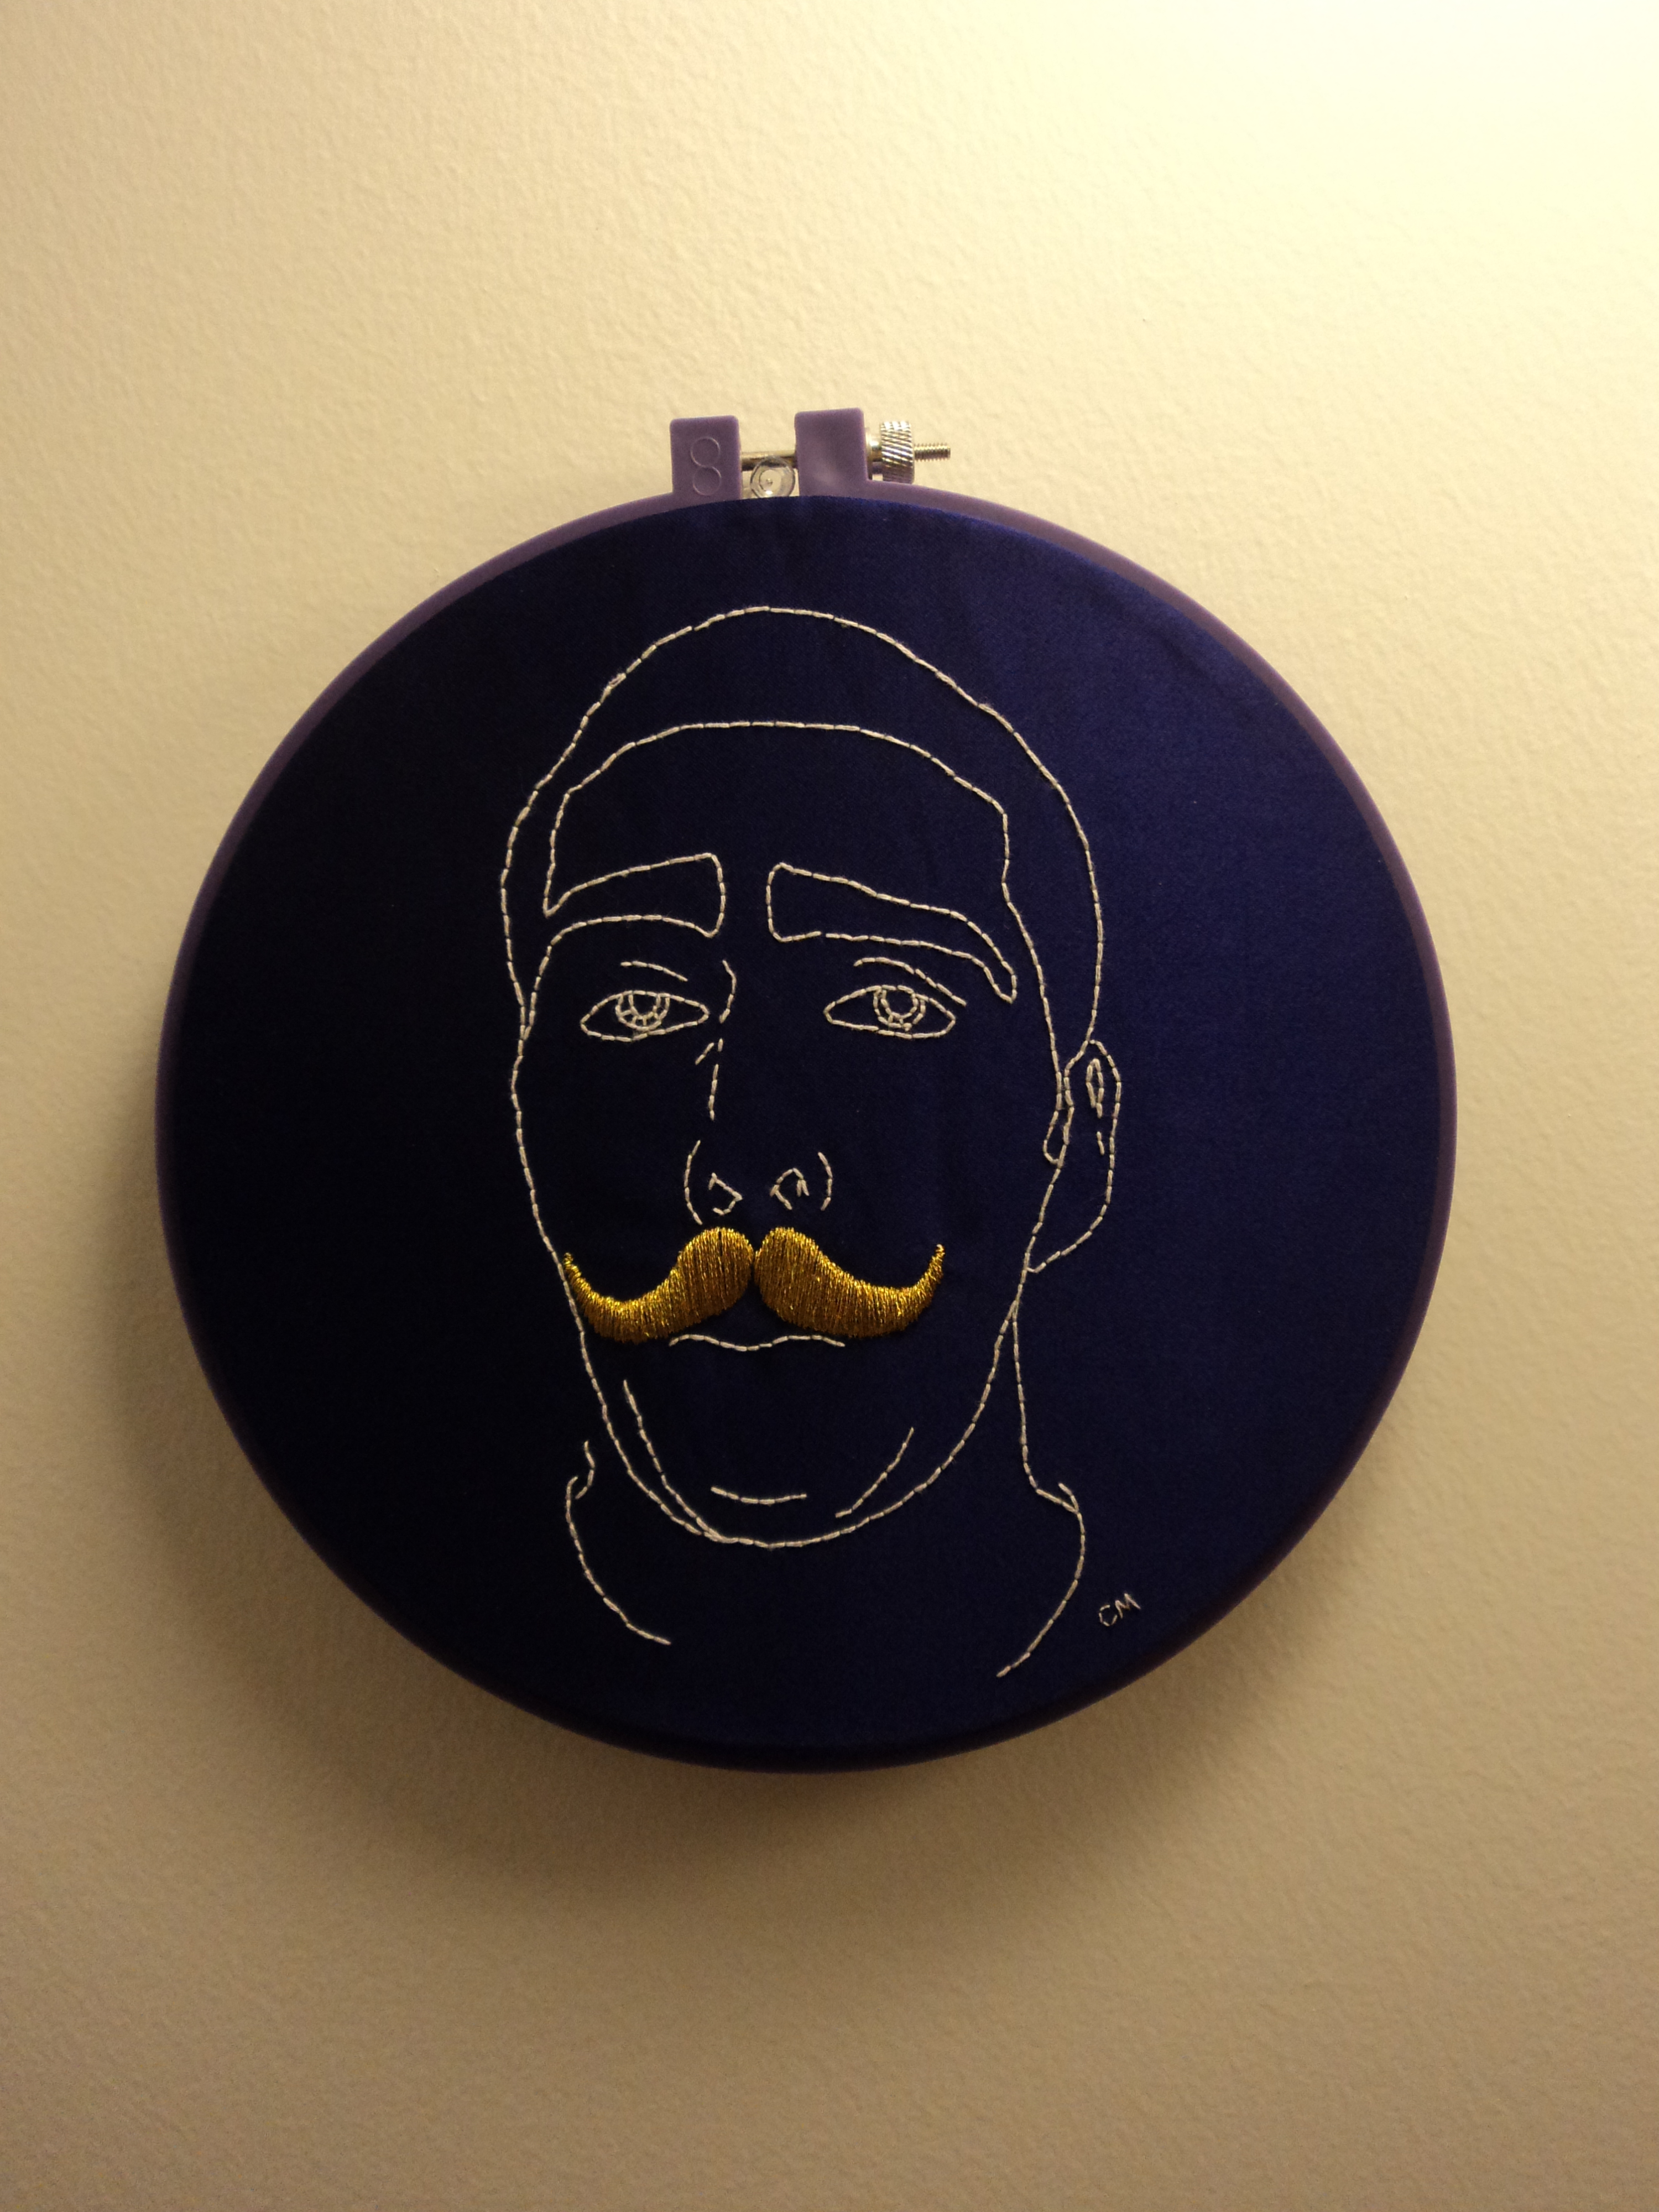
Mustache
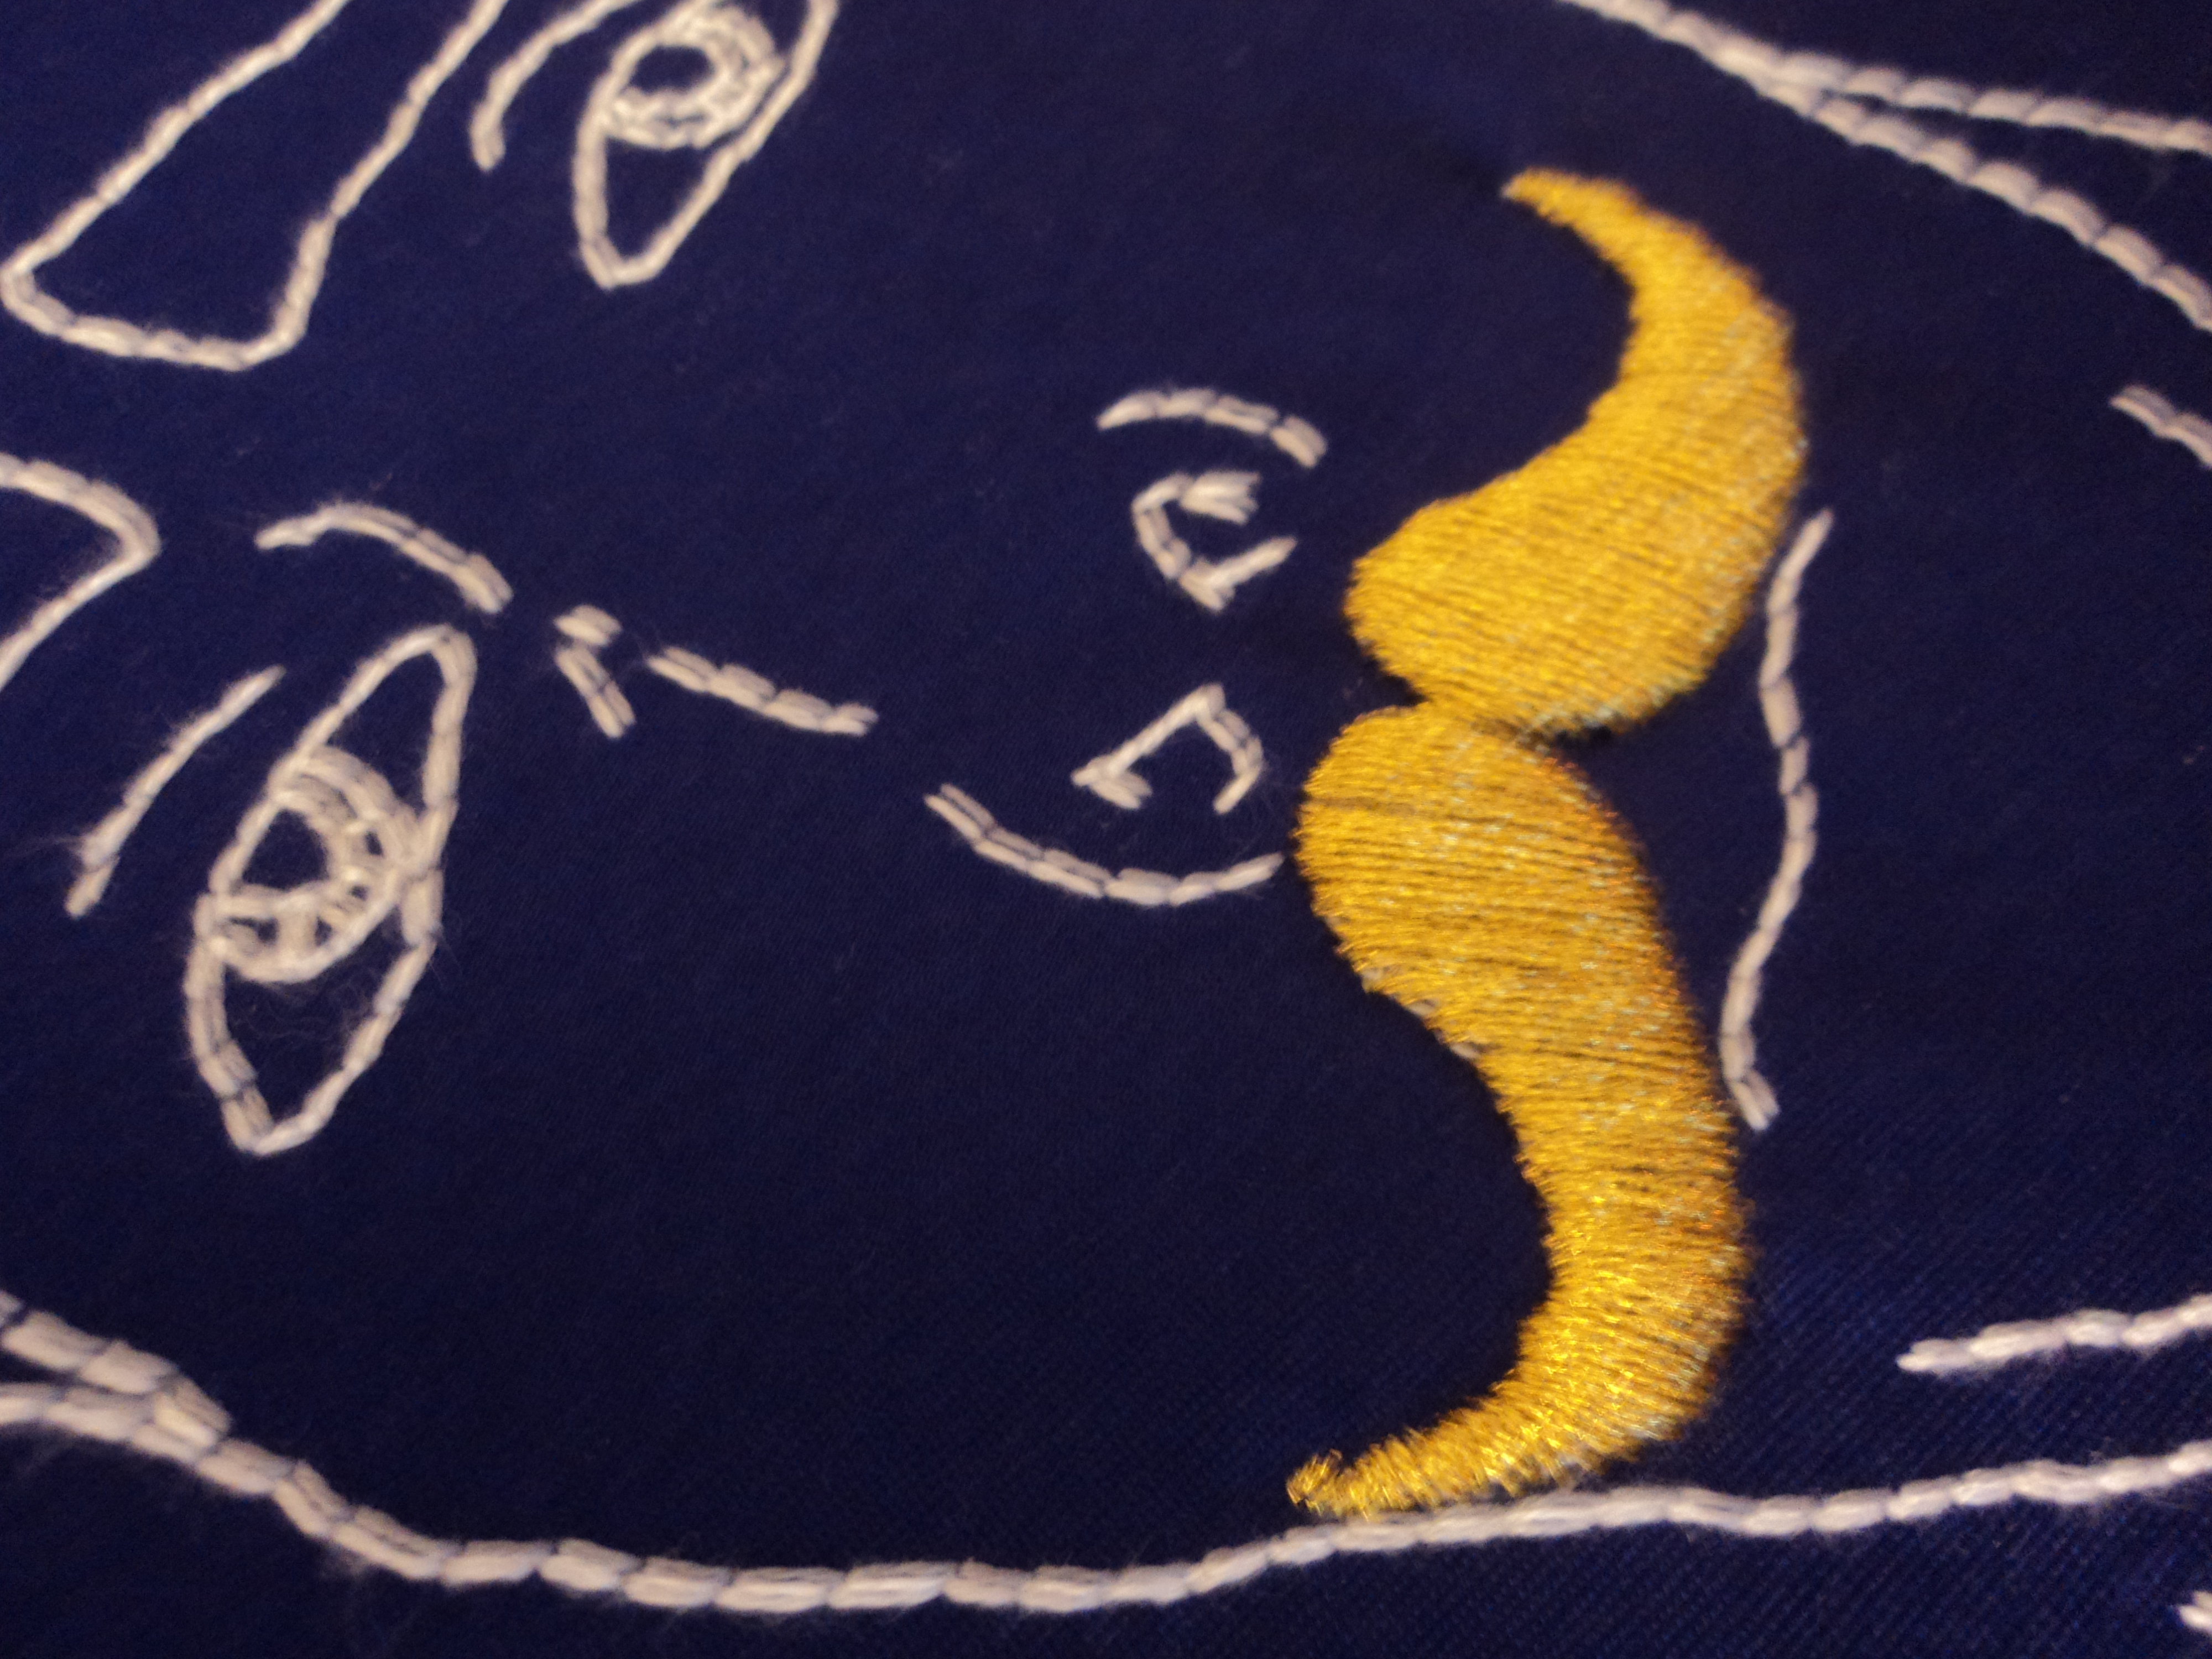
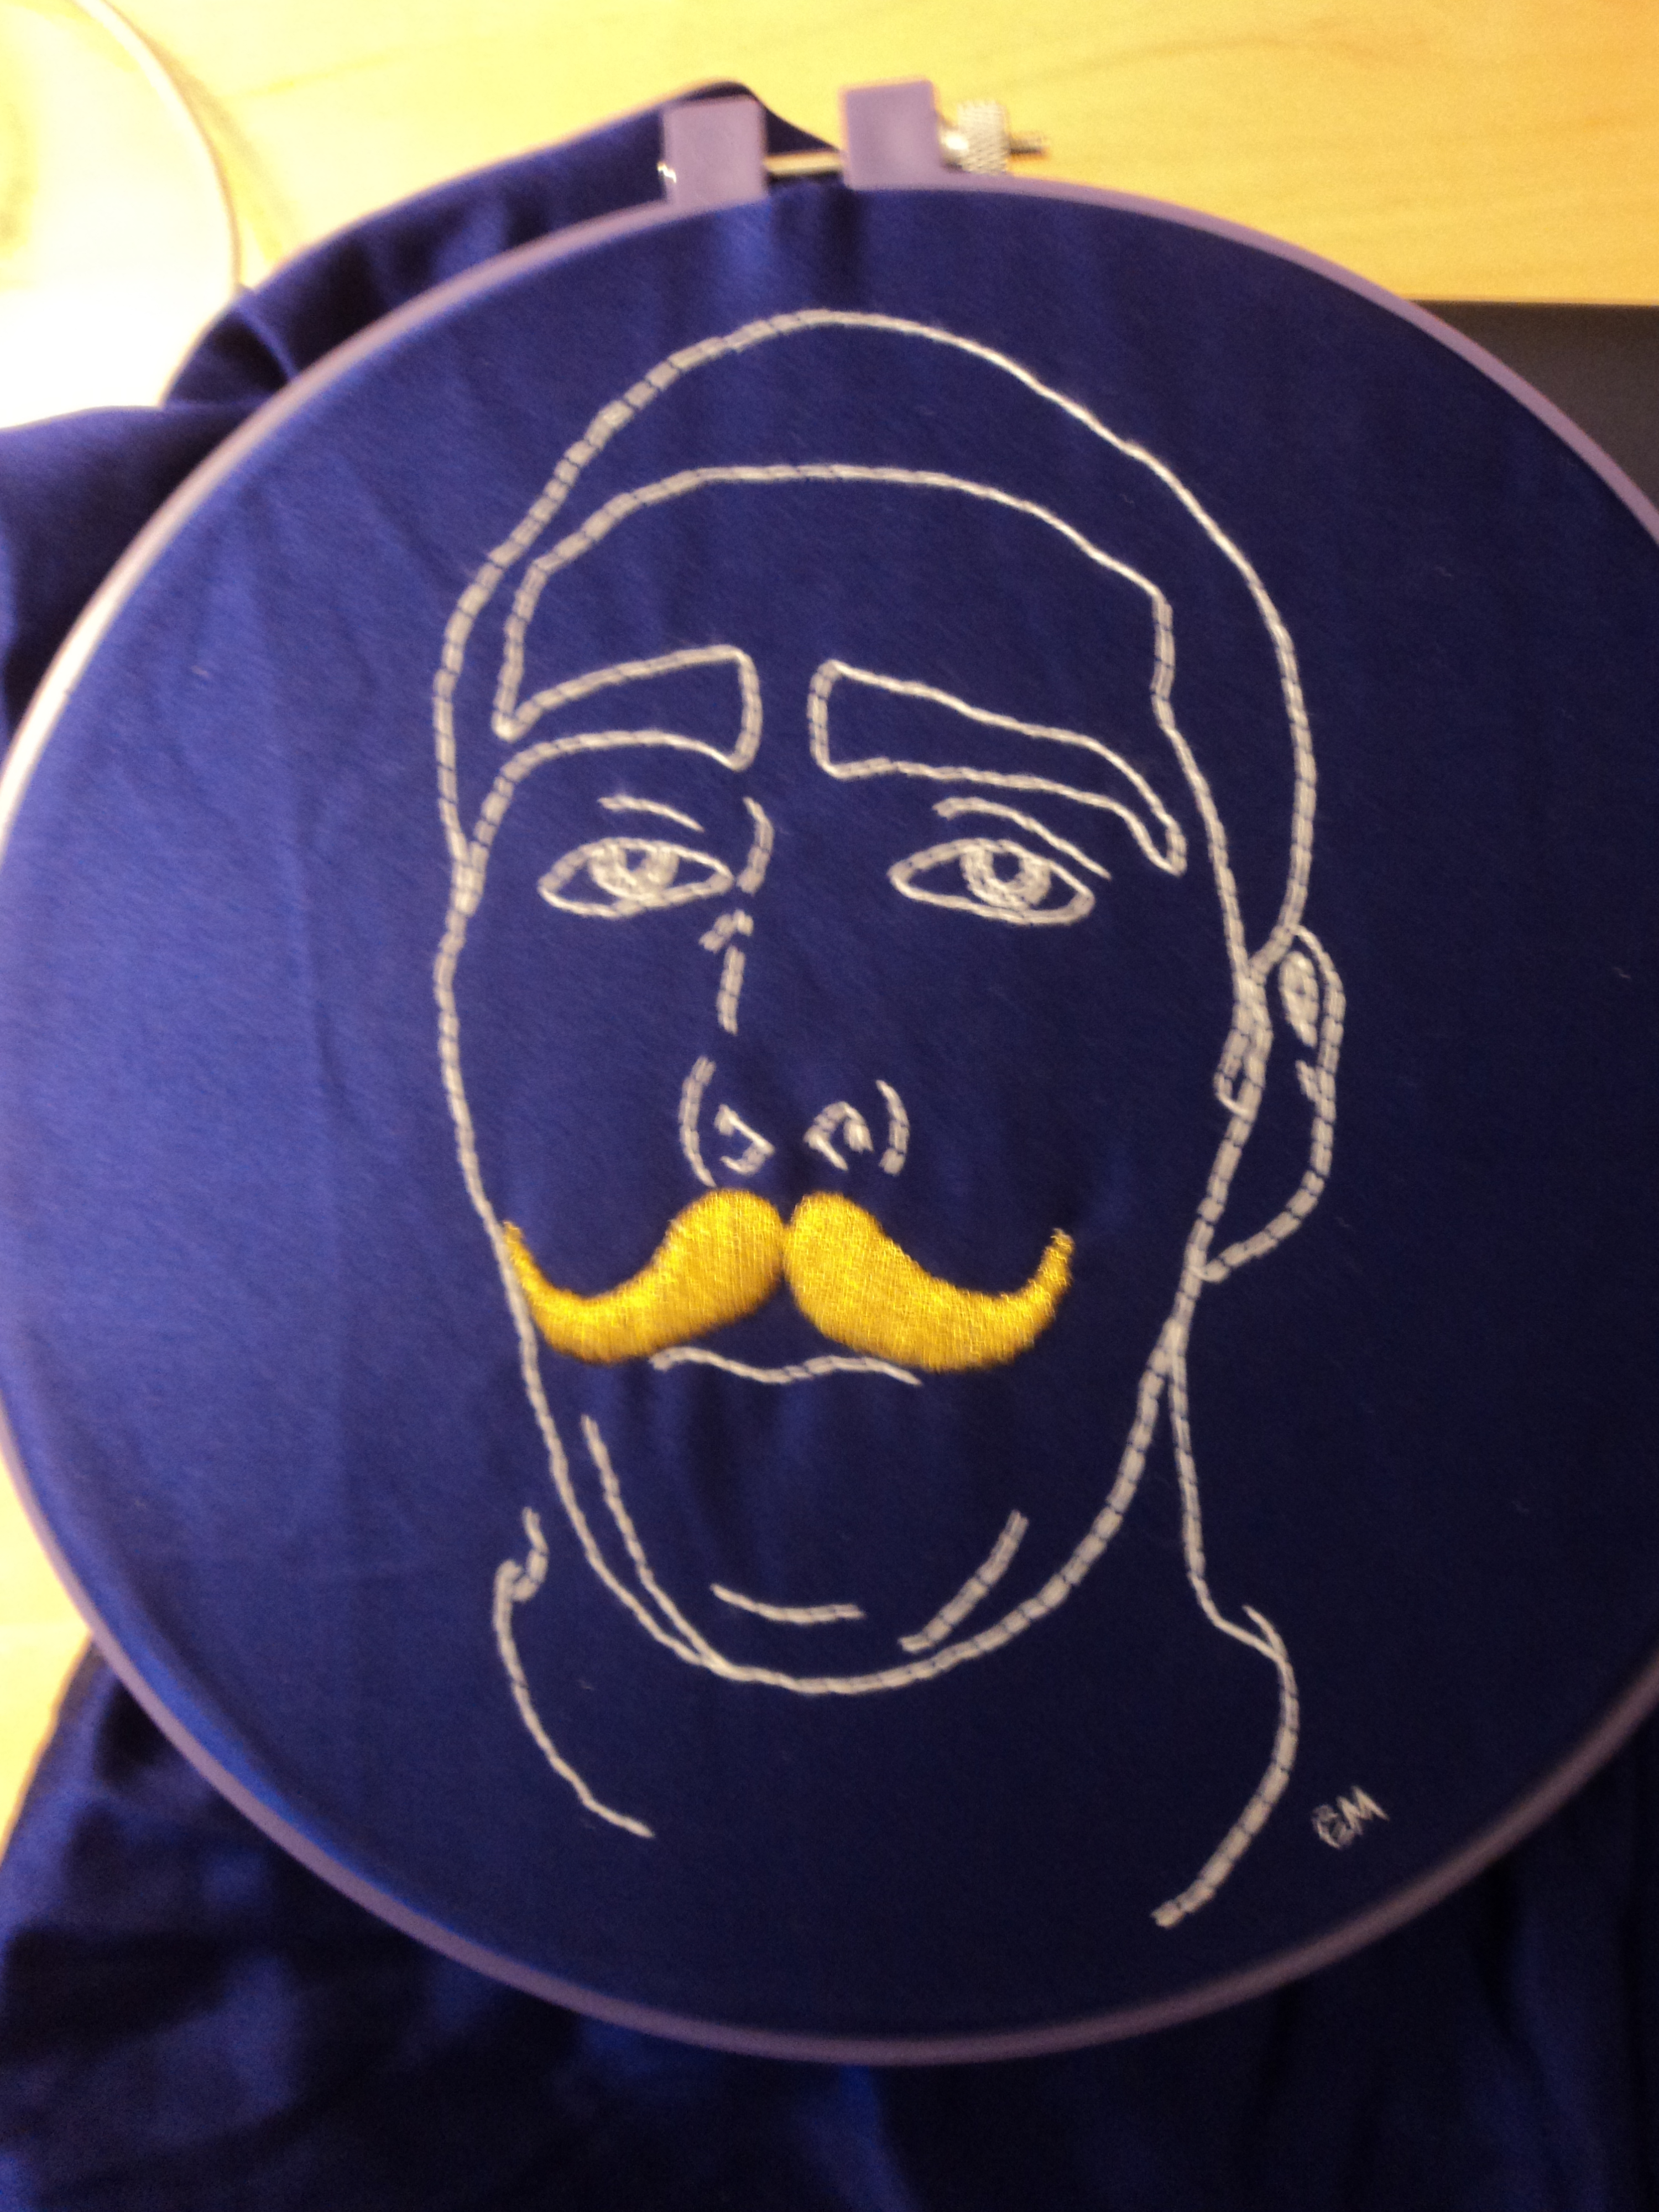
I used satin stitch to emphasize the mustache I had outlined in the pattern. I used metallic gold thread to make it especially awesome.
If you need a satin stitch tutorial, here's a good guide https://www.instructables.com/id/embroidery-how-to-satin-stitch/ I stitched outside the outline I created with the white stitches, but you can do it either way, of course, whichever you prefer.
If you need a satin stitch tutorial, here's a good guide https://www.instructables.com/id/embroidery-how-to-satin-stitch/ I stitched outside the outline I created with the white stitches, but you can do it either way, of course, whichever you prefer.
Finish!
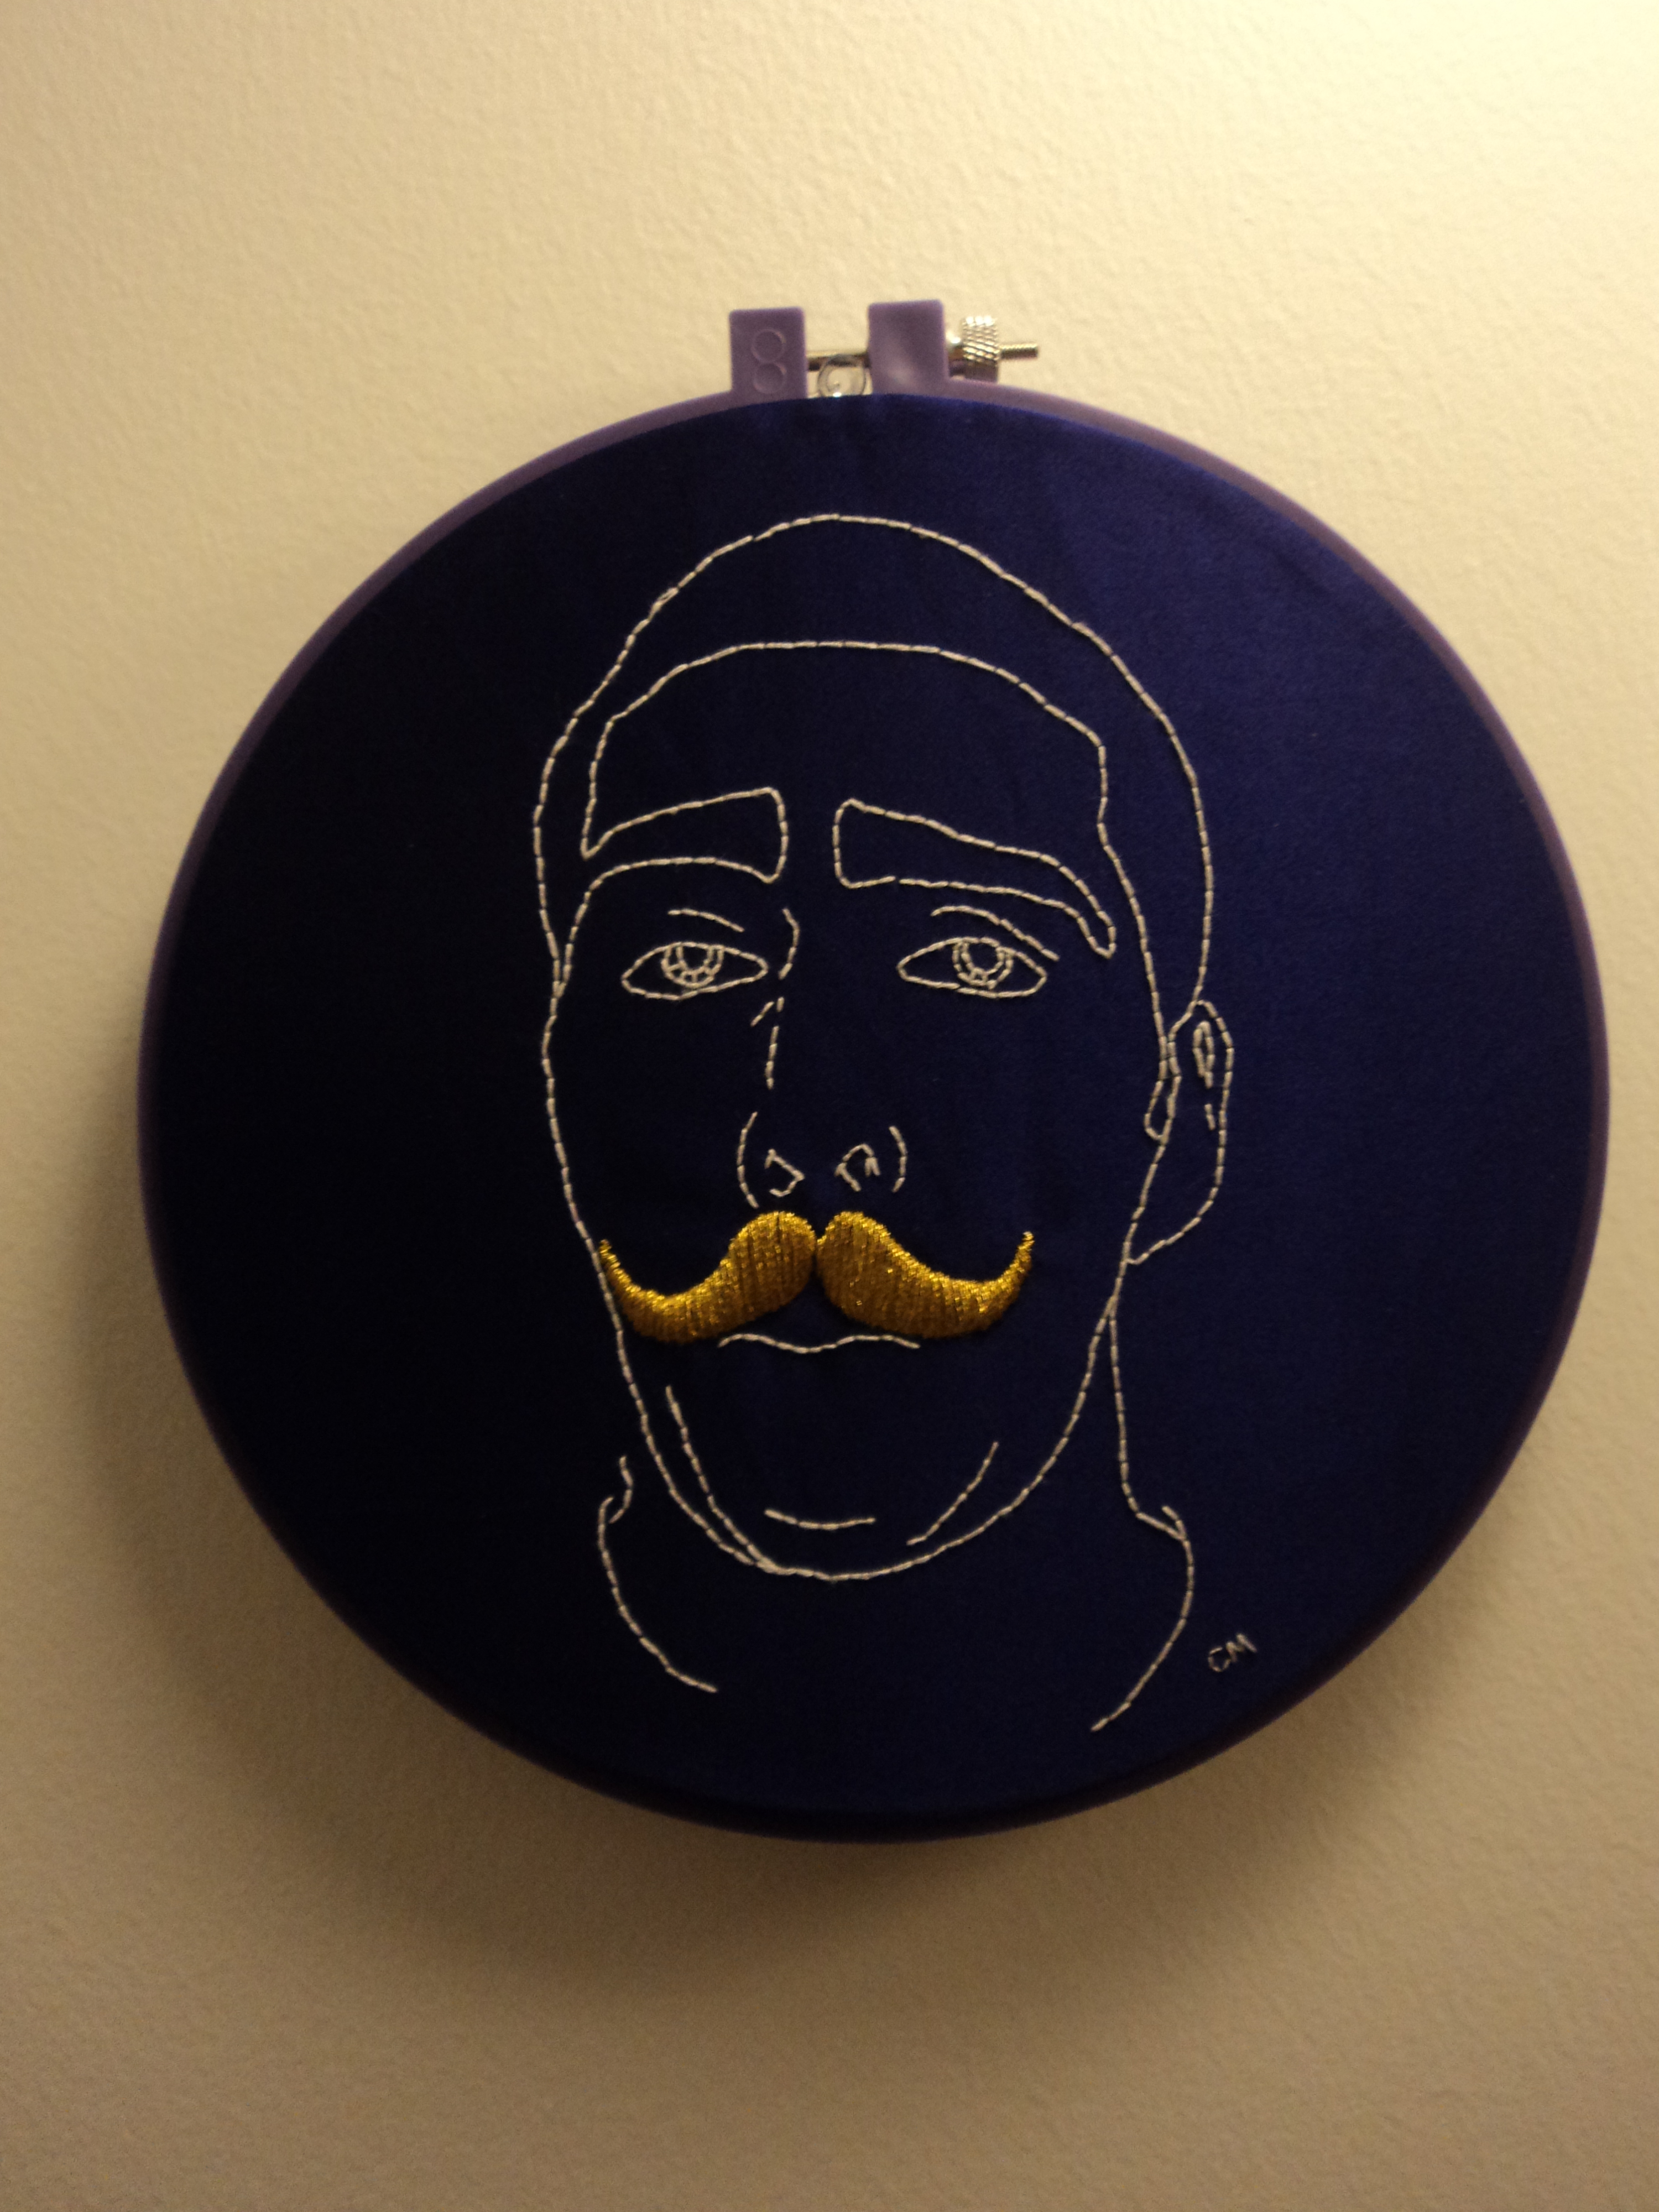

Finish your embroidery! I trimmed my fabric and gathered it with a running stitch to the back side of the embroidery hoop.
And you're done! Give it to your friend!
And you're done! Give it to your friend!