Turn Day to Night in Photoshop
by john_psddude in Design > Digital Graphics
23301 Views, 25 Favorites, 0 Comments
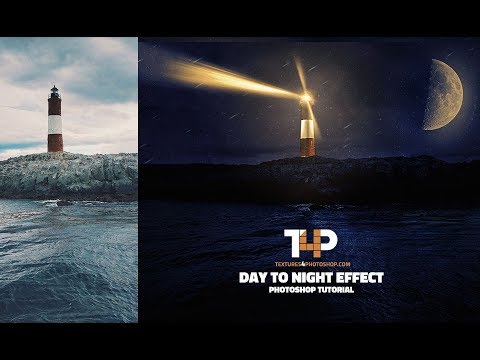
Turn Day to Night in Photoshop
![turn-day-to-night-photoshop[1].png](/proxy/?url=https://content.instructables.com/FGI/7U6X/JAIJIMUL/FGI7U6XJAIJIMUL.png&filename=turn-day-to-night-photoshop[1].png)
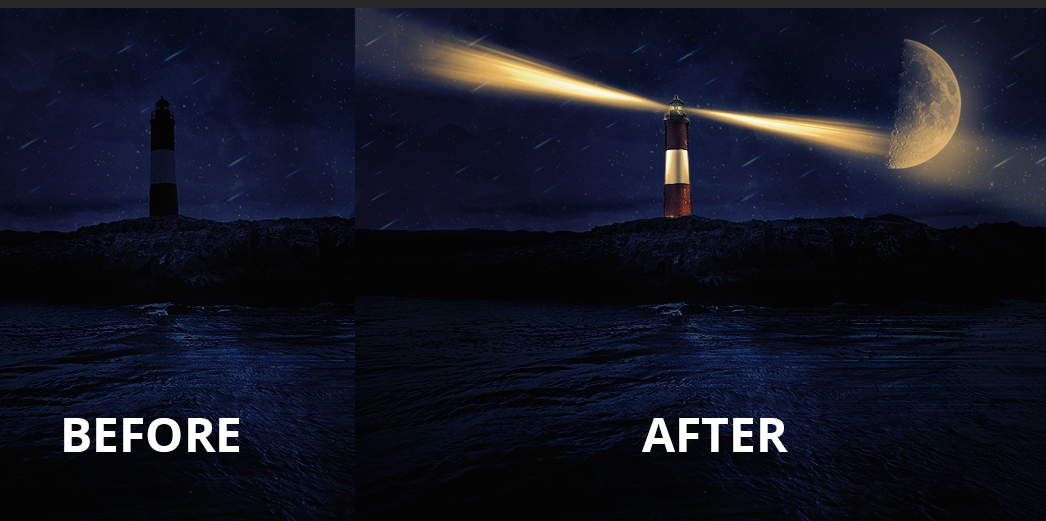
In this video tutorial I will show you how to turn day to night in Photoshop. I will use a moon image, galaxy and stars texture, falling comets and a light beam effect.
Images Used in This Tutorial

For this tutorial I will use this stock images and textures:
- Moon texture
- Stars texture
- Falling stars texture
- Light beam texture
- Light burst texture
- Silk texture (for water reflections)
- Lighthouse
Watch the tutorial:
Day to Night Effect
Import the daytime Lighthouse image.
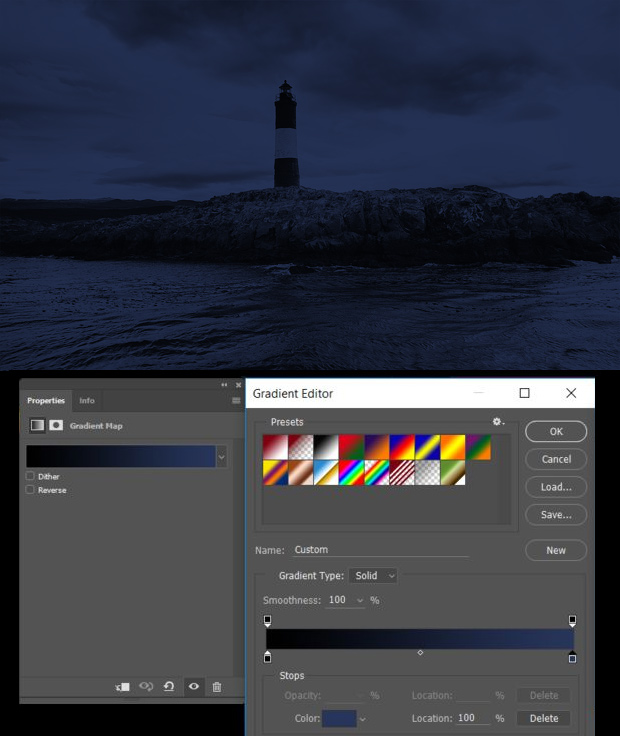
Add a Gradient Map to create the night effect. Simply go to Layer > New Adjustment Layer > Gradient Map...
In the Gradient Map settings choose a color ramp to go from black (#000000) to a dark blue (#27355b). Set the blending mode for this layer to Multiply.
Add the Moon
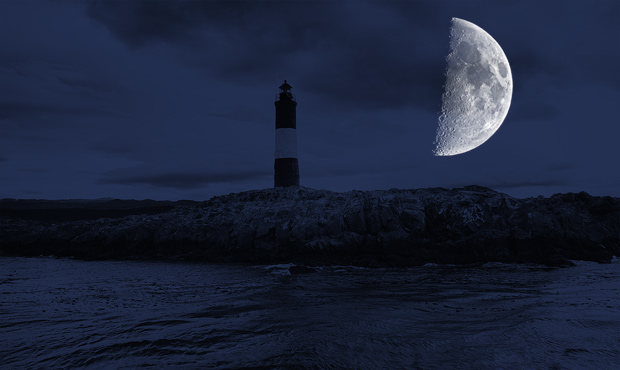
Import the texture for the Moon and place it in the scene. Switch the blending mode for the new layer to Screen and set the opacity to 75%.
Optionally you can paint the Moon disc for the dark side of the moon using a brush and a dark blue color. Do this in a layer below the Moon layer. Set the size of the brush approximately the size of the Moon and click once on it.
Also, you can add a glow to the Moon. Create a new layer on top of the moon and draw on the edge of the Moon using a soft brush and white. Switch the blending mode to Screen.
The Starry Sky

Import the Stars texture as a new layer. Set the blending mode to Screen and set the opacity to around 30%. Create a mask for this layer to show the texture only in the sky area.
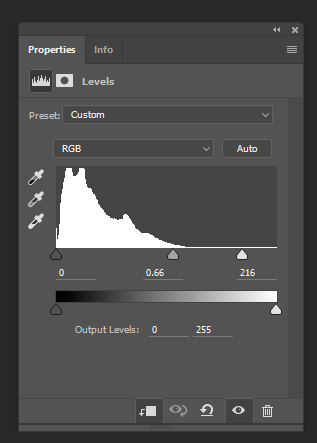
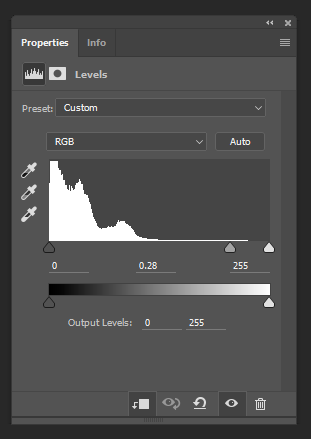
To make the stars brighter add a Levels adjustments layer. Drag the White Point marker to the left to around 200. Clip the effect to the layer below only and not the entire scene.
Falling Stars
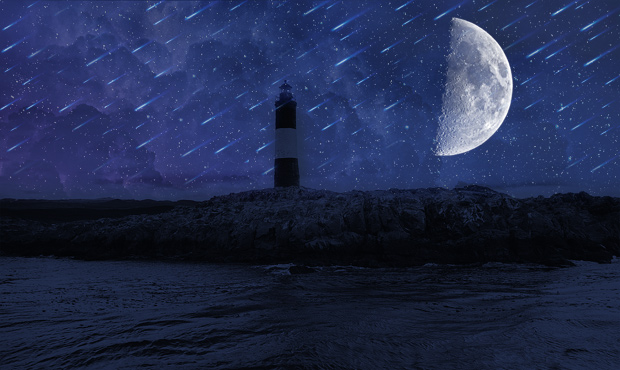
Import the Falling Stars texture in a group of its own. Use the same mask for the group as for the Stars texture layer. Use the Clone Stamp tool to duplicate the texture such that it covers the sky area.
Using a new Levels adjustments layer drag the Midpoint marker to around 0.28 to fade the glow of the falling stars. Also, clip the effect to the layer below only.
Water Highlights

Import the Silk texture in a new layer. Rotate and stretch it over the water area. Switch the blending mode to Color Dodge and lower the opacity to 50%.
You can use a mask on this layer to smoothen the result. To decrease the intensity add a new Levels adjustments layer and drag the Midpoint marker to around 0.76 clipping the effect to the layer below only.
Darken the Scene
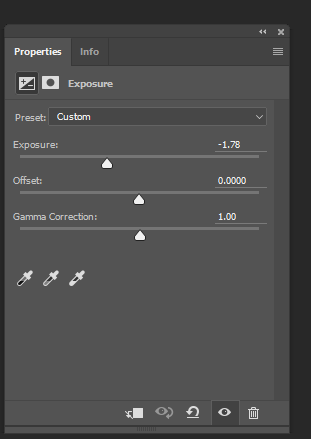
To darken the scene further add a new Exposure adjustment layer and decrease the exposure to -1.78. Using a mask on this layer, exclude the areas that should be brighter like the light house, the rocks near it and some areas on the water.
Light Around the Lighthouse
To brighten the lighthouse first make a copy of the original Lighthouse image. Then create a mask to only show the lighthouse. Add a Hue/Saturation adjustment layer to increase the saturation of the Lighthouse layer to around 75. This will give the impression that a hard yellow light shines on it.
Create the light beams of the lighthouse by first importing the Light Beam texture. Set the blending mode to Screen. Use Filter > Blur > Motion Blur to make the beams more faded. You can also decrease the saturation a bit using a Hue/Saturation adjustment layer.
To create the beams glow, create simple triangles starting at the center of the lighthouse. Fill these triangles with white. Switch the blending mode to Soft Light. Then use Filter > Blur > Gaussian Blur with a setting of around 20px.
You can see the lighthouse before and after adding the light beams.
Extra Light Beams

Duplicate the two light beams just created. Make them smaller, rotate them and switch the blending mode to Screen.
Import the Light Burst texture and switch the blending mode also to Screen. Apply Filter > Blur > Gaussian blur of about 5px. Place the Light Burst right in the center of the lighthouse.
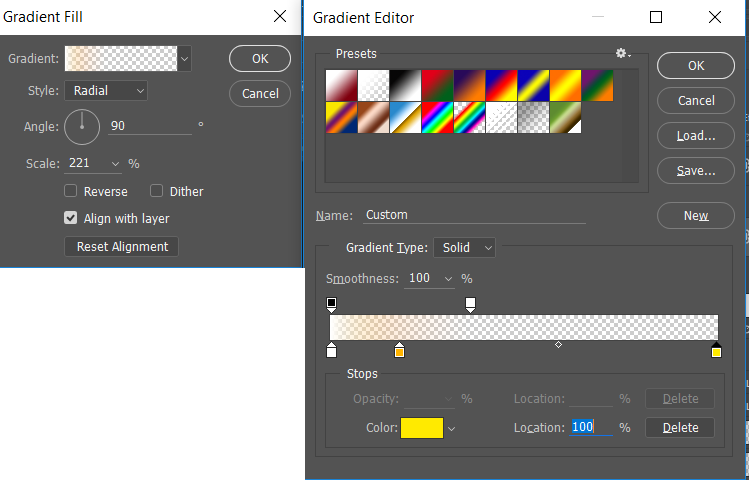
To add a circle of glowing light around the lighthouse add a radial gradient using Layer > New Fill Layer > Gradient... Switch the blending mode to Screen.
Use 3 stops for the color: white, orange (#ffb400) and yellow (#ffea00). Make the gradient go from full opacity to 0 opacity.
You can see the result without and with the extra light beams.
Finishing Touches
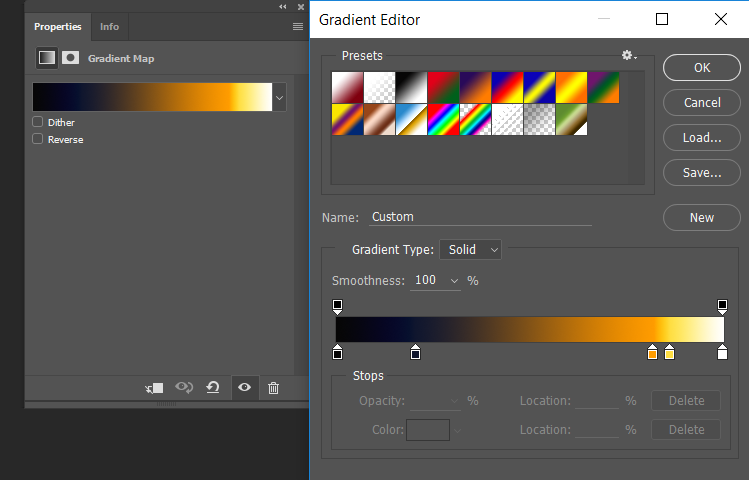
To give the resulting image a more consistent look apply a Gradient Map adjustment layer. This affects the colors in the scene according to their luminance from black to white.
For this day to night transformation we will apply a Gradient Map with these colors: near black (#070606), dark blue (#0f162e), orange (#ff9c00), yellow (#ffde42) and white.
The final result is a fully transformed day to night scene.
You can watch the full video tutorial here: