Turing 2D Sketches to Realistic 3D Objects!
by Maker Dad DIY in Design > Art
1241 Views, 22 Favorites, 0 Comments
Turing 2D Sketches to Realistic 3D Objects!
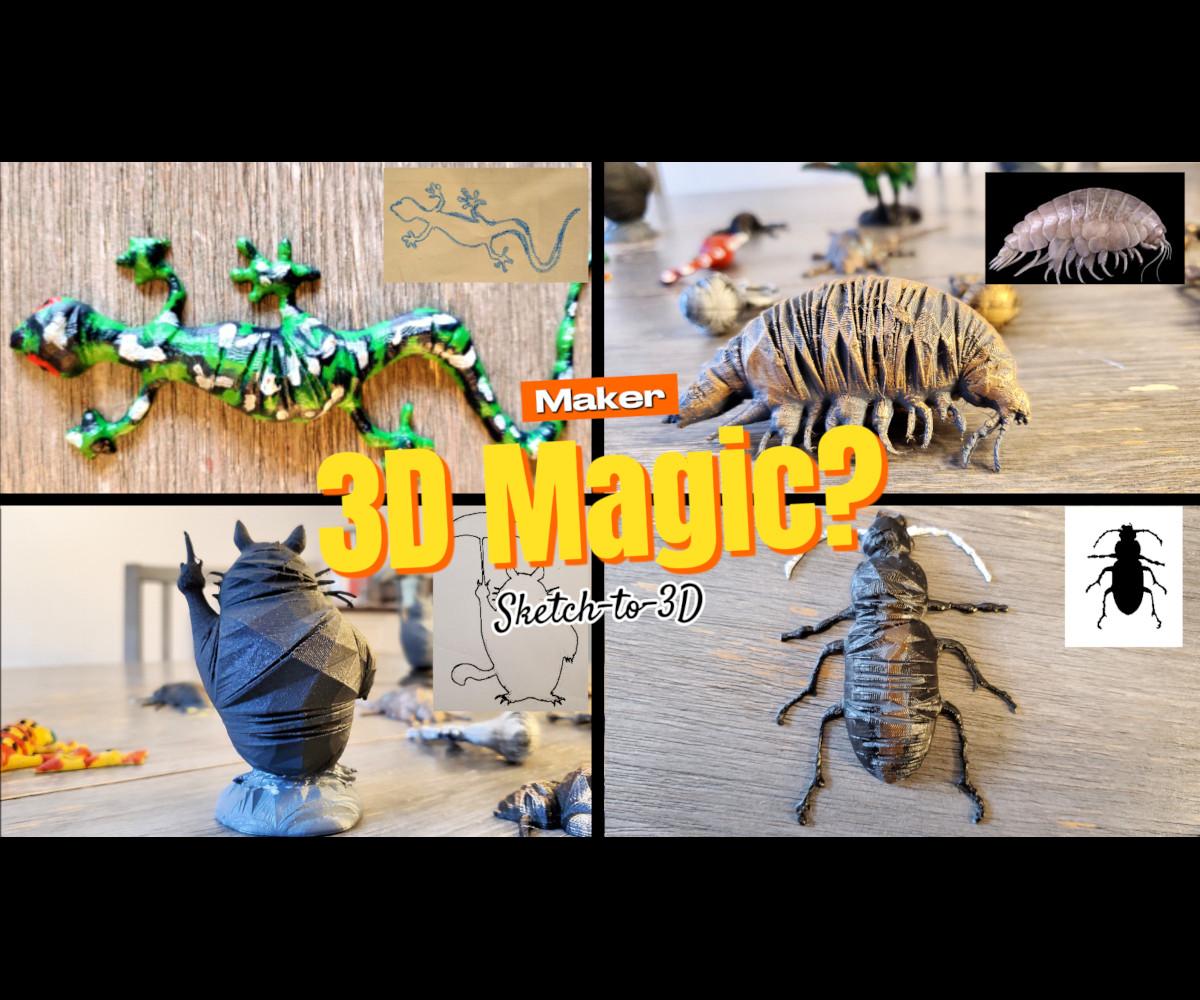
Have you ever wanted to preserve your kid’s drawings or sketches in a more creative and tangible way? Instead of just framing it and hanging it on the wall, what if you could turn it into a real 3D object? Well, you can! In this guide, I’m going to show you how to transform a simple 2D sketch into a realistic 3D model.
By the way, besides this guide, I highly encourage you to watch the video above as well, because there are a lot of details I didn't put in this guide.
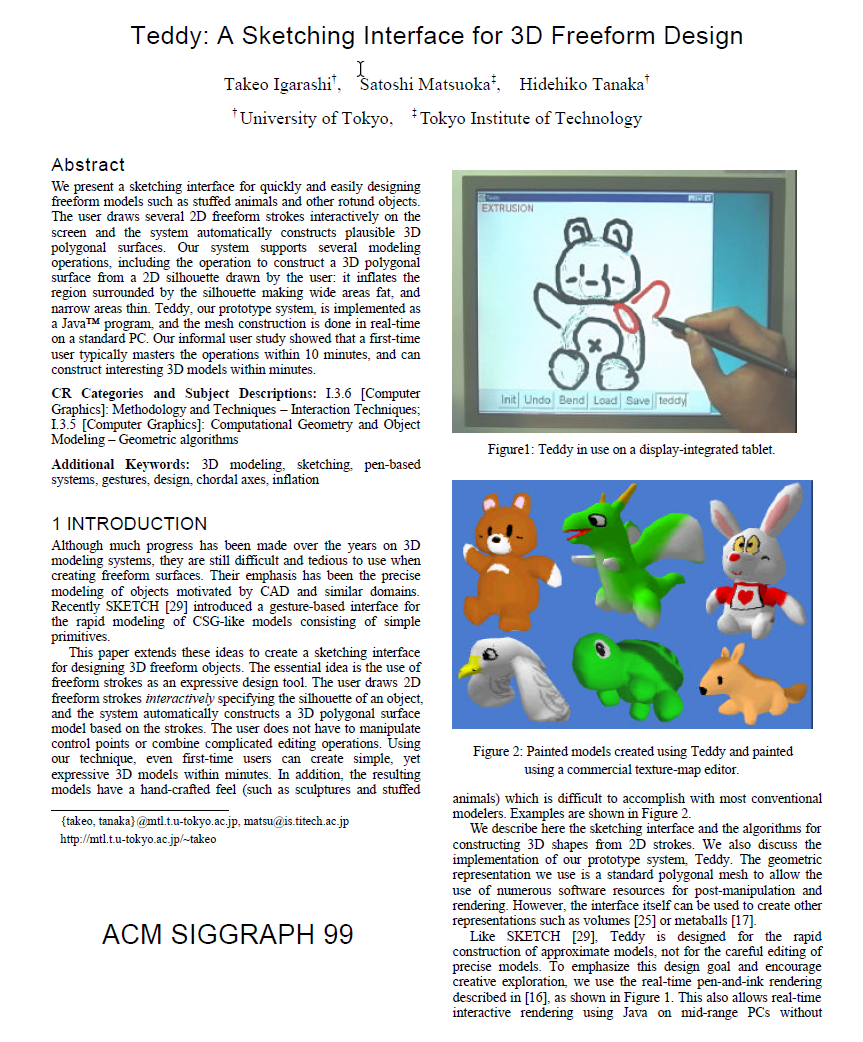
This concept isn't brand new—it was first proposed over 20 years ago by Dr. Takeo Igarashi in his groundbreaking paper titled 'Teddy: A Sketching Interface for 3D Freeform Design.' He introduced an ingenious way to create 3D models from hand-drawn sketches using just a few simple strokes.
When I first came across this technique several years ago, I was blown away. So much so that I decided to implement my own version. I wrote the code in MATLAB and shared it on GitHub.
In this guide, I’ll walk you through how to use my software to bring your 2D sketches to life as real 3D objects.
This guide contains 5 main sections:
- Algorithm Theory
- Downloading and Running the Software
- Using the Software
- Discussion
- Results Showcase
Supplies
Tool & Materials
- 3D Printer: if you like to print out the resulting 3D models
- Magnet: if you like the 3d print to be attached to the refrigerator
- Super glue: for gluing 2 cut-half models. To be explained.
- Black primer: applying the primer before painting the 3D models
- Acrylic Paint: if you like to paint the 3D prints
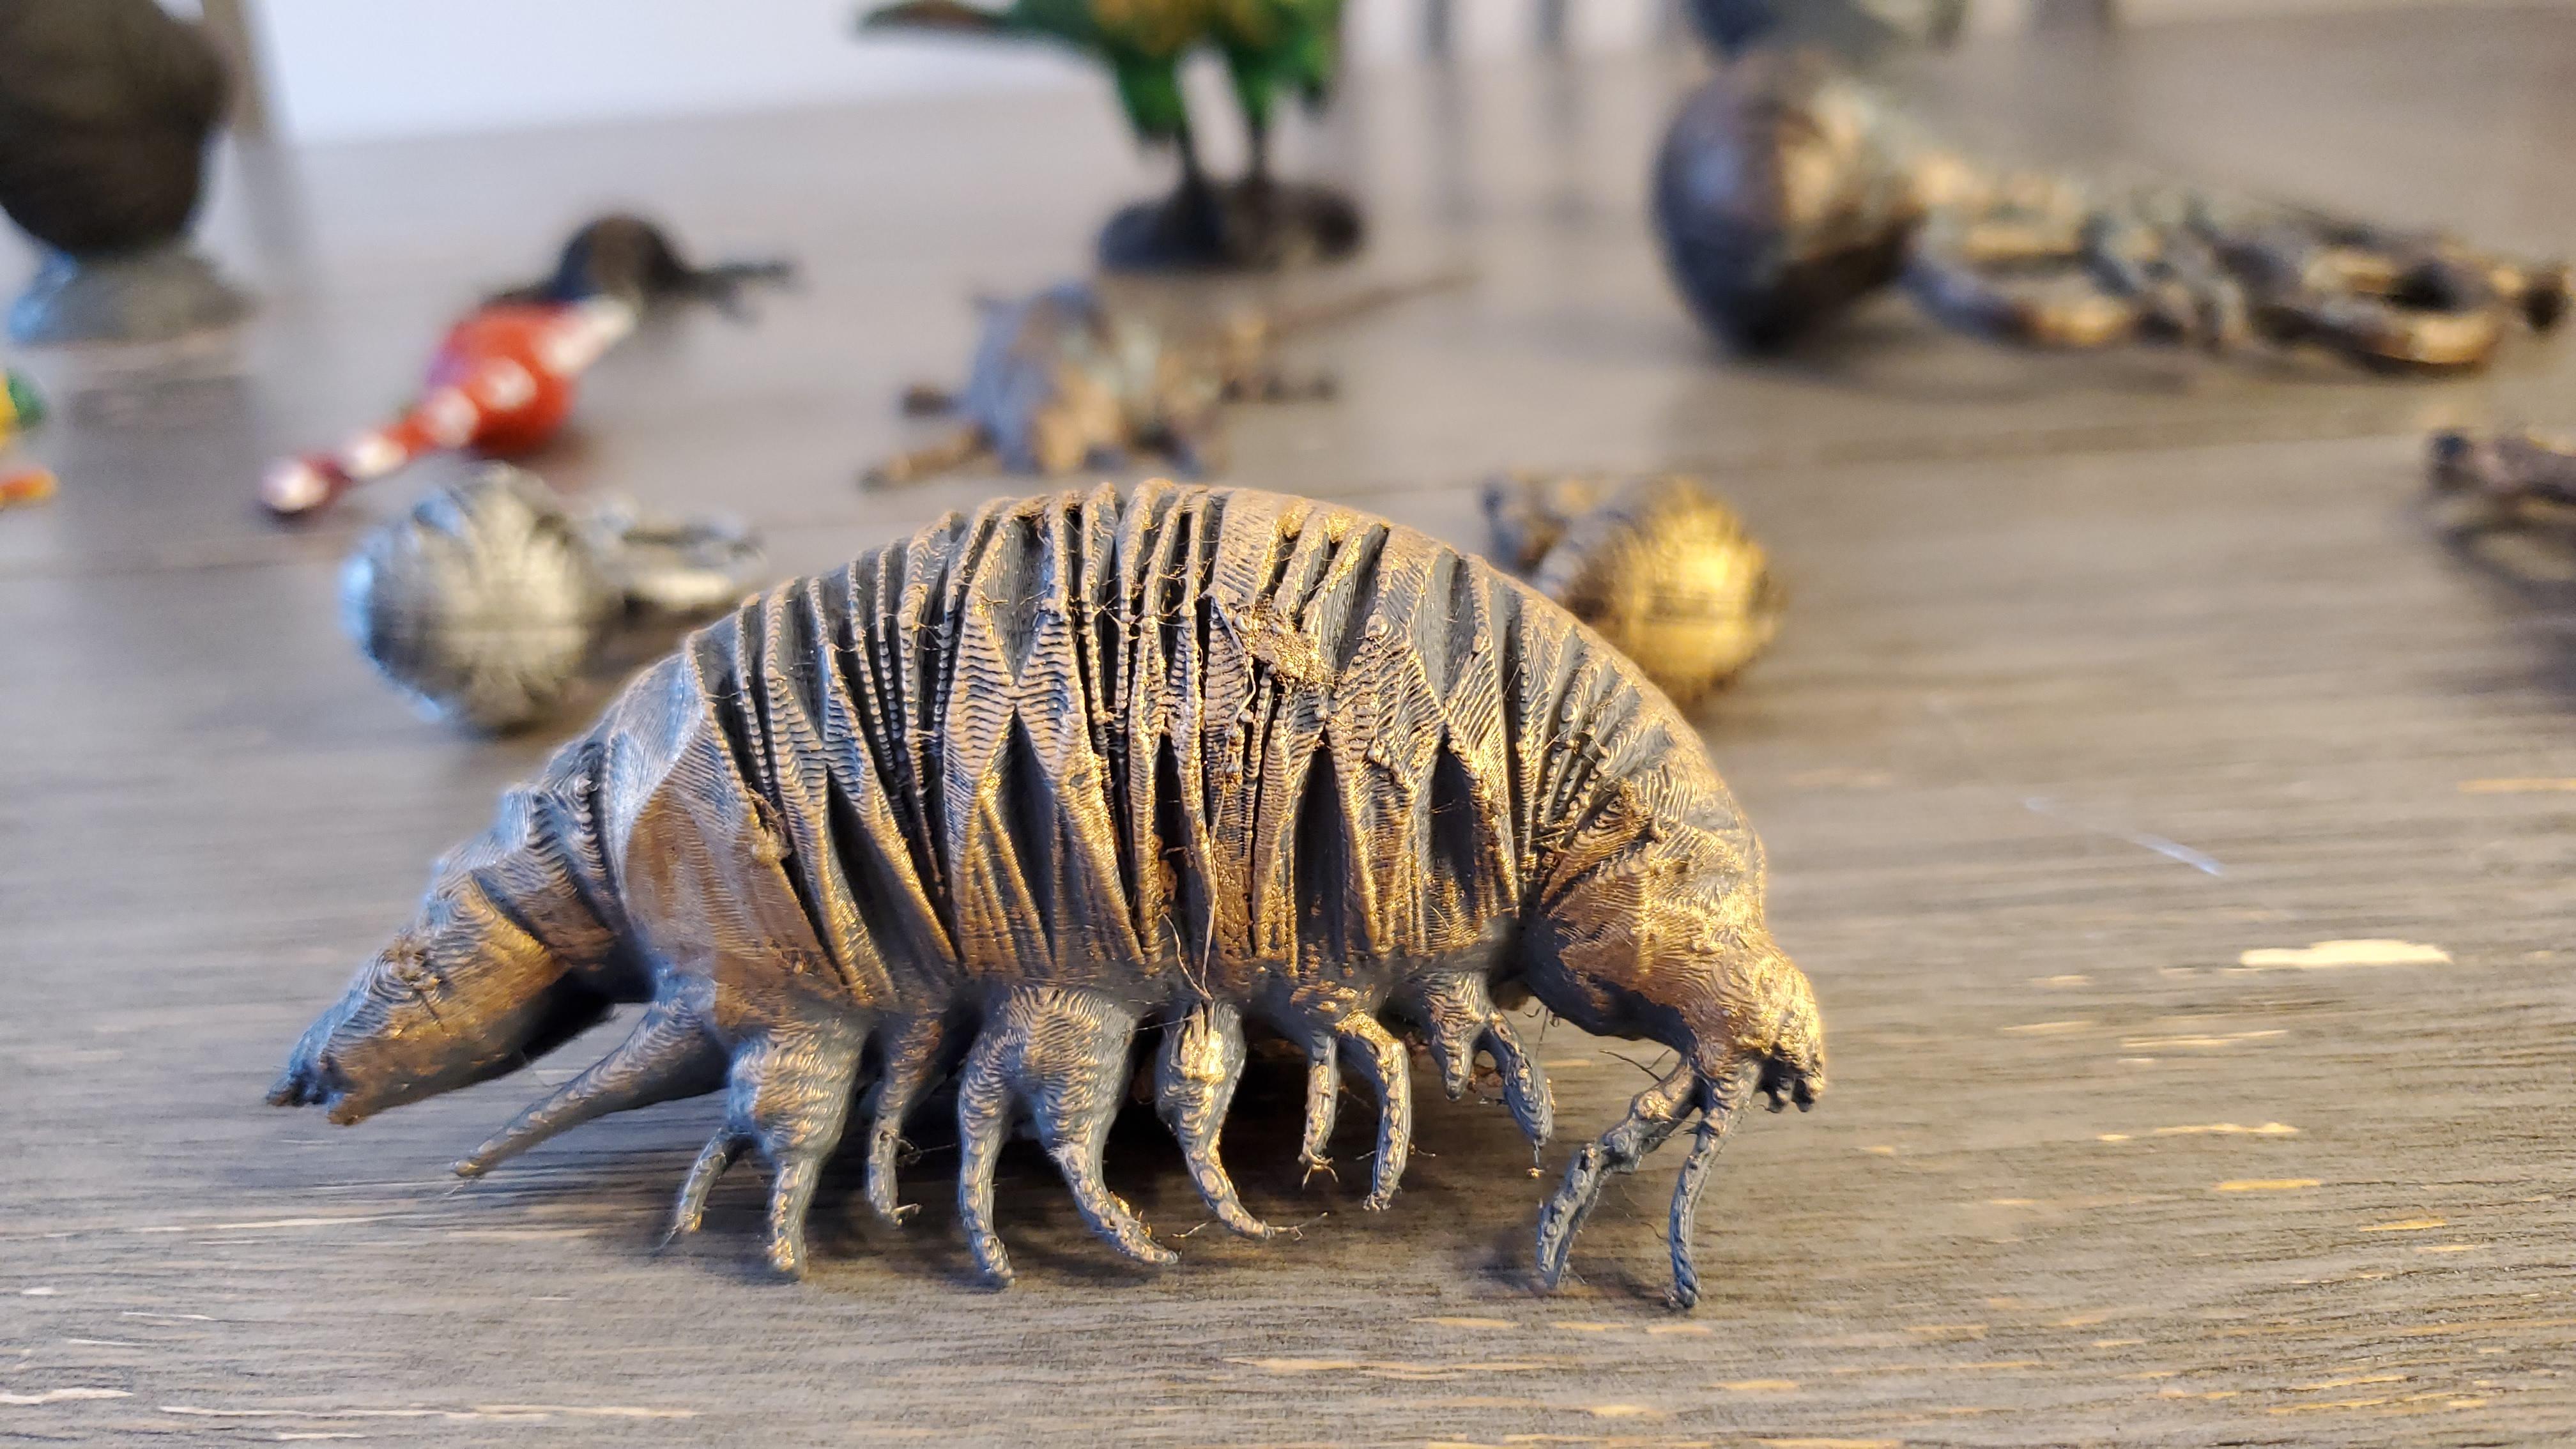
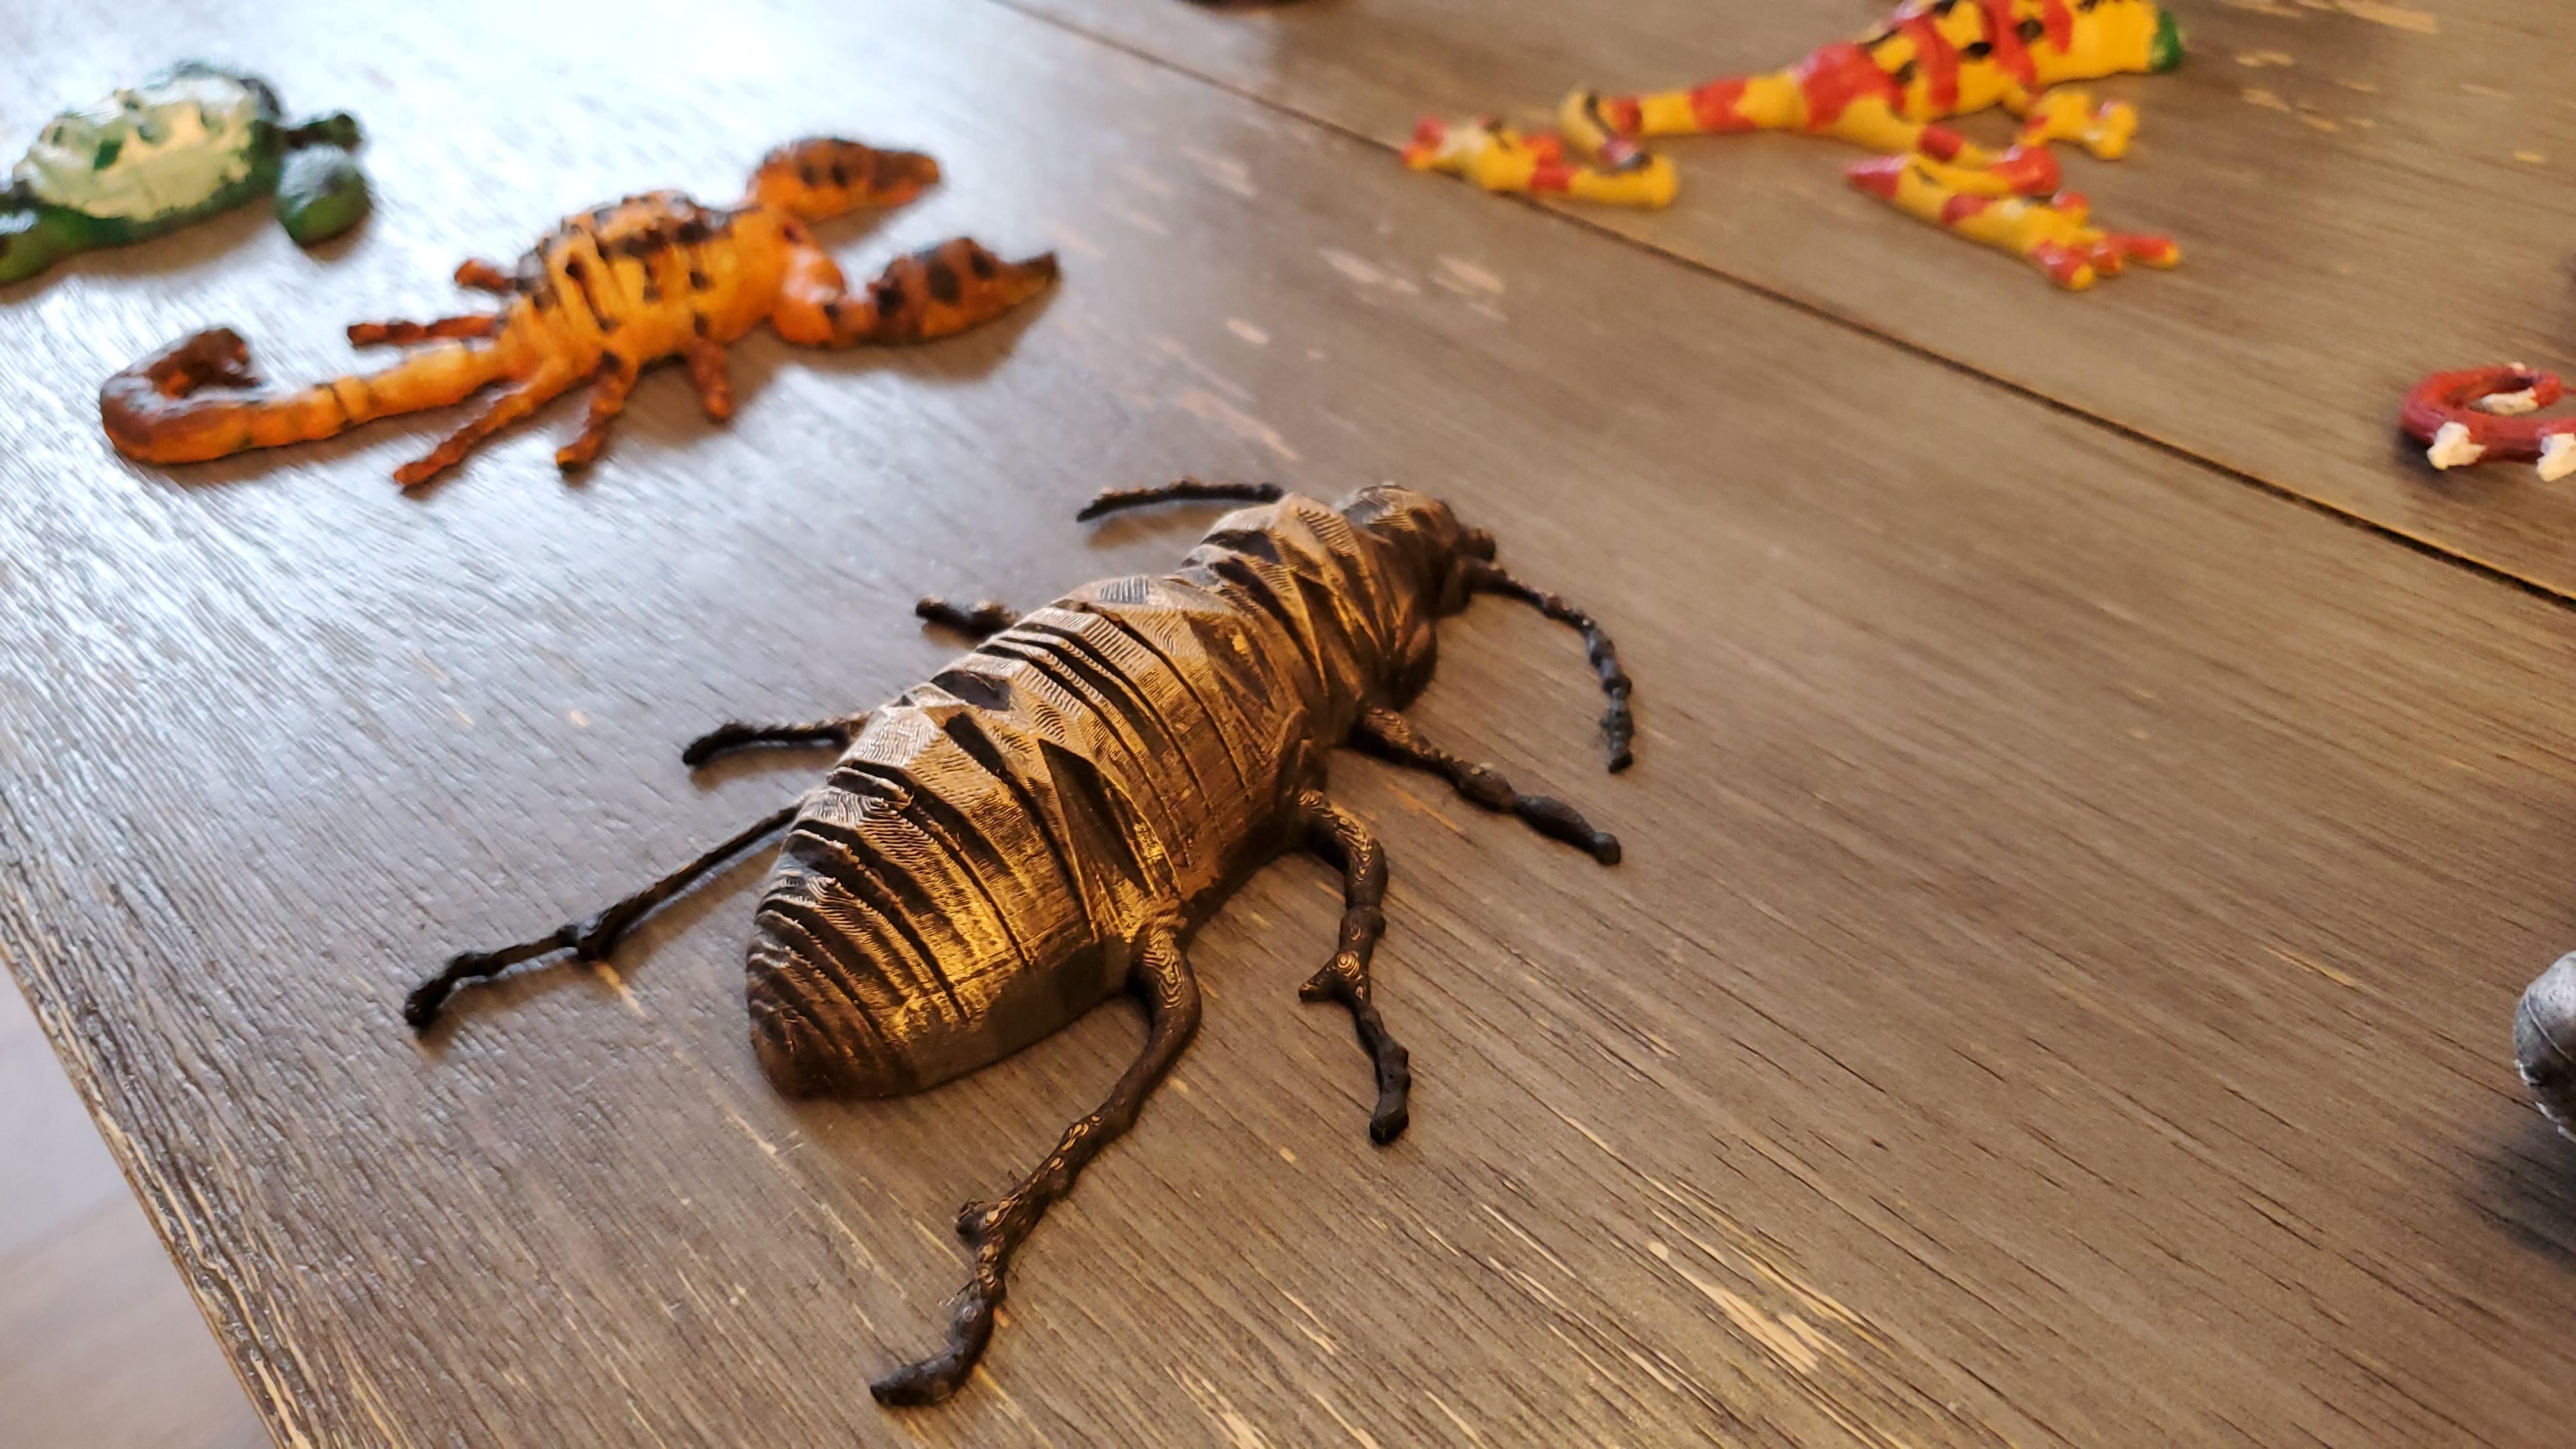
- Metal Effects Bronze Paint: very fancy metal effects!!
- Rub n Buff Wax Metallic Finish: very fancy metal effects!!
Algorithm Theory
Below let me explain the algorithm for the contour inflation to convert a 2D closed shape into 3D model. If you are not interested in the algorithm or the theory, feel free to jump to the “downloading and using the software” step.
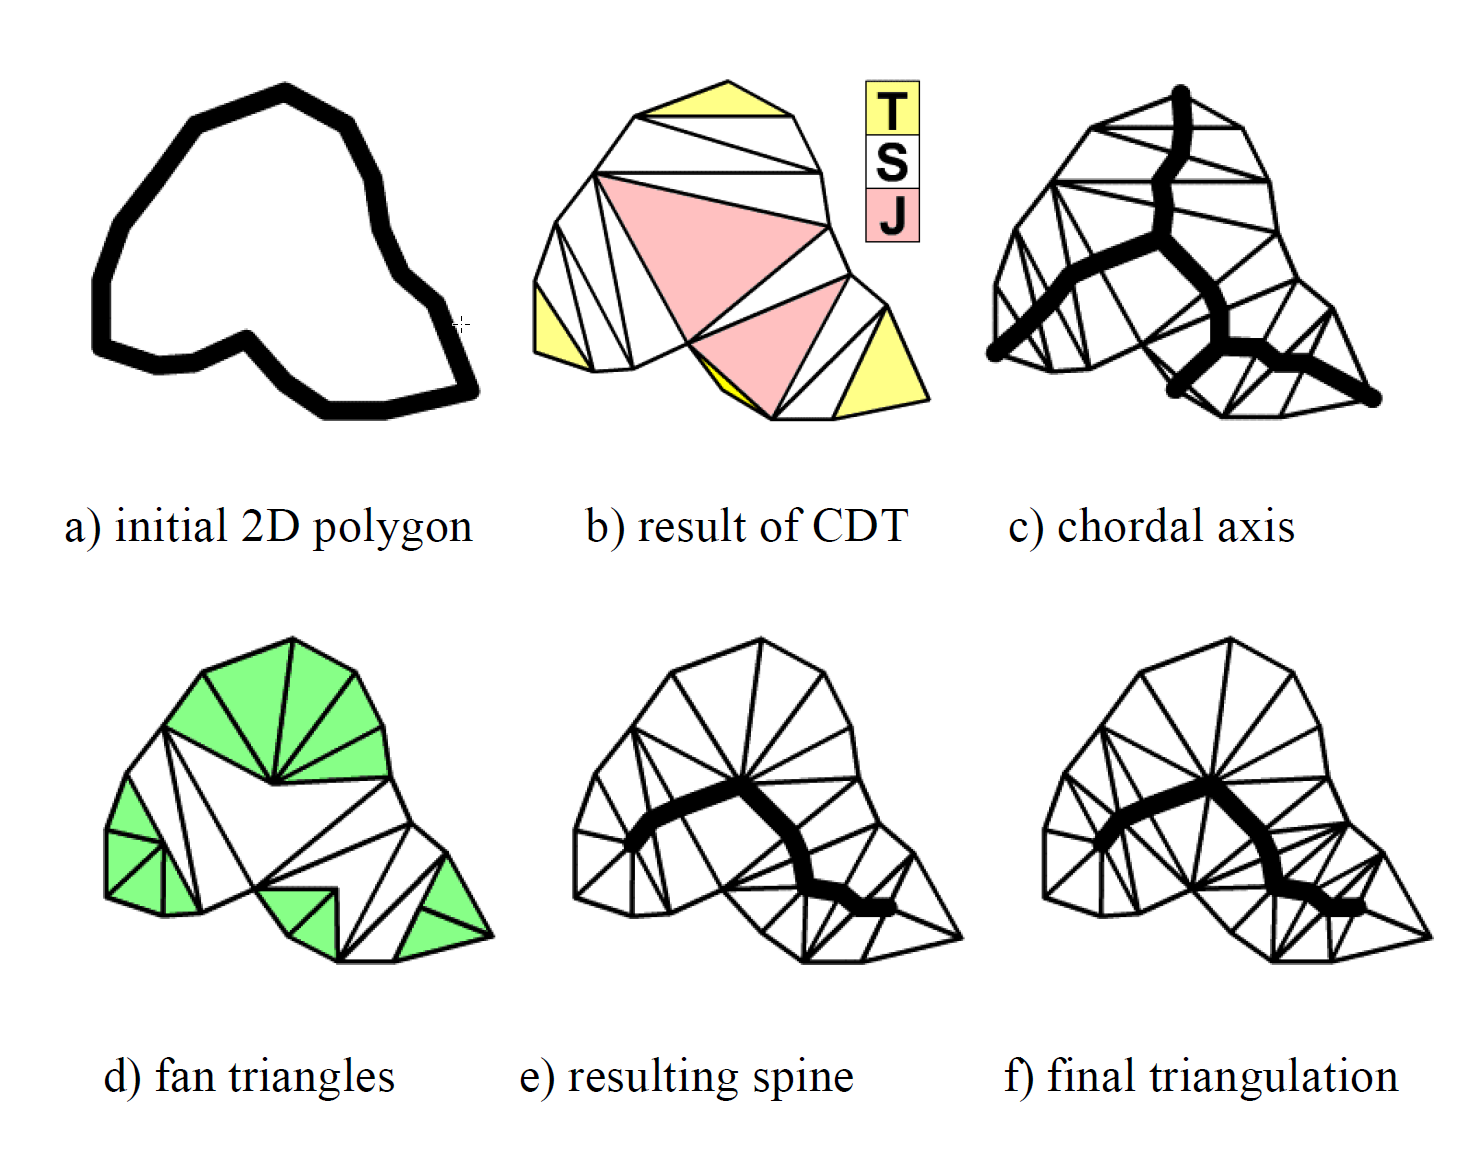
Algorithm
Conceptually,
1. it first triangles the contour by Delaunay Triangulation,
2. then it constructs the skeleton” (or chordal axis)
3. then modifying the triangulation into a fan-like structure. This leads to the "spine" of the shape and the final triangulation.
Using this final triangulation, the algorithm elevates the spine based on a height proportional to the distance from the contour.
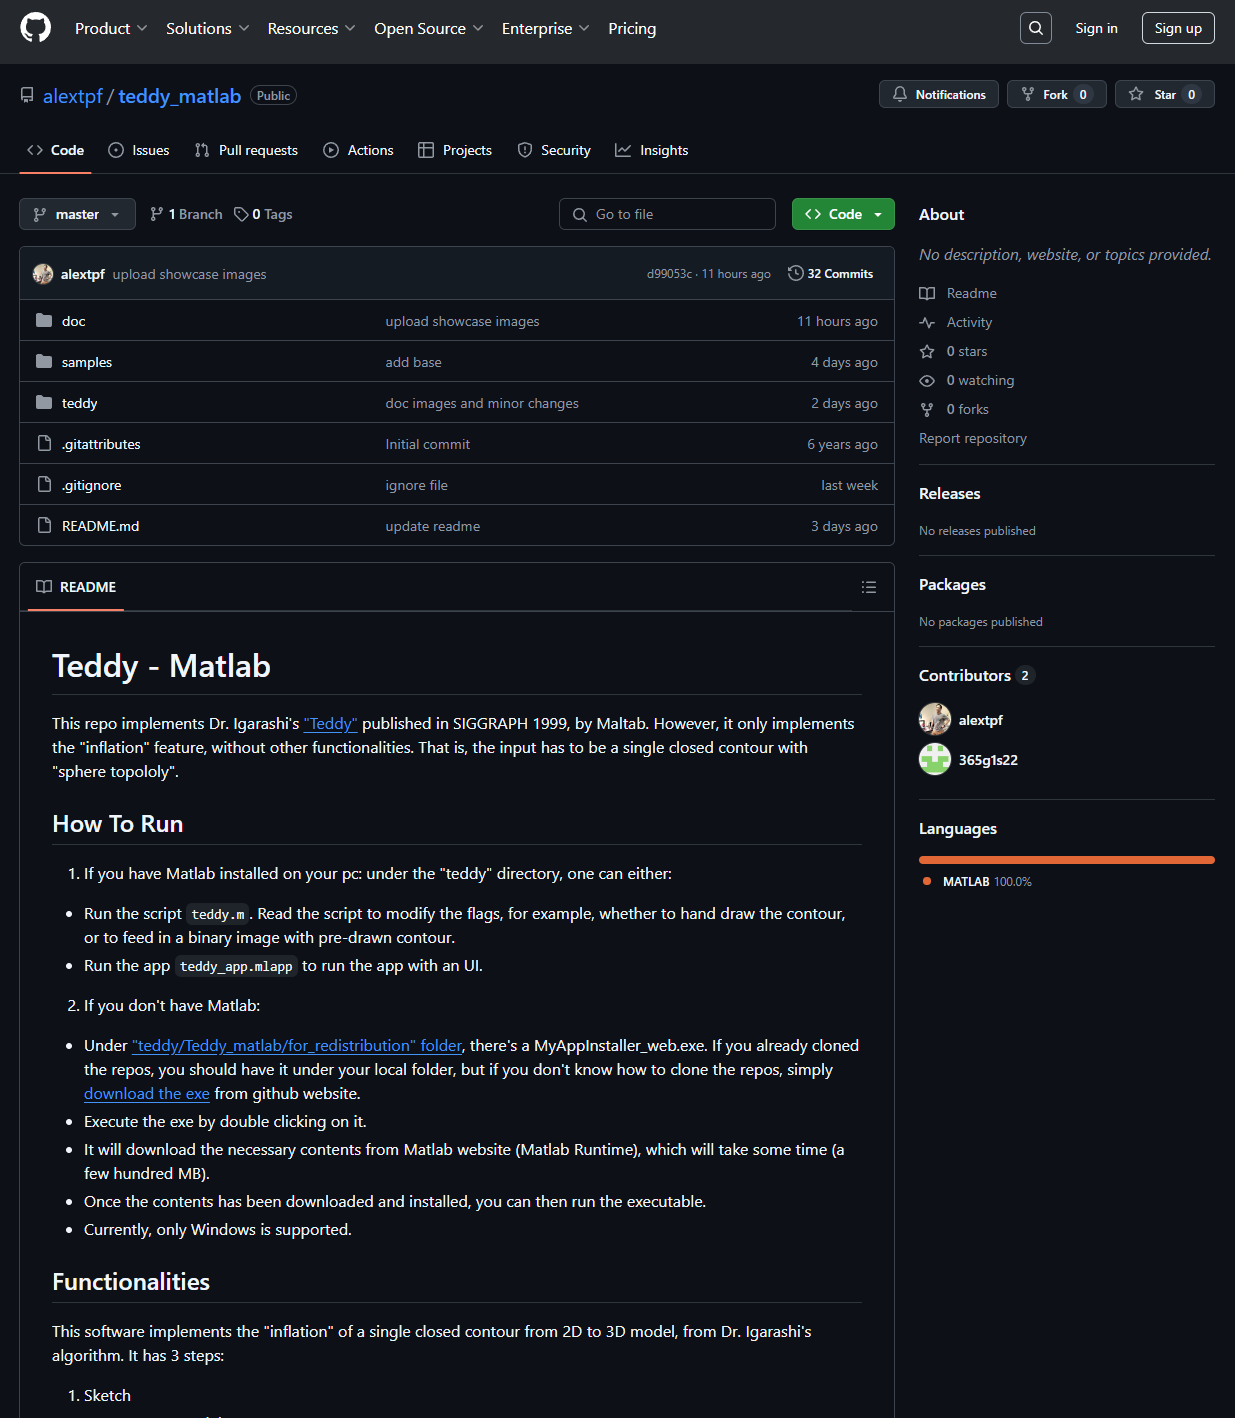
Downloading and Running the Software
Please also refer to this section of the video for detailed steps in action.
1. head to my Github repo "Teddy Matlab"
2. clone the repo to your local machine, by either
a. git clone (if you are an experienced Github user):
b. or, simply click on "code -> download zip file", and then unzip the file to your local machine.
3.
a. if you are an experienced Matlab user and have Matlab installed on your machine, simply execute the file by double-clicking this file:
b. otherwise, execute by double-clicking the *.exe:
This will then install "Matlab Runtime" (~500 MB, so it takes a long time) on your machine and the Teddy Matlab application. Just follow the prompt in the textbox and click "next" and "yes" until installation is finished.
Once it's finished, go to your installation folder, and execute the file:
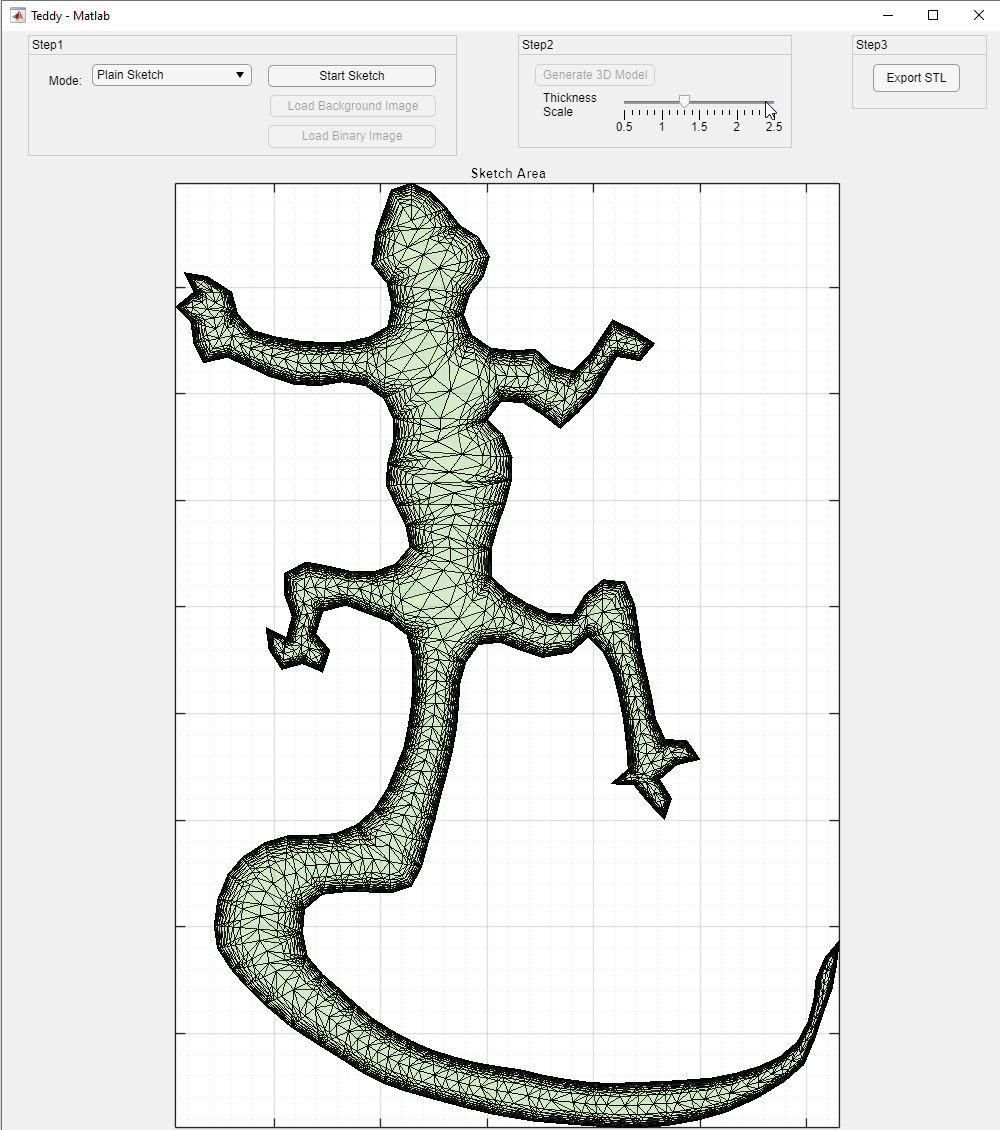
If you see the app interface like below, you've successfully started the app!
Using the Software
Please also refer to this section of the video to see the live demo in action.
This software has 3 steps:
1. Sketch
2. Generate 3D model
3. Export *.stl (for 3D print)
and let me describe each in turn.
Sketch
The sketch step has 3 modes:
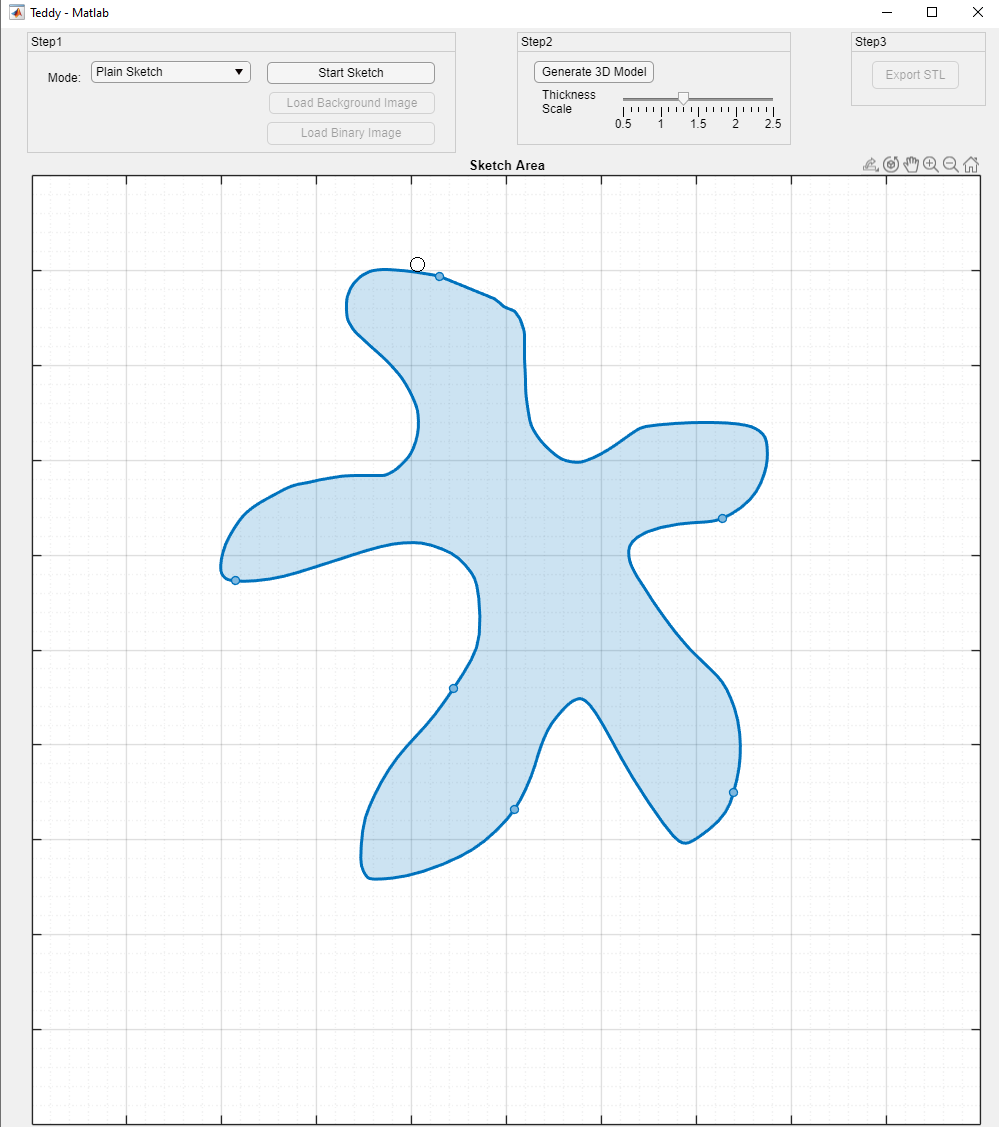
1. Plain sketch:
- it allows the user to draw a closed contour on a blank canvas freely.
- The user can press the left mouse button, and move the mouse, and the program will trace and draw the path the mouse undergoes.
- Once the left mouse button is released, it automatically closes the contour by connecting the last point before the button is released and the initial point.
- Once the contour is drawn, several "waypoints" are automatically generated. The user may manually drag and move those waypoints to change the shape of the contour. The user may as well add extra waypoints by right-clicking when the cursor is on the contour.
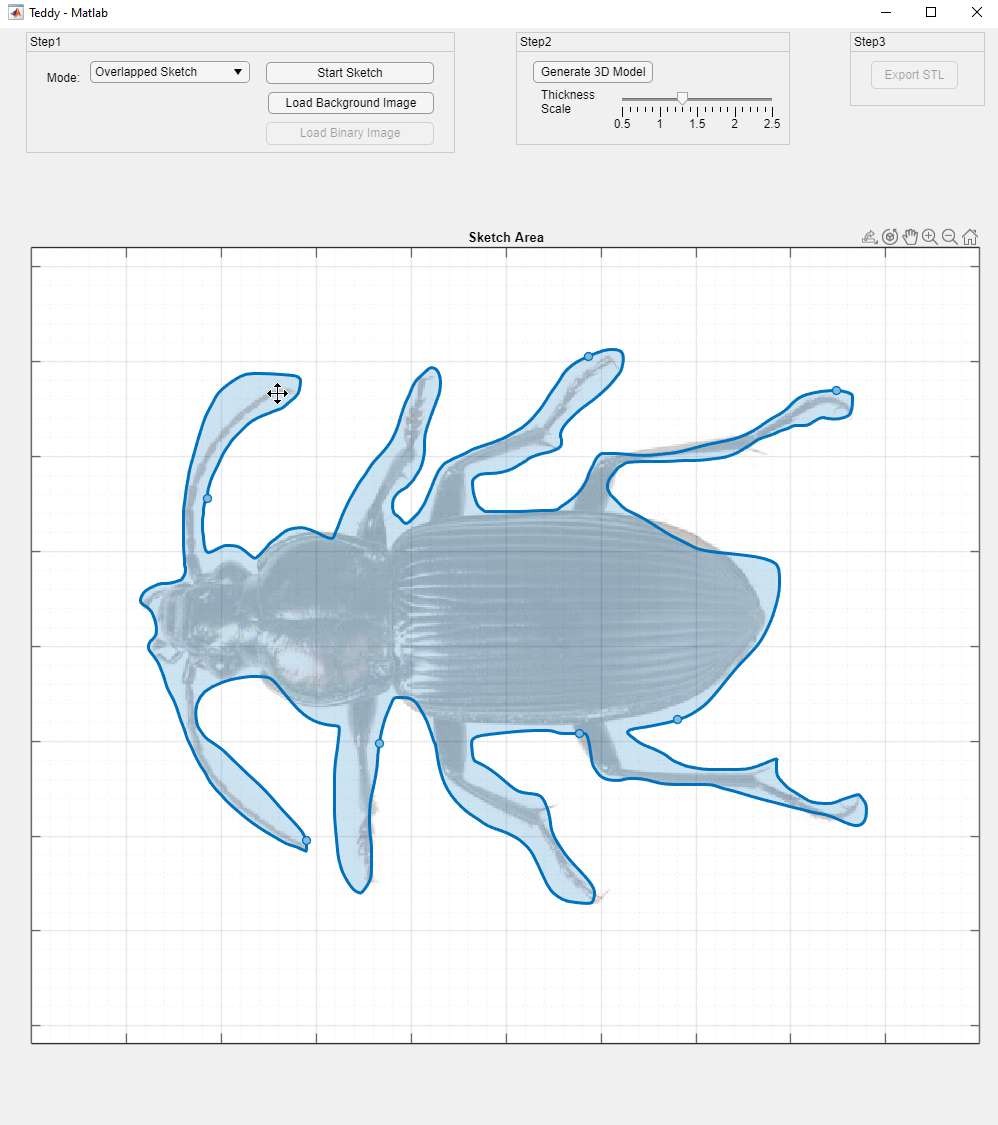
2. Load an overlay image and sketch:
- The user can choose to load an image as the background, and then sketch on top of the background image. The sketch process is the same as the "Plain sketch" mode, and the background image assists the user in tracing the feature/outline of the image.
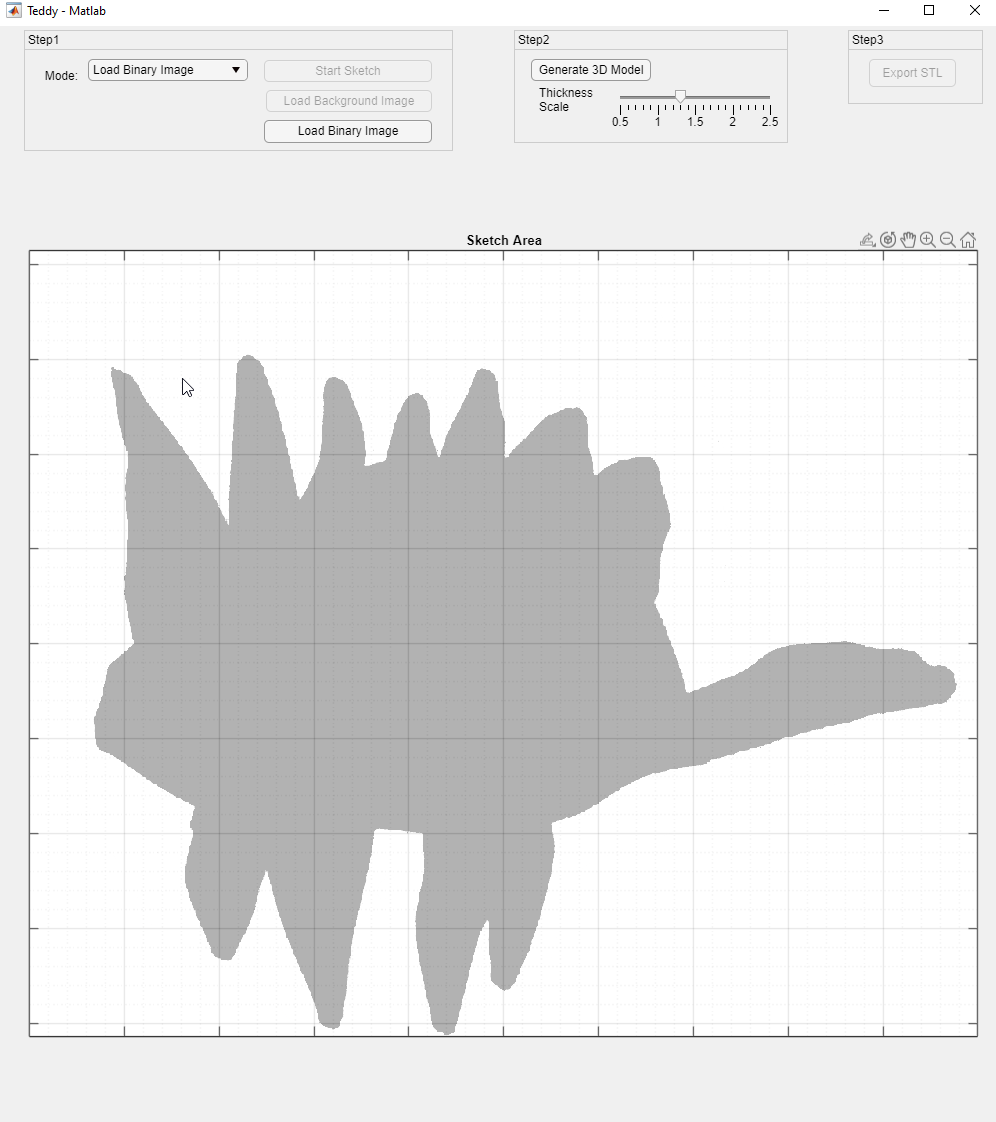
3. Load a "binary" image:
- The user may prepare a "binary" (i.e. black and white) image by using other image editing software (e.g. GIMP, Photoshop...etc).
- The binary image has to have black content and a white background.
- Please see this section of the video where I live demonstrates how to generate a "binary" image
Generate 3D Model
This button generates the 3D model from the sketch or the binary image.
Export STL
This button exports the generated 3D model to a *.stl file, for 3D printing purposes.
3D Sprint & Finish
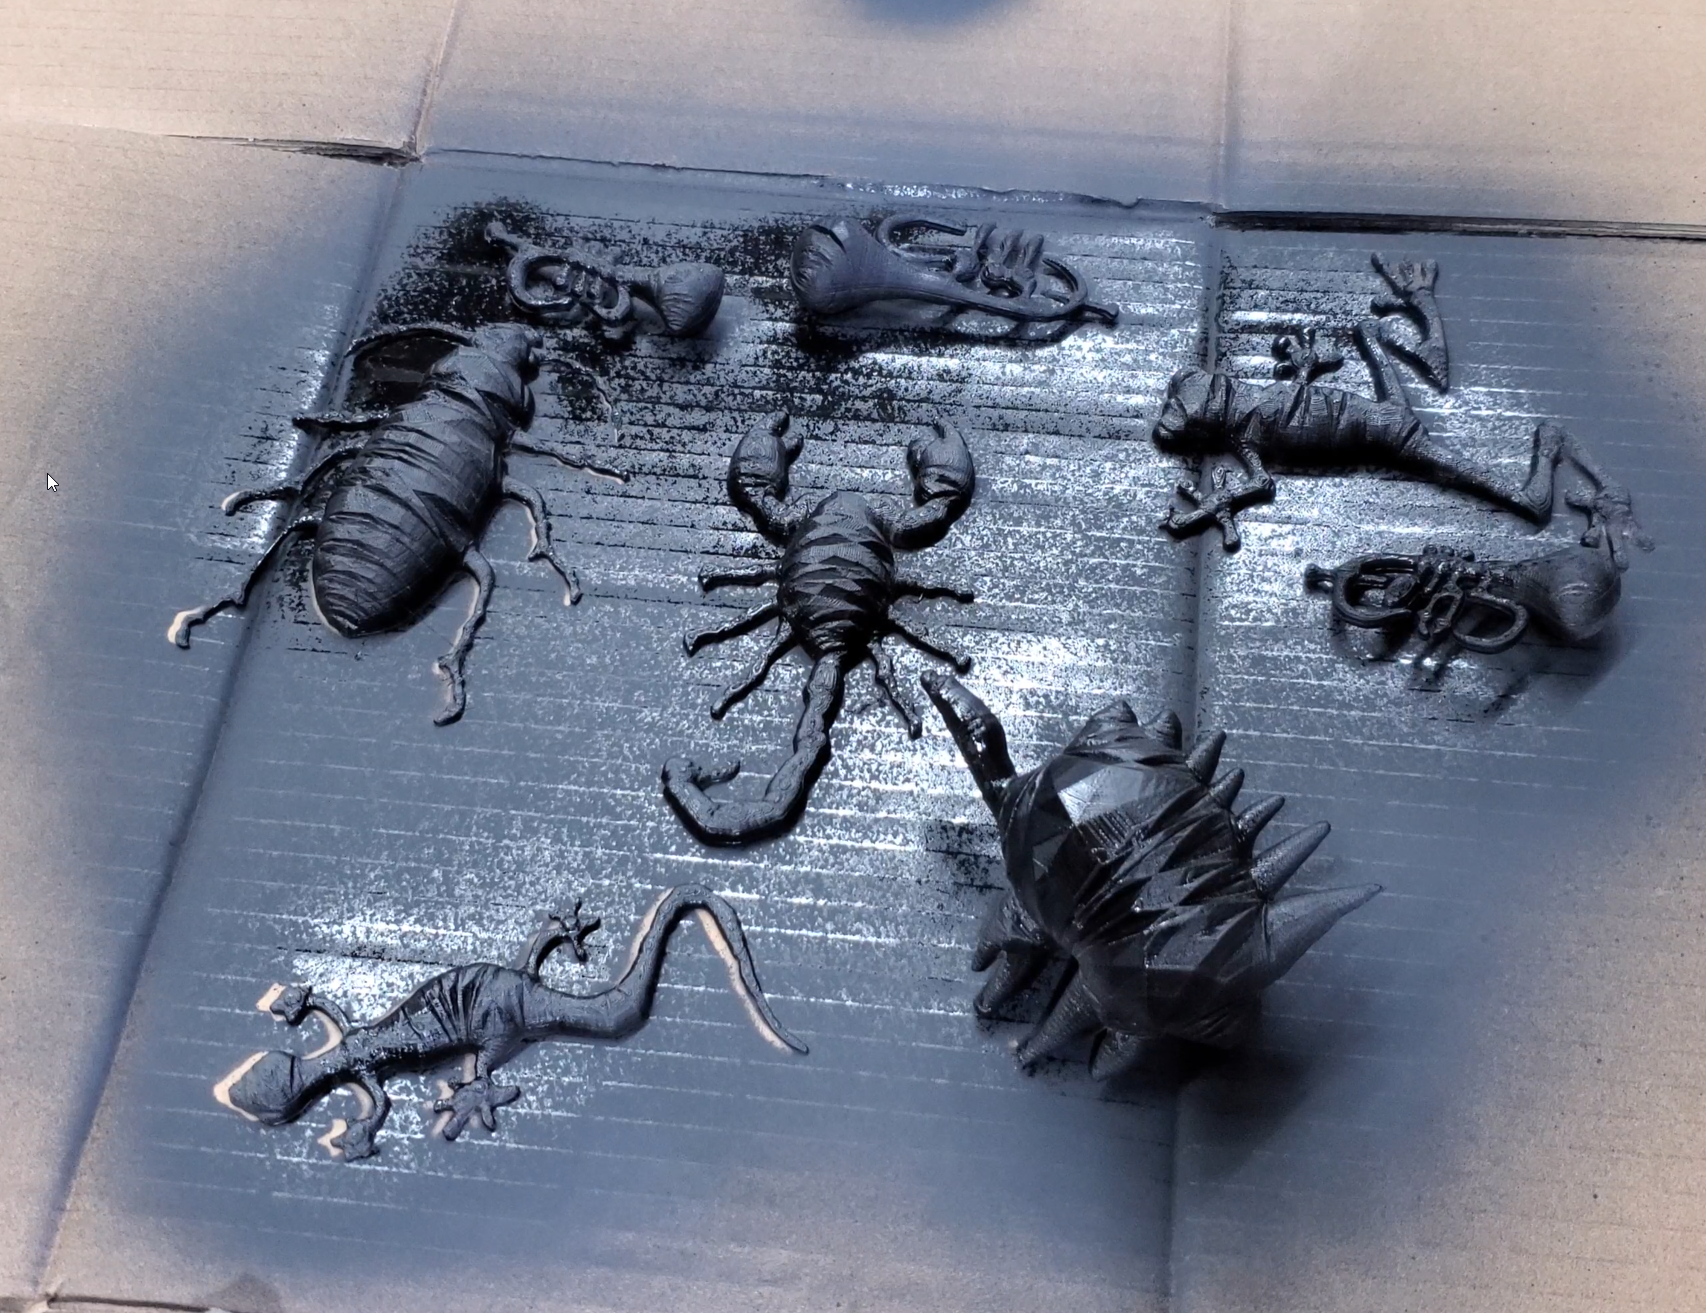
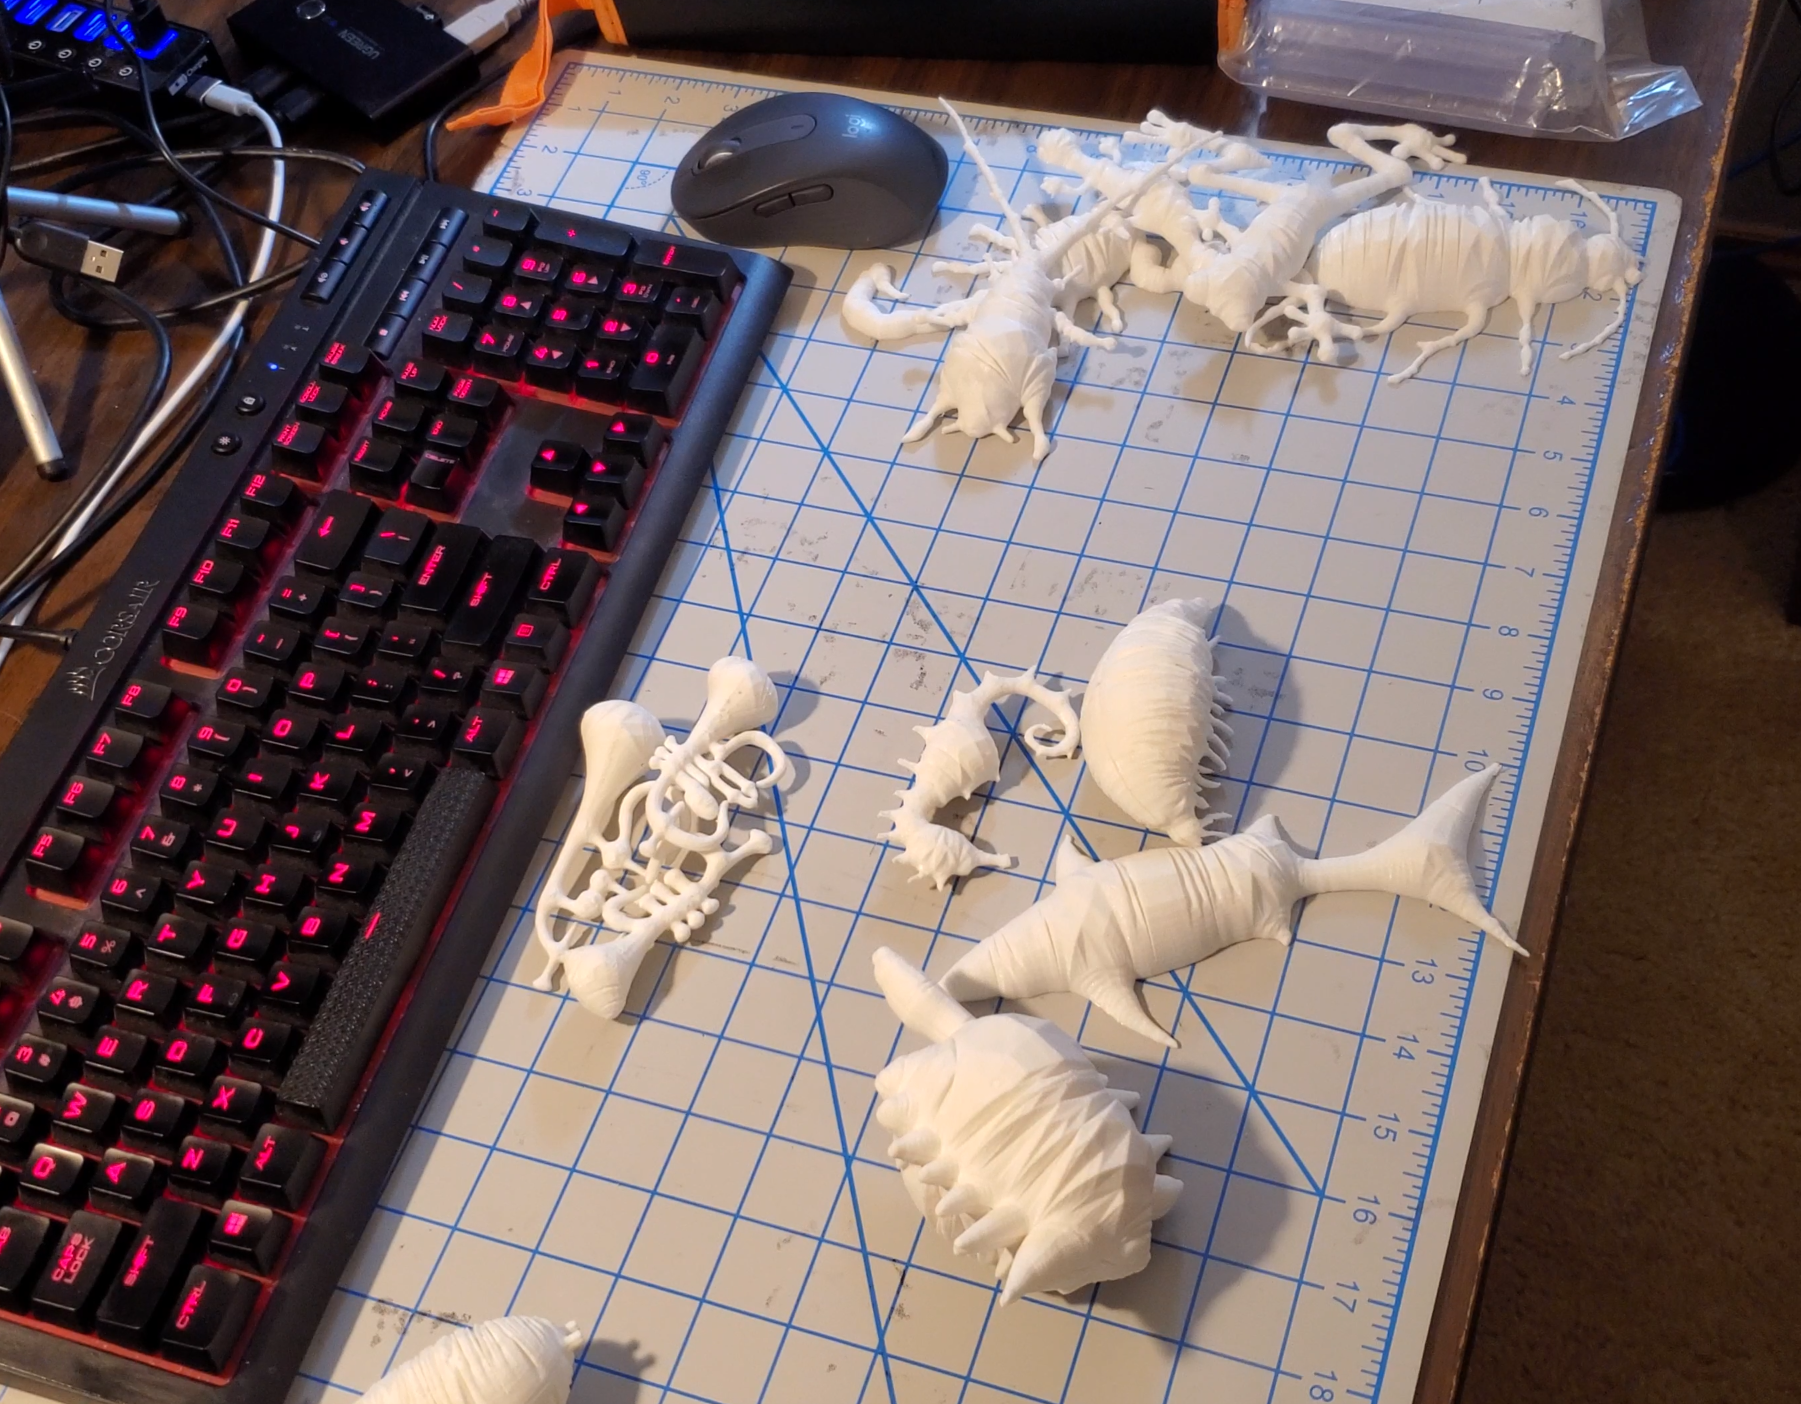
Once you export the *.stl files, you can then send them to the 3D printer for the print!
Some tips:
- The generated 3D model is symmetric along the positive and negative Z direction, and so for some objects (e.g. lizards, frogs...etc), it's more realistic to keep half of the model by cutting out the negative Z part. See this section of the video for live demos.
- Even if you don't want to discard half of the model, printing a model in 2 halves, and gluing them into one entity is beneficial, because on the surface it won't have artifacts of the "supports".
- I used primer to coat the prints before I paint them
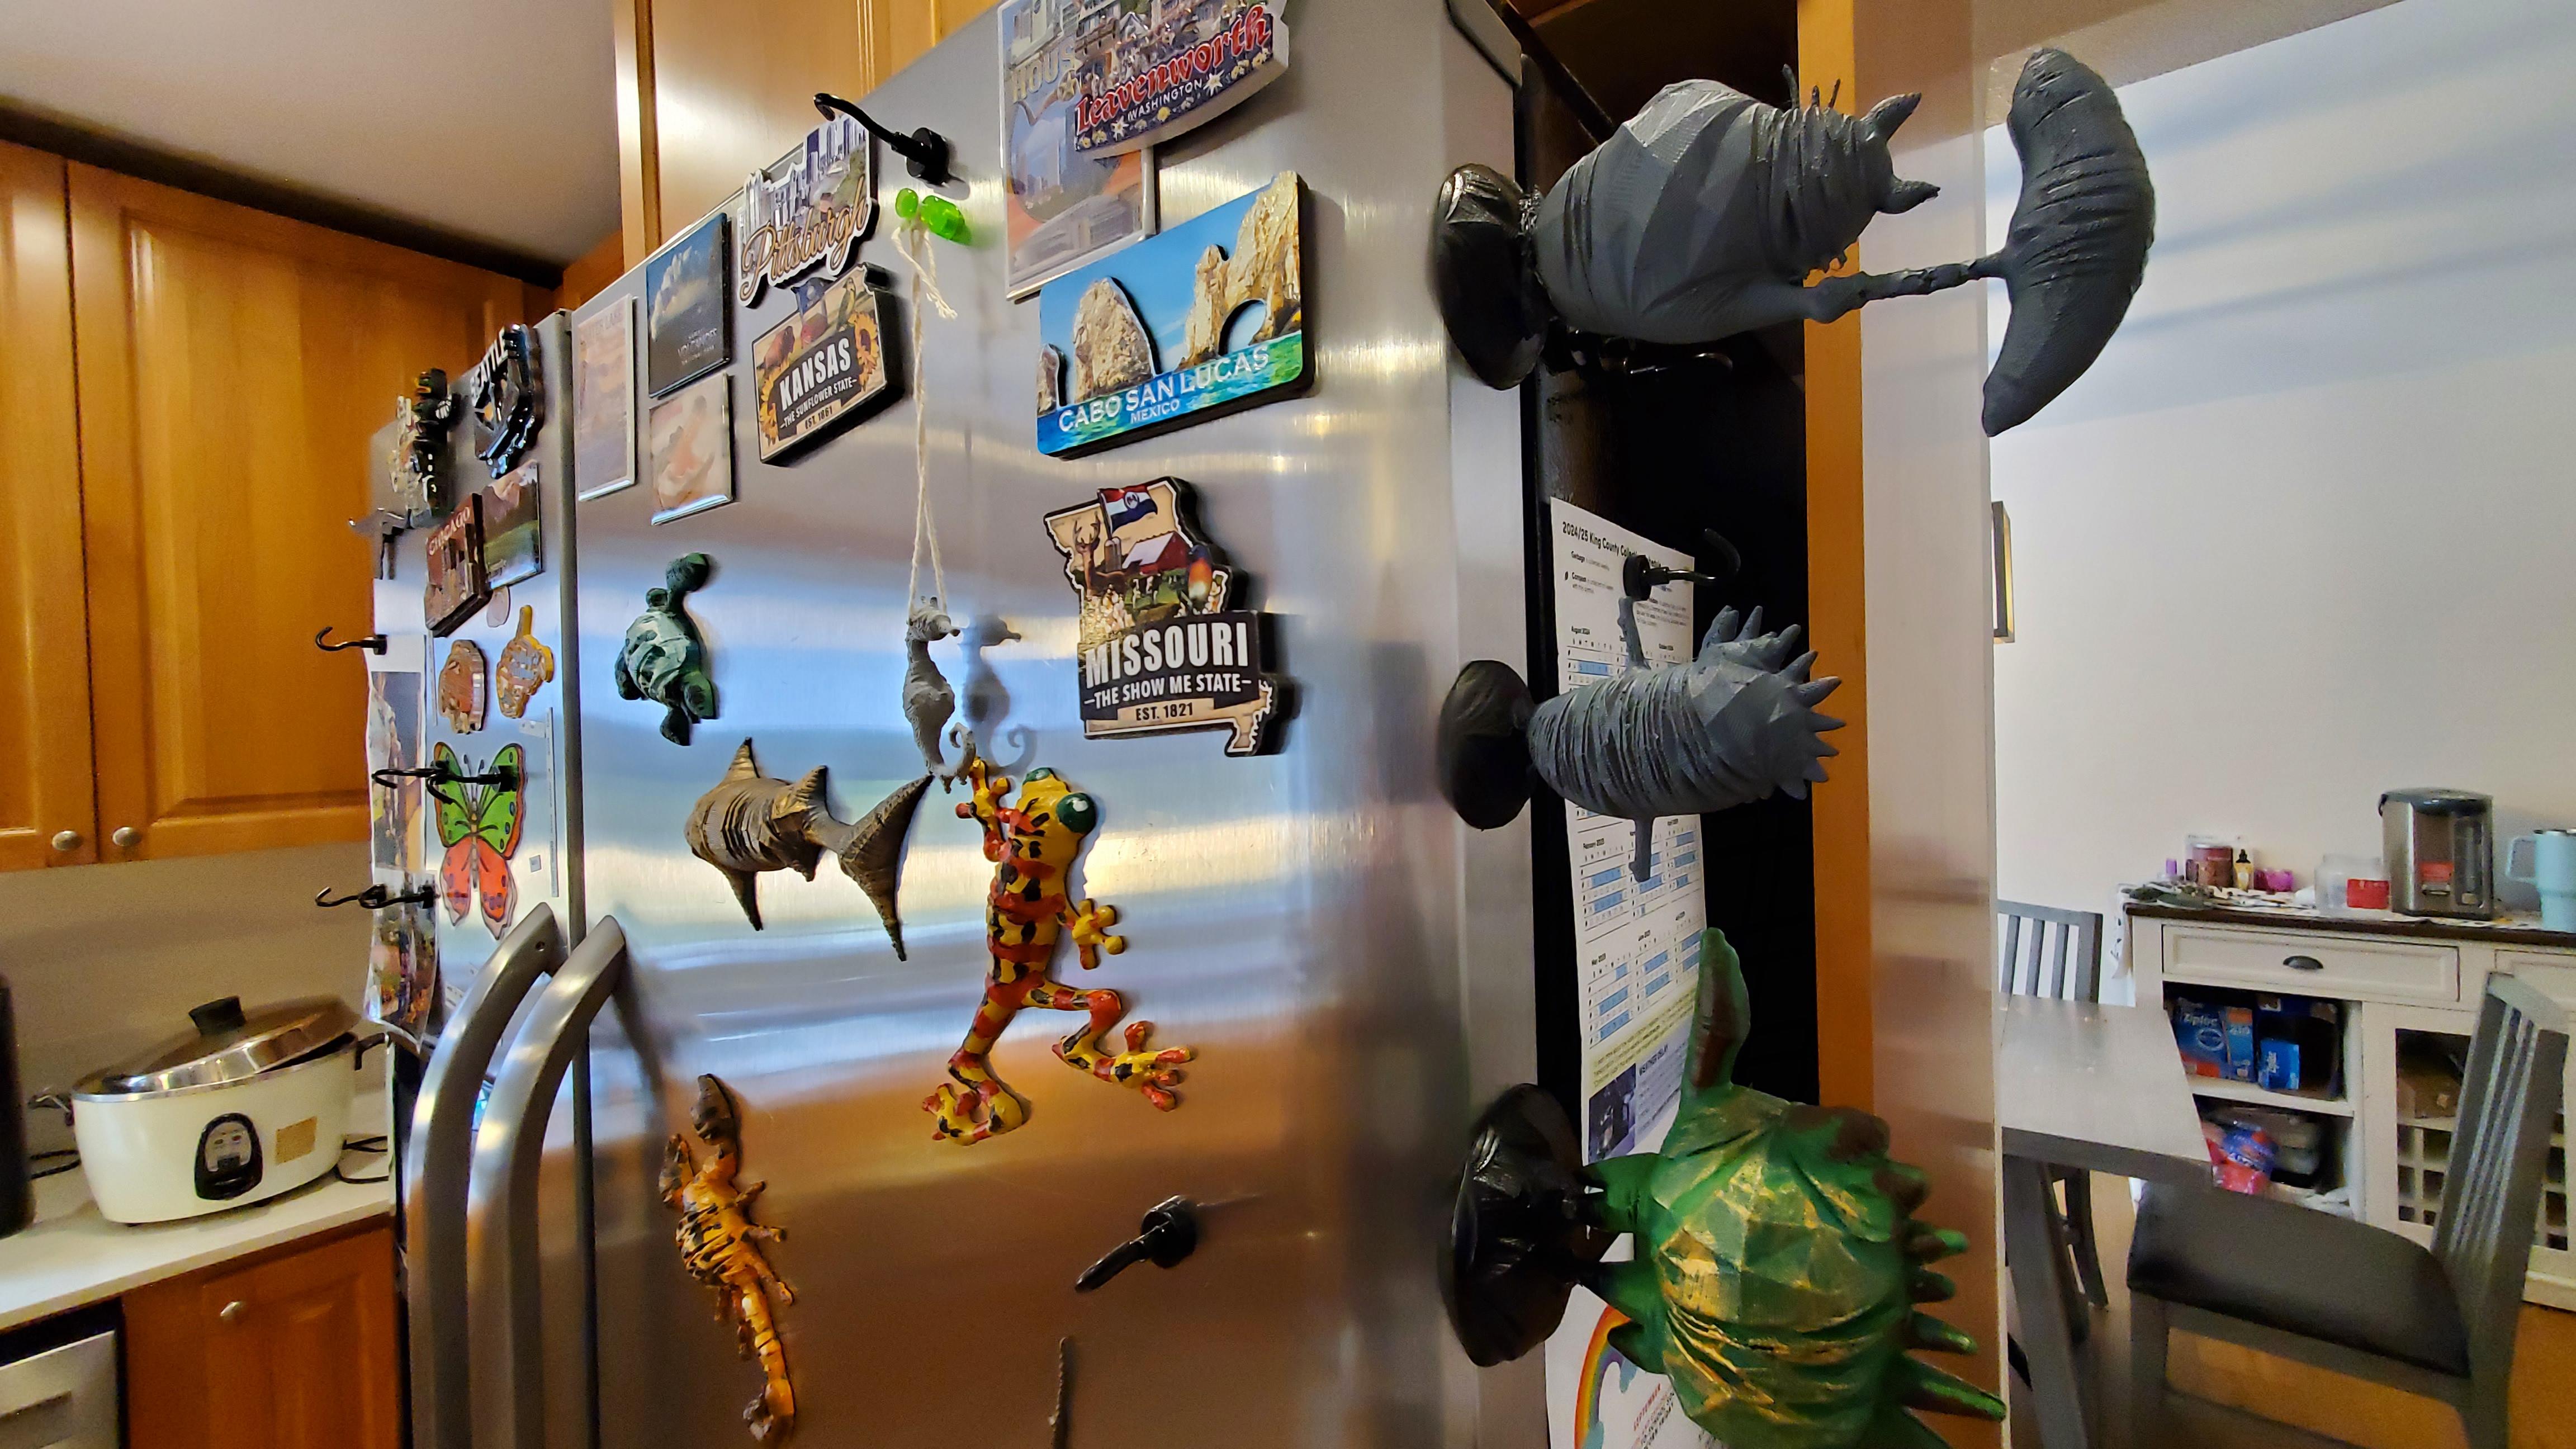
- I installed magnets on the bottom of the 3D prints so that they can attach to the refrigerator
Discussion
I'd like to mention some related works and today's latest technology:
- Dr. Igarashi's original website: where there's his app written in Java, with even more functionalities. The only downside I think is the resulting model is of too low resolution.
- Monstermash : this work brings sketching to another level. The paper proposed a new method for animating hand-drawn sketches!
- AI: Today, AI is the most powerful tool that can do amazing things. Simply google "convert 2d to 3d AI" and you'll find some results. As of today, not all websites are able to generate promising results, but I do see a couple that does amazing jobs.
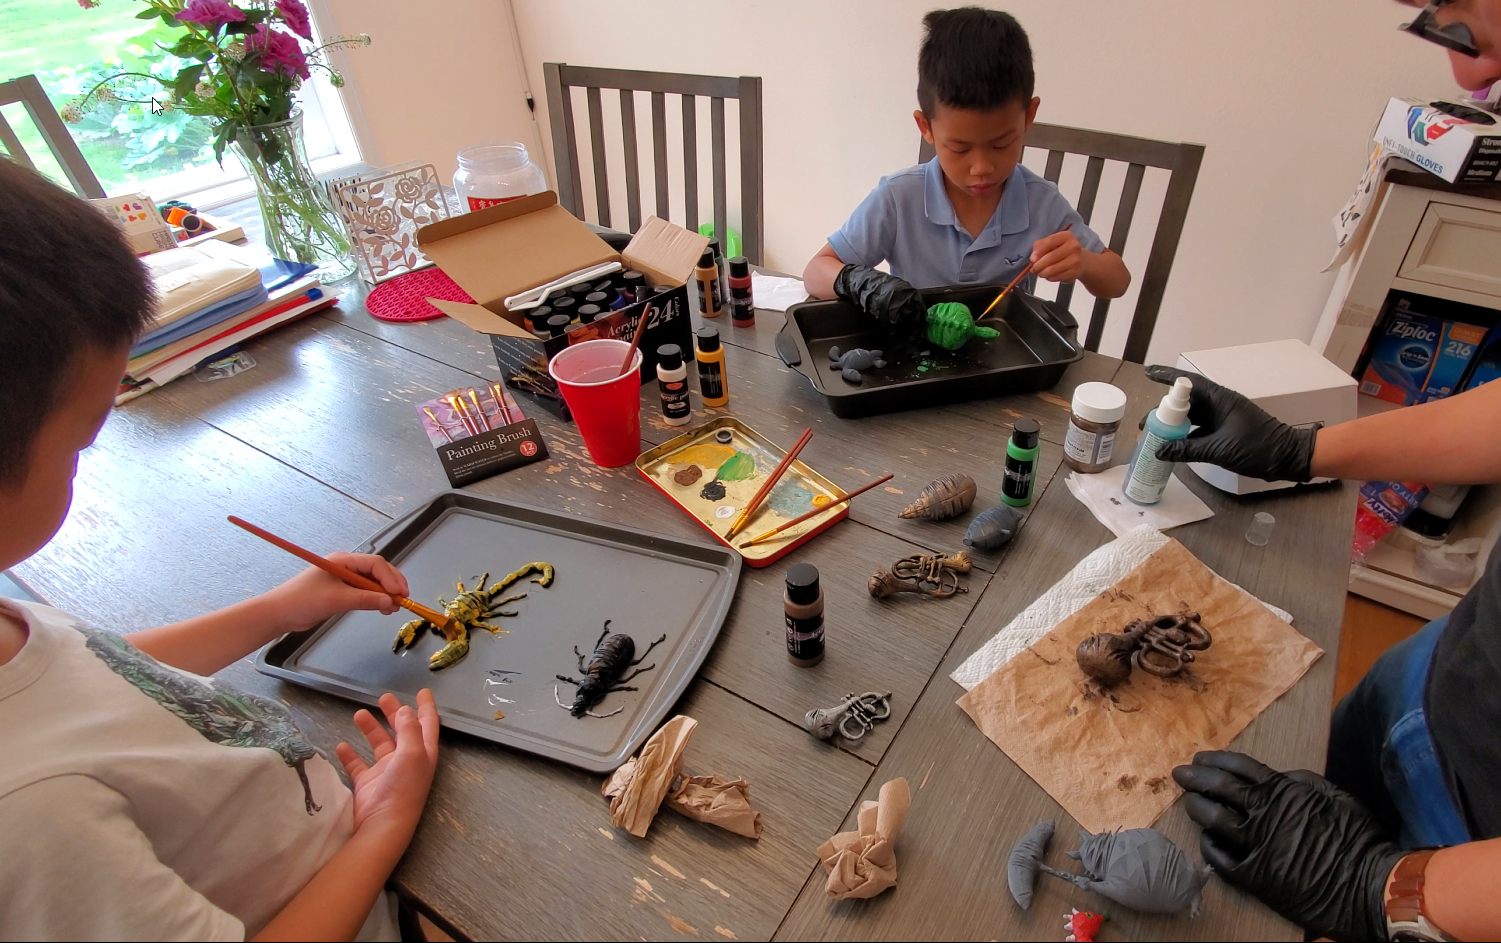
Showcase
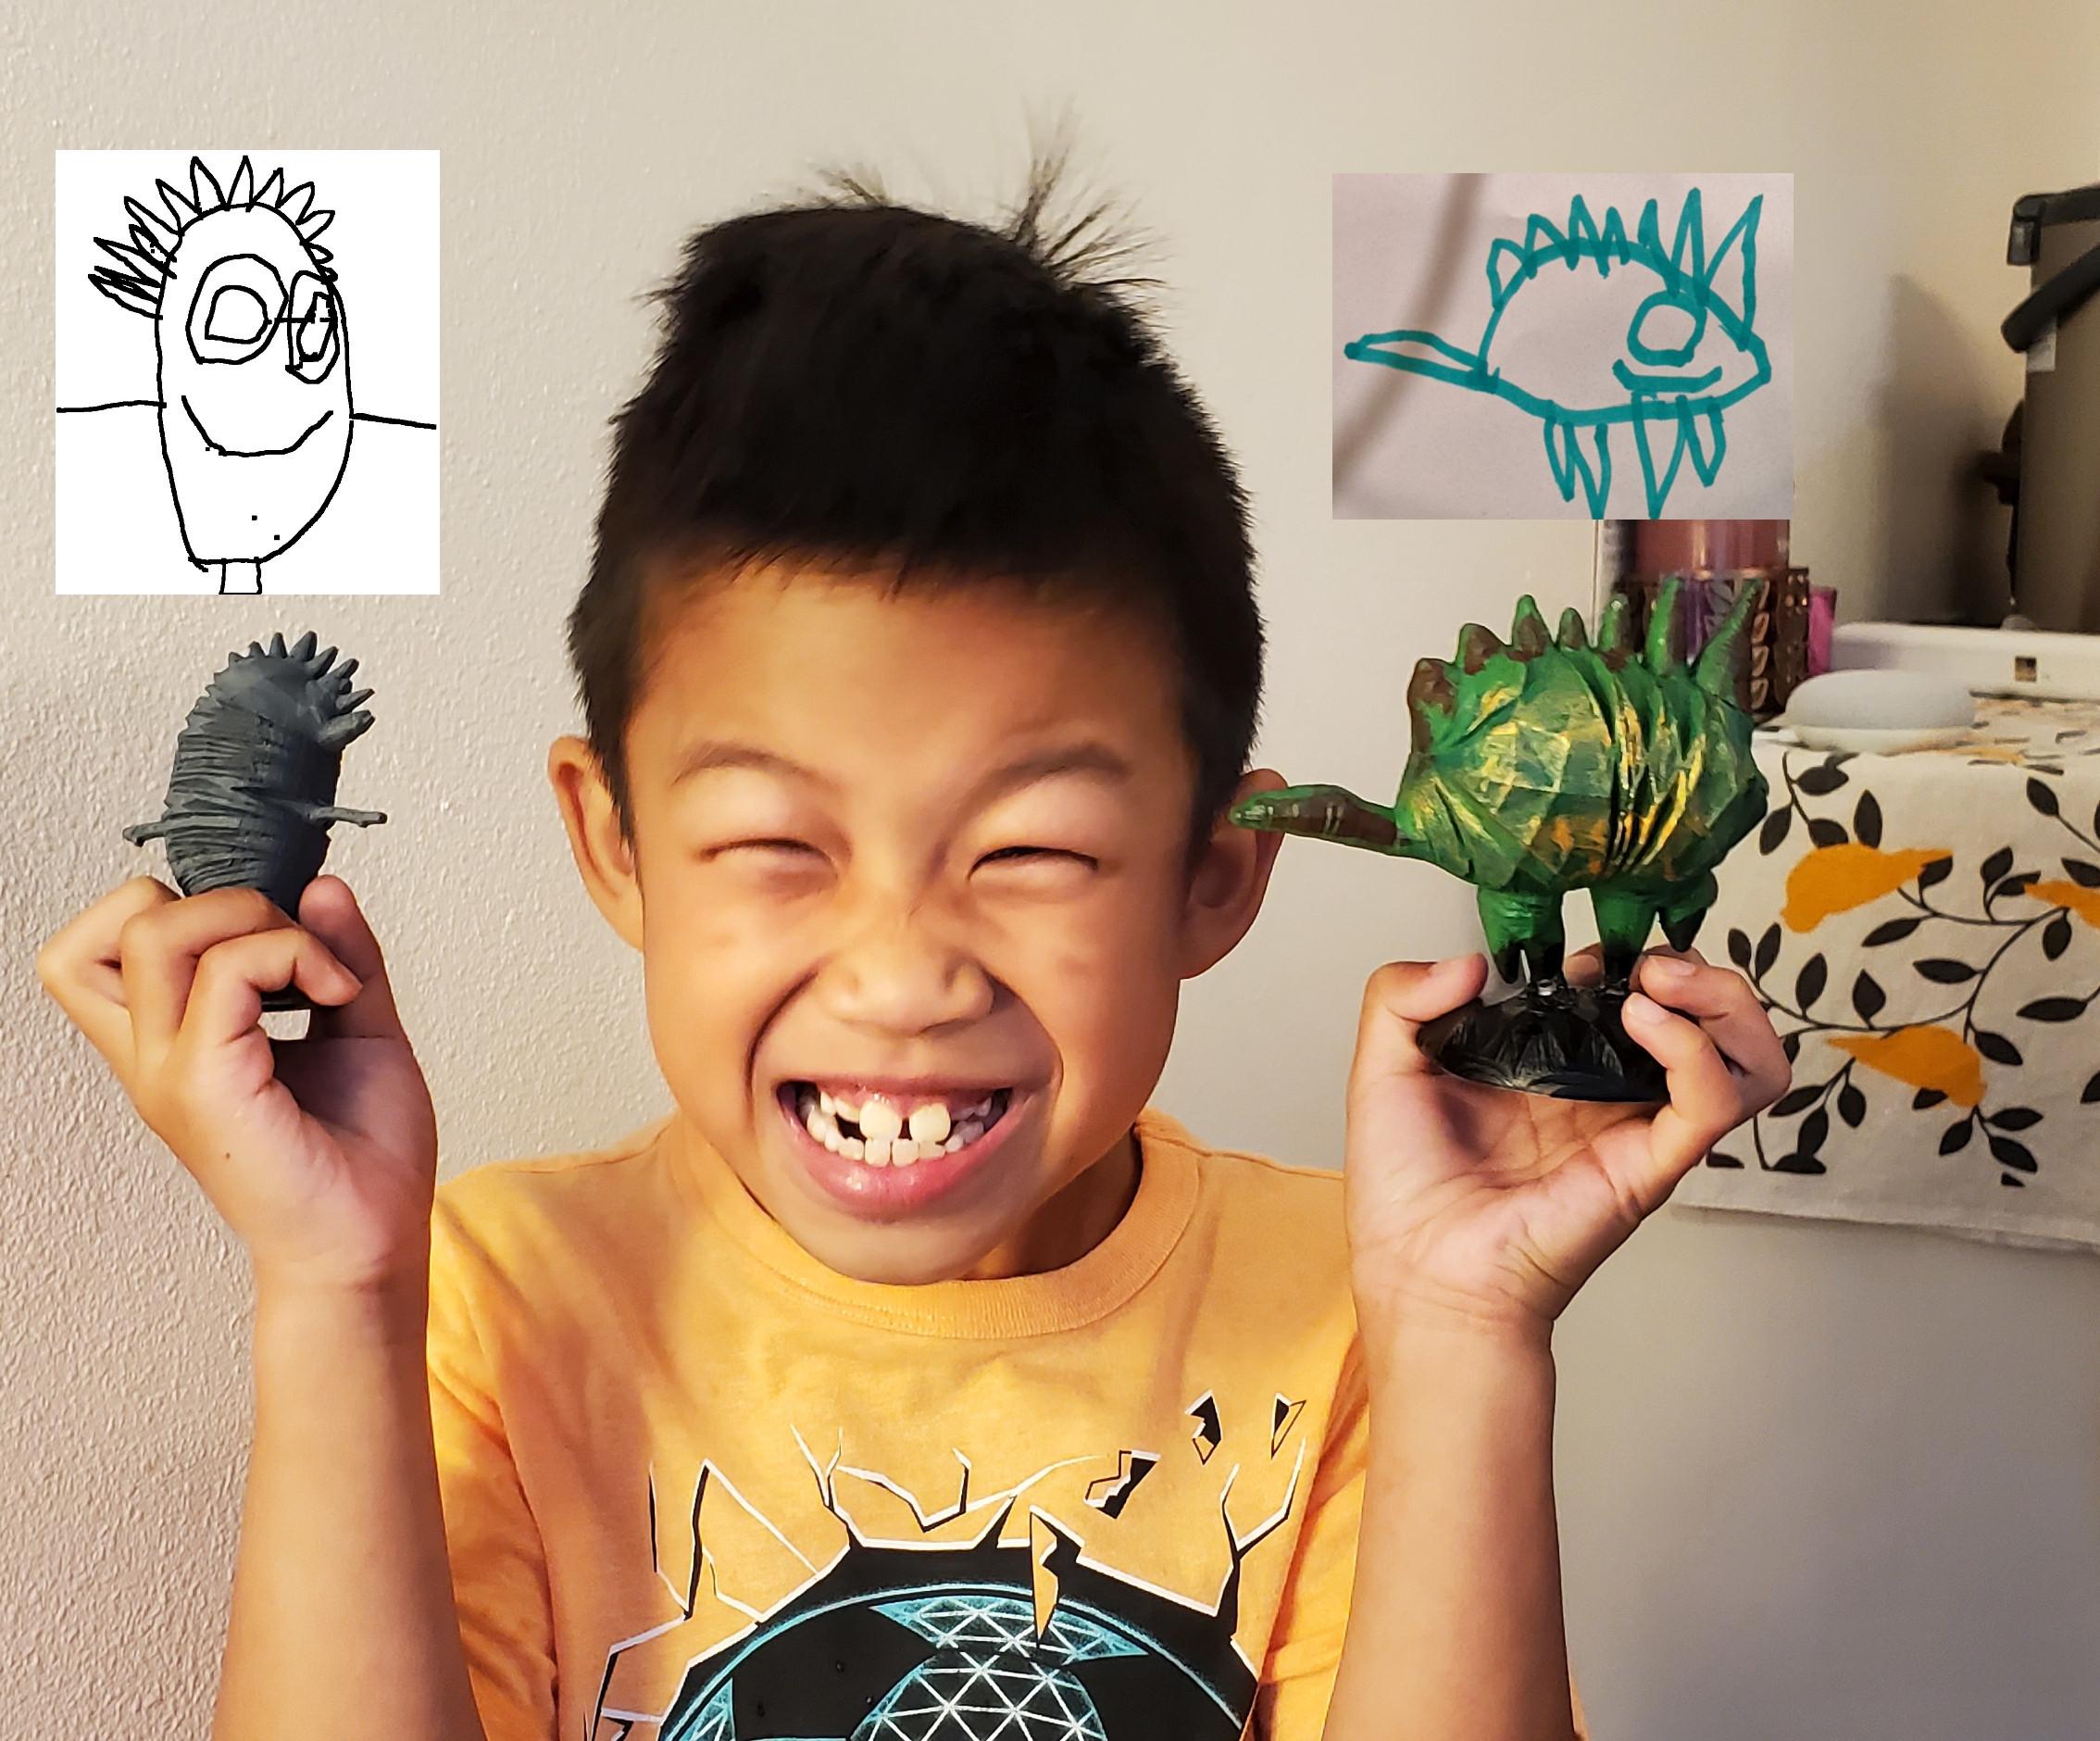
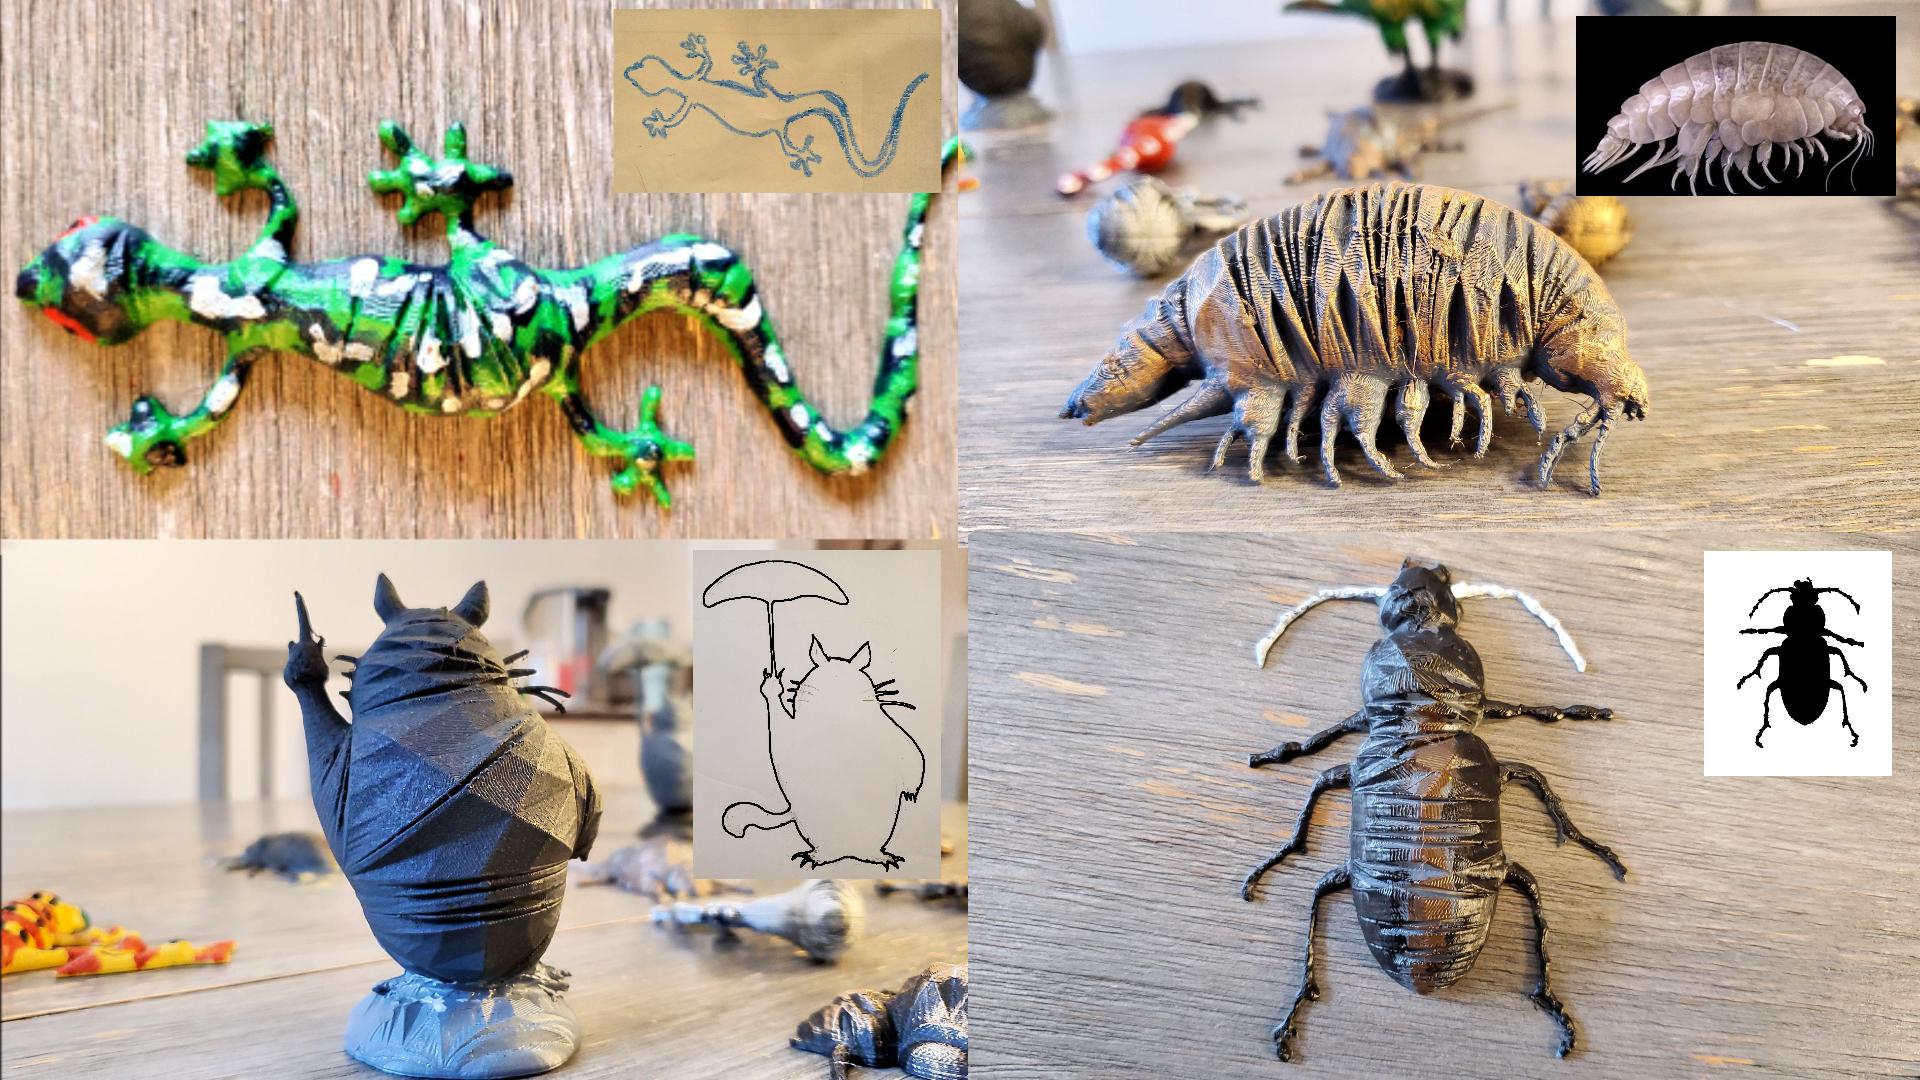
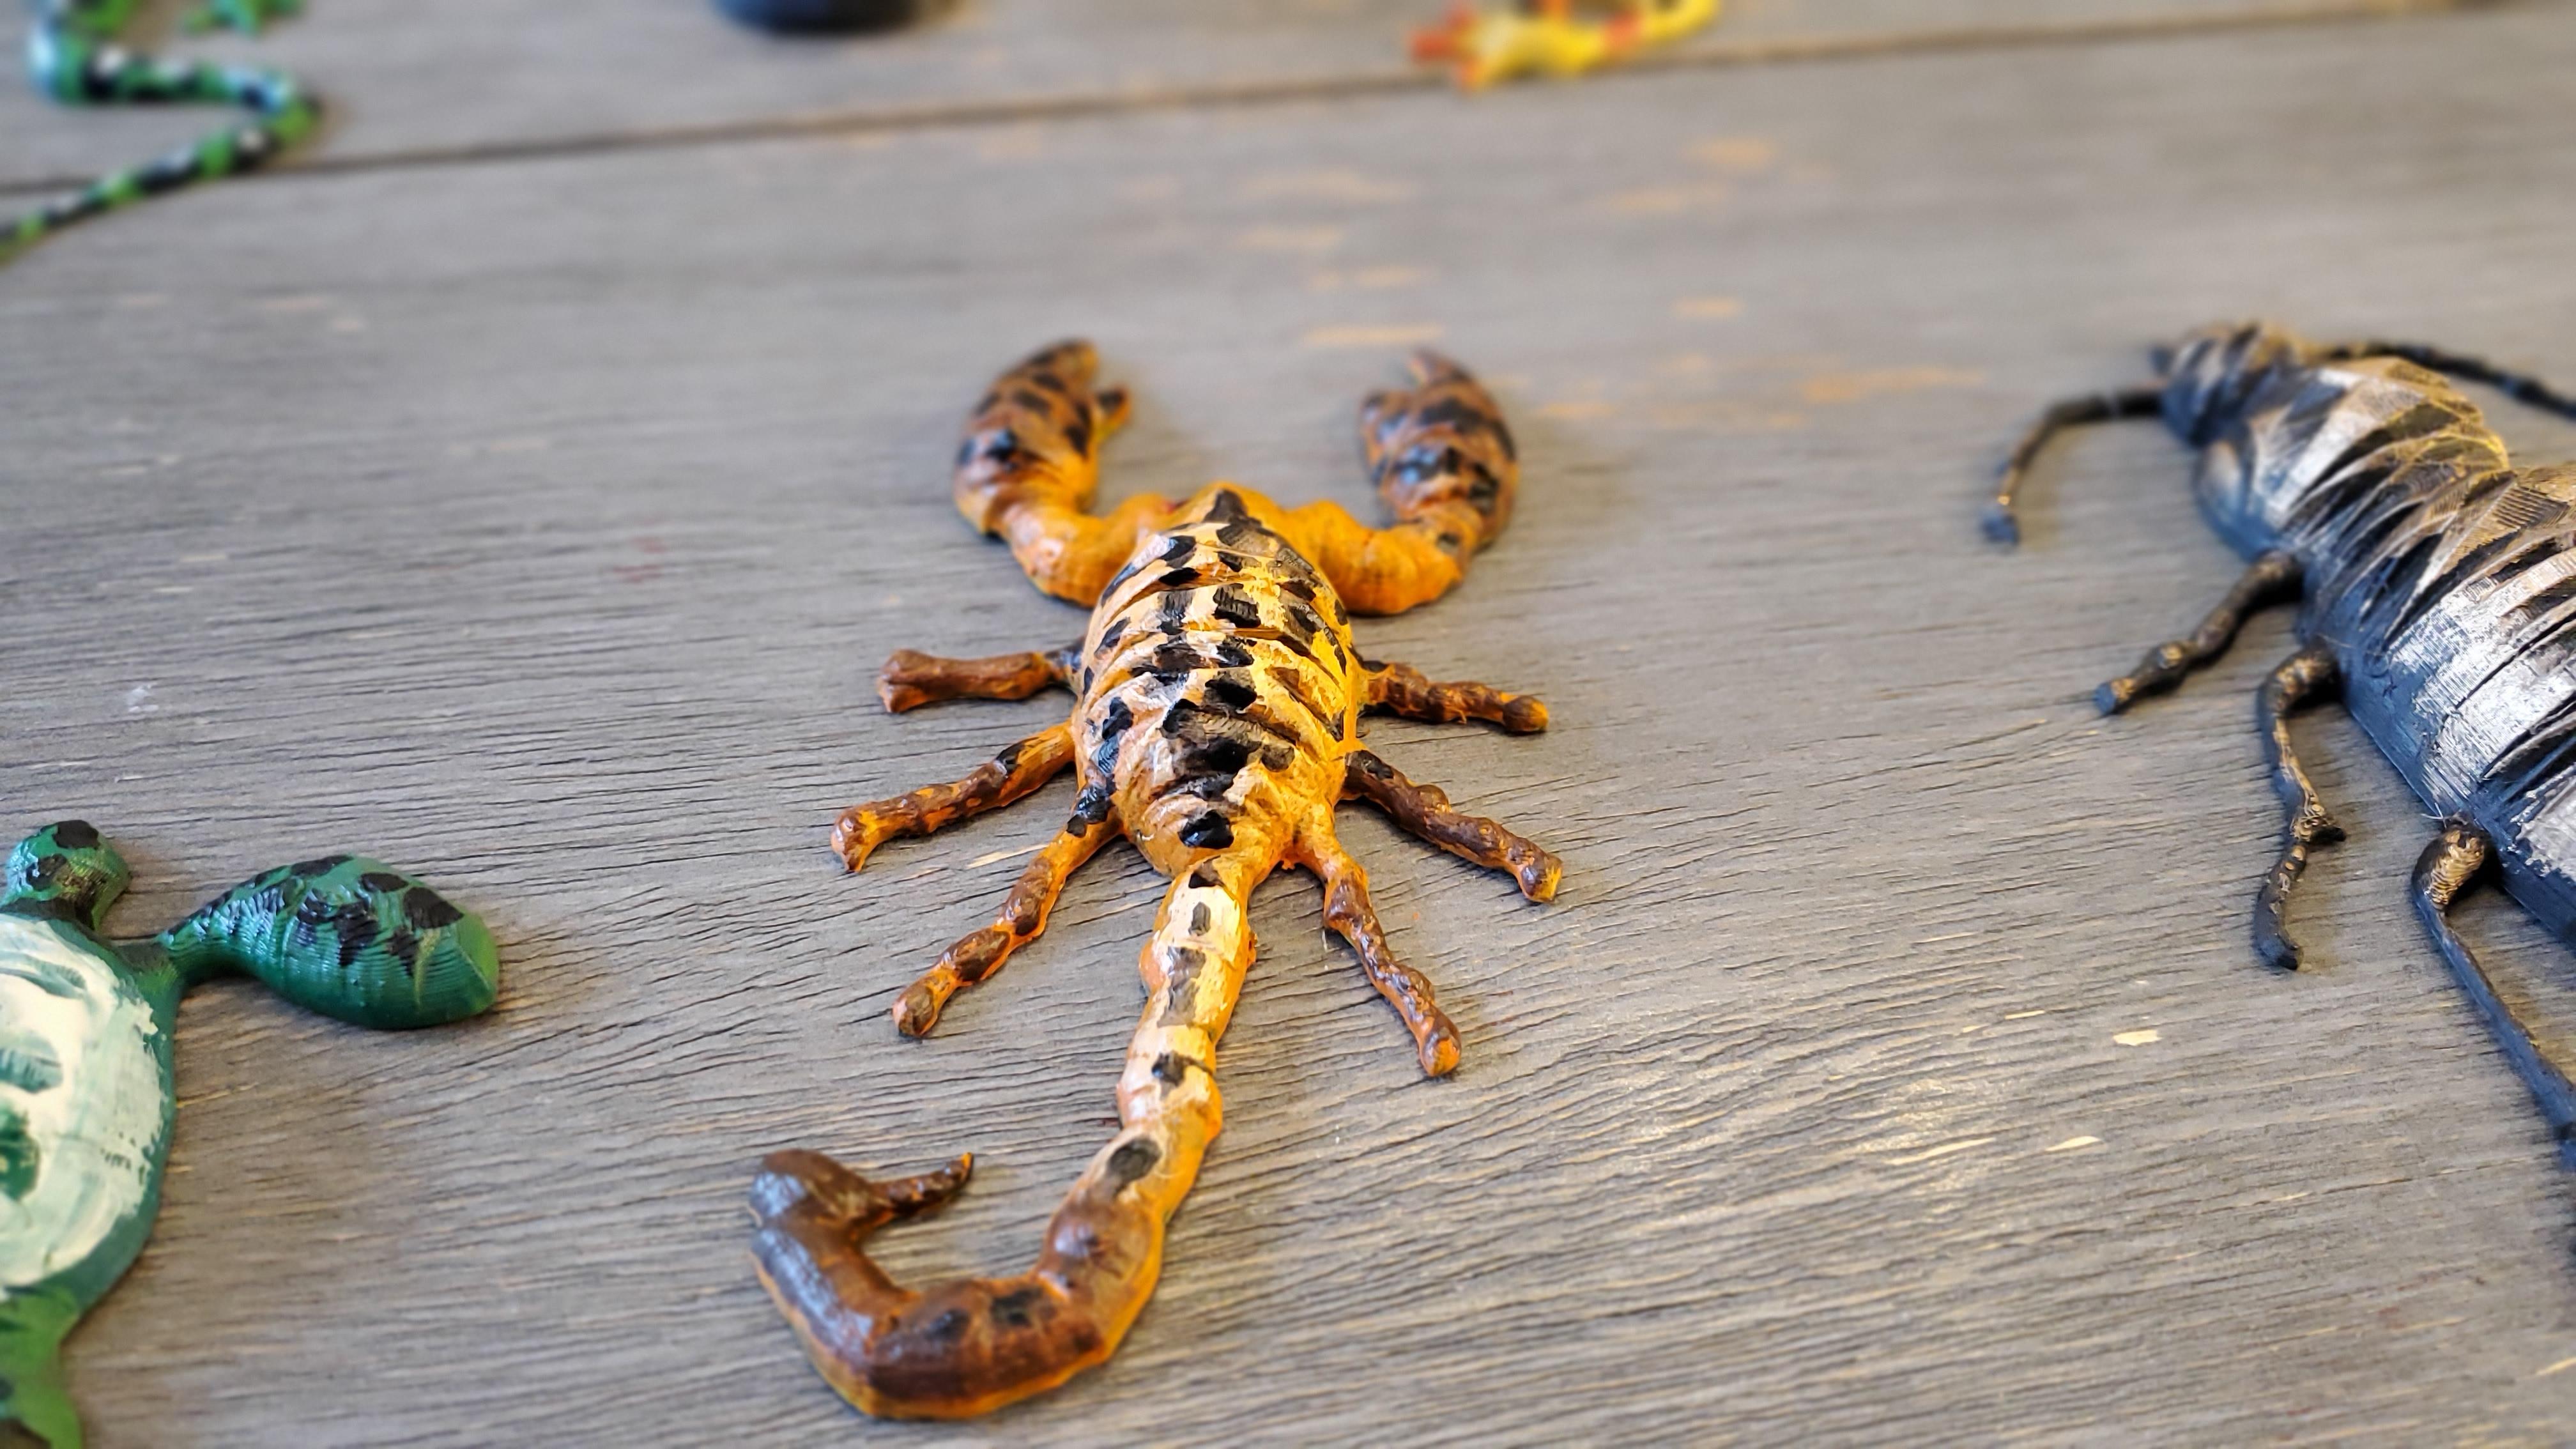
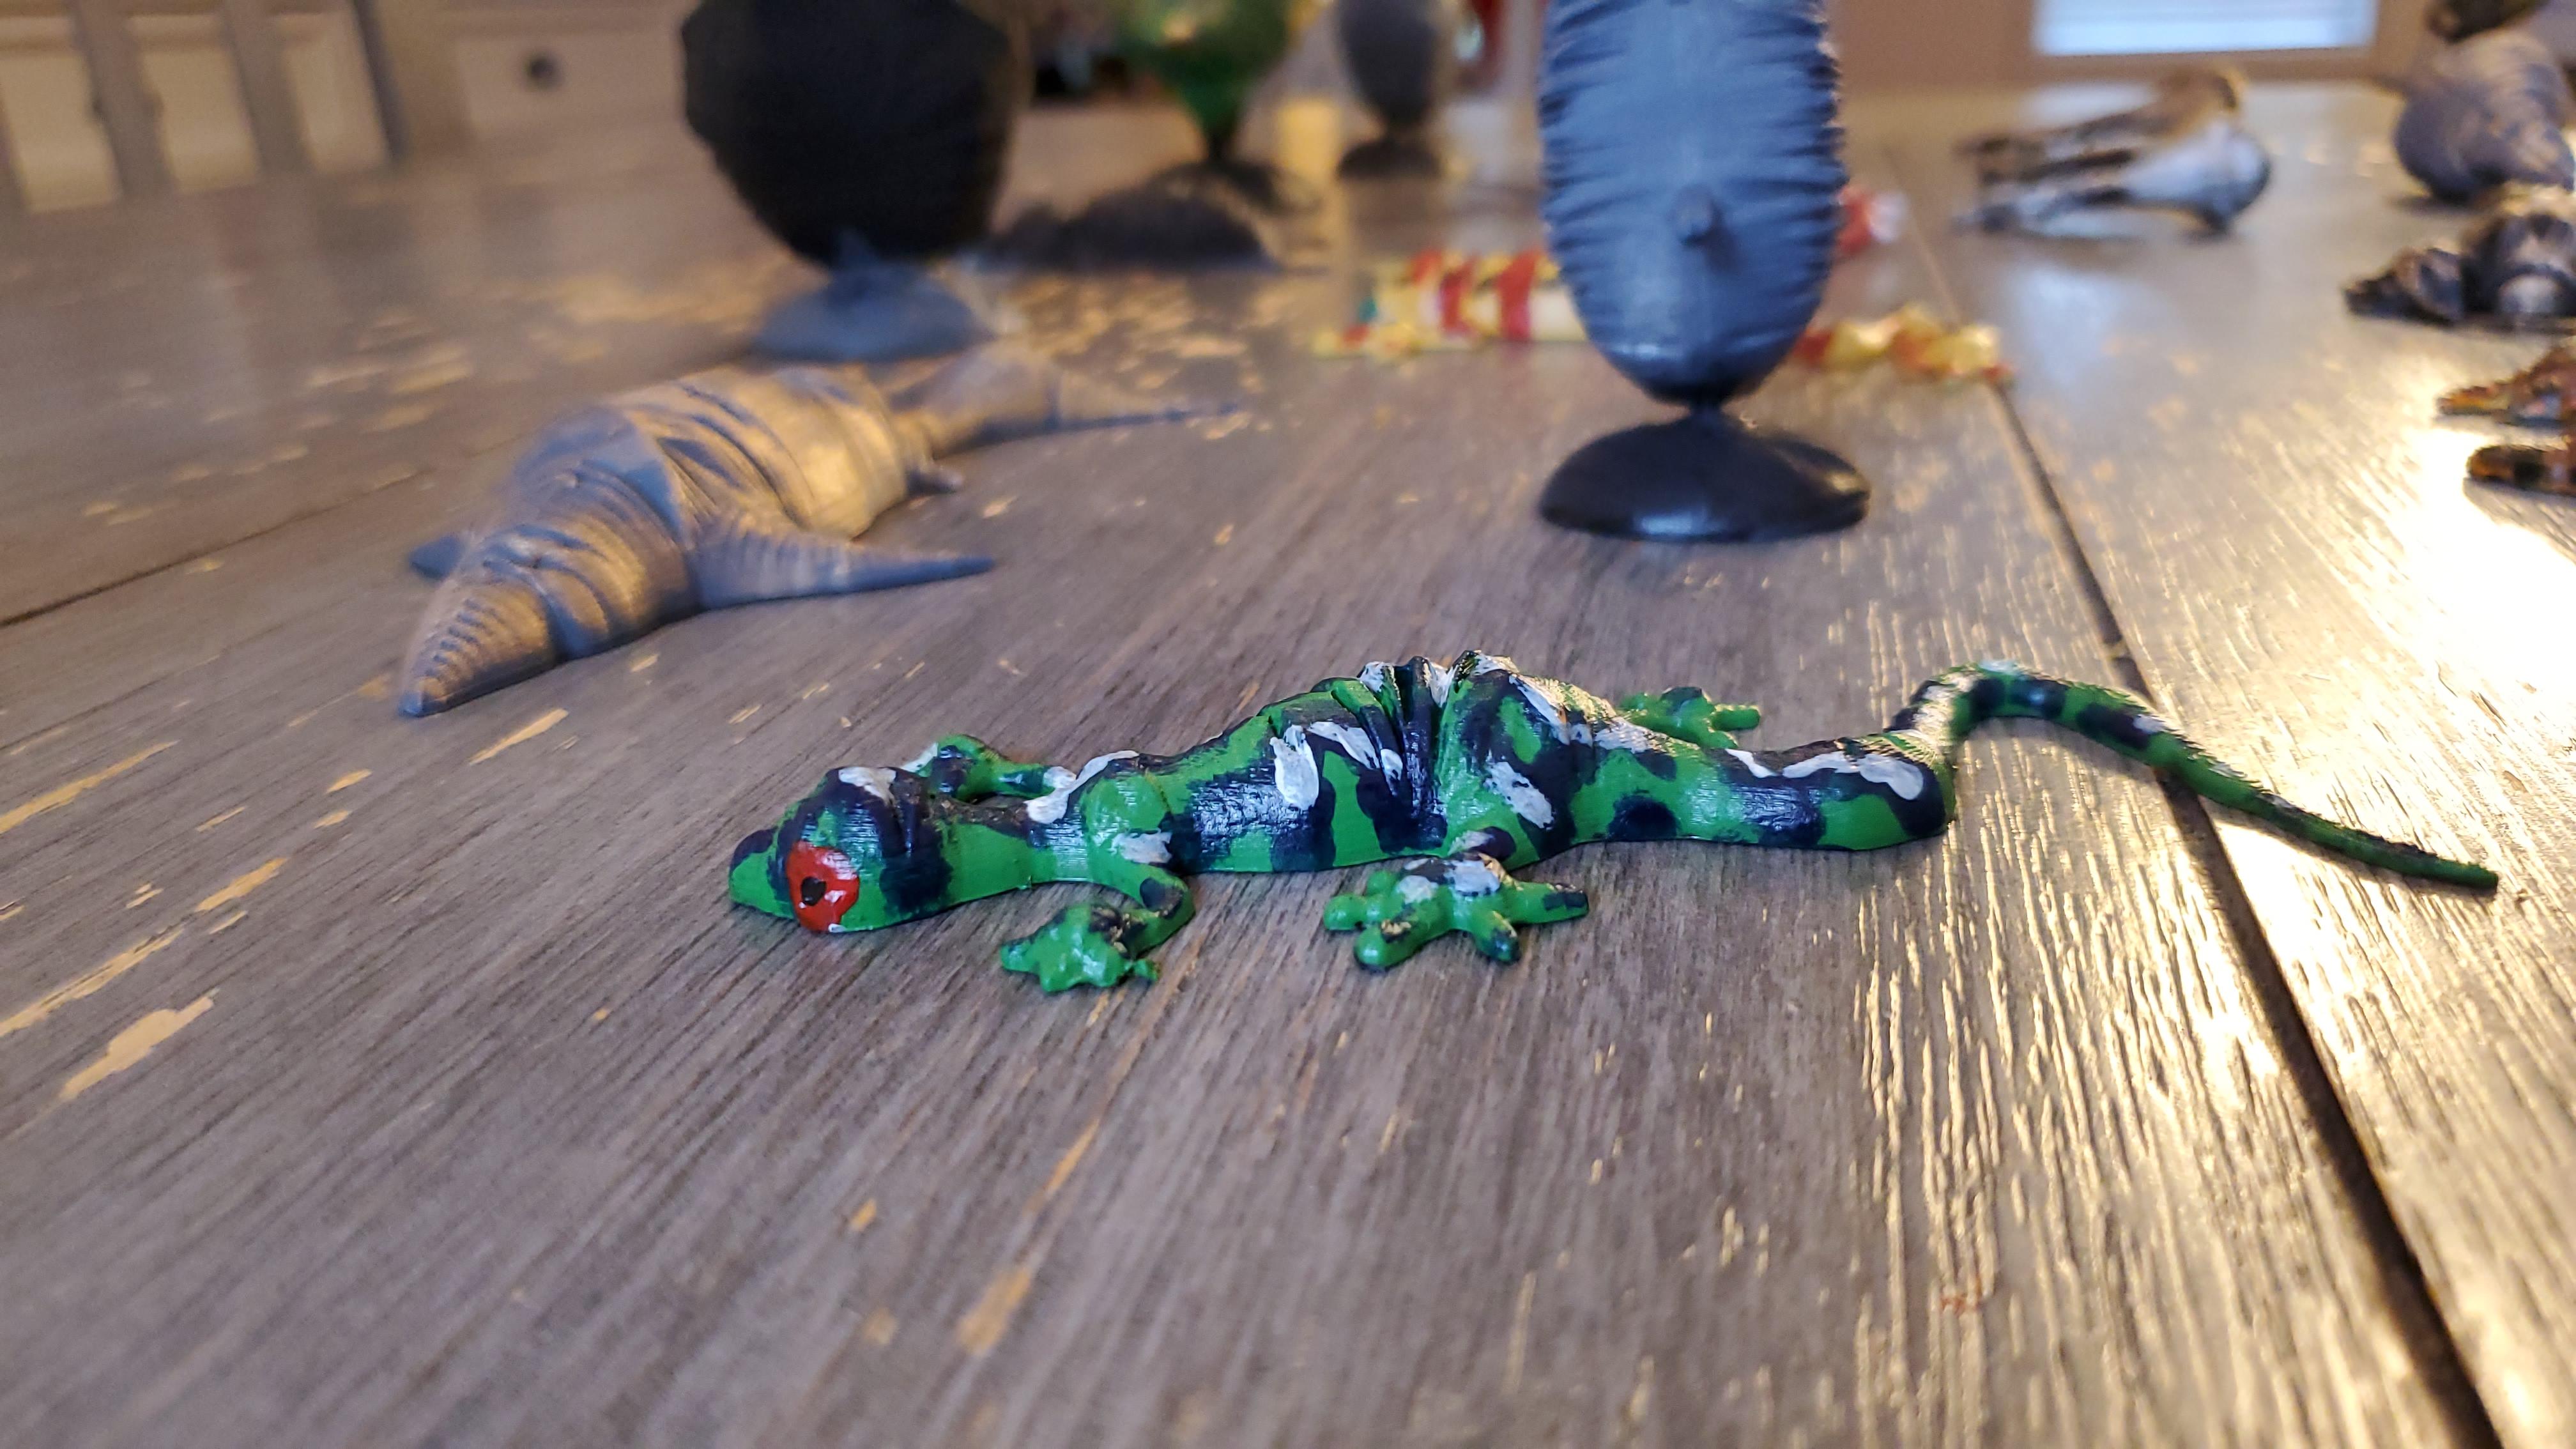
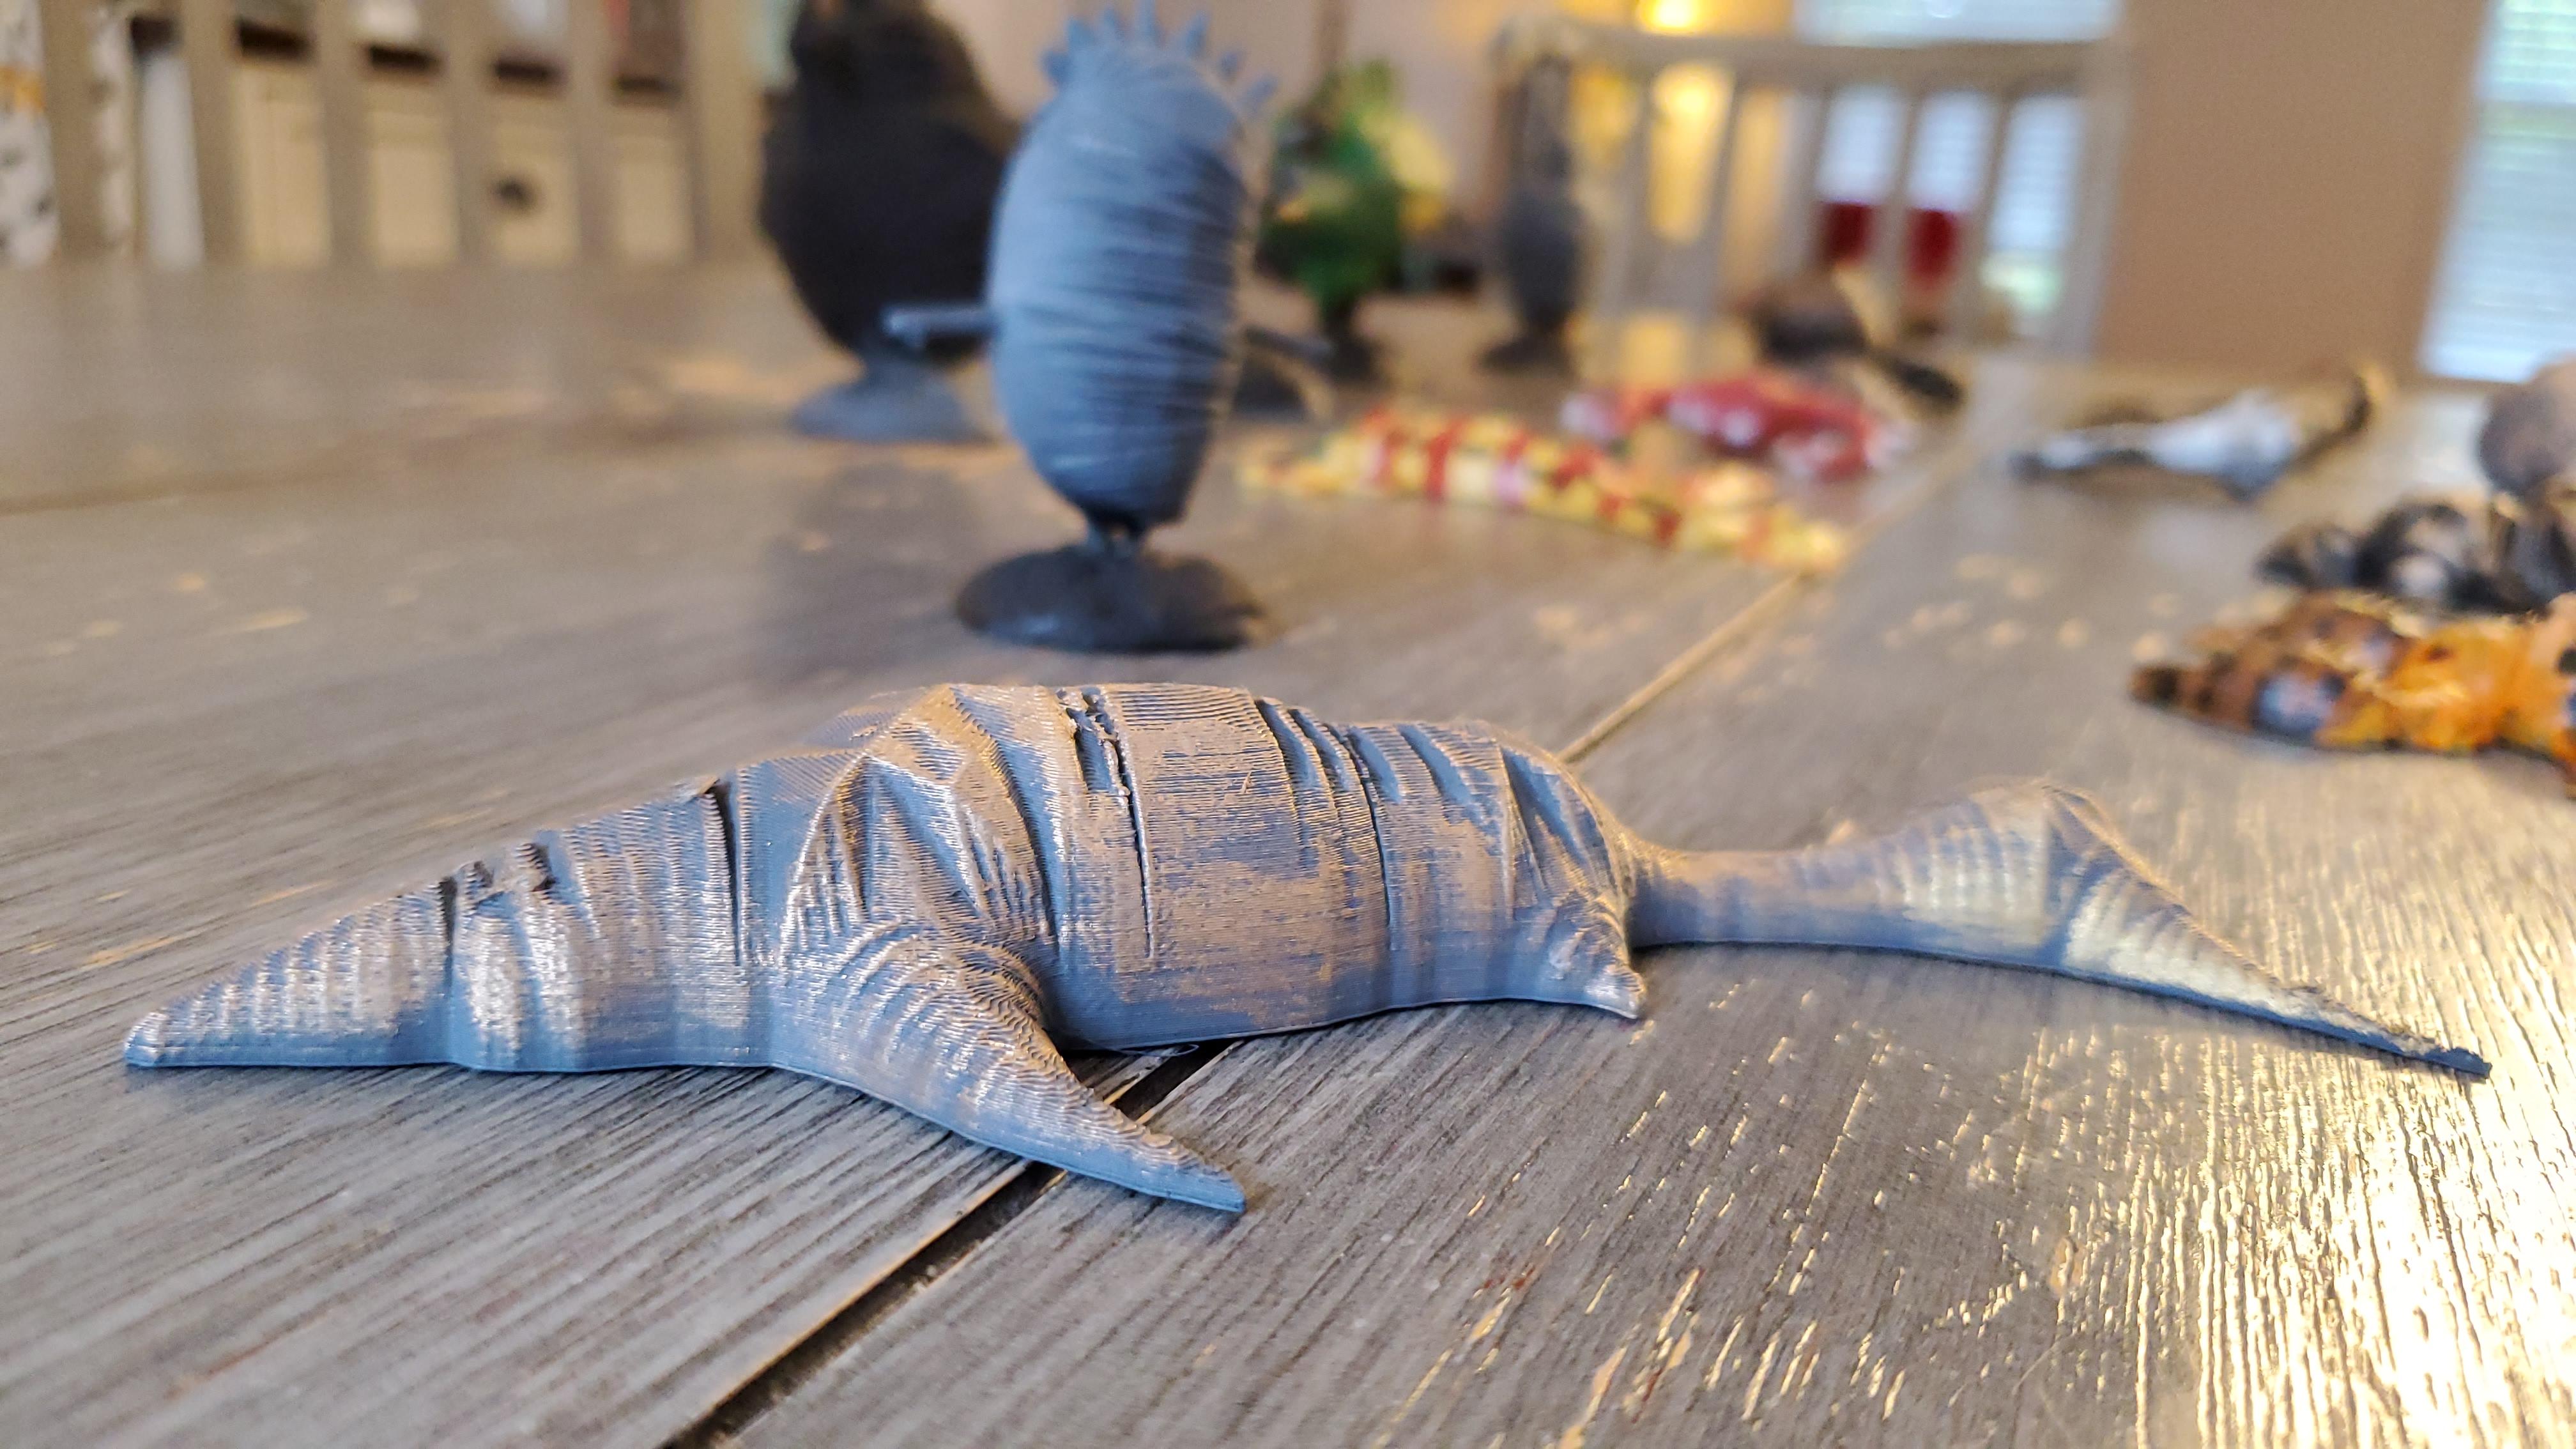

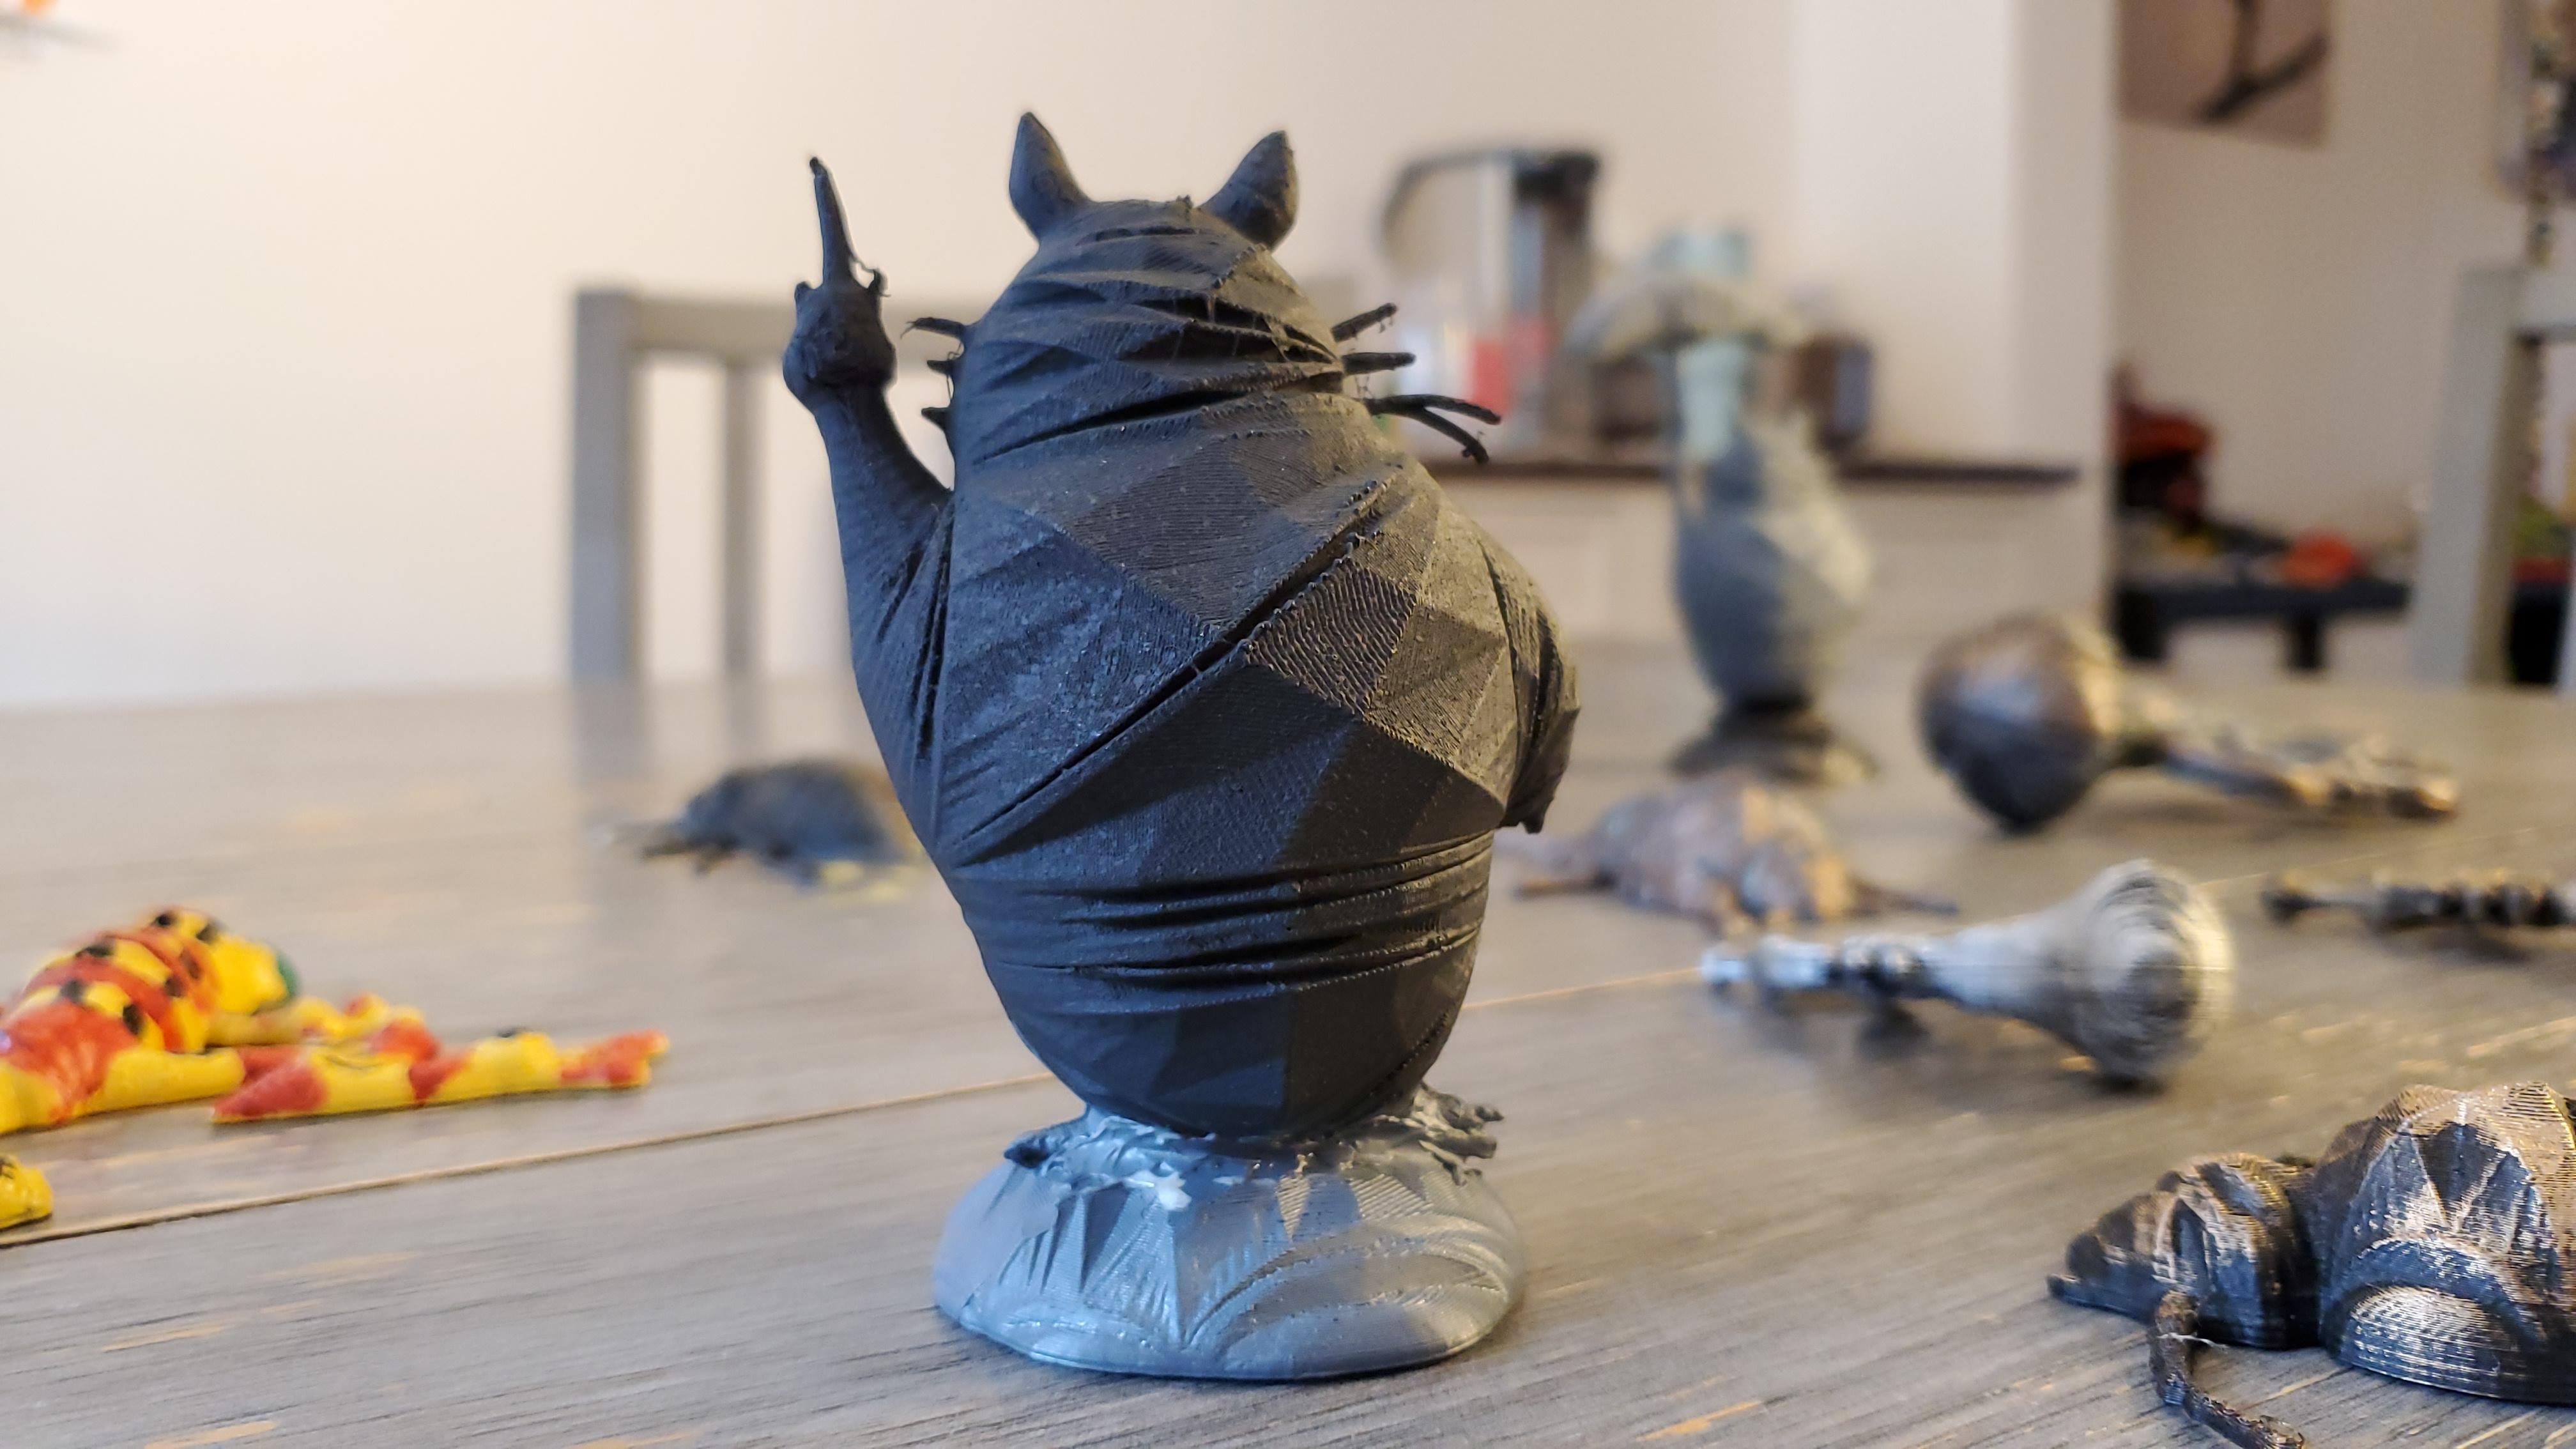
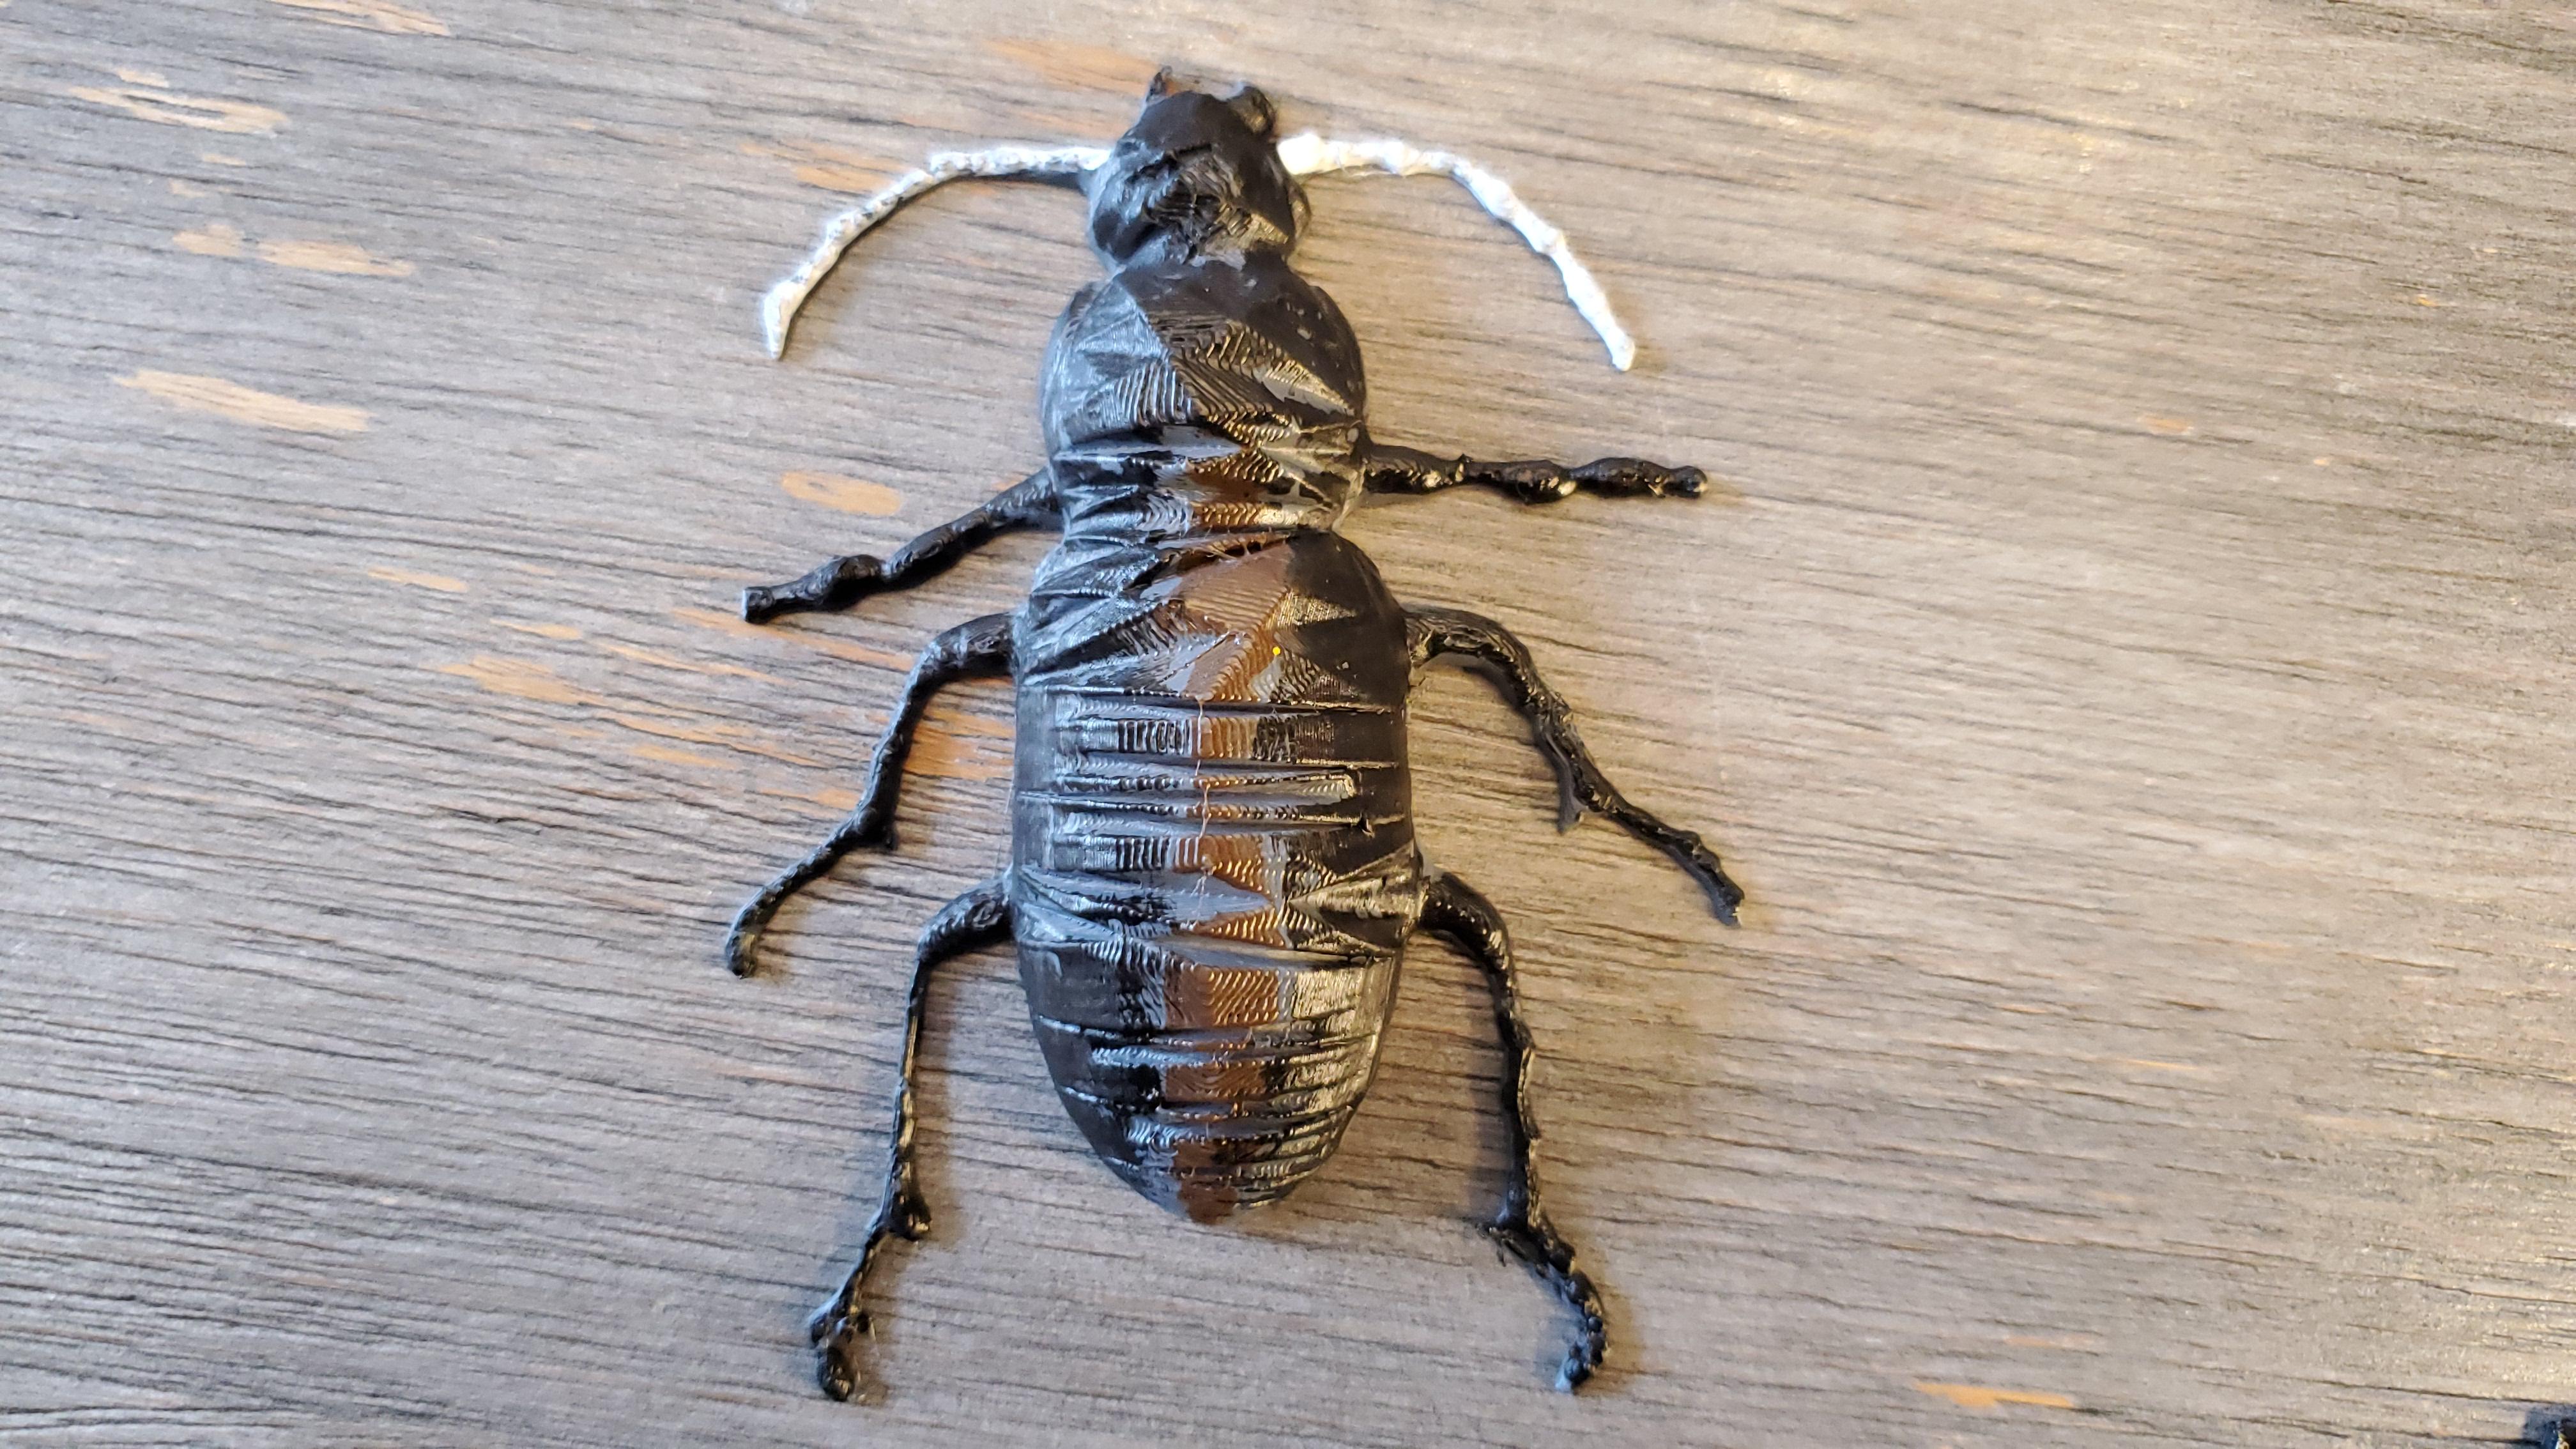
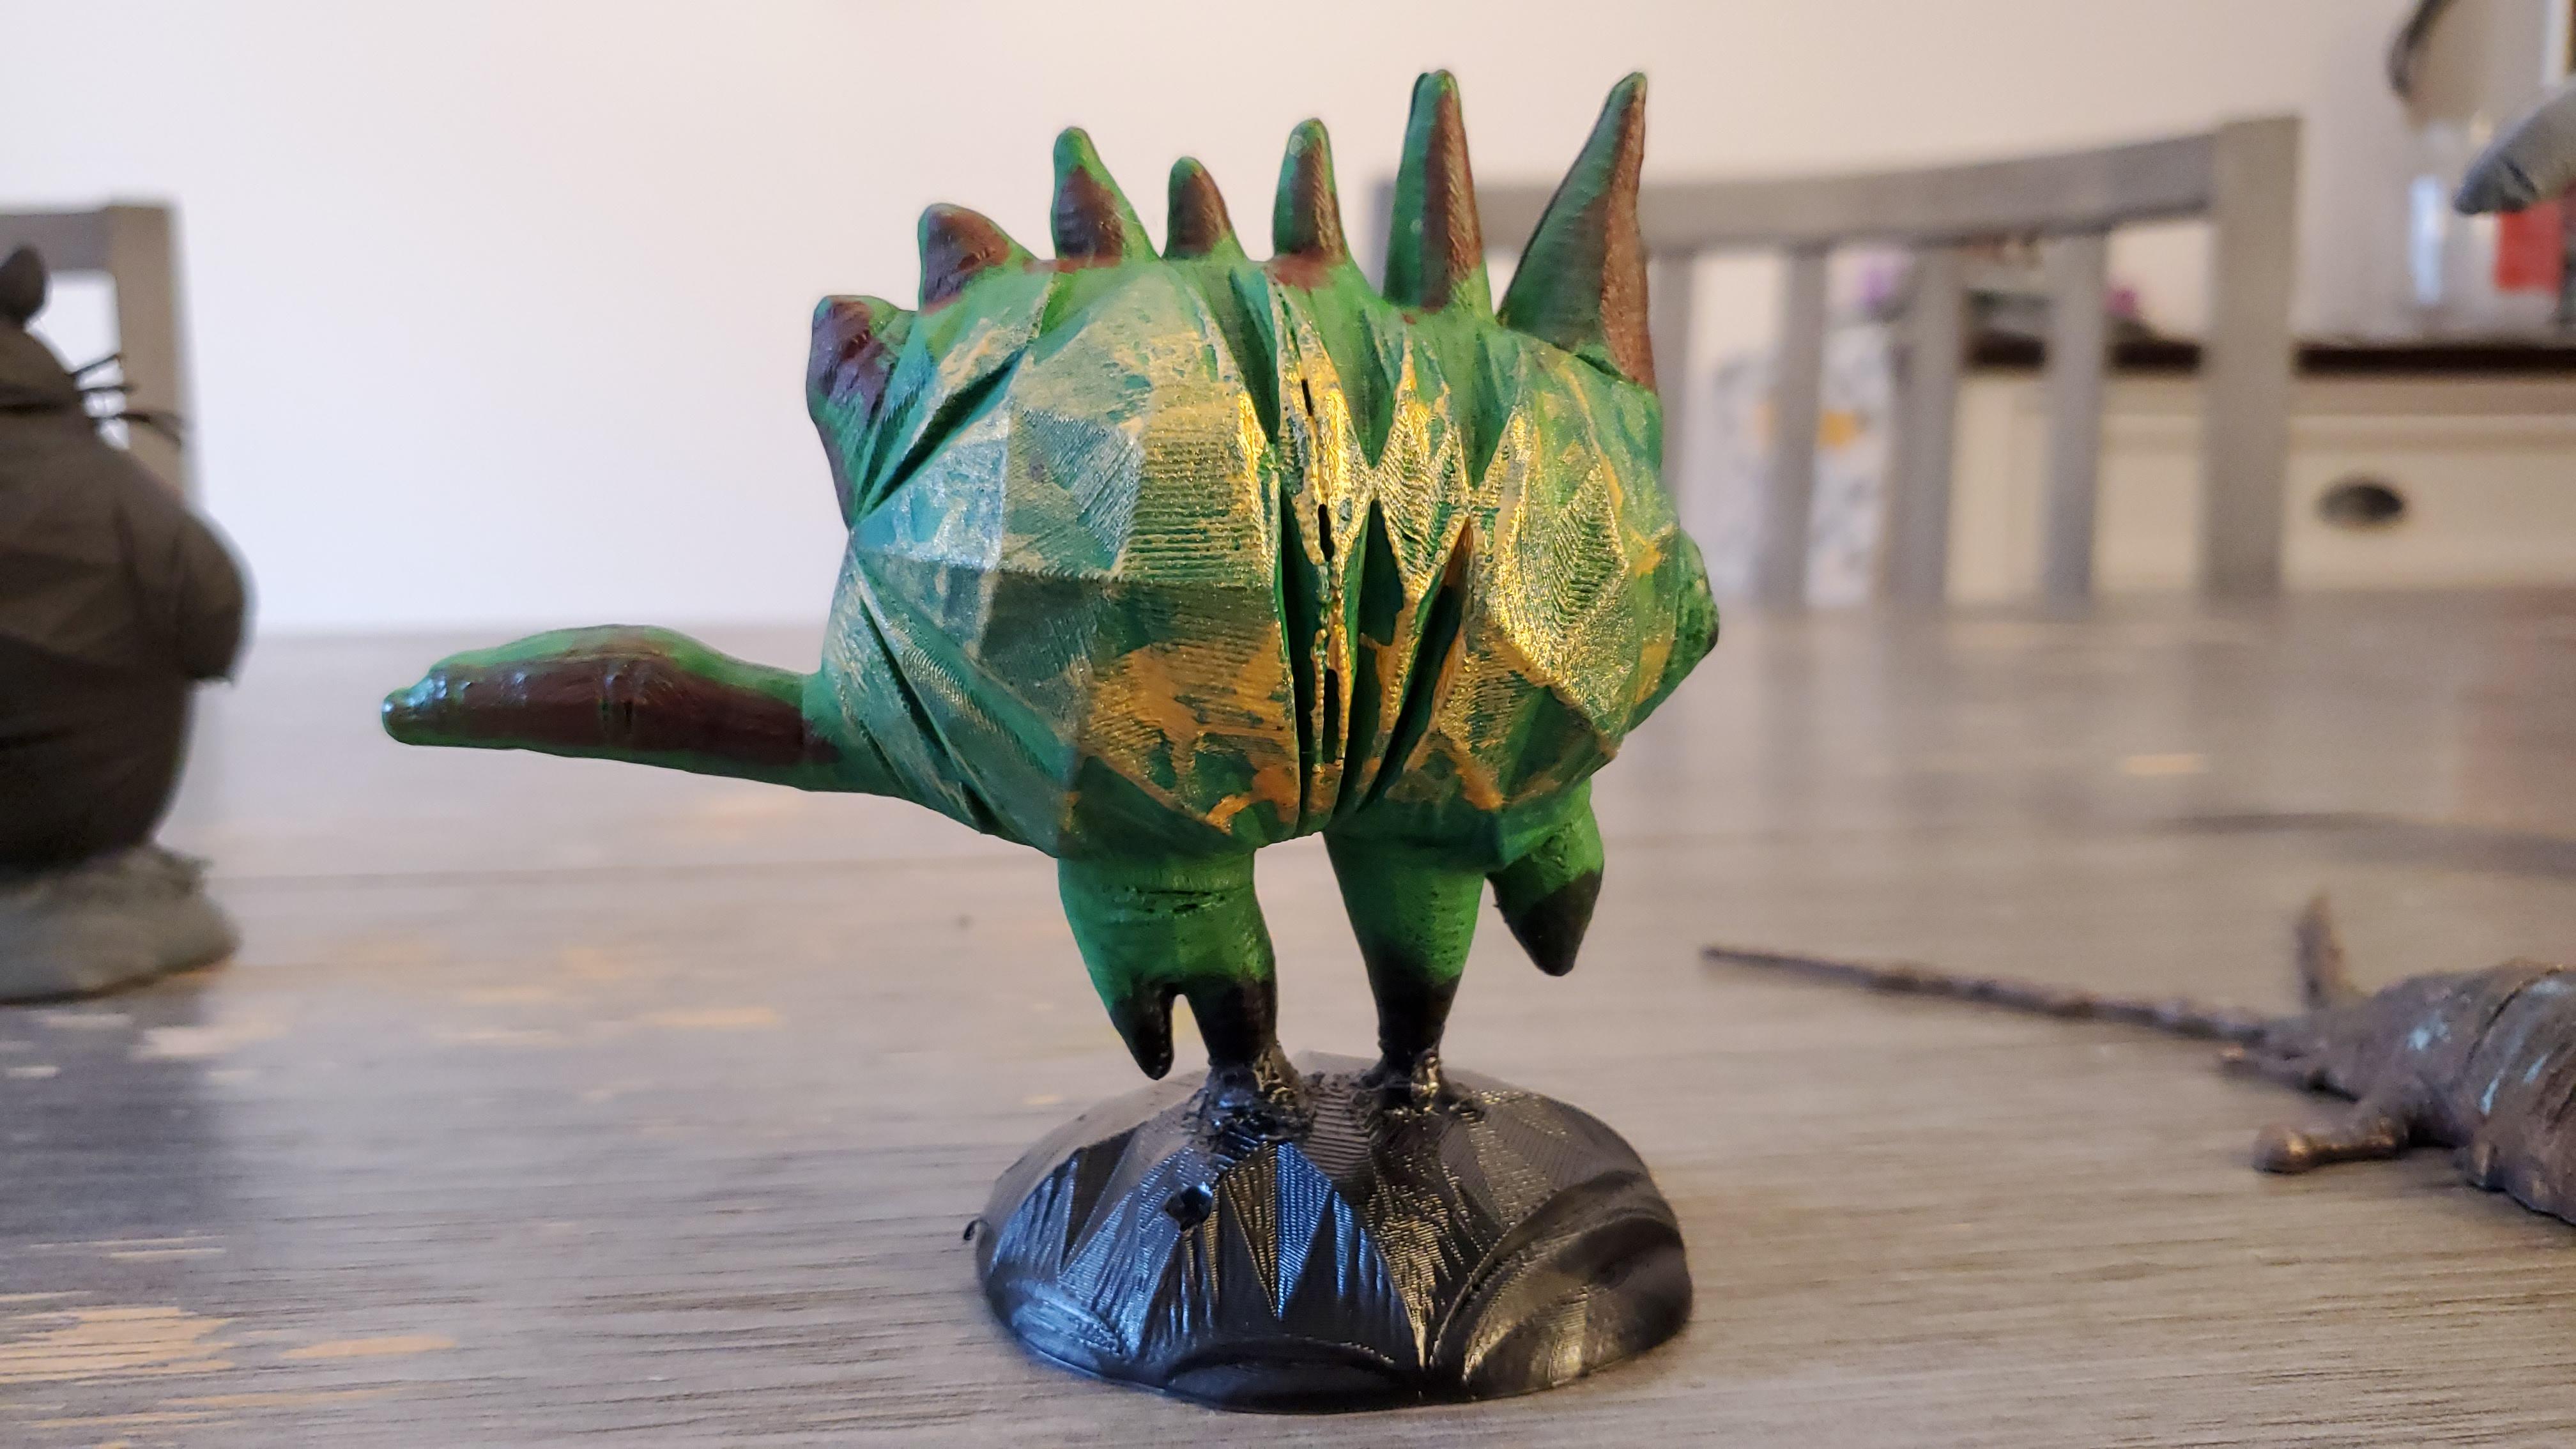
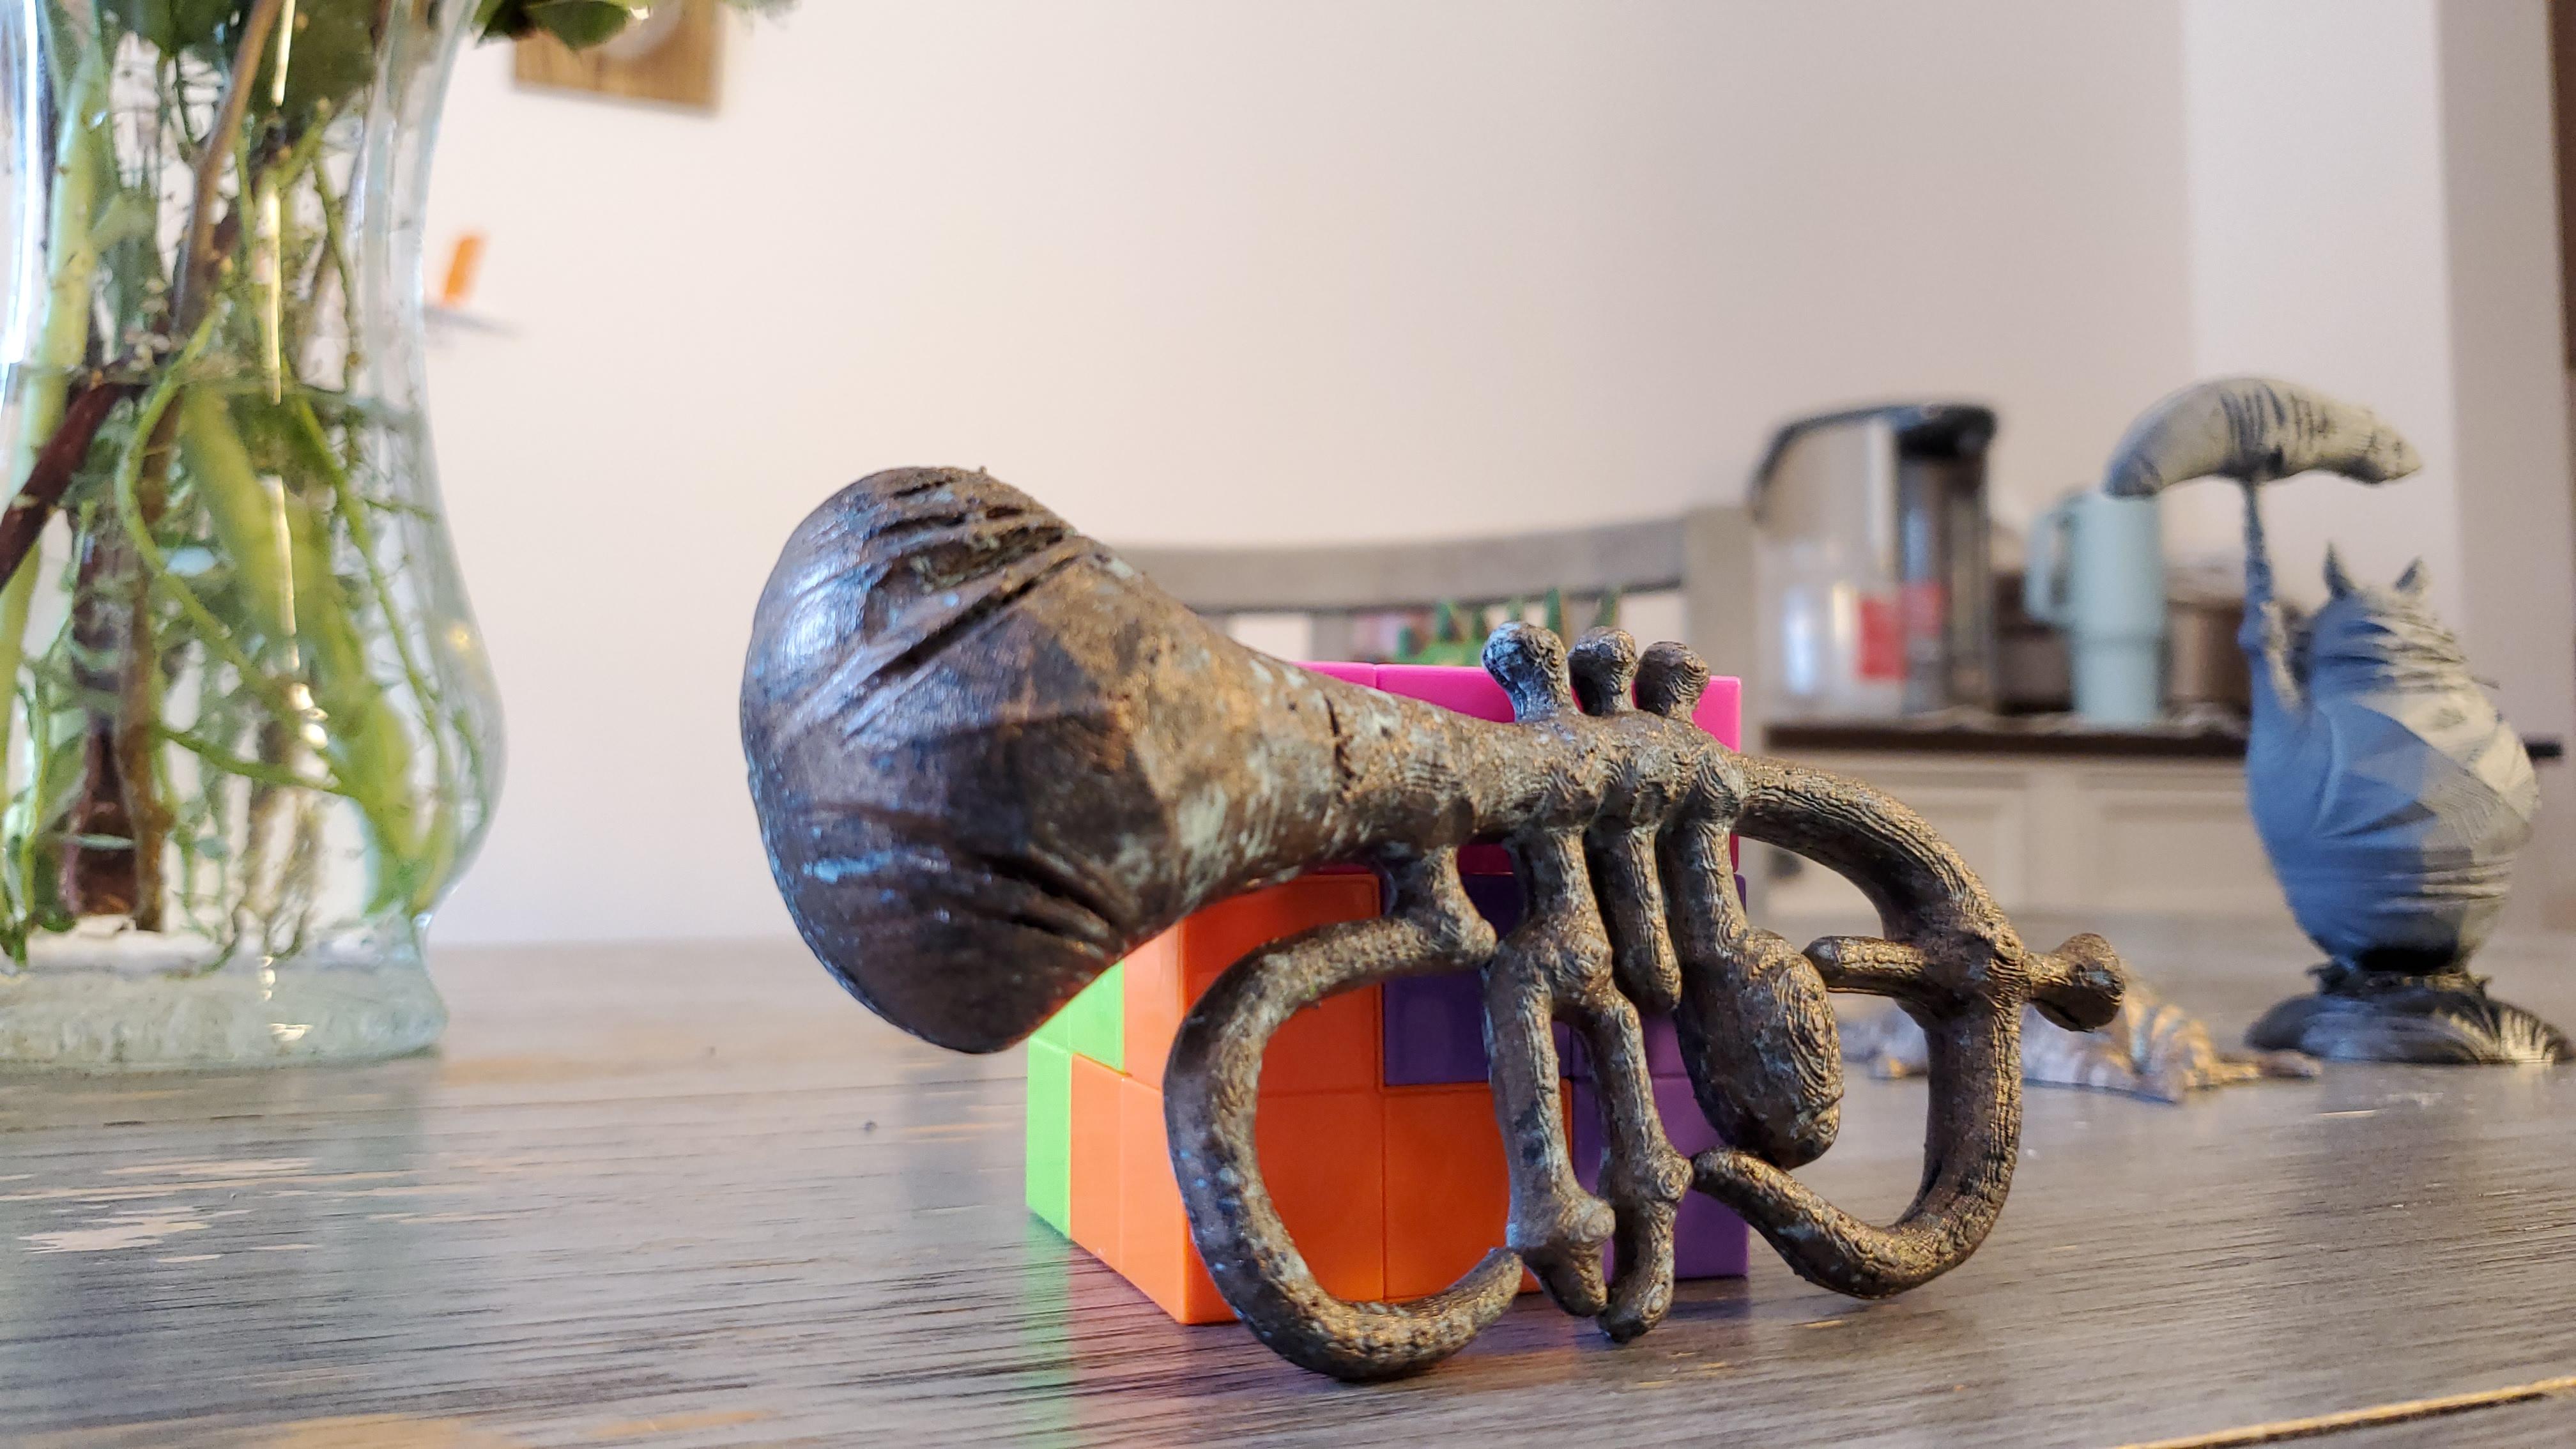
These are the outcomes. I finished these prints with different methods, including:
- Acrylic Paints
- Metal Effects Paints
- Metal Effects Paints with Patina effects
I really like the outcomes. I hope this guide is helpful to you too!