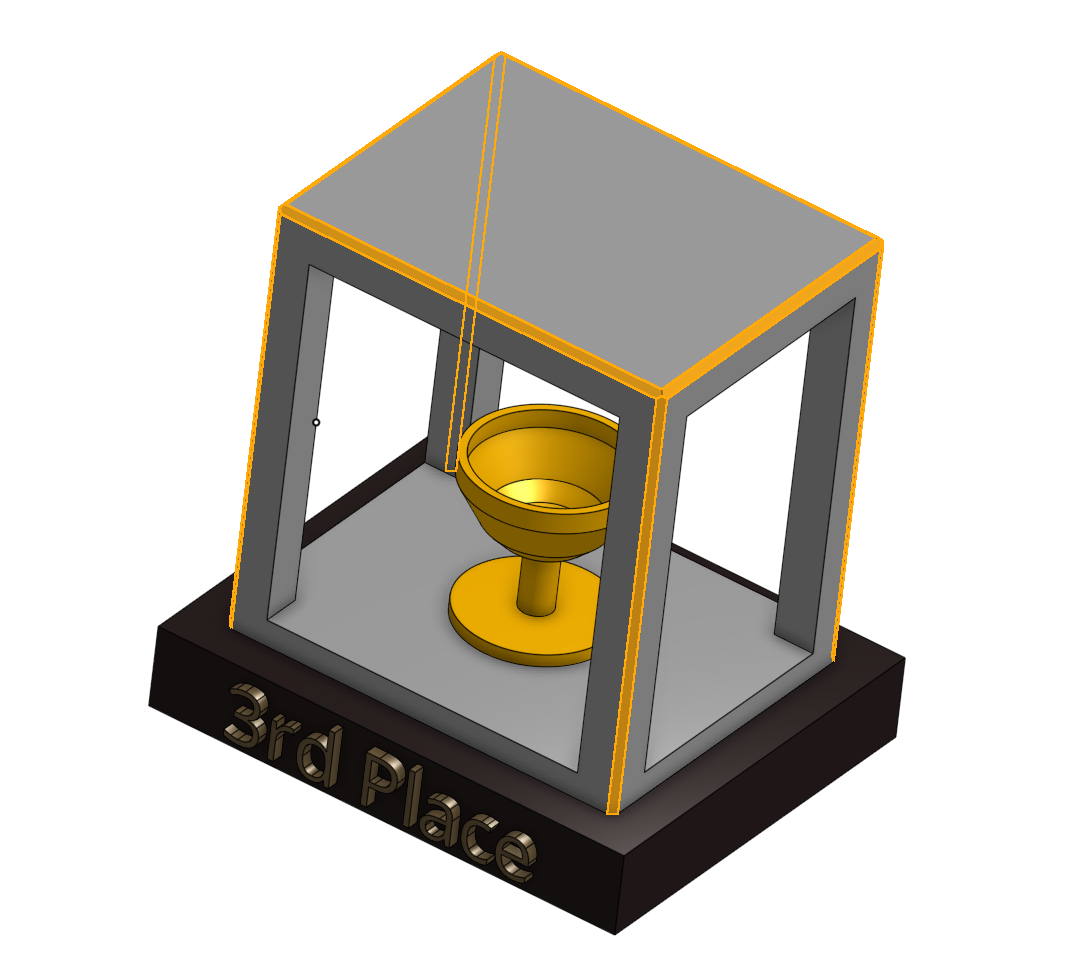
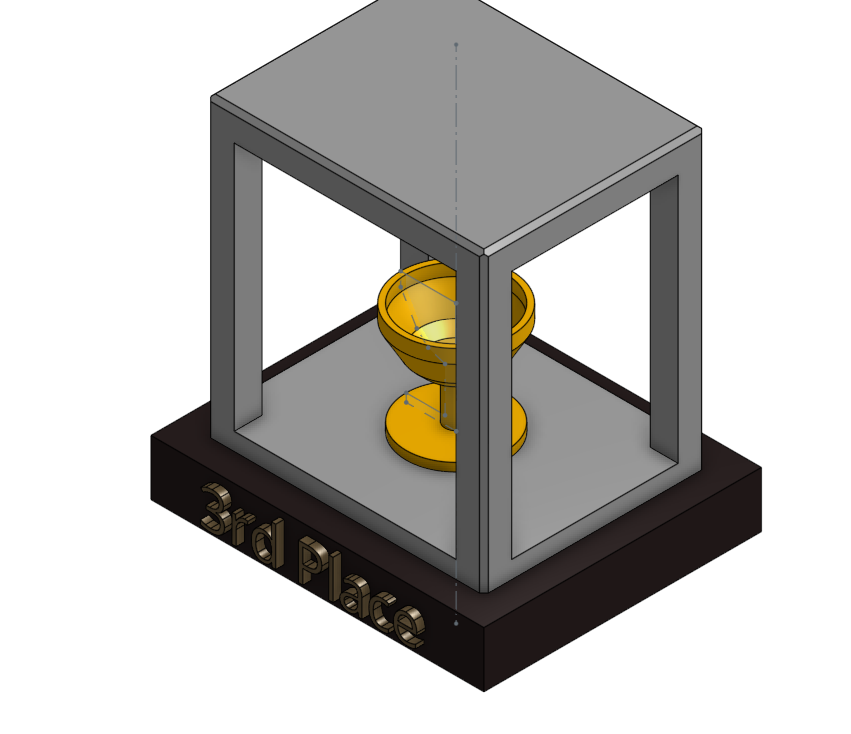
Trophy in a Case
by somerabryanjames5867 in Workshop > 3D Printing
143 Views, 0 Favorites, 0 Comments
Trophy in a Case
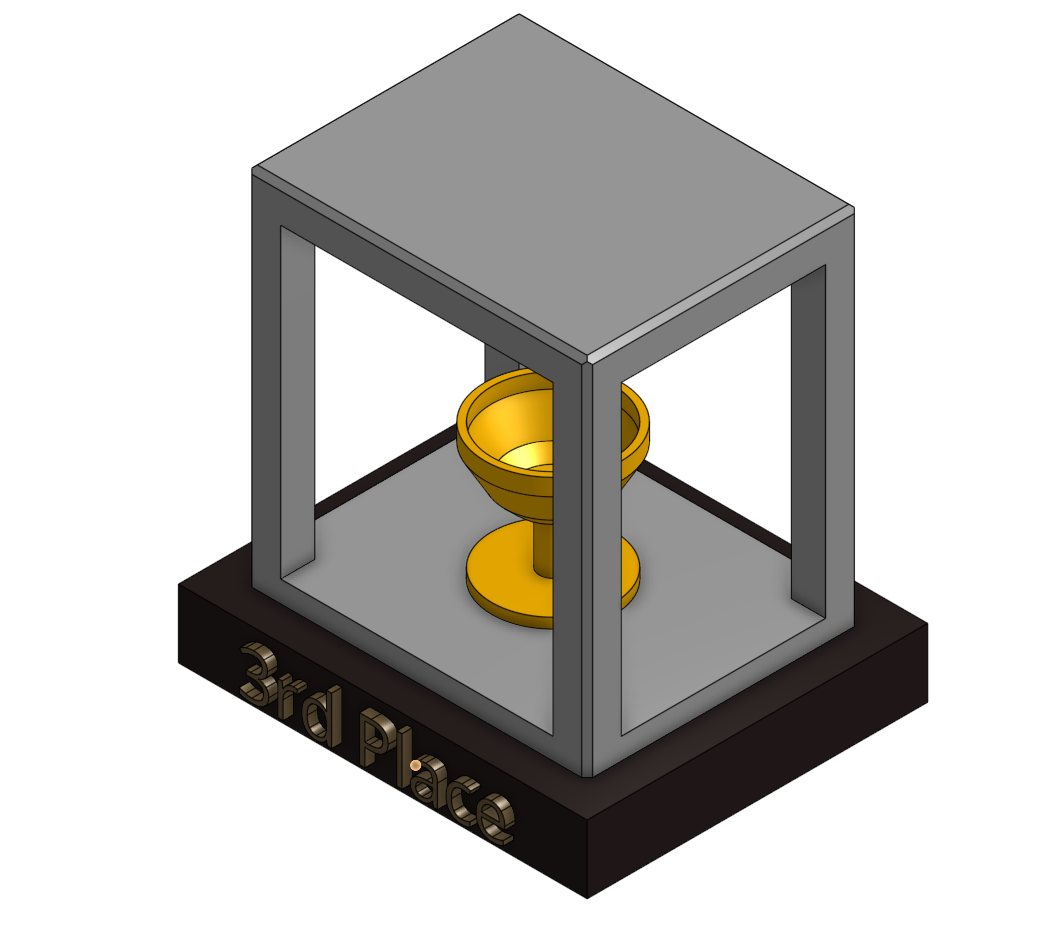
I made a trophy case because it's nice to look at.
Supplies
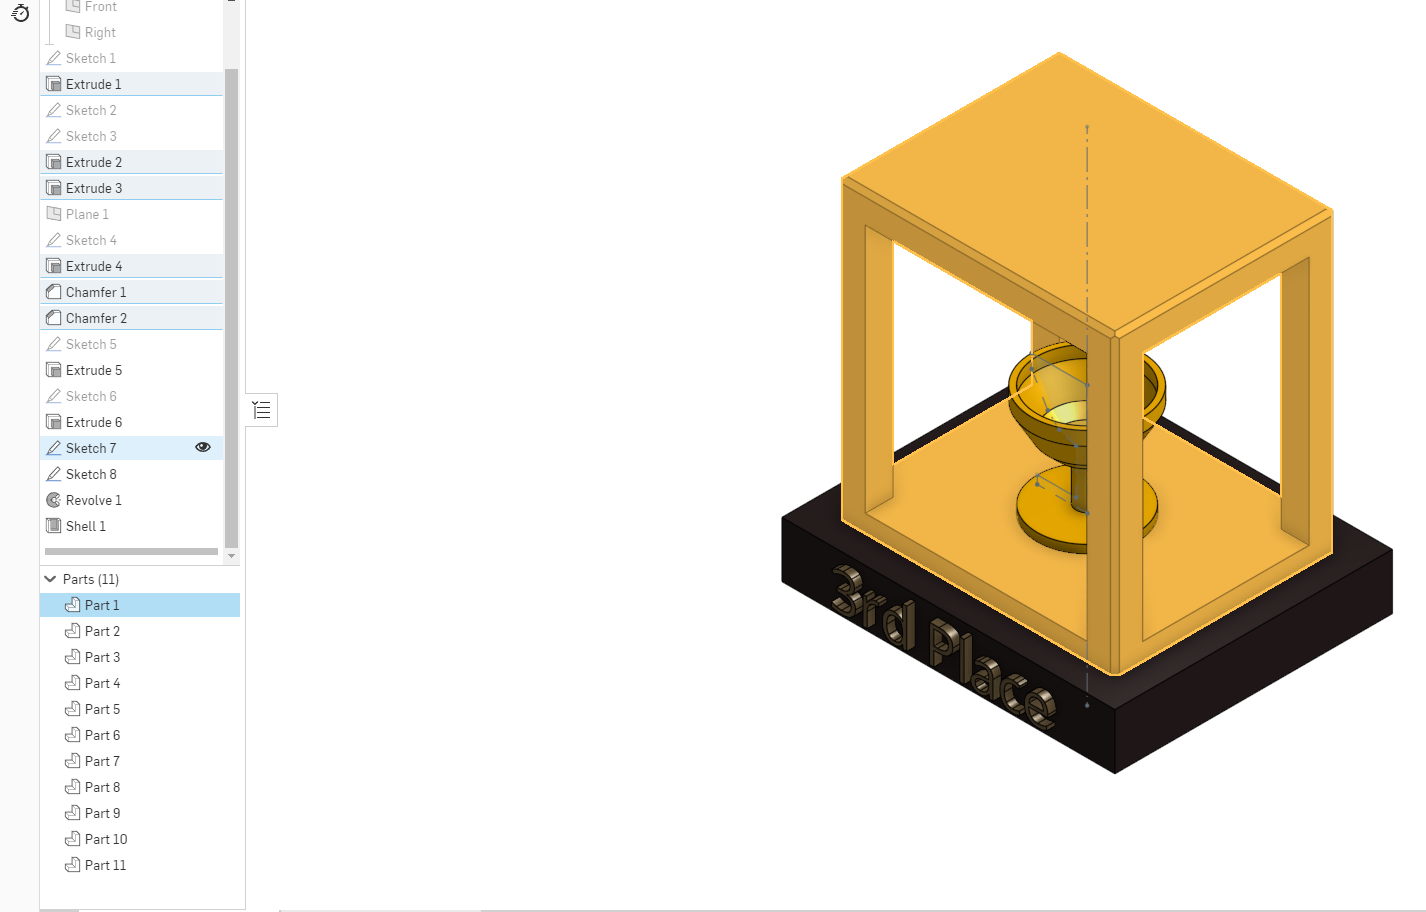
ONshape
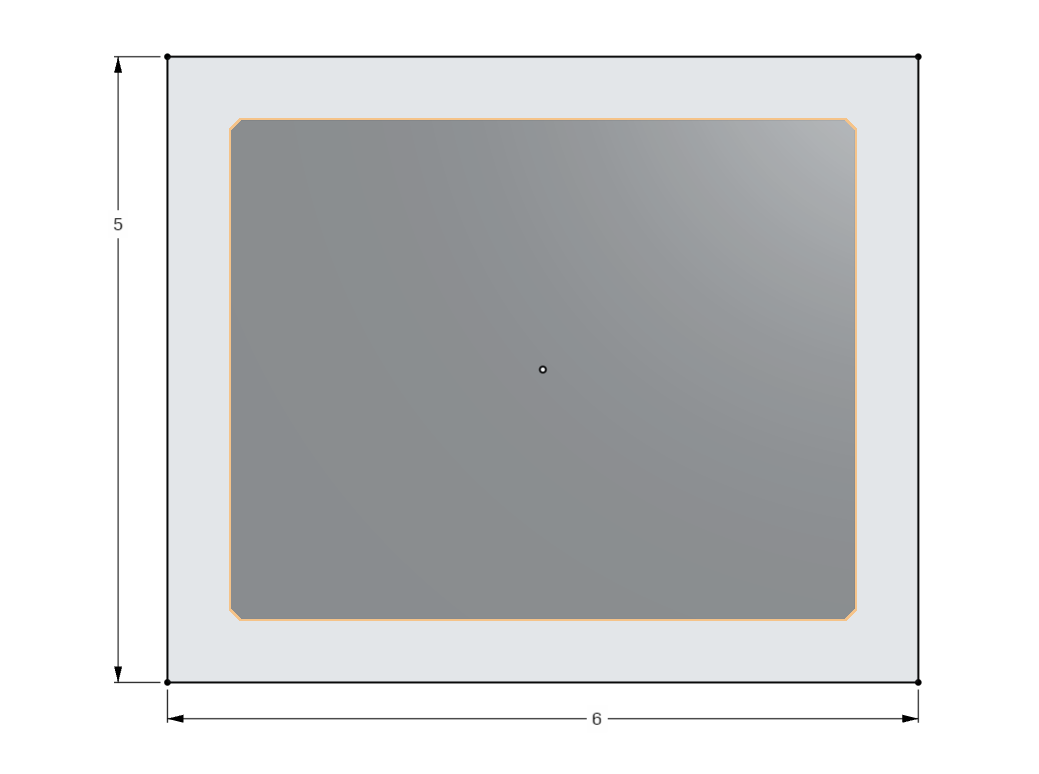
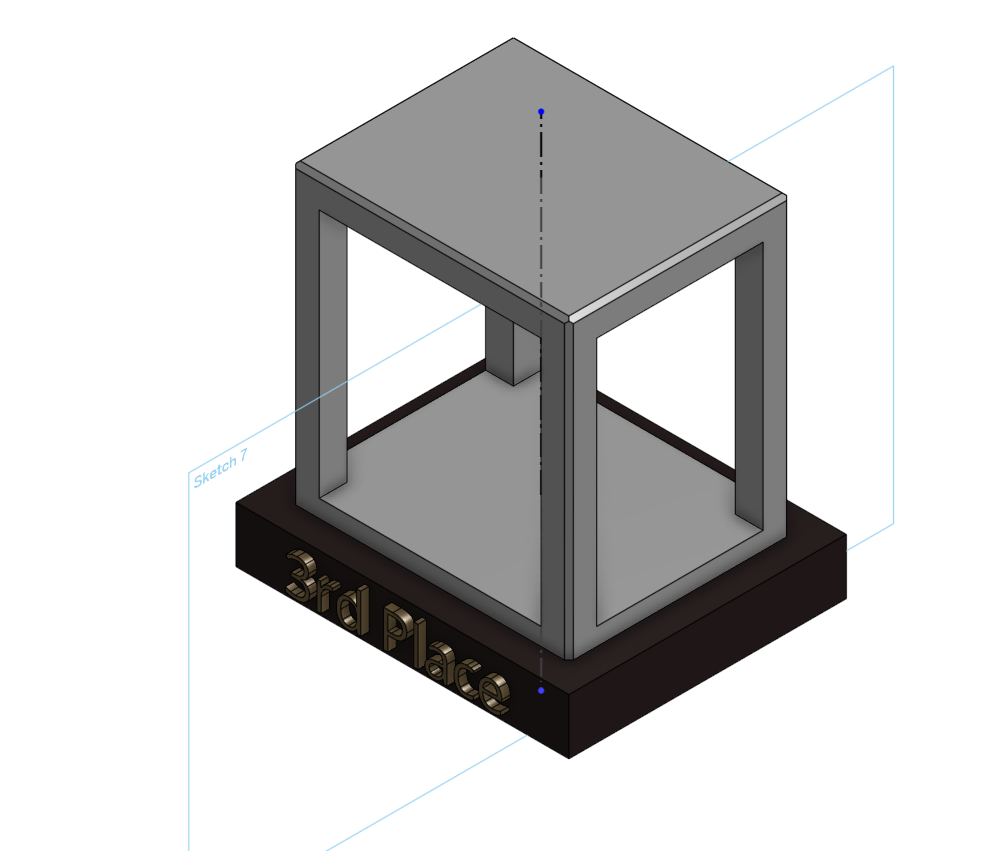
Base Sketch
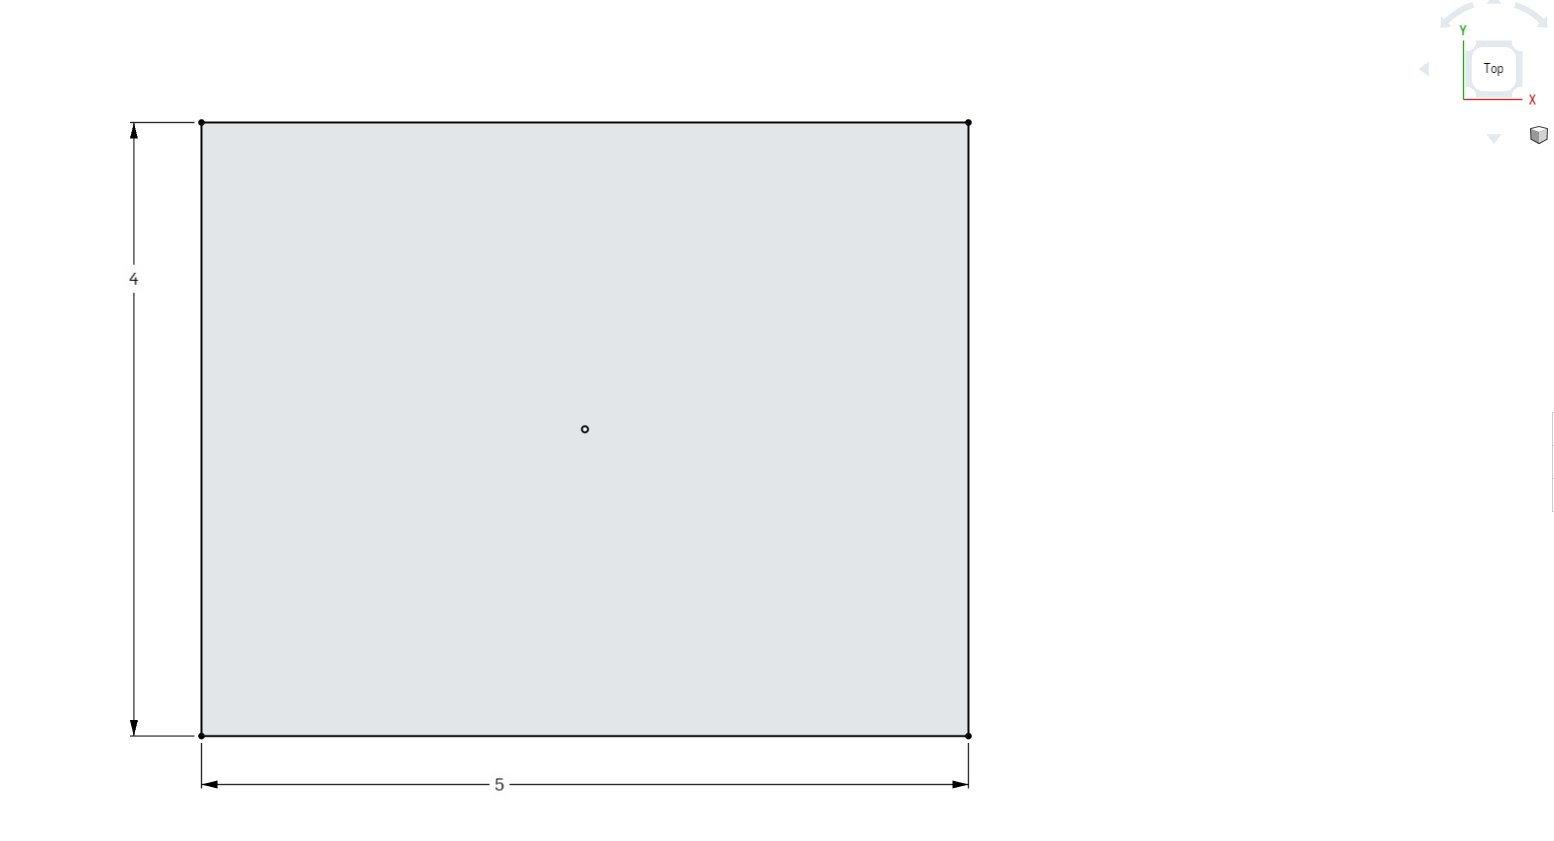
Create a sketch on the top plane and draw a 4x5 rectangle (in INCHES).
Extrude 1
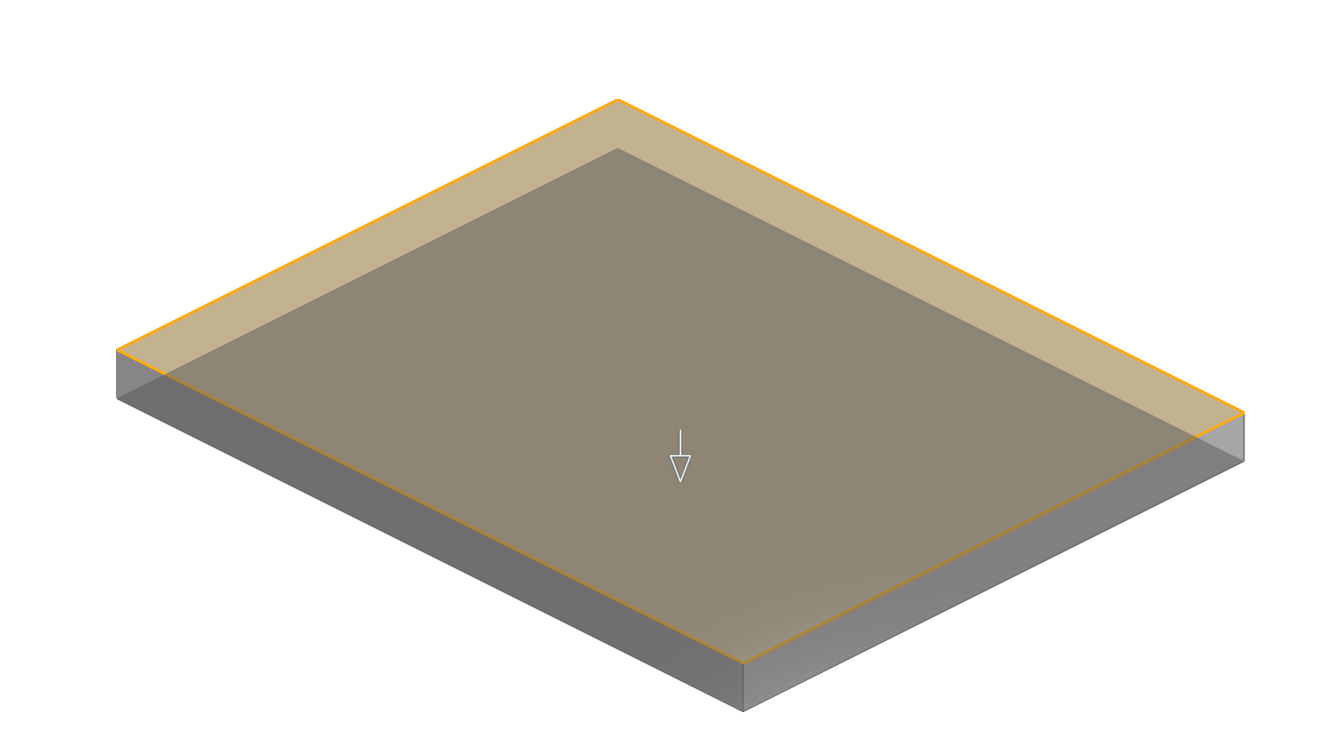
Extrude towards the bottom by 0.315 inches. Make sure it's set to "solid," "new," and "blind."
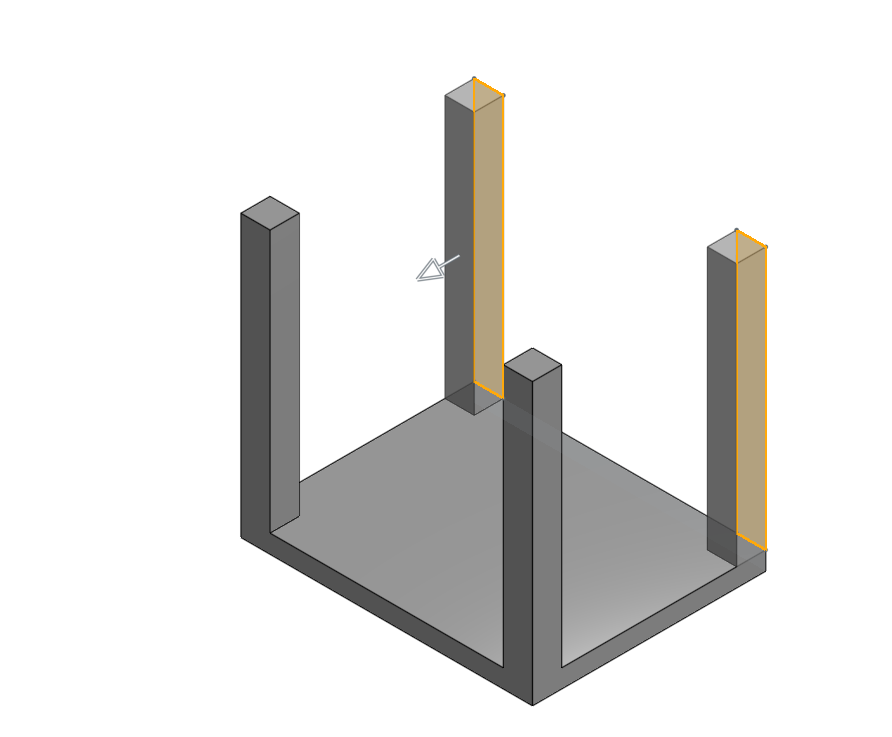
Sketch 2 & 3
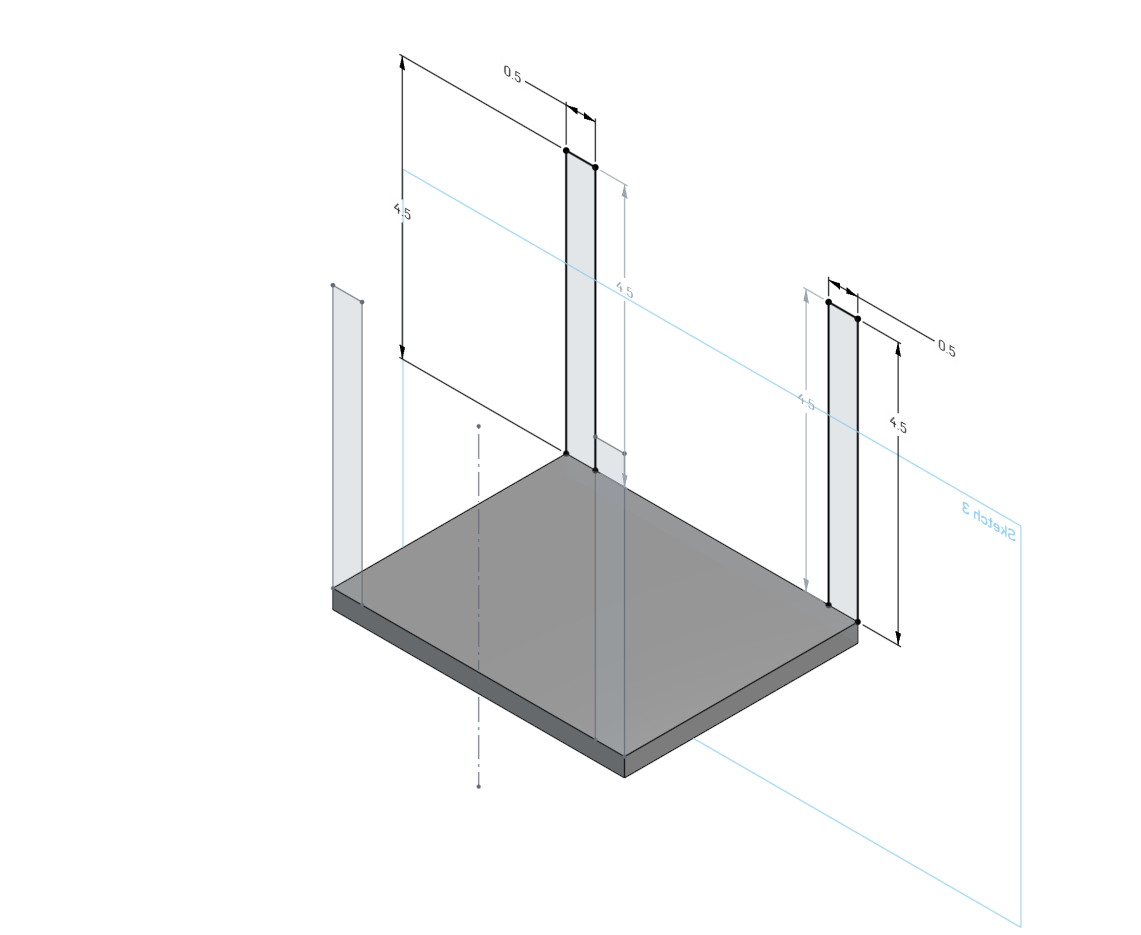
On the front and back of the face of extrude one, make a total of four 4.5x0.5 inch beams.
Extrude 2 & 3
Extrude the faces of the sketches inwards by 0.5 inches.
Offset Plane
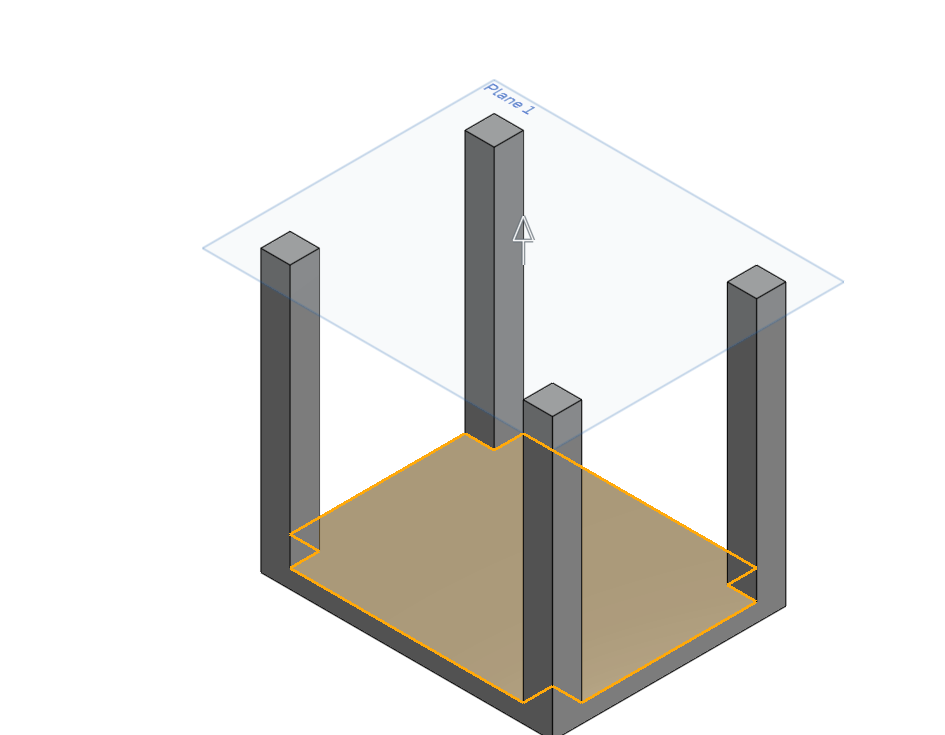
On the top face of extrude one, create an offset plane that is 4.5 inches from the face of extrude one.
Roof and Extrude
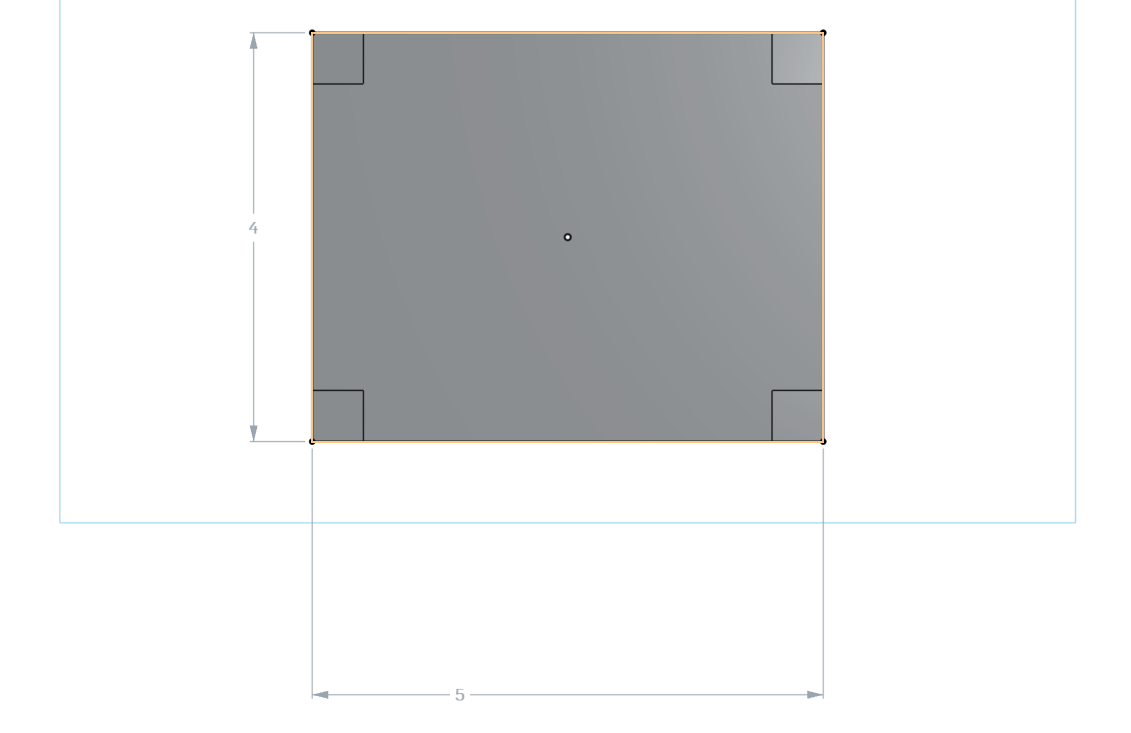
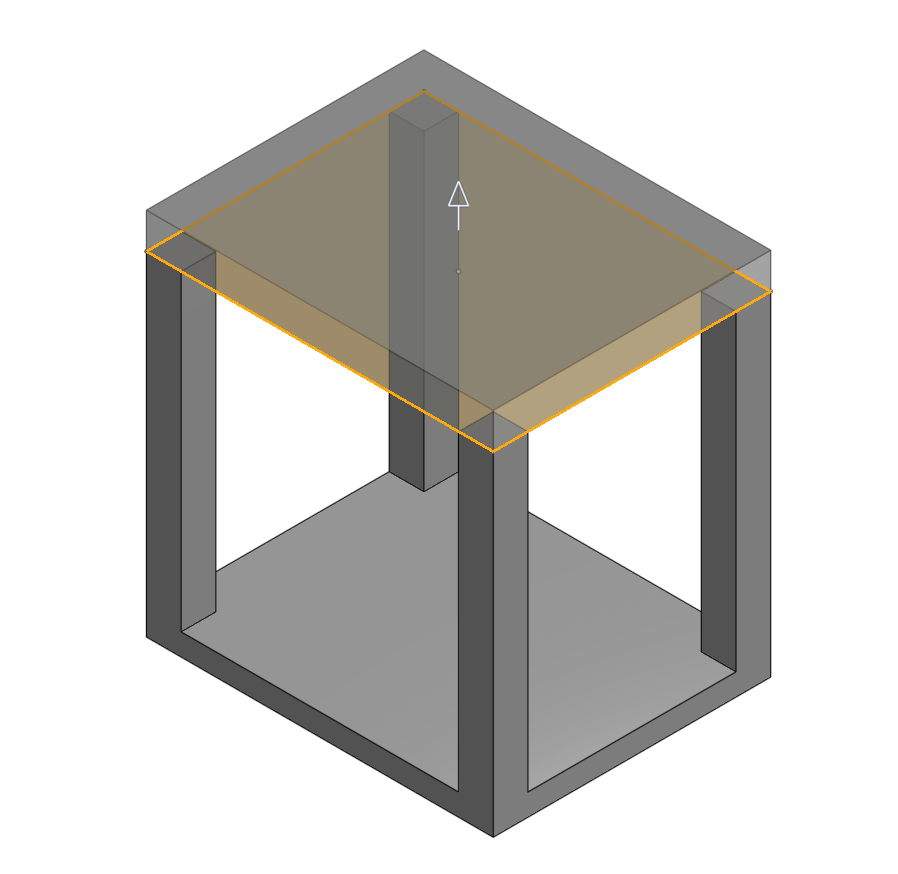
On your offset plane, create a 4x5 inch rectangle and extrude it upwards by 0.515 inches.
Chamfer
Then you'll chamfer all the edges highlighted by 0.08 inches.
Bottom Base
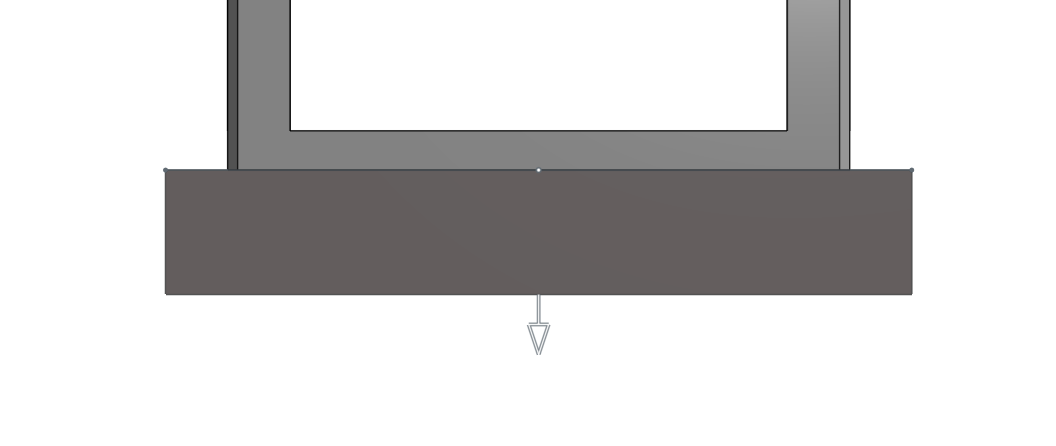
At the bottom of extrude one, create a 5x6 inch rectangle and then extrude by 1 inch.
Stencil
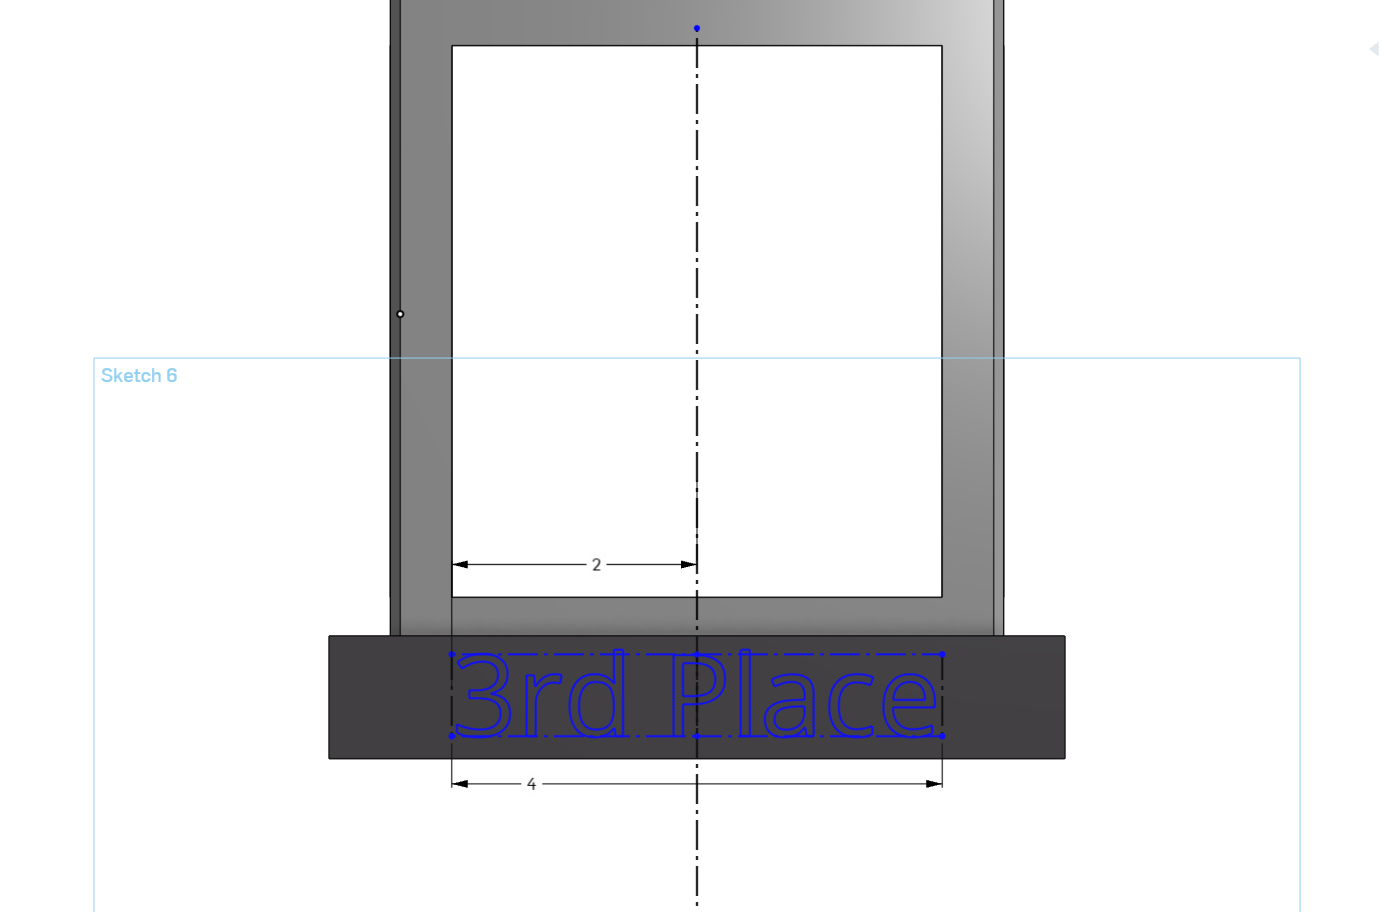
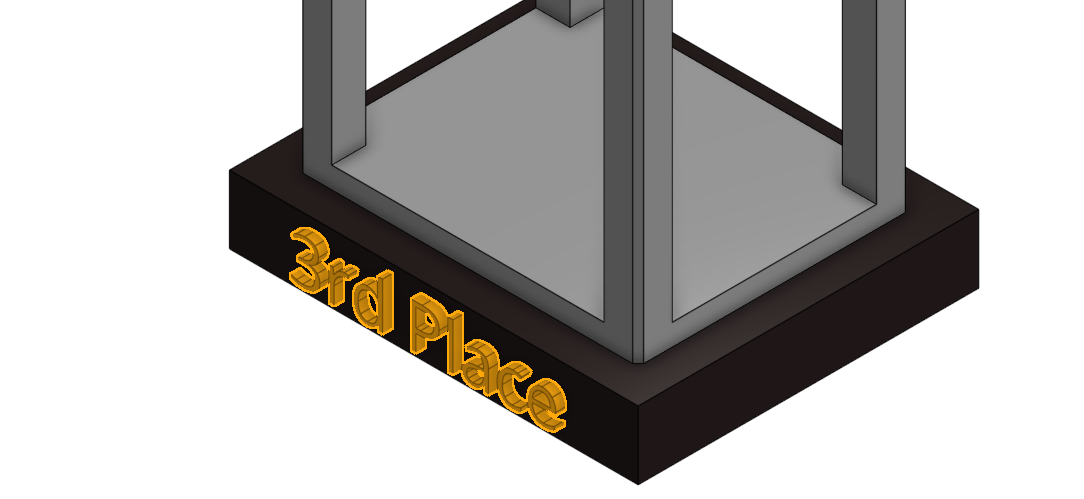
On the face of extrude 5 (Your bottom base), write the stencil "3rd Place." Then create a center line to center what you've written. The length of the stencil should be 4 inches, and the edges should be 2 inches away from the centerline.
After that, extrude your stencil by 0.15 inches.
Center
On the right plane, create a construction line in the center.
Trophy Sketch
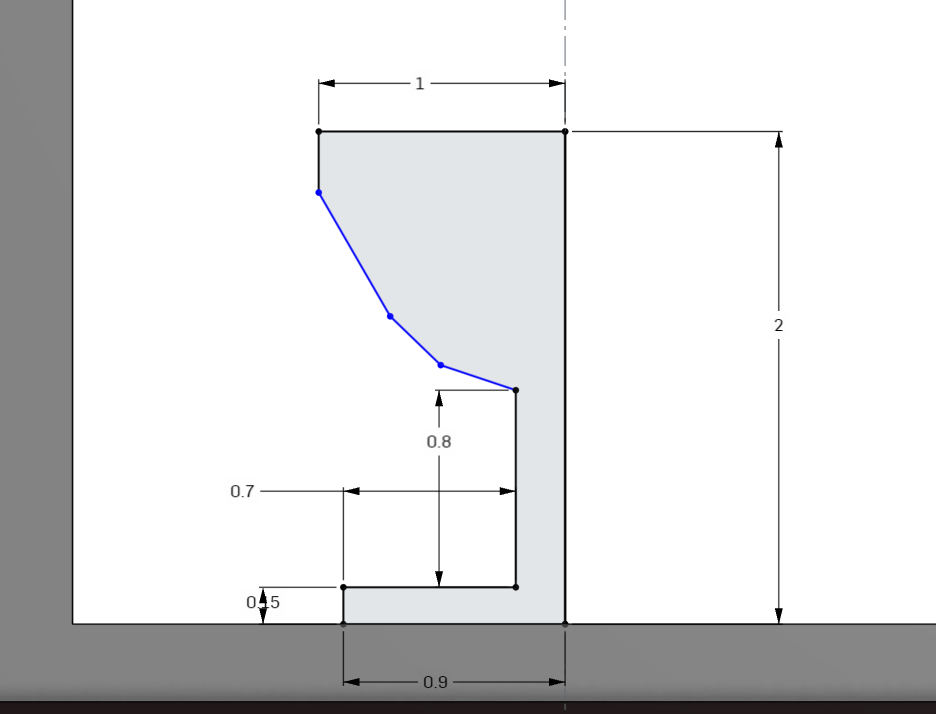
On the front plane create the half of your trophy using the dimensions above. Any dimensions work as long as they're within the area of the case.
Revolve and Shell
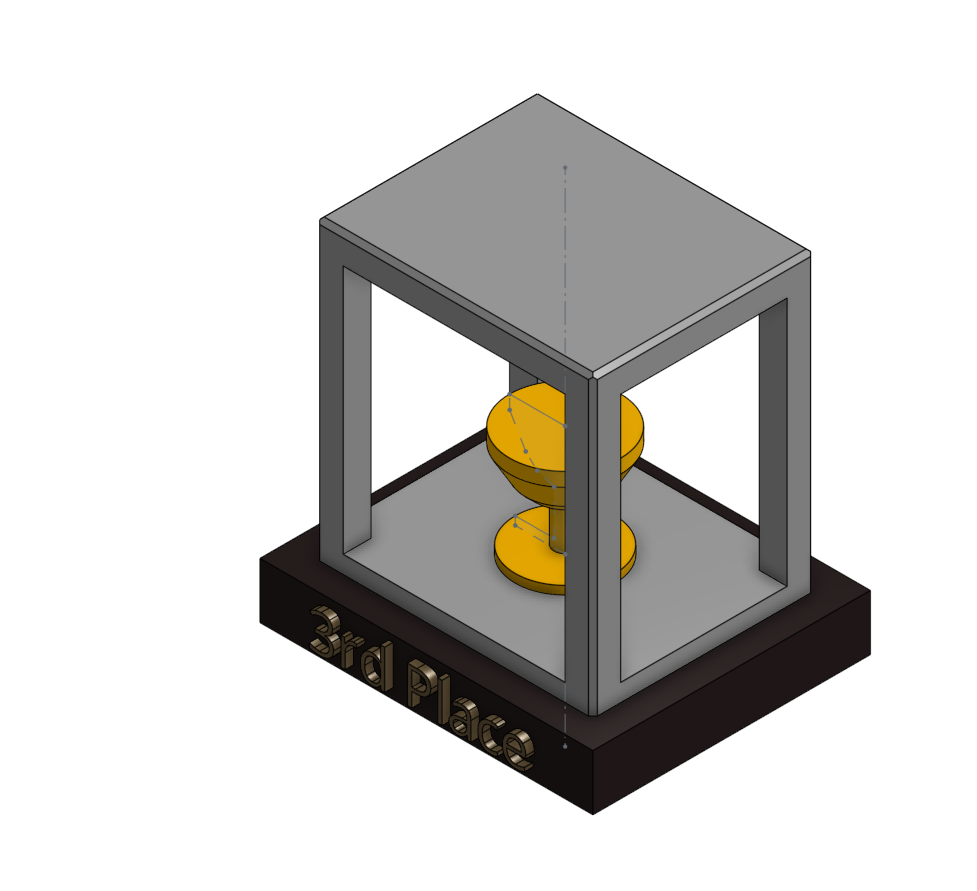
After the sketch, you will revolve the sketch around the center construction line. After that you will shell the trophy by 0.1 inches.
Color
After finishing your trophy, color all your remaining parts to whatever color you choose.