Transmit & Visualise WiFi Sensor Data Without Coding!
by sylwekbala in Circuits > Sensors
2393 Views, 14 Favorites, 0 Comments
Transmit & Visualise WiFi Sensor Data Without Coding!

In this project we show a very easy way of putting together battery powered WiFi sensor devices, transmitting and visualising their data out of the box. We can stick them anywhere within WiFi range and run on single batteries for months. We use the IOT Cricket WiFi module for a sensor device (i.e. temperature) to transmit data and AdafruitIO to visualize it. Both can be easily configured to stream data over either HTTP or MQTT without writing a single line of code and programming.
In a few steps we show a complete workflow on how to create graphs and feed data to AdafruitIO via HTTP (Webhook) from the sensor device. Then we configure IOT Cricket to send data directly to that webhook to plot a graph on our dashboard. This project can be realised by makers at all skill levels. It may require some basic soldering though. In the end of this project you will get a solid idea how you can easily build any sensors, visualise their data and come up with some awesome dashboards all by yourself.
Supplies
- IOT Cricket WiFi module
- 2xAAA battery holder
- 2xAAA batteries
- [optional] 6-Way Terminal Block
What Is Webhook?
As we feed data to AdafruitIO via webhook, we first need to explain what it is. Webhook is a HTTP API on a server-side. Any function on a server can be triggered by sending a HTTP request to a given URL address. Usually the HTTP address is a link composed with a unique private token string and only clients who have this address can send a request. There are different methods of requests and for this project we use the POST method.
POST is one of the most common methods used to send data to a server. The data is stored in the body of the HTTP request and usually it is coded in JSON format. For example, to send a value equals 20 to our Adafruit webhook (https://io.adafruit.com/api/v2/webhooks/feed/YOUR_TOKEN) we can use command line tool curl as shown below:
curl -X POST -d '{"value":"20"}' -H 'Content-Type: application/json' https://io.adafruit.com/api/v2/webhooks/feed/YOUR...Configure AdafruitIO (1/3)

Go to AdafruitIO account or register (io.adafruit.com) if you do not have one. The account is free of charge with some limitations. However, for this project the free account is sufficient.
> Create a Dashboard and name it e.g. MyHome
> In the dashboard create a Block
> Select "Line Chart" type
> Create a data feed channel, e.g. MyTempSensor
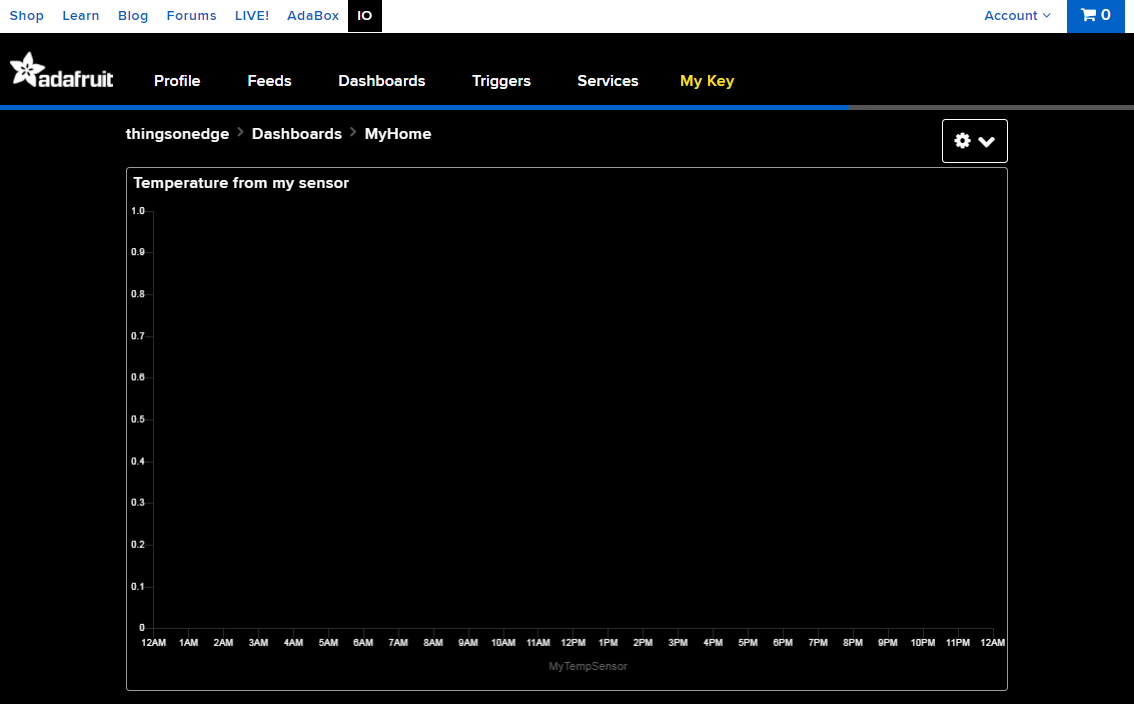
And here we get this Line Chart, which looks like on the image above:
Configure AdafruitIO (2/3)

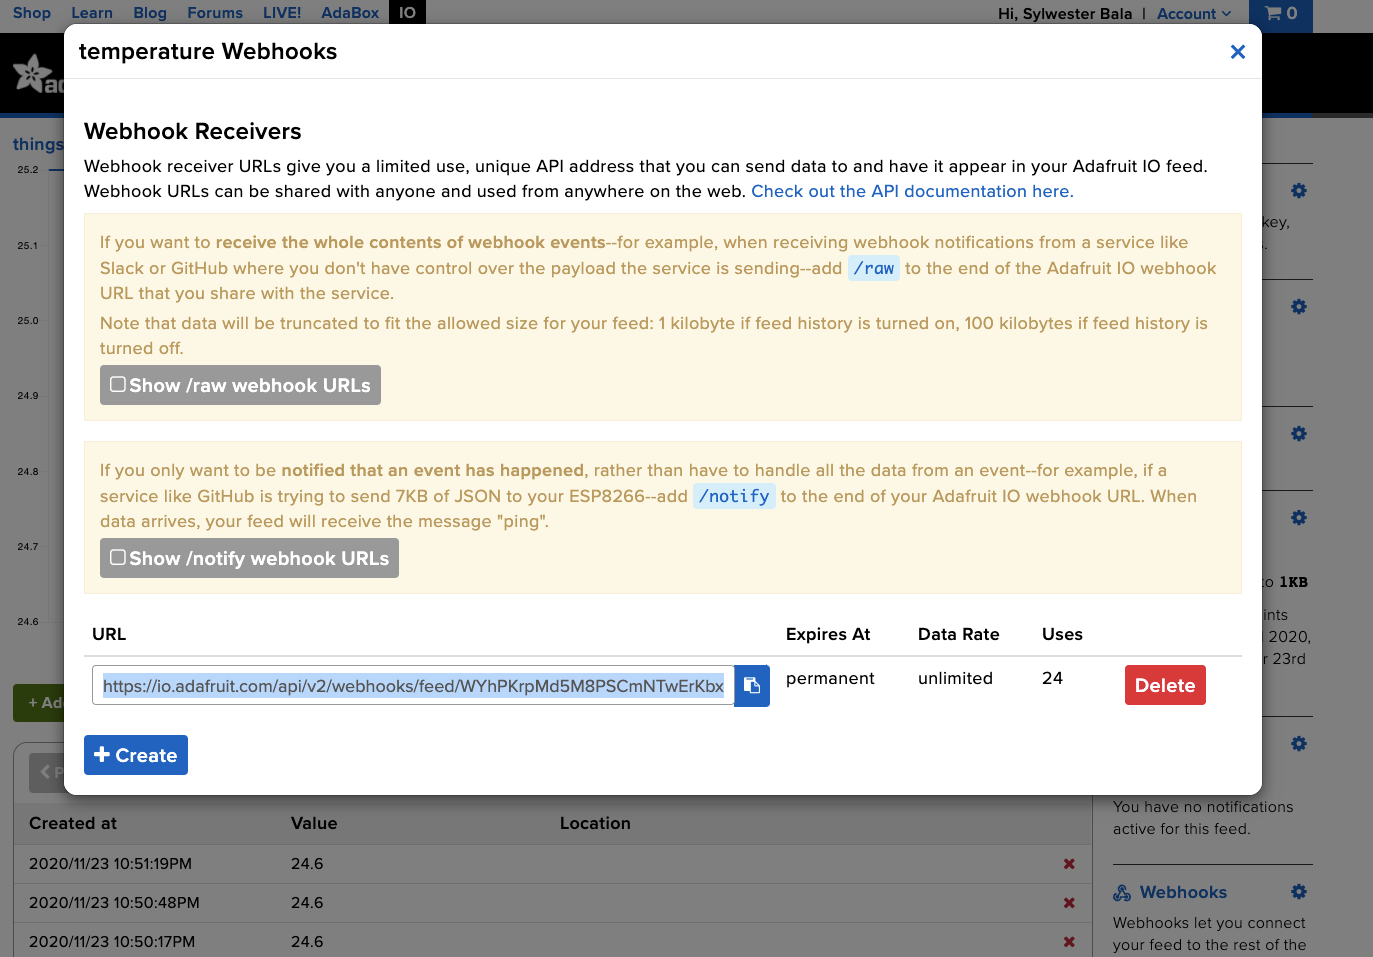
The graph is empty and we need to feed it with the data from our sensor. In order to do this we also need to create a Webhook for the MyTempSensor feed:
> Go to the Feeds tab and click on MyTempSensor (or whatever you named it)
> Create a Webhook (right-bottom corner)
> +Create URL link as shown above
Configure AdafruitIO (3/3)
Now we have the webhook URL link which we need to copy-paste to IOT Cricket configuration.
NOTE: You can close this window and reopen it again by clicking on Webhooks link - the URL remains the same. Optionally, before moving on to Cricket's configuration of our sensor, you can test if the webhook works by feeding data with a curl commands e.g.:
curl -X POST -d '{"value":"20"}' -H 'Content-Type: application/json' https://io.adafruit.com/api/v2/webhooks/feed/YOUR...Configure Device (IOT Cricket) [1/3]

In this project we use the IOT Cricket WiFi module for our sensor device to report a temperature every 5 minutes (to save battery we can later lower the frequency to 1 hour and disable force-update). Later you can use IOT Cricket to build other battery powered WiFi sensors, alarms, buttons, switches and connect them too.
In the first step we connect batteries to Cricket.
Configure Device (IOT Cricket) [2/3]

Cricket comes with a built-in temperature sensor so we do not need to attach any external sensor for now. We need to configure it to send temperature value to our AdafruitIO webhook by setting both url and data for HTTP_POST connectivity method.
We press the Cricket's built-in button for 5 seconds, which opens the toe_device hotspot. Then we connect to the hotspot from either a laptop or a phone and pass our WiFi credentials (see the detailed steps here).
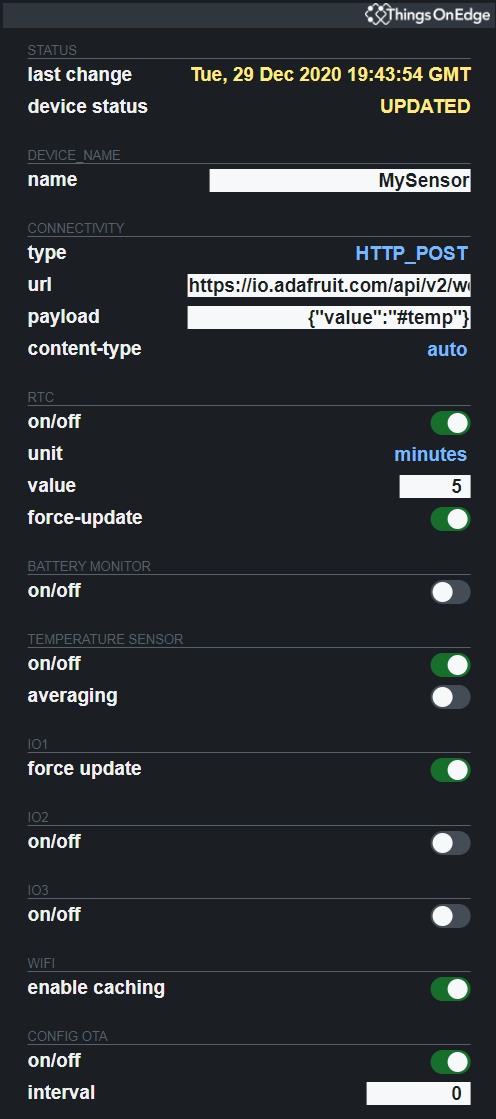
Then configure it with the following settings as shown below:
- Select HTTP_POST connectivity type
- url: copy/paste the URL from the AdafruitIO webhook e.g:
https://io.adafruit.com/api/v2/webhooks/feed/YOUR_...
- payload: we need to define in JSON format what data we want Cricket to send to our webhook. We use a #temp tag which Cricket replaces to an actual temperature value before sending it out. If we used an external sensor then we would have to use #io2 instead of #temp. The complete payload definition looks like this:
{"value":"#temp"}- Enable RTC and set it to wake up every 5 minutes
- Enable the Temperature sensor
So our complete configuration looks like on the image shown below:
Configure Device (IOT Cricket) [3/3]
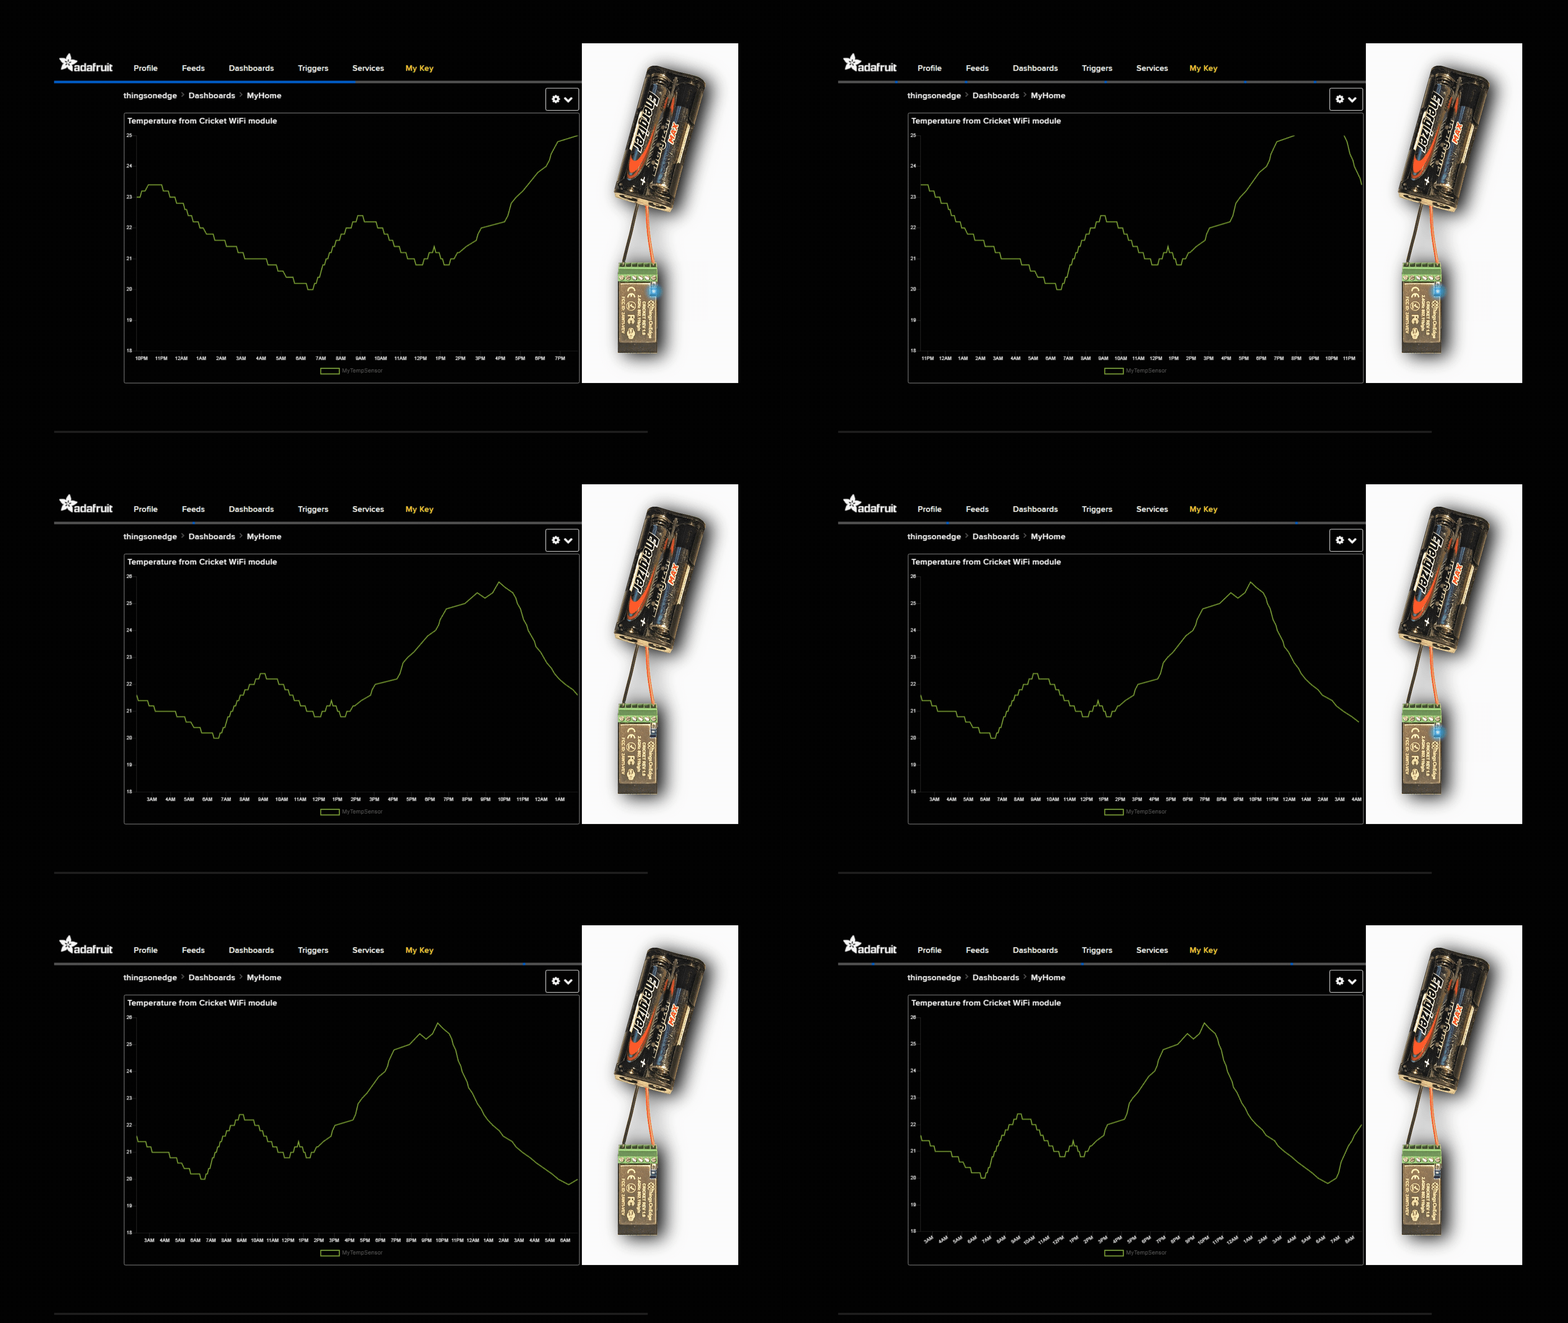
Now we can exit the configuration and our device is ready! Cricket sends data, every 5 minutes, to our AdafruitIO webhook which is feeding the graph as shown below:
Summary
In this project we have shown how you can easily build your own battery powered WiFi sensor device, transmit and visualise its data by using both the Cricket WiFi module and AdafruitIO without writing a single line of code.
For this project we chose AdafruitIO but there are many other great services, which you might also want to consider. To mention a few: Blynk, Thingsboard, ThingsPeak, Horavue, Zapier, IFTTT, Google Sheets, etc. Those services let you play with the data out of the box. There are even more advanced systems which might require a bit more effort to set up but in return they bring almost endless possibilities such as Home Assistant, OpenHAB, Domoticz, NodeRED, Grafana, where you can do a lot more advanced projects. However, the basic principles of how you build and integrate your devices remains almost the same.
The ecosystem of software and services which can be integrated with either HTTP or MQTT is HUGE! There are a lot of great systems as mentioned above to let you come up with a great user experience. Not only can we plot a graph from a single temperature sensor, but we can have great dashboards visualising data from many various types of sensors and events.
Now, the sky is our limit of what other WiFi devices we can build using IOT Cricket modules and integrate them with our dashboards.
Thanks for getting up to here. We hope you enjoyed this tutorial!
Things On Edge team
About Us
Things On Edge is a company based in Cambridge, UK. We design ultra-low battery powered Cricket Wi-Fi module to enable you to connect various electronic devices to smartphones or other internet services literally in minutes. It doesn't require any programming and coding. It allows you to integrate your devices to a huge IOT ecosystem services over MQTT and HTTP apis.