Topographic Coasters
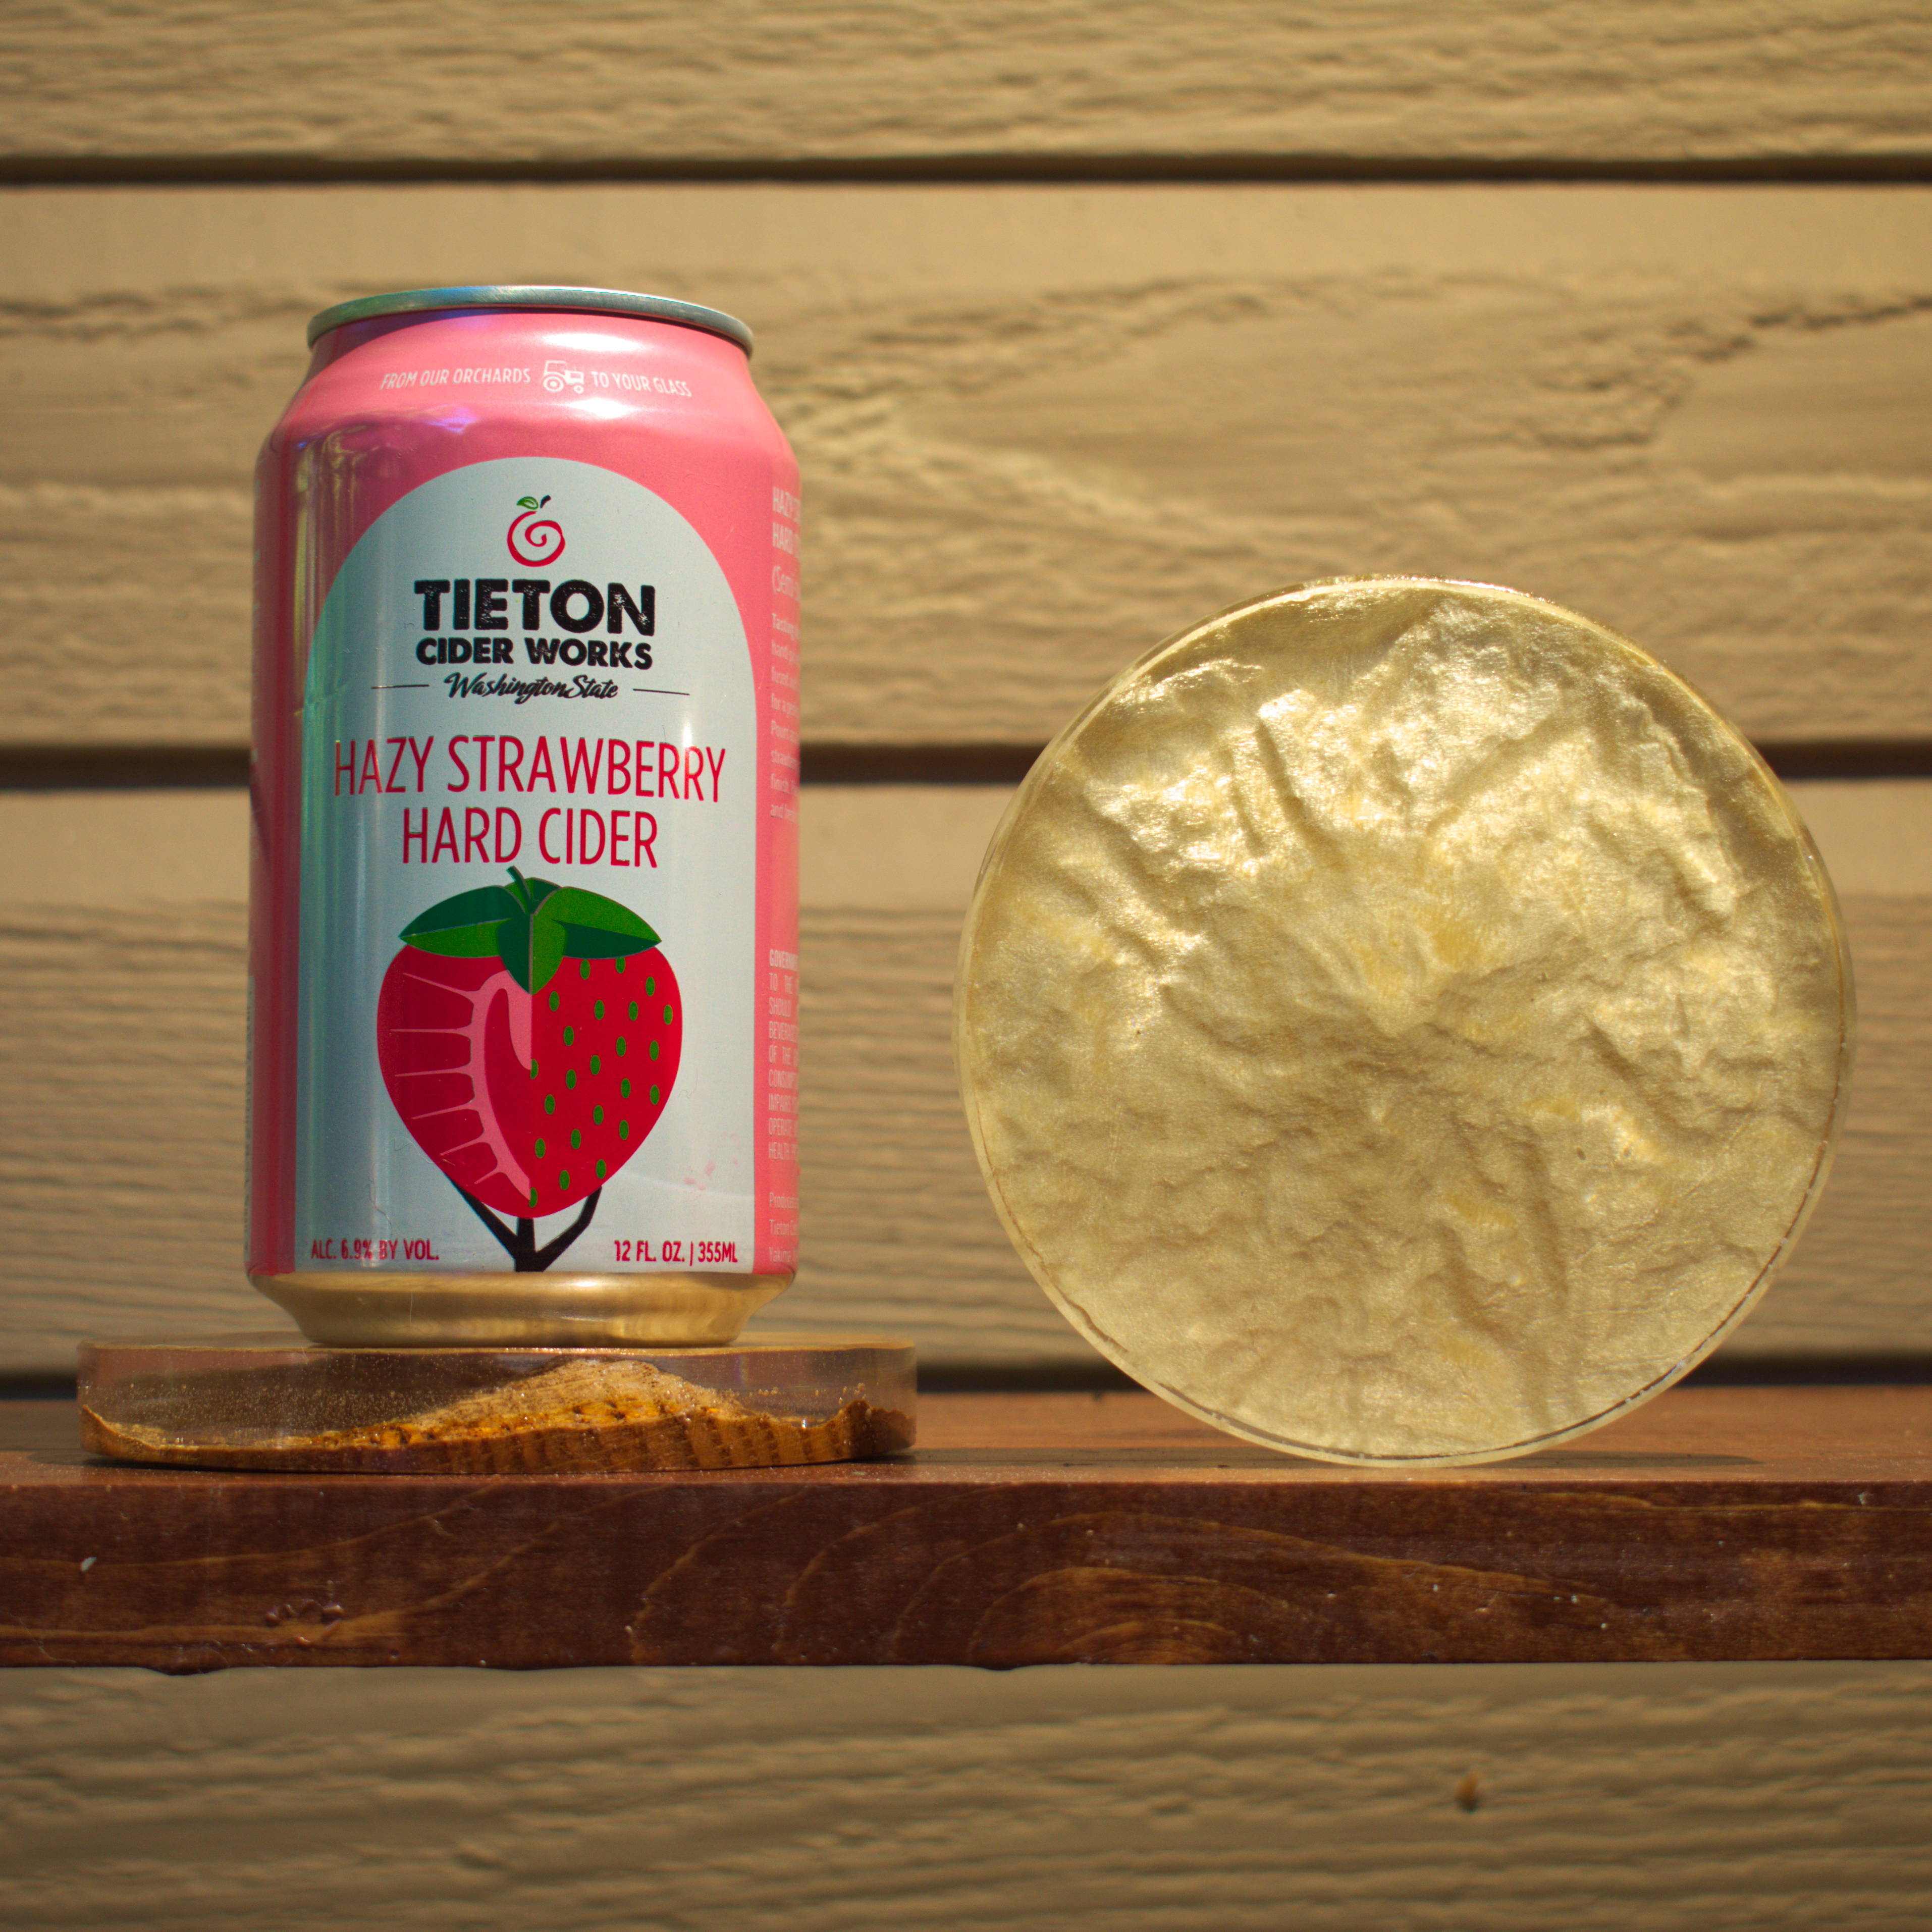
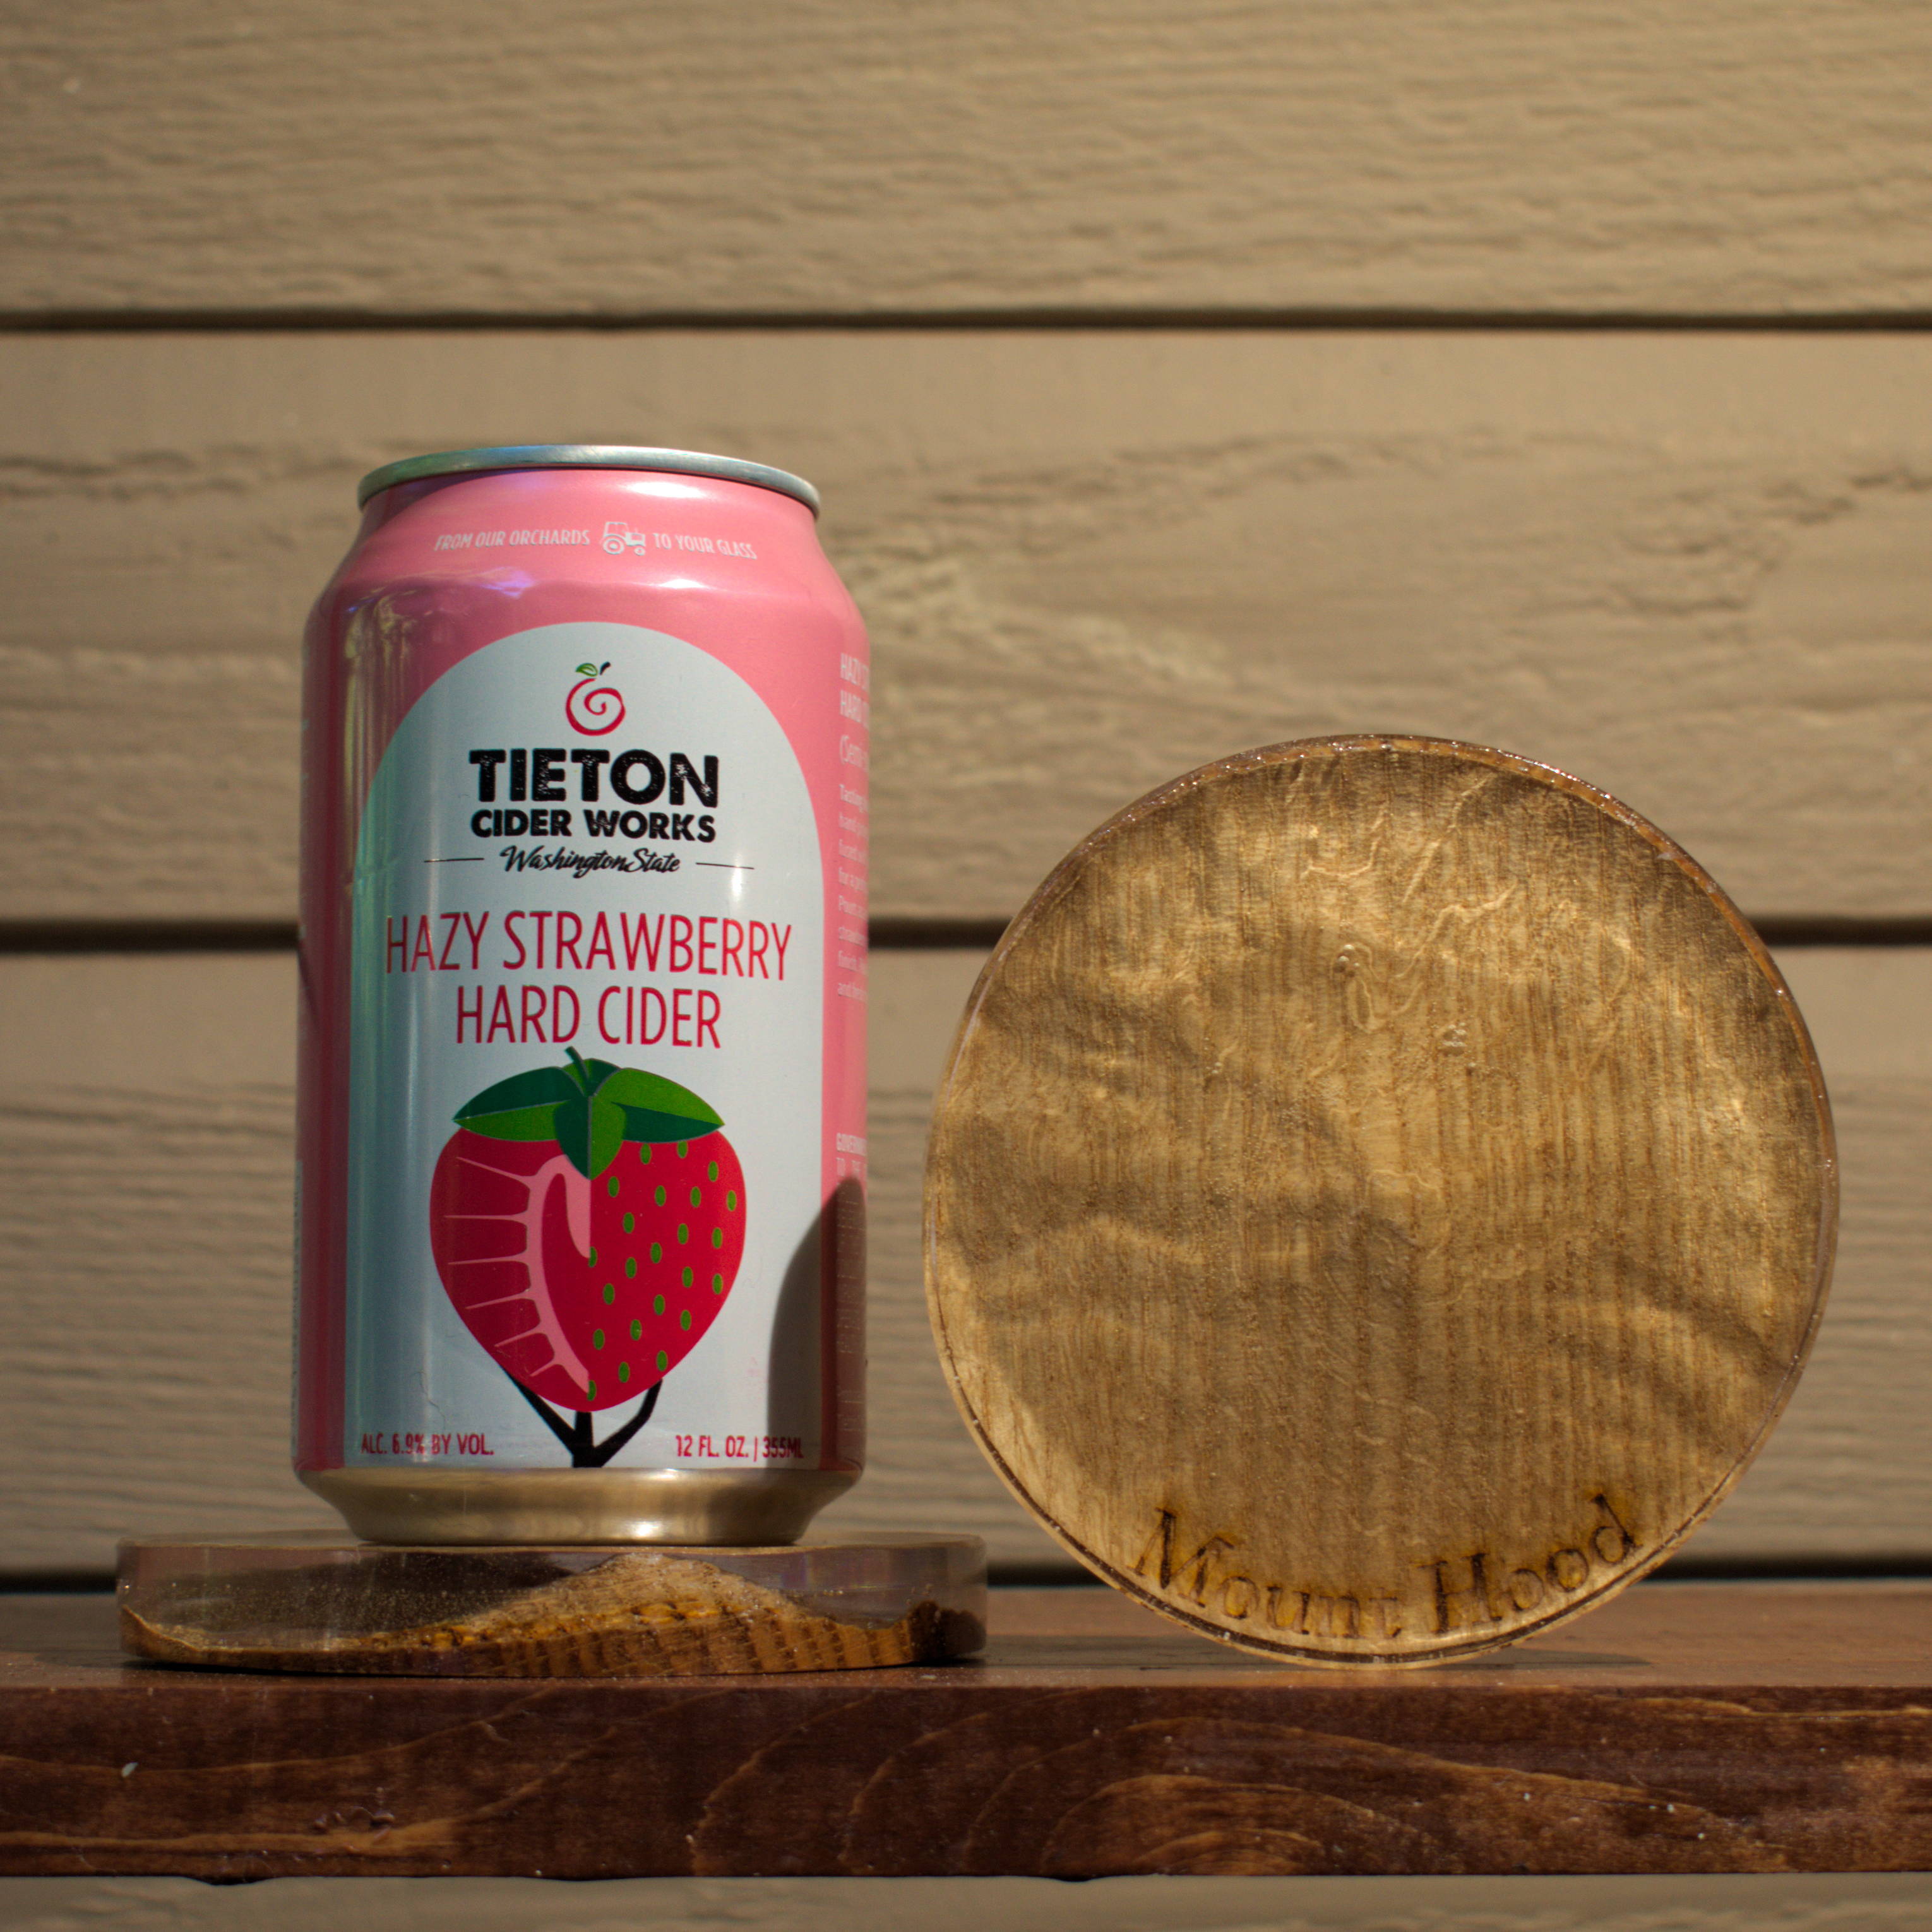
As a good first project to try on my new CNC router, and to take advantage of my recently learned skill set on how to make custom topographical data, I decided to try and make topographic coaster maps. These are potentially great personal gifts, as they are pretty small and reasonably quick to make (in batches), but are also simple to customize if you can make your own topographic data.
Topographic coasters were something that I had thought up in my head, but I wasn’t sure if the idea was going to translate well into real life. The first warning bell was when I googled “topographic coasters”, and didn’t see anything pop up that was similar to what I was thinking. The idea is simple enough; a topographic wood base with an epoxy resin top to flatten it out so that it can be used as a coaster. Now this sounds great until you start getting into the logistics of it. For a topographical map, you generally want as much height difference as possible to show the contrasting heights of the geography. But when you visualize a coaster, you’re probably not thinking about a big chunky thing. Coasters are pretty thin. For this project, my compromise between these two conflicting design goals was to aim for half inch thick coasters; hopefully thick enough to show the height contrast, but not so thick that it looks comical as a coaster.
In this tutorial I will go through the process I experimented with to create the topographic designs and build the coasters, and hopefully give you a few tips at the end from lessons I learned so that you can do it even better than me!
And if you enjoy this project, please consider voting for it in the maps contest!
Supplies
Needed Supplies:
-
Wood of your choice (at least 0.5” thick and 4” in diameter)
-
[Optional] Wood Stain/Finish (if you want to stain the wood or seal it before laser cutting)
-
Epoxy Resin (tabletop epoxy works, but after my experiments I'd recommend a variety that can be poured at least 0.5" thick)
-
Resin Mixing Supplies
-
Silicone Mold (I used a basic 10cm mold from Amazon)
-
[Optional] Mold Release (which I did not end up needing to use on my molds)
-
[Optional] Polishing Sandpaper (due to it's intensive nature, I ended up just sanding the sharp corners of my coasters, and very carefully applying a top layer of resin to the sanded areas)
-
[Optional] Epoxy Polish (same as above)
Needed Tools:
- CNC Router (I used an ⅛” Endmill bit for rough cutting and an ⅛” ball mill for the fine cutting)
- [Optional] Laser Cutter (if you want to engrave anything on the wood)
Needed Software:
- Maperitive (which is free and open source), or other source of black and white topographic relief map
- Inkscape (which is free and open source), or other vector graphics program
- Carbide Create (grayscale conversion might only be in the pro version), or other software to generate the CNC file
Getting the Topographic Data (Maperitive)
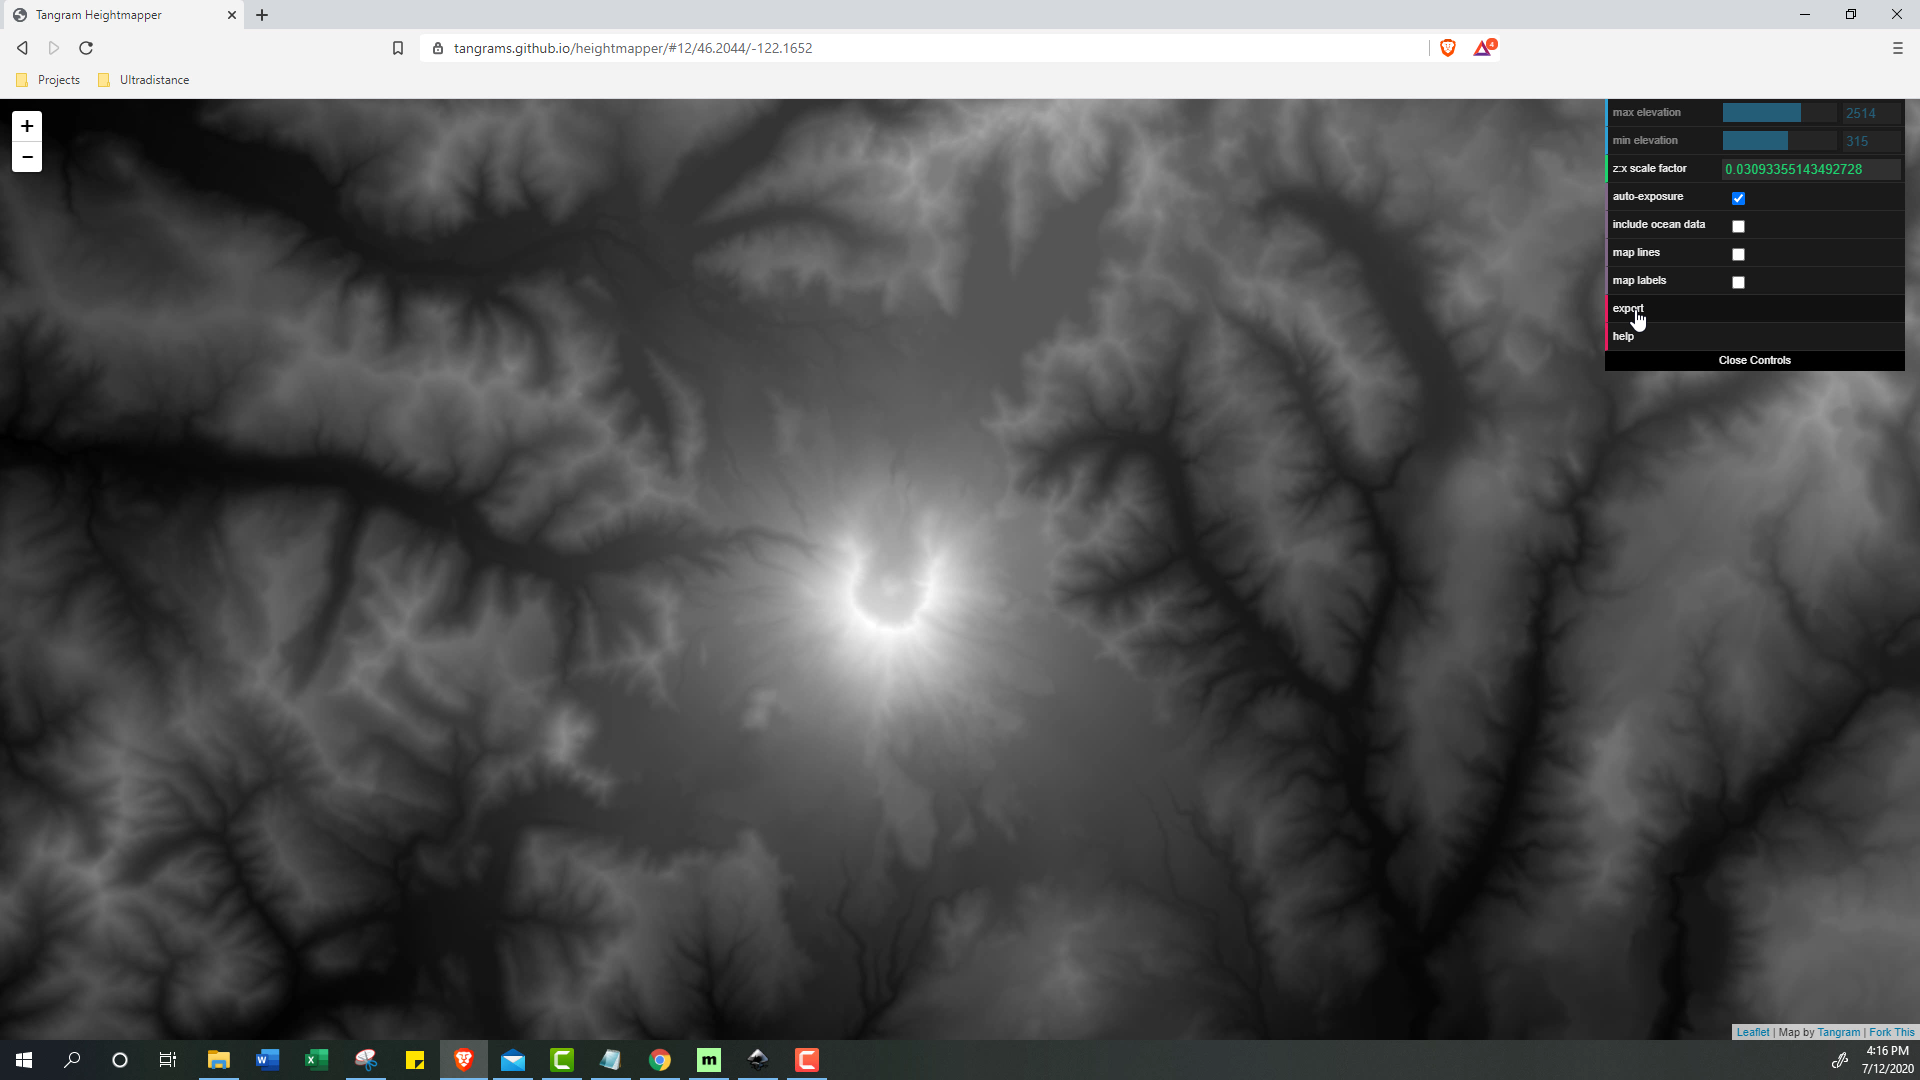
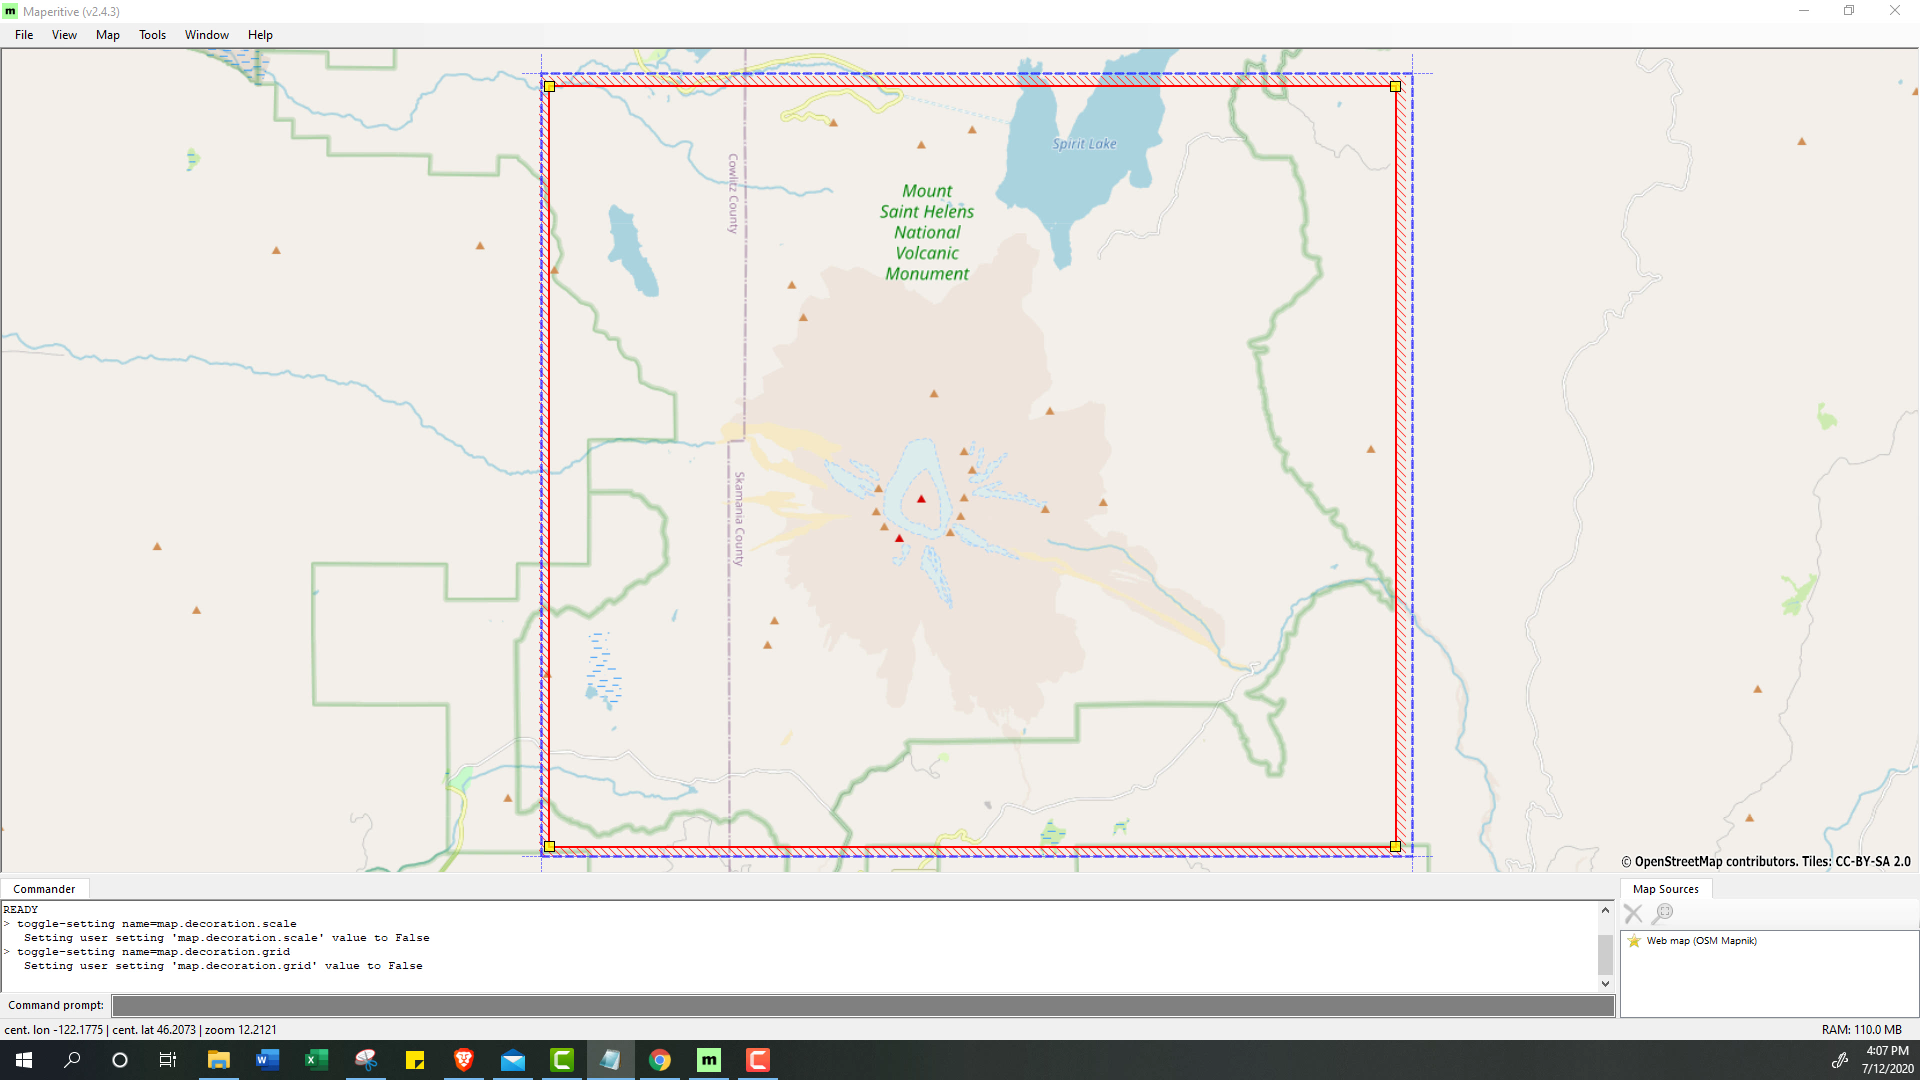
The end result you want from this step is a grayscale map of a location's topography. There are multiple ways to get this kind image. You can find these available online premade, and there are even some websites that will convert this image into the format that you need. One good example of the latter is this website, where you can go to a specific area and download a grayscale image of the topography. The limits of these sources though is that you can’t do much customization, or may need to do more post processing. But they may very well suit your needs, which is why I am sharing them. A more in-depth option that I’m going to show involves using Maperitive, which will give you a greater degree of flexibility when generating the data. And it also allows you to download other data as well, like trails or roads, which I experimented with in this project. And the advantage of getting these from the same program is that you can line up the trail/road features with the gray scale topography very easily for laser engraving.
Maperitive is a free and open source, and is pretty intuitive to use while packing a decent range of features. That being said, it does have some quirks, the first and foremost of which, is that you need to manually add your topographic data to the program.
The basic process for getting topographic data from Maperitive is:
- Getting the Topographic Source Data
Manually add the topographic data for the area that you need. I detail the process in step 2 of a previous tutorial that I've done about topographical maps, and even made a video tutorial of how to do it. So I won't go into the specifics here. -
Place Bounds on Area you Want
Go to the area that you want to make a map out of, and using the right click functionality, place both the geometry and printing bounds around the place that you want. Make the printing bounds slightly larger than the geometry bounds if you plan on using SVG elements; this will make it easier to line up later in Inkscape. If the map grid is showing (lat and long lines), you also want to disable those at Map -> Show Grid in the top toolbar. -
Create Grayscale Topographic Image
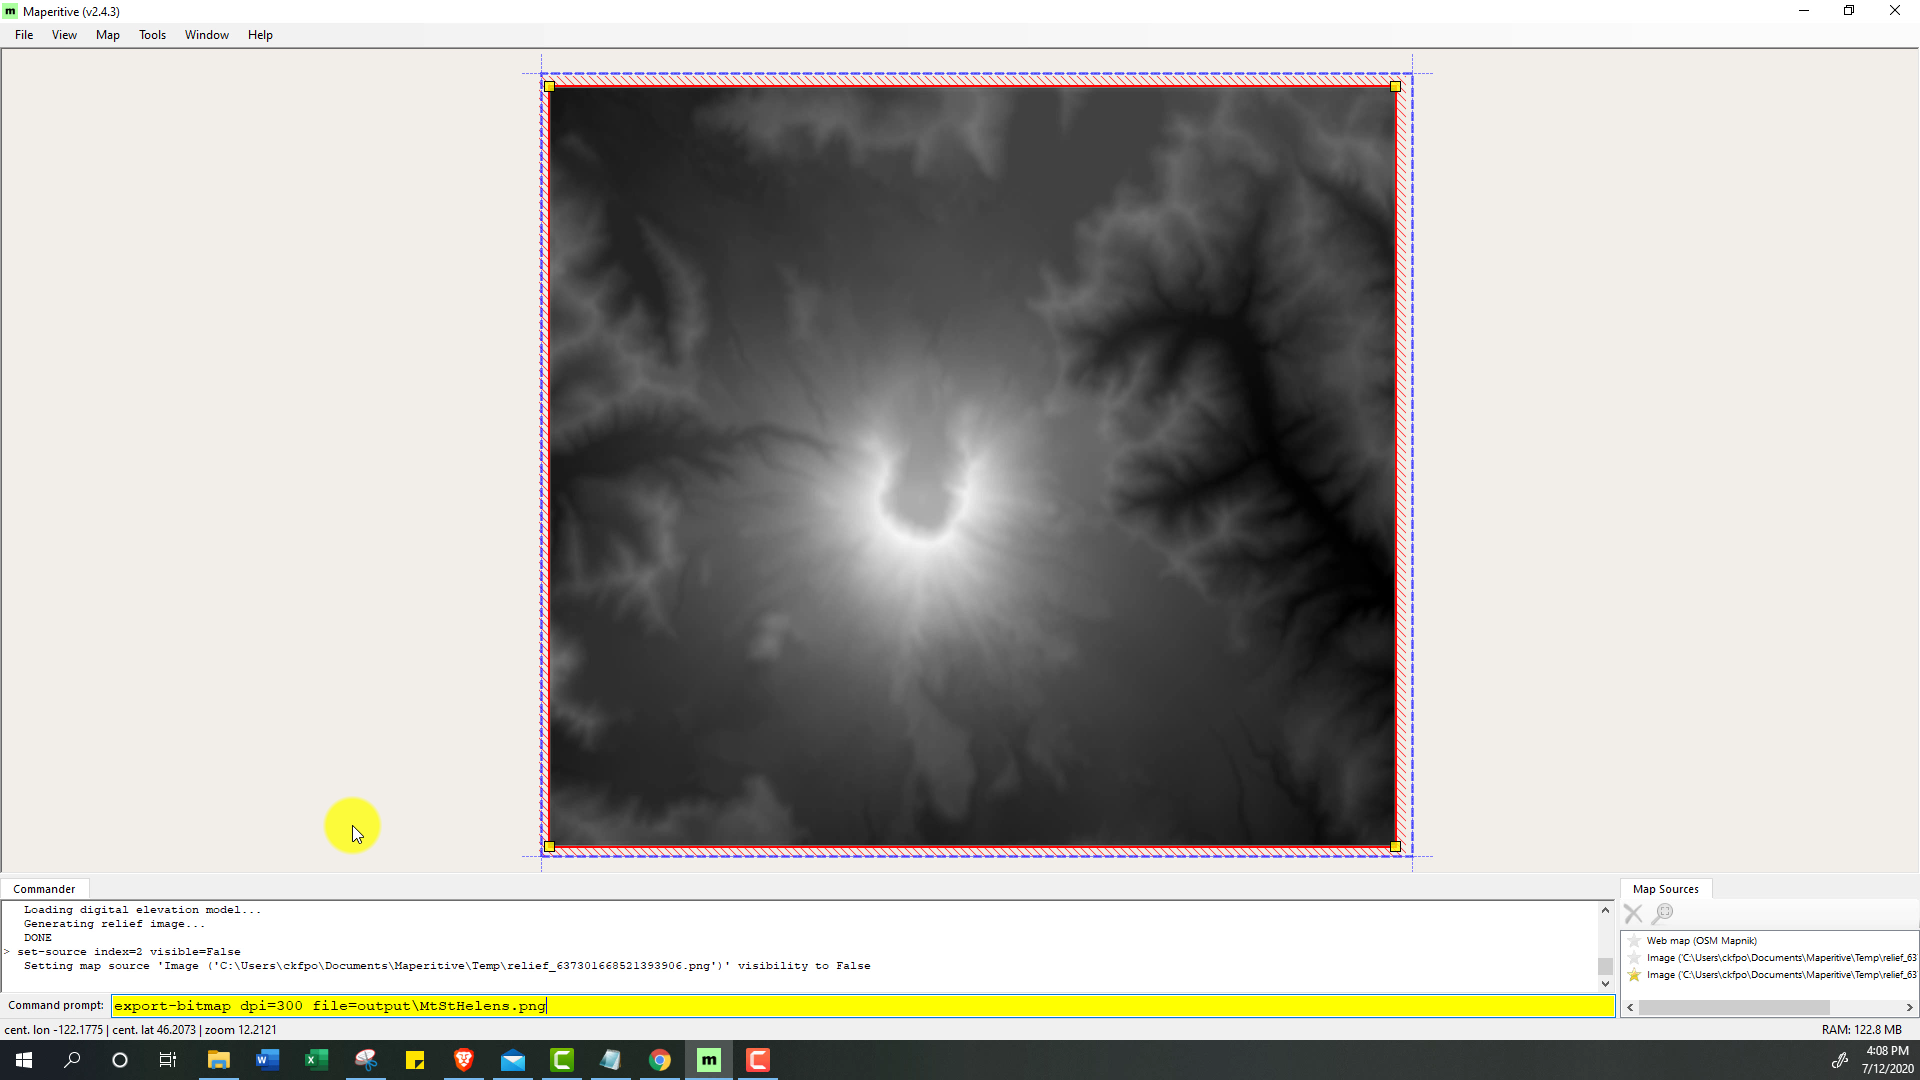
To generate the grayscale map, enter your variation of “generate-hypsometric ramps=0:black;1000:white” into the command prompt at the bottom. You will want to change the numbers 0 and 1000 into the height range (in meters) of the area that you are looking at. The upper bound is pretty easy if you are doing this for a mountain; you just need to google the height of the mountain. But the lower bound may take some trial and error to determine what it should be. The resulting image will not be immediately visible, because it was put under the default map display. To view it, uncheck the star next to “Web map (OSM Mapnik)”, which hide the default map layer. -
Export Image
With this result, you can then export the image using “export-bitmap dpi=300 file=output\Image1.png” in the command prompt. This will export the map you just made (bounded by the printing bounds we placed earlier) into the output folder with the name “Image1”. The dpi controls the resolution; so change it to what you want depending on your needs. I personally found that I didn’t really notice a difference after 200 dpi, but I also only used an ⅛” ball mill for my cutting. -
[Optional] Export SVG Data
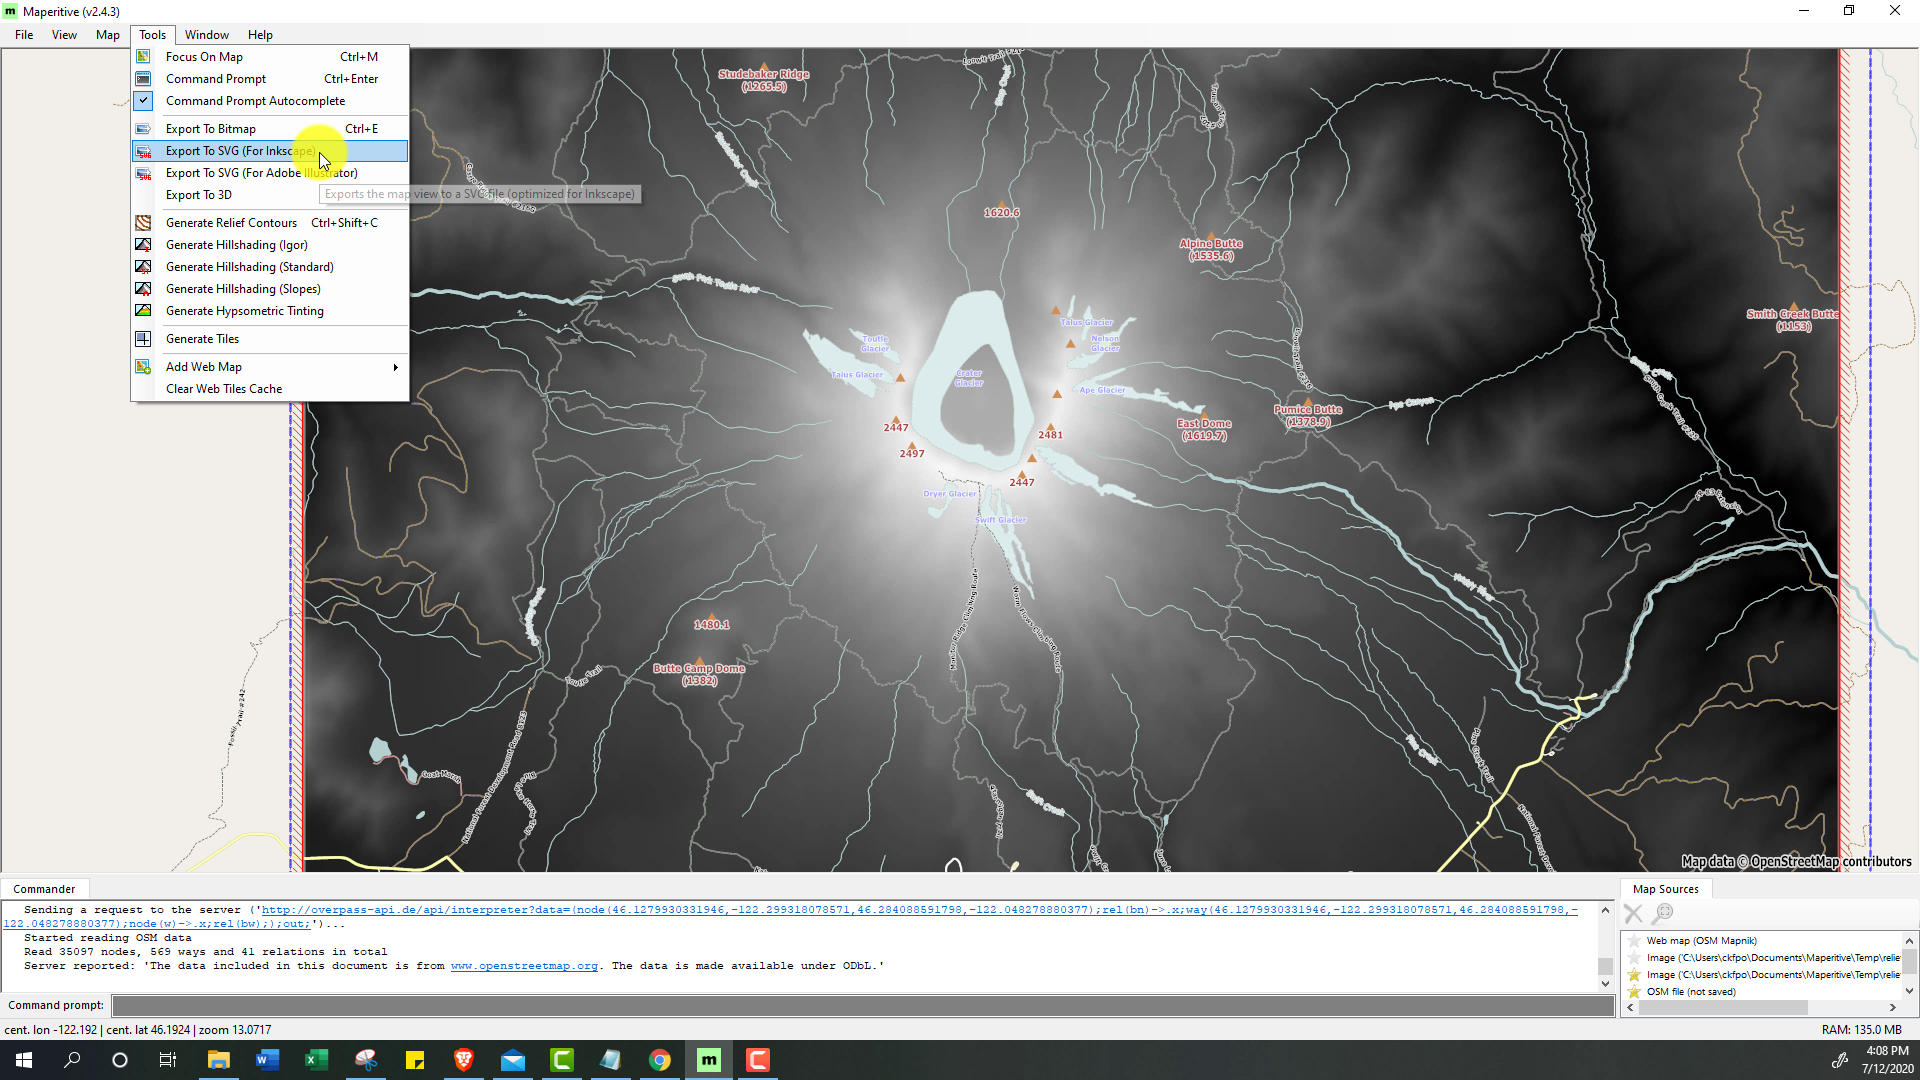
Maperitive also allows you to download OSM map data, which can be used to add extra features to your map on top of the topography. For example, I downloaded trail data, and engraved it onto some of my coasters. To get this data you need to go to Map -> Download OSM Data. This may take a minute depending on your map size (and may not work for maps that are too big). Once it is download, you will need to zoom to the level where what you want is visible before exporting the data (Maperitive will only export visible elements). Once zoomed in, go to Tools -> Export to SVG (For Inkscape). This will put it in the output folder as output.svg.
Processing the Data (Inkscape)
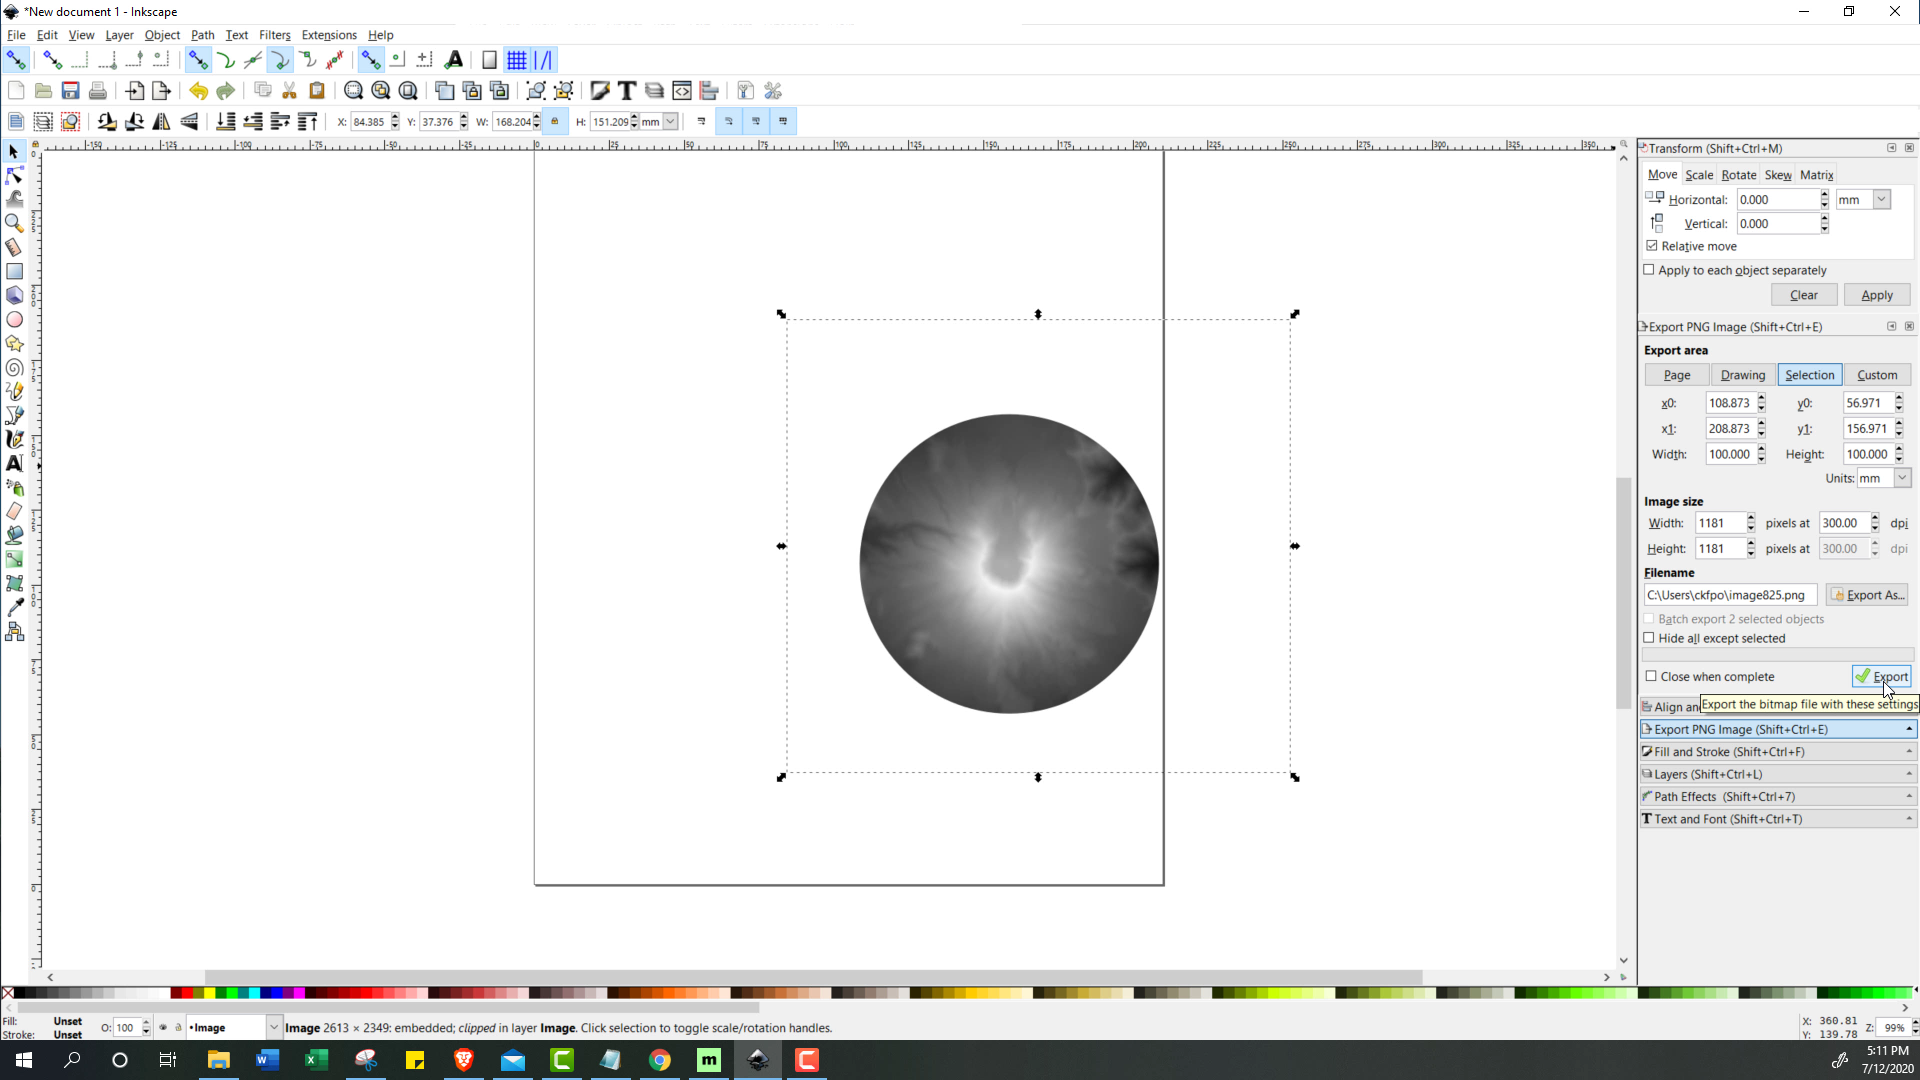
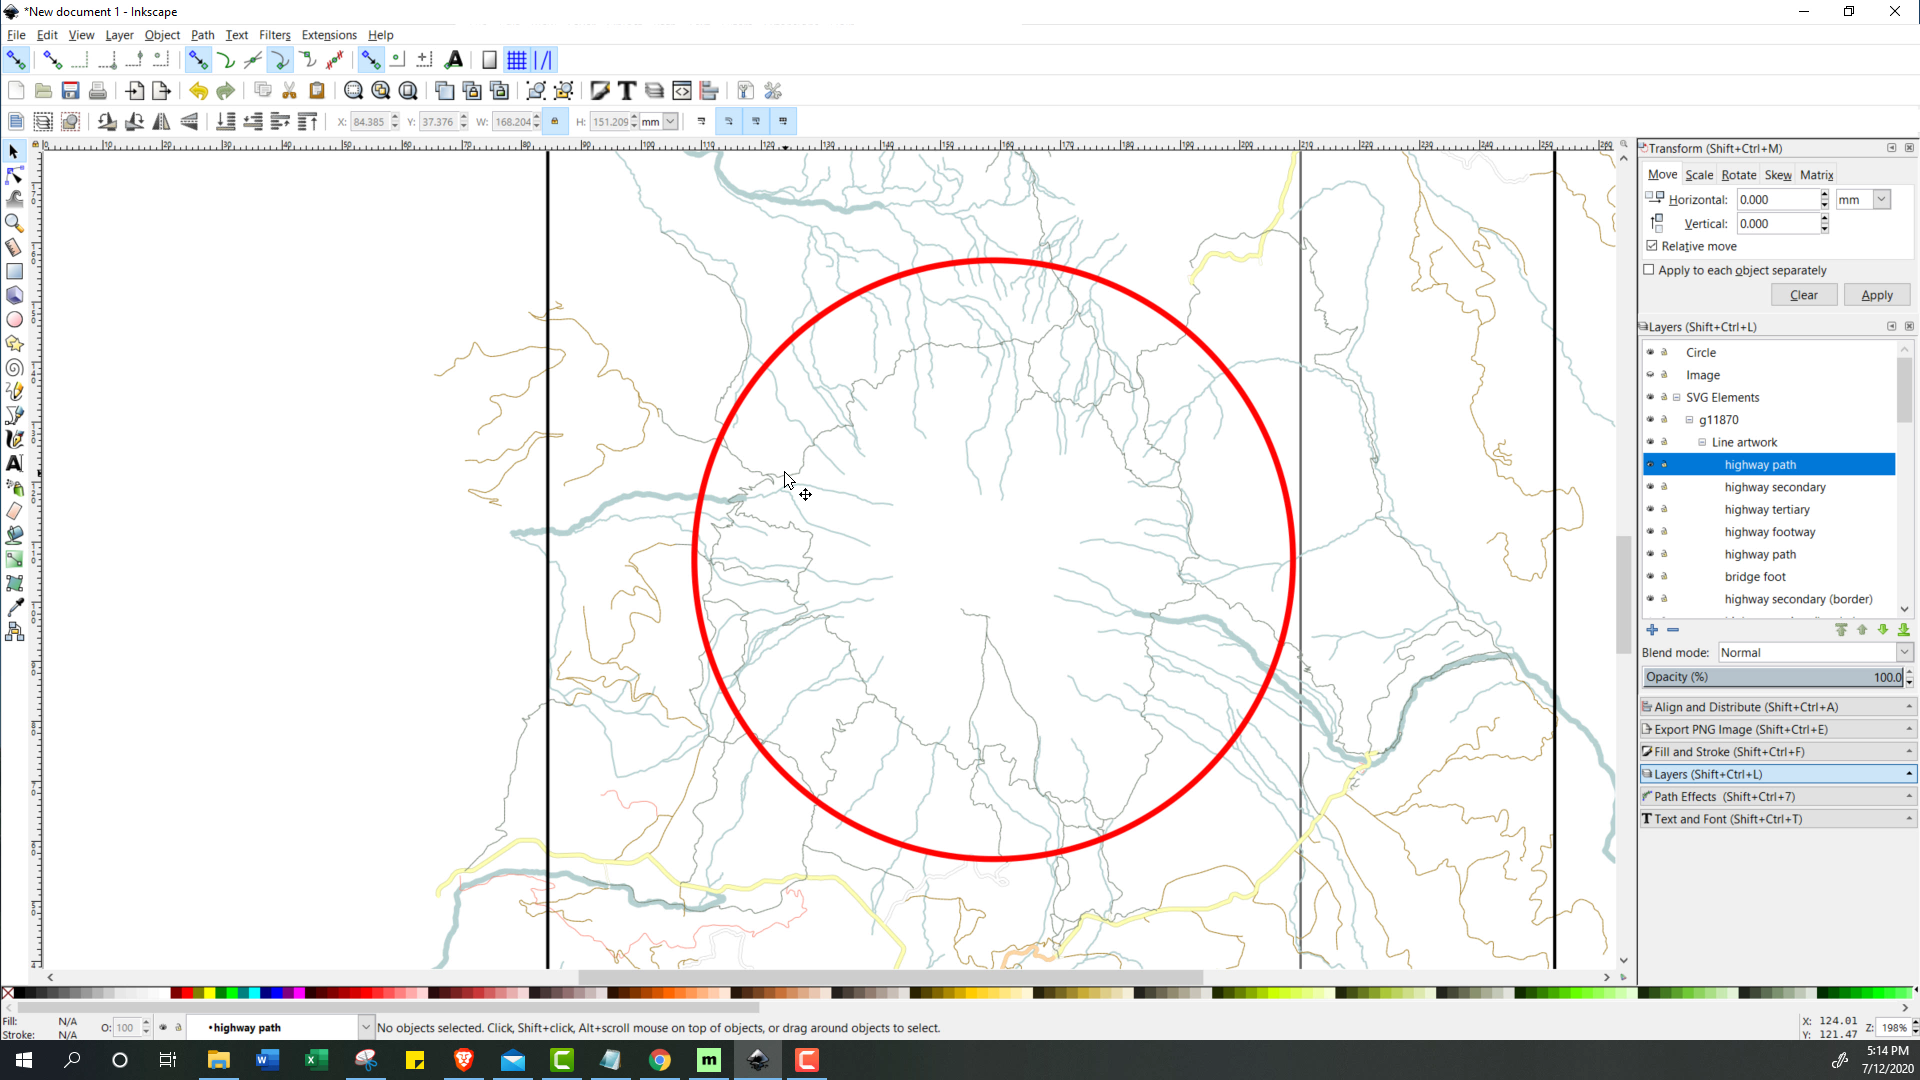
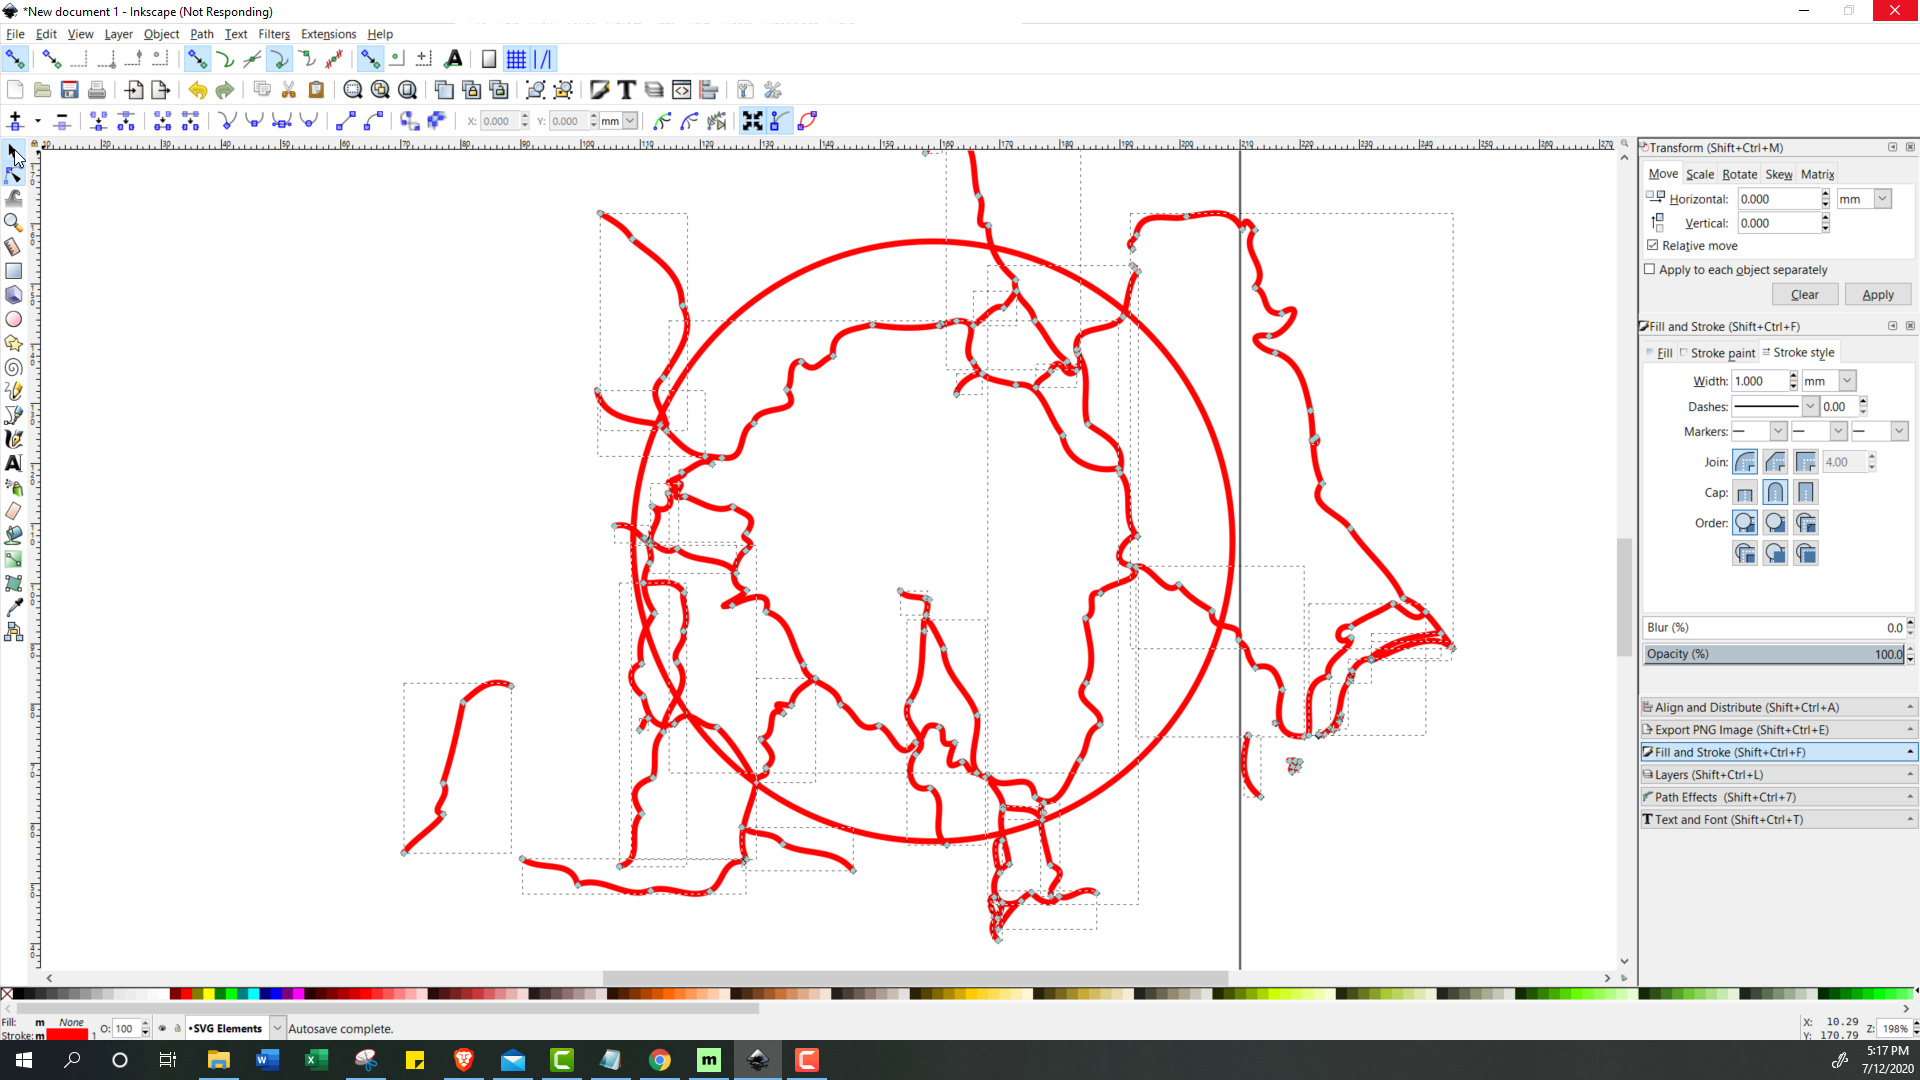
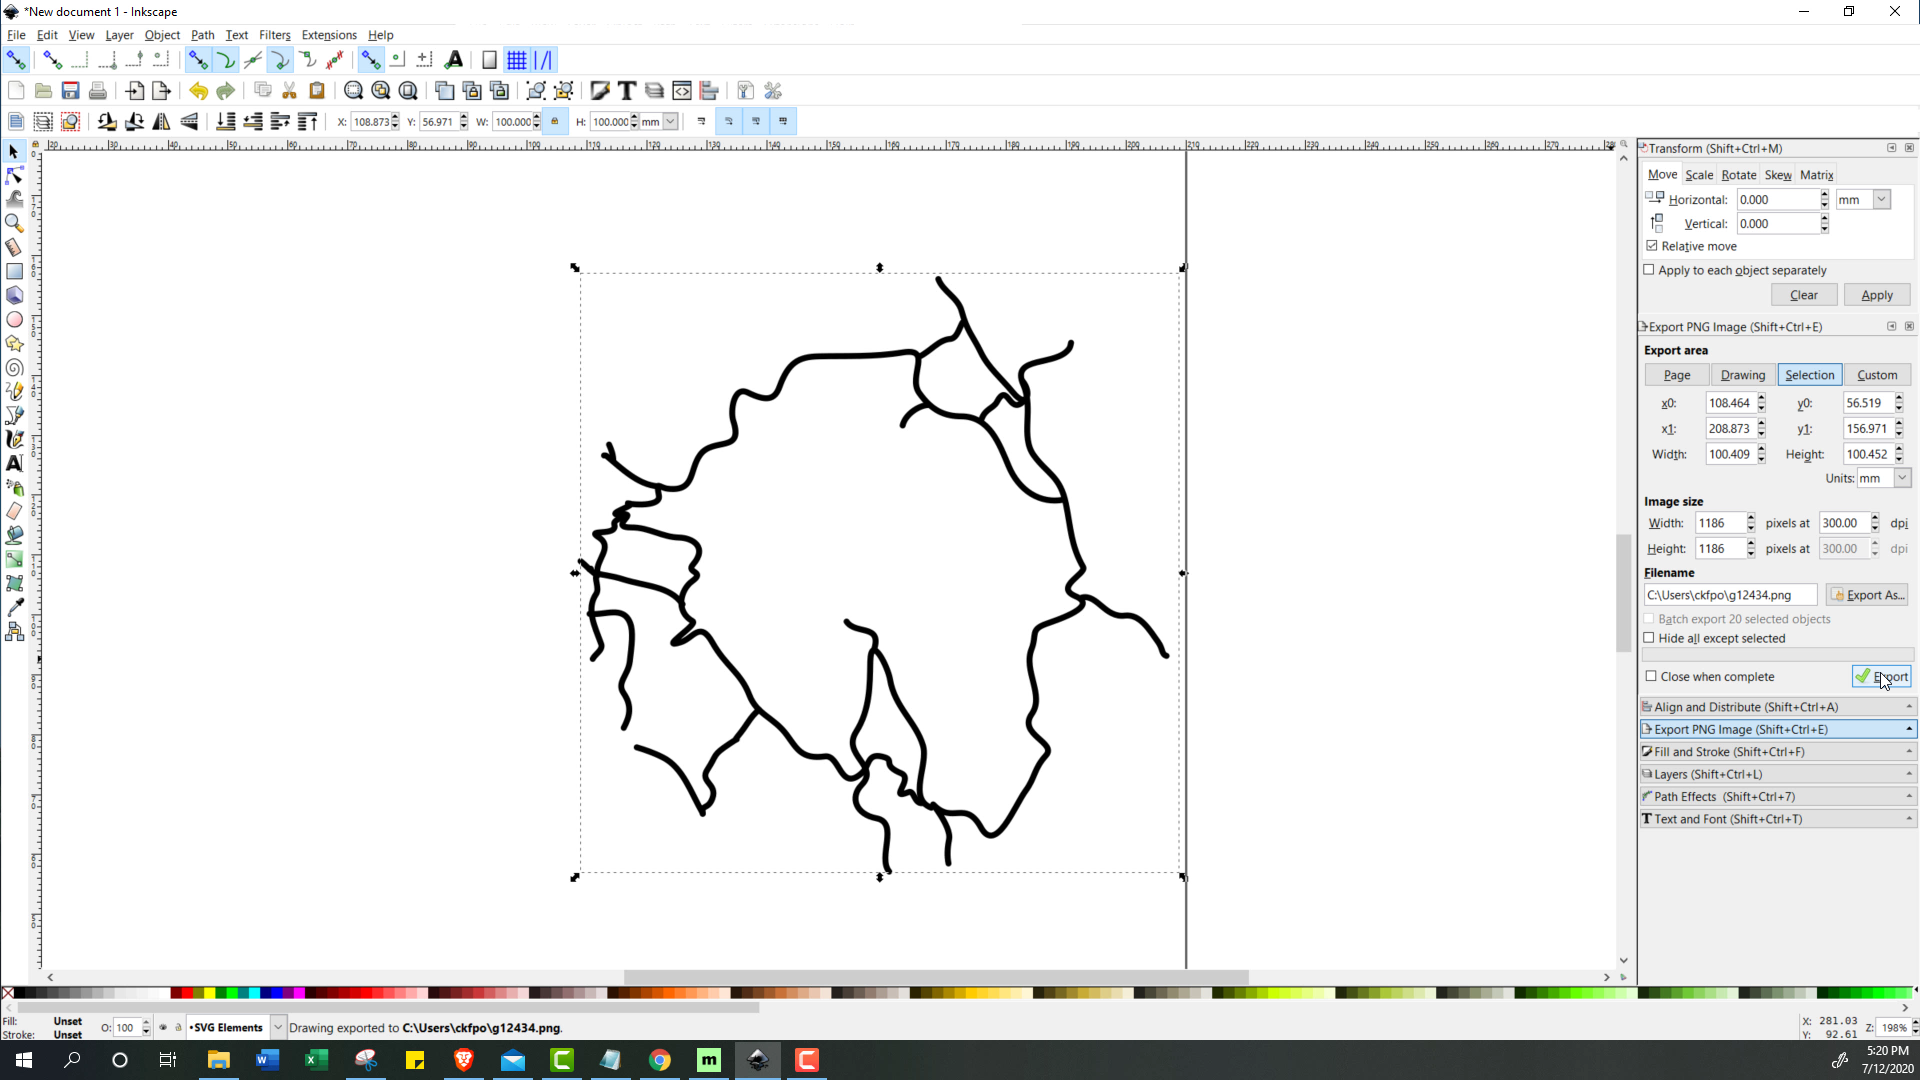
Now that we have the topography data, we are going to want to trim that data to the final size we will be using, and add any extra elements before sending it to our CNC editing software. Depending on your CNC editor, if you aren’t adding anything extra to this, you might be able to skip this step and do all the trimming in the CNC editor. Multiple vector graphics programs will work for this, but for this tutorial I’m going to show how to do it in Inkscape.
- Importing and Aligning
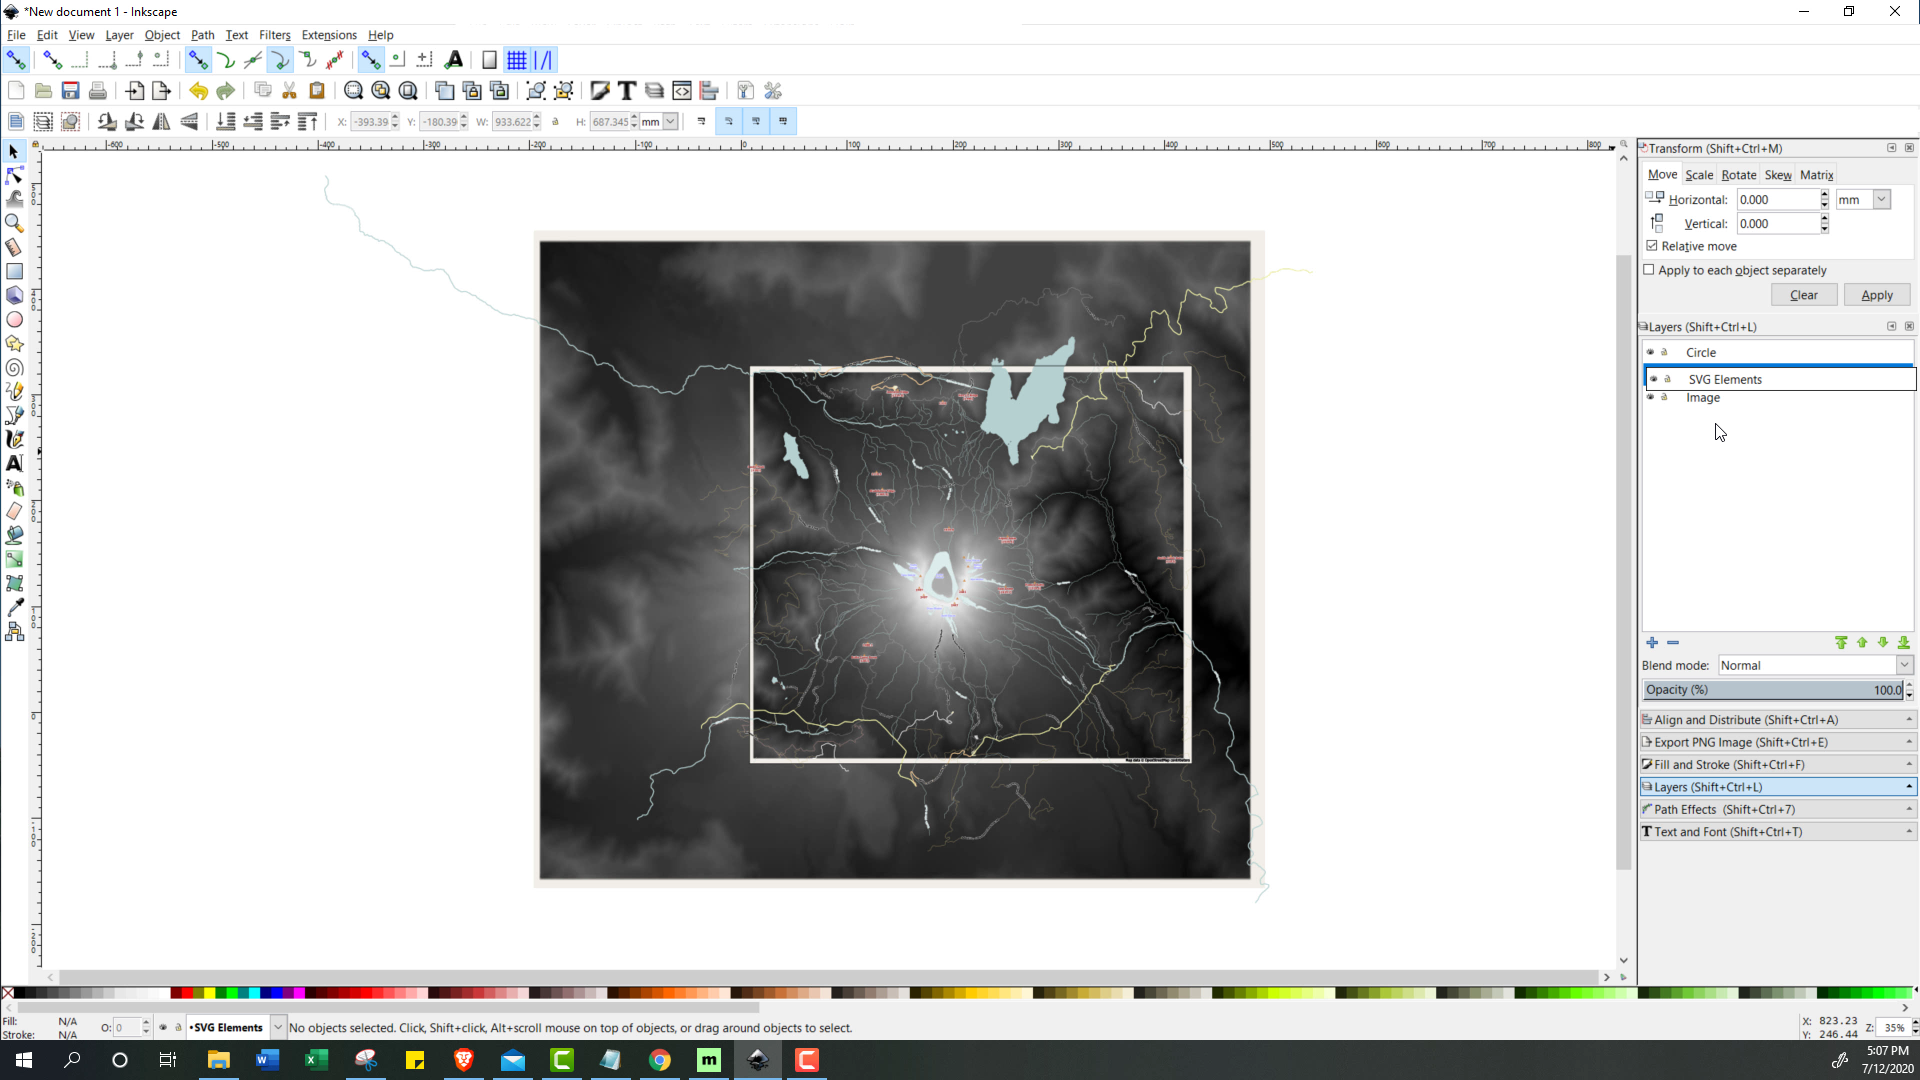
Start by opening Inkscape, then importing the output image and SVG file (if you're using svg data) that we got from Maperitive. It will help to have these two on two different layers. Next, align and scale the two images to the same size (you can use element snapping for this to get an exact alignment). You may need to hide some layers of the imported SVG to properly align the images (specifically the “polygons” layer). -
Scaling to Final Size and Shape
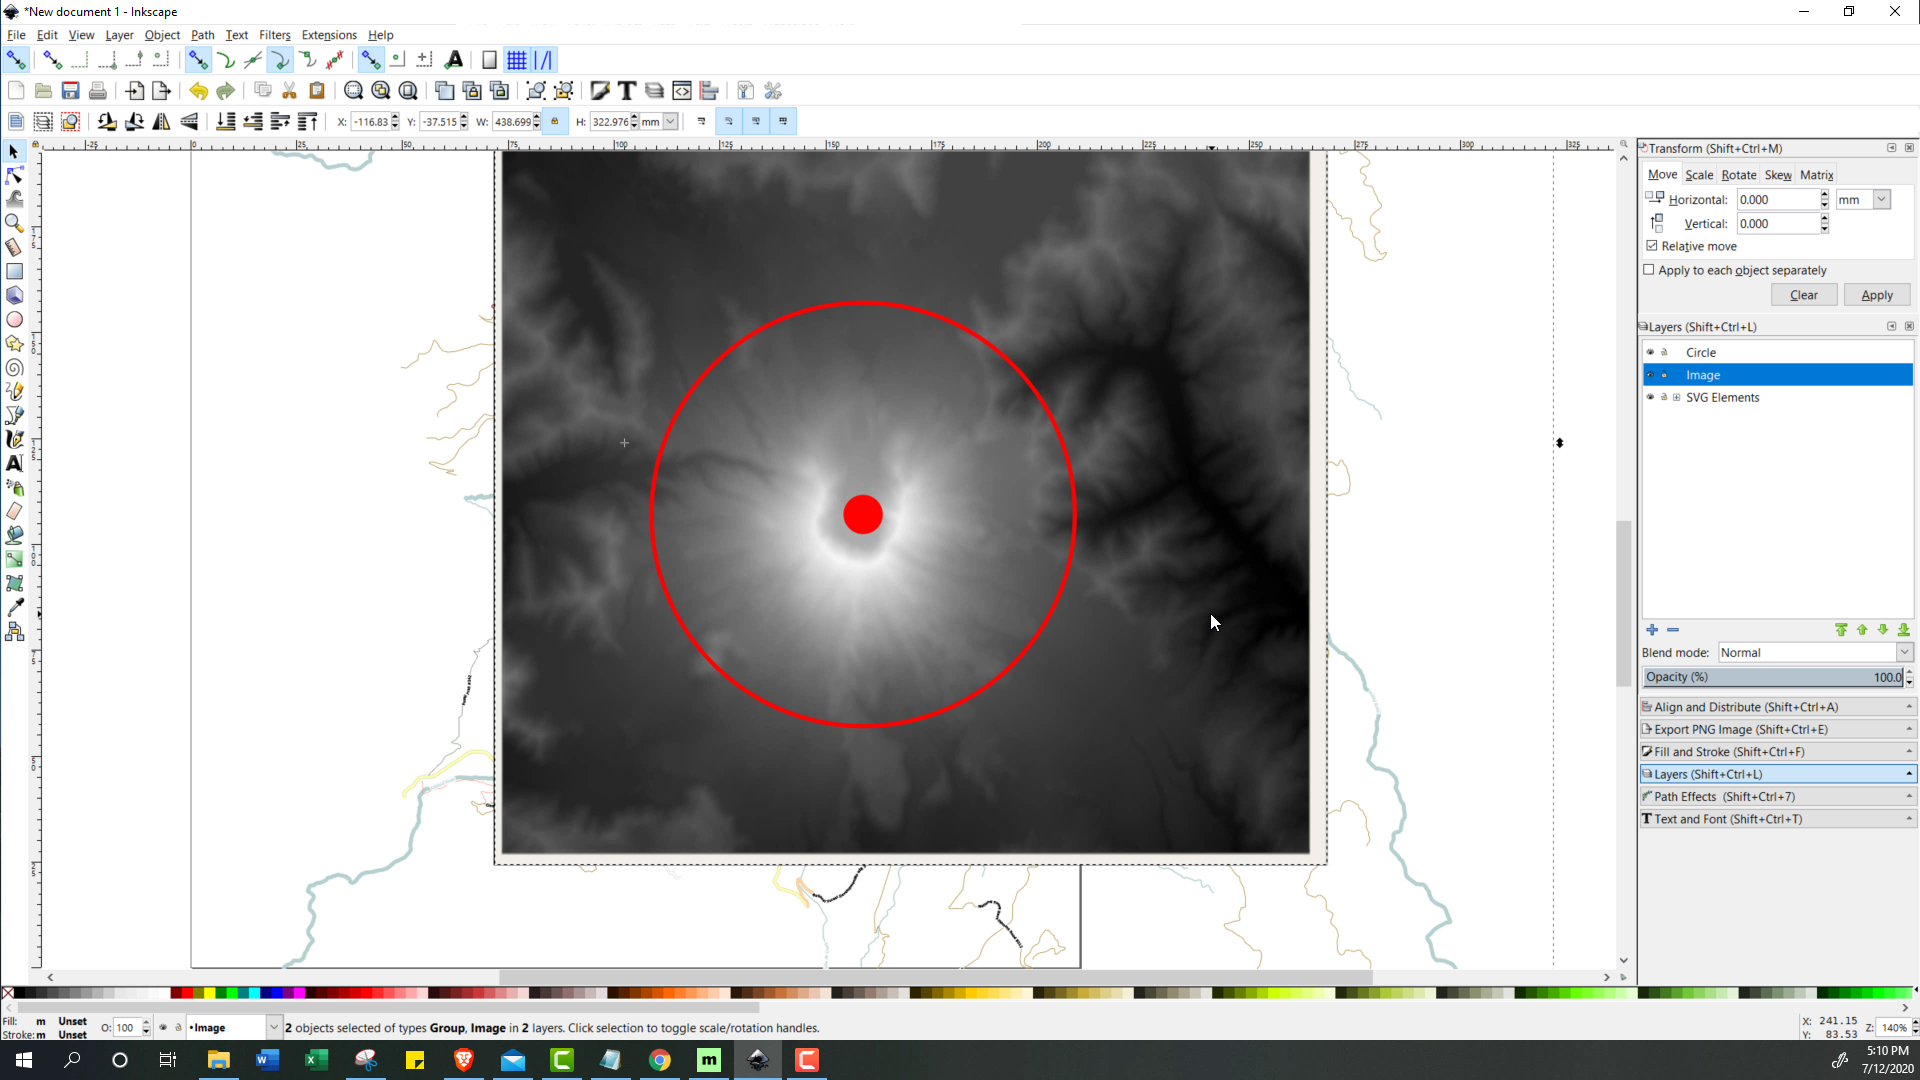
Next, add a circle and resize it to 10cm (or any other shape or size that you plan on using). We will be using this circle to trim any extra stuff from what we imported from Maperitive. Scale down both the image and SVG data until they are the right size and location within the circle that you made -
Trimming and Exporting the Grayscale Map
Hide the SVG data (if you have it), create a duplicate of the circle (Ctr+D), and then with both the image and circle selected, go to Object -> Clip -> Set. Navigate to the Export PNG Image tab (Shift+Ctr+E), then using the selection export area and whatever DPI you exported the original image at, click “Export As” to specify where, and then click “Export”. Thats all you need to do for processing the grayscale. If you don’t want to add any other SVG elements, skip right to the next part. -
[Optional] Trimming and Exporting the SVG Trail Data
Unhide the SVG data, then go through the imported layers to find what data you want, then delete everything else (I recommend deleting because Inkscape can be slow with a lot loaded). In my experience, I’ve found that trail data is in the Line Artwork -> highway path layer (there may be multiple highway path layers). With all other SVG data gone, ungroup the highway path layer until you get to an object called “Symbol”, then go to Edit -> Clone -> Unlink Clone. This makes it editable. Edit the line to make it the thickness, line type, and color you want in the “Fill and Stroke” Tab (Shift+Ctr+F). Then before we start trimming the trails, I recommend going to Path -> Simplify, and doing this 1-3 times. Maperitive exports this in a resolution way higher then we need here, so simplifying the data will help us work with it. Note: depending on the size, it may take Inkscape a few minutes to run each simplification. Once simplified to the point that works for you, with all of the trail lines selected, go to Path -> Combine. Then create a duplicate of the circle, select it and the trails, and the go to Path -> Cut Path (make sure both are on the same layer). Now any trail that crosses the circle should be cut at the intersection, so we just need to go through and delete any lines outside the circle. For final cleanup, you may want to go through and modify lines that were badly warped by the simplification process, or delete lines that are too close together (and wouldn’t look great on an engraving)With that done, it’s time to export the file for the laser cutter. Depending on what software you use, you might export it differently. For me, my engraving software using an image, so I converted the lines to black and white then exported the image at ~300 dpi. And that’s it!
-
[Optional] Adding Text
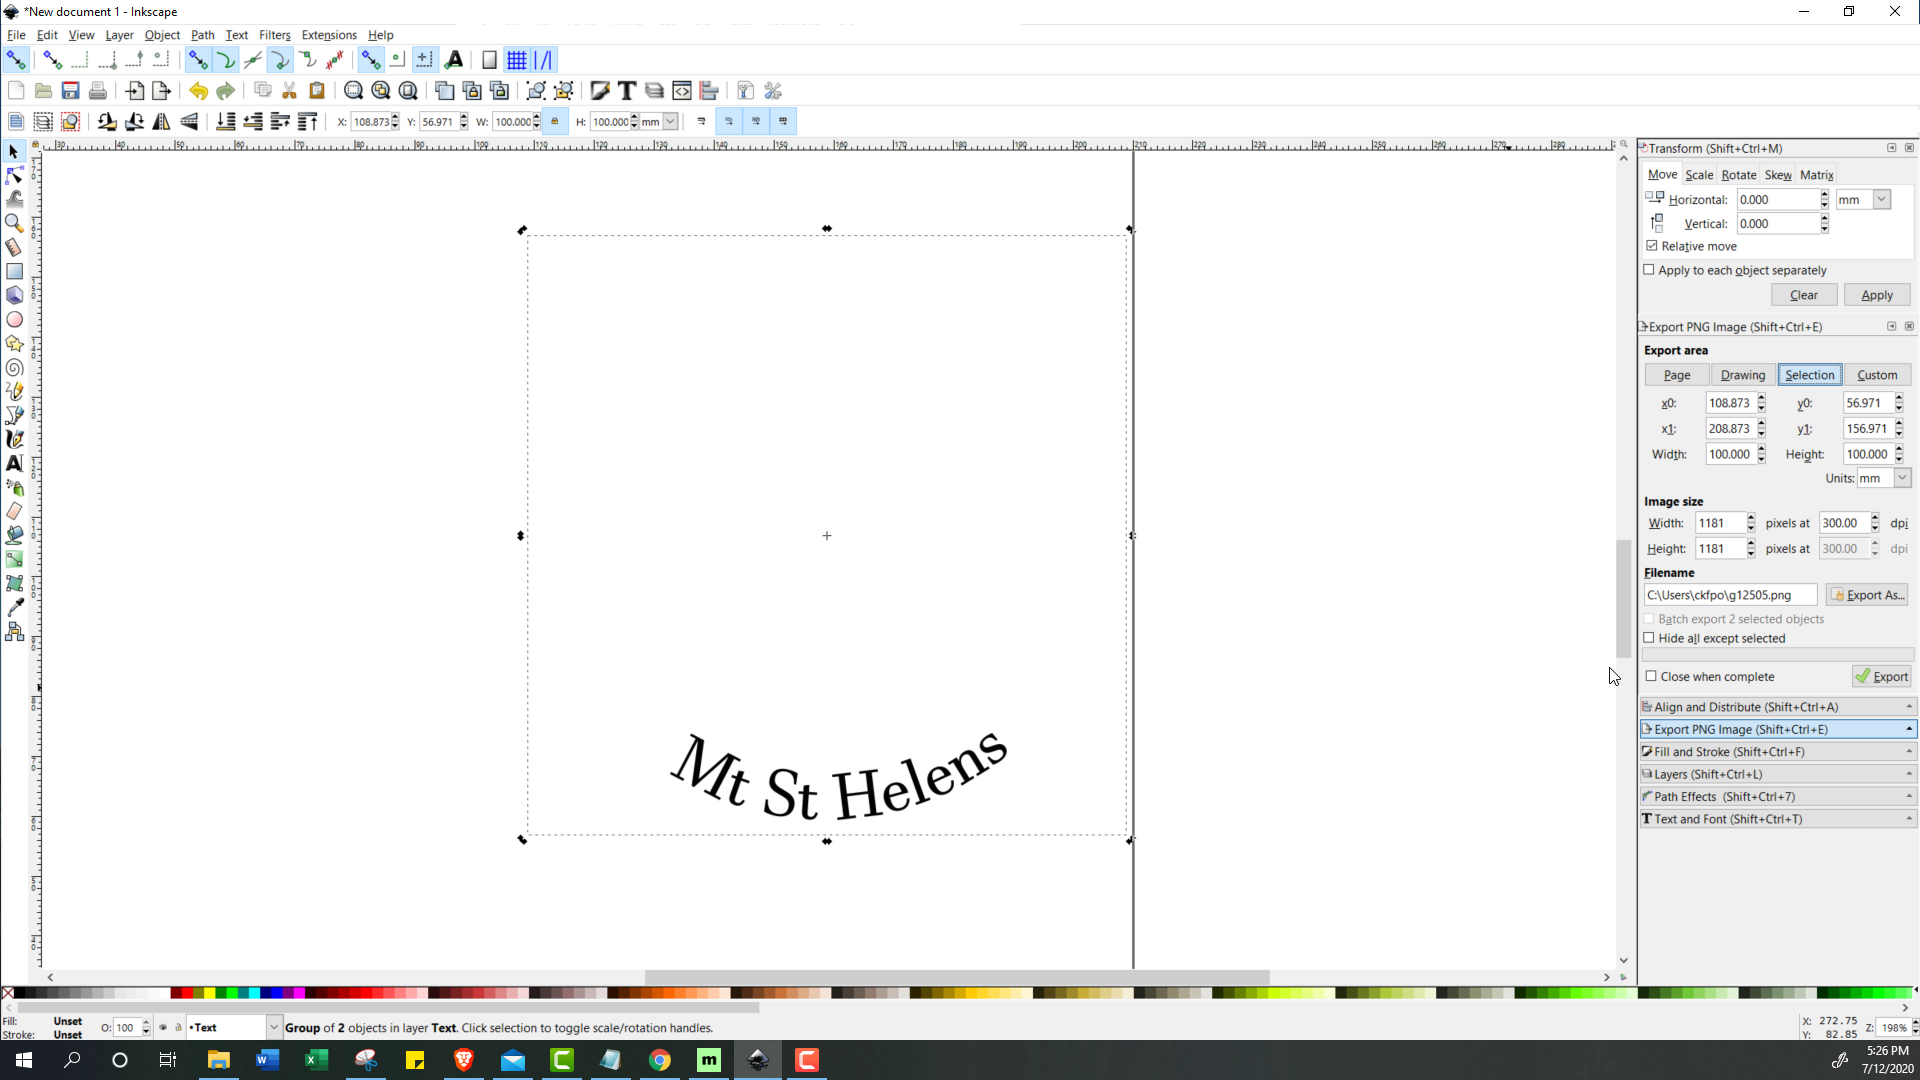
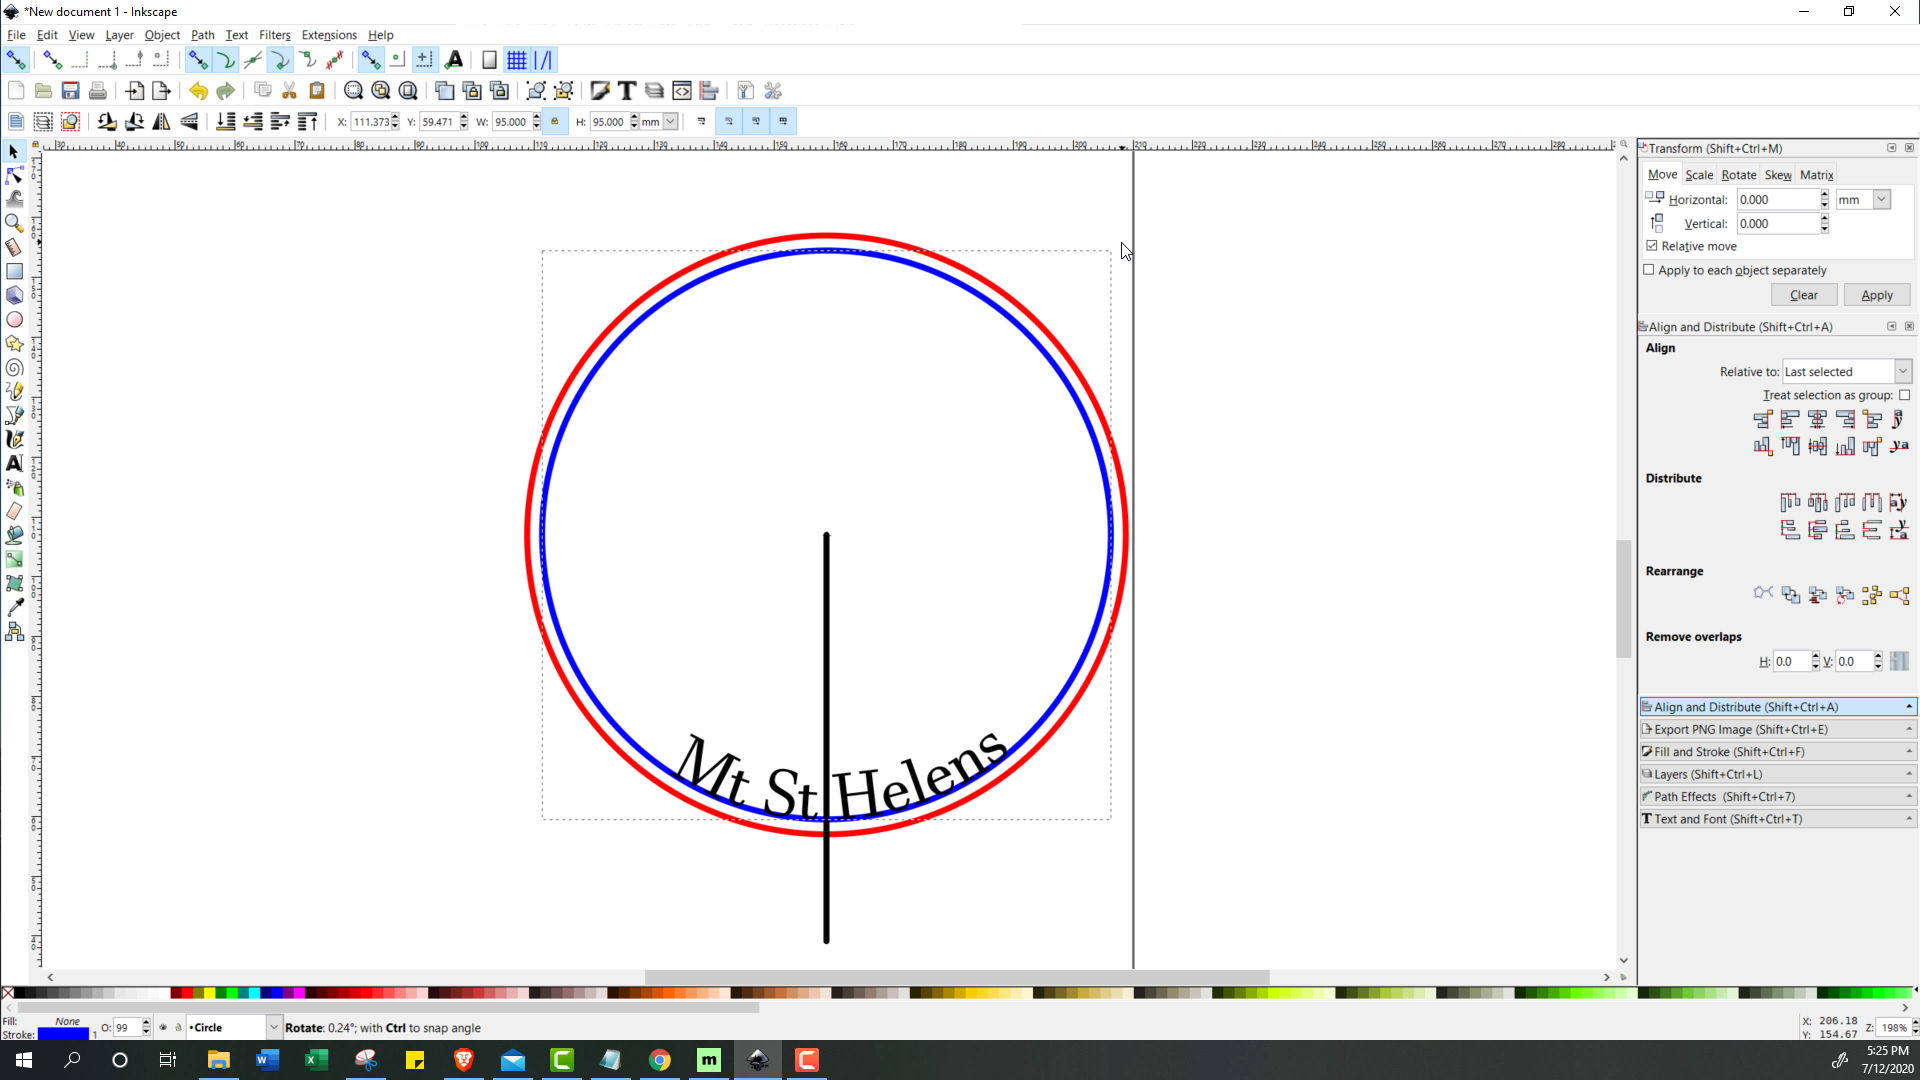
Another optional step, and an alternative to the trail data, is to instead add the name of whatever the topography is from. This can be done in Inkscape using the Text tool, and some text wrapping to make it look stylishStart by selecting the text tool (F8), and typing in the text that you want, like for example Mt St Helens. You can modify the text font in the Text and Font Tab (Shift+Ctr+T); personally I used Javanese font, and made the text about 8mm tall (no hard rules here). Next make a duplicate of the 10cm circle and shrink it 9.5cm, then center it with the 10cm circle. With both the smaller circle and text selected go to Text -> Put on Path. This will put the text on the circle, but probably in the wrong orientation. To put it on the inside of the circle, with just the text selected, click either the flip selected horizontally or vertically. Then with the small circle selected, rotate it (the text will follow) until the text is lined up on the bottom. Then with the text selected, go the Path -> Object to Path. Finally, you can delete the smaller circle. Now we have wrapped text slightly inset so that it’s not right on the edge.
Similar to the last optional step, export this as needed for your laser cutting software. I exported mine as an image for engraving.
Prepping the CNC File
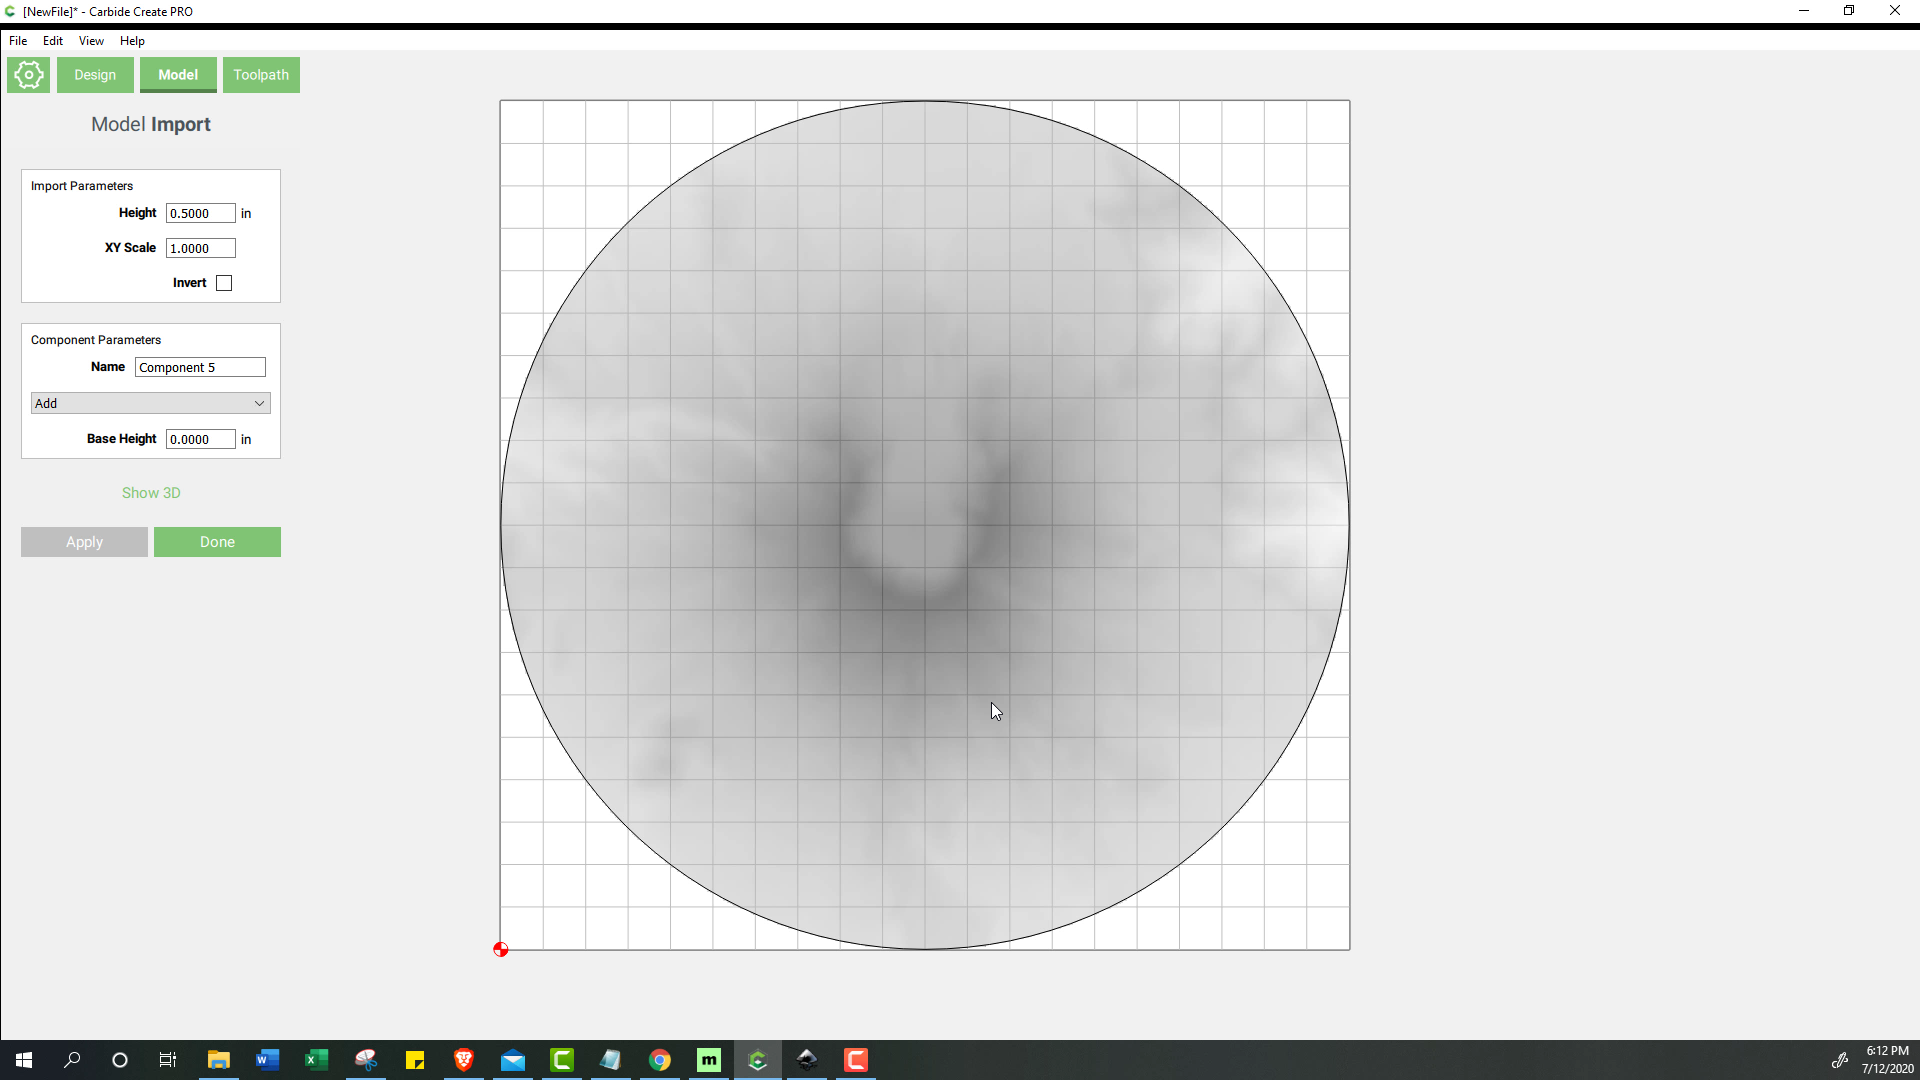
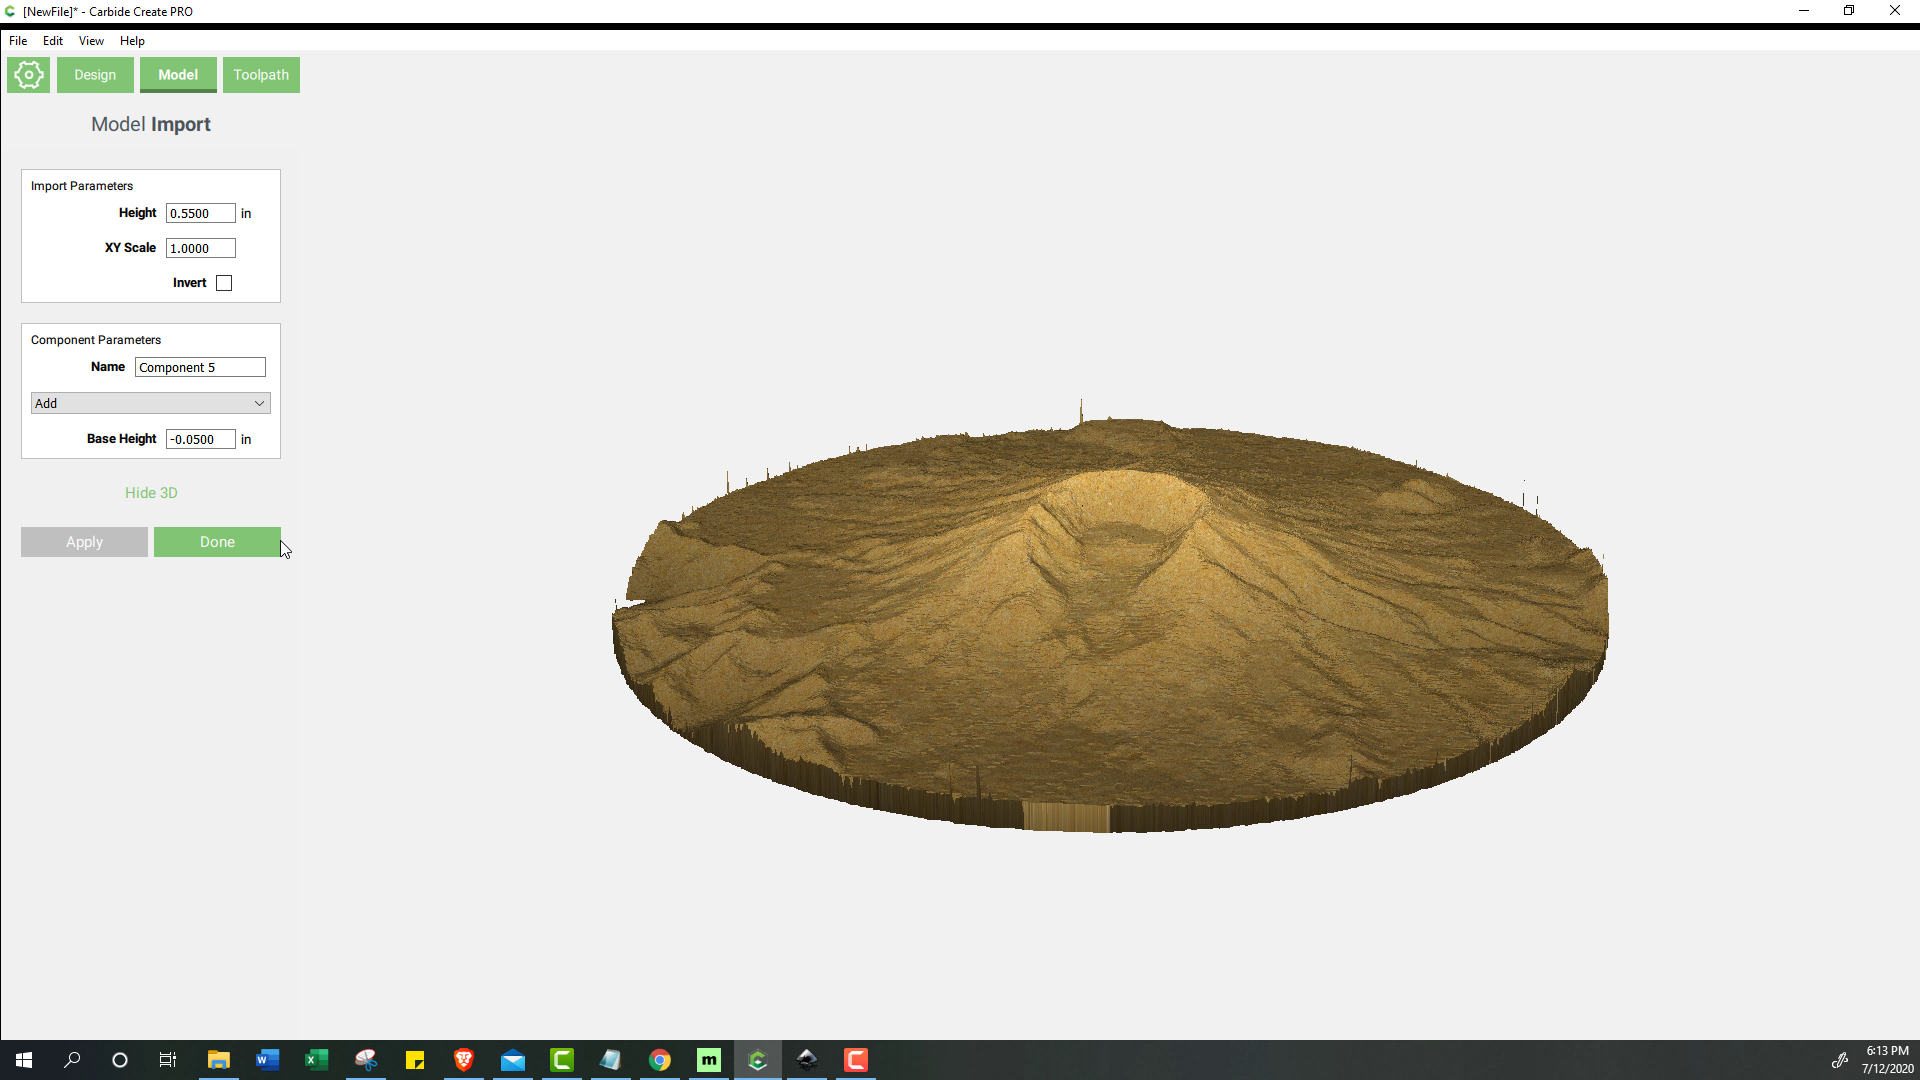
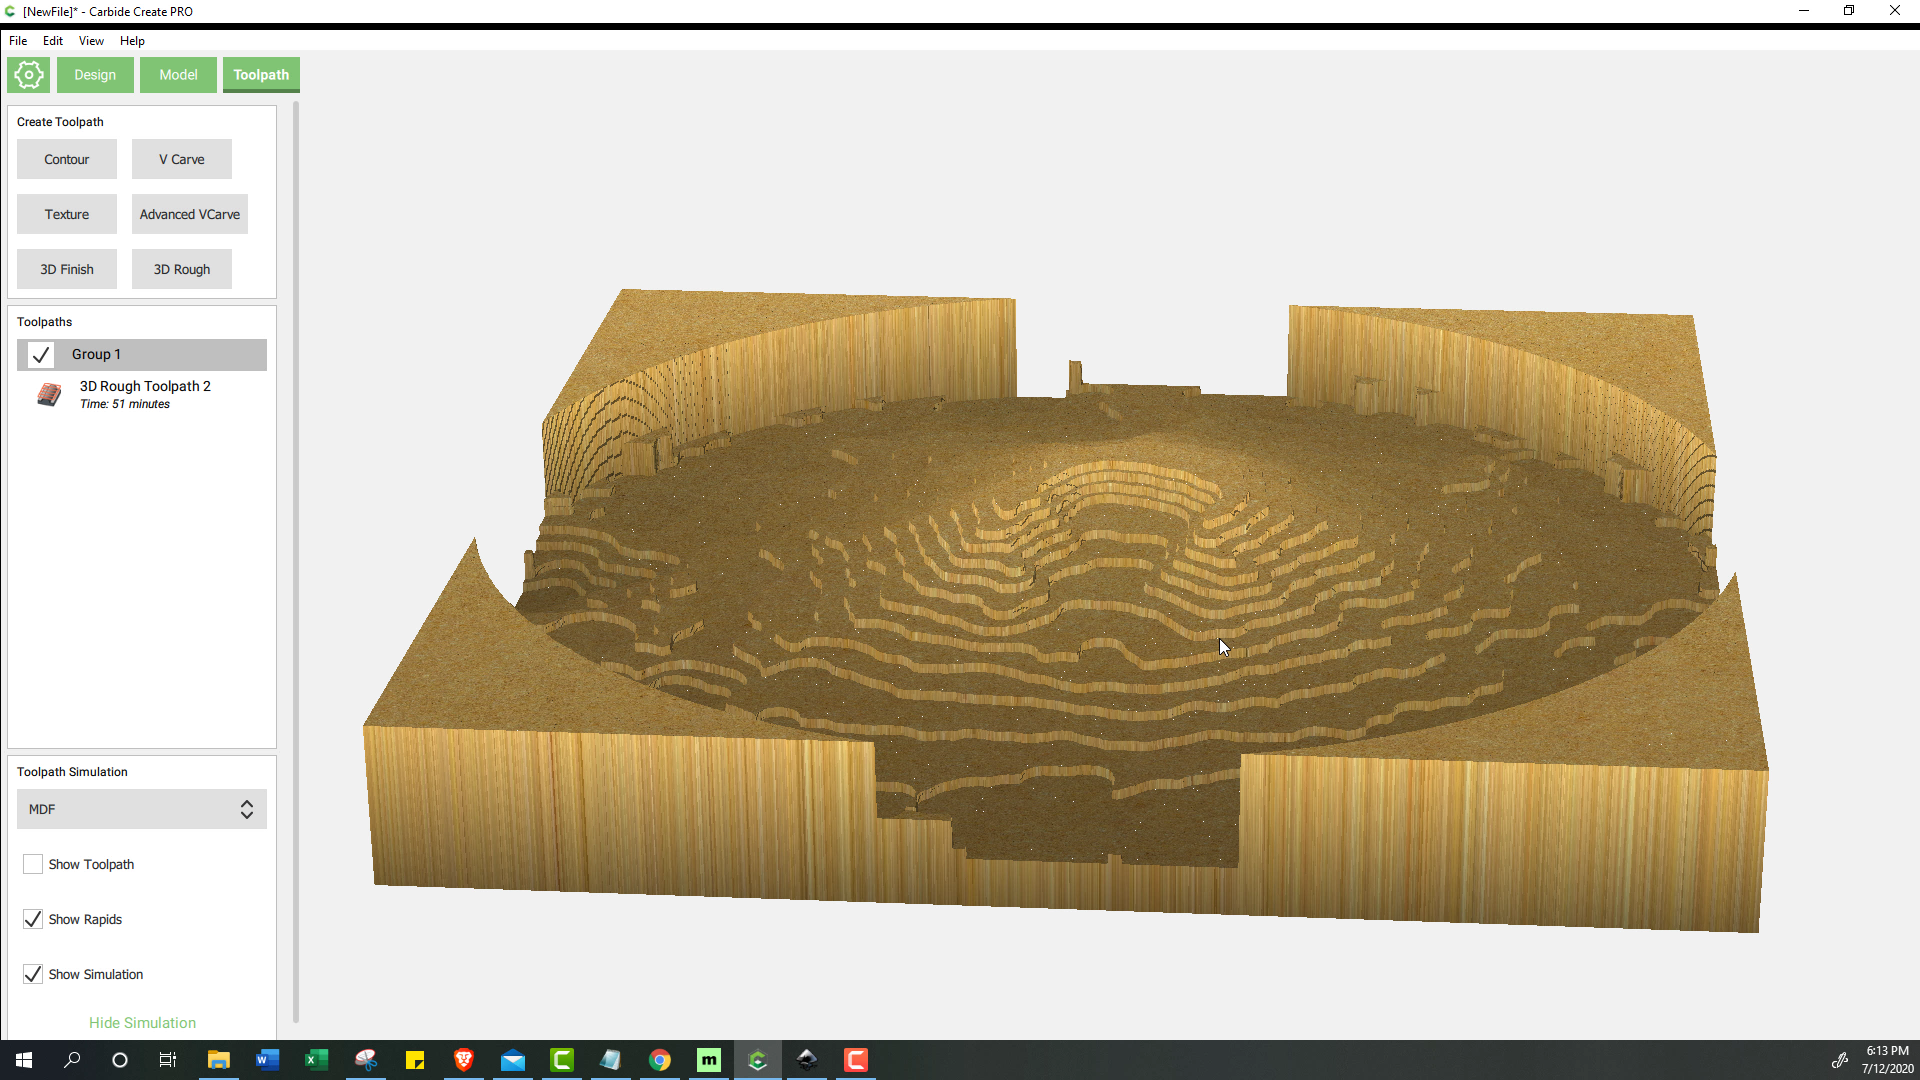
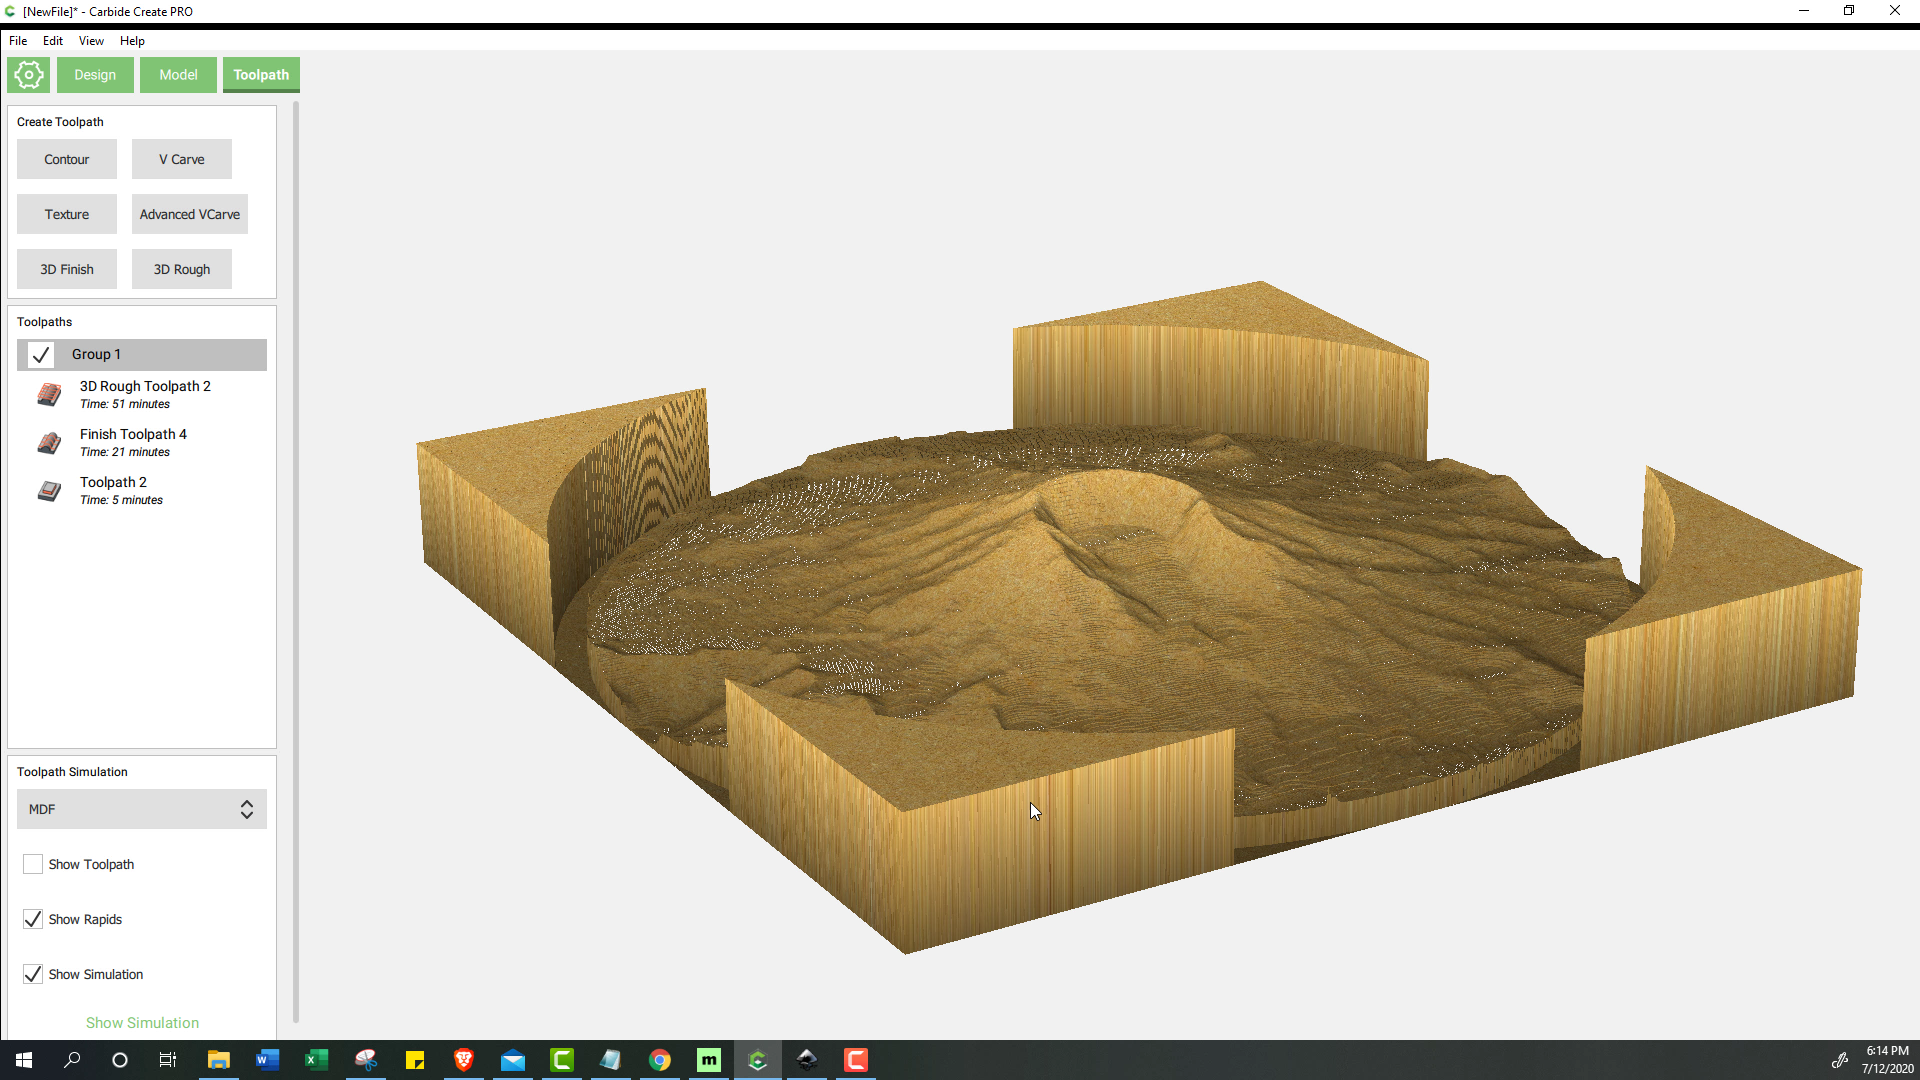
This step will vary widely depending on the CNC software that you use. I have a Shapeoko CNC, so I will show how to do this using Carbide Create (I believe the topographic features are only available in the pro version).
- Set Job Parameters
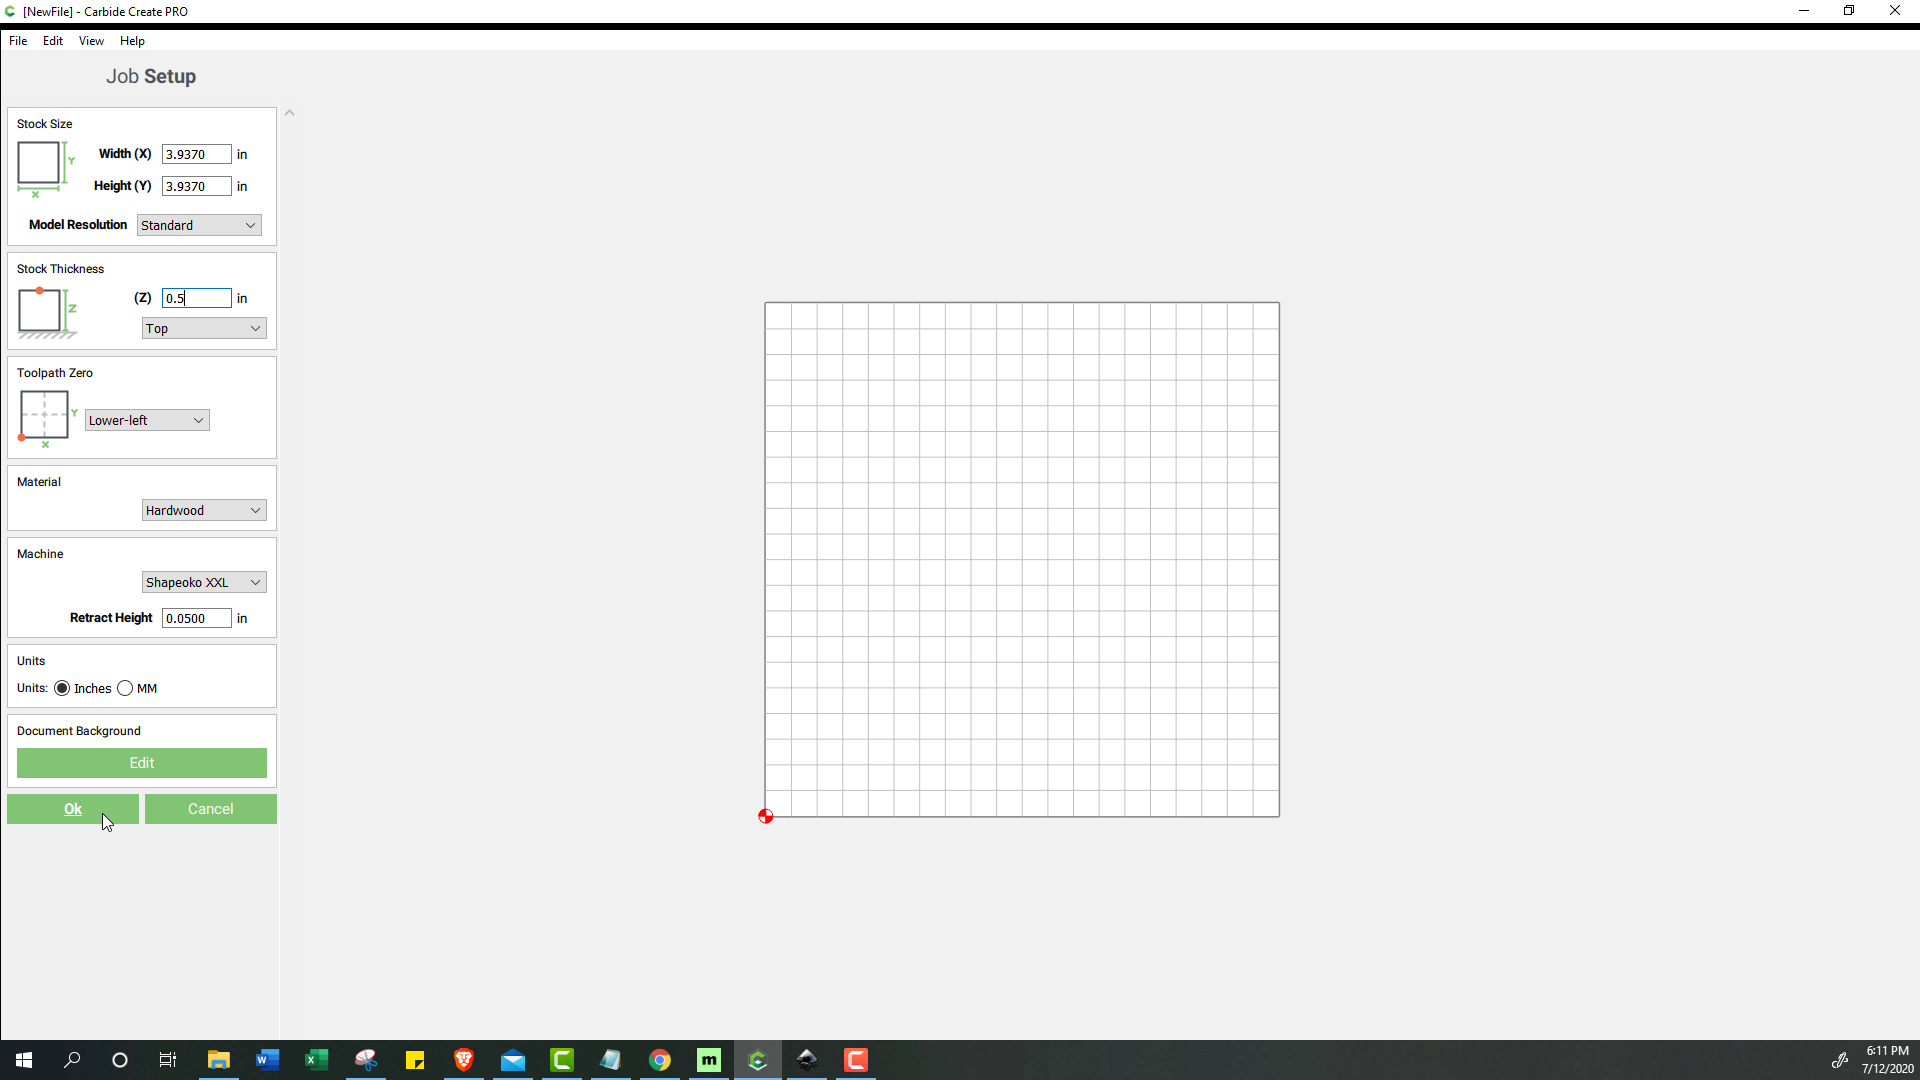
With a new file open in Carbide Create, start by opening job setup and adjusting the parameters for the project, in this case most notably the stock thickness which I set to 0.5” (+/- whatever the actual material thickness was measured by my calipers).
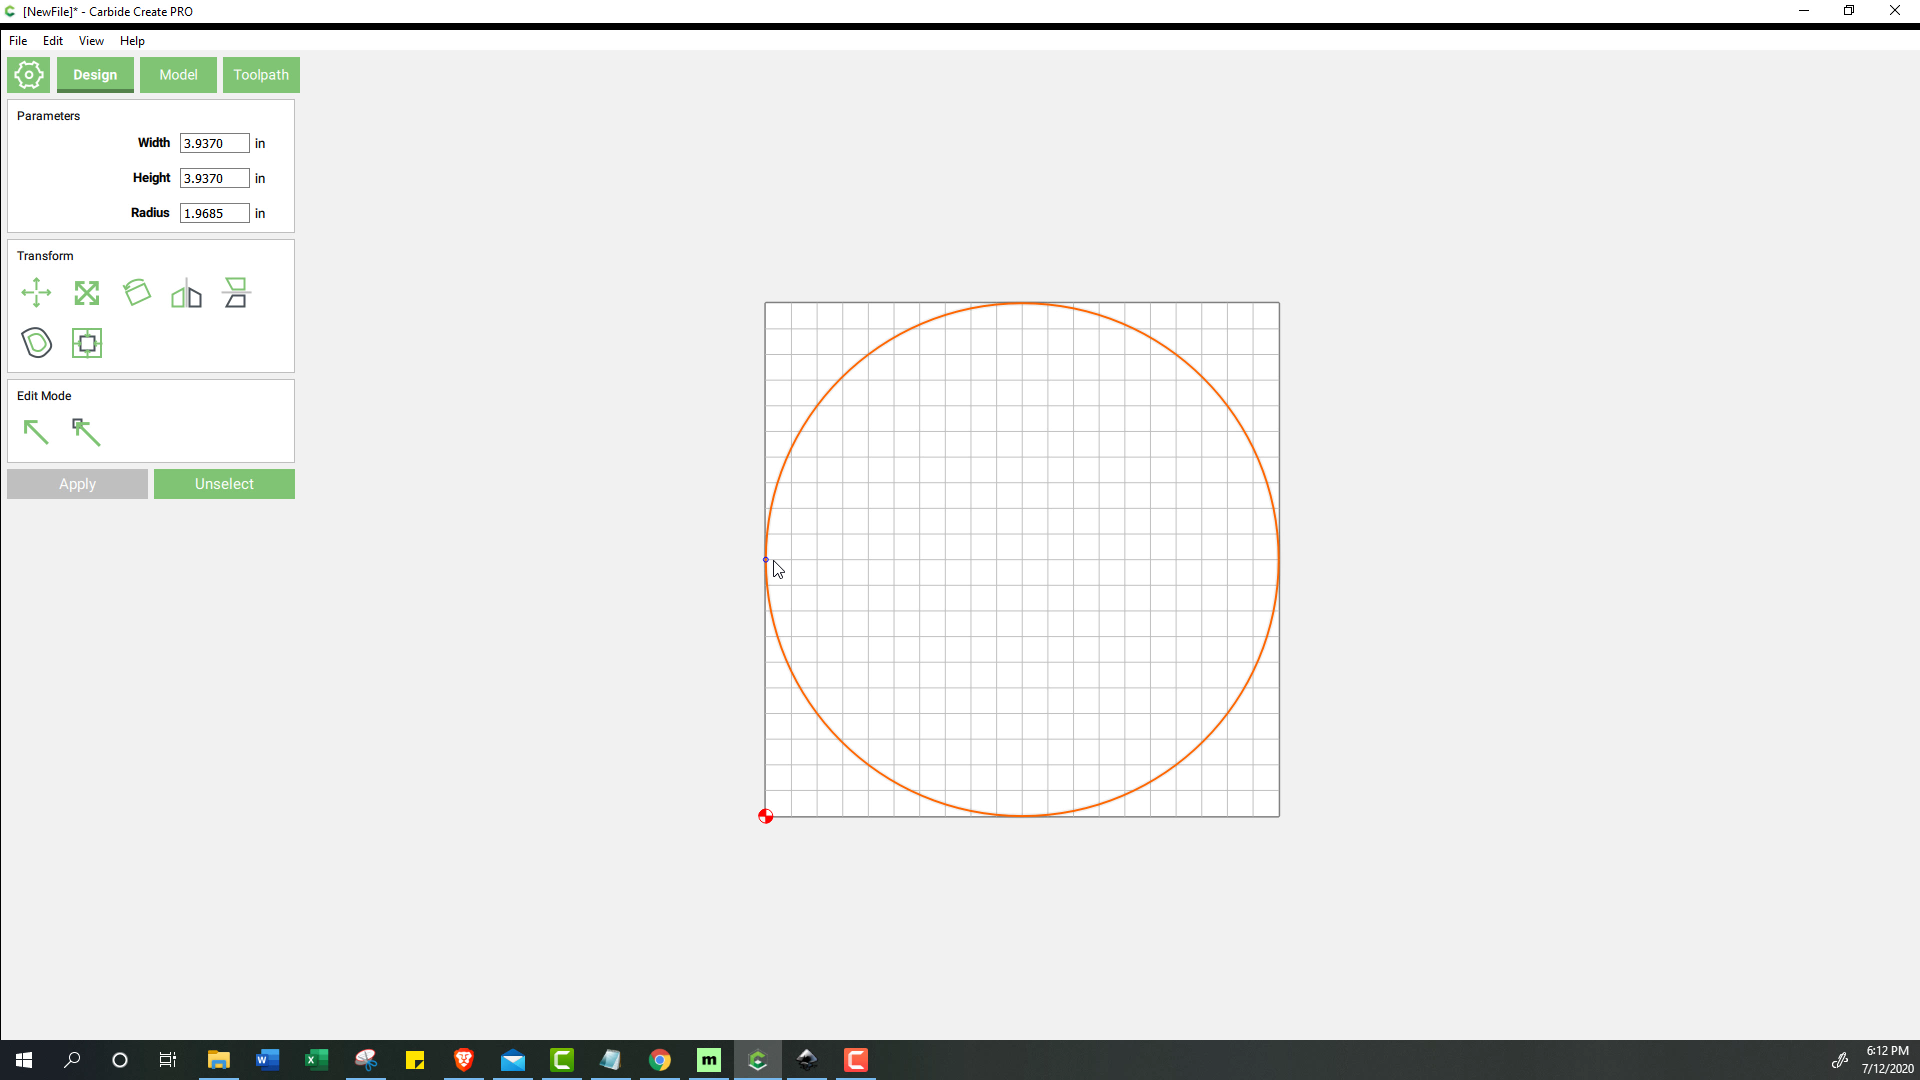
Then, add a circle, resize it to 10cm, and align it to the bottom and left walls. - Add Grayscale Image
Next, click over to the model tab, and select import component. As long as the image was sized correctly in Inkscape, it should automatically line up just about perfectly. Click show 3D to see what the topographic image looks like. Depending on how accurate you were when guessing the low bound was when making the “hypsometric” image in Maperitive, the lower border of the map may sit well above the base height. Because of how little height we already have available (0.5”), I want the lower bound of the map to be about as close as 0 as possible. You may not want to do this depending on how strong the wood you are using is (and what your map looks like), so experiment with this to see what suits your needs. But to lower the bottom of the map, while keeping the height the same you add a negative base height to the component parameters, and add that difference to the height in the input parameter. As an example, if I want my final height to be 0.5”, but I needed to drop the base height by 0.1 inches, I would set the Height in the input parameters to 0.6”. This will adjust the map height to your needs. - Add Toolpaths
I used 3 separate toolpaths for my project. As I am still learning about this machine, I used the default settings for each tool, and only sped it up when cutting if I thought that I could.
- I started with a rough pass using an ⅛” endmill
- Then did a finish pass with an ⅛” ball mill
- Finished it off by cutting out the pattern with an ⅛” endmill
You can potentially get quite a bit more detail by using a finer tool for the finishing pass. But due to time (and learning) constraints, I stuck with an ⅛” ball mill for this project. Even with an ⅛”, I thought the detail turned out pretty well.
CNC Carving and Laser Engraving
.jpg)
.jpg)
.jpg)
.jpg)
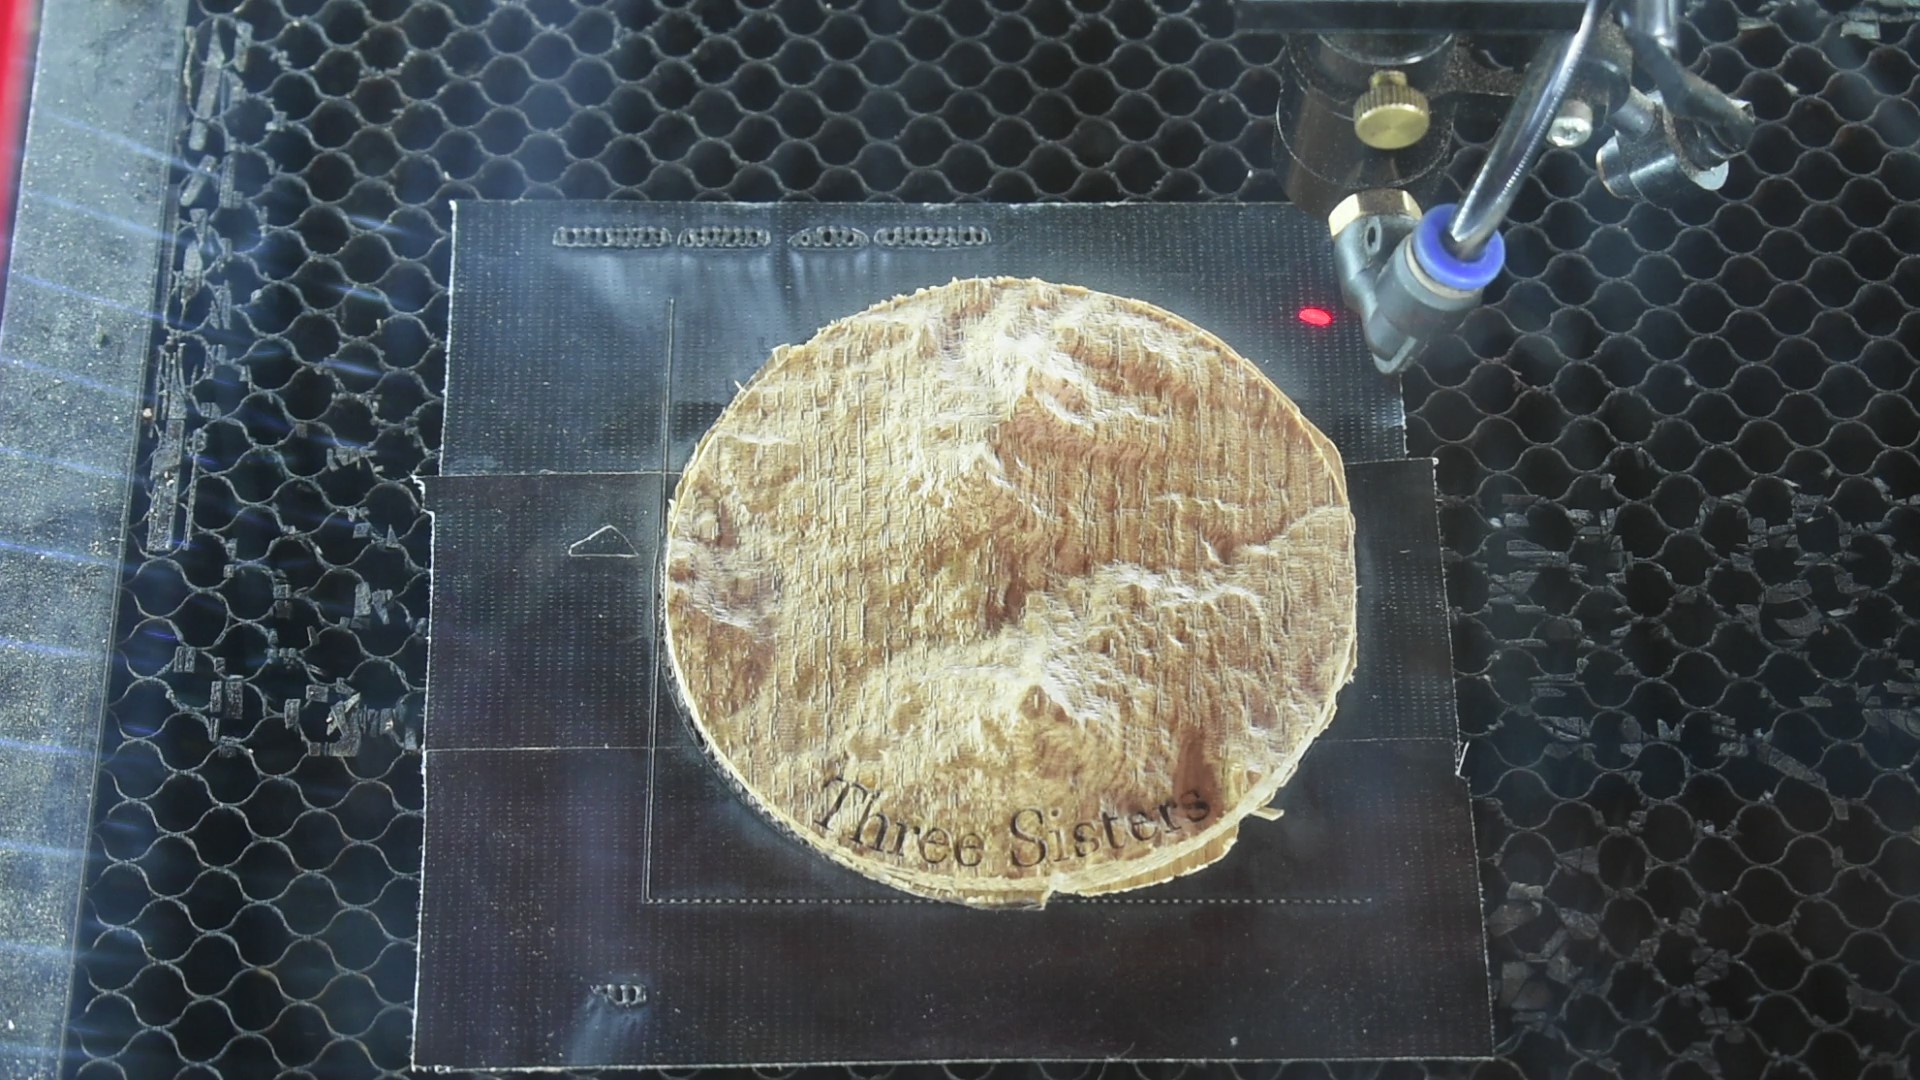
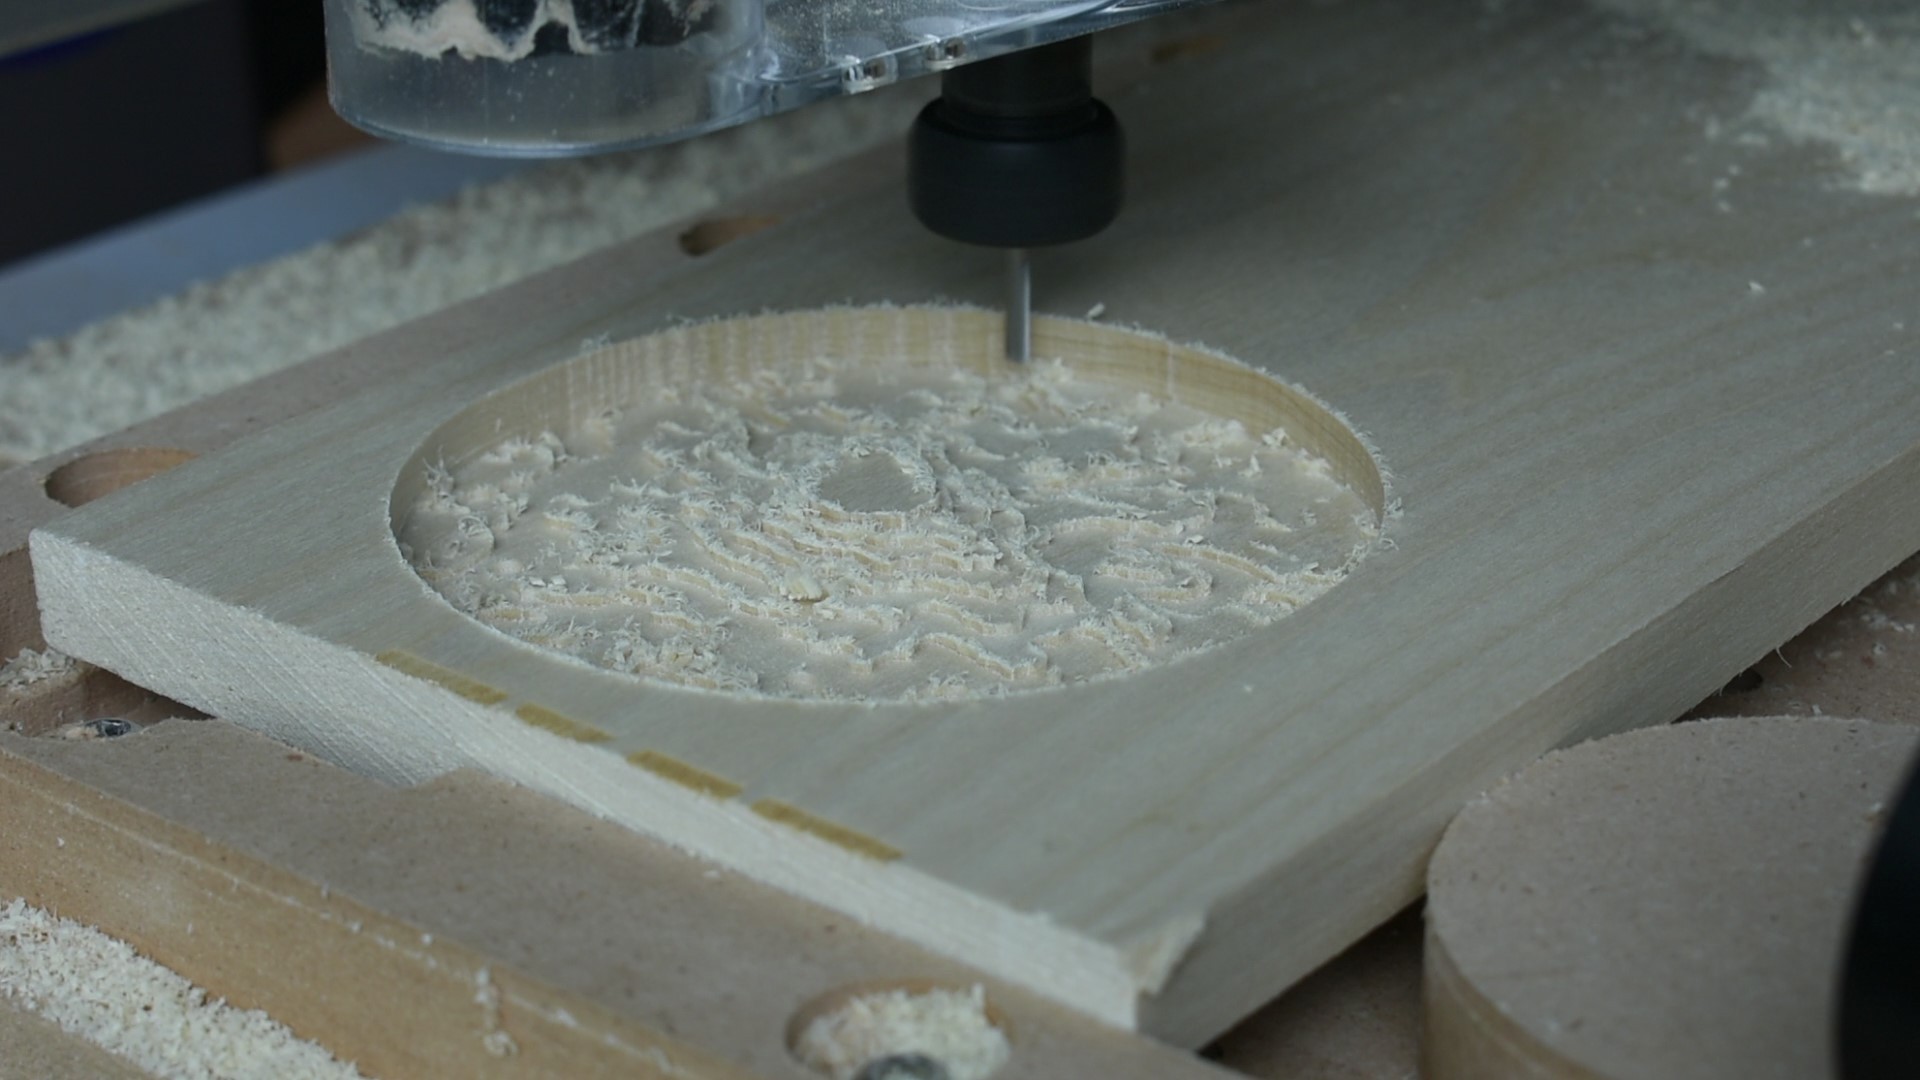
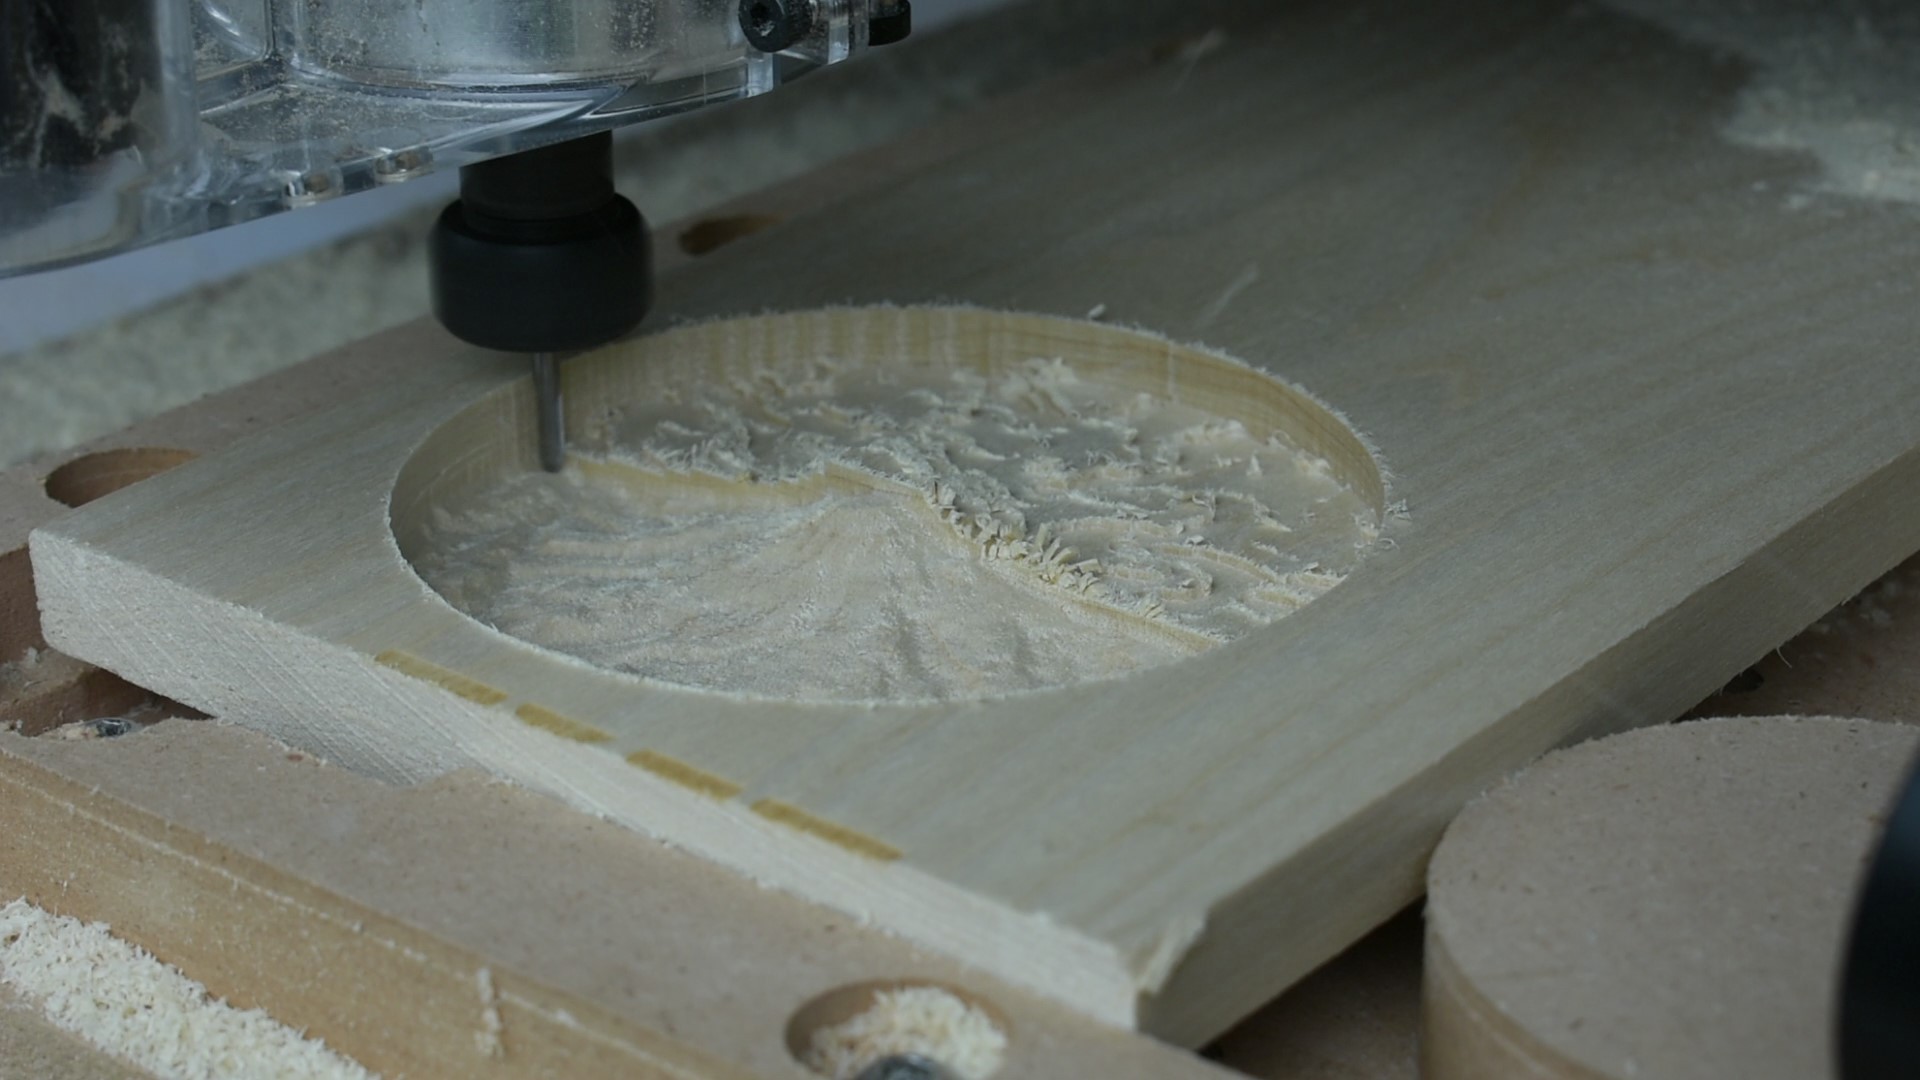
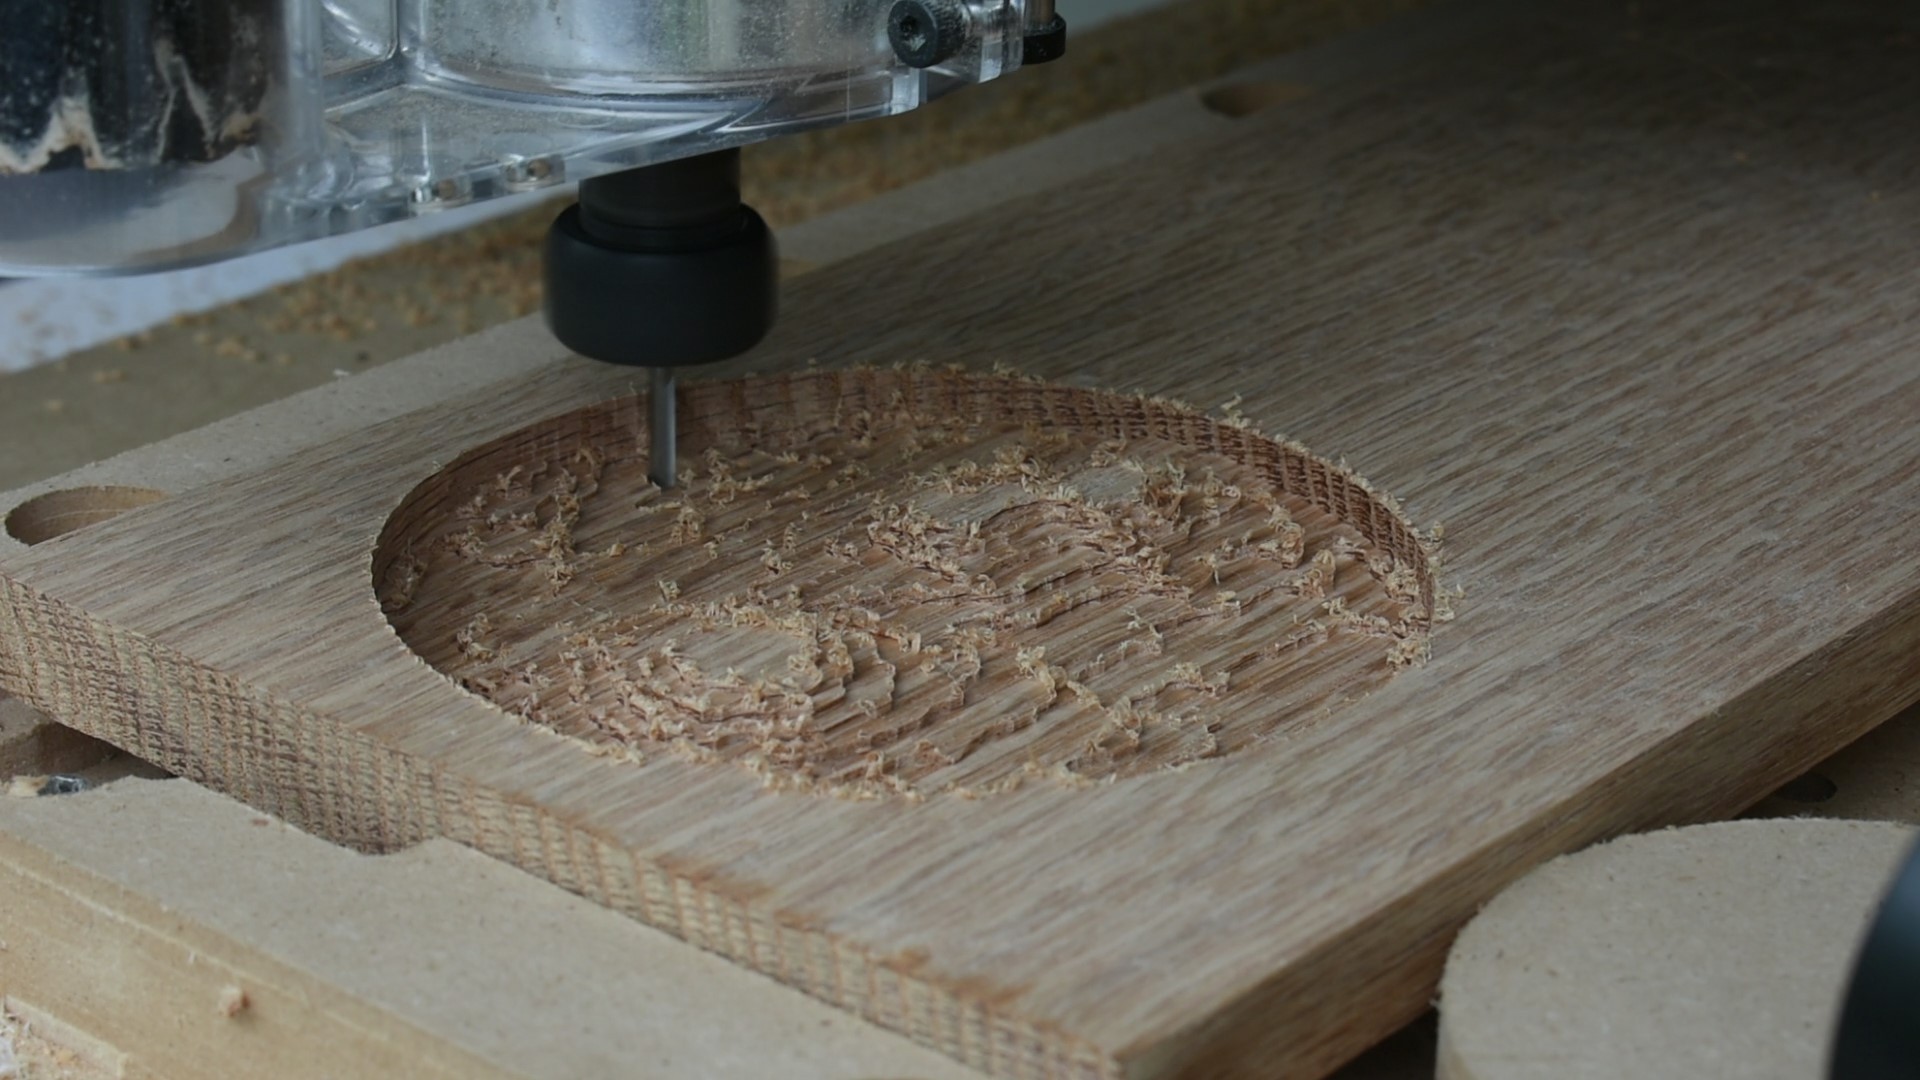
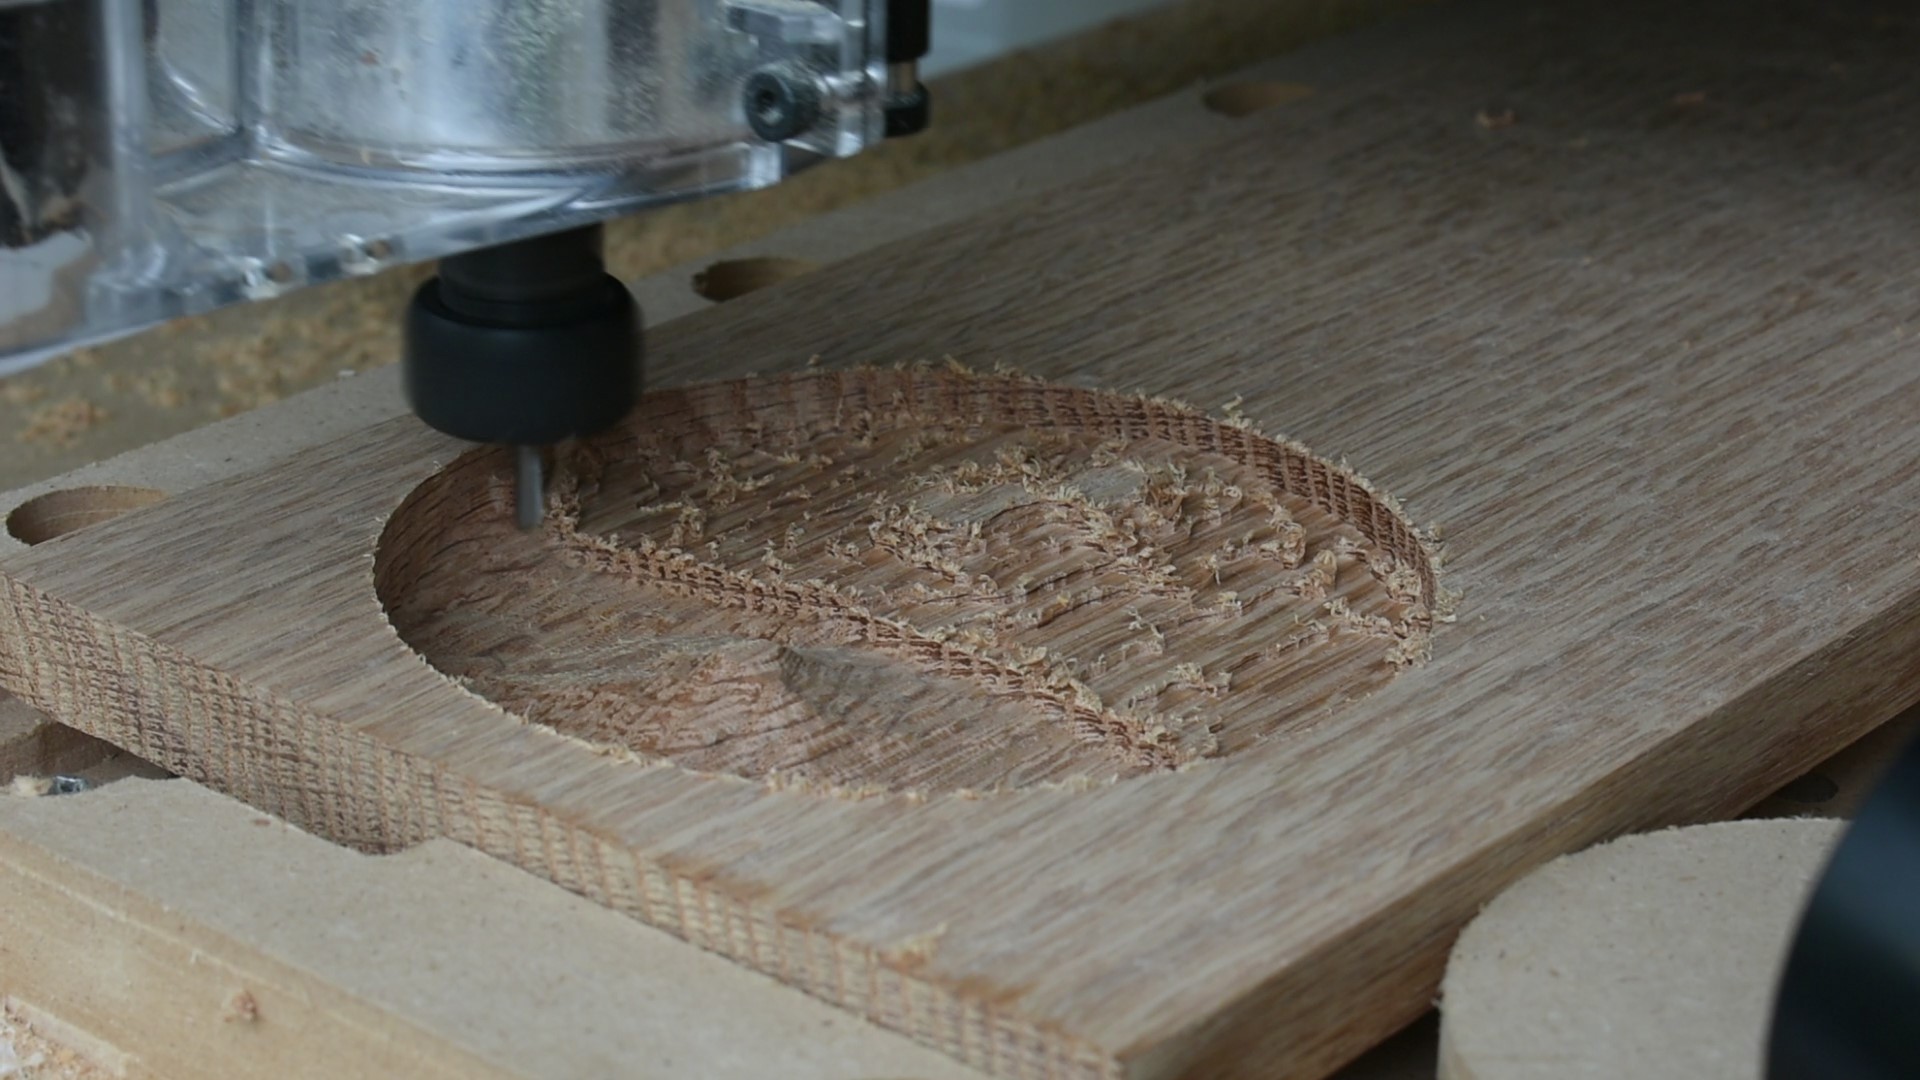
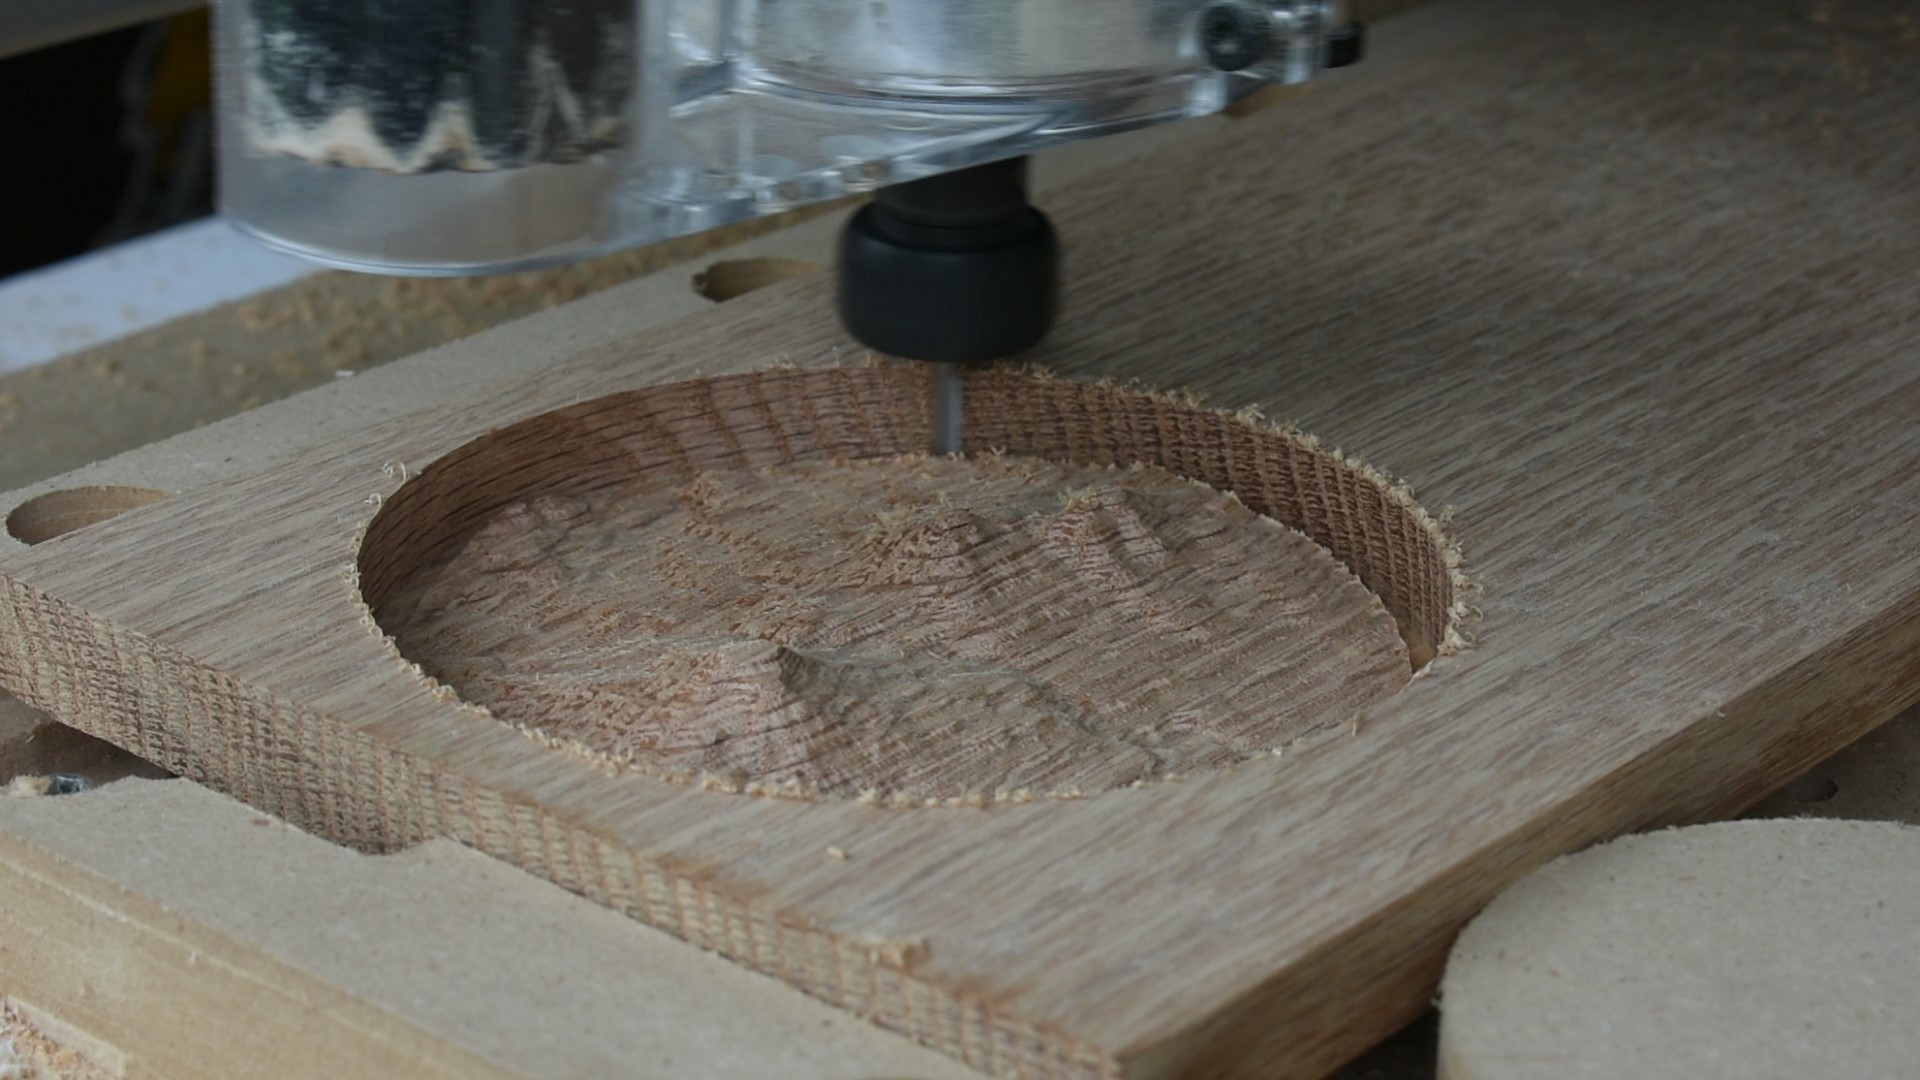
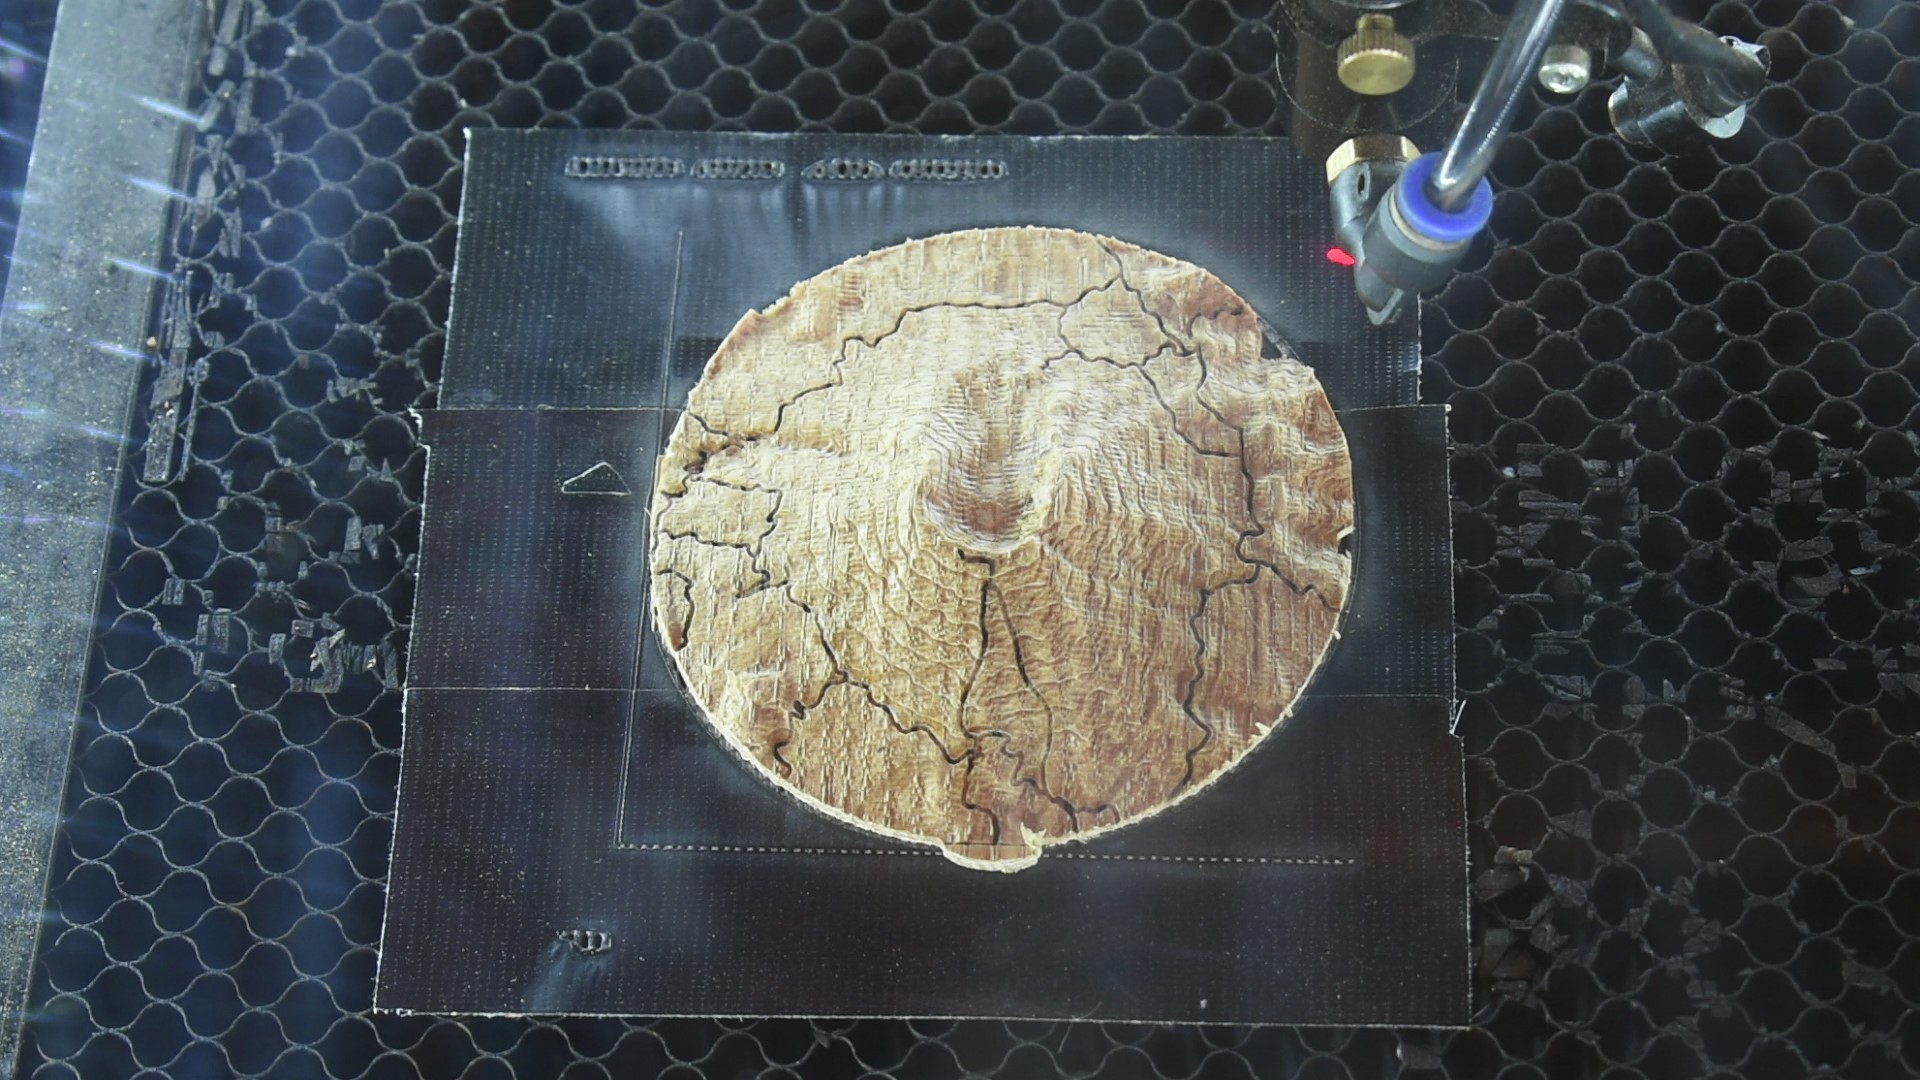
This part is pretty self explanatory. The main thing that I will talk through is wood choice. If not engraving, you only need a wood that looks good when cut, and this is both from general appearance, and splintering during the actual cutting. If laser engraving, you also want a wood that ideally burns dark when laser cut, to maximize contrast. This can potentially be sidestepped by adding a finish/dye/paint to the engraved area to help the contrast, which I unsuccessfully tried (and will explain a little later). I did a few test cuts and engravings using what project wood varieties that I had available at my local store (now’s not exactly a great time to go exploring a bunch of different stores to see what their wood variety is…). I tried Oak, Pine, Hemlock, and Poplar. The only one that had a nice finish after cutting was the oak, so that is the one that I did most of my coasters using, though for reasons I will show at the end, I will say that pine was the underdog that I would probably use if I were to do this again
I didn’t think any of the wood varieties that I tried had particularly great contrast when engraving, so I just stuck with the one that cut the best with the CNC (oak), and decided to try adding a finish to the engraved areas later.
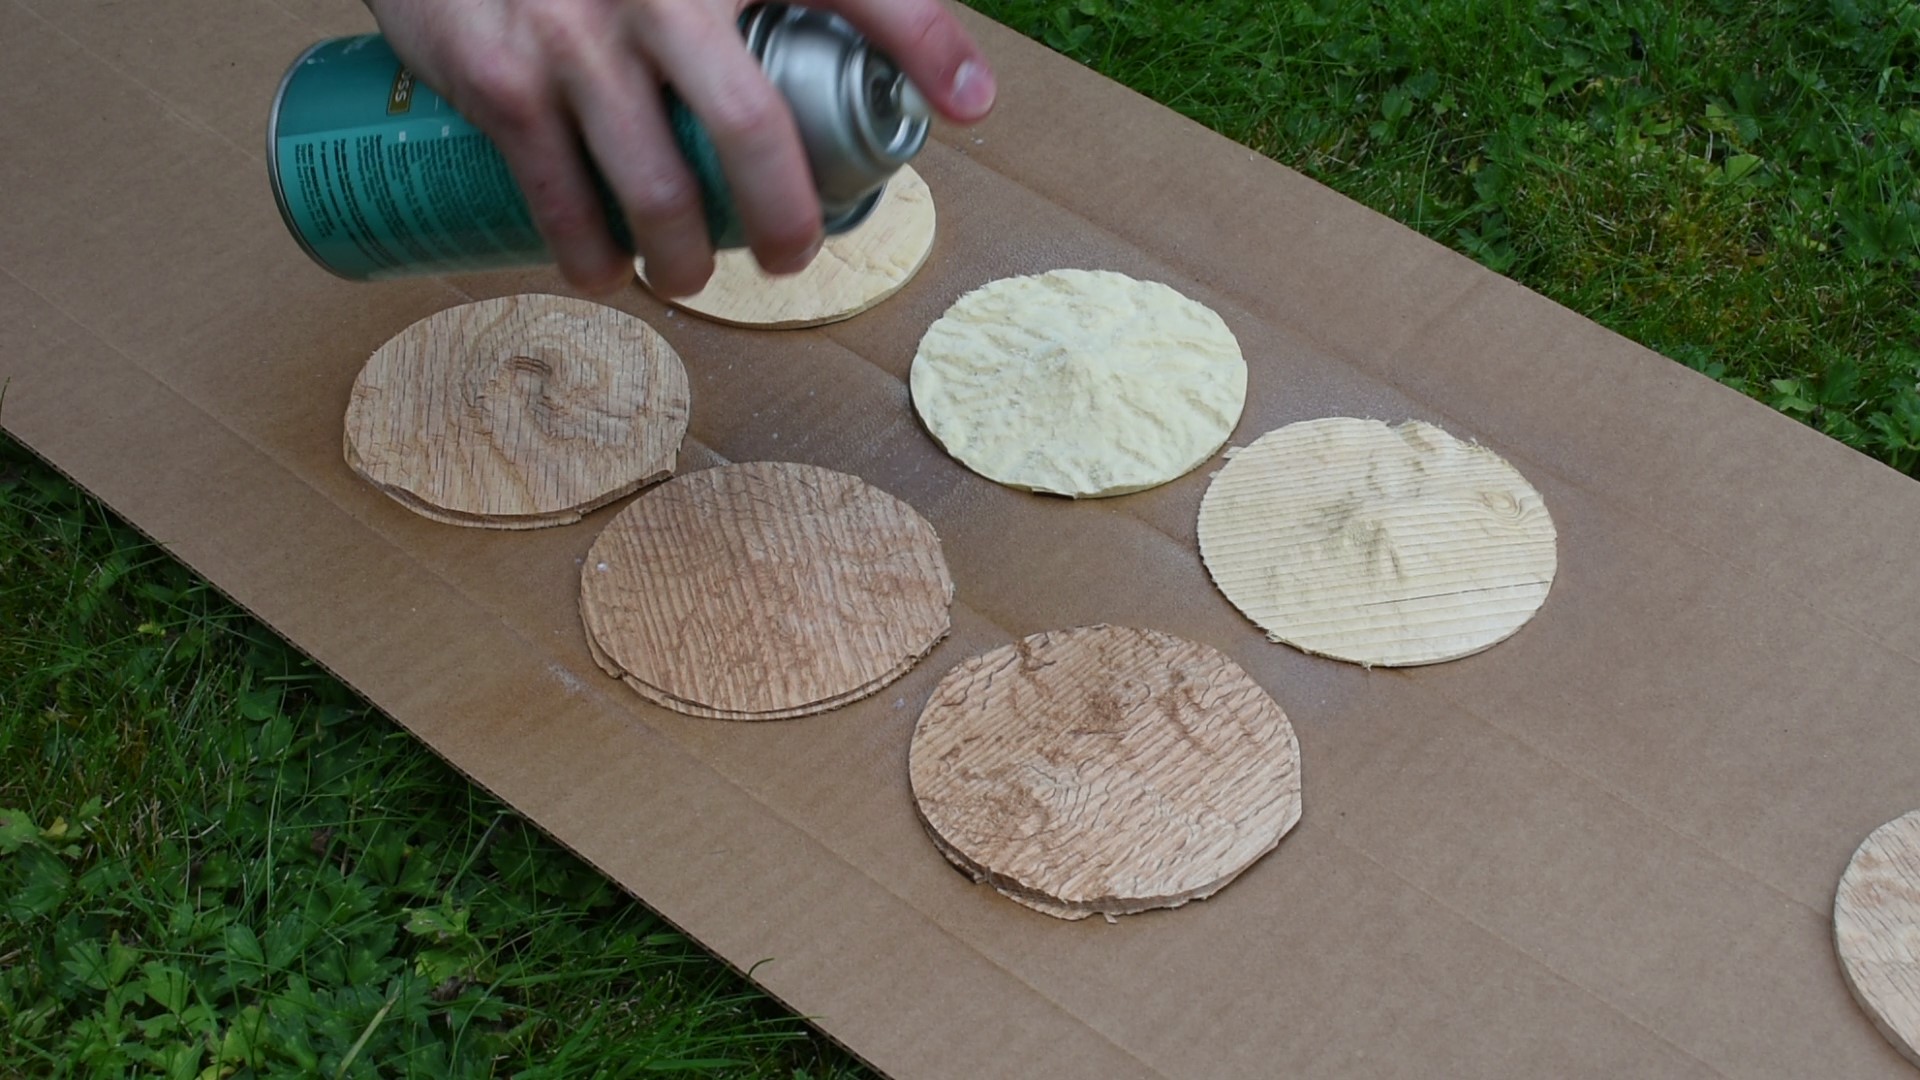
Due to the fact that I was cutting out and then engraving on a non-flat surface, the only way that I found to possibly increase the contrast of the engraved areas, was adding a finish between cnc cutting and laser engraving, then adding a dye that would bleed into the engraved areas, but not the finished parts. I was essentially trying to replicated what was demonstrated in this video here. Unfortunately I only had one weekend for this project, so I only had one attempt at choice of finish, and had to rush the application of that as well. For the finish, I used a spray on water based Min-Wax polycrylic finish. I used water based because I read that you don’t want to use epoxy on wood that has oil based finish. But if I were to do this again, I would use oil based finish, engrave, tint, and apply a water based finish before applying the epoxy.
I wasn’t sure how the engraving was going to look on a height-varied surface, but it ended up looking decent enough. I didn’t have any problem with the text, but some of the trails did come out weaker in some spots than others do to the larger height variation.
[Optional]: Adding Dye to the Engraved Wood
.jpg)
.jpg)
.jpg)
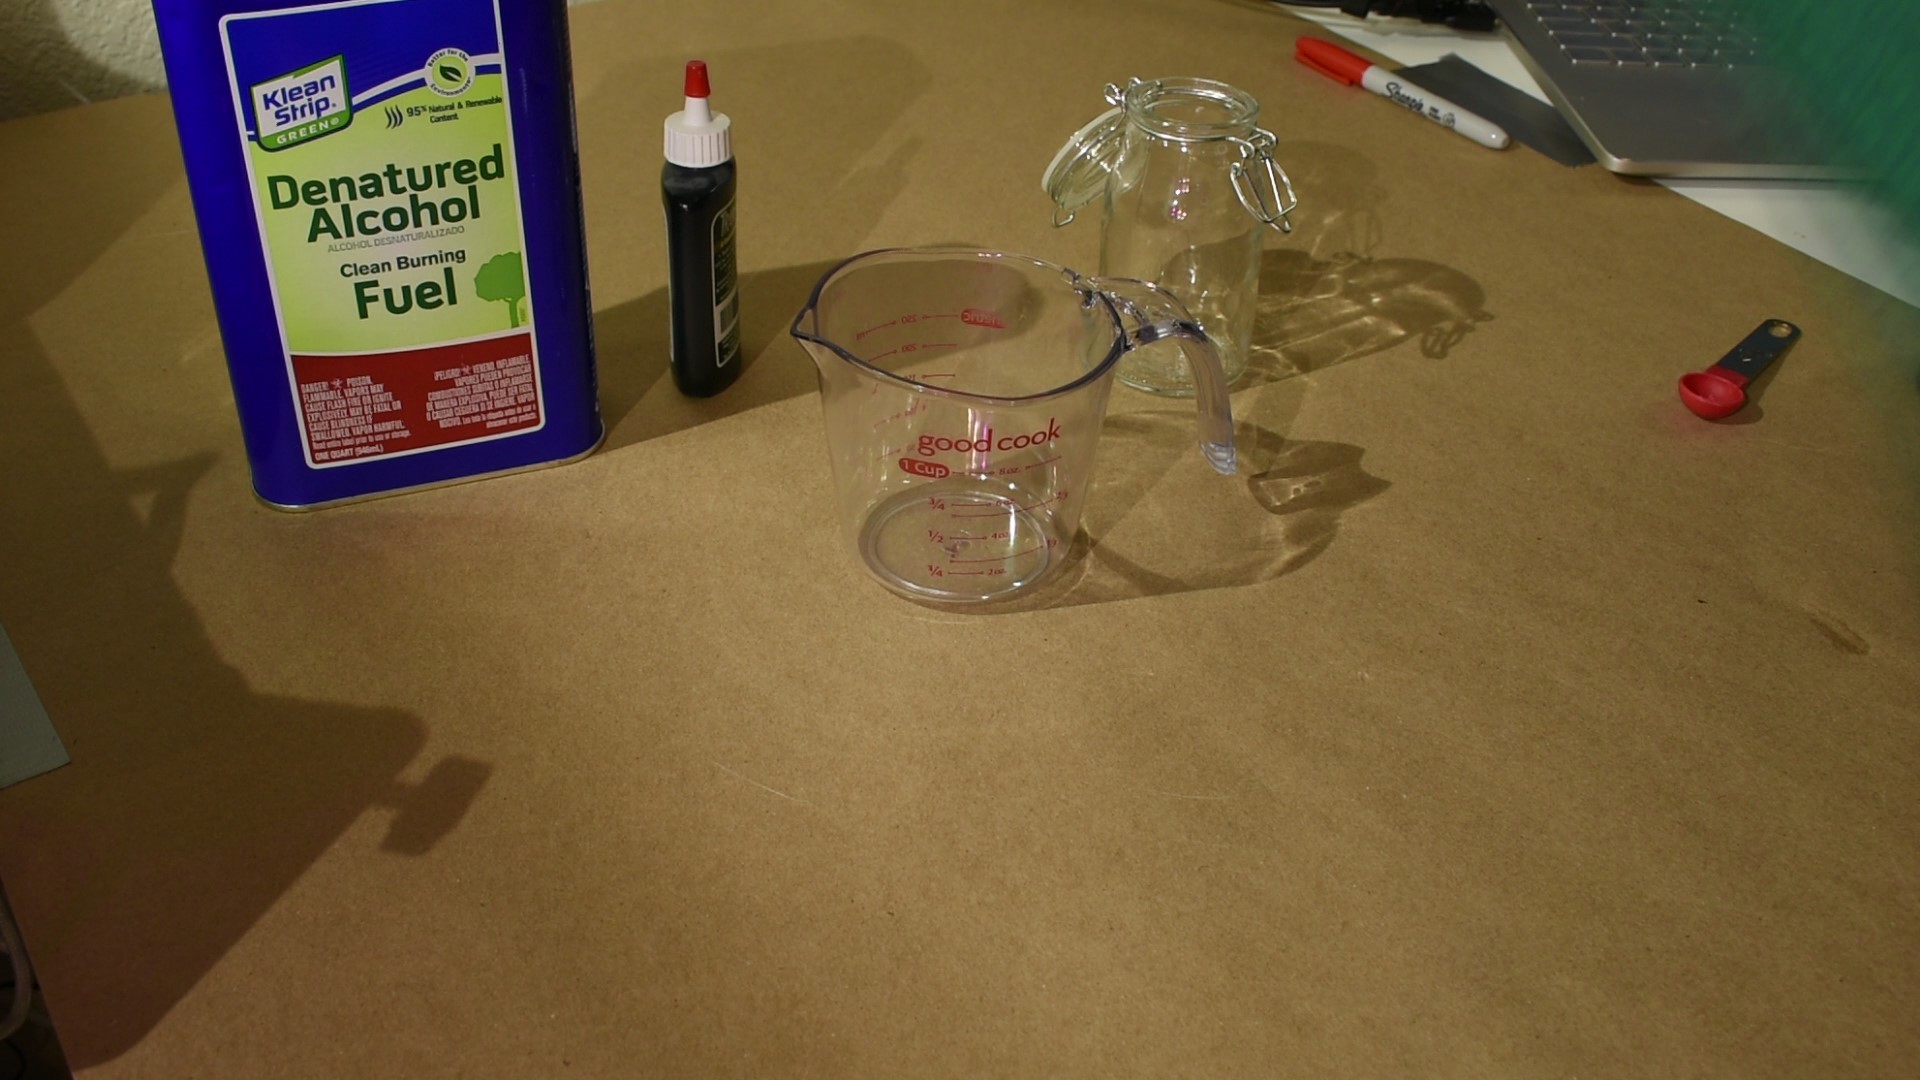
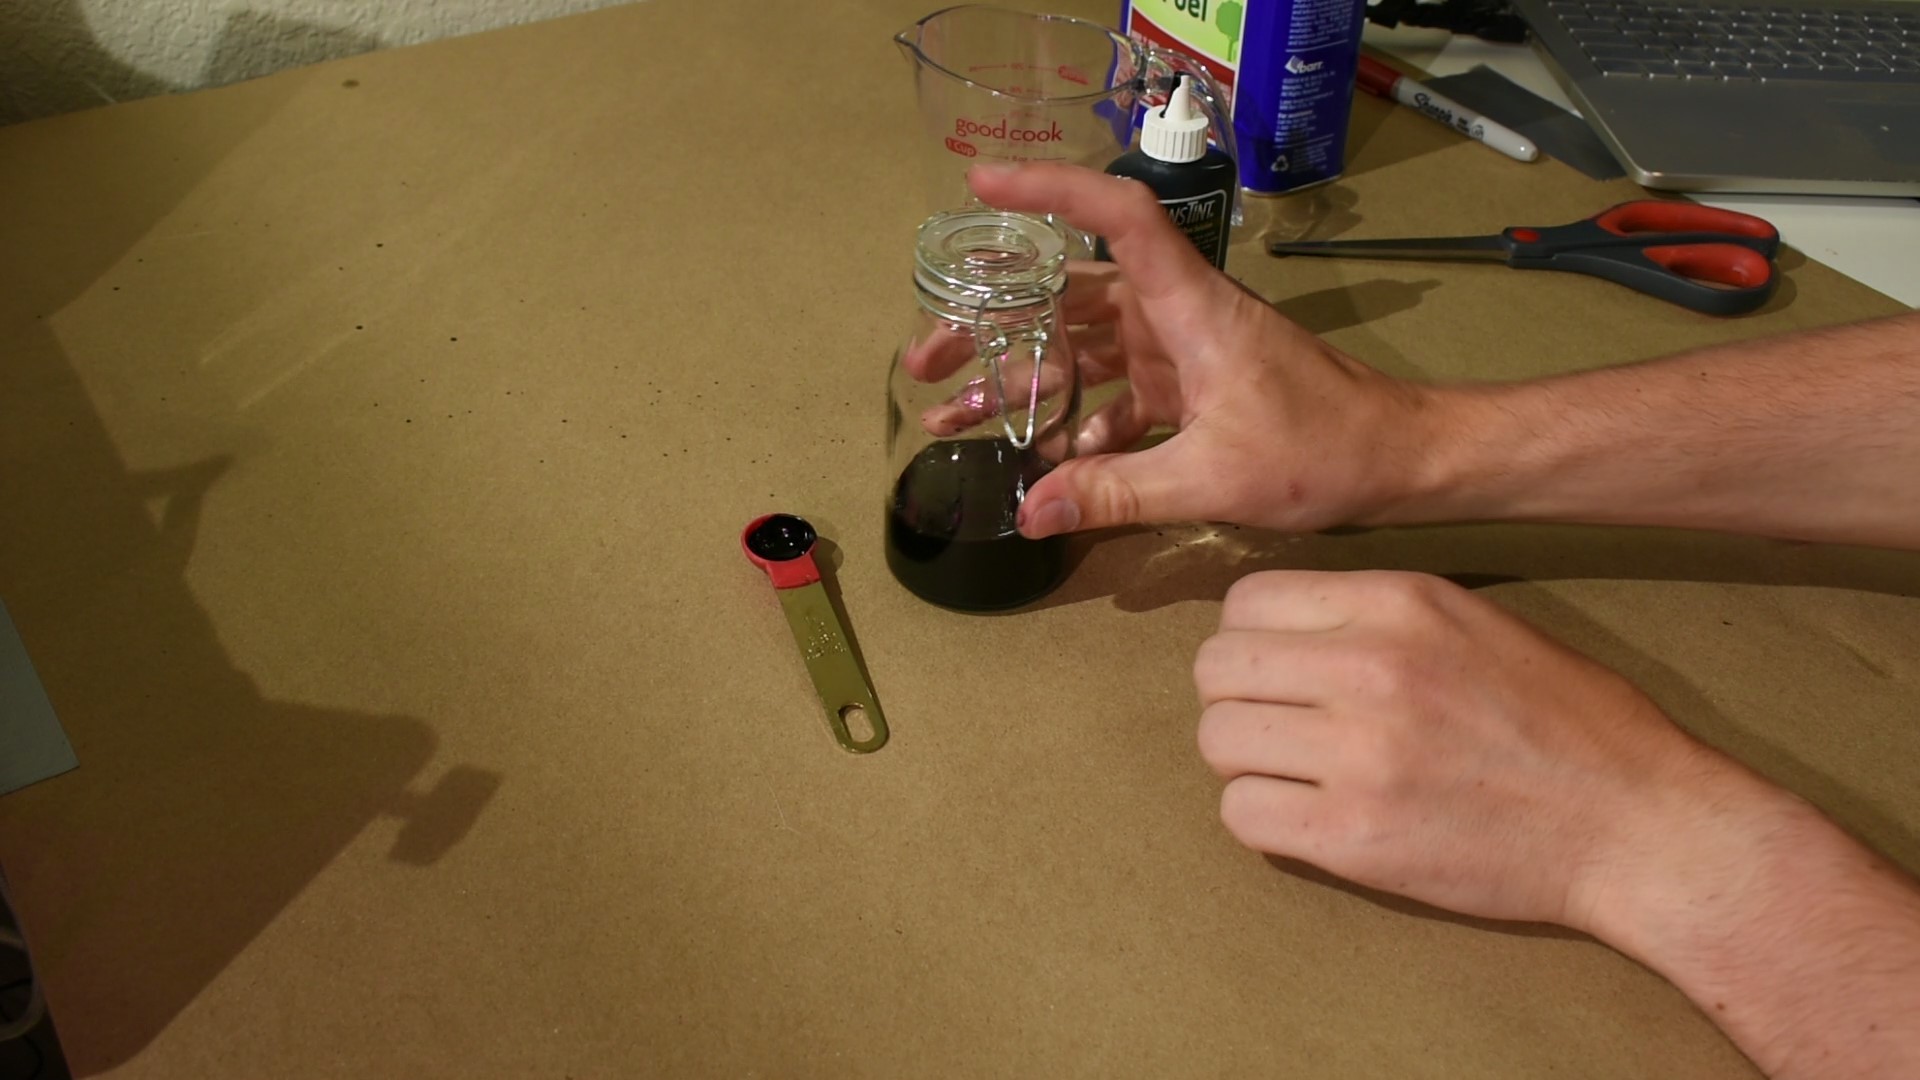
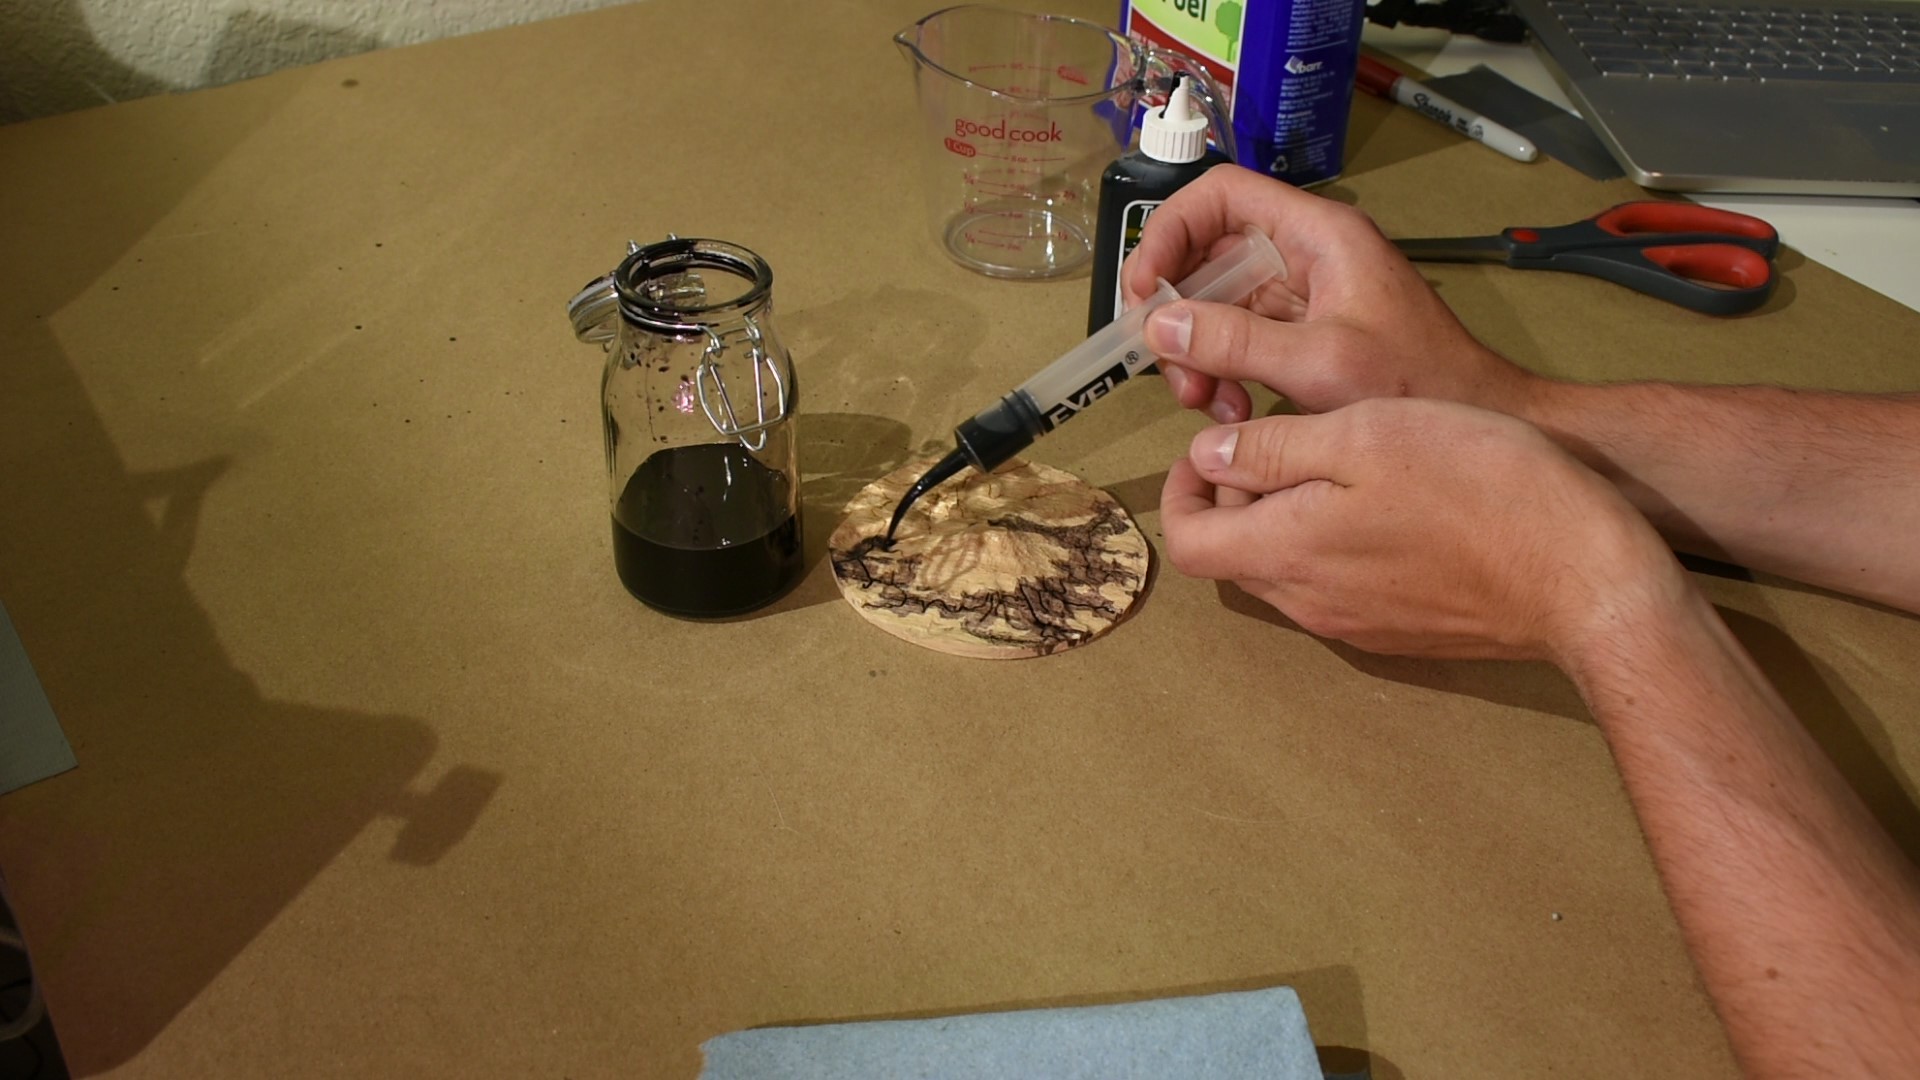
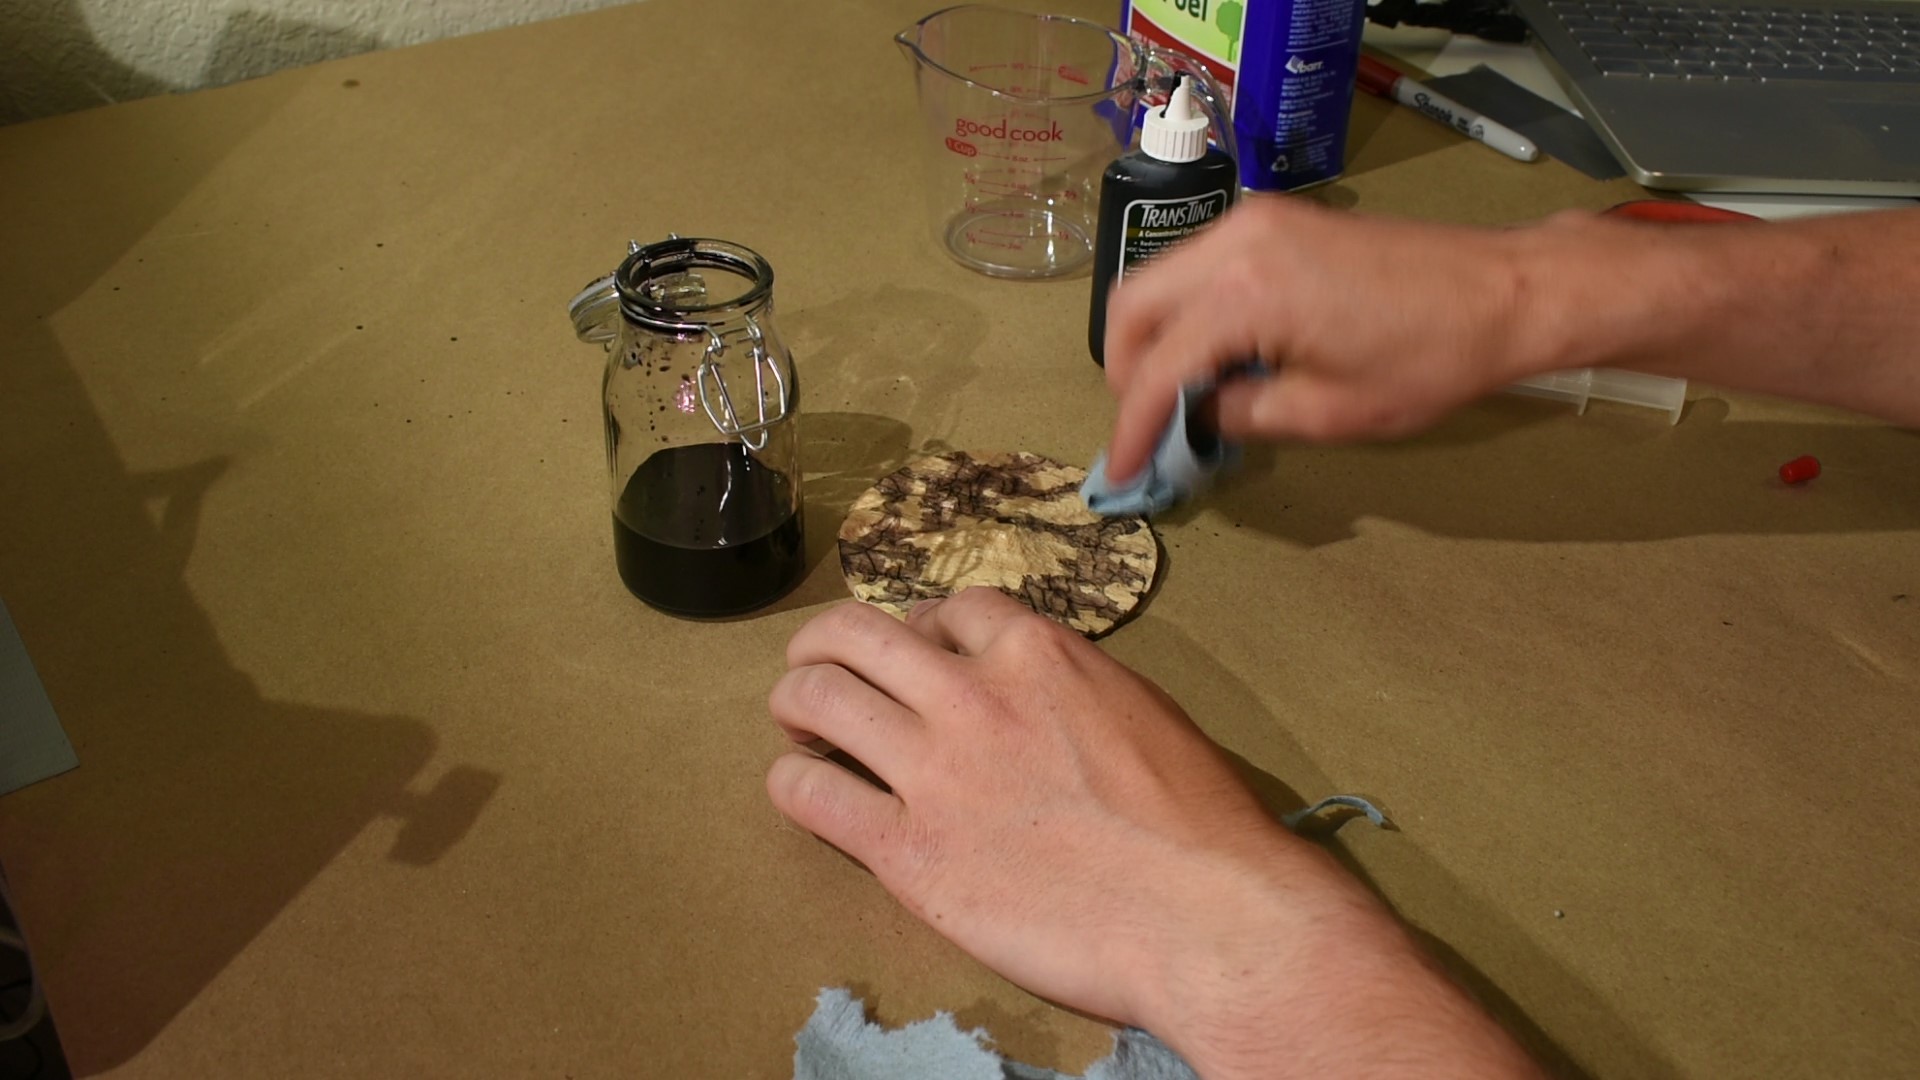
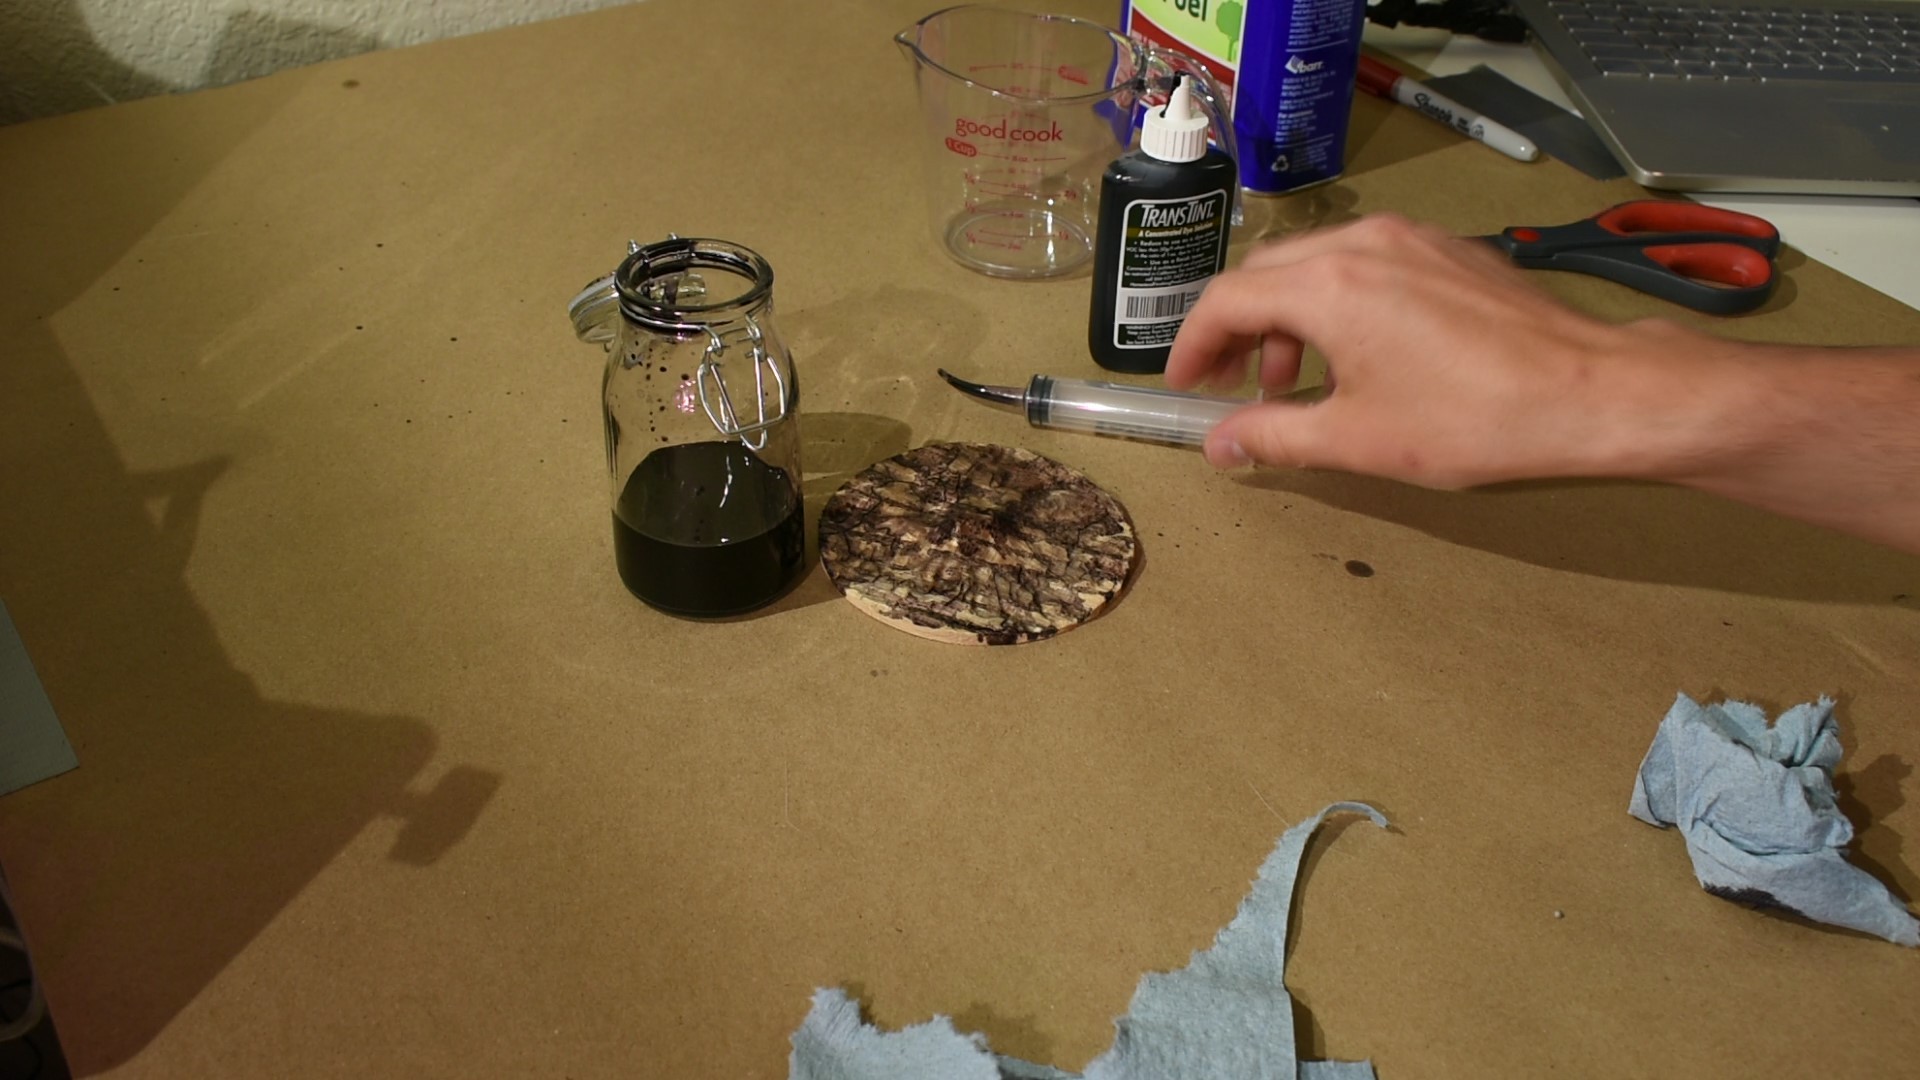
In an effort to increase the contrast of the engraved parts of the wood, I tried using a dye to color the engraved sections. For this, I used TransTint for the dye, denatured alcohol to dilute the dye for use, and a syringe for the application.
Unfortunately, as you can see, the finish I used ended up not sealing the wood much at all, so the dye that I added bled into all sections of the wood, not just the engraving. This is partly because the oak that I used was rather porous, and I hadn’t applied enough finish to completely block the absorption. Because I was time constrained, I didn’t get a chance to try it again, but next steps would probably be to try an oil based finish (or maybe even a coating of epoxy) before laser cutting, and see if that would seal it better.
Adding the Epoxy Resin
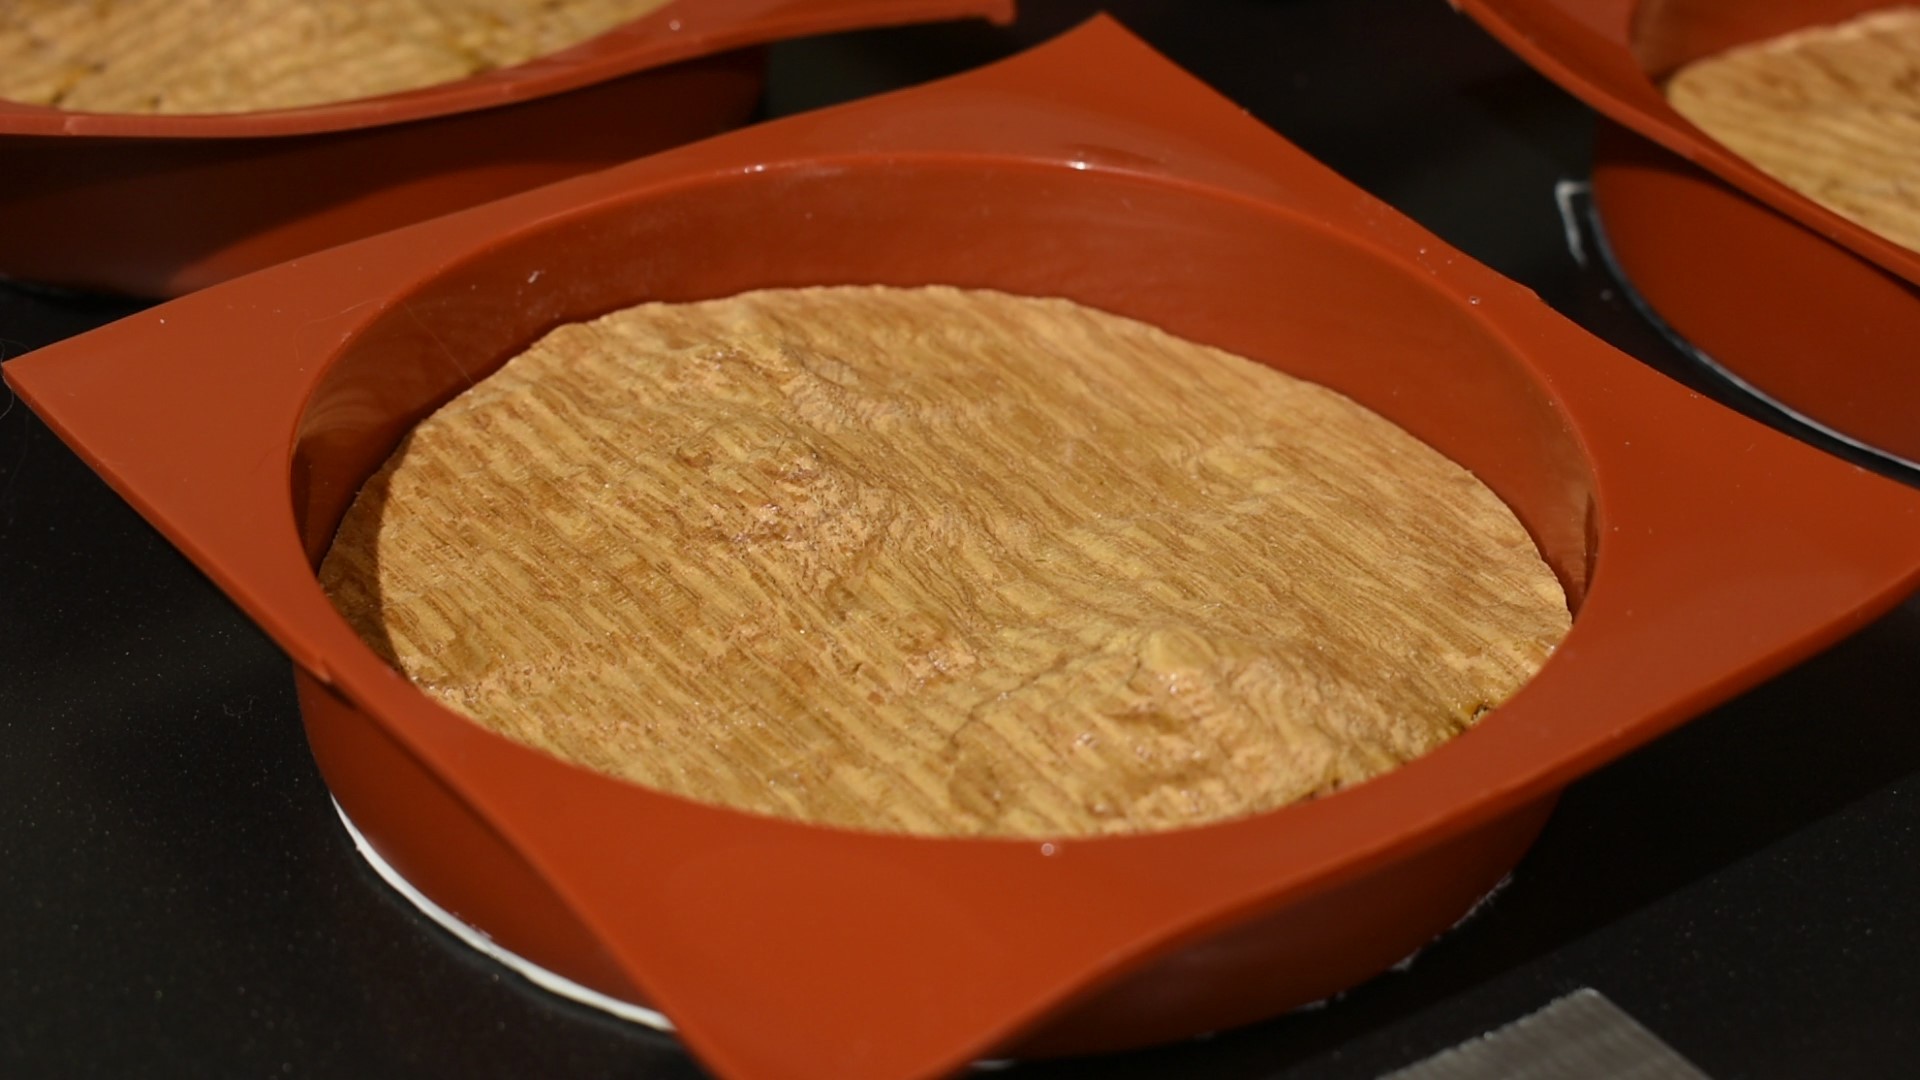
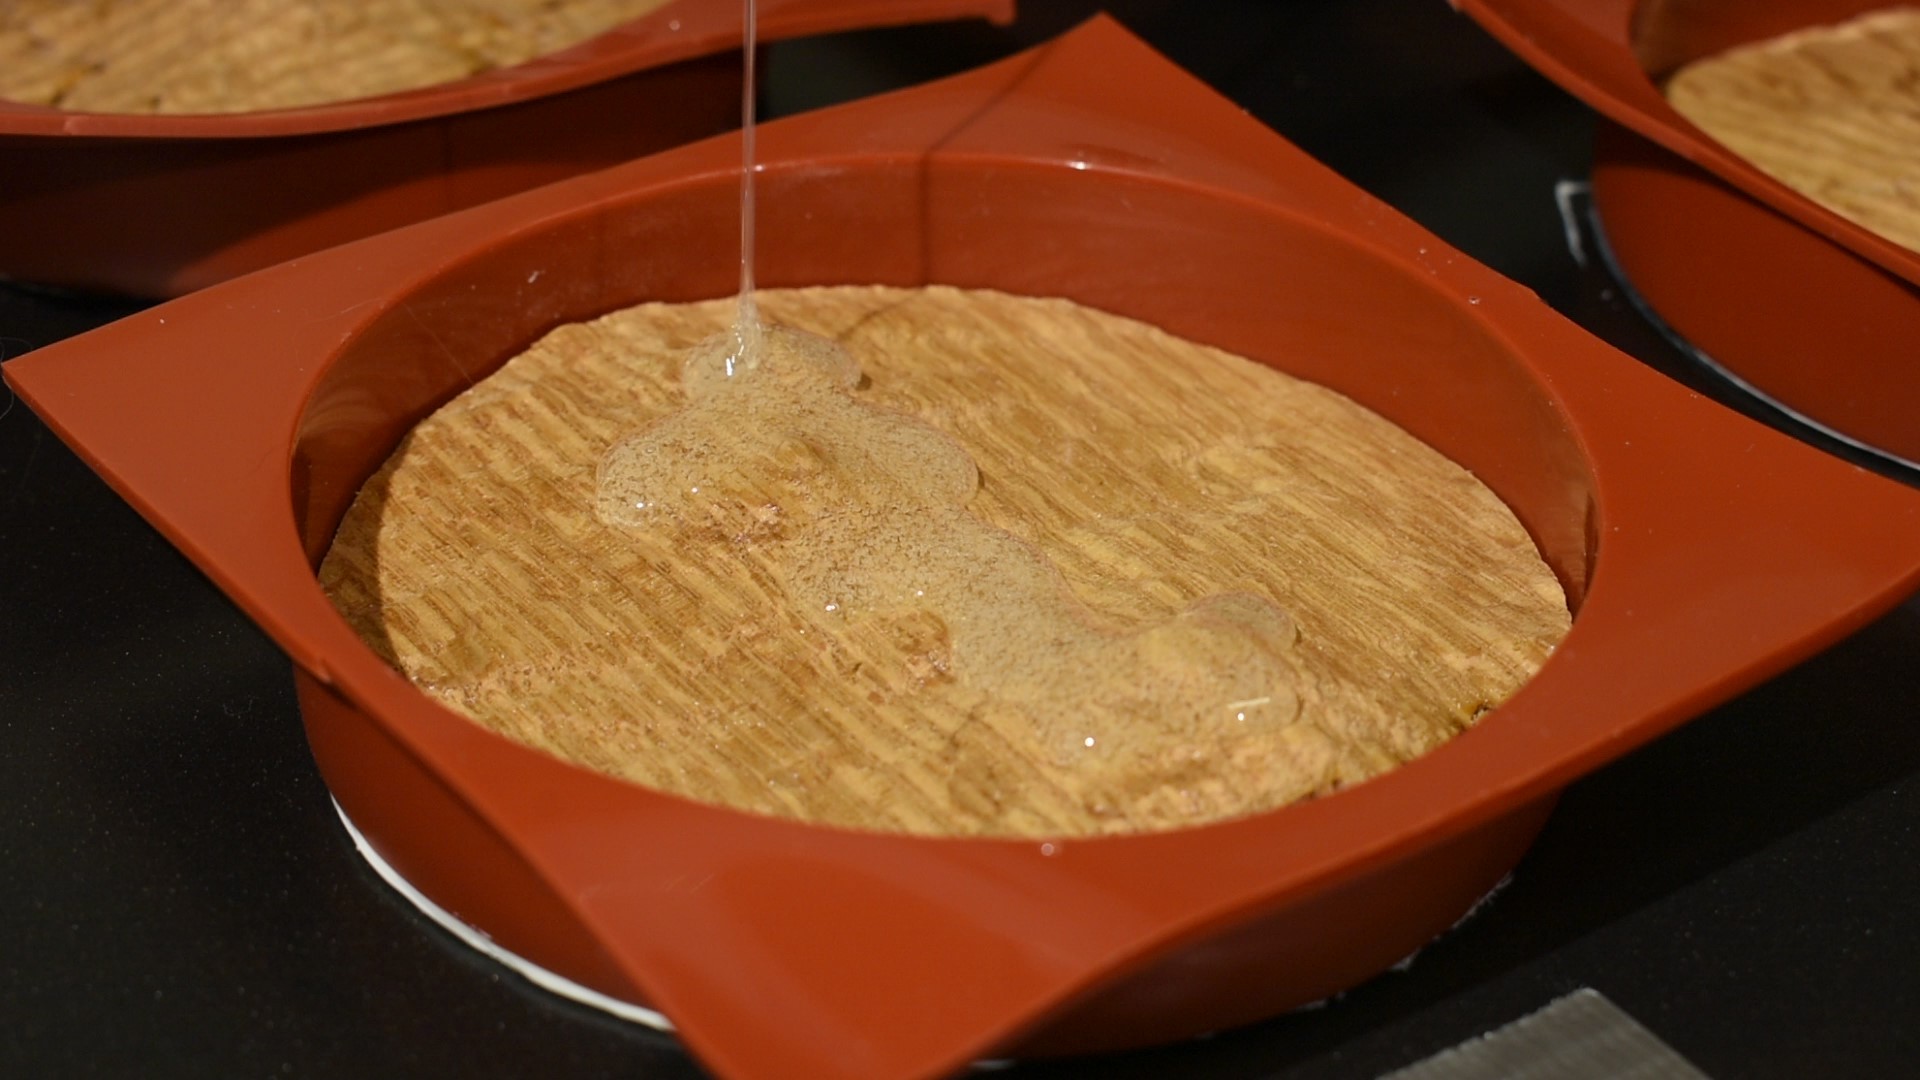.jpg)
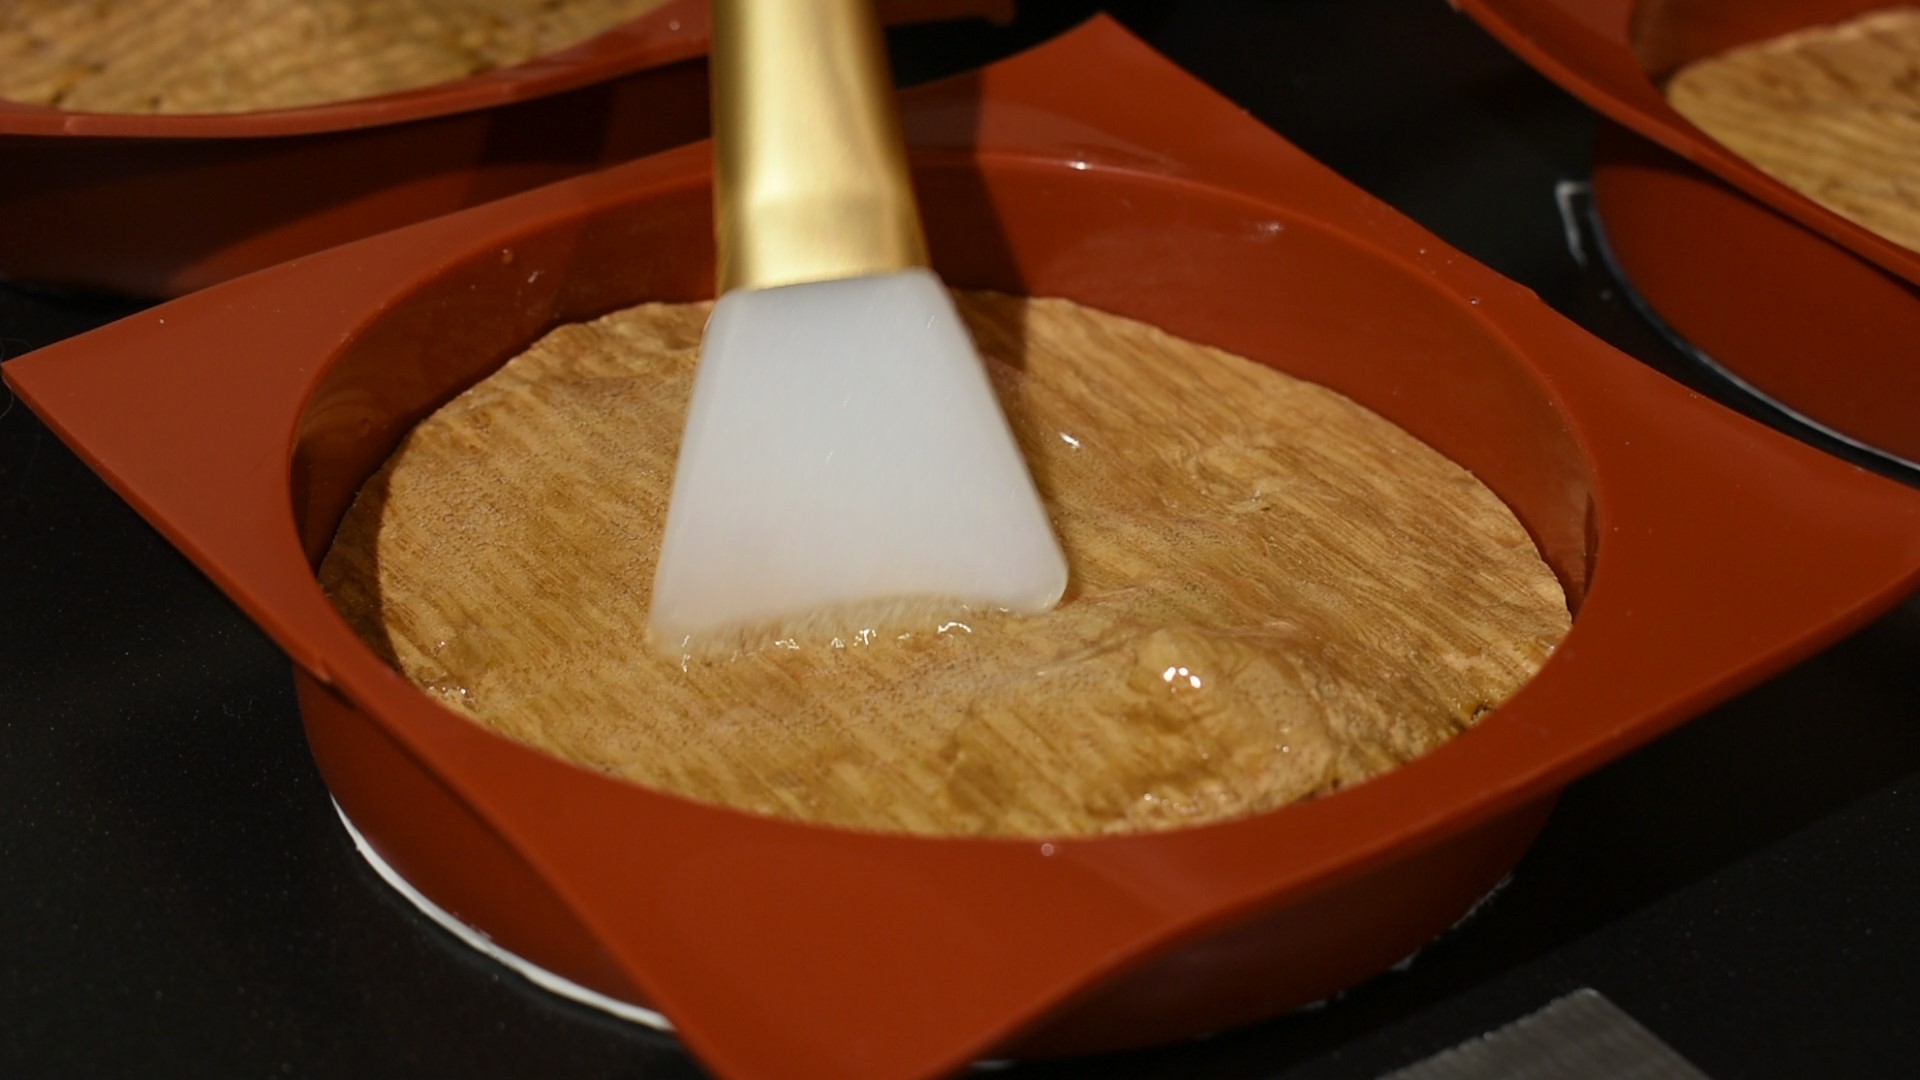.jpg)
.jpg)
.jpg)
.jpg)
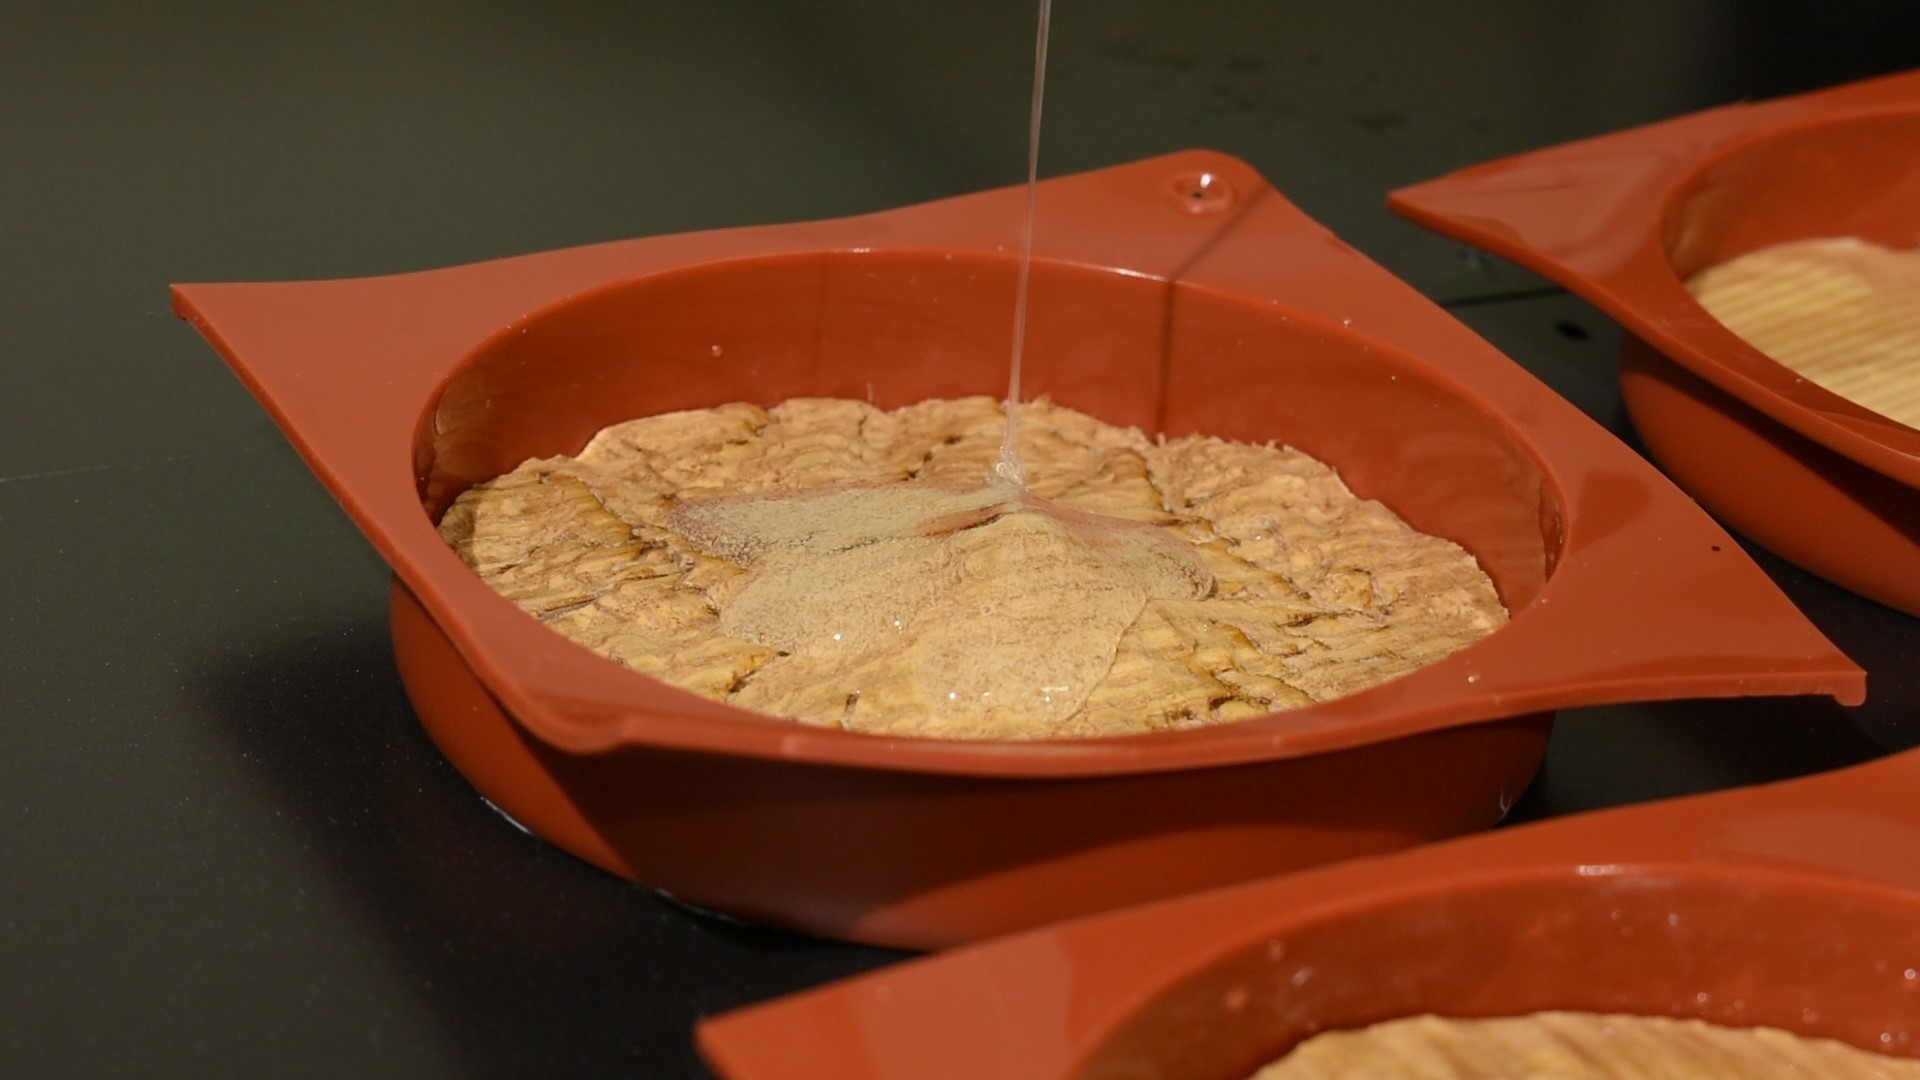
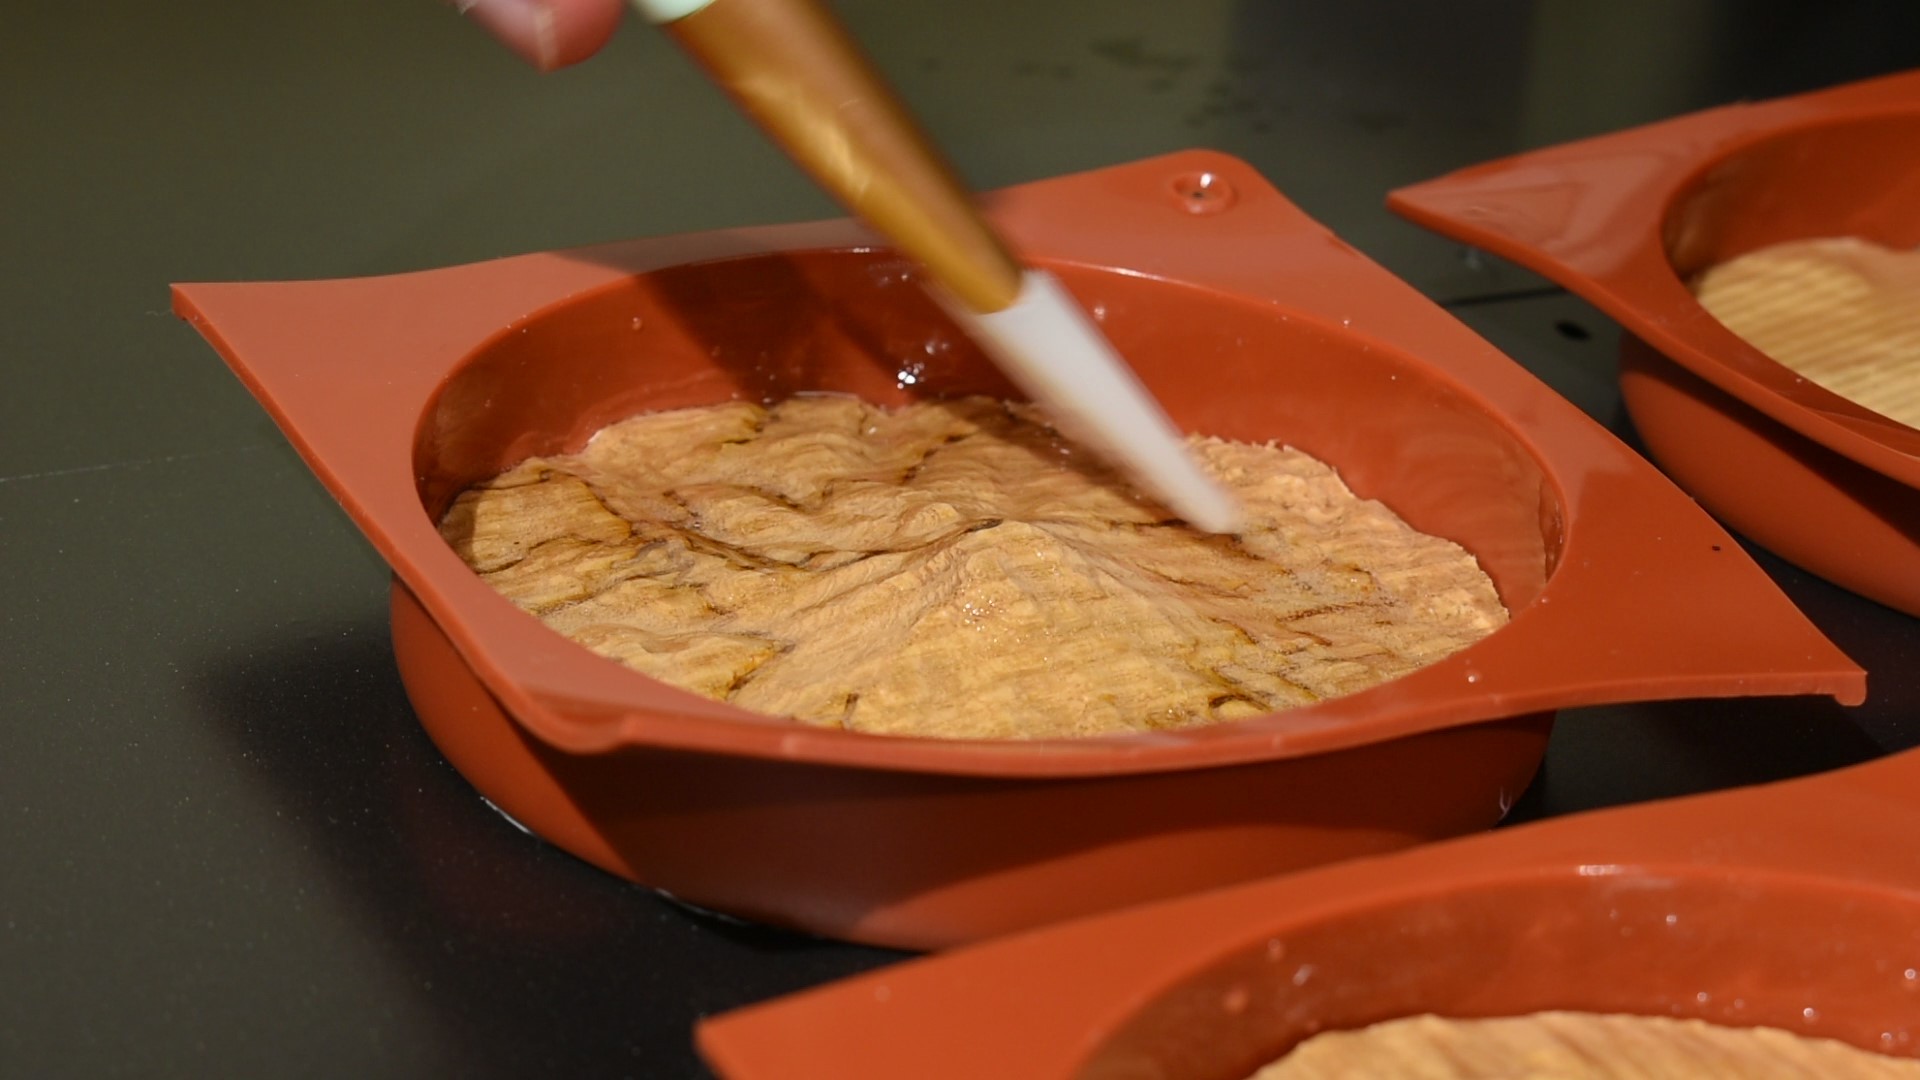
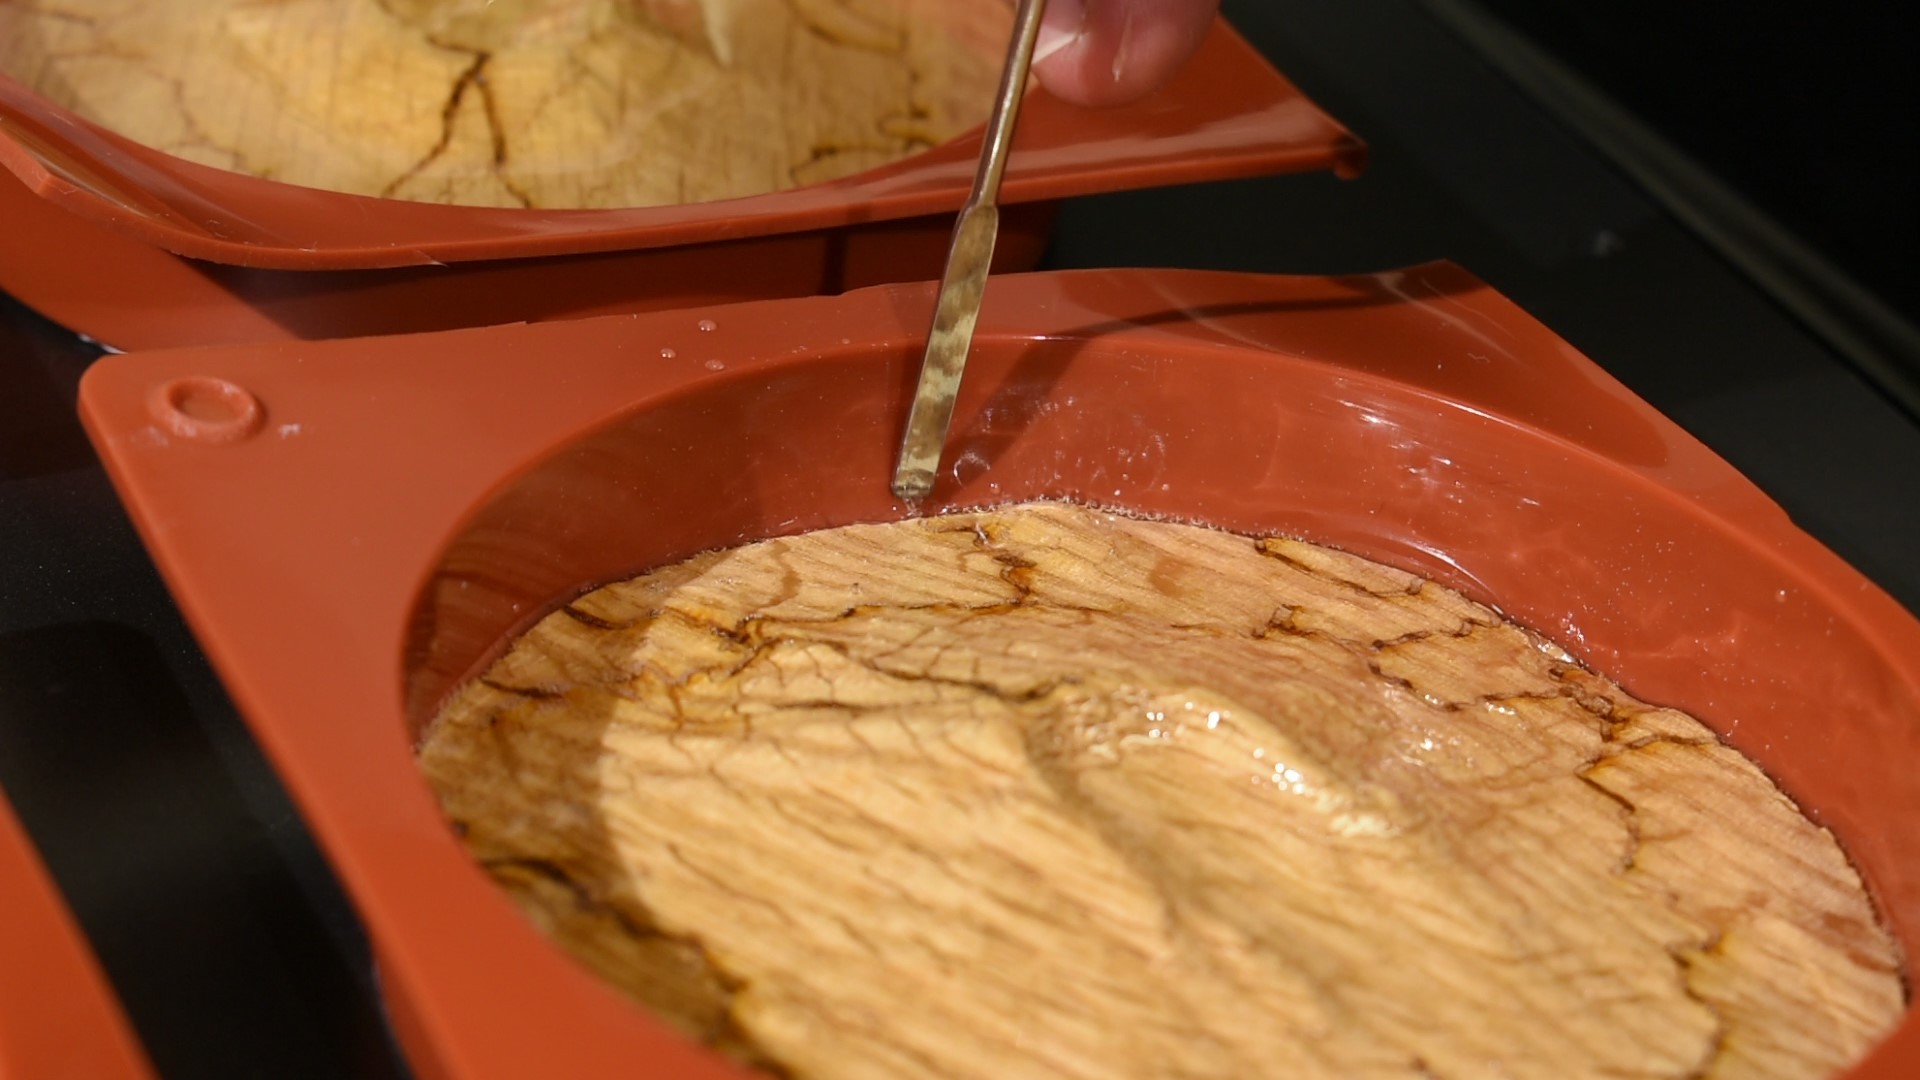
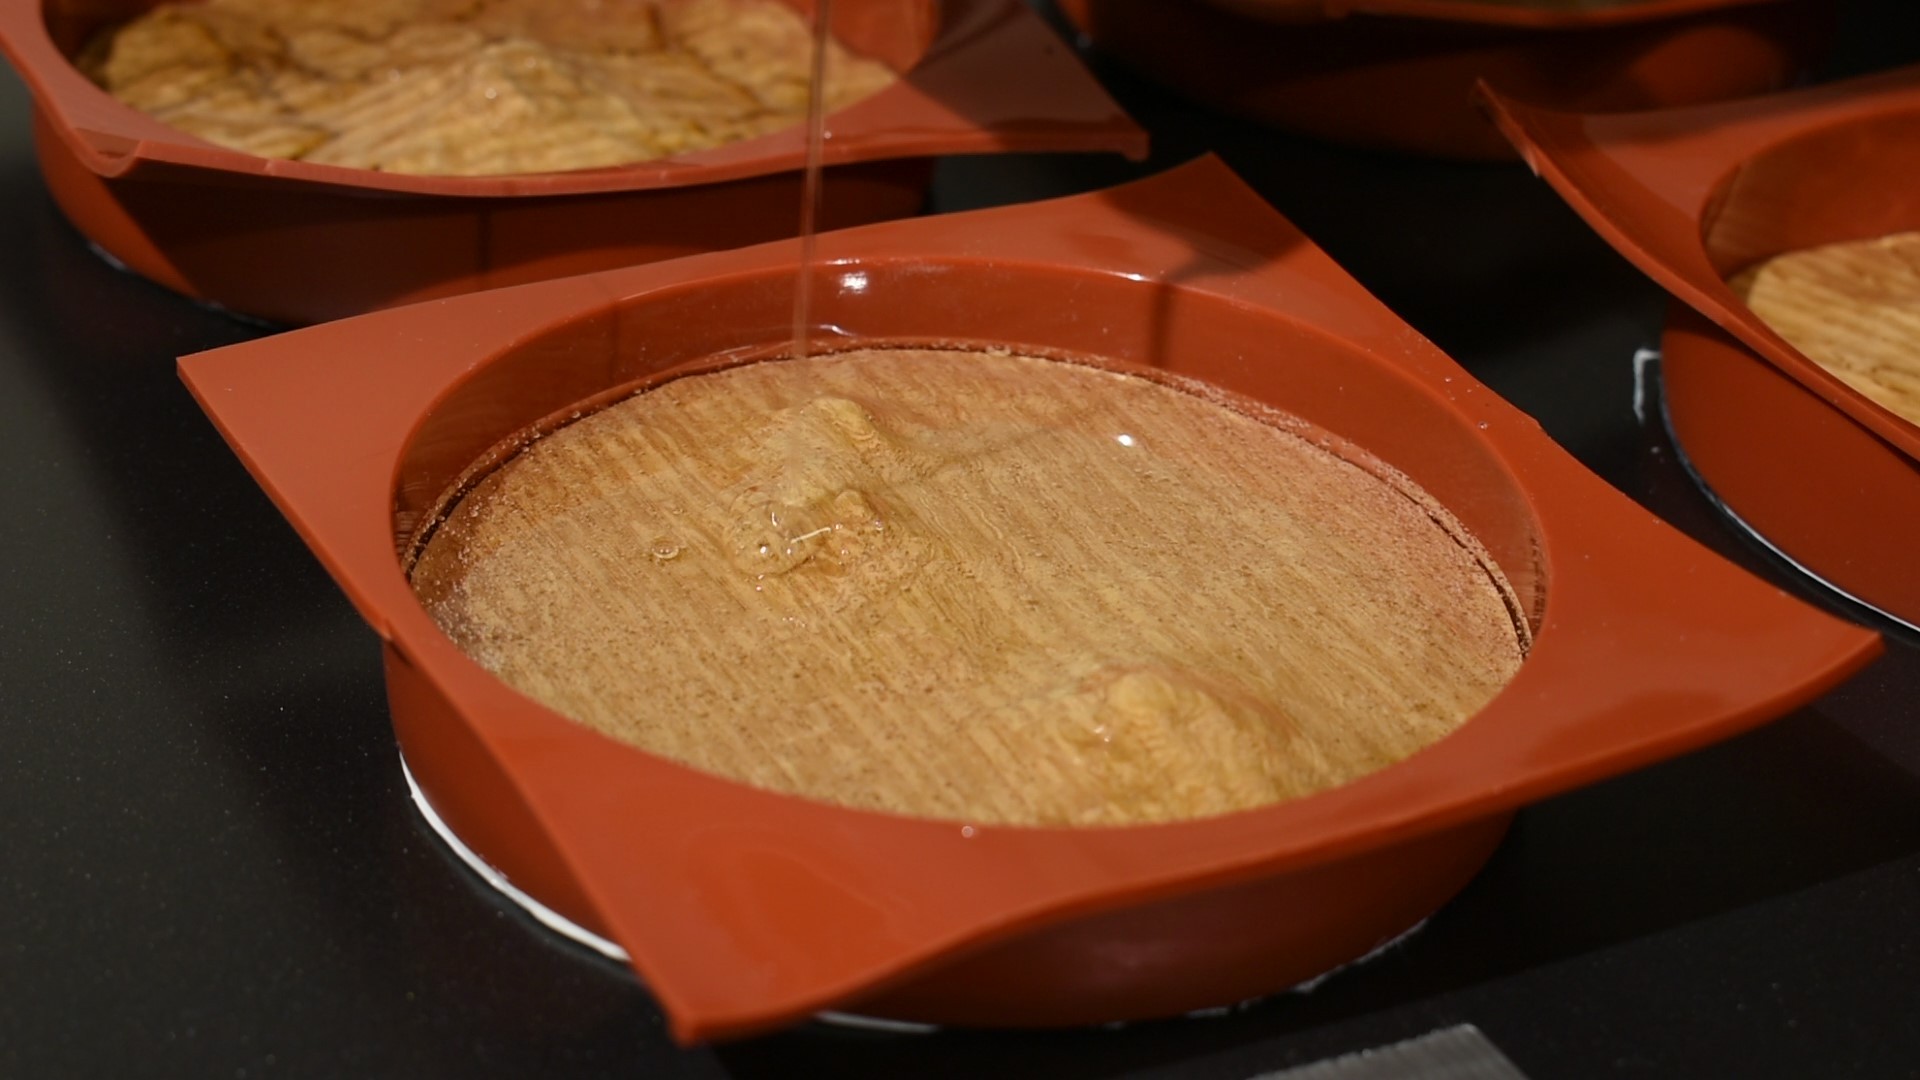
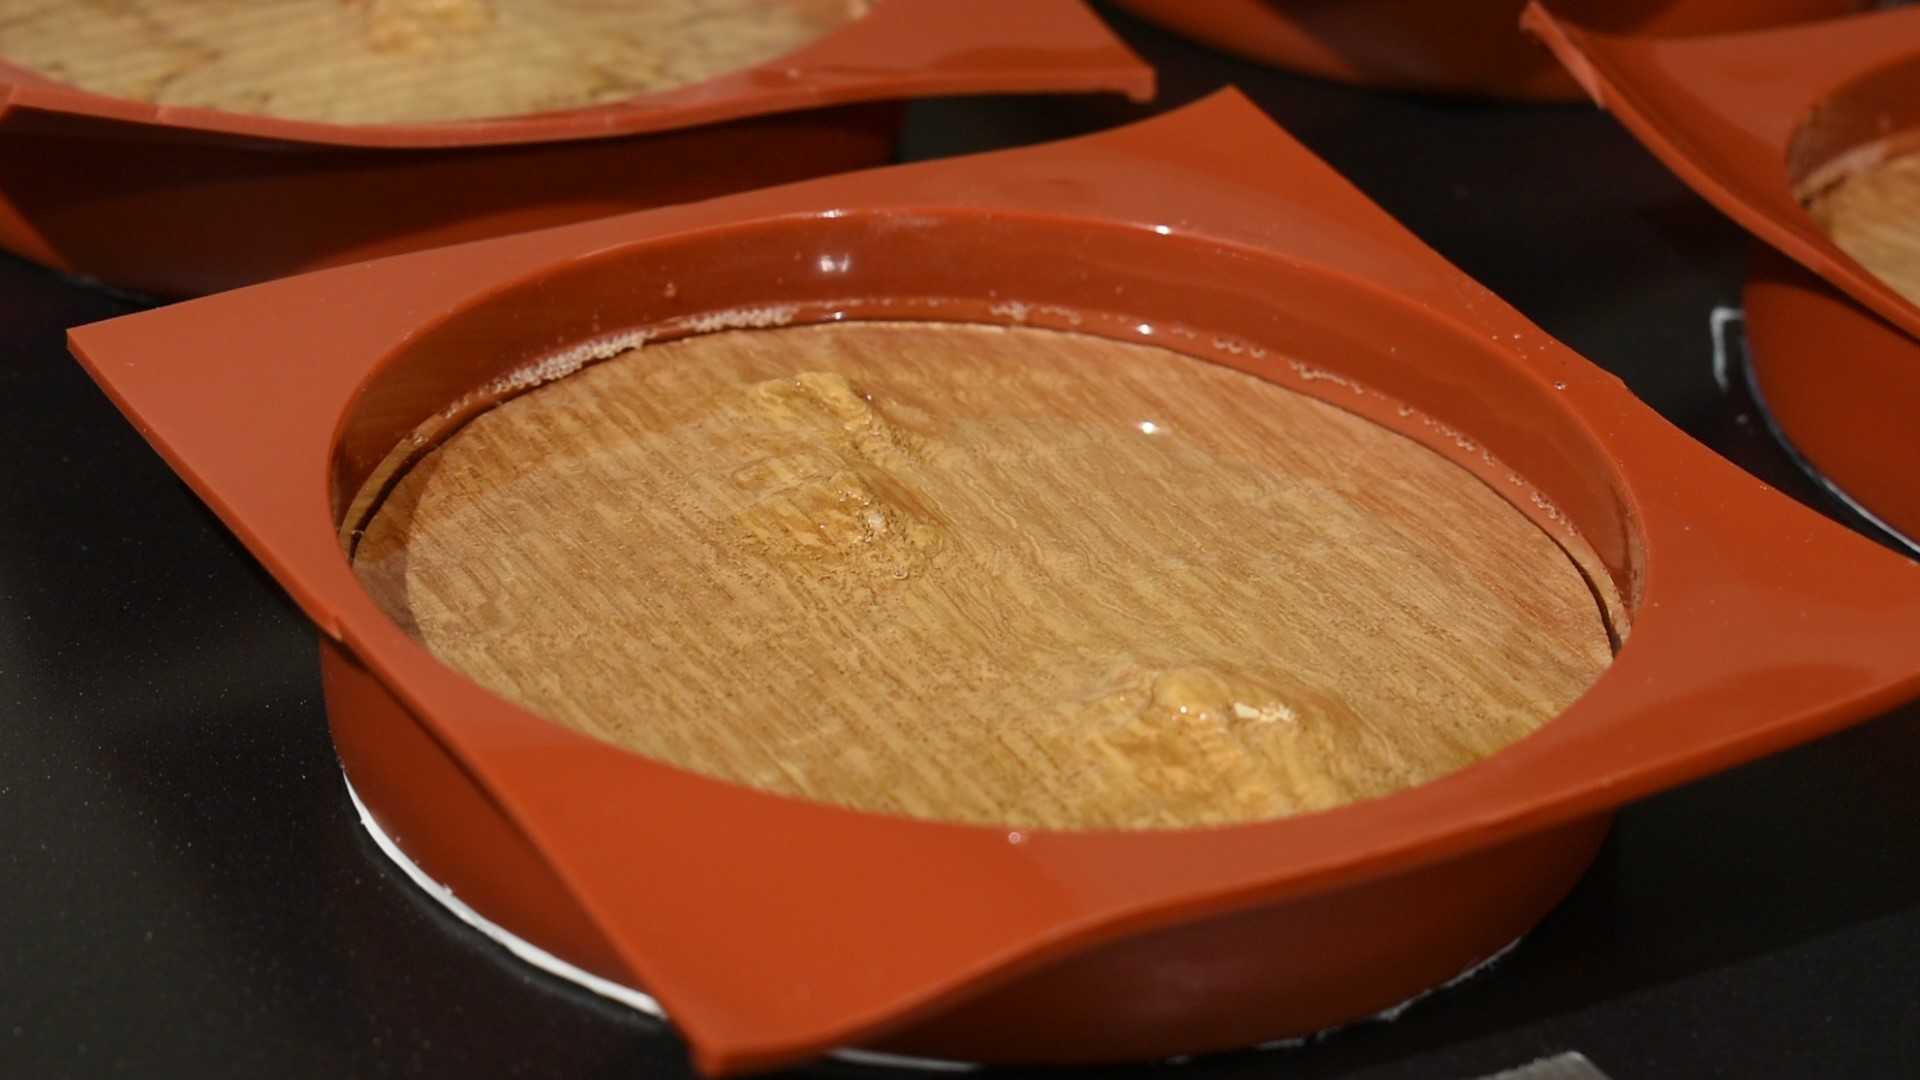
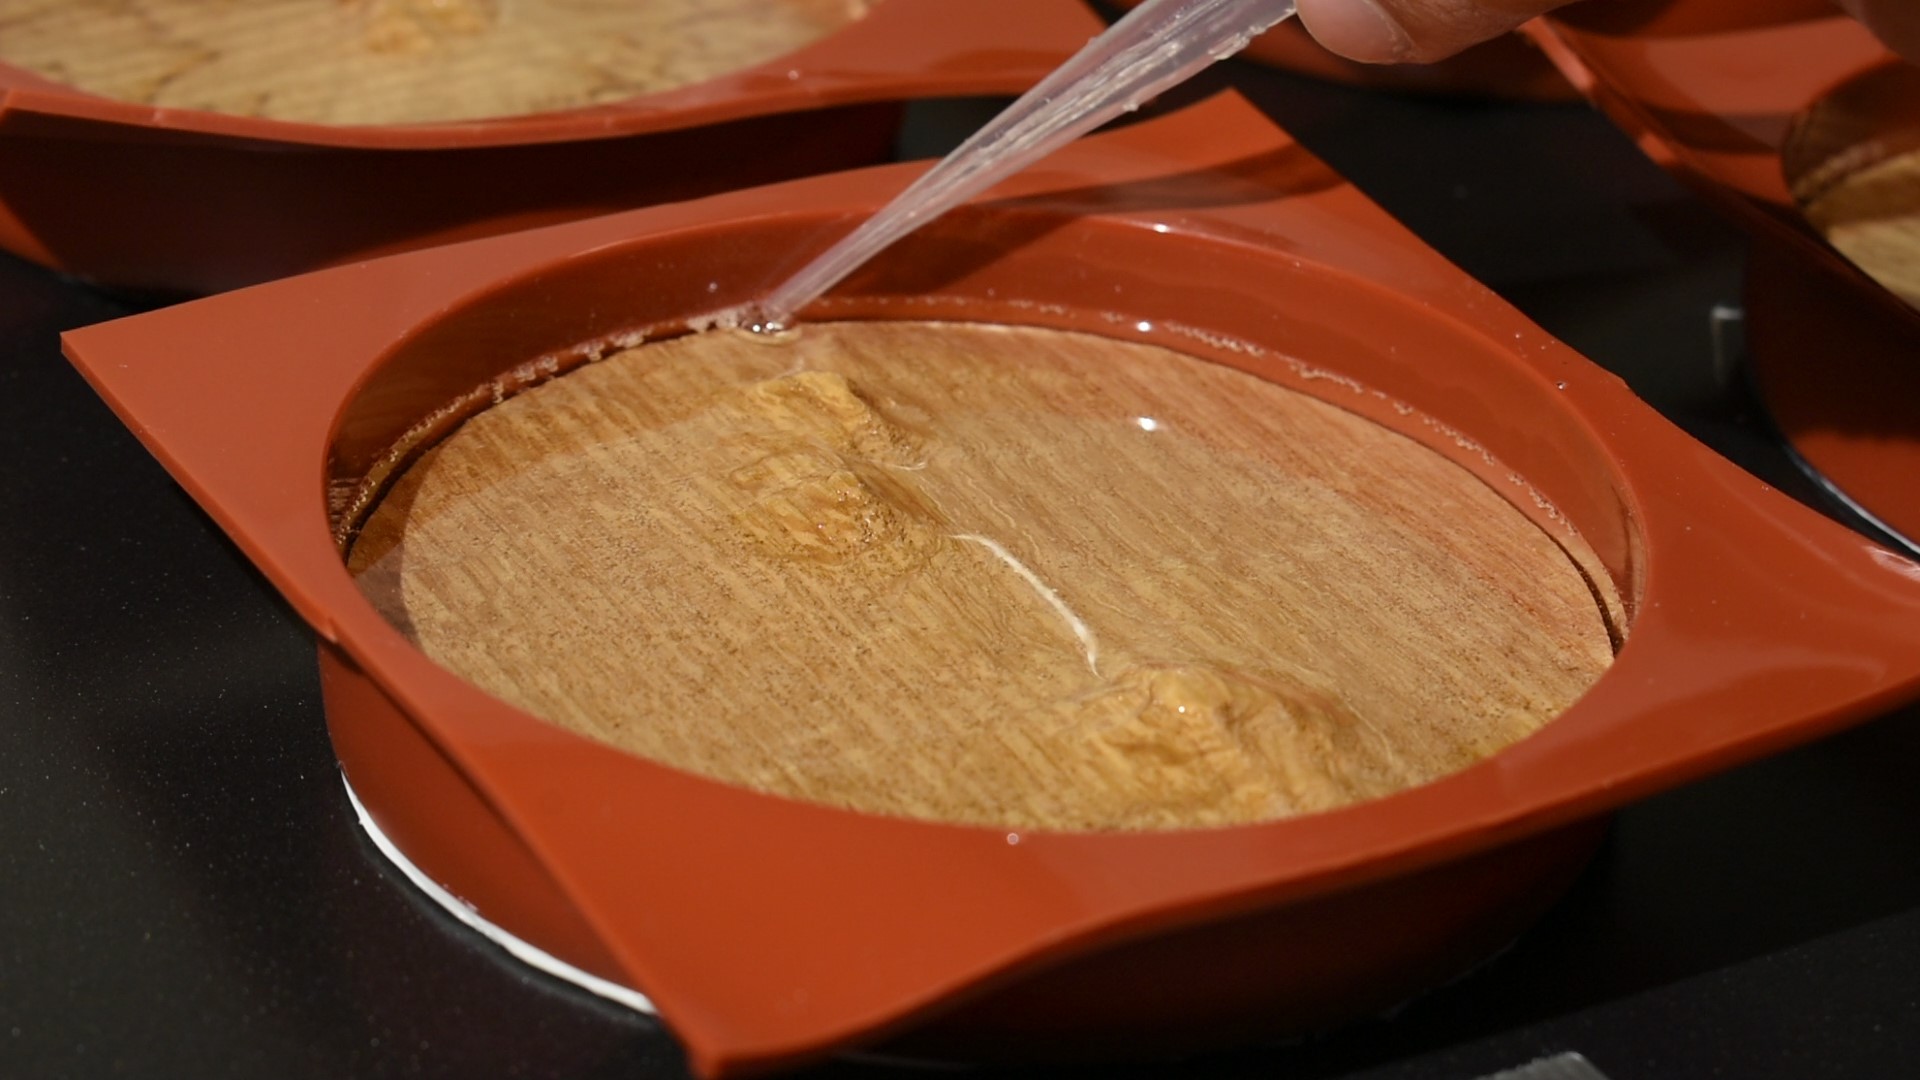
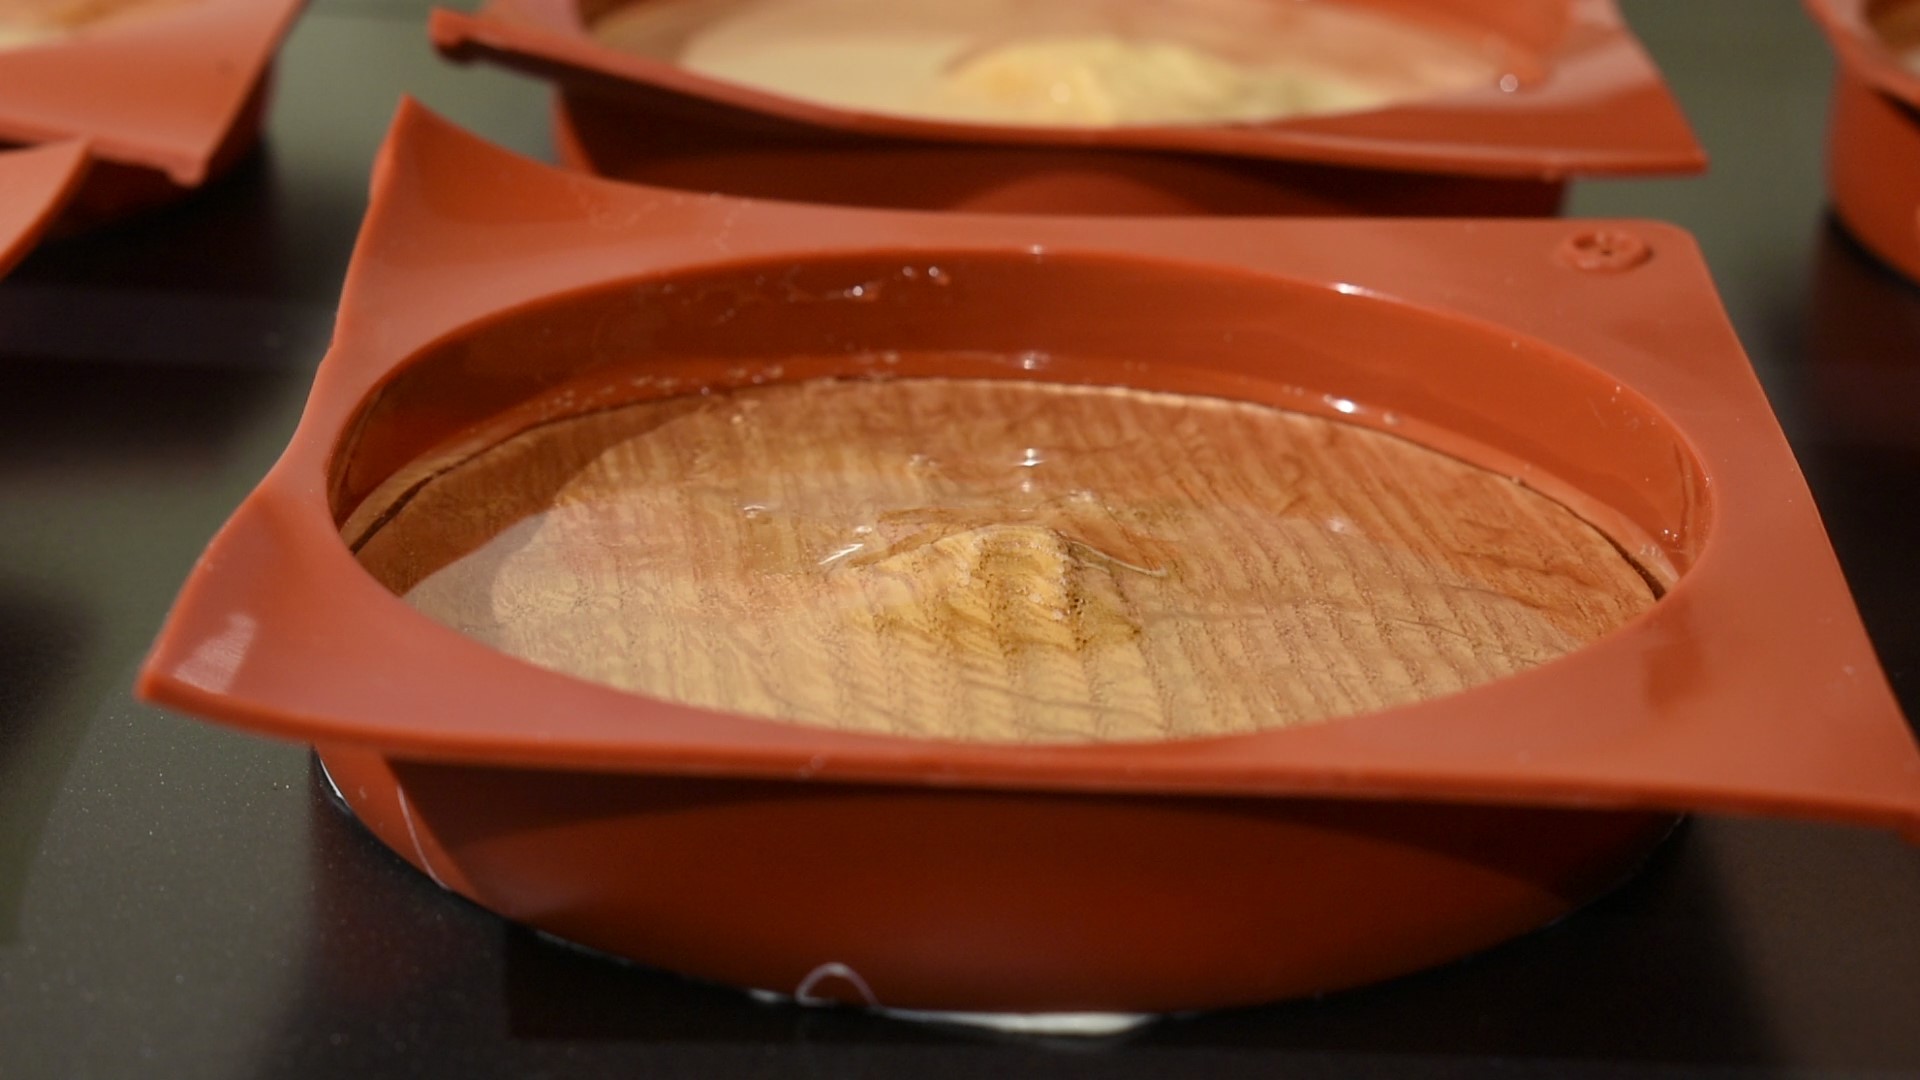
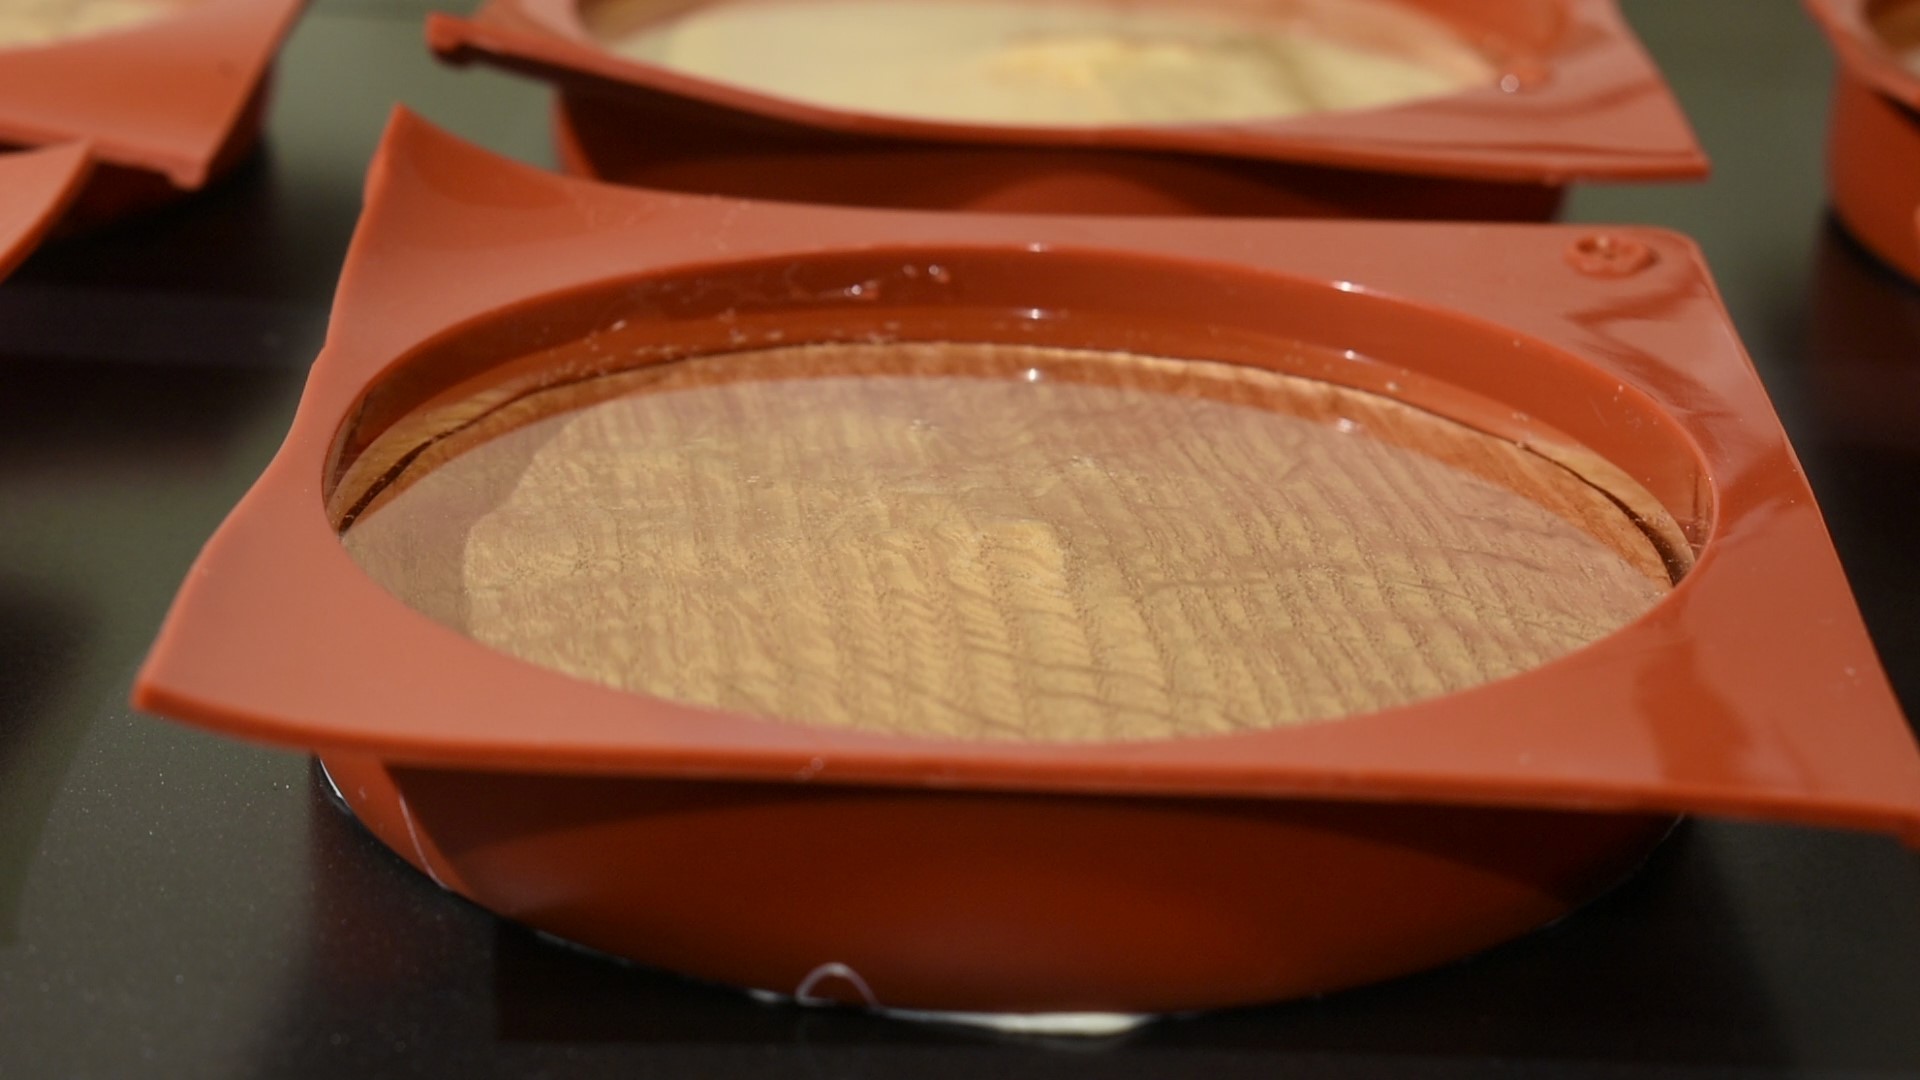
For adding the epoxy to the wood, I used standard “Table Top” epoxy, a basic silicone mold from amazon, a basic epoxy mixing kit, and a heat gun for bubbles. The epoxy that I got allowed for pours up to 0.25” thick. Since my coasters were 0.5” thick, I ended up doing 3 pours; one as an initial “top coat” to prevent out-gassing of the wood (creating bubbles), and 2 ~0.25” pours to fill in the coaster. I also glued the molds down to a flat surface, because I had some problems with the molds not sitting perfectly flat by themselves.
Pouring epoxy was rather new to me, so here are a few lessons learned that I found out after doing this myself:
- I definitely struggled with bubbles from mixing the epoxy. I got a little better over the couple sets that I did (trying tips like heating up the epoxy before mixing), but I still struggled get all the bubbles out before the epoxy started hardening.
- I made a major mistake between the 1st and 2nd pour by breaking the seal on the edges between the silicone and epoxy when removing bits of epoxy from the edges of the mold caused by when I was brushing the epoxy on the mold. By breaking that seal, I allowed epoxy to go down the edges during the second pour, and more importantly, had bubbles coming up along the edges because of that. And the epoxy started hardening before the bubbles were done rising, so I was stuck with bubbles along some of the edges of my coasters.
- The coasters that I got were pretty flimsy, but I didn't see any better alternatives besides making my own molds, which would be much more energy intensive. But I accidentally made this flimsiness worse by cutting my mold set into individual pieces, which made the sides of the mold even more floppy. These types of molds will probably work fine for you needs, but I don't recommend cutting them up.
Post Processing Epoxy
.jpg)
.jpg)
.jpg)
.jpg)
.jpg)
.jpg)
There were three things that I tried to improve in post processing:
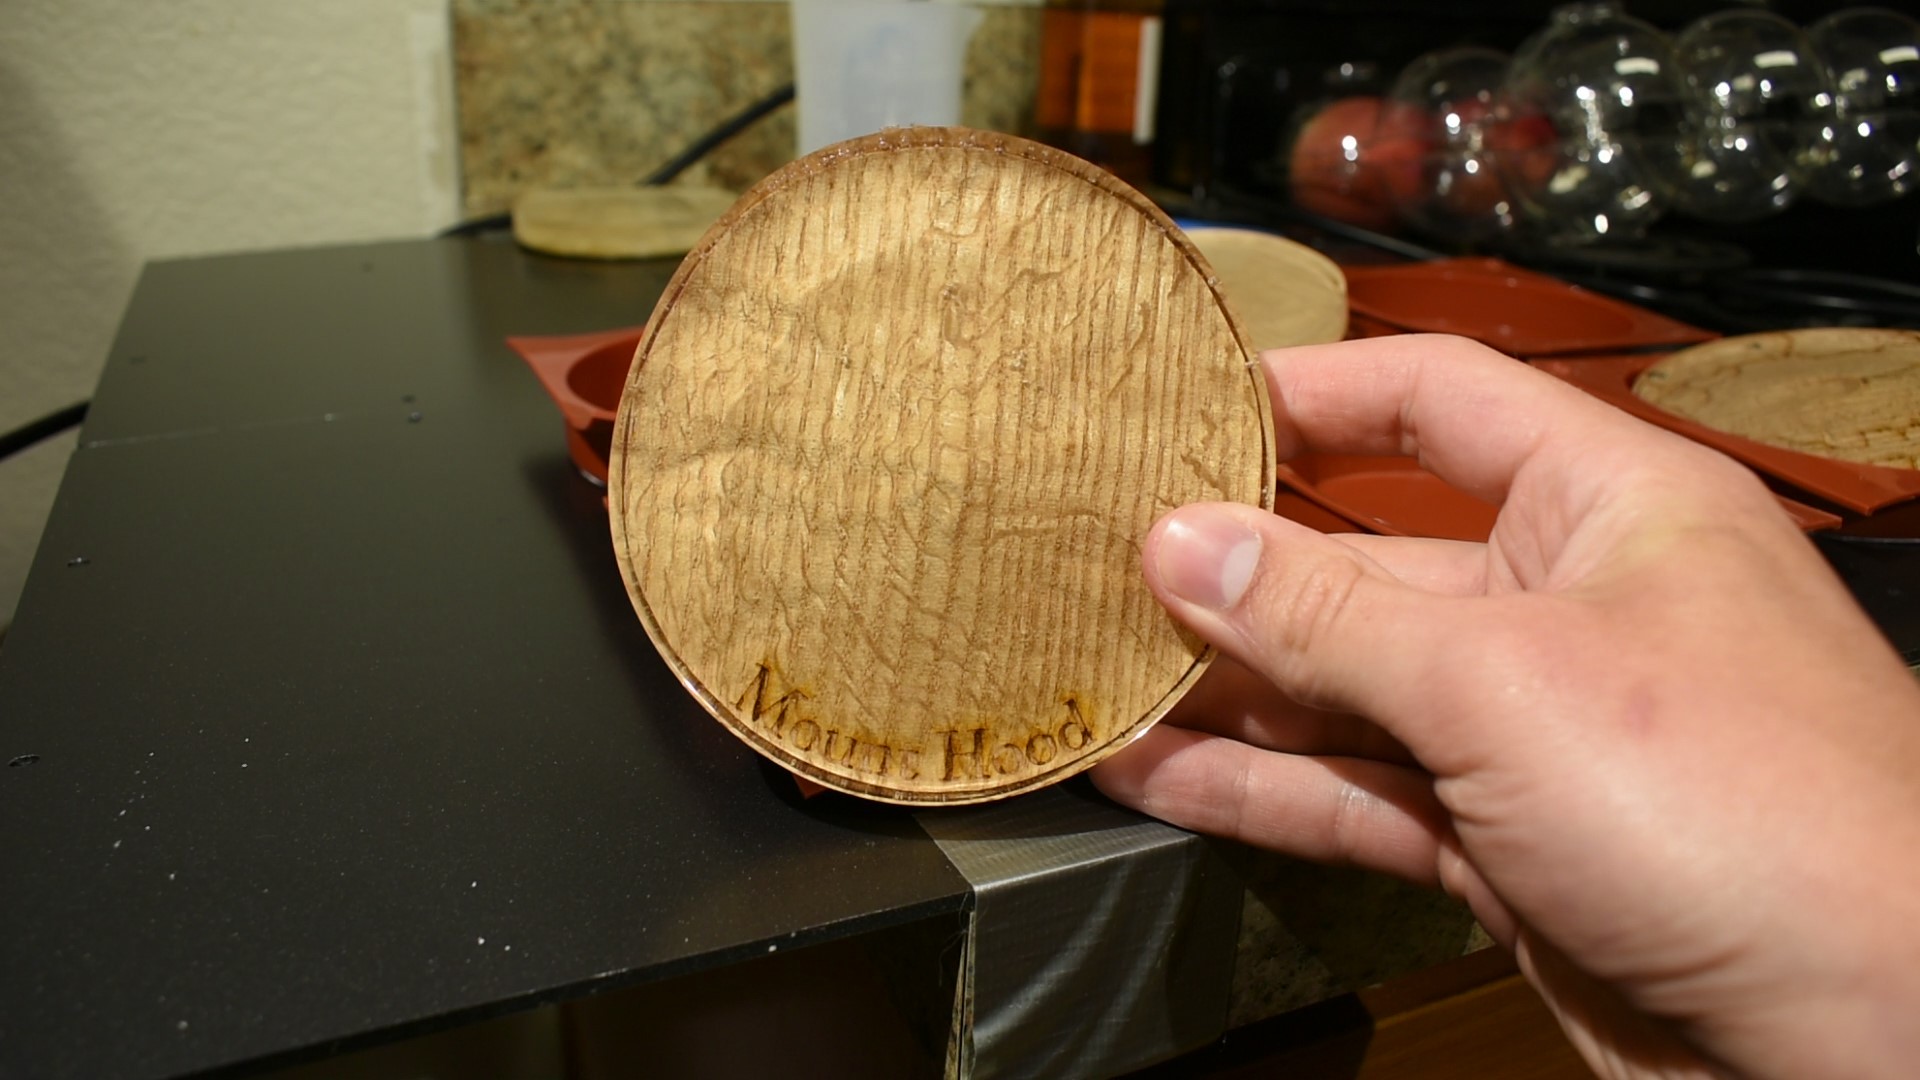
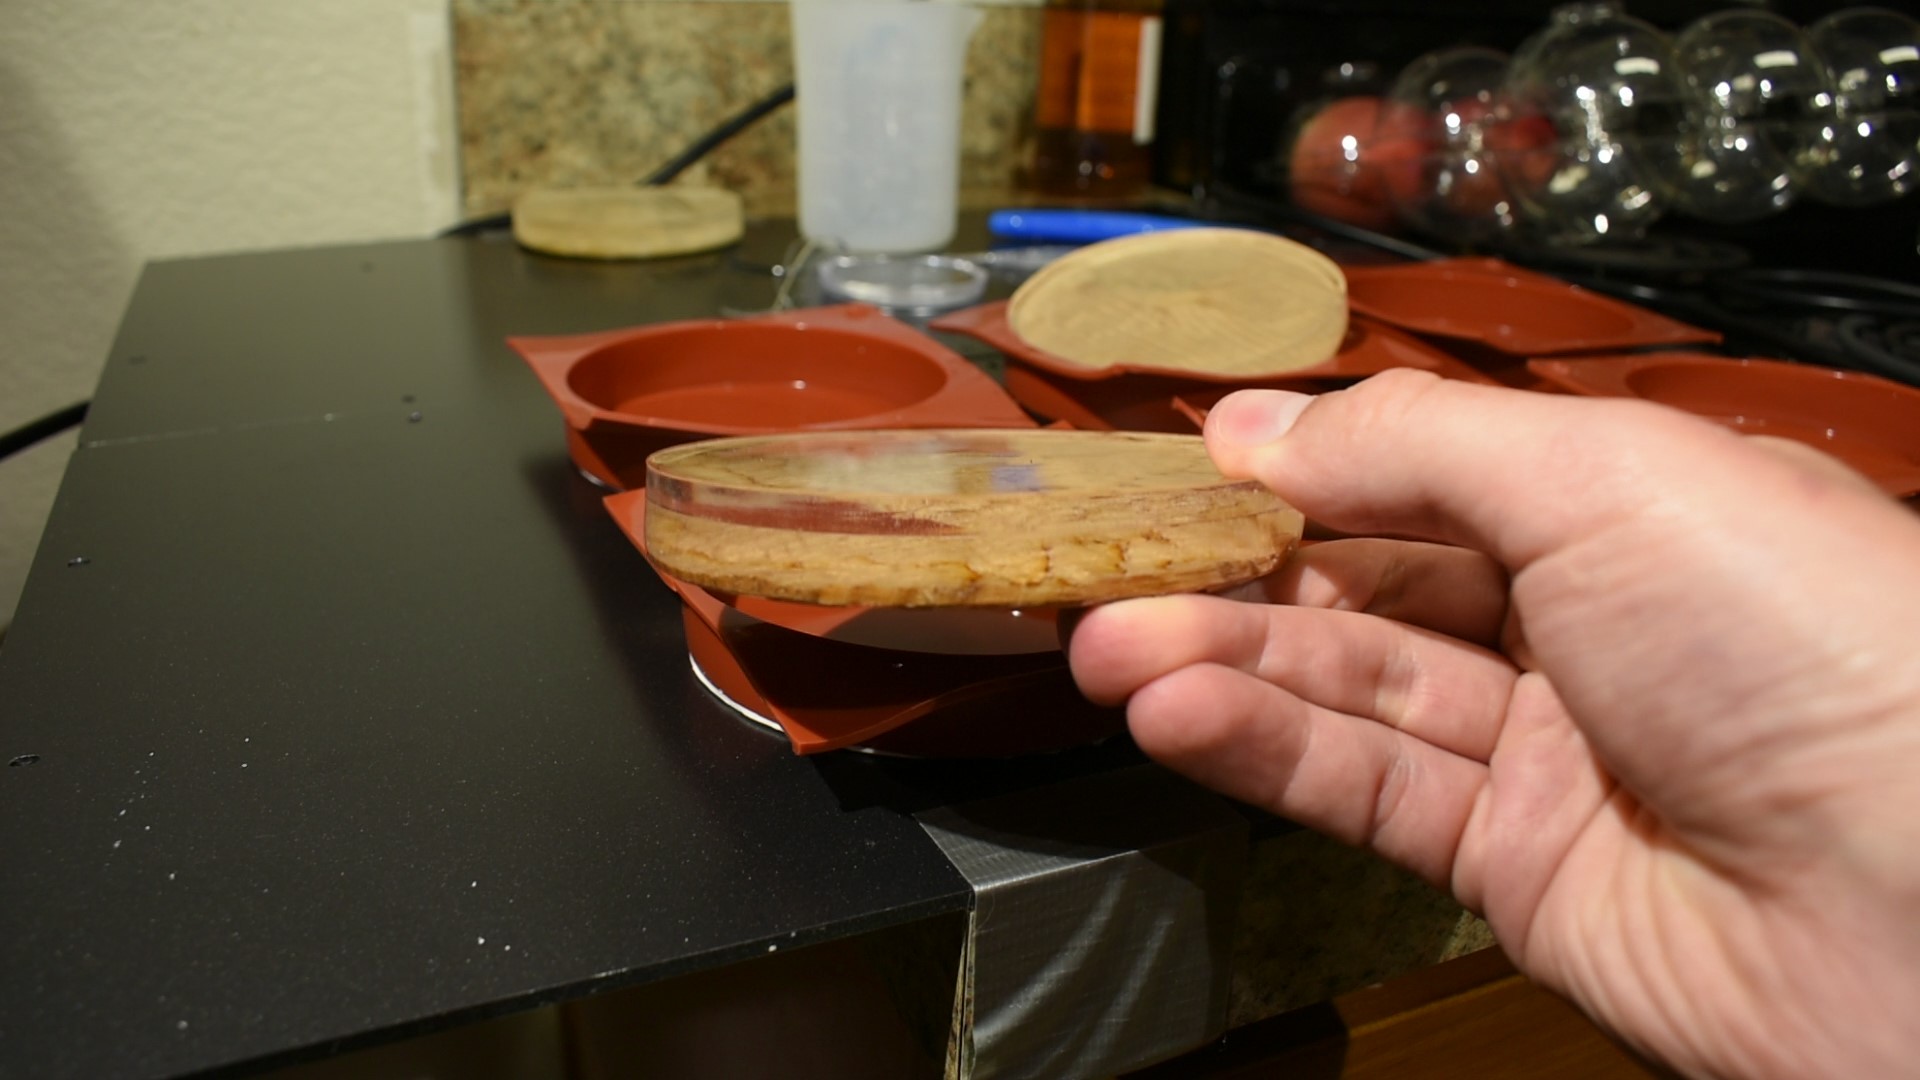
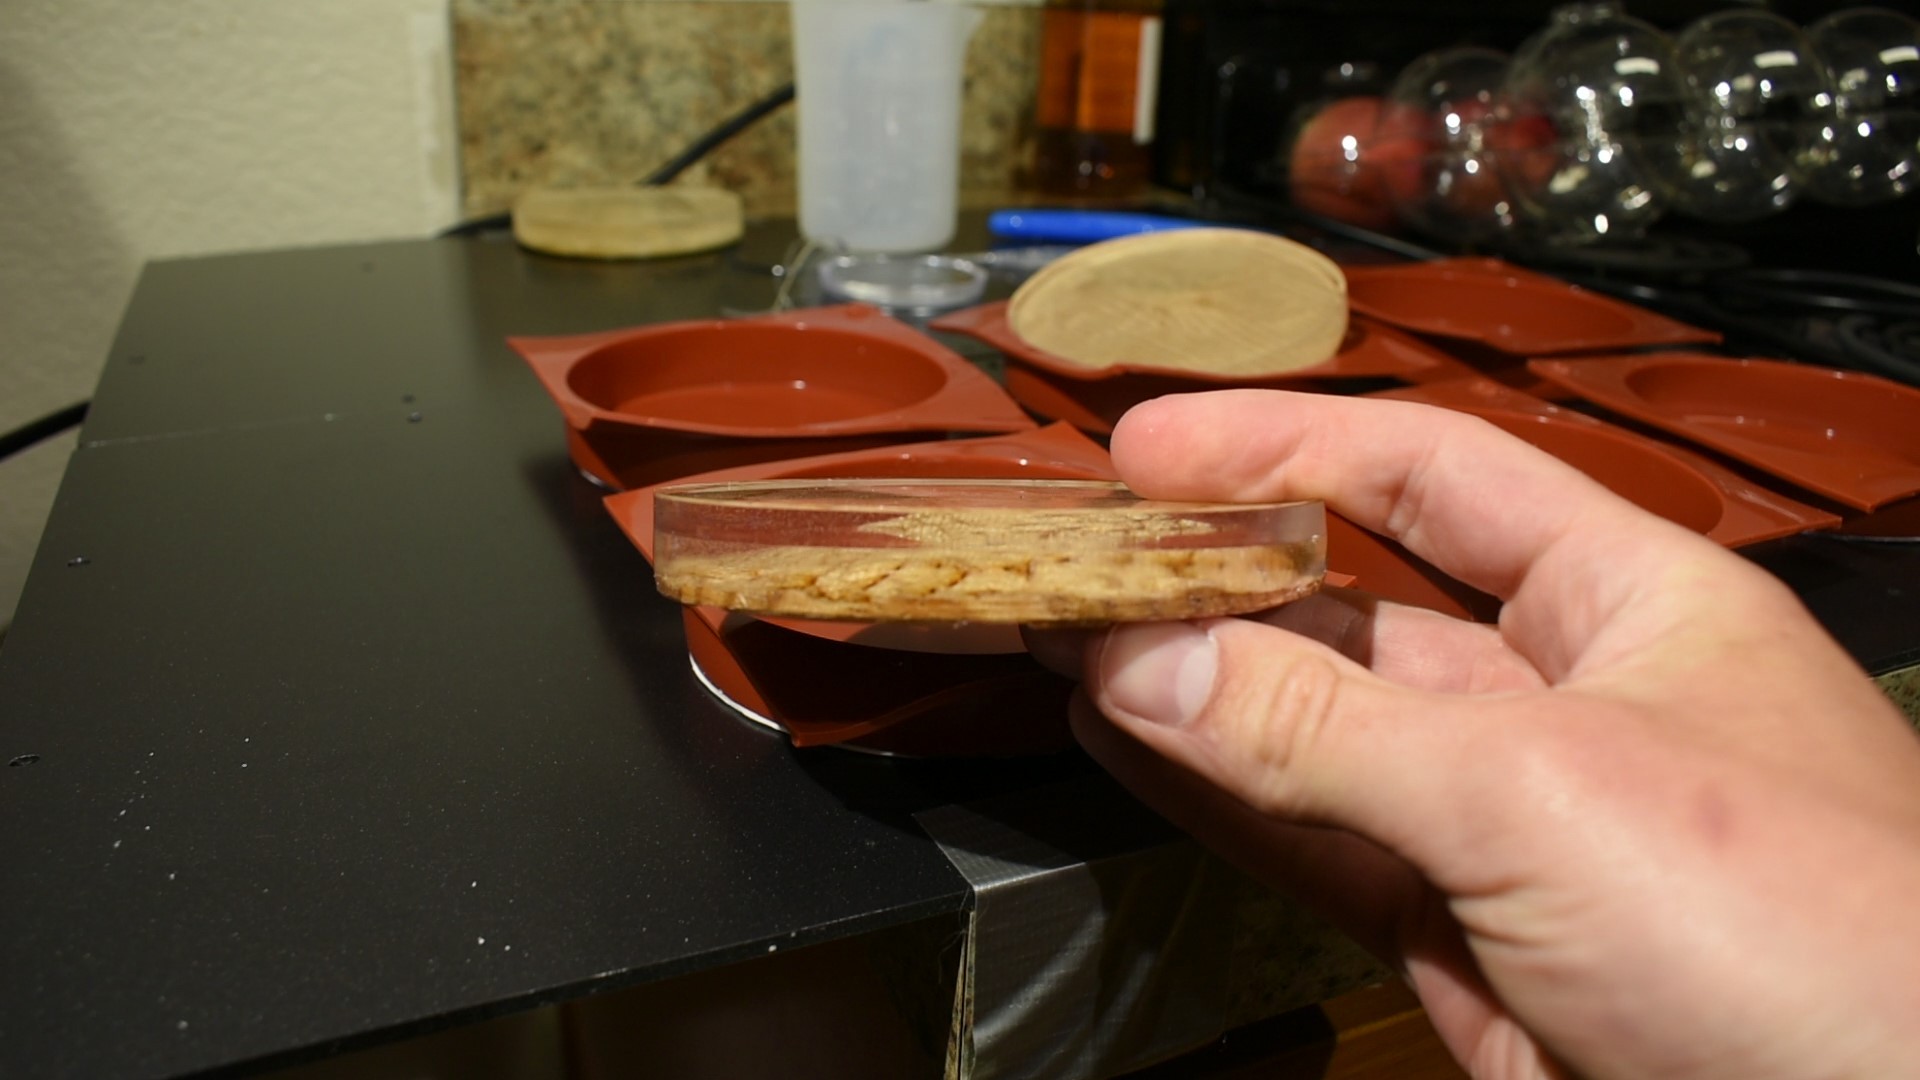
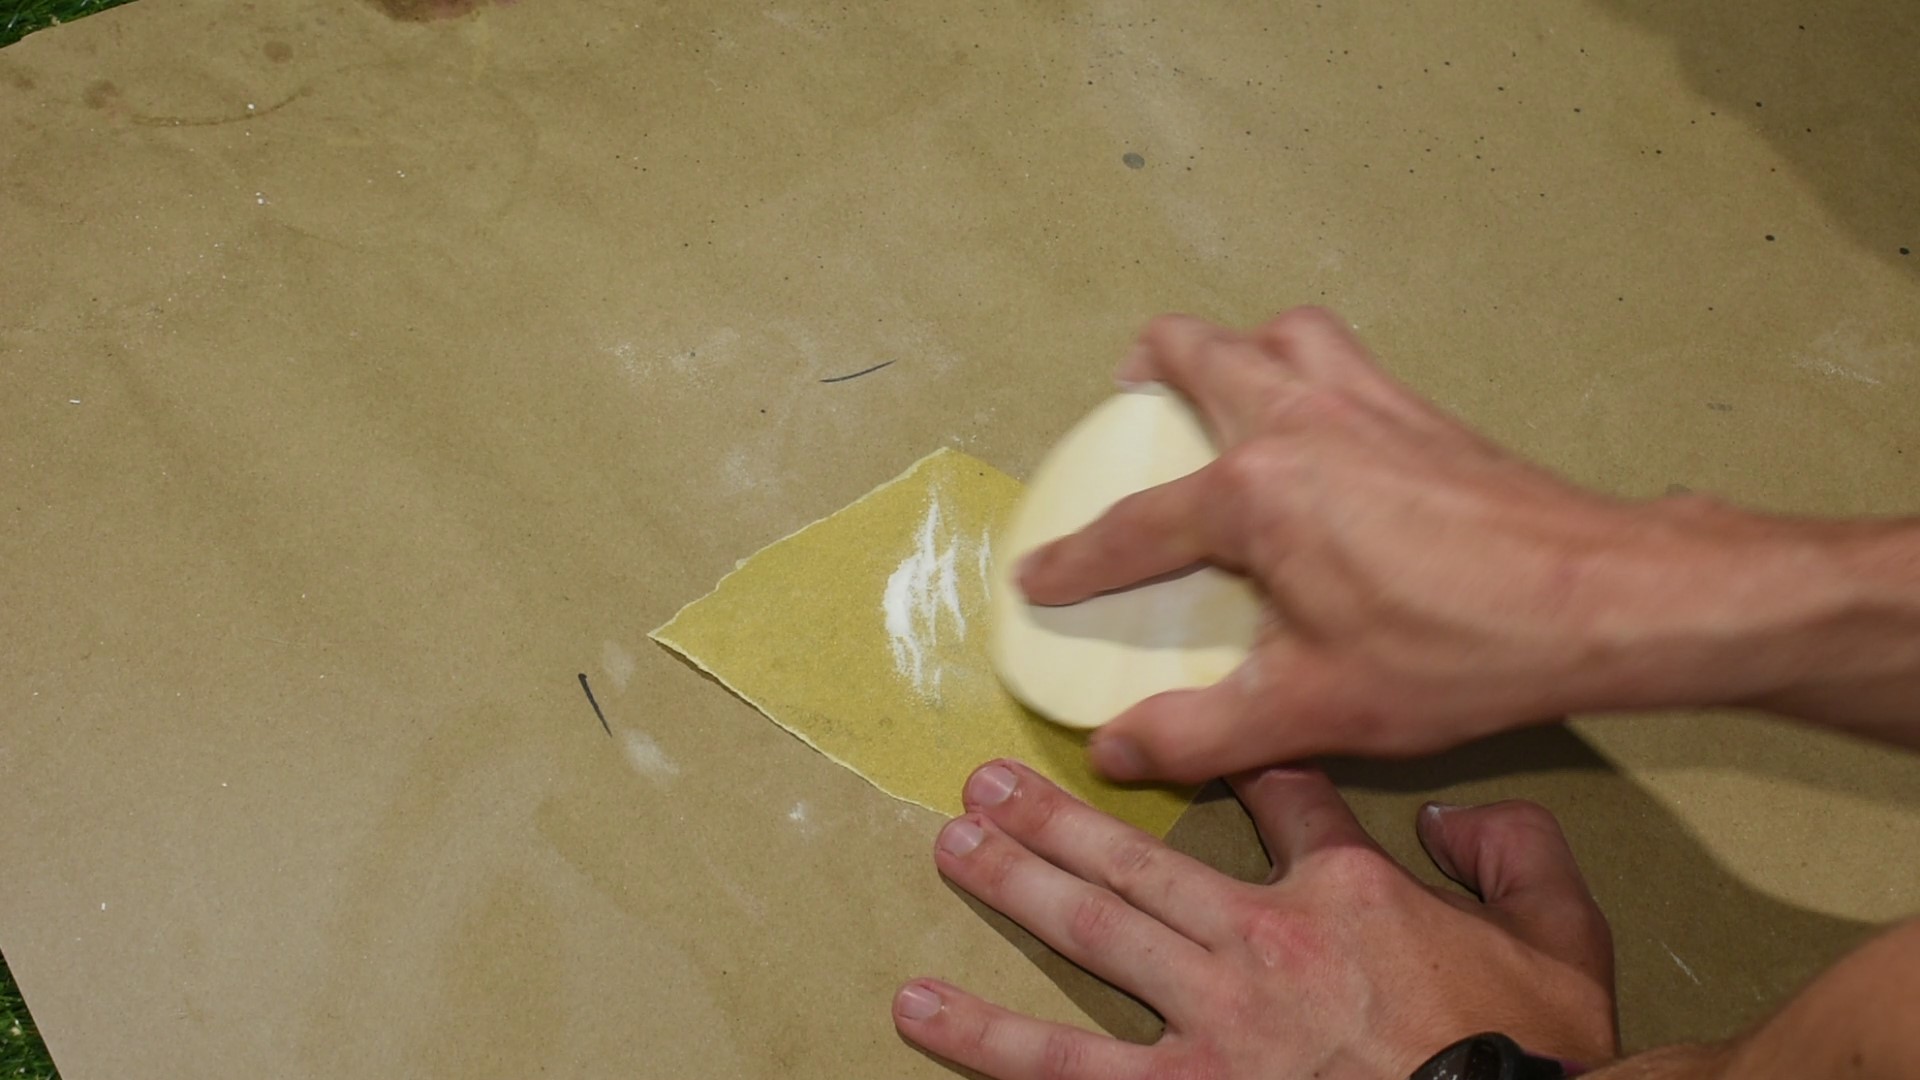
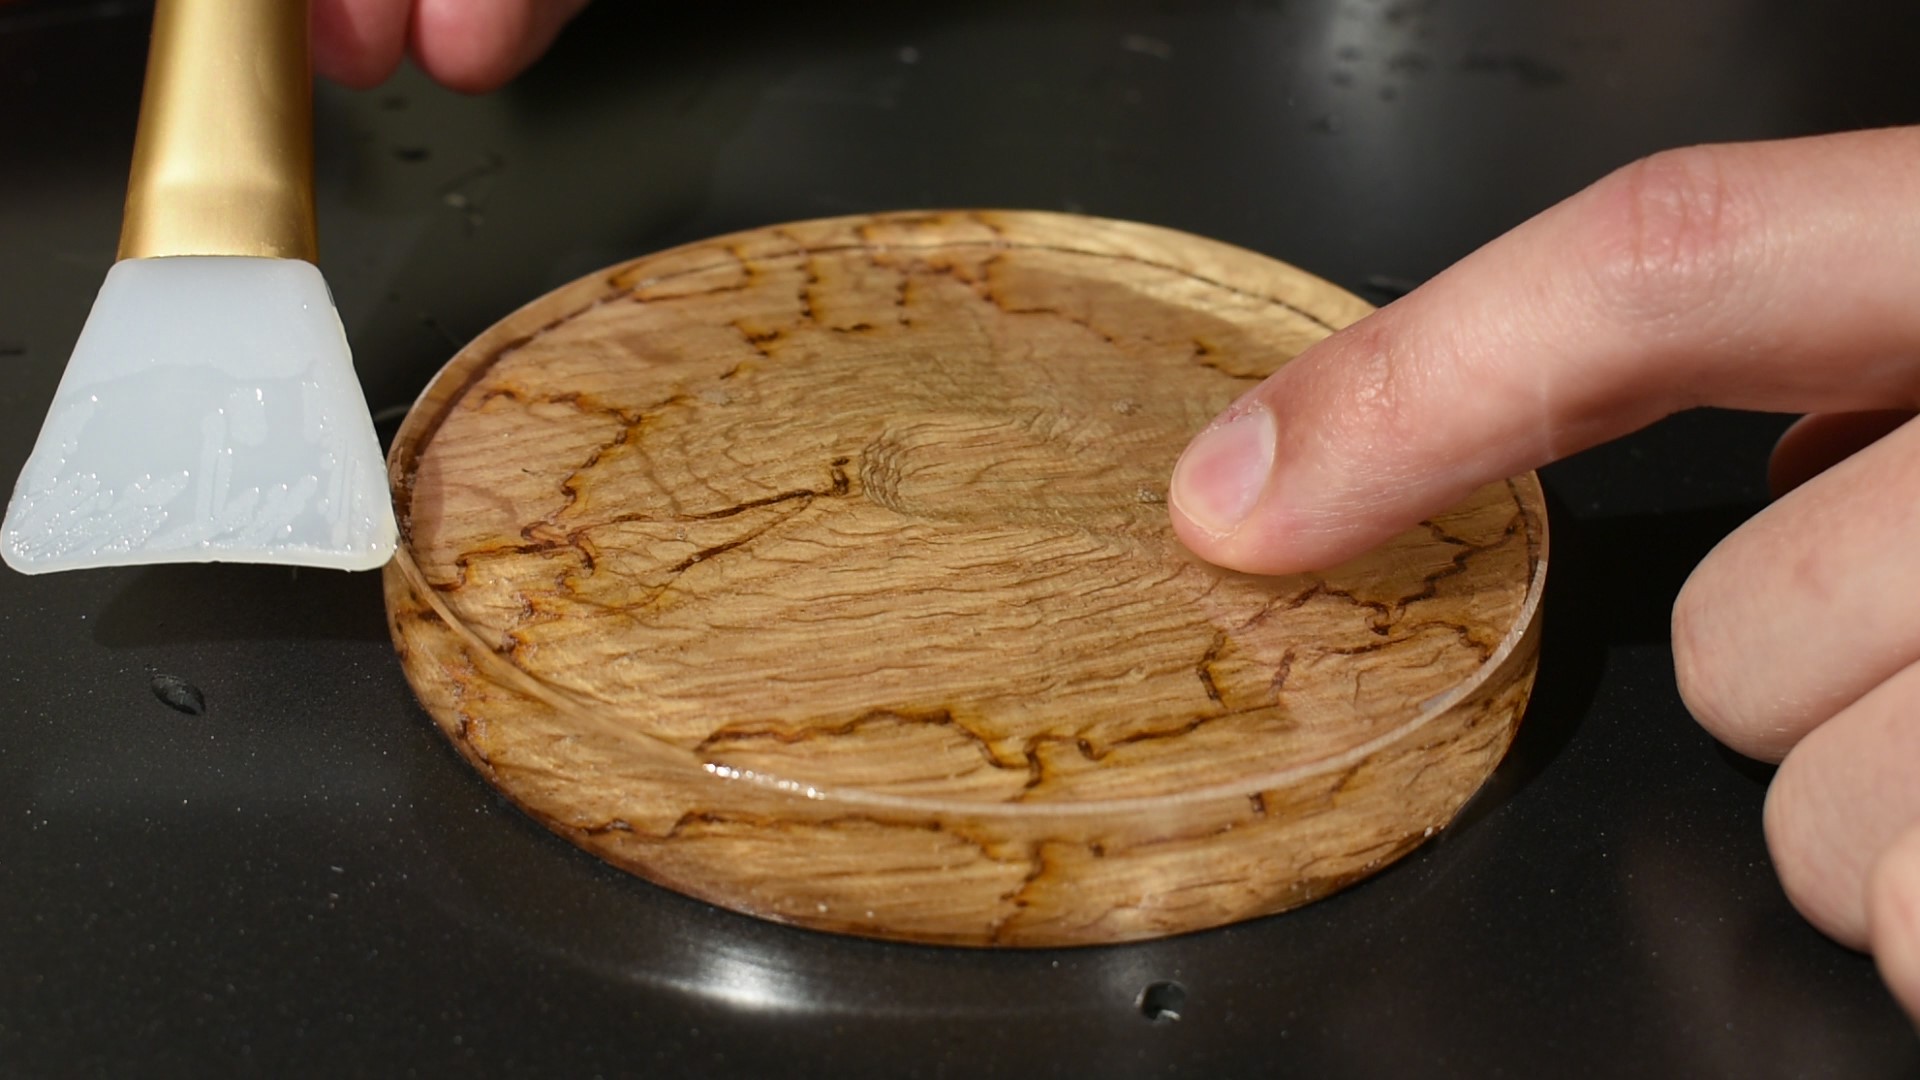
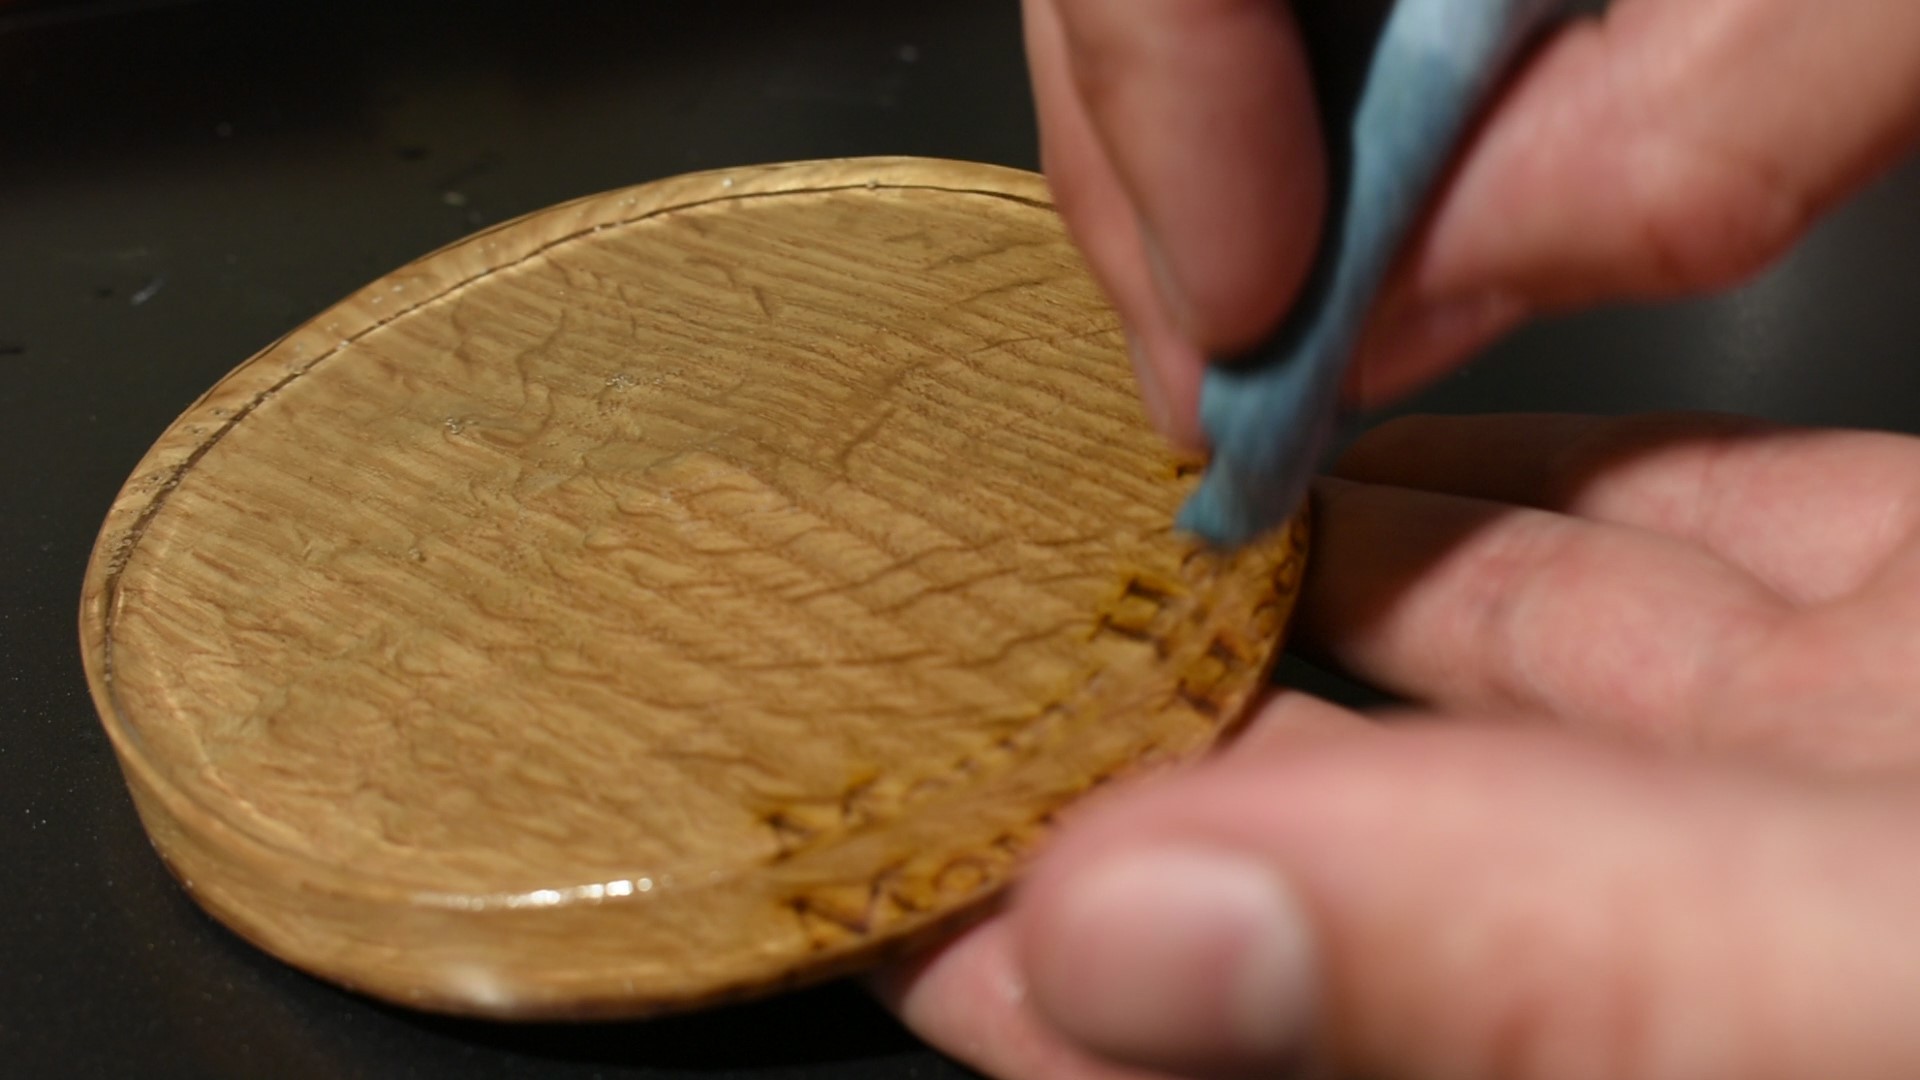
- The two main pour layers were pretty obvious in some of the coasters when viewing from the side. I was hoping that this could be improved by sanding down and then polishing the edges of the coasters. I tried achieving this through two methods. First by using increasingly fine sandpaper along the edges, then finished with epoxy polish polish. And the second by using a rougher (still 220 grit) sandpaper, and brushing on a layer of epoxy along the edge to get the polish back. The polishing method was very energy intensive, and did not remove that layered look (try as I might, I couldn't even get the epoxy back to the original see through quality). The rough sanding and brushing method was easier, but even though it did restore the edge to it's original shine, the edges were more wavy, which made it harder to see through into the coaster. Because both methods that I attempted were worse than the baseline, I decided to stick with no processing of the edges, and keep what I got.
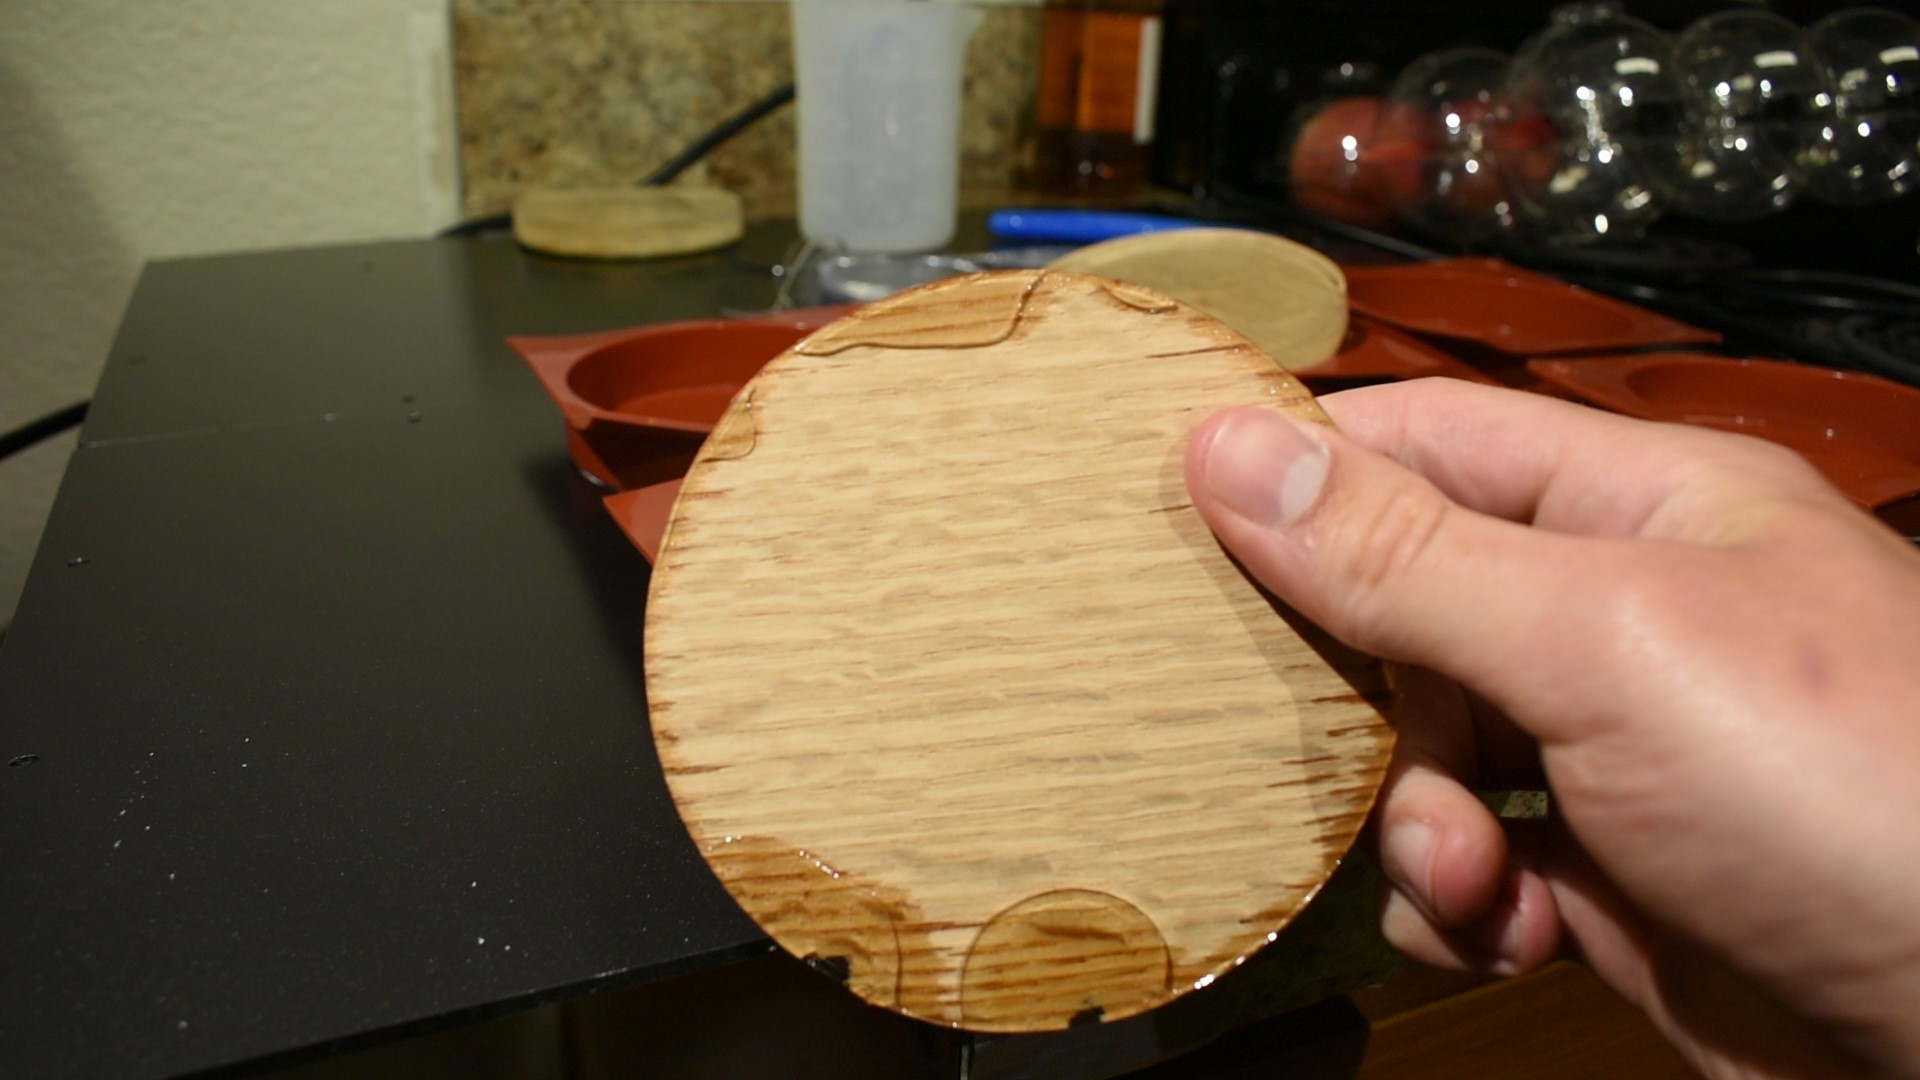
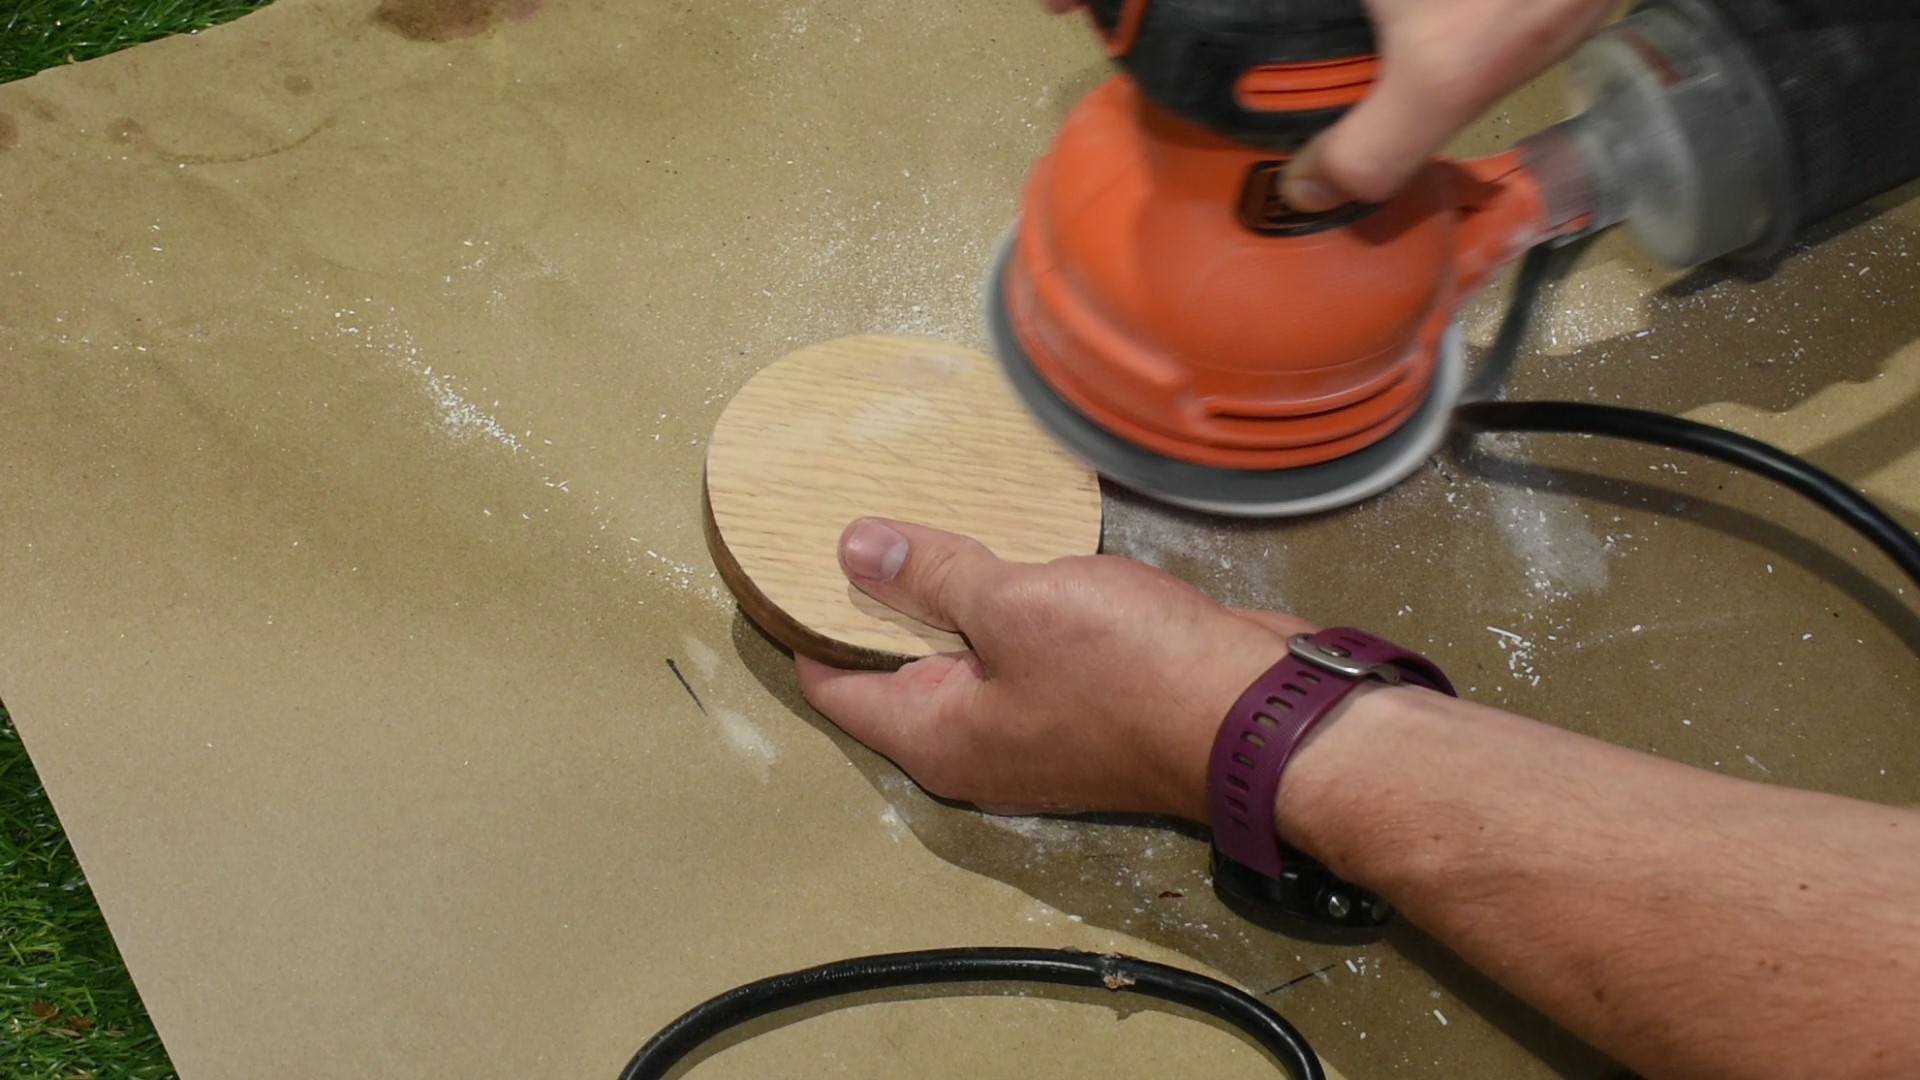
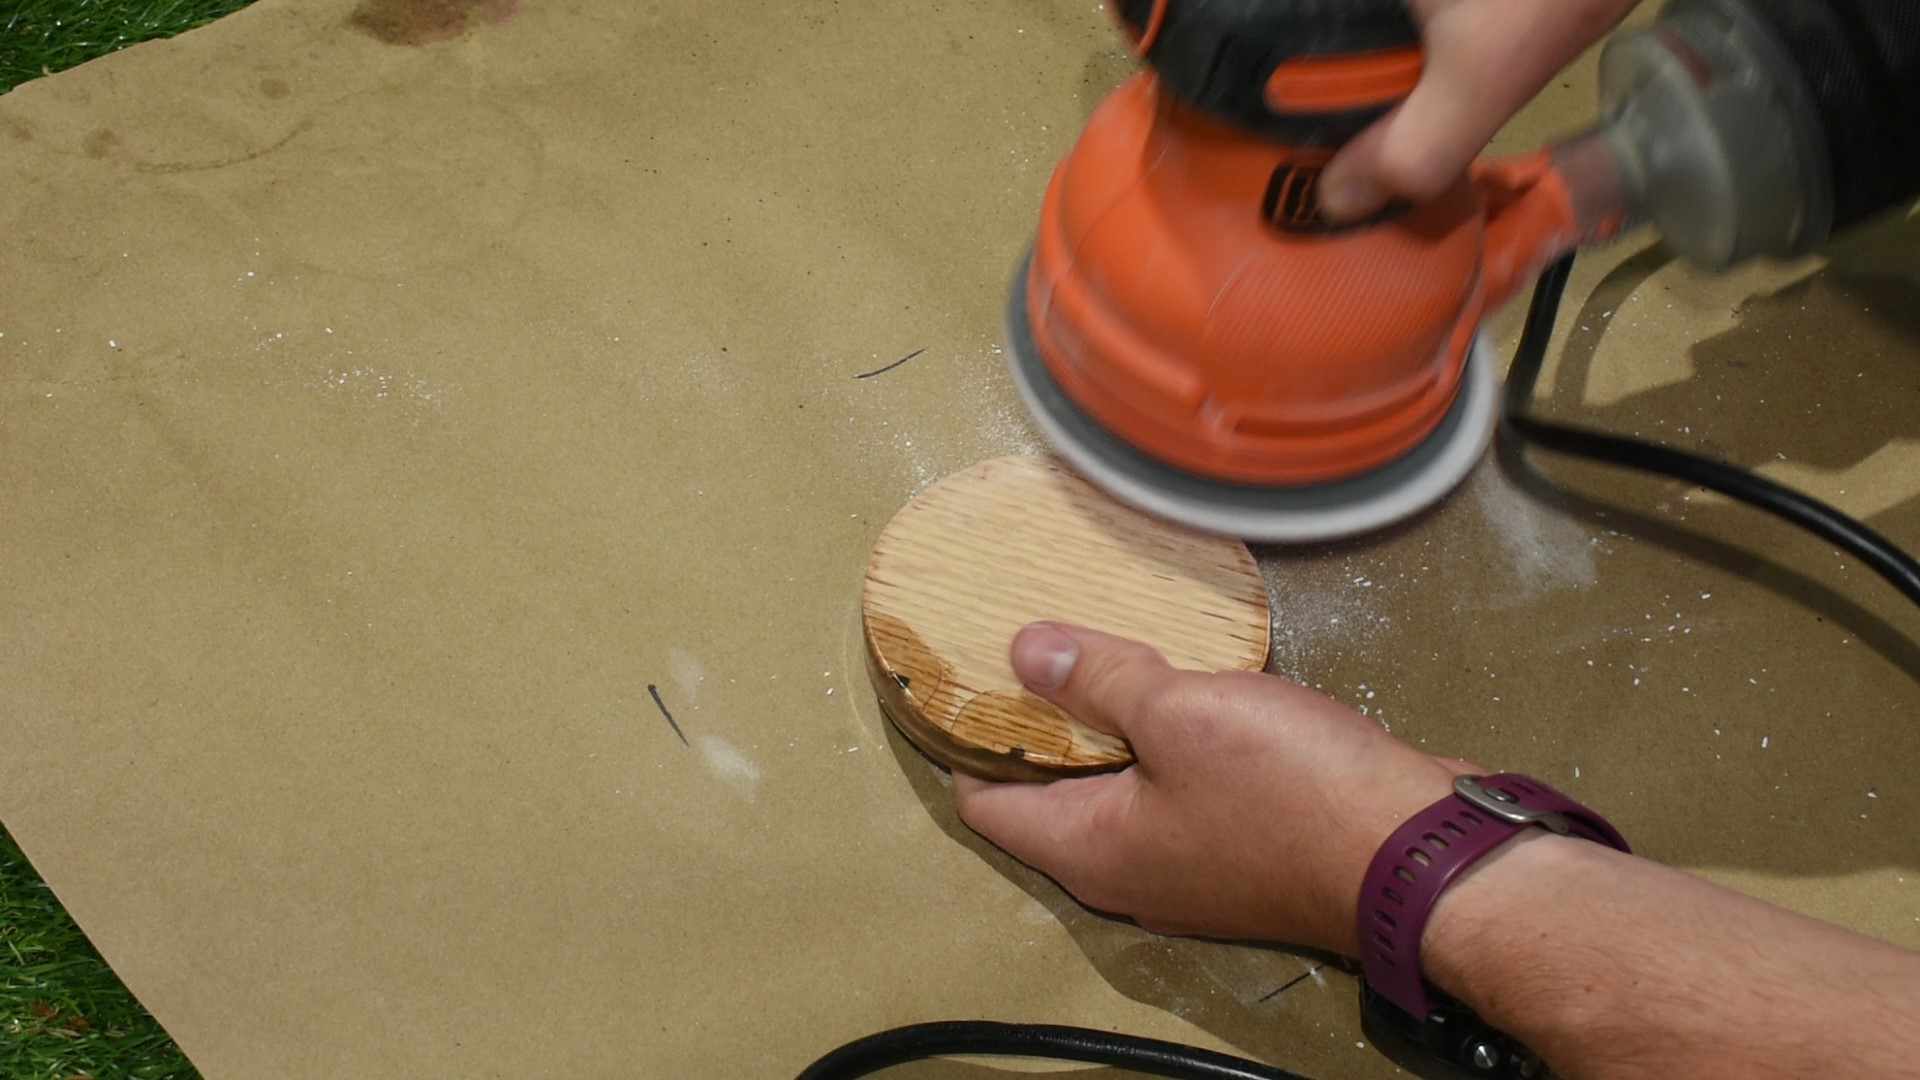
- Despite my attempt to keep the coasters flat in the mold, some of them still had resin get under them. To remove this and flatten them out, I simply used an orbital sander on the bottom.
- The coasters had a sharp top corner after the epoxy pour, so to remove this I very carefully sanded just the top corners of the mold enough to round off the edges. Then I (again very carefully) brushed a very thin layer of resin on the now rough corner to improve the finish. After brushing, I ran a paper towel with isopropyl alcohol along the edges to remove any resin that had gotten onto the sides or top.
Final Product, Thoughts, and Lessons Learned
.jpg)
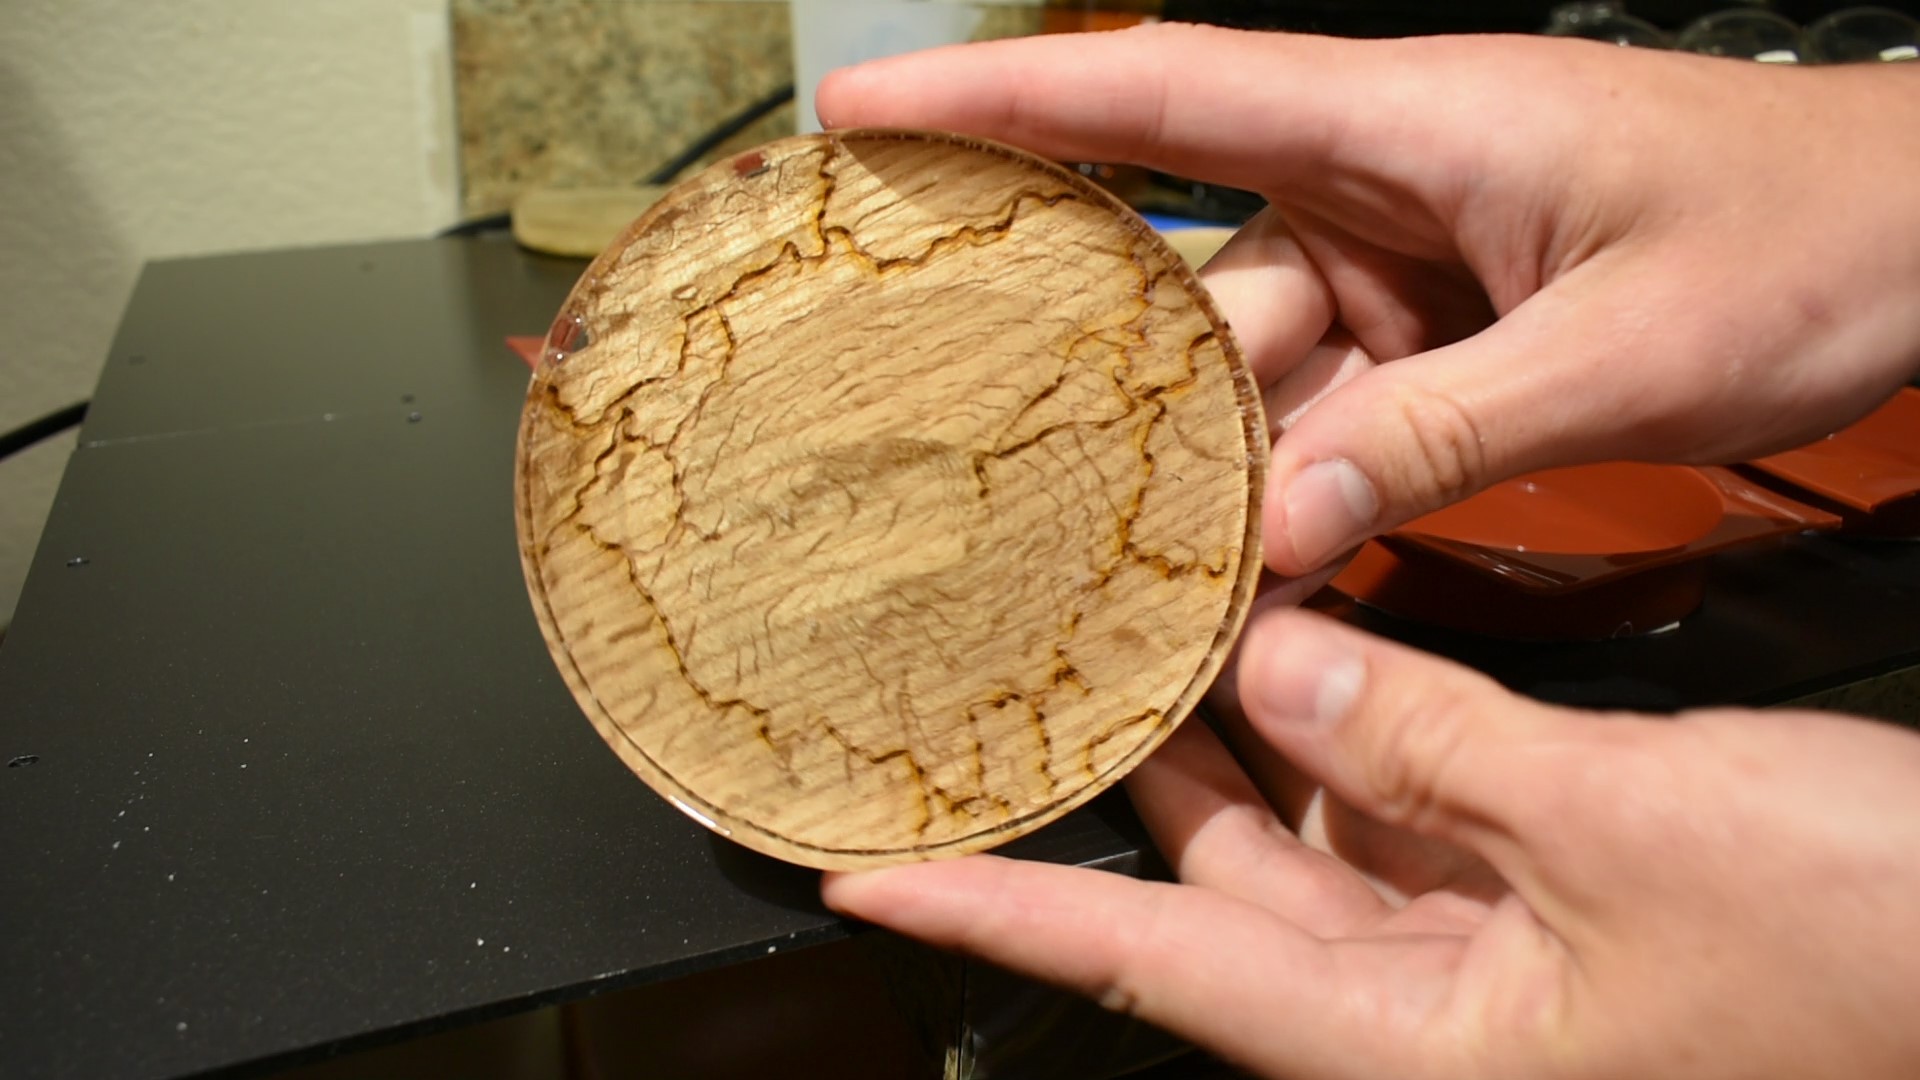
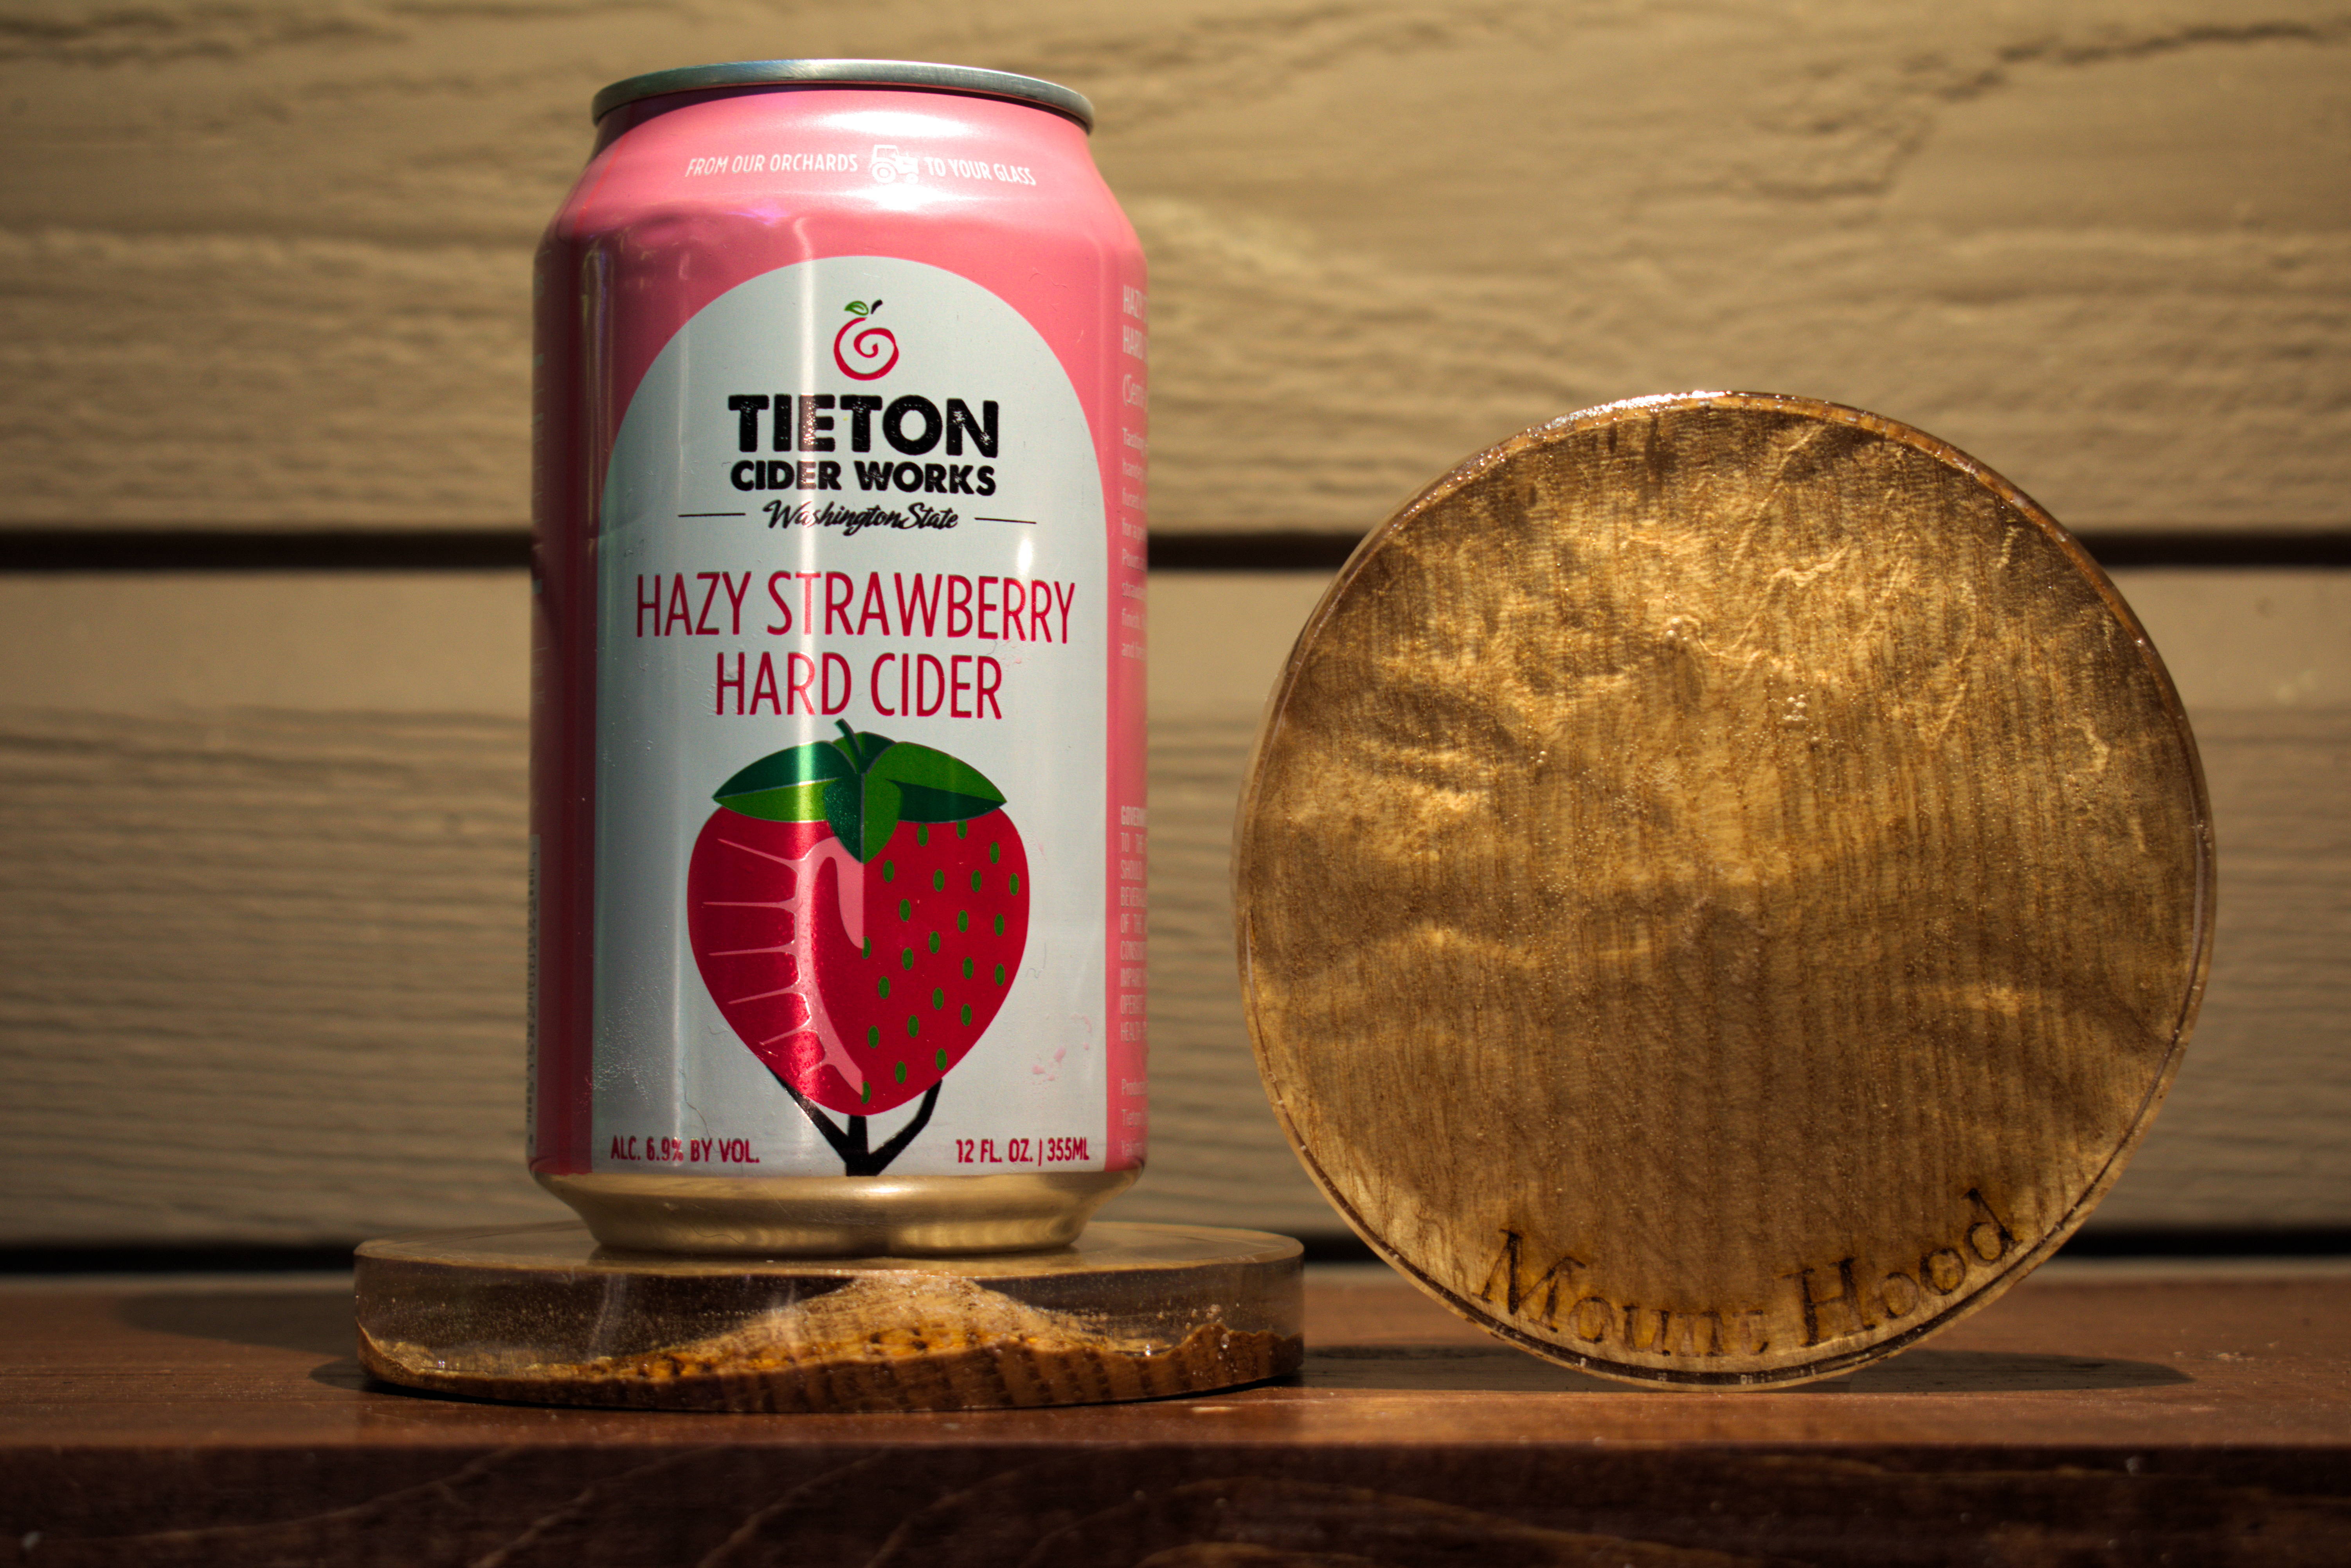
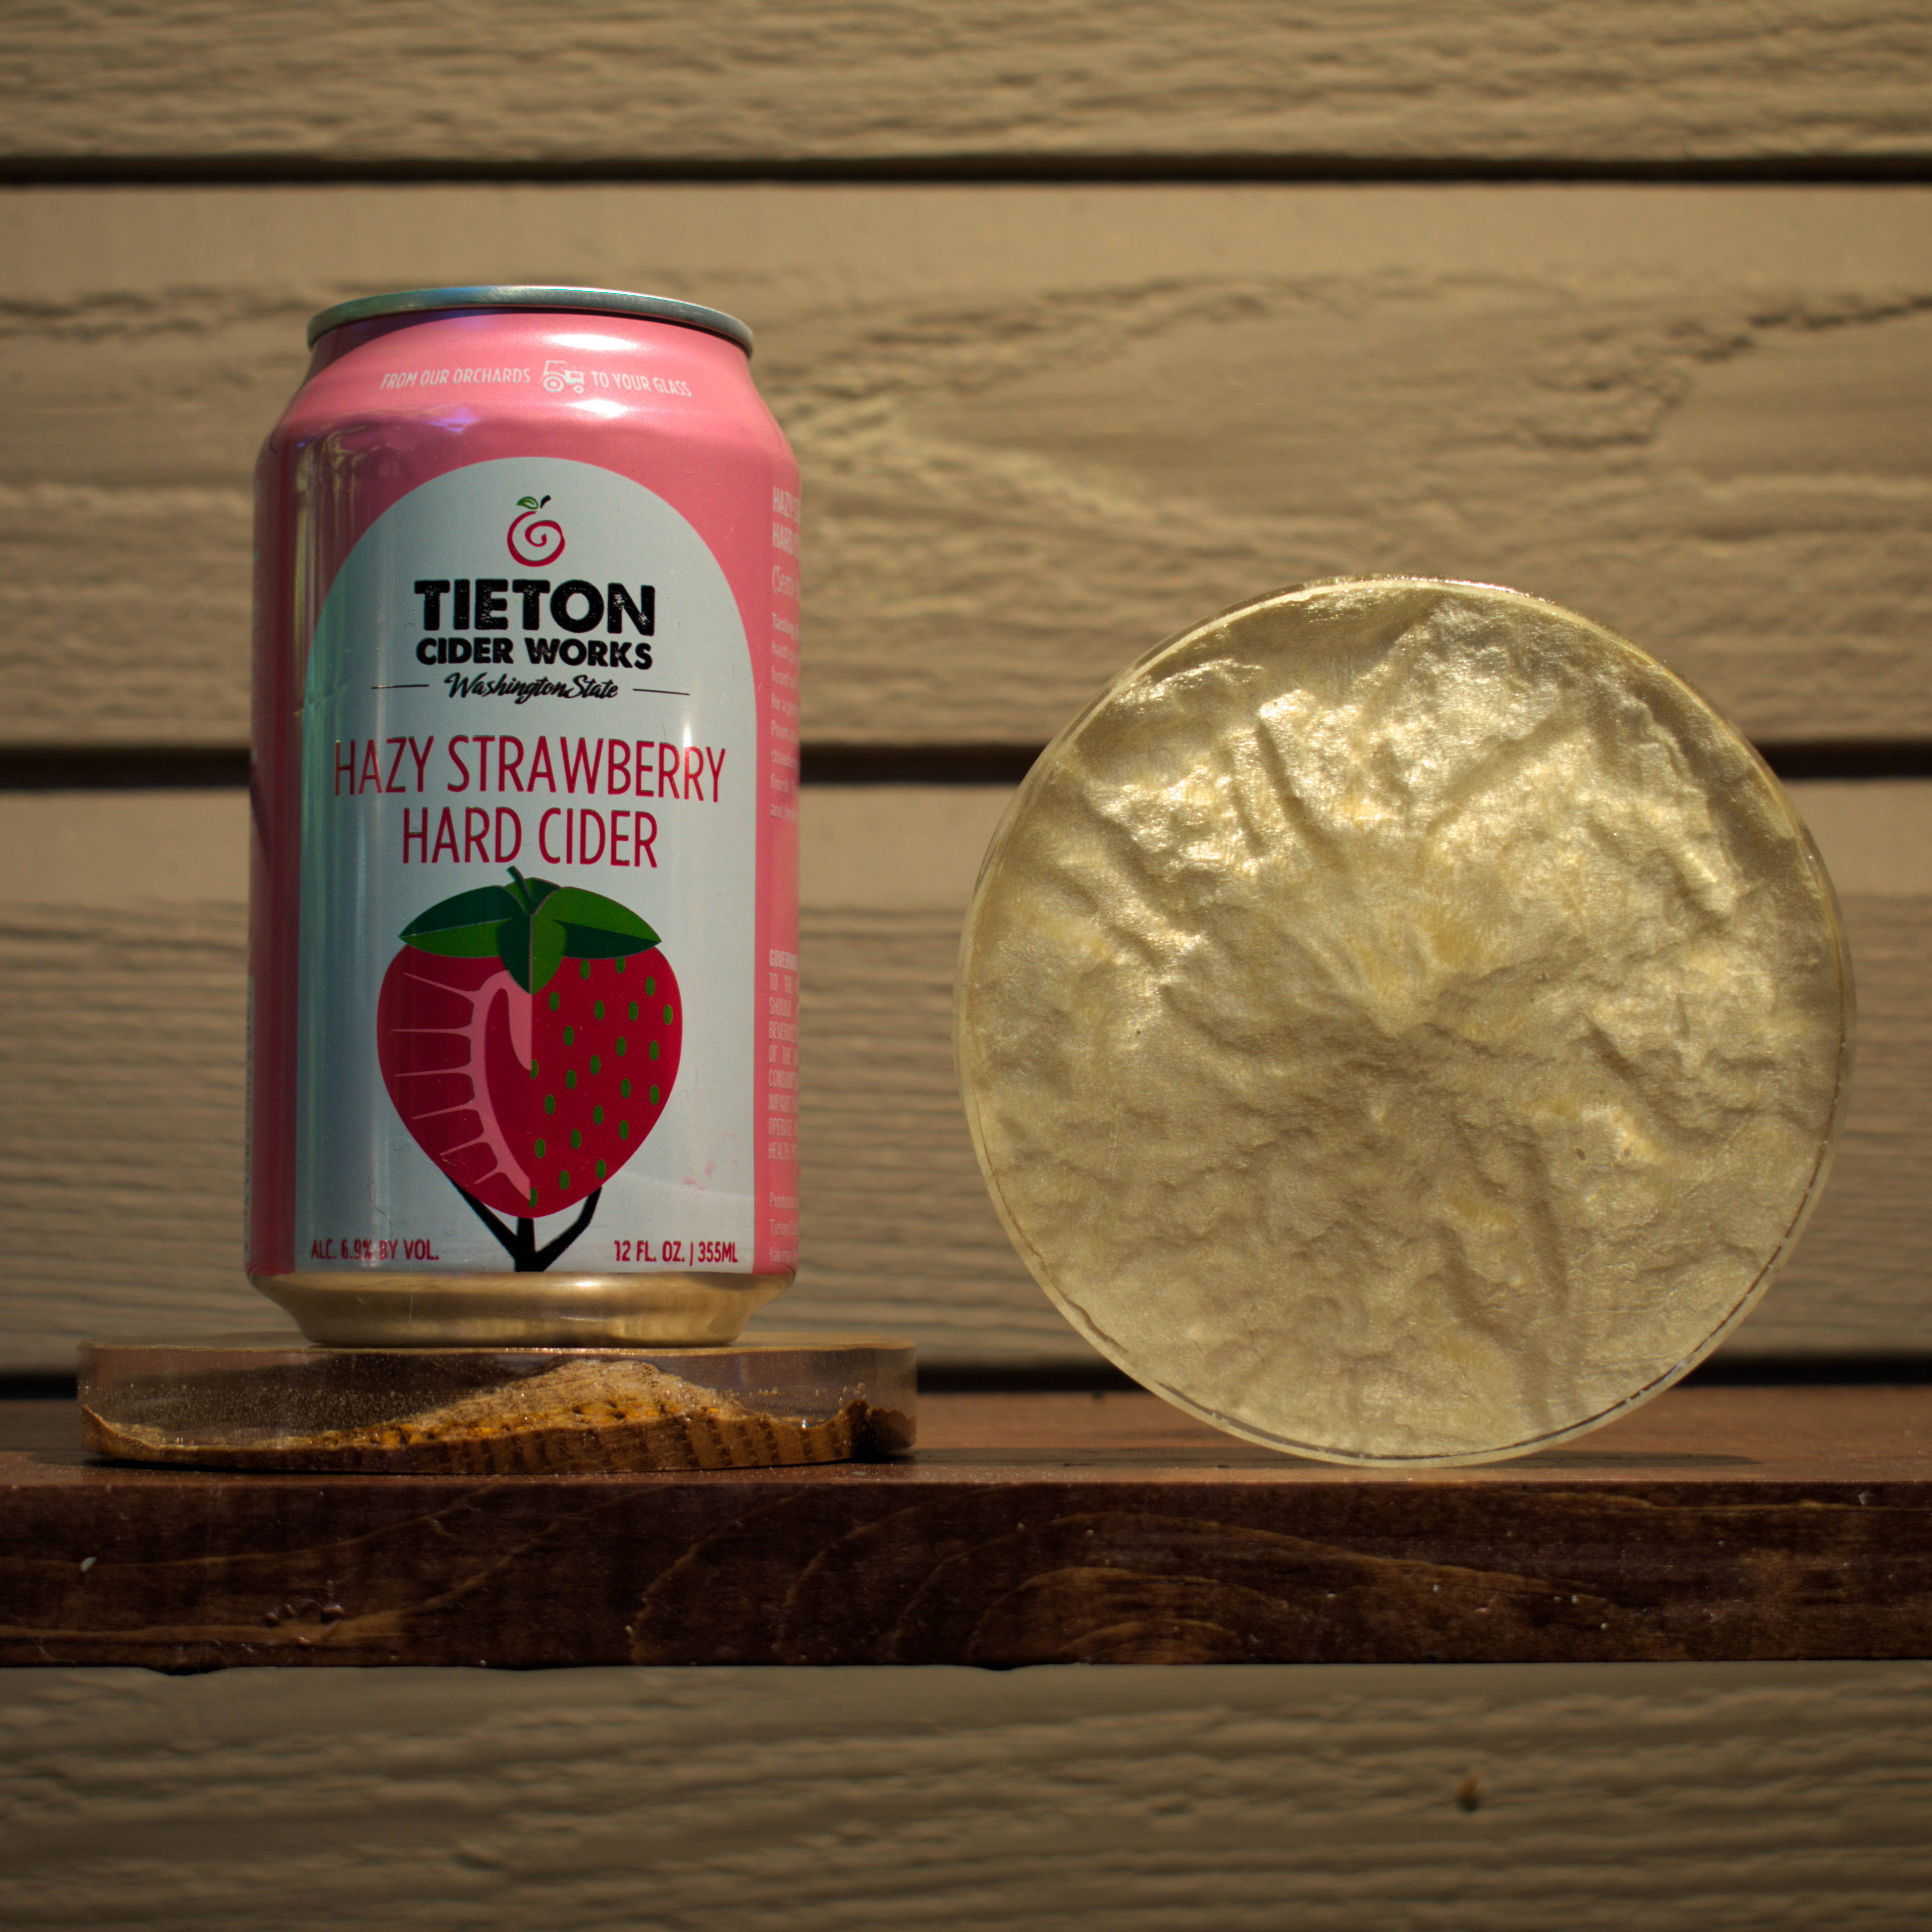
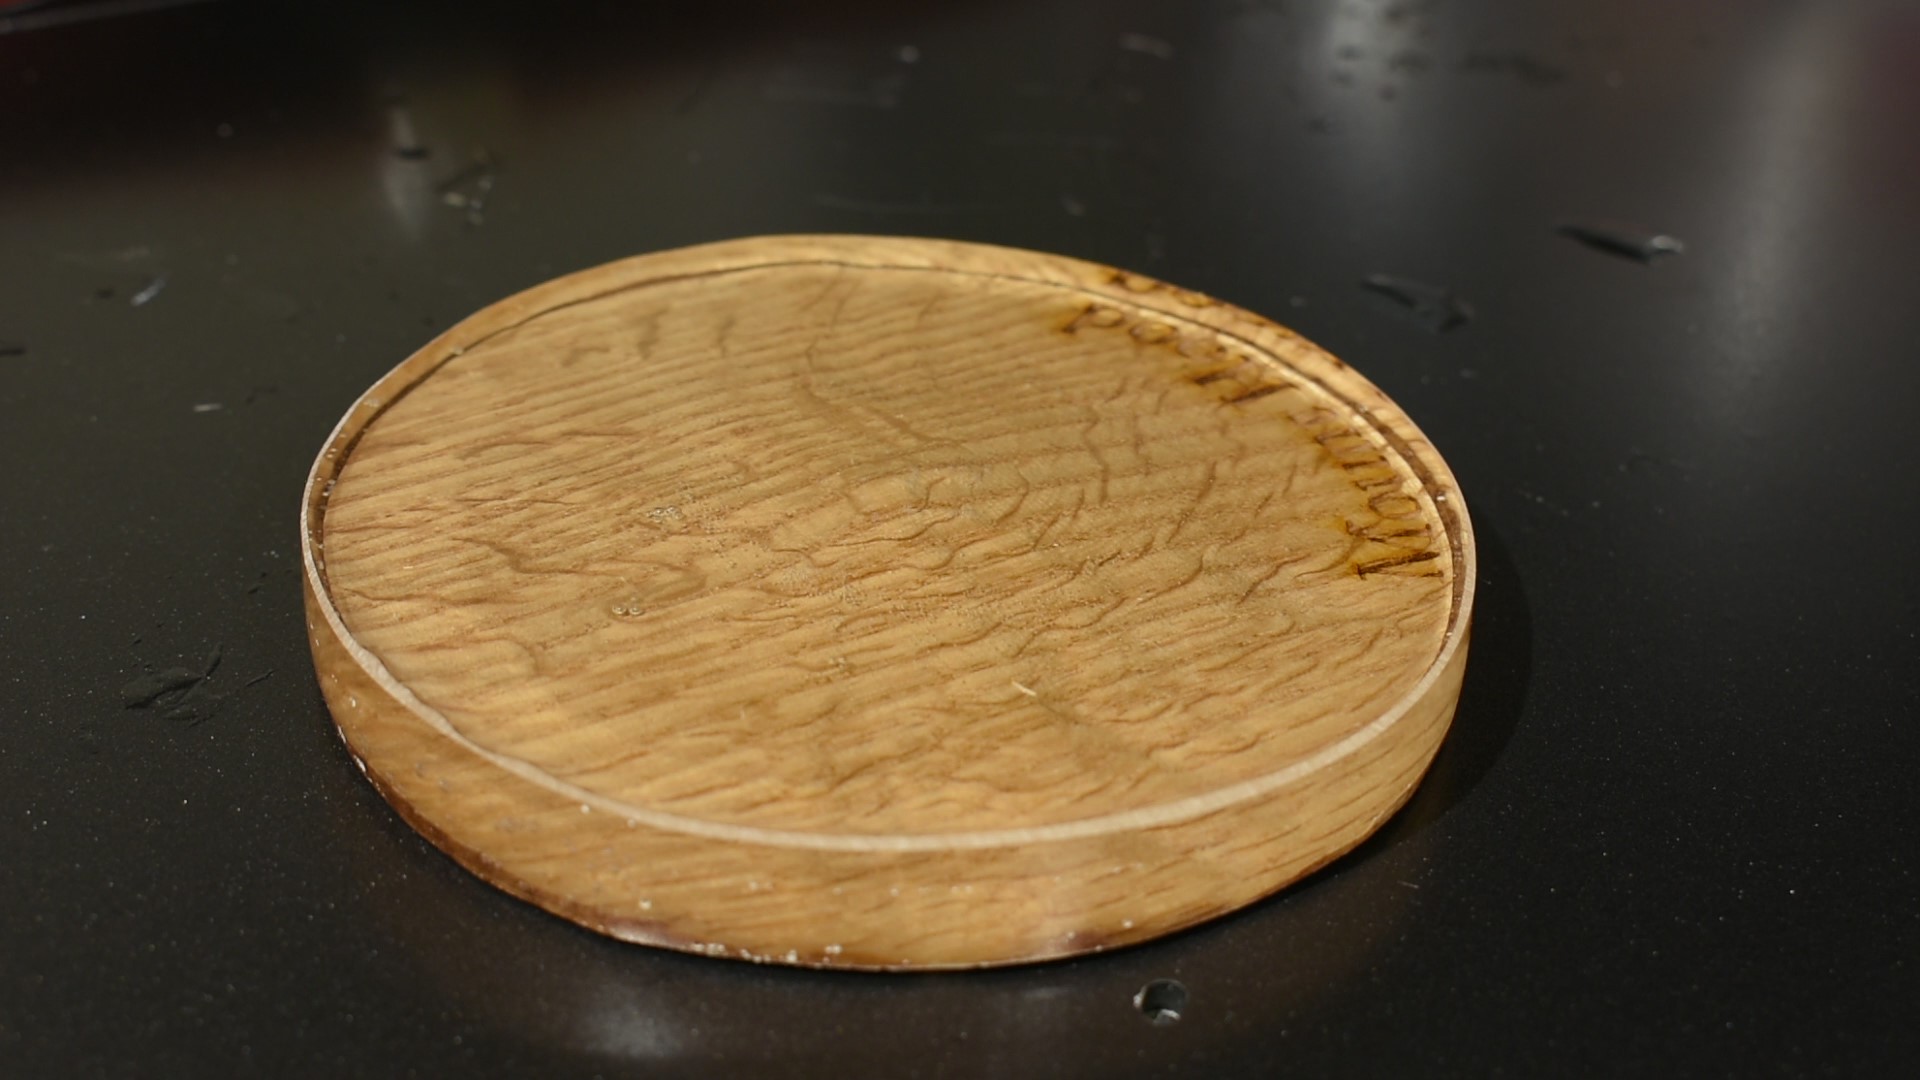
The final products that I got out of this first round of experimenting with this idea were definitely a bit of a diamond in the rough, most of it due to my inexperience with working with epoxy. That being said, the end result still looks pretty cool, and I think through a couple more iterations of working this, I could get to a very nice final product! Here are my final thoughts on ways that I intend to experiment with in future iterations of this project to improve it:
Wood choice:
I originally chose oak because it was the only wood that I had that I thought looked good after the cnc carving.But the main downside with oak that I learned later is that it is pretty porous, which makes it hard to tint the engraved portions with dye, and can cause outgassing when layering with epoxy. The underdog of this project ended up being pine, because even though it carved kind of rough with the CNC, it had a very nice, almost holographic look to it after being cast in epoxy. I'd also like to experiment with other woods in future iterations.
Laser Engraving/Dying:
In my attempt to get high contrast engravings on the coasters, I tried applying a finish before laser engraving, so that I could soak dyes into the engraved portions. The water based (polycrylic finish) that I used did not work very well in this experiment (it might work better with multiple coatings, but I had to rush it unfortunately). In my next iteration, I will probably try an oil based finish, and applying a top coat of resin before engraving, in the hopes that these will seal the wood better for the dyeing process. The caveat to using an oil based finish, is that you will likely (depending on your epoxy instructions) need to put a water based finish on top of it after dyeing.
Epoxy Resin Pouring/Casting:
-I used a standard table top epoxy that can be poured up to 0.25" thick, and this resulted in pretty noticeable refraction lines when you look at the coaster through the sides. In my next iteration I will probably try a different epoxy that can pour at least 0.5" thick. That's the simplest way that I can think of to improve the refraction lines.
-I got a 6-pack set of molds, and cut them into individual molds for easier handling, but this made the molds more flimsy, and some of the coaster that I made did not come out perfectly round. Next time I will not cut up the molds, and maybe even try finding more rigid ones (though I hard time finding anything online that looked more rigid than what I ended up getting).
And that's pretty much it! I hope that you enjoyed my Instructable, and if you decide on doing this project yourself, hopefully these instructions are instructive enough to not only help you do this project, but do it better than I did! And if you did enjoy it, please consider voting for it in Maps contest. Thanks!