Token Teapot 3D Printed Planter
by bot boy in Living > Decorating
724 Views, 1 Favorites, 0 Comments
Token Teapot 3D Printed Planter
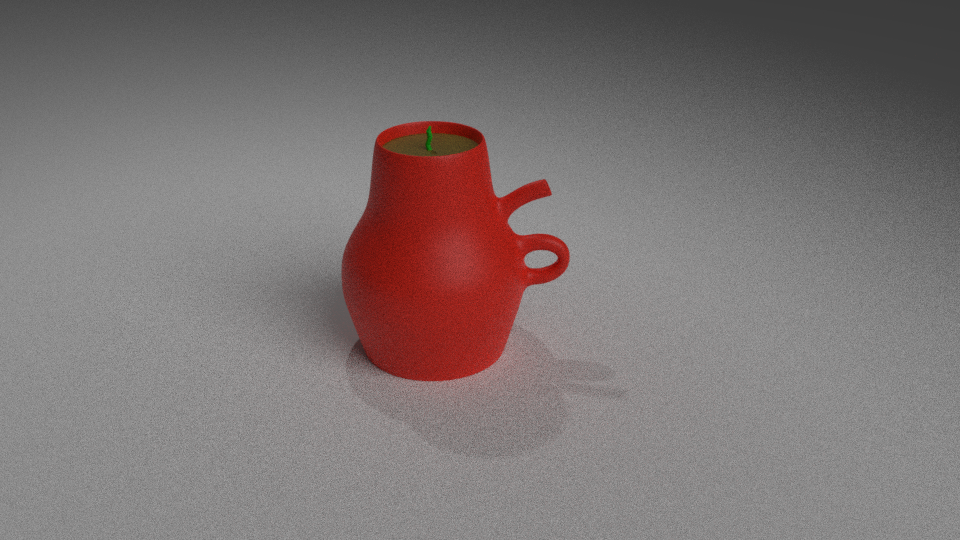
Token something that is a symbol of a feeling, event, etc.
As a software developer, I have a tendency to create some programs that are as functional as they are useful--they aren't very much of either. For this reason, it is necessary to remind myself to produce a sufficient design plan before diving head-first into code, no matter how simple the program specification may seem.
Although I'm sure I could find many inspiring quotes to hang over my desk or a "productivity" application that locks me out of my development environment for a length of time, in my mind, the cover of The Design of Everyday Things is one of the best reminders to plan before beginning a project. The book cover artwork is an image that is known as "Carelman's Teapot" or the "Coffeepot for Masochists" (since we won't be the ones drinking from this vessel, we'll leave the name up to the plant; but we'll keep the title as it is, because alliteration always wins).
Unless you actually are a masochist and would like to mold this with your own hands, we'll be using Blender, a free 3D creation suite used by artists, game developers, animators, and now you. We both know you're only here for the teapot and are probably expecting me to include the stl file, but you're going to have to follow this instructable to get one. If you would like to go further with Blender, Blender Guru has a ton of great beginner through advanced tutorials available for free.
Well, that's enough rambling (that won't be the last bad pun)--let's get started!
Setup
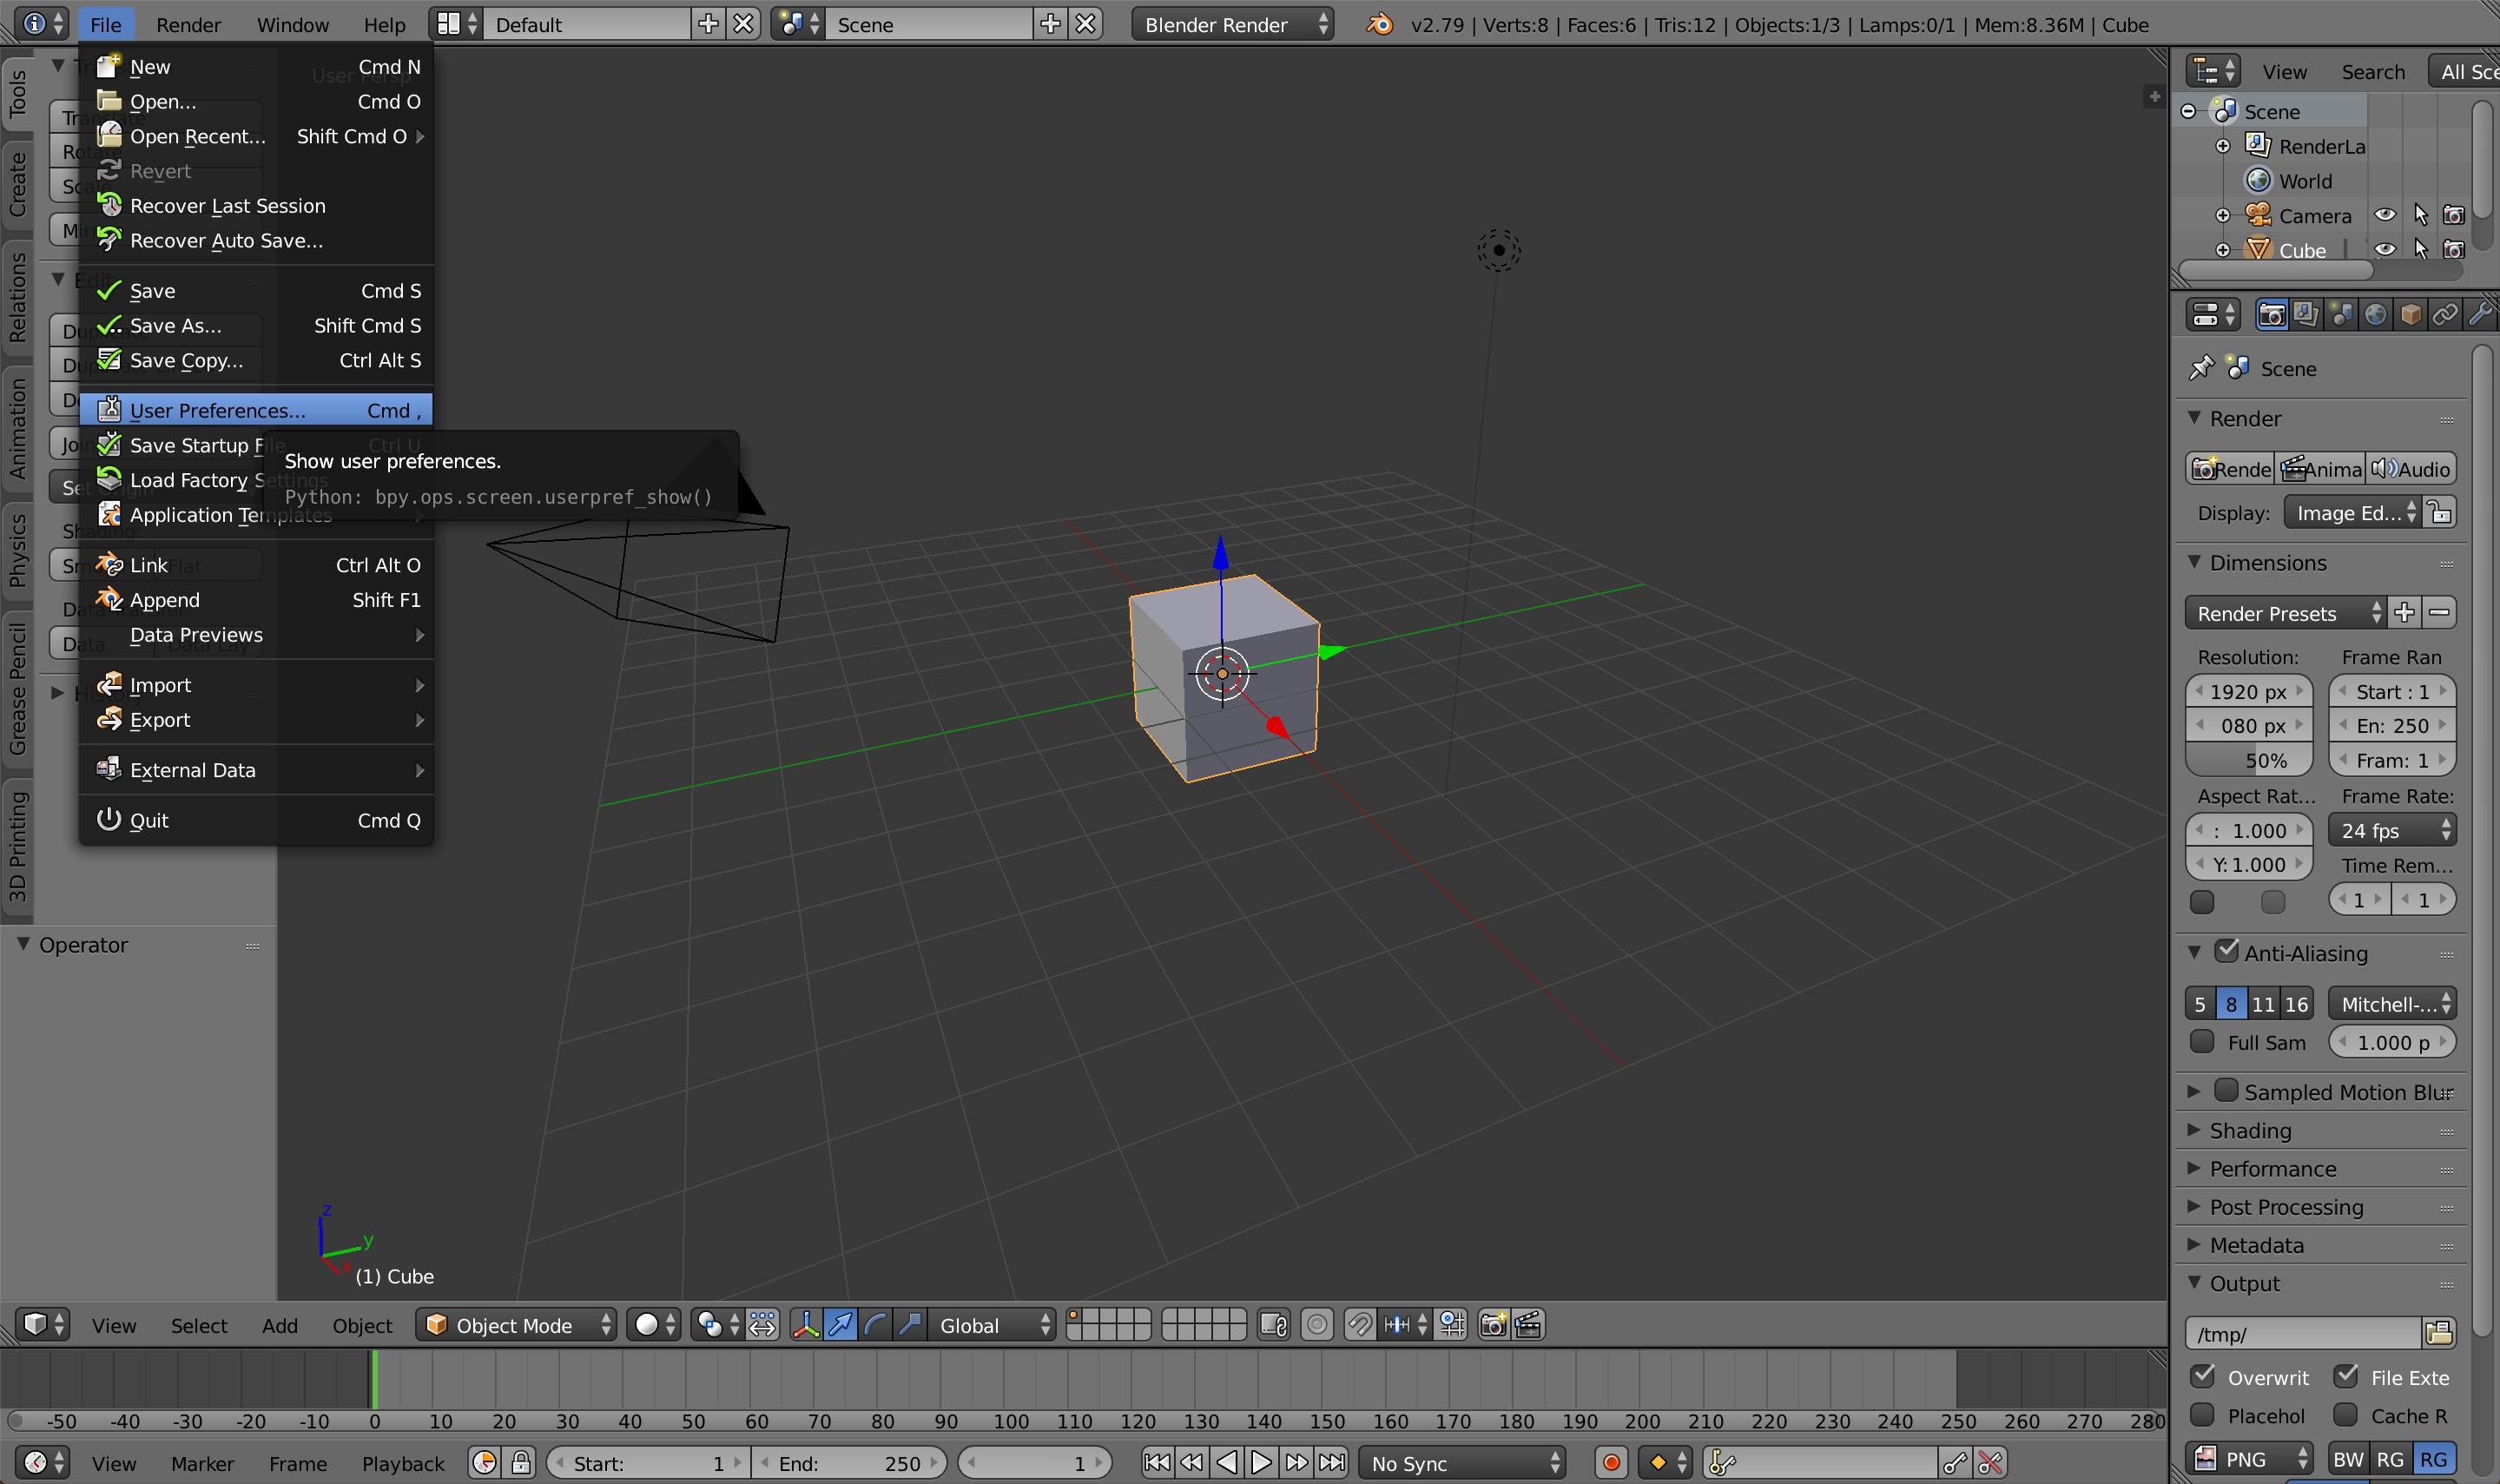
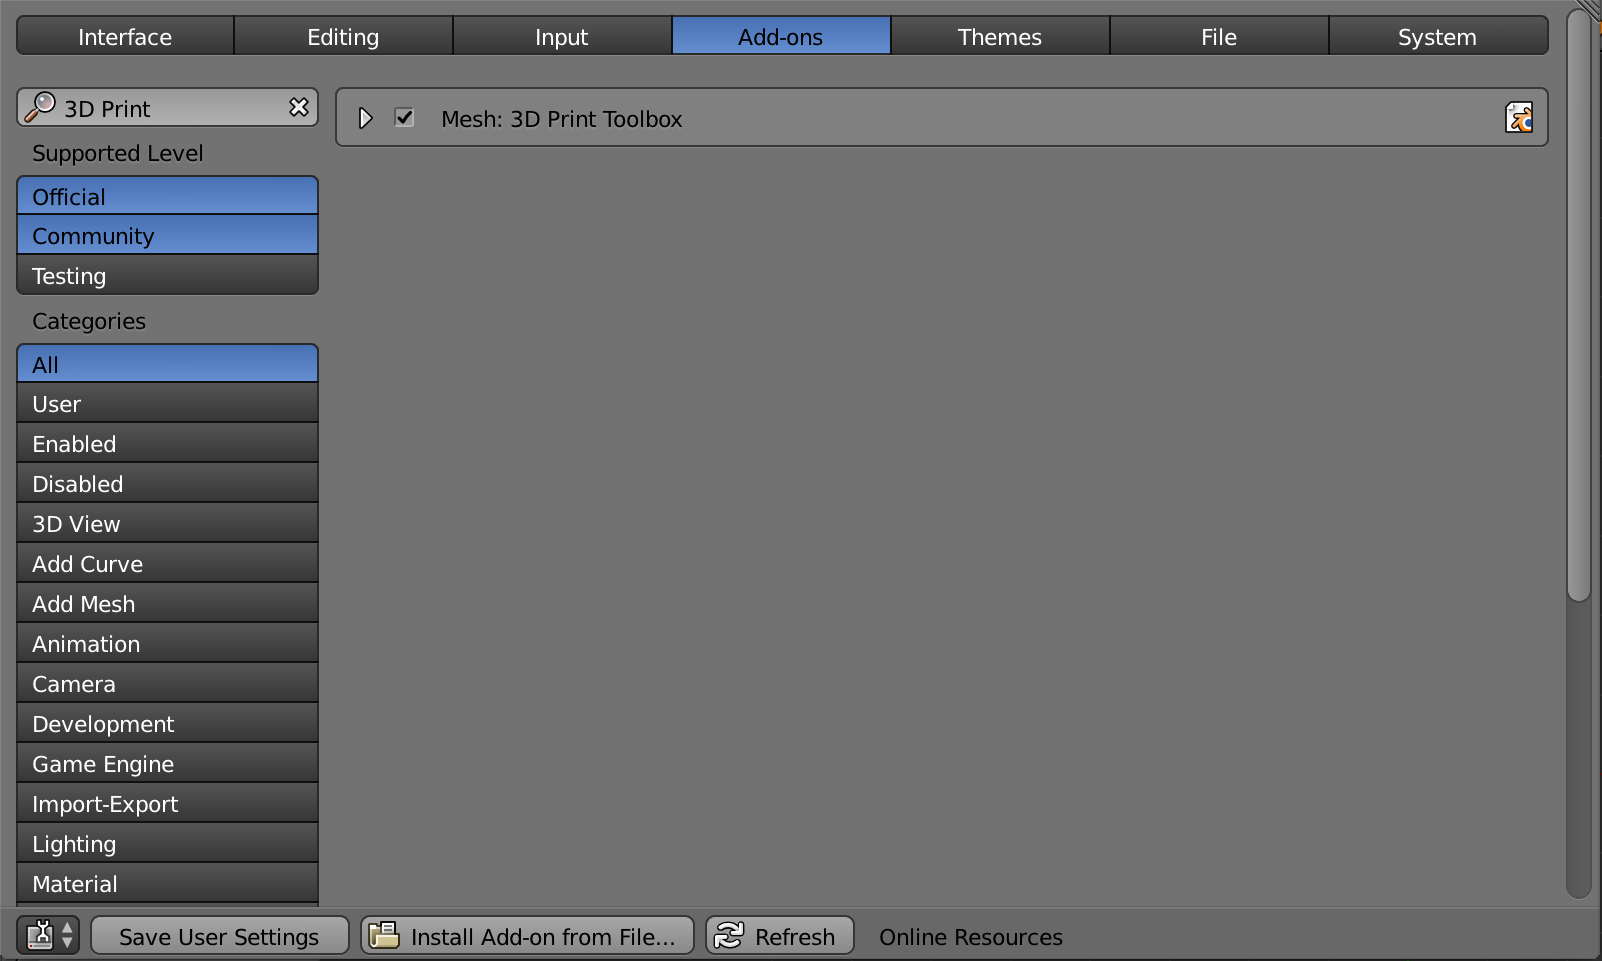
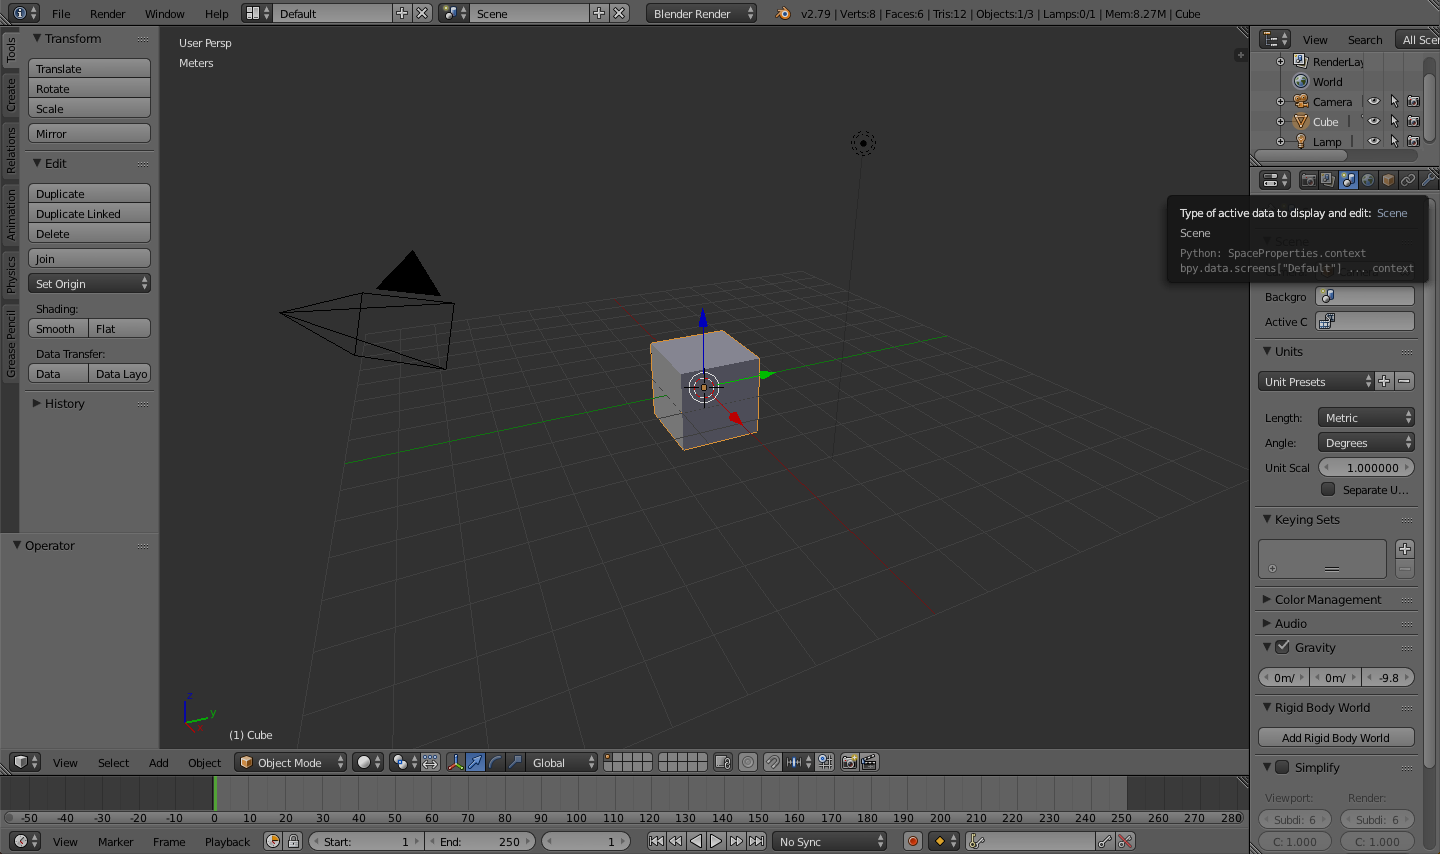
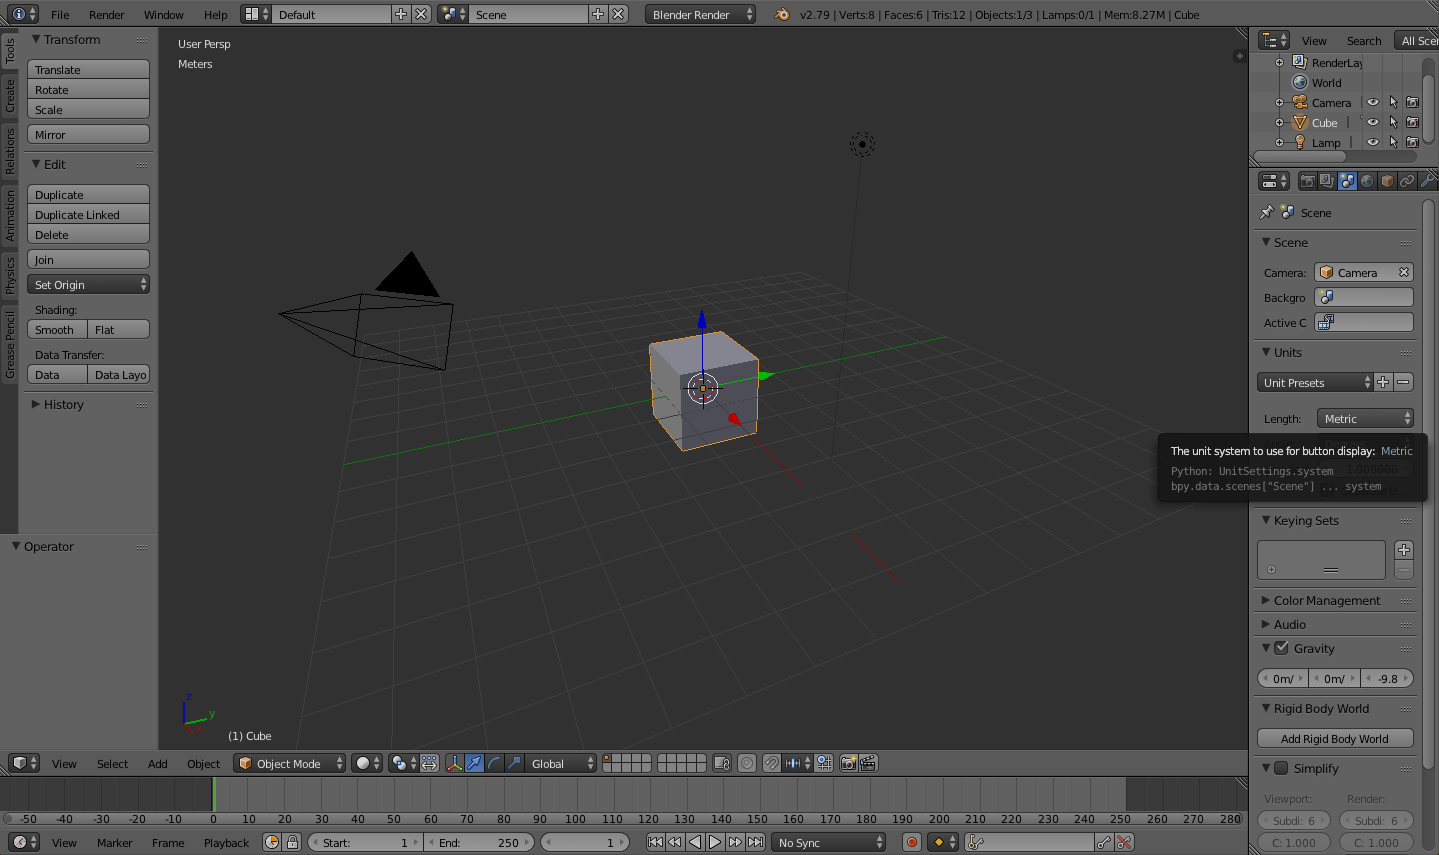
If you don't already have Blender installed, you can download it here. Blender's website has lots of great free resources other than the software, so be sure to poke around!
Blender has a bad rap for being convoluted with its use of shortcuts, but it's actually a great feature. With a comprehensive cheat sheet (like the one provided here) and some simple changes to the default settings, it's pretty easy to learn enough to be dangerous.
Change Mouse Button
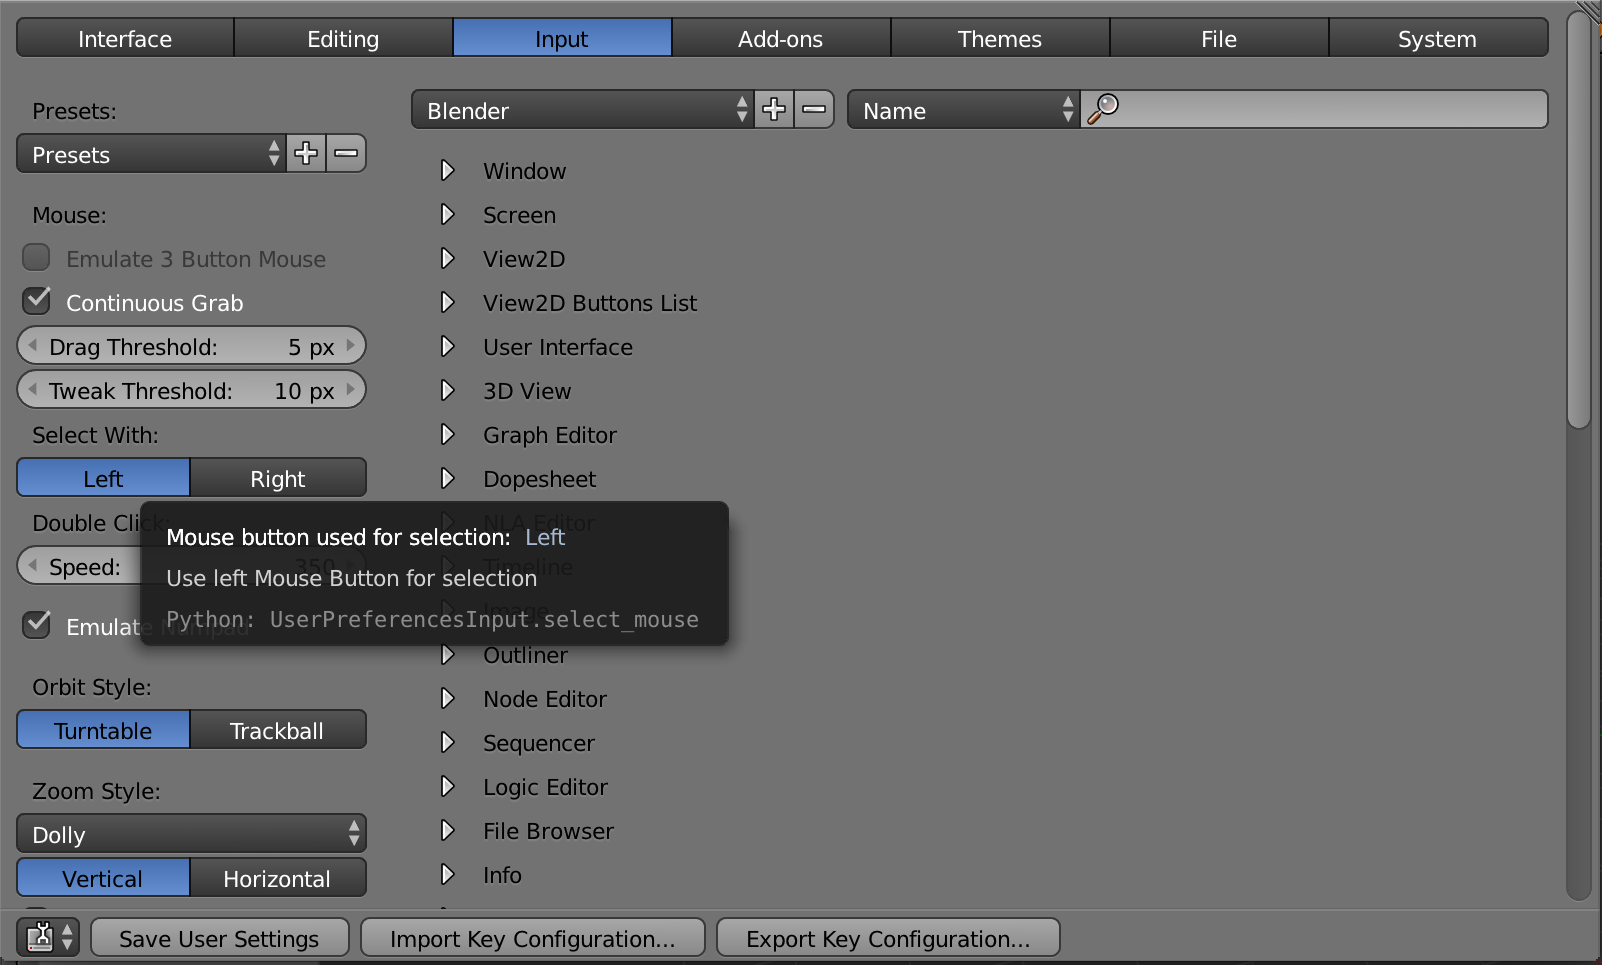
By default, the right mouse button is used for selecting. Most people are not accustomed to using a mouse that way, so I'd recommend changing this setting.
- Navigate to File => User Preferences => Input
- Set Select With: Left
- Click Save User Settings
Emulate Numpad
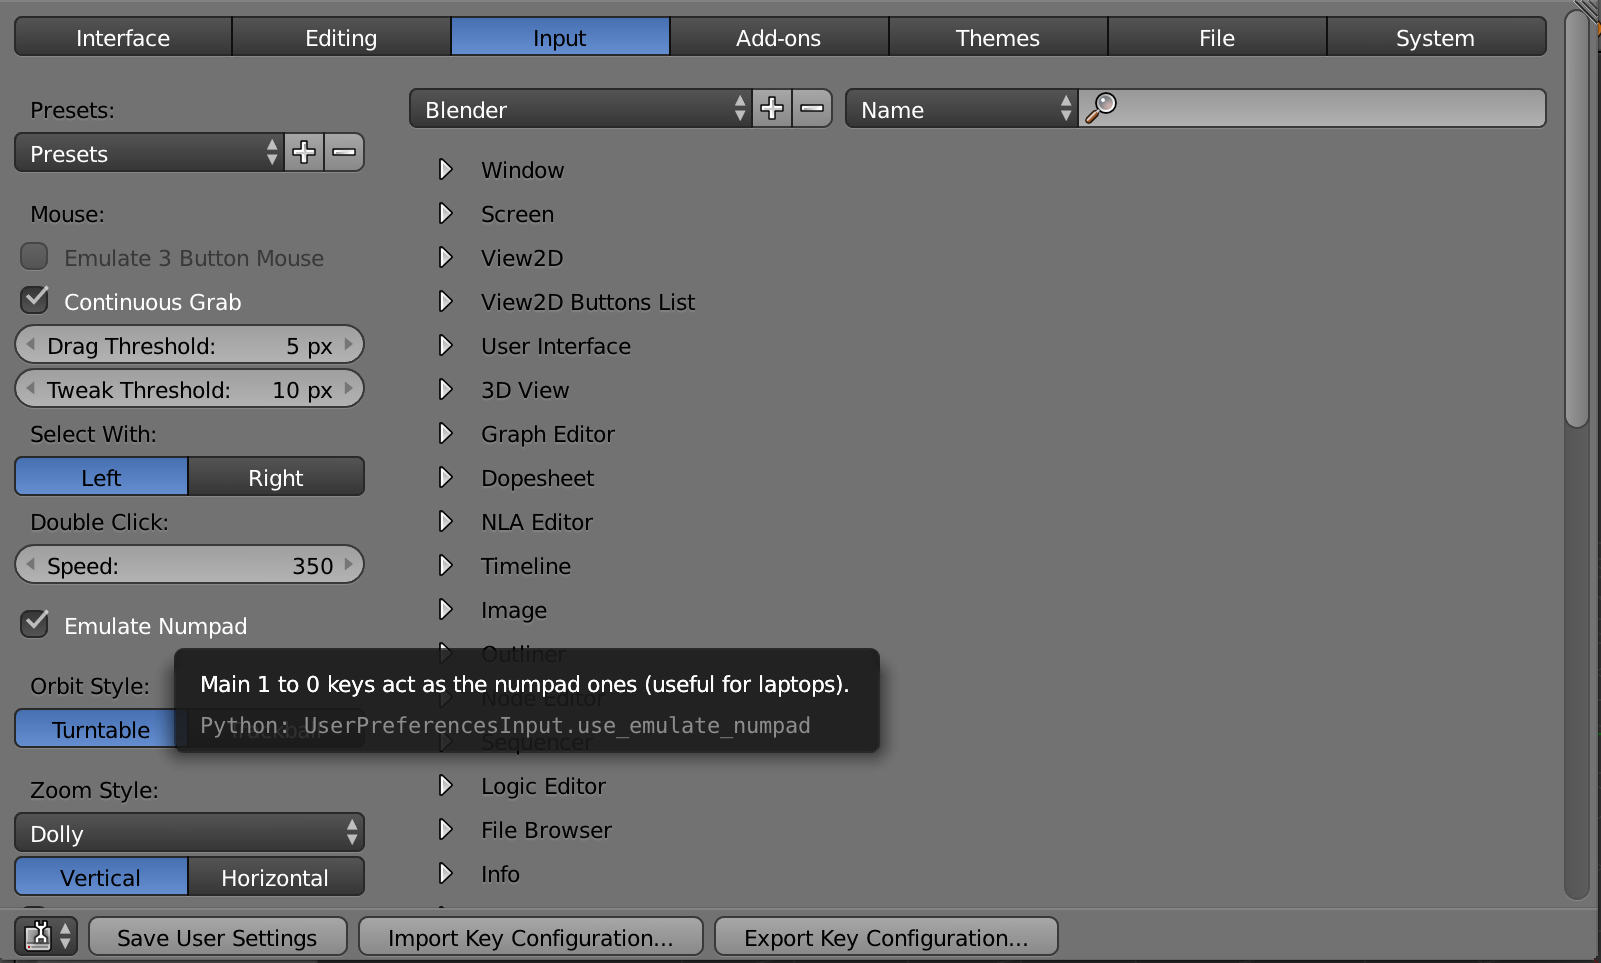
If you're using a keyboard that doesn't have a dedicated numpad, you'll want to turn on this setting to take advantage of some 3D viewer shortcuts.
- Navigate to File => User Preferences => Input
- Check Emulate Numpad
- Click Save User Settings
3D Print Toolbox
To get some great helps for 3D printing, we'll need to enable an Add-on (don't worry, it's free).
- Navigate to File => User Preferences => Add-ons
- Search for "3D Print"
- Check Mesh: 3D Print Toolbox
- Click Save User Settings
Scene Scale
Although you could scale down the size in your slicing software, it's nice to know that you've got your model ready to share with someone else.
- Navigate to Scene
- Change Length to whichever unit system you are comfortable with
- Change Unit Scale according to your unit system (Metric: 0.01 = 1cm, Imperial: 0.083 = 1")
Let's get to modeling!
Clear Workspace
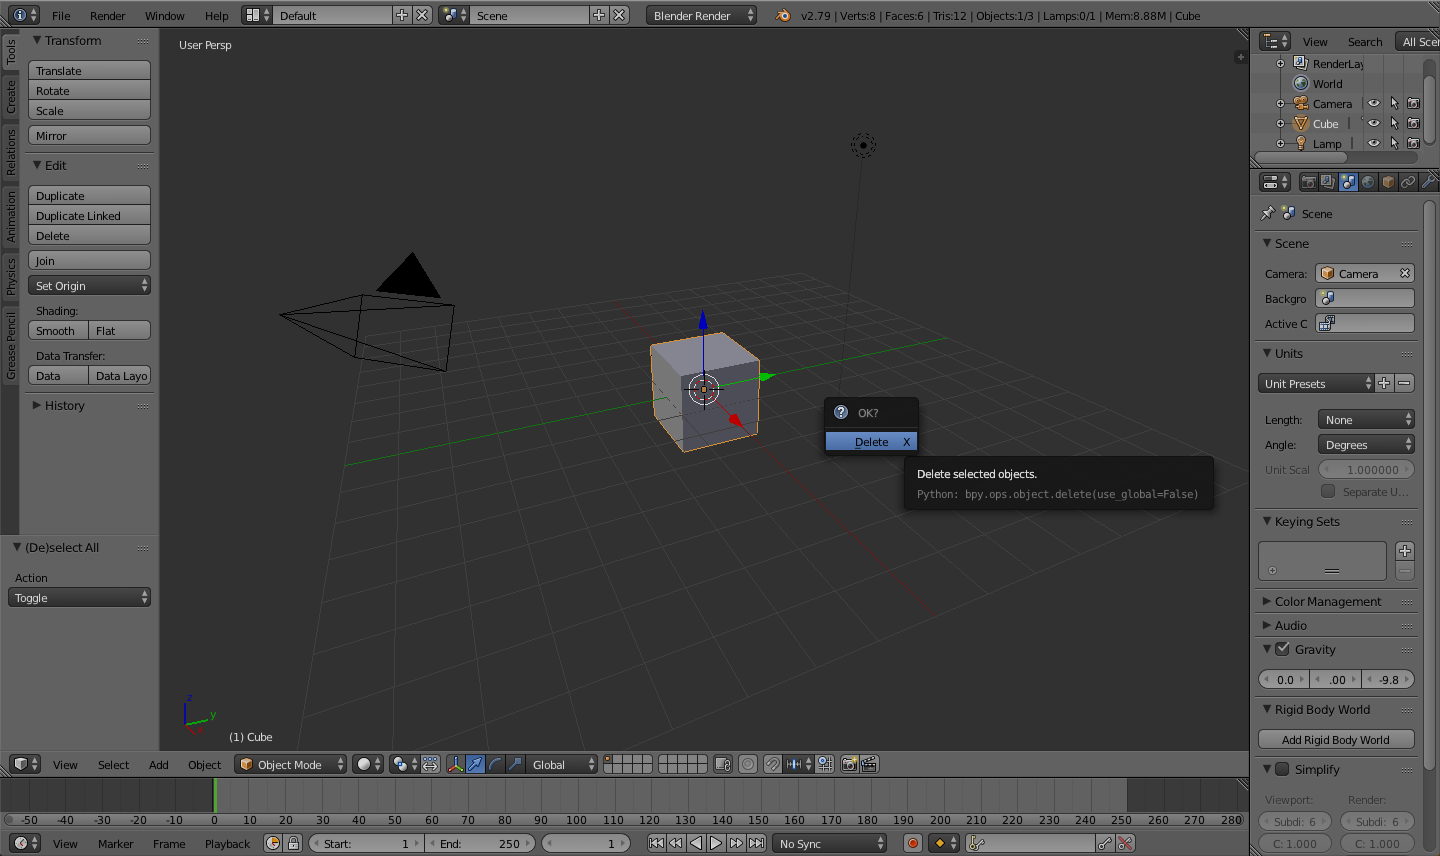
Every new project starts with a cube. This should be removed before we start working on our model.
- Click on the cube, making sure it's the only object selected (press A to select/deselect all objects)
- Press X on your keyboard
- Confirm that you would like to delete it
Next we'll add our starting cylinder!
Add a Cylinder
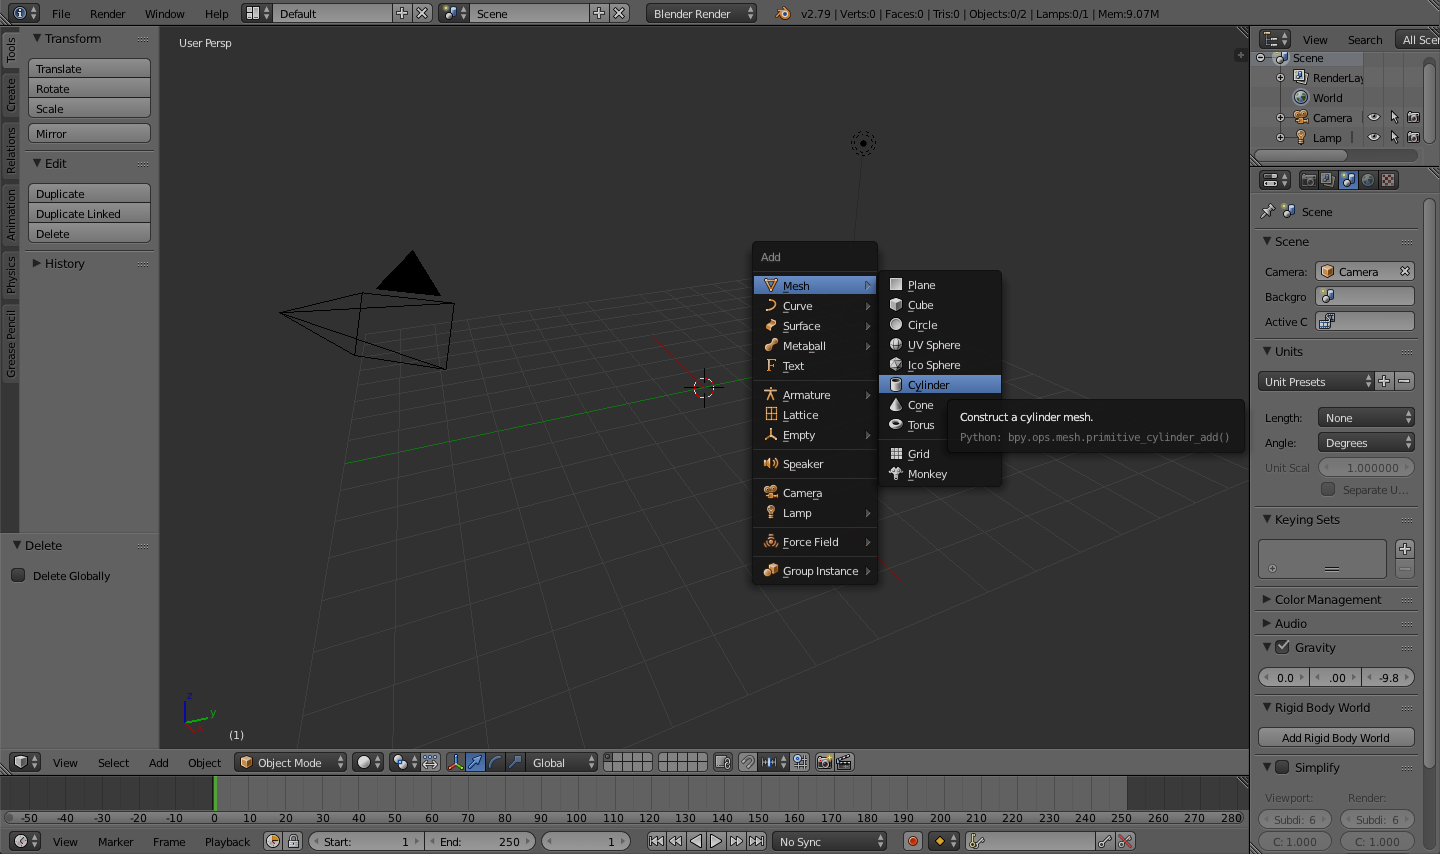
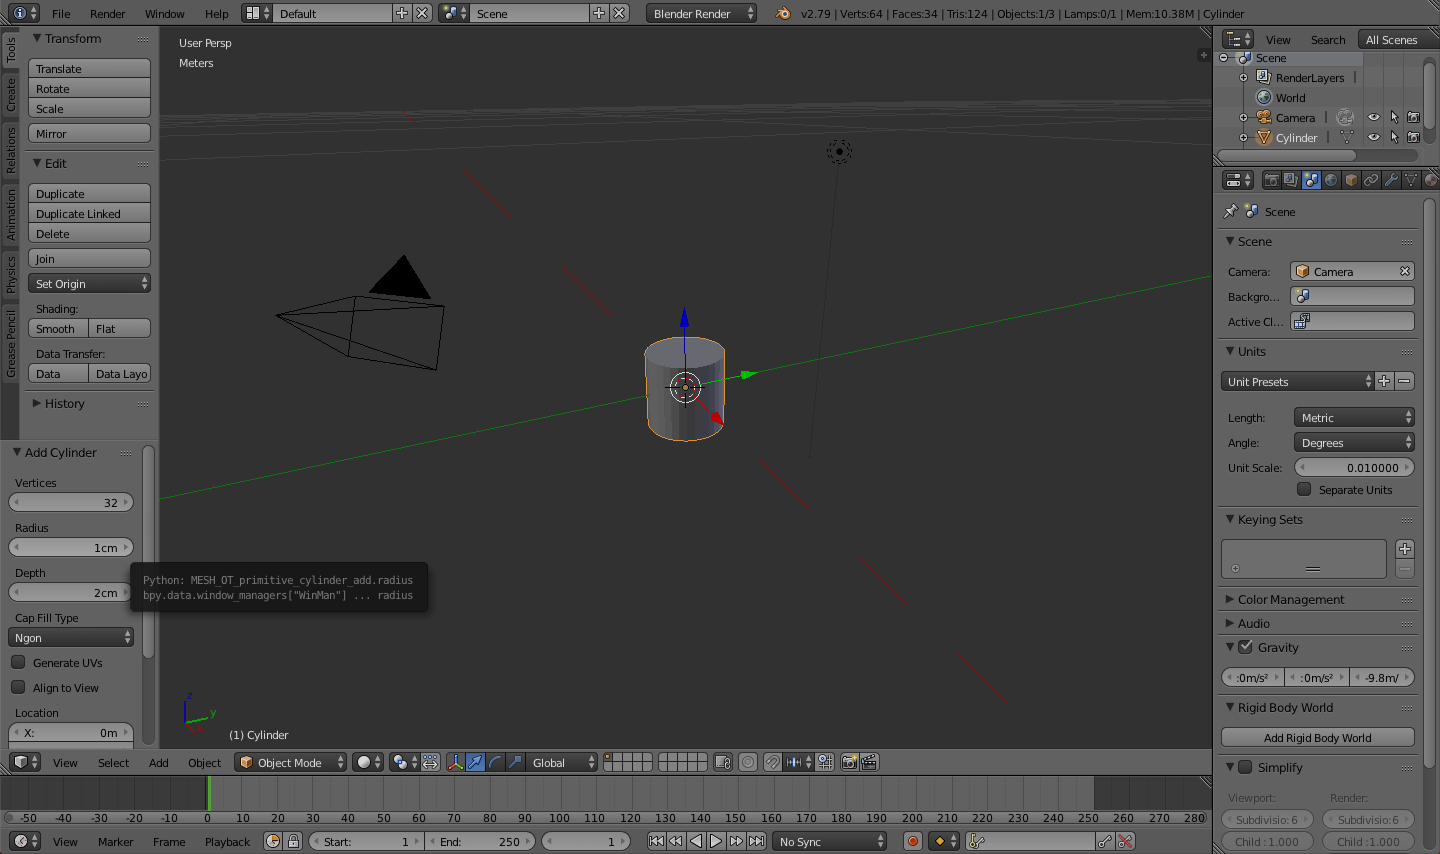
Blender has plenty of starter objects (primitives) that make it easier to shape your model. It also includes Suzanne (the monkey), but there's not much use for her in this model.
- Press Shift + A on your keyboard
- Navigate to Mesh => Cylinder
Great! We've got the main body of our teapot!
You may have noticed the options come up on the left toolbar to adjust the dimensions of our cylinder. This will only come up when you first add the object, so if it's gone, you may want to retry adding the cylinder (don't forget to delete the old one first). I'll be changing the radius to 5cm, but feel free to improvise! It's usually good practice to decrease the number of vertices, because this will help with performance while we're modeling, but we won't be doing it for such a simple model.
Next up: shaping the cylinder!
Mold the Cylinder
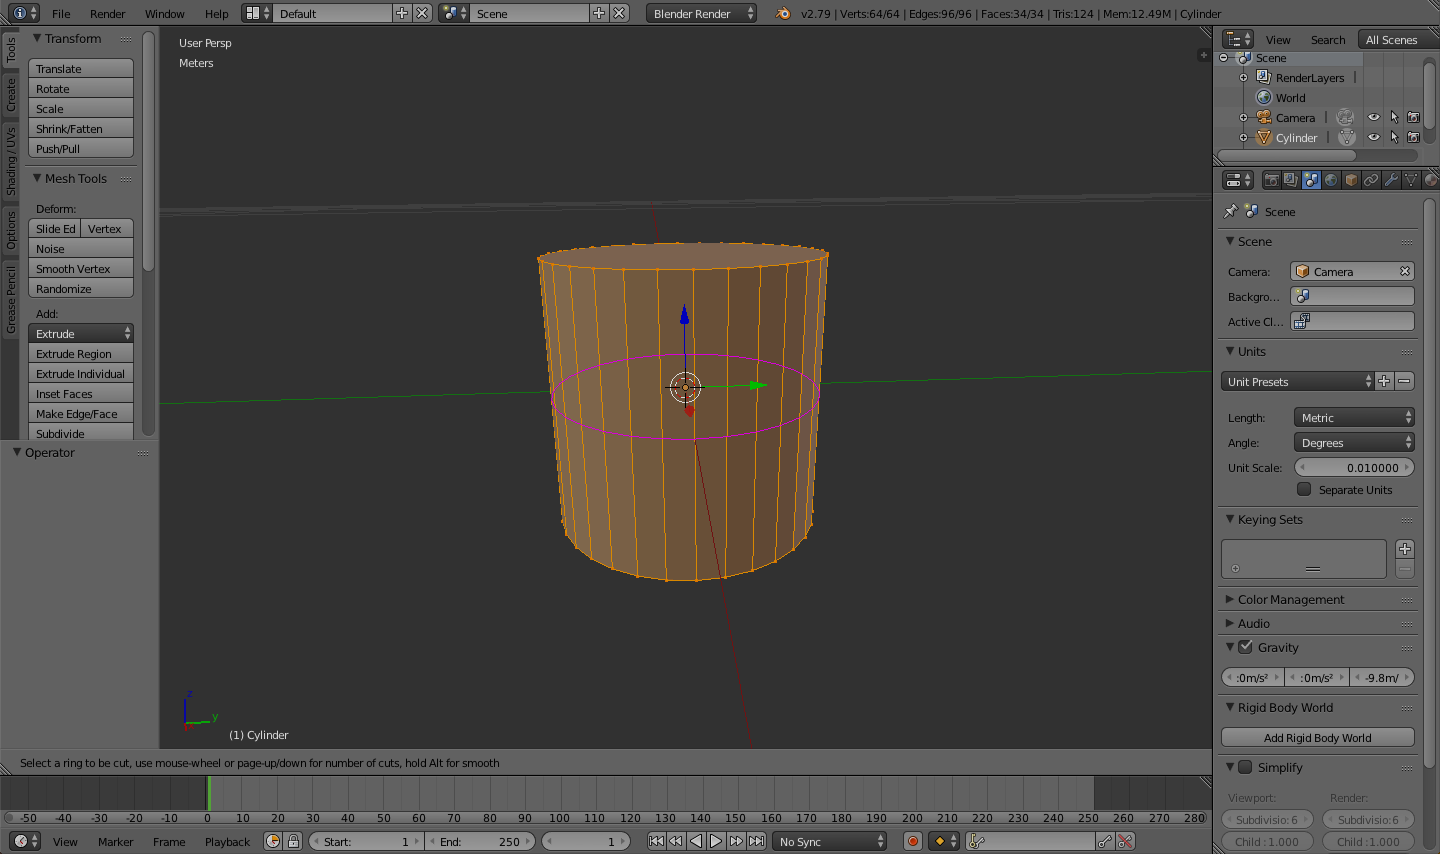
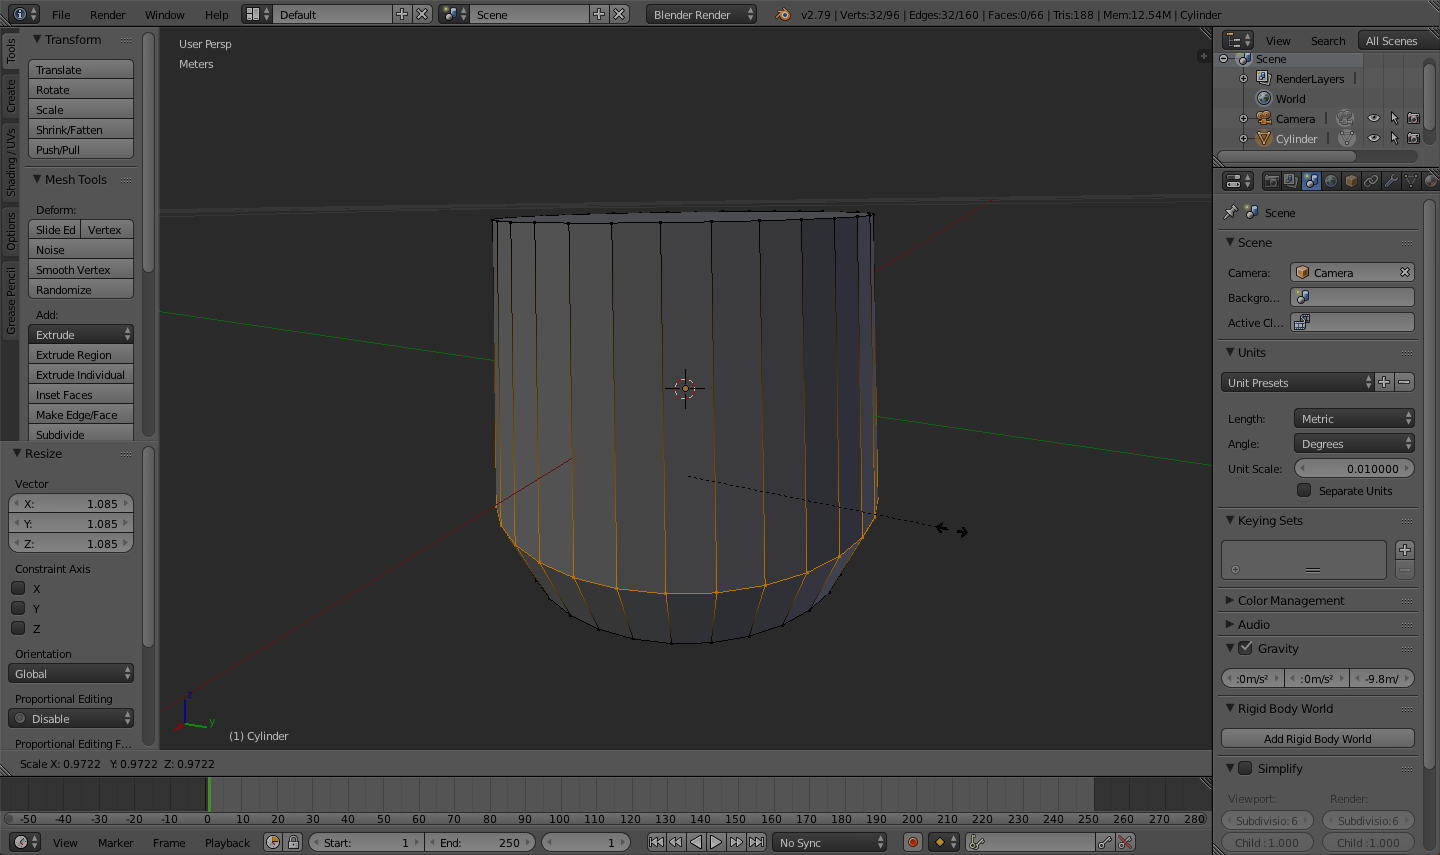
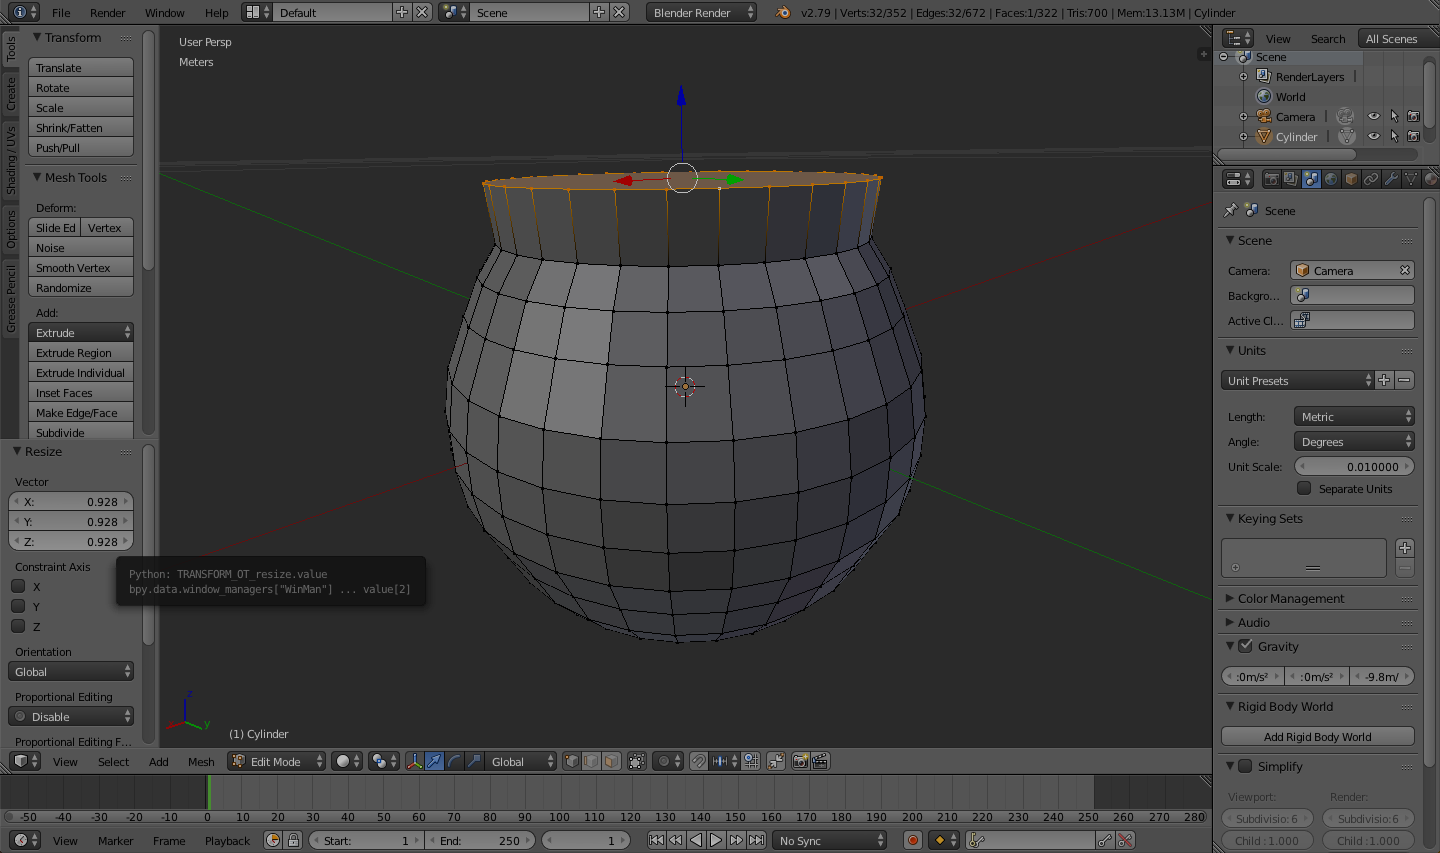
This is where you start adding some definition to your teapot!
- With the cylinder selected, press tab on your keyboard to enter Edit Mode
- Press CTRL + R to add a loop cut
- Hover over the cylinder and left-click when the purple line is surrounding the center of the cylinder
- Move your mouse down to bring the loop cut near the bottom of the cylinder and left-click
- Press S and move your mouse to adjust the radius to your liking
- Left-click once more to lock your radius in place
Great job! You can keep adding loop cuts on the cylinder until it starts to look like the teapot you're going for. Don't give up on the somewhat-unconventional feel of selecting and modifying the model! Being patient and learning how to use it is well worth it!
If you need to make the cylinder taller while in Edit Mode, here are some quick steps to make that happen:
- Hold ALT and left-click the top circumference of the cylinder
- Press G to grab and Z to only move it along the z-axis
- Move your mouse to adjust the height of the cylinder
- Left-click to lock your adjustment into place
After following those steps, you can also set the exact height by adjusting the z vector translation in the left toolbar.
Onward to adding the top opening!
Open the Teapot
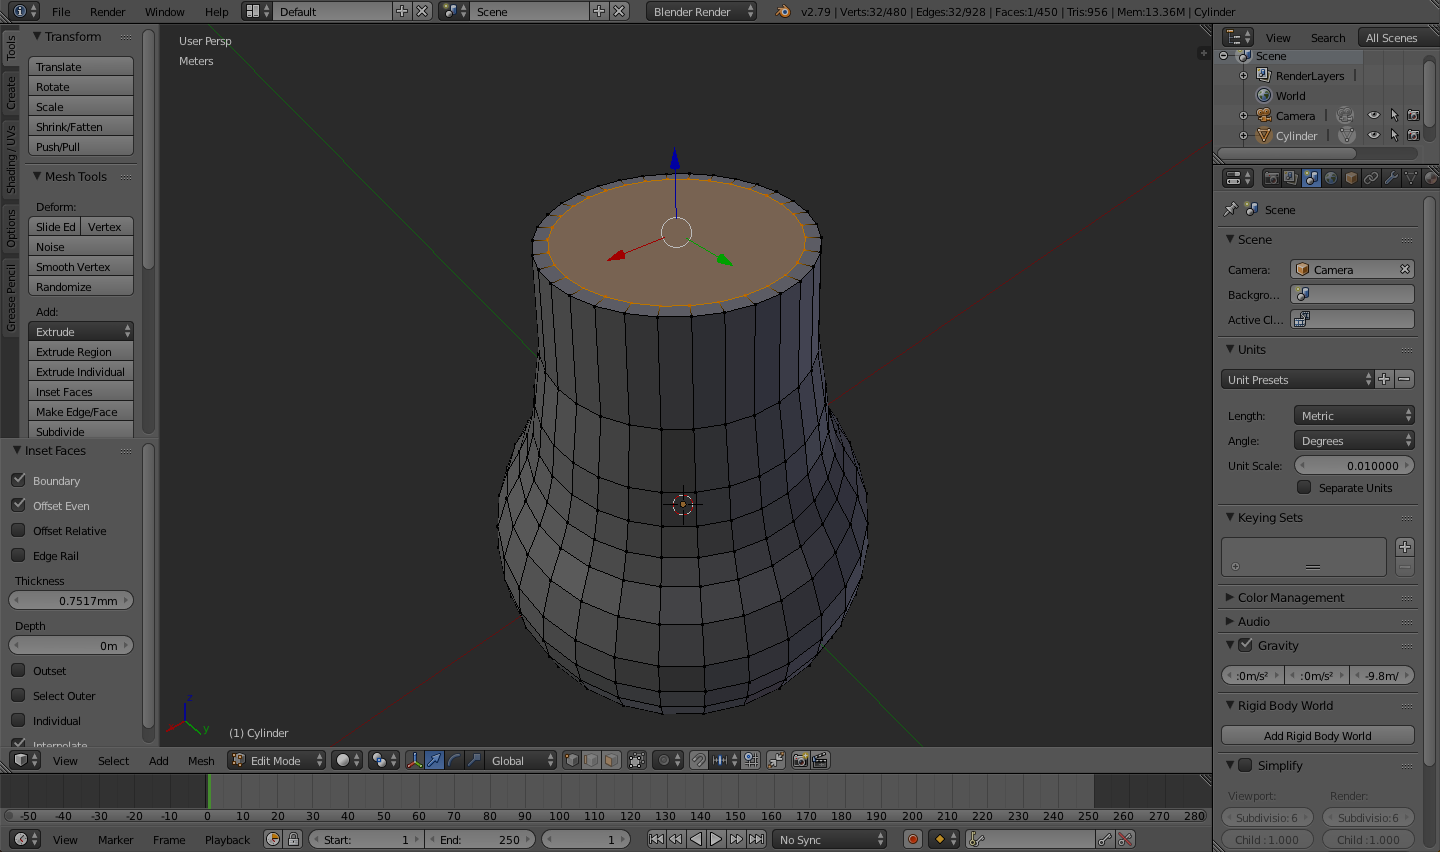
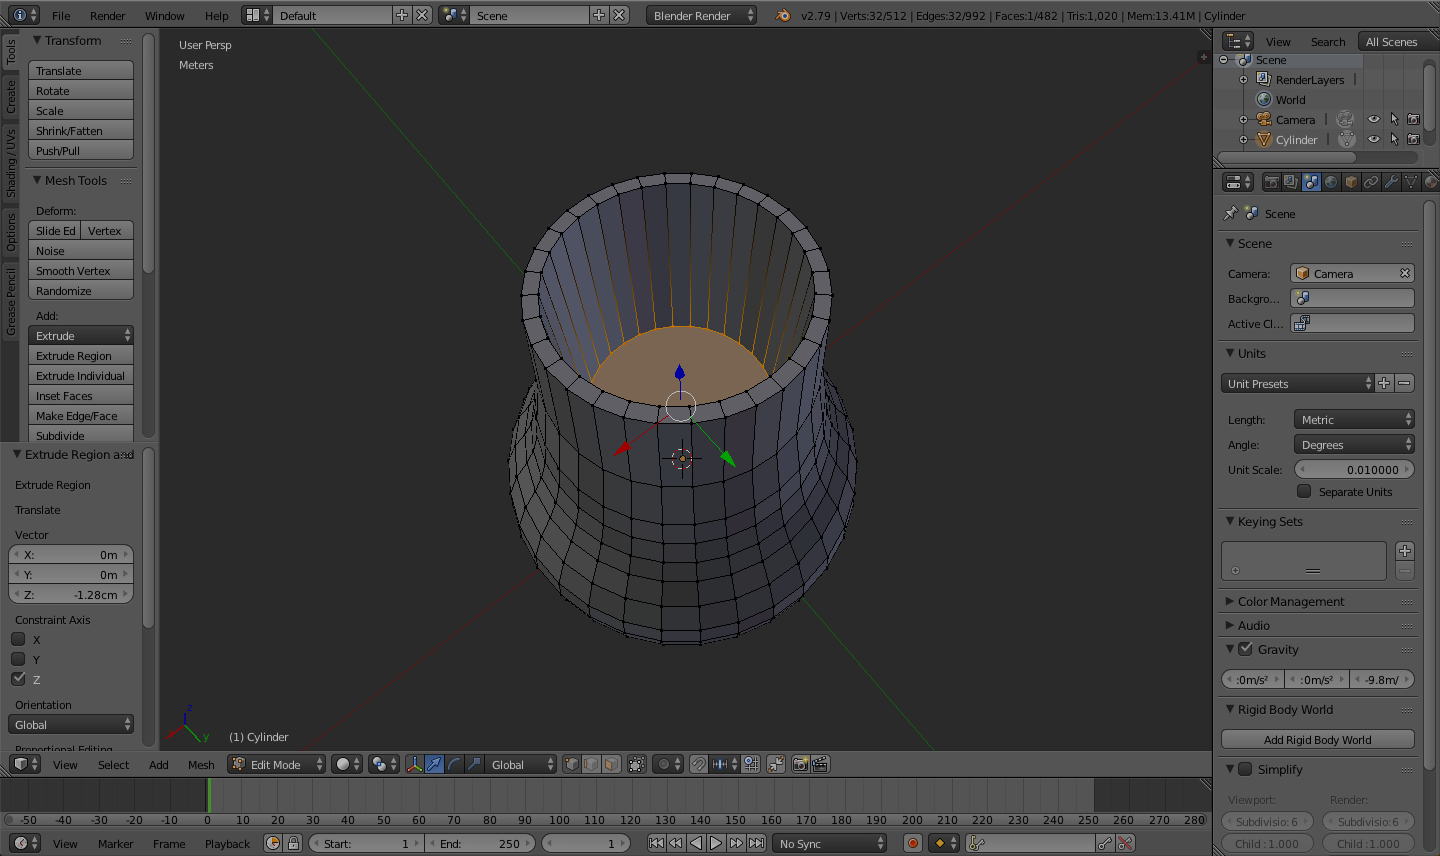
It doesn't take much effort to add a hole to this teapot!
- Hold ALT and left-click the top circumference of the cylinder
- Press I and move the rim to the thickness you'd like, followed by a left-click
- Press E and move your mouse to the depth of hole your plant will need
- Left-click to lock your changes
Now, we'll add a handle!
Add a Handle
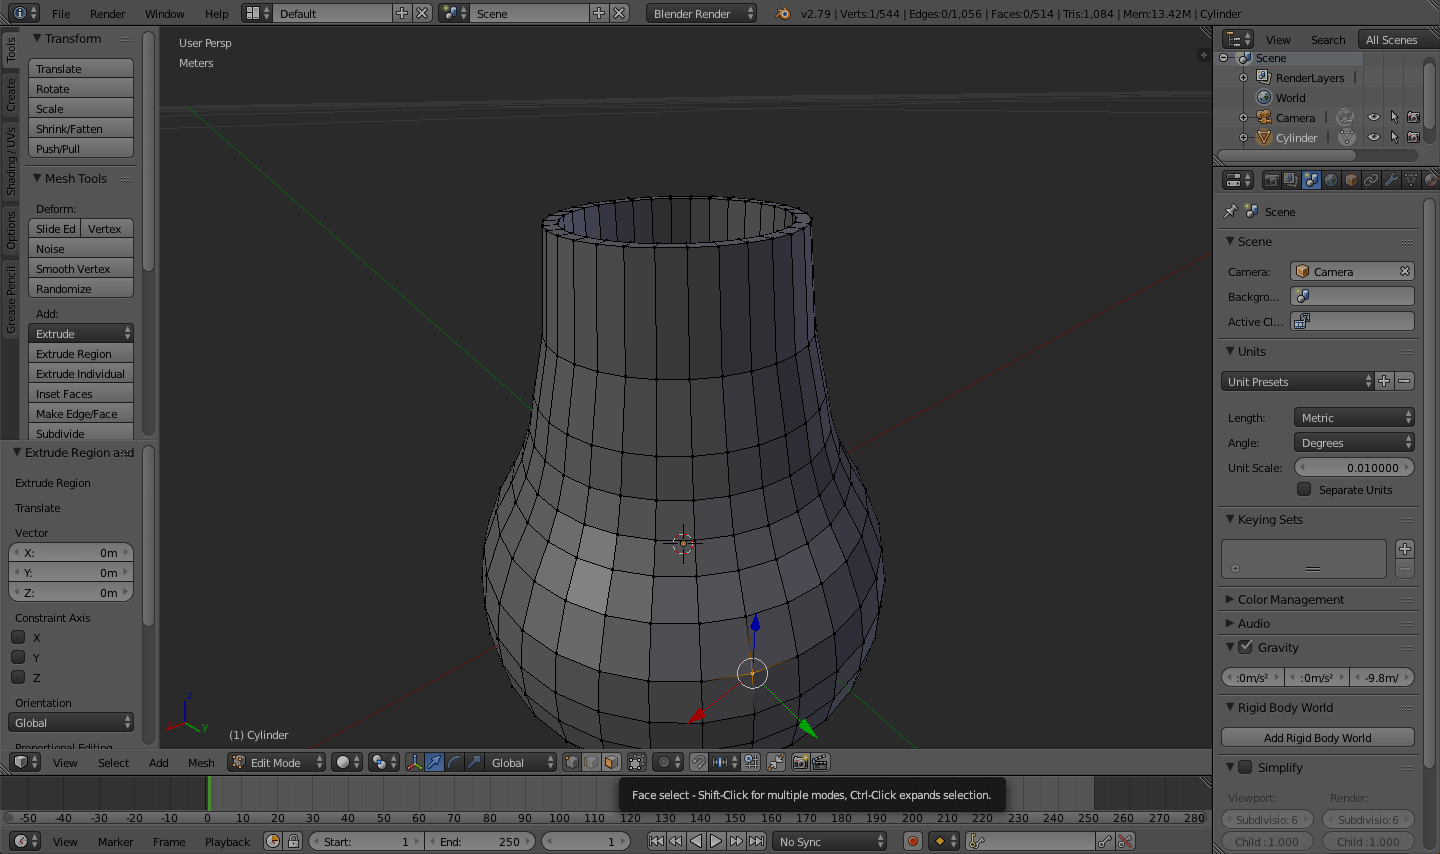
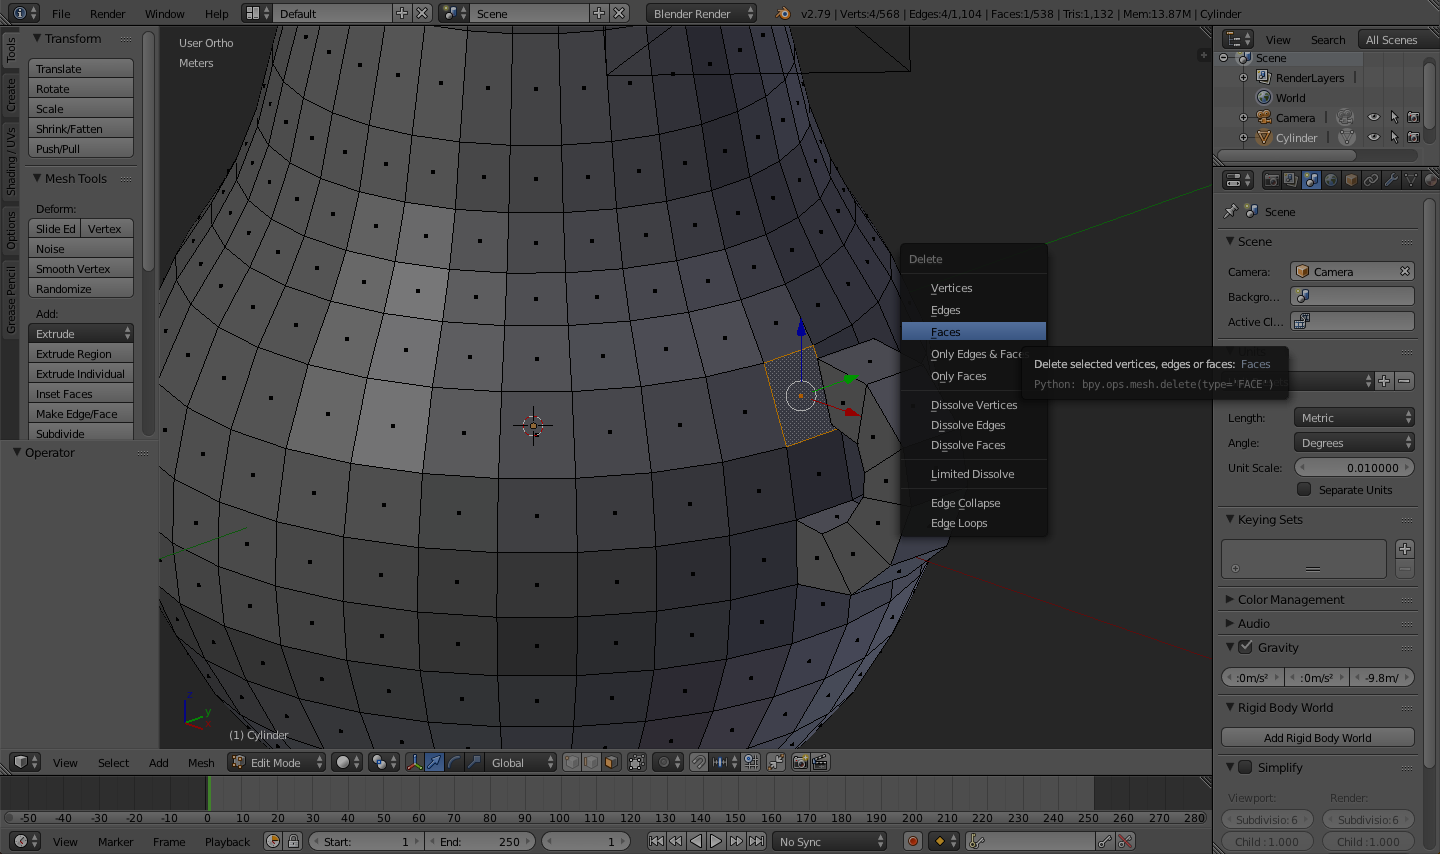
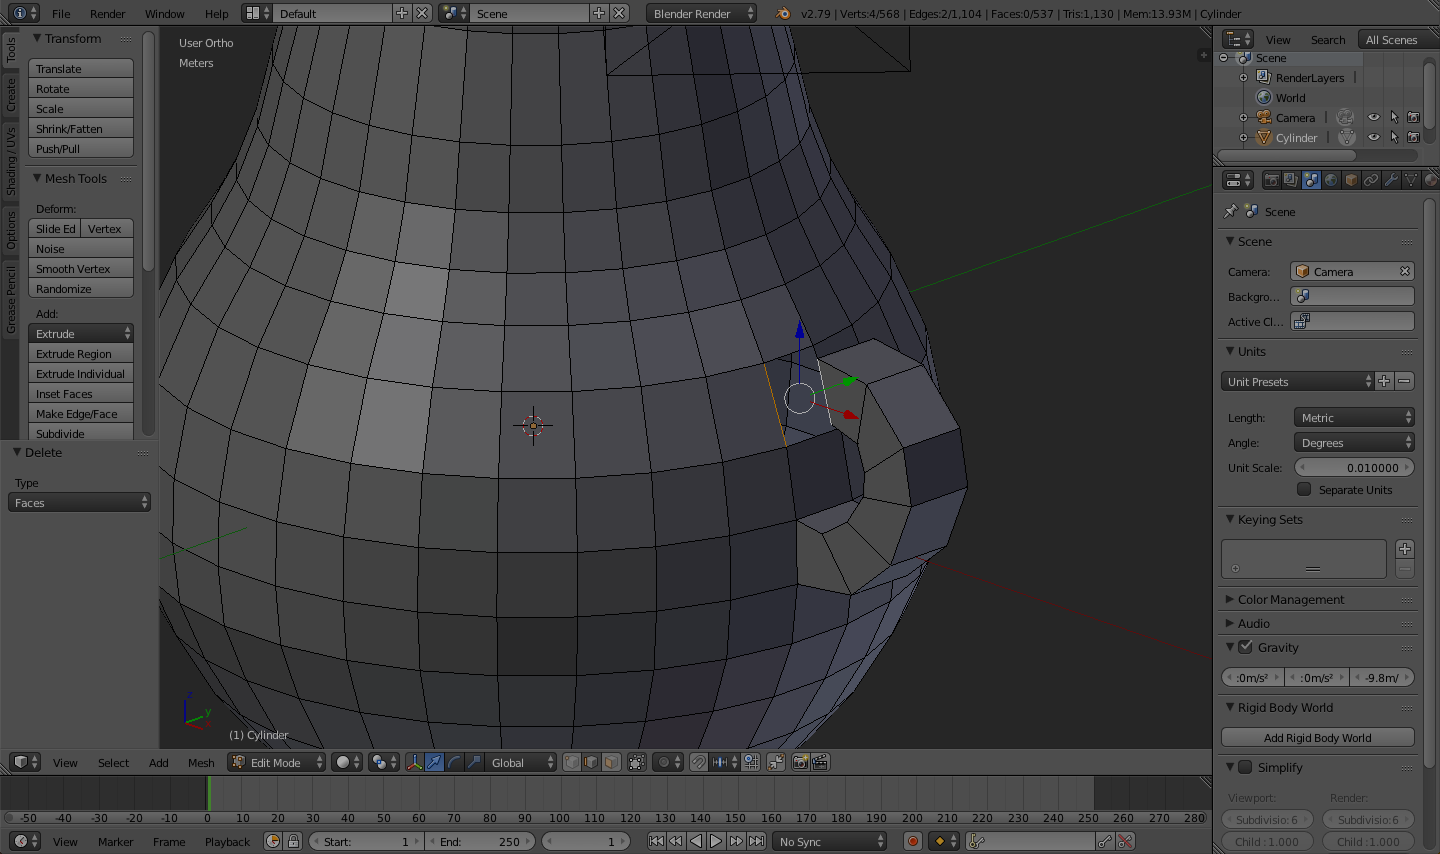
This is one of the trickier additions, but it shouldn't be perfect!
- Enable Face Select mode
- Left-click the face where you would like the base of the handle
- Press E and move it out until it's to the point where it should curve, then left-click
- Press R to rotate, then X or Y to lock the rotation to that axis
- Repeat steps 3 and 4 until the handle is nearly curved all the way back to the teapot body
- Left-click the face you are going to connect the handle to and delete it (X => Faces)
- Enable Edge Select instead of Face Select
- Left-click the an edge of the open face and, holding Shift, select the edge nearest it on the handle
- Press F to create a face
- Repeat steps 8 and 9 until all edges are connected to the body by a face
Next we'll add the spout!
Add a Spout
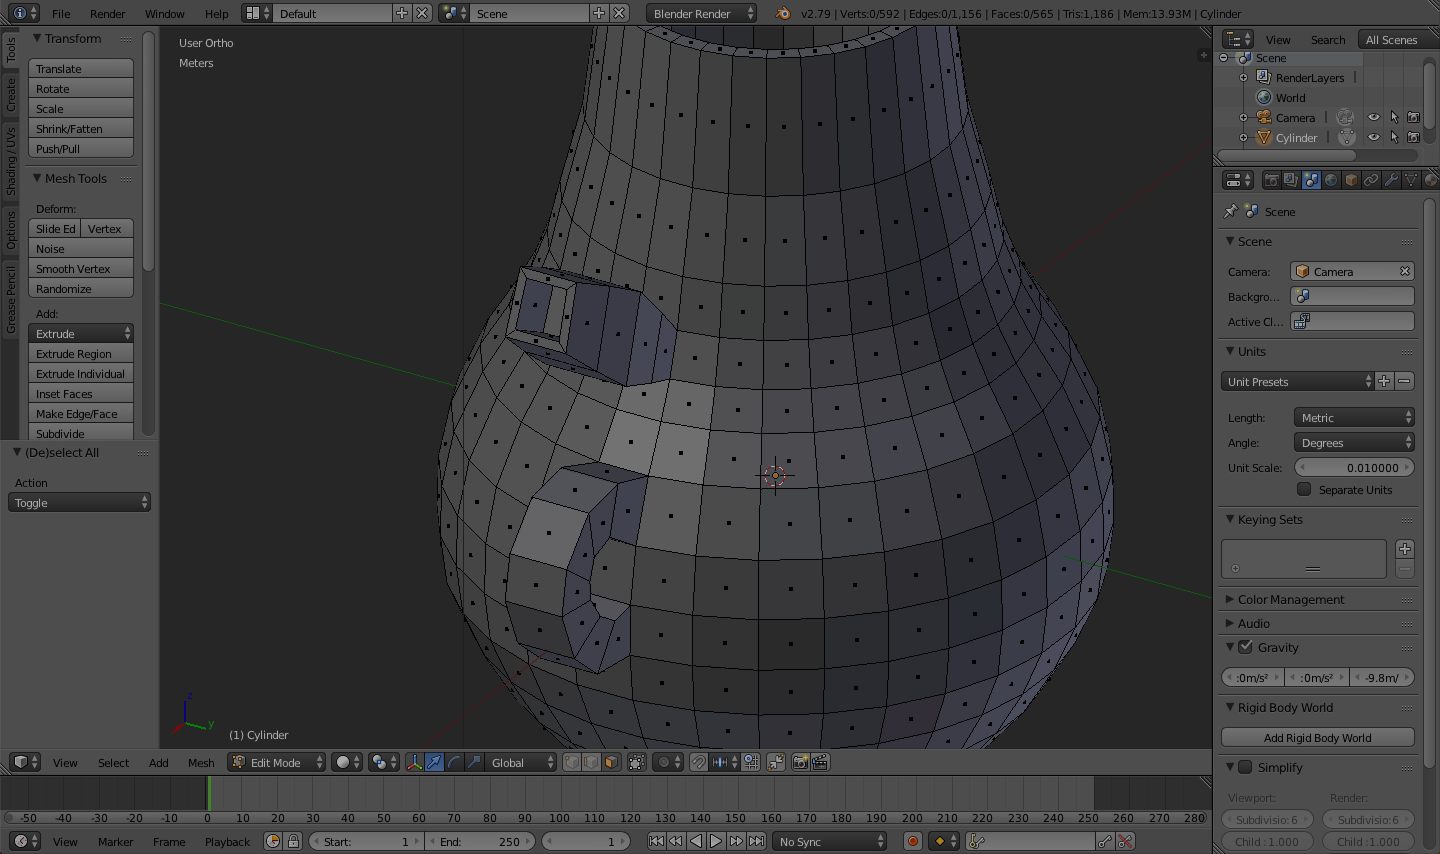
Really, this step is a combination of the last two. To give you some practice, I'm going to challenge you to make your own spout. It won't take any steps you haven't already learned so far! I've included mine as an example, but I urge you to create the spout of your dreams.
Next, we'll prepare our teapot for 3D printing!
Smooth Out the Model
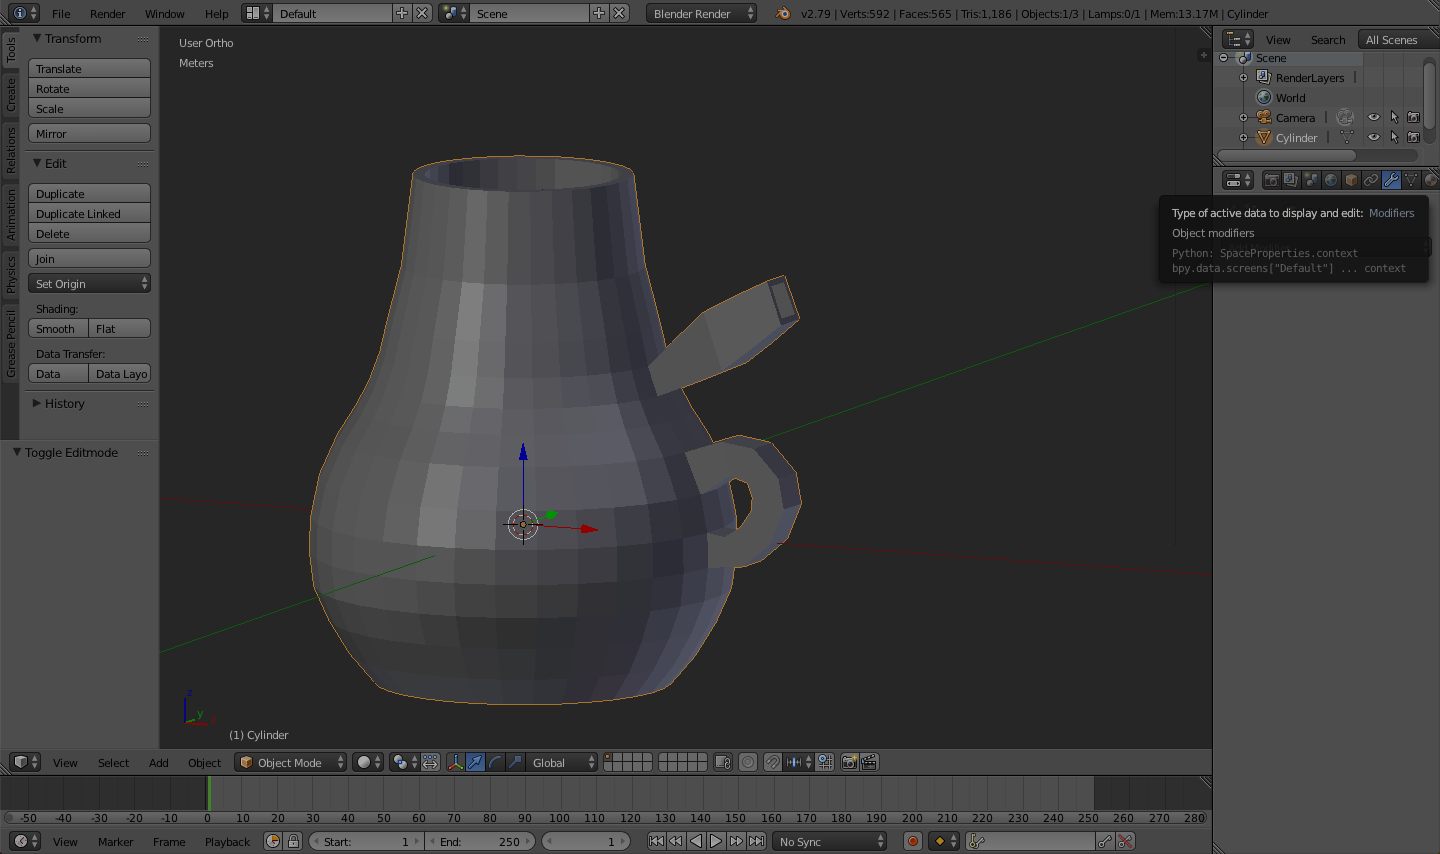
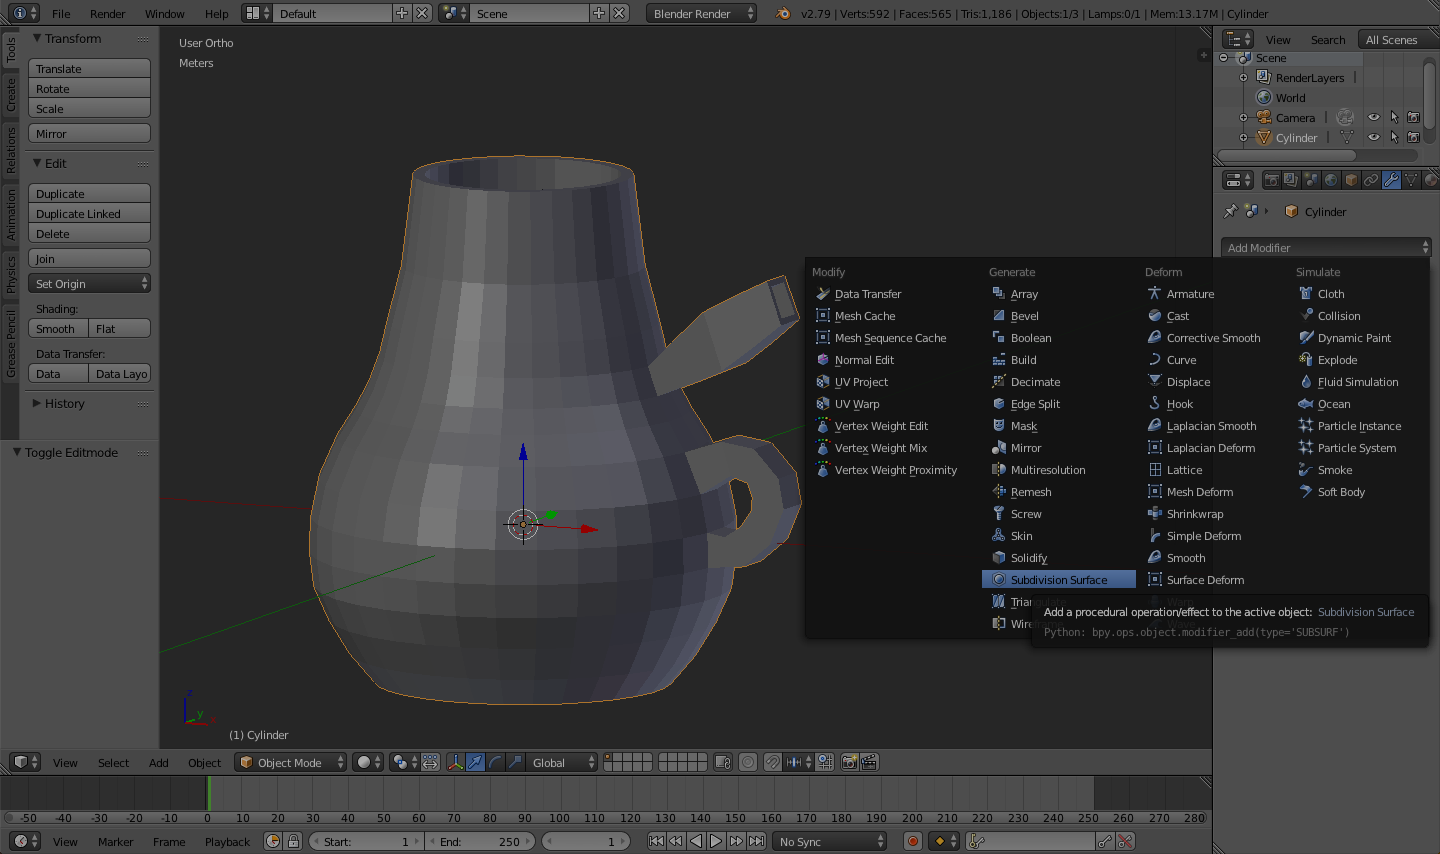
Up to this point, the teapot has looked pretty blocky. No worries! We're going to add a Subdivision Surface that will make the model as smooth as you'd like.
- Press TAB to exit Edit Mode
- Go to the modifiers tab in the right toolbar and add a Subdivision Surface modifier
- Bump up the View subdivisions until the model is nice and smooth (but don't get too crazy with it!)
- Click Apply
Now we're going to do some last-minute checks before printing!
Check Open Faces and Overhang
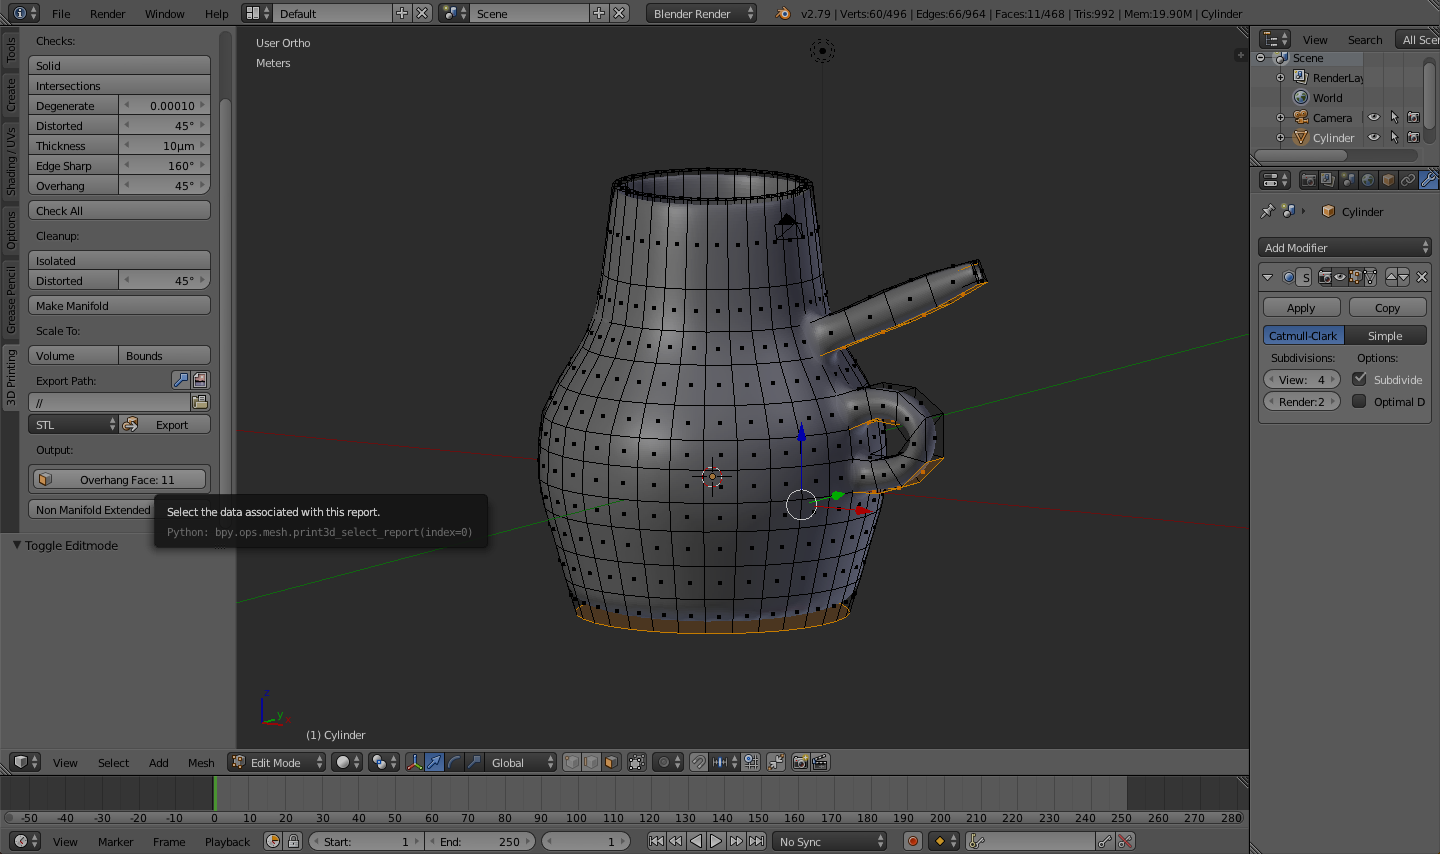
Before sending the model to your slicer, it's a good idea to check for errors that won't be handled very well by your print: mainly unclosed faces and overhangs.
While in Edit Mode, in the left toolbar, you should see a tab labeled 3D Printing. If not, you'll want to go back to User Preferences and make sure you enabled the 3D Print toolbox correctly. You can check as many or as few of the options available in the tab, but I recommend you at least check Solid and Overhang by left-clicking on their labels inside of the left toolbar. This should give you a good idea of what to expect for supports. Just don't move on without ensuring you have 0 open faces!
Finally, we'll export our model for printing!
Export STL
This step is easy! Inside of the 3D Printing tab, choose your export path (where you want the STL file to be saved), and left-click Export. You're ready to import the planter into your 3D slicer!
I'd recommend settings for your print, but I don't own a 3D printer to test this out. Since I can't print my own, I'd love to see your prints or hear about your progress in using Blender. Make sure to let me know in the comments!
Thanks for reading!