Tipping Bucket
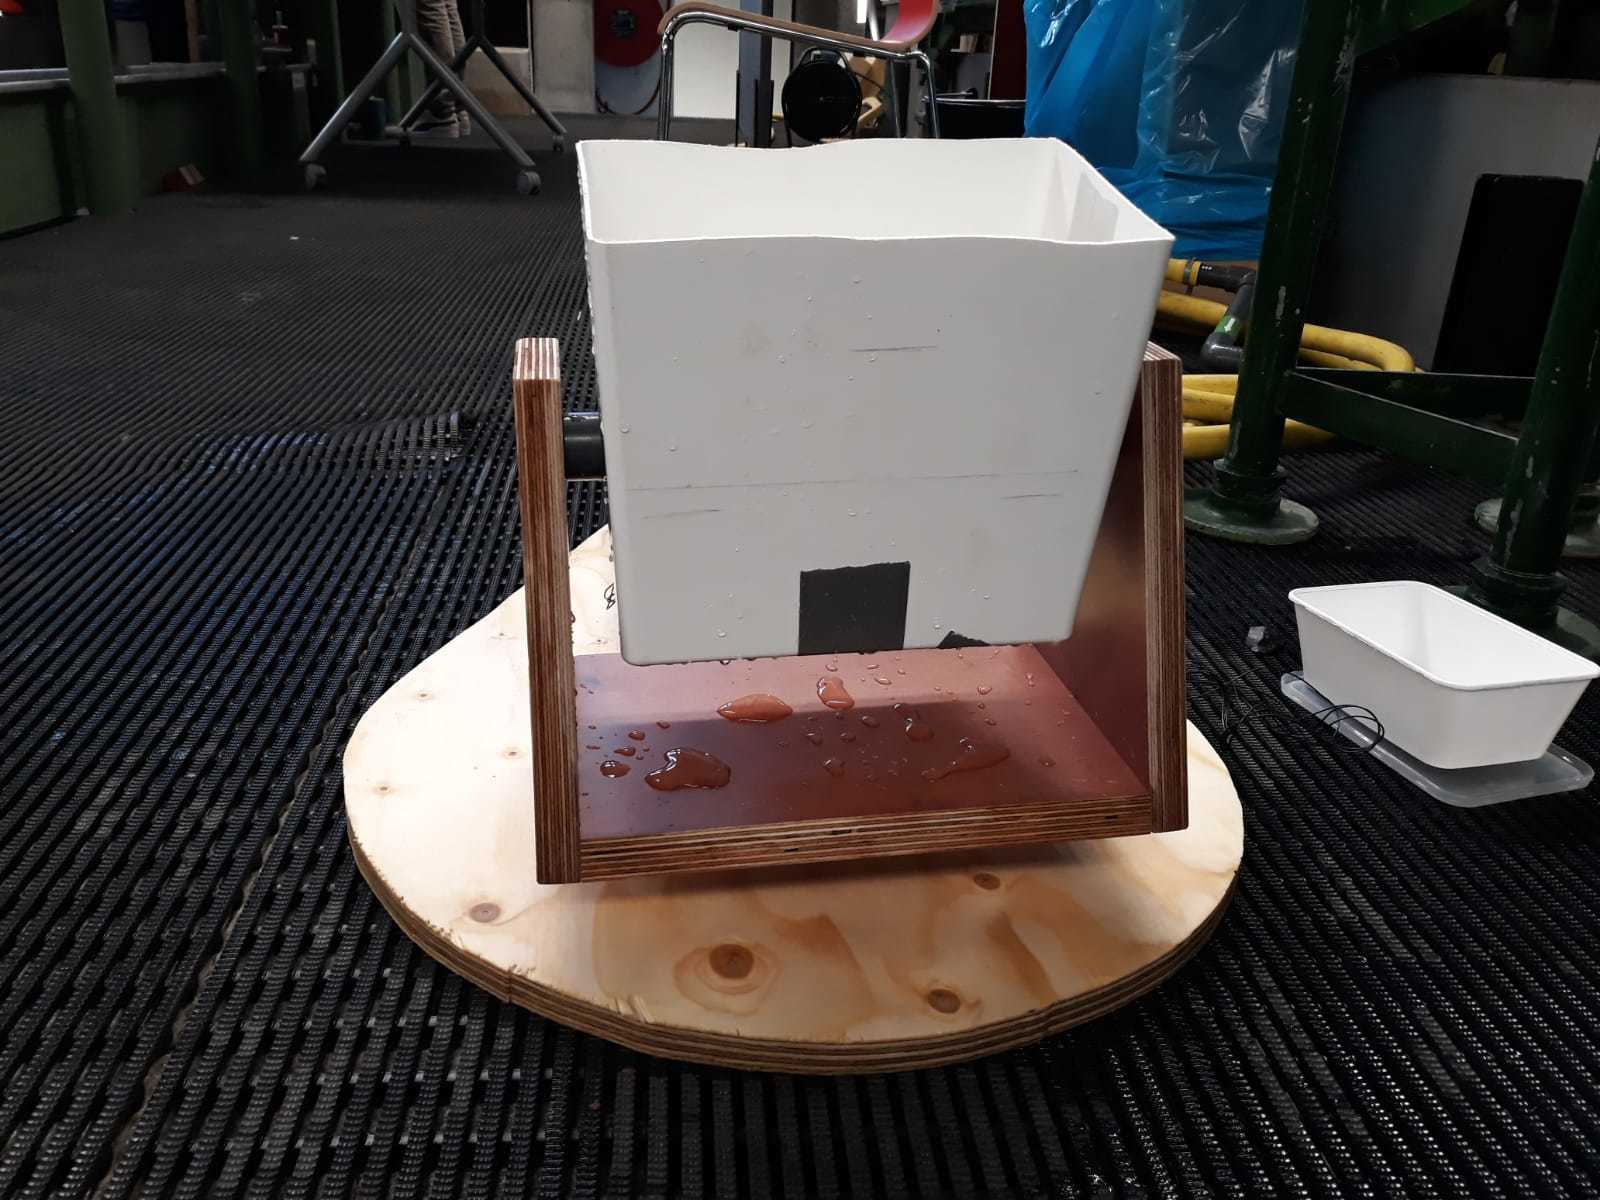
Welcome to this instructable to make a tipping bucket. For an assignment of ''Measurement for Water'' we created a tipping bucket to measure a low discharge. In this instructable we will explain how to make your own tipping bucket so that you can measure discharge yourself!
First, collect all the supplies needed.
Supplies
- Breadboard 400 points
- Particle Photon
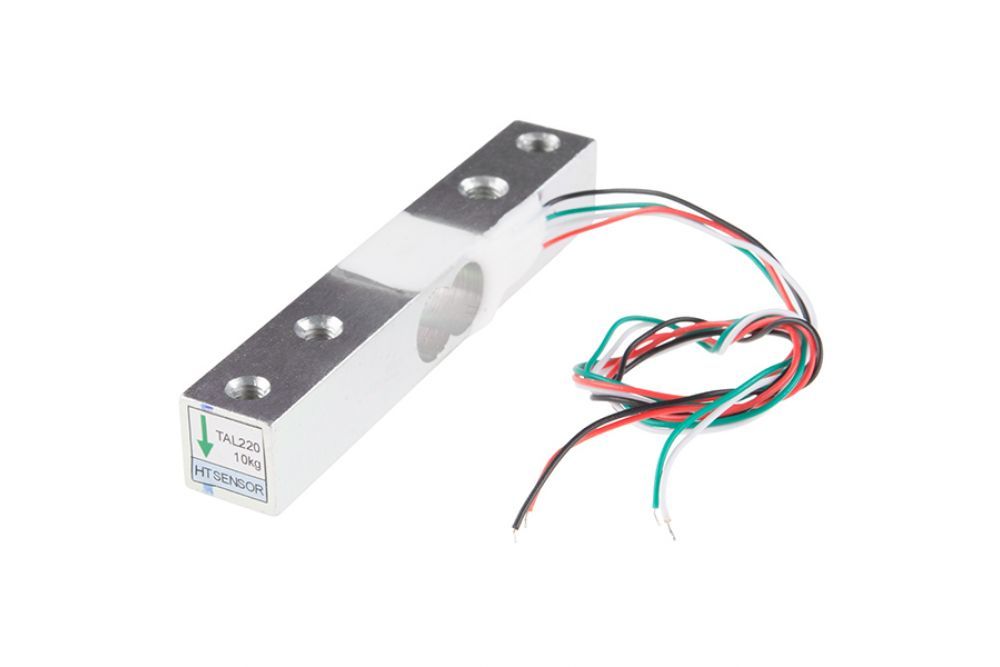
- Load cell - 10 kg
- Load cell amplifier
- Breadboard wires
- 8 dupont male/female breadboard jumper
- shuttering plywood (betonplex)
- residual wood
- IKEA trash bin ''Filur, 10 L''
- PVC pipe with a solid core
- Metal pin
- Screws
- Weight
- Ducttape
- Super glue
- Glue gun
- Soldering iron
- Heat Shrink Tubings
- Saw
Install Your Particle
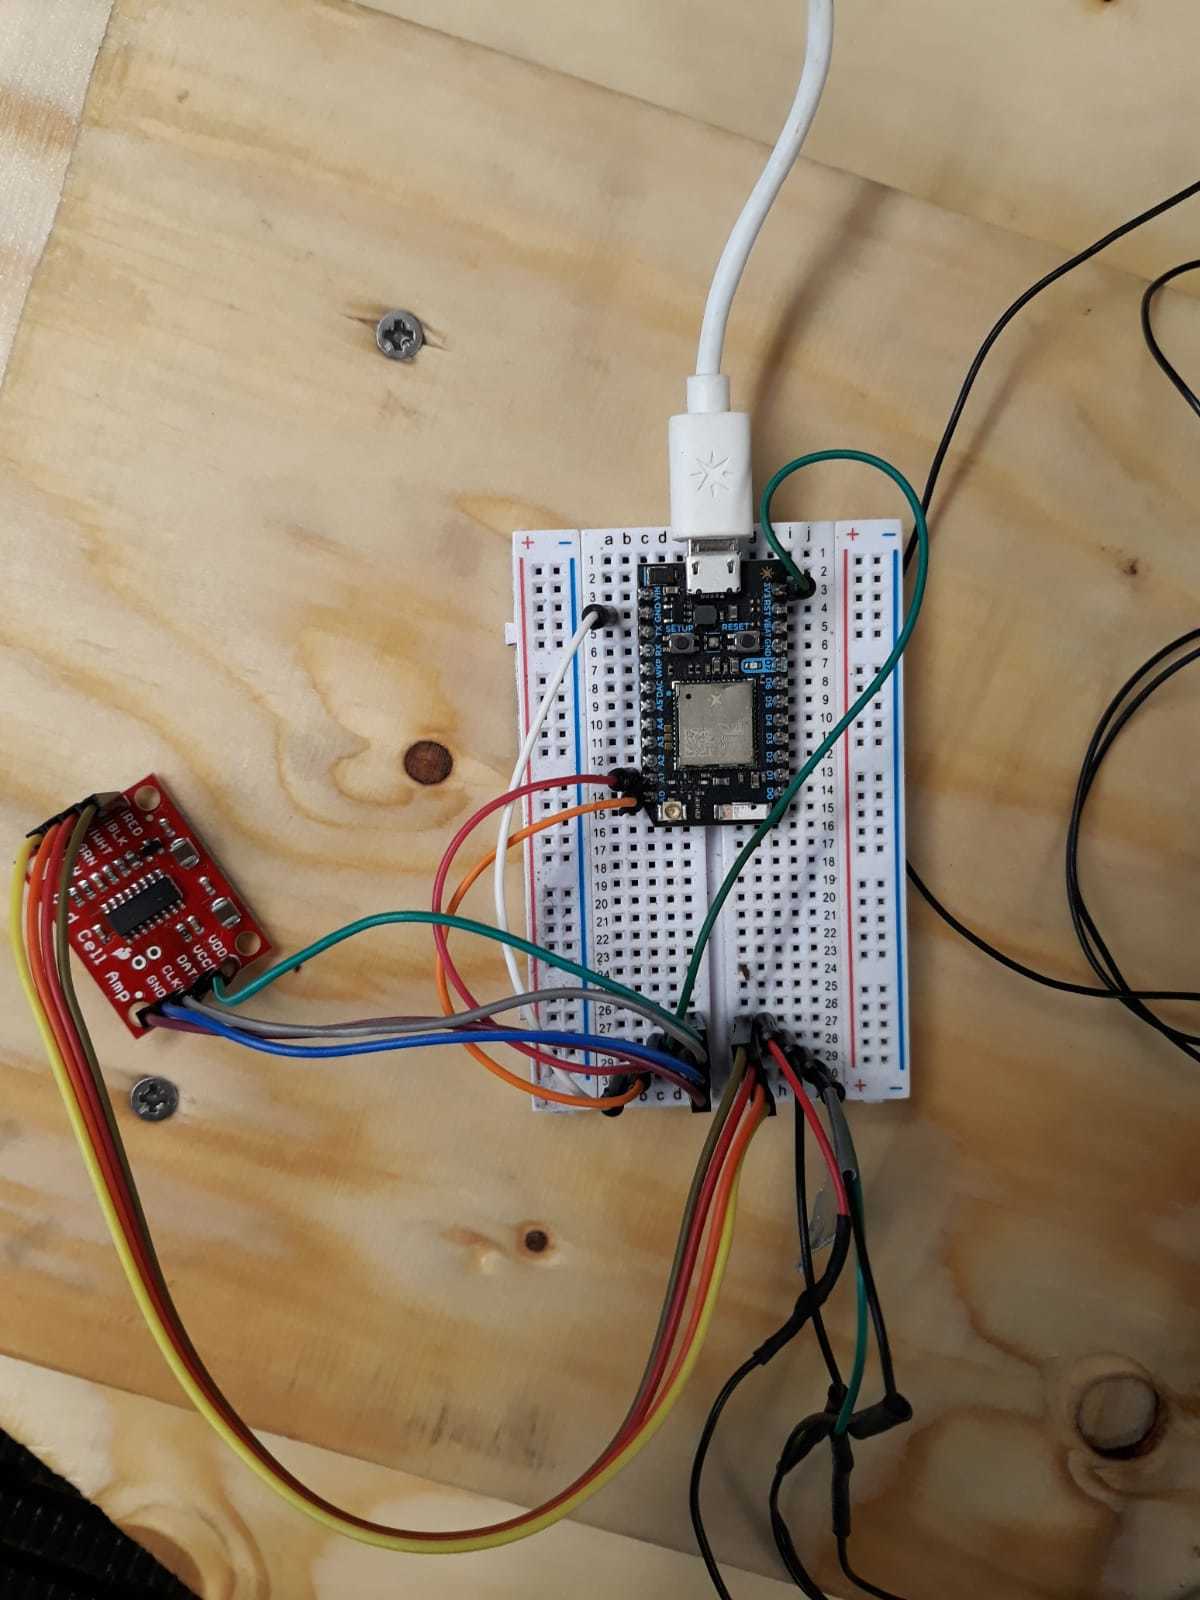
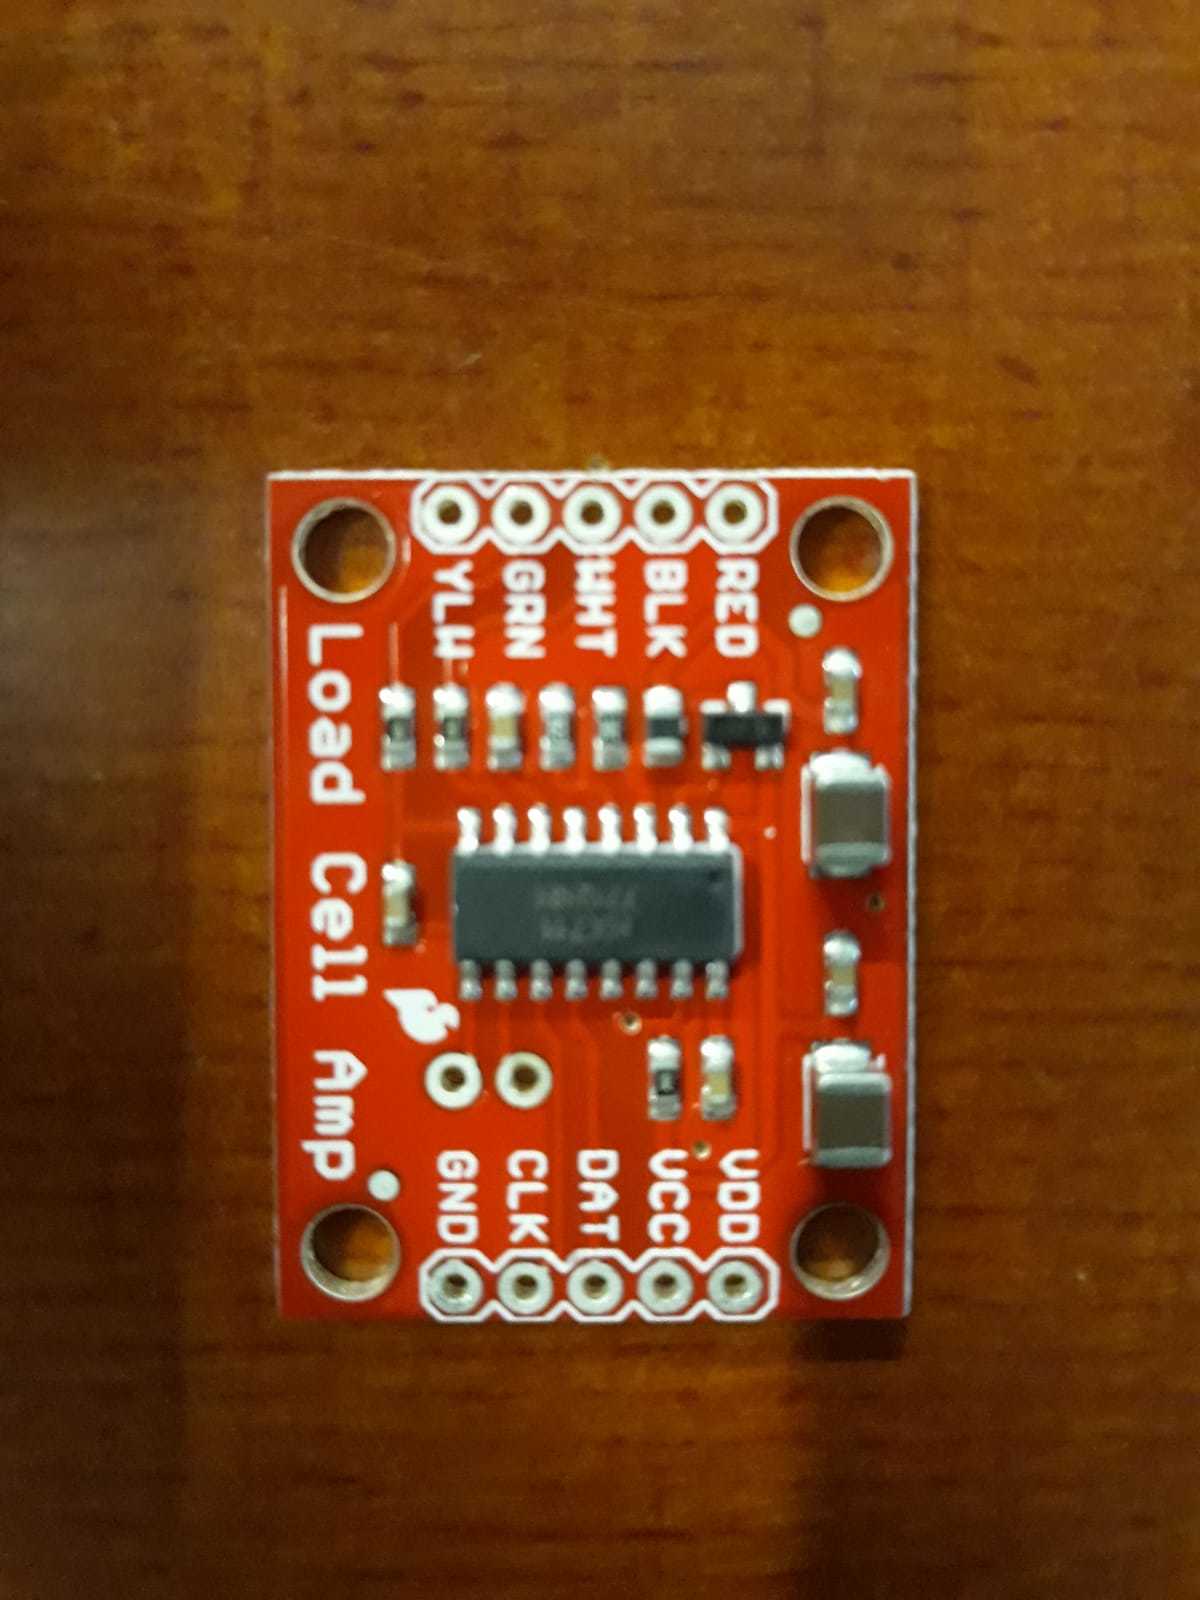
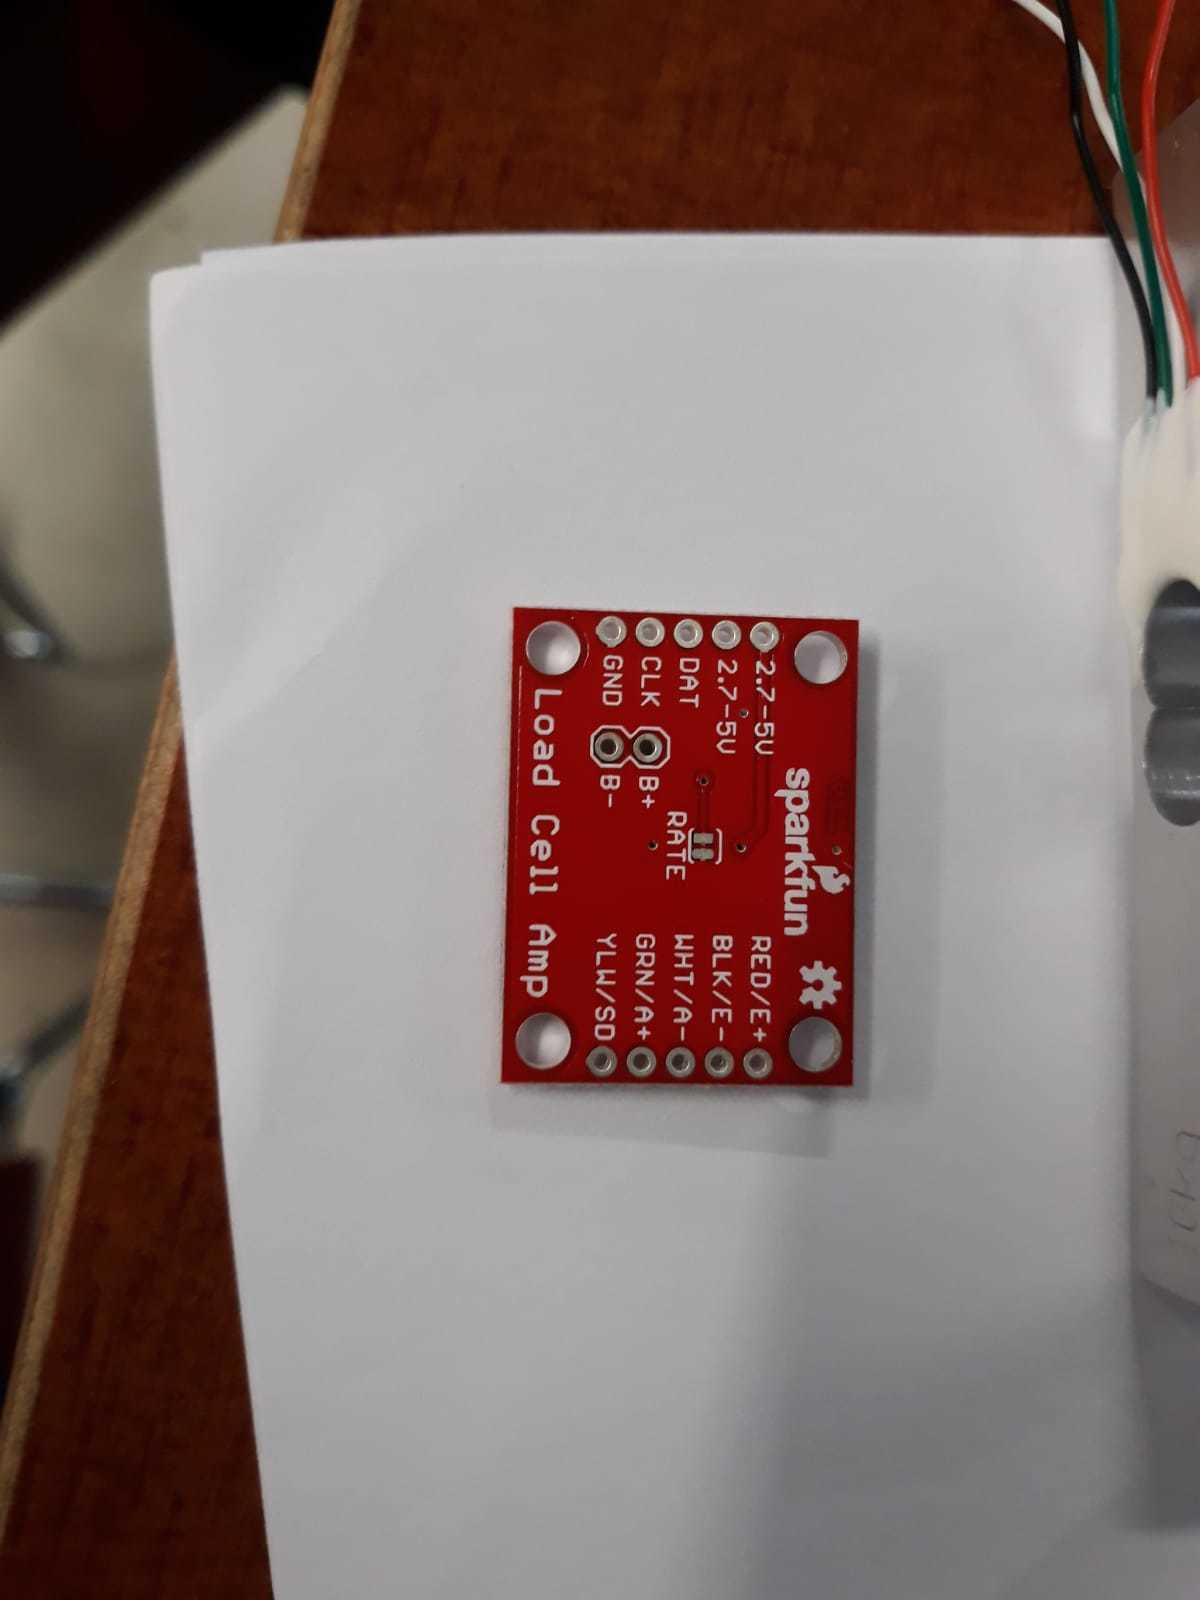
First we decided to install our particle.
1. Place your particle on your breadboard
2. Extend your wires of the load cell to 1.5 meters, securing your particle will not get wet (make sure to put the heat shrink tubings on)
3. Solder the amplifier pins with short ends in your amplifier
4. Connect the dupont male/female breadboard jumpers with the amplifier and breadboard
-----------------------------------------------------------------------------------------
5. Connect the load cell with the amplifier
- Connect the red wire of the load cell with ''RED''
- Connect the black wire of the load cell with ''BLK''
- Connect the white wire of the load cell with ''WHT''
- Connect the blue/green wire of the load cell with ''GRN''
6. Connect the amplifier with your particle
- Connect VDD to 3V3
- Connect DAT to A1
- Connect CLK to A0
- Connect GND to GND
Make Your Wires Water Proof
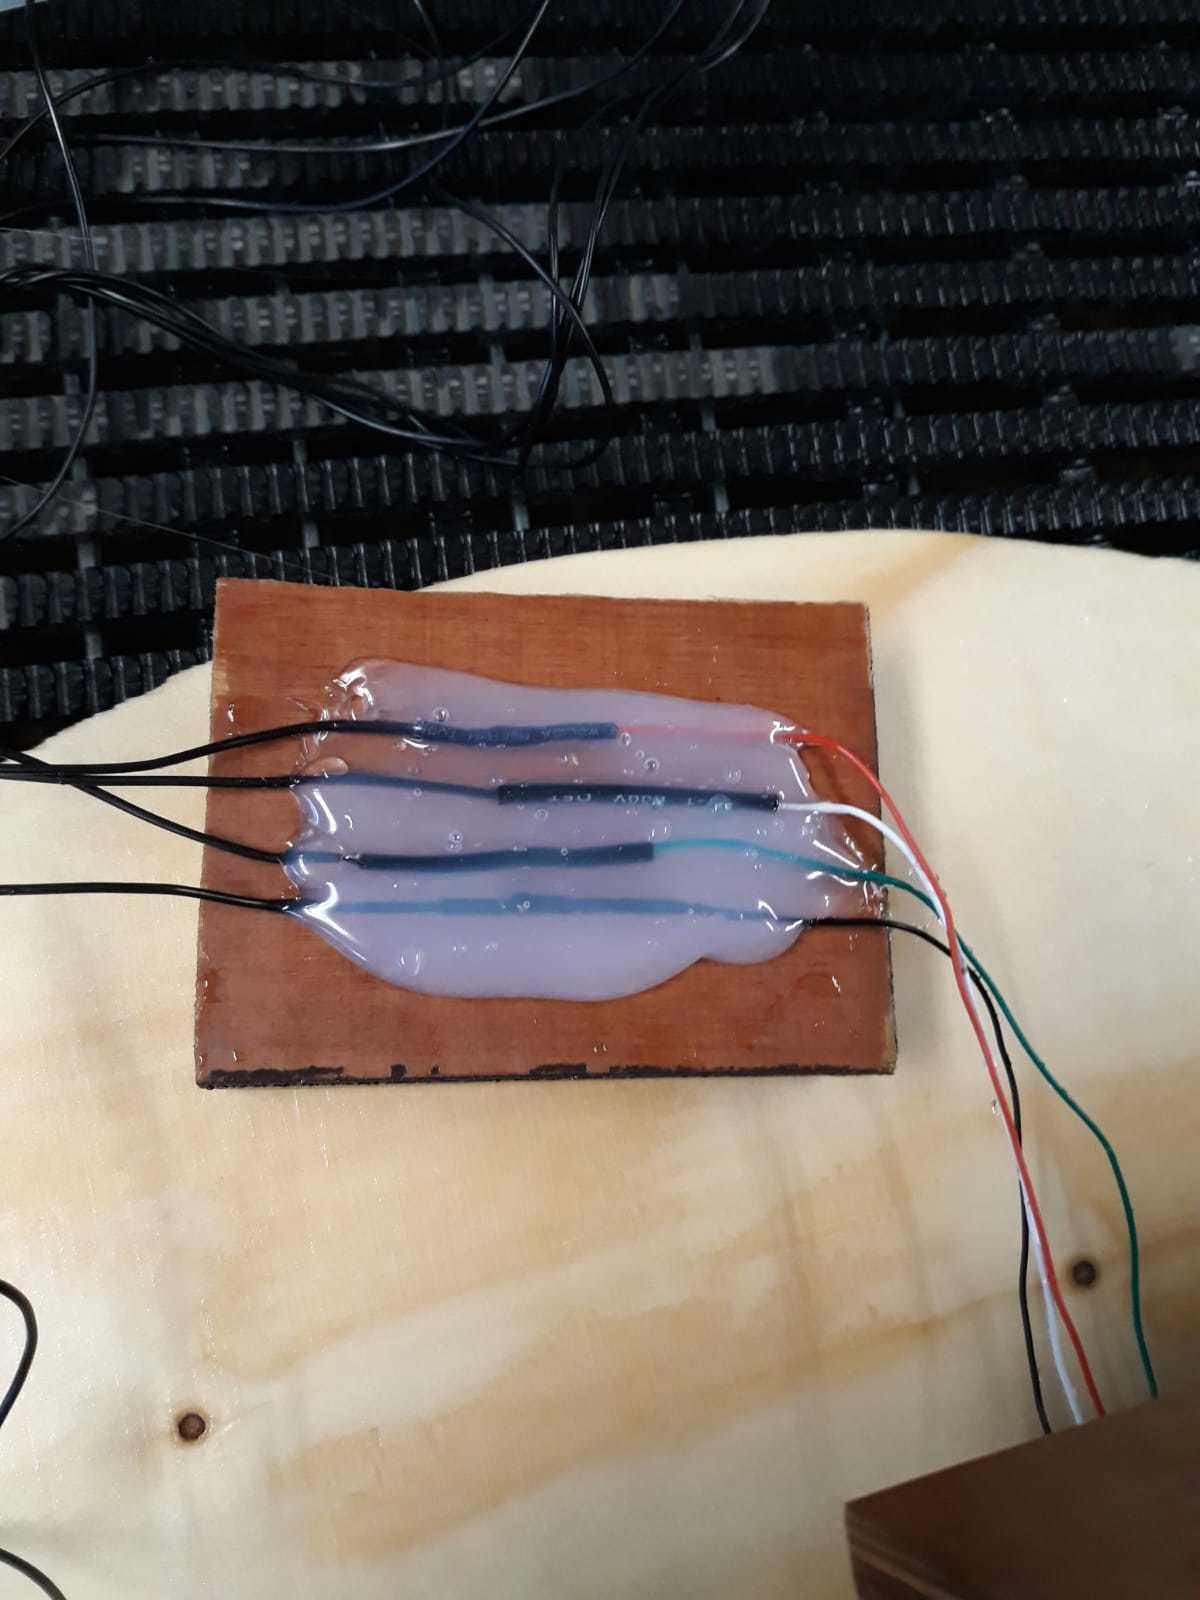
The extensions of the wires of the load cell are close to the tipping bucket. Make sure it's waterproof, otherwise a short circuit may occur.
1. Take a small piece of residu wood (shuttering plywood)
2. Place the wires on it
3. Glue the wires with a glue gun and a lot of glue
Create the Tipping Bucket
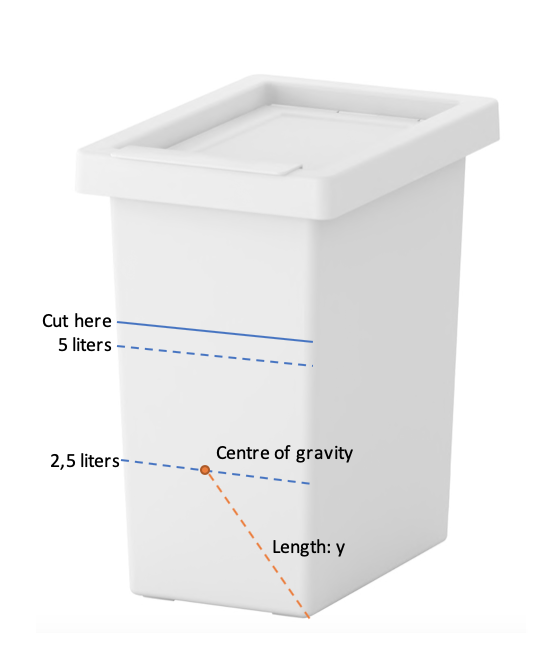
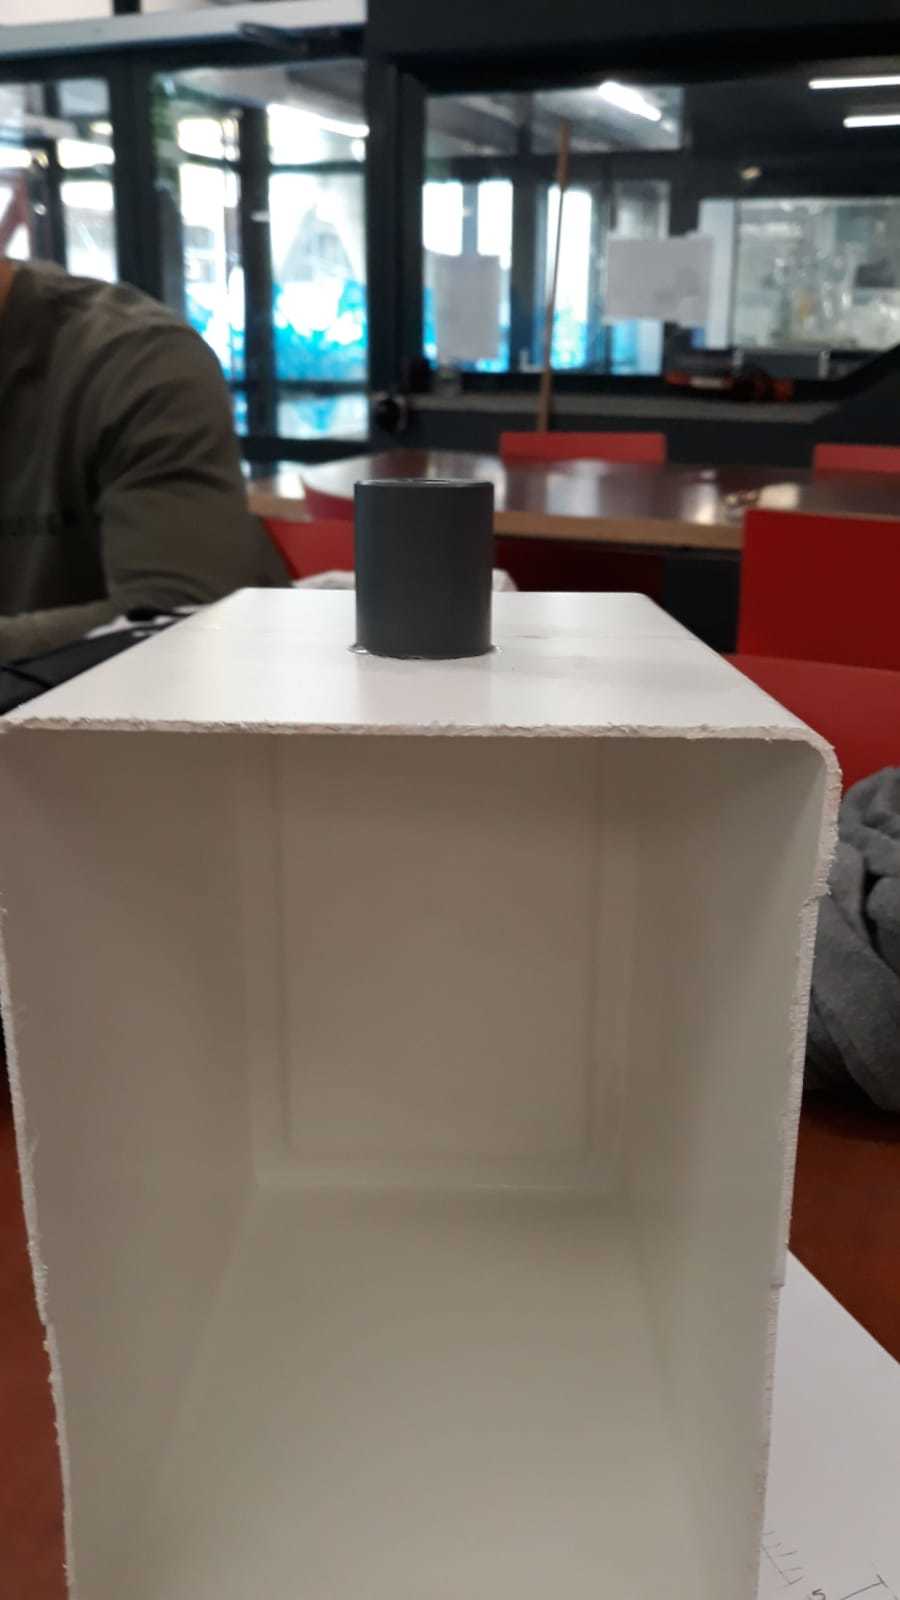
Cutting the IKEA trash bin
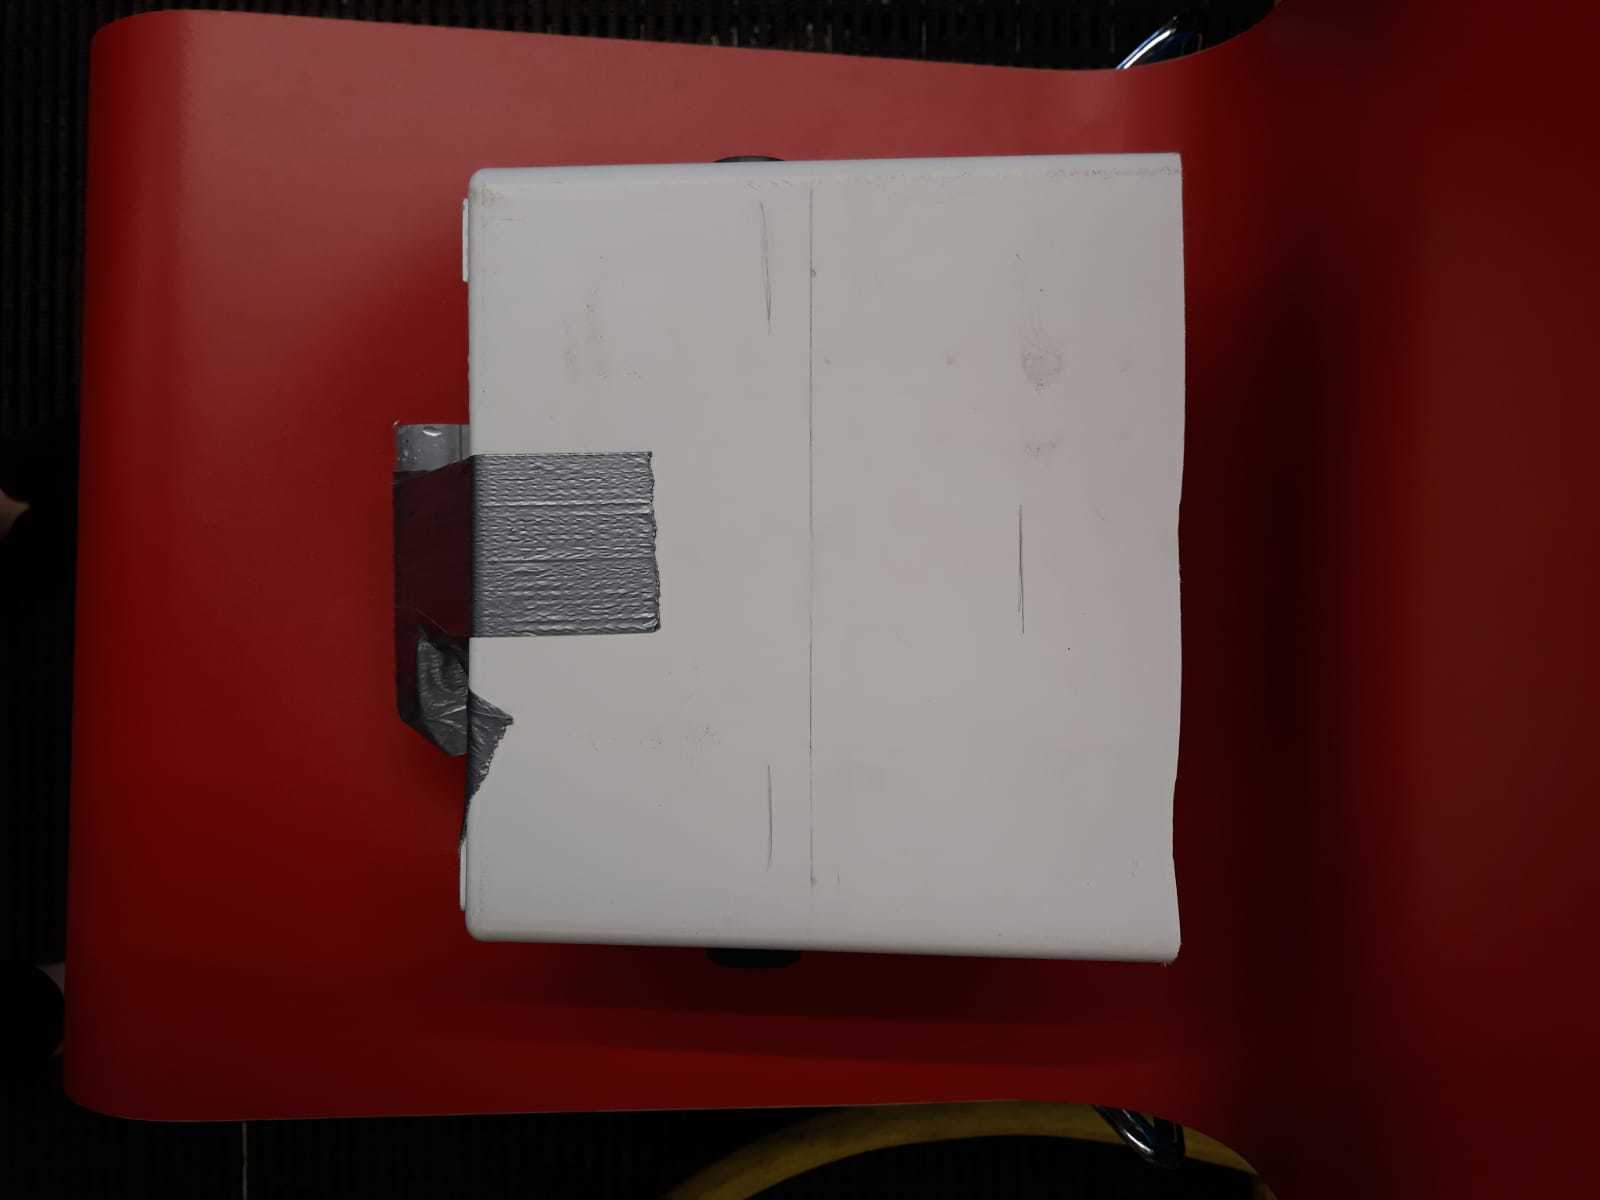
1. Fill the IKEA trash bin with 5 liters of water
2. Draw a line on the outside off the bucket
3. Cut or saw the bucket with a marge of 2 cm above the 5 liters line
Create the construction of the tipping bucket
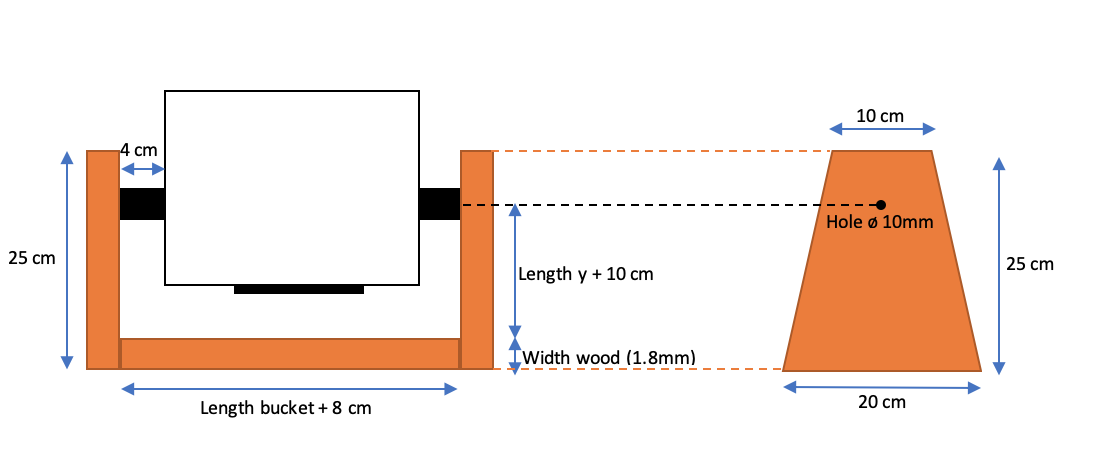
1. Draw a blueprint of the construction
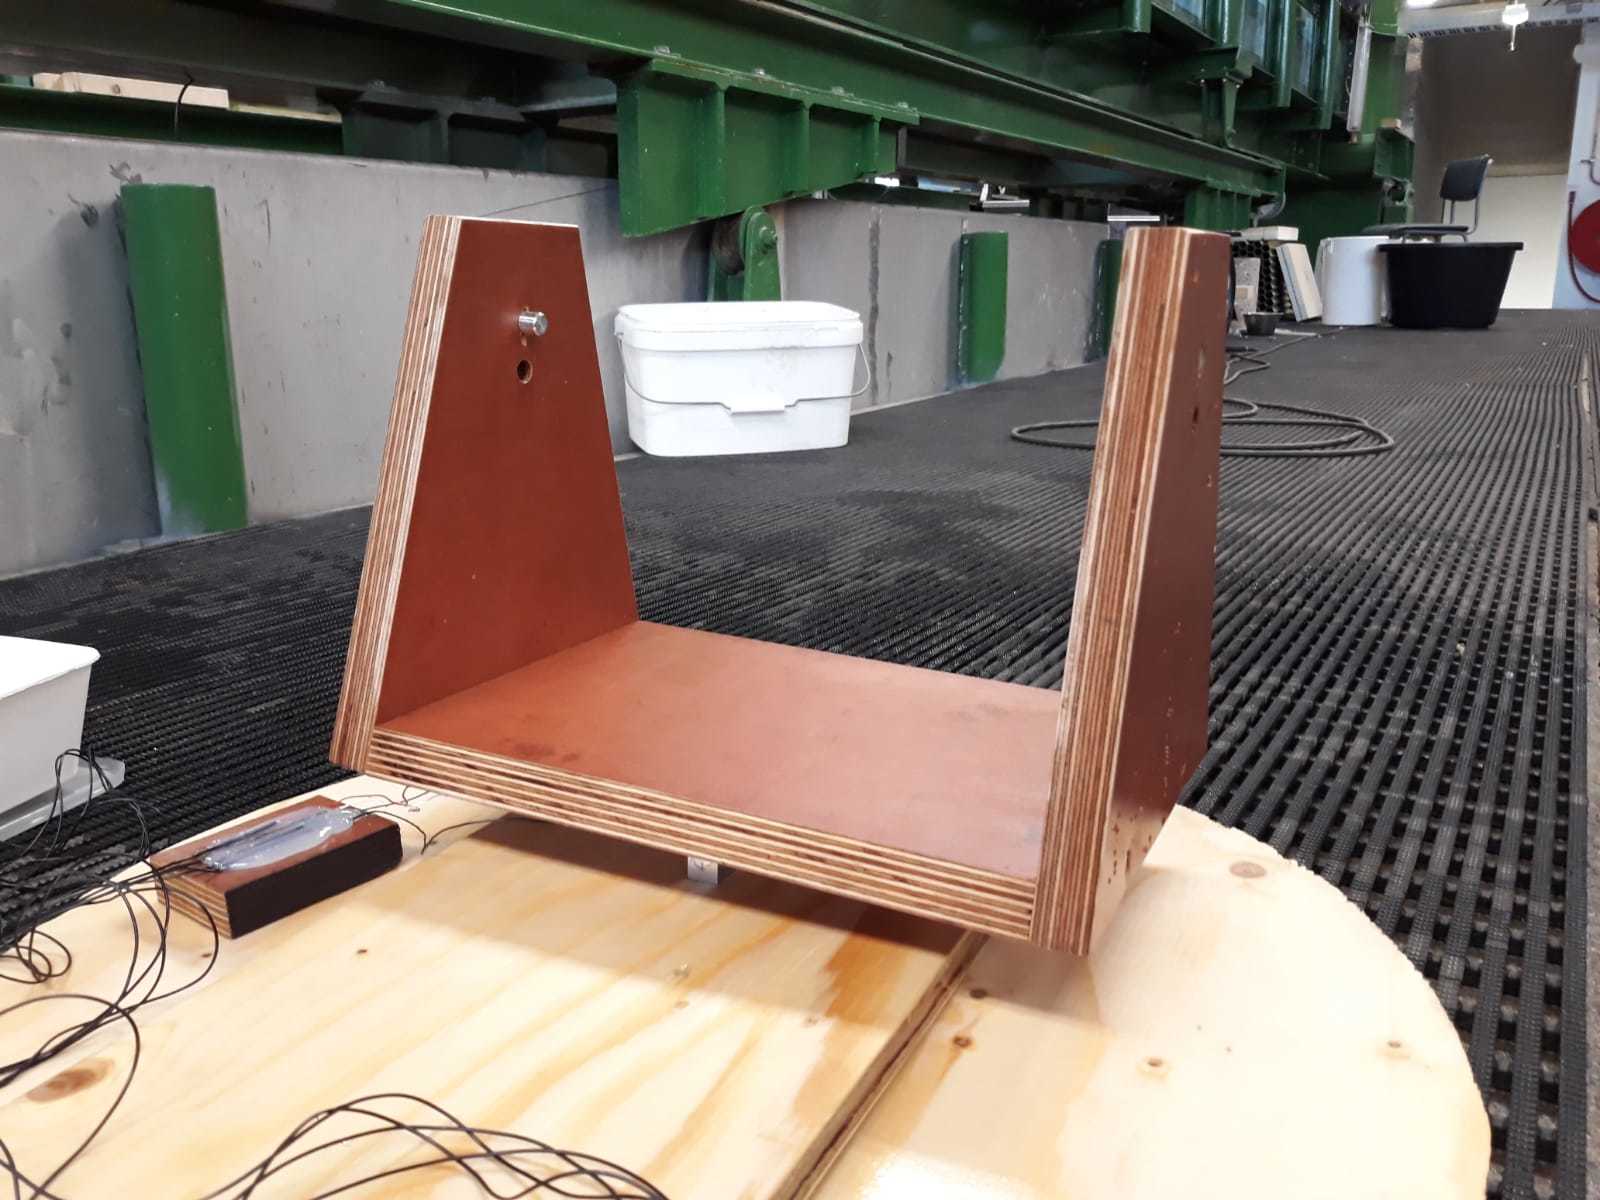
2. Saw the shuttering plywood in the right dimensions
3. Drill a hole of ø10 mm in the shuttering plywood
4. Screw it together
Create the tipping mechanism
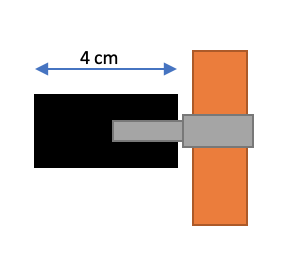
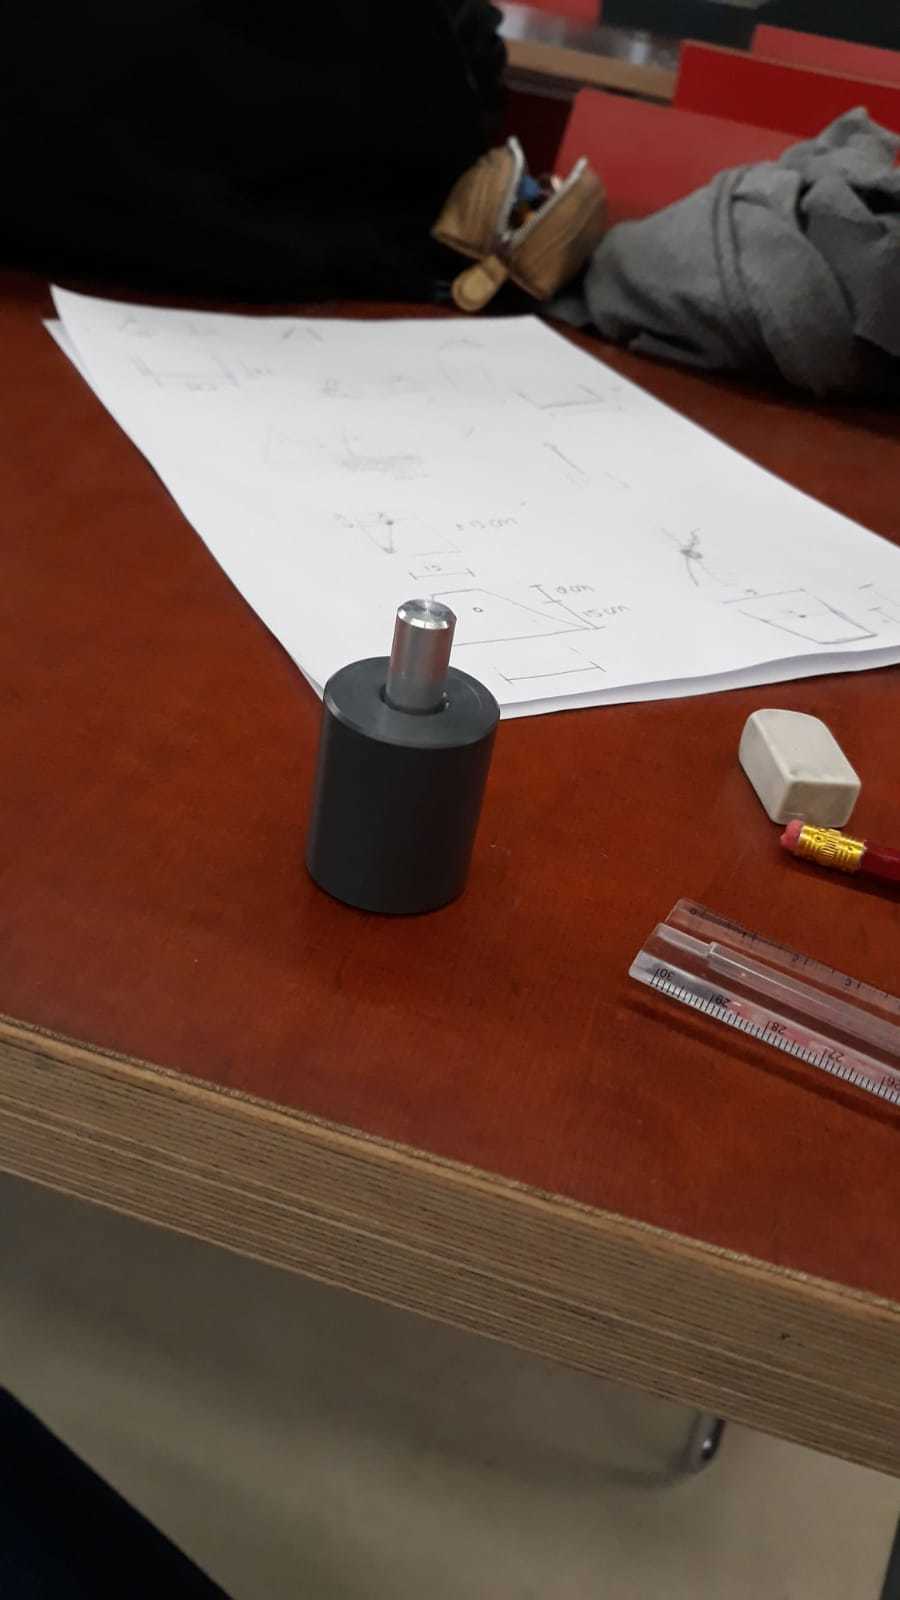
1. Cut 2 pieces of the solid PVC pipe of 4 cm
2. Drill a hole of ø10 mm 2 cm deep in the PVC pipe
3. Cut 2 pieces of the metal pin (ø10mm) of 4 cm
4. Thin 2 cm of the metal pin to ø9mm
Put it all together
1. Determine the center of gravity of the bucket if it is filled with 5 Liters of water. (fill the bucket with 2.5 L water and draw a line, the horizontal middlepoint can be seen as the center of gravity of the bucket)
2. Glue the PVC exactly at the center of gravity with super glue
3. The center of gravity of the bucket with 4.5 Liters is below the center of gravity of the empty bucket itself. So to keep the bottom of the bucket faced downwards when it's empty, put a small weight underneath the tipping bucket.
4. Put the tipping bucket in the construction and hammer the metal pin through the wood in the tipping mechanism
5. Test if the bucket is tipping when it's filled with water
6. Not working? Use a smaller weight.
7. Still not working? You could try to put some styrofoam on one side of the bucket, this is lighter than water so now the bucket will tilt faster. Note: We never had to do this, so we don't know how this will work out.
Load Cell Set Up
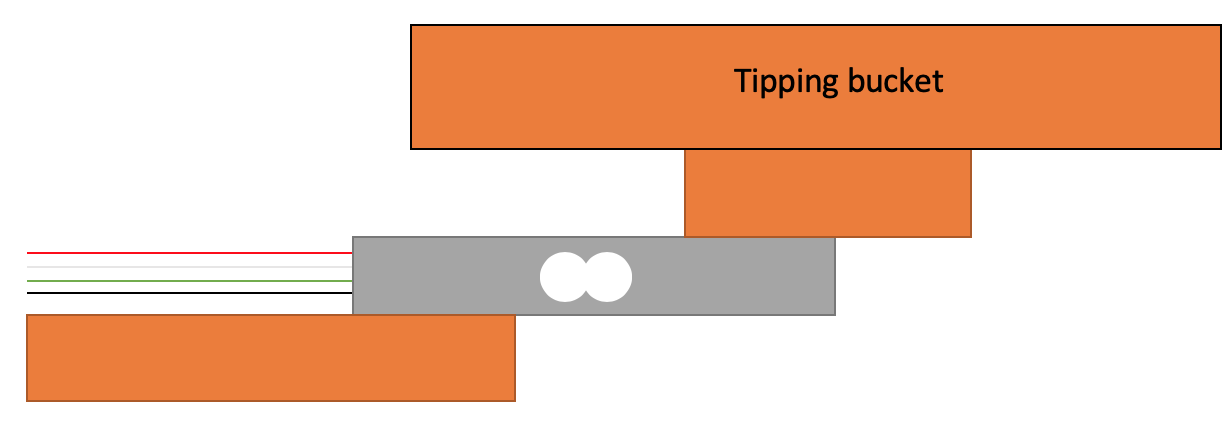
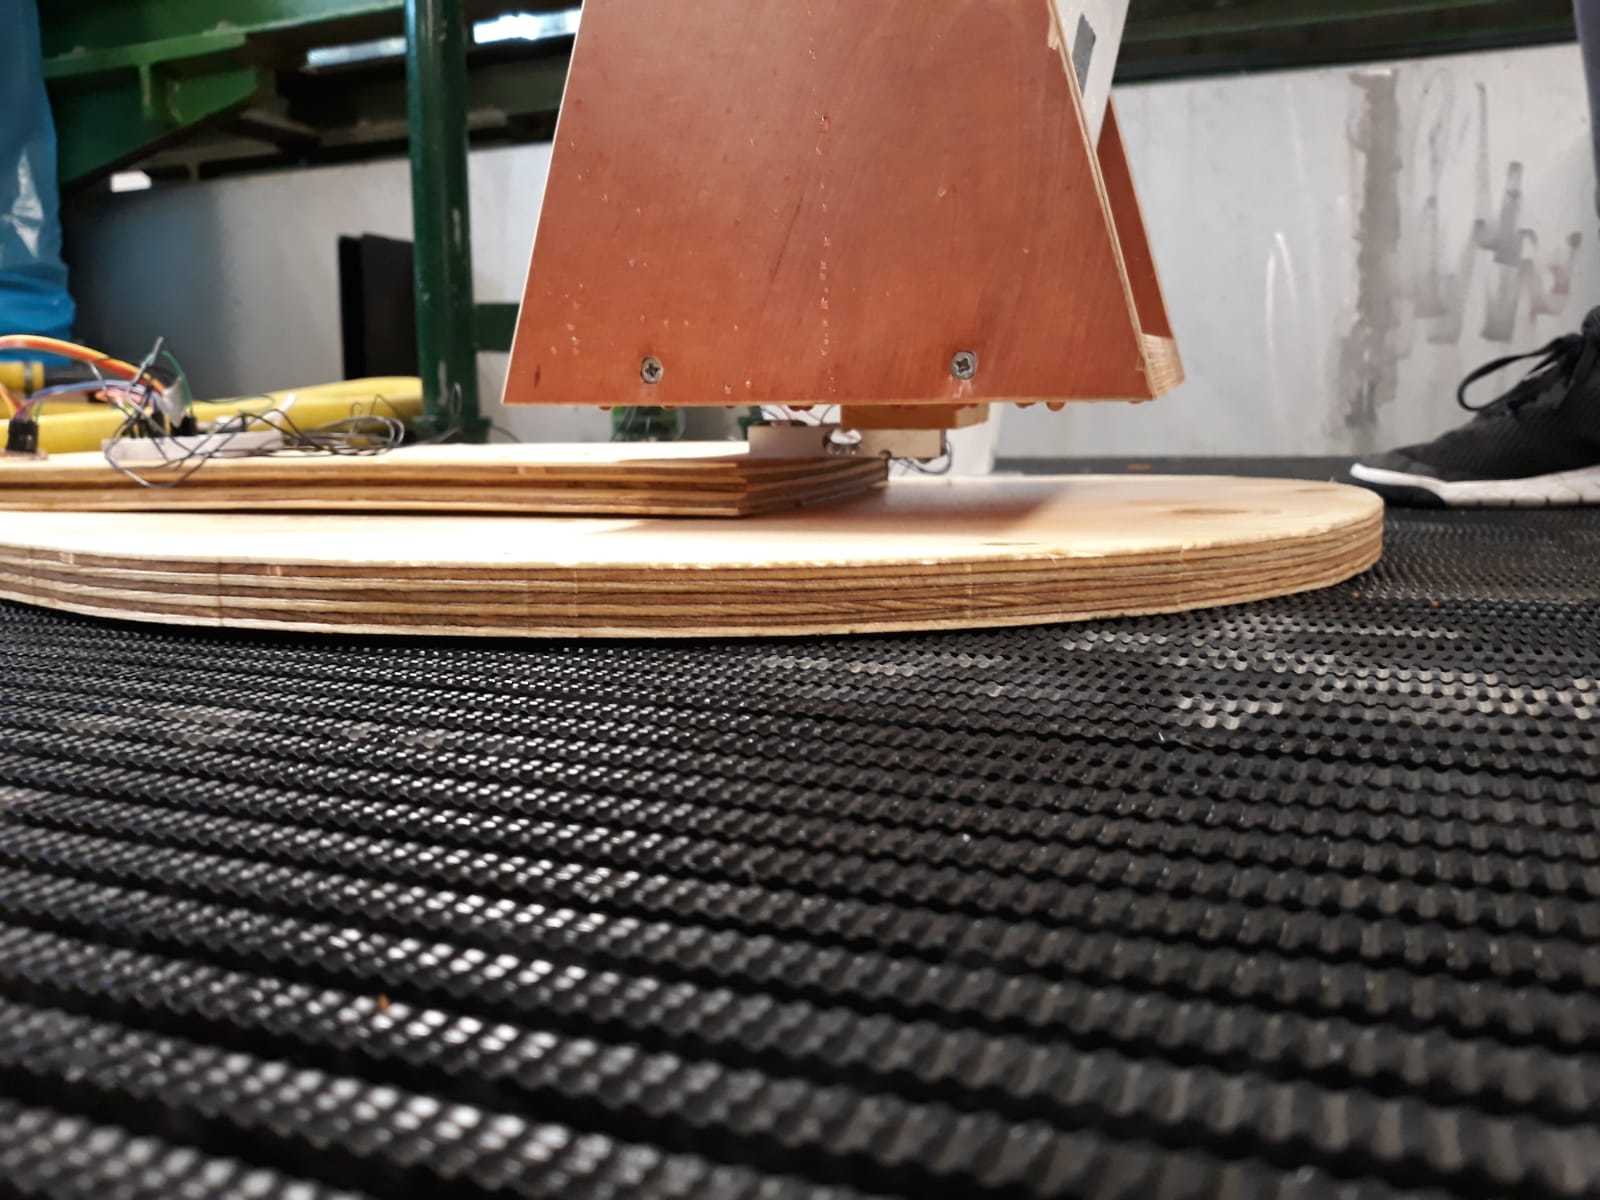
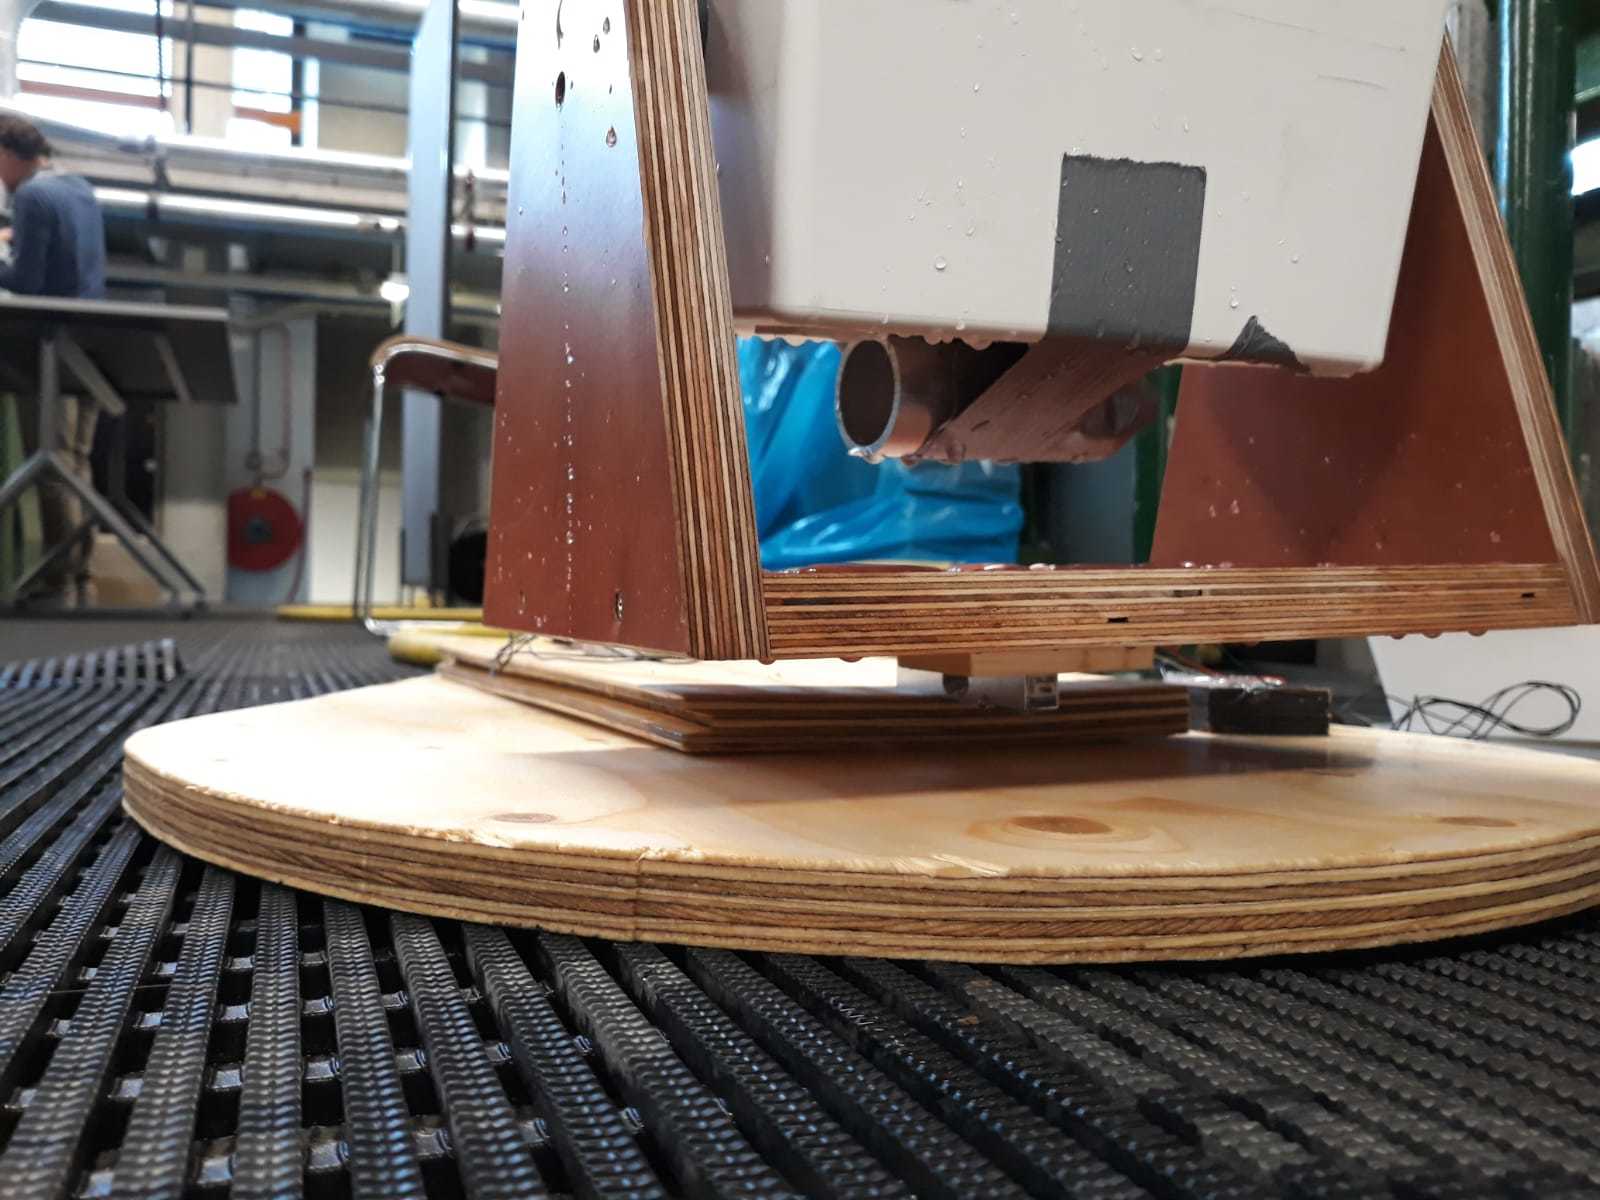
- Screw a small piece of wood on 1 side (the upperside if the arrow faces downwards) of the load cell and
- Screw a large piece of wood on the other side of the load cell
- Screw the small piece of wood in the exact middle of the plywood (bottem part of the construction)
- If needed screw the large piece of wood on an even bigger piece of wood to create extra counterweight
Calibrate Your Sensor
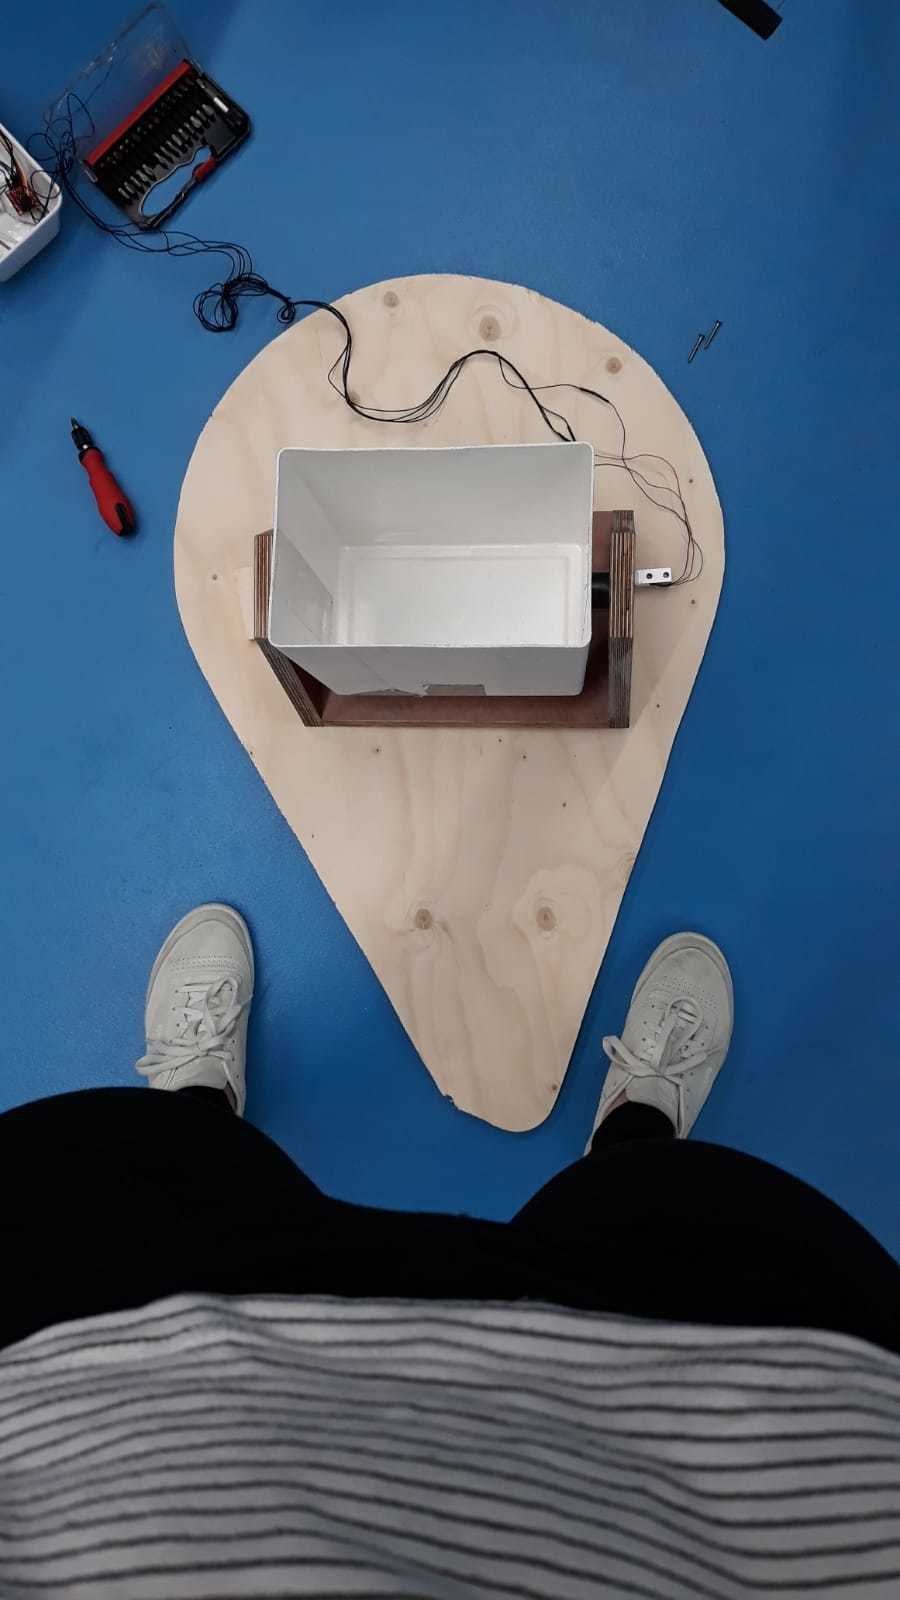
1. Empty the bucket
2. Run the code
3. Fill the bucket with 1 liter of water and read the value of the load cell and write it down in excel
4. Repeat this for 2 liters, 3 liters, 4 liters and 5 liters of water
5. Make a graph of the values and create a trendline
6. Read the formula of the trendline
7. You will need this formula for your code, to rewrite the values of the load cell to volume of water
Write the Code
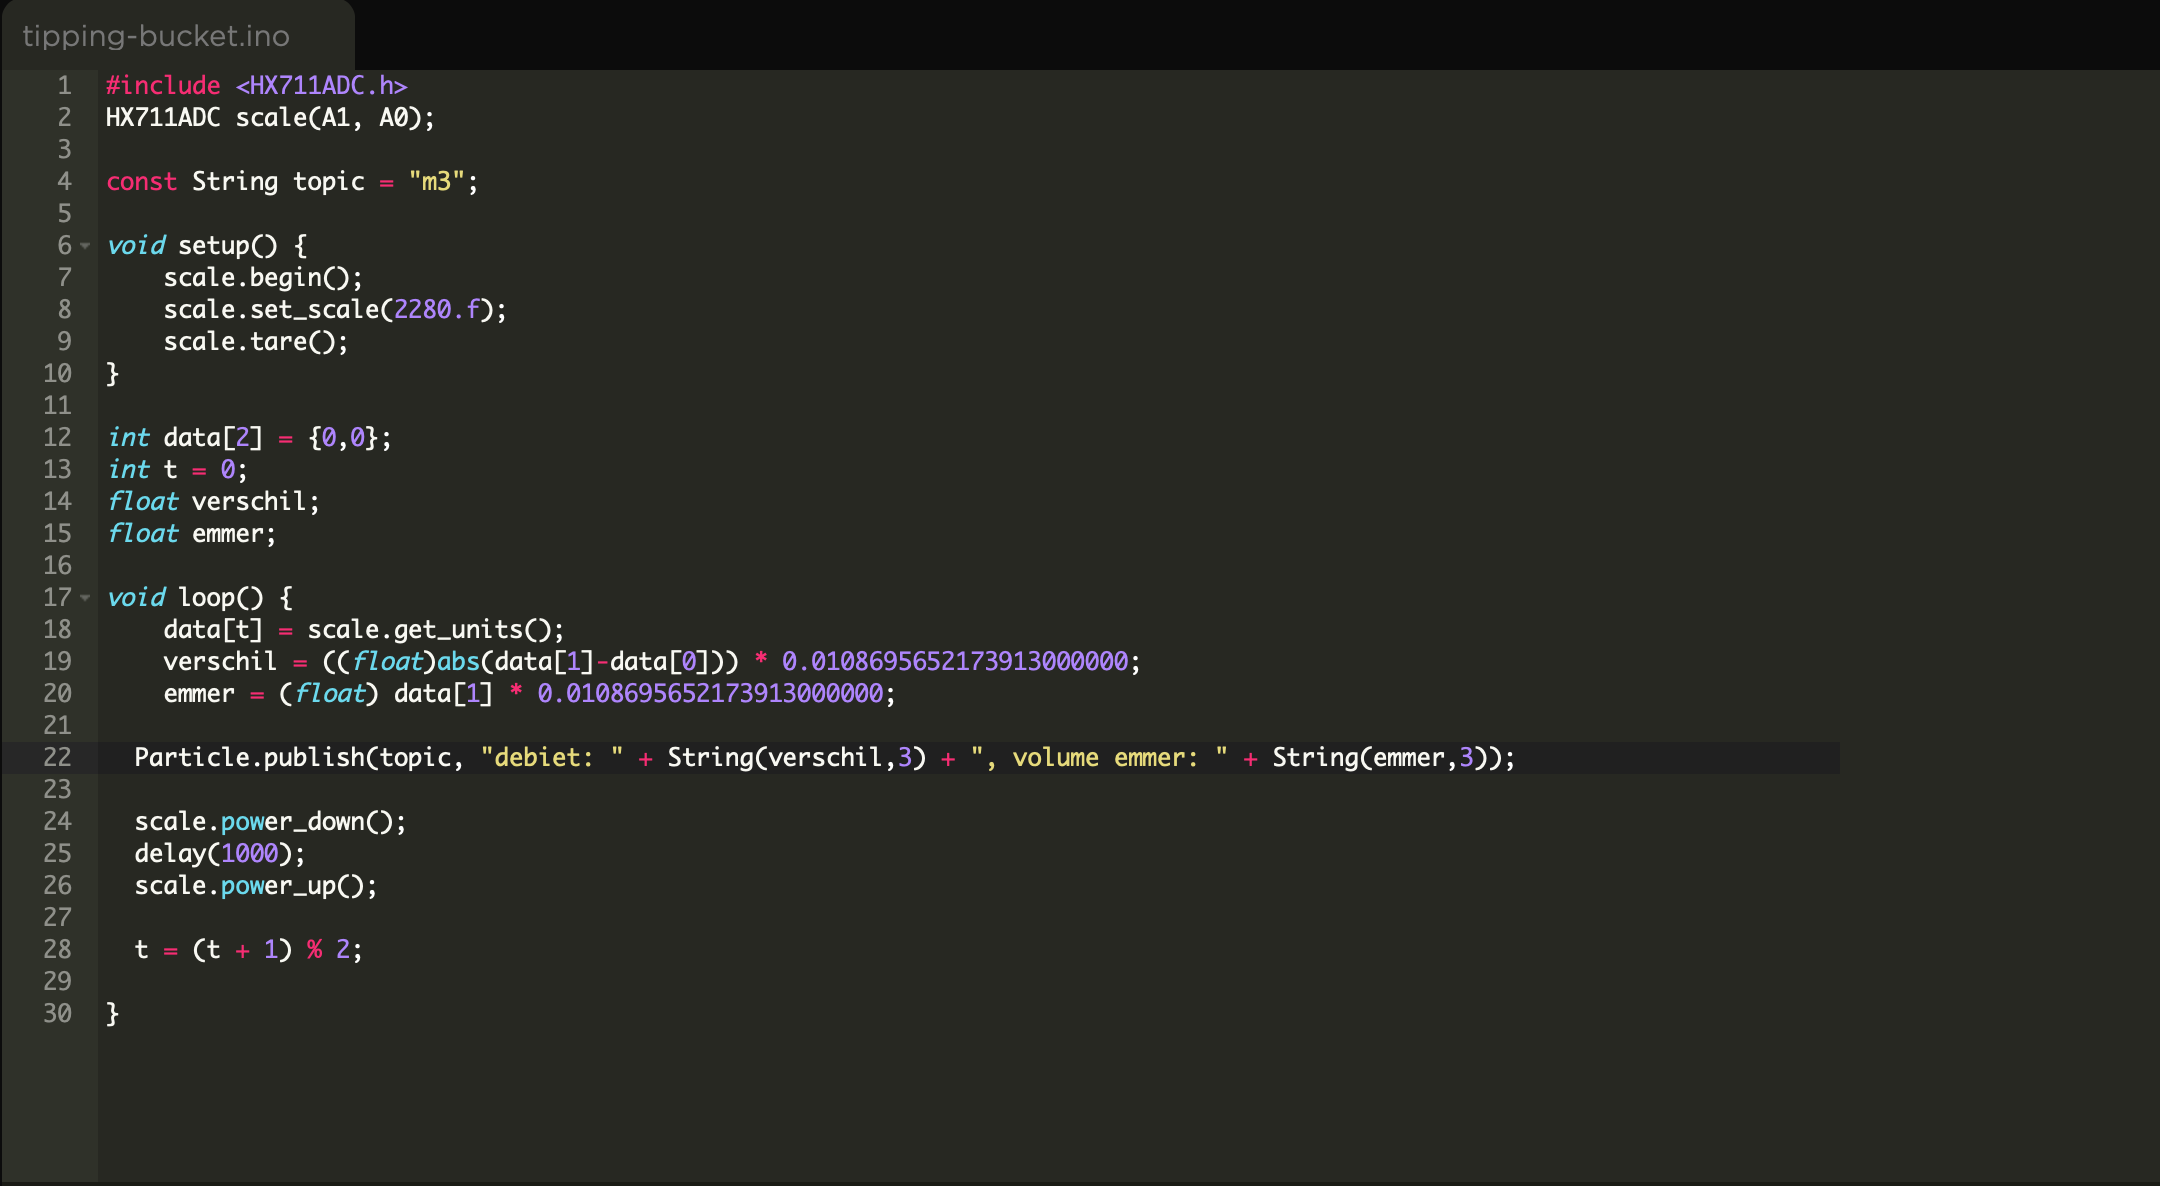
1. Write the code
#include
HX711ADC scale(A1, A0);
const String topic = "m3";
void setup() {
scale.begin();
scale.set_scale(2280.f);
scale.tare();
}
int data[2] = {0,0};
int t = 0;
float verschil;
float emmer;
void loop() {
data[t] = scale.get_units();
verschil = ((float)abs(data[1]-data[0])) * 0.0108695652173913000000;
emmer = (float) data[1] * 0.0108695652173913000000;
Particle.publish(topic, "debiet: " + String(verschil,3) + ", volume emmer: " + String(emmer,3));
scale.power_down();
delay(1000);
scale.power_up();
t = (t + 1) % 2;
}
Test If Everything Works
Enjoy your tipping bucket!