Tinkercad Robotics for School: Laser-cut Sketchbot
by M.C. Langer in Teachers > 7
7215 Views, 91 Favorites, 0 Comments
Tinkercad Robotics for School: Laser-cut Sketchbot
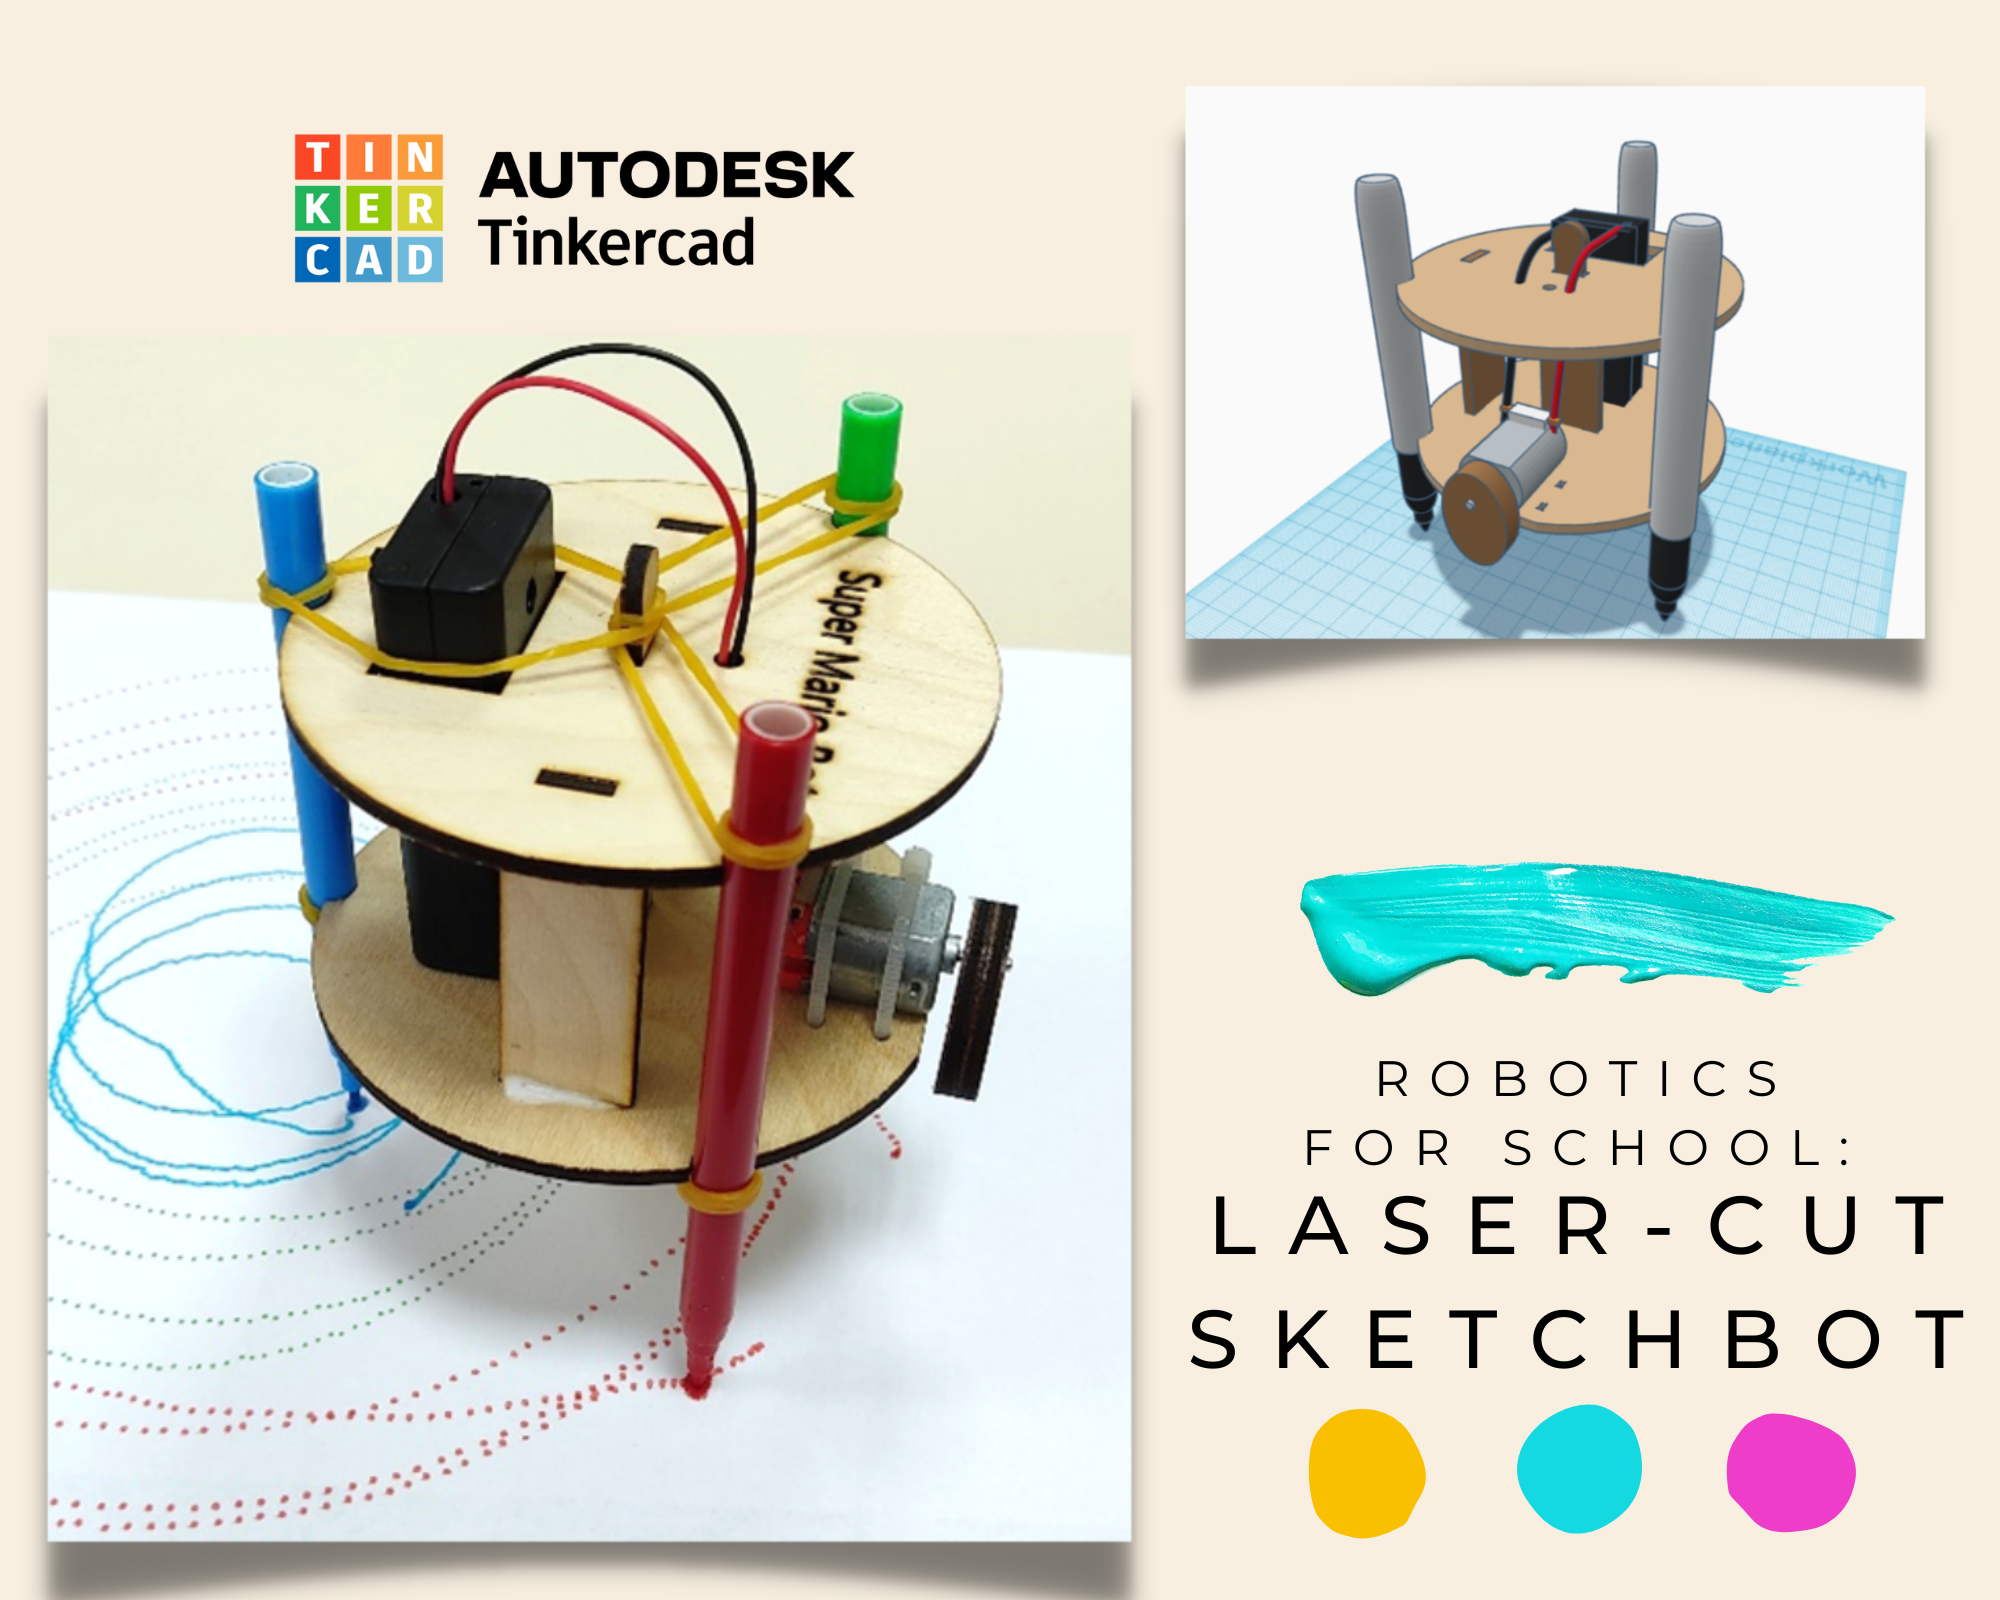
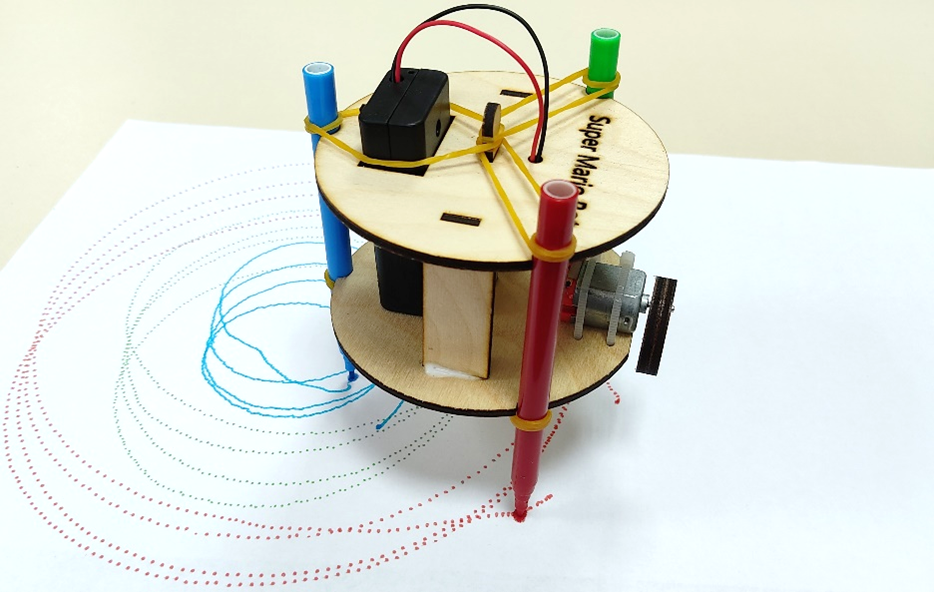
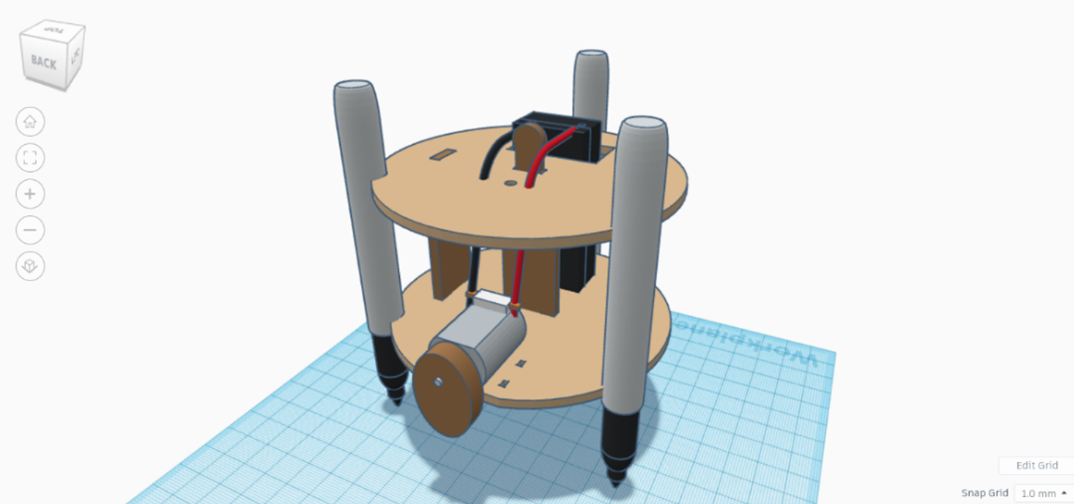
Sketchbots are probably some of the most popular STEAM projects. They are simple to make, affordable, fun, and mesmerizing. That's the reason kids and adults love them!
Welcome to a new episode of my "Tinkercad Robotics for School" series. This time, we will keep exploring the fascinating world of CAD for laser-cutting, take the next step in the evolution of the sketchbots, and learn how to design, prepare, cut and assemble a little wooden bot, that will use the power of vibration for locomotion, while creating a multicolor piece of abstract art.
This sketchbot has an extra feature: you can change the shape of the unbalanced weight to create new drawing patterns. Also, laser-burnt wood has a great smell :-)
Well, what are we waiting for? IT'S LAZER TIME, BOYZZ!
Supplies
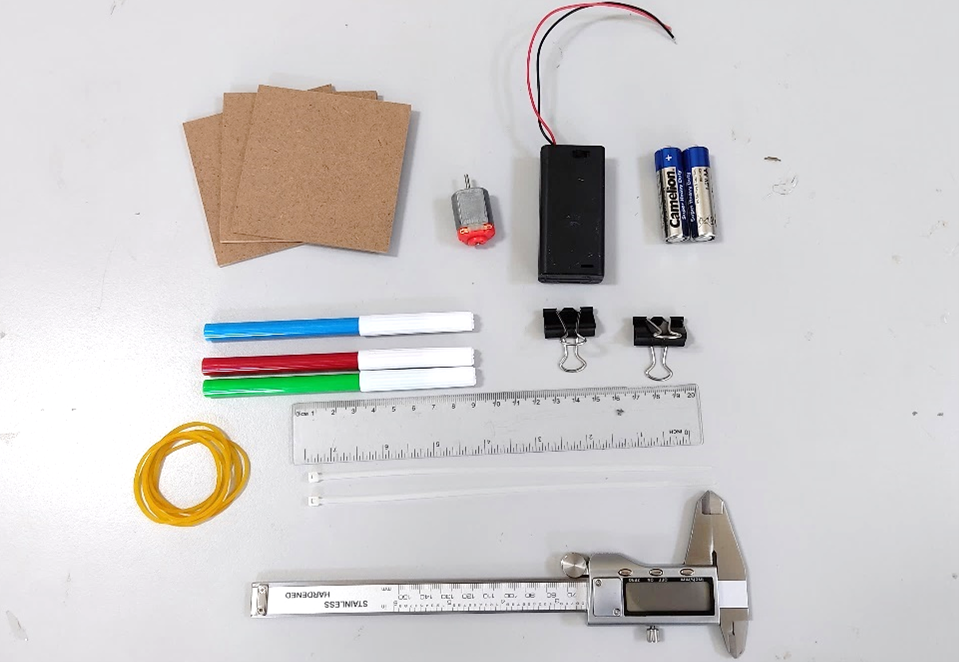
- 1 CNC Snapmaker (laser head)
- 1 laptop with Wi-Fi connection, access to Tinkercad (www.tinkercad.com), and the following programs installed: Snapmaker Luban and CH340 Driver for Windows (https://snapmaker.com/product/snapmaker-original/downloads); and Inkscape (https://inkscape.org/release/1.1/windows/)
- 1 Laser Safety Goggles
- 3 Wooden tablets of 120mm x 120mm x 3.15mm
- 1 motor
- 1 AA Batteries holder for two batteries
- 2 AA Batteries
- 2 zip ties
- 1 PVA glue for wood
- 3 color makers (plumaster)
- 6 rubber bands (preferable small)
- 2-4 small binder clips (for keeping the wooden tablets fixed to the work area.
- 1 Vernier caliper
- 1 Ruler
- Scissors
- OPTIONAL: cutter, small abrasive file, sandpaper, super-glue (cyanoacrylate).
Pre-Lesson
- Download the Snapmaker and Inkscape programs to the classroom computers and get acquainted with the software.
- Check the Snapmaker User Manual. Review the operation instructions and safety measures.
- Connect, test, and perform all setup calibrations in the Snapmaker CNC machine and software before the lesson. To save time and achieve a good cutting, it is especially important to know how to achieve the right calibration on each Snapmakers, particularly in the Z-axis. More about this topic later.
- Create a sample of this sketchbot, so you can train yourself in this project and show students what they will be designing and building.
- Prepare the materials.
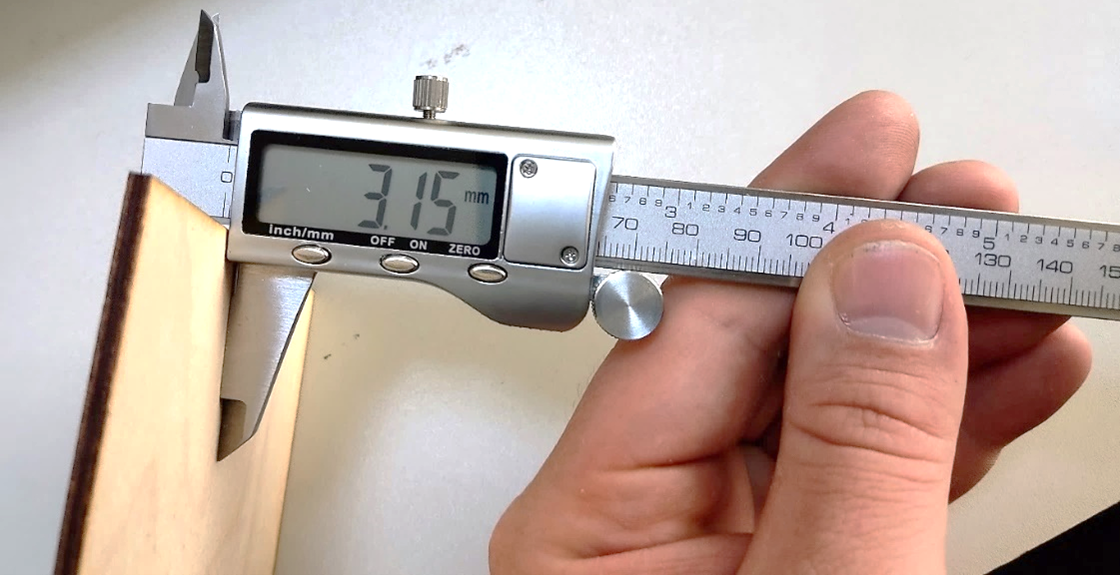
- Verify the dimensions of each wooden tablet. Check the thickness using the caliper. This lesson will work with wooden tablets of 3.15mm of thickness, and it is very important to keep this value in mind. In case your wooden tablets have a different thickness, use that value instead during the design, and consider it during the cutting process.
The First Cylinder
Welcome your students and explain that during the next lessons we will learn how to use Tinkercad to design a sketchbot. Then, we will create it using Snapmaker, a CNC machine that can be transformed into a laser cutter/engraver, a CNC router, and a 3D printer.
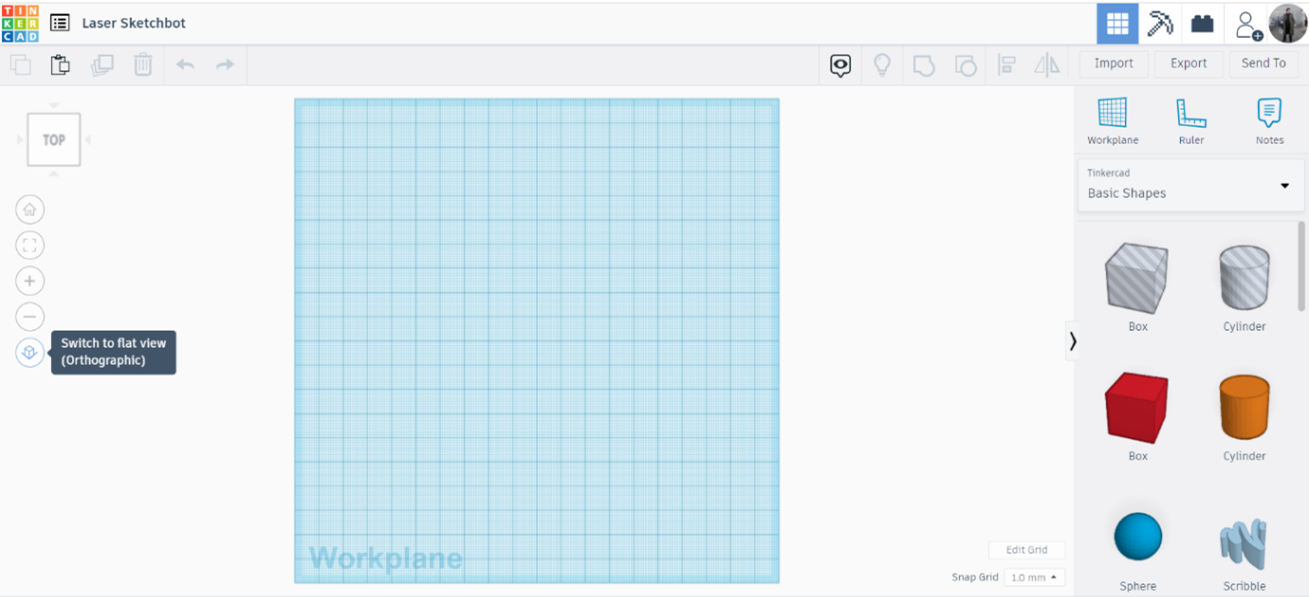
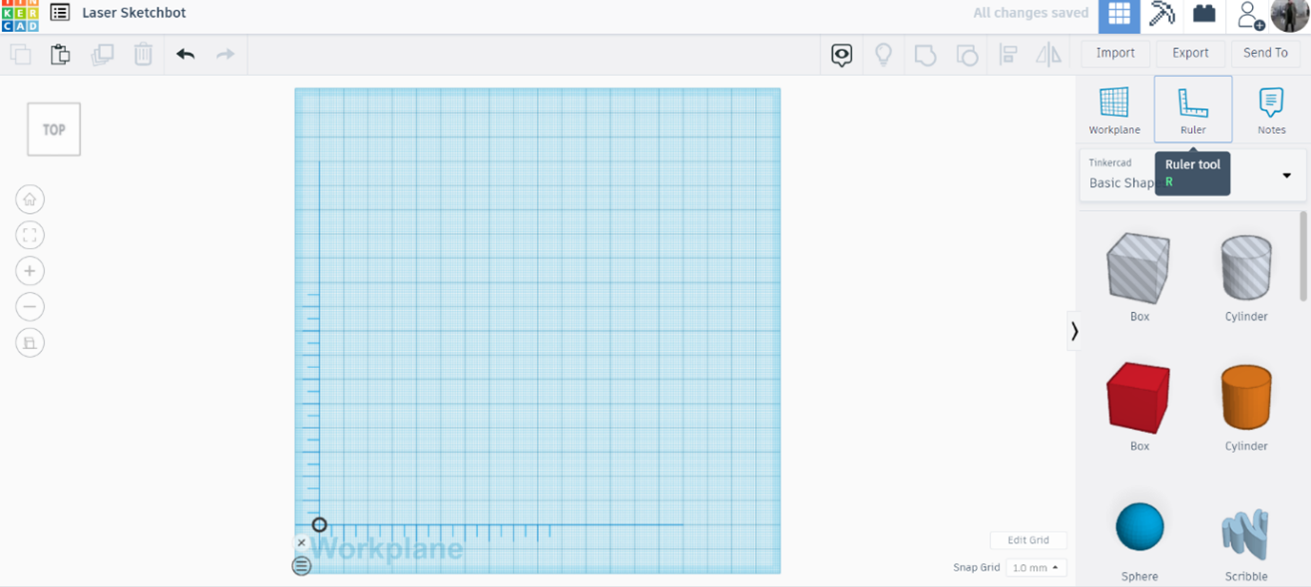
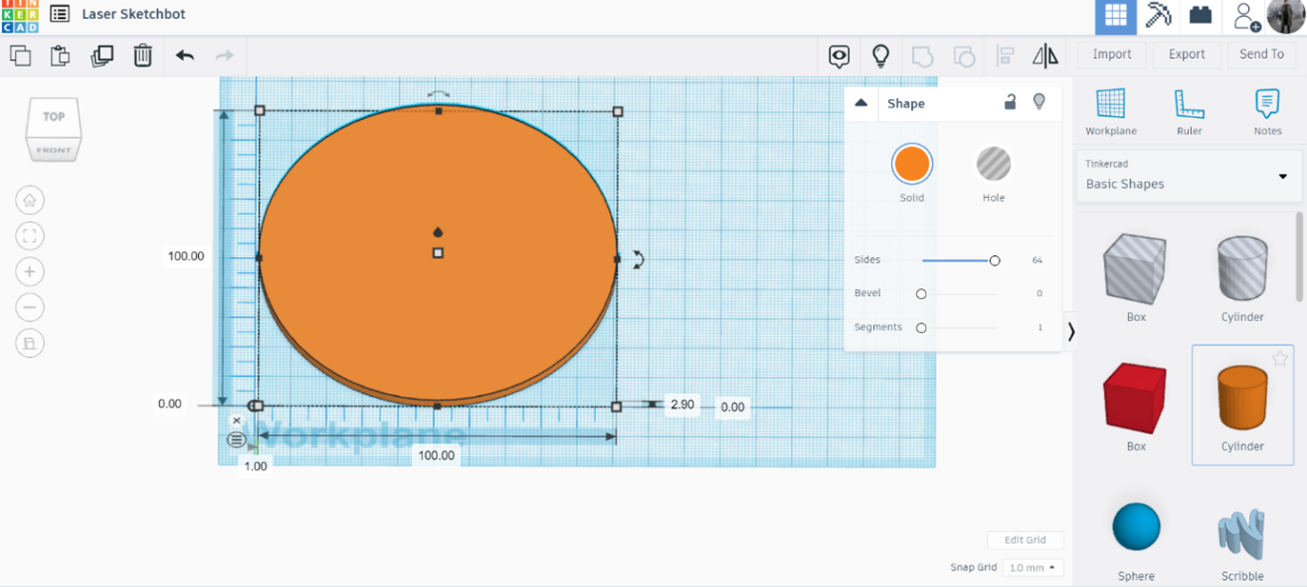
Open Tinkercad. Change the view to Flat View (Orthographic) and the Viewcube to Top View. Activate the Ruler Tool (placed between the Workplane and the Notes tools) and place it in the lower-left corner of the Workplane.
Bring a Cylinder from the Basic Shapes library. This cylinder will be of 100mm (length) x 100mm (width). Now, there will be an extremely critical dimension to consider during the rest of the lesson: the thickness of the wooden tablet (in this case, it will become the height of the cylinder). Explain students that this sketchbot will be assembled as a Lego, and to achieve that, the holes of each piece must be as wide as the thickness of the connecting parts; and the best way to have an accurate measurement of this thickness is using a caliper. The height of the cylinder must be 3.15mm
If your wooden tablet has a different thickness (example: 3.80mm), then use that value instead of 3.15 every time we use that dimension. Verify the caliper is in Zero position when is closed and take measurements in different points to be sure.
Making Space for the Plumasters
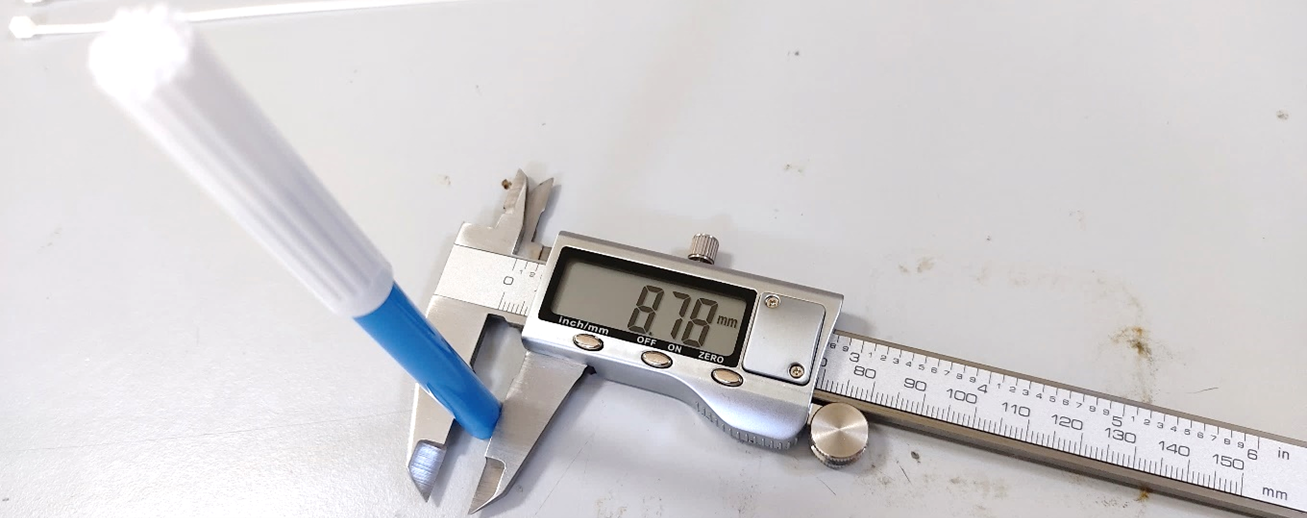
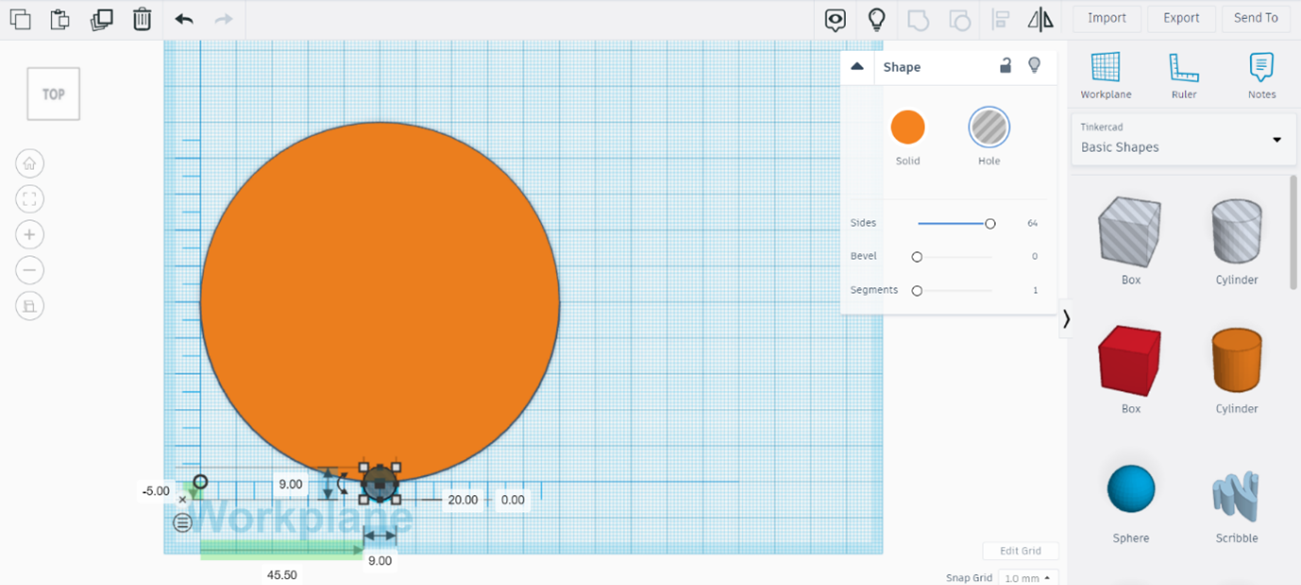
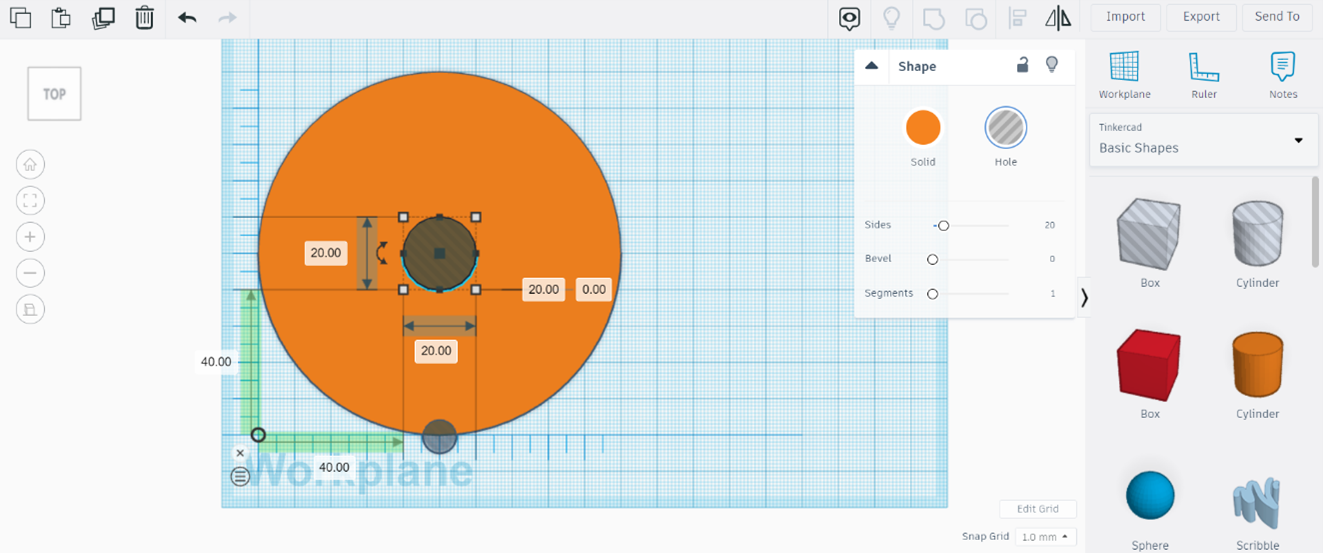
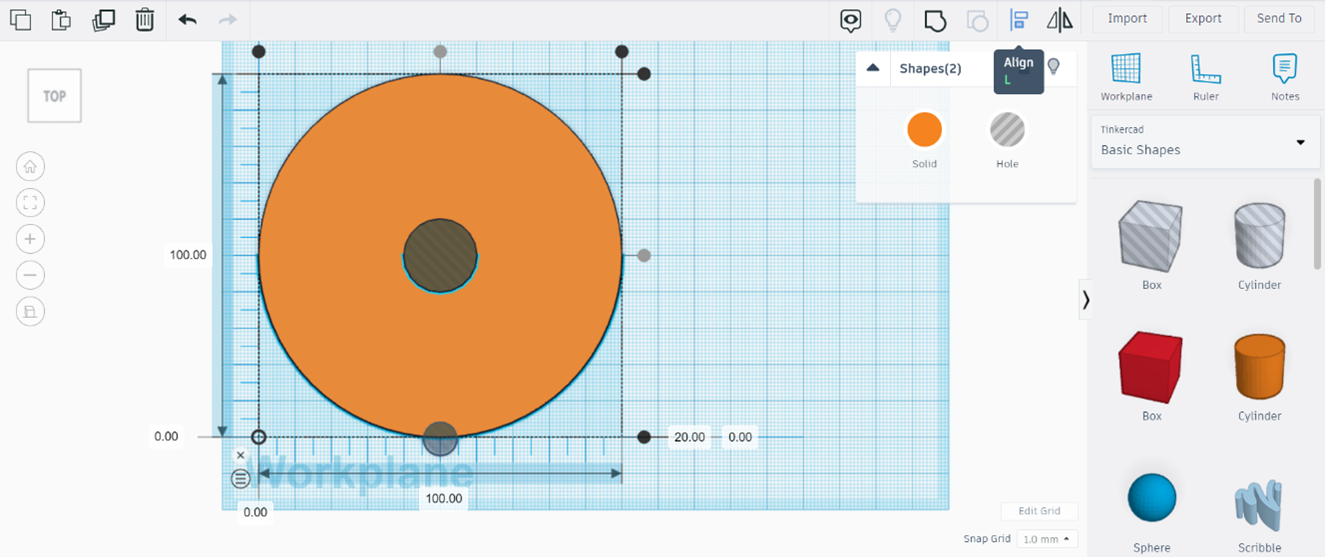
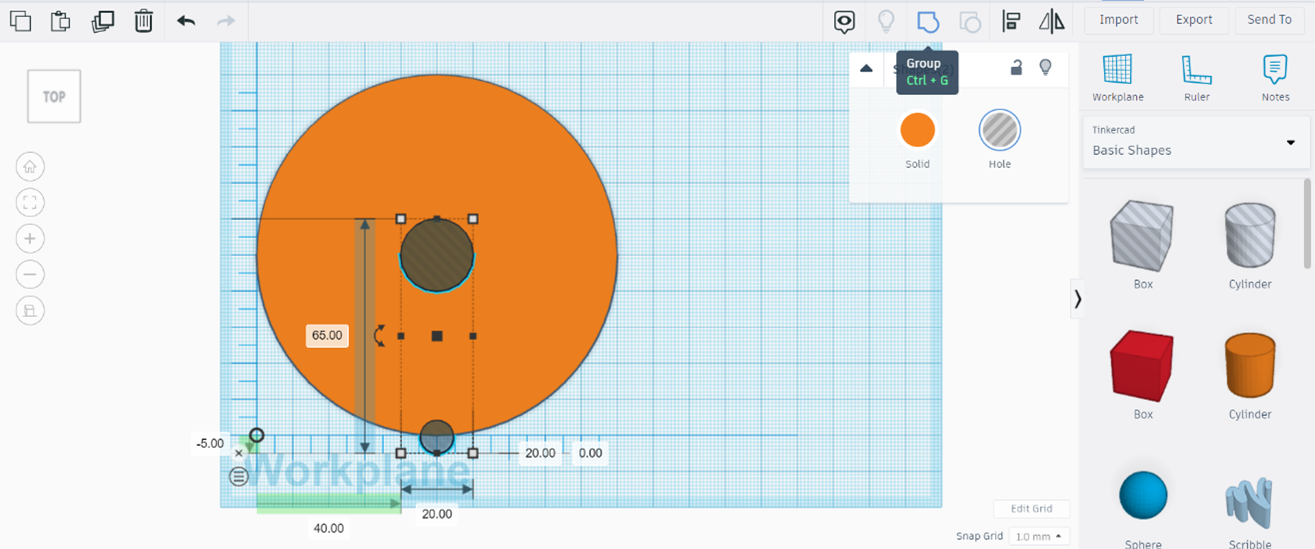
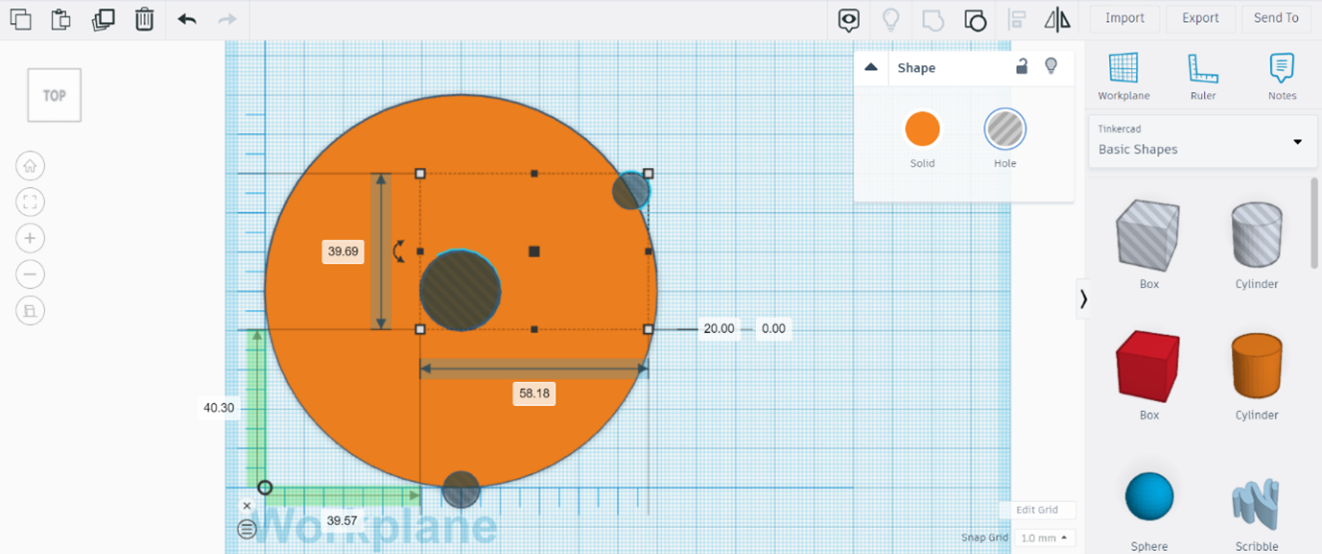
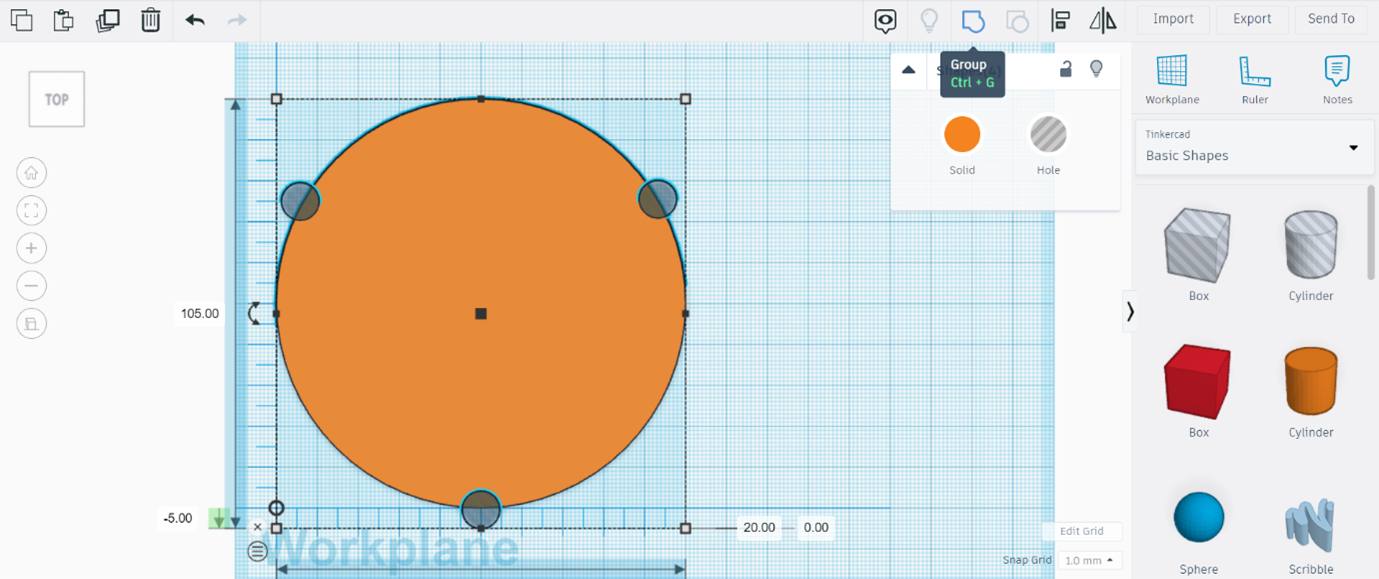
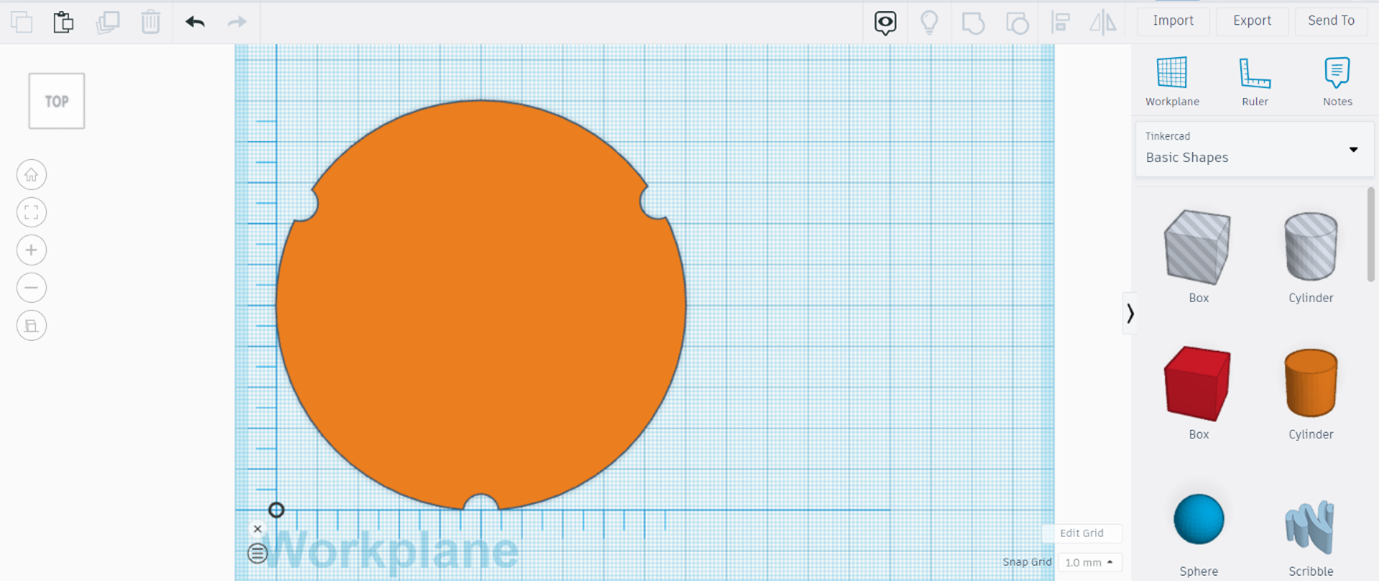
Let’s create the space for the plumasters. Using the caliper, measure the diameter of the plumaster. In this case is 8.78mm, but only in this case, we will round it to 9 mm. Bring a hole cylinder of 9mm x 9mm and place it on the lower part of the large cylinder, with half of the small cylinder out of it. Height can be 20mm, for the moment.
Bring a hole cylinder to the center of the large cylinder. No need to change the dimensions. This cylinder will not be part of the final design, but we will use it as a reference point for the next steps. Use the Align Tool and verify that this new hole is perfectly on the center, and that the small hole is aligned to the middle.
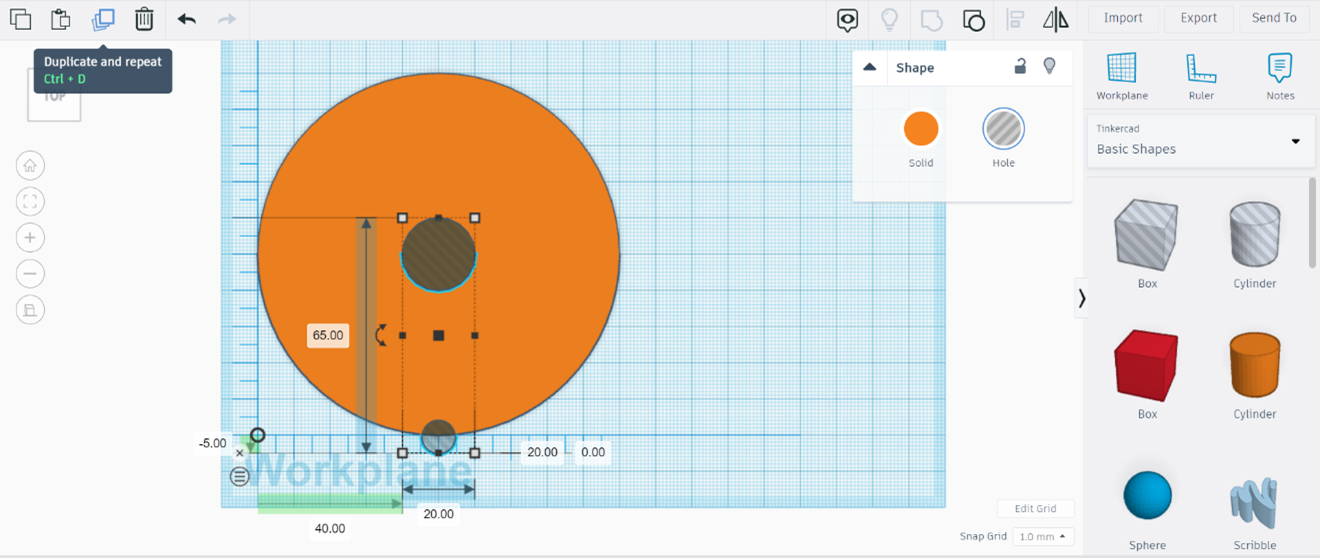
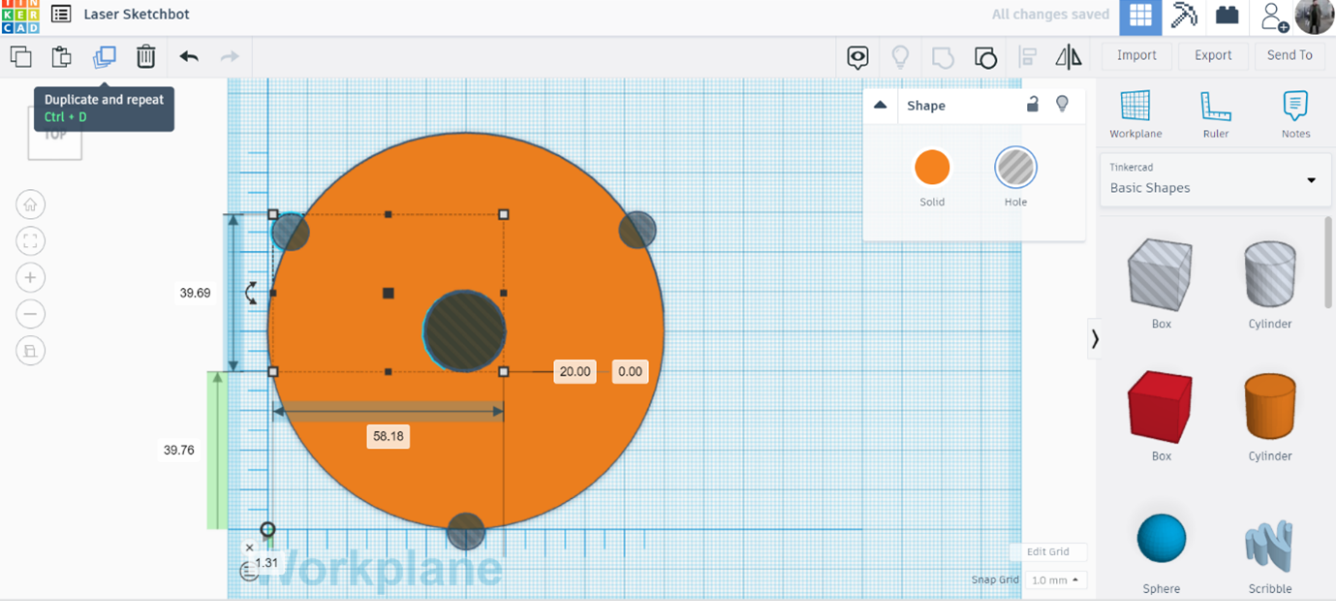
Select both hole cylinders and group them. Then, duplicate them. Keep the duplicated shapes selected.
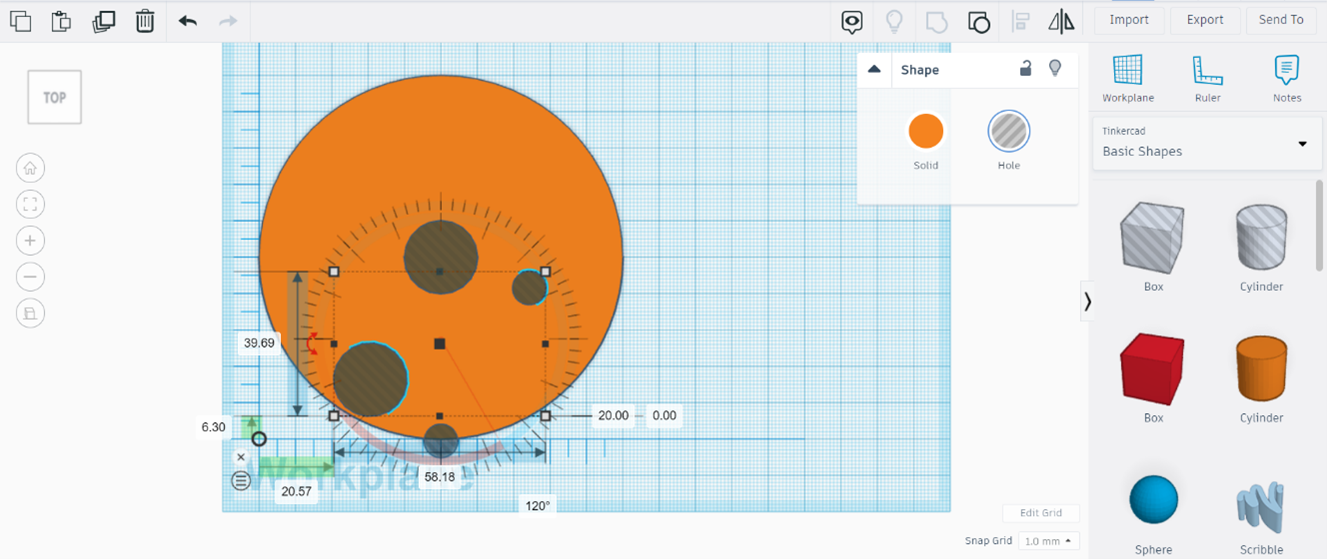
A circle has 360° and we will use 3 plumasters. 360°/3=120°. With this calculation, rotate the duplicated holes 120°. Keep the duplicated shapes selected.
Move the duplicated holes until the large hole of the duplicate is exactly in the same place of the original large hole. Keep the duplicated shapes selected.
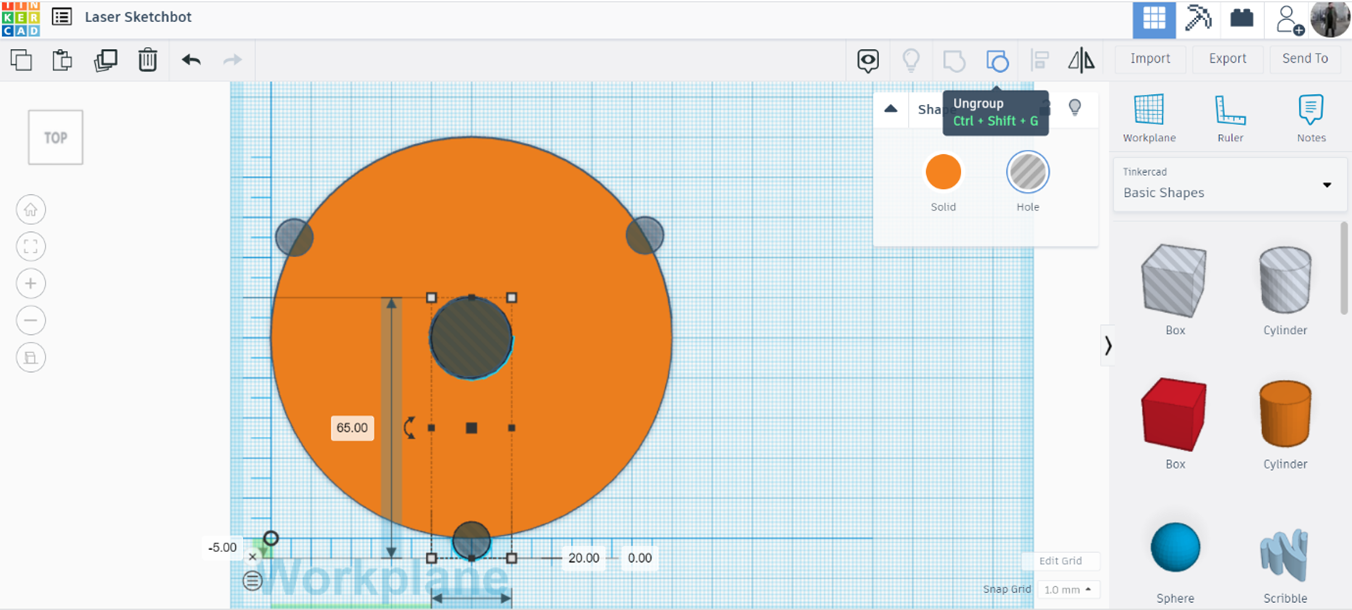
Now, press again CTRL+D to duplicate. The new duplicated must appear on the other side of the cylinder, as it has turned 120°, and all the large holes must be in the same position (center of the large cylinder)
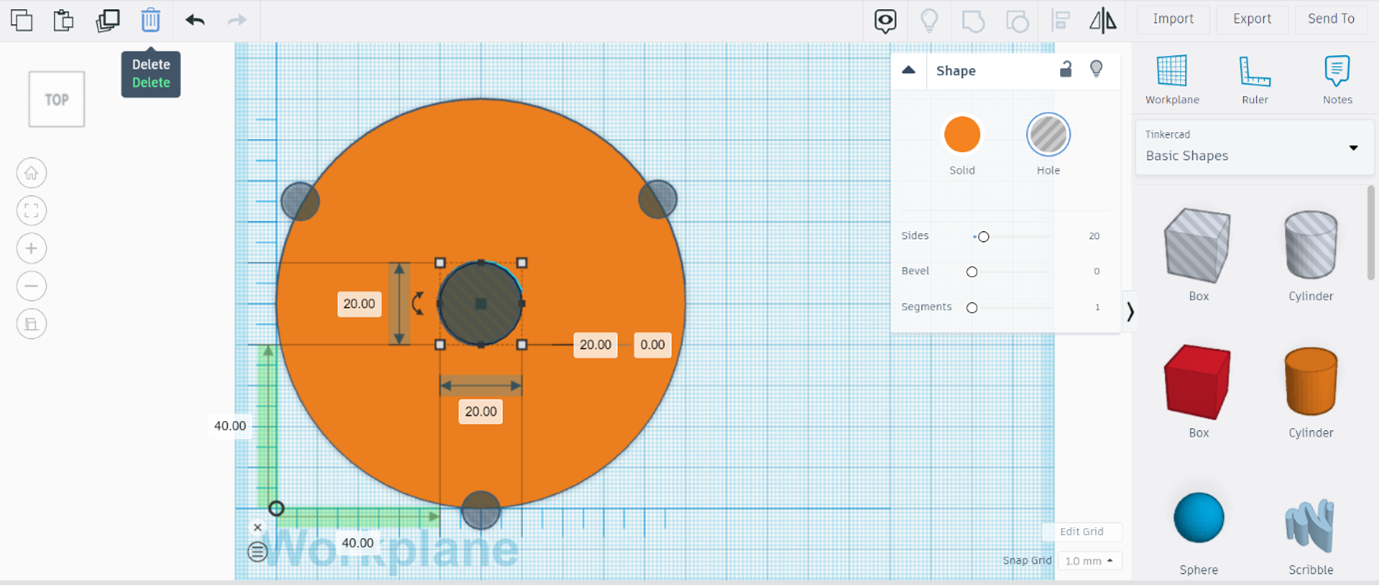
The large hole cylinders already accomplished their function, so we do not need them anymore. One by one, select the holes and ungroup them, so the three large holes will be separated.
Now, delete the three large holes. At the end, only the large solid cylinder and the three small holes must remain on the Workplane.
Select the large cylinder and the three holes; and group them.
Making Space for the Center Column
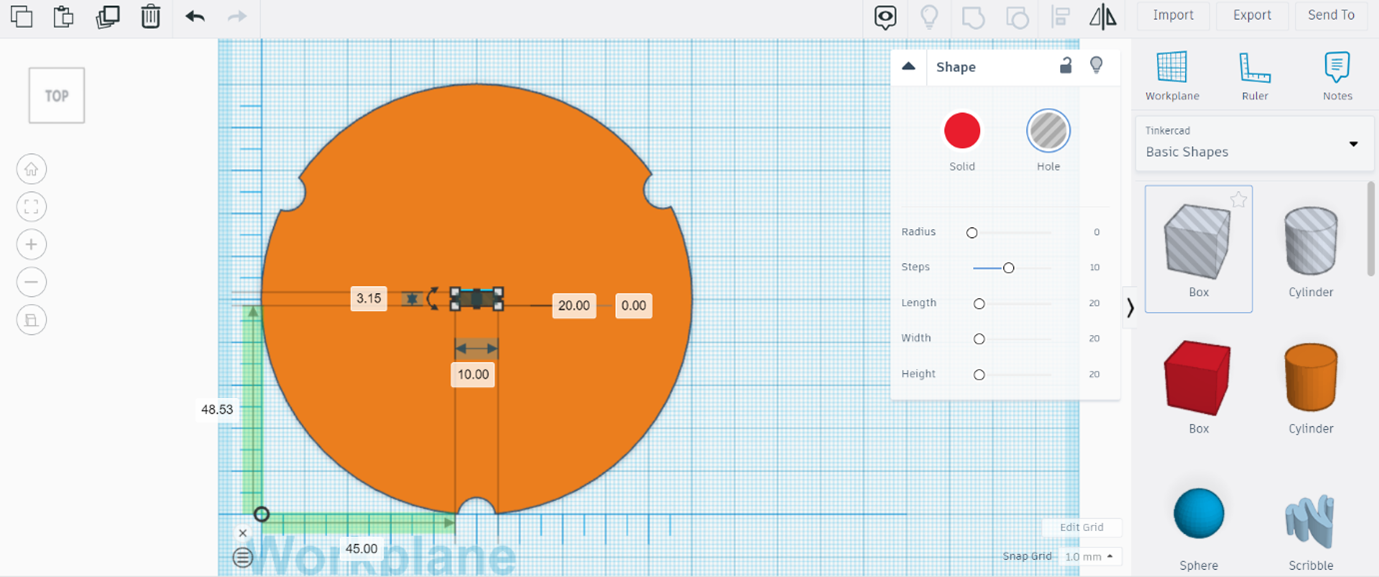
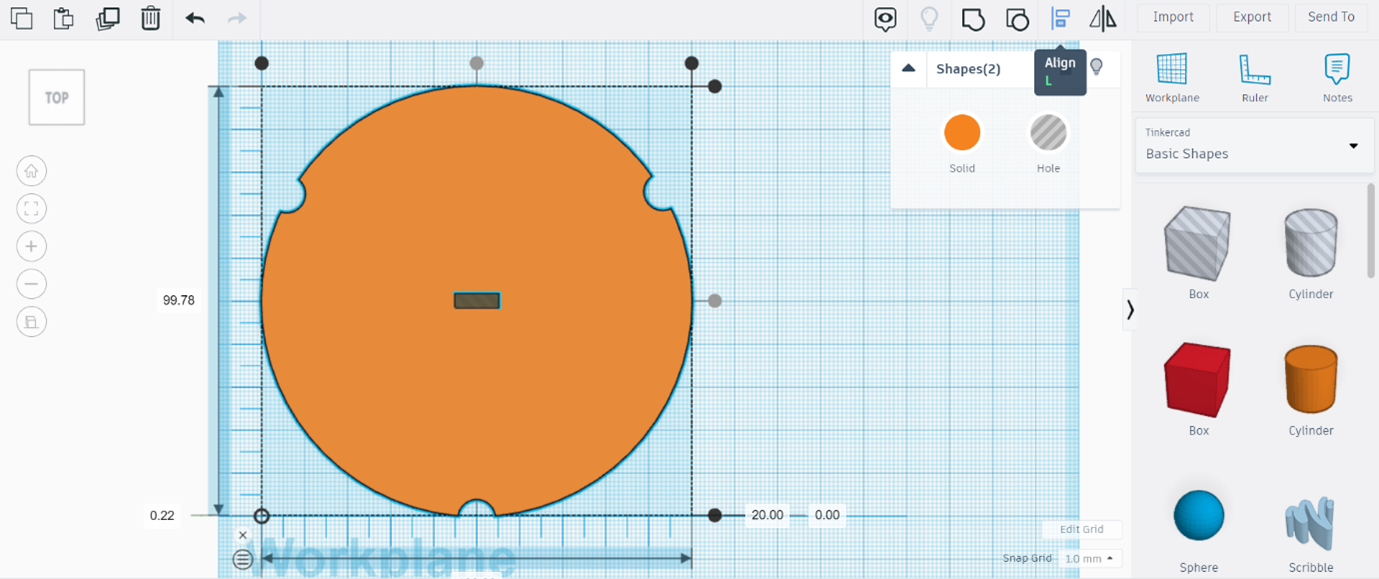
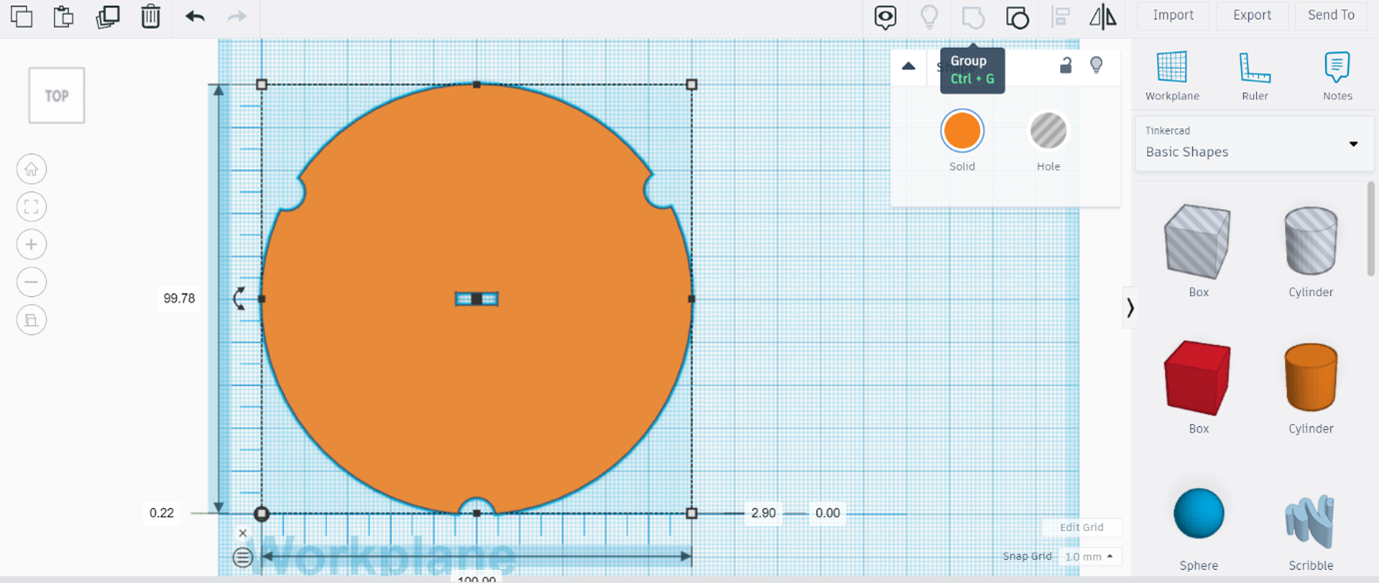
Let’s create the hole where the center column will be located. Bring a hole box, placed it on the center and give it these dimensions: 3.15mm (length, the thickness of your wooden tablet) x 10mm (width). The height can be 20mm.
Use the Align Tool to place the hole box exactly in the center of the large cylinder.
Now, group them. From now, we will name this part “Bottom Panel.”
The Battery Holder
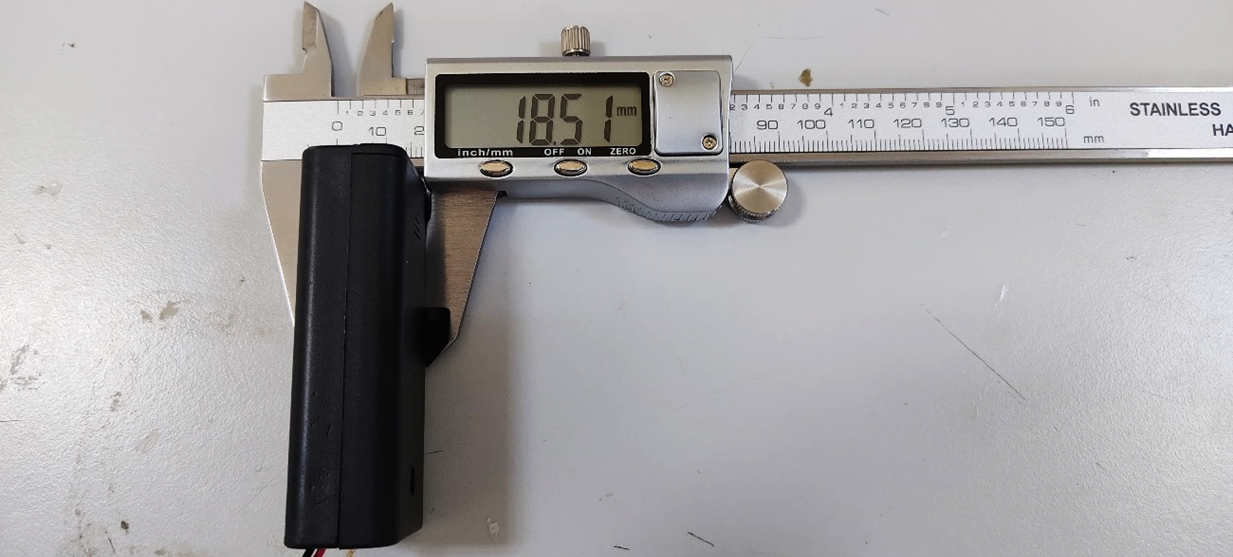
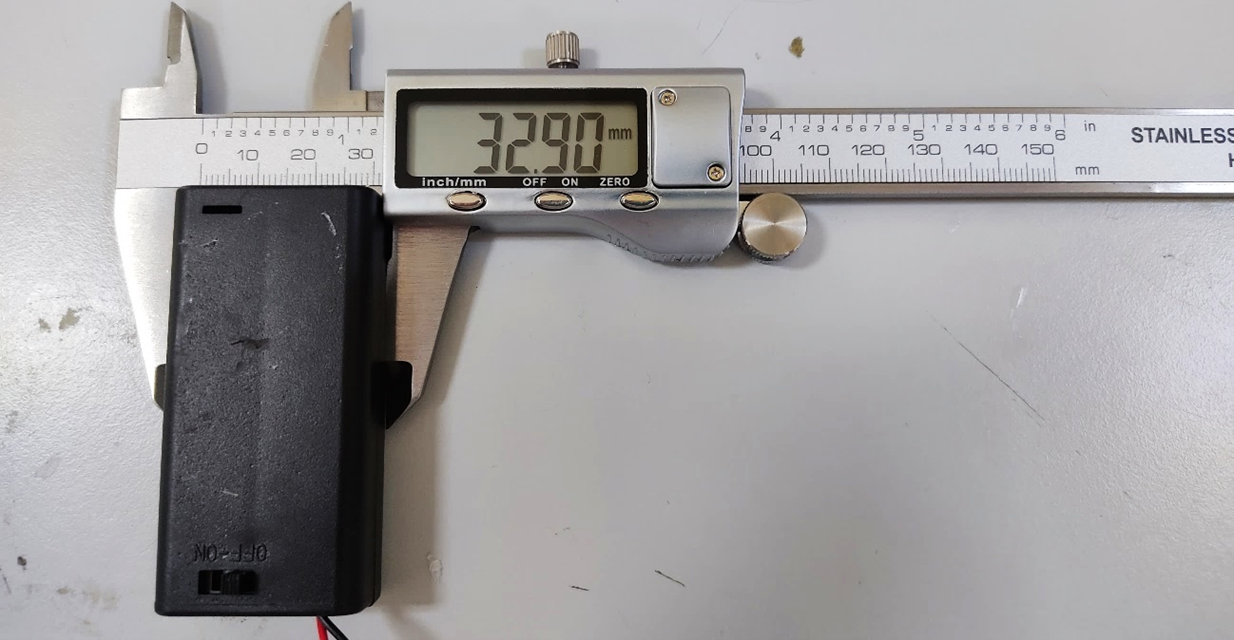
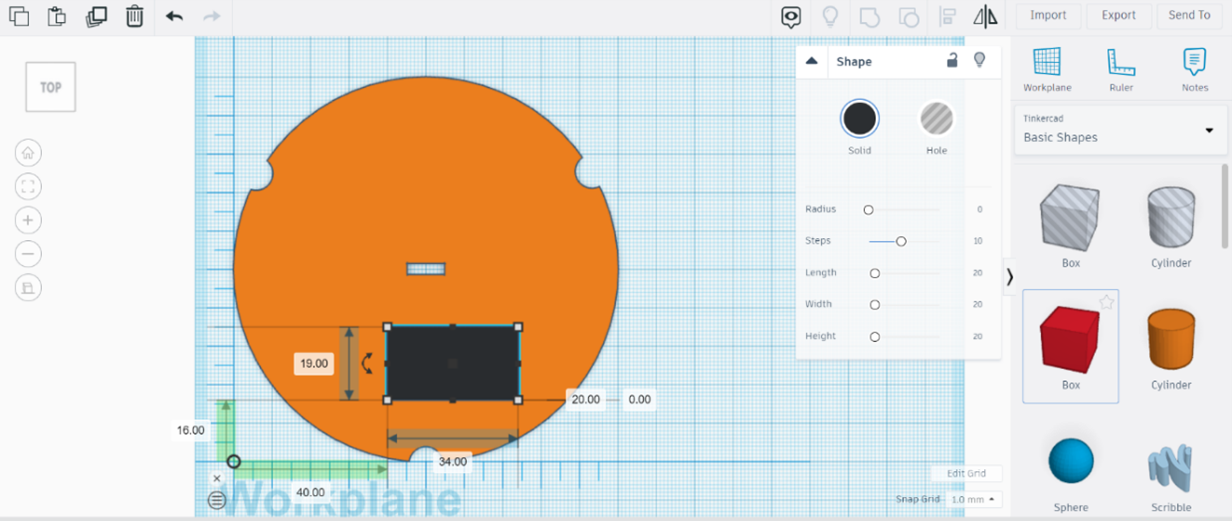
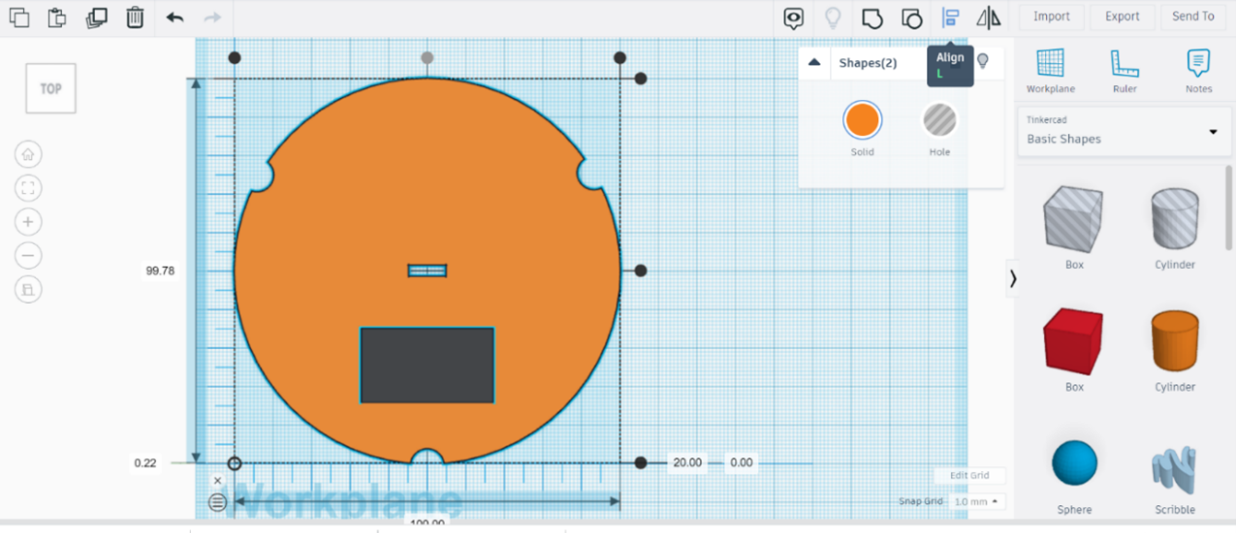
Let’s create the space for the battery holder. Measure the length and width of the Battery Holder, to create the space for it in our bottom panel. Length is 18.51mm, so we will round it to 19mm. Width is 32.90mm, so we will round it to 34mm. The extra tenths of millimeter will be the tolerance so the Battery Holder can fit. Bring a black box with those dimensions. For the moment, we will keep the default height (20mm.)
Select the bottom panel and the black box and align them in the middle through the Y axis. The black box must be located between the hole box and the hole half-cylinder.
Spaces for the Side Columns
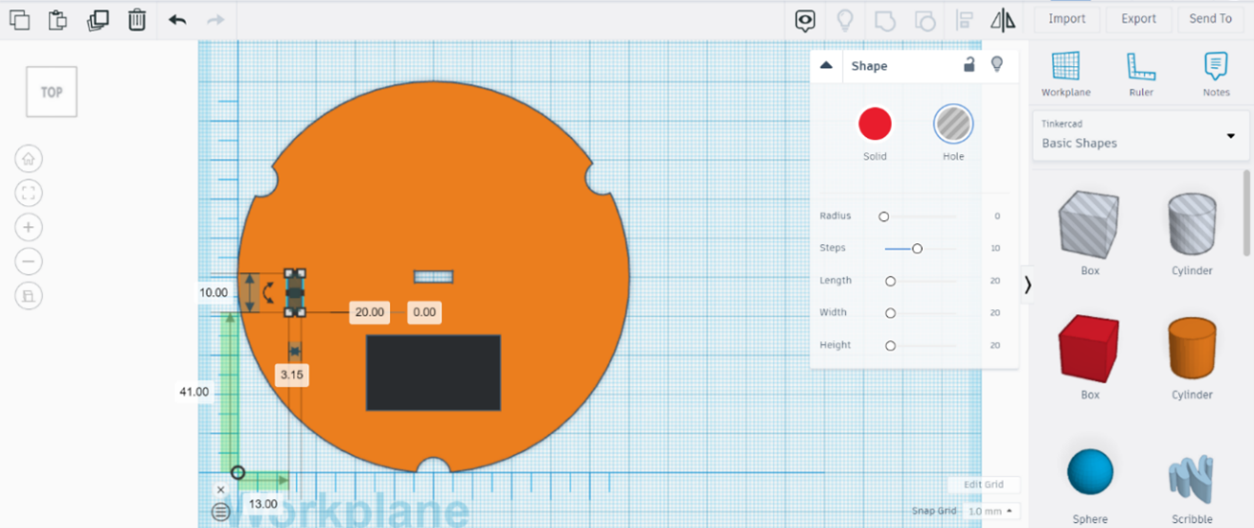
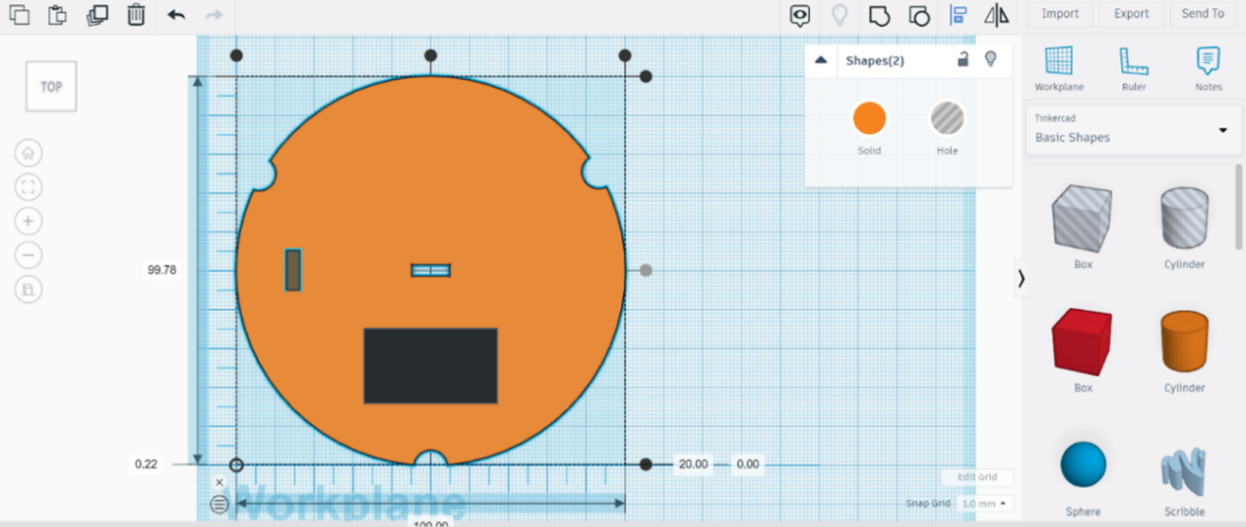
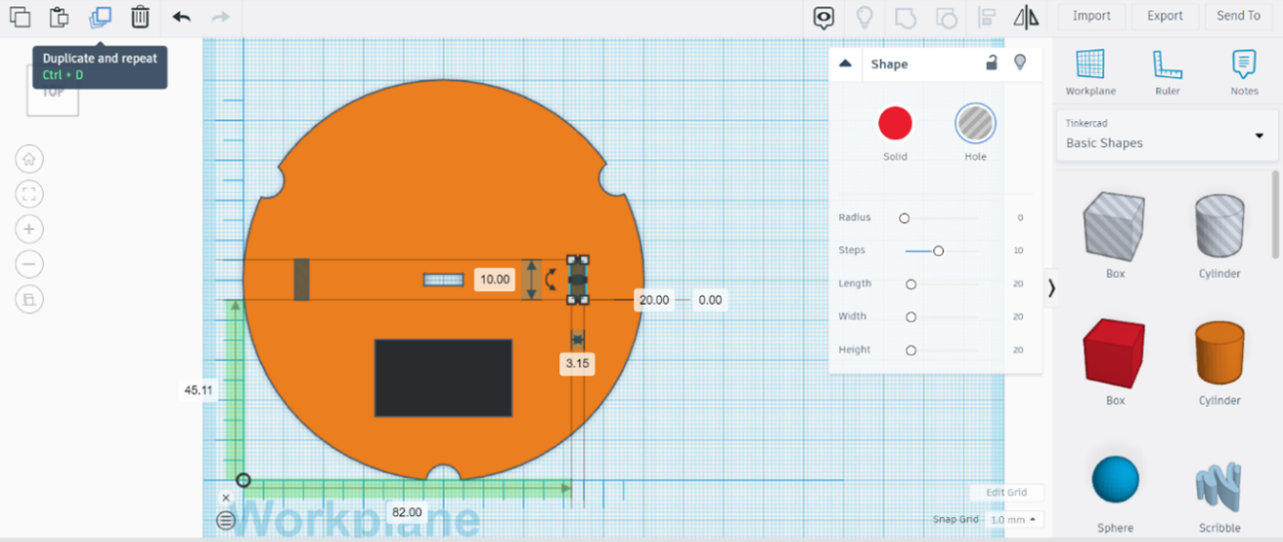
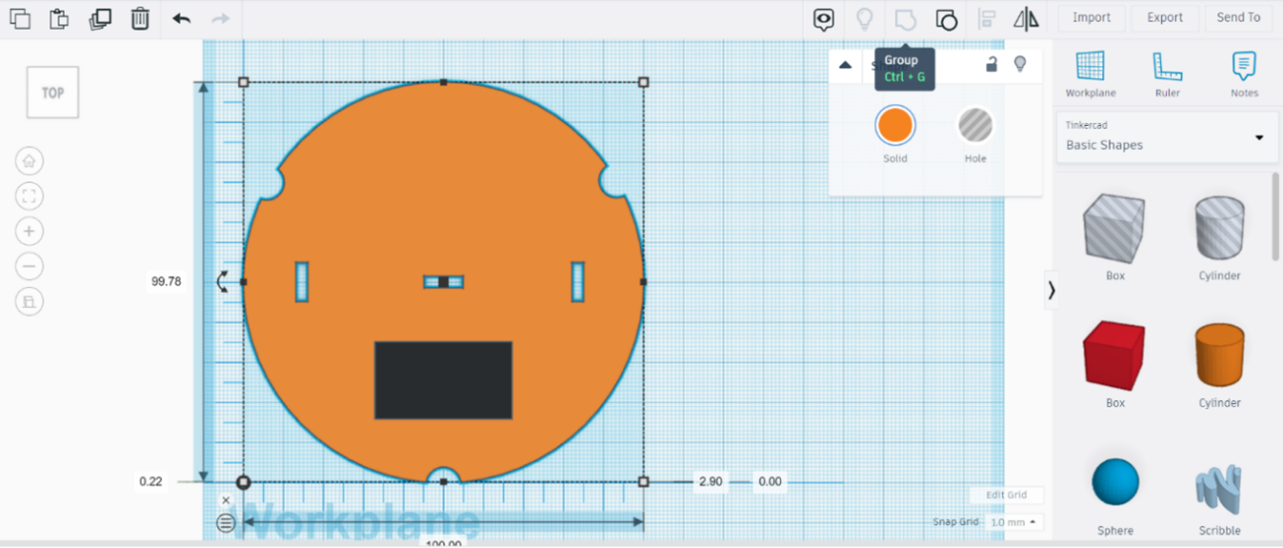
Let’s create the holes for the side columns. Bring a hole box to the left, 13mm away from the left border of the bottom panel. The dimensions of the box are 10mm (length) x 3.15mm (width, thickness of the wooden tablet).
Use the Align Tool to align this new box to the middle through the X axis (middle handle on the right.)
Duplicate (CTRL+D) the new hole box; and bring it to the right side of the bottom panel, this time, 13mm away from the right border of the panel.
Select the two holes and the bottom panel; and group them.
Creating the Top Panel
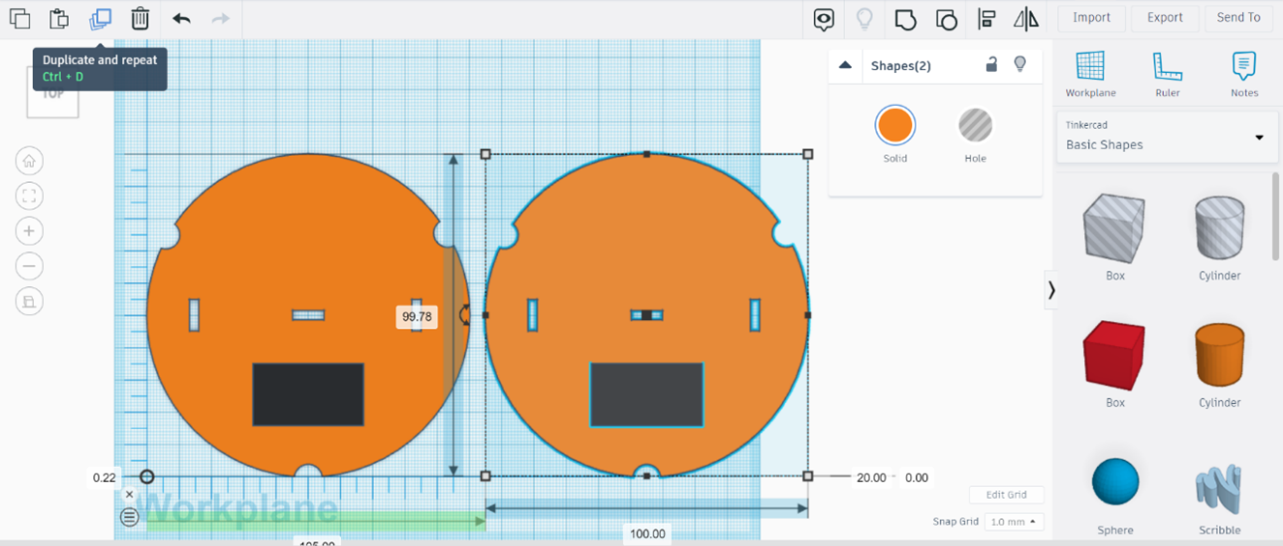
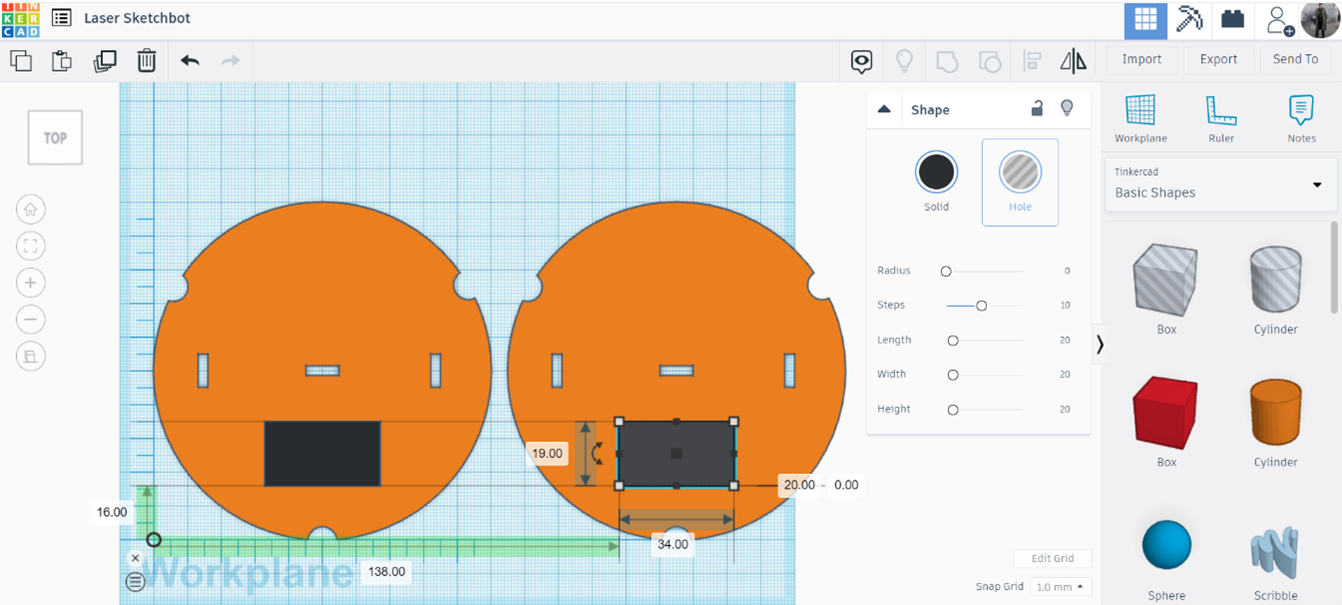
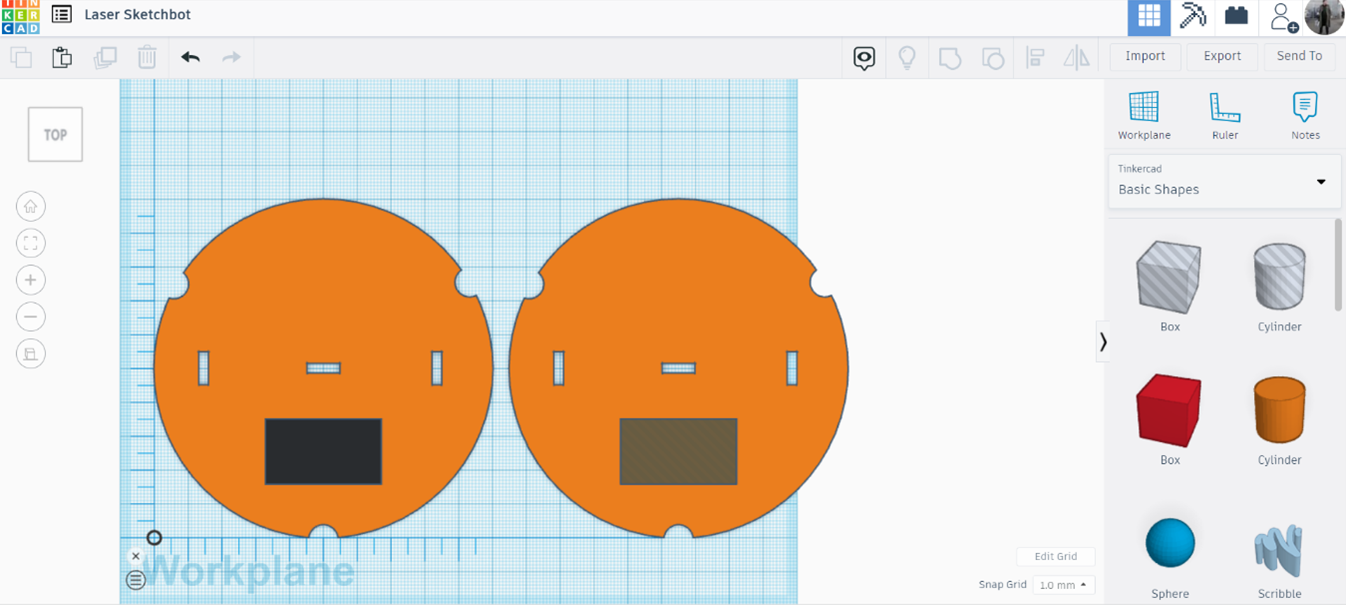
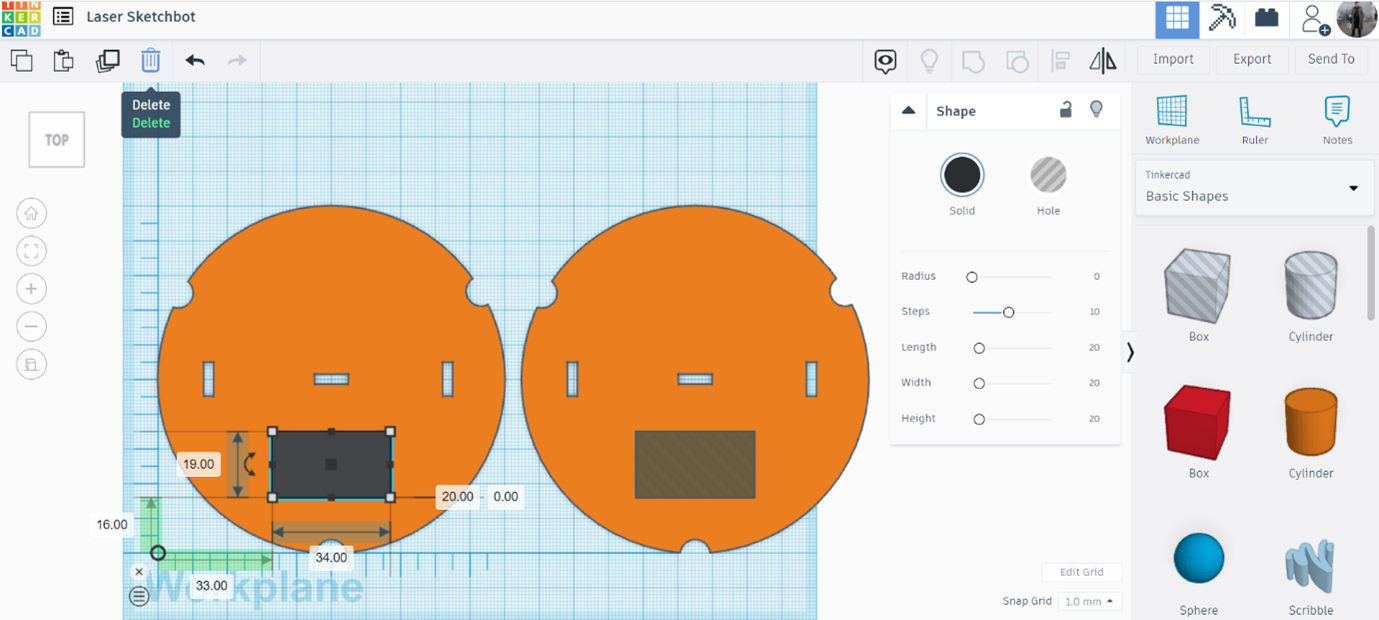
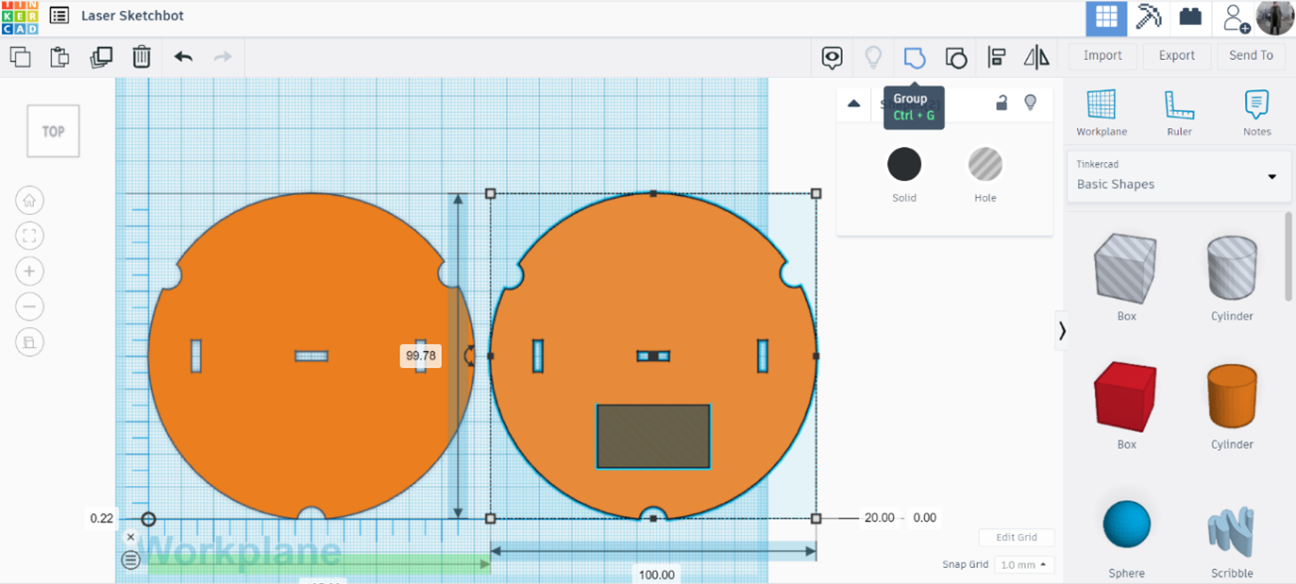
Let’s start creating the Top Panel. Select the bottom panel and the black box; and duplicate them. From now, we will call the duplicate on the right side “Top Panel.”
Select the black box of the Top Panel (right) and transform the black box into a hole.
Select the black box on the bottom panel (left) and delete it.
Select the Top Panel (right) and the hole box; and group them.
Motor
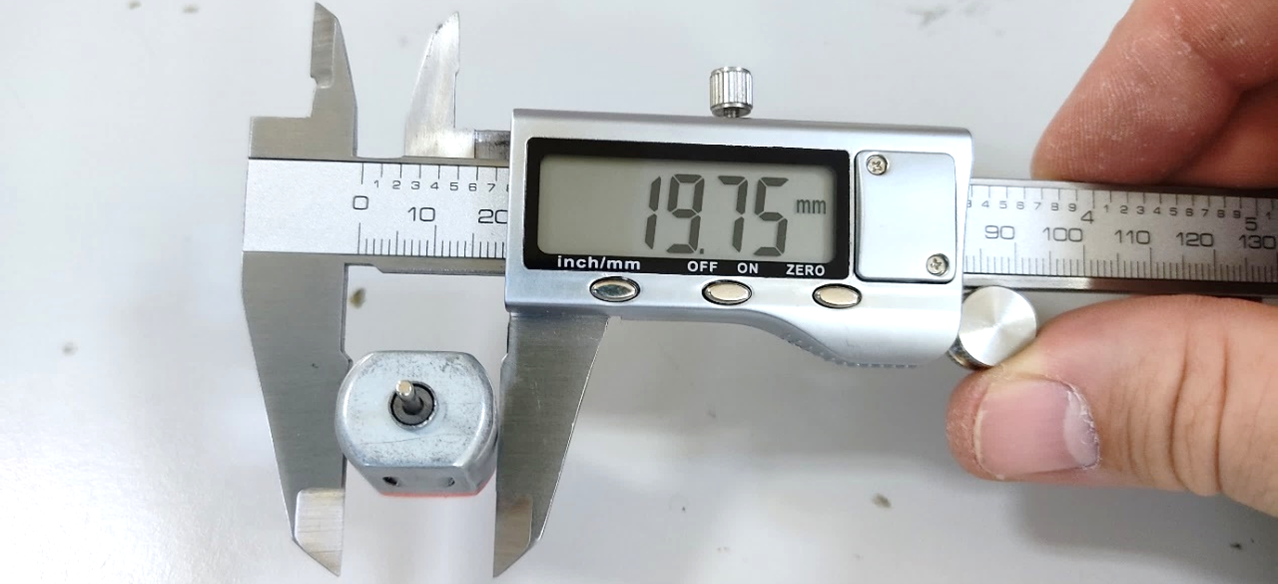
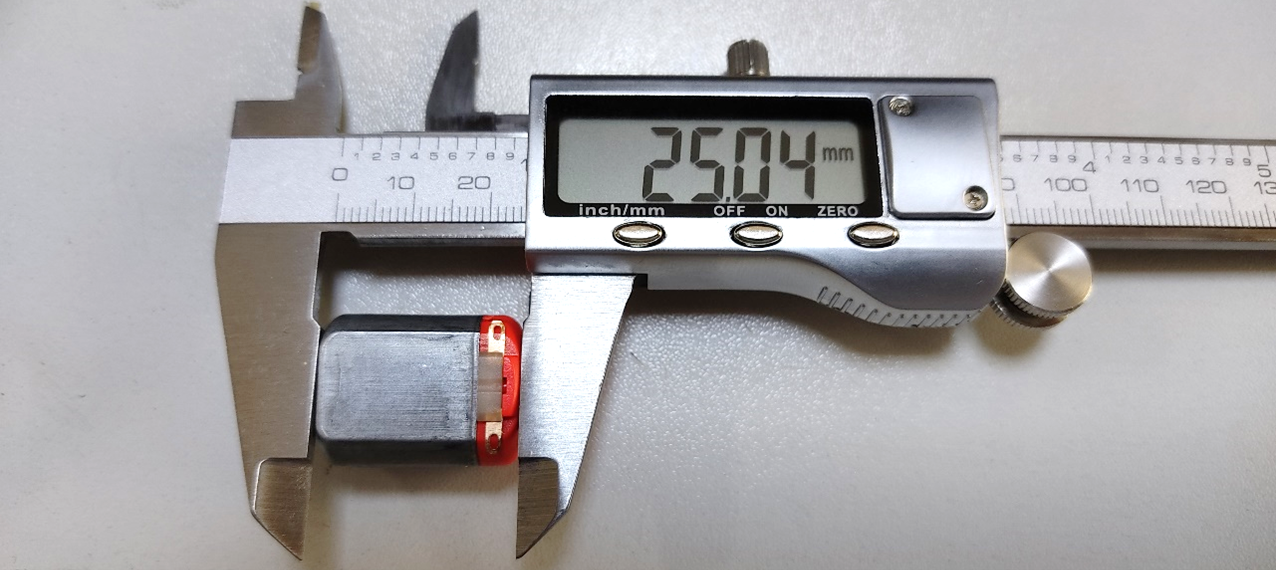
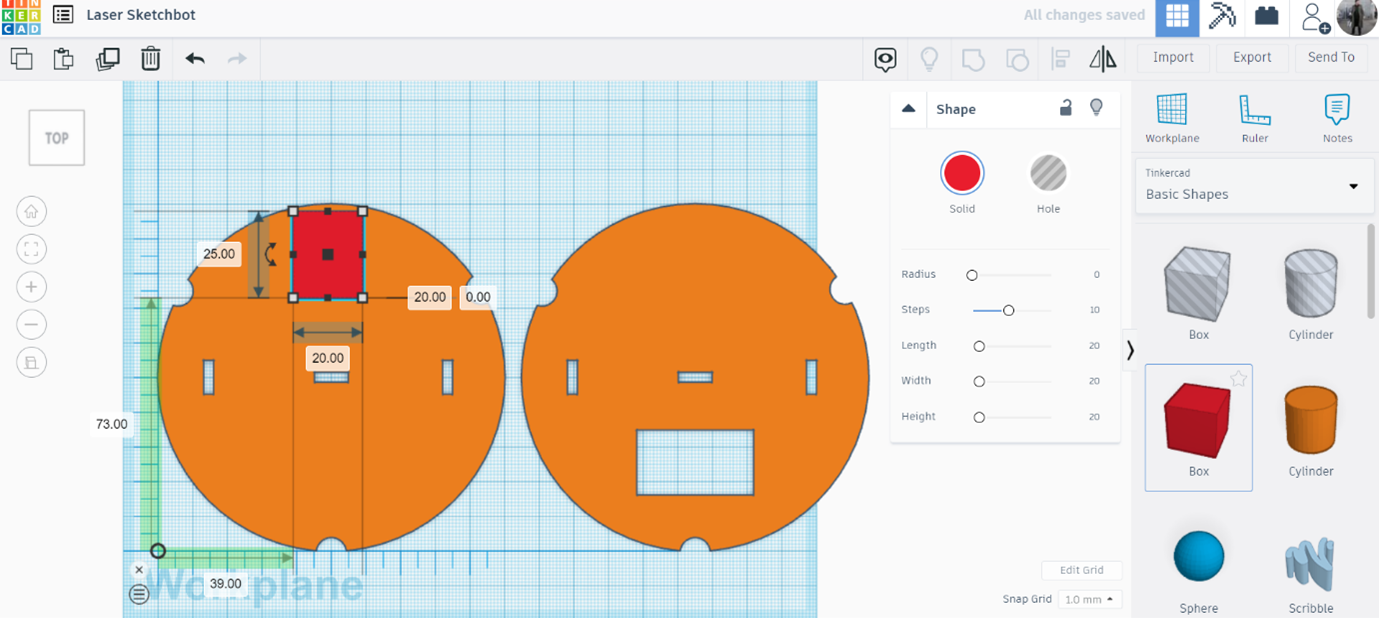
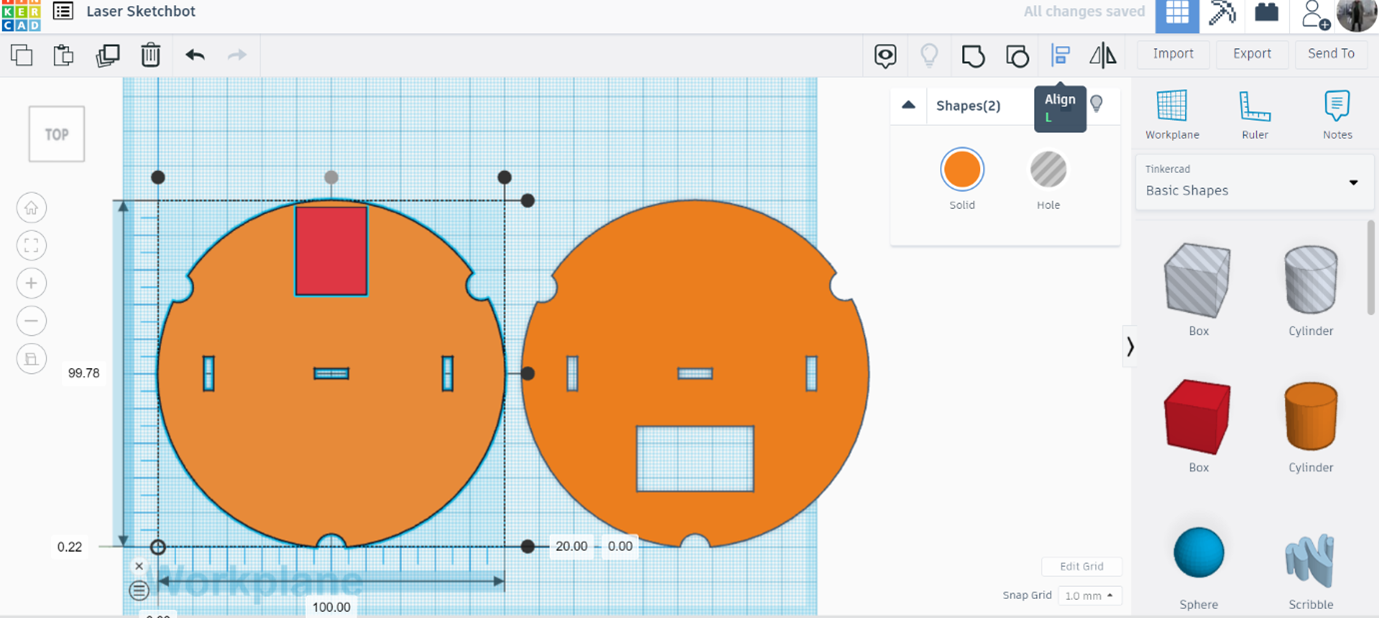
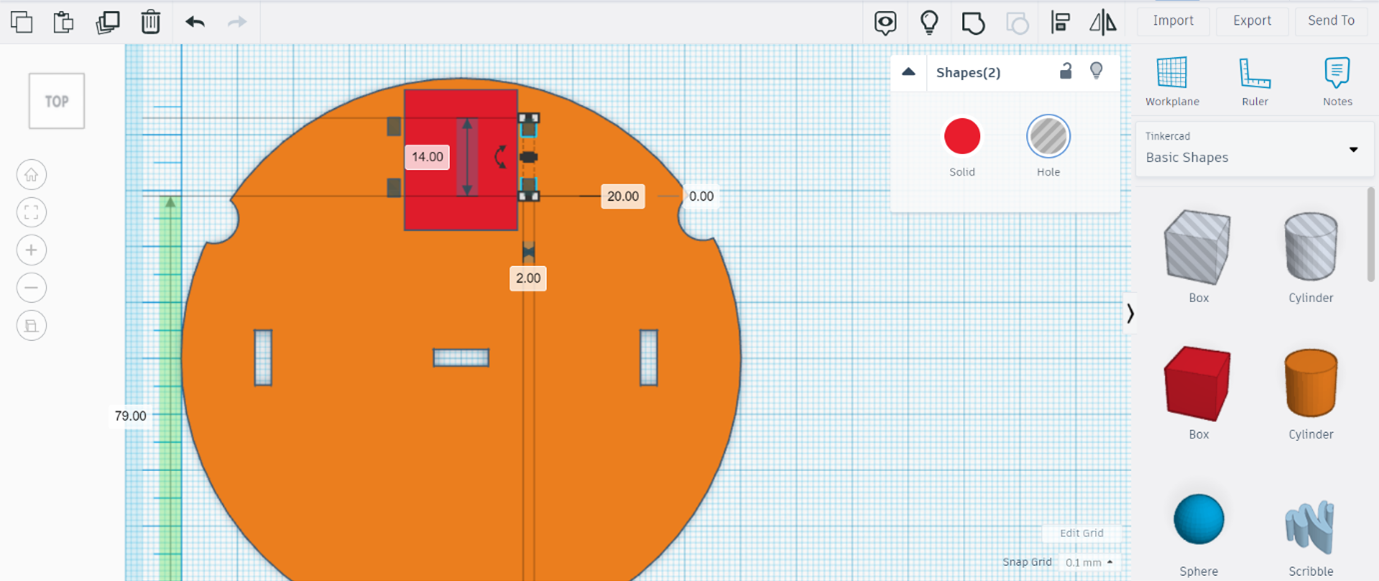
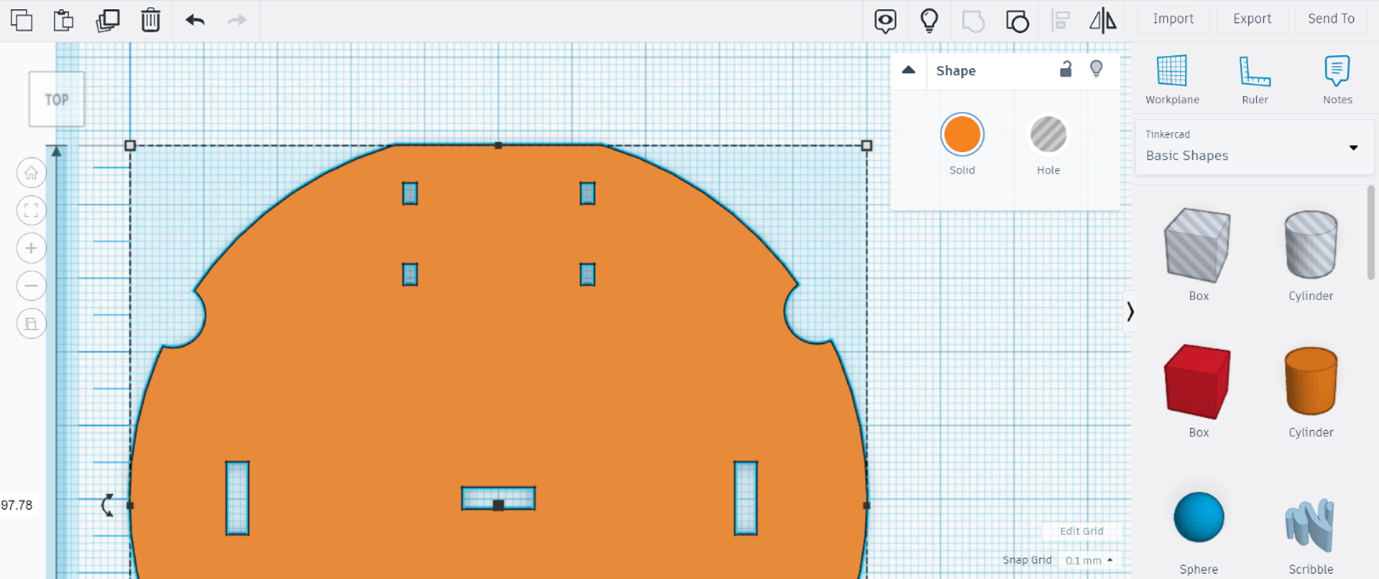
Let’s prepare the place for the motor. Measure the electric motor. The measurements for a standard hobby motor are 19.75mm width (we will round it to 20mm) and 25.04mm length (we will round it to 25mm). Bring a box to the bottom panel and change to those measures (25mm x 20mm). Place it on the upper part (with both corners touching the circumference.)
Using the Align Tool, align the red box to the middle through the Y axis.
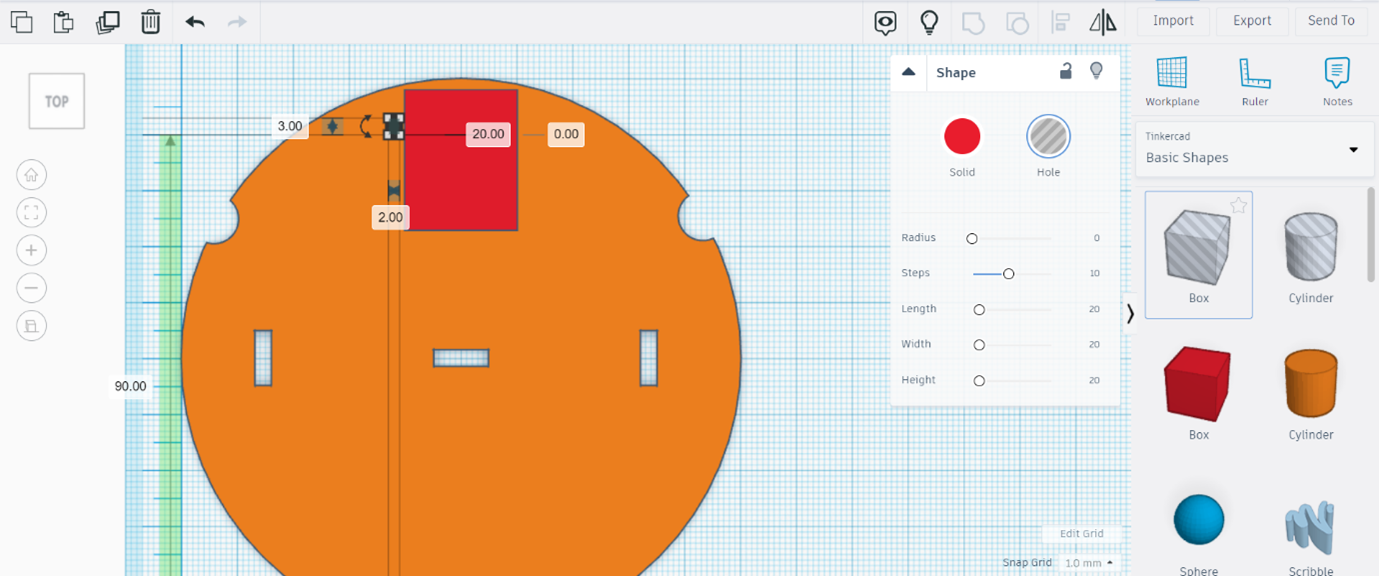
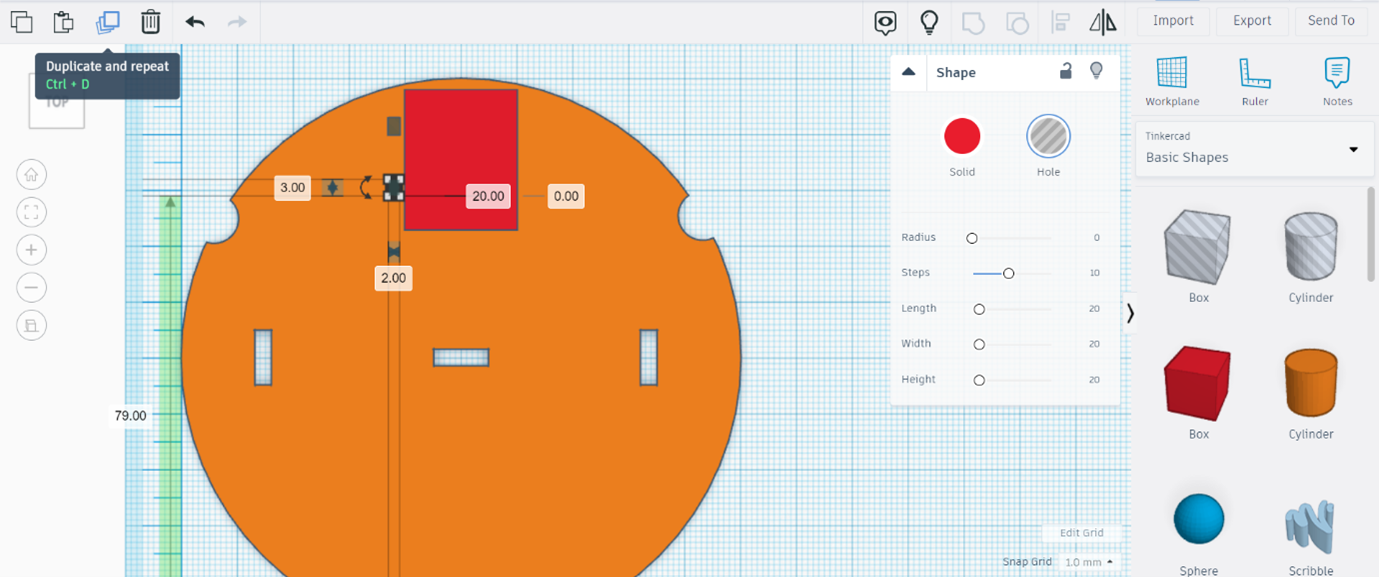
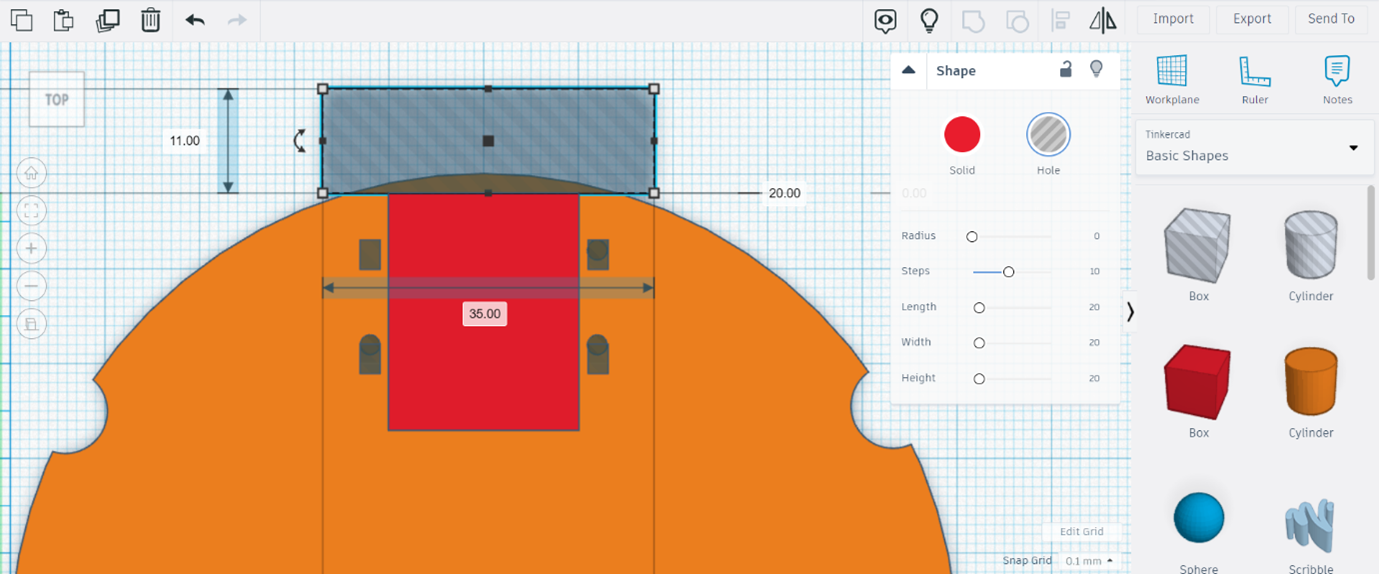
Now we will create the holes for the zip-ties, to keep the motor in place. Bring a hole box to the left side of the red box. Change its dimensions to 3mm (length) x 2mm (width.)
Duplicate three times that small hole box, so you can have two hole-boxes on the left side and two hole boxes on the right side of the red box.
Bring a hole box and place it over the red box. Dimensions must be enough to cut a small portion of the bottom panel but separated several millimeters from the small hole boxes.
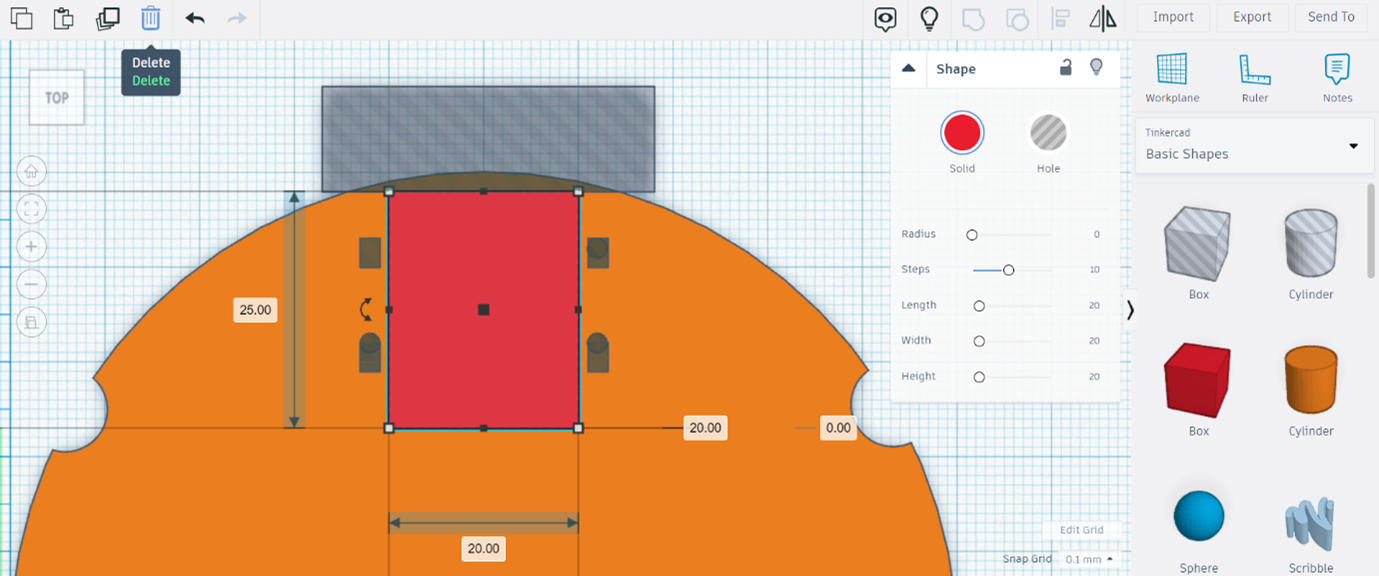
Delete the red box.
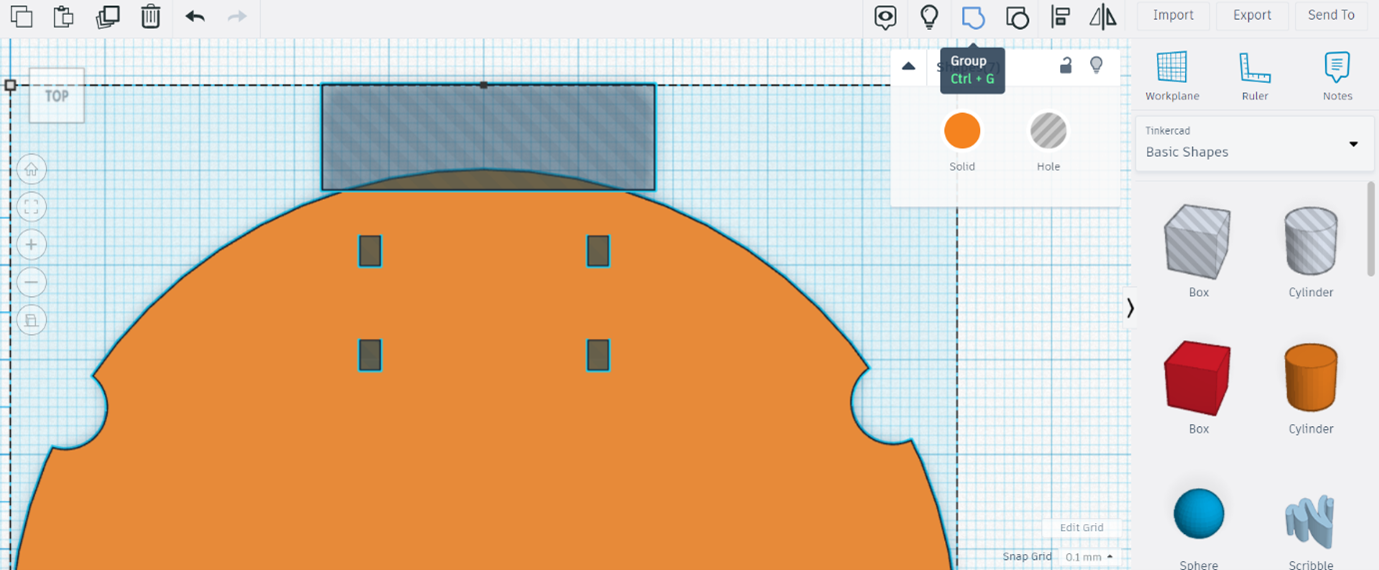
Select all the holes and the bottom panel and group them.
A Hole for the Wires
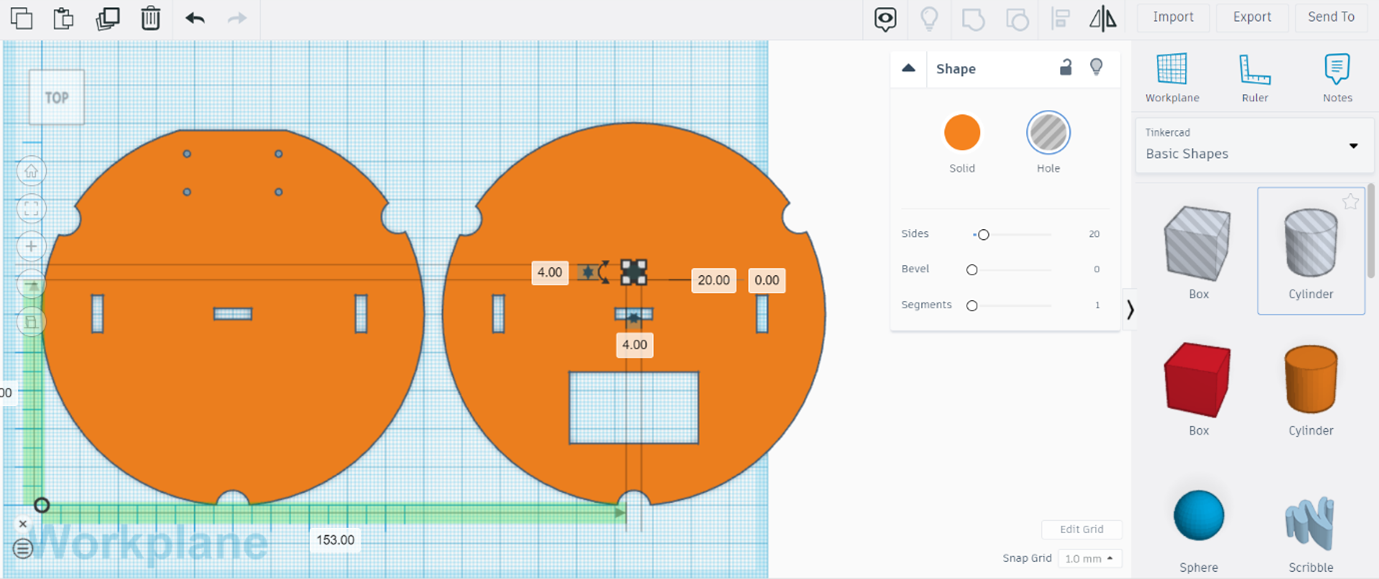
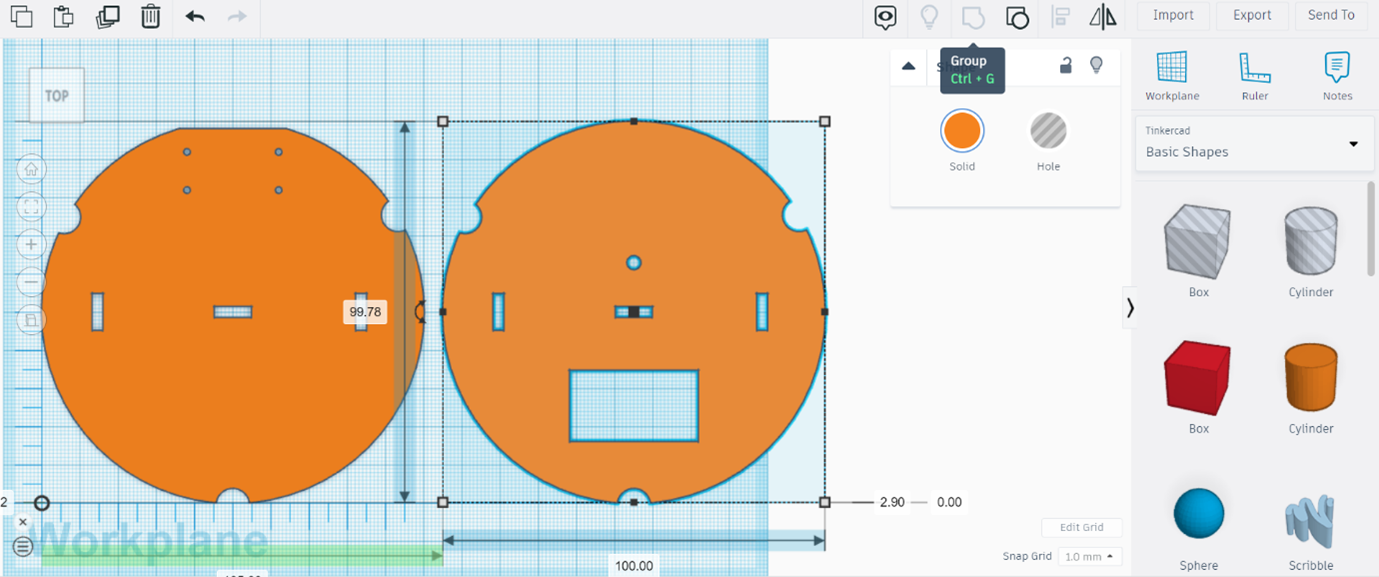
Go to the Top Panel (right) and place a hole cylinder of 4mm x 4mm. Then, group it with the Top Panel. The cables from the battery holder will pass through this hole, to connect with the motor.
Side Columns
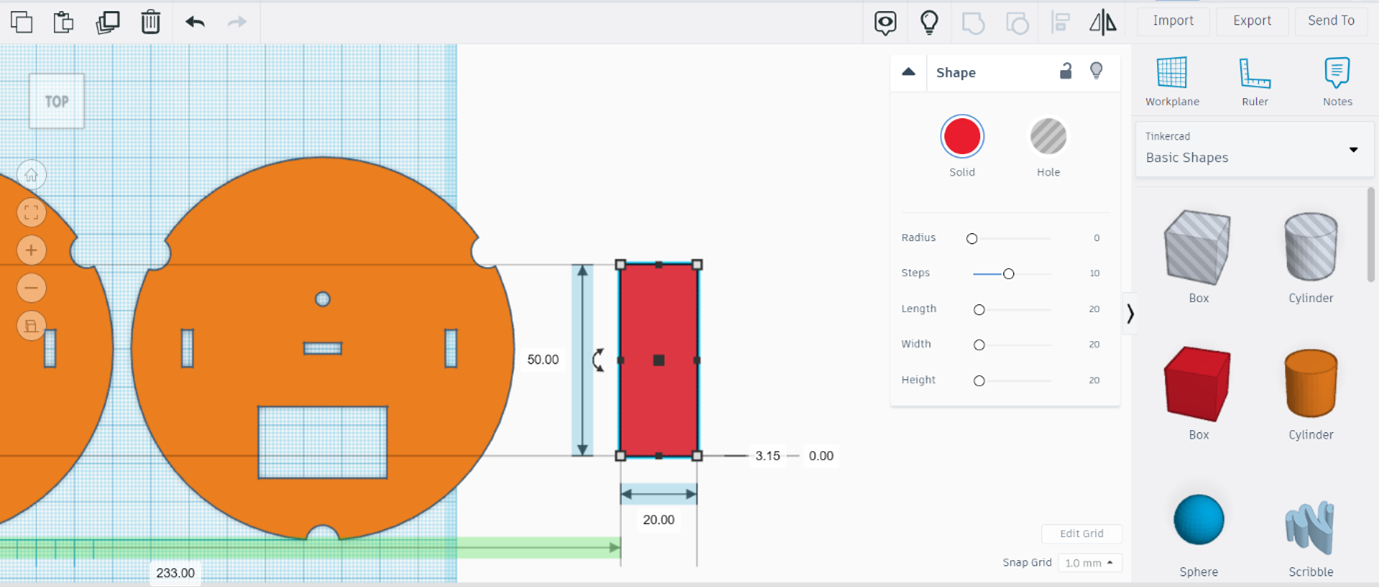
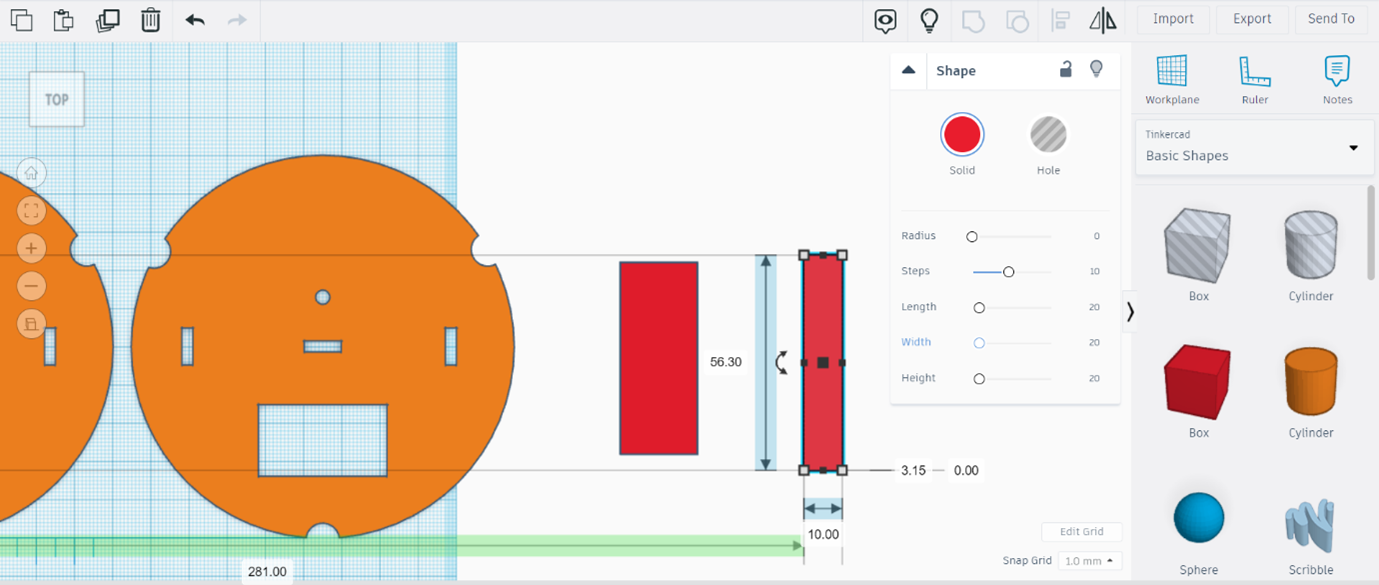
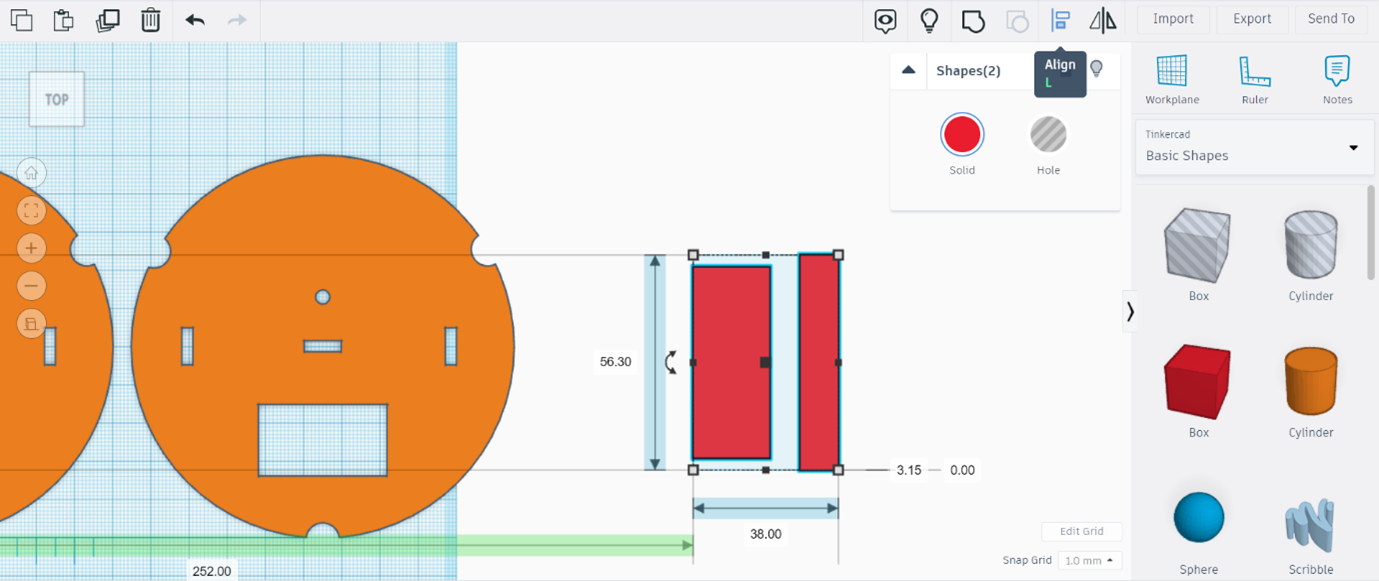
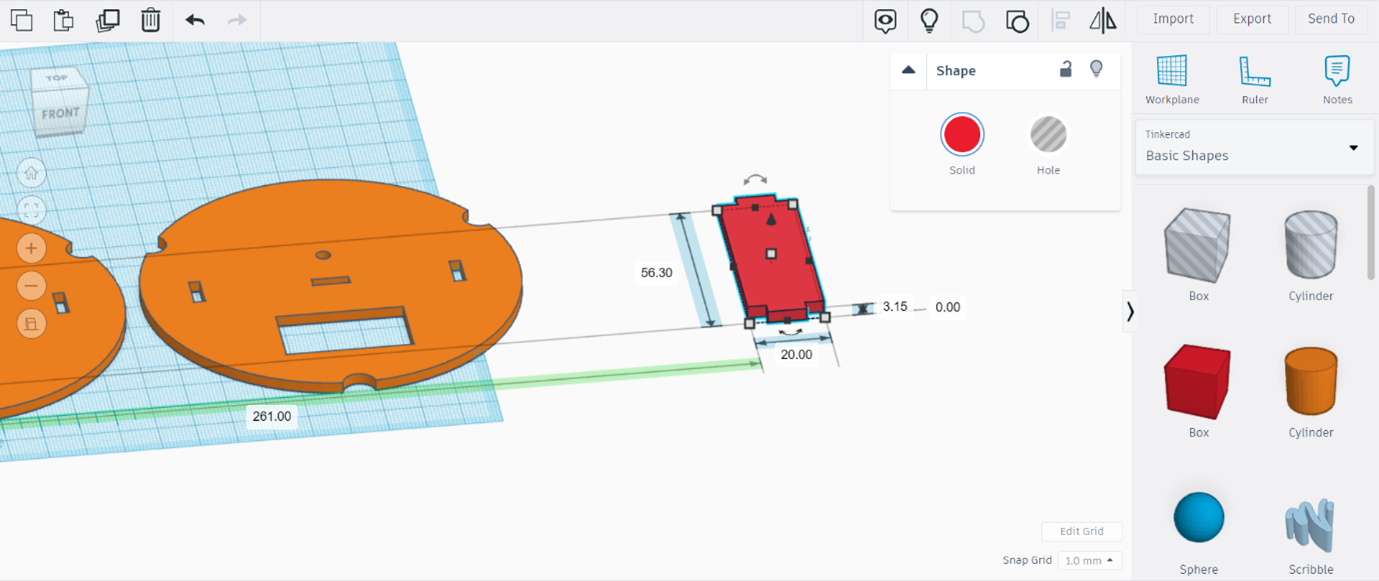
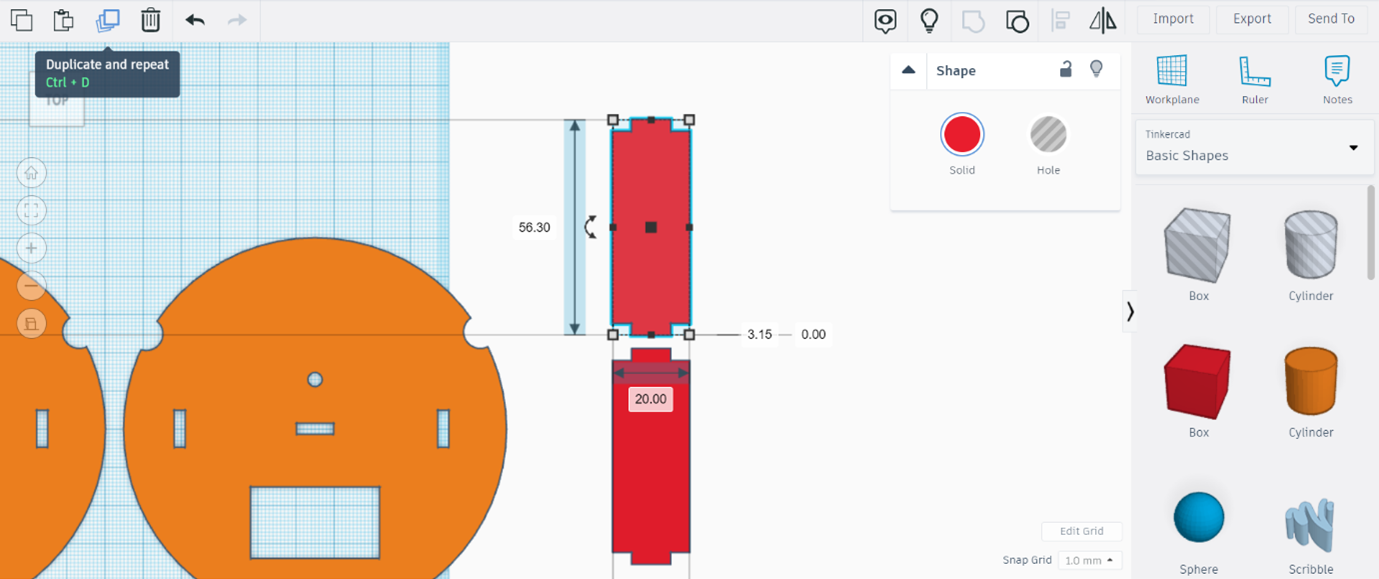
Time to create the Side Columns. Bring a box and change the dimensions to 50mm (length) x 20mm (width) x 3.15mm (height, thickness of the wooden tablet.)
Bring another box and change the dimensions to 56.30mm (length) x 10mm (width) x 3.15mm (height, thickness of the wooden tablet.)
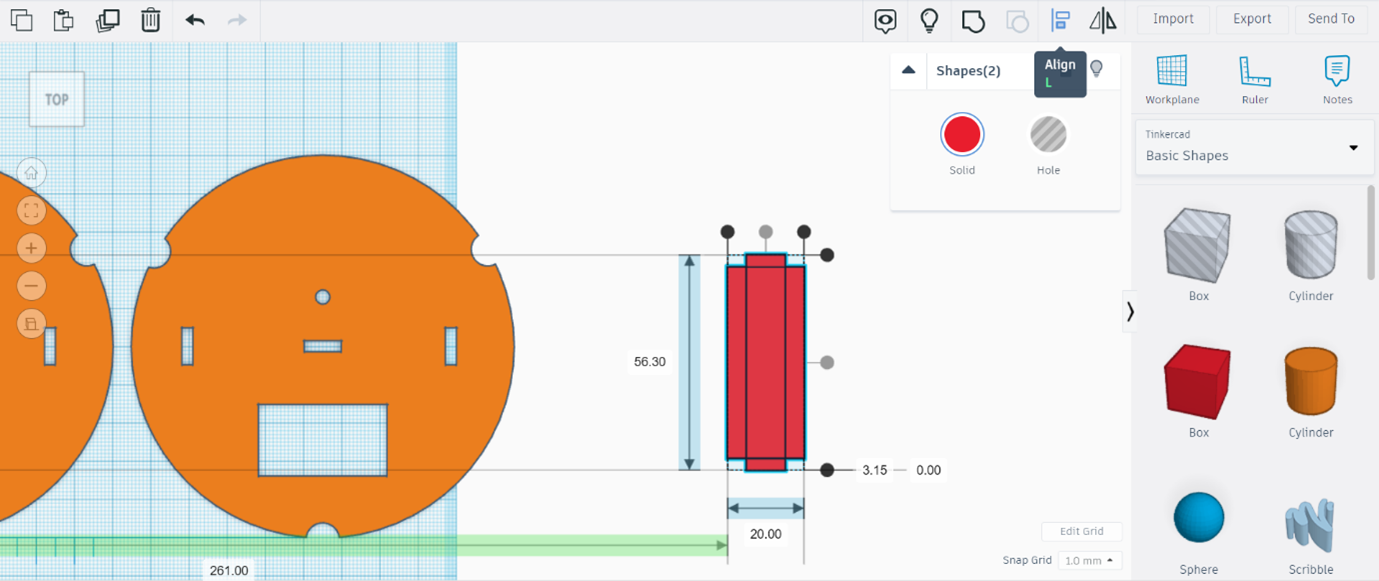
Select both boxes and use the Align Tool to completely center them.
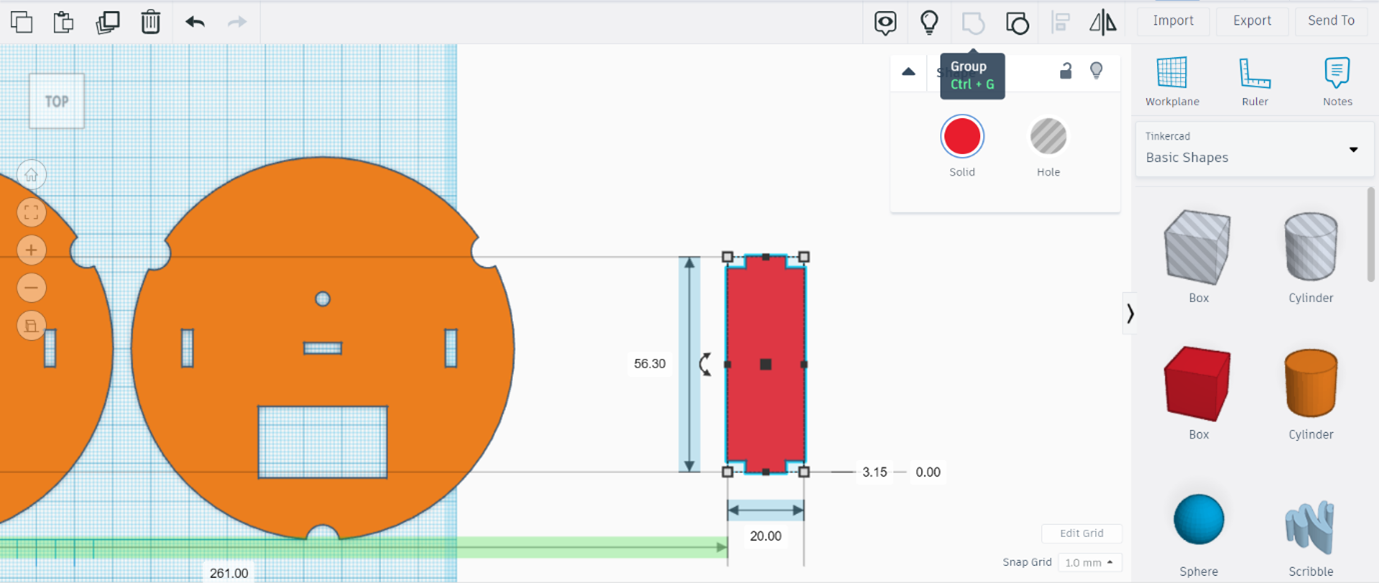
Group both boxes. If you did it right, it will look like a whole figure without dividing lines. In case you see dividing lines, check that both boxes are 3.15mm high and over the workplane.
Create a duplicate of the Side Column.
Center Column
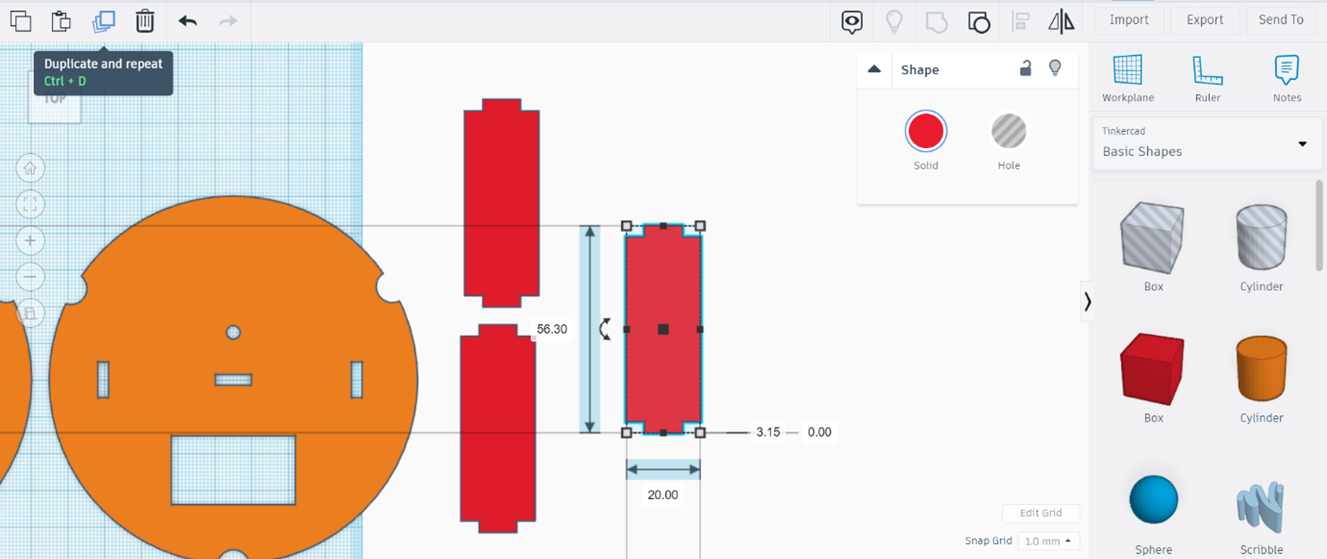
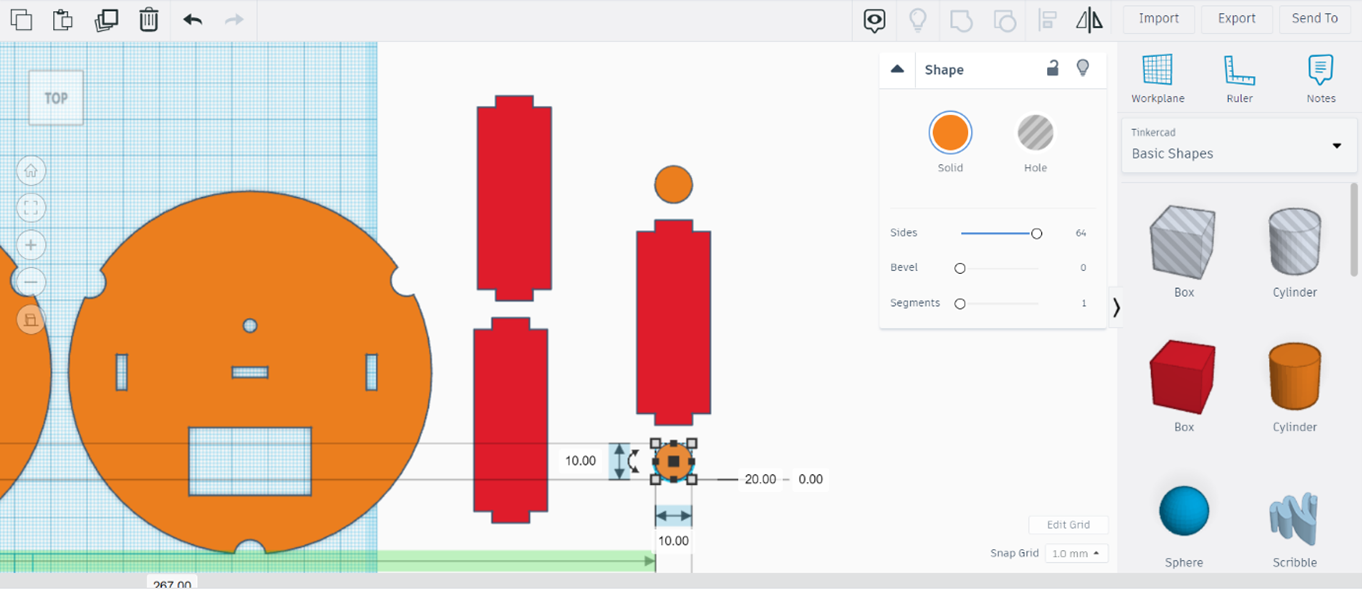
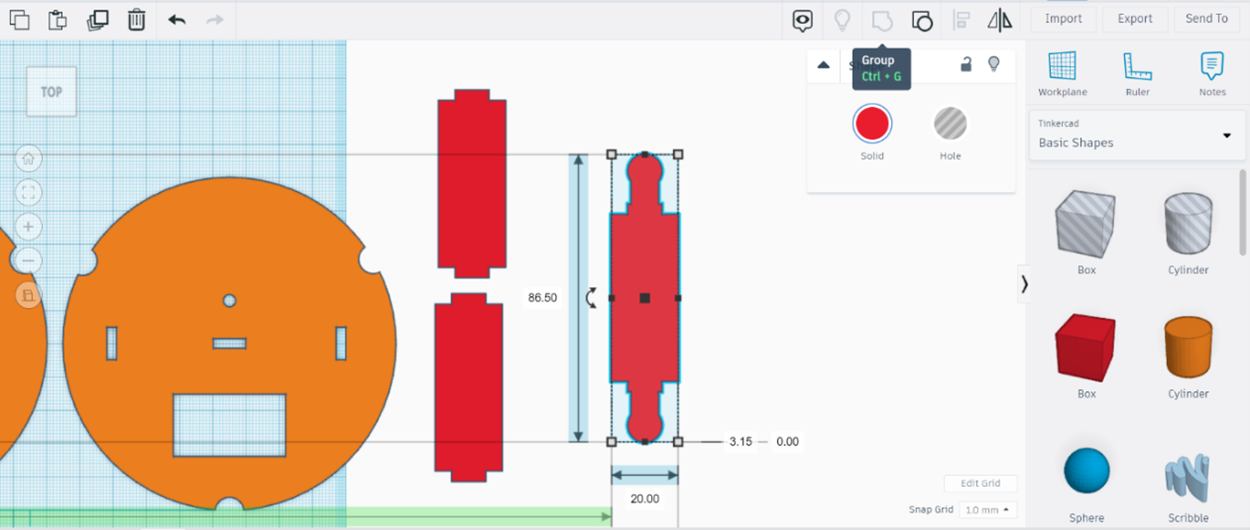
Now we will create the Center Column. This piece will be different to the other columns because the rubber bands will be tied here to keep the plumasters in place. Create another duplicate of the side column.
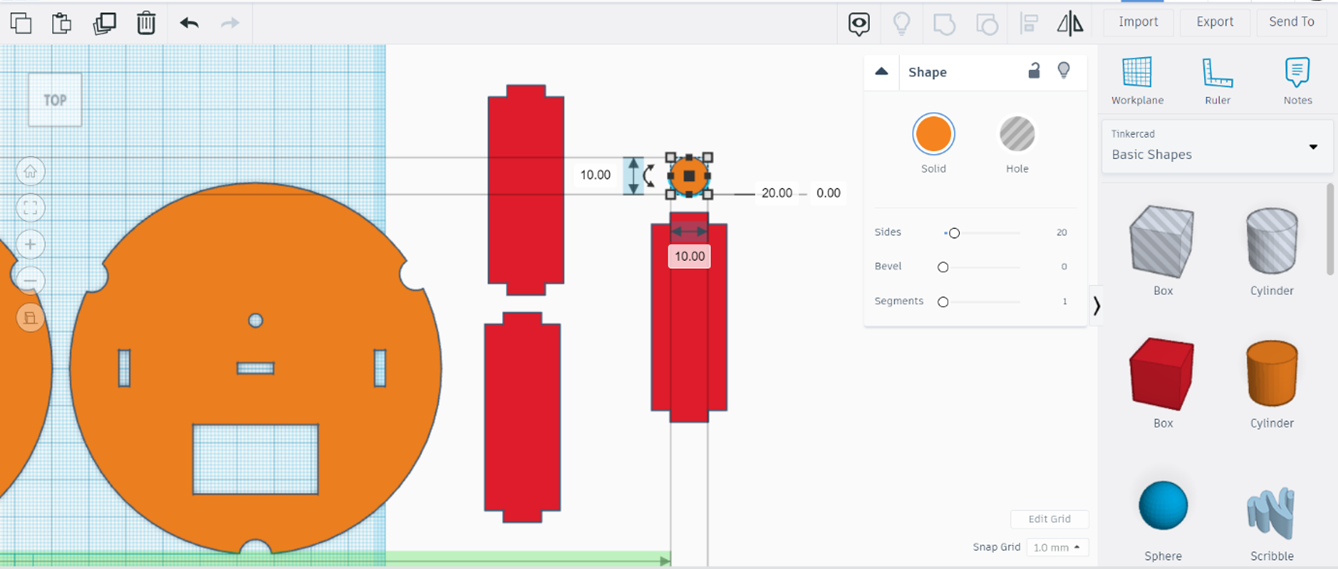
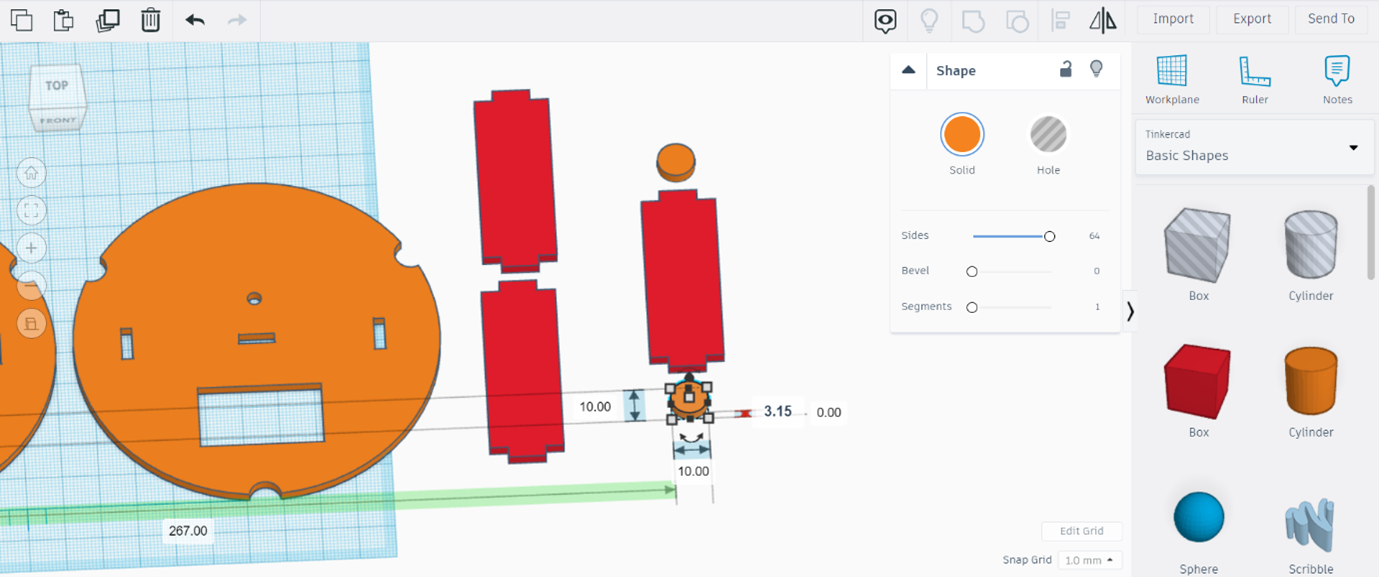
Now, bring a cylinder of 10mm x 10mm x 3.15mm (height, thickness of the wooden tablet) and place it up of this new duplicated column.
Duplicate the cylinder and bring it down of the duplicated column. Don’t forget to check that all the shapes are 3.15mm high (thickness of the wooden tablet.)
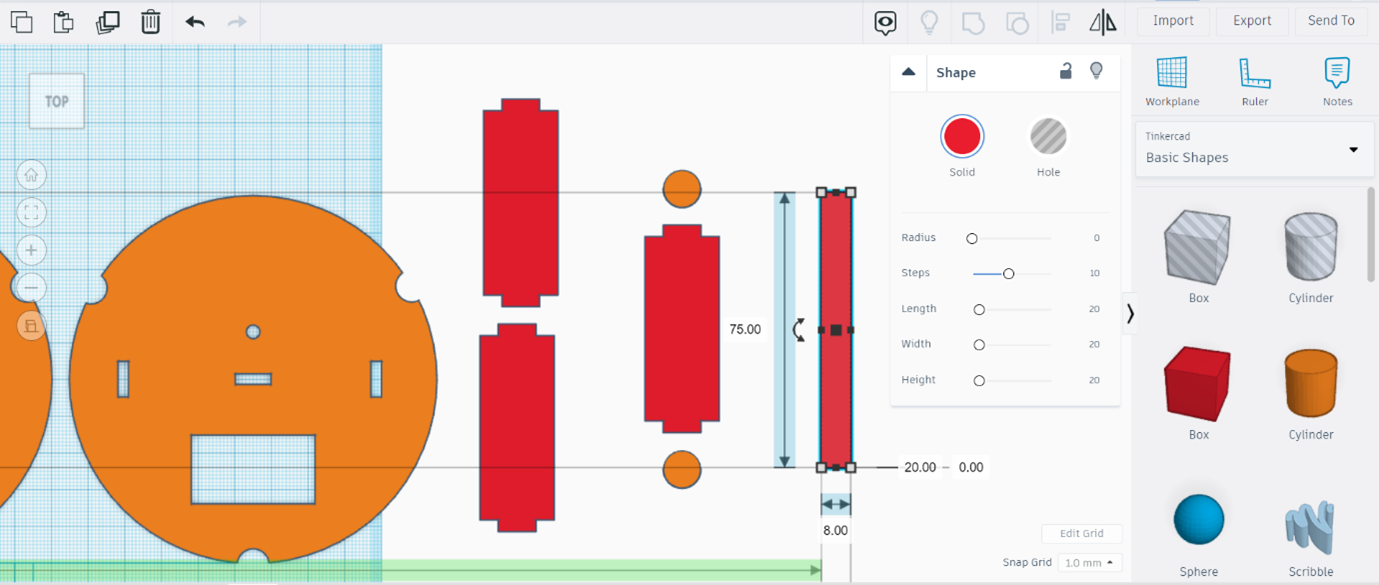
Bring another box and change the dimensions to 75mm (length) x 8mm (width) x 3.15mm (height, thickness of the wooden tablet.)
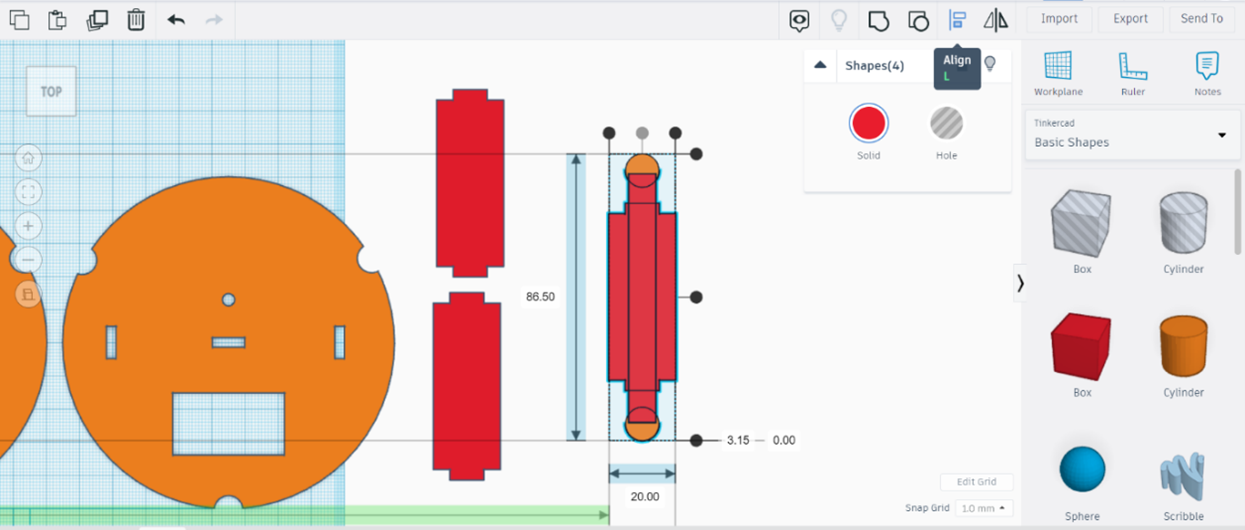
Use the Align Tool to center both boxes. Also, check that the cylinders are aligned with the boxes through the Y axis. The position of each cylinder must be that half of the circumference is occupied by one of the ends of the longer box.
Group the two red boxes with the two cylinders.
Unbalanced Weight
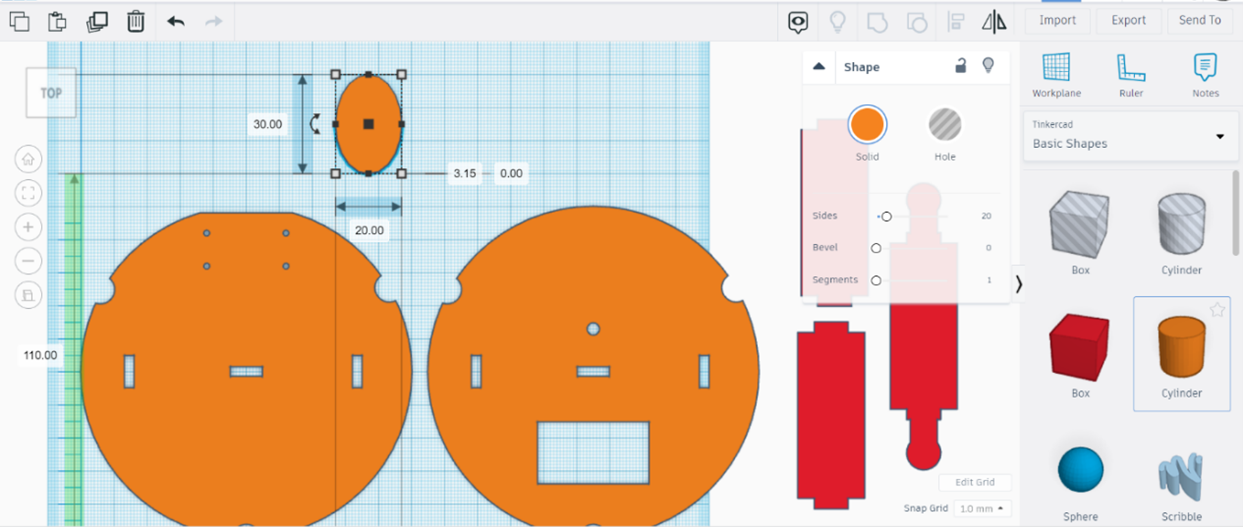
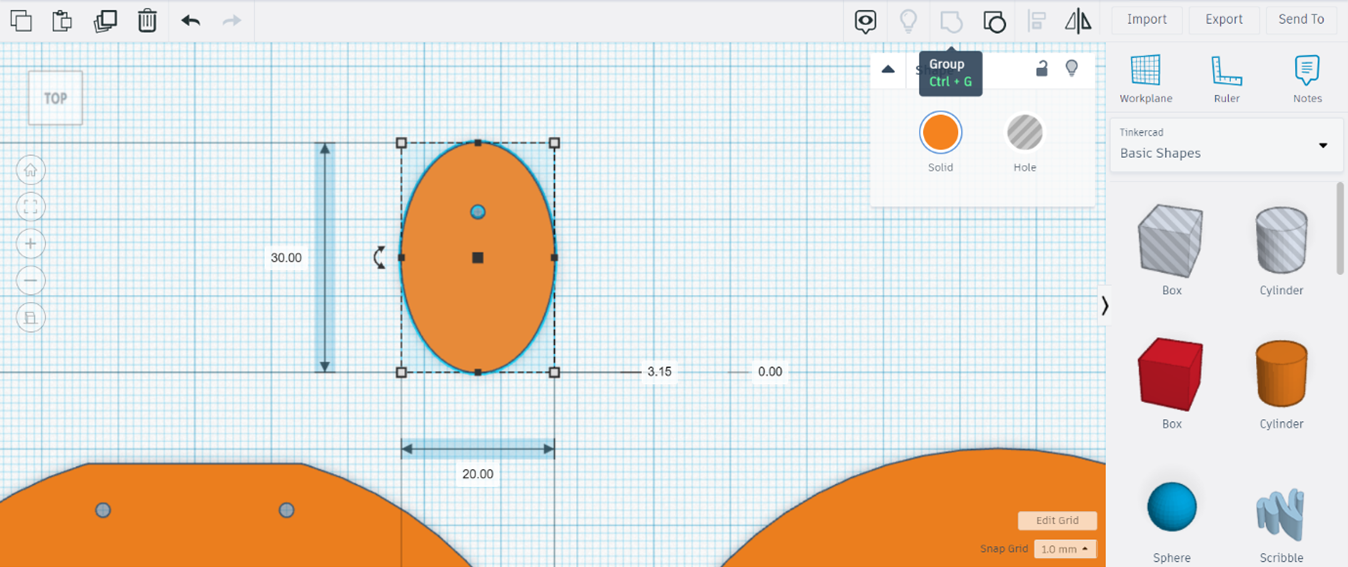
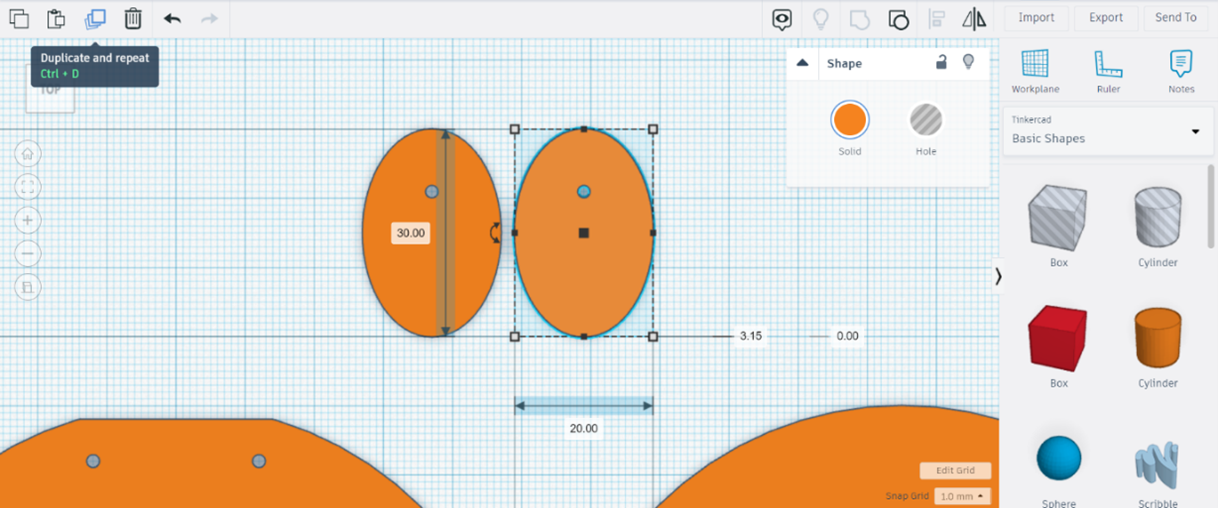
Now we will create the unbalanced weight that makes the robot vibrate and move. Bring a cylinder and change the dimensions to 30mm X 20mm x 3.15mm (height, thickness of the wooden tablet).
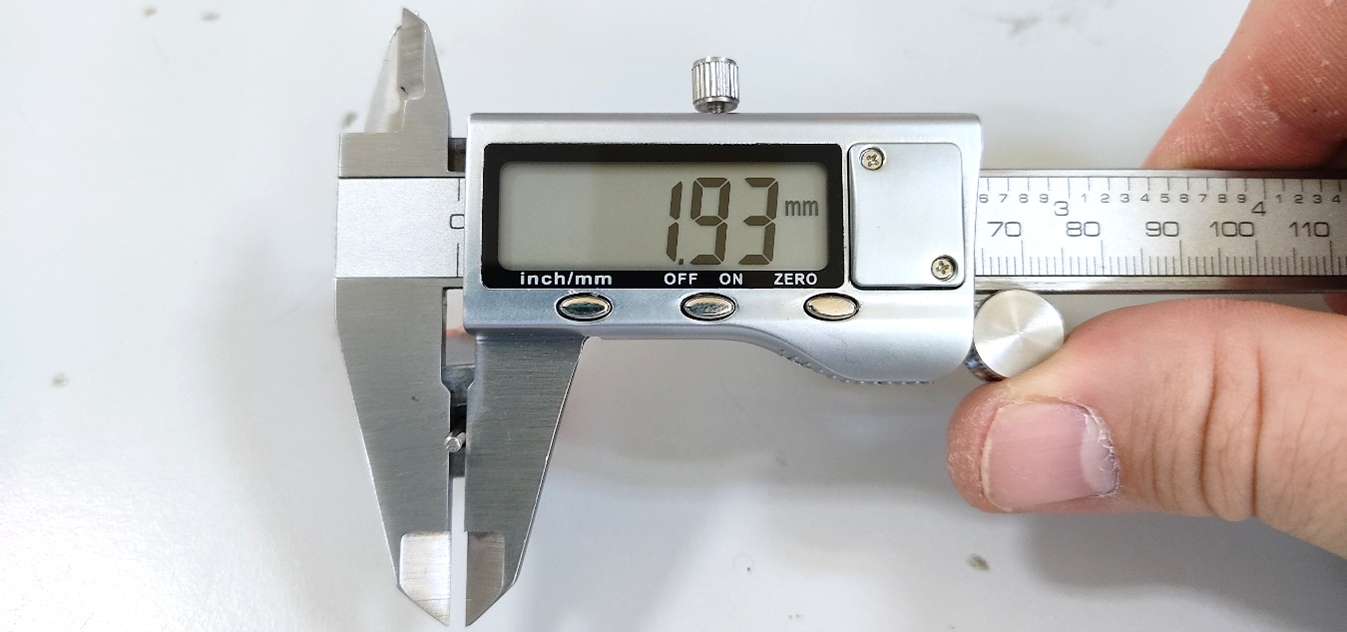
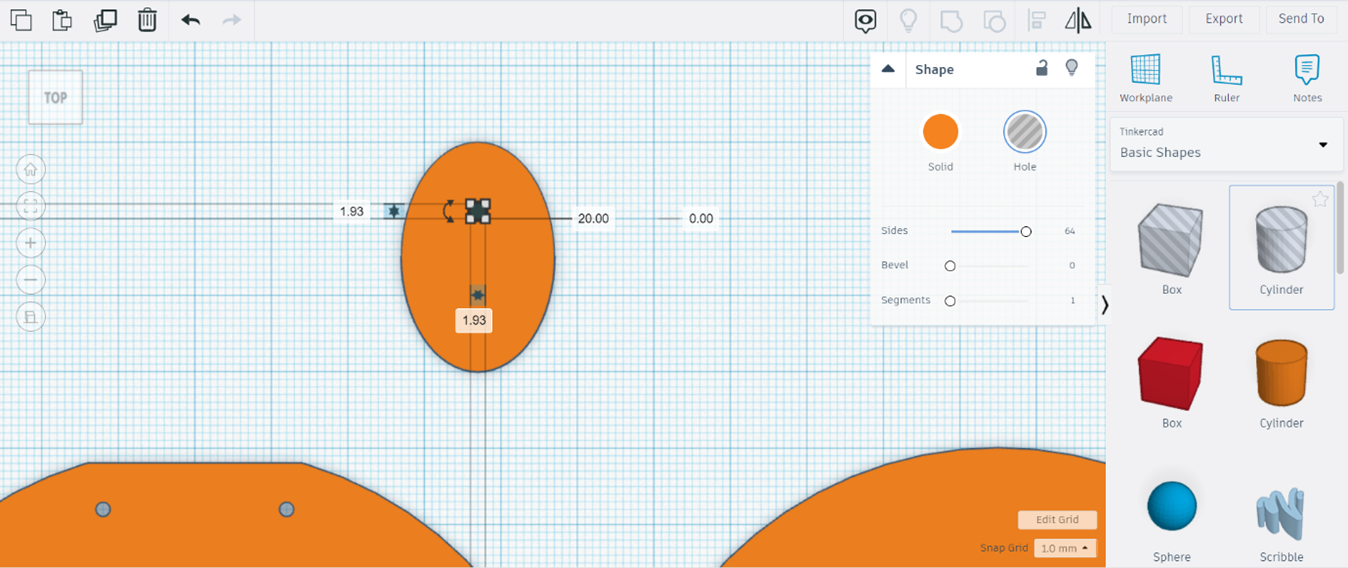
Place a cylinder hole of 1.93mm x 1.93mm. This is the shaft’s diameter of a standard hobby motor.
Select the large cylinder and the small hole; and group them.
Duplicate the unbalanced weight. We finished with the design!
Exporting the Shapes
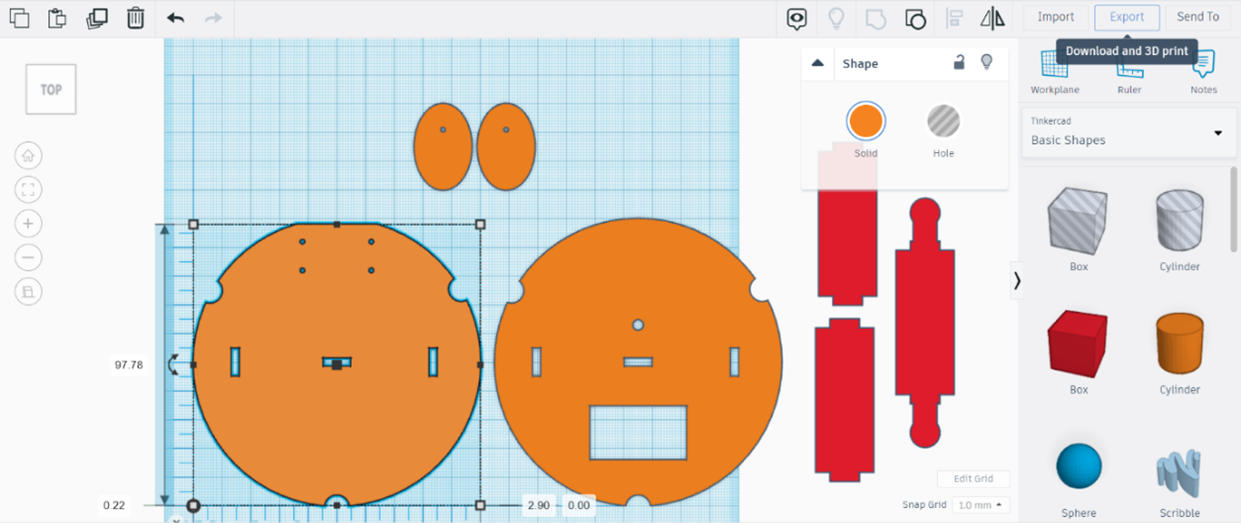
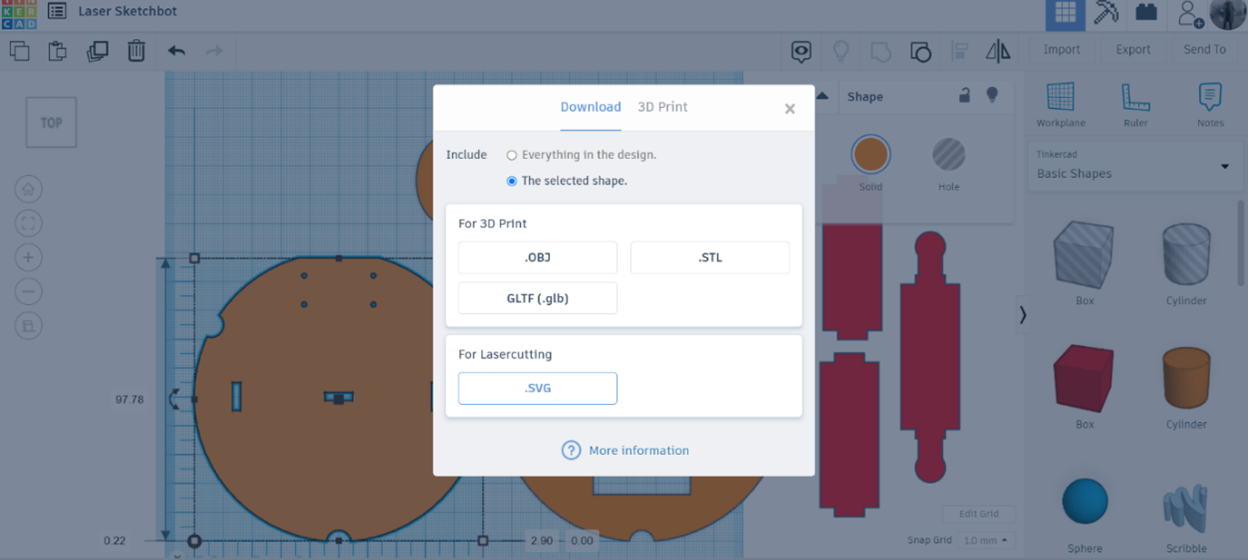
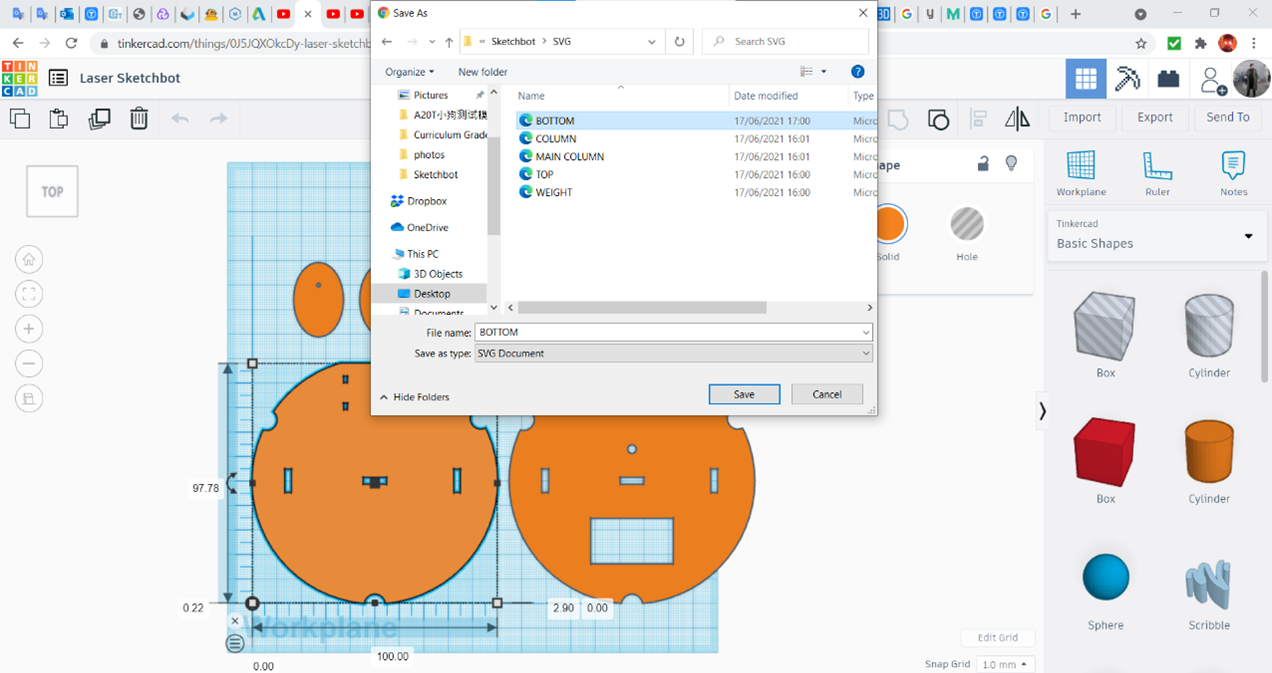
Time to export the shapes. We will do it one by one. Check that all pieces are touching the warplane (click each one and press “D”). Select the first shape (Bottom Panel) and click on “Export”.
Go to “Include” and check on the “The selected shape” option. Go to “For Lasercutting” and click on the “.SVG” option. Then, save the shape in a special folder for this project. Do the same with the other parts.
Preparing the Parts for Laser-cutting (Inkscape)
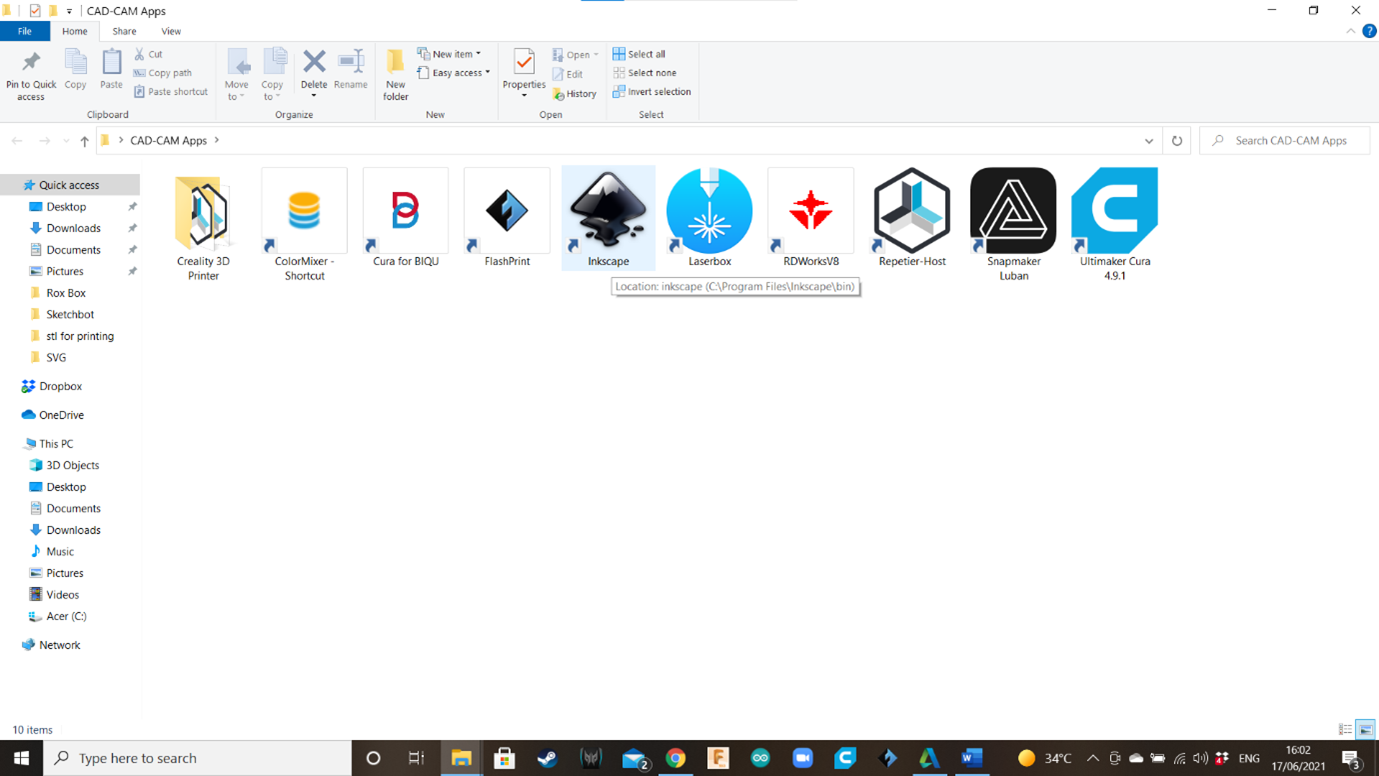
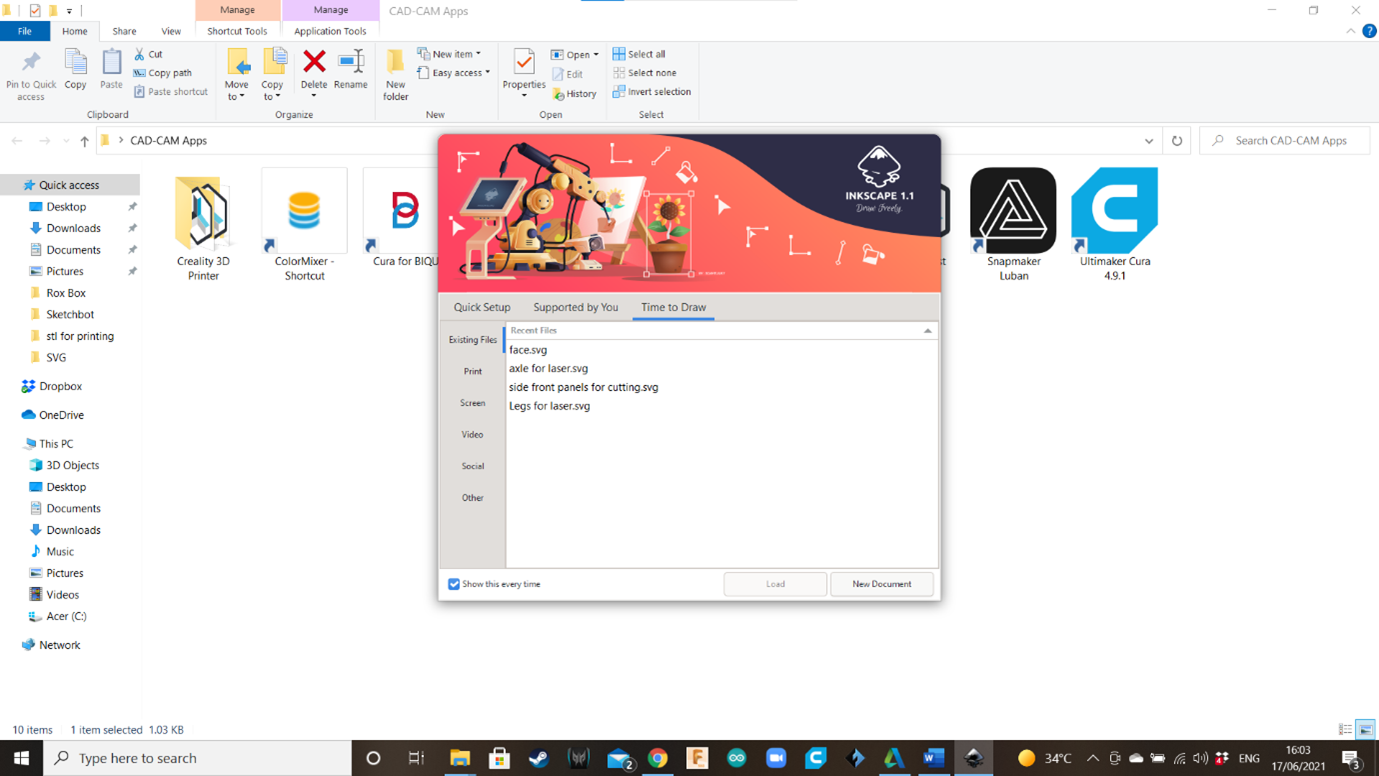



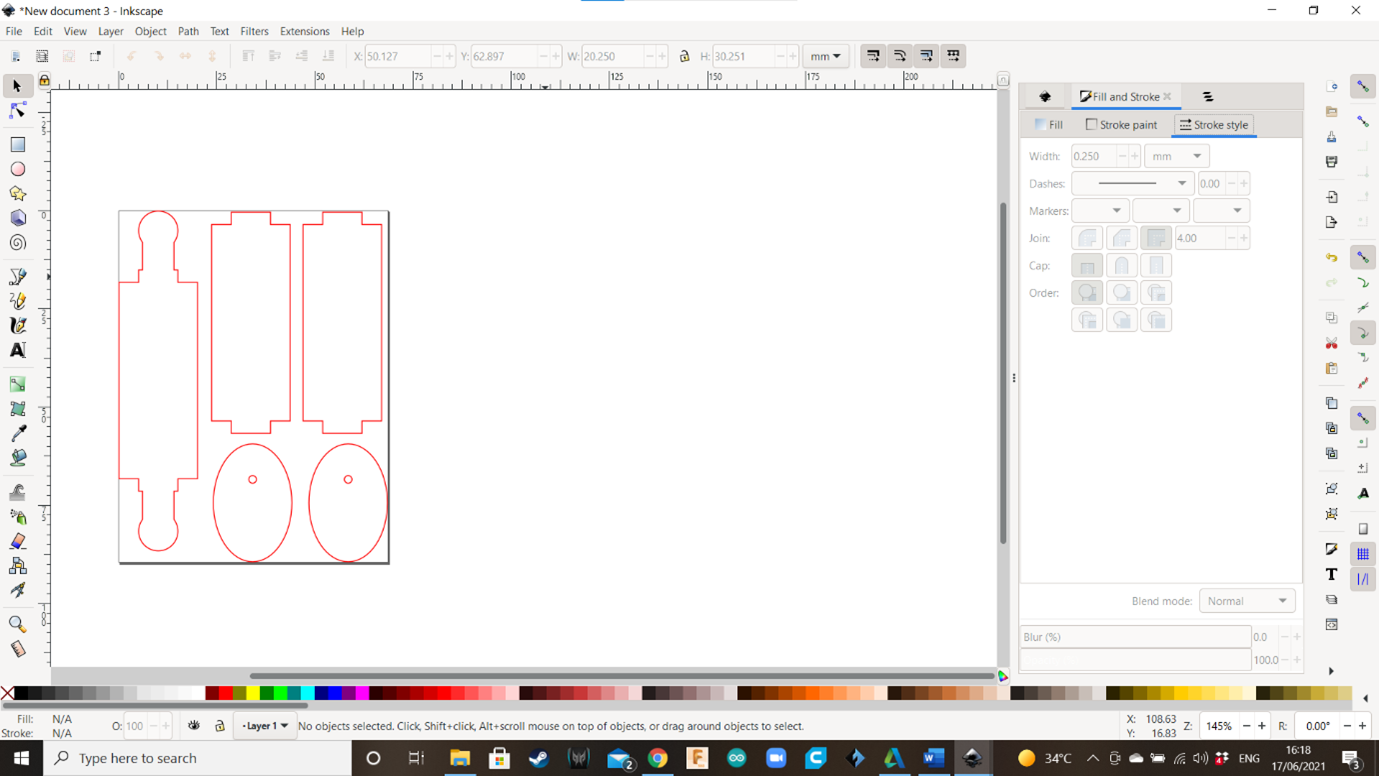
In theory, the parts are ready for cutting. However, Tinkercad shapes usually have a very thin line, and they will be invisible when you bring them to the Snapmaker Luban app. To solve this problem, we will use a tool named Inkscape. Click on the icon and open Inkscape.
A small window will appear. Click on “New Document”.
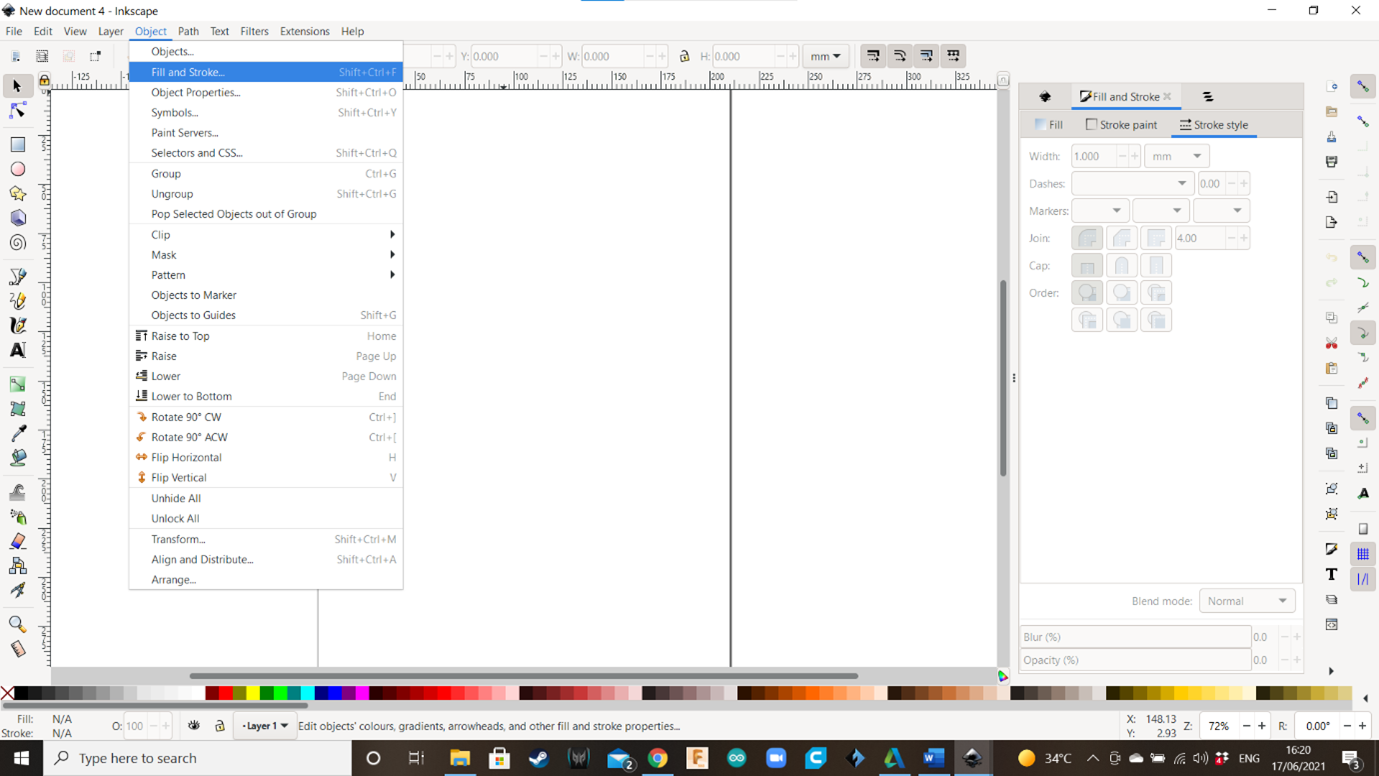
We will need to deploy a special window to modify our shapes. Go to the top bar menu and click on “Object”, then click on “Fill and Stroke”.
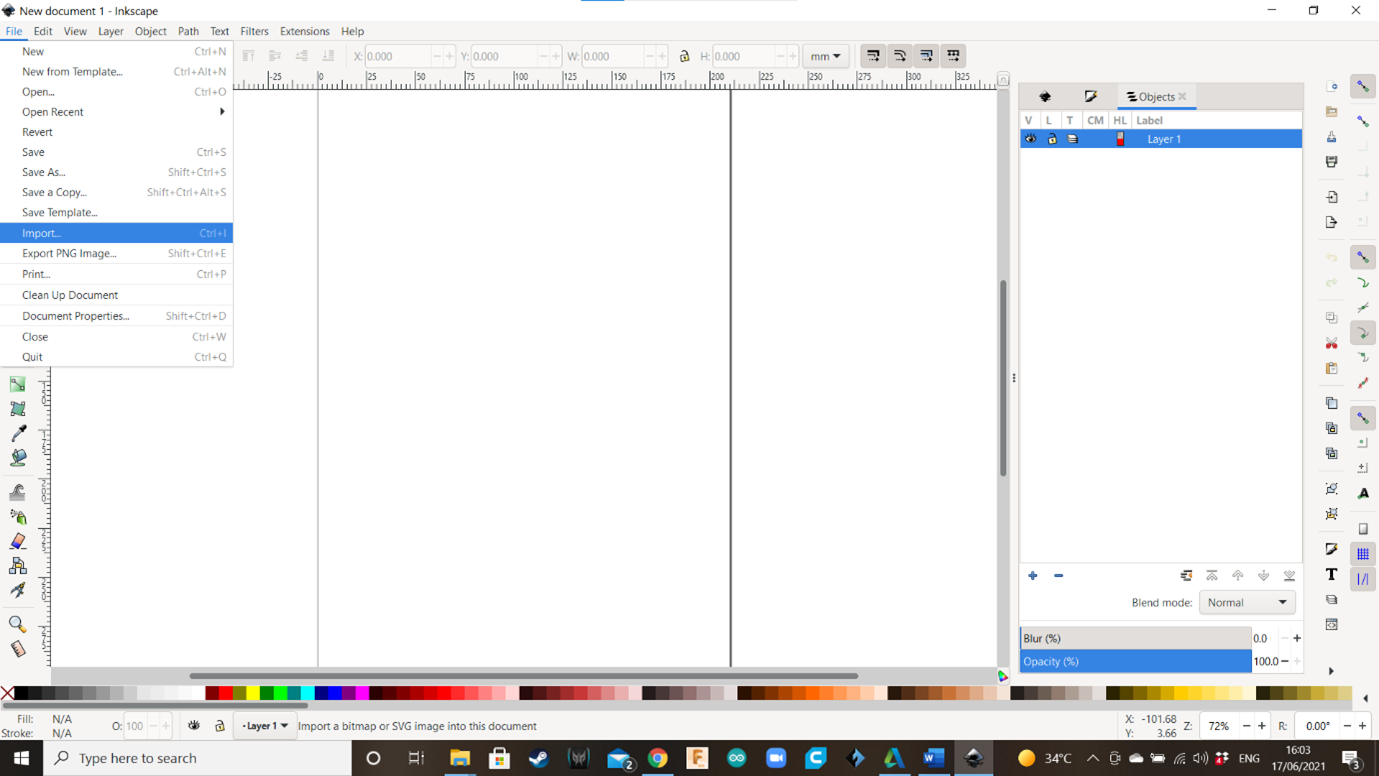
Let’s start importing our shapes. Go to “File” and select the option “Import”.
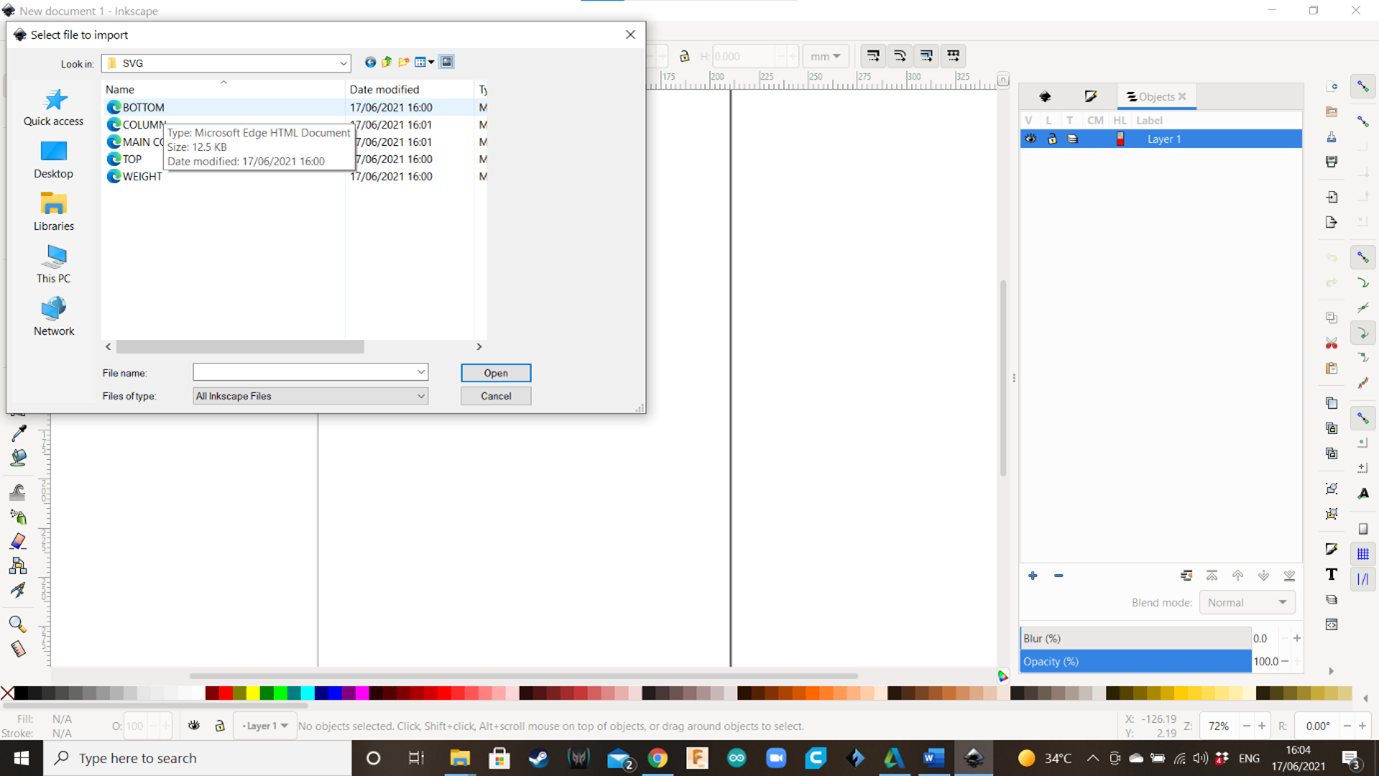
Choose one of the shapes. In this case, we will select the Bottom Panel (here is named “BOTTOM”.)
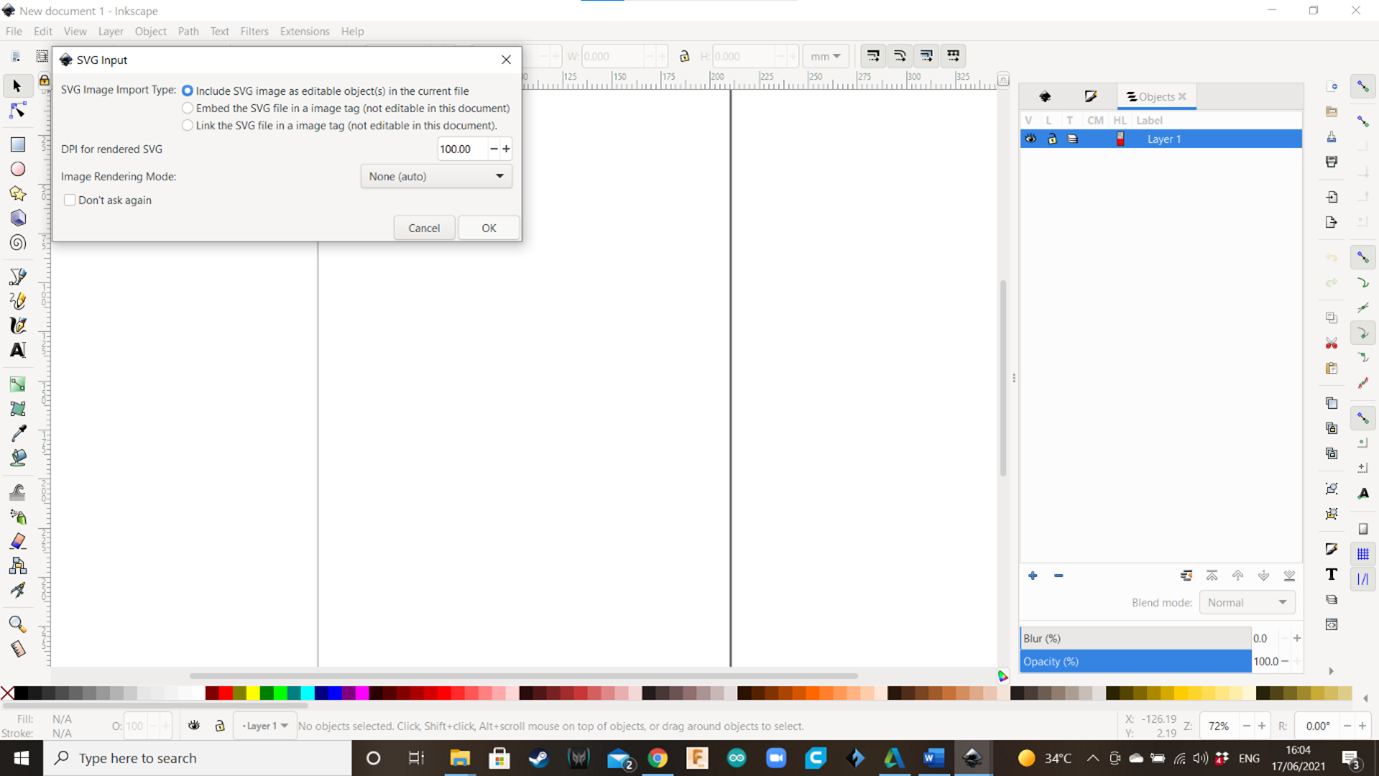
A window named “SVG Input” will appear. Select the first option “Include SVG image as editable…” and go directly to “OK.”
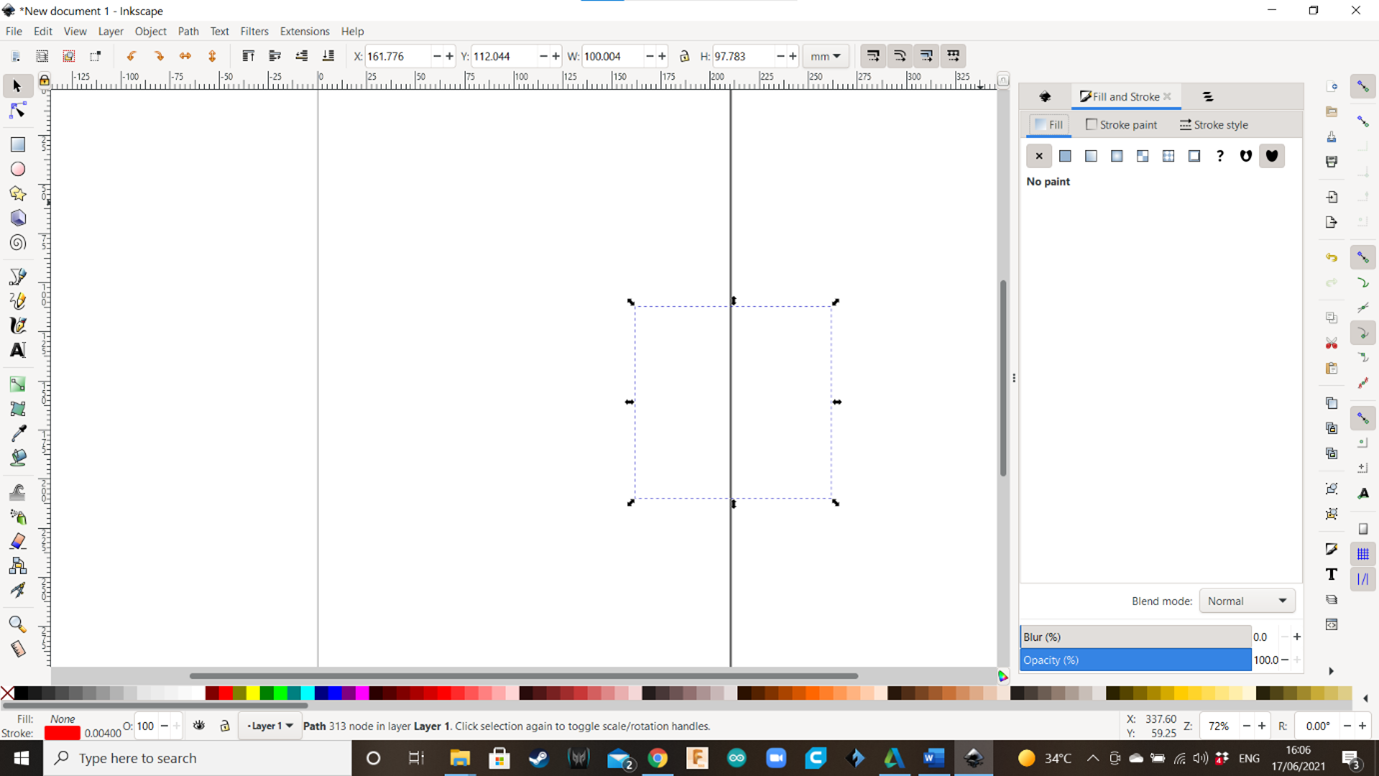
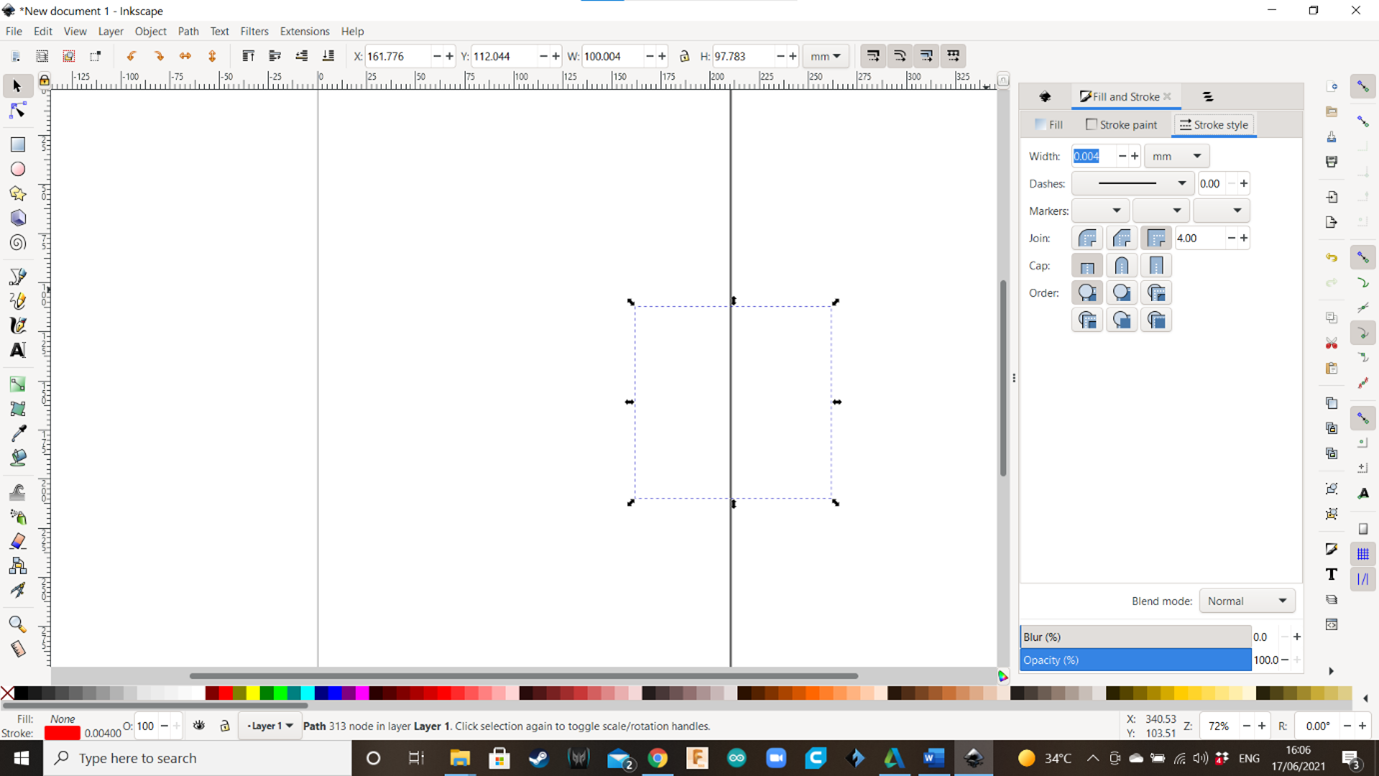
As expected, the Bottom Panel is not visible, and you can only see a selection square. So, go to the “Fill and Stroke” area (right area of the screen).
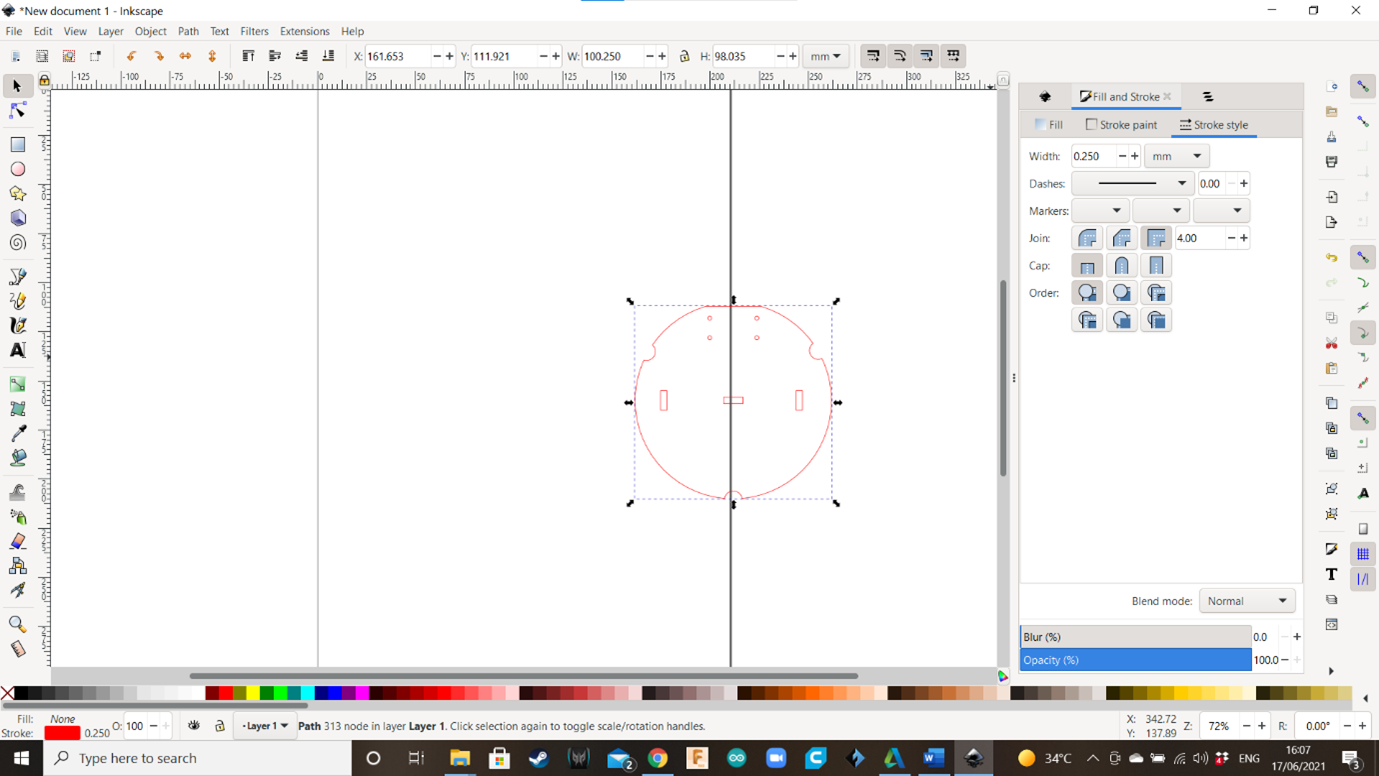
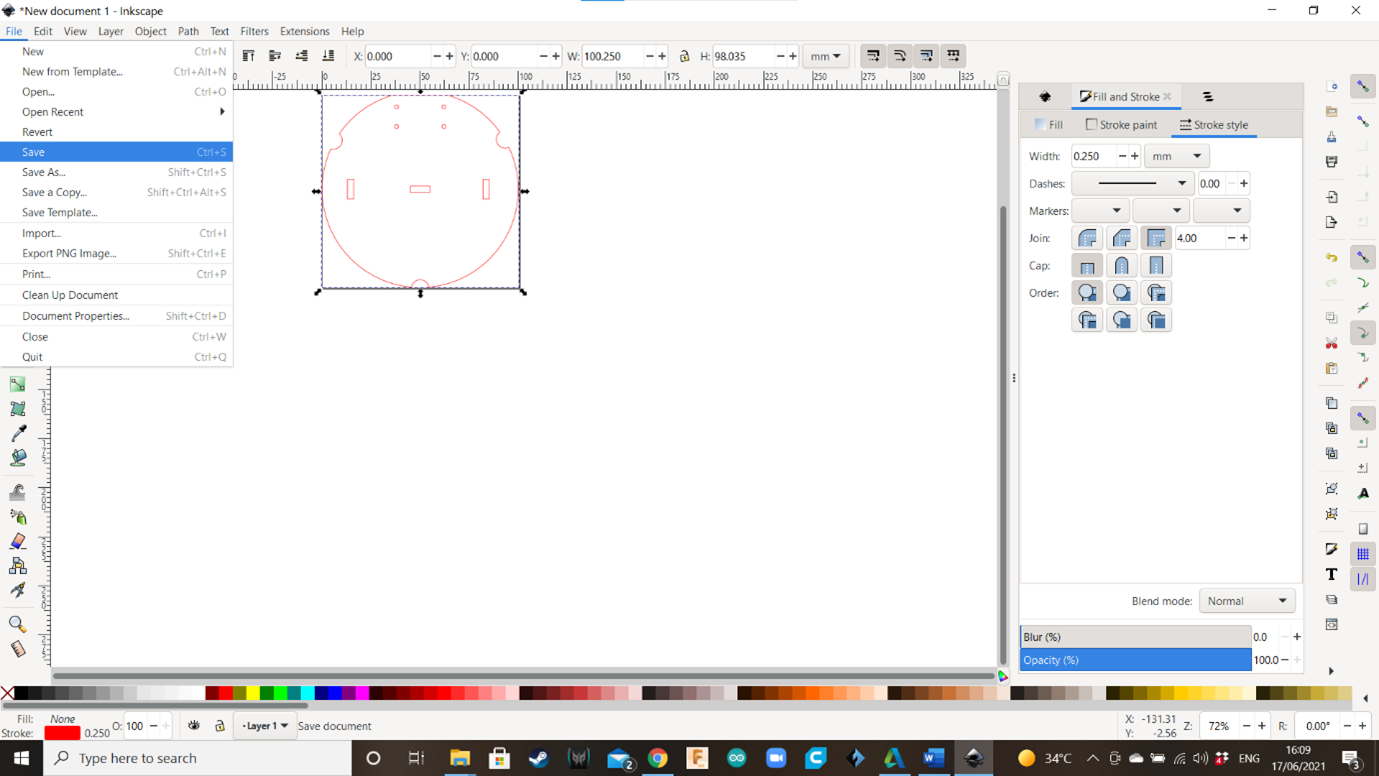
Go to “Stroke Style” and click on “Width”. Change the value from 0.004mm to 0.250mm. Now your shape is visible!
Click on the shape and bring it to the top left corner of the page.
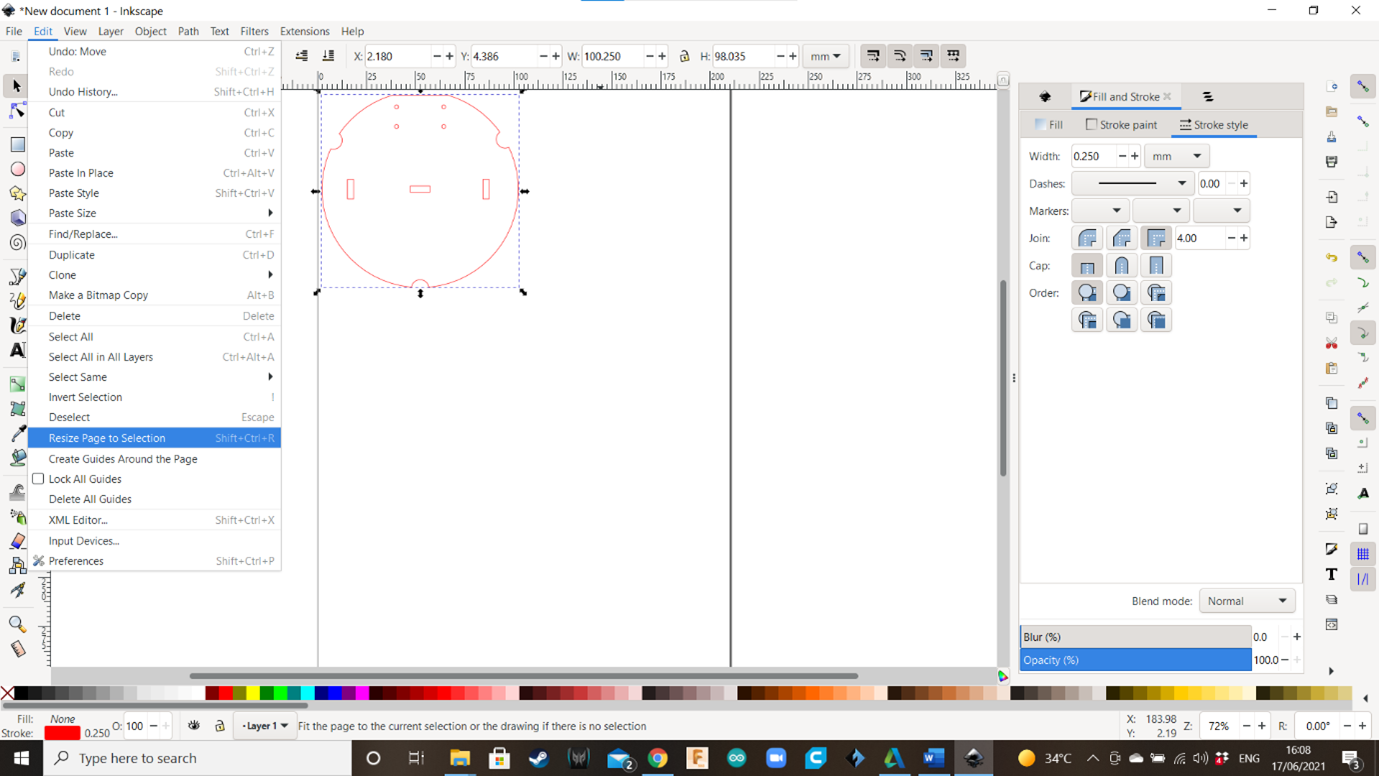
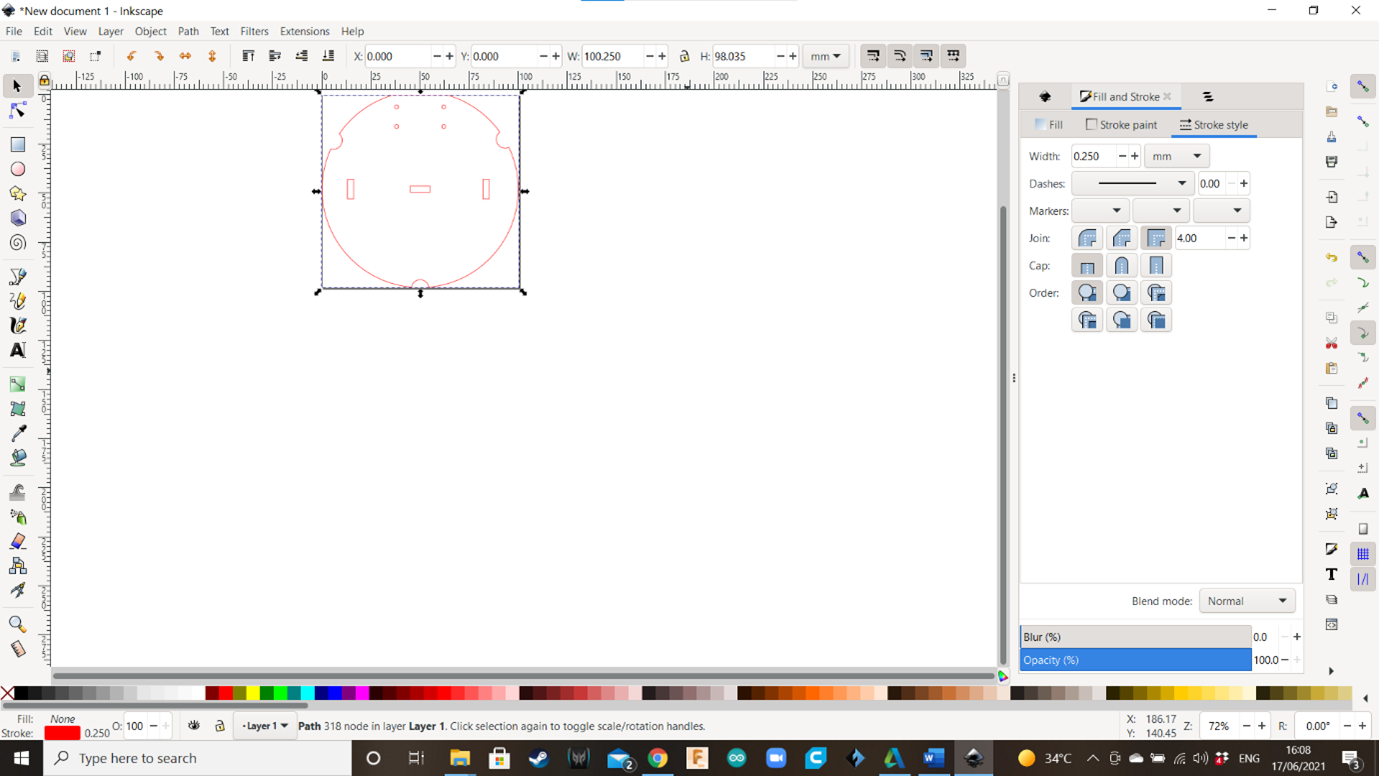
Go to “Edit” on the top bar and click on “Resize Page to Selection”. This is necessary so the program only export the required area and not all the page. After doing this, the page will be reduced to a square around the selected shapes.
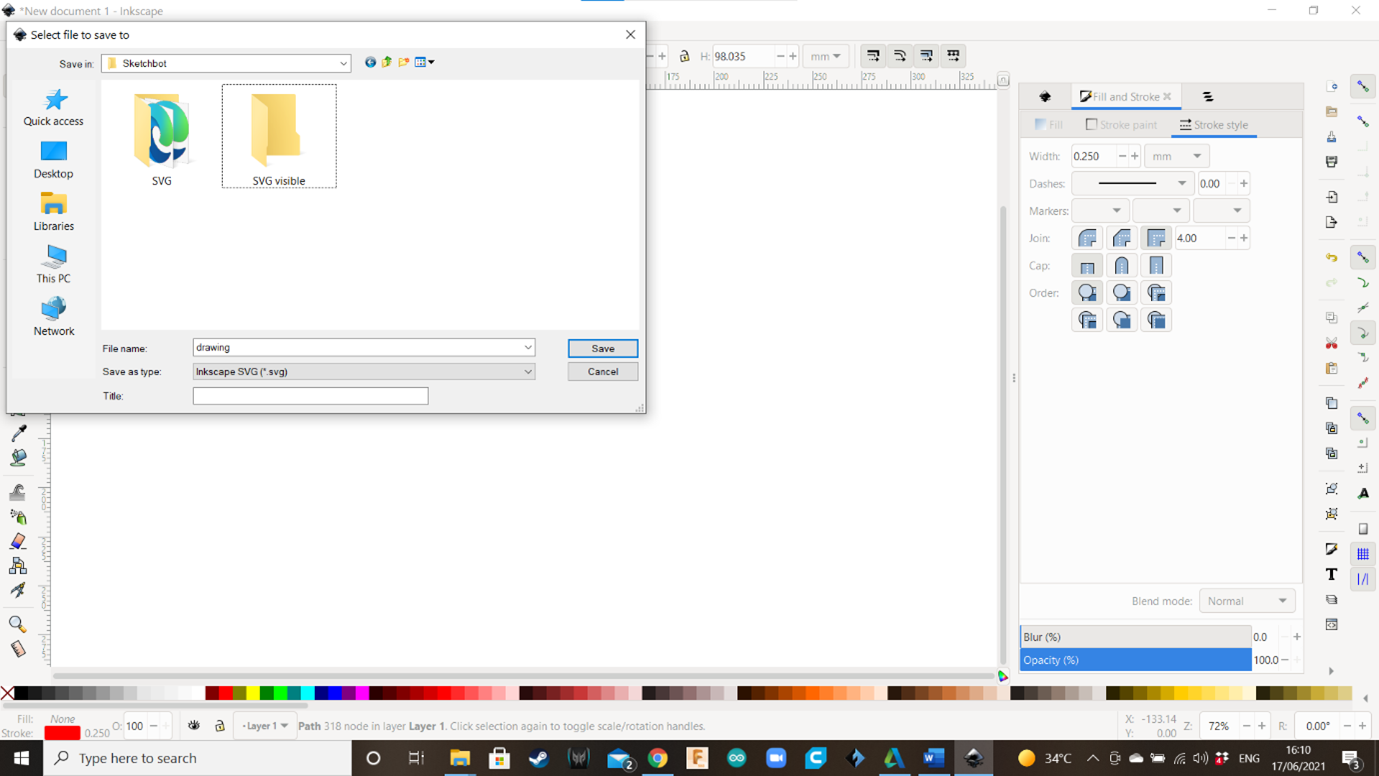
Go to “File” and click on “Save.”
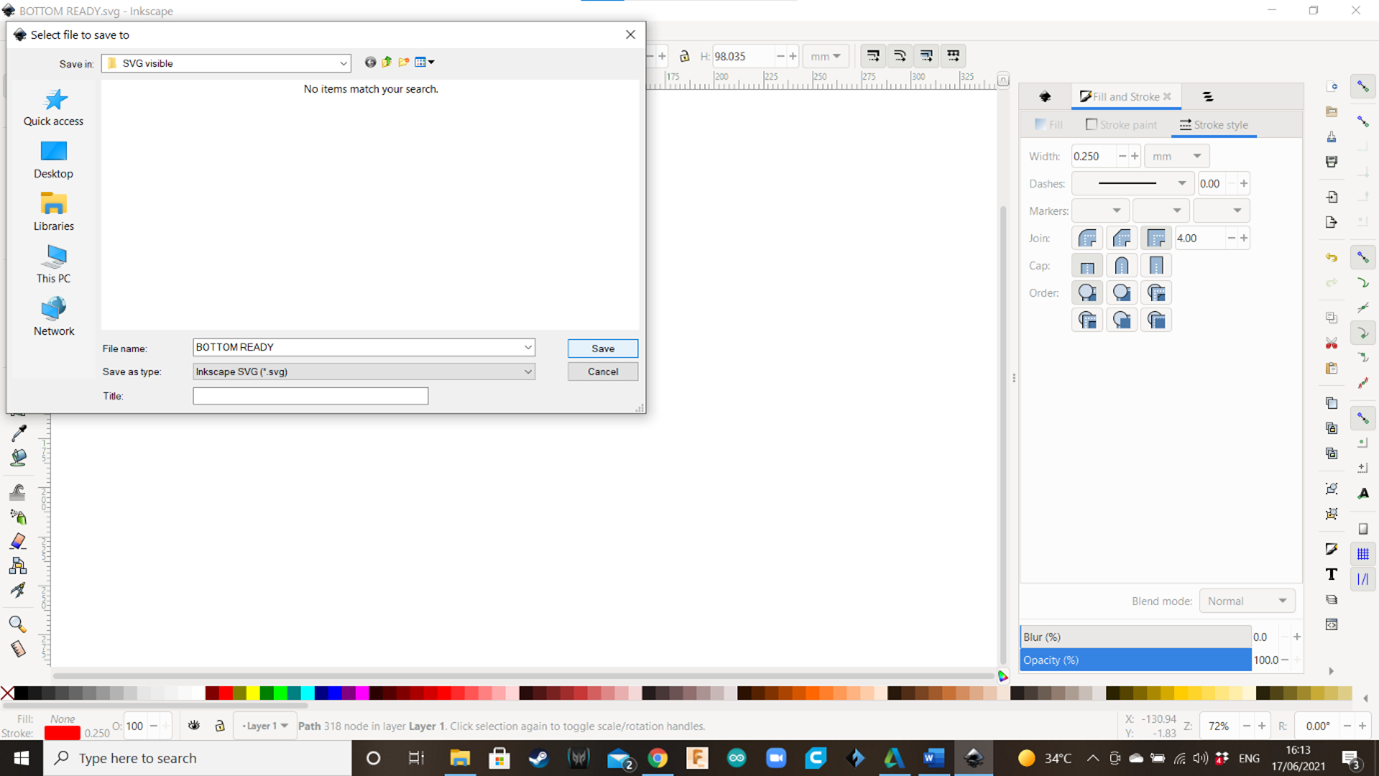
Save the file. You can create a new folder named “SVG Visible” and named the file “Bottom Ready” or some other name; or simply, overwrite the original file, but be careful to control the files you already improved.
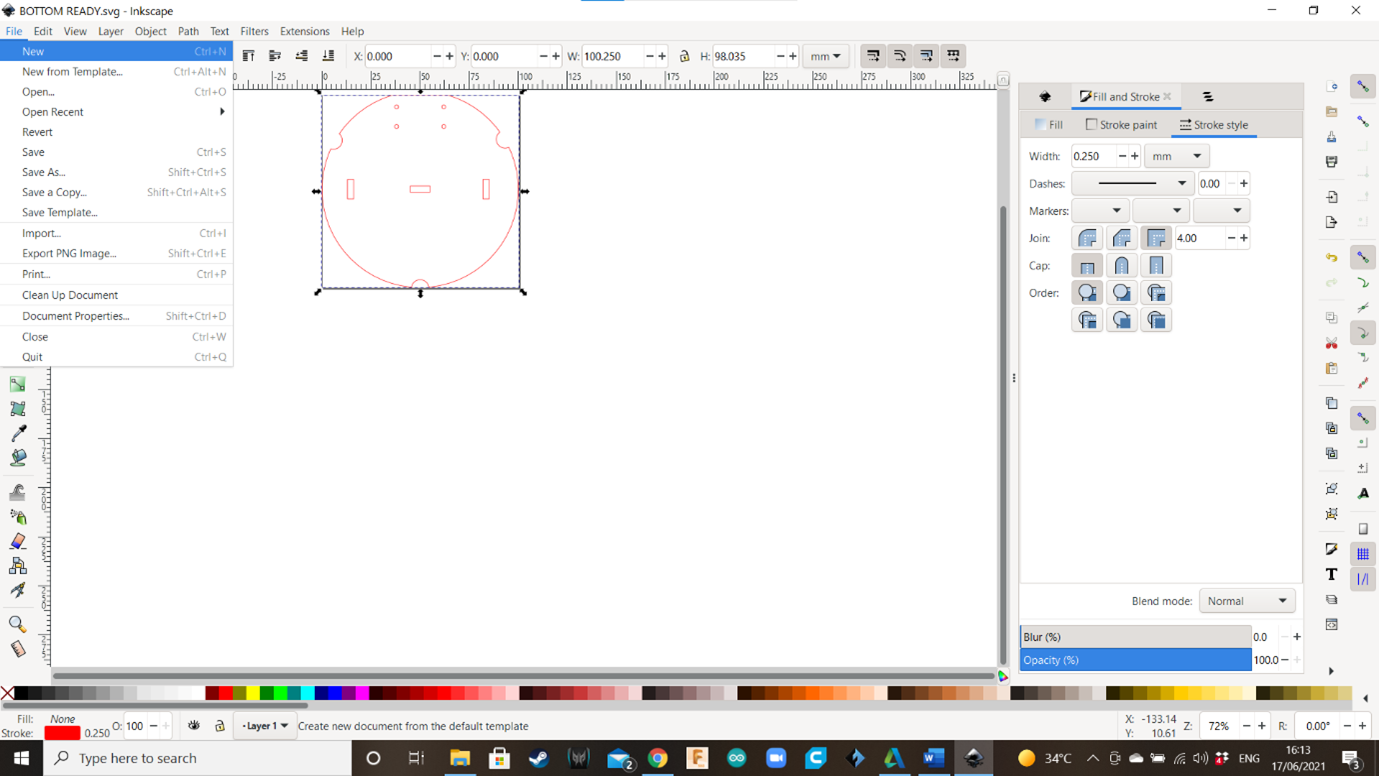
Let’s import the next file. Go to “File” and click “New”.
Follow the previous instructions to import the Top Panel and modify it. At the end, name it “Top Ready”.
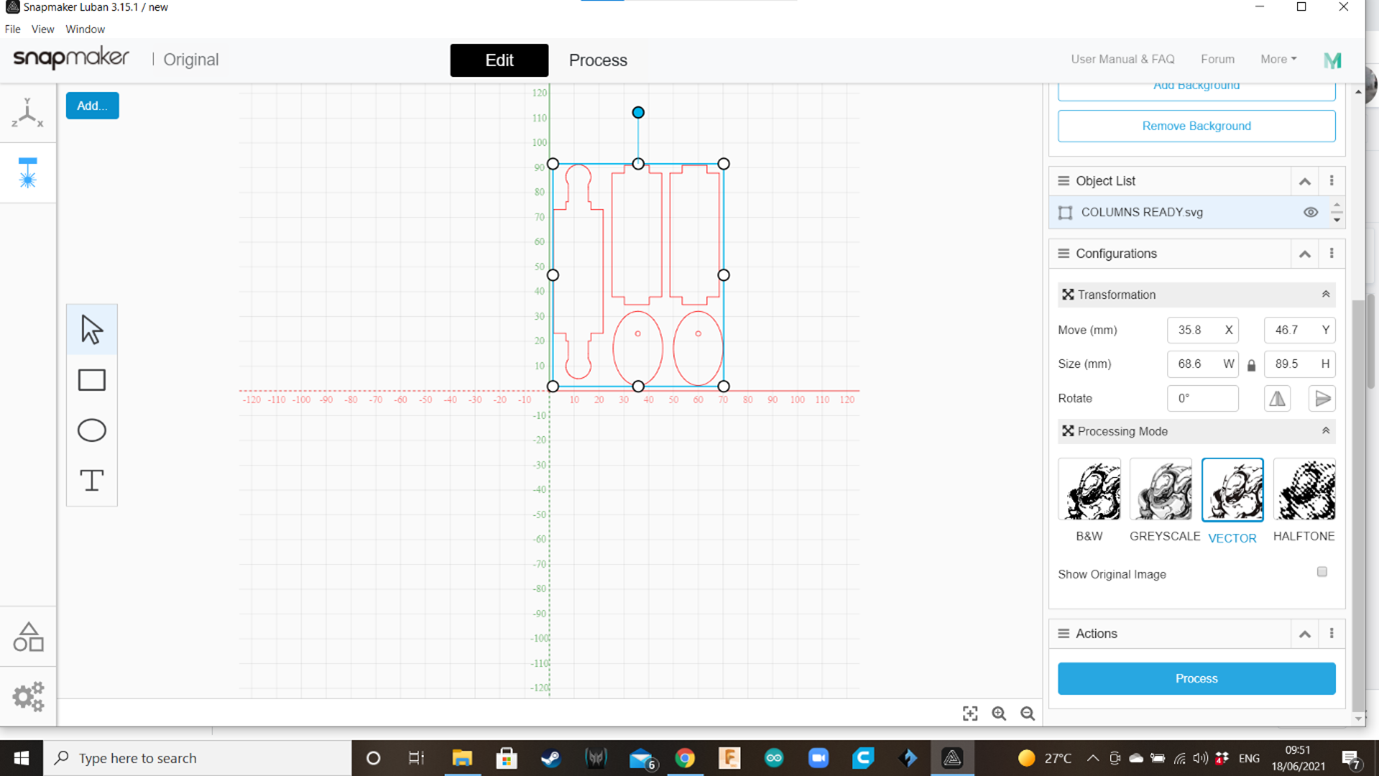
When you finish, click again “File/New”, and bring the remaining pieces (columns and weights). You can import several files and arrange them in a way that all of them may fit in a single wooden tablet. Select each piece and move it using the arrow keys. Use the ruler the confirm that they do not exceed the size of the wooden tablet (120mm x 120mm; but is better to leave a safety margin). At the end, name this file “ columns ready.”
Preparing the Parts for Laser-cutting (Snapmaker Luban)
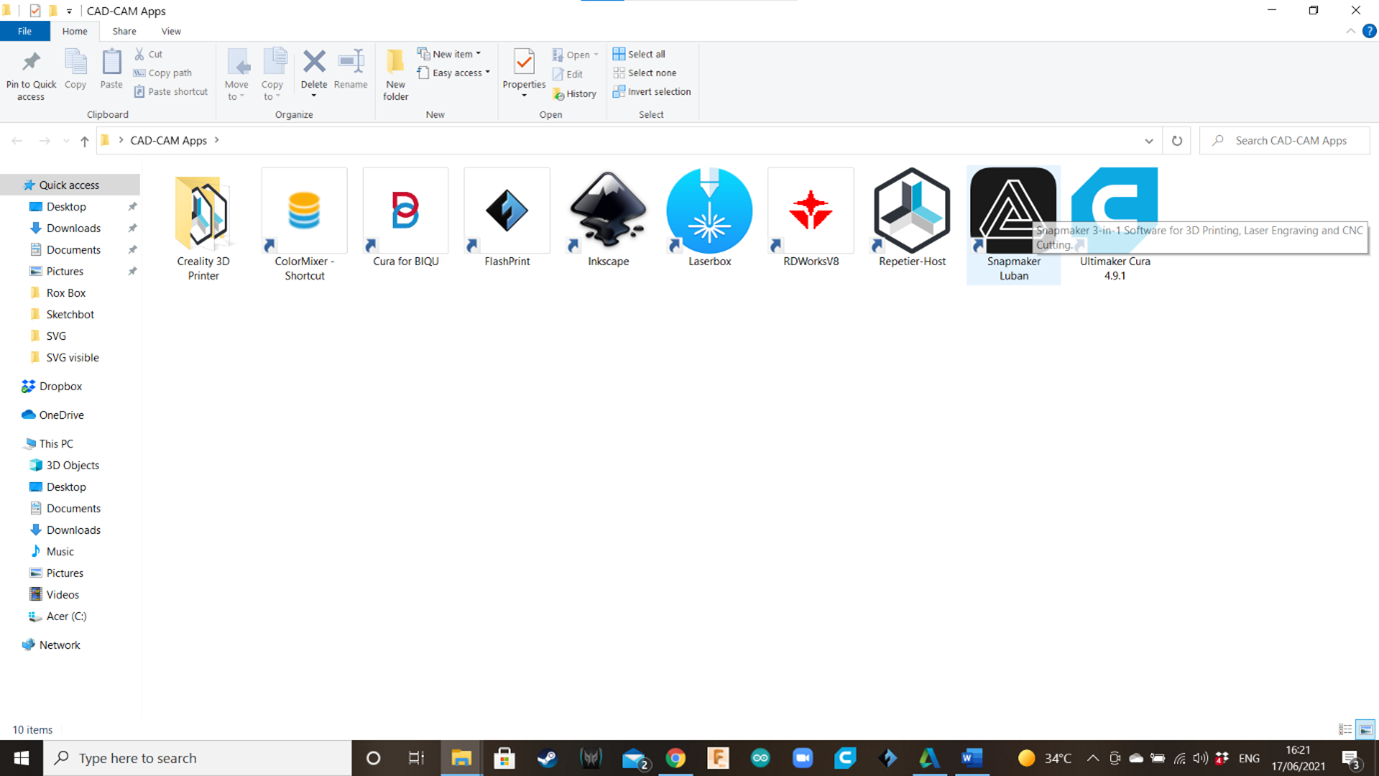
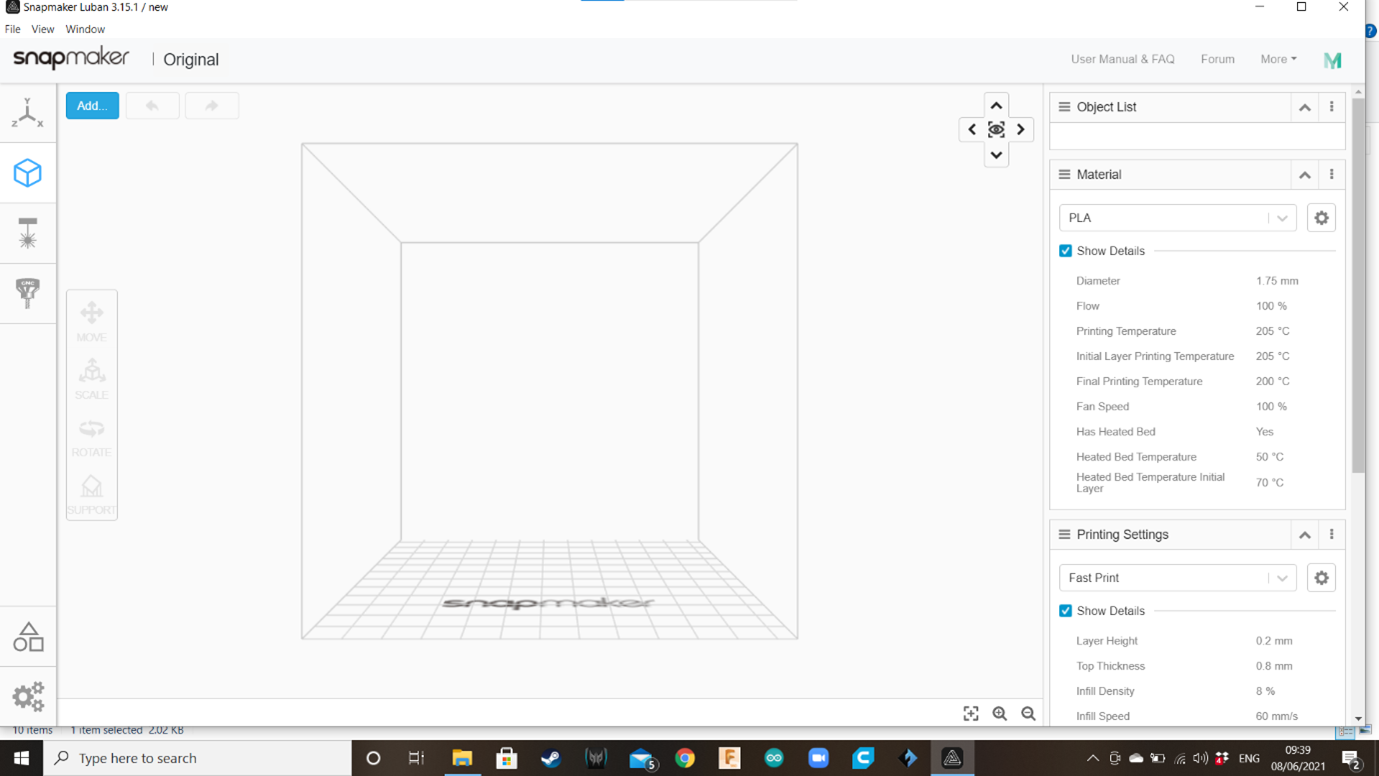
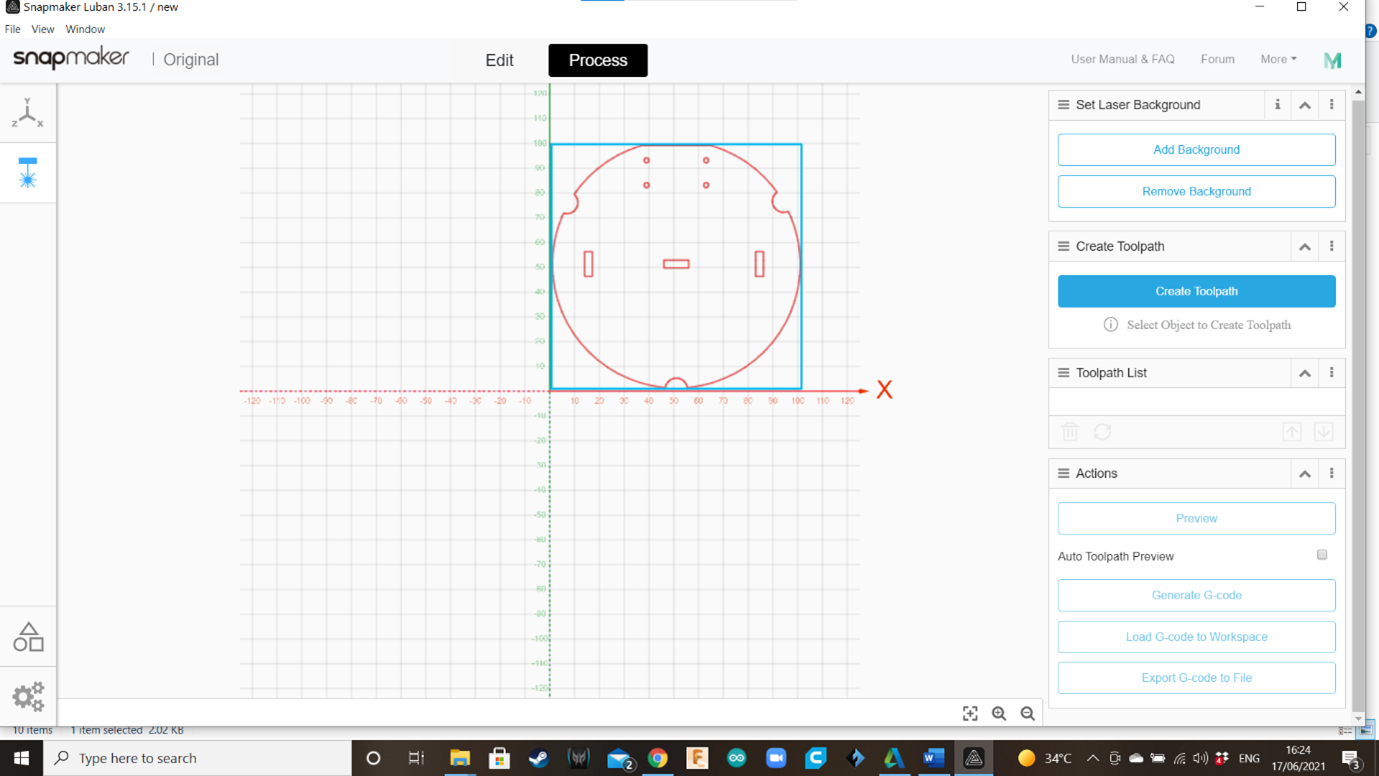
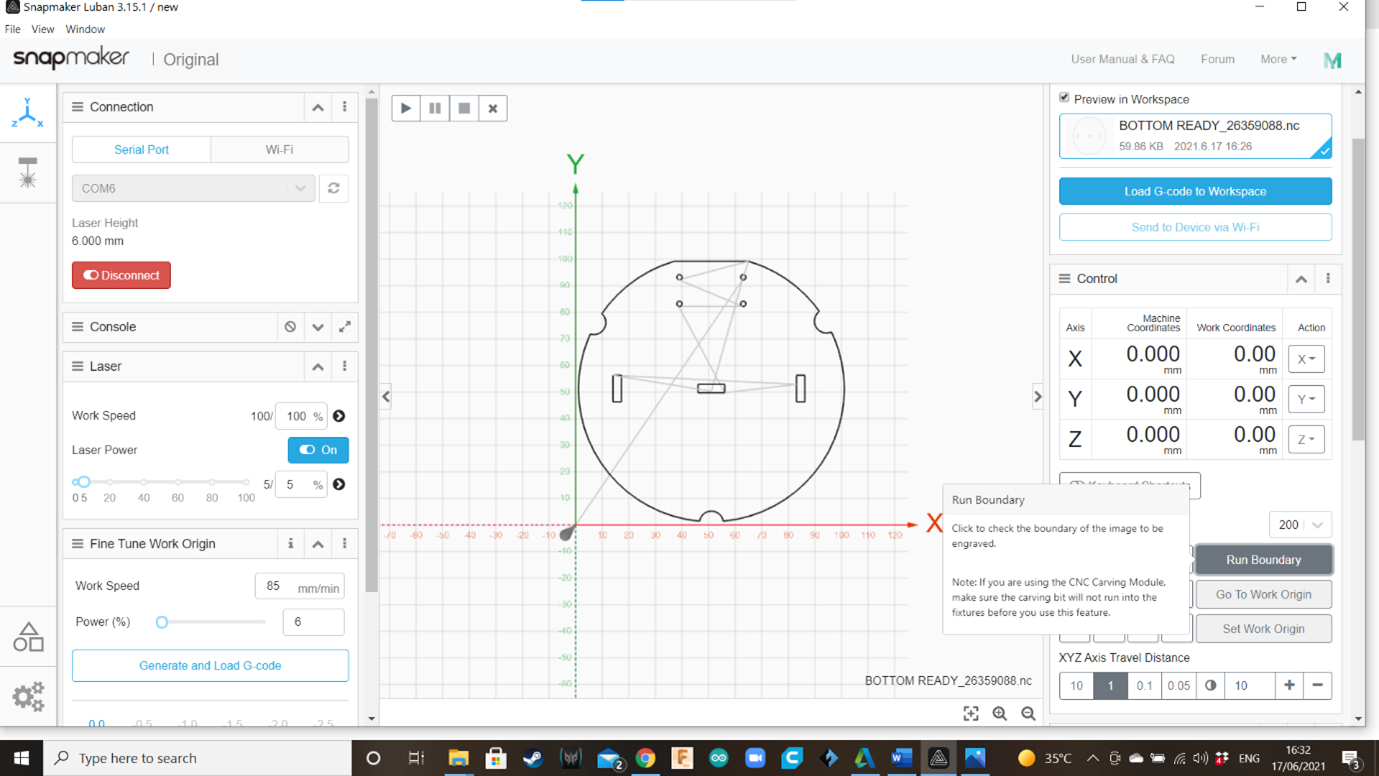
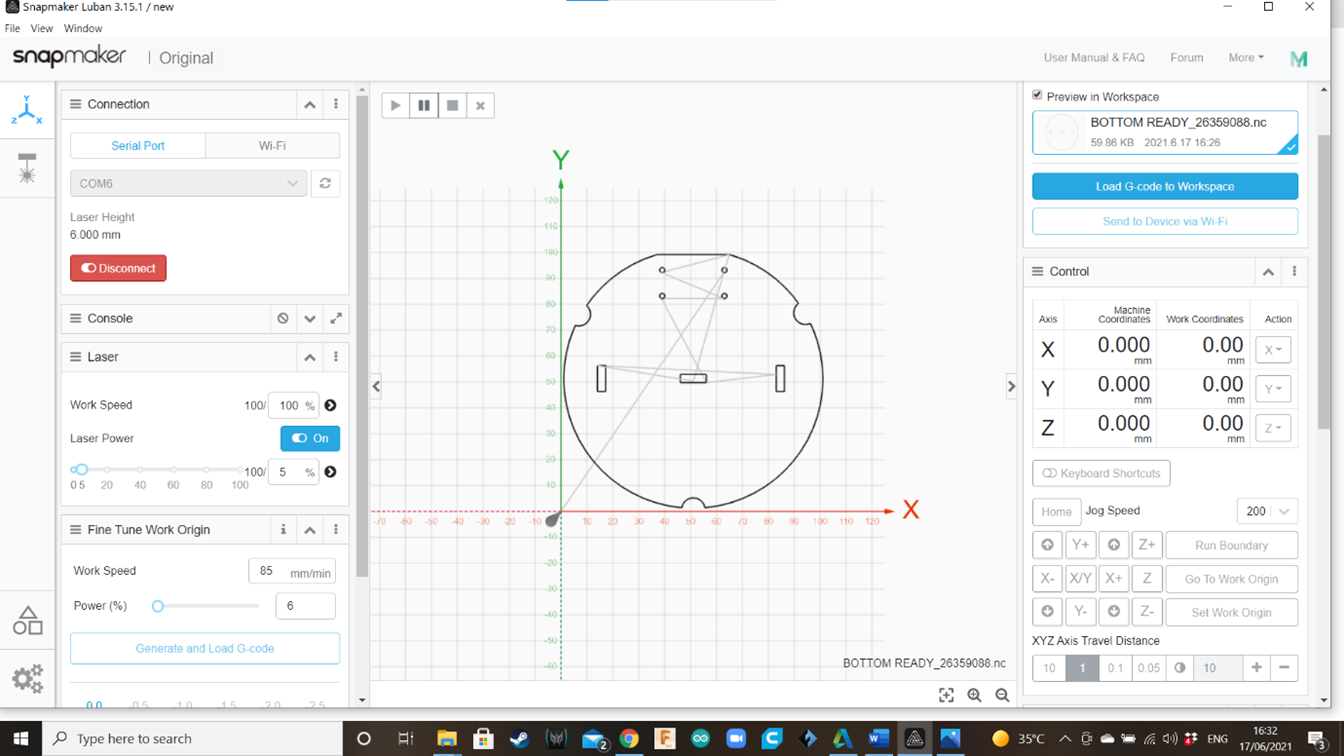
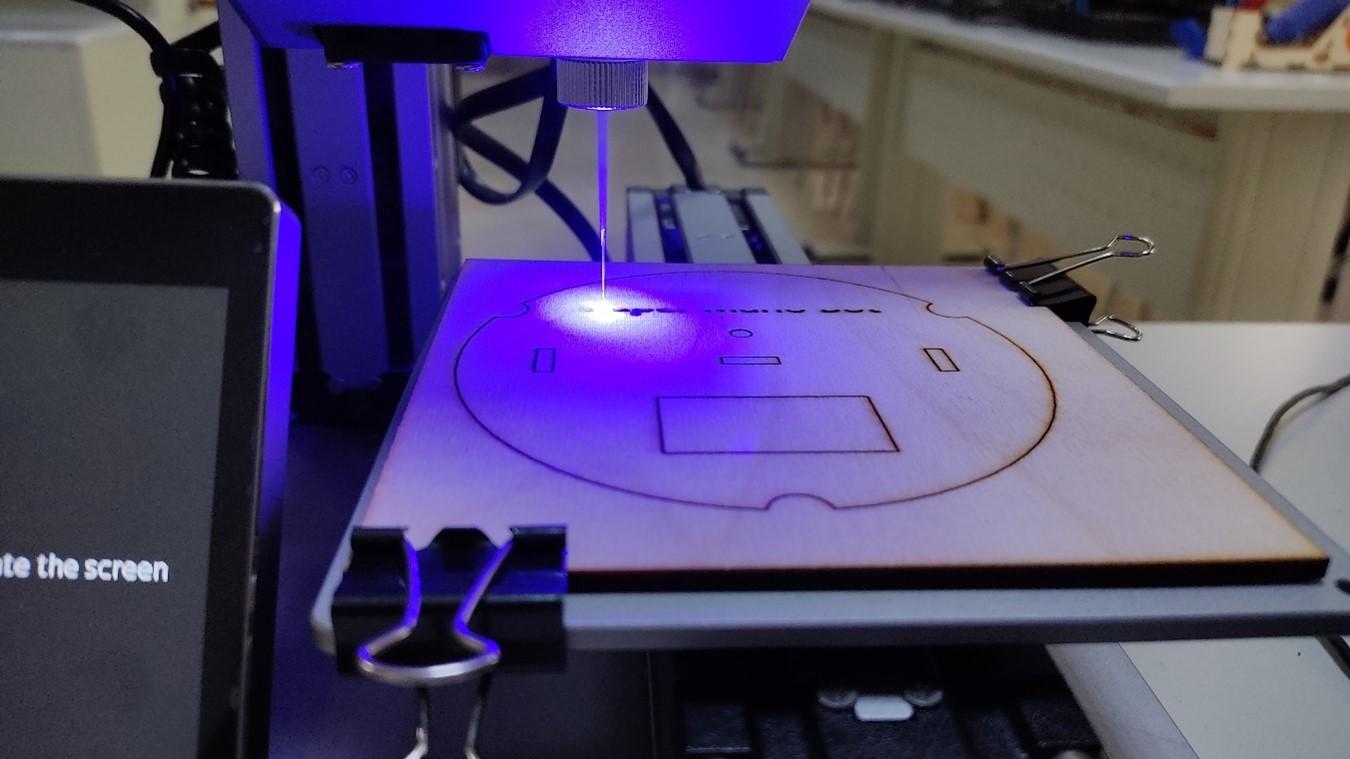
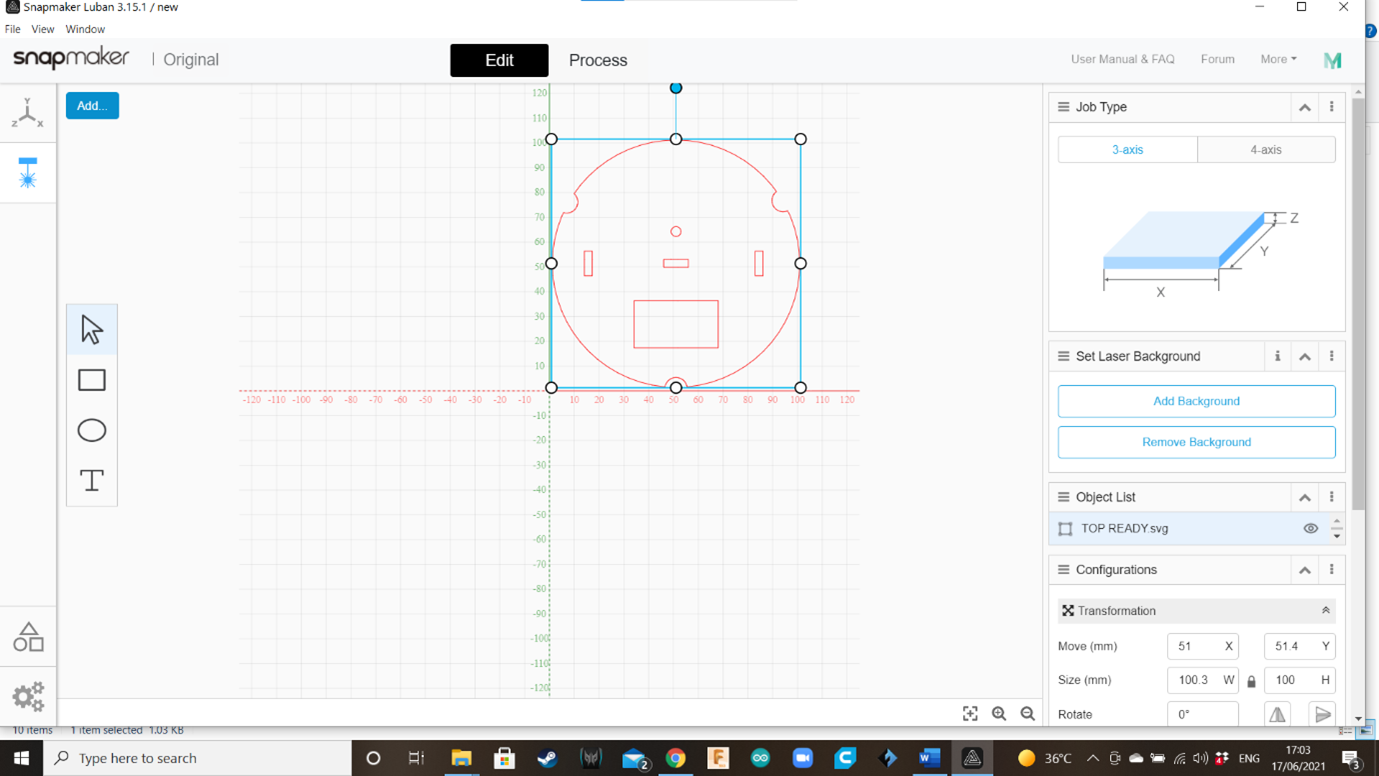
Now that our parts are visible and in a proper distribution, let’s lasercut with the CNC Snampmaker. Open the Snapmaker Luban application.
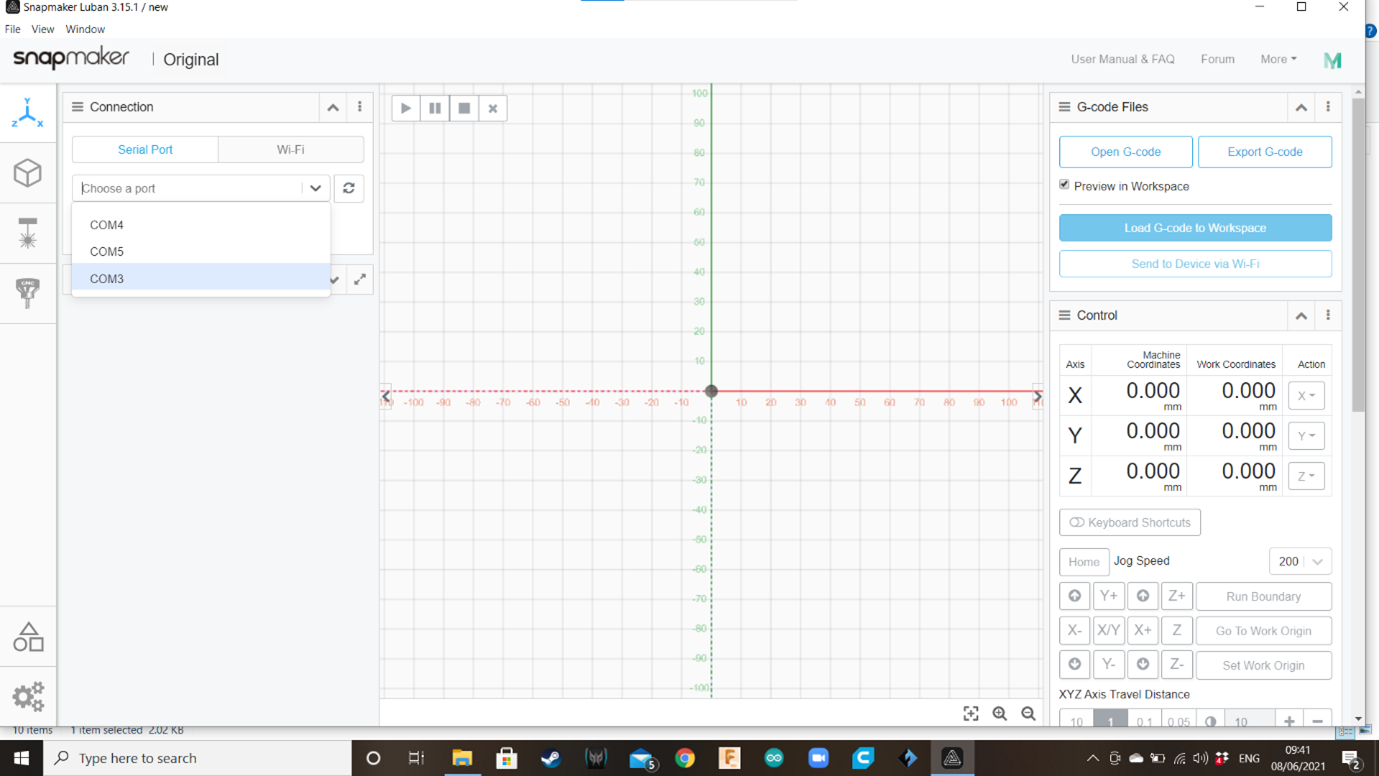
For safety and quality of the lesson, the teacher must be already acquainted with the Snapmaker basic operation. In case of doubt, please refer to the operations manual that comes with the Snapmaker. However, let’s remember the basic steps. In the Snapmaker’s application lobby you will find a left toolbar with four options (Workspace, 3D Printing, Laser and CNC Engraver). Go to “Workspace” (on top of the left bar, the symbol of the X,Y,Z coordinates.)
Turn on the CNC Snapmaker and connect the cable to one of the USB port. In the “Connection” window, click the Refresh icon and select the COM where the CNC Snapmaker is connected,
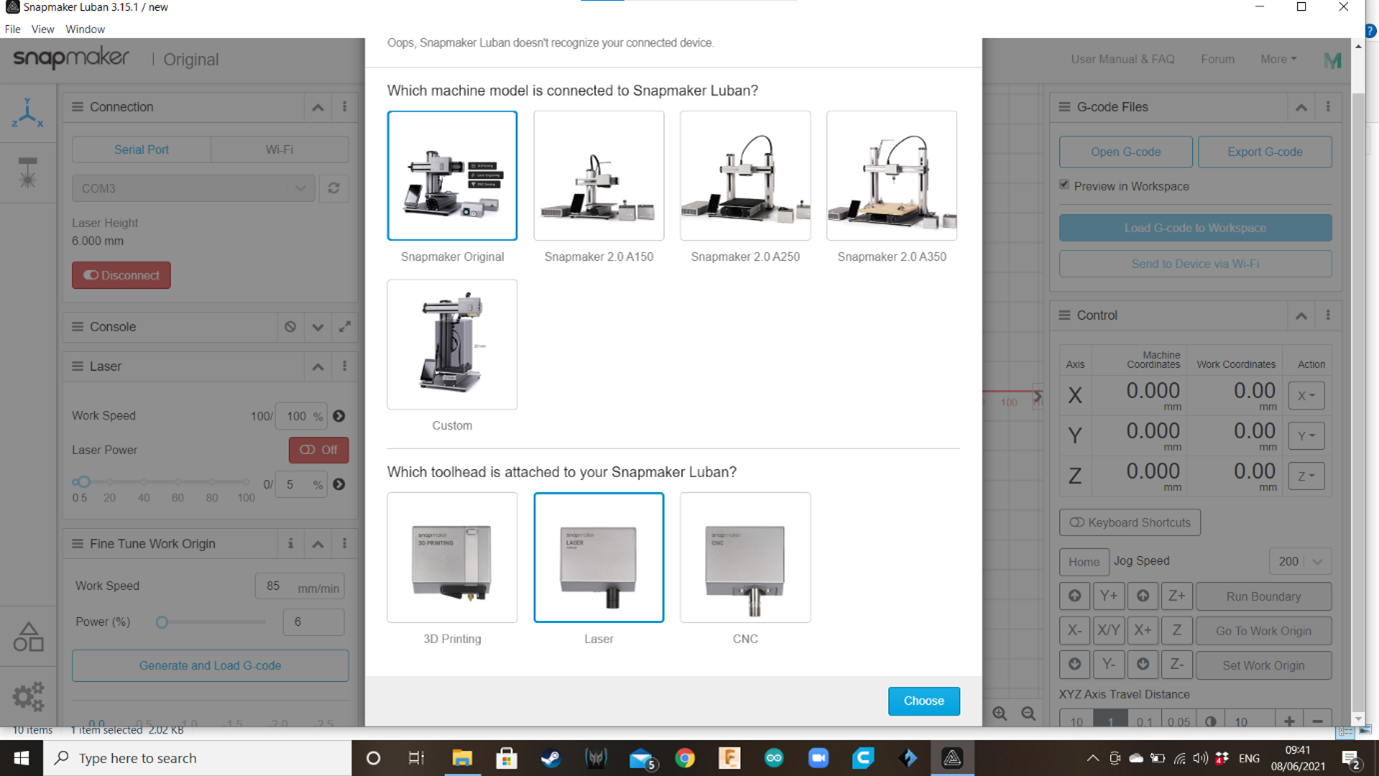
A window will appear, asking to confirm the machine you are using (Snapmaker Original) and the attached Toolhead (Laser). Then click “Choose”.
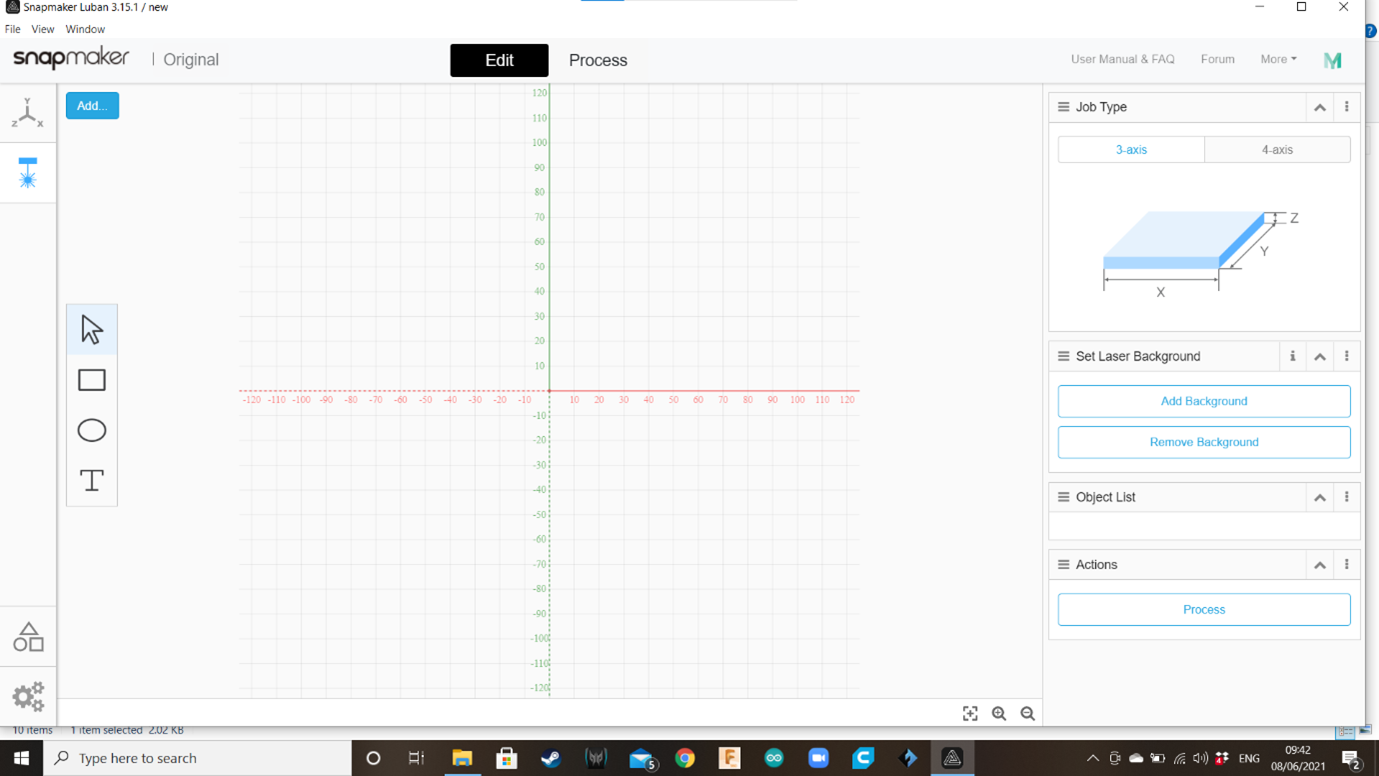
If the connection was successful, the four options of the left toolbar will be reduced to only two (Workspace and Laser), and you will be in the “Edit” screen of the “Laser” option. Click “Add”.
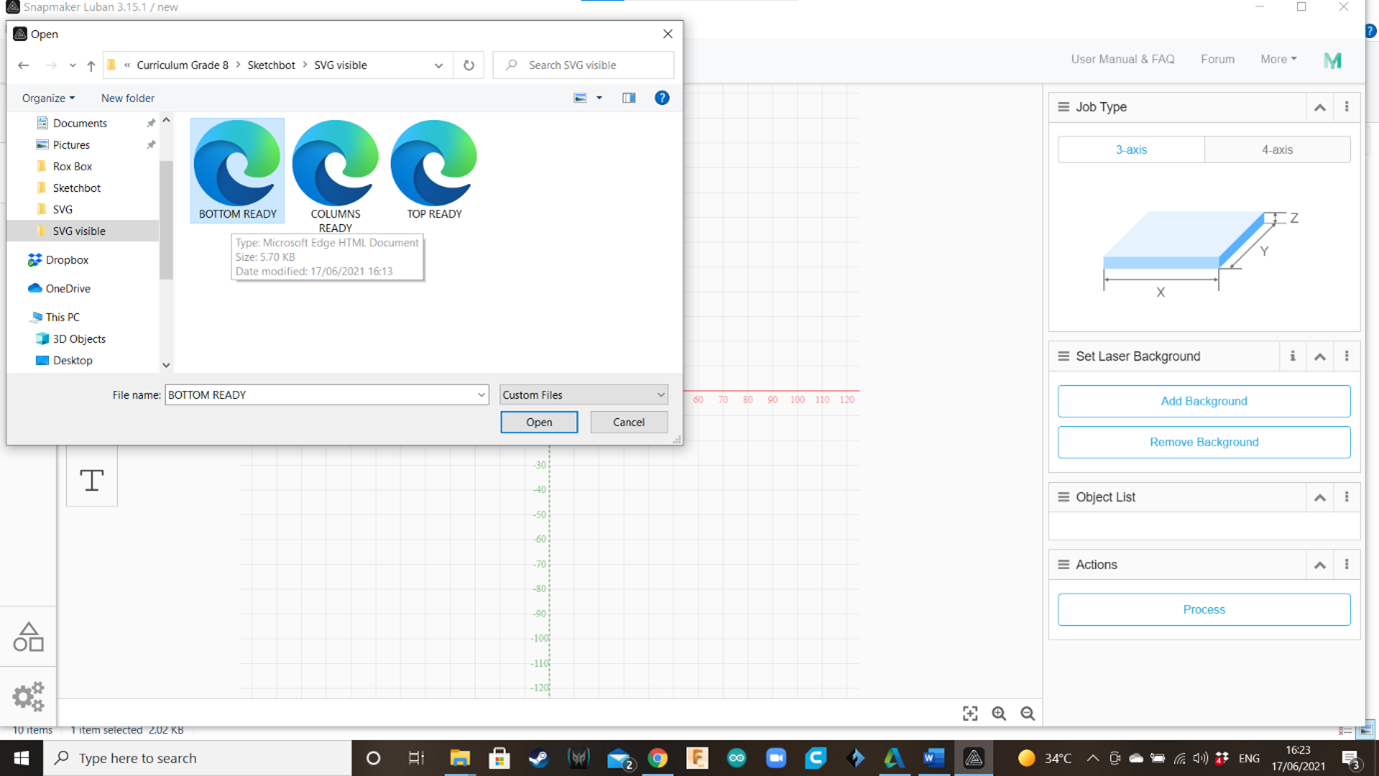
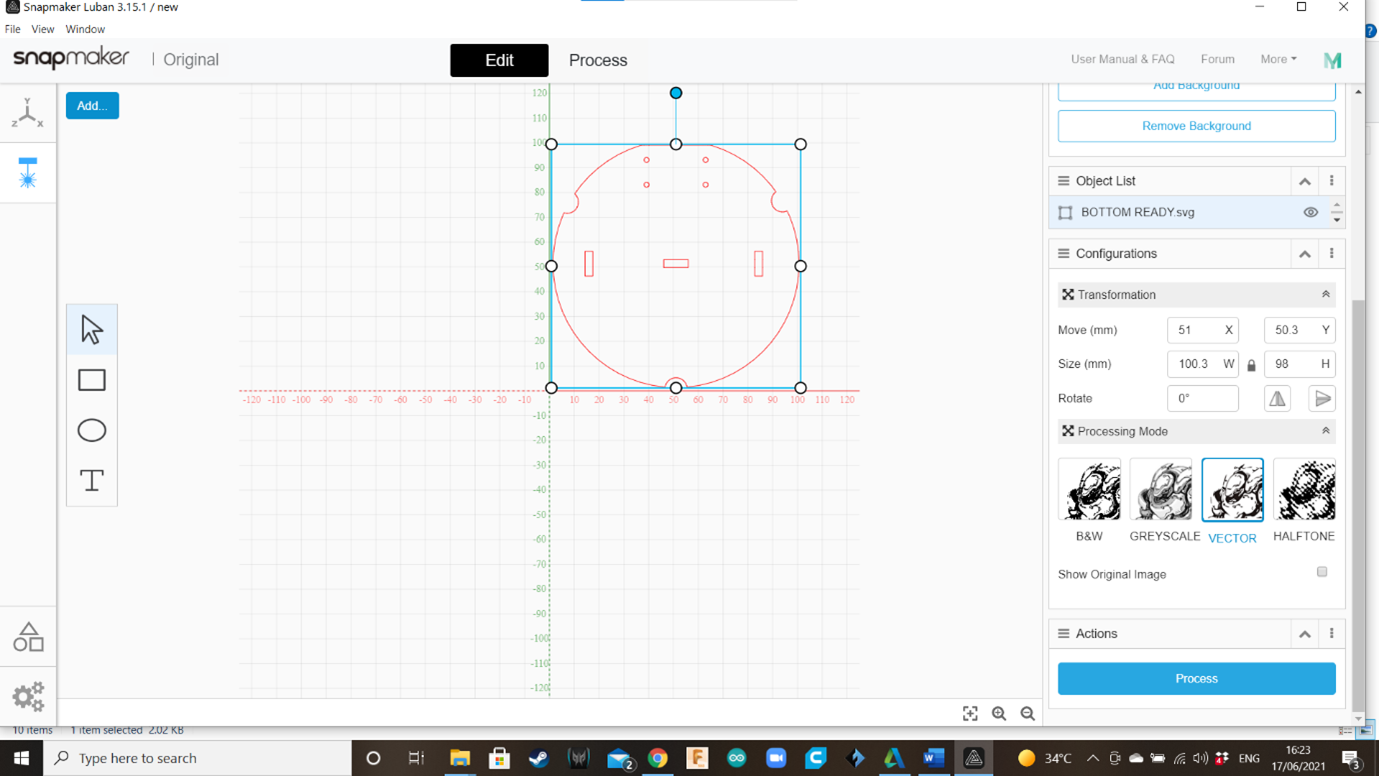
Choose the first SVG ready file (in this case, “Bottom Ready”). Probably it will appear on the center of the cartesian plane, so move it to the top right quadrant. Check that the shape is not surpassing the dimensions of the wooden tablet (it’s 120mm x 120mm, but consider 110mm x 110mm to leave some available space for the binder clips to attach the wooden tablet to the platform). This file will be processed as a Vector. Then, click “Process” (right toolbar).
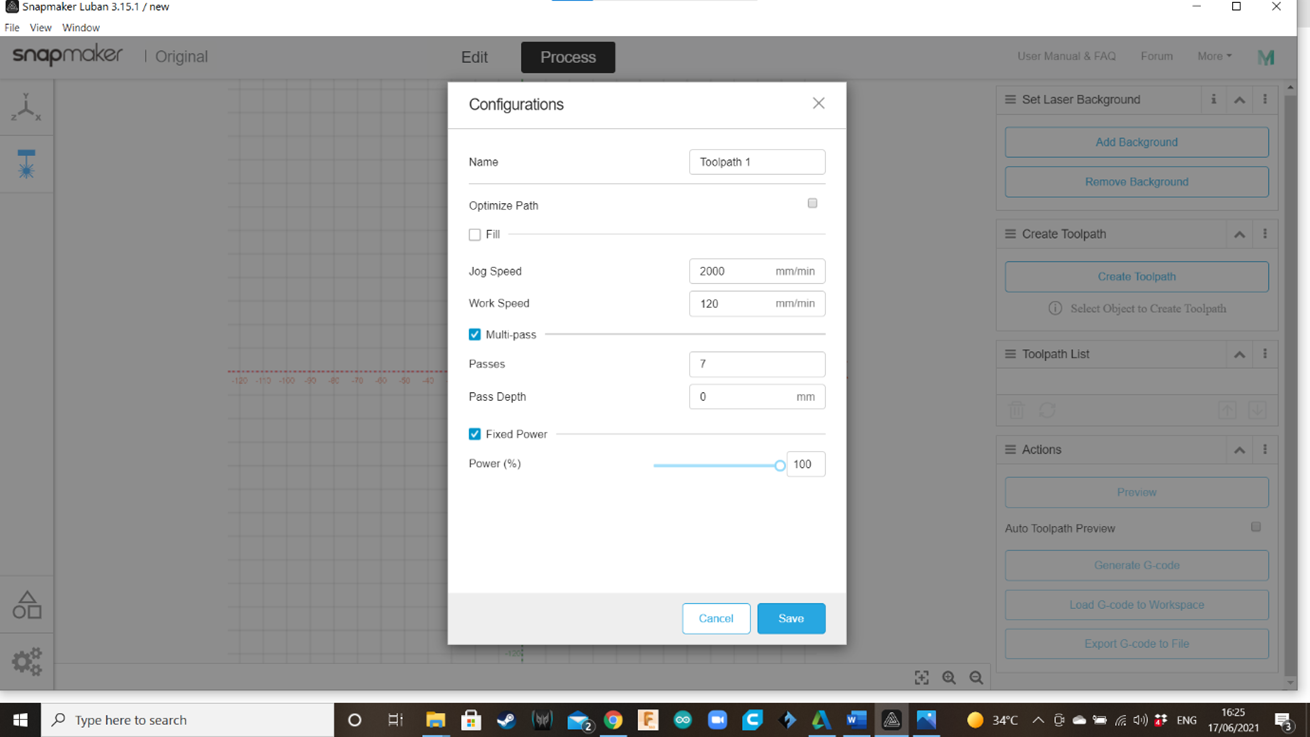
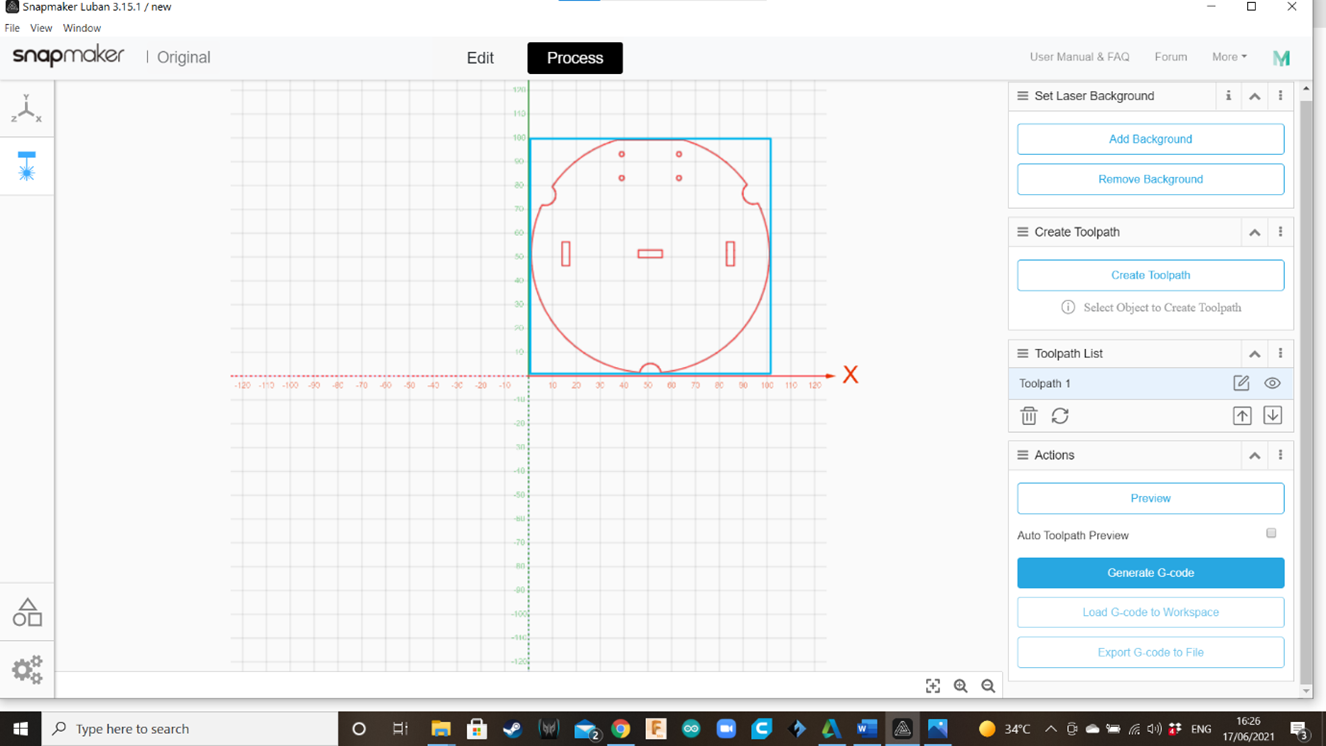
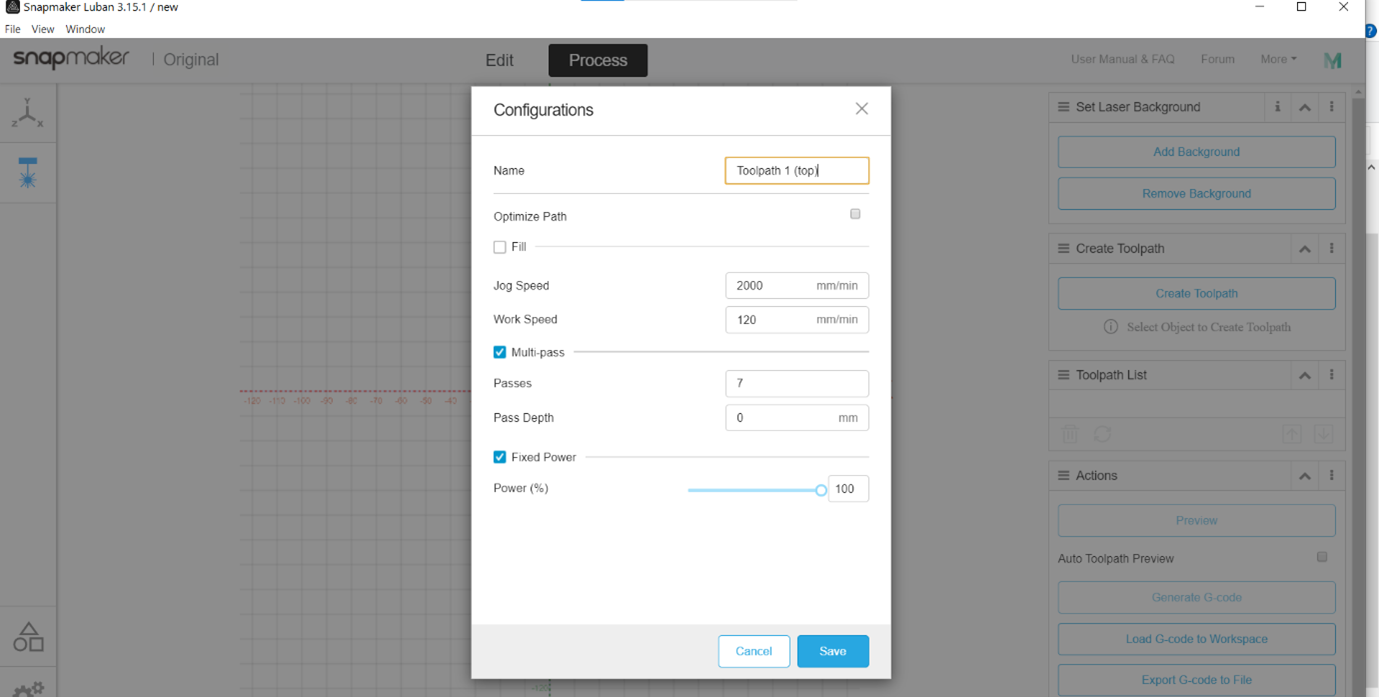
Now the shape is in the “Process” screen, where you will add a toolpath. A toolpath is the program that controls the speed and intensity of the laser, and the number of times it will travel over the shape. Click on the shape to select it. Then go to the right toolbar and click on “Create Toolpath”.
For the Toolpath, use the following configuration, then save:
- Name: Toolpath 1
- Fill: NO
- Jog Speed: 2000 mm/min
- Work Speed: 120mm/min
- Multi-pass: Yes
- Passes: 7
- Pass Depth: 0
- Fixed Power: Yes
- Power (%): 100
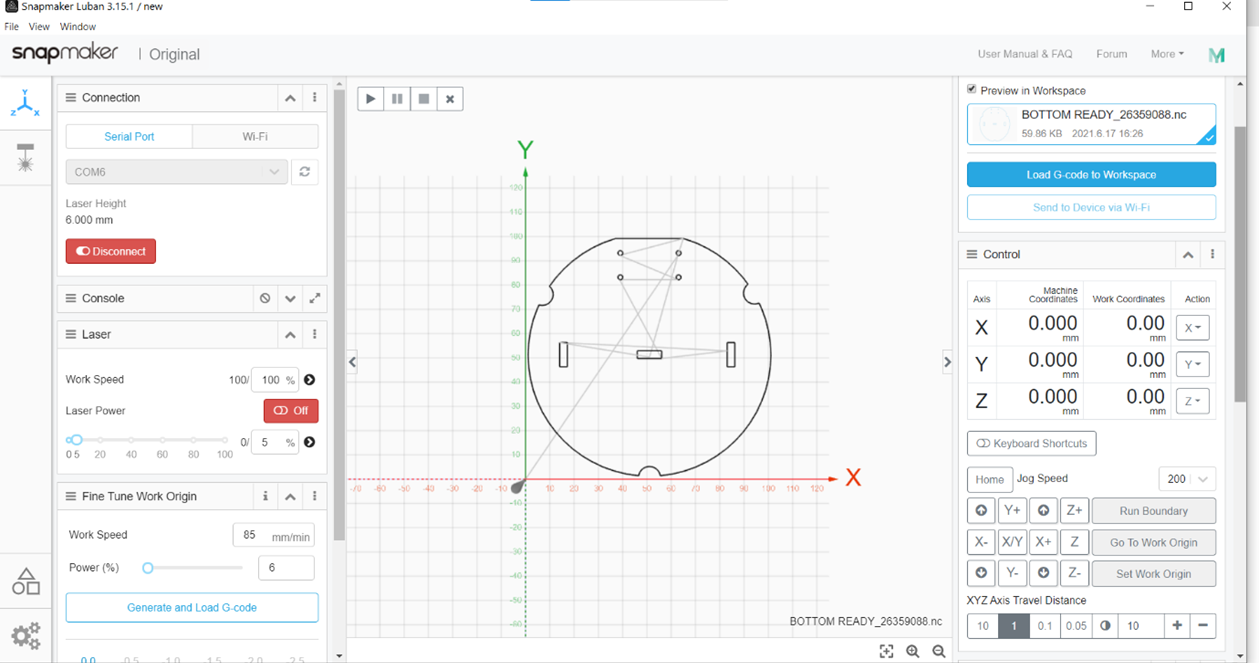
Now click on “Generate G-code”; and when it is ready, click on “Load G-code to workspace”.
WARNING: From now we will start operating the laser. Remind the kids that they must avoid eye or skin exposure to the laser beam and radiation, or they can get hurt or damage their eyes. Teacher and students must always wear the protective goggles (green color) when they are supervising the laser calibration and operation. Also, do not leave the CNC unattended when is working.
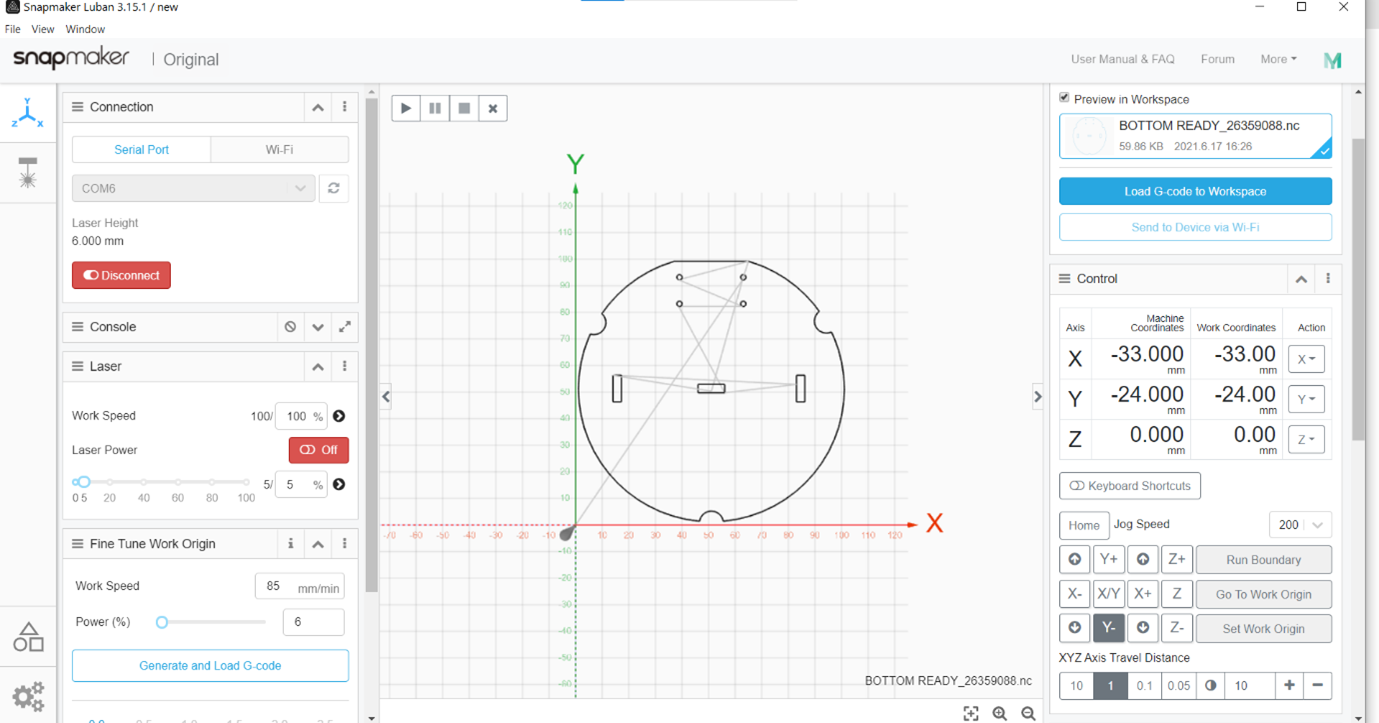
Now we will set the work origin in the CNC Snapmaker. The Work Origin is where the X and Y axis intersect in their 0 point, and it is where the cutting work will start. But first, we need to find the perfect focal distance in the Z Axis, between the laser head and the material to be cut. It is recommendable that teachers find this point when they practice before the lesson, to avoid delays and class management issues. Also, the focal distance in Z is critical to achieve a perfect cutting in just one attempt.
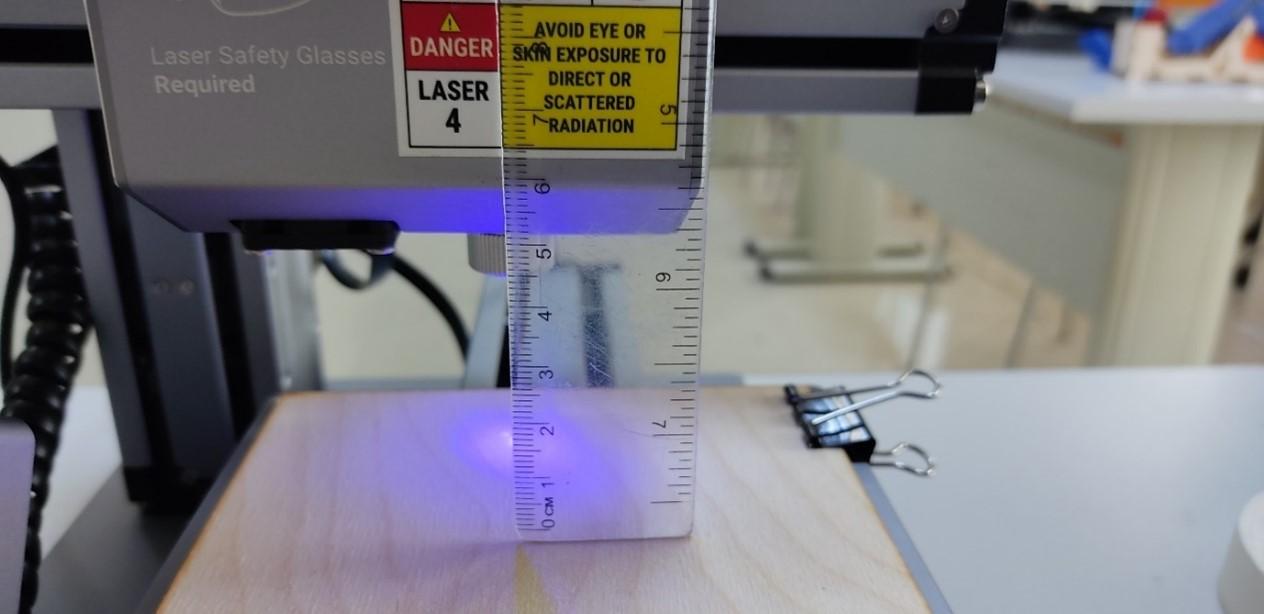
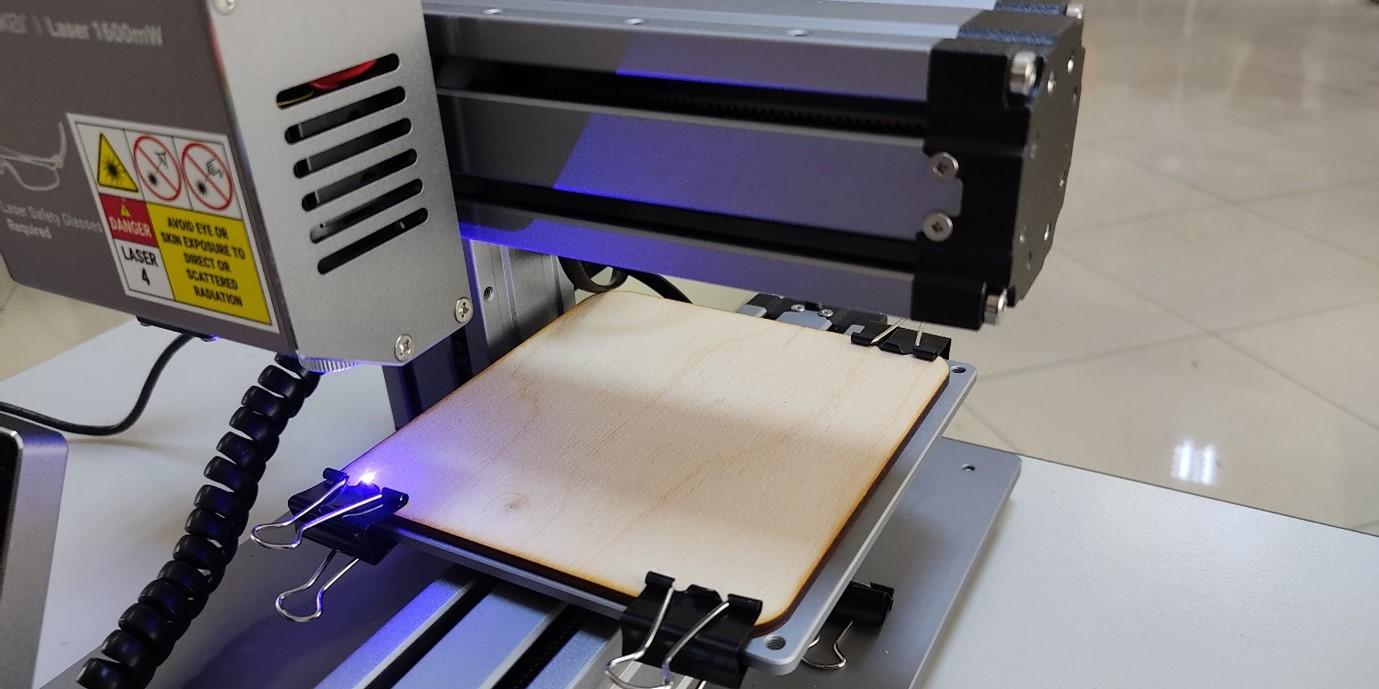
Place a wooden tablet on the CNC’s working area and fix it with binder clips. In the “Laser” option (right toolbar), select a low intensity (0.5) and turn the laser on. Then, using the Z+ and Z- controls, and the “XYZ Axis Travel Distance” control, find where the laser beam projects the smallest point (0.5mm). Use the “Calibration Card For Laser” that comes with the Snapmaker.
TIP: Once you have found the perfect focal distance of a Snapmaker, measure it with a ruler (from the cutting material to a reference point, like the Laser head label) and write it down. In this specific case, the perfect distance is 63mm. This will save you a lot of time for the next opportunities.
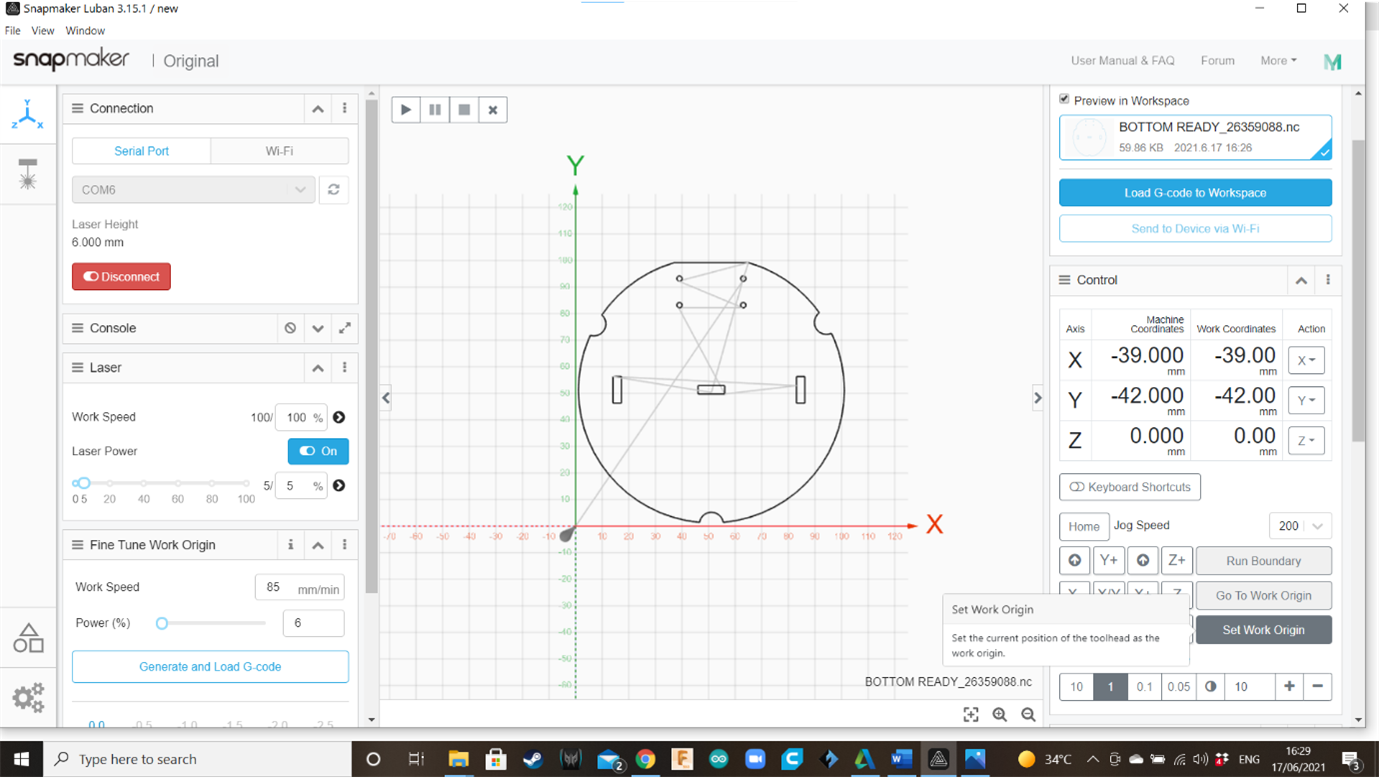
Using the X-, X+, Y+, Y- controls and the “XYZ Axis Travel Distance” control, bring the laser to the front left corner of the wooden tablet.
Click on “Set Work Origin”. From now, this will be the starting point of the cutting work.
Click on “Run Boundary”. The laser beam will do a preliminary travel showing the limits of the cutting work. In case the laser is burning out of the wooden tablet, it could mean that you need to move the Work Origin, place the wooden tablet in a better position or review your design.
If everything is ready, click on the “Run” icon (top of the cartesian plane). The laser will start engraving and cutting.
After finishing cutting this shape (bottom panel), import another shape (top panel) and repeat this whole procedure.
Optional - Engrave Your Name!
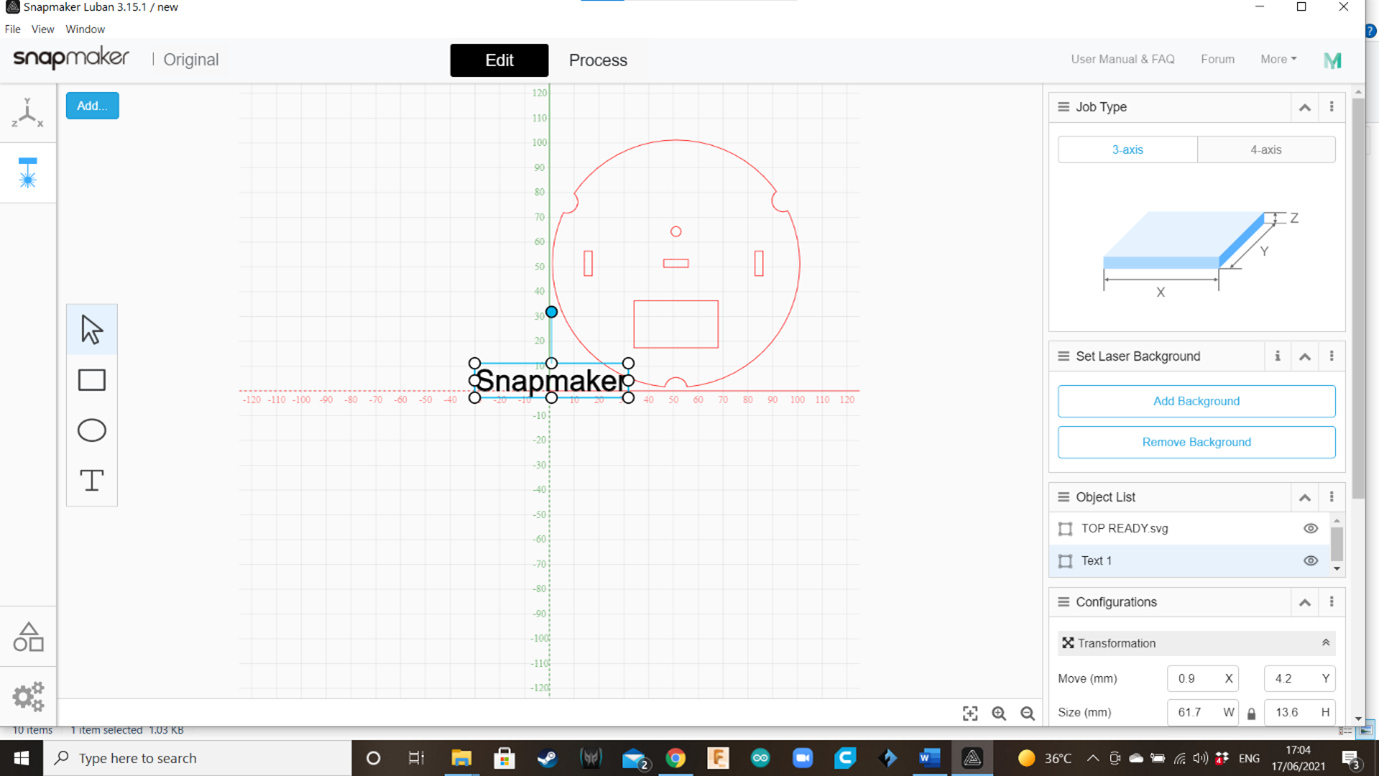
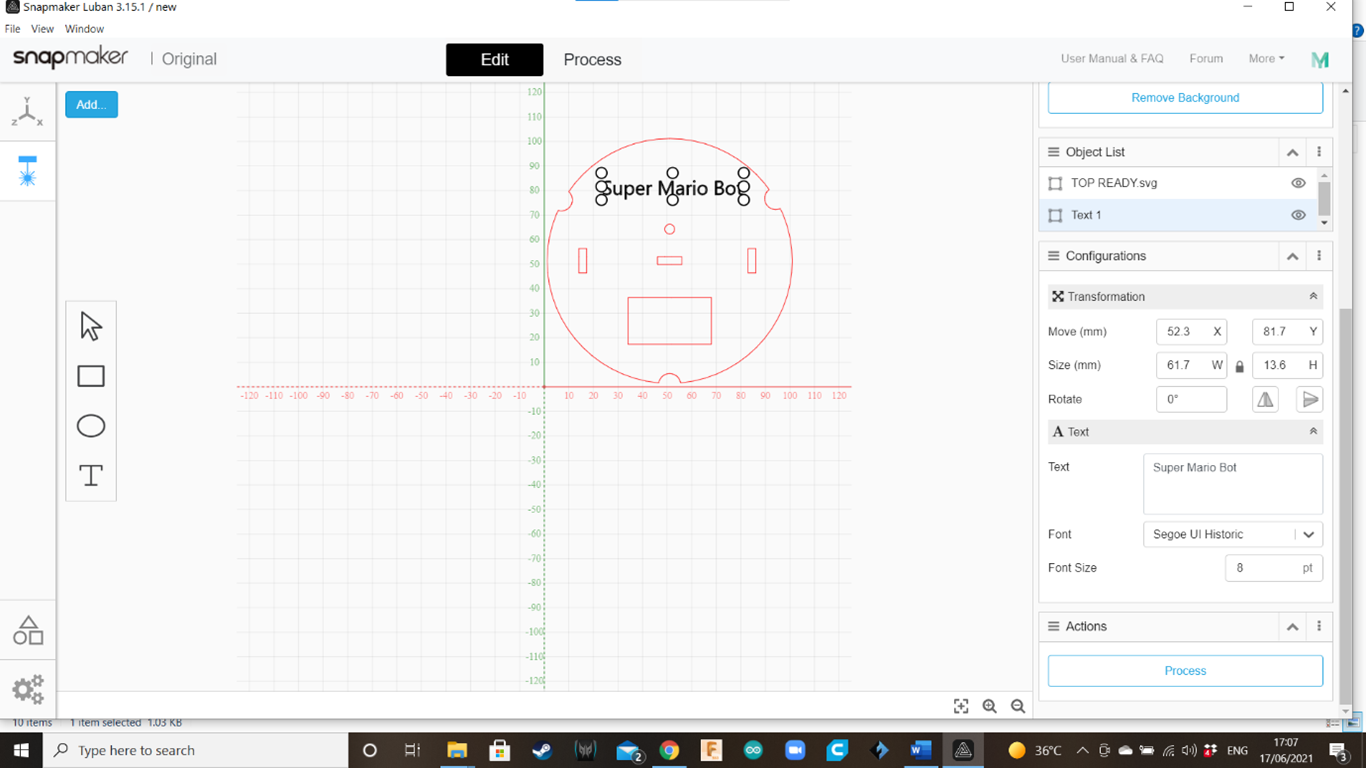
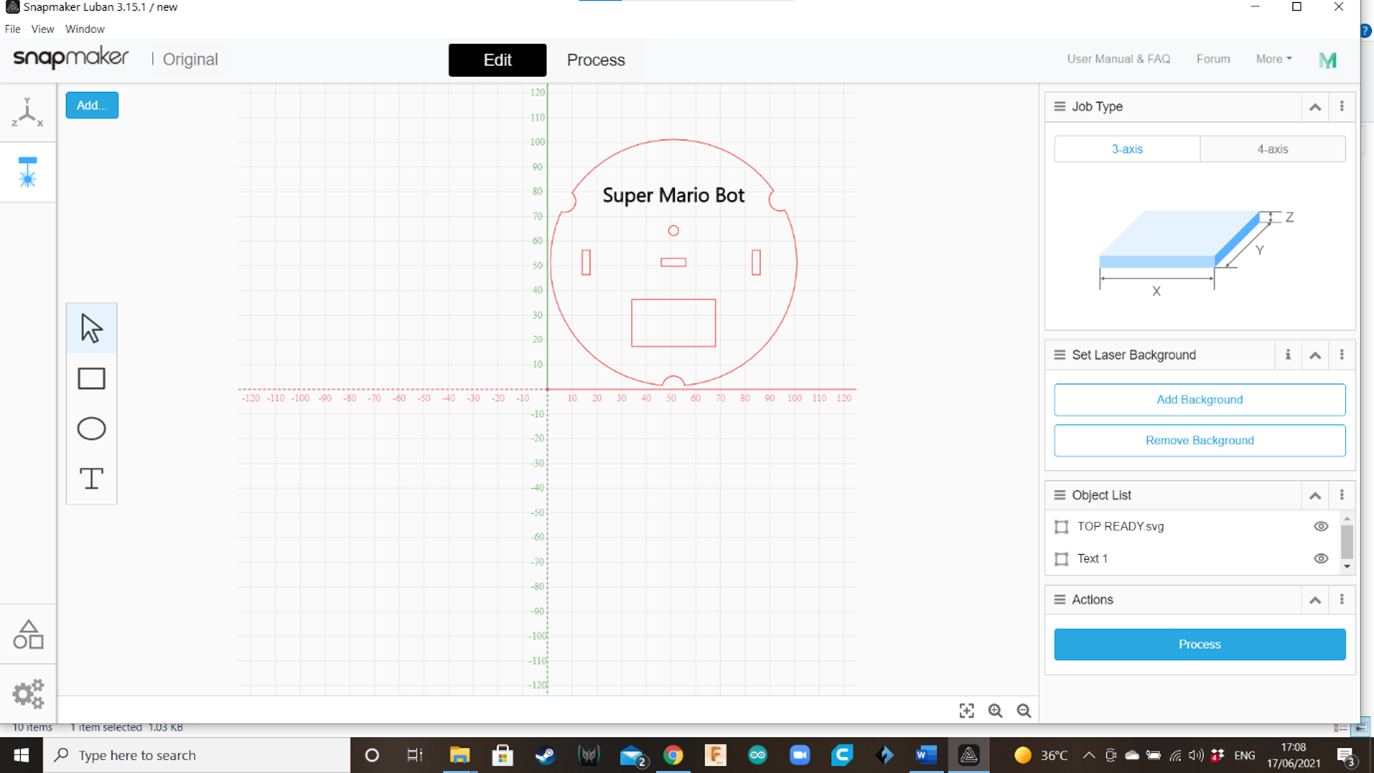
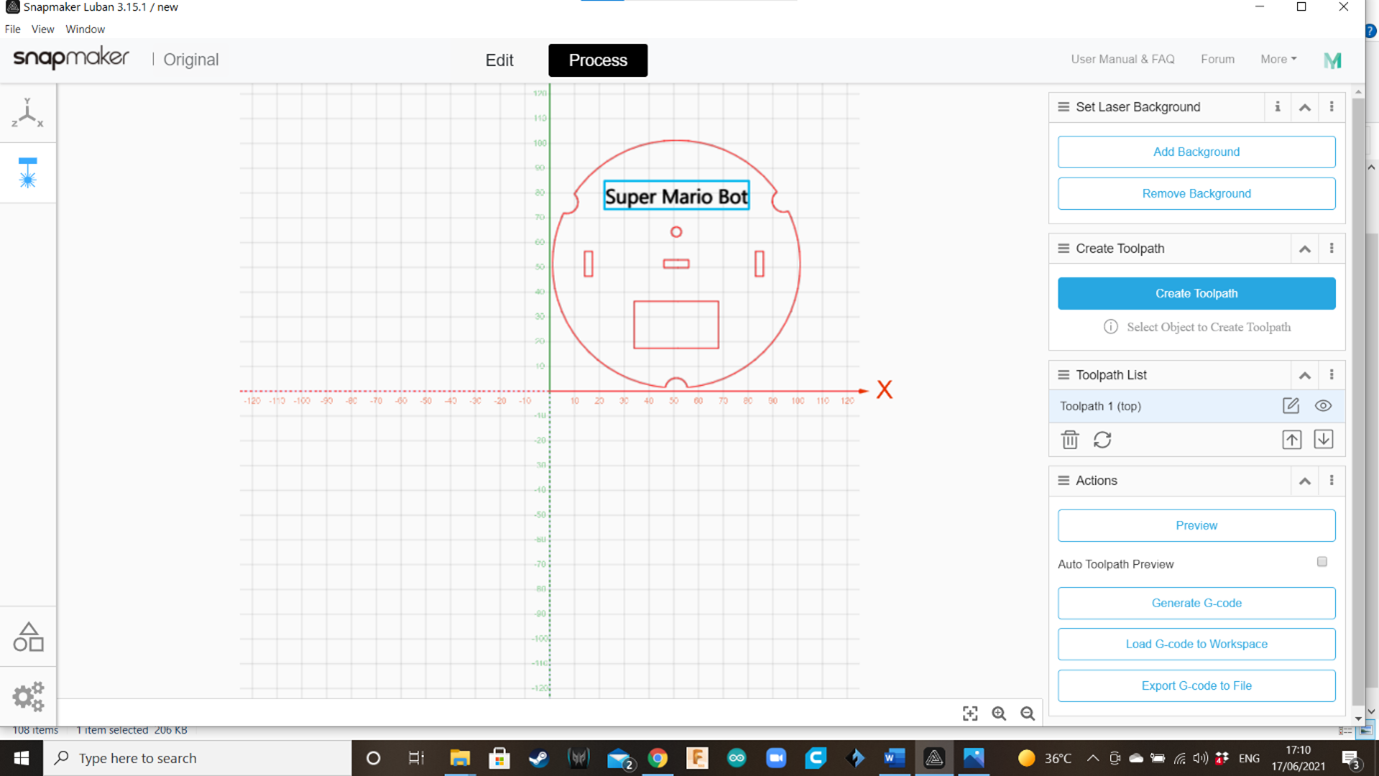
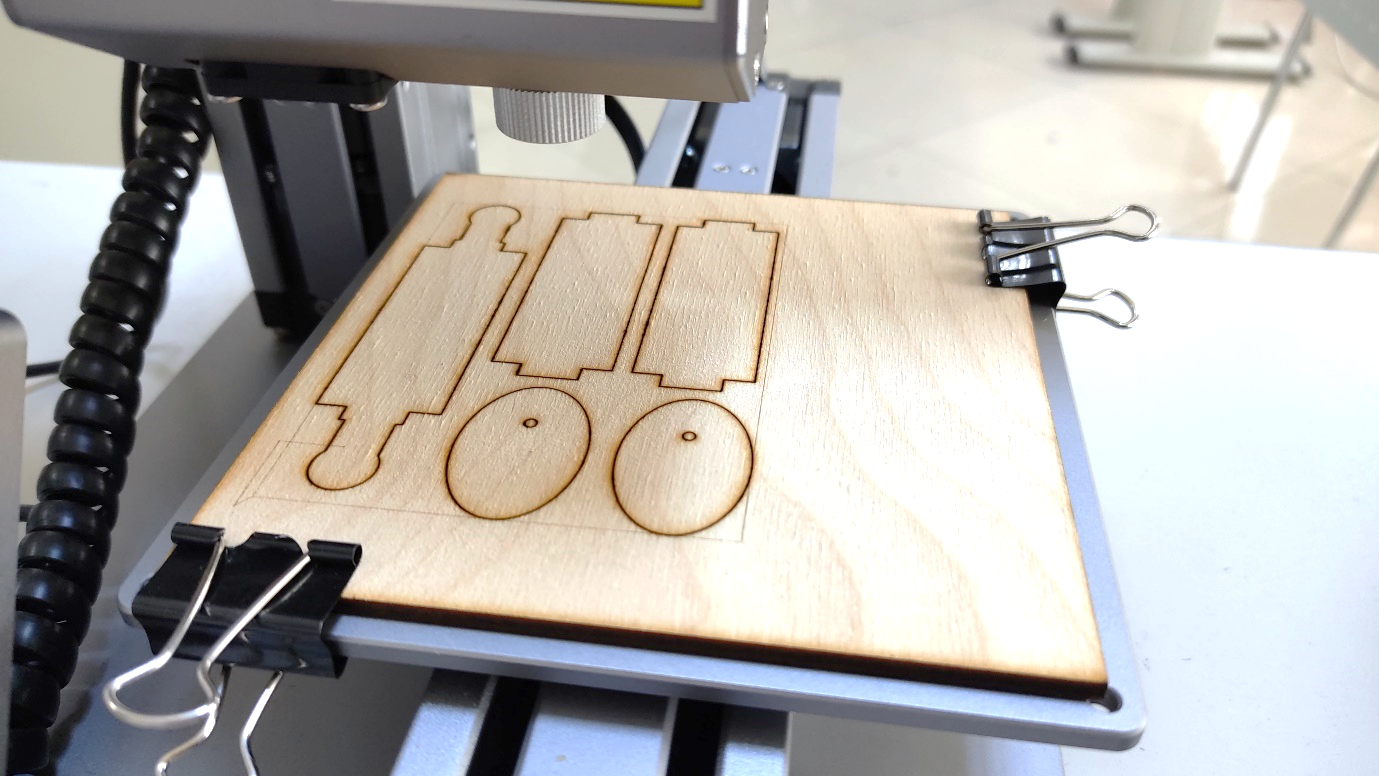
If there is enough lesson time, students also can try engraving a name for their sketchbot, on the top panel. To do that, they can use the Text option “T” located near the left toolbar.
Using the mouse, they can bring the label to the middle of the panel, and modifying the test, size and font using the “Text” option on the right toolbar.
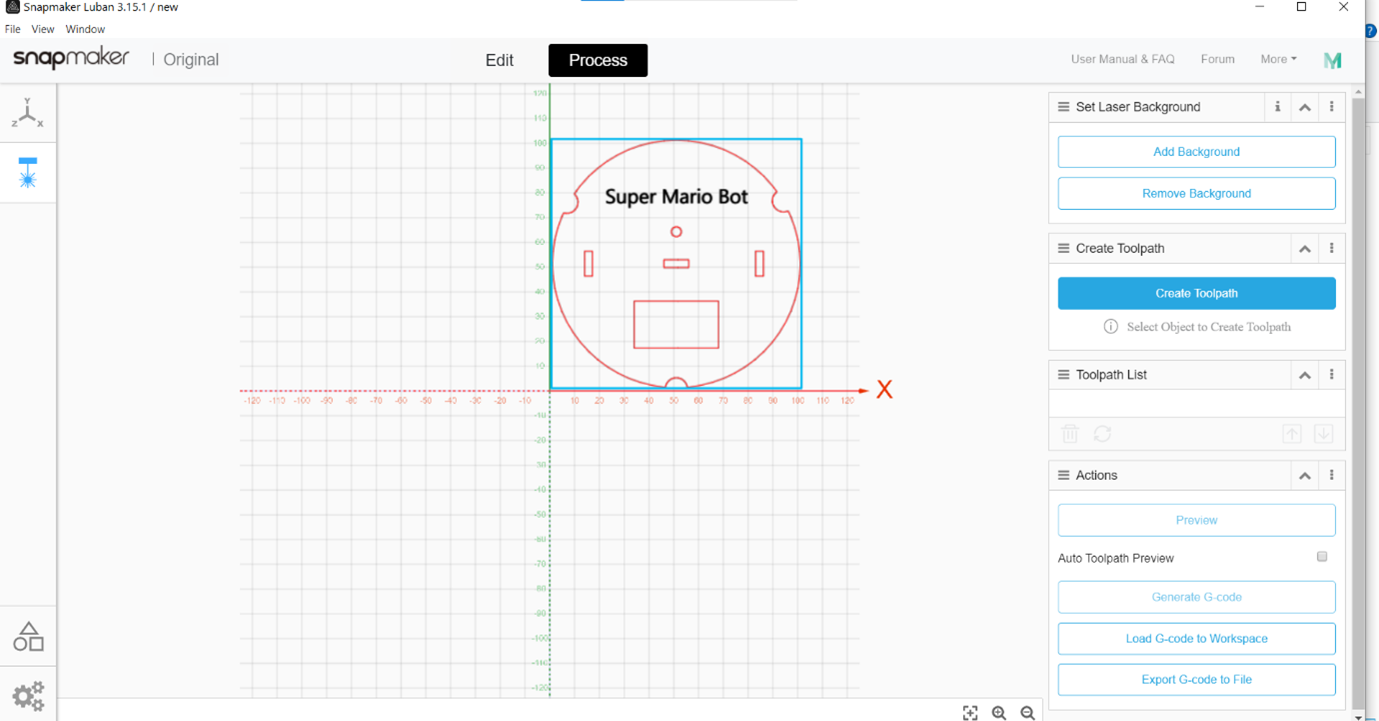
Note that now we will have two objects (in this case: “TOP READY” and “Text 1”) and each one will need to have their own toolpath created in the Process area.
Select the Top Panel; and create the Toolpath 1 with the same parameters of the Bottom Panel.
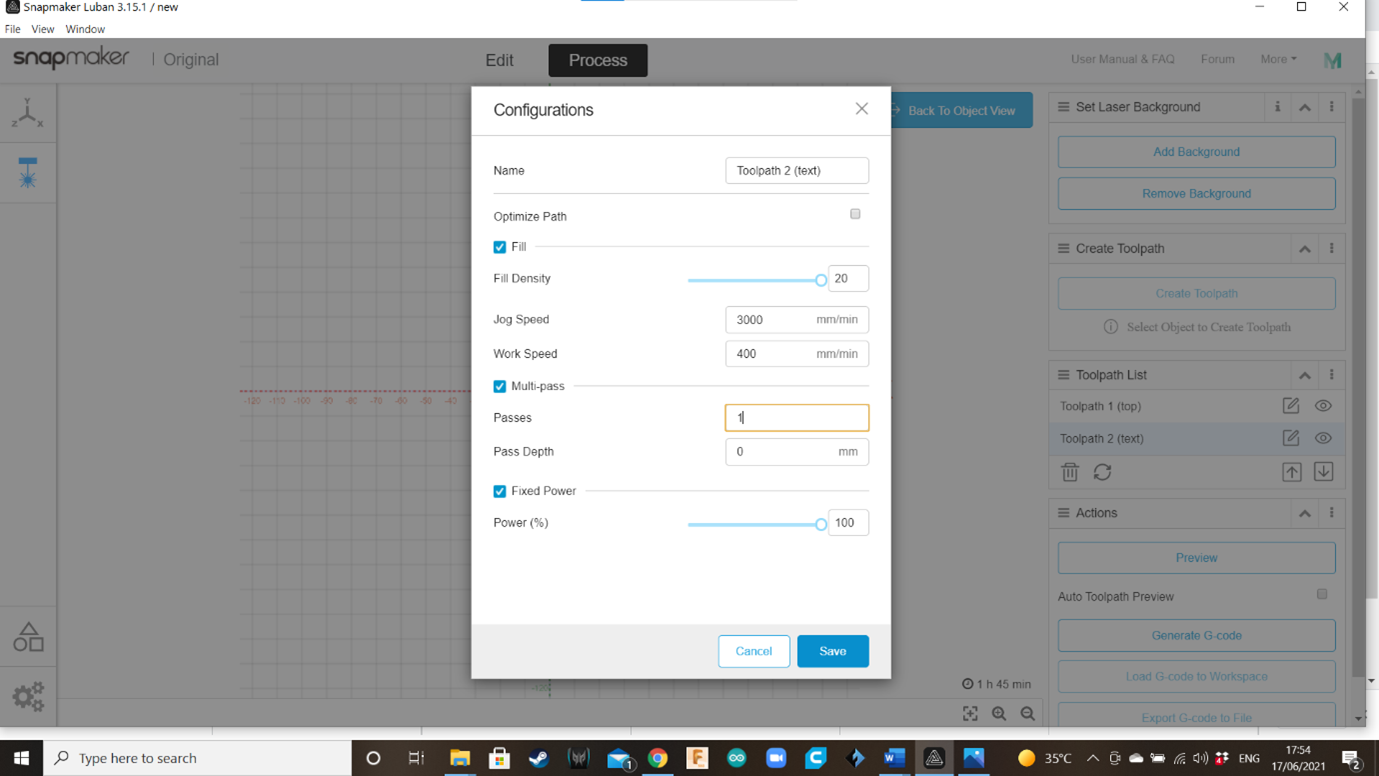
Now, select the text, and create another toolpath with the following configuration:
- Name: Toolpath 2 (Text)
- Fill: YES
- Fill Density: 20
- Jog Speed: 3000 mm/min
- Work Speed: 400mm/min
- Multi-pass: Yes
- Passes: 1
- Pass Depth: 0
- Fixed Power: Yes
- Power (%): 100
After finishing with Top and Bottom Panels, do the same process with the columns and weight, so we finish the laser cutting part.
Assembling the Sketchbot - Bottom Panel and Motor
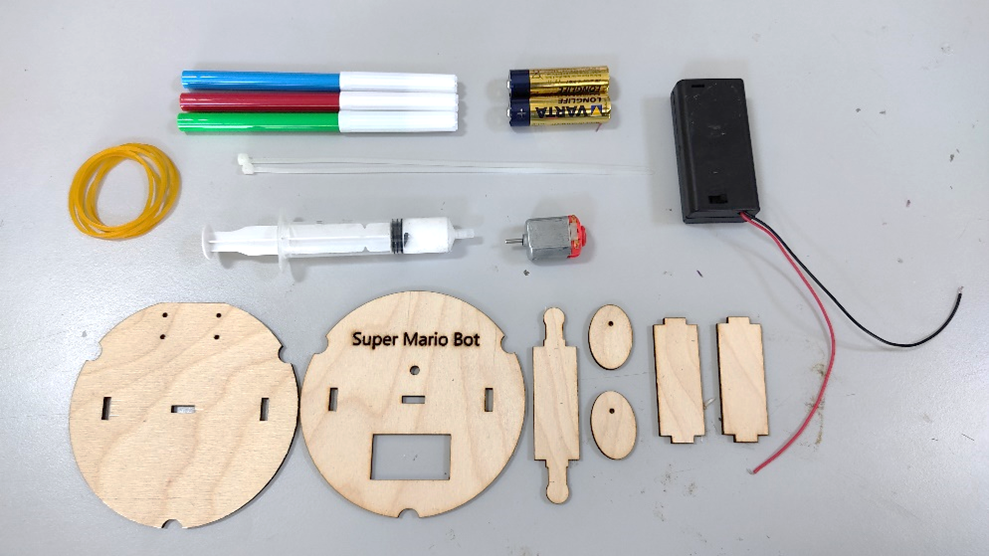
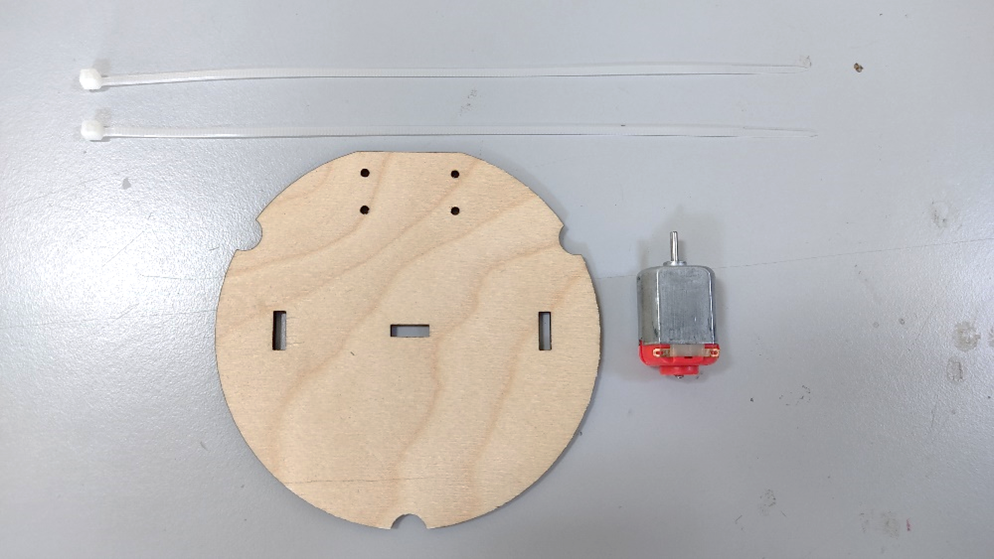
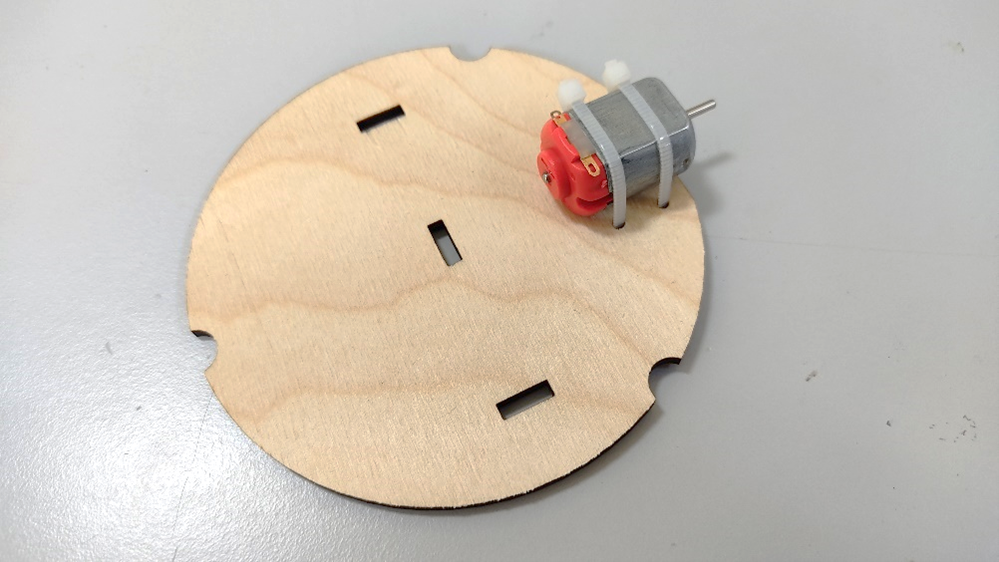
Prepare the materials mentioned at the beginning of the lesson and bring the cut pieces.
Take the zip-ties, the motor, and the bottom panel.
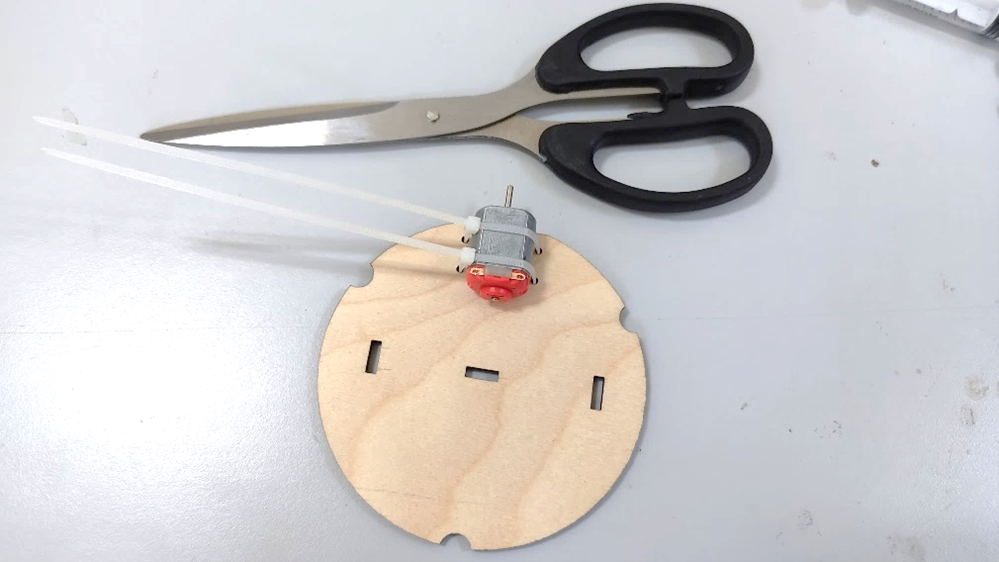
Using the zip-ties, attach the motor to the bottom panel.
When the motor is rigidly attached to the panel, cut the remaining ends of the zip-ties.
Unbalanced Weight
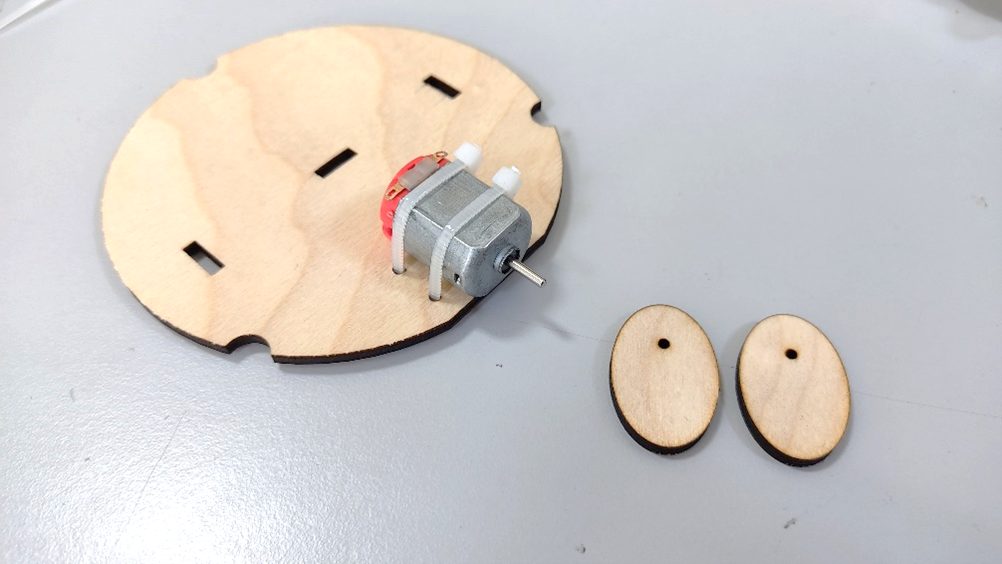
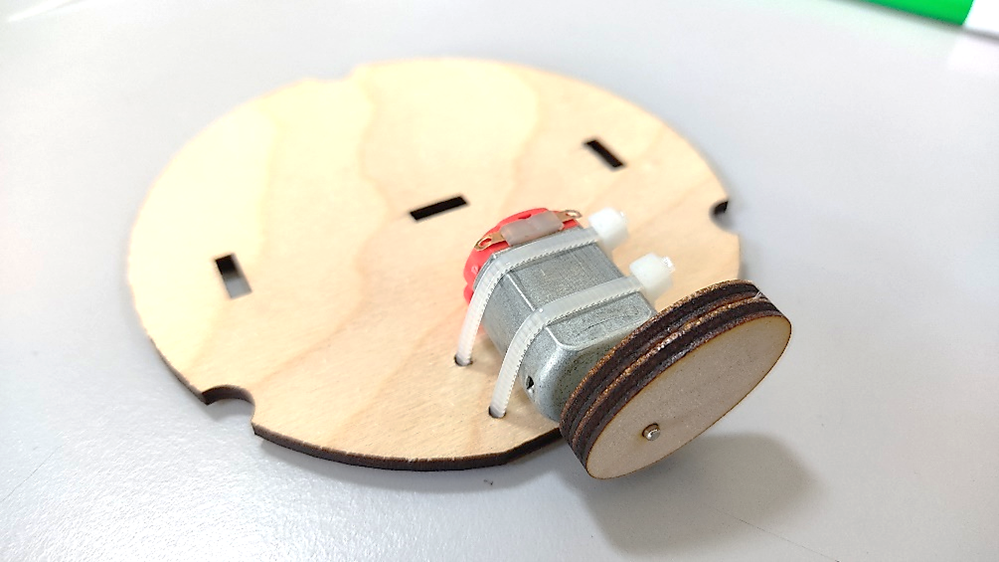
Bring the weights and insert them in the motor’s shaft. They must enter in a tight way. If not, use a bit of glue between the shaft and the wooden weight.
Columns
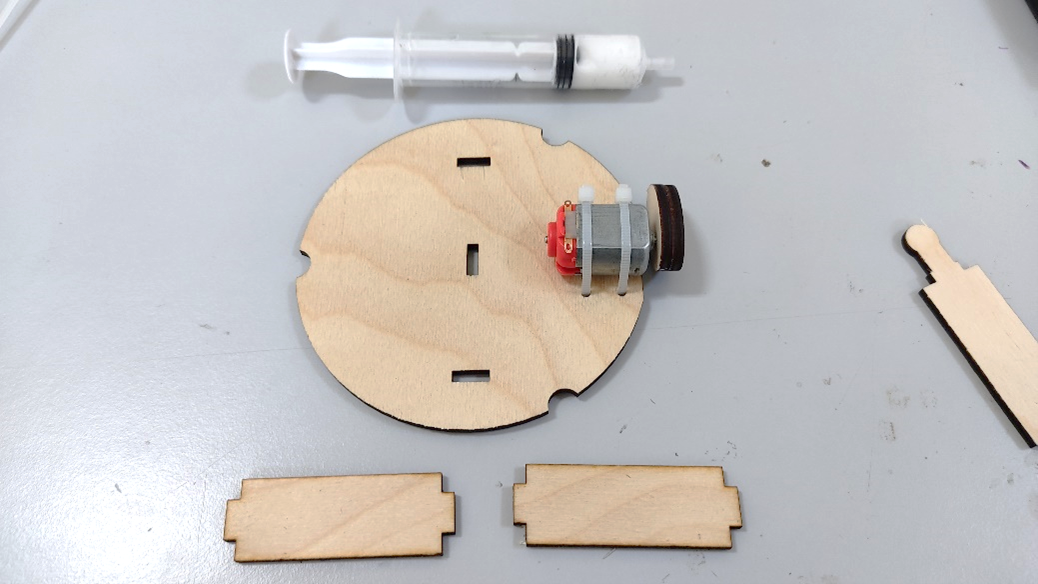
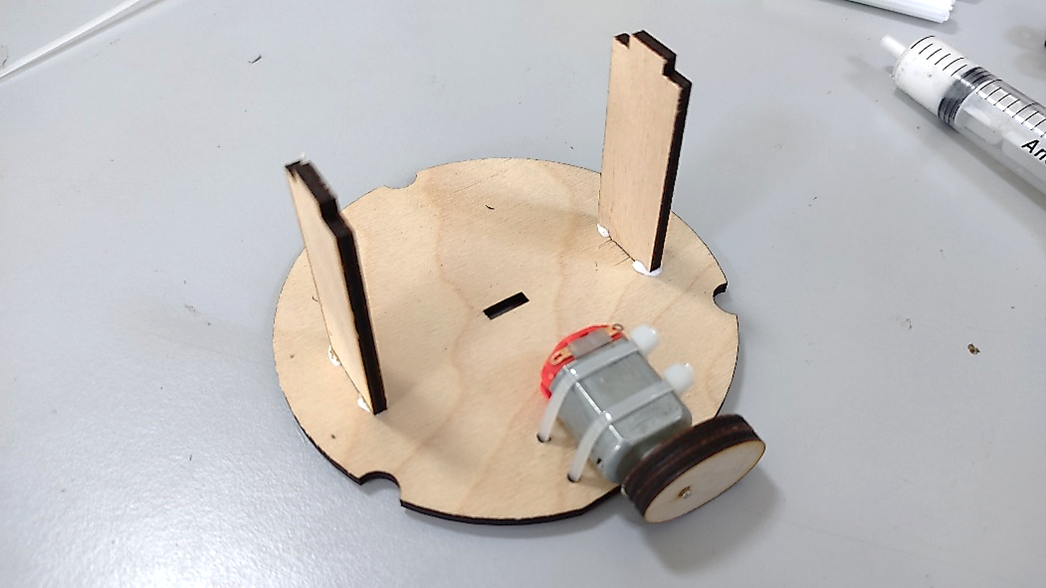
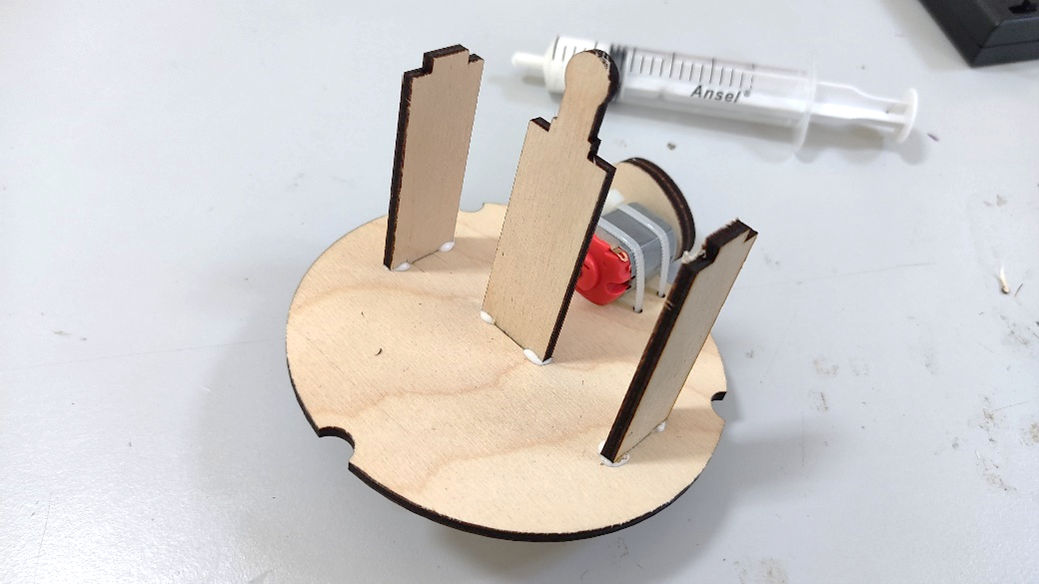
Bring the side columns and insert them in their respective slot. Adhere them using glue for wood.
Insert the center column.
Top Panel
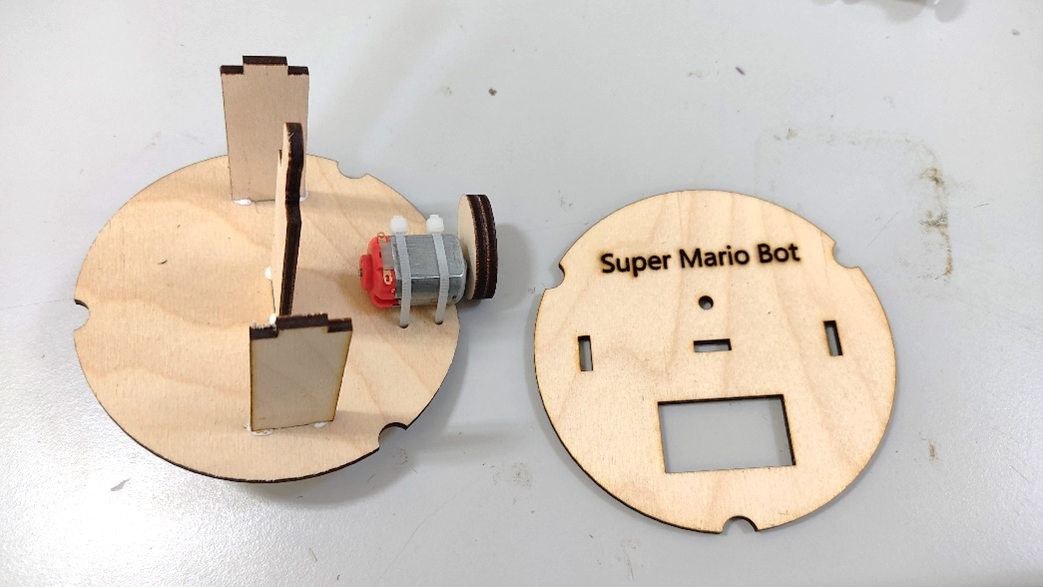
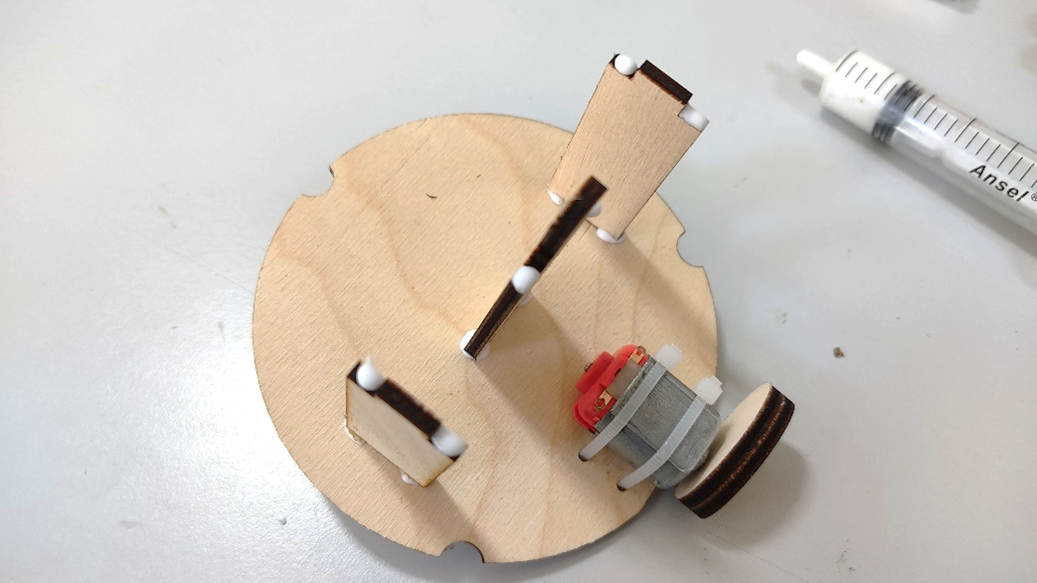
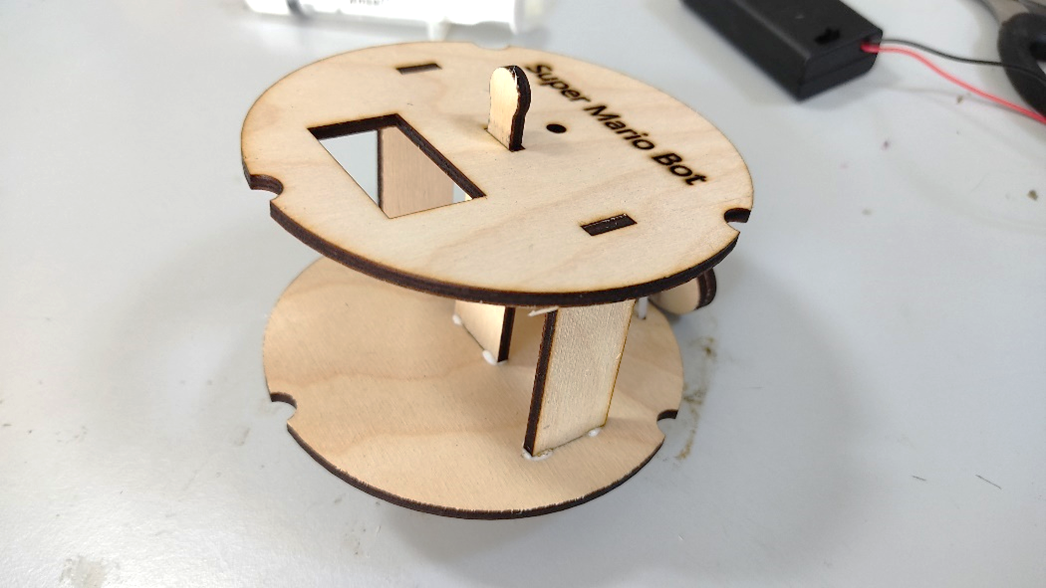
Now add some glue to the top segment of the columns; and attach the Top Panel.
Attaching the Plumasters
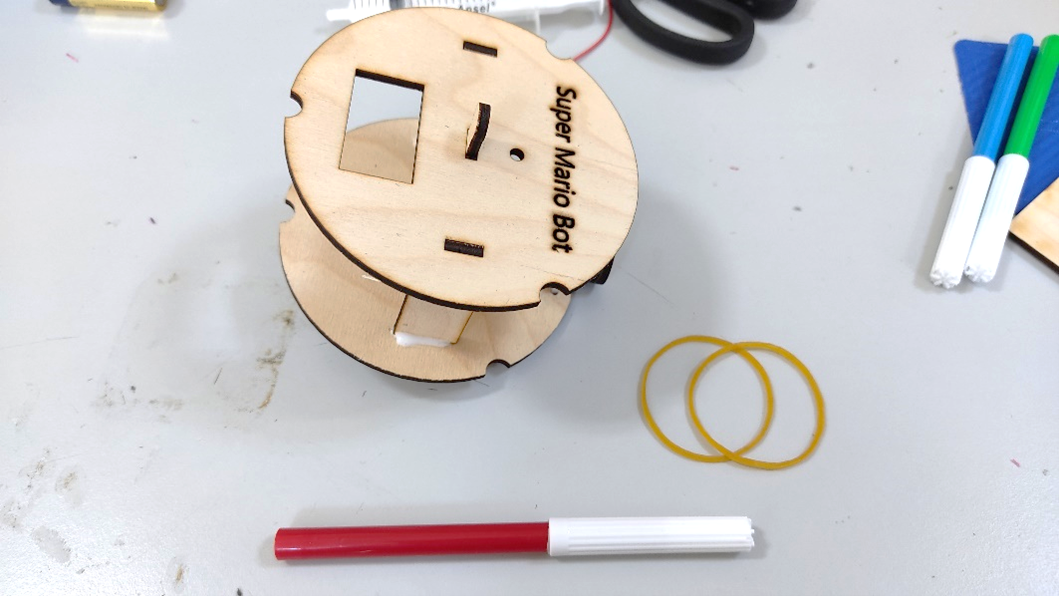
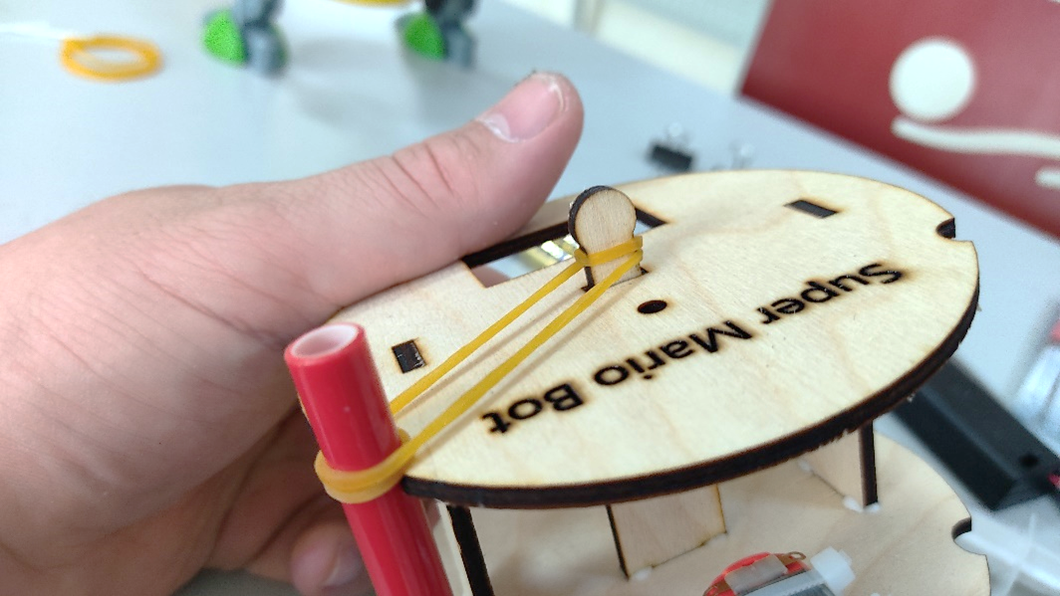
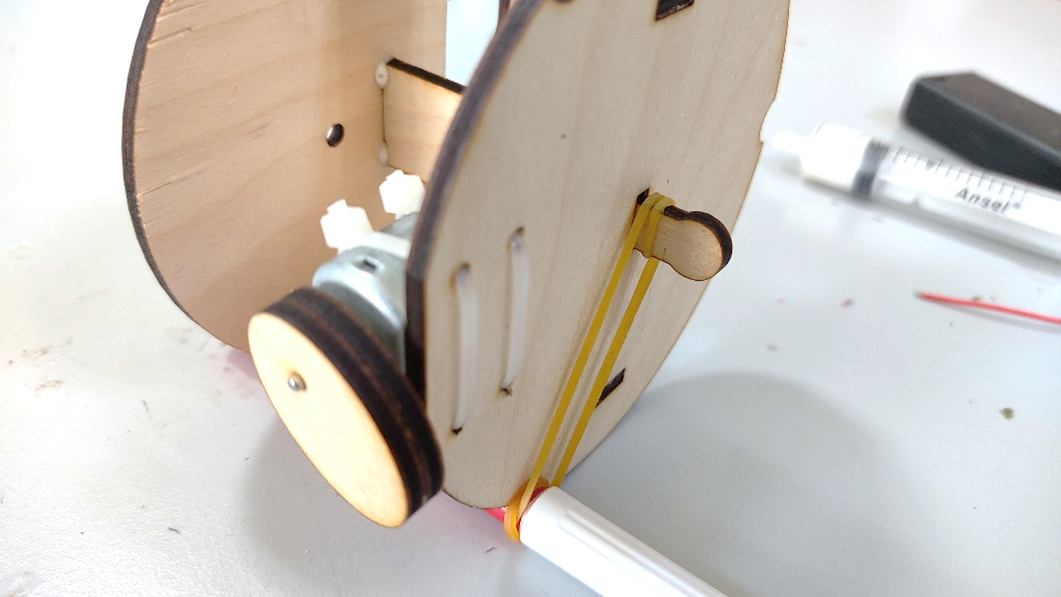
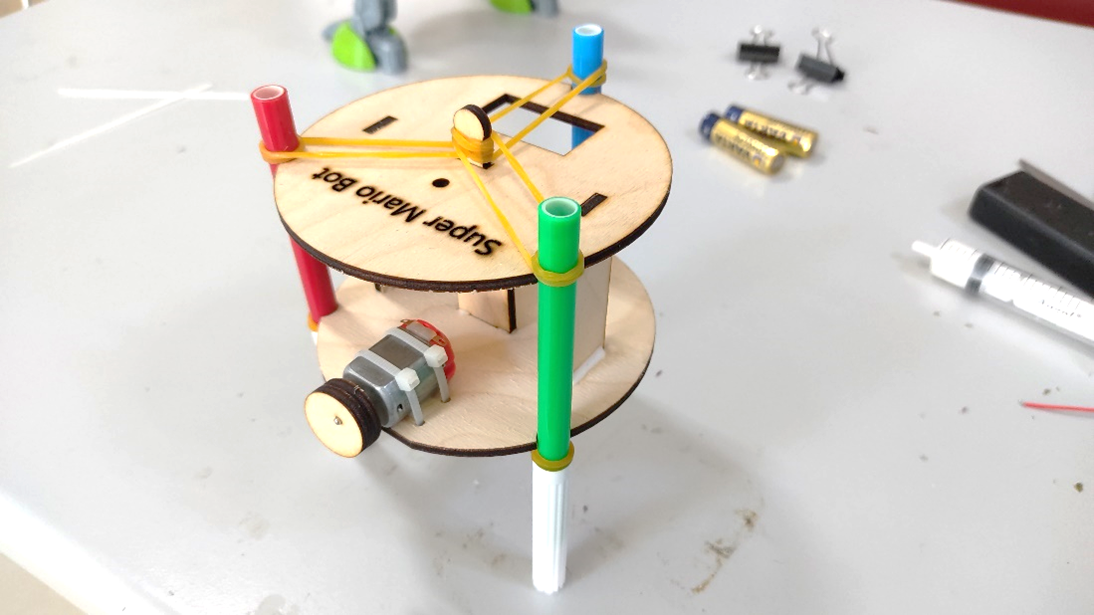
Bring one plumaster and two rubber bands. Fix the plumaster to the sketchbot tying the top part of it to the top end of the central column, and the middle part of the plumaster (near the drawing end) to the bottom end of the column.
Do the same operation for the other two plumasters.
Batteries and Connections
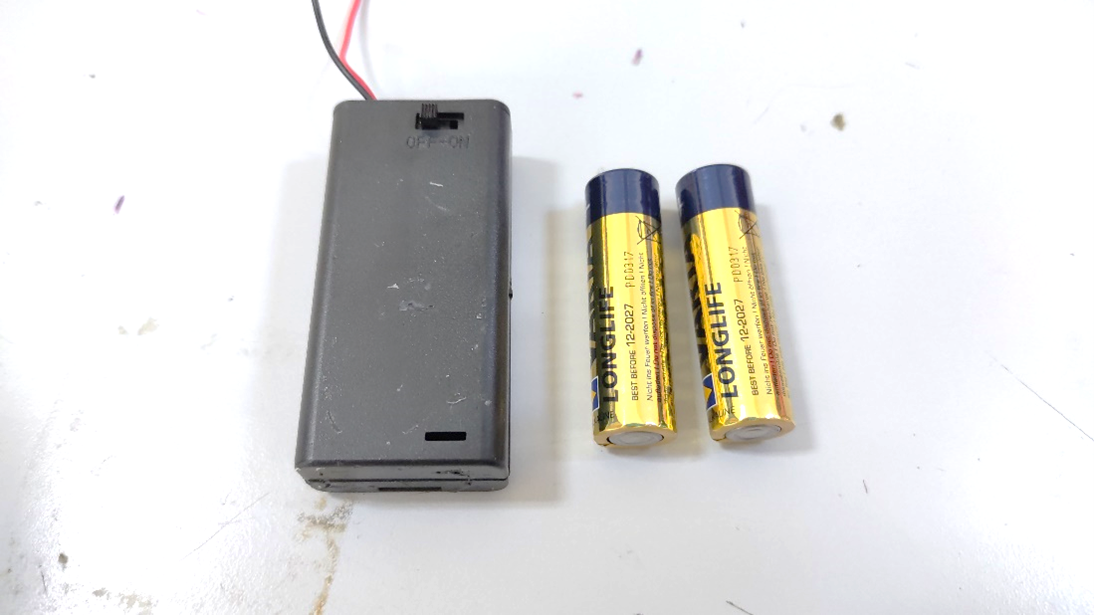
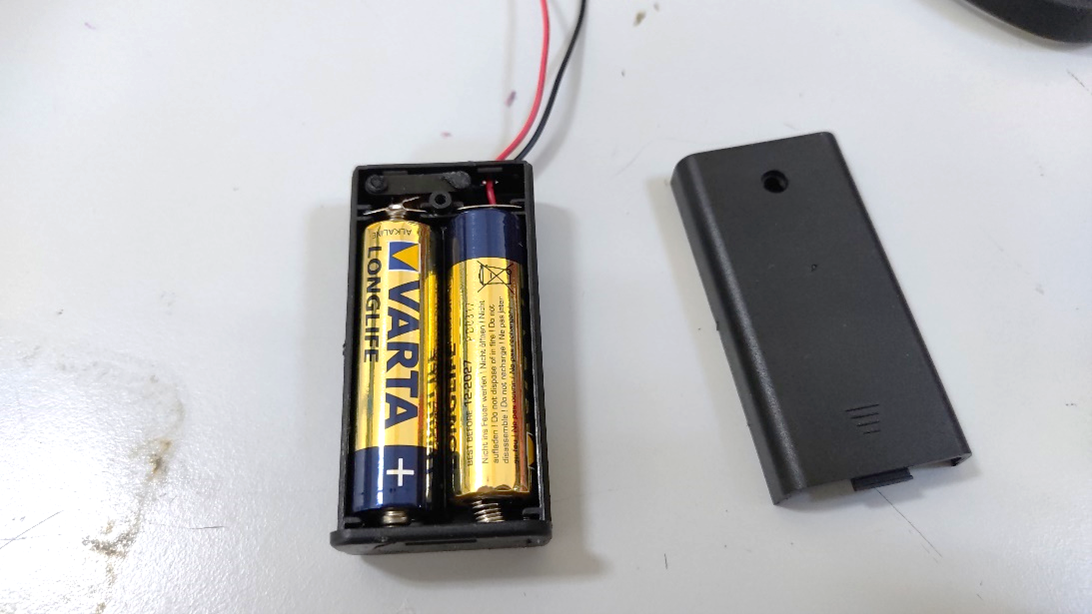
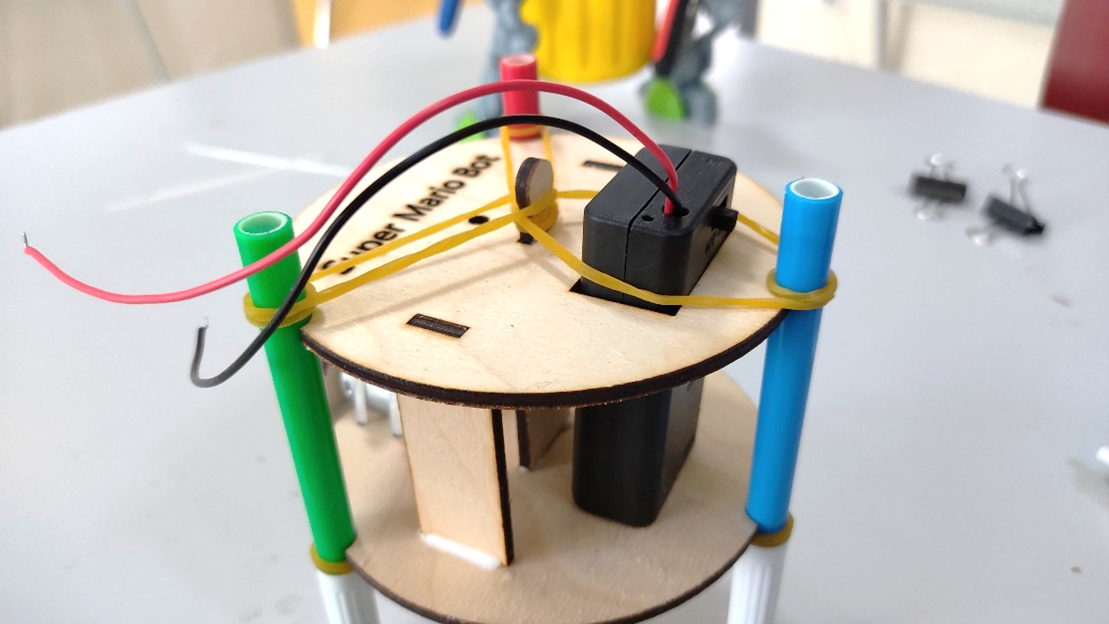
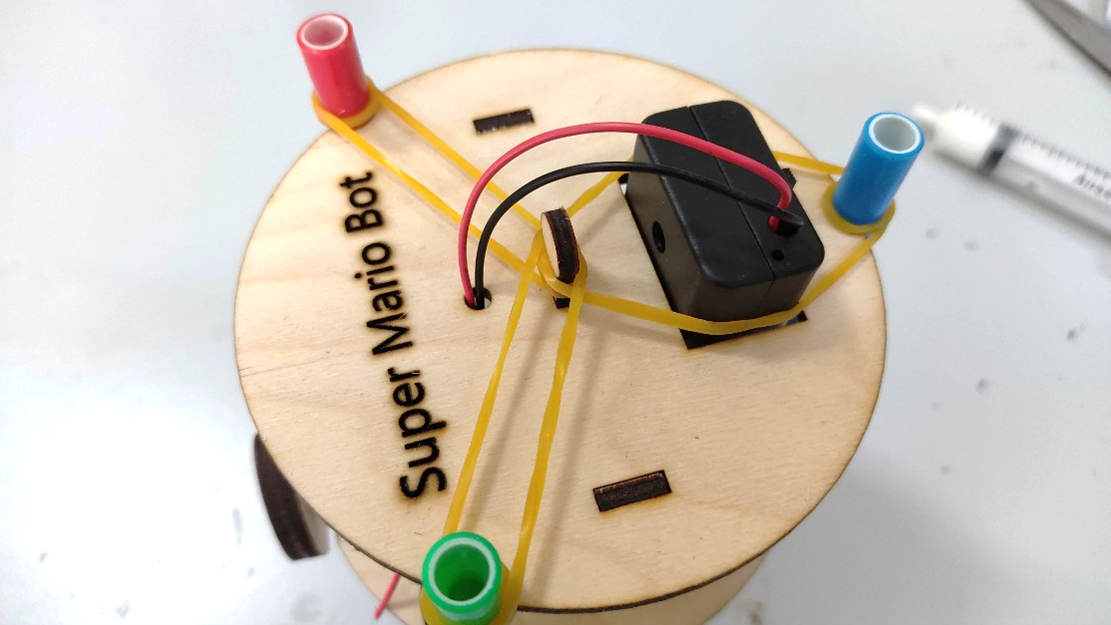
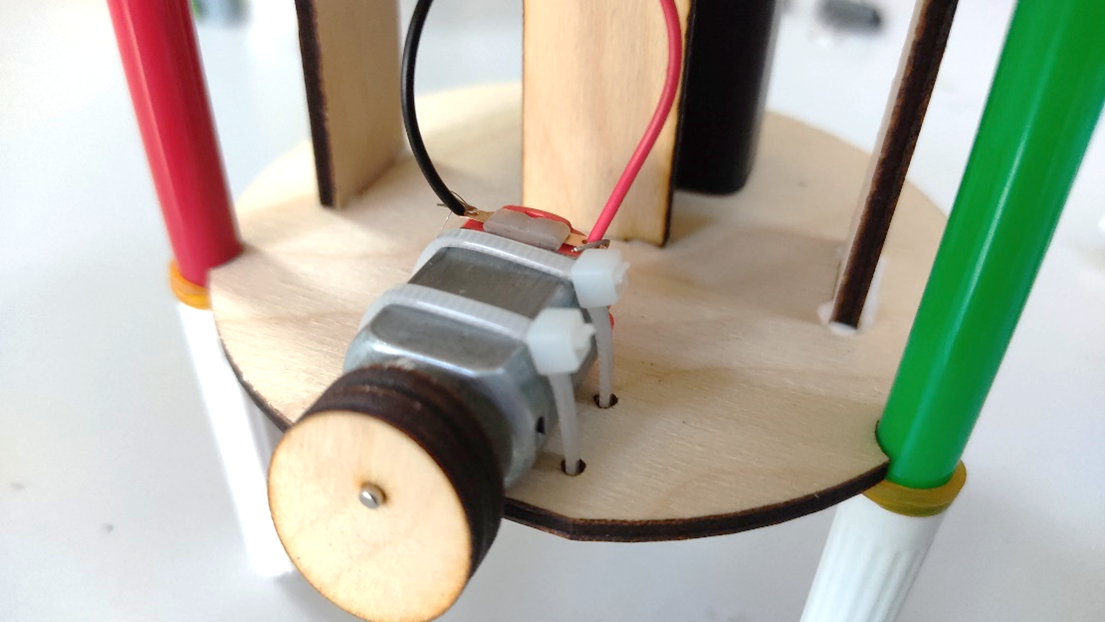
Insert the batteries into the battery holder.
Insert the battery holder into its respective space on the Top Panel.
Pass the wires through the hole and connect each one to each pin of the motor.
Aaaand... It's Ready!
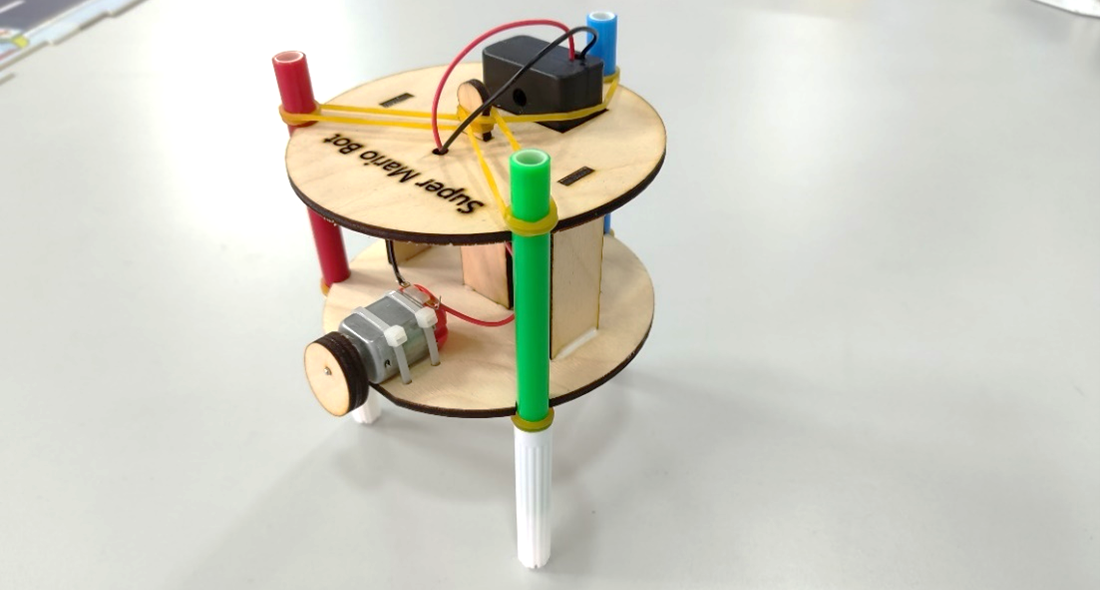
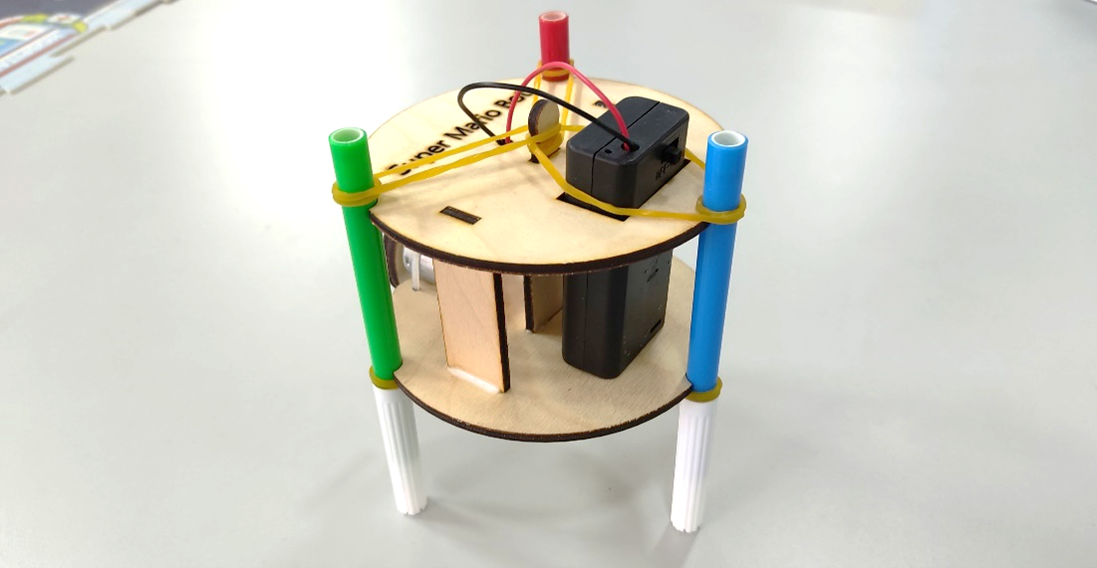

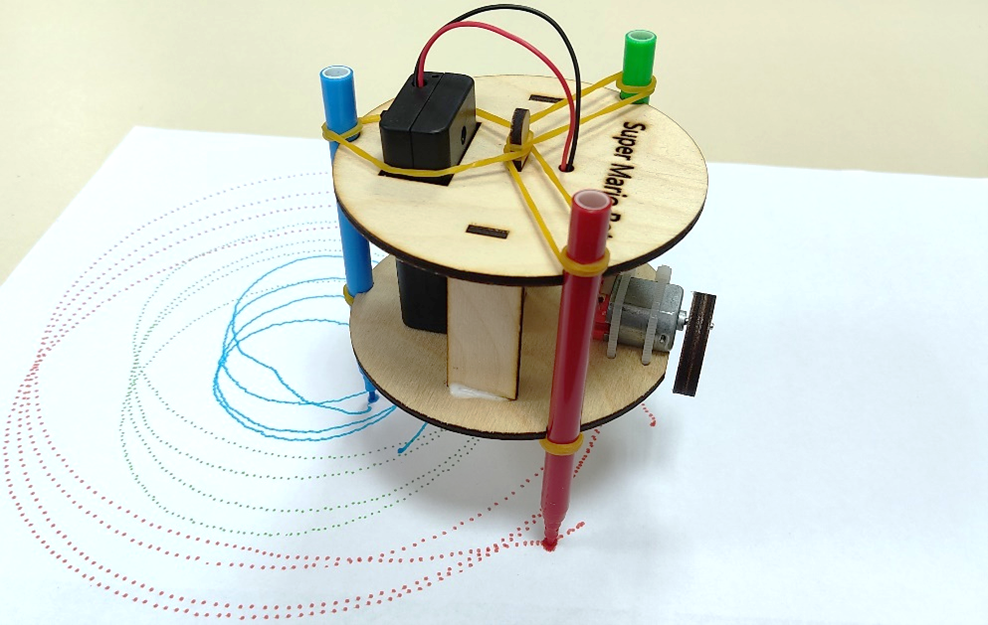
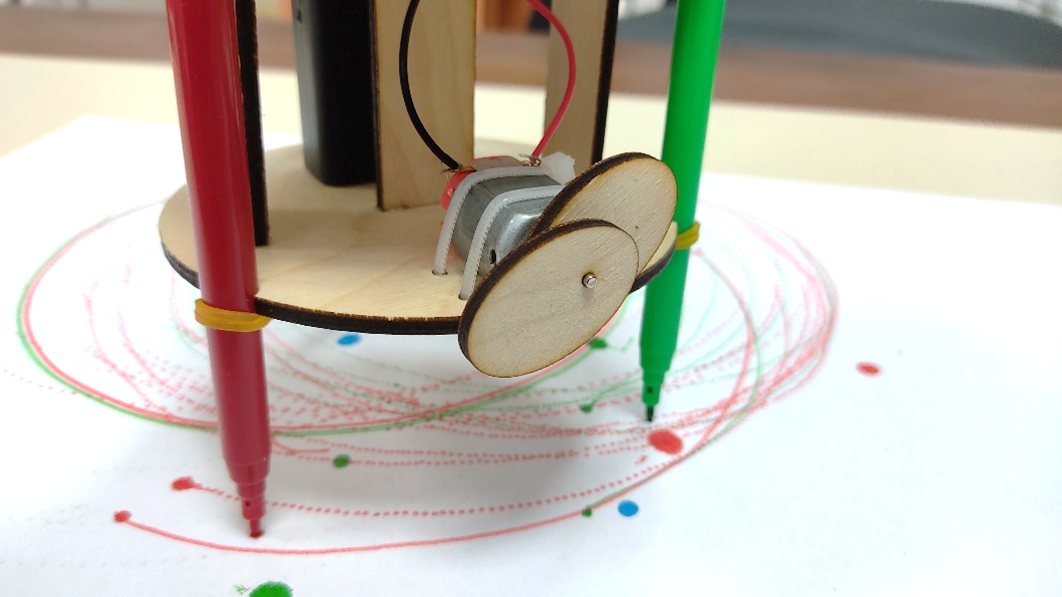
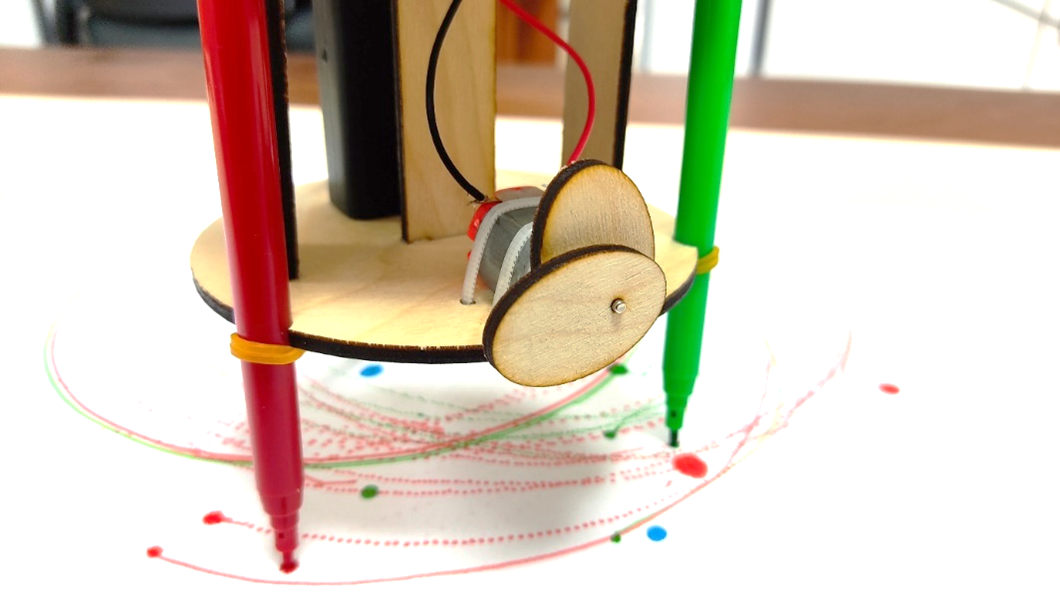
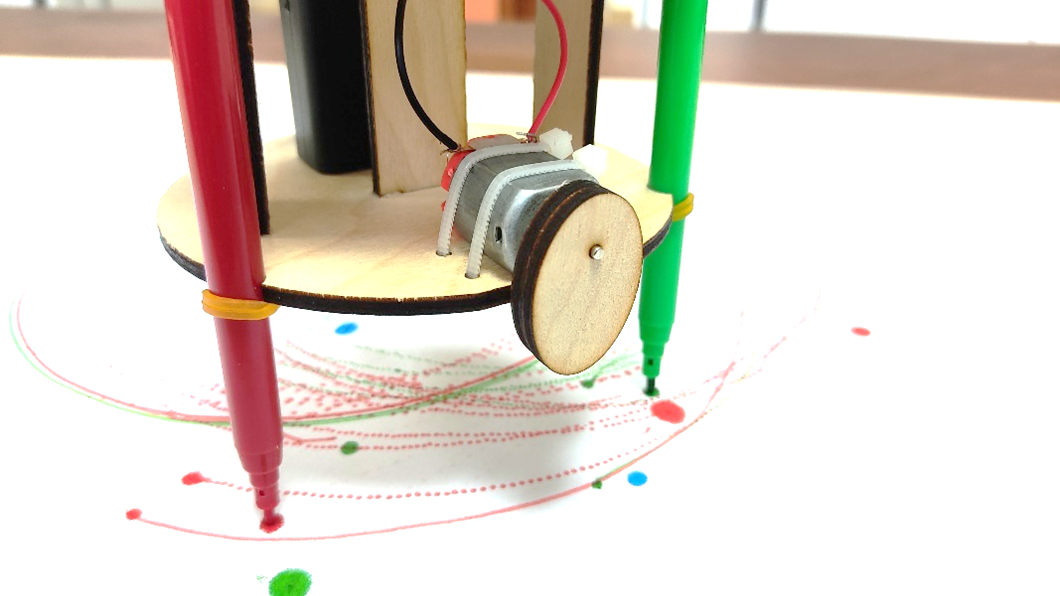
Remove the caps from the plumasters and place the sketchbot over a paper sheet, so it can start painting.
Also, you can experiment with different weight configurations, to see how they affect the drawing.
Have fun!