Tim's PCA9685 Controller
by Palingenesis in Circuits > Arduino
15633 Views, 44 Favorites, 0 Comments
Tim's PCA9685 Controller
Many projects done with the Arduino, involve using a Servo.
If using only one or two servo, these can be controlled direct from an Arduino using a library and allocating pins to do this.
But for projects needing many servo to be controlled, the (lets give it its full name) PCA9685 16-channel, 12-bit PWM Fm+ I2C-bus LED Controller, may be the better choice.
The PCA9685 LED controller although designed to control LED's, can be configured to control Servo. (Data Sheet)
The PCA9685 communicates via I2C and has 64 possible address, this means that 64 of these devices can be daisy chained one after the other, each with 16 servo or LED attached to each. That totals 1024 number that can be controlled from one Arduino.
Now having a project that has many Servo to control, lets say a four legged robot. Each leg having two servo to control it. (we start simple, in theory my app can control 1024)
Setting up eight servo, finding the trim setting for each, determining there max. and min. positions, can be very time consuming.
Writing and re-writing code to see what happens, can be quite a pain.
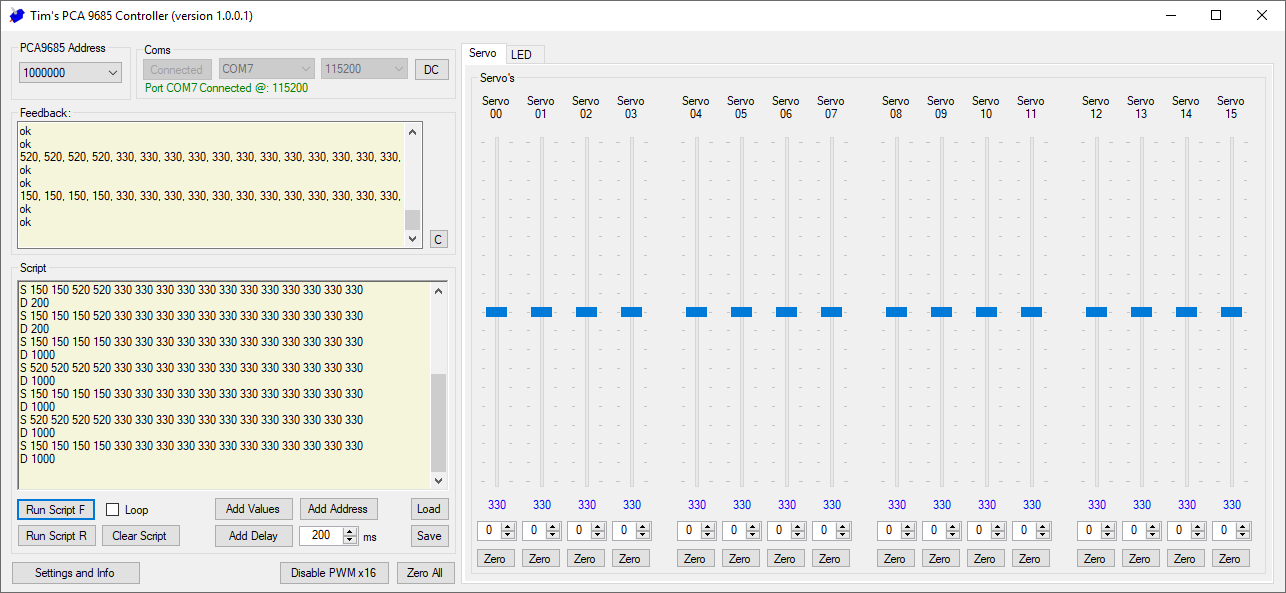
So I decide to make an application to make things simple, and help find each Servo setting required and be able to run sequences (script) to test commands sent to the servo.
There is a new Module LU9685-20CU.
- If you can't find a PCA9685 Module, Check the new Instructable I have done.
- Tim's Mechanical Spider Leg [LU9685-20CU] : 28 Steps (with Pictures) - Instructables
Connections
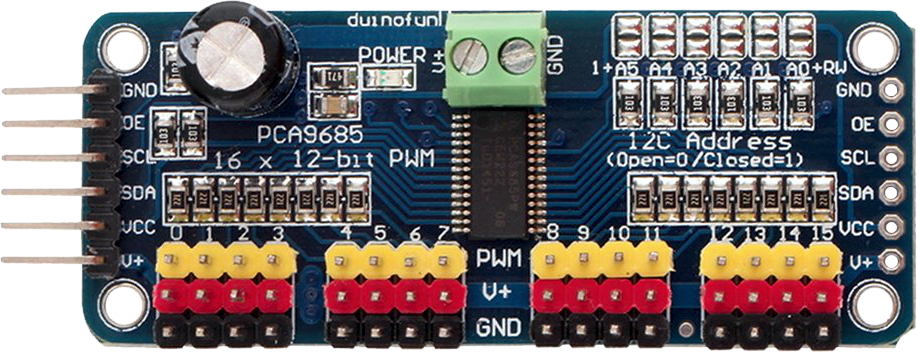
The connections are quite simple.
The PCA9685 Breakout Board has six connection. (The same connections are repeated at the opposite end of the board, to make it easy for daisy chaining)
- GND Ground (negative power connection).
- OE Output Enable (making this Logic High, disables the PWM).
- SCL I2C Bus, Signal Clock Line.
- SDA I2C Bus, Signal Data Line.
- VCC +5 volt. (logic positive voltage).
- V+ +5 volt High Current Power Line.
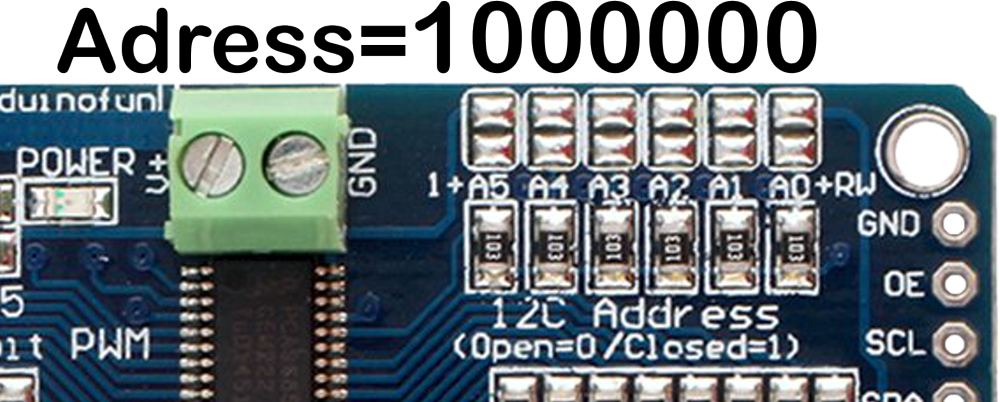
Top right as shown in photo, there are six solder able links that can be soldered to change the address of the PCA9685, should more than one be connected. (these links are linked Binary, e.g. 000000, 000001, 000010, 000011 etc. It's actually it is 8 bit but you don't see the first or last bit)
A note about Power (No. 6)
If you are using power from the Arduino, don't have the Arduino power just by a USB, have at least 9 volt powering it on the power VIN. (if just powered of the USB, there will be a voltage drop of about 1.5v through the voltage regulator)
I recommend having a separate voltage supply for the PCA9685 V+ power (No. 6). 5 volt, a minimum of 2 Amps. (each servo under load, can peek over 1 Amp)
Also most breakout boards I have seen come with a capacitor. (if it hasn't got one, get one) I recommend the bigger the better. (I have seen 16v 10,000 uF Capacitors)
Mine currently has 1,000uF and struggles to keep 8 Servo in sync. (I have some 10,000 uF on order)
Power is what limits the number of Servo.
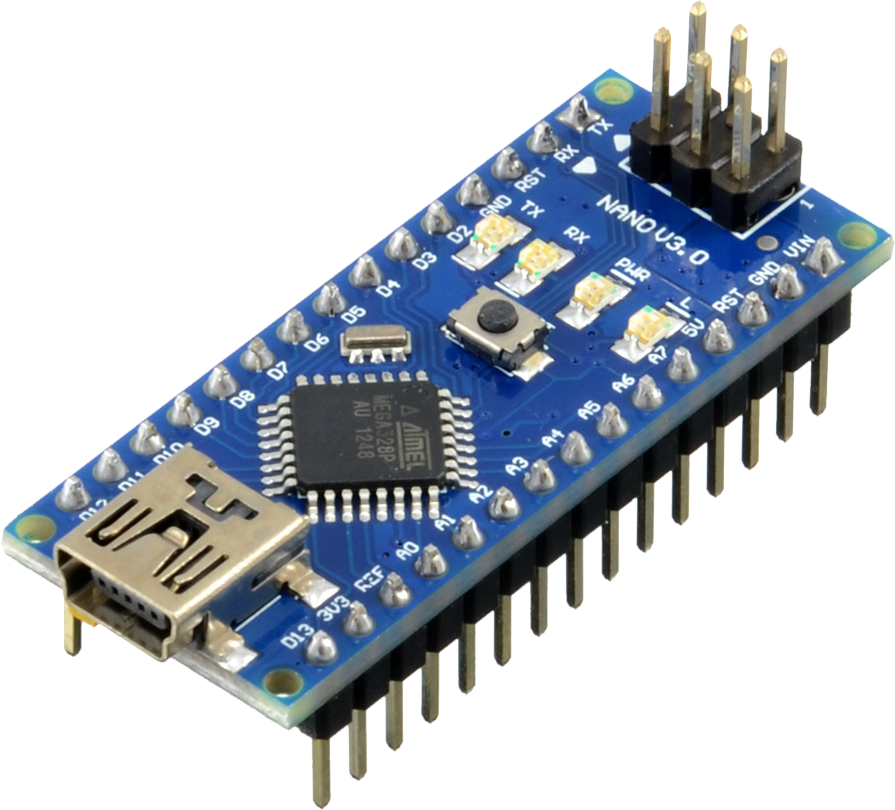
Arduino connections are:
- A4 to SDA
- A5 to SCL
- 5V to VCC
- GND to GND
- D13 to OE
- VIN to Battery (9 to 12 volt)
- USB to Computer
Firmware
Here is a link to my software: Tims_PCA_9685_Controller.zip
Inside the zip file will be the setup file for my Application.
Also there will be a folder called Arduino. In that folder will be three HEX files, and a zip for XLoader.
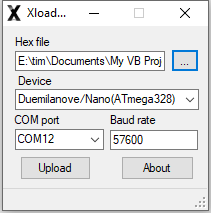
XLoader is a simple application for installing Hex files to an Arduino.
Just choose the HEX file to Upload:
Tims_PCA9685_16_LED_Servo_Controller_UNO.hex is for the Arduino UNO.
Tims_PCA9685_16_LED_Servo_Controller_NANO.hex is for the Arduino NANO.
Tims_PCA9685_16_LED_Servo_Controller_NANO_Old.hex is for the Arduino NANO with Old Bootloader.
Select which Arduino you are uploading to.
Select the port it is connected to.
Click Upload.
Once the firmware is uploaded to the Arduino, My application will be able to control Servo or LED attached to the PCA9685.
Install the Aplication

In the zip file from the previous step, the will be a file called setup.exe
Run it and install the software.
I have tried to catch most errors in my code, but if you want to brake it, I'm sure it is possible.
Once installed run the application.
Obviously you will need you Arduino connected to the computer via USB, and the PCA9685 and Servo connected to the Arduino.
When the application starts most of the controls will not be active. all the controls work live, so the first thing to do is connect to the Arduino.
Top left is the connect button, chose the COM port the Arduino is connected, set the BAUD to 115200, then click connect. (some times when the Arduino is first powered on, handshaking is out of sync, click DC and connect again)
When connected feedback will appear in the Feedback window, and all the controls will become active.
Each slider represents the corresponding Servo connection on the PCA9685 breakout board. The sliders move the Servo, -90 or +90 degrees from the centre position.
Each slider has a Zero button, this centres the Servo.
Above the Zero button is a numeric box which you can entre -90 deg. to 90 deg.
Above the numeric box is the Pulse Width value the PCA9685 channel is set to. This is the value used when writing your code.
Lets say we are using the most common PCA9685 library,
#include <Adafruit_PWMServoDriver.h>
#define PCA9685_ADRRESS 0x40

Adafruit_PWMServoDriver PCA9685_01 = Adafruit_PWMServoDriver(PCA9685_ADRRESS);

PCA9685.setPWM(Servo_Number, 0, Value); // command to set value of server
Atop the sliders are two tabs, the other tab is for controlling LED, it has sliders similar to the Servo tab.
At the top left of the application is a drop down list of all the possible address used with the PCA9685, I put them in binary with the addition of the left bit which is always 1. (I haven't included the right hand bit RW to keep it simple) so that it matches the solder bridges on the breakout board.
Set this to the address of the board you want to control.
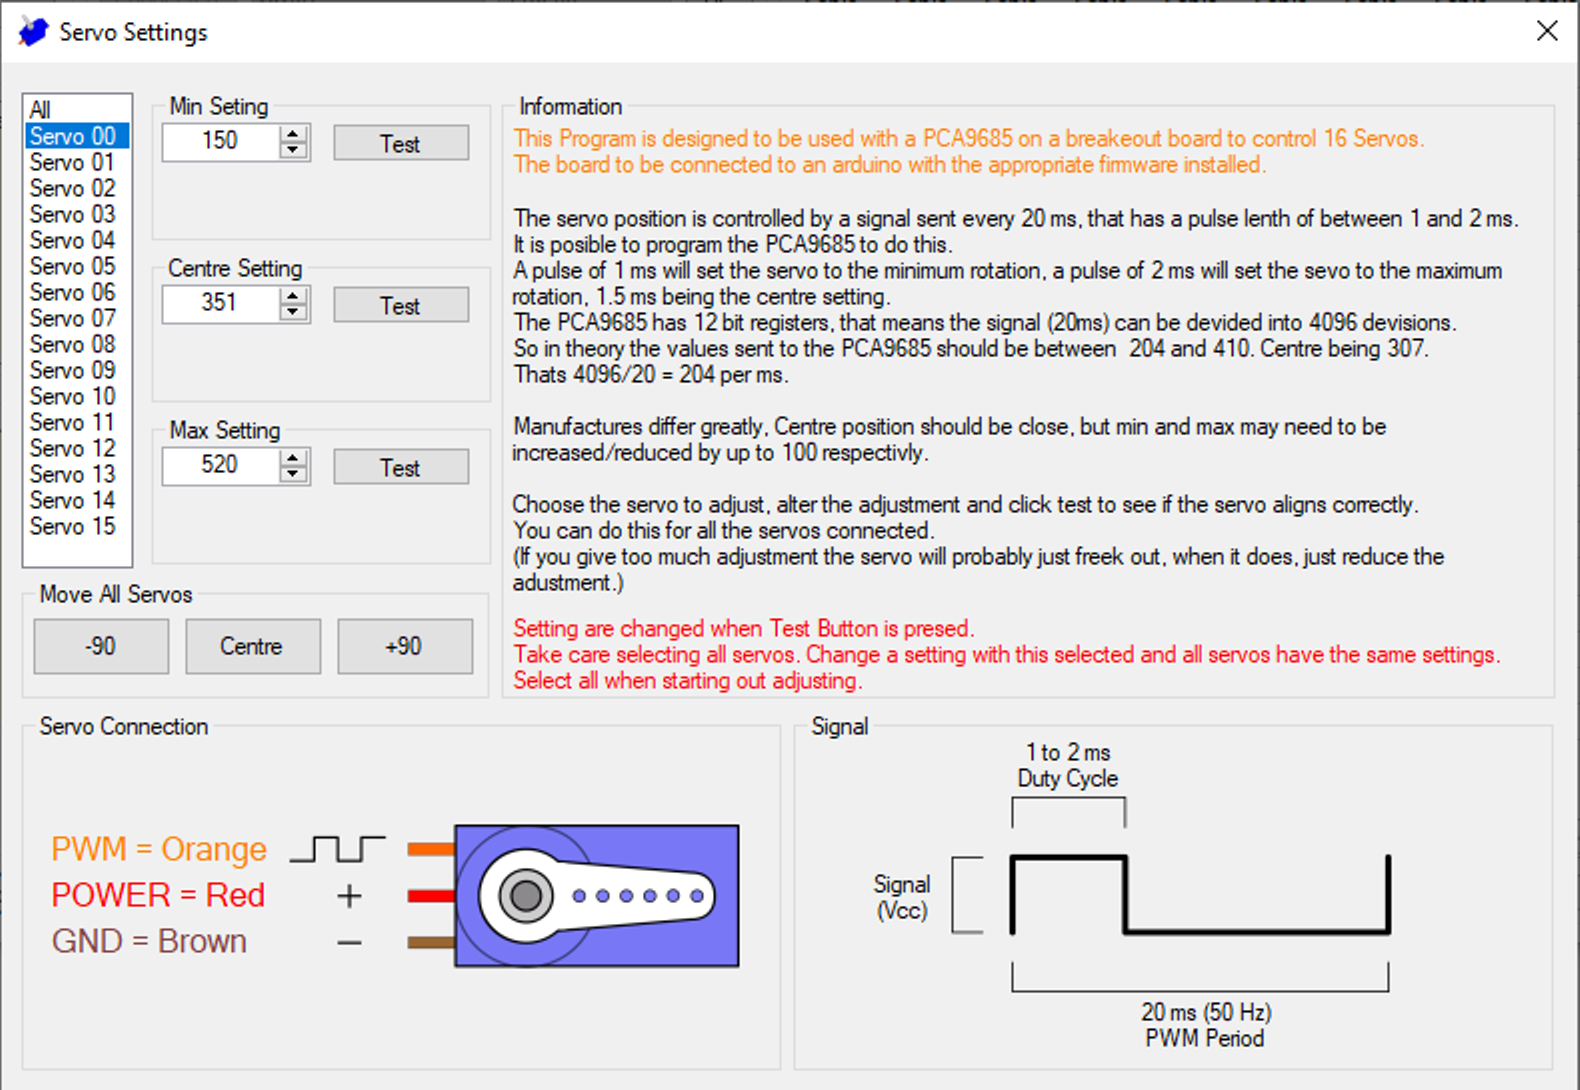
At the bottom left of the application is a button "settings and Info". Click this to set the trims of each Servo.
Chose the Servo to adjust from the list on the left, adjust the appropriate setting and click test for the setting you want to check. (the setting is changed when the test button is pressed)
If you have the newer Servo that don't have physical stops at there extreme positions (they can be manually turned continually), I recommend centring the arm/lever at the 307 value, then adjust the 90 deg. -90 deg. positions.
When the trims are done, movement of the sliders in the main application will calculate the correct position/value.
The three buttons in the "Move All Servos" section, just move all, they don't change any settings.
To the right of the "Settings and Info" button is the "Disable PWM x 16" button. This button Disable/Enables the PWM, that is, it turns on/off the signal to all pins.
The "Zero All" button is equivalent to pressing all the "Zero" buttons
Script
)
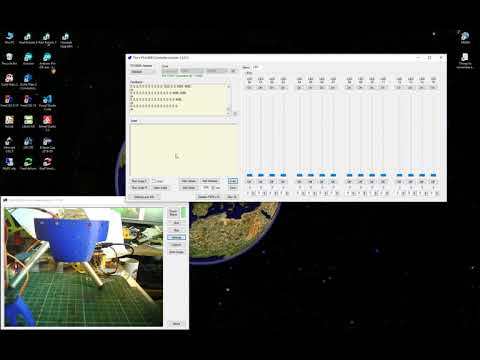)
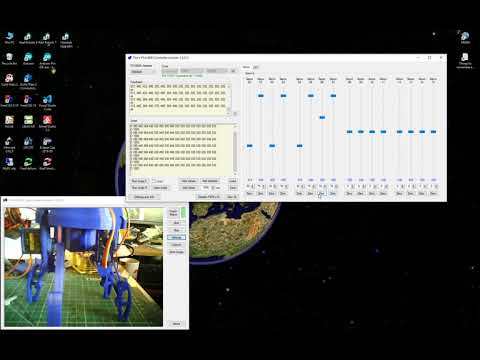
The Script section is the fun part, this is where you can create sequences of Servo positions.
Get your project to do what you want it to do.
- The Add Value button, adds the current slider settings.
- The Add Delay button, adds a delay in milliseconds set in the box next to the button.
- The Add Address button, adds a command switch to a different PCA9685, (change address to top left) it also used to change mode, Servo mode or LED mode.
- The Run Script F button, runs the current script forward.
- The Run Script R button, runs the current script in reverse.
- The Loop checkbox makes the current script run over and over, when one of the Run Script buttons is pressed. To stop the loop un-check the checkbox.
- The Clear Script button, does just that, it clears all script comands.
- The Load button, loads a previously saved script.
- The Save button, saves the current script.
Note!
I have not written any script checking into the application, the scrip must follow the following rules:
One line per command, values separated by a space.
- Servo command starts with "S" followed by sixteen values, each value between 0 and 600
- LED command starts with "L" followed by sixteen values, each value between 0 and 4095
- Dely command starts with "D" followed by one value, between 0 and 10,000
- Address command starts with "A" followed by one value and a word. The value between 0 and 64. The word being "Servo" or "LED".
The application can control Servo or LED, Don't put LED and Servo on the same Breakout Board, Servo and LED need different frequency to run correctly.
If you try to control servo with the LED settings, they may freak out, it wont harm them, but if they are installed in a project, you may not want them to move to some possition.
I have done video of some simple script.
Epilogue
As instructions go on Instructables, most people expect to end up with a physical item at the end of an instruction.
I find there is no realistic category for software.
I suppose you could class it as a tool, even so, the instruction is not how to make the tool, it is how to use it.
Hopefully by having a tool like this, people will be able to make better projects with the Arduino using Servos or LED arrays.
Please excuse the in video of the project in action, I was using an ESP32-CAM breakout board with another application I made to view images from ESP32-CAM.
EDIT
I have improved it.
Updates can be found here: Tims_PCA_9685_Controller
EDIT April 2024
I was a little late finding this, but this is an exhalent example how I intended the Application to be used.