Timelapse Photography With a DSLR Camera
by Professor-Mousedude in Circuits > Cameras
6368 Views, 19 Favorites, 0 Comments
Timelapse Photography With a DSLR Camera
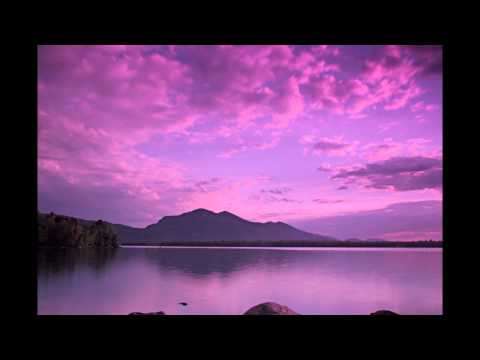)
If you like this instructable, please vote for me in the photography contest!
Timelapse photography is easier than you think, but it is more time consuming than "still" photography, and if you try to figure out by trial and error, the learning curve can be steep. My goal is to teach you what I've learned, and show one way to accomplish professional looking timelapse videos, using photos from a DSLR camera.
There are many ways of making a timelapse video. If you use the camera on your phone, tablet, or laptop, there are apps which can automate the process. But those devices lack the versatility and high quality lenses of a DSLR camera.
The basic steps are:
- Take the photos. A single second of timelapse video can require 30 photos. You will need some way of automatically triggering the camera, a good power source, and a big memory card. You will also need a rock solid tripod or other mount, and probably some basic filters.
- Batch process the photos. Almost all photos need some processing, to remove dust, adjust contrast and color, etc... Since you are dealing with hundreds or thousands of photos, you need a way to do this automatically.
- Assemble the timelapse clips. Once you have a sequence of processed photos, you need to use software to combine them into video clips. There are many programs that can do this, ranging from free, to expensive. I prefer free. There are also many video formats to choose from.
- Edit the clips into a movie. Timelapse clips are usually short, 10-30 seconds long, and they have no sound. You will probably want to add it into a longer movie, and add music.
Step 1. Photography Gear
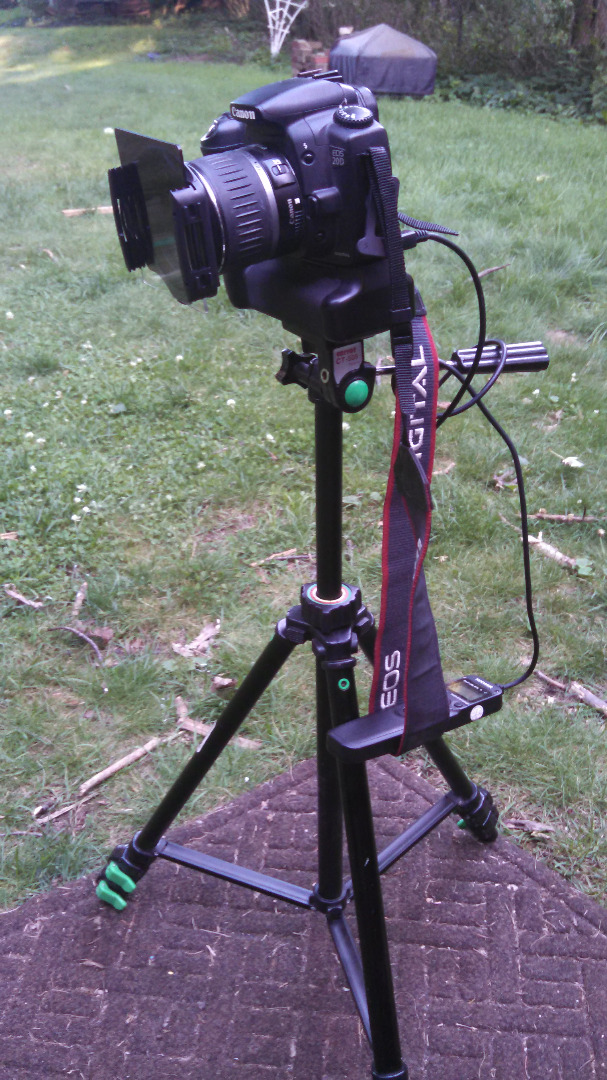
to take the photos you will need:
- a camera. DSLR is best, but any camera that has full manual control and a plug for a shutter remote will work. the most important thing is the ability to manually set both the shutter speed and exposure. Don't worry about megapixels. You'll lose most of those during the editing process. Remember, HD video is only about 2 megapixels, and you'll be taking and storing thousands of photos. Some newer cameras have timers included in the camera, so that might be useful. if it doesn't have a built in timer function, be sure it has a plug for a remote shutter. An older camera is fine, as long as the lenses and sensor are good.
- a camera timer. Also known as an intervalometer, "timer remote", "remote shutter" and various other names. it's a little electronic gadget that attaches to your camera and automatically triggers the shutter. It has a timer which you can program to take photos at any time interval. most intervalometers can also control the shutter speed (exposure time), and are also useful for long-exposure photos. prices range from $17 to several hundred dollars. The cheaper ones do the job, but are not as well built or weather resistant.
- There are a number of smartphone or computer apps and programs that function as an intervalometer. You can either connect your device to the camera with a cable, or, depending on the phone/computer and camera you have, you may be able to use bluetooth or infrared to trigger the camera.
- Among the many options are: iOshutter, Triggertrap, DSLR remote, IR Remote for Canon, Smart DSLR, DSLR controller. Just go search online.
- There are a number of smartphone or computer apps and programs that function as an intervalometer. You can either connect your device to the camera with a cable, or, depending on the phone/computer and camera you have, you may be able to use bluetooth or infrared to trigger the camera.
- A good power source. At the very least, you should have new batteries. I recommend buying a battery grip which can use several batteries. Remember, each clip will require taking hundreds or thousands of photos. Nighttime or low light shots require long exposures, which use even more power, and will drain a battery quickly.
- A solid tripod. You will need to hold the camera very steady. any movement will be noticeable.
- extra memory cards.
Things you don't absolutely need, but which are very helpful.
- filters. To make the shots look smooth, you will probably be taking fairly long exposures, even during daylight shots. taking a 10 second exposure on a sunny day will require you to limit the amount of light entering the lens. Get a set of good, fairly dark, "Neutral Density" filters. I also like gradient filters, which can darken the sky, while leaving the foreground bright. I prefer the Cokin filter system, which has the ability to easily mix and match several filters at once, rotate filters in any direction, and adjust the gradient filters for different horizon lines.
Camera Settings
Timelapse photography takes some trial and error. The "speed" of the movement in the scene will vary depending on the interval between shots. The "smoothness" of the movement will depend on the shutter speed of the photos. You should look at the movement you are trying to capture and adjust the timing accordingly. Fast movement will require more frequent shots (a shorter interval of only 2-5 seconds), and slow movement will require a longer interval of 5-15 seconds, or more. The more you practice, the better your estimates will be.
Here's what I recommend.
- Set up your camera and frame your scene, just like any other photo shot. This is no snap shot. Timelapse photography is a lot like the olden days of photography, where an artist might take one or two shots an hour. It forces you to really think about the composition of the shot. If it is night time, you may have difficulty getting the auto-focus to work. The best solution for that is to pre-focus the camera during the day
- Adjust your camera settings.
- Take a few still photos at different exposures and apertures. write down the settings that look best. I usually use the "shutter priority" setting, pick the appropriate shutter speed, and let the camera figure out the F-stop. Then set put the camera in full manual mode and plug in those settings.
- The shutter speed depends on what kind of effect you want. You will probably control shutter speed with the intervalometer, but it makes sense to discuss it here.
- For a "flickery" effect use short exposures. This will make the motion jittery, and can convey a sense of frenetic, busy activity. There will be no blur, and there will be long gaps between each shot, so objects will skip from place to place. It will feel more like a rapid series of still shots than a movie. It's great for construction sites, city scenes, and other places where there is a lot of bustling activity.
- For a "smooth" effect (like clouds flowing across the sky, stars moving, etc...), use long exposures. For maximum smoothness, make the exposure time as long as you can, so that one shot finishes just before the next shot begins. I try to make my exposure times at least half as long as the interval between shots. You might need to use neutral density filters to limit the amount of light, or those long exposures will be too light (overexposed)
- Always use the fully manual setting. You want the aperture and exposure to be exactly the same for each photo. In general, you want to limit the amount of light hitting the sensor as much as you can, so you can take the longest exposures possible.
- Use the lowest ISO, this makes the sensor less sensitive, which in this situation, is good. This will reduce "noise" in the picture, and allow longer exposures.
- Use the smallest aperture (highest F-stop), this will allow more of the image to be in focus, and limit the amount of light, allowing longer exposures.
- Use the longest exposure time you can. This adds a bit of "blur" to any moving objects in each shot, which gives the illusion of smooth movement.
- Always disable the auto-focus. You can use it to frame the shot, but always disable it while the shots are being taken. If you don't, it might try to focus on the different objects each time, especially if there are objects moving in and out of the frame, such as insects or birds.
- Don't use auto-white balance. It can give each shot a slightly different tint, which would be bad.
- Set the camera to "Bulb" mode. This allows the intervalometer to trigger the shutter. On most cameras, you simply keep increasing the exposure time until it says "bulb" on the lcd display.
- Always use the fully manual setting. You want the aperture and exposure to be exactly the same for each photo. In general, you want to limit the amount of light hitting the sensor as much as you can, so you can take the longest exposures possible.
Intervalometer Settings
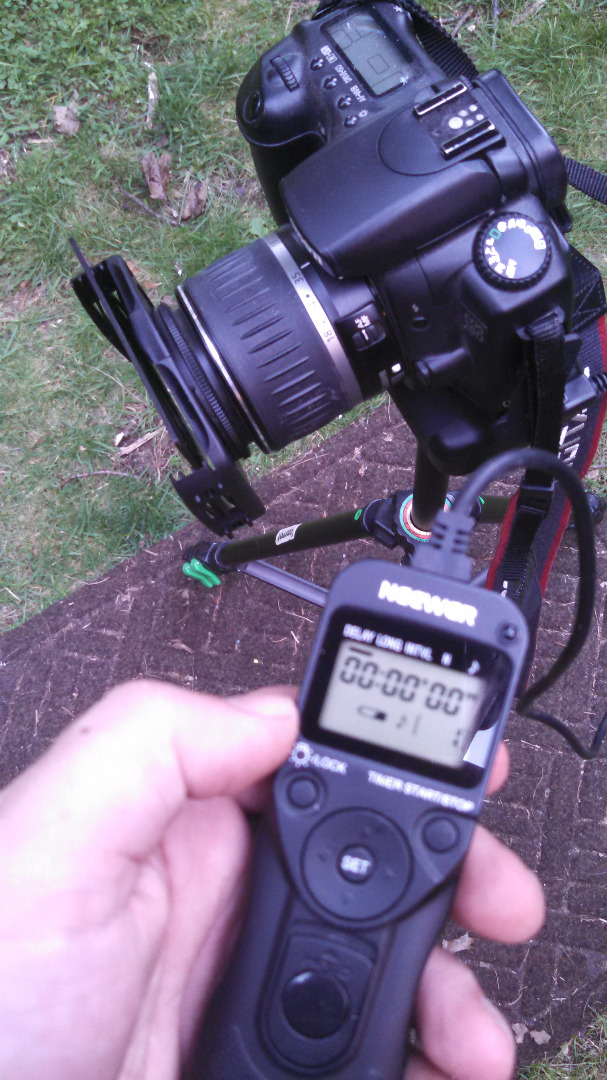
Each intervalometer is slightly different, so follow the instructions for yours.
- Set the interval. The interval is usually measured as the time between the START of an exposure. so the interval must be longer than the exposure time, or it will try to take the next picture before the first one is finished, and the intervalometer may get confused and shut down.
- For rapid movement, such as a flowing river, moving cars or people, or fast moving clouds, 1-3 seconds may be enough.
- For slower movement, such as slow moving clouds, you may need intervals of 5, 10, or even 30 seconds. estimating the interval takes practice. When in doubt, aim a bit on the fast side (shorter intervals).
- Set the shutter speed. It must be less than the interval, but for smooth movement, it should be as long as possible. See the previous step for a full discussion of the proper shutter speed.
- Set the number of shots to take. Remember, it takes about 30 photos for 1 second of video. 10 seconds of video requires 300 shots. If these are 10 second exposures (at night, for example), that could take almost an hour. the camera must be set to "bulb", or the intervalometer won't work. (They call it this because back in the olden days, remote triggers were little air pressure bulbs connected to the camera with rubber tubing.)
-
Set a delay before it starts taking pictures. This allows you to step away before the sequence begins, to avoid the risk of accidentally moving the tripod or camera.
-
Set the camera to "Bulb" mode. This allows the intervalometer to trigger the shutter. On most cameras, you simply keep increasing the exposure time until it says "bulb" on the lcd display.
Process the Photos
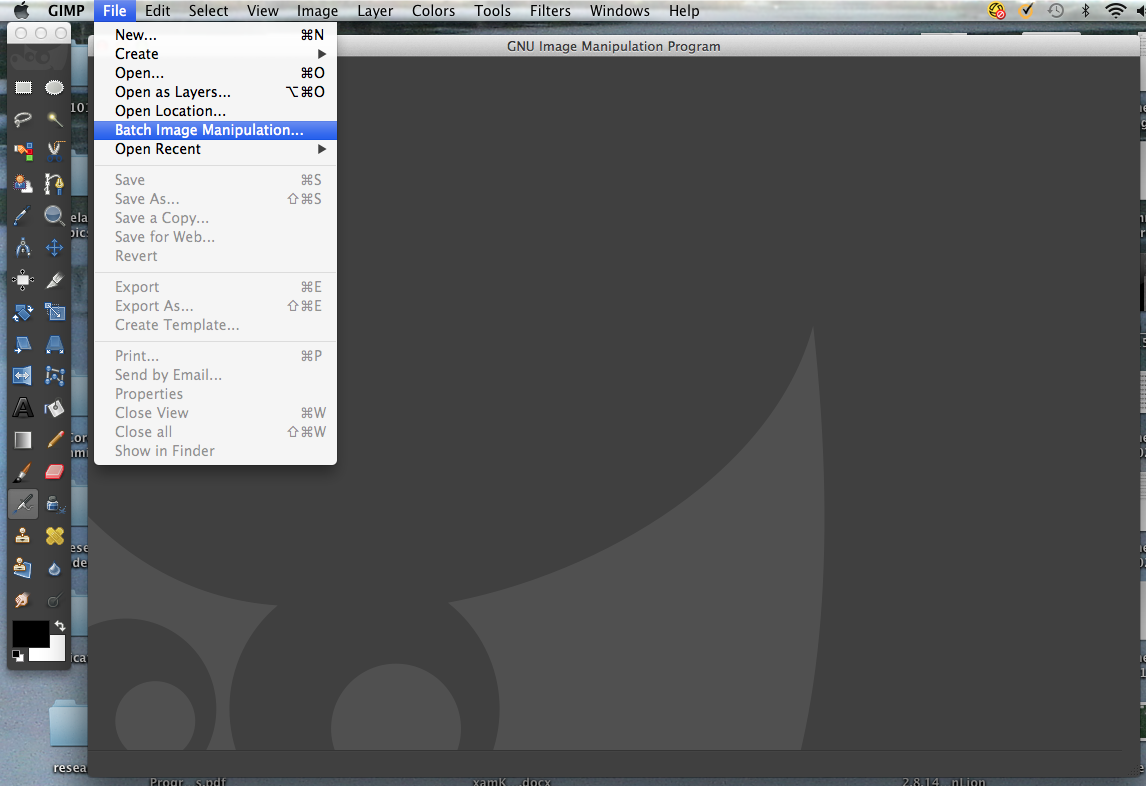
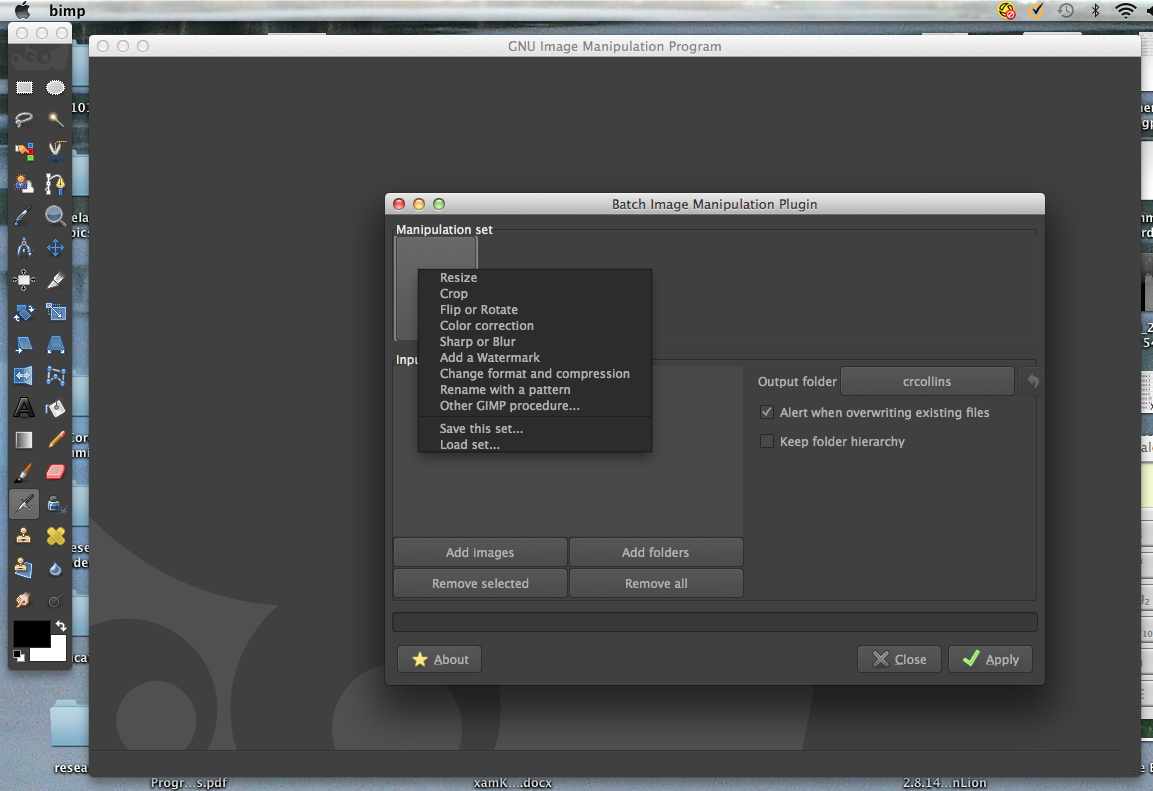
Now you have a bunch of photos. If you are lucky, the photos already look great. Most likely, you will want to enhance the photos. But remember, you have to process every photo exactly the same way. To do that, you need a batch processor. Be sure you give the files numerically sequential file names.
You have a few options. There are many other batch processors. these are the most powerful.
- Photoshop. If you have access to photoshop, it has a built in batch processing function. you will need to create an "action", which is simply a sequence of processing steps. Then you apply this action to all the photos. Be sure you give the files numerically sequential file names. There are lots of online tutorials for batch processing in photoshop.
- GIMP. free, open source, and powerful. And did I mention it's free! Recent versions have a batch processing plugin called BIMP that makes batch processing quite easy.
Here are the steps I usually take when processing. The actual process depends on what software you are using.
- Crop to size.
- sharpen (I use unsharp mask)
- adjust highlights and shadows (using levels and curves)
- color correct using color filters or color balance function (remove any strange tints)
- introduce a tiny bit of noise (to reduce banding) see below
- remove any dust or other specks that are in the same place on all the photos.
- adjust image size (# of megapixels), if necessary.
- The most common problem that appears at this stage is "Banding" in areas of the image with color gradients, such as sunsets, or blue skies. instead of a nice smooth transition, you see stripes of different color, which can ruin a clip. sometimes this is visible in the individual photos, but usually it becomes obvious during the video processing stage. However you can partially prevent this by taking certain steps during the batch processing. One possible solution is to convert the photos to 16 bit, which has many more colors available. Another option is to use "dithering", which introduces a small amount of "noise" or static to the image. Dithering can be as simple as applying a noise filter, very lightly to your photos. The noise will not be noticeable in the finished video clip.
About Video Formats and Codecs
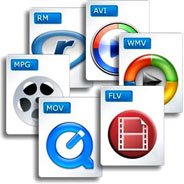
Before you go ahead and assemble the photos into a clip, you need to learn a bit about video formats and codecs.
The first thing you need to know is that file types are not the same thing as codecs.
- The file format is really just a container or folder to hold the data. It may look like a single "file", but really, it's a folder. Think of it as a box, with instructions for how to unpack the contents of the box. It contains an index of the contents of the file, and code that communicates with the playback software and tells it how to read the encoded video and audio in the folder.
- For example, Some common video formats are Quicktime (.mov & .qt), Advanced System Format (.wmv), AVI (.avi), Flash (.flv & .f4v), MPEG (.mpg) & MPEG-4 (.mp4 & .m4v).
- I recommend MOV, or AVI. Be sure your video editing software can handle the format you chose. iMovie has trouble with AVI, for example.
- The codec is a program that compresses the raw video and audio data for storage in the "container". It also usually unpacks the compressed file while it is being played. You need the proper codec to create the video clip, and to read it. This is what determines the file size and quality. For example, some common codecs are Xvid, DivX, H-264 (Also known as MPEG-4 AVC), and the various types of MPEG.
- There are many, many codecs available. some codecs can be used in a wide variety of format "containers", others only work with specific containers. For example, a file format such as Audio Video Interleaved (AVI) can contain data that is compressed by any of a number of different codecs, including the MPEG-2, DivX, or Xvid codecs.
- You may need to download and install certain codecs, but they are generally easy to find online. The easiest way to do this is to download codec packs that contain dozens of audio and video codecs.
So which format and codec should you use?
- I usually use MOV file format, encoded with the H-264 codec exported at 1080HD resolution (1920x1080 pixels), at 24 frames per second. It's widely compatible with most video editing software, including iMovie, and youtube likes it. It's fairly high quality, but the file size is manageable. It looks great on any HD screen. It's a good place to start, but try a few formats and see what you like. Some are higher quality, but the file sizes are usually much larger. it's usually a tradeoff.
Assemble the Clip
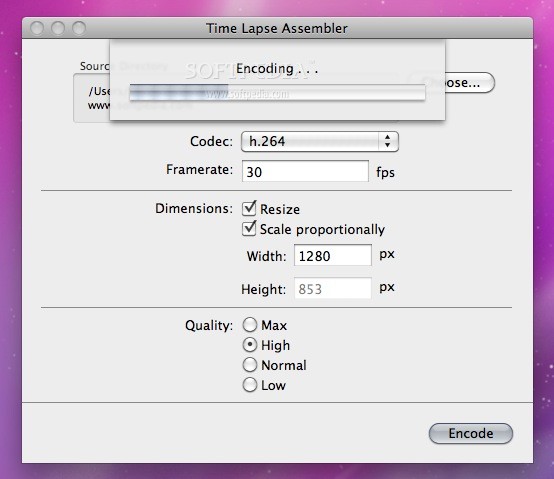
Now you need to take all those photos and turn them into a video clip.
Note: for most of these programs, you need to have the image files in their own folder, and the images must have sequentially numbered file names. Photo1, Photo2, etc...
Here are some options
- Quicktime Pro. ($30 mac and windows) it's not free, but it's pretty cheap ($30), and easy to use.
-
Go to File > Open Image Sequence and select any image in the sequence. set your frame rate (I use 24fps, and click OK
- Pick the beginning and end points for the output clip, using the two little triangles under the timeline.
- Export to the appropriate file format.
-
- Timelapse Assembler. (free, Mac only) It does one thing, but it does it well.
- Select the files by clicking the "choose" button, then go to the folder where you have all the shots you need (before you do this, remember to number your shots in the right order).
- Pick a frame rate, format and codec, and click encode.
- Windows Movie Maker (free, windows only) If you have a PC with windows, you probably already have this program. Import all your photos, click "edit" and change the duration to the appropriate length for your frame rate (see table below). Go to the home tab and click the "sharing" button
-
16 fps = 0.06
-
20 fps = 0.05
-
24 fps = 0.04
-
30 fps = 0.0
-
- VirtualDub (free, windows only) Many people love this program. it's got a bit of a learning curve, but once you get the hang of it, it's easy. Here is a link to a tutorial.
- Adobe Lightroom. ($10/month) It's sort of the video editing equivalent of Adobe Photoshop. Very powerful, but it requires a subscription. If you are lucky enough to have it, here is a link to an excellent instructable for how to make timelapses in lightroom
- Openshot. (free, linux only) Suggested by a commenter (thanks Marvin2843). A versatile video editor that can assemble timelapse movies from photos, but it can do a lot more than that.
Edit the Clips Together
Now you have made a bunch of video clips, but they are probably each only a few seconds long. You'll probably want to edit them together into a longer movie, with music. I use imovie, but there are many other programs. I won't go into detail about how to edit the movie, since each program has it's own methods.
here are some options:
- iMovie (free with every mac).
- Windows movie maker (free with every Windows PC)
- Lightworks (free version, Windows and Mac) the free version can only export to "web ready" formats and codecs, such as youtube. to get the full version, there is a subscription free)