Tiled Photo Art
.jpg)
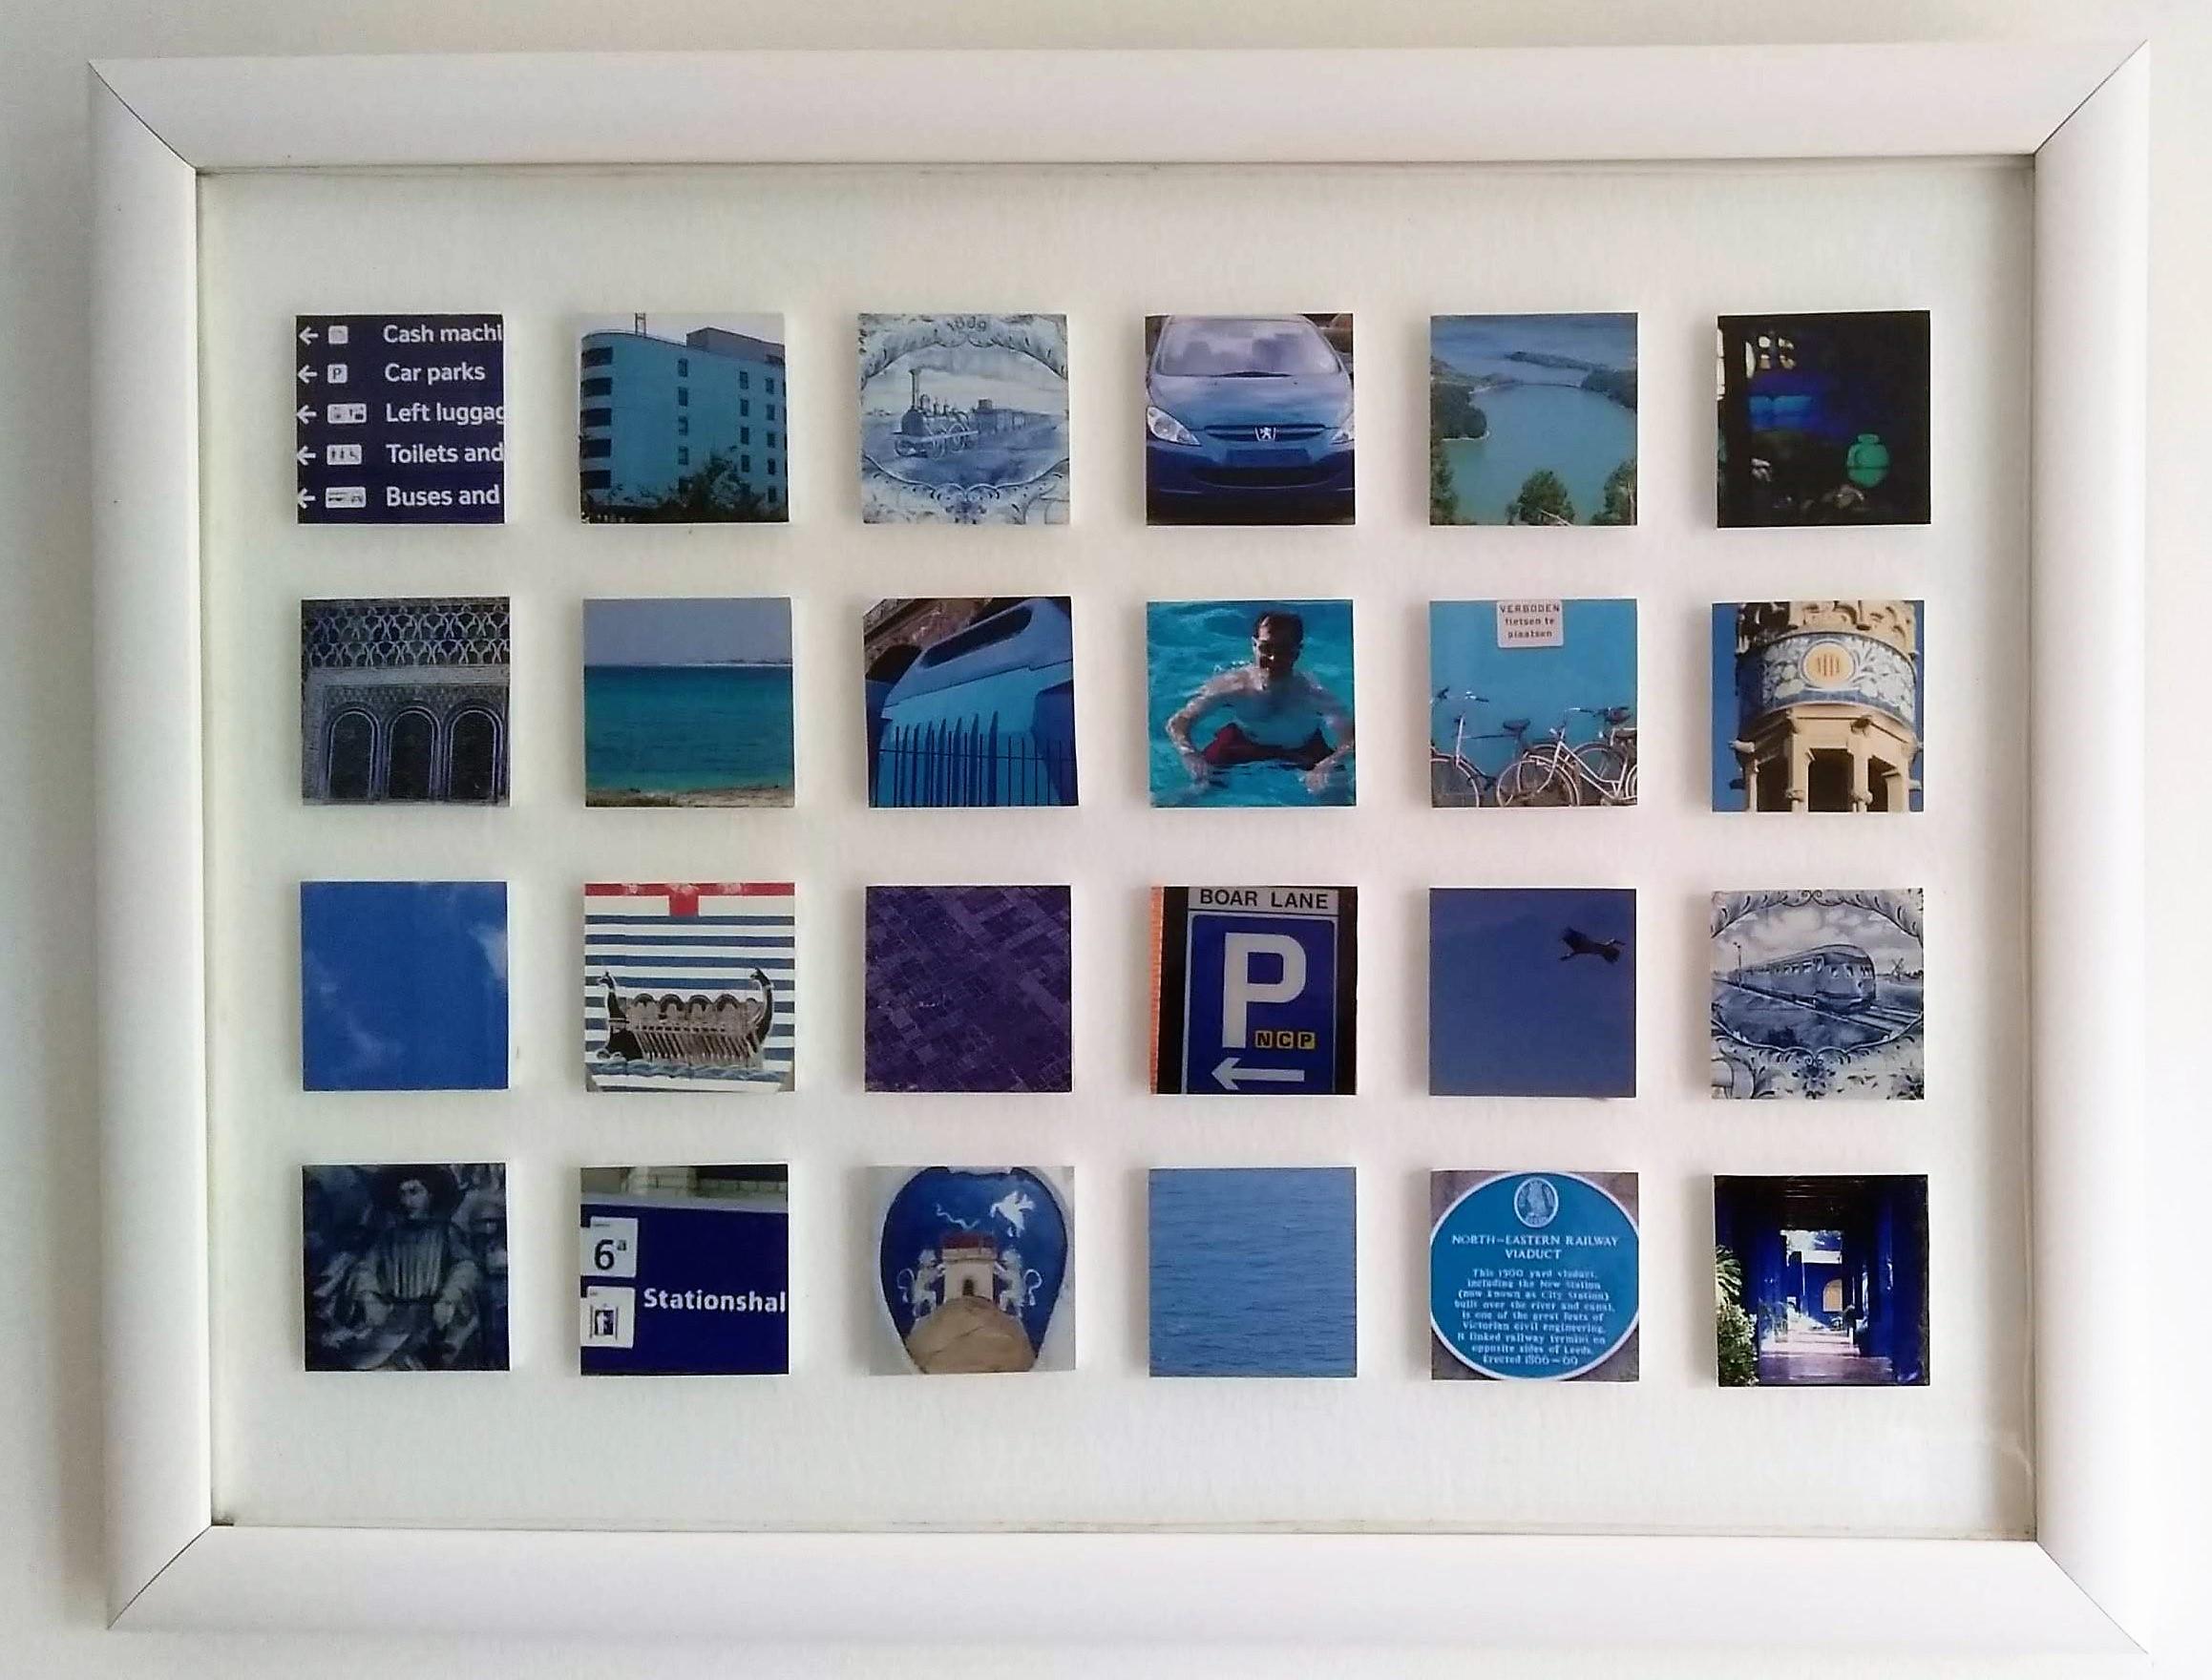
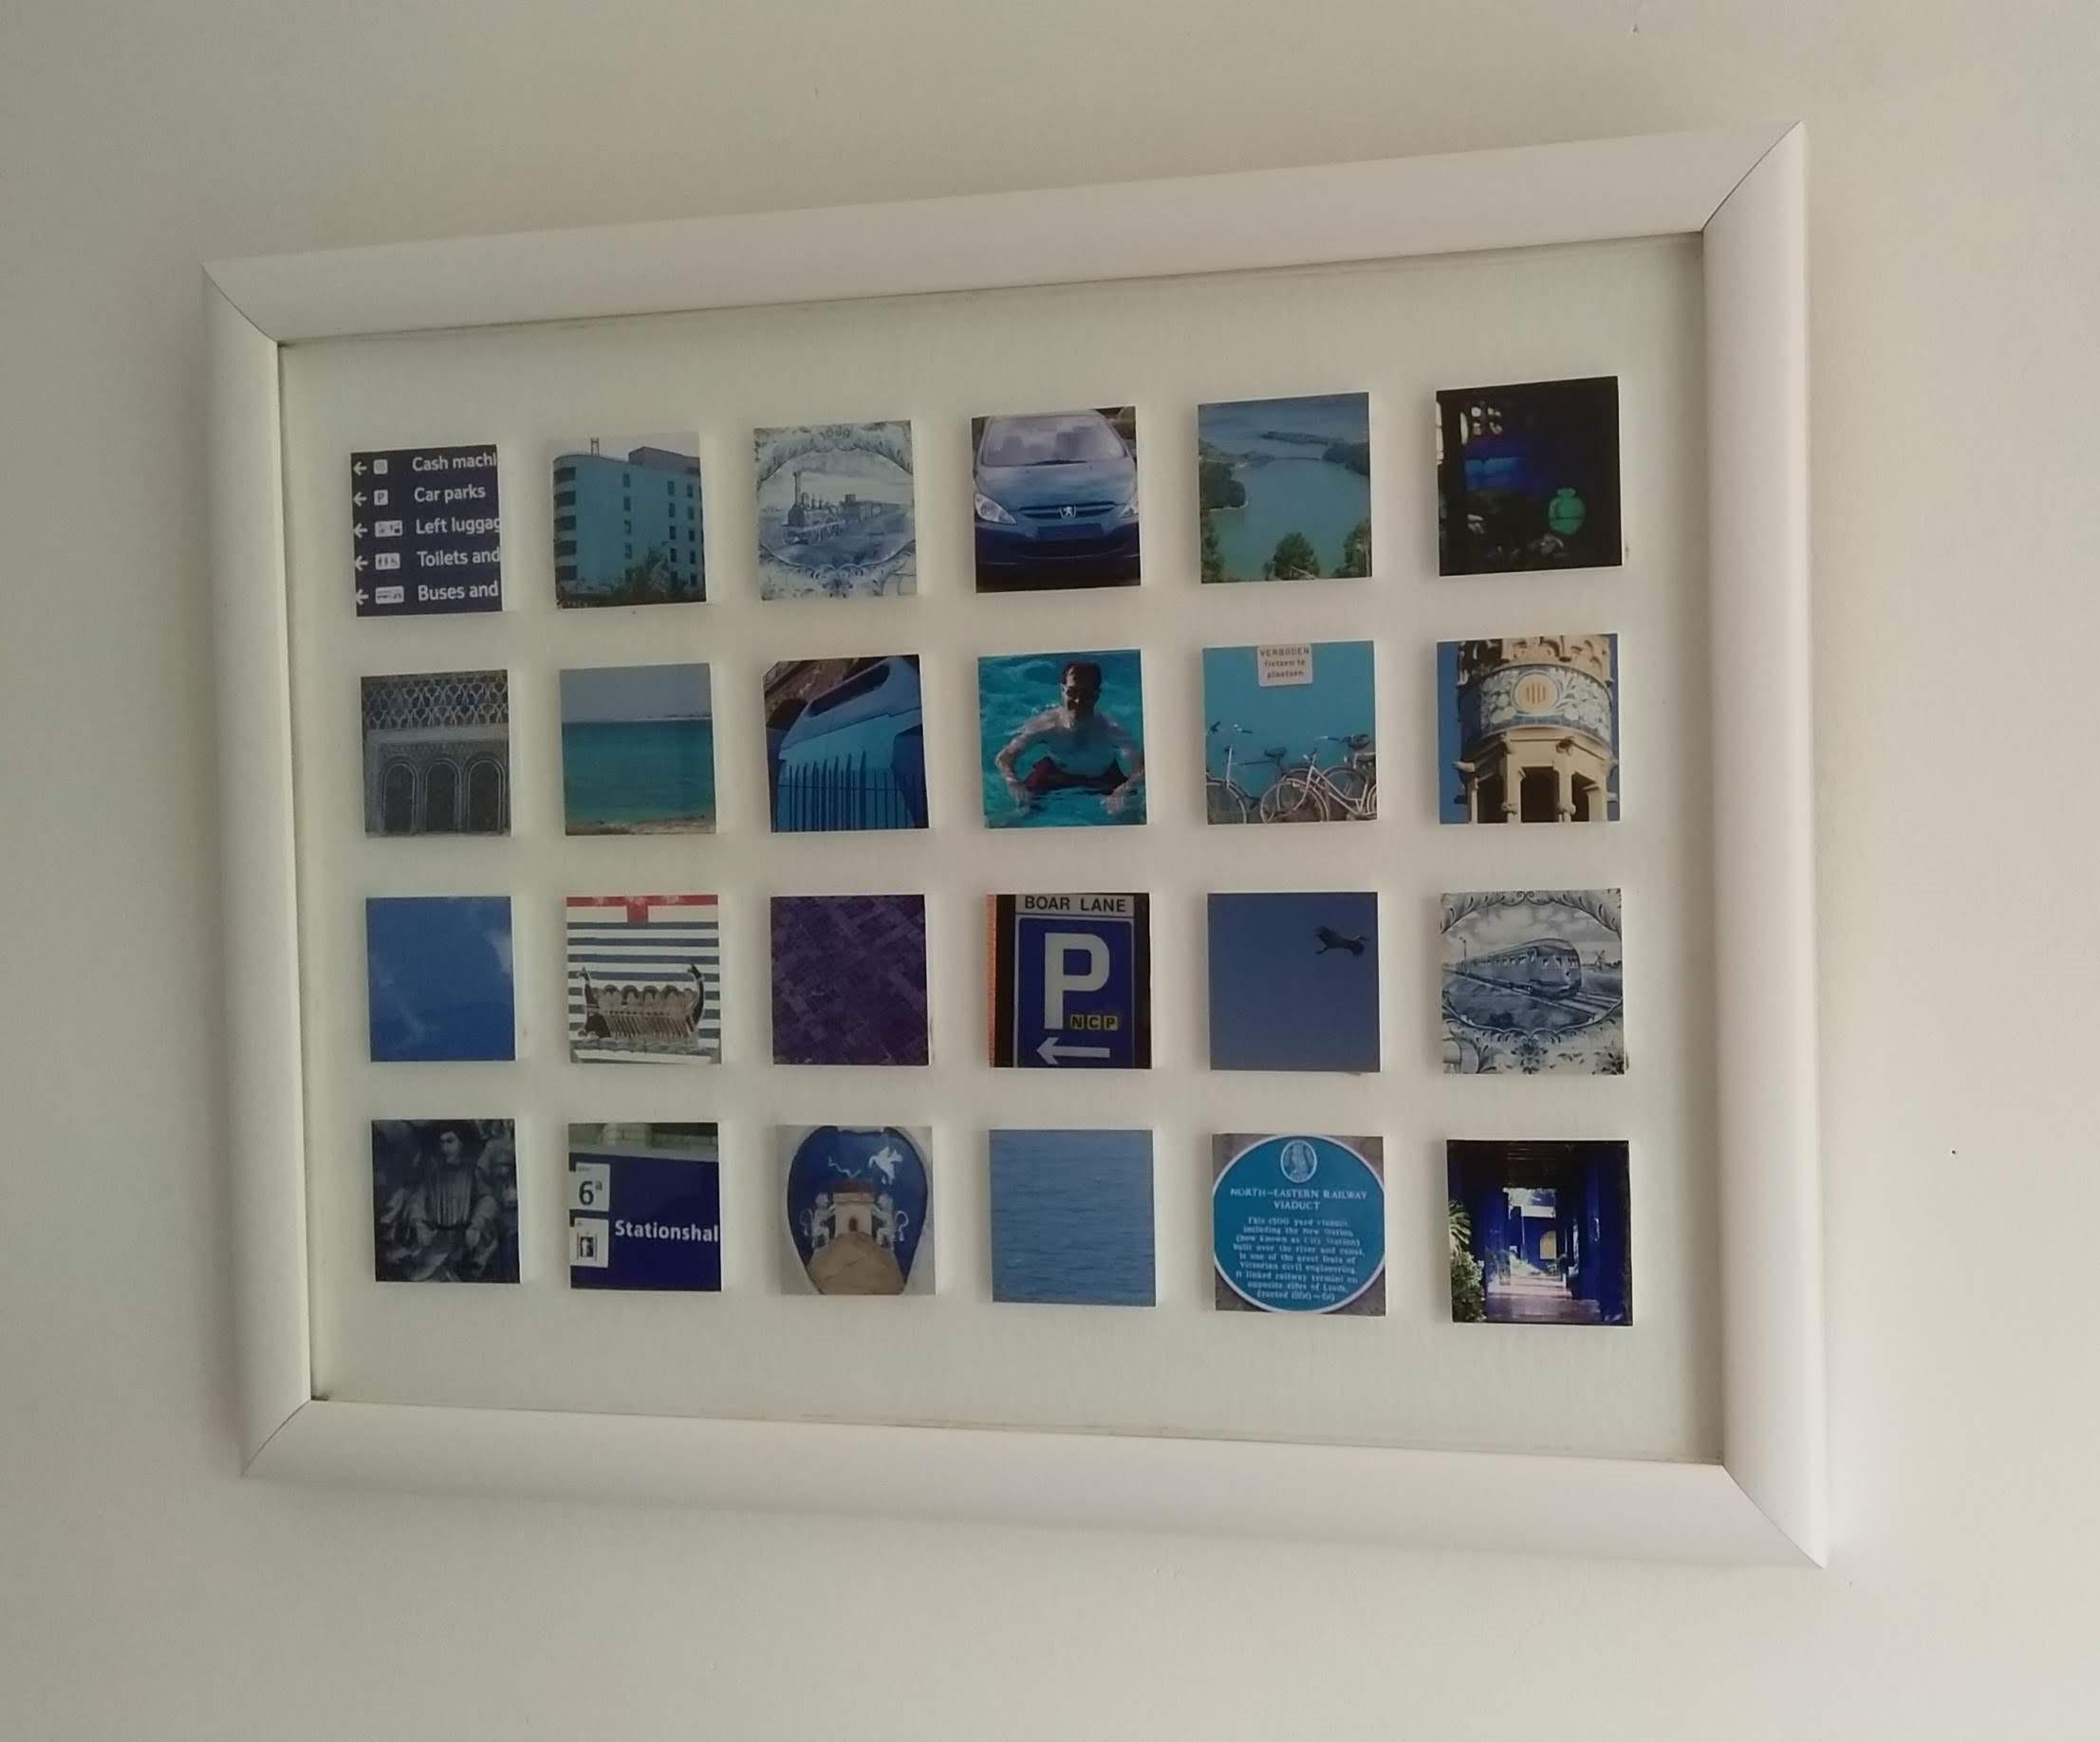
We all have a stash of digital images nowadays that stay on our phones despite being worthy of displaying. Give your photos impact by printing them out and then combining them to create a tiled effect. I think these arrangements work best if all the images have the same predominant colour, so decide which room you’ll display the end result in and then choose photos in a colour that matches the décor. As well as keeping within a colour range, you could have a theme such as objects, people and places that have a special meaning for you (or the person you’re making this for), or choose photos from a holiday or an event such as a wedding.
Supplies
A picture frame with a deep enough rebate (see Step 1)
A selection of digital images
5mm thick foam board – if it’s as big as the frame, that’s enough
A glue stick or other glue suitable for paper
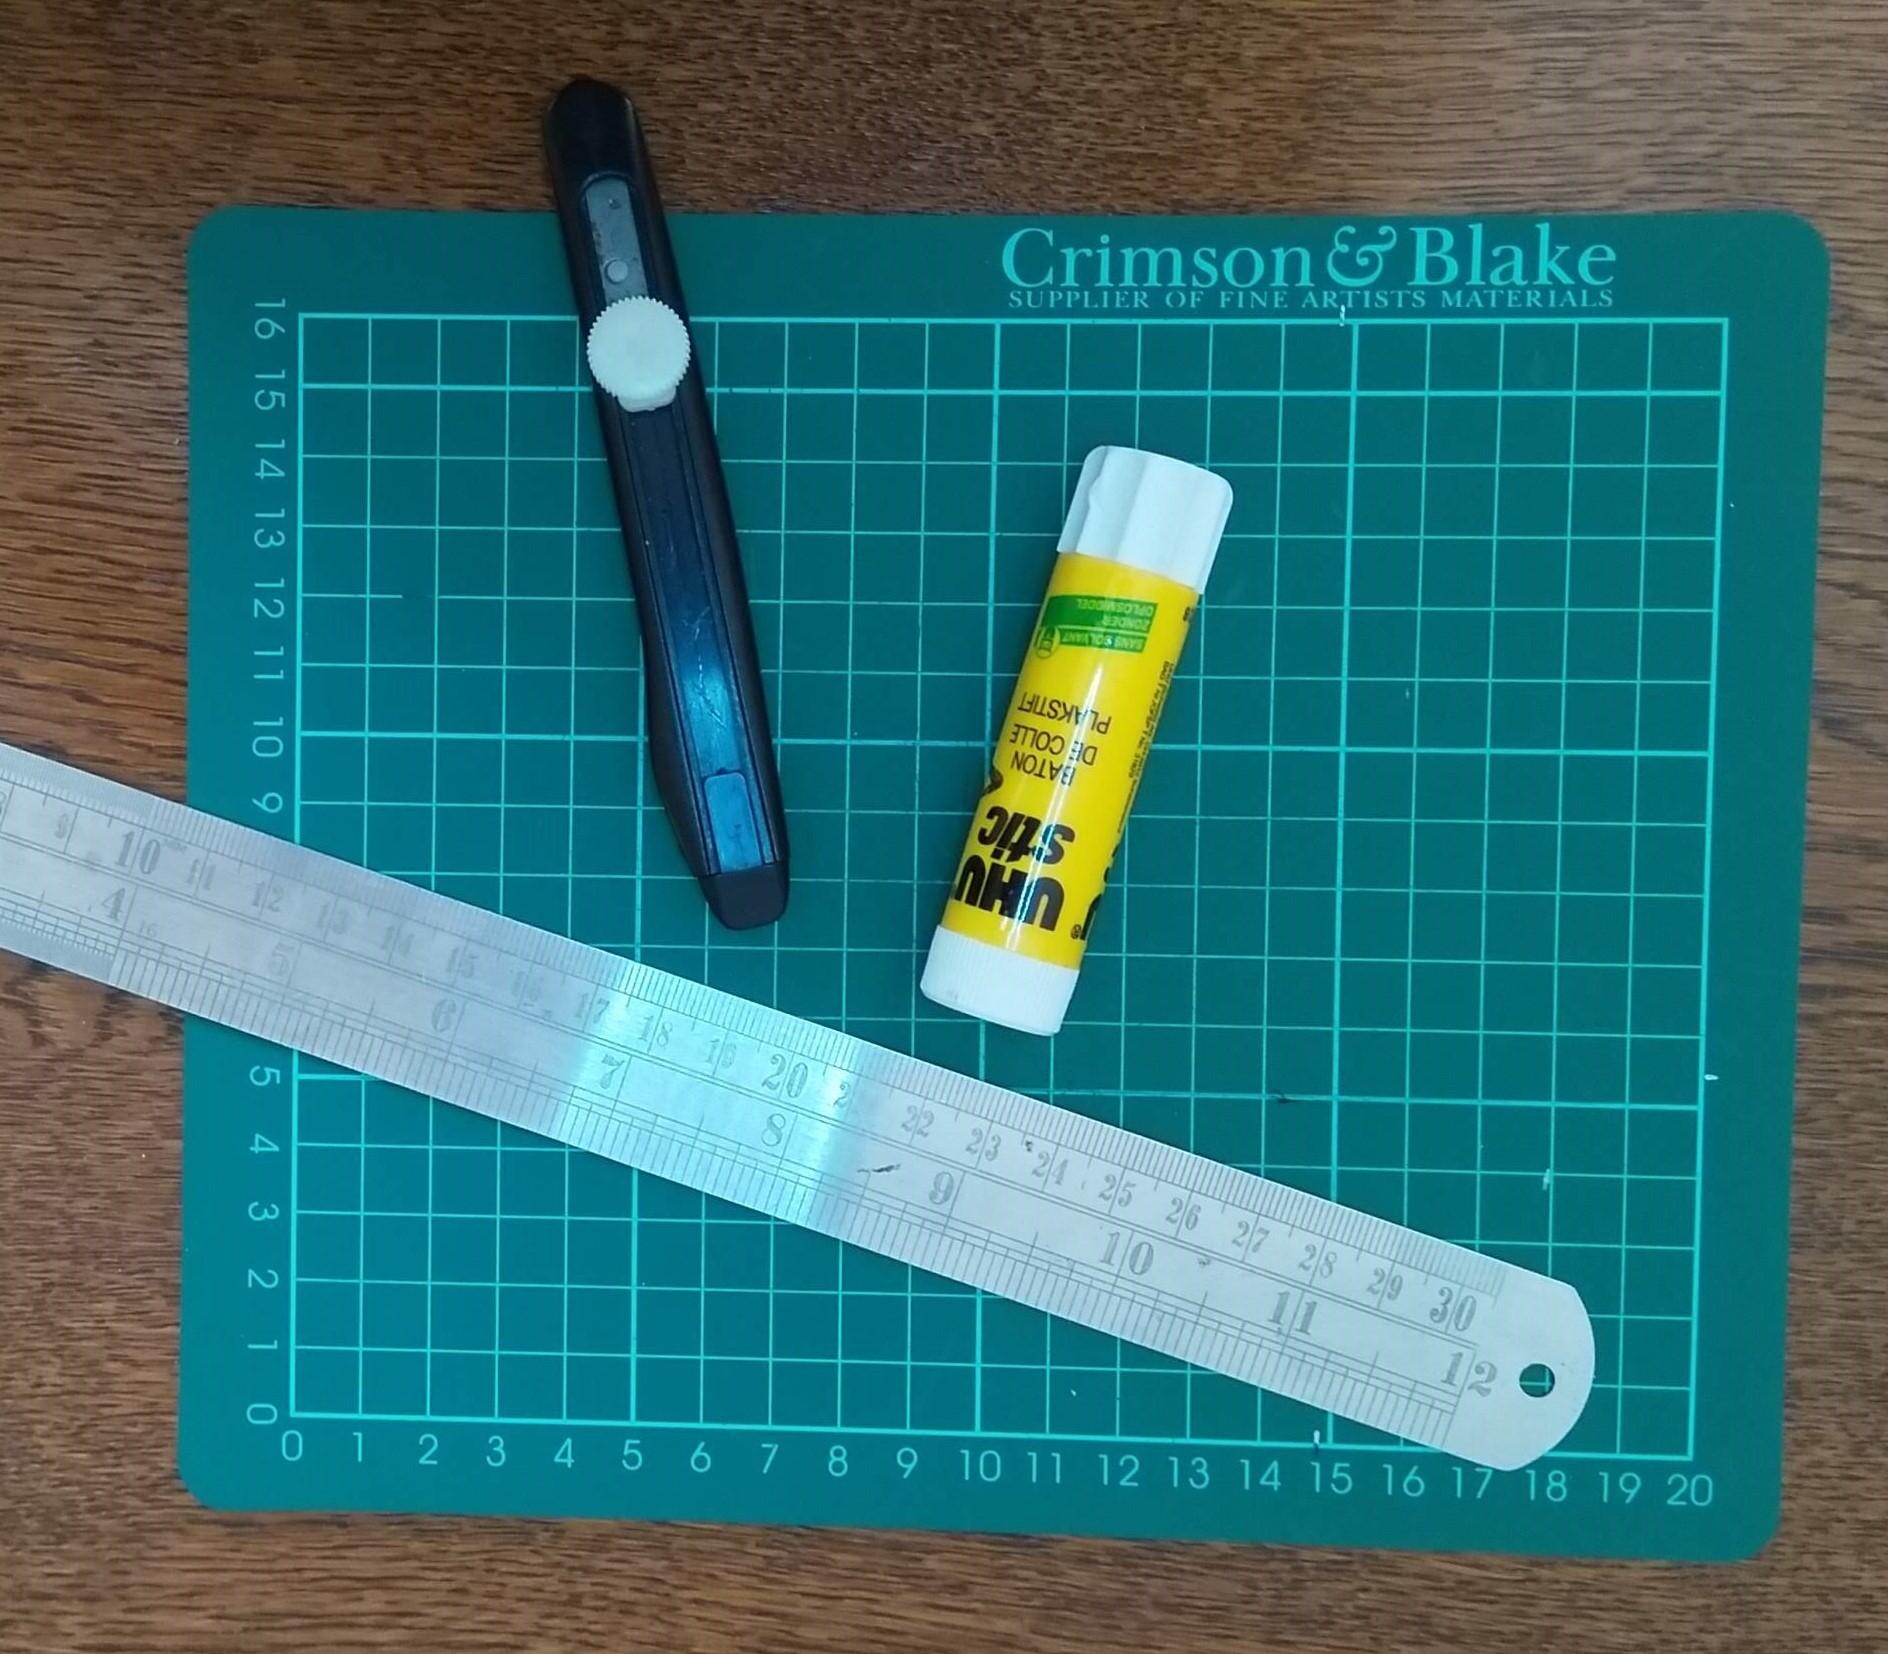
A sharp knife and a cutting mat
Scissors
A ruler, soft pencil (B or 2B) and eraser
A piece of fairly stiff cardboard a bit bigger than the frame and the same colour as the foam board, or another piece of foam board
Optional – gummed paper tape or parcel tape
Selecting a Frame
.jpg)

You probably have a rough idea how big a frame you want for wherever you’ve chosen to hang it. But when you go shopping for one, reject any that are much wider than they are tall (or vice versa, if you’re going to hang it portrait style), focus on those that are squarer. This way of displaying images looks odd if you can only fit, say, two or three rows of tiles in one direction and nine or ten in the other.
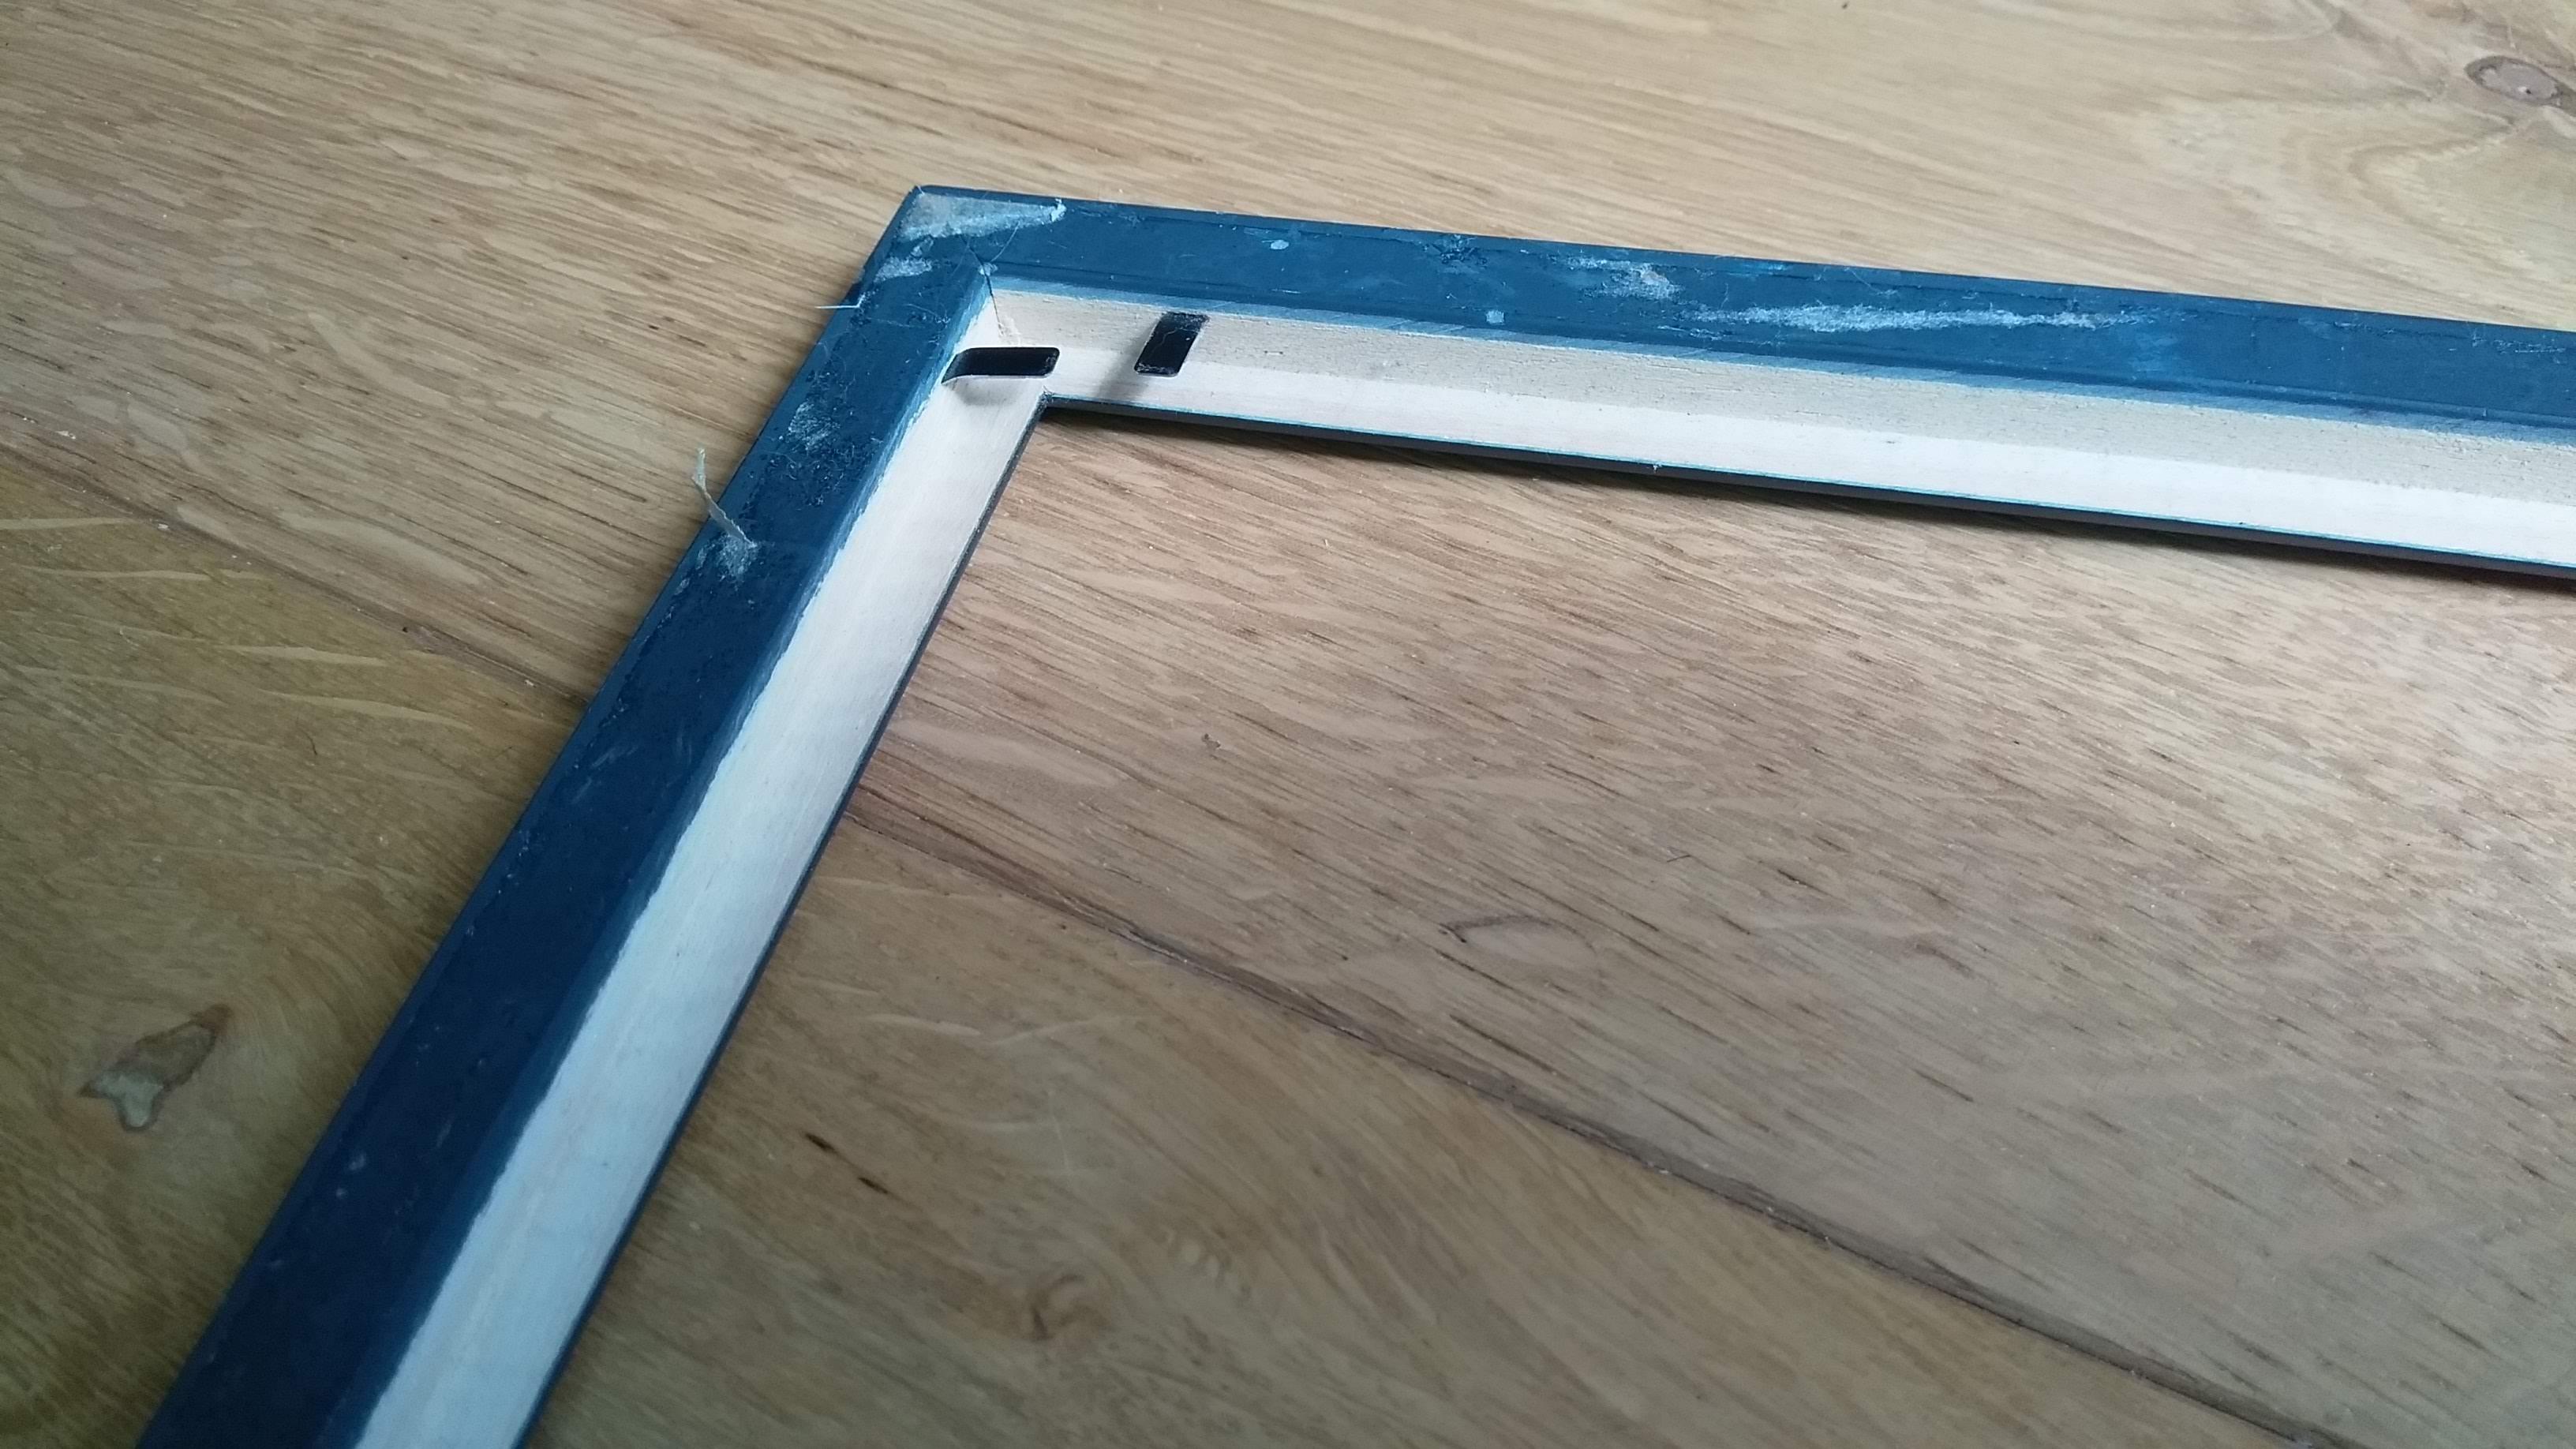
The other thing to focus on is the gap between the glass and the back edge of the frame’s moulding, ie the rebate. We’re going to be sticking photos onto tiles cut from foam board and then backing the whole thing with a sheet of card (or more foam board), so there needs to be enough space behind the glass for those three layers. You can buy deep box frames (sometimes called shadow box frames), but you can probably get away with an ordinary frame if the rebate of the moulding it’s made from is deep enough and the backing board is held in place with tabs or glazier’s points that could be bent or relocated further back. Also, many frames come with a window mount cut from fairly thick board, which you’re not going to need, and removing it will save a little room too. So go looking for a frame armed with the measurement of the depth you need and a ruler and be prepared to inspect the frames closely.
Cutting the Backing Sheet

Disassemble your frame and use its backing board or glass as a template, drawing around it onto a sheet of cardboard. Cut the cardboard to size using a sharp knife against a ruler. Check that it fits closely within the frame. This will be the backing sheet to which the individual picture tiles are stuck.
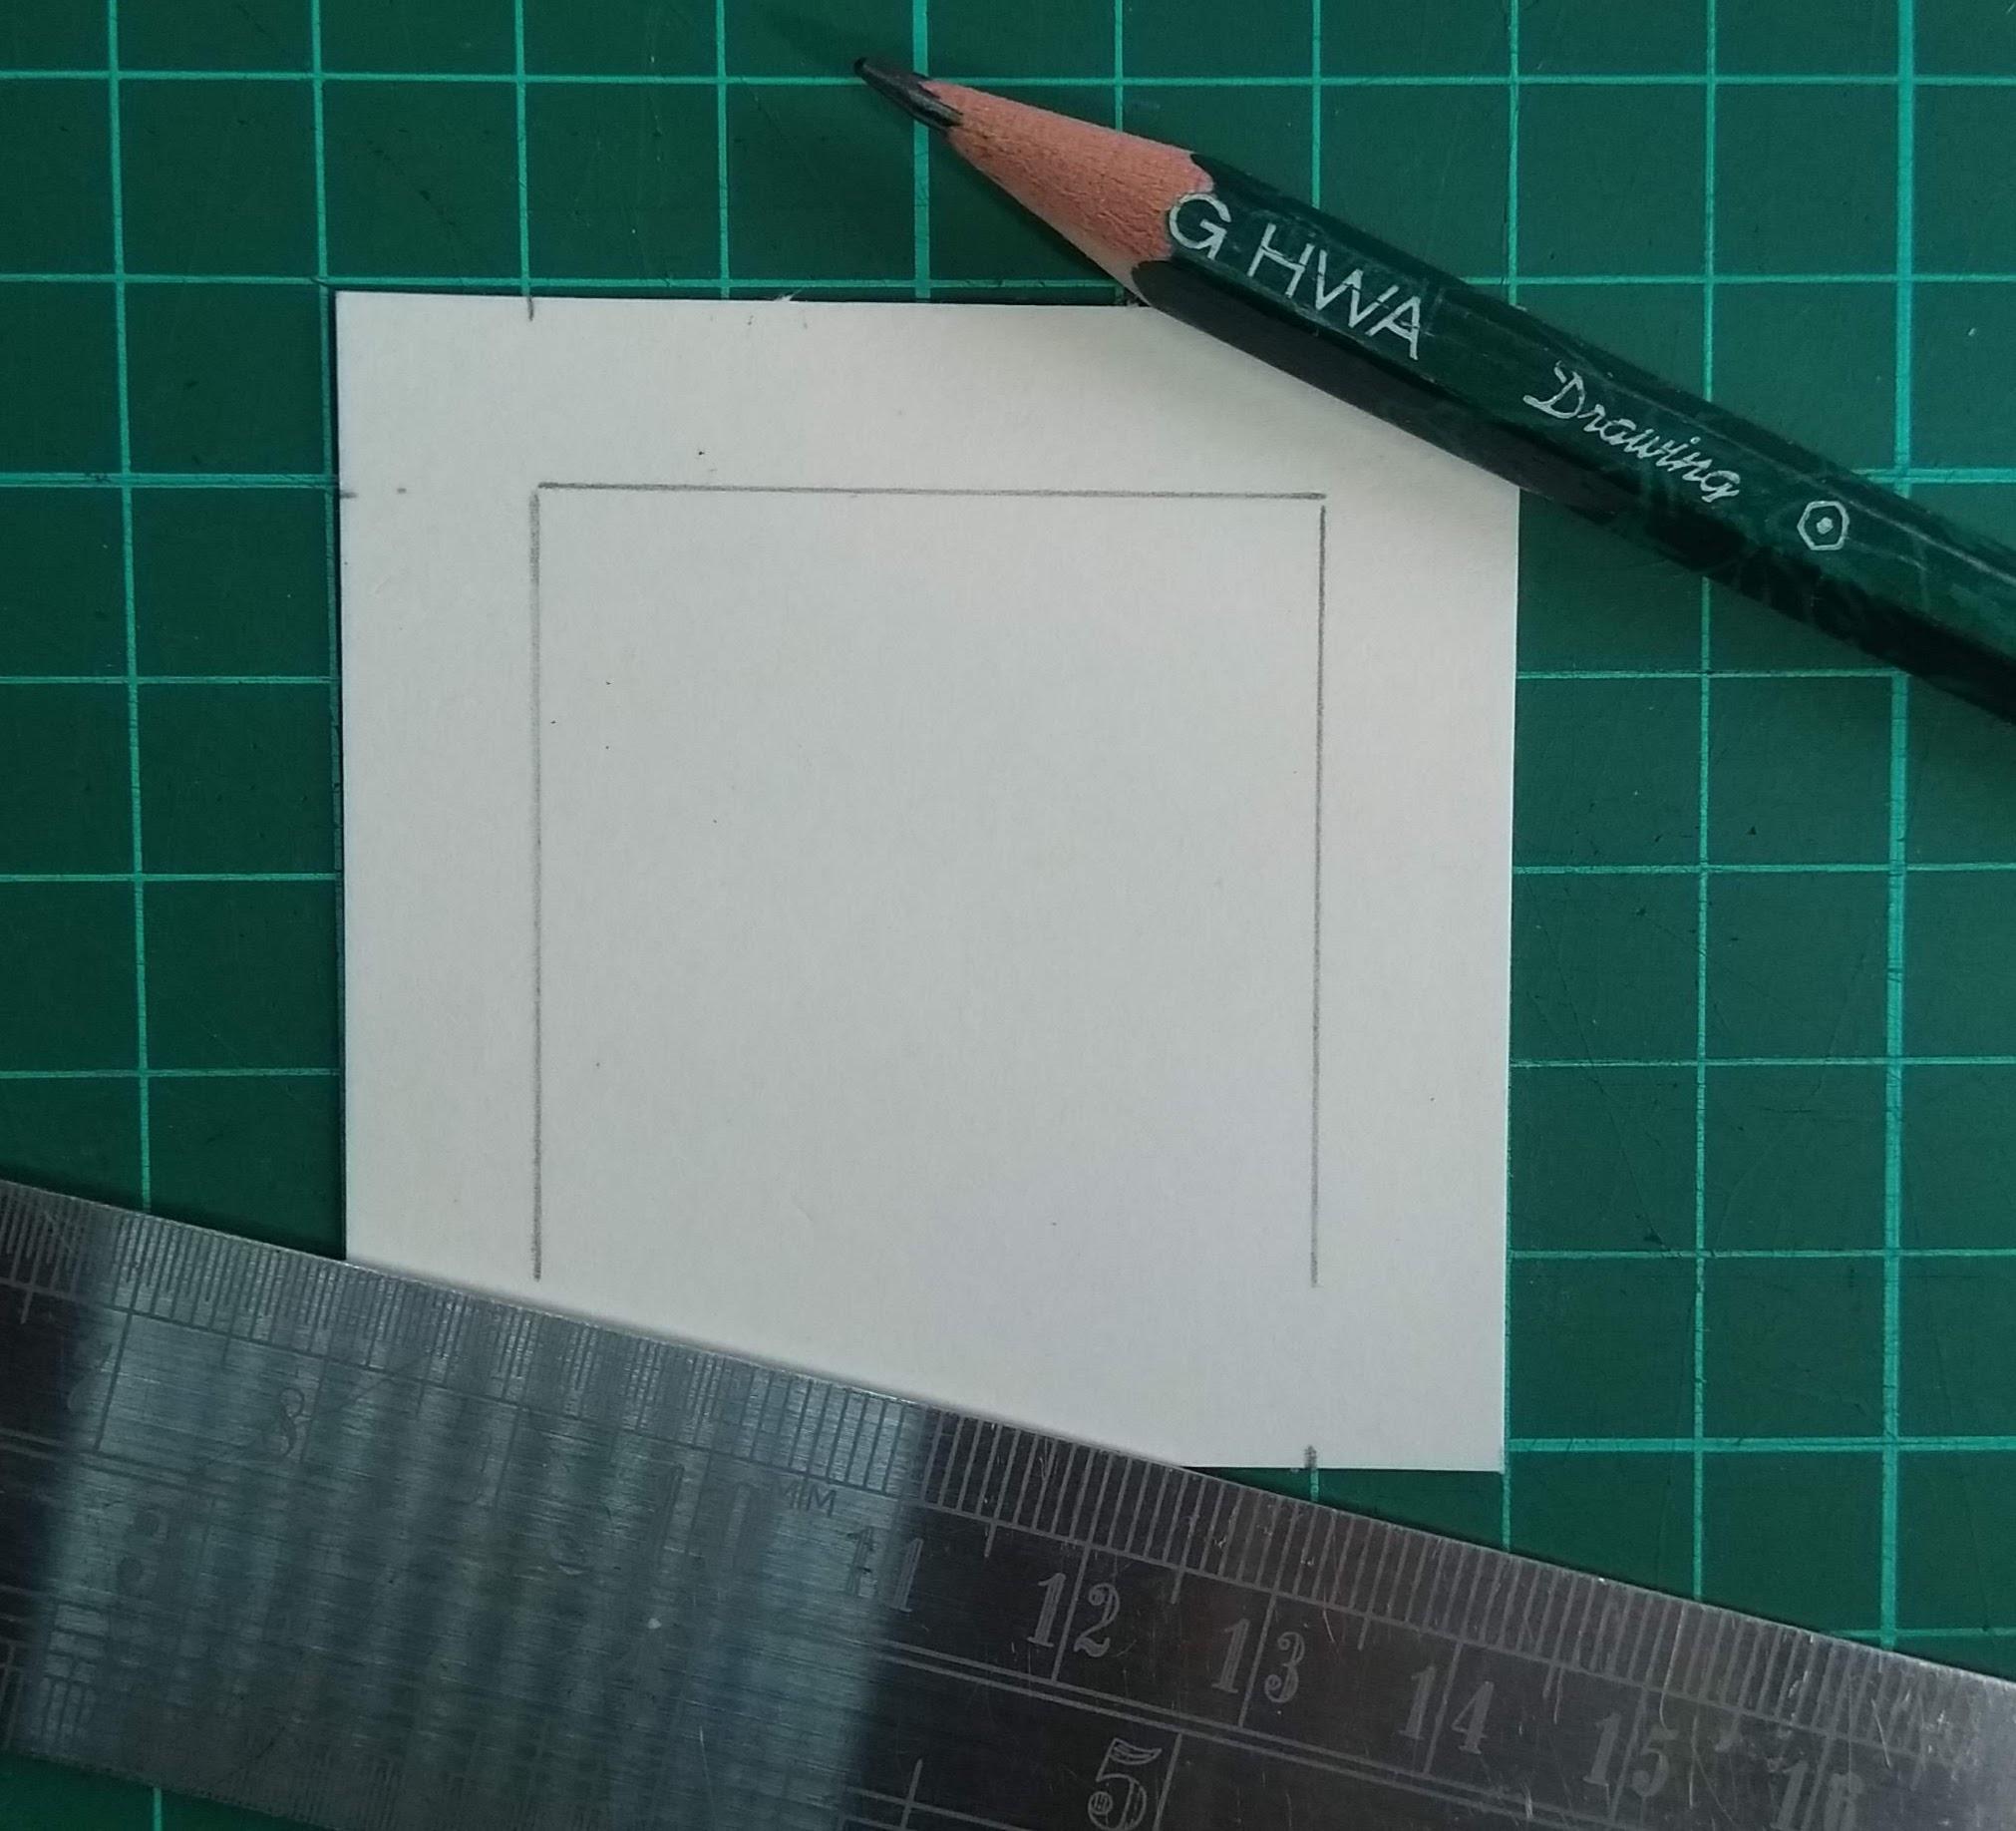
Remove the glass from the frame, place the cardboard backing sheet in it with the frame’s backing board behind it to hold the cardboard against the front of the rebate. With a sharp, soft pencil, draw lightly around the inside of the frame from the front, to give you a window on the cardboard showing how much of it will be visible when the frame is assembled. Measure the horizontal and vertical dimensions of this window – they should be whatever the frame size is stated to be, but there could be a small difference.
How Many Tiles?
The window dimensions from the previous step give the overall size of the tile arrangement. Now you need to decide how big each square tile should be, the spacing between tiles and the width of the border between the grid of tiles and the frame. That will determine the number of tiles.
When I made my blue photo montage I just picked a tile size and spacing fairly randomly, with the result that there’s a much bigger border at the top and bottom than at the sides. I think that looks unbalanced and I wish I’d given it more thought. I’ve since developed a method that produces an even border all the way around. But it does require a little maths. If that turns you off, then judge the tile size and spacing by eye instead.
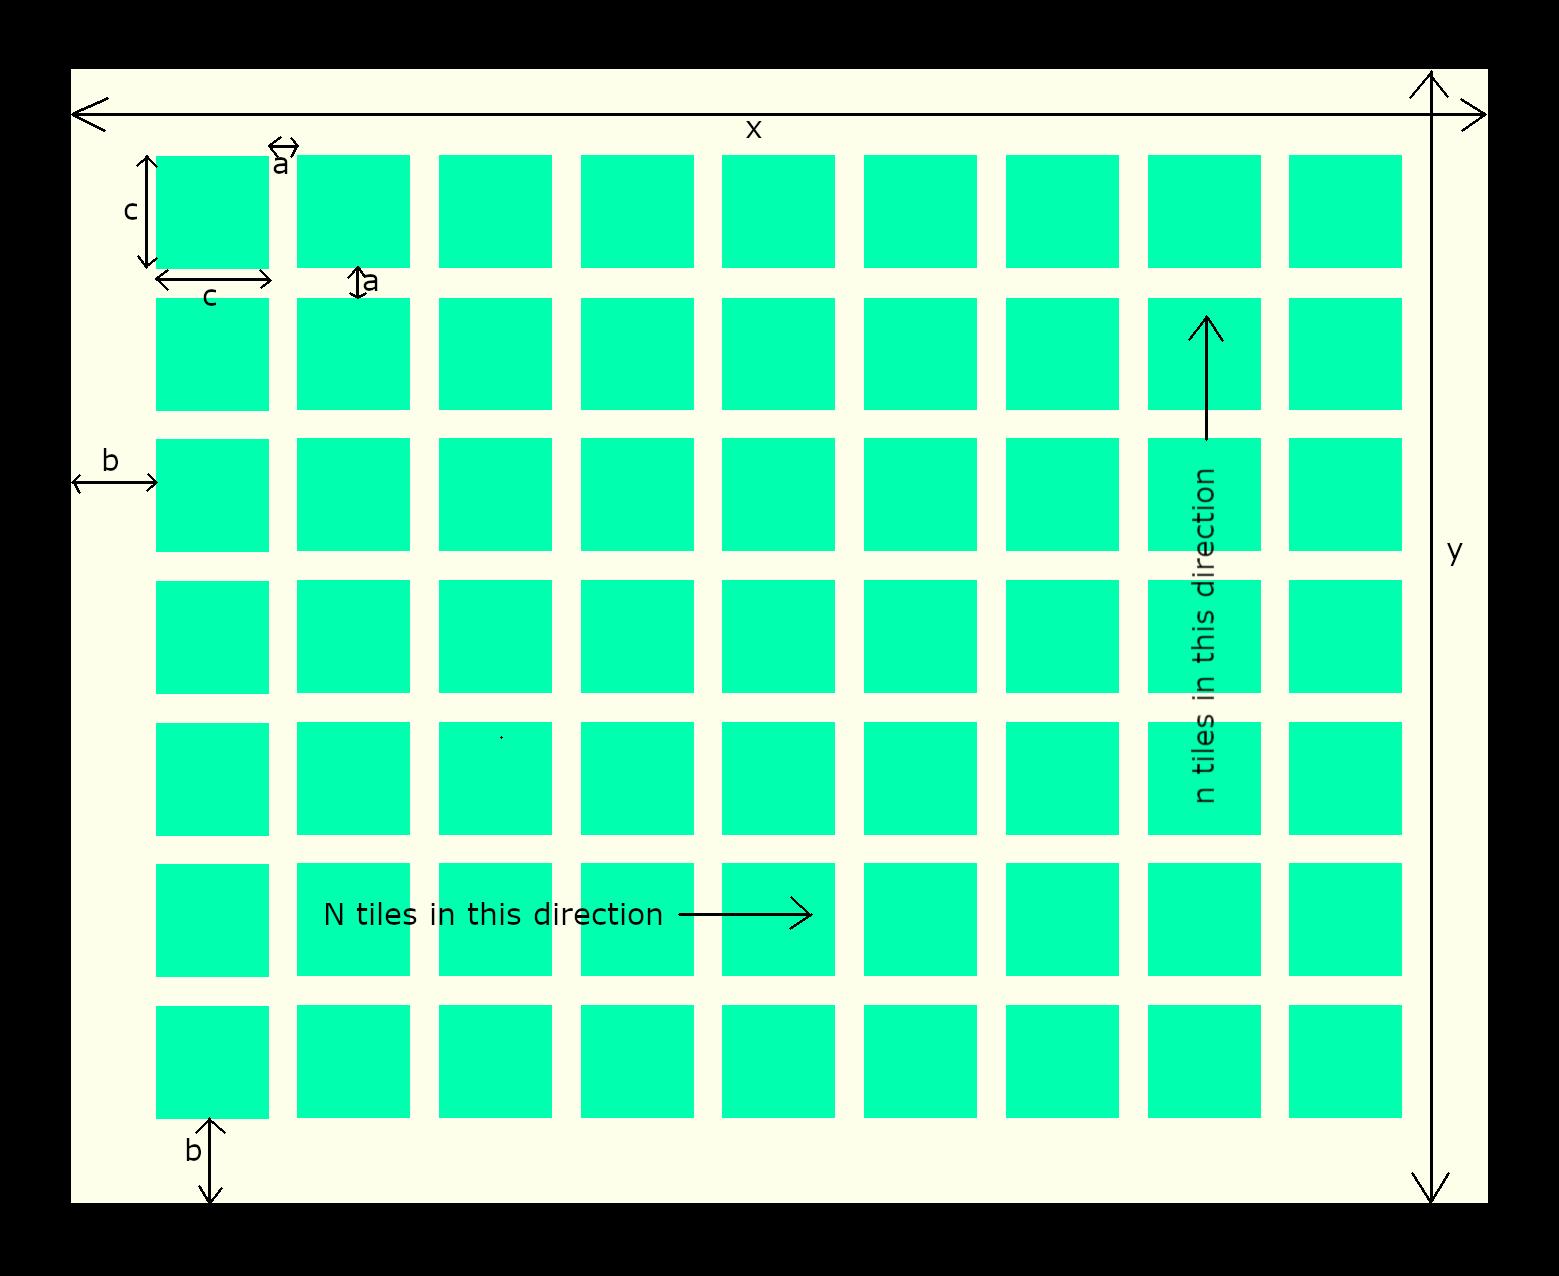
Let’s say the width of the window is x and its height is y. The tile spacing is a, the borders (top, bottom and sides) are each b and the tiles have sides of length c. There are N tiles across and n tiles down, which means there are N-1 gaps between the side borders and n-1 gaps between the top and bottom borders. As an example, I’m going to use a frame with a window of 50cm across (x) and 40cm up/down (y). (See 1st image in this step.)
There are too many variables to solve, so we need to reduce them. We can eliminate N (or n) by fixing the relationship between them. This frame has a fairly square aspect ratio (width:height) of 5:4, so let’s say that we’ll have just 2 more columns of tiles than rows, ie N - n = 2.
Then (N-1)a + Nc + 2b = 50 ①
and (n-1)a + nc + 2b = 40
Subtracting the second of these equations from the first gives:
(N-n)a + (N-n)c = 10
But N - n = 2, therefore 2a + 2c = 10
⇒ a + c = 5
The tiles need to be quite a bit bigger than the gaps, so let’s say a = 1 and c = 4. (But you could vary this to make the tiles bigger or smaller, as long as a + c = 5.)
For a balanced look, the border around the grid (b) shouldn’t be too different from the spacing between tiles (a). So let’s start by working out how many rows (n) and columns (N) of tiles there would be if the border were the same as the tile spacing, ie b = a. Using equation ①:
(N-1) + 4N + 2 = 50
⇒ N = 49/5 = 9.8
But N and n are integers, because there must be a whole number of tiles in each direction. So let’s set N at the closest integer to 9.8, which is 10. Then n = 8 and the value of b is given by equation ①:
(N-1)a + Nc + 2b = 50
⇒ 9 + (10x4) + 2b = 50
⇒ b = (50 – 9 – 40)/2 = 0.5
This would produce a grid of 4cm tiles with 10 across, 8 down and a border that’s half as big as the tile spacing of 1cm.
Should you want a bigger border, try setting N to 9. Then n = 7 and b becomes:
(50 – 8 – 36)/2 = 3.
Alternatively, try it with 3 more columns than rows, ie N - n = 3. This could give a 14 x 11 grid of 3cm tiles with a border of 1.8cm and a tile spacing of 0.3cm.
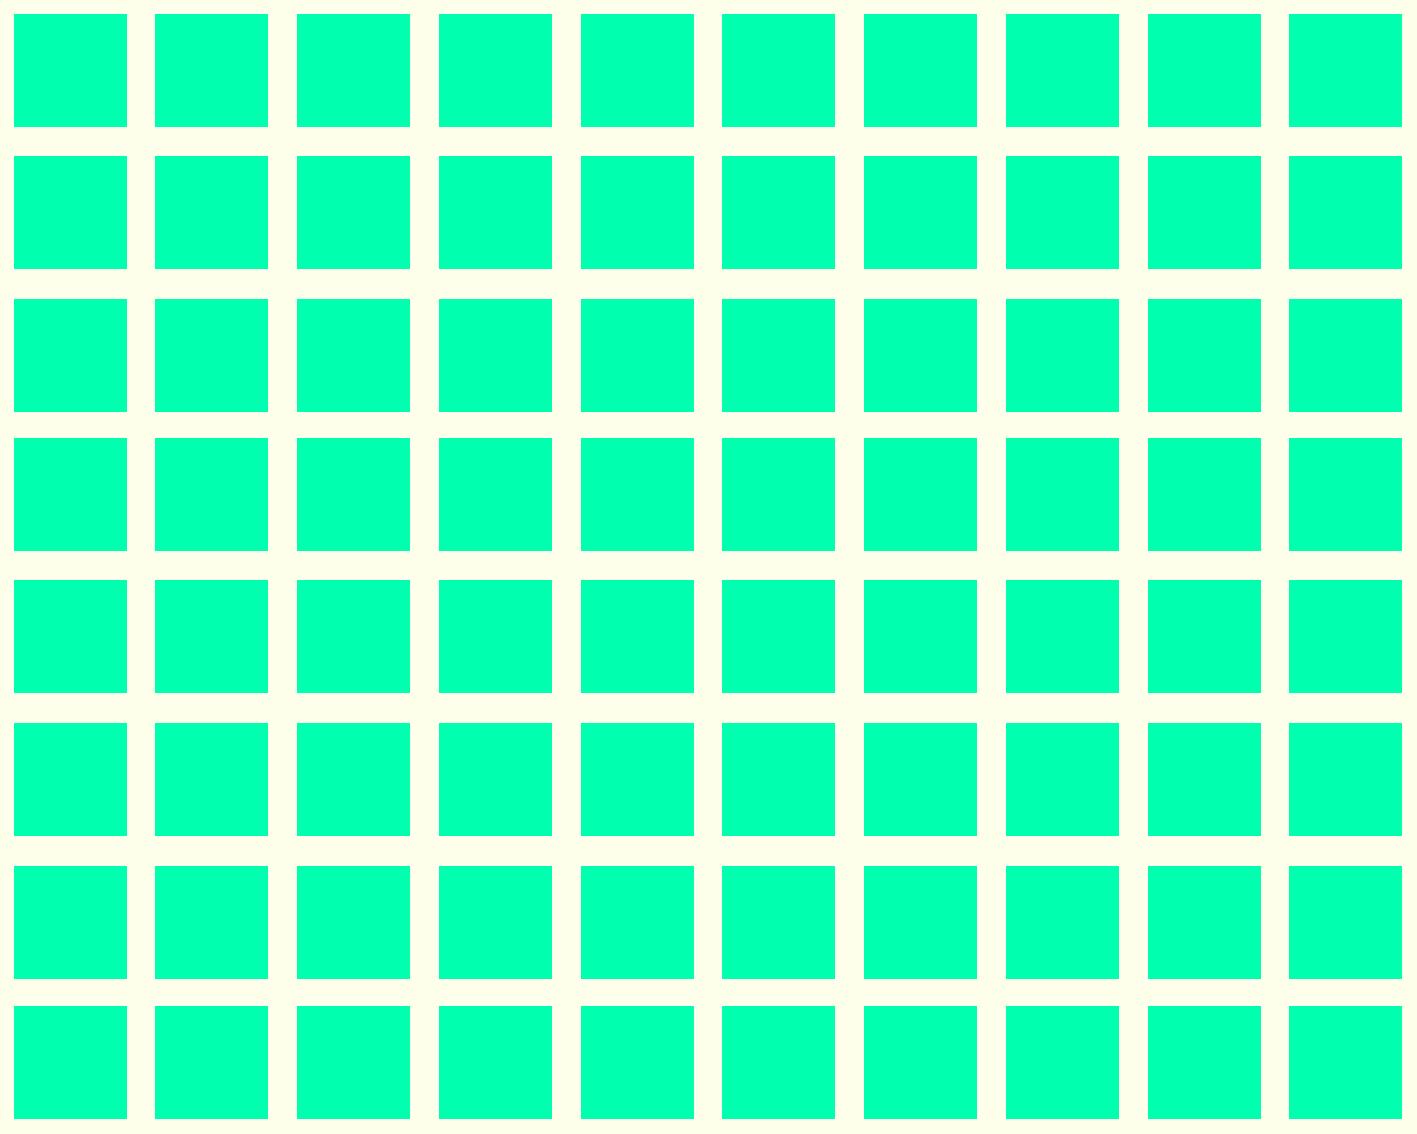
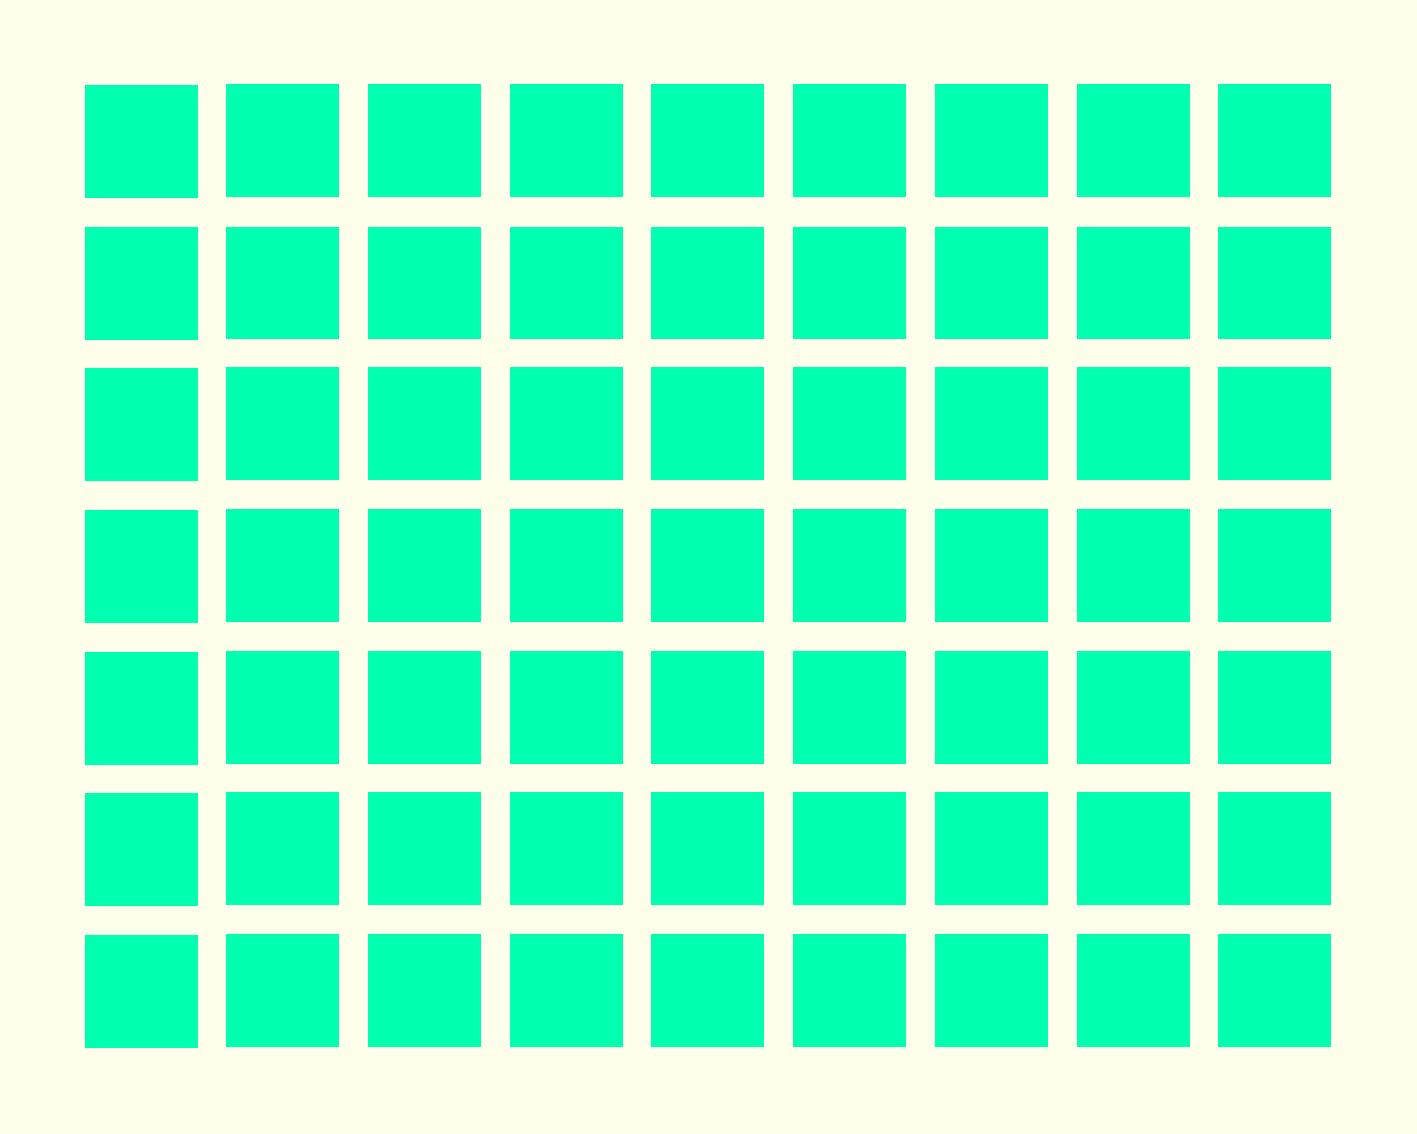
If you put these equations into a spreadsheet, it’s easy to play around with the numbers until you get a result you’re happy with. When you think you know what the tile size, spacing and borders should be, I recommend drawing the resulting grid on a sheet of paper, or in a graphics program such as Photoshop or a free alternative like The Gimp. The final two images attached to this step show the results for a 50cm x 40cm frame with 4cm tiles, 1cm spacing and N set to 10 and 9 with n = N - 2.
Choosing Images
Now for the fun part. You’re going to need Nxn different images, so either 80 or 63 using the examples from the previous step with N = 10 or N = 9 and n = N - 2. Go search in your digital photos to produce a “long list” of those that are the right colour, or have the right colour somewhere within them. Photos taken with modern smartphones should be high enough resolution to be able to zoom right in to select a detail and print it out at the size of a small square tile without any pixellation being apparent.
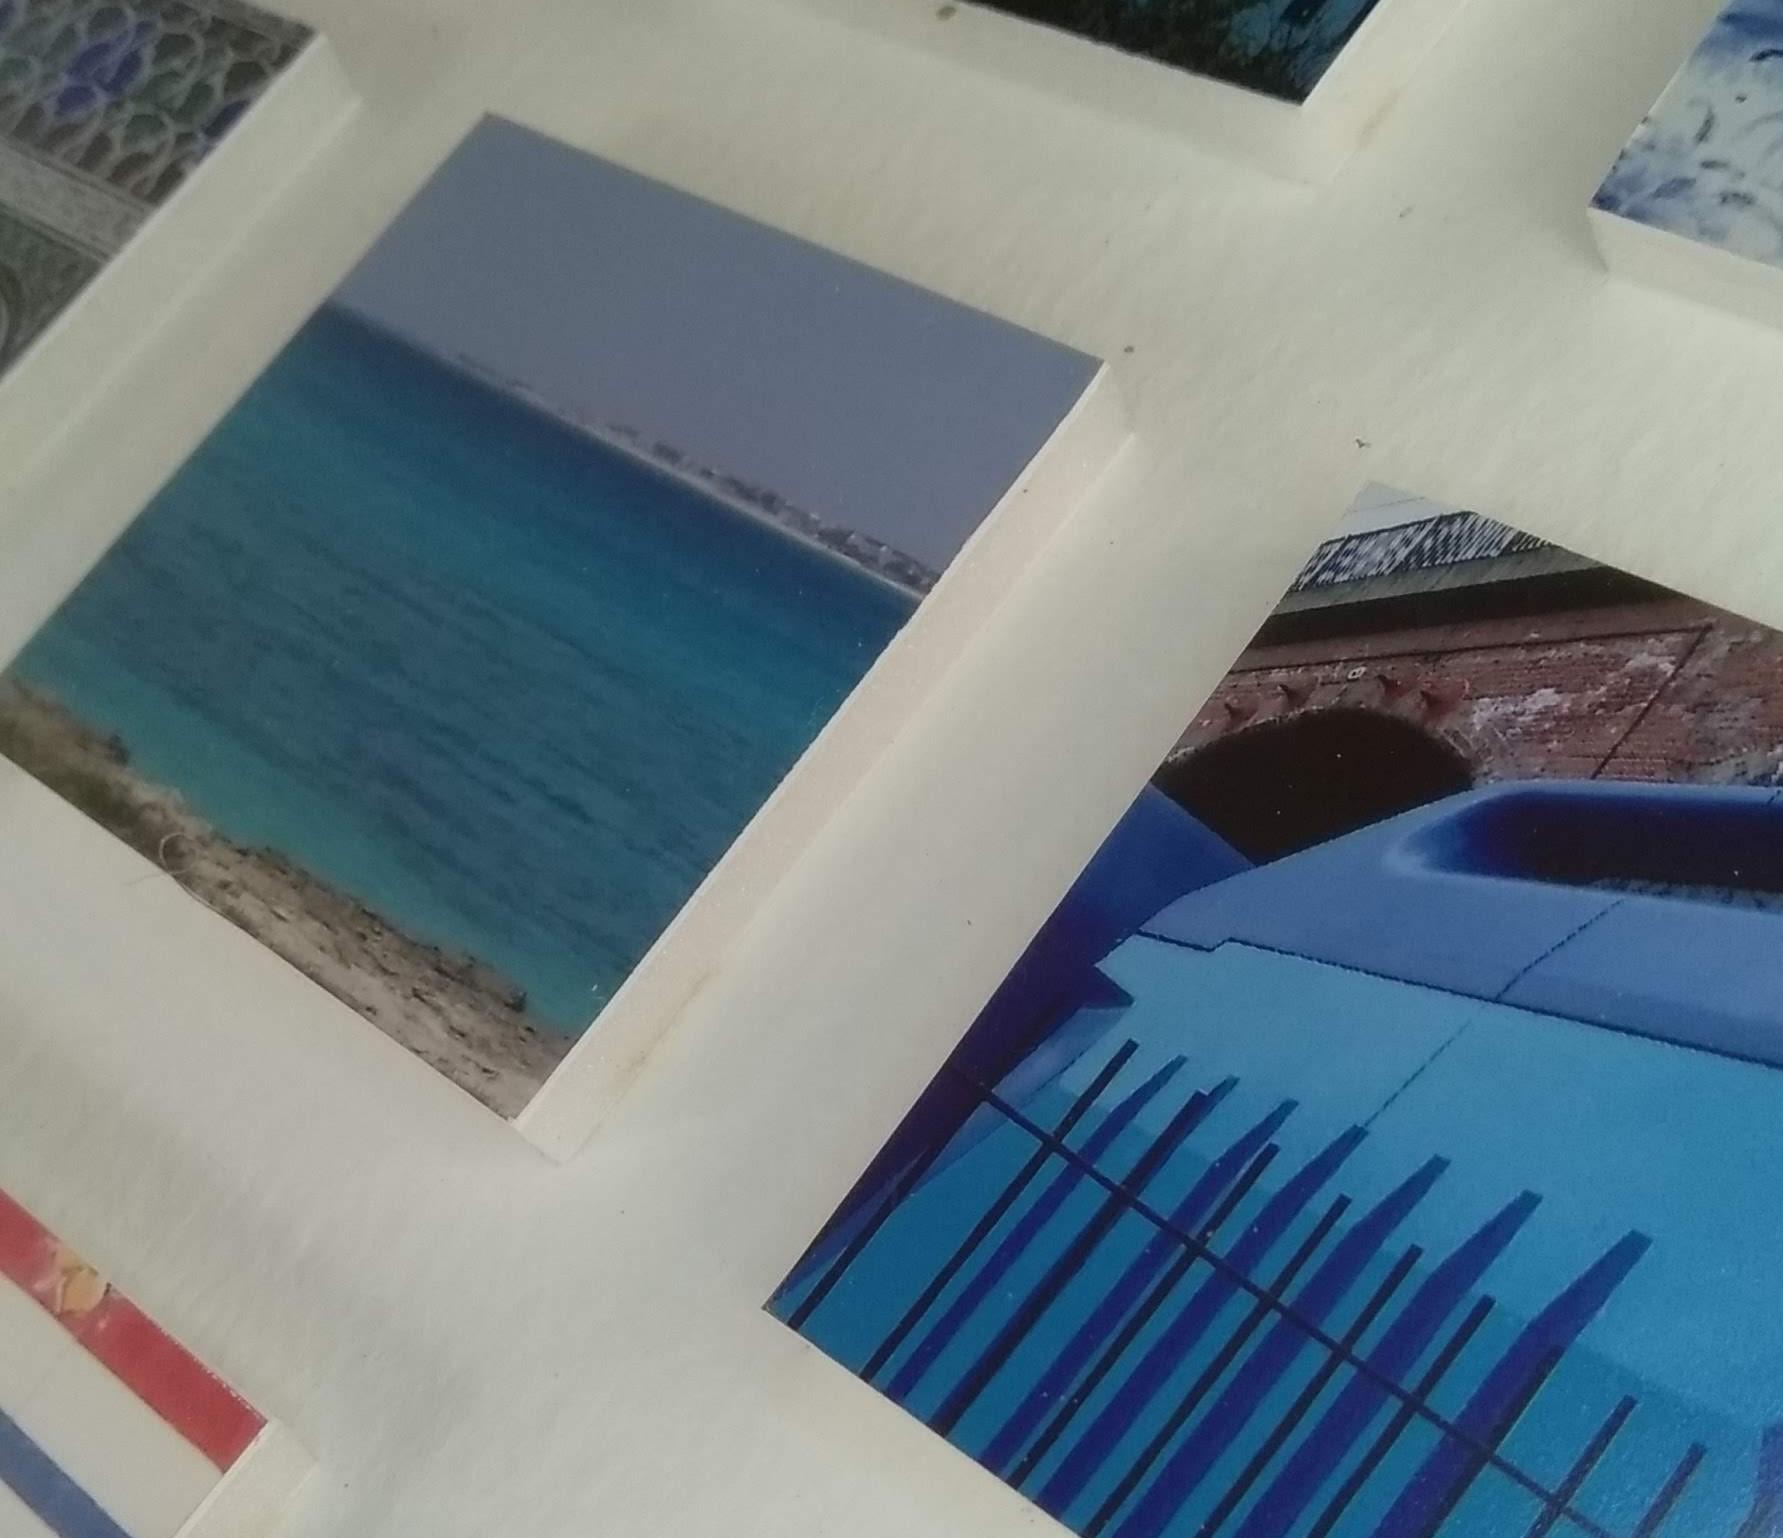
I went for a range of scales in my photos: some are distant shots of landscapes and seascapes, some more the size of buildings, some people-scale, and some close-ups. You can also make the selection more interesting by including a mixture of natural subjects (plants, people, animals) and man-made ones (buildings, vehicles, gadgets), and a few with text. As well as keeping within a colour range, consider working to a theme as well.
You can use Google Photos or whatever other app you use to search for images of a particular subject. In Google Photos, just type something like “animal” or “building” into the search function.
You might find that you’re short of some of the images you’d like, perhaps you want more flowers, or insects, or landscapes to provide a balance. In which case, go take more photos or search for suitable images online. I had a period of about a month when I went around photographing everything that was yellow, from dandelions to AA vans.
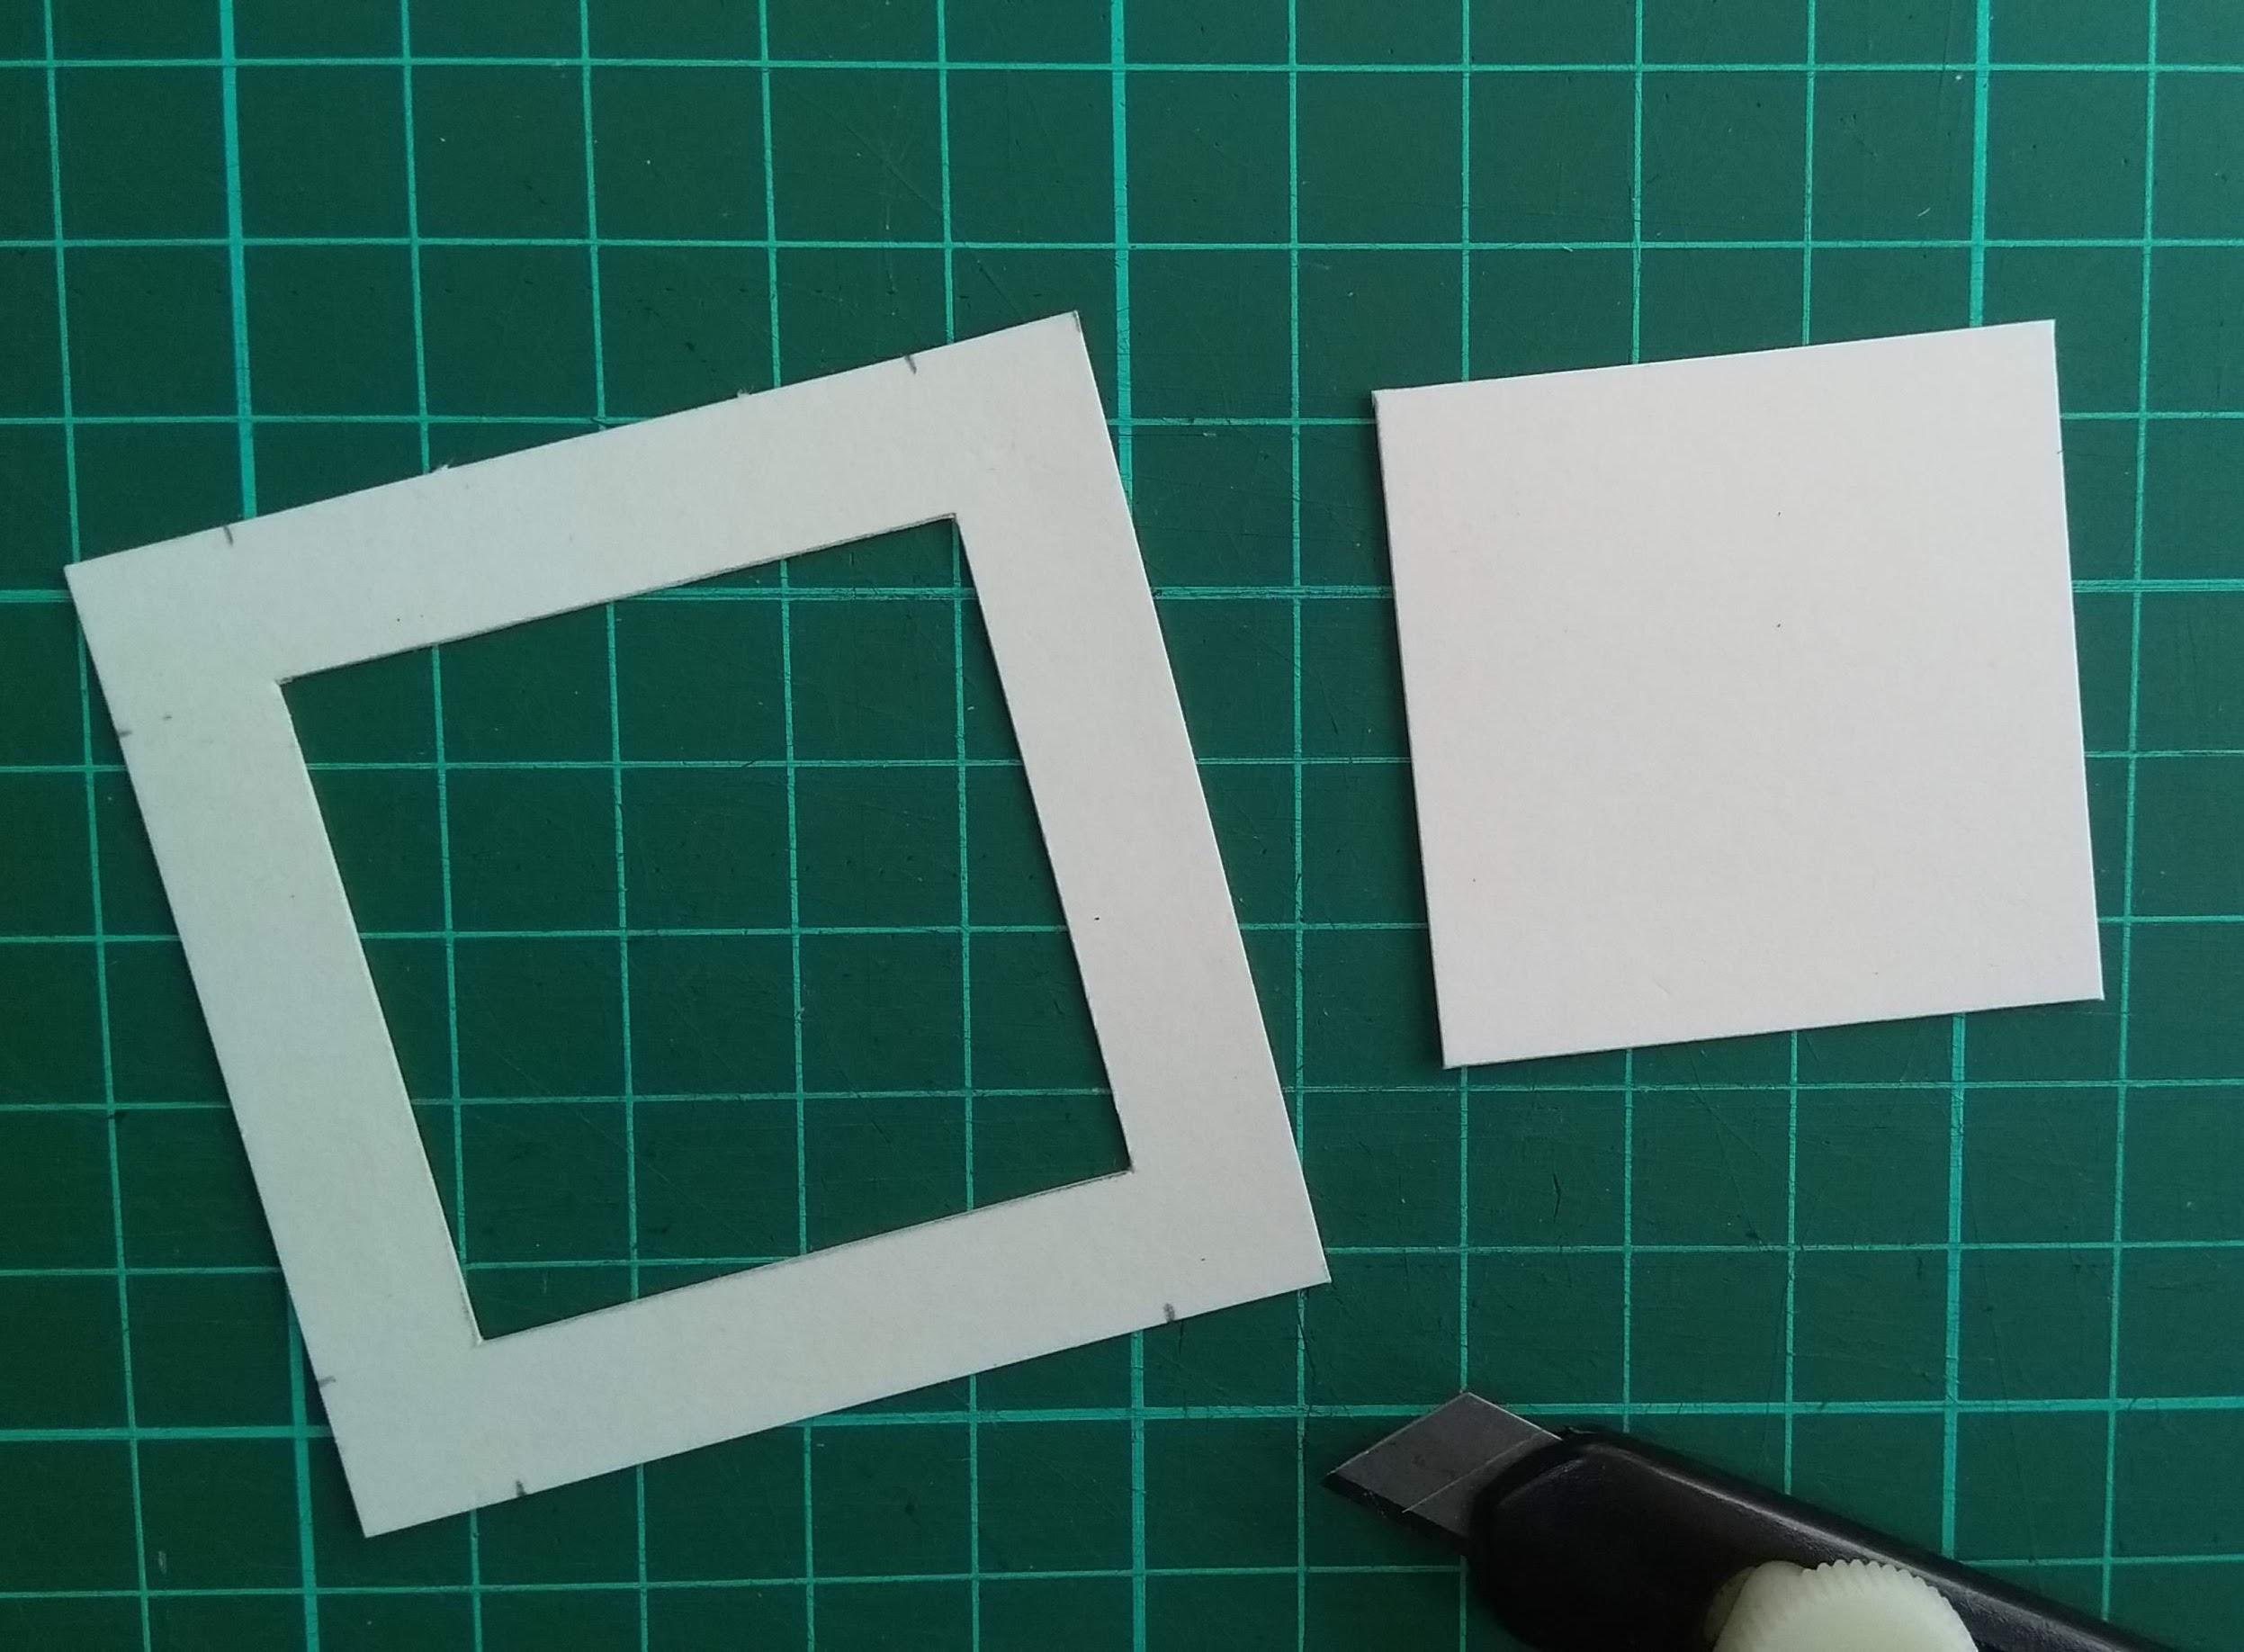
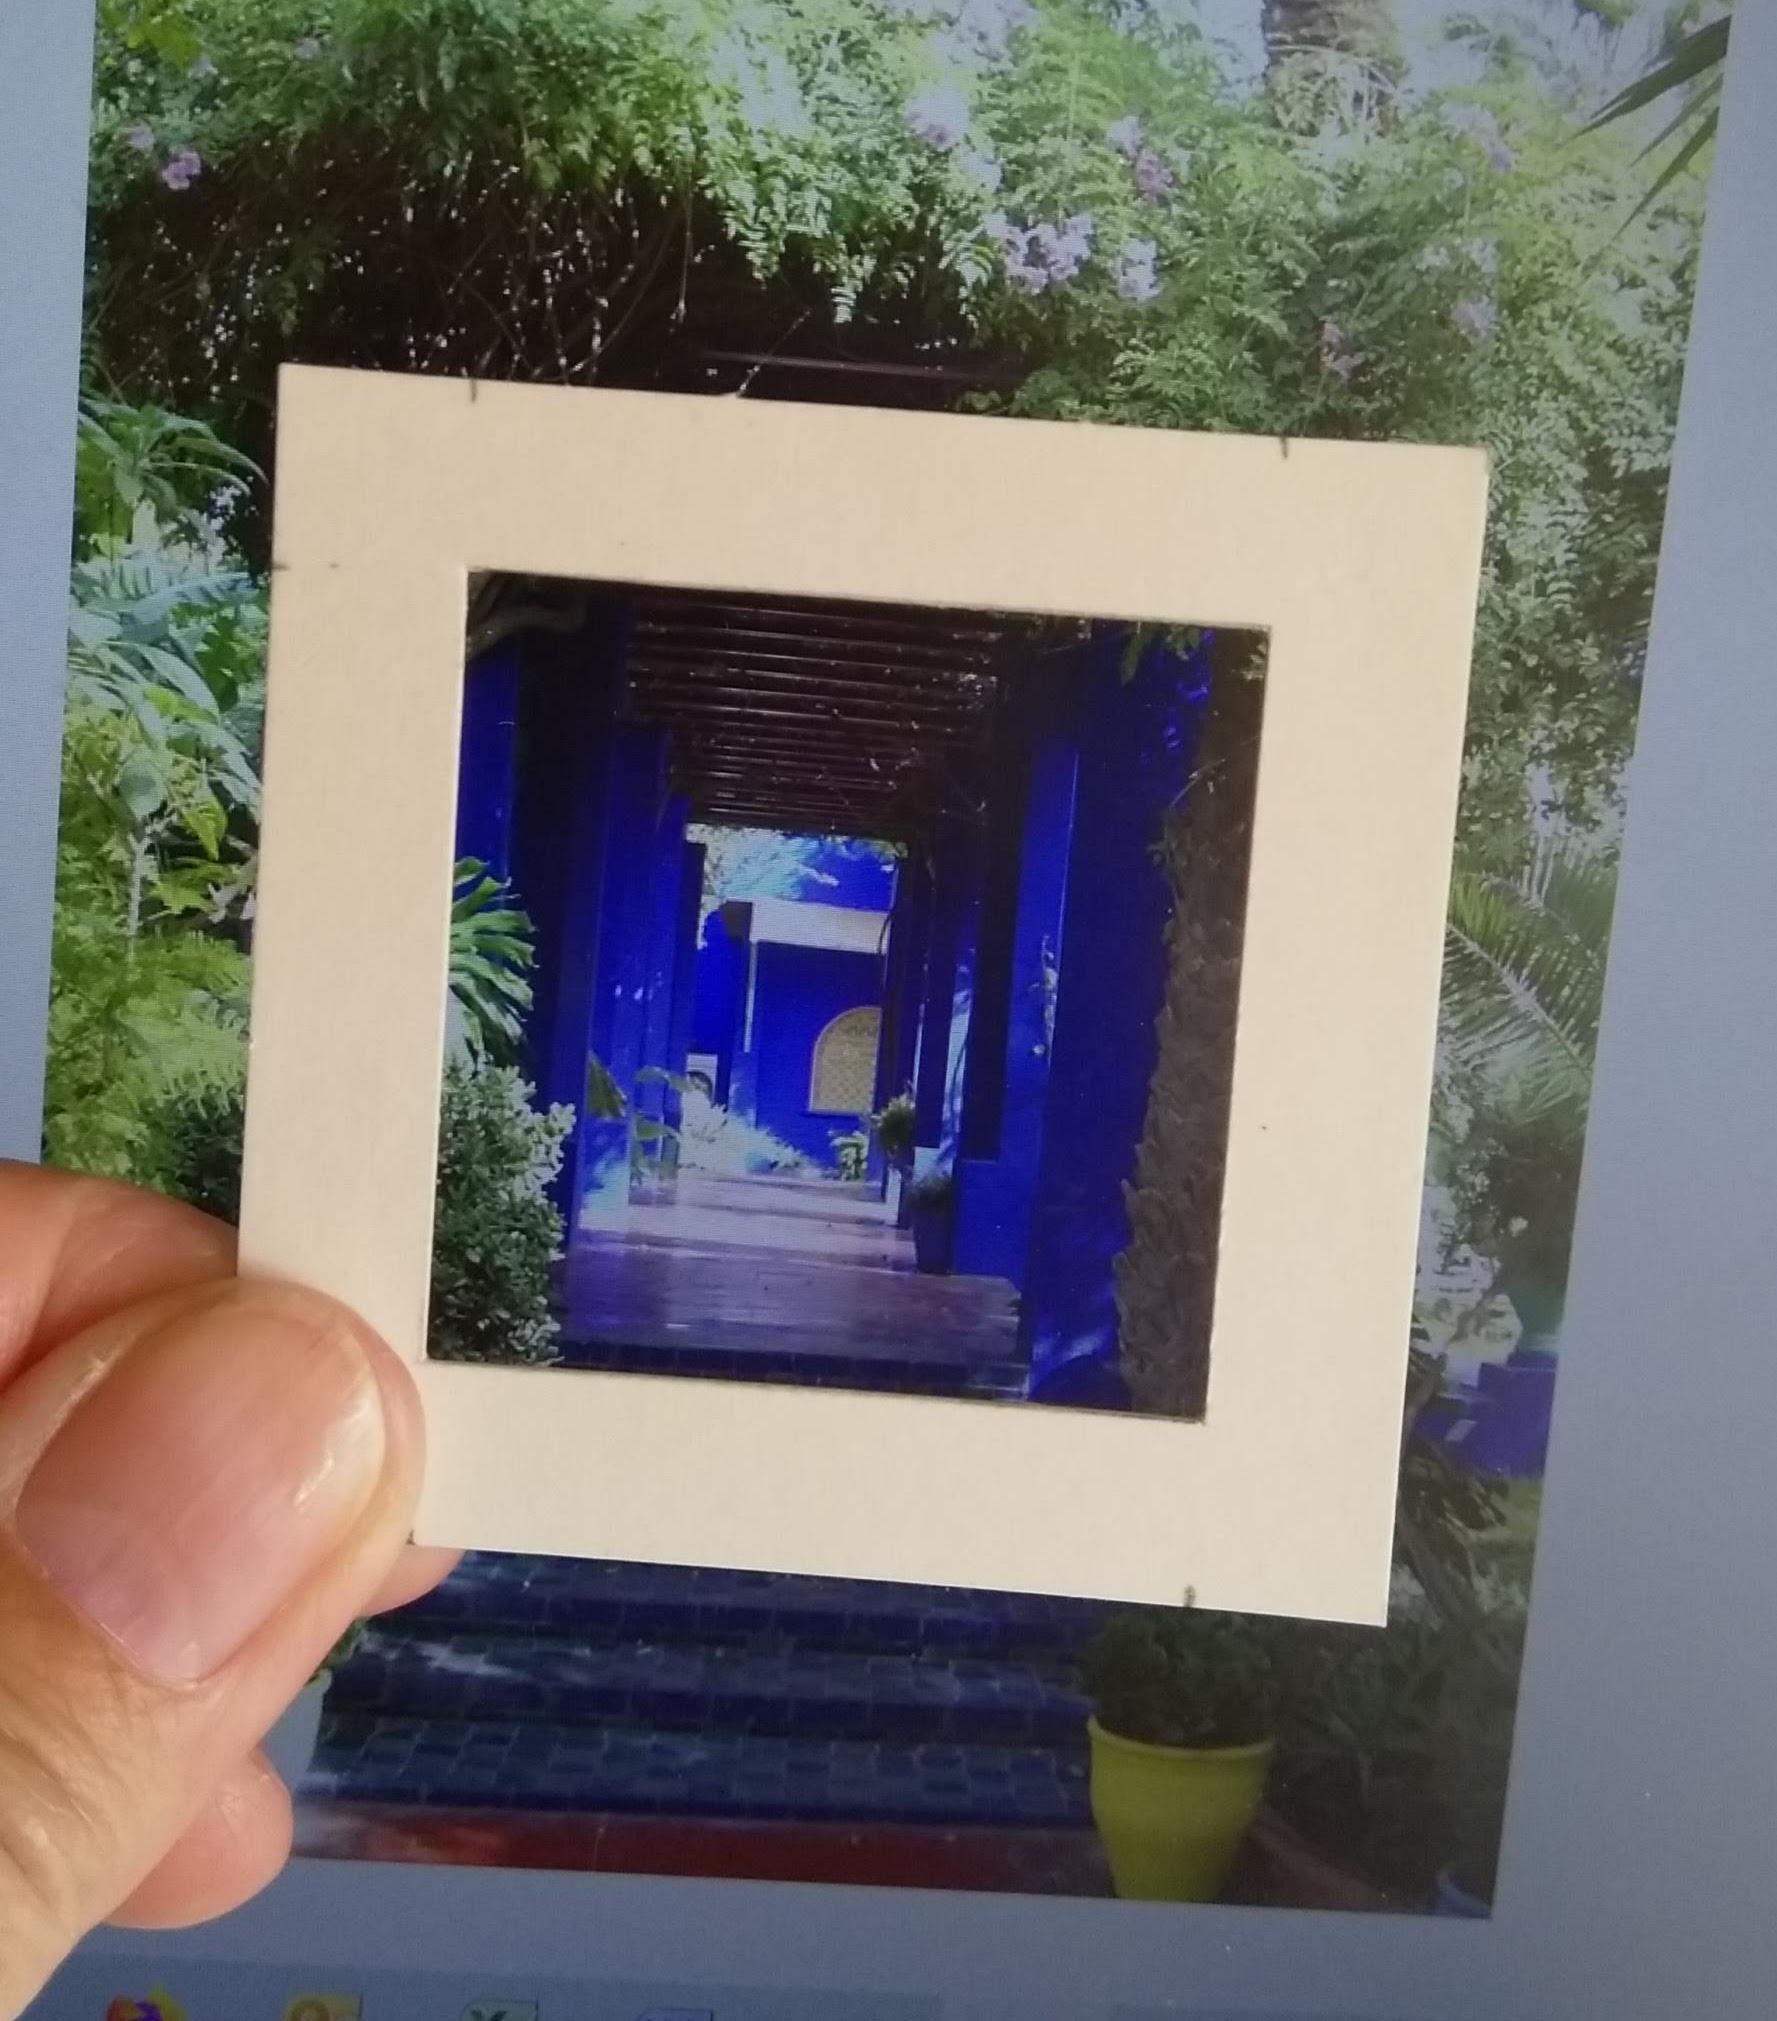
For many photos, you’ll want to use most of the image with only enough cropping to make it square and get rid of unnecessary background detail. But for those where you intend to zoom in to focus on just a small area, it can be difficult to judge from the full sized image whether that will work in the composition you’re planning. Making a tile-sized frame will help the process – use a sharp knife to cut a square window from an offcut of the card you used in Step 2 and hold it against the screen you’re viewing the photos on. (Keep the square of card from the centre of this window, you’re going to need it later.) When you’ve chosen the area and zoom level you want, crop it out of the image leaving a generous border (so you can make a final decision in the next step) and save it as a new version.
Put all the candidate photos into a new folder or online album. I suggest saving at least 10% more than the number of tiles to allow a choice to be made when you have them all printed and can see them together.
Getting the Photos Printed
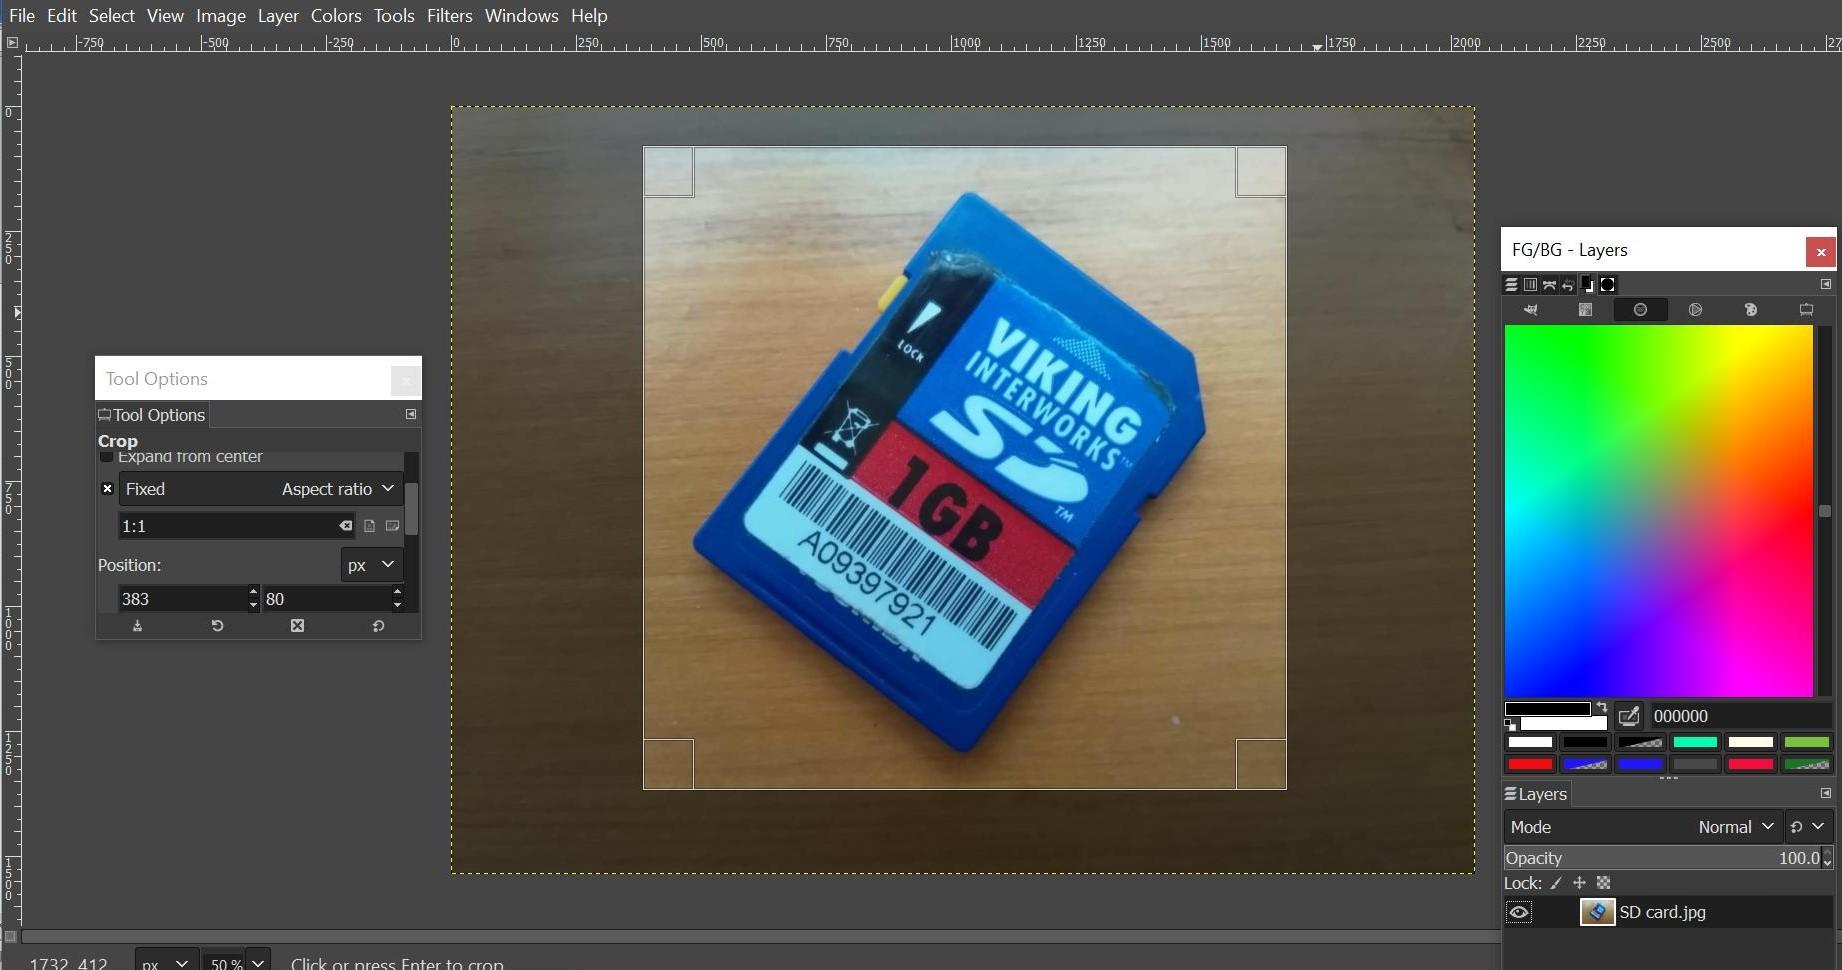
Use photo editing software, crop all the images first to a square aspect ratio that’s as big as possible, making sure you don’t crop off anything interesting. Then, working in units of measurement rather than pixels or percentages, create a square crop window that’s a little bigger – say 6mm (1/4”) – than the tile size. For each image, resize it (by scaling, not zooming) within this crop window, moving the window around as necessary to select the part of the image you want to keep at the scale that seems right. You might want to edit the image in other ways too, eg straightening it, rotating it, correcting the exposure or applying an interesting filter. View your images at 1:1 zoom level so you can judge whether you’ve enlarged an image so much that it’s pixellated. Save your resized, cropped images as new files.
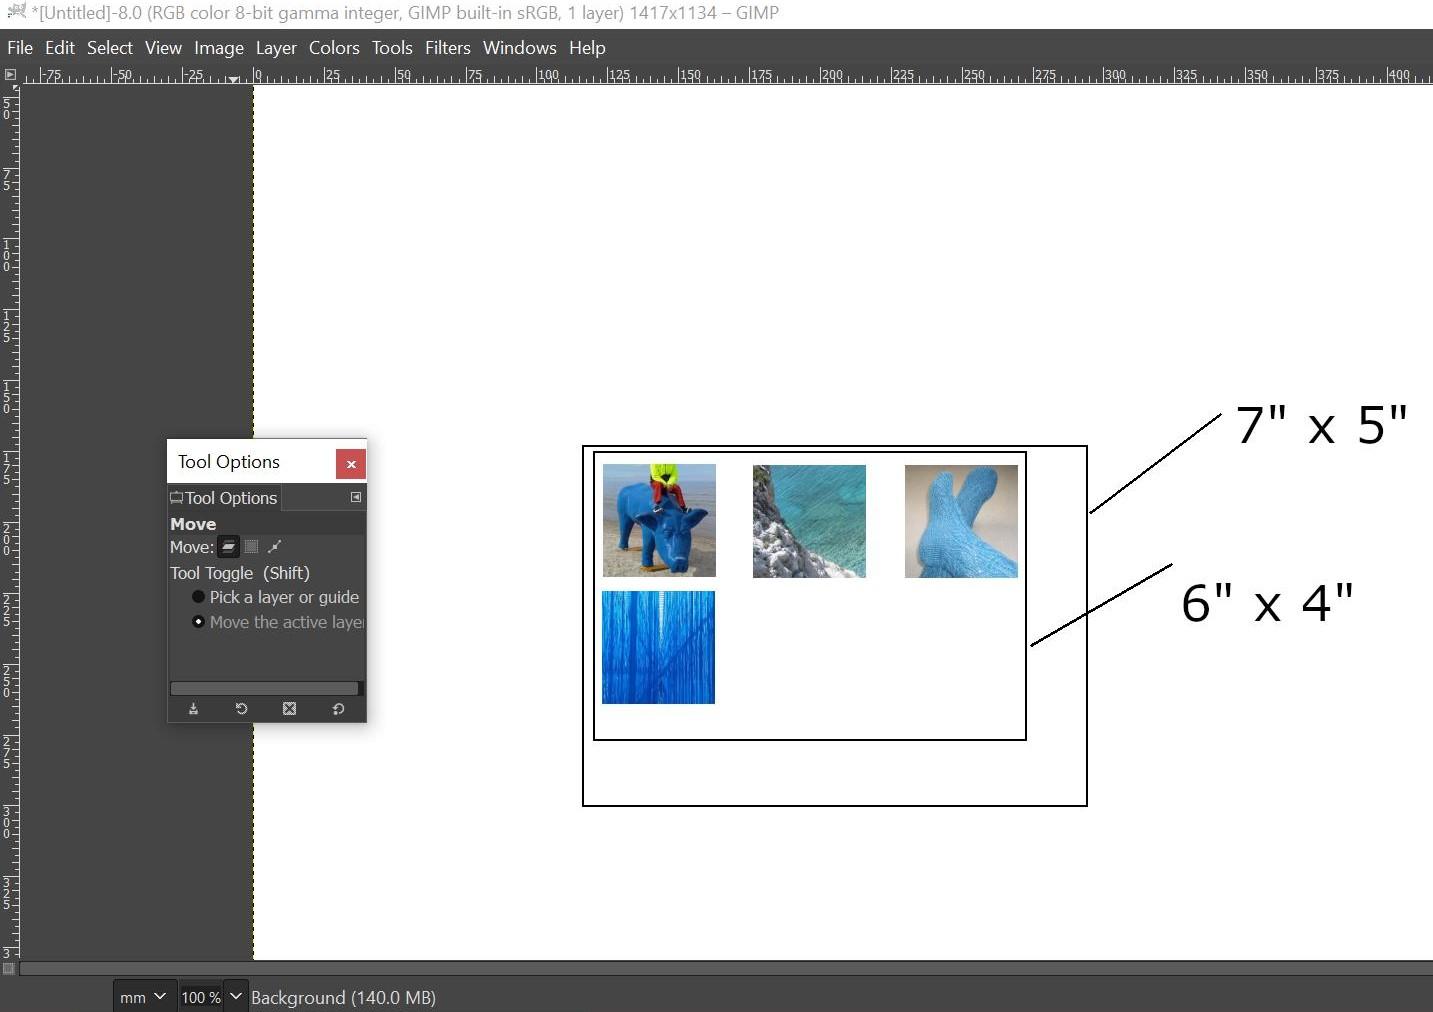
When you’ve done them all – remembering to include a few more than you’ll eventually use – use the editing software to place them onto blank white canvases for printing. It’s usually cheaper to get several photos printed at the standard sizes of 15 x 10cm (6” x 4”) or 18 x 13cm (7” x 5”) than one larger print. Leave a gap around the images so each one can be cut out cleanly without risking damaging its neighbours. Also, be aware that the print sizes quoted by photo processors are usually nominal rather than exact and there may be a white border around the edge, so read the information carefully to make sure your photo tiles aren't going to be shrunk to fit within the border or clipped if they're near an edge.
Send off your photos for printing, or maybe print them yourself if you have a good enough printer and a stock of photographic paper. I think a glossy finish is best.
Mounting the Images

When you get the photos back from printing, cut around each one with a pair of scissors and then glue the back of them and stick them onto the sheet of foam board, leaving gaps between. Make sure every part of the photo has glue on it, you don’t want the corners to curl up. Add a few unwanted pieces from the prints, such as blank spaces between images or the border around the edge. Leave the board overnight under something reasonably heavy, like a wooden chopping board or a few books, to dry.
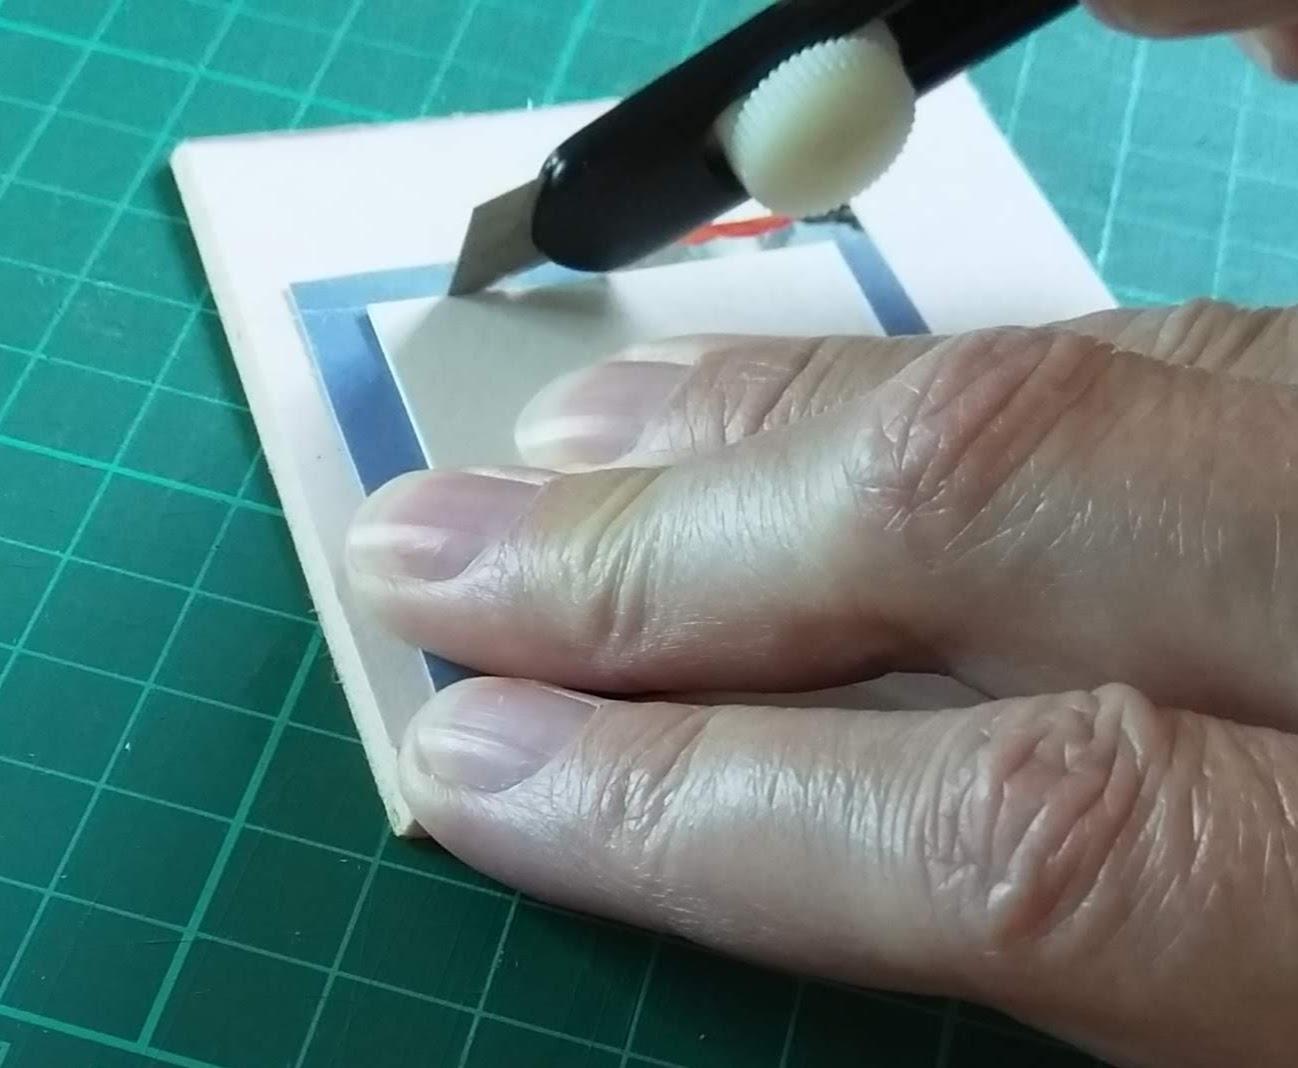
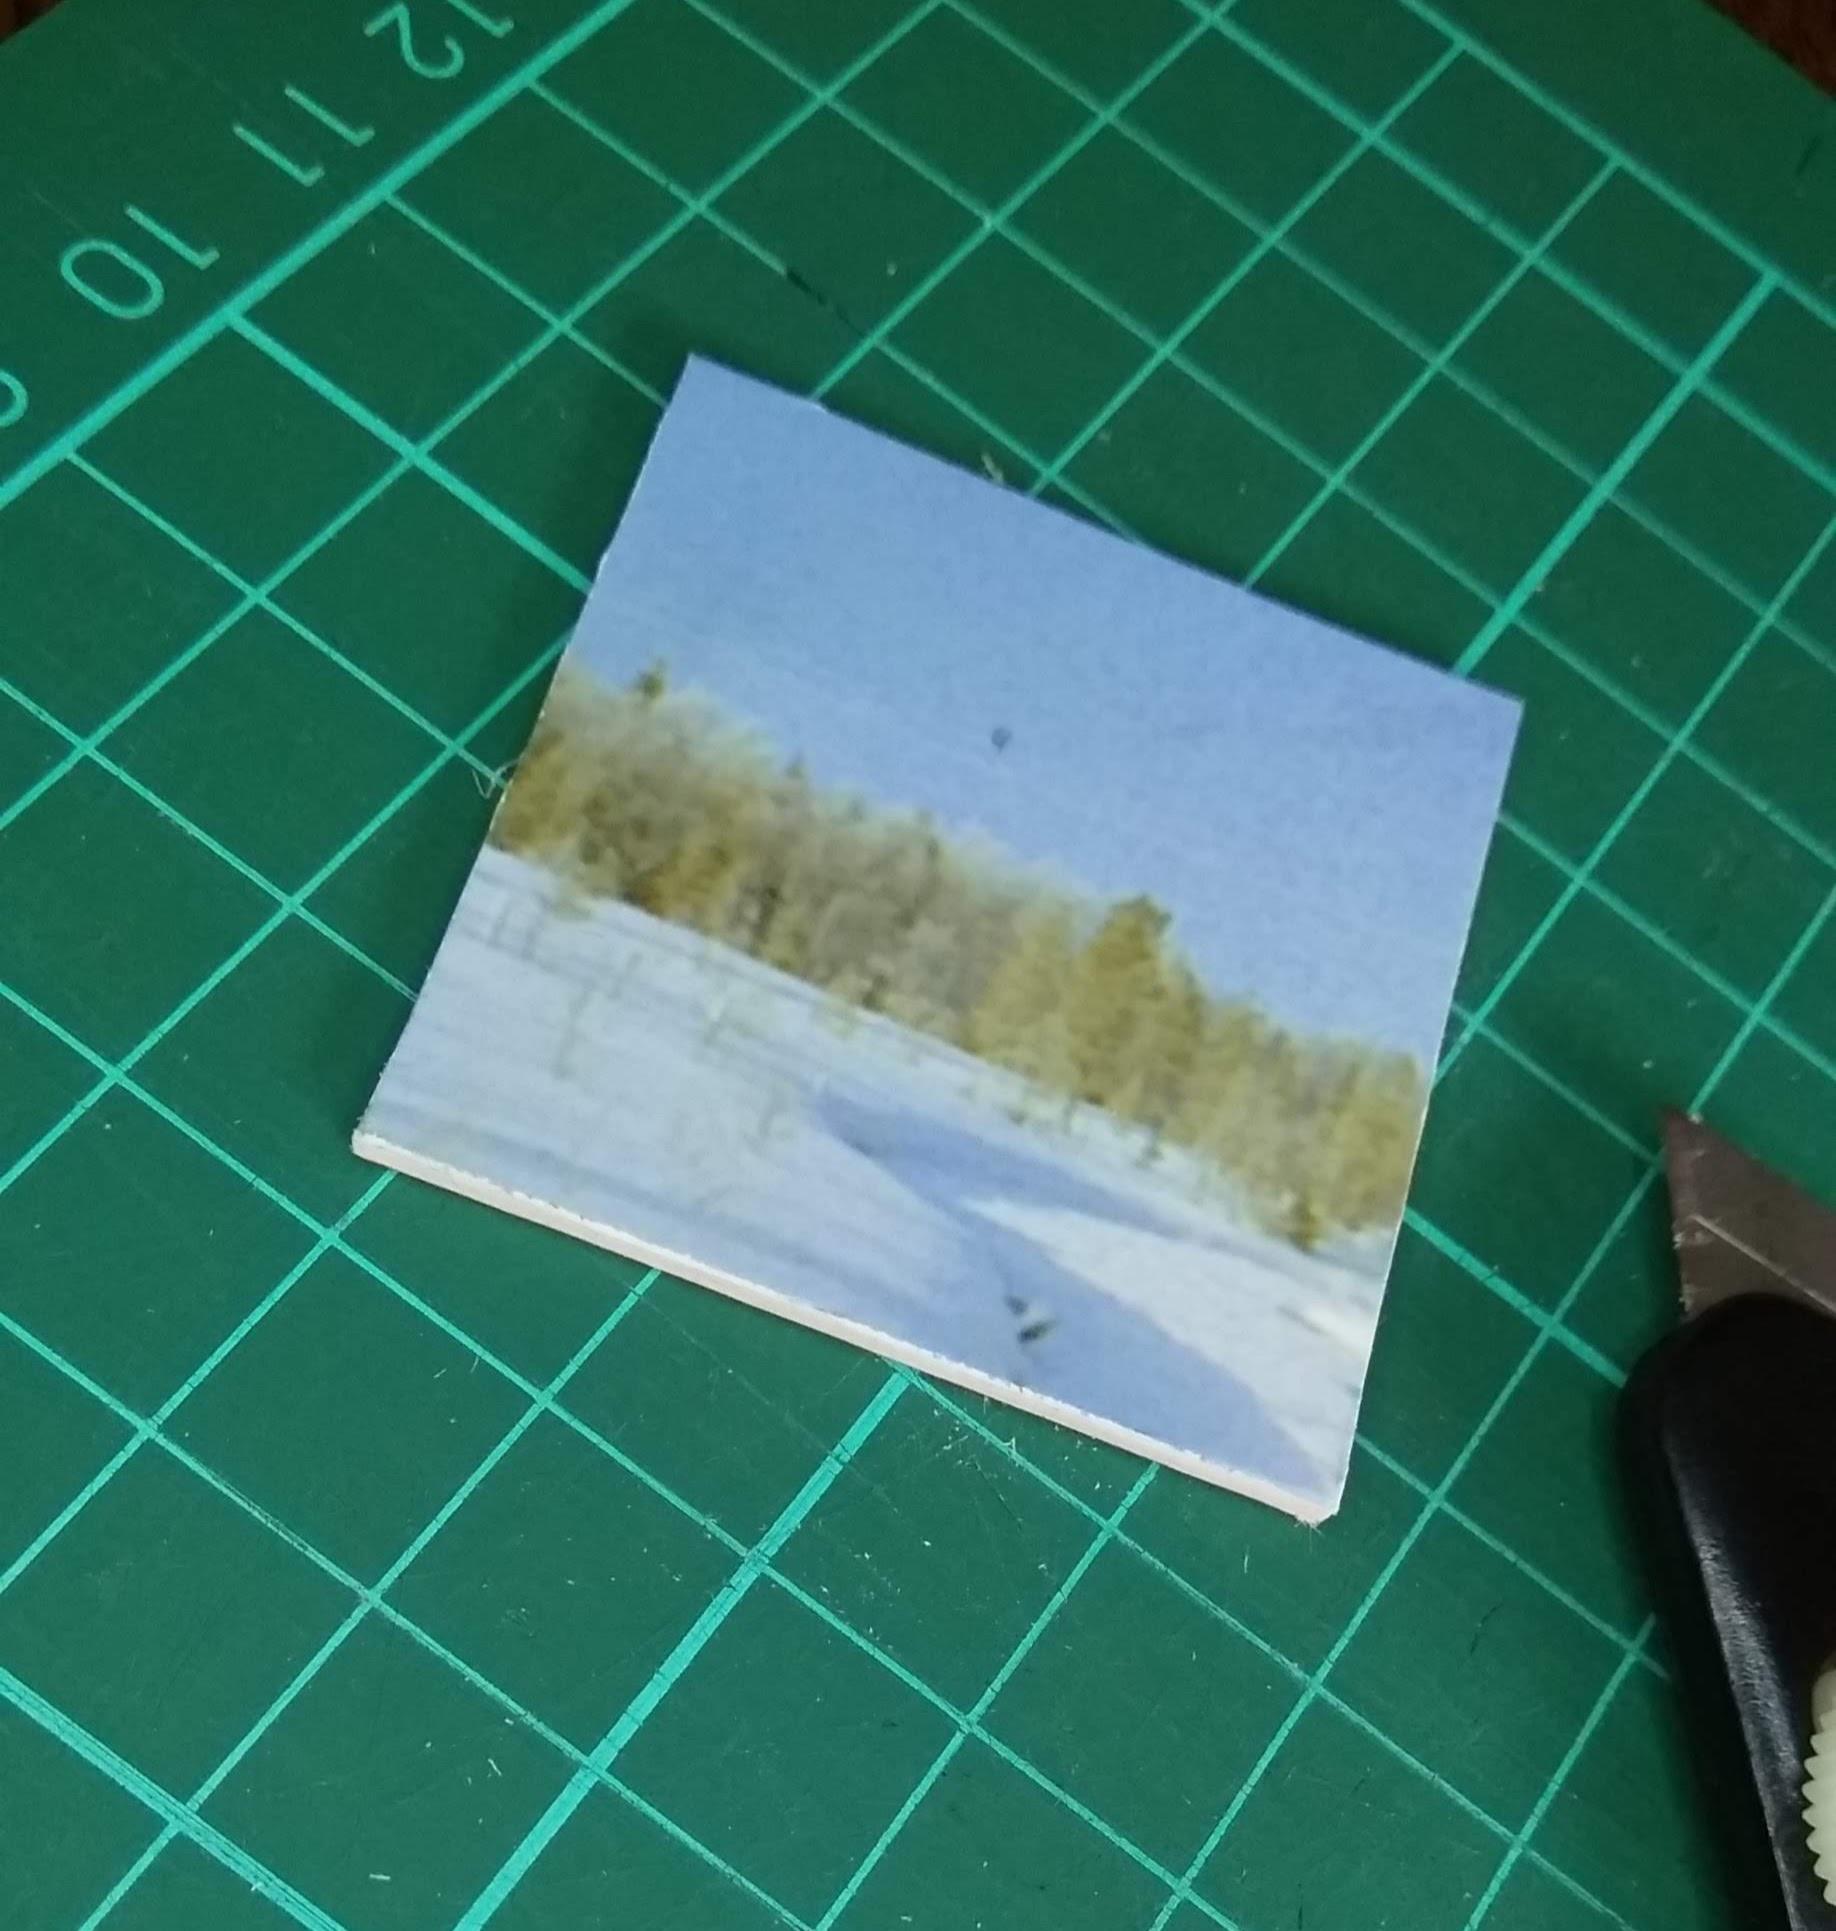
Cut the foam board up between the photos with a sharp knife so that each photo tile is separate (but with a visible foam border around it). Then use the unwanted pieces to practise cutting through the double layer of photo and foam board against a ruler or straight piece of cardboard. This needs to be done with the photo side uppermost, both so that you can see exactly what you are trimming off and so that the photographic paper is cut cleanly, which means you can’t press too hard with the straight edge or it might damage the photo. I found that several light pressure, partial cuts was better than trying to cut right through the first time.
Before trimming each tile to size, use the window card from Step 4 to check whether you want to trim more off one edge than another, or whether an even trim will do. If you decide that an uneven trim is needed, just place the square card cut-out back in the window, remove the window, then press gently on the square card to keep the mounted photo in place while you cut around its edges. For those tiles where the trimming is less critical, place the square of card centrally by eye and then trim around it.
Arranging the Images
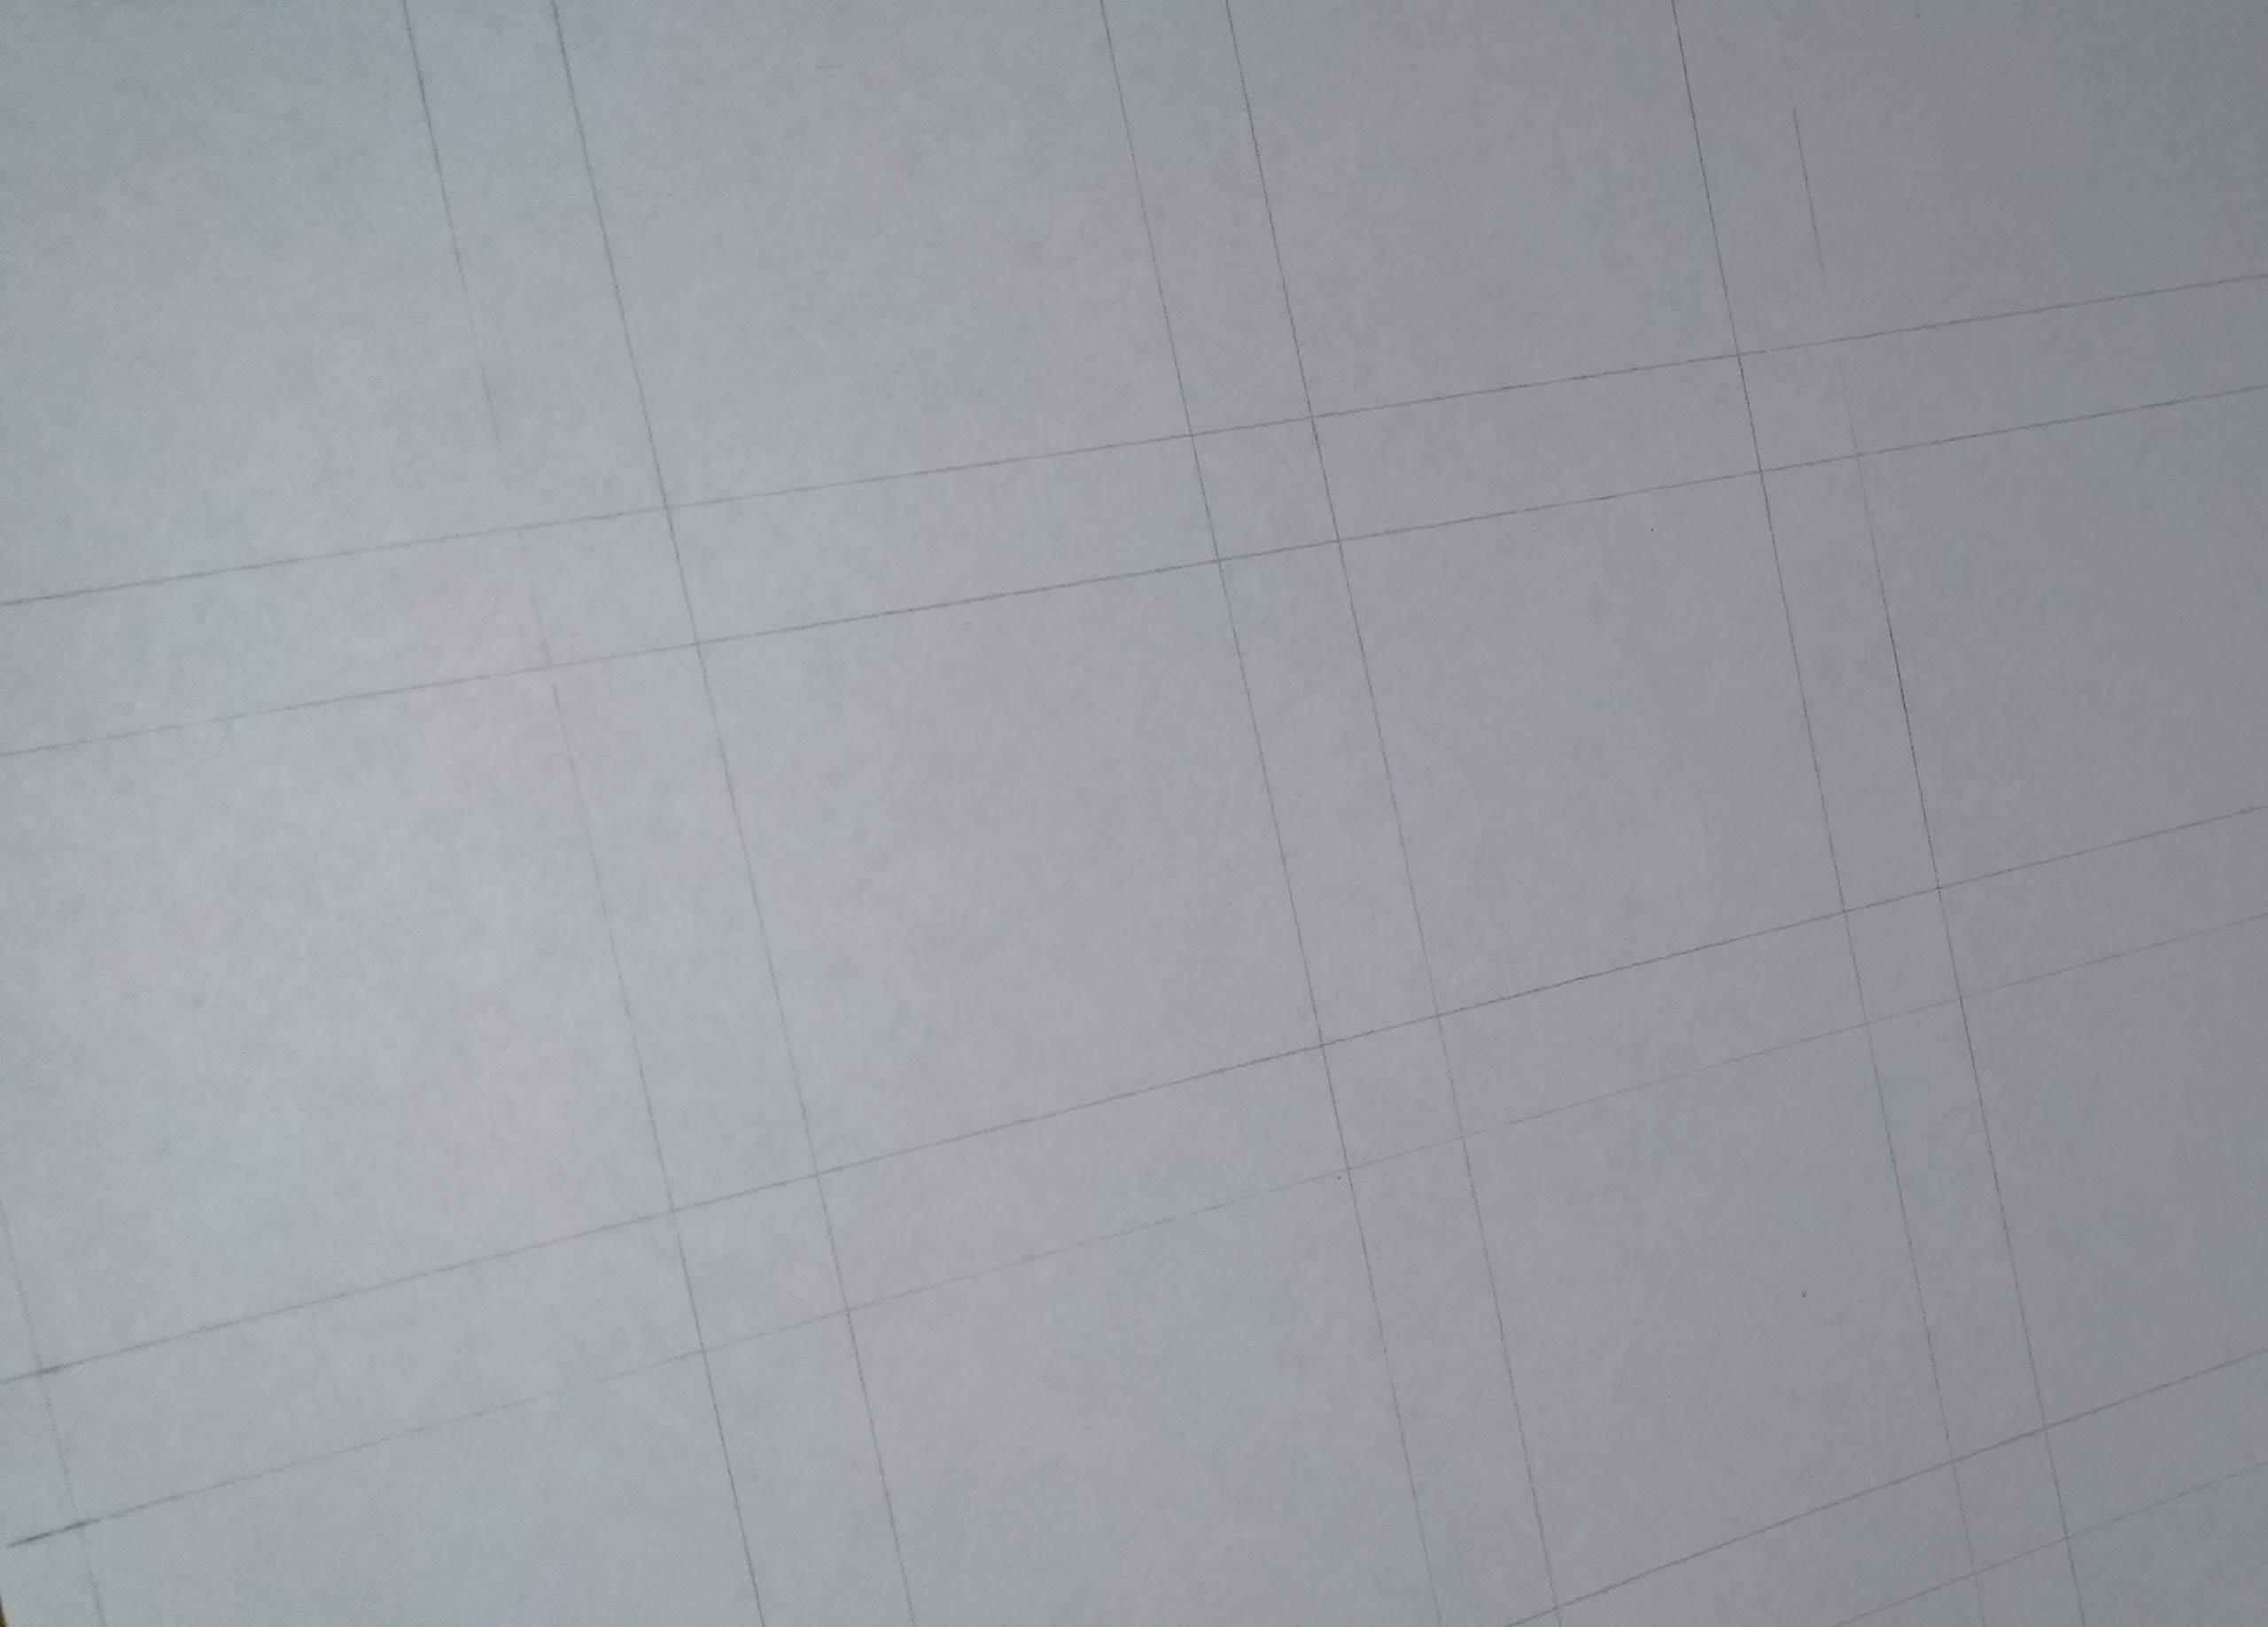
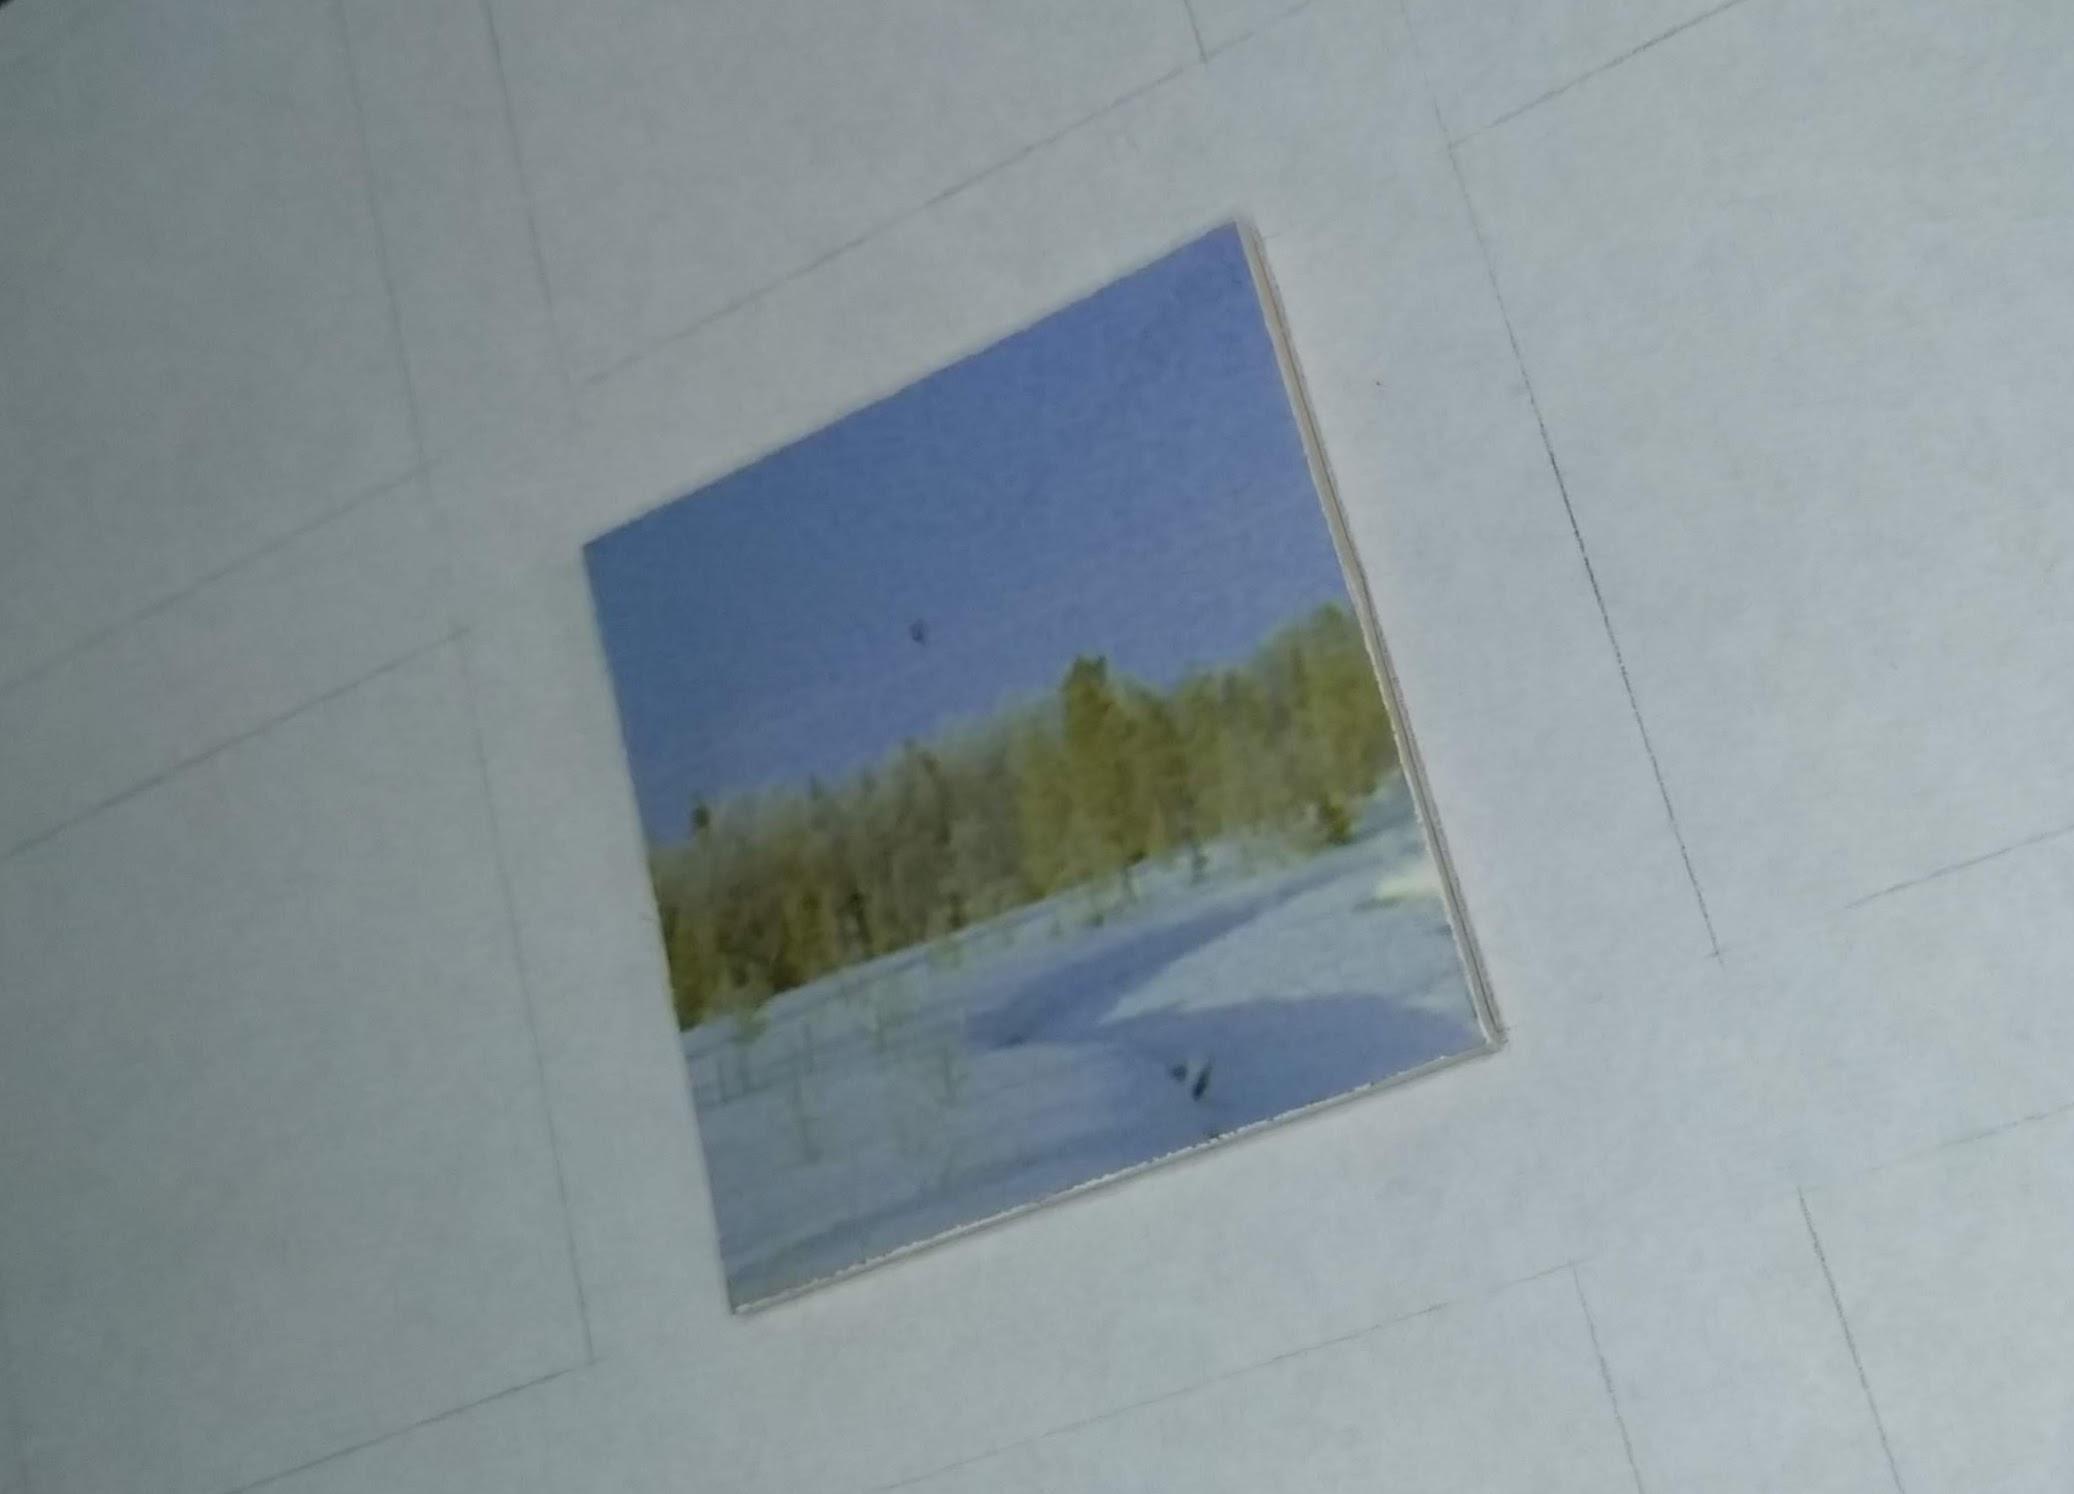
Draw a pencil grid lightly on your backing sheet of cardboard, within the pencilled window you drew in Step 2, to indicate where each tile is to be placed. Use the measurements a, b and c from Step 3. Then rub away all the lines other than those that form the squares.
Now try different arrangements of the photo tiles, moving them around until you find what looks best. Try to avoid too many images of the same type and scale being close to each other or in the same row, column or diagonal line. You could make the colours shift across the composition, eg paler shades in one corner merging gradually to darker shades in the opposite corner, or yellow at the top fading to orange at the bottom.
Before deciding, view the arrangement from across the room as well as from close up. No one part of the overall composition should draw the eye. Leave it on a table overnight and have a fresh look in the morning.
When you’re satisfied, use the glue stick on the back of each tile to stick them down one at a time, working row by row from top to bottom. You can lay a ruler under each row to help with lining them up. Leave the sheet of glass from the frame to weigh it down until the glue has set.
Framing
Rub out any visible pencil marks on the backing sheet, then give the sheet of glass a polish as you’ve been handling it. Reassemble the frame with the tiles towards the glass. If there isn’t room for the original backing board that came with the frame, discard it, the cardboard sheet that the tiles are stuck onto will be enough.
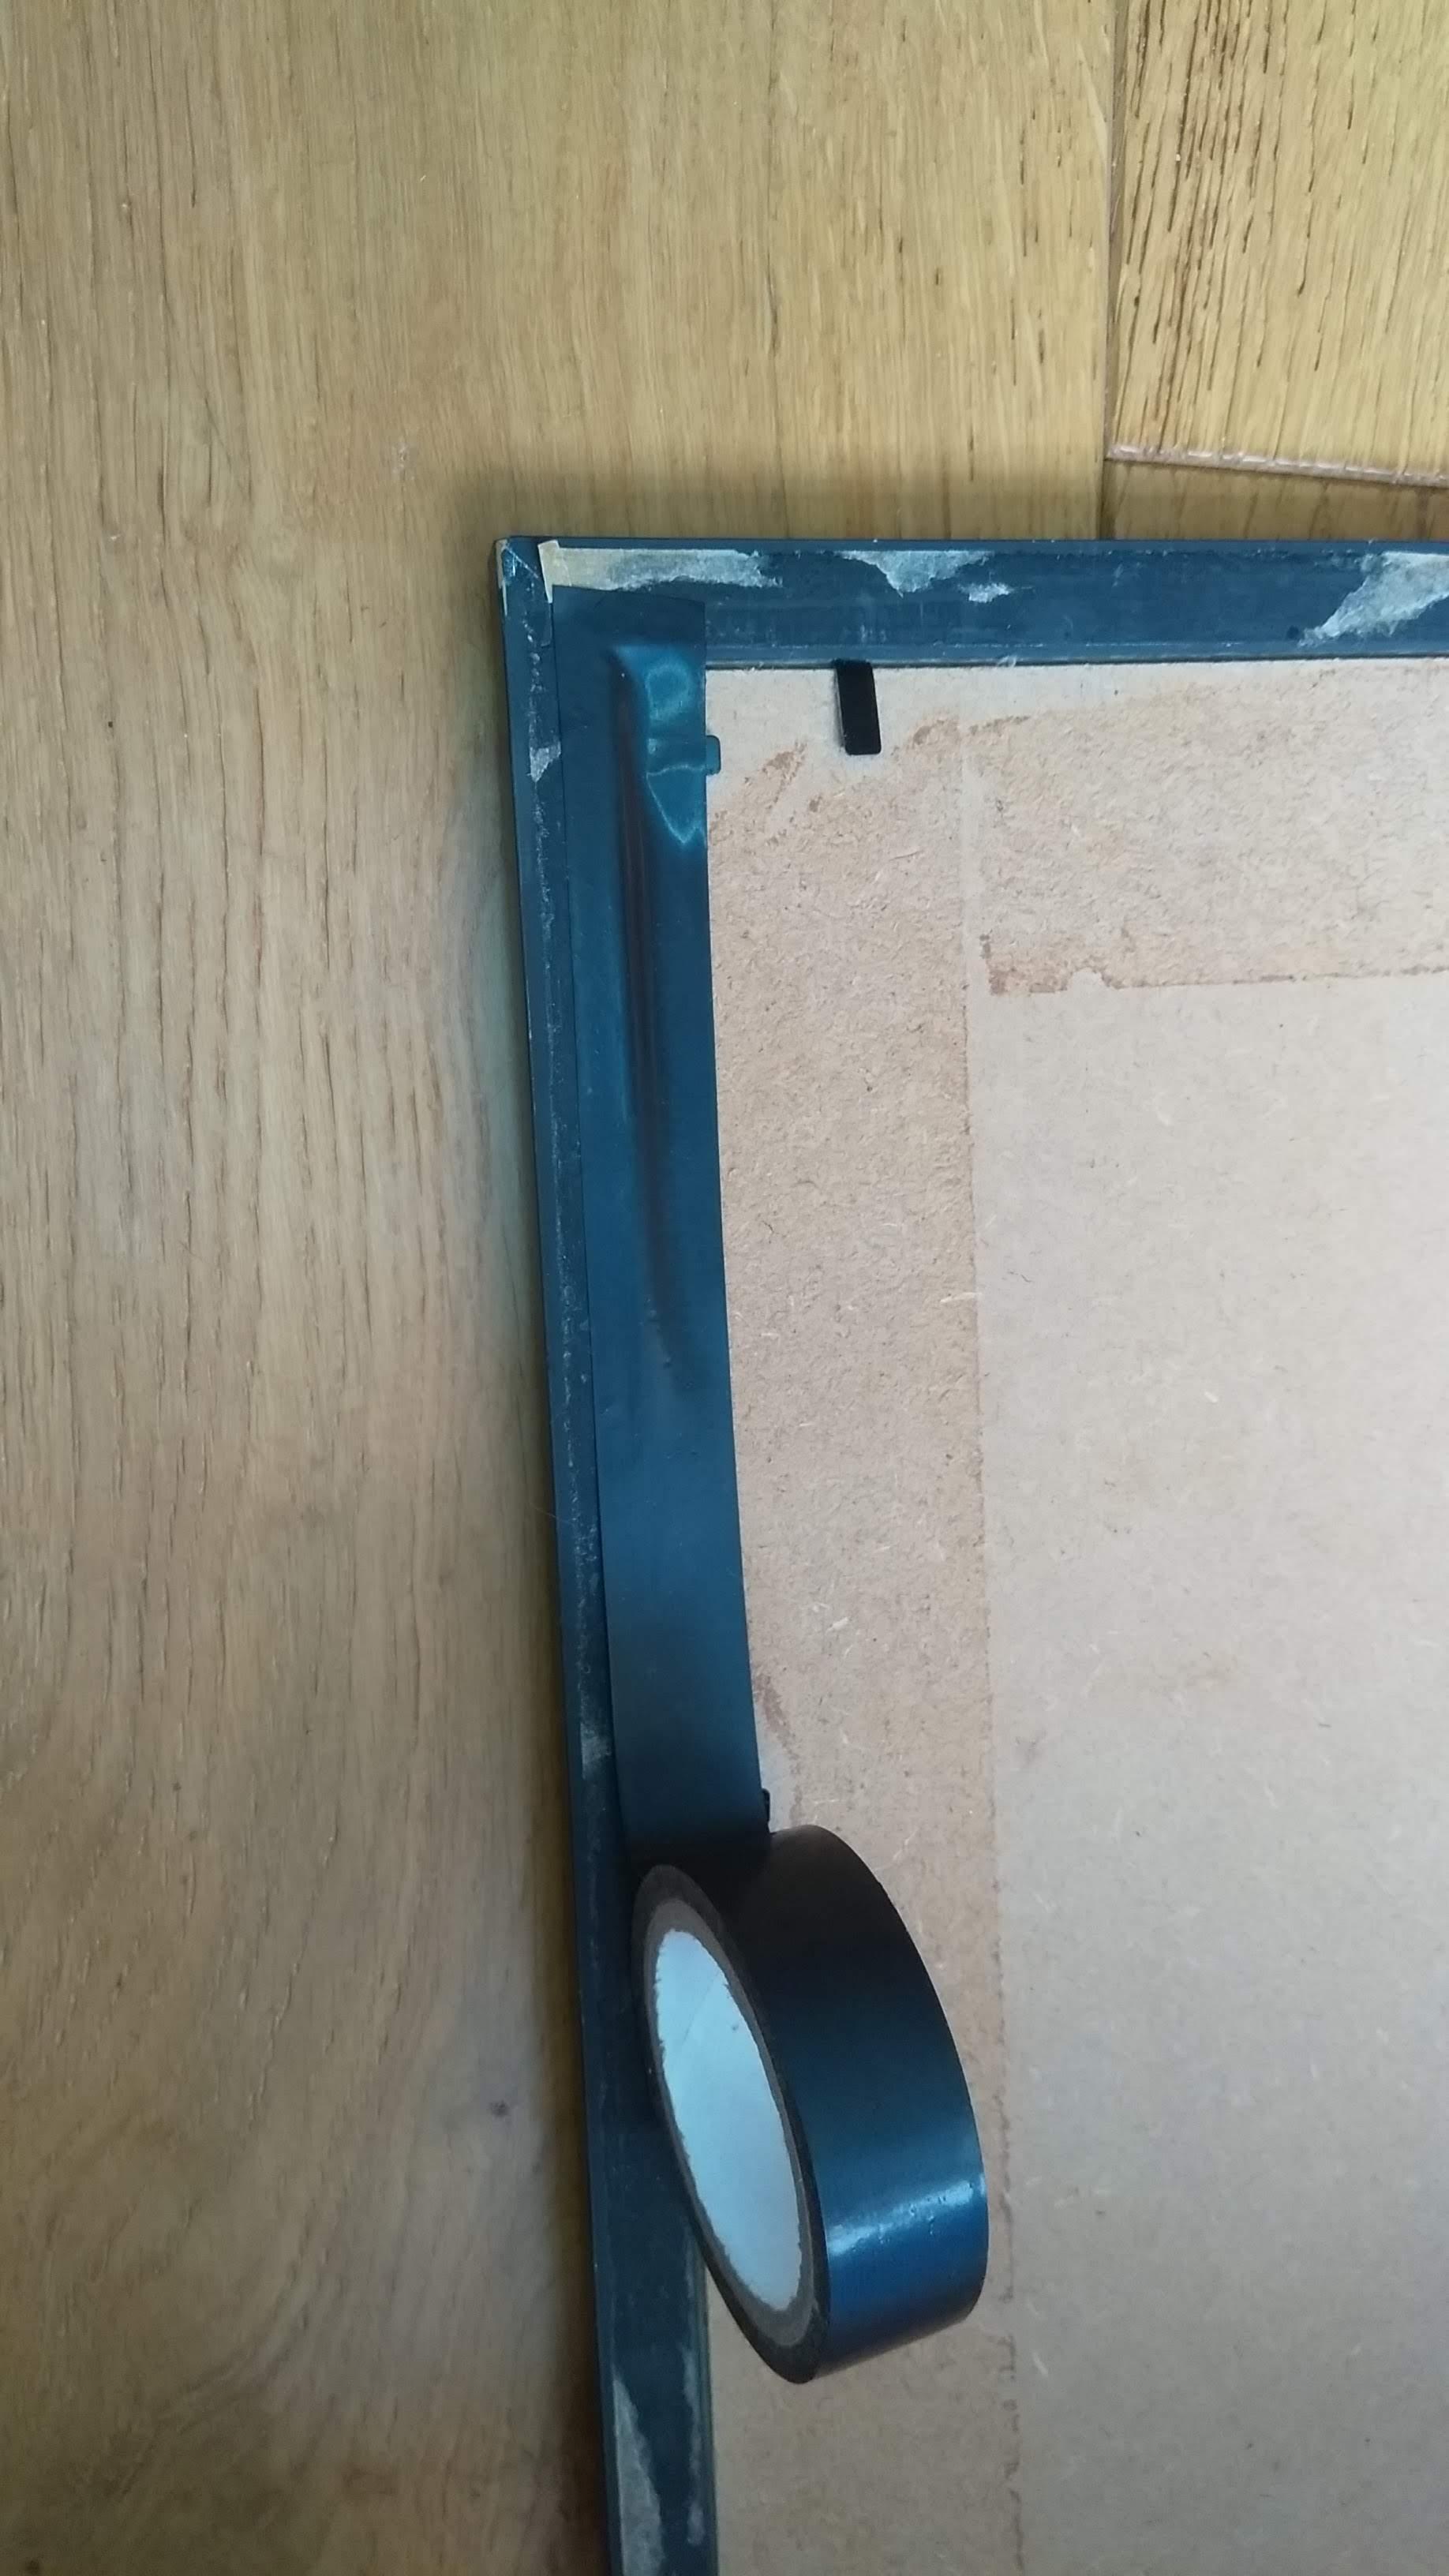
Reposition the tabs or glazier’s points if necessary to hold the backing in place. You may want to tape over the joint between the backing and the frame moulding to keep the dust out. It’s traditional to use gummed paper tape for that, but parcel tape, masking tape or even electrician's tape will do.
You're done. Hang your new artwork and enjoy.