Thinking in 3D - a D20 Die Three Ways
by ChristinaGSmith in Workshop > 3D Printing
6612 Views, 31 Favorites, 0 Comments
Thinking in 3D - a D20 Die Three Ways
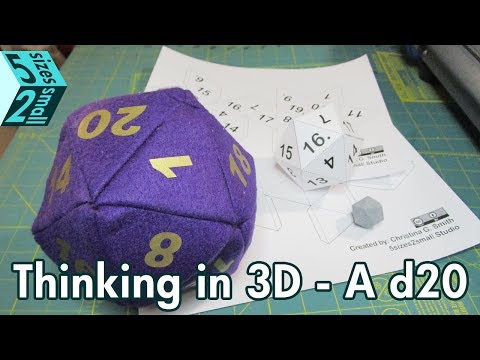
This is an exercise in how to start thinking of your projects three dimensionally. Being able to break down a project into it's components is critical for makers and creators. Often, when you first become introduced to a new medium like sewing, 3D printing, and CAD software there is a slight learning curve. Not all of these mediums always work in the way you expect, but with a little practice things get easier, especially when see the connection to another medium that seemed difficult in the past.
I like to think of this as leveling up three dimensionally! It's a great confidence booster, and opens your work up to a higher level of creation.
I picked a d20 because it is a familiar shape, and it is a great introduction for those who have never tried CAD software, 3d printing, paper craft, or making a stuffed toy.
What we'll be using:
Software
- Tinkercad - Browser Based 3D CAD Software - Free
- Fusion 360 - 3d CAD software - Free Startup license for personal use
- Ulitmaker Cura - 3d Model Slicing Software - Free
- Pepakura Designer - $38 + Tax (Free to create a printable version but you cannot save your work unless you buy the license.)
- Inkscape - Vector Editing Software - Free (Optional: Used to add numbers to your papercraft design yourself.)
Equipment:
- 3D Printer - I am using a Powerspec i3 Mini Printer
- Laser Printer (ink jet is acceptable) - I am using a Brother MFC-7460DN
- Computerized Plotter (optional) - I am using a UScutter Titan Vinyl Cutter
- Iron (Optional for heat transfer vinyl)
- Hobby Knife
- Ruler (Optional)
- Cutting Mat
- Fabric Scissors
- Sewing Machine
- Computer (this may seem obvious, but you cannot do all of these things on a smartphone.)
Material:
- Felt (Fabric is acceptable)
- Polyfill (Filling from a cheap stuffed animal from a thrift store would work too.)
- Heat Transfer Vinyl (Vinyl decals could work, but would easily pull off over time. A fabric marker or paints are also an option.)
- Thread
- Cardstock (Copy paper can work, but is not as durable)
- Glue
- PLA Filament 1.75mm
Please feel free to do as much or as little of this project that you would like. I have provided all the files for each step, and details if you want to follow along.
You can follow along with the Youtube video for each step.
Creating a D20 in Tinkercad
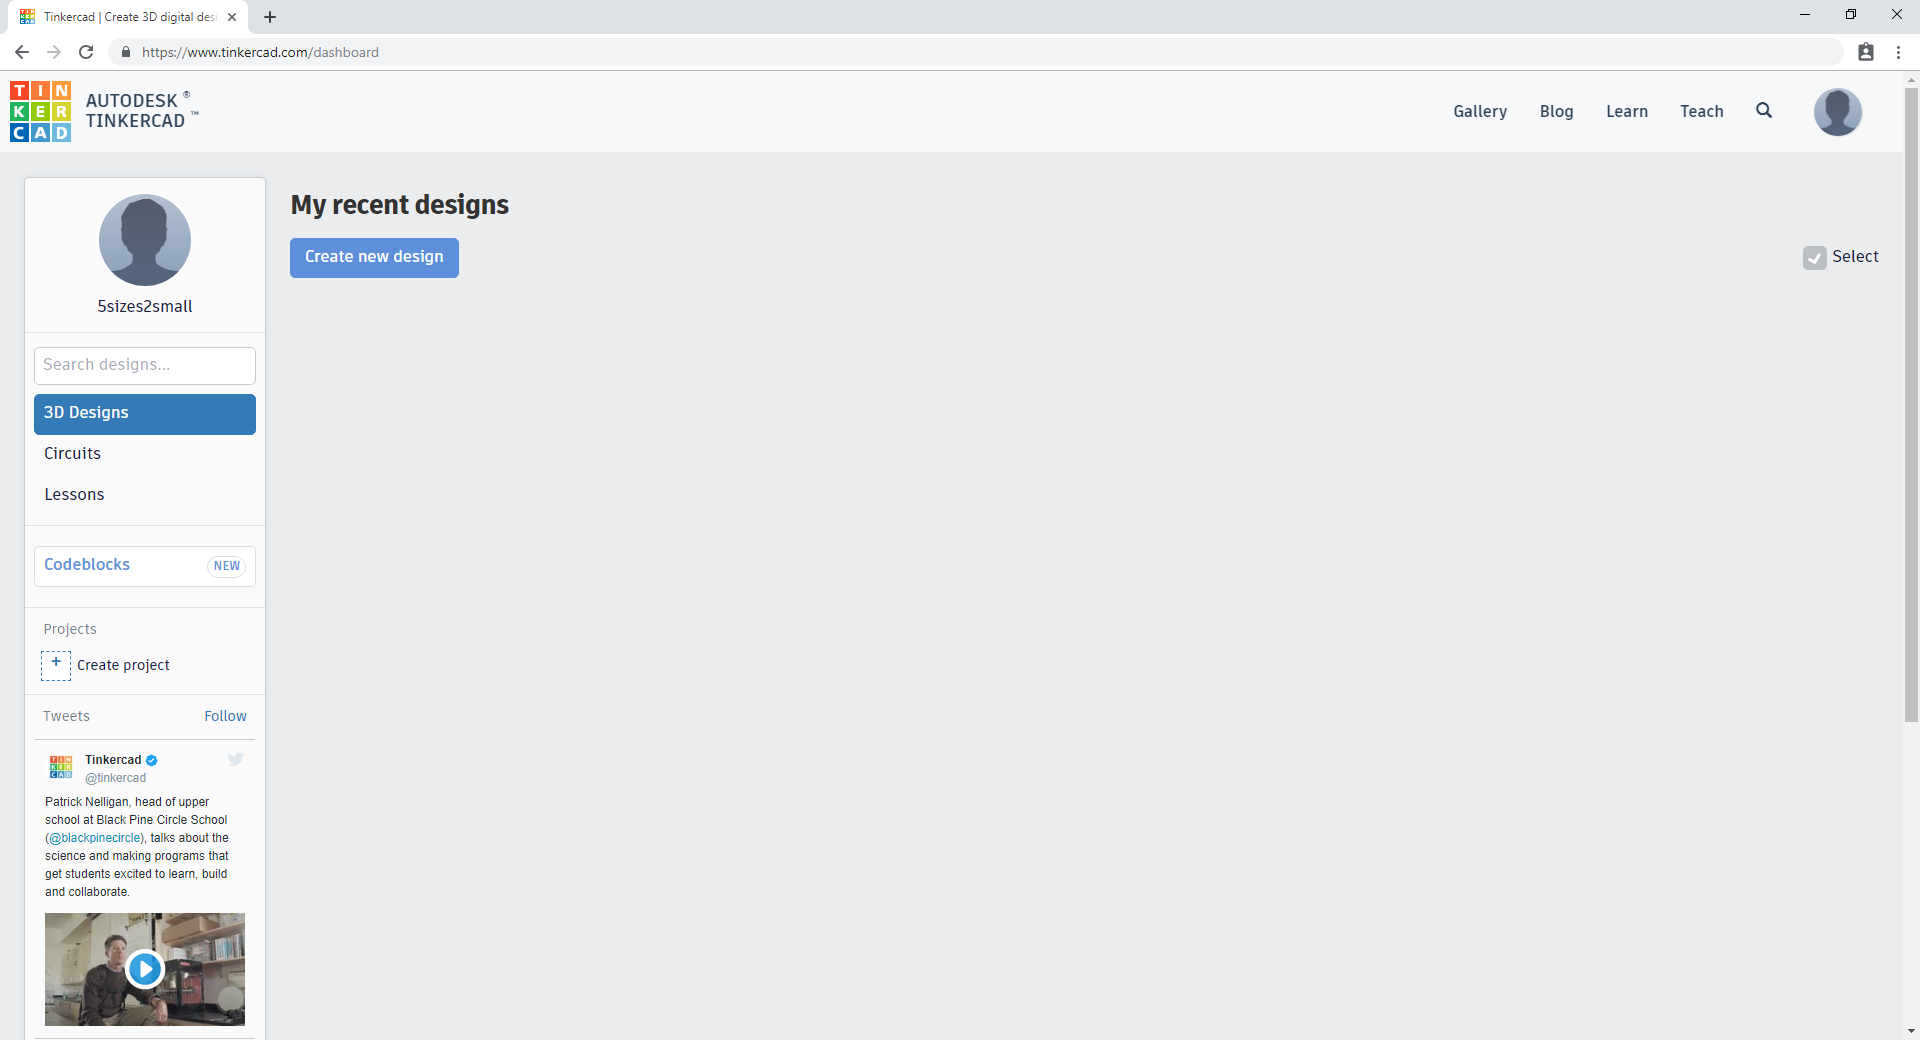
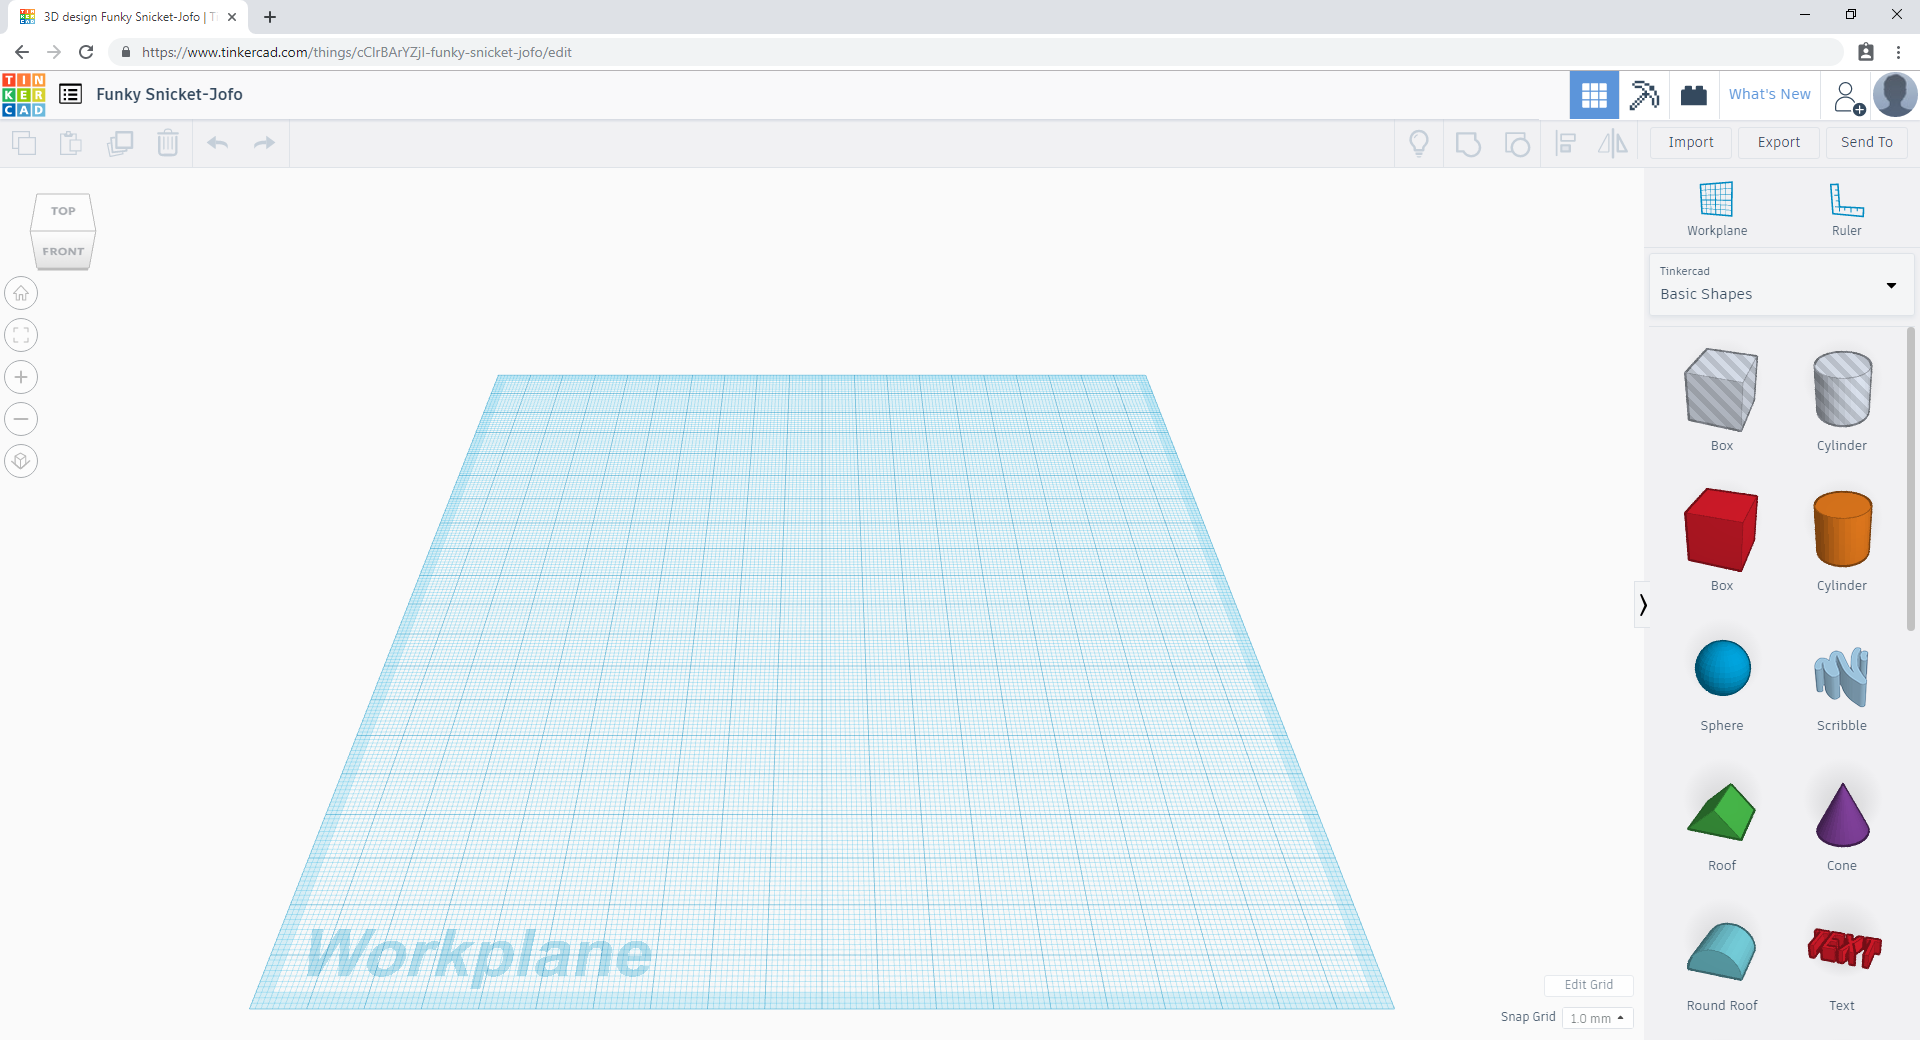
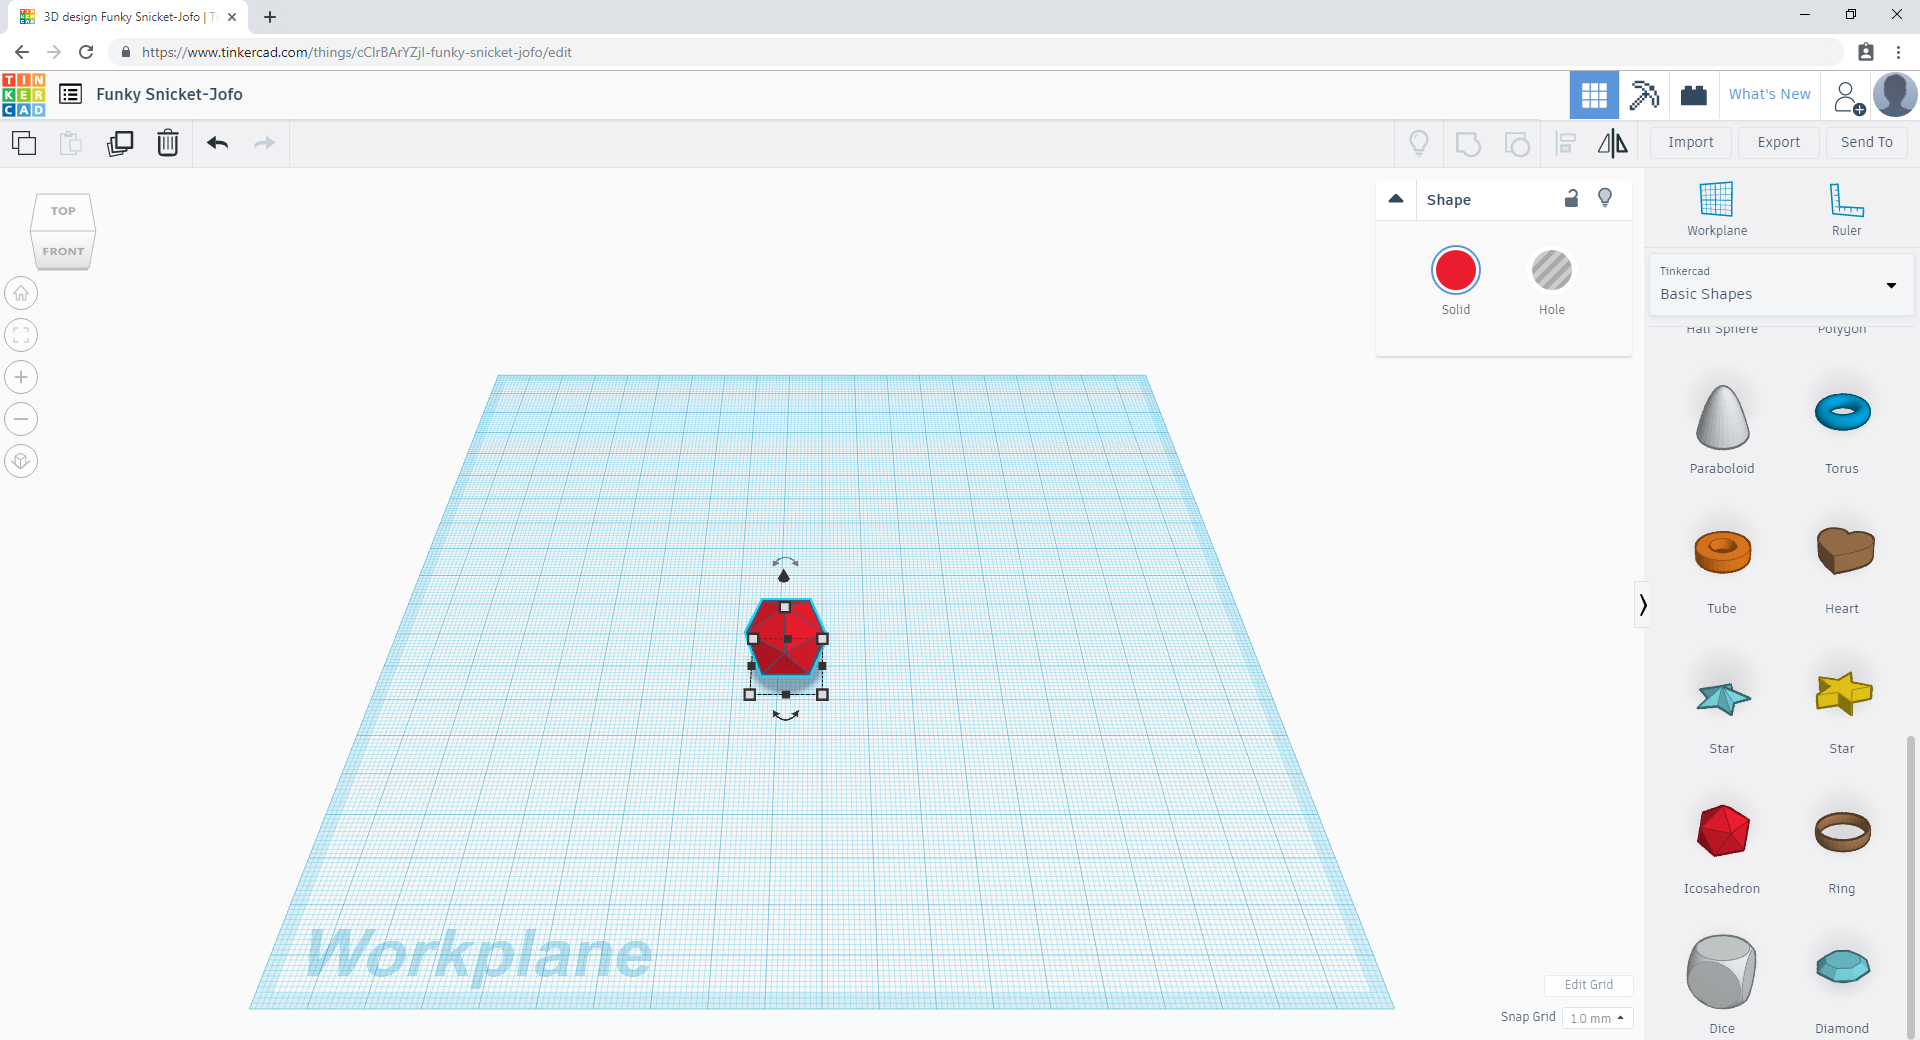
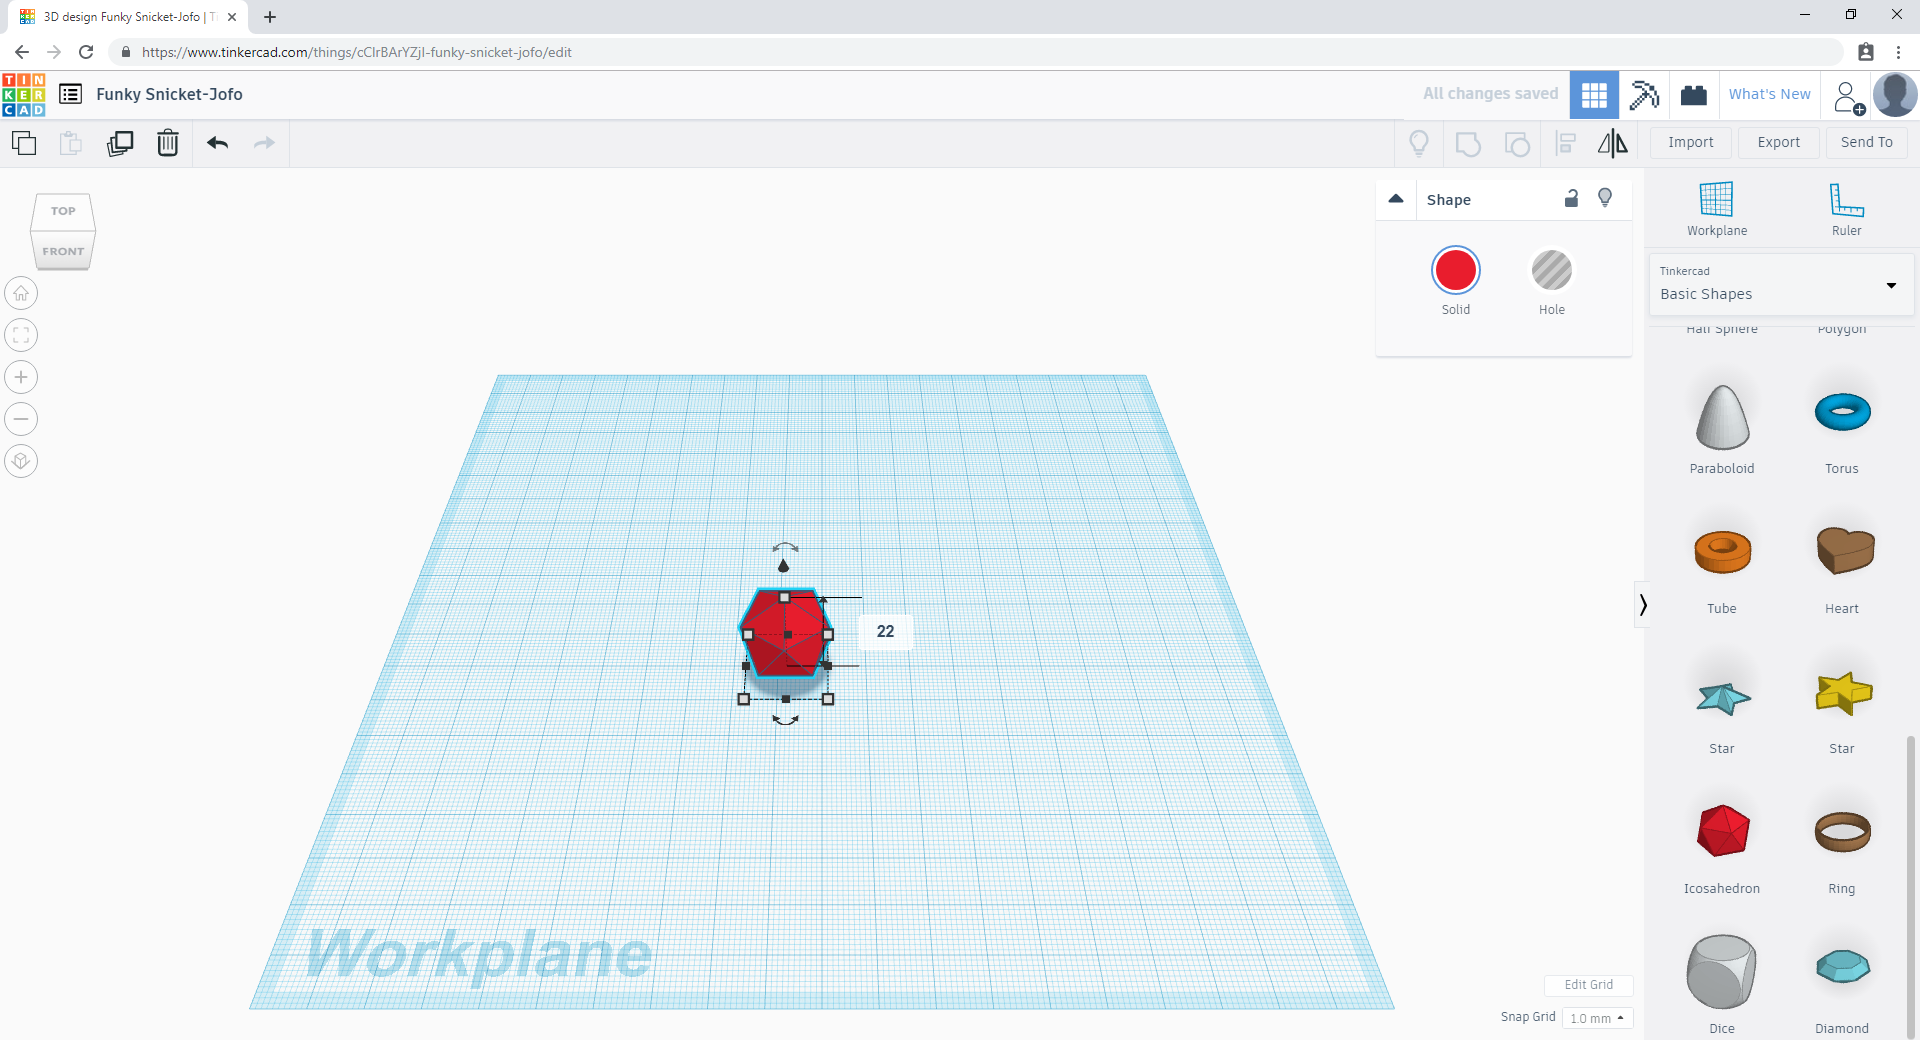
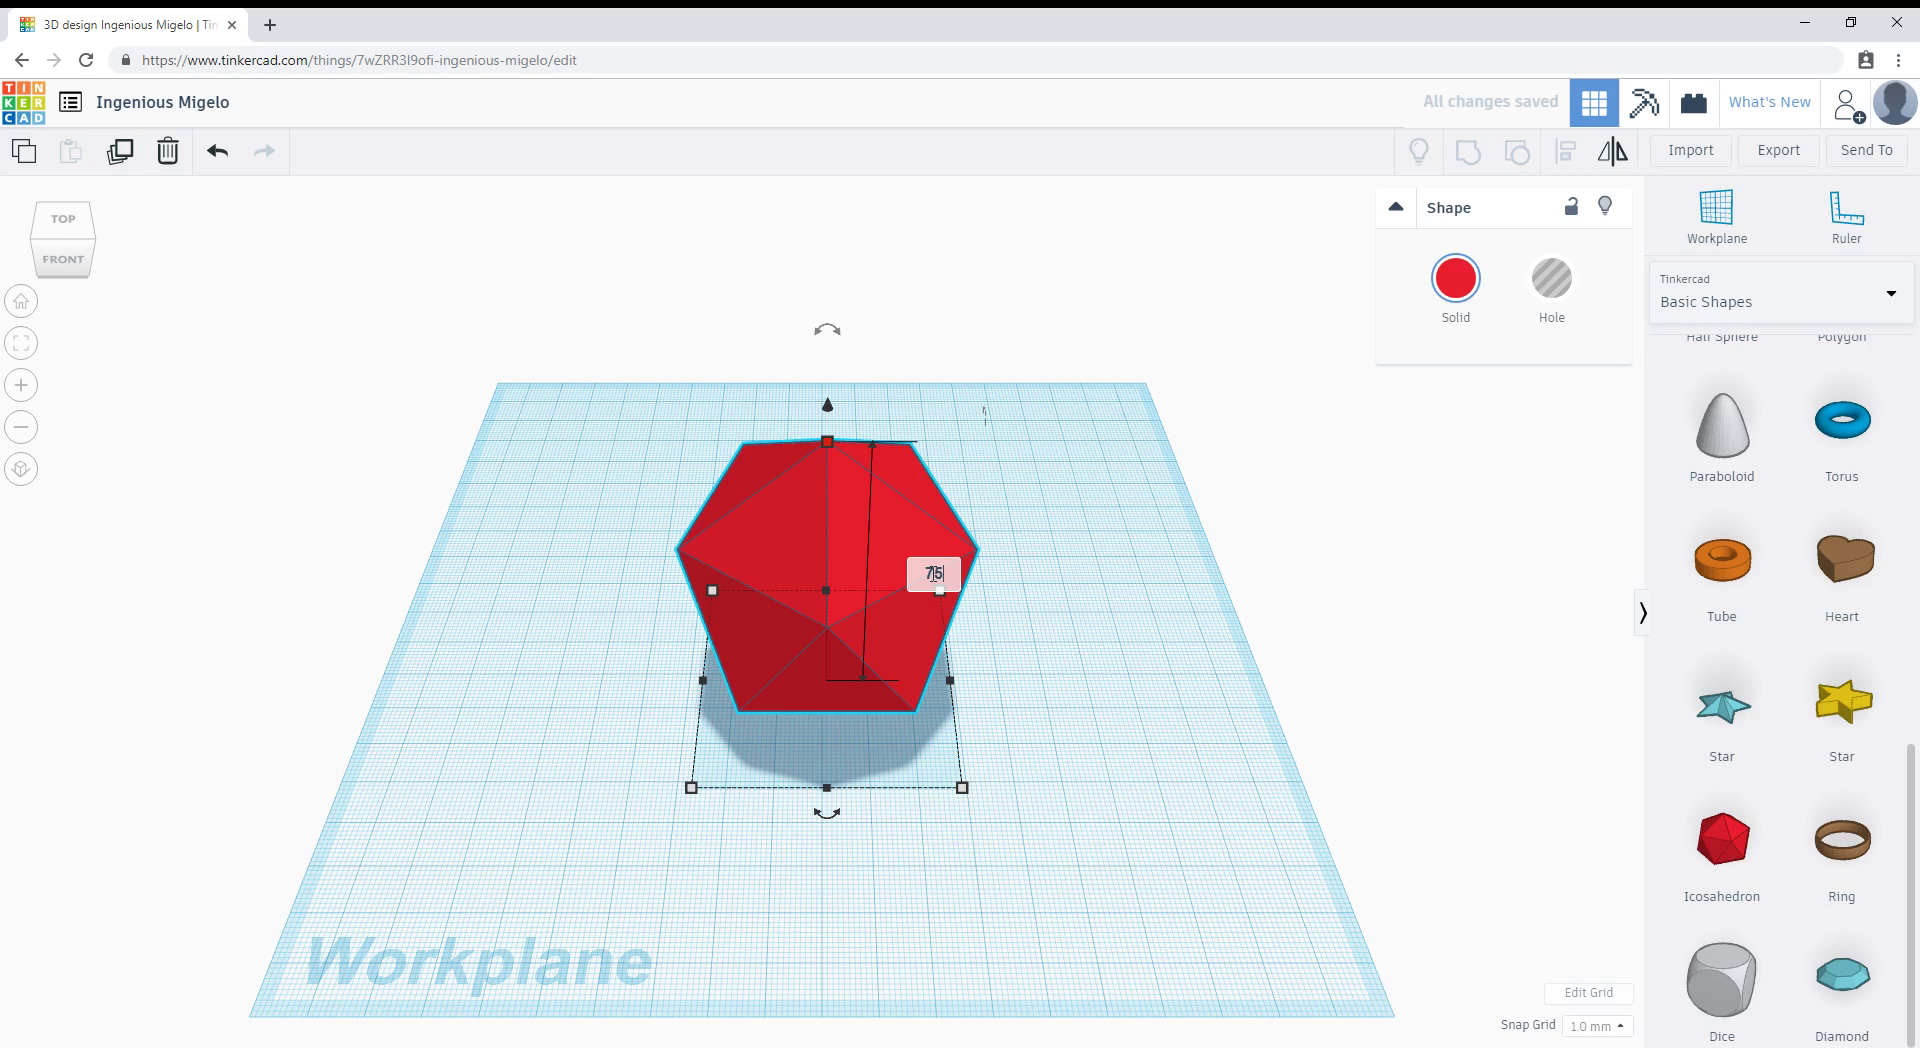
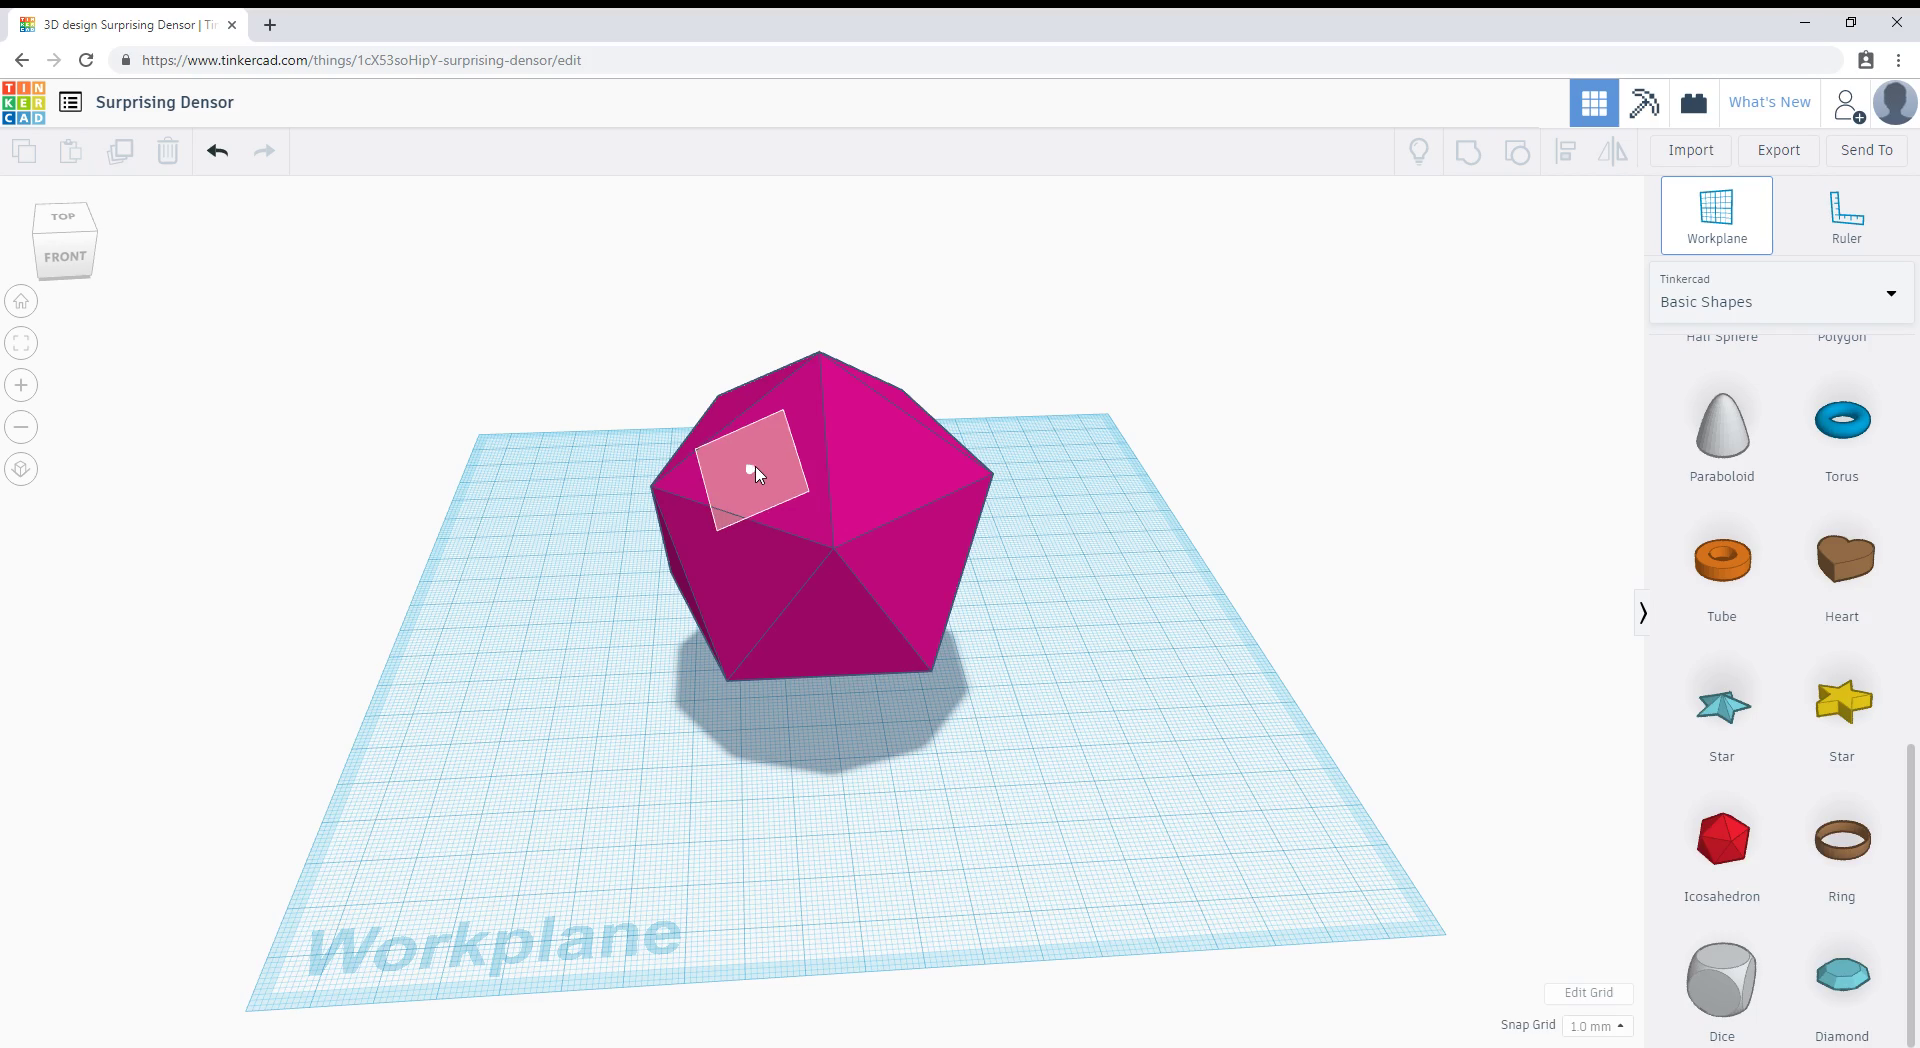
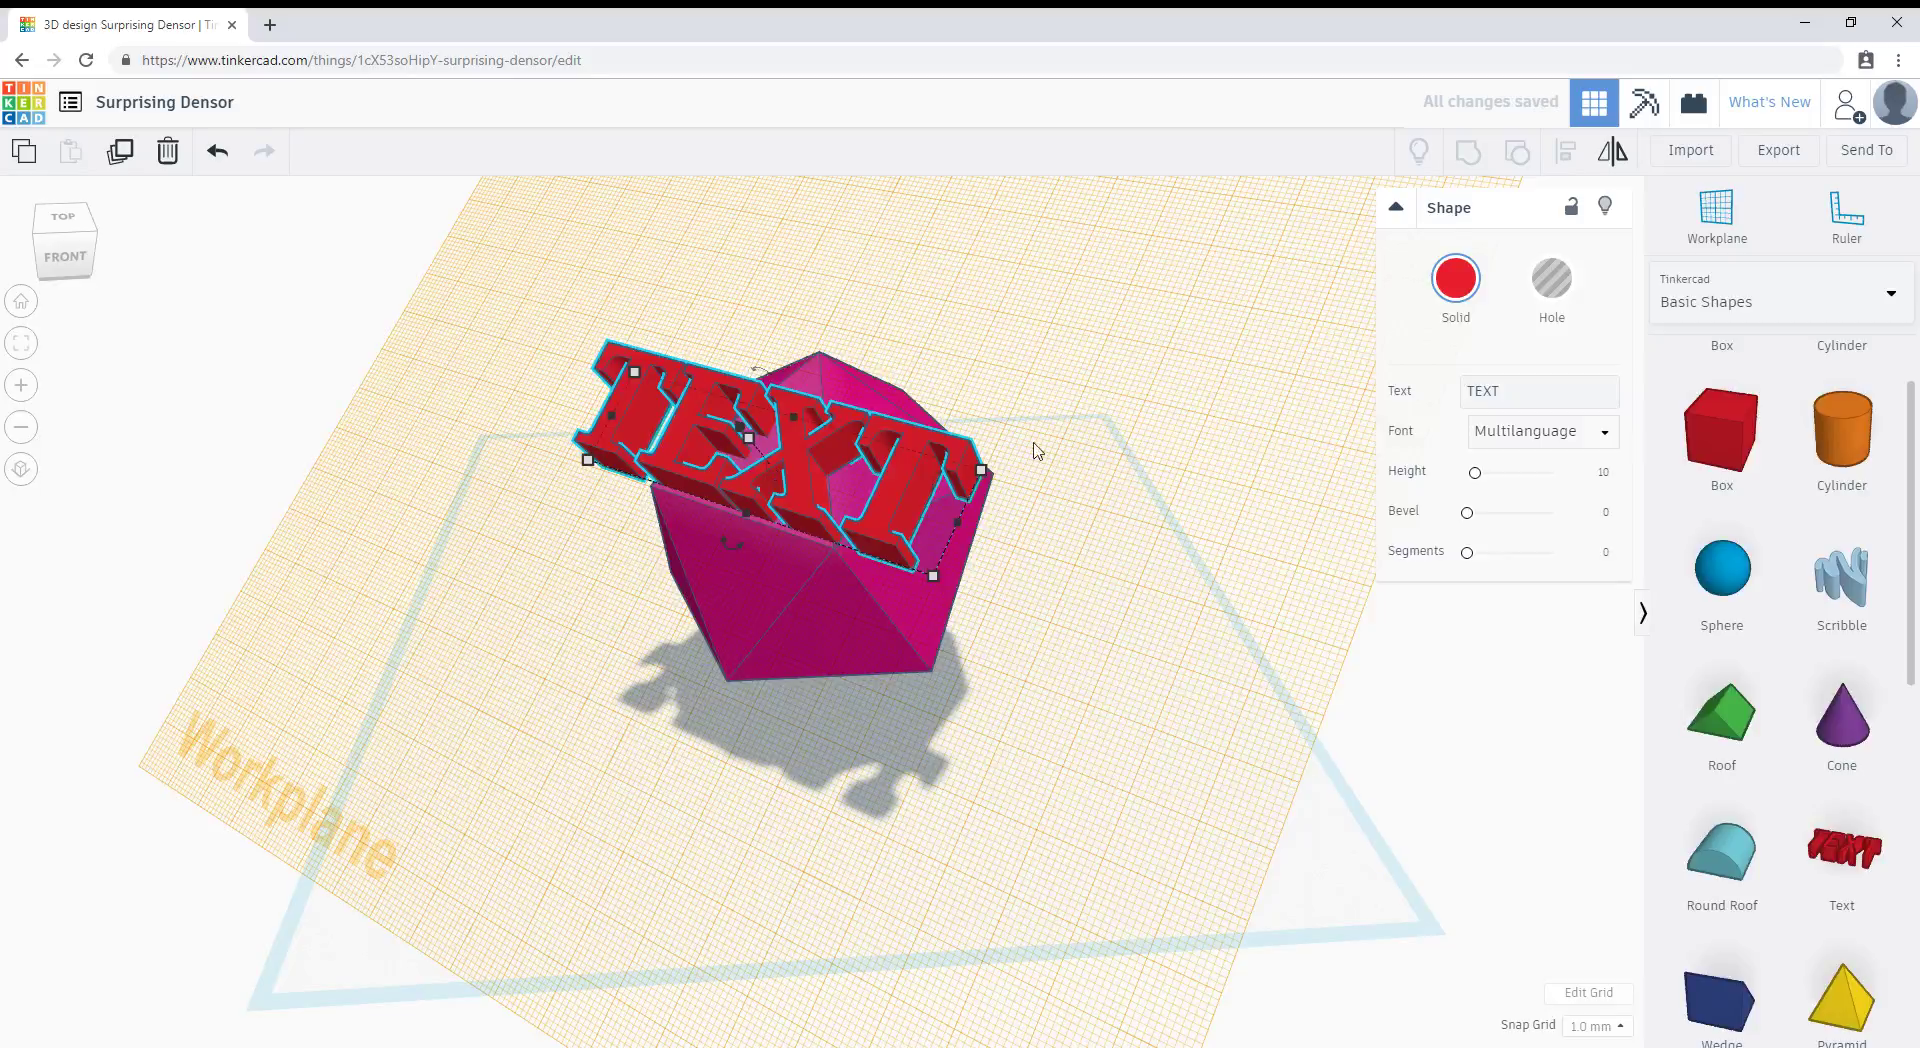
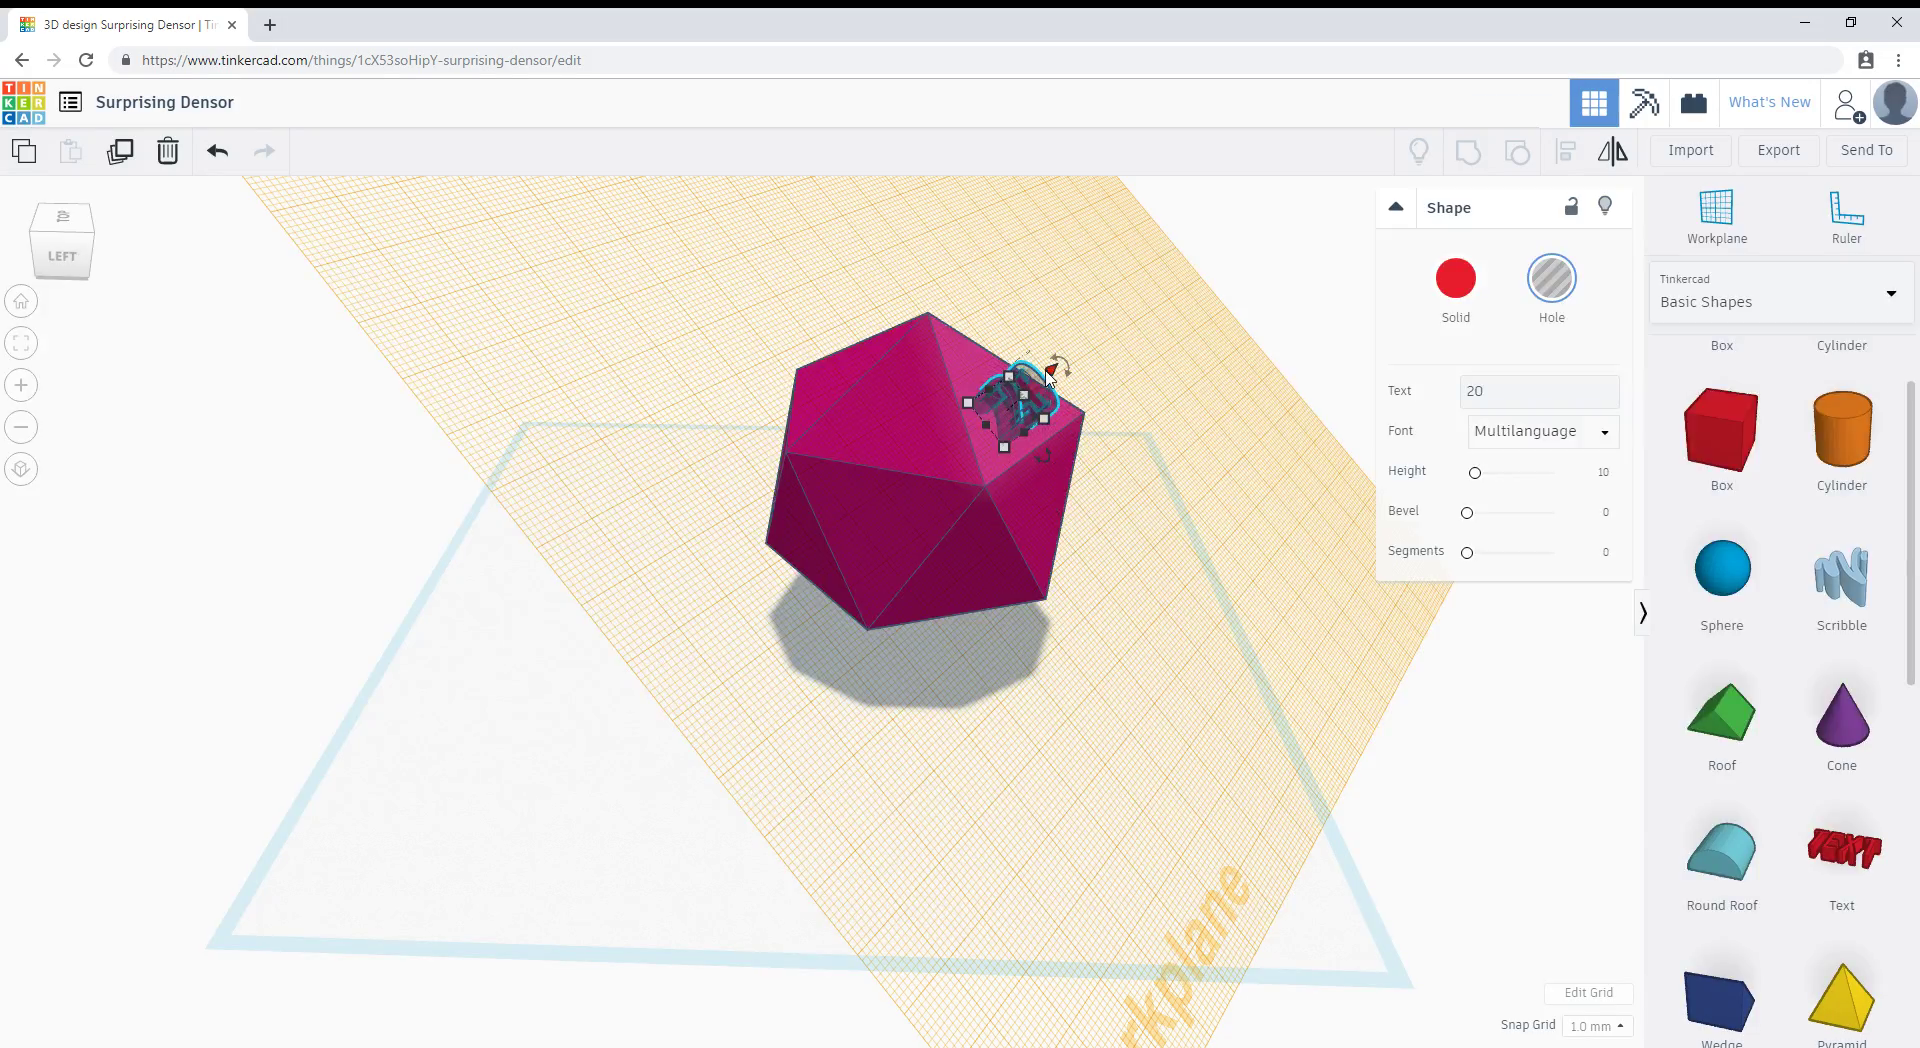
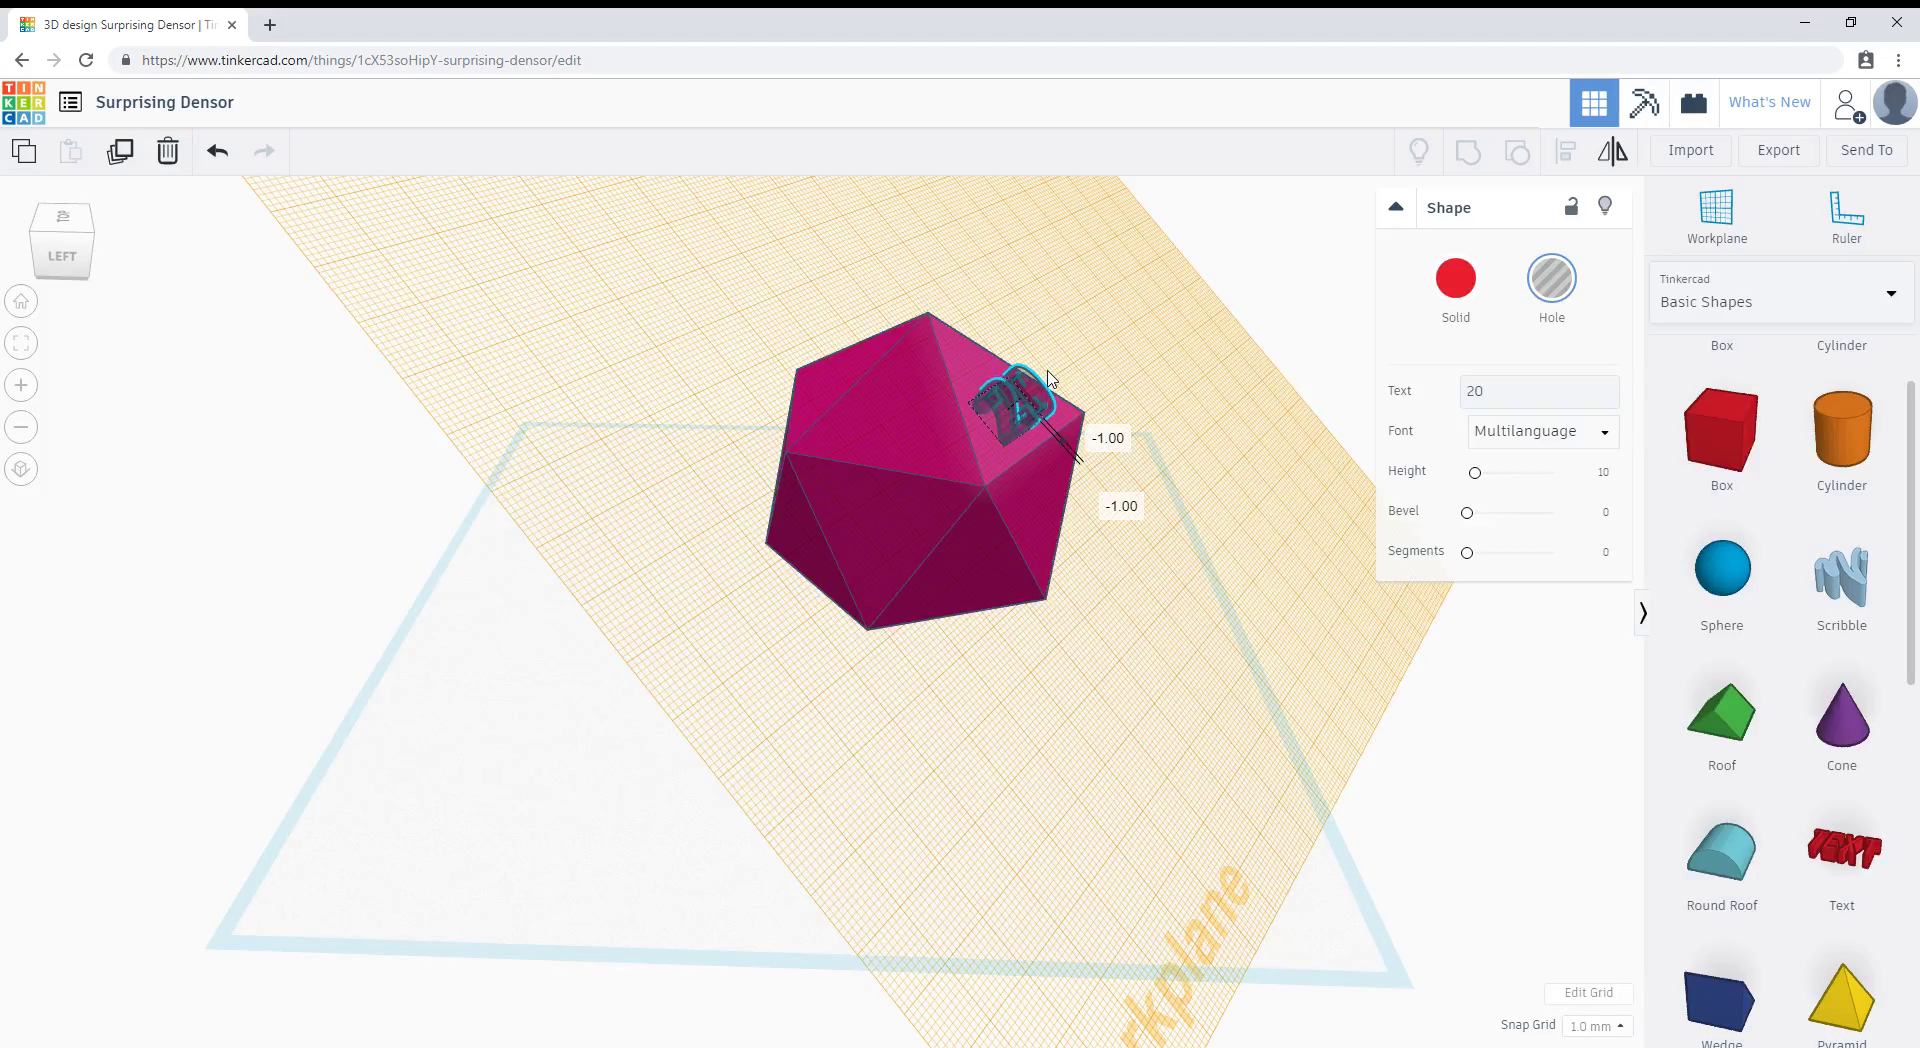
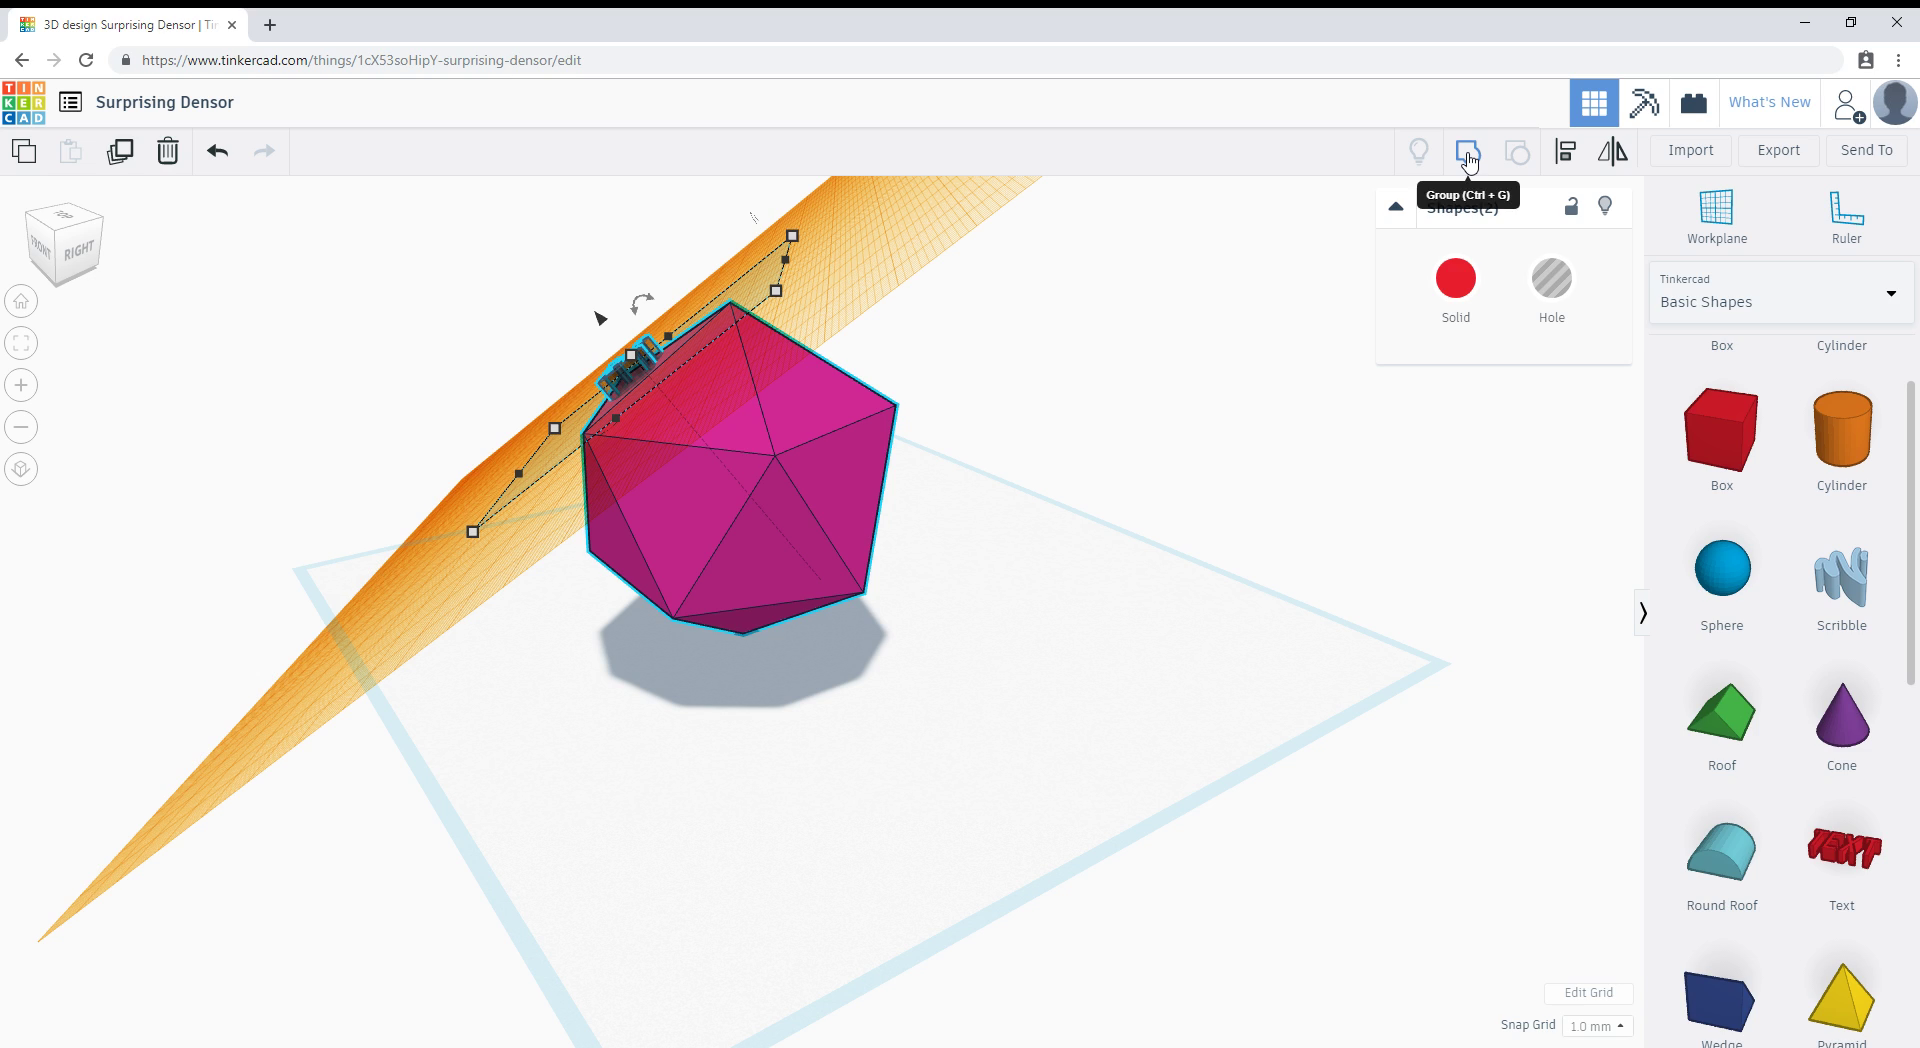
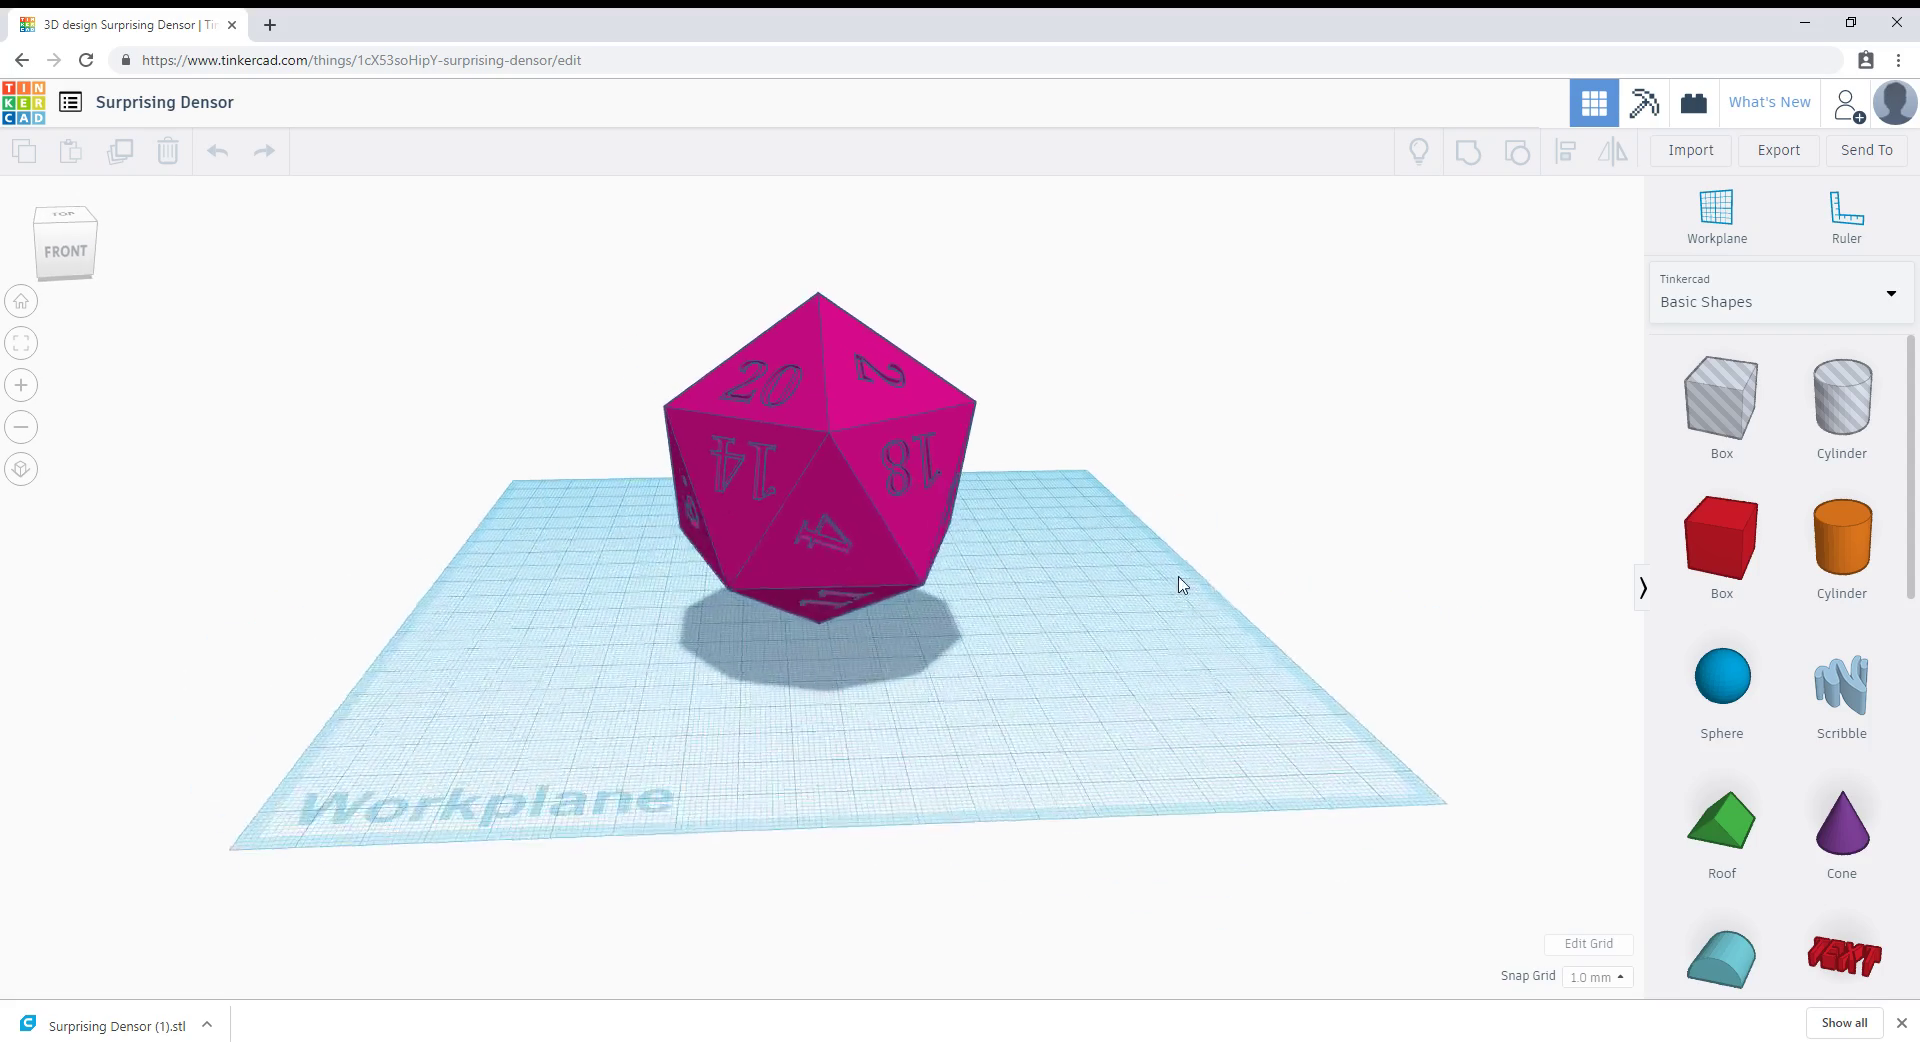
To begin we need to make a 3 dimensional icosahedron which is the shape of a d20.
An easy free way to build 3d models is the Autodesk browser program, Tinkercad.
You will need to make a free account with Autodesk if you have not already.
1. Once you are signed in, on the home screen select "Create New Design" and the page will open into a new workplane.
2. To your right look for "Basic Shapes". Scroll down and find the "icosahedron". Select the shape, then hold and drag the shape onto the workplane. When you release the shape will be placed on the workplane. Do not click away on the workplane after placing it.
3. Hold down shift and select the upper gray dimension square at the top of the shape. By holding shift when you do this, you will scale the shape proportionally. You can drag this to the size you want, or you can click the pop up area as shown in the photos. I then typed in 75mm and hit enter. I made it larger than I needed because it can always be resized later, and I changed the color just for myself it has no bearing on it's printing.
(If you intend to complete this tutorial through to the papercraft be sure to save a blank version of this shape before adding the embedded numbers. Or simply download the attached file in the papercraft step of a blank version.)
4. Now we need to start putting the numbers onto each side of the die. Select "Workplane" near the top on the right. Choose where you will begin and select it that triangle.
5. The workplane will change. Now in the "Basic Shapes" select the "Text" option and drag it onto the workplane just like you did the icosahedron.
6. On the right side of your screen you will see the "Solid" and "Hole" options box. Click on the "Hole" which will make the text hallow. Below that, you can type in the text you want and choose any other options.
7. You will need to resize the number. Hold shift and select one corner of the text shape to scale it uniformly. You may also rotate it during this step.
8. To embed the text into the shape look for a small cone shape. You may need to right click and drag along the workplane so you can see your design from different angles to find the cone. If you select the cone shape then drag that cone in or out it will move the text above or below the workplane. We want it only go -1mm deep into the die shape. The deeper the letters the harder it is for the 3D printer to get those numbers printed legibly on the angles of the die.
9. Now we need to combine the die and text. While the number is active hold shift and select the die shape so both are active. Click the the group option next to the small light bub on the right side of the screen at the top, or you can press CTRL+G.
10. Now start the whole process over starting from #4 and click on all the 20 different sides, placing your numbers.
11. Click on "Export" to the top right, it is above the area that says workplane and ruler.
12. At the prompt, select how you would like to export. I used .STL which is a widely used file type for 3d printing.
From here you can move on to step 3, unless you are wanting to use fonts that are not available in Tinkercad.
In step 2 I will explain how to turn an object you made in Tinkercad into an object with editable planes in Fusion 360.
Alternative Way to Add Numbers to Your Shape in Fusion 360
Fusion 360 is a very powerful program. It is free to use if you are not a business and just using it for hobby and personal use. Download the program and install it as you would most any other program. If you have a much older computer you may experience issues running it without lag. Fusion 360 is also now available in a browser form.
To start designing in a browser:
1. Go to www.autodesk.com/fusion360
2. Select “Sign In”
3. Select “Fusion Team”
4. Select "Create New Project". You will need to upload the .STL file you created that does not have any numbers embedded into it.
I will be using the program version from this point on.
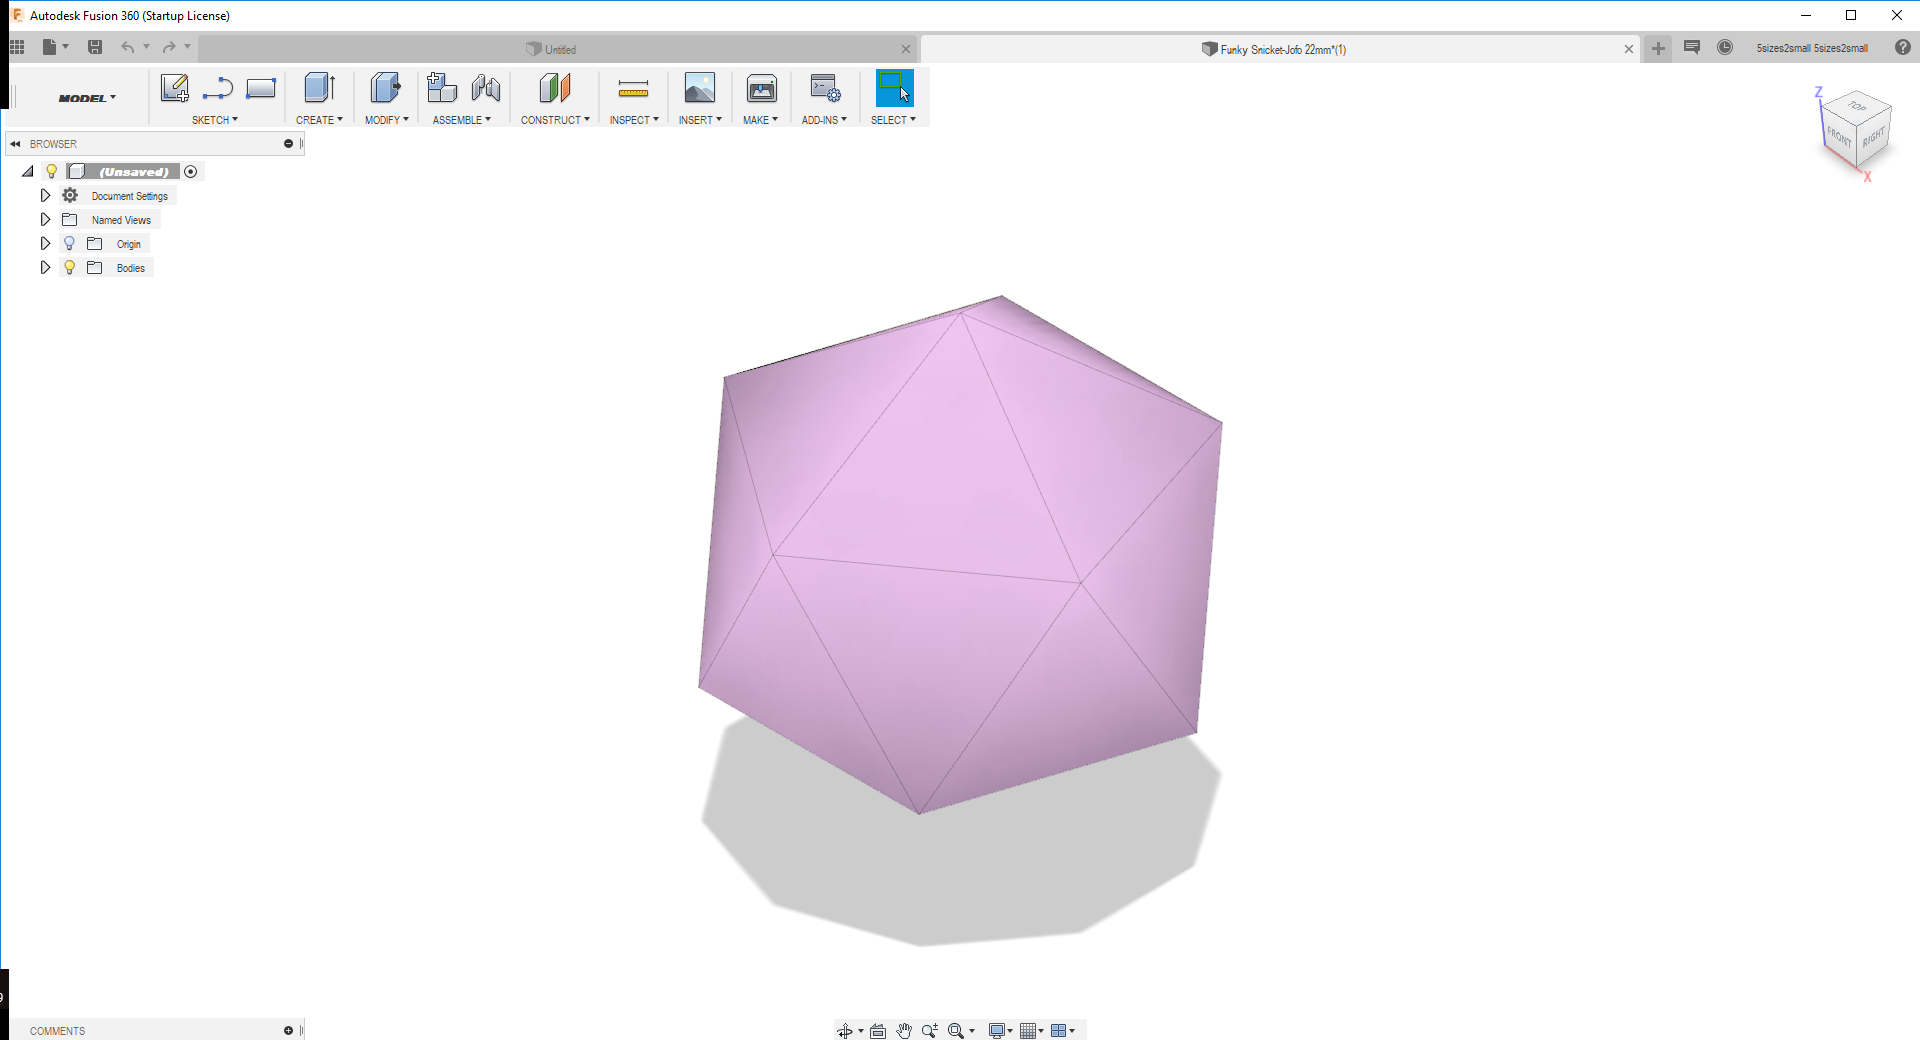
1. Once the program is opened select "File > Open" and find the .STL file you just created in Tinkercad.
2. Select on your shape to make it active.
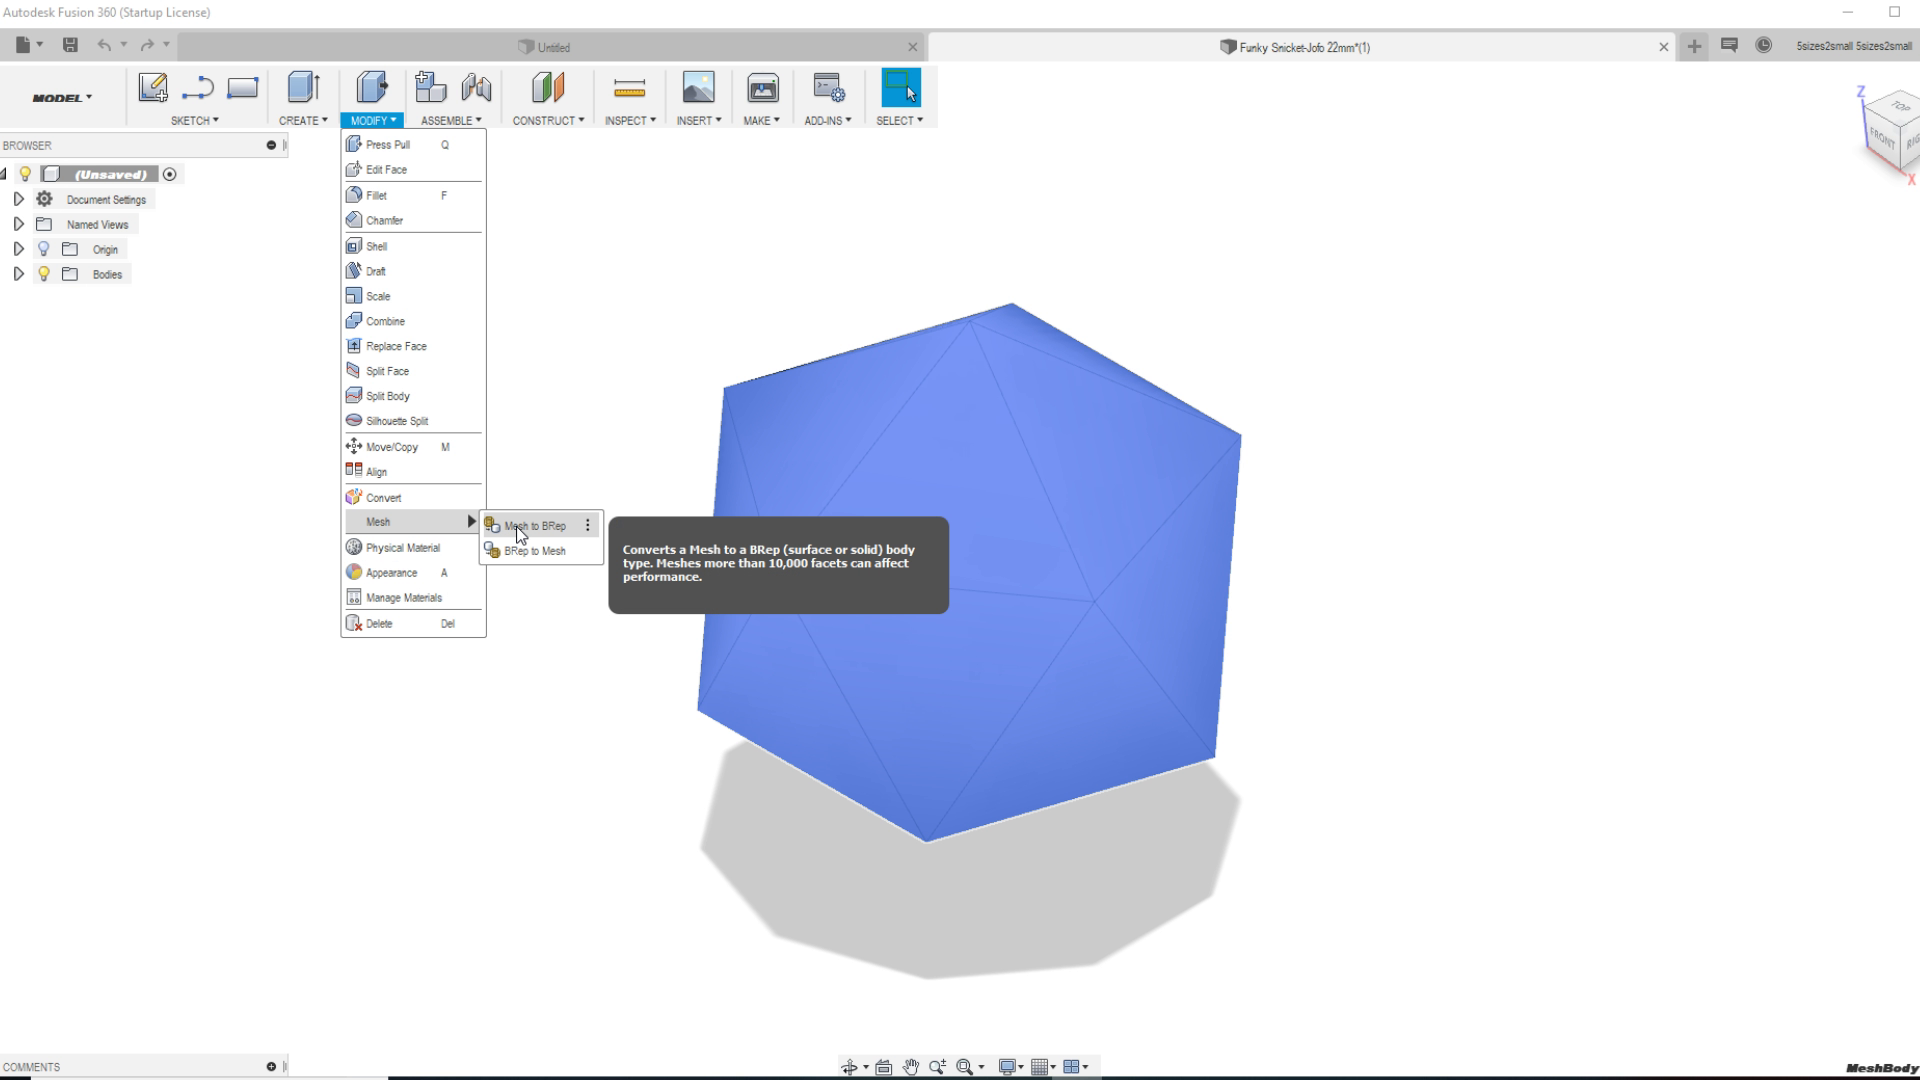
3. On the tool bar at the top click on the word "Modify" it will then drop down with options.
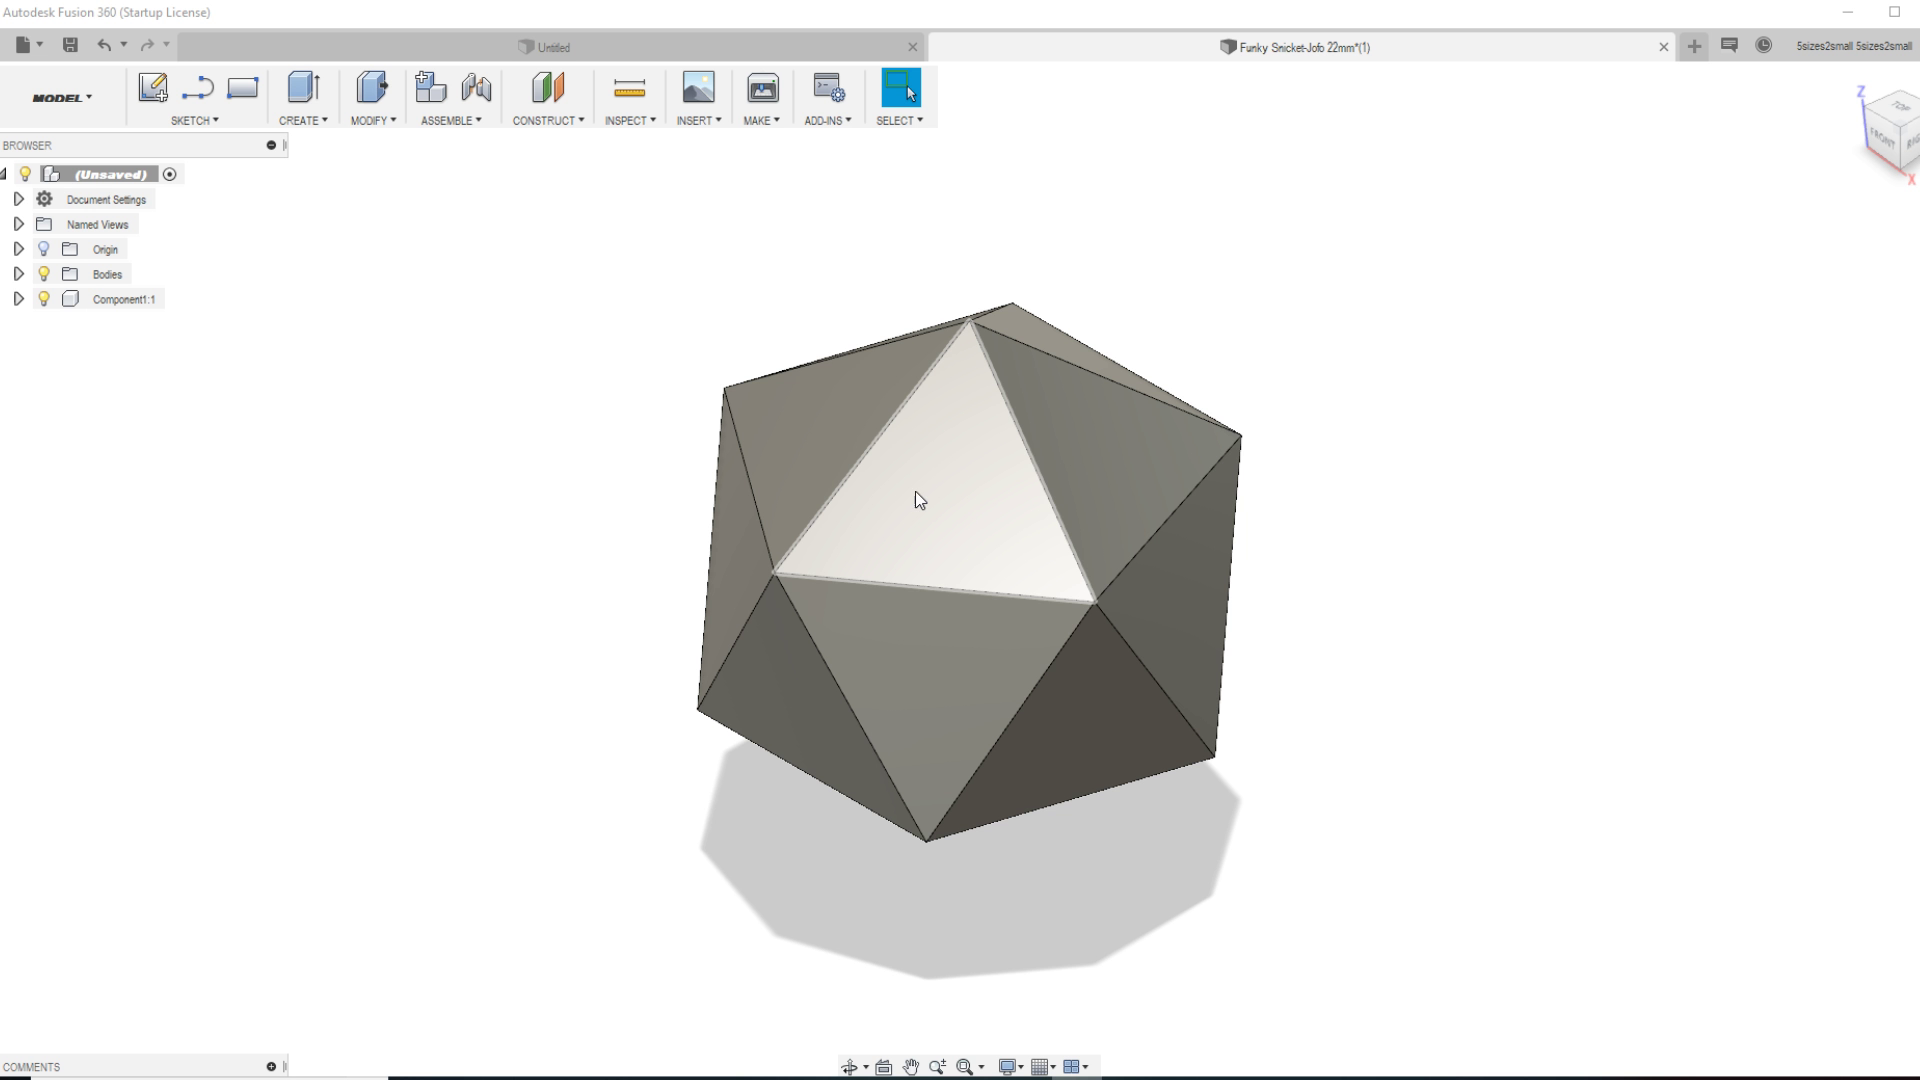
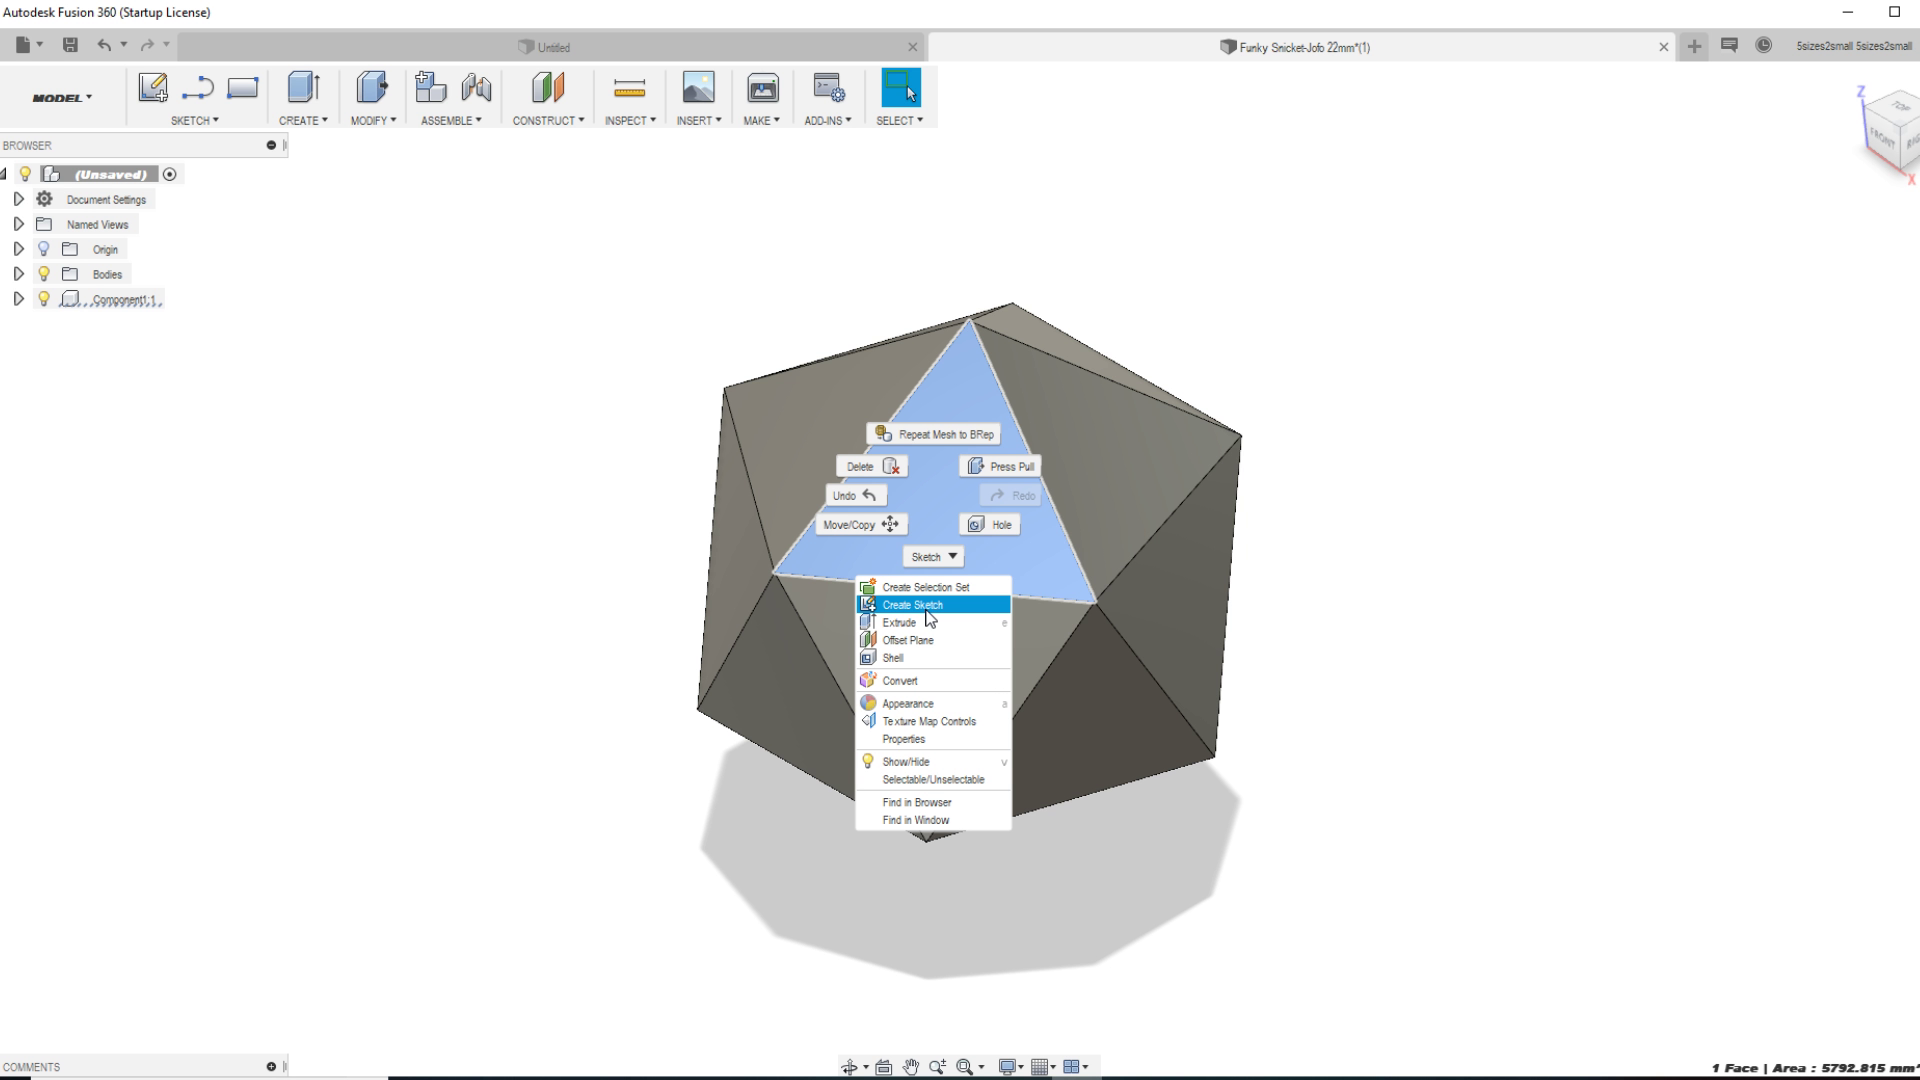
4. Put your cursor on "Mesh" and two options pop up, "Mesh -> BRep or BRep -> Mesh". You want the first option so click on "Mesh -> BRep". It will then become a gray shape with selectable sides. This is important for placing the text on each side without needing to find each exact angle.
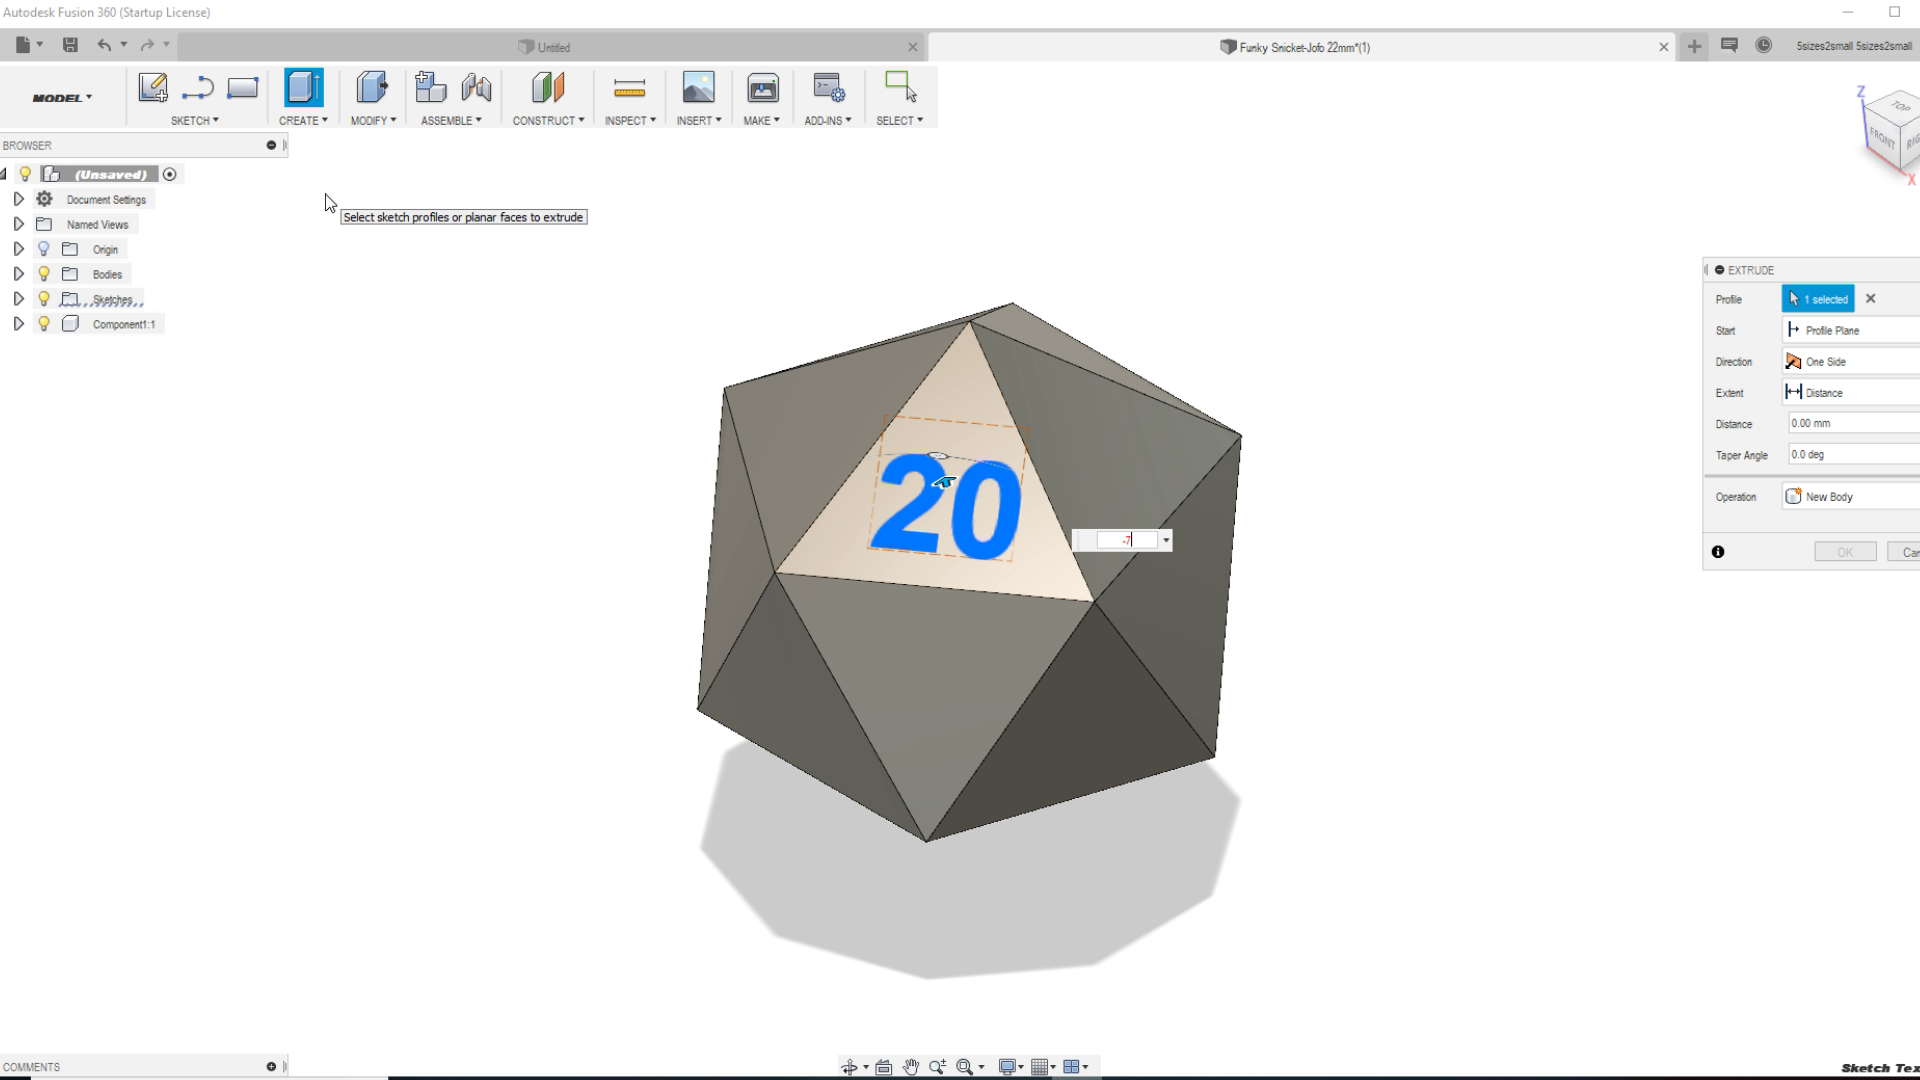
5. Select a triangle plane and then right click on it choosing the "Create New Sketch" option.
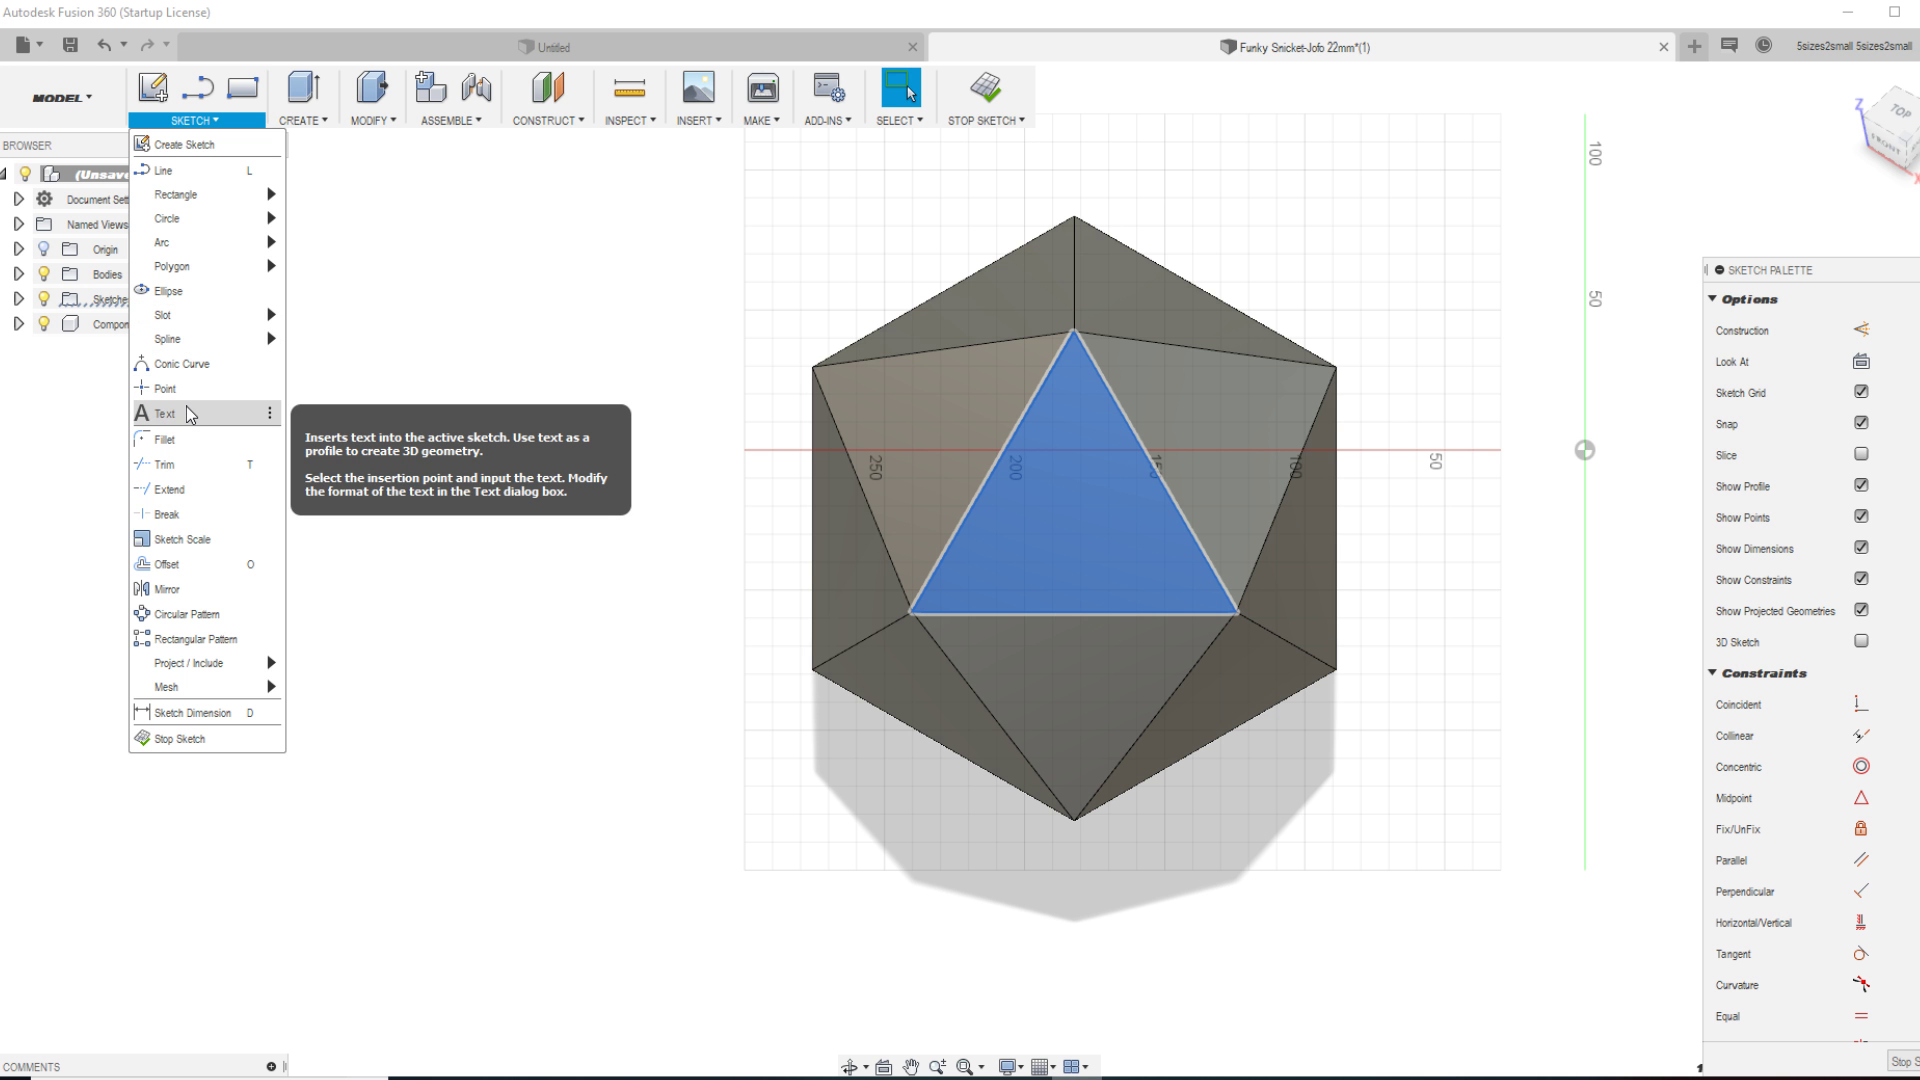
6. Once it has changed the angle and it is still highlighted go to the drop down of "Sketch" and click on "Text".
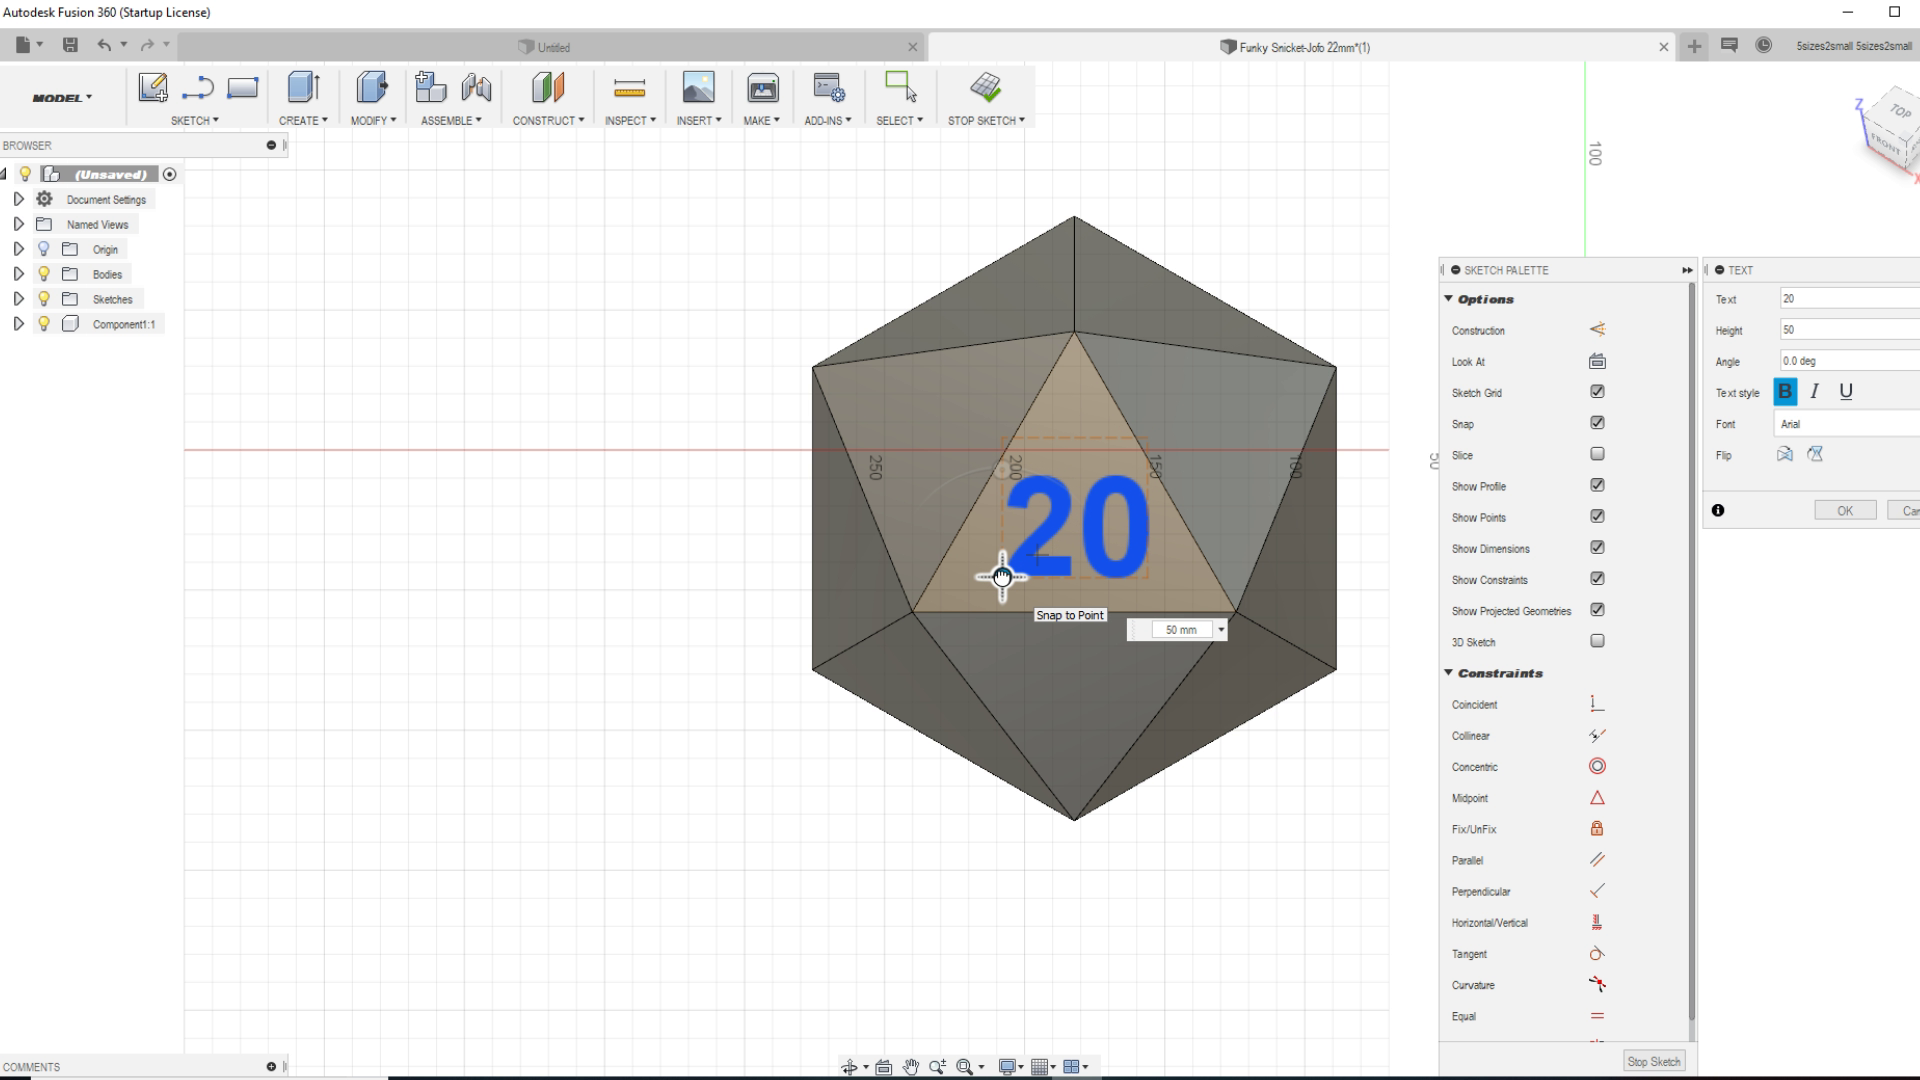
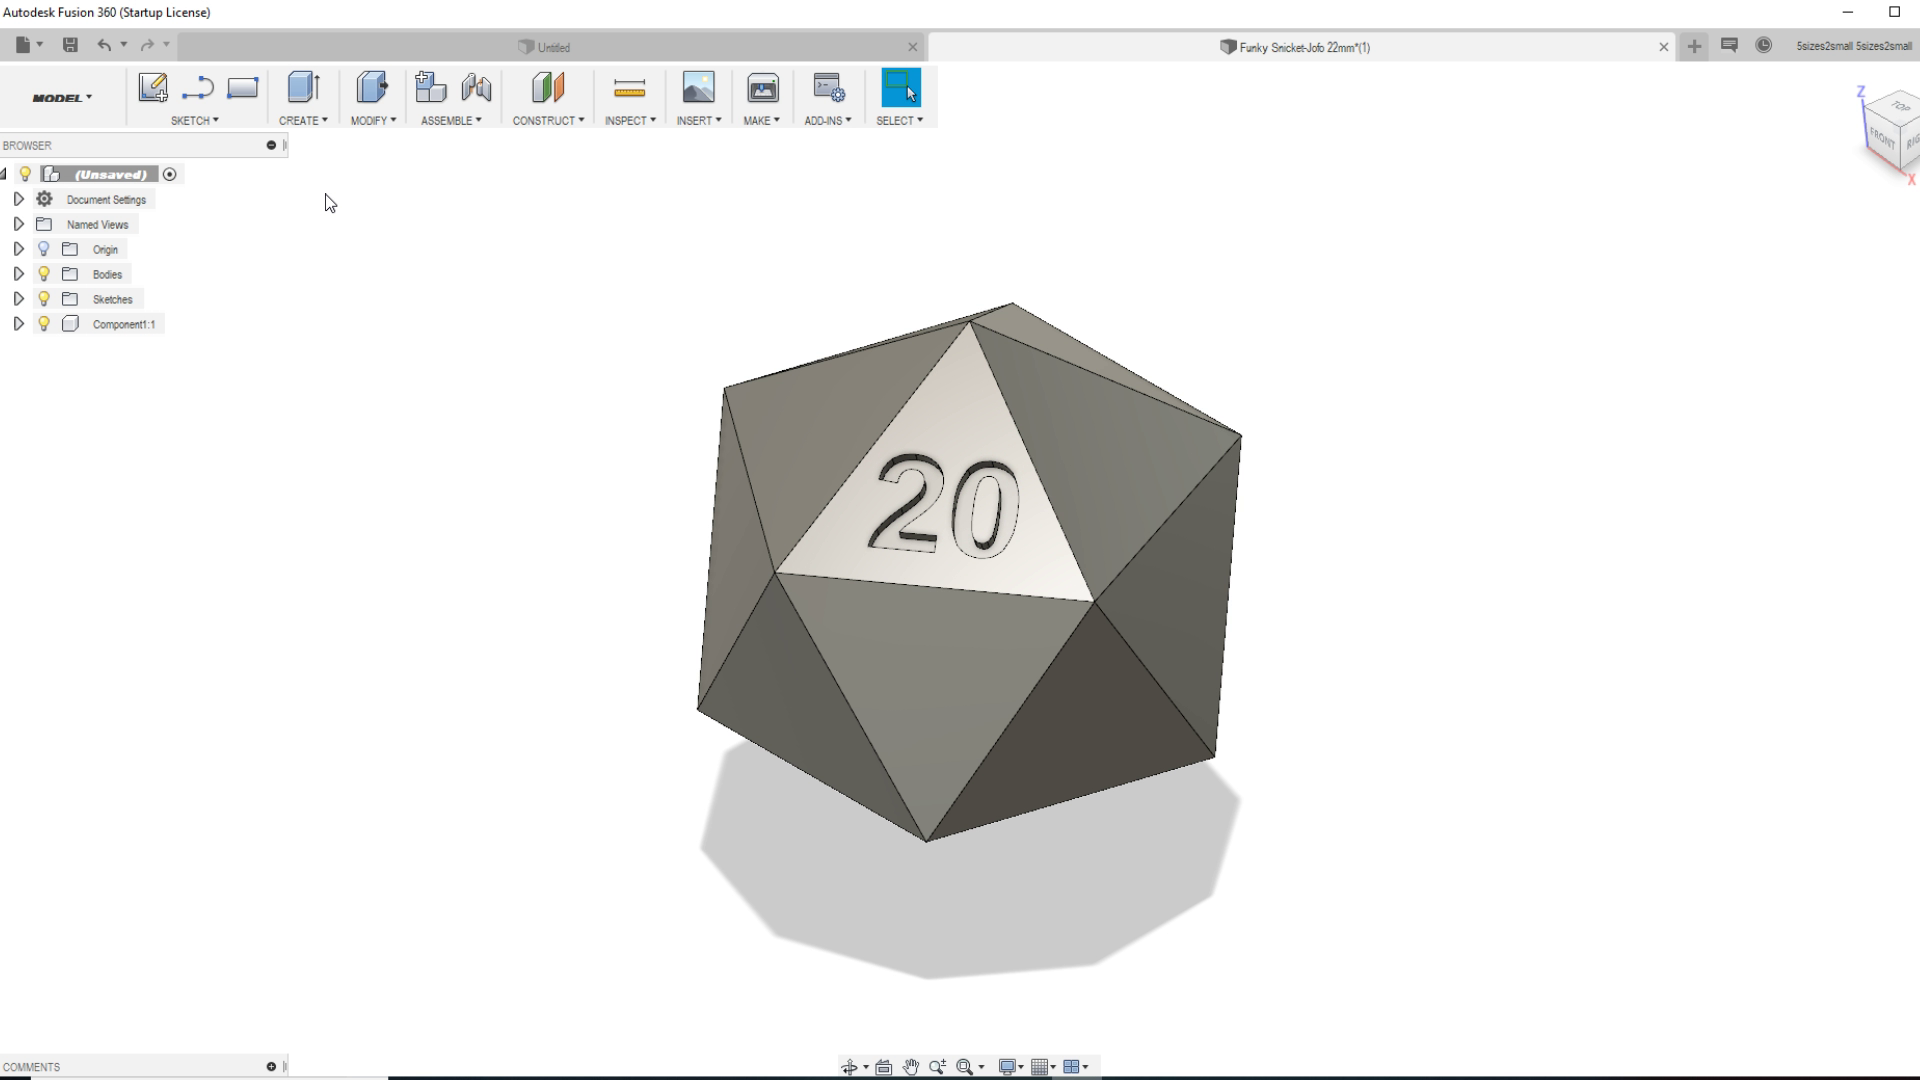
7. To your right there will be an options box for text where you type in your number, decide which font you want, and more. You can also resize at this point, and rotate the text. When you have it the right size click "ok".
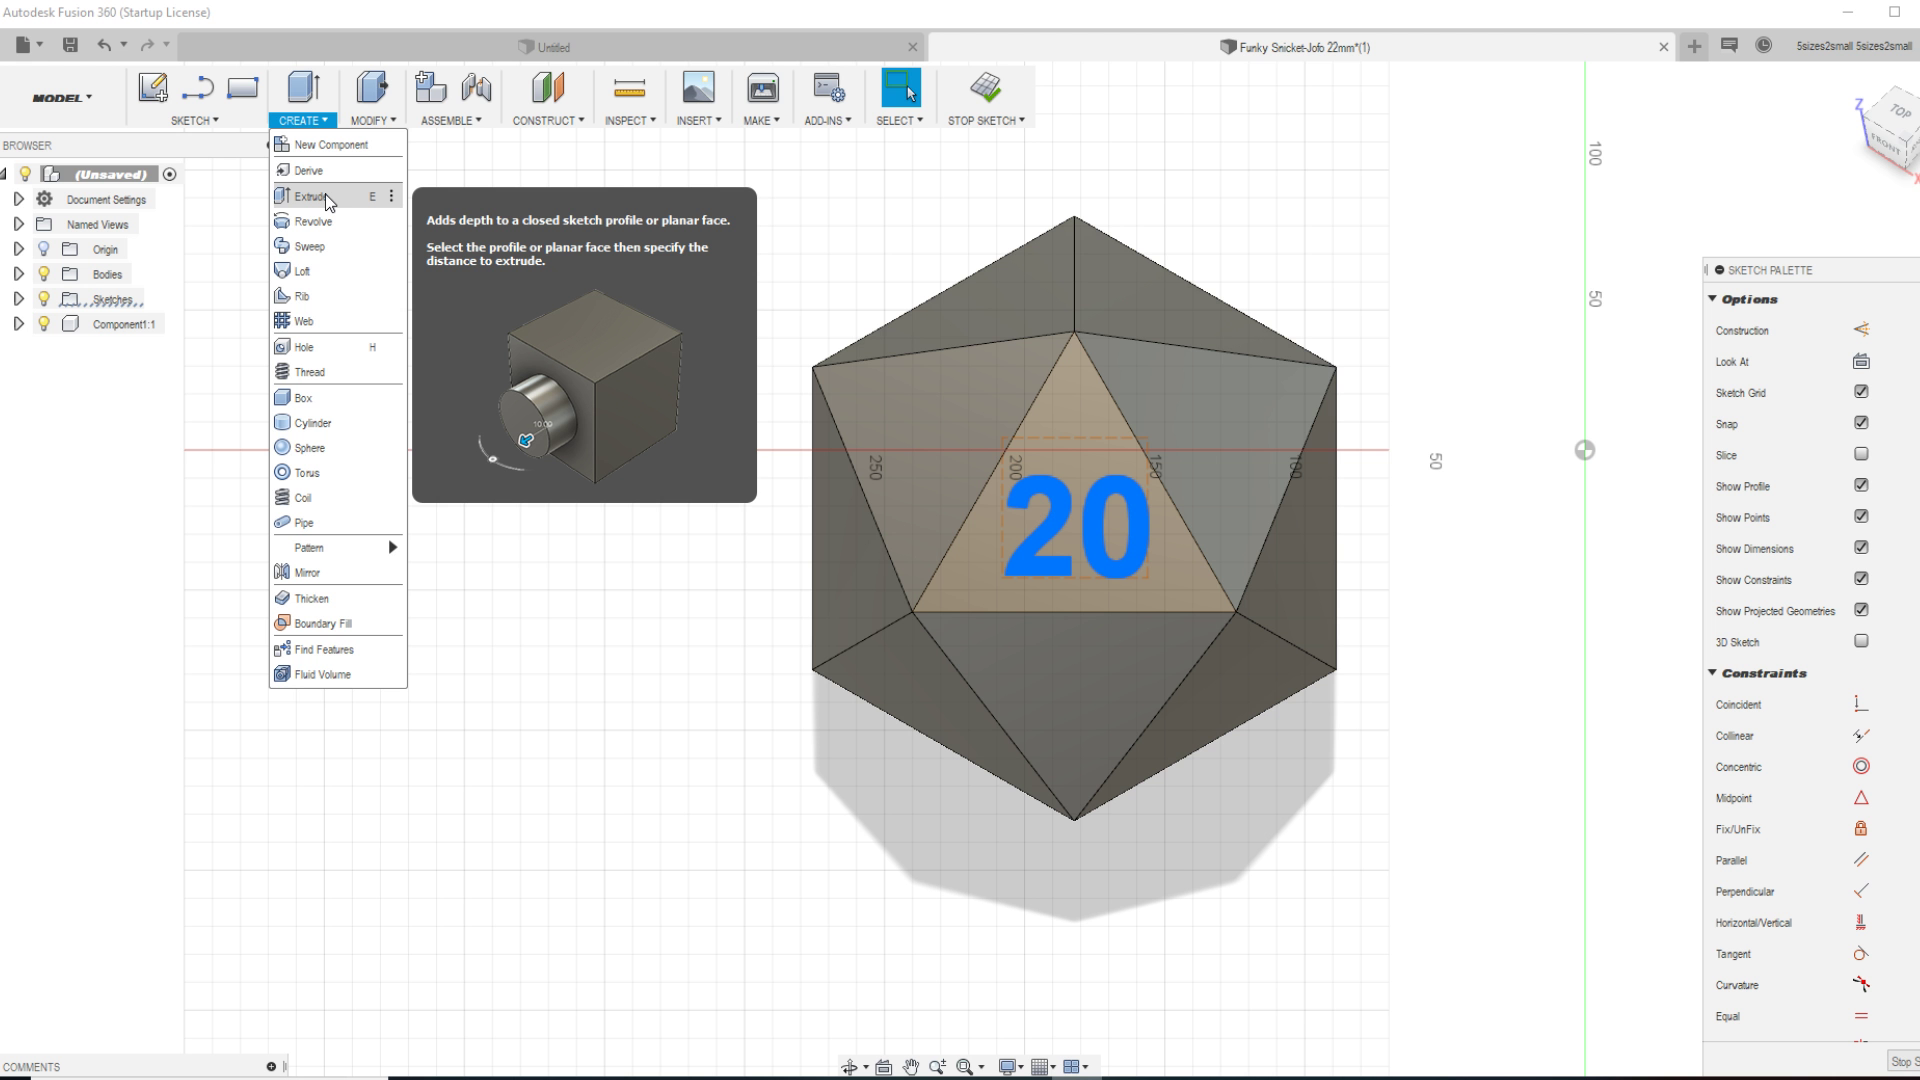
8. Next go to the drop down for "Create" at the top and select "Extrude".
9. You will see an arrow appear above your text, if you pull up then it will add material to your design and if you push in it will carve into it. Pick the depth you are looking for, I suggest 1-2mm for this die shape.
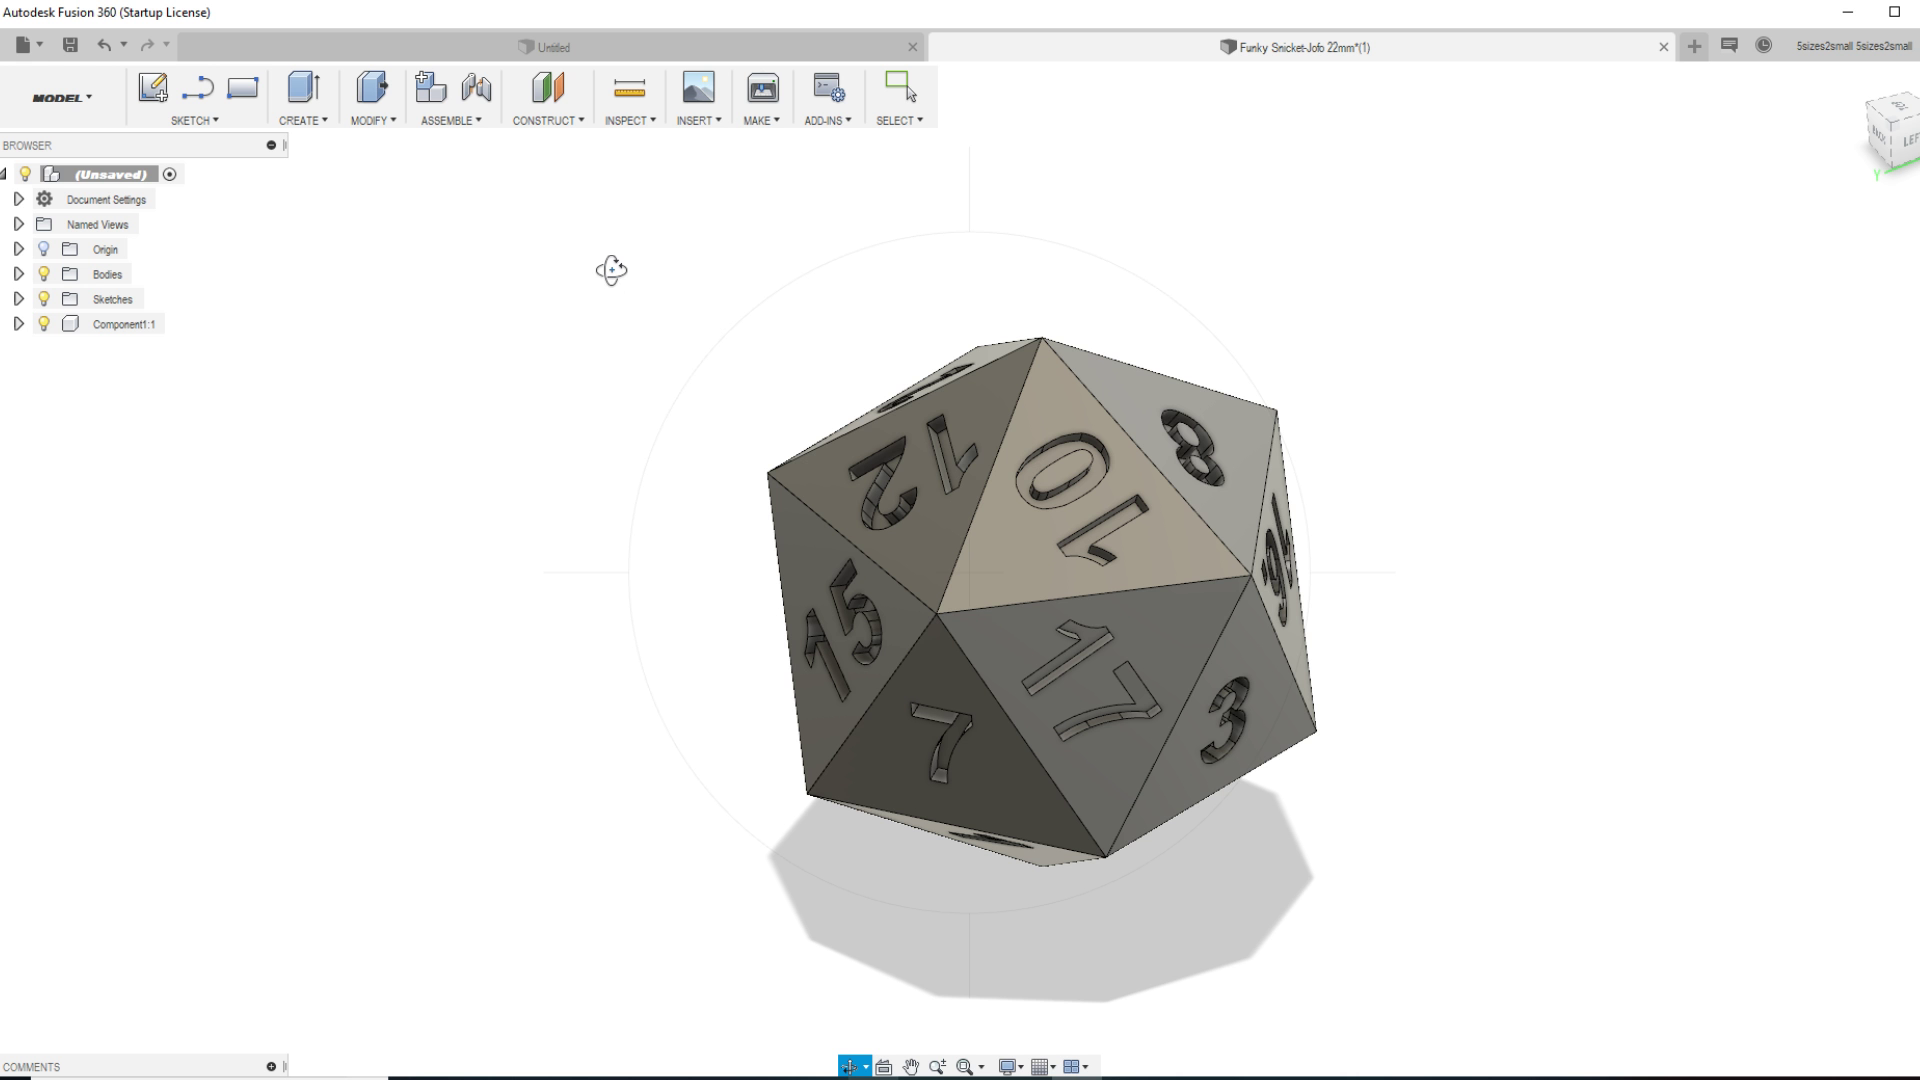
10. Continue repeating this all from #5 until you have all 20 numbers finished.
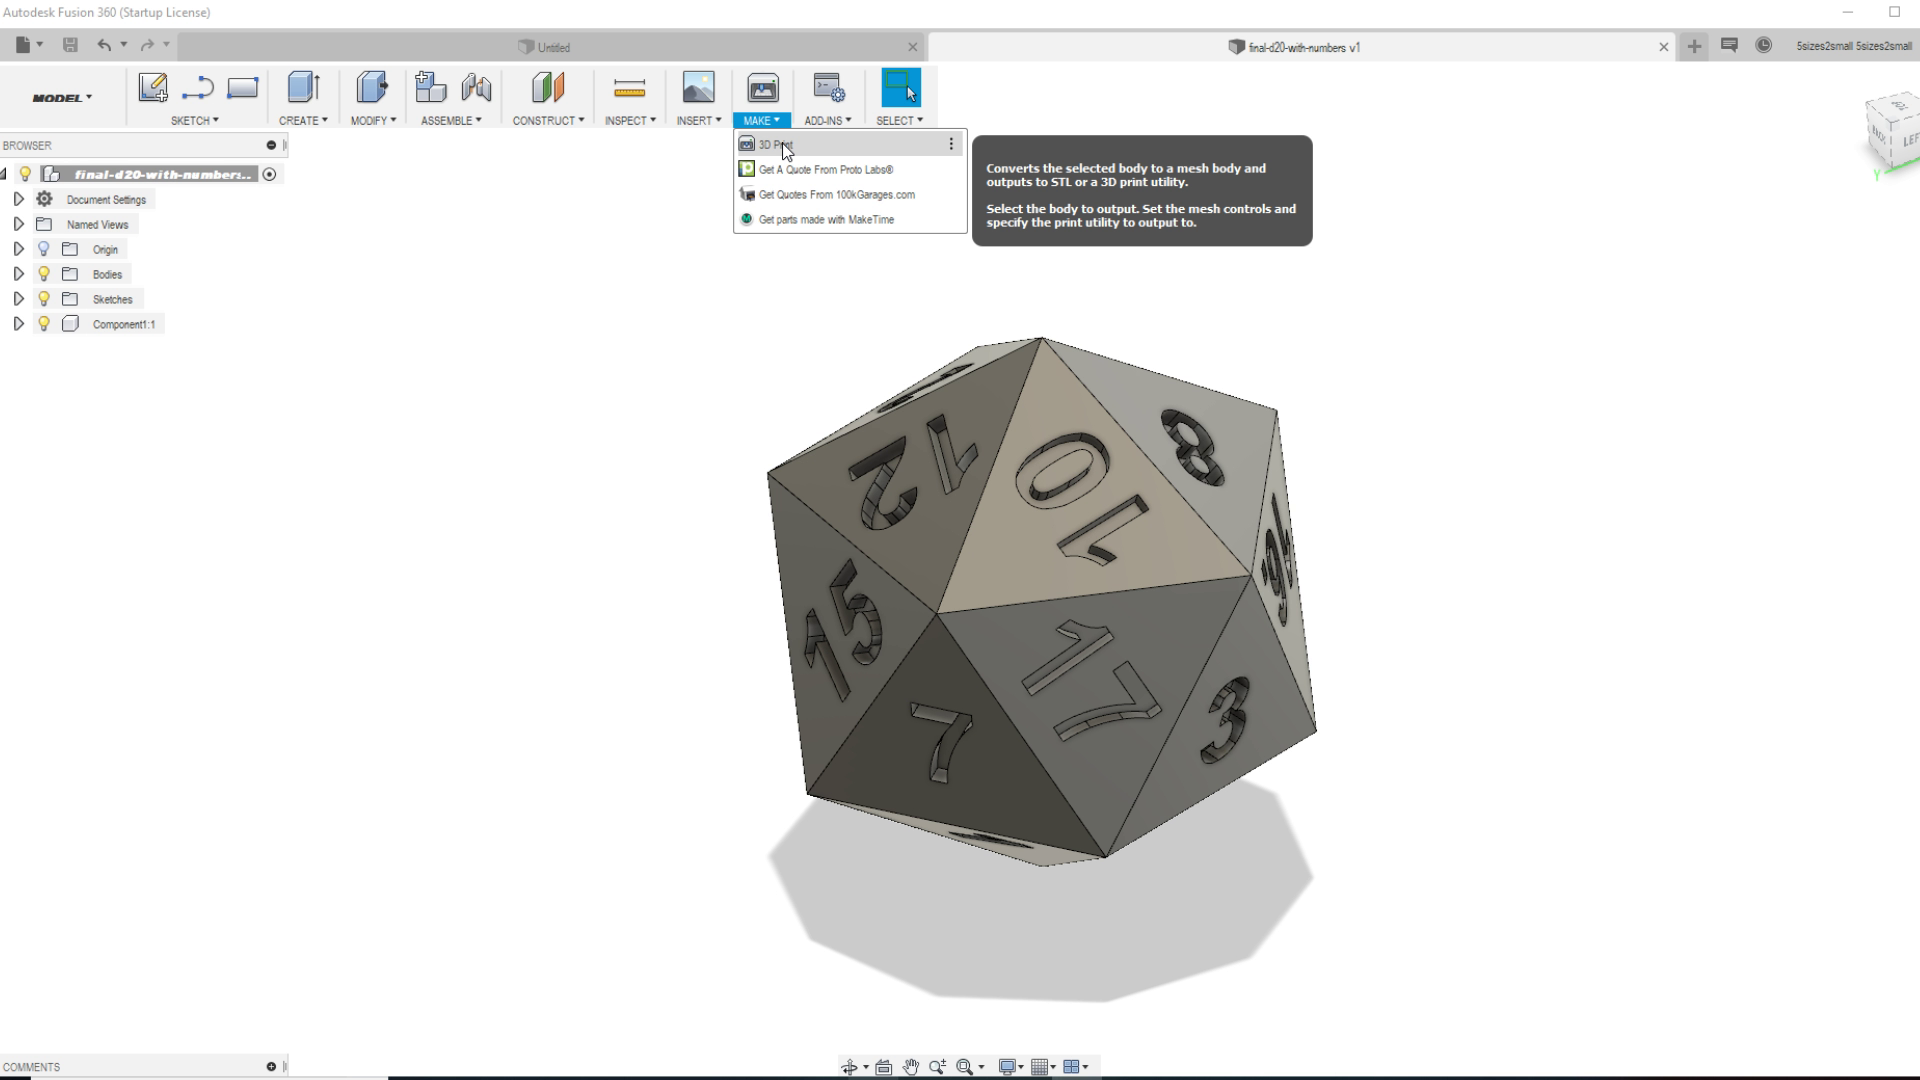
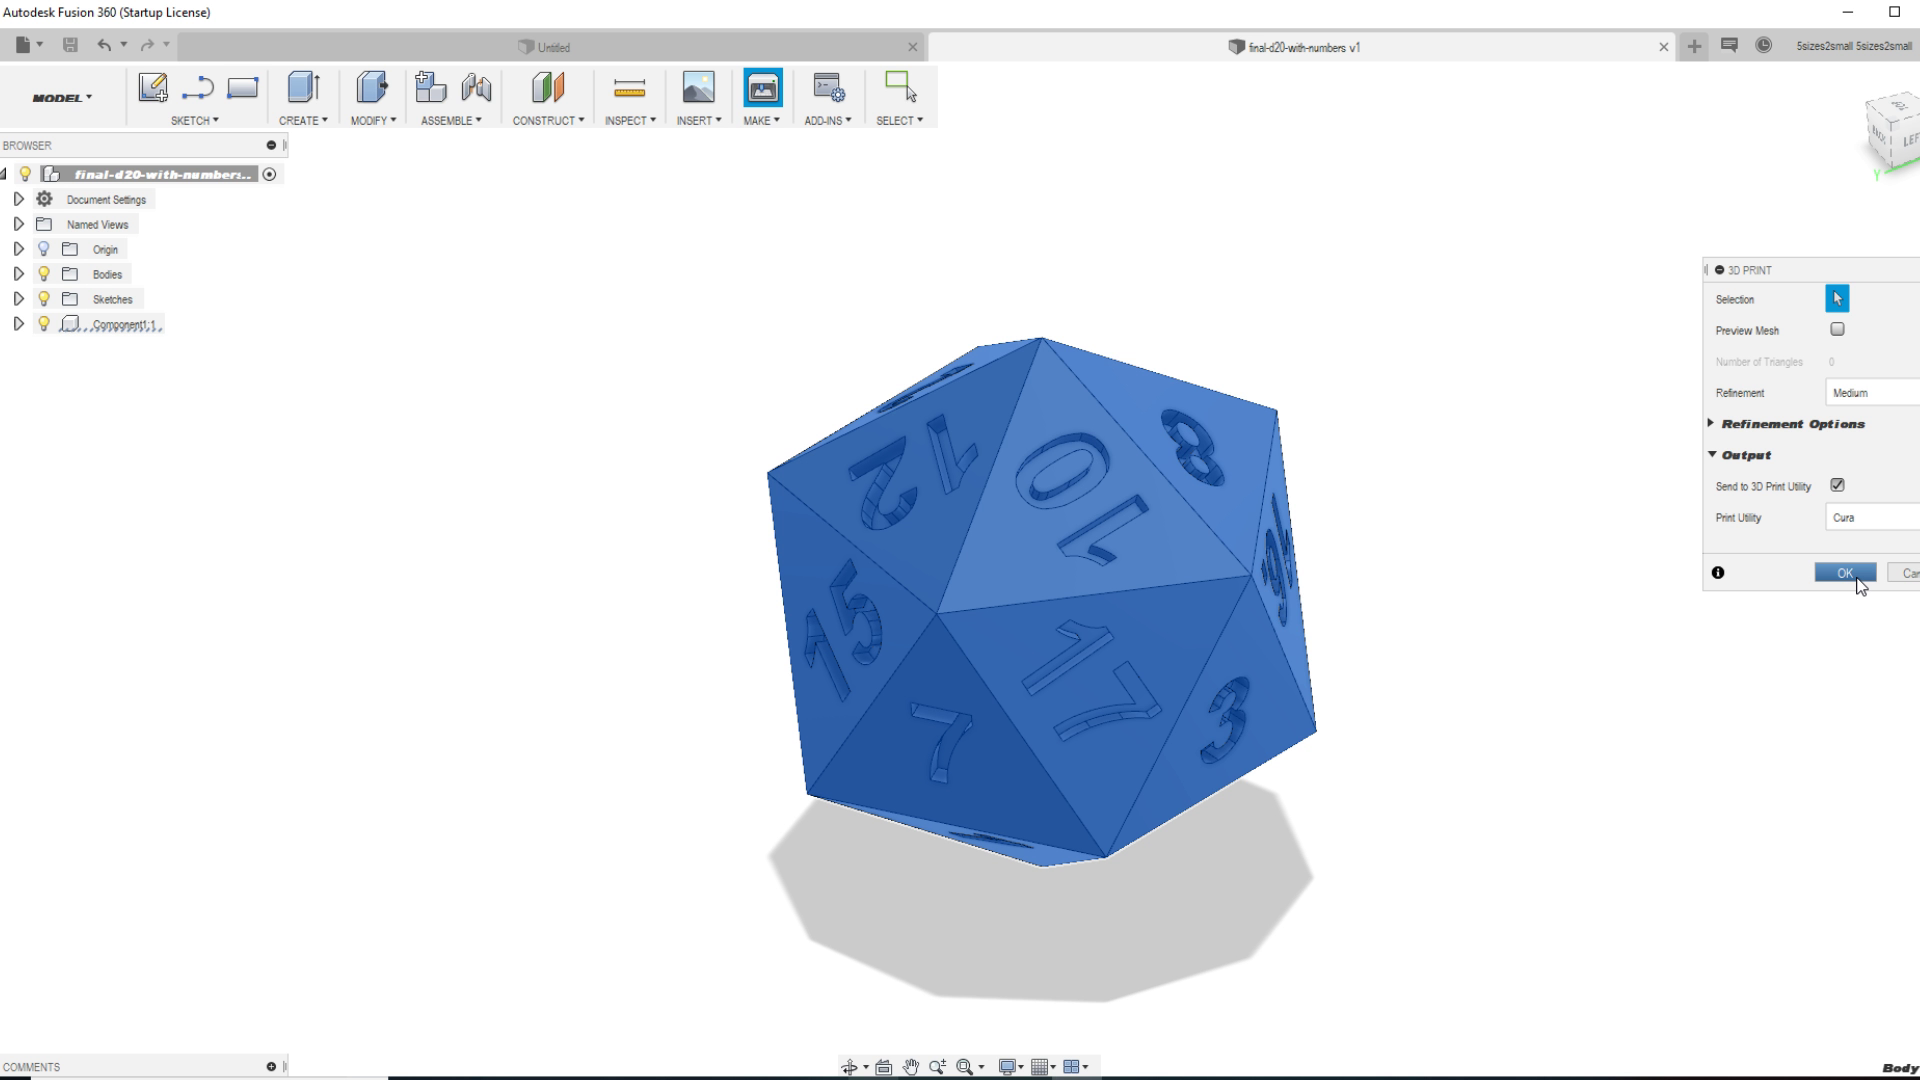
11. Be sure to save it, then click on Make and the drop down reading 3D Print.
12. At the prompt I have it set to go straight to Cura. You will need to click on the shape and then click ok.
13. Cura will open automatically and import your design for you.
Please move on to step 3 which will combine the same principles whether you used Tinkercad or Fusion360. We are going to slice the shape and get it ready for 3d printing.
Using Ultimaker Cura to Slice Your Design Before 3d Printing
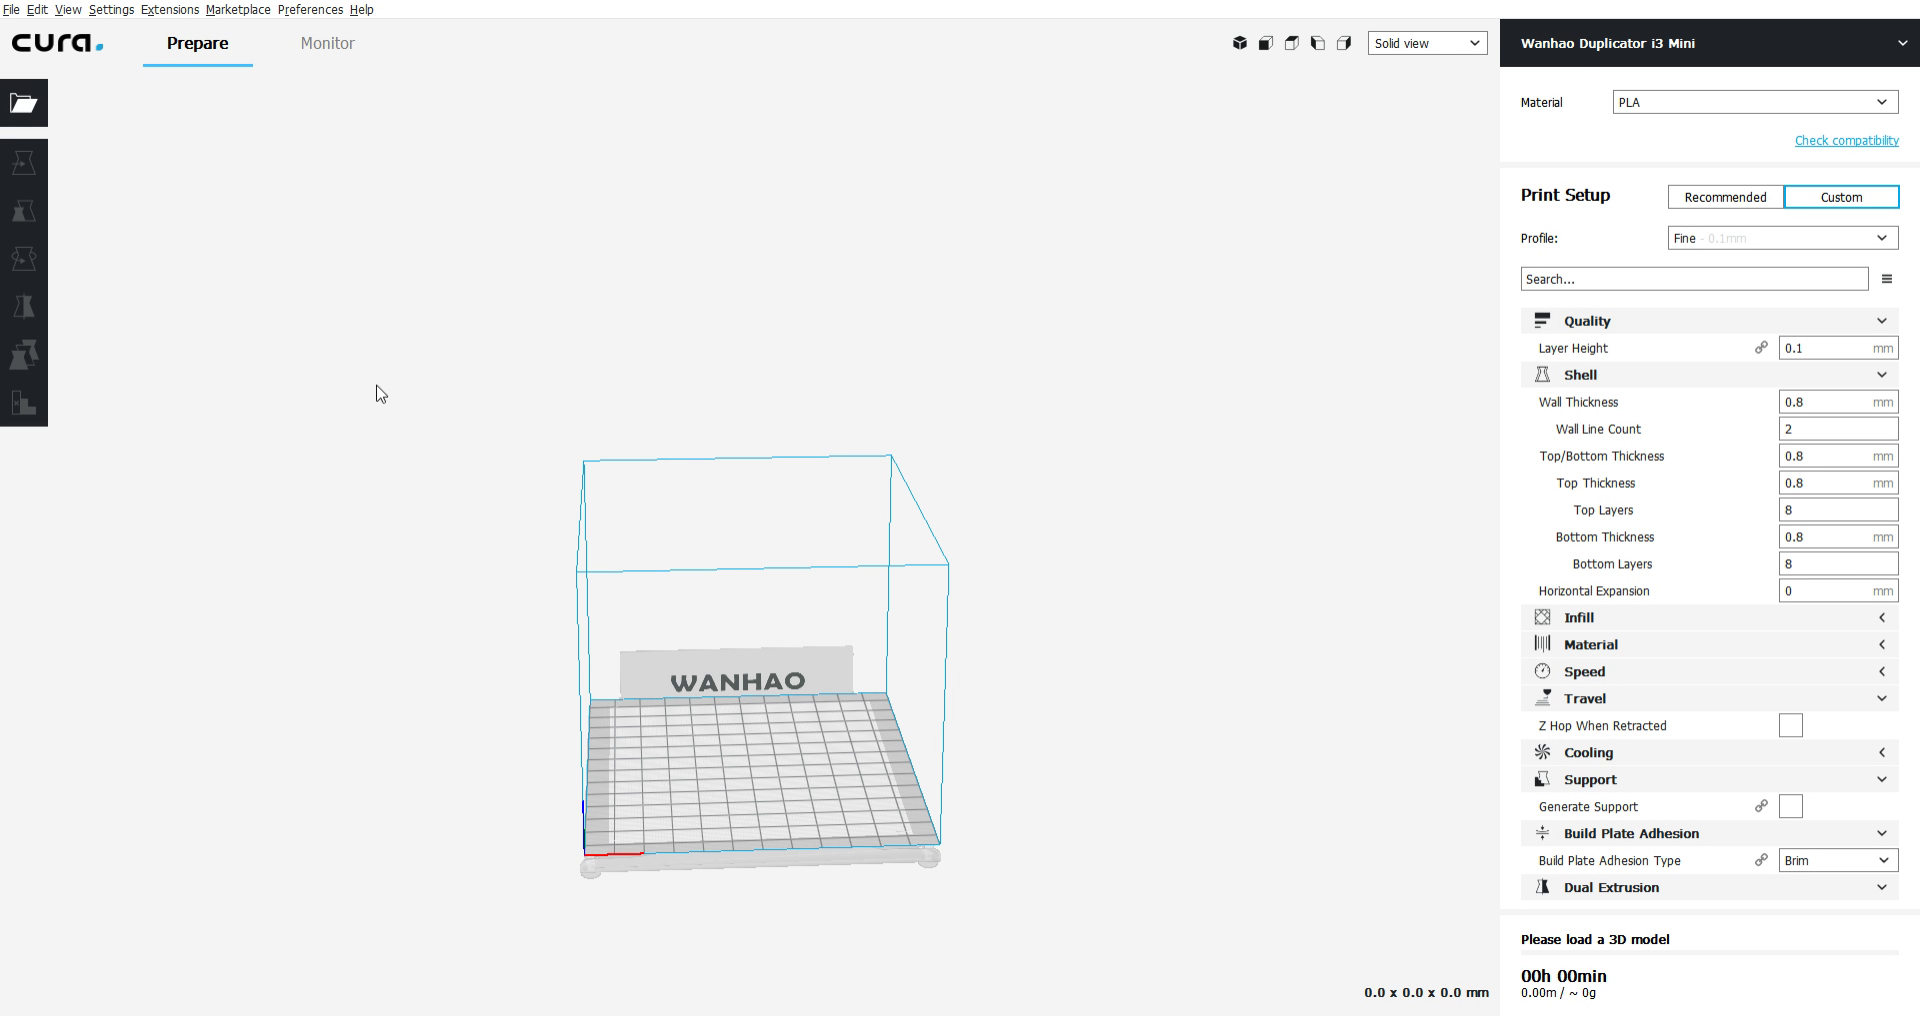
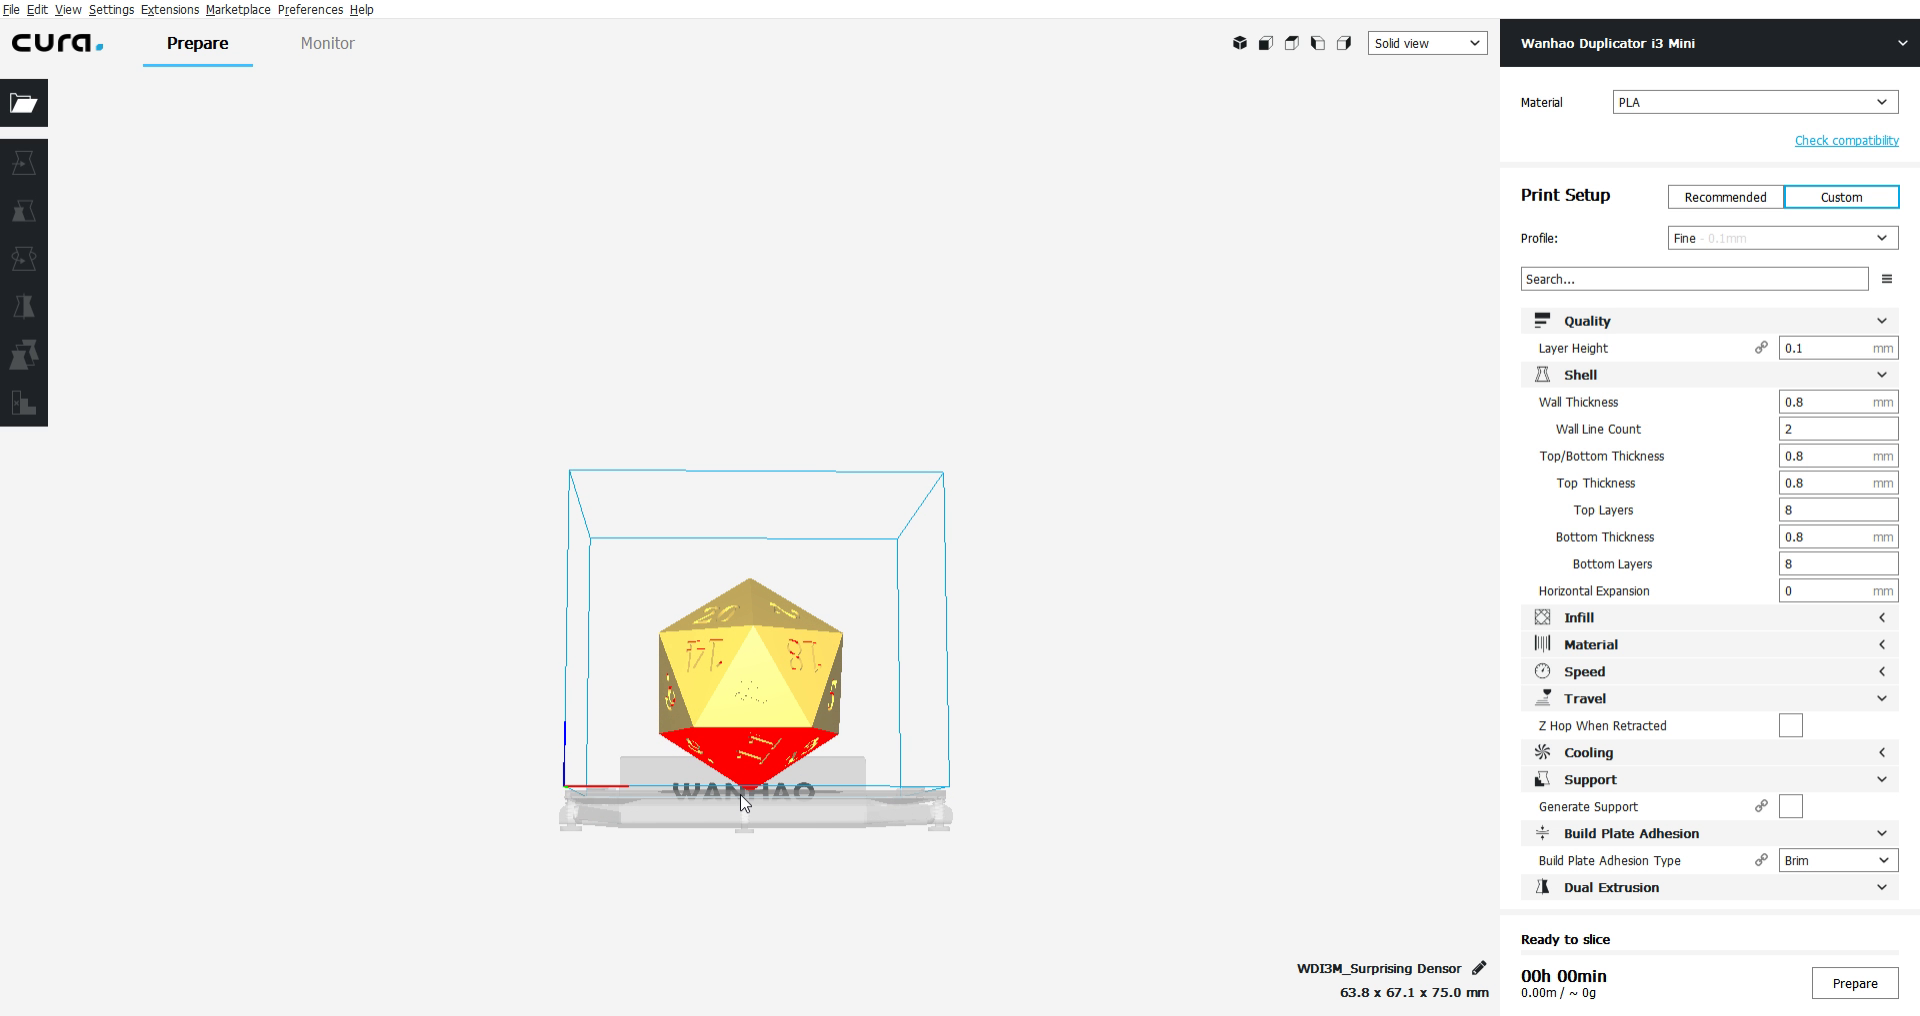
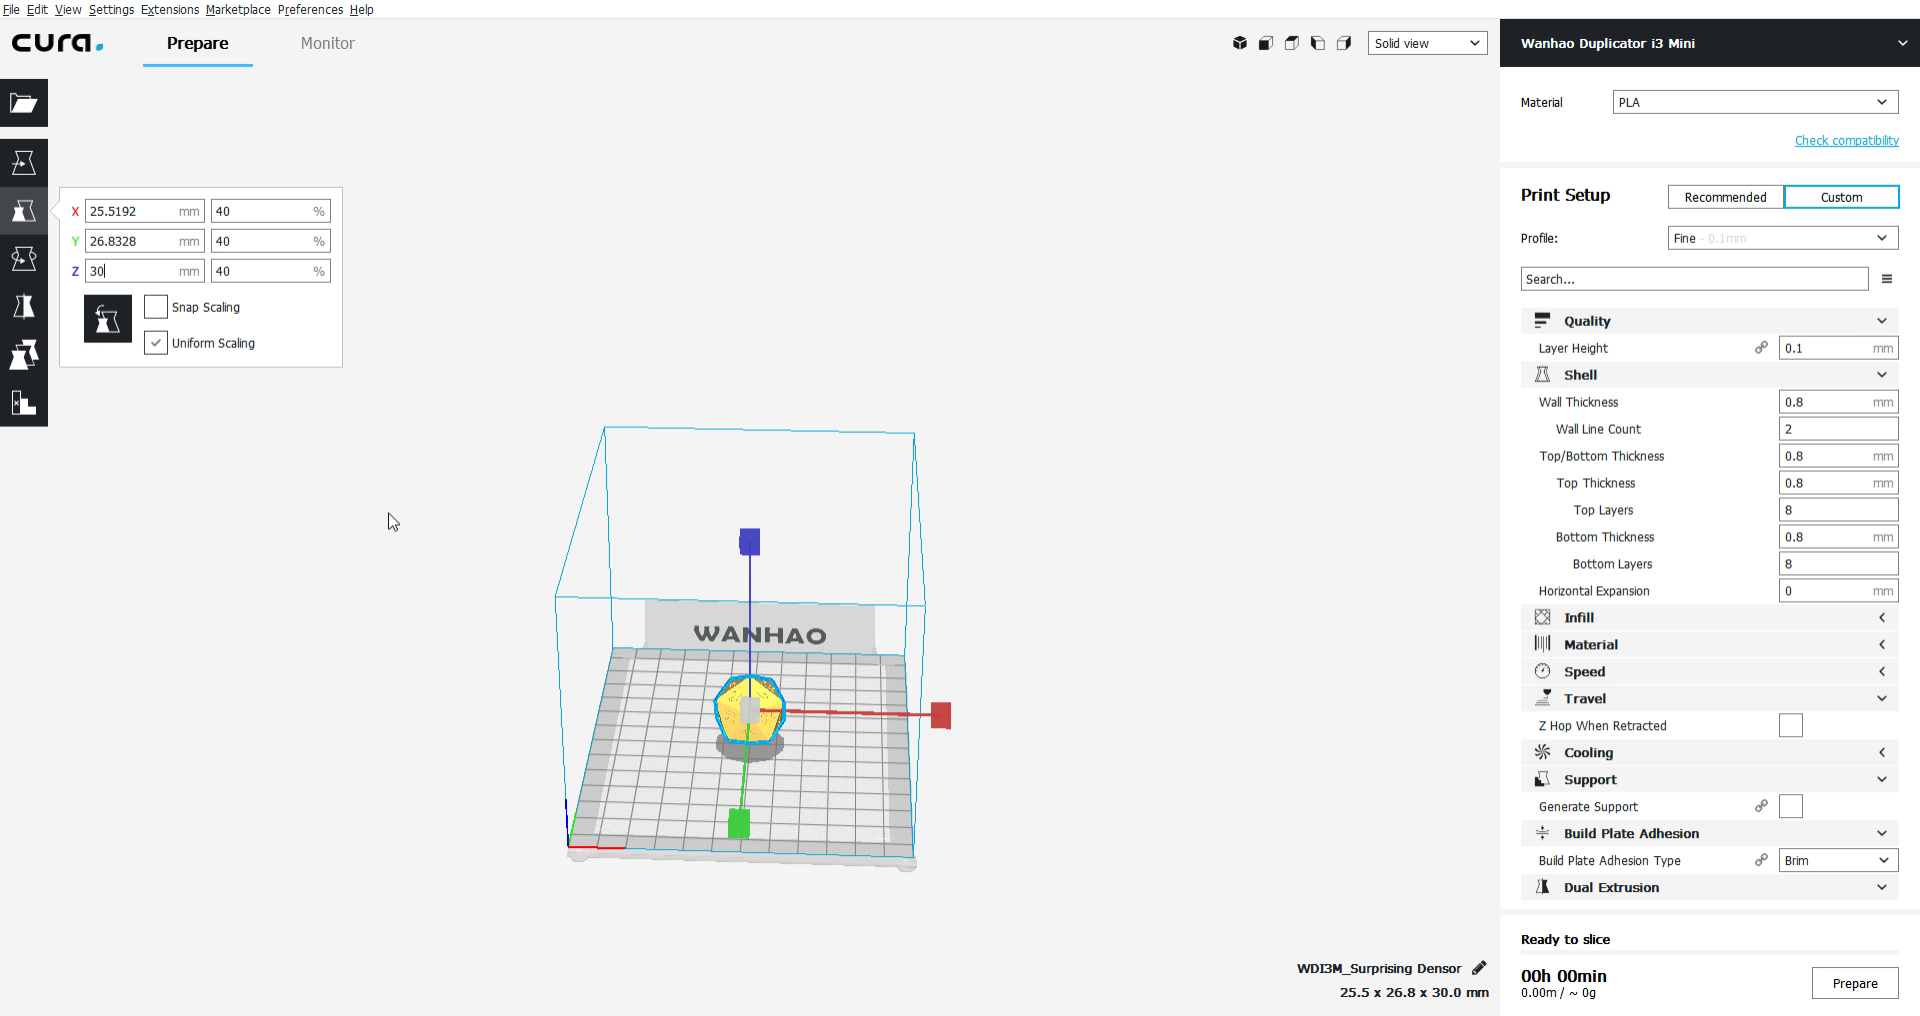
Now that it's time to slice our .STL file for printing.
1. Open your file. If you are importing from Fusion 360 it will have opened automatically for you.
2. First let's resize it, under the folder icon to the left is a small set of 6 images that kind of look like a beaker. We want the 2nd one which is where we resize. I decided to go with 30 mm.
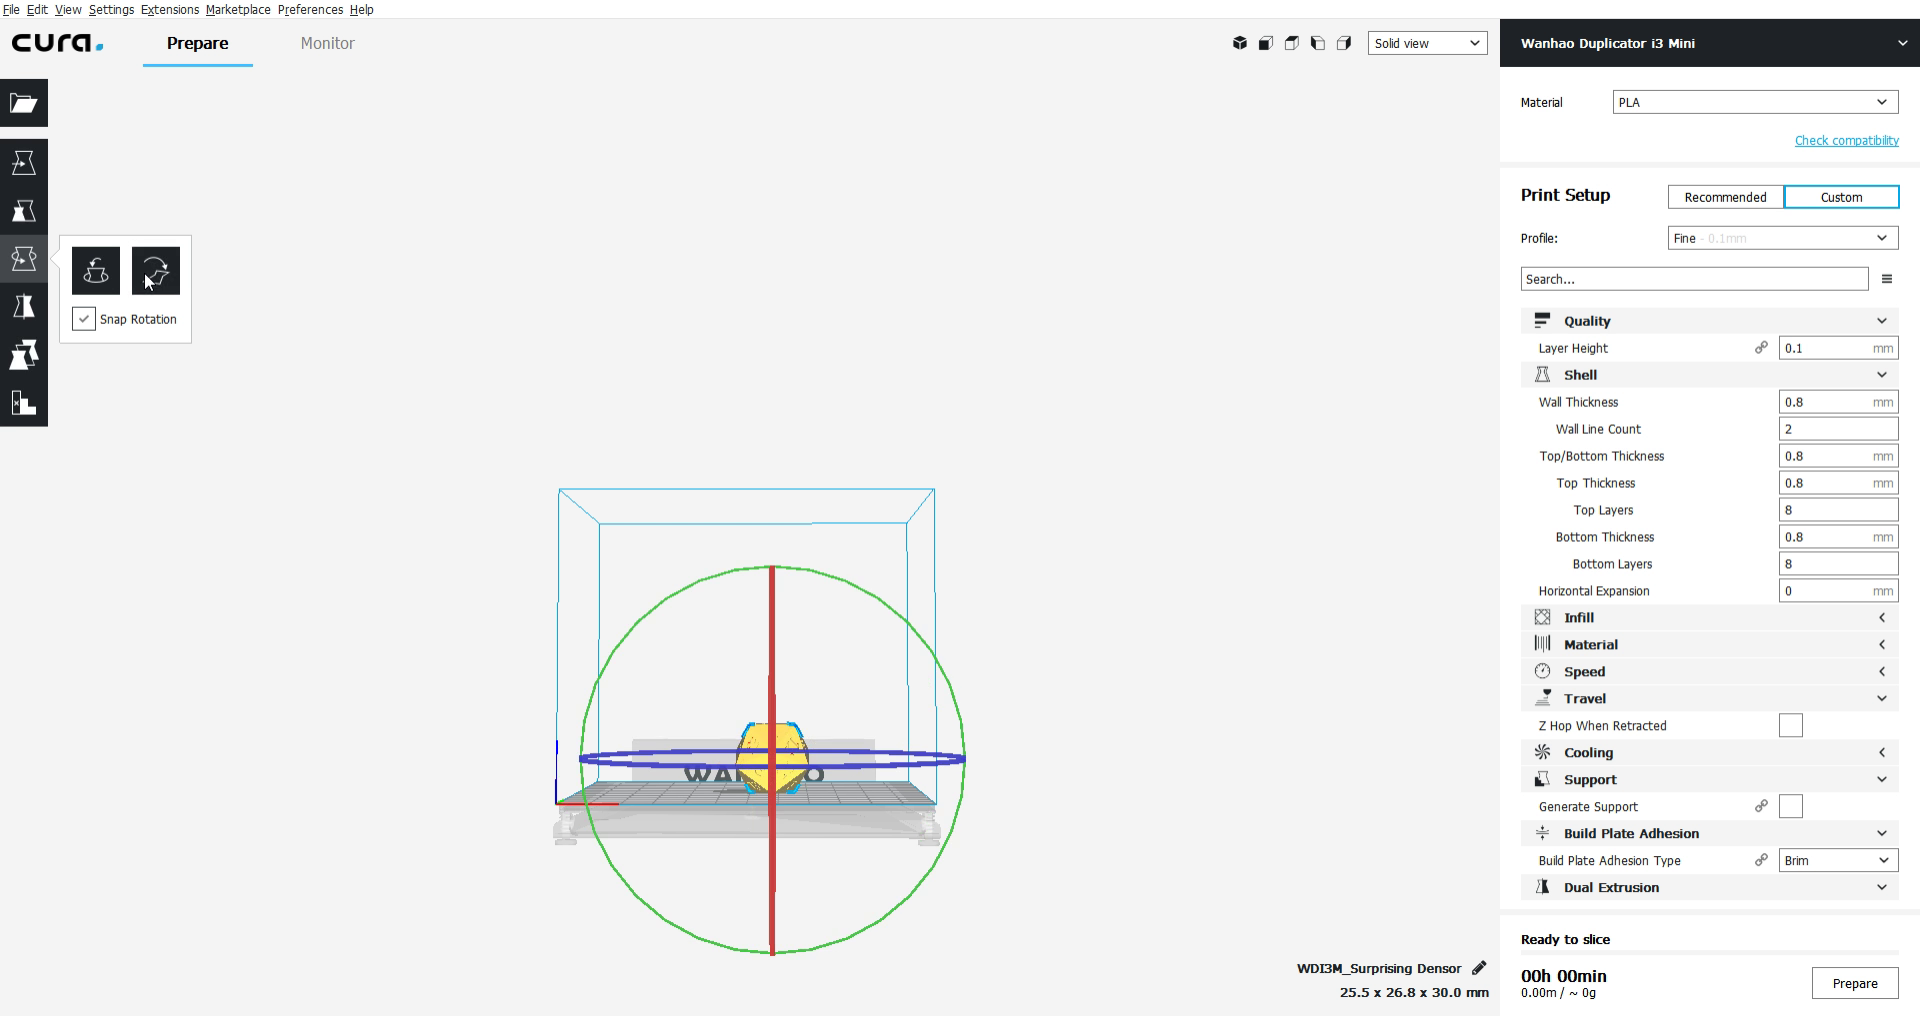
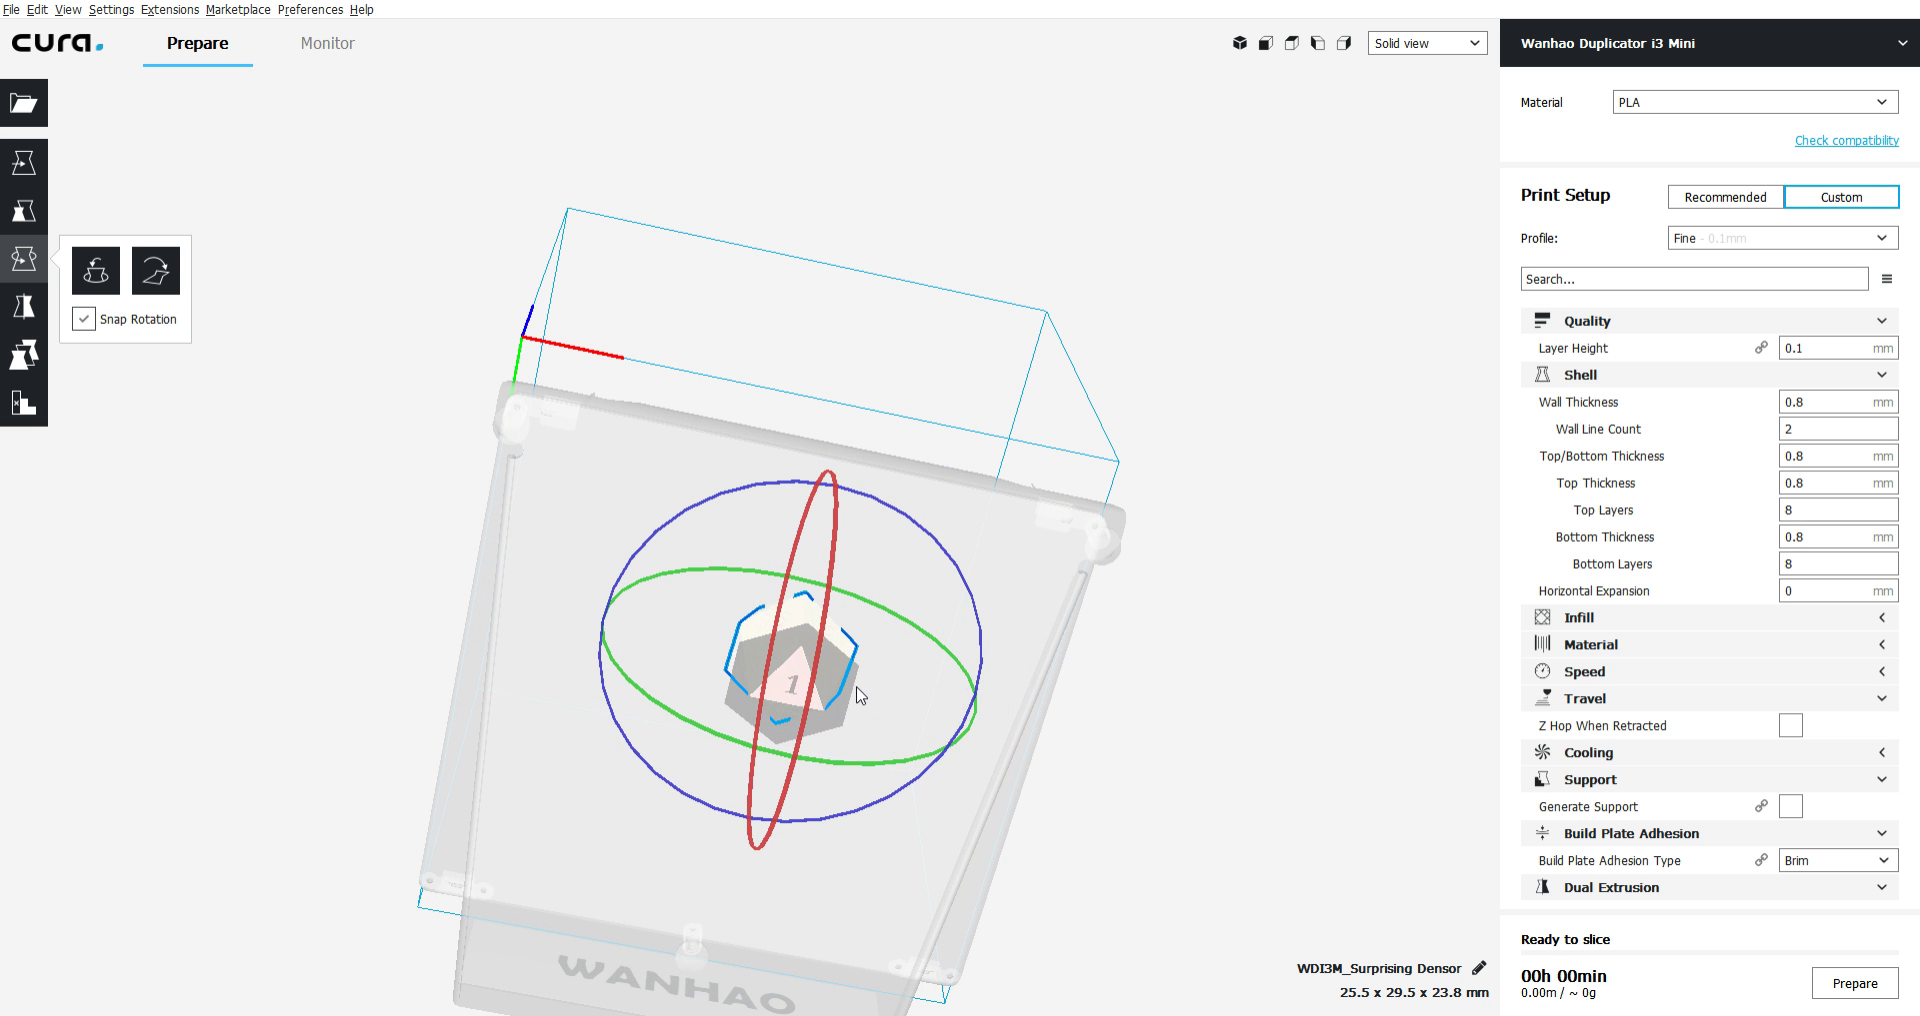
3. Now we need to make sure it's laying flat on the printing bed. Click the next option under where you found the resize on the far left. Make sure "Snap Rotation" is checked and then click the 2nd image. This will make your shape automatically lay flat.
4. Right click and hold, then move your mouse around to see the shape from all angles. If you go to the bottom you will see where the shape is touching the bed. You can see the number one on mine as that is the side that it decided to sit flat. Yours might be different, it doesn't matter either way as long as it's not pushed past the bottom. If it is poking through the bottom click on the first image option to your left toolbar. Select and drag the blue arrow a little and let go, because of the snapping option we checked in step #3 it should snap itself to the bottom of the printing bed automatically.
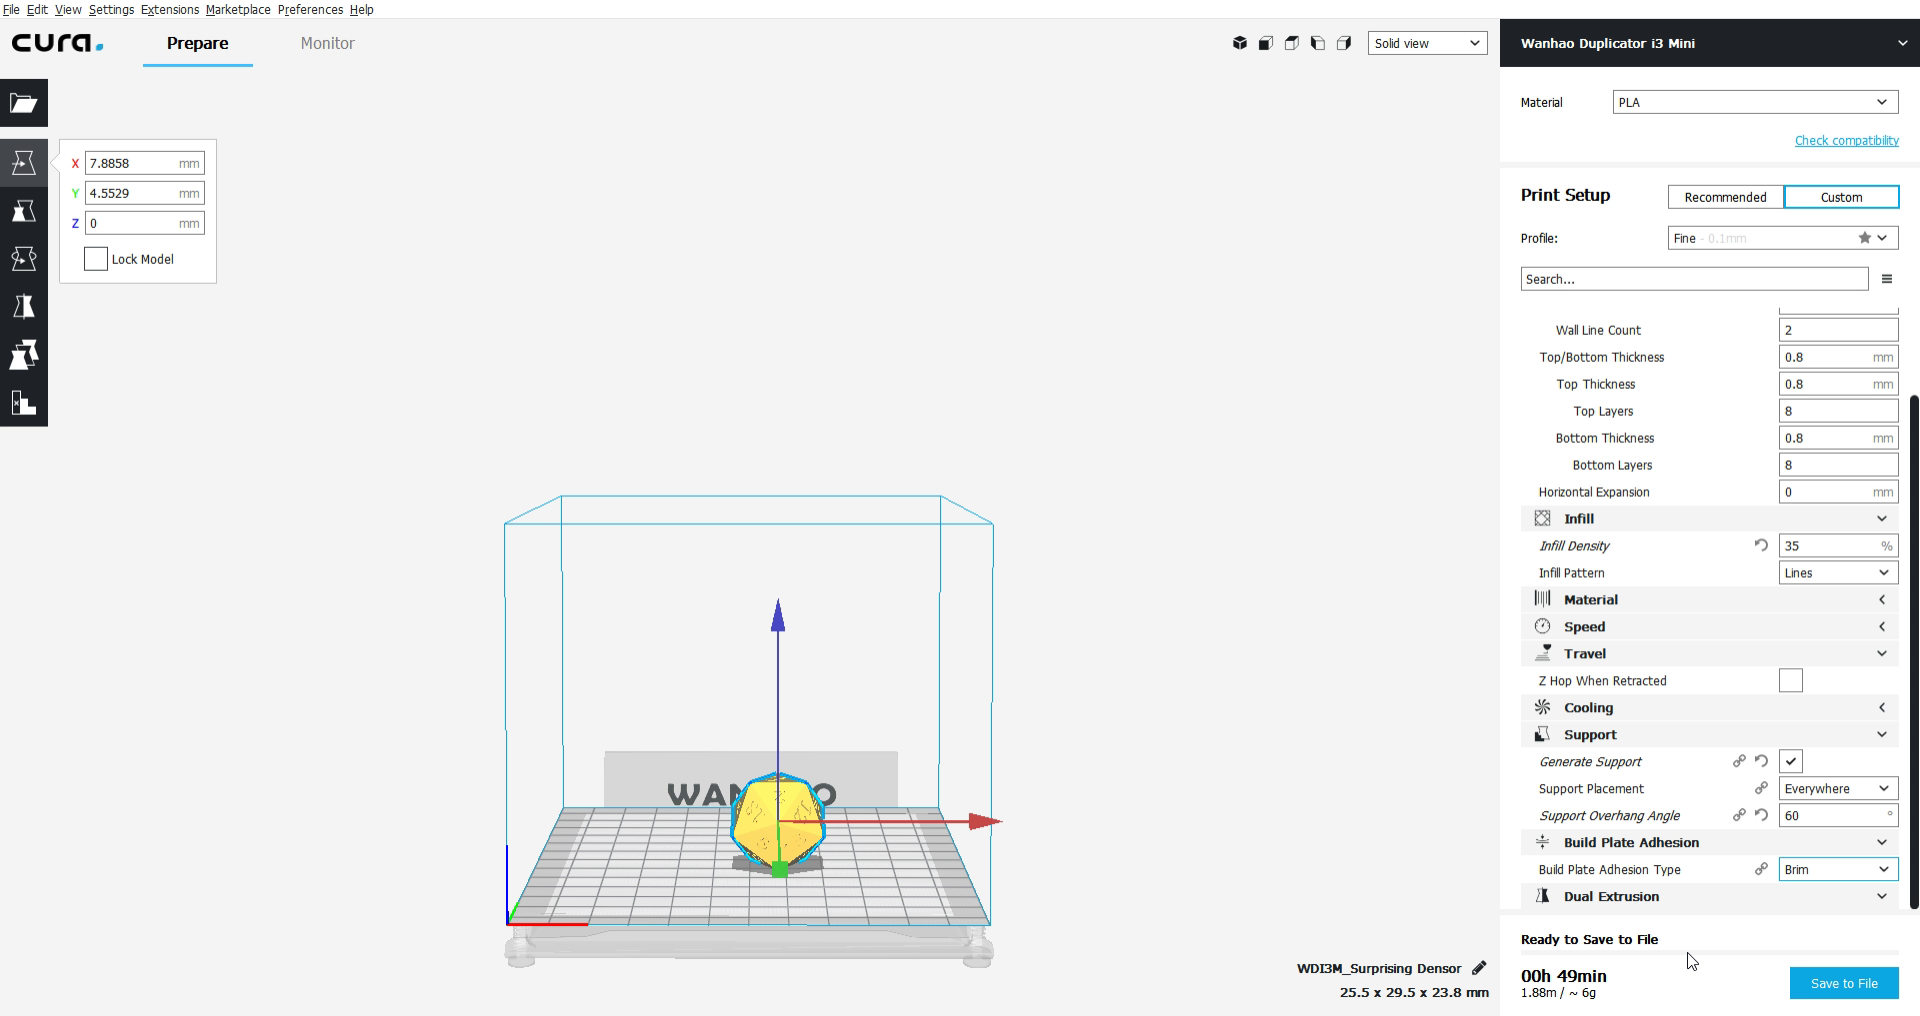
5. Now to enter your printing options. This is how I set it up to print and I'm pretty happy with how it came out. (Please be aware if you know your printers best settings you probably want to try those first. Often it takes at least two prints to find a good outcome for most beginners.)
Layer Height: 01 mm
I kept the shell to it's normal settings which can be seen in some of the above images.
Infill 35% with a line pattern
Supports were set to everywhere with a 60 overhang angle.
Build Plate Adhesion: Brim
6. Select "Save to Removable Device"or "Save to File". Either one is okay, if you already have your SD card attached it will tell you to "Save to Removable Device". This step will be different for many people depending on what 3d printer you are using. Mine can connect to a computer to print directly, but I use the mini SD card option. (Refer to your manual if you are having issues with your printer.)
As there is always some clean up expected from any 3d print do not get upset if there are some rough areas at the end. This can be cleaned up with sandpaper, a small file, or other methods for those who are ambitious.
I have attached the final .STL file if you would like to use it as reference or simply print it to save time.
------------------------
Now that you have a little experience with making a 3d object, how else can we use what we have learned to make something else?
For me the most natural progression is turning 3d files into paper craft. Check the next step for the second way to make a d20.
Downloads
Turning Your 3d Design Into a Paper Craft
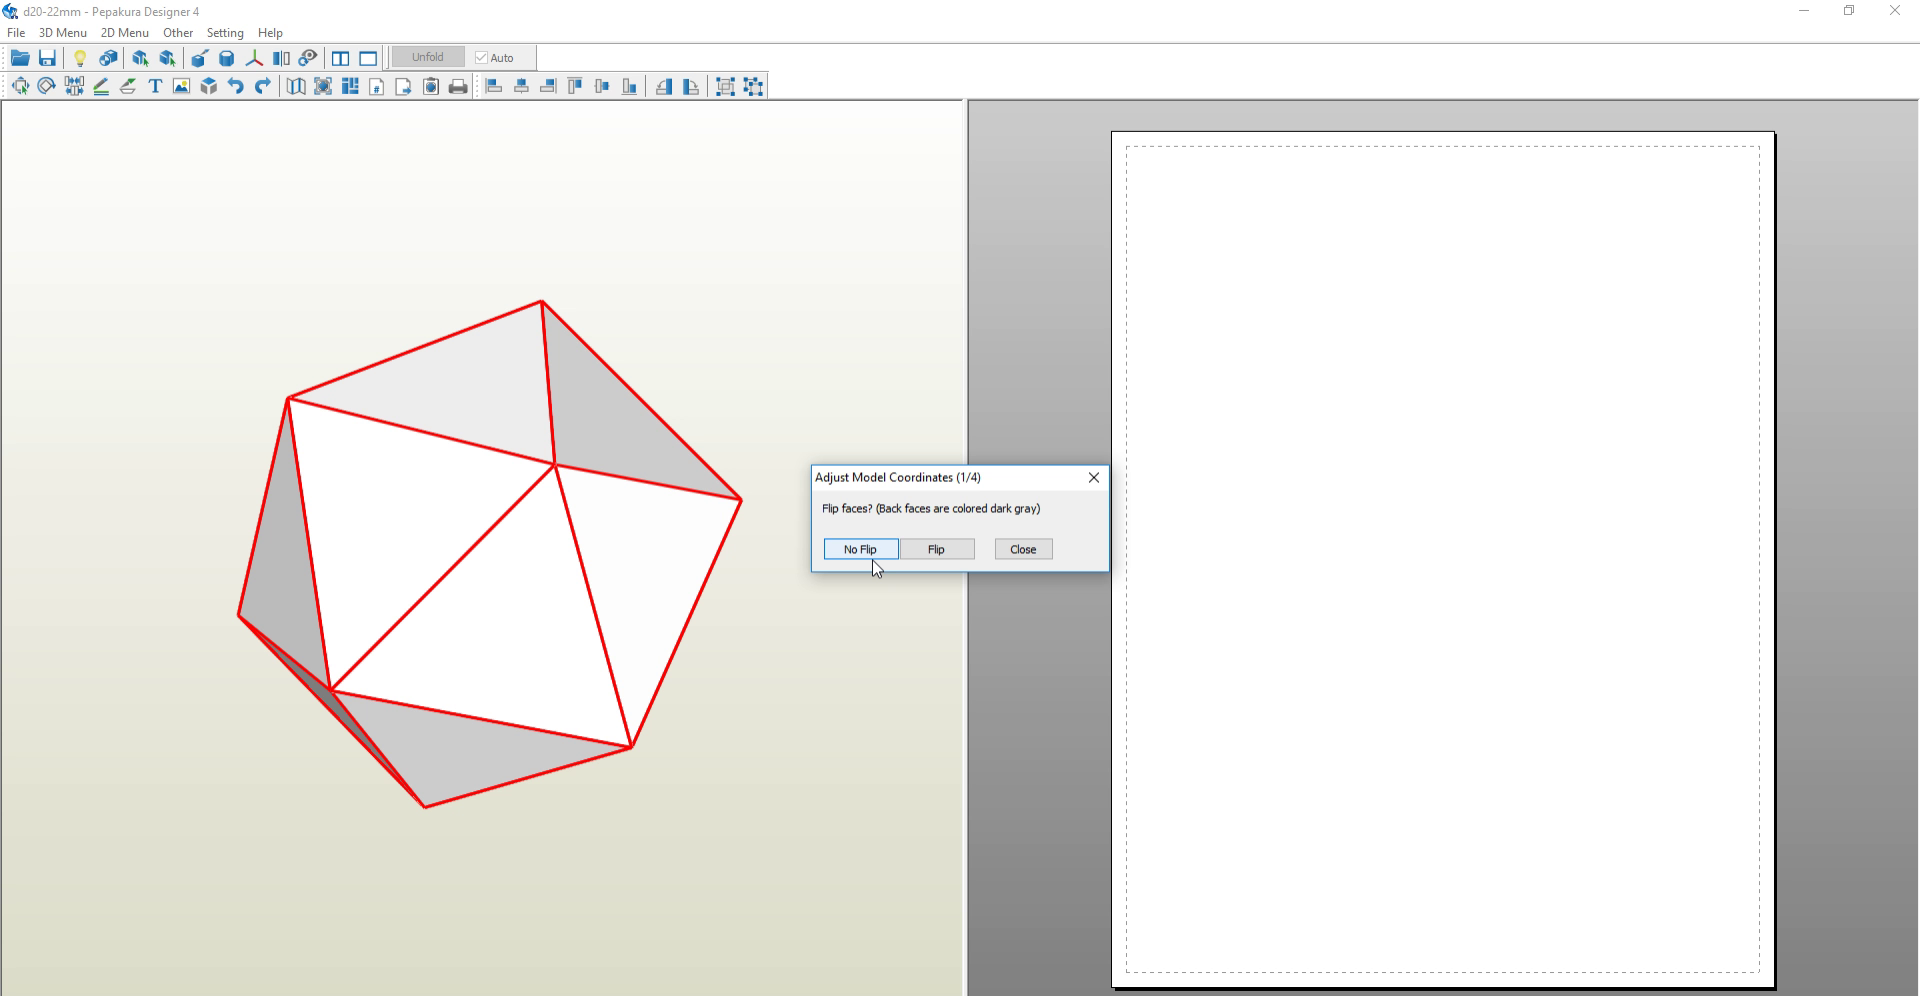
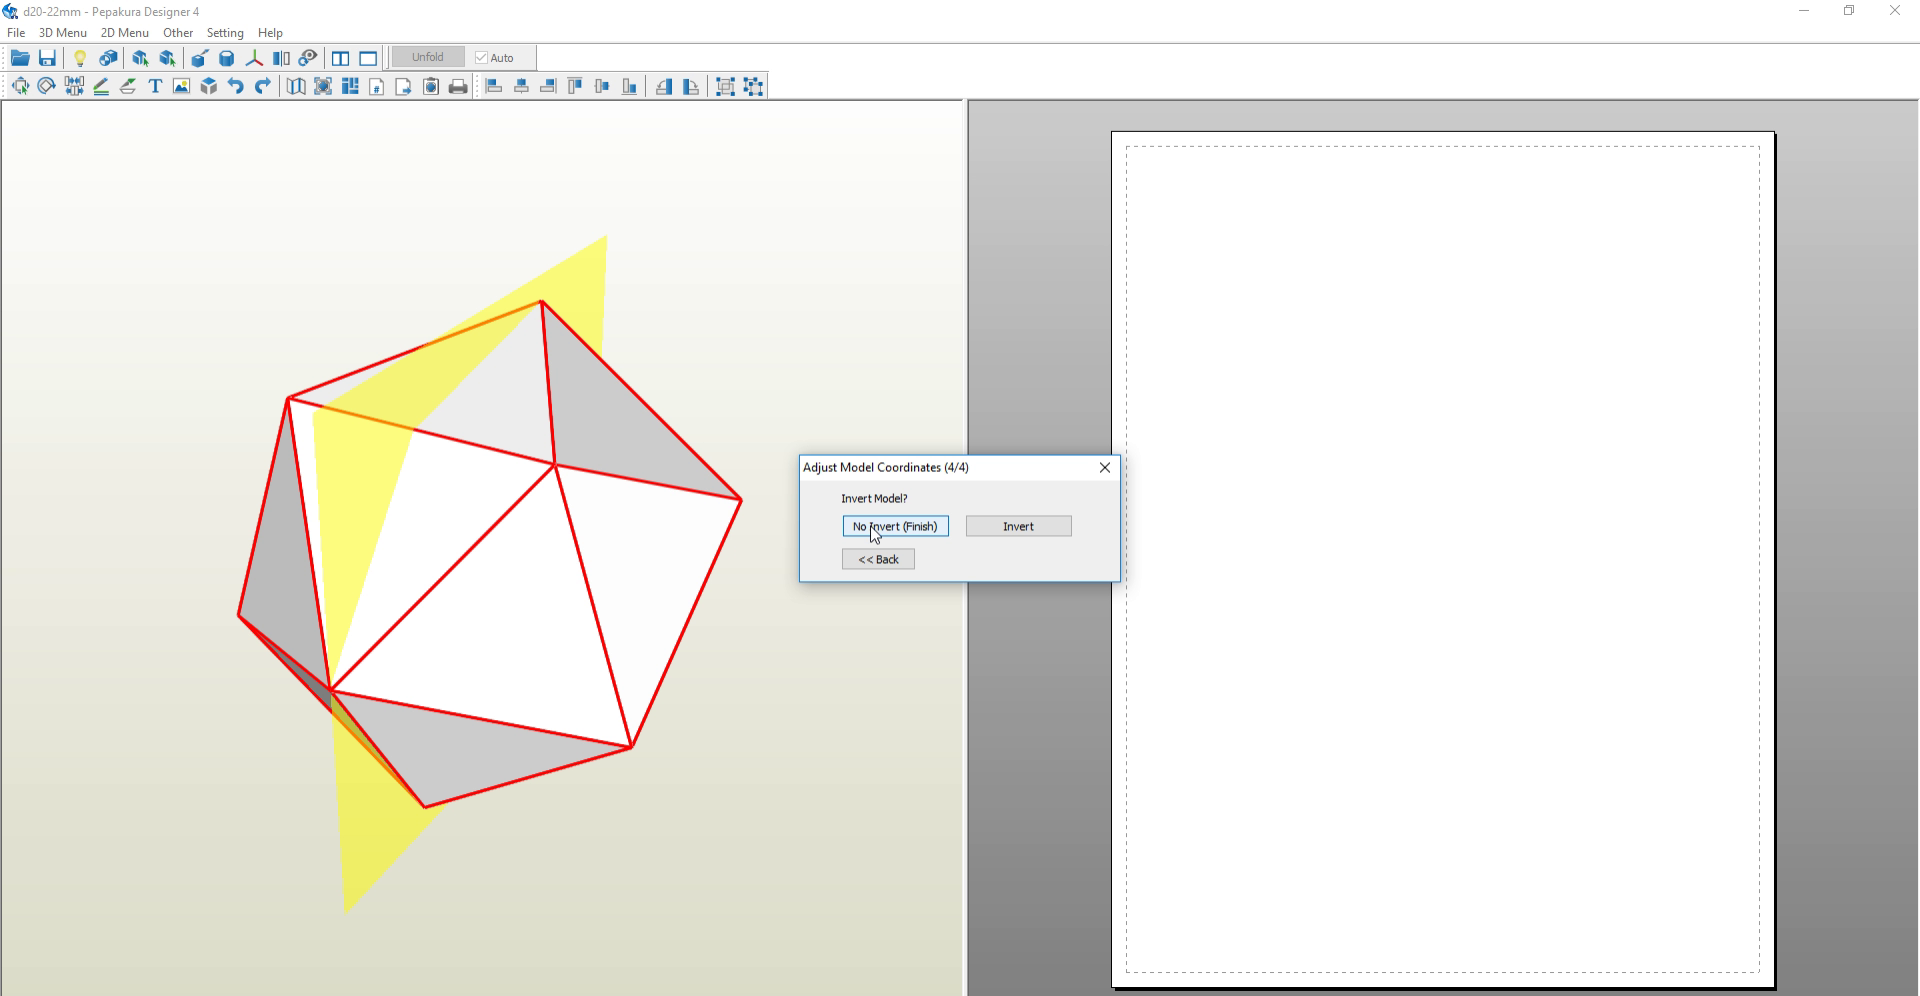
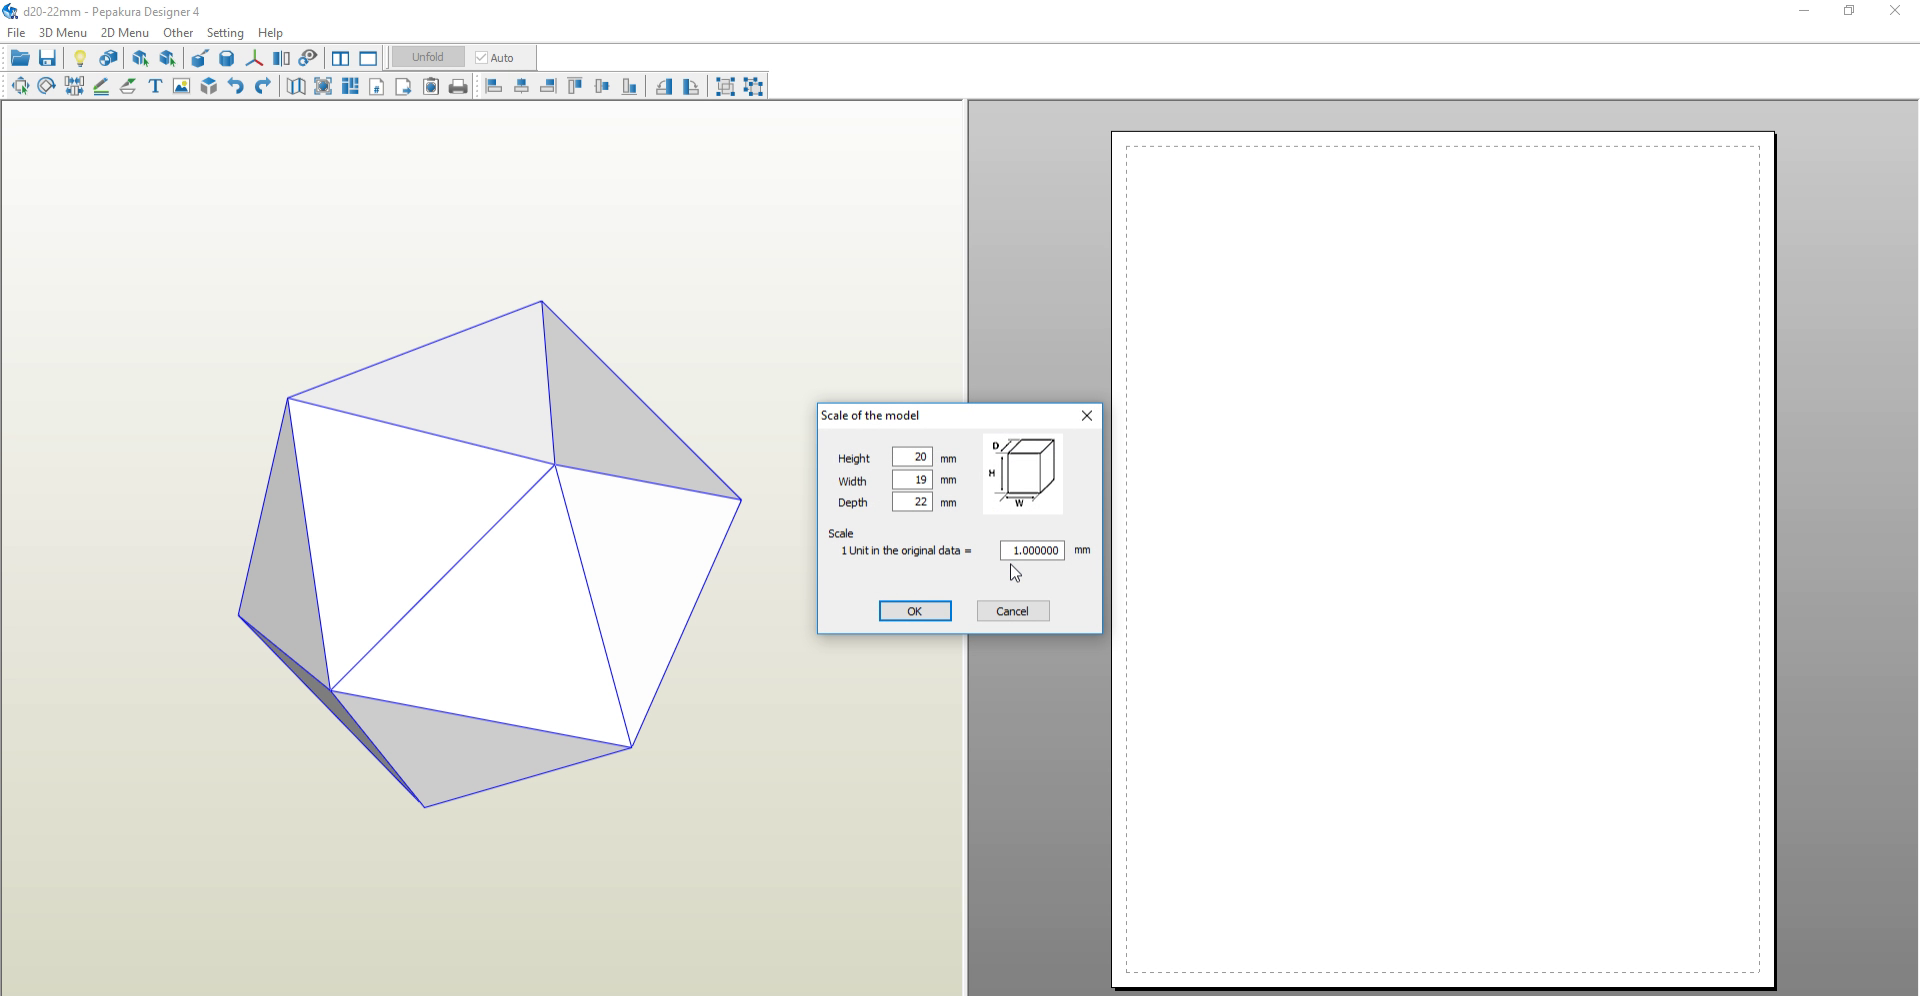
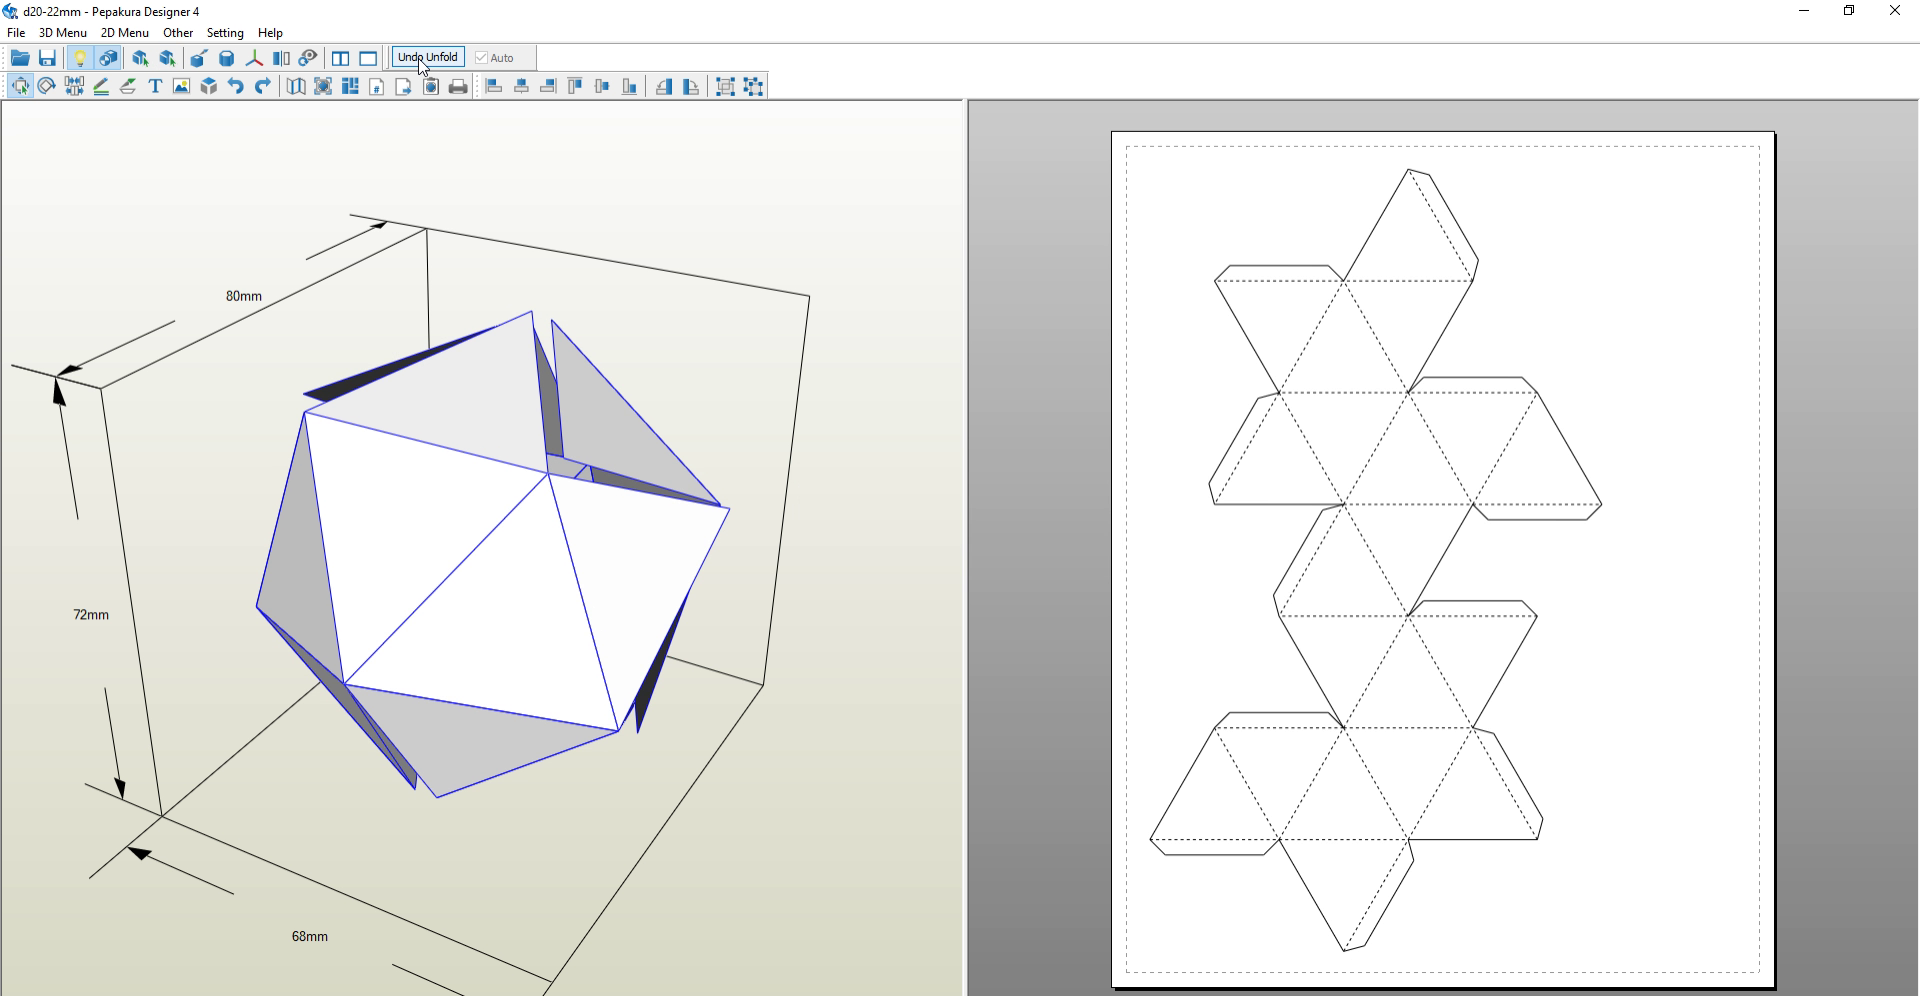
Pepakura Designer is a very easy to use program. It has been around for many years, and is created by a Japanese company which has been fully translated.
1. Open the program and then File > Open your .STL file.
(If you did not make a saved version of the icosahedron before putting any engraved numbers on it please feel free to use my attached blank .STL file.)
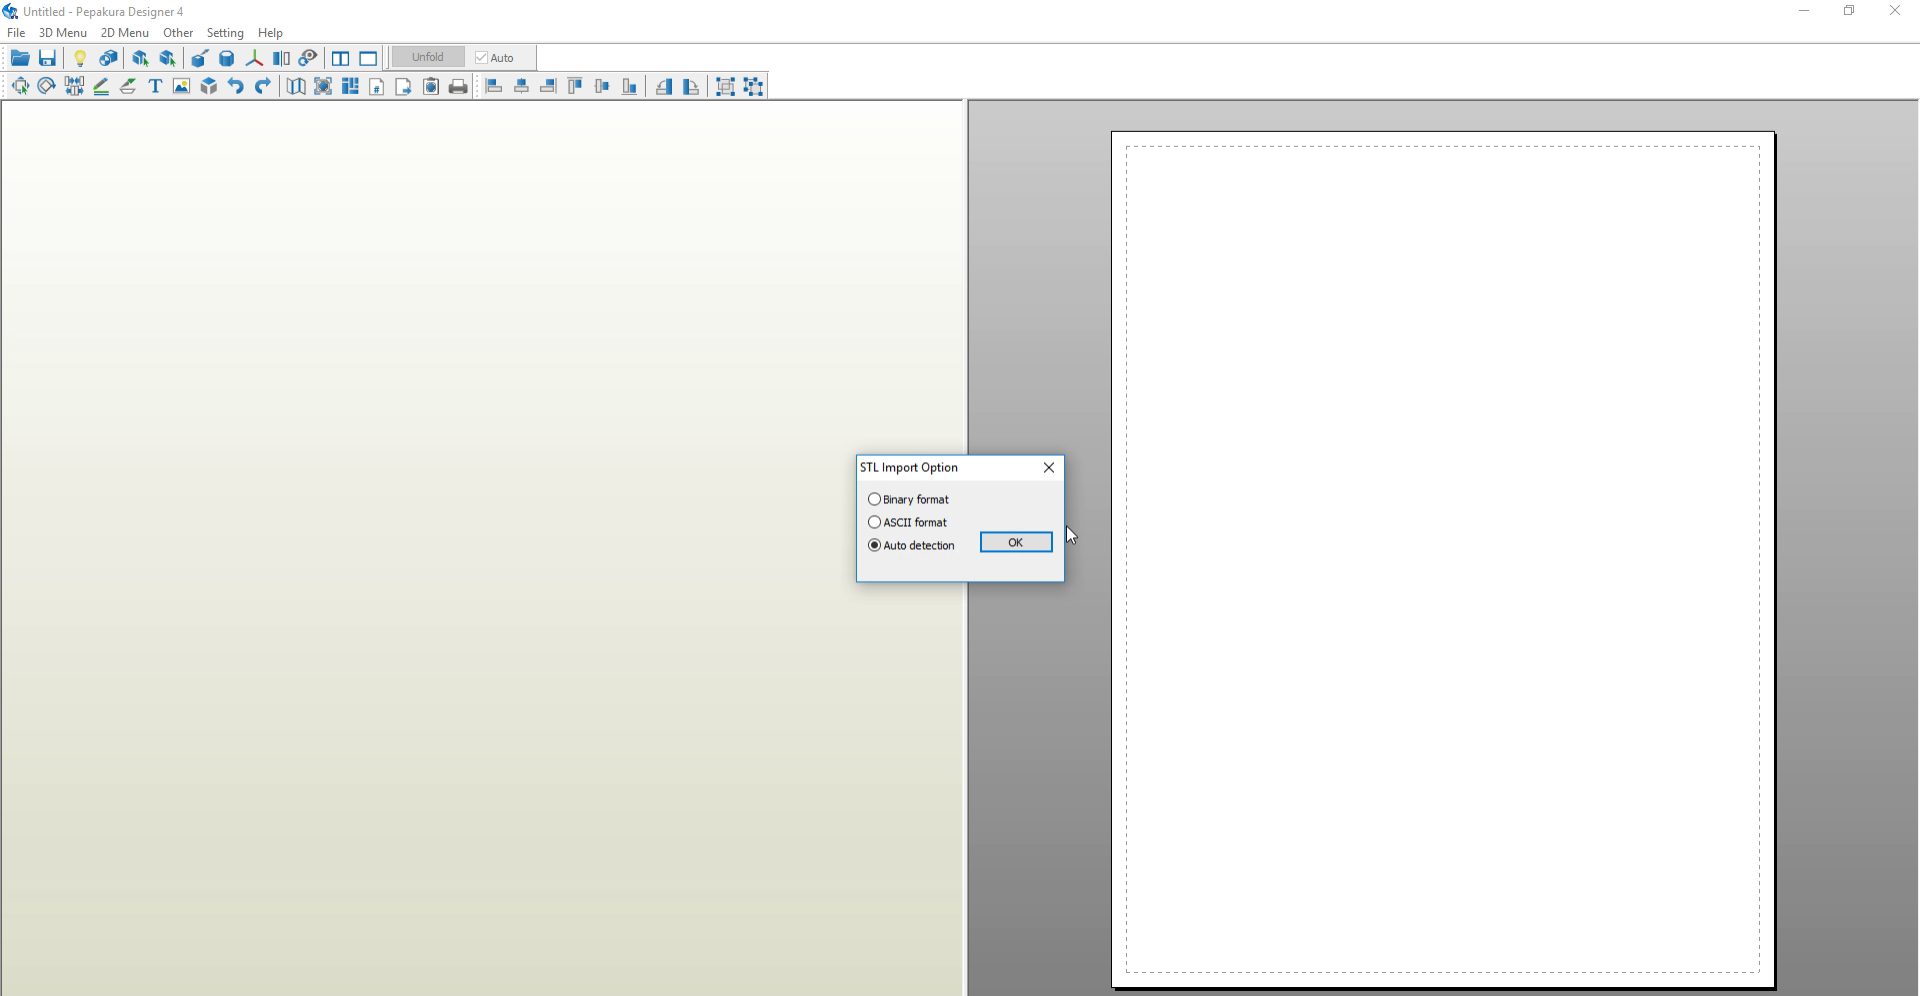
2. When promoted choose "Auto Detection".
3. Next choose "No Flip".
4. It will ask you it you want to change the colors of certain planes. This is not necessary here so click "Next" twice.
5. When prompted select, "No Invert".
6. It should now prompt you for how large you would like it to be. I did 80mm for depth, and it nearly takes up the whole page. (Changing your margins in the Settings > Printer and Paper Settings can give you a larger printing area for your paper.)
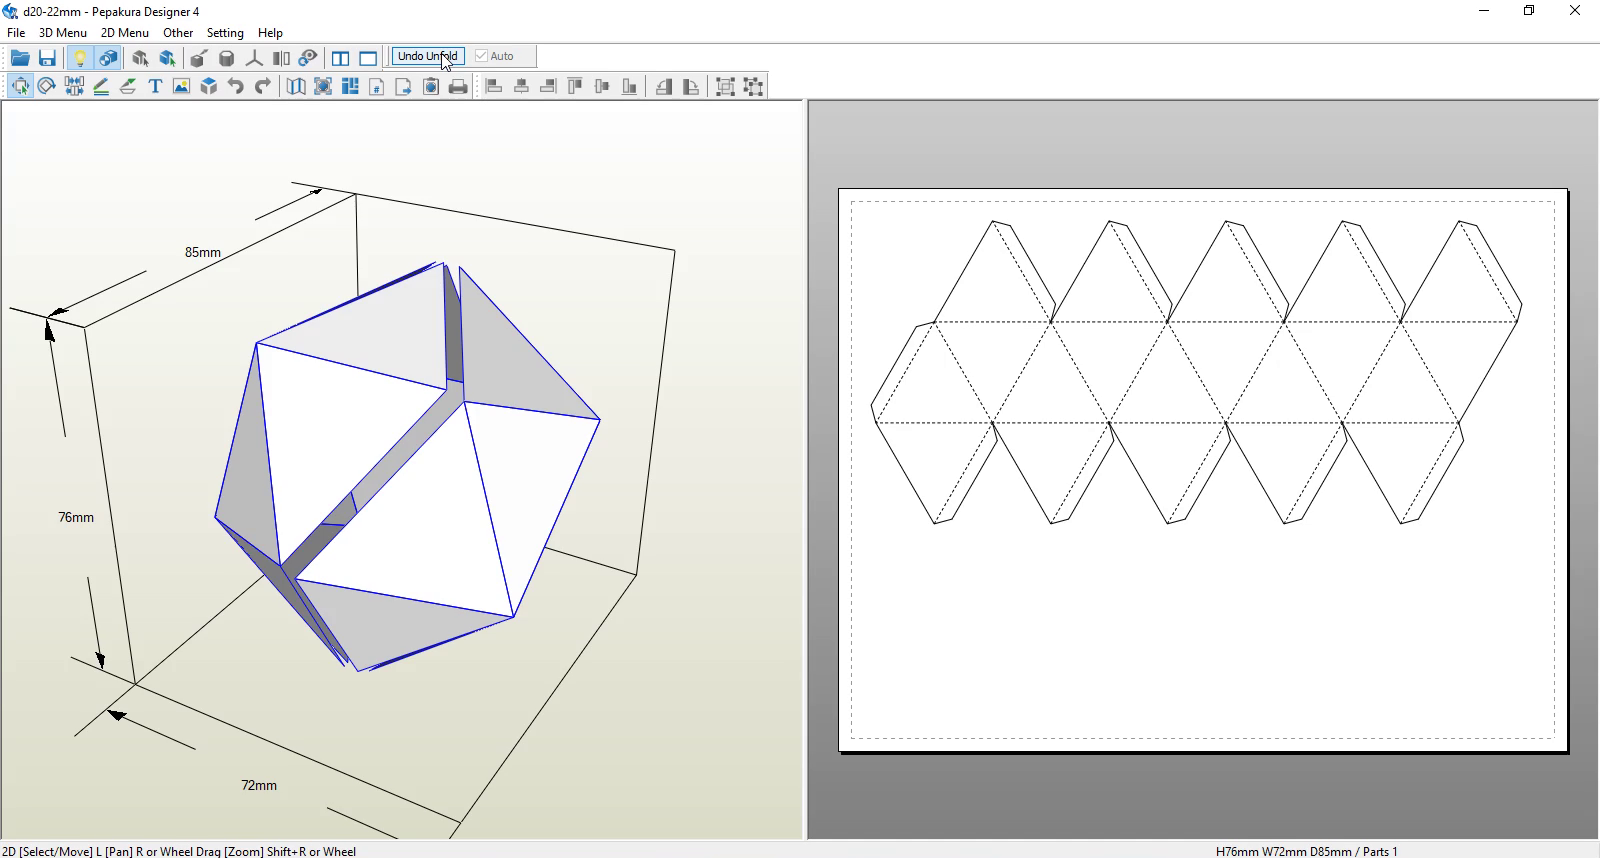
7. Select "Unfold" from the top tool bar. It will generate a papercraft model to the left of your shape.
8. Now it's time to print, be sure that you have it set up to go to your printer, and already have your cardstock in the paper tray.
If you want to add numbers to your version I simply saved it as an .SVG and opened in it Inkscape (Illustrator is also a good option). You want to make sure your numbers are at least aligned with one flat side of the triangle on the bottom of each number. I've found many different d20's have different numbering on different planes, so don't feel you have to put them on the exact same way I did.
If you do not have a licensed copy of this software you can still print your unfolded designs, you just won't be able to save the files or export them. When export in .SVG and .EPS making it very interesting for laser cutters, and plotting machines.
As far as software goes though, it is quite cheap and worth the money as you start getting deeper into 3d designing.
If you are completing this step yourself Pepakura may come up with a different unfolded shape. I tried two versions and found this one the easiest to put together as one piece. As the program is very powerful you can move your unfolded paper version to the left of the screen and place the triangles how you'd like them to connect.
I suggest checking their official overview with with some details on how the program works.
------------------------------
Now that you have seen your 3d model broken up and laid flat we can glue it together in the next step.
Downloads
Cutting and Assembling Your D20 Papercraft
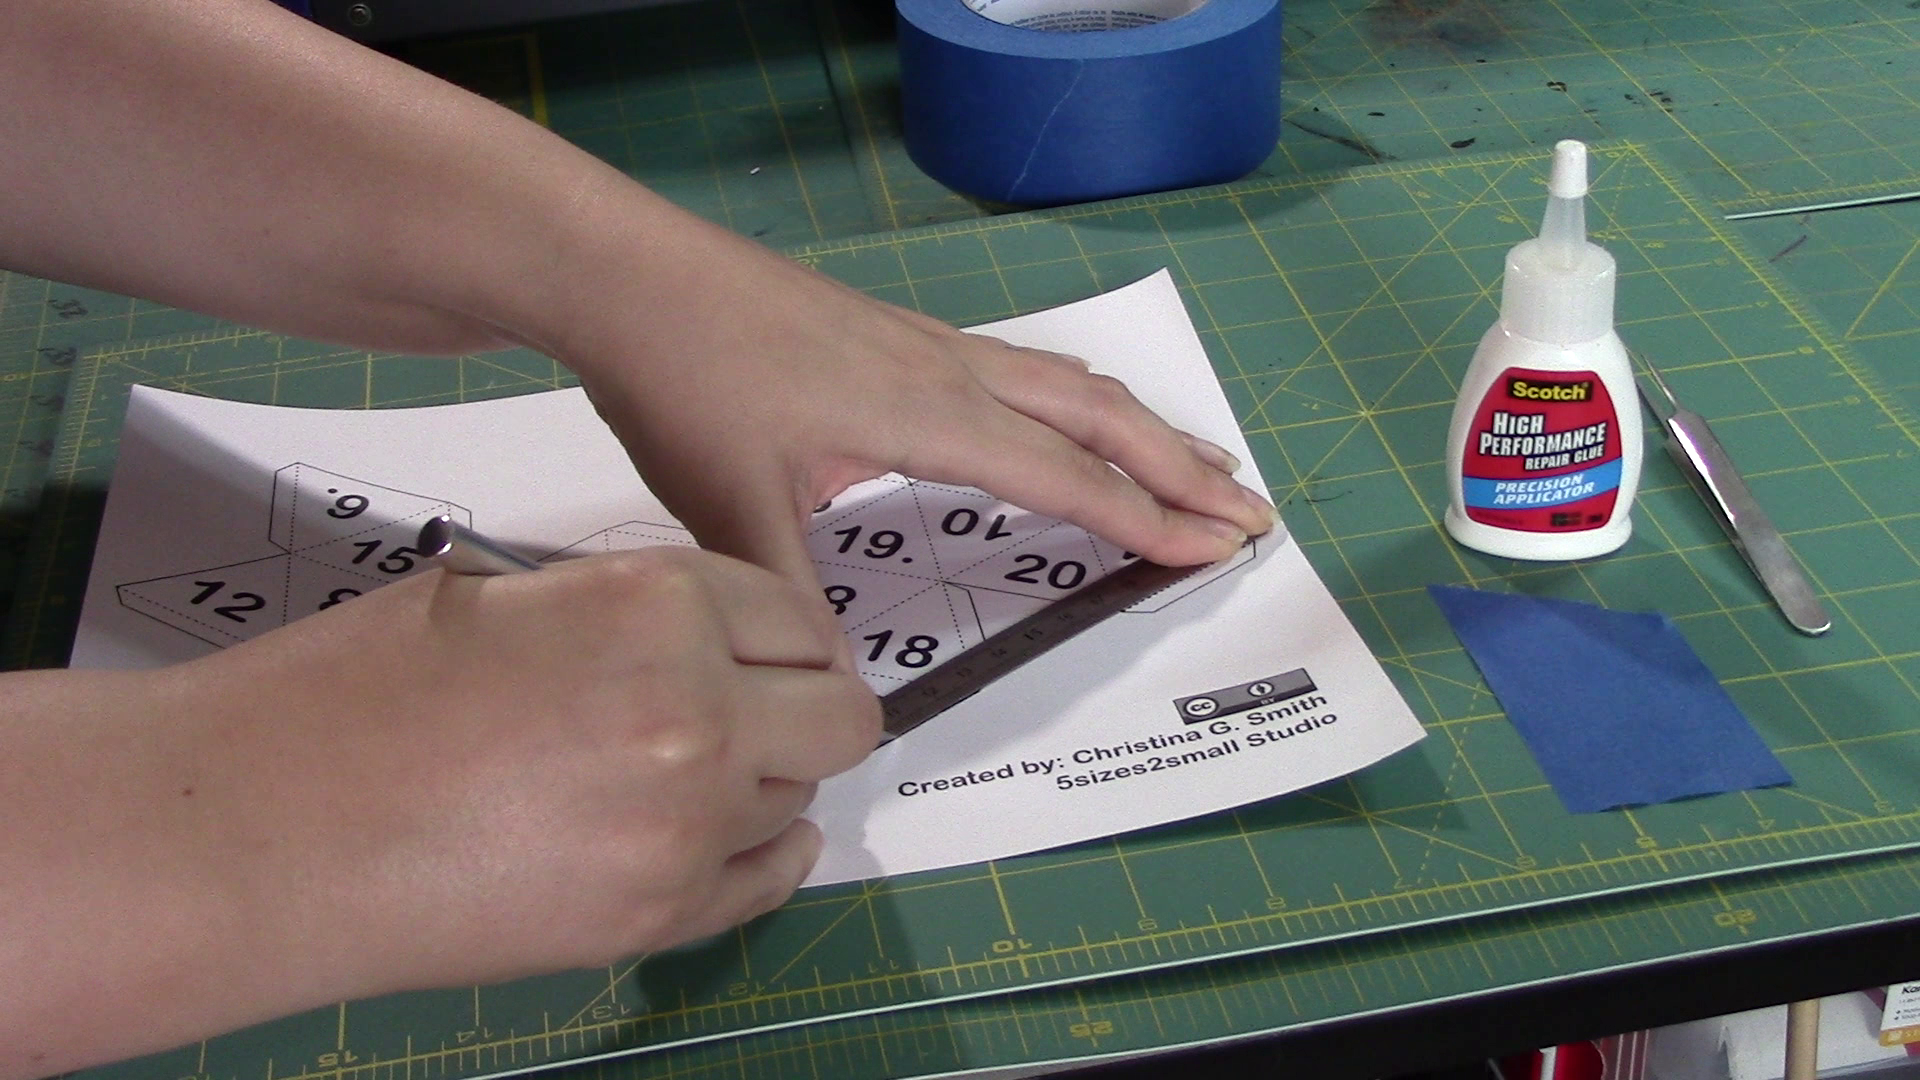
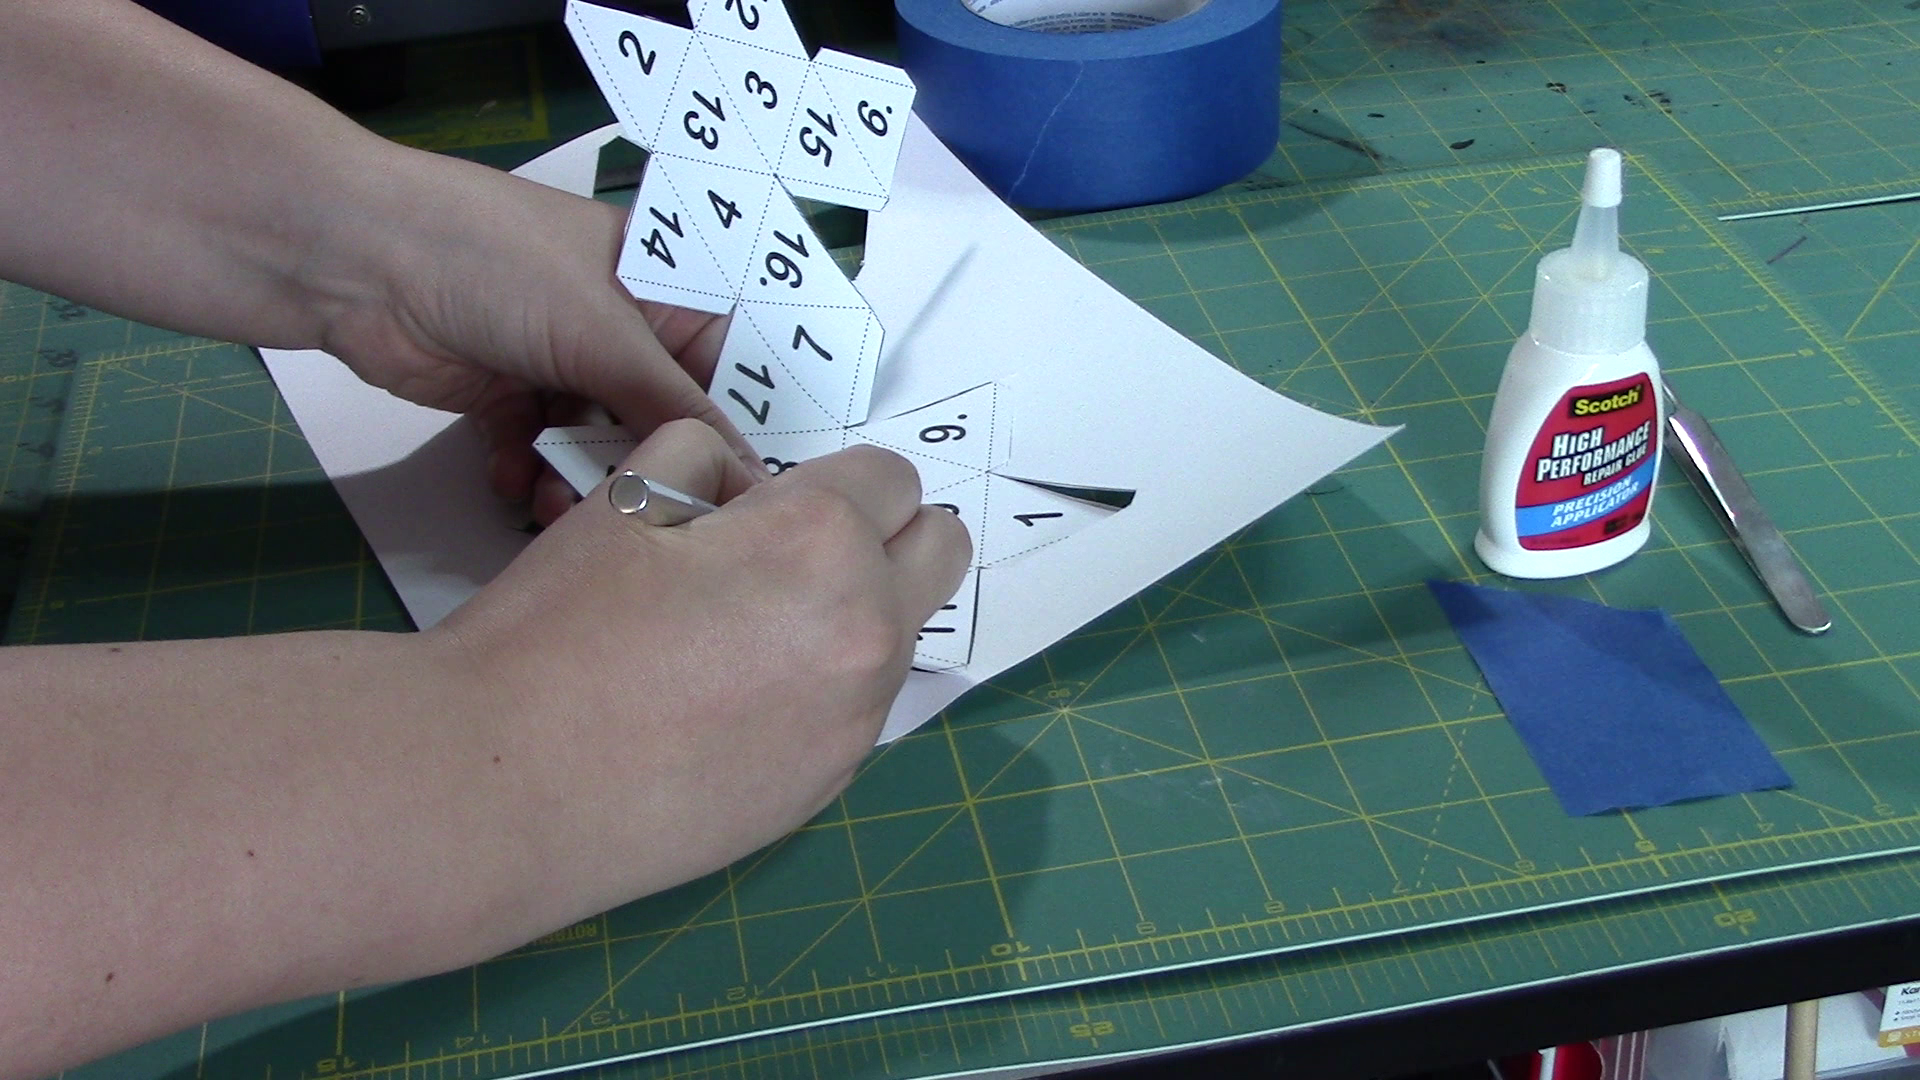
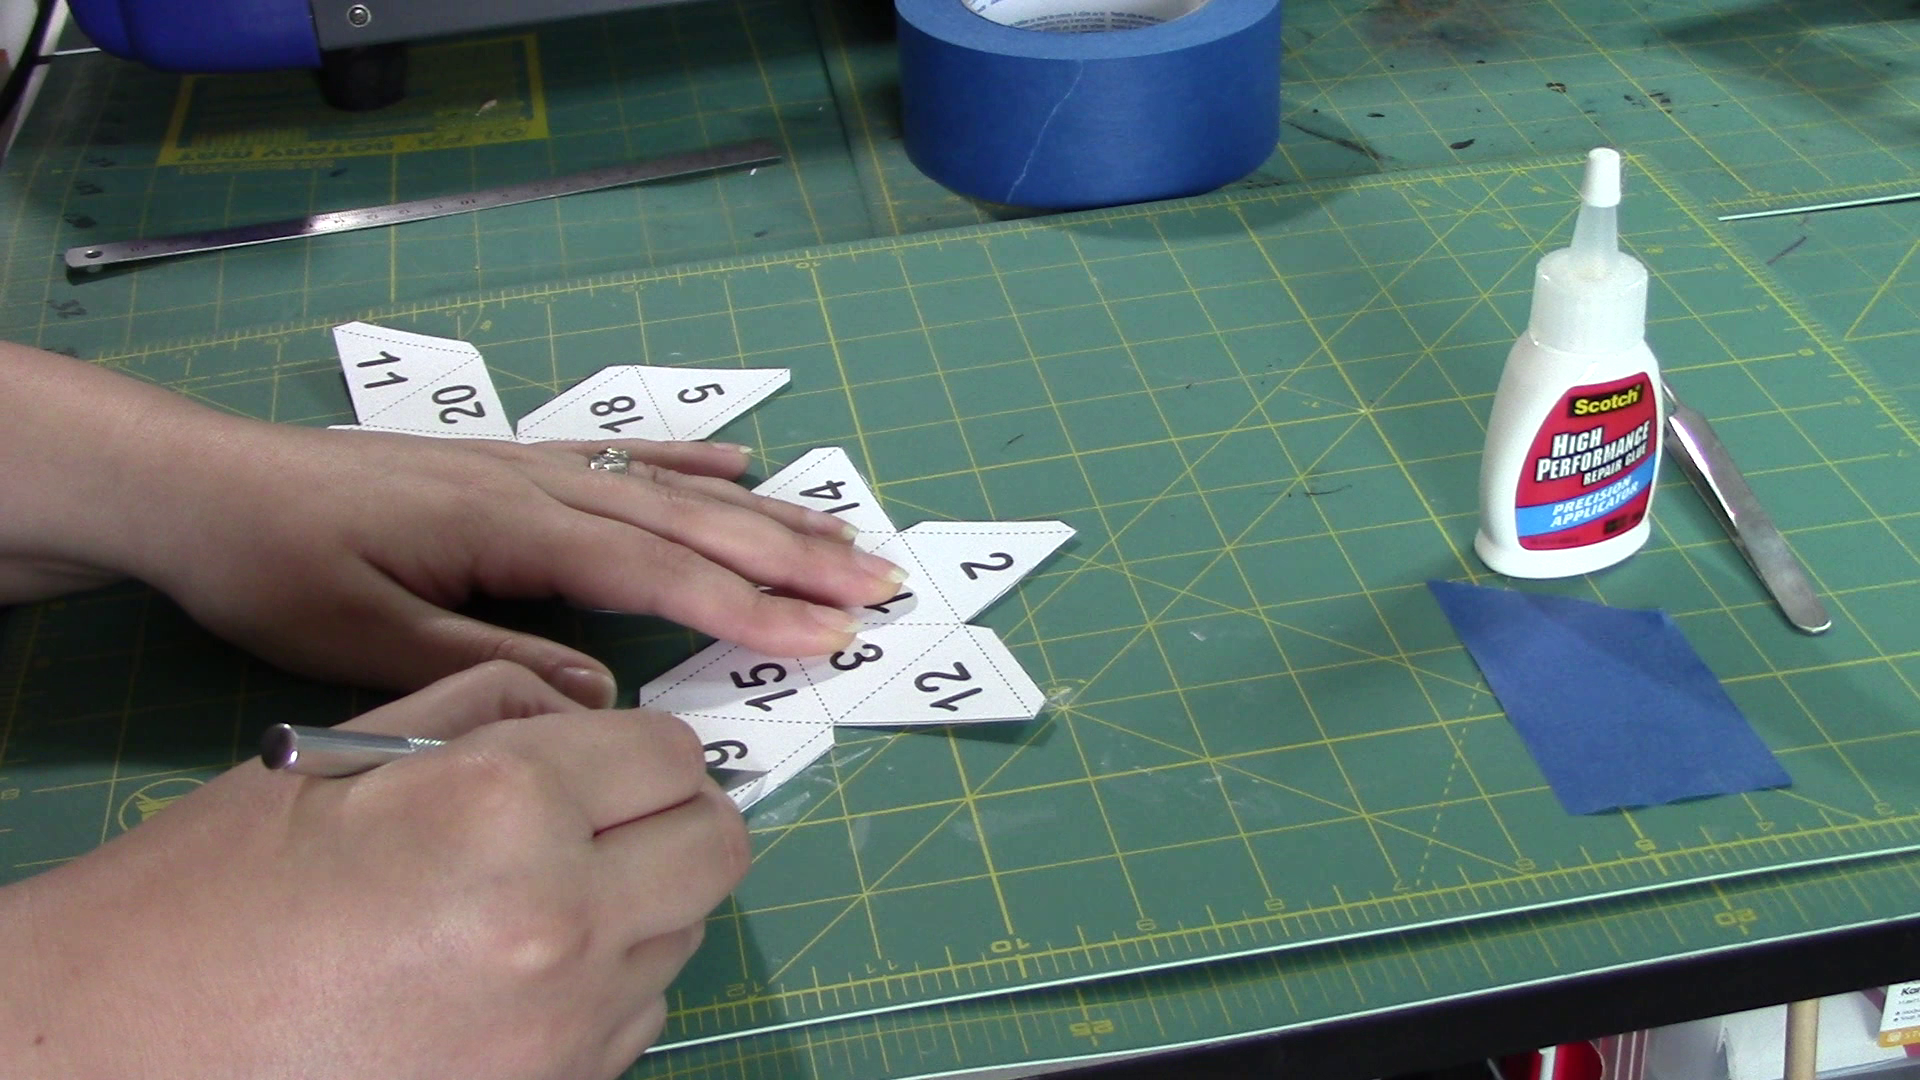
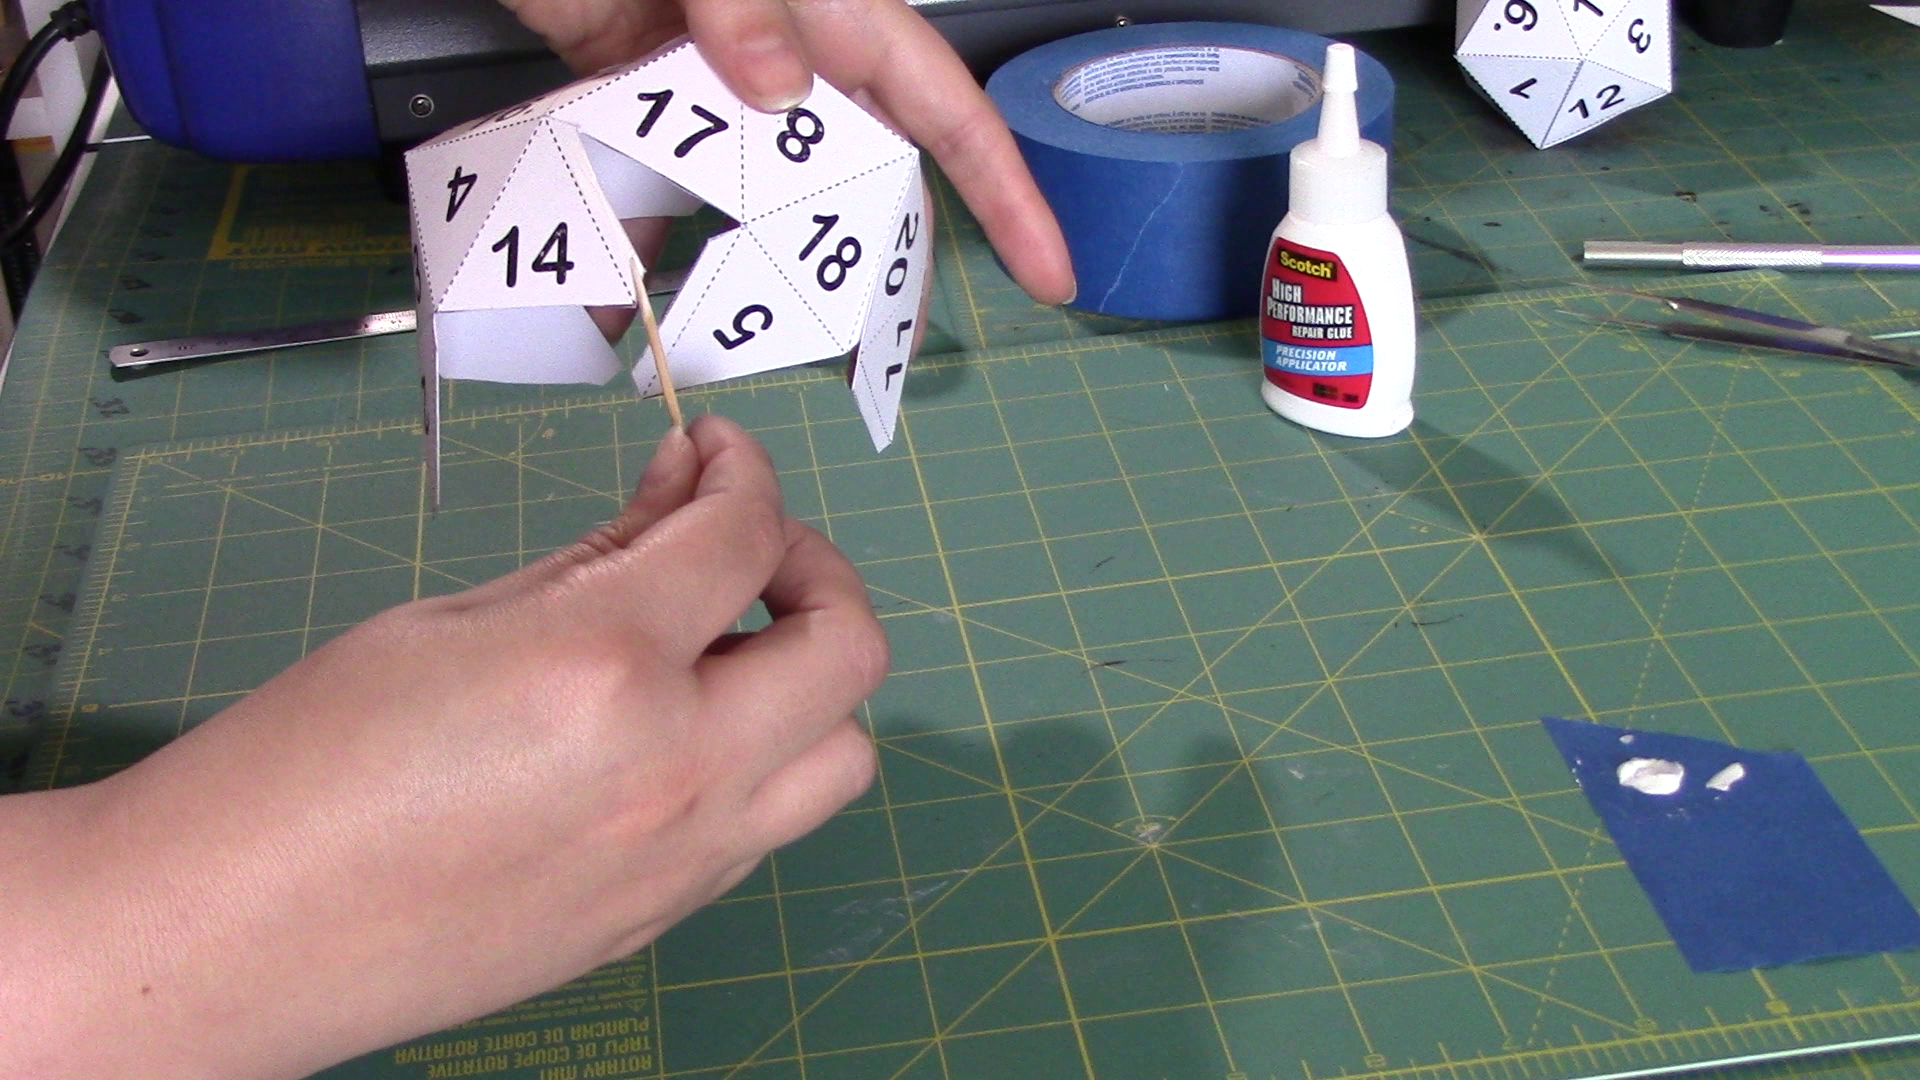
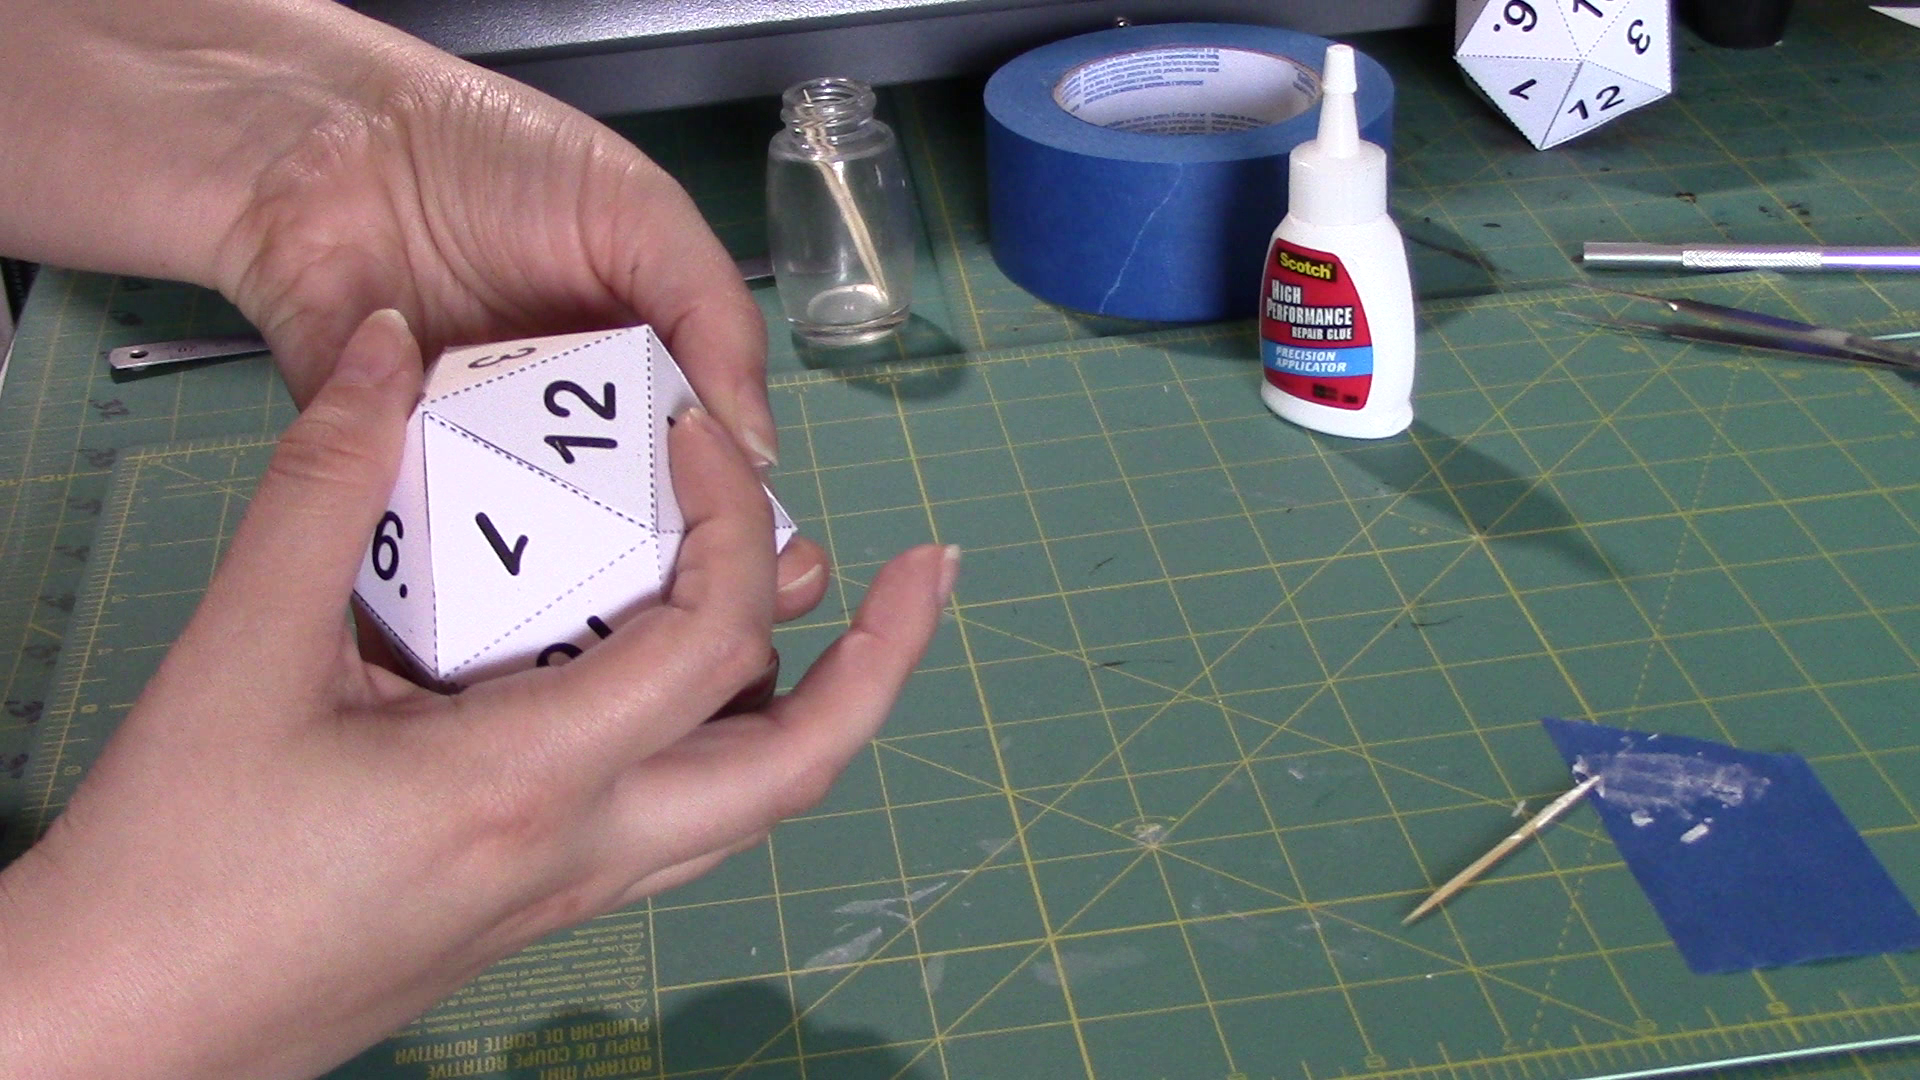
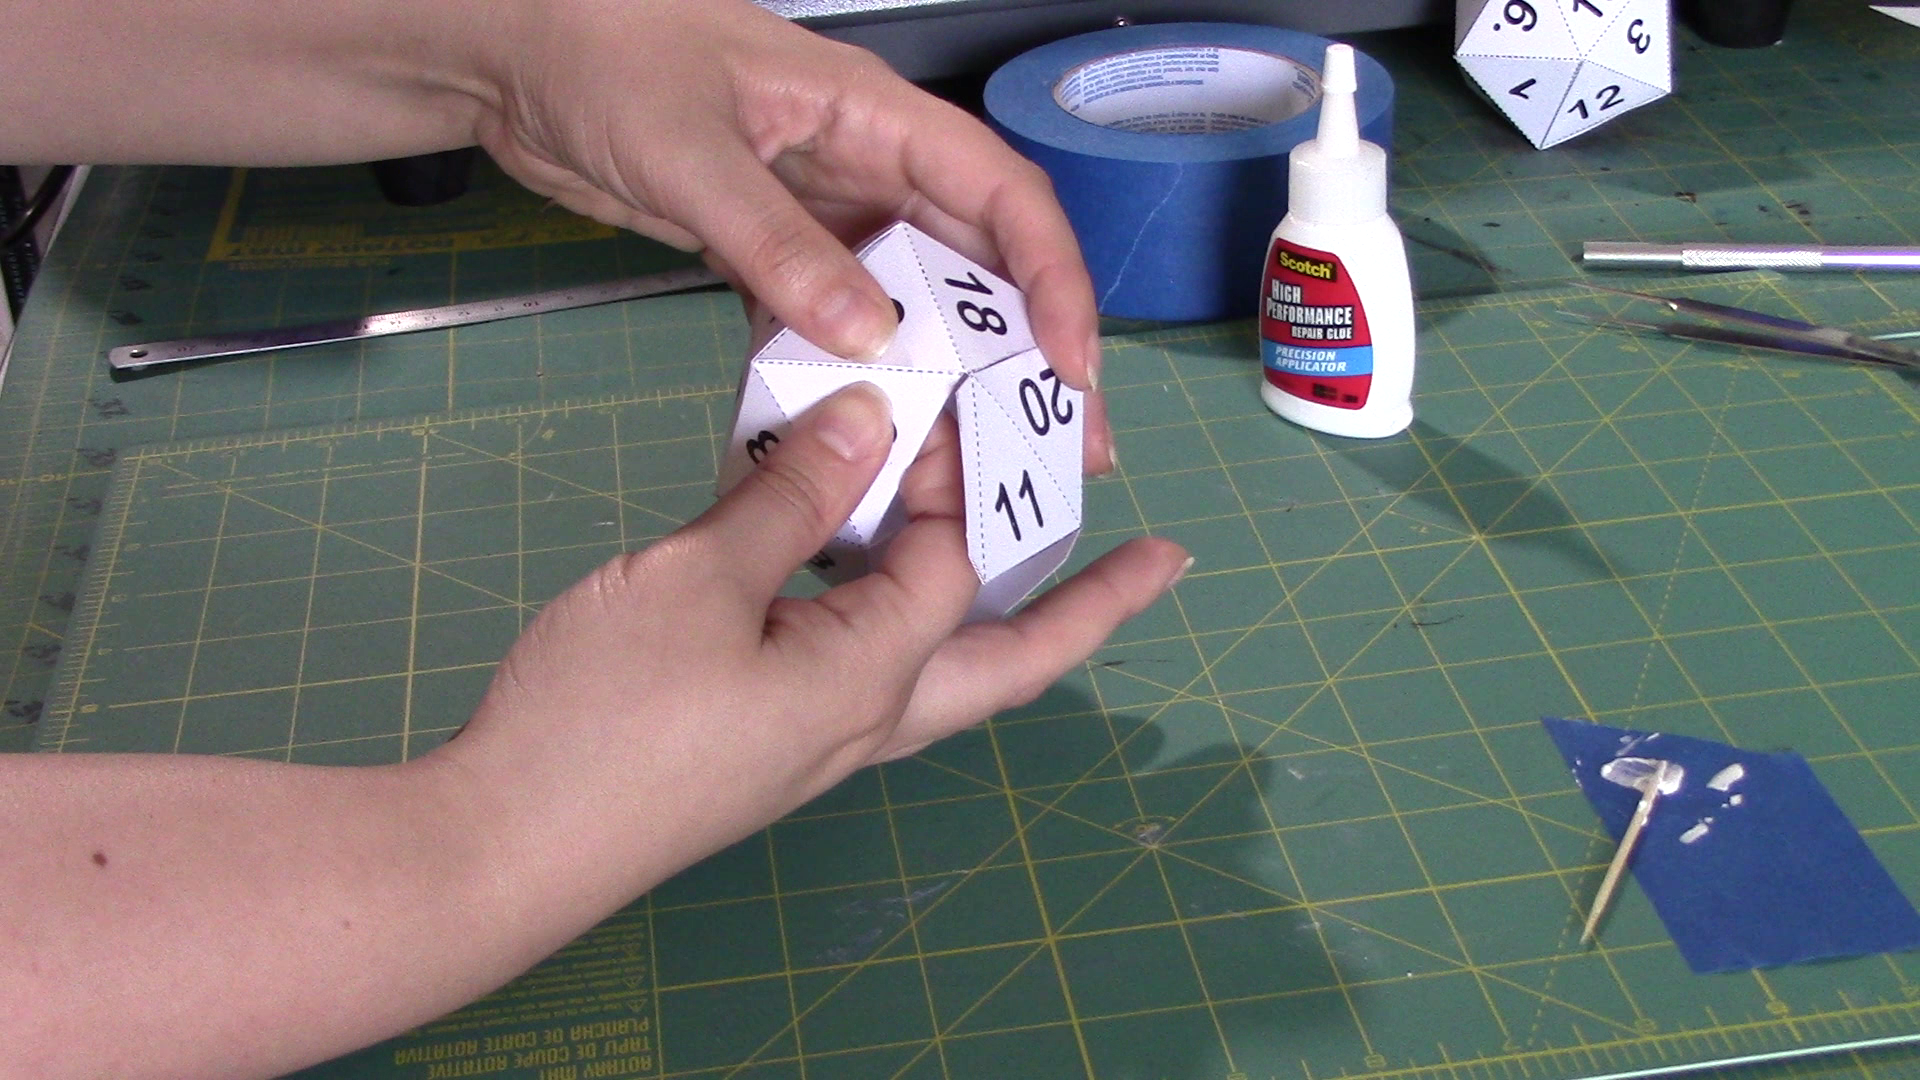
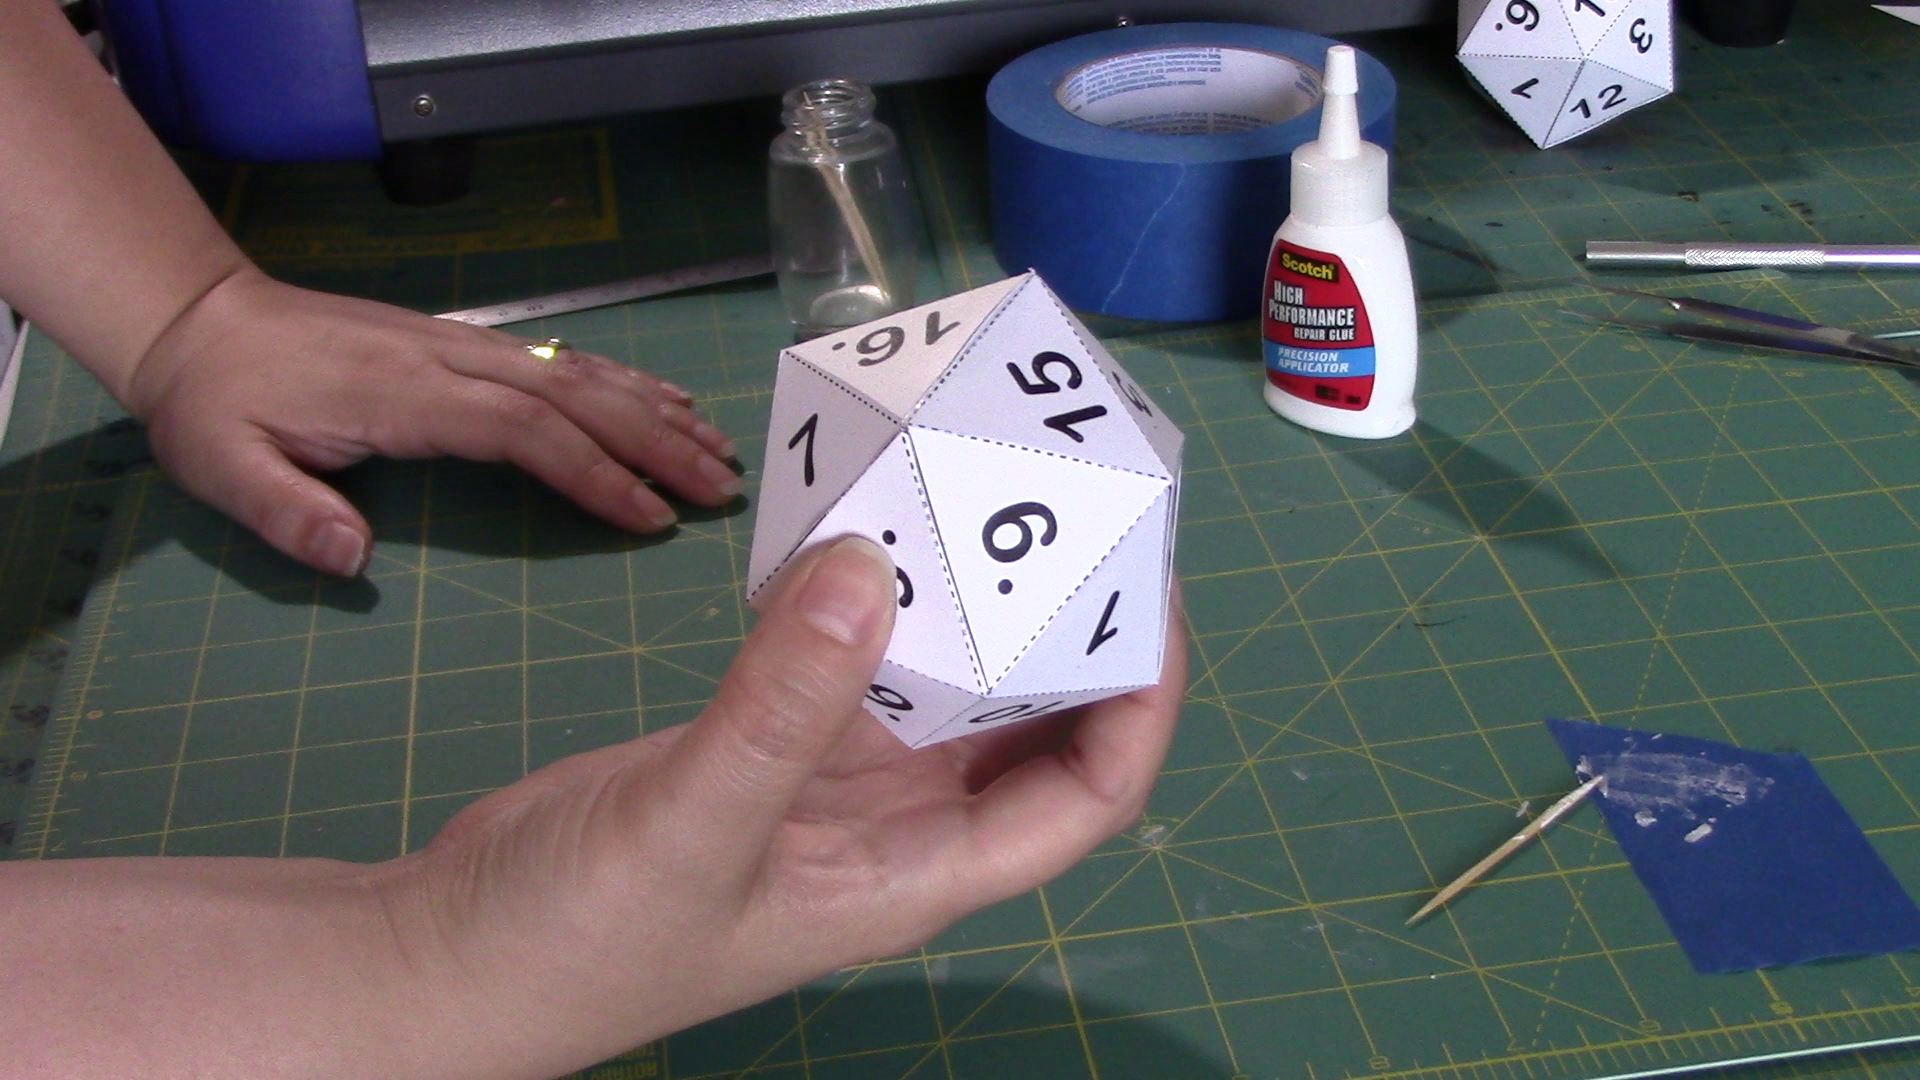
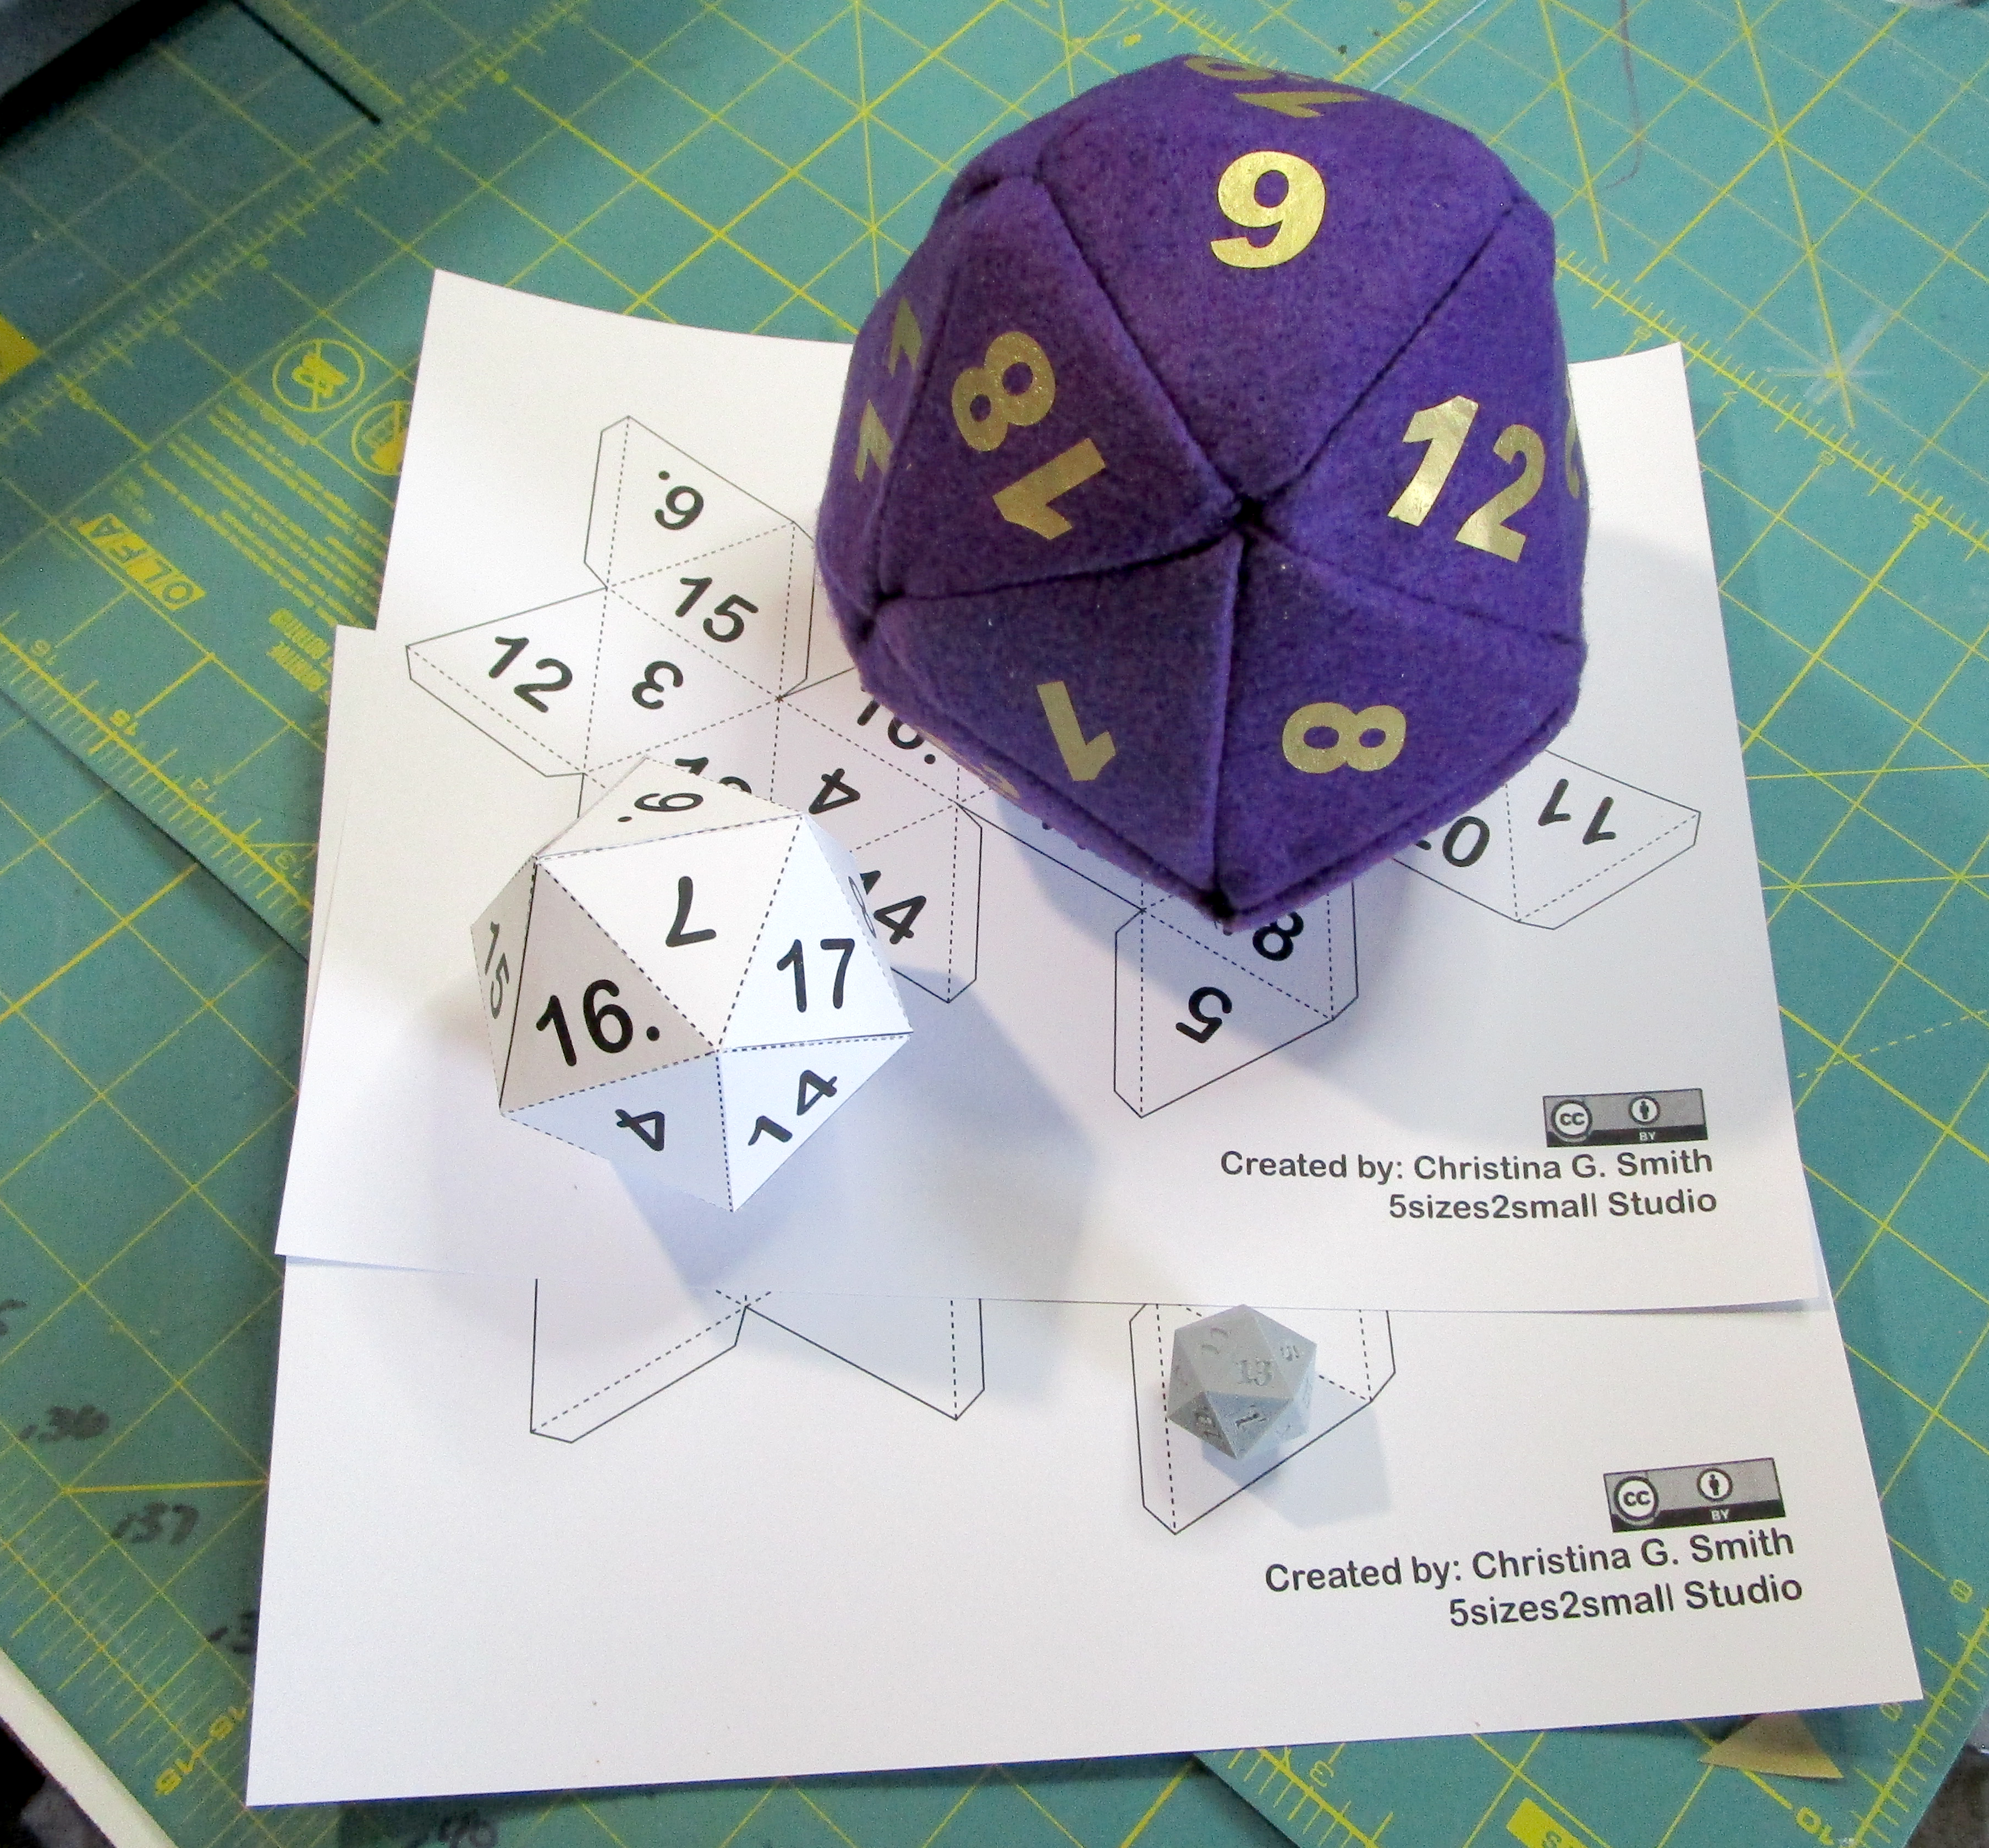
Putting together your papercraft can seem daunting at first, but after starting and connecting a few areas it suddenly changes into the d20 in front of your eyes.
1. On all the solid lines use your hobby knife (X-acto blade) to cut through completely.
TIP: Using a ruler to get really straight edges, it can be very satisfying. If you are under 13 be sure to ask an adult to help or be in the room while you cut.
2. On the dotted lines, scoring the paper is very helpful, this means lightly going over the dotted lines with the blade, but not cutting all the way through. This is not necessary, but will give you a cleaner look.
3. Fold across those scored dotted line, making sure that you consistent with the direction you decide to fold. Try not to fold the tabs where you will be adding glue too harshly.
TIP: Beginners I suggest folding away from you leaving the dotted lines visible on the outside. This will help you visualize how the shape comes together.
As you continue to work with paper craft there are more and more ways to assemble complex shapes, so as you level up always look for a key on how folds should be done. Some models have both inward and outward folds.
4. Every flap along the edge will be glued to a side that does not have a flap. As soon as you have made your folds, this will make a lot of sense. The main thing is to make sure that every point of the die is 5 triangles coming together.
TIP: Be sure to not use too much glue, I suggest using a toothpick to apply glue to each flap. And try to use a fast drying glue that will help you move onto your next tab quickly. If parts aren't staying together, get a tool like long tweezers, or even a pencil to be able to push from the inside as well as the outside with your finger. The last flaps you cannot push together from the inside, this is why I suggest not folding them too harshly. When they are less bent it is easier to give slight pressure from the outside to make those connections. Gently hold the whole shape for about 30 sec and it should hold itself.
Please feel free to use the finished .PDF files you can print and use as you like they are under Creative Commons Attribution (by).
Don't get discouraged if it takes a few tries to get it just perfect. This is a good activity for kids and adults a like.
----------------------------------
Now that we have our 2nd d20 finished, what else can we do with what we've learned?
With a 3d model we learned how to create a basic shape and print it.
With the papercraft we now see how the outside shell of triangles can become the icosahedron.
What other forms of making is basically making a shell?
Got to the next step to see how we kept going with what we've learned so far.
Making a Stuffed D20
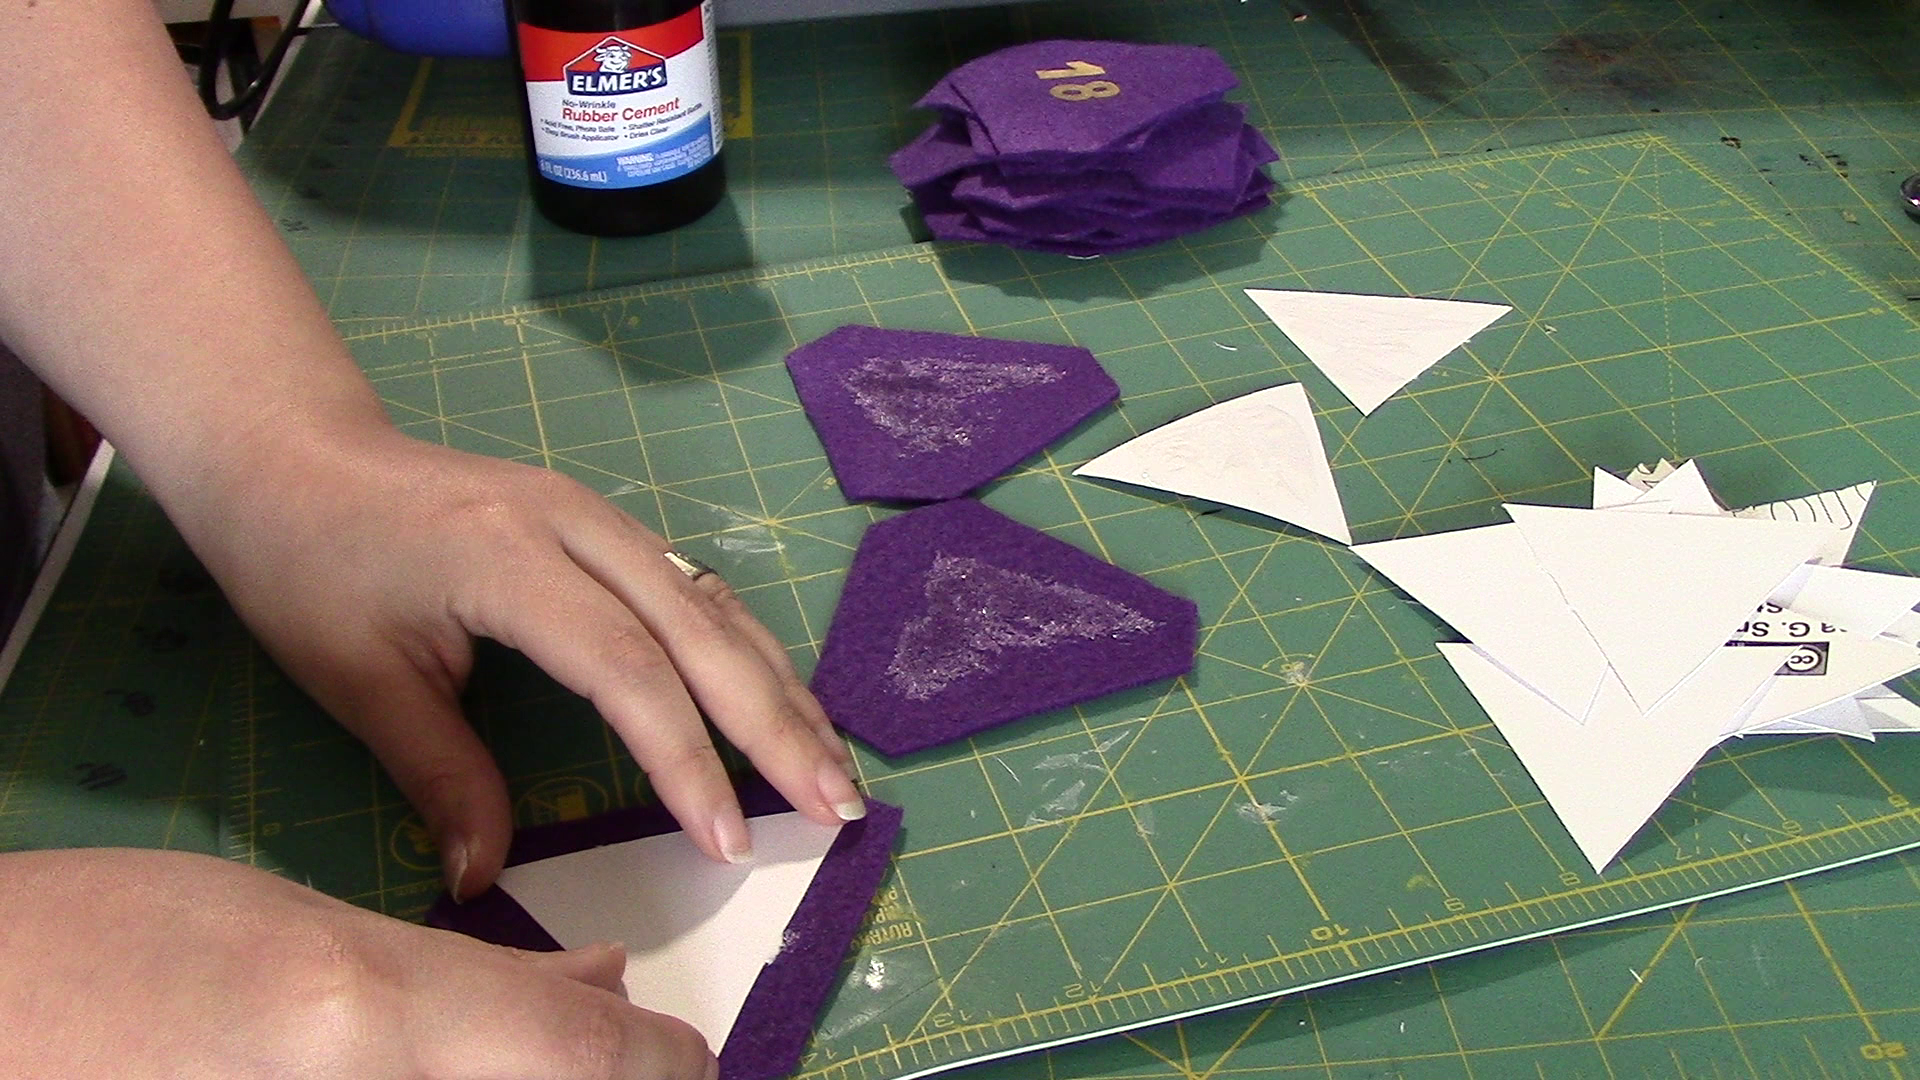
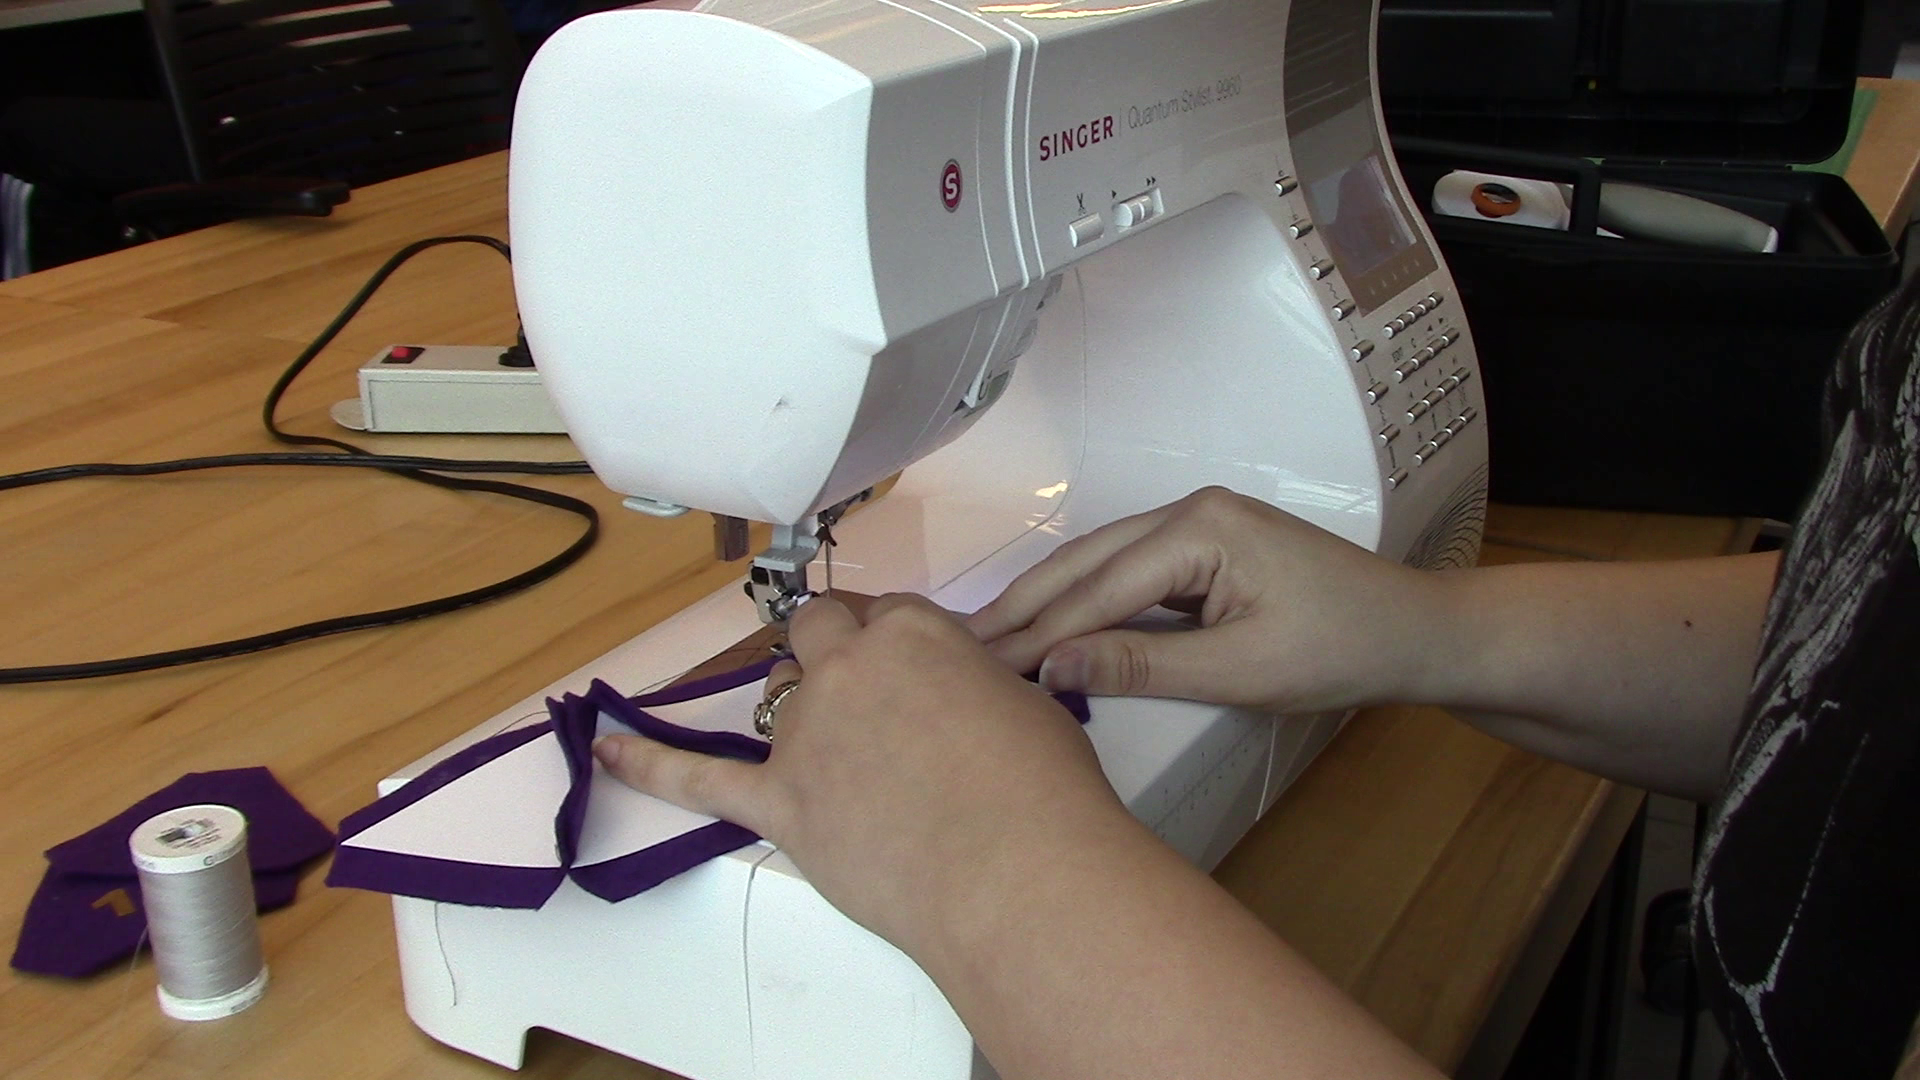
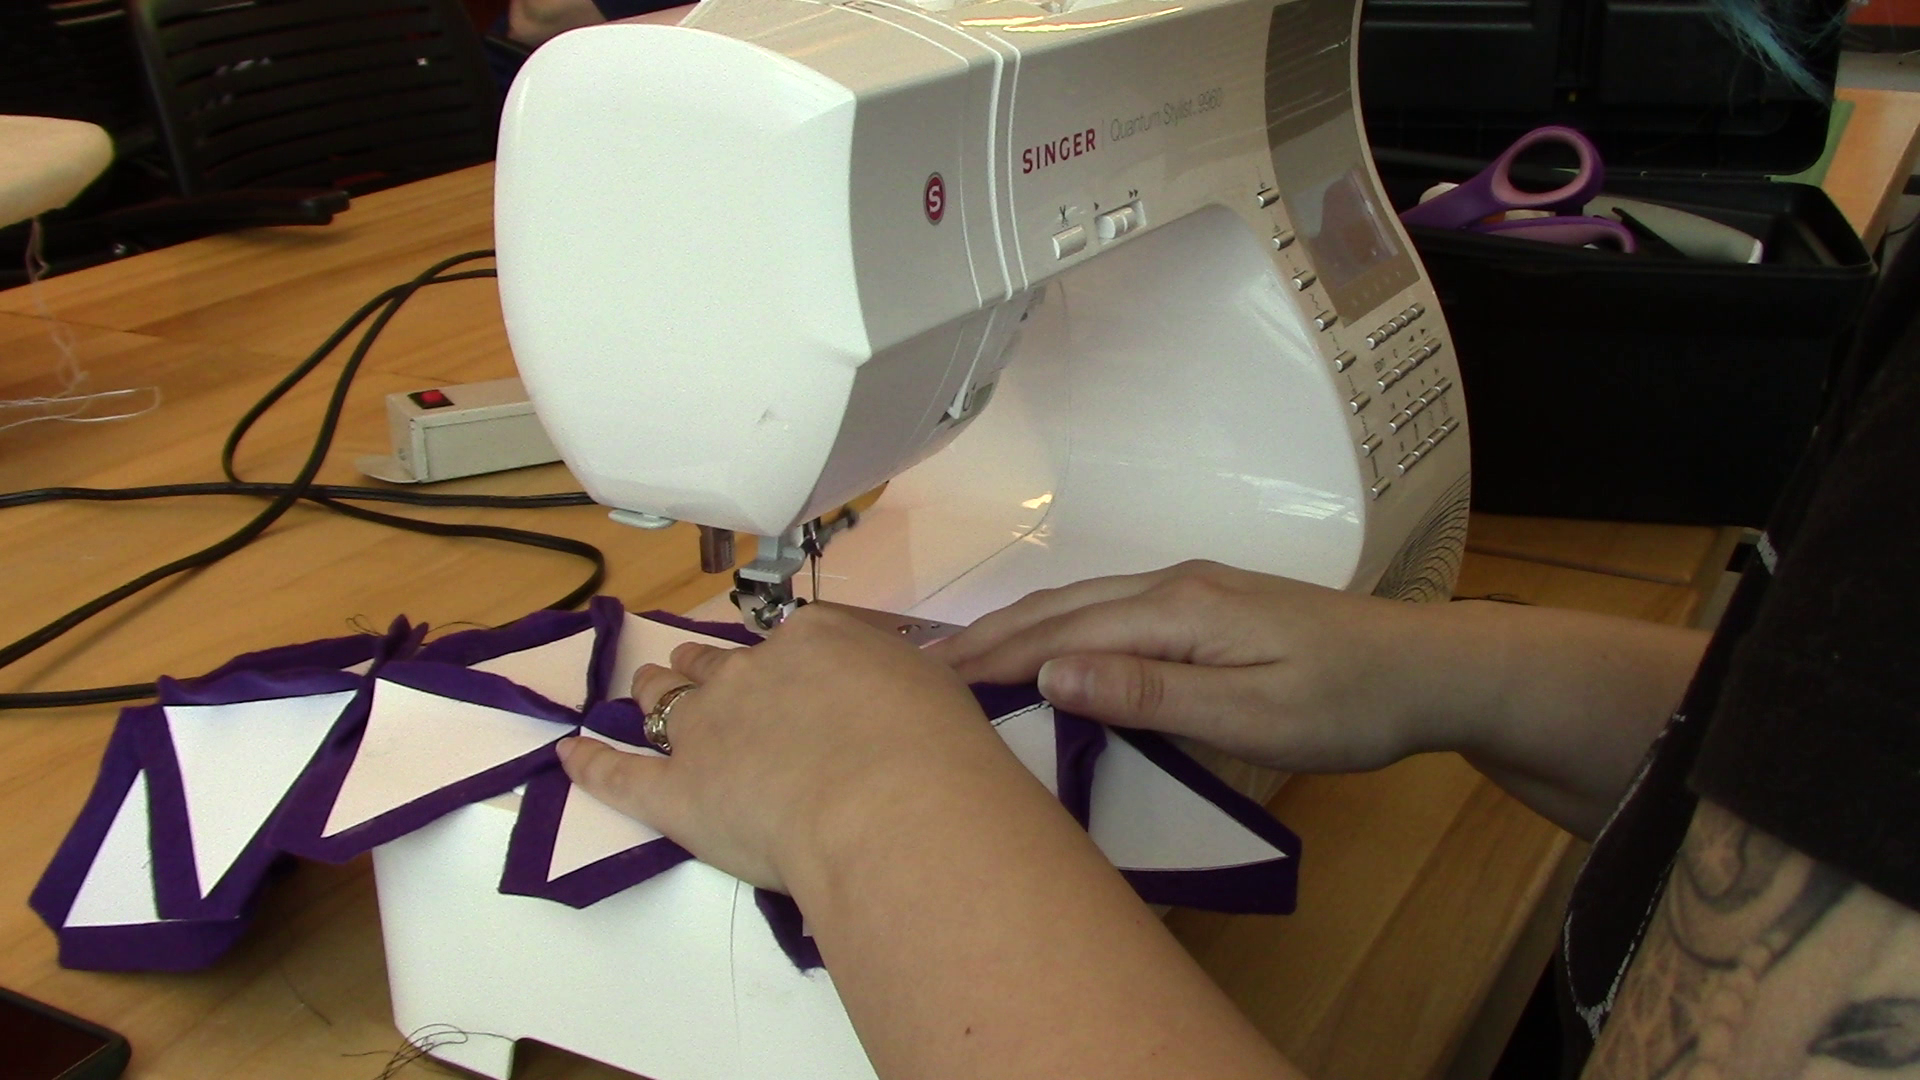
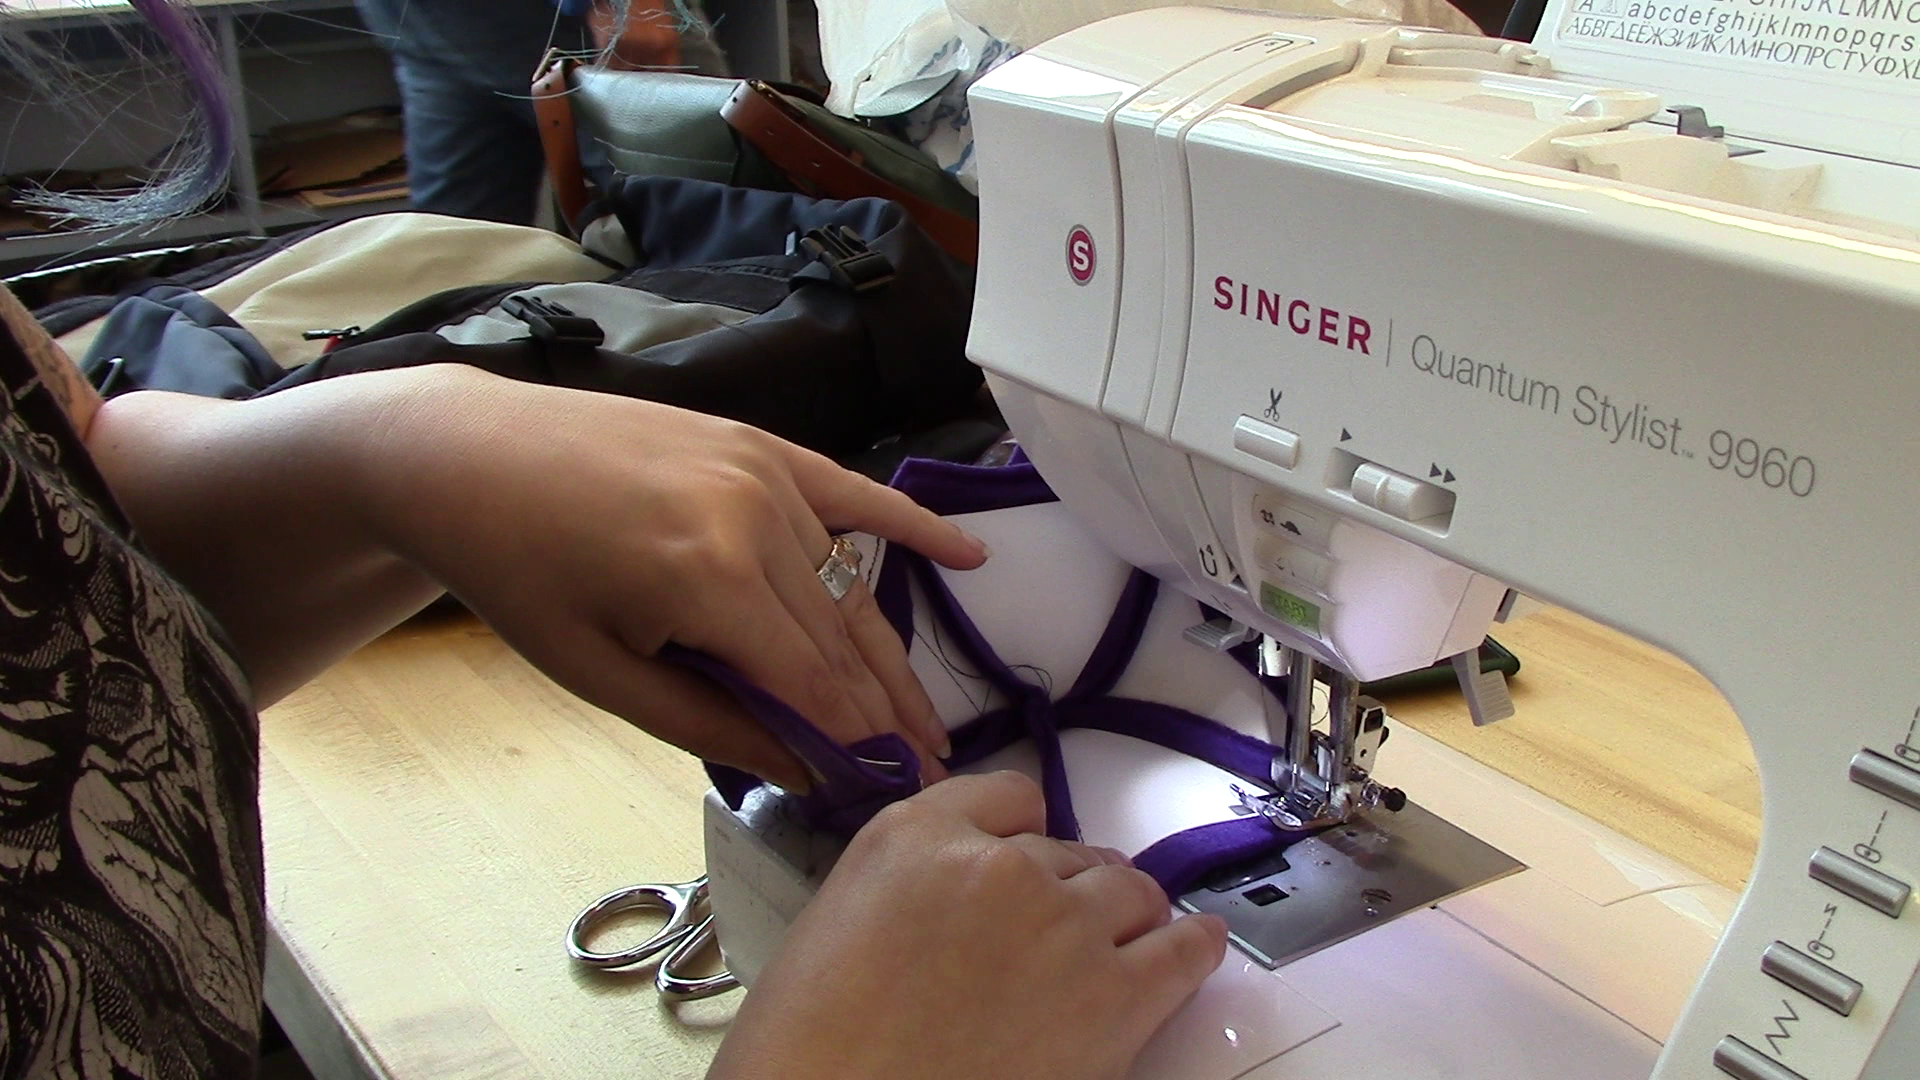
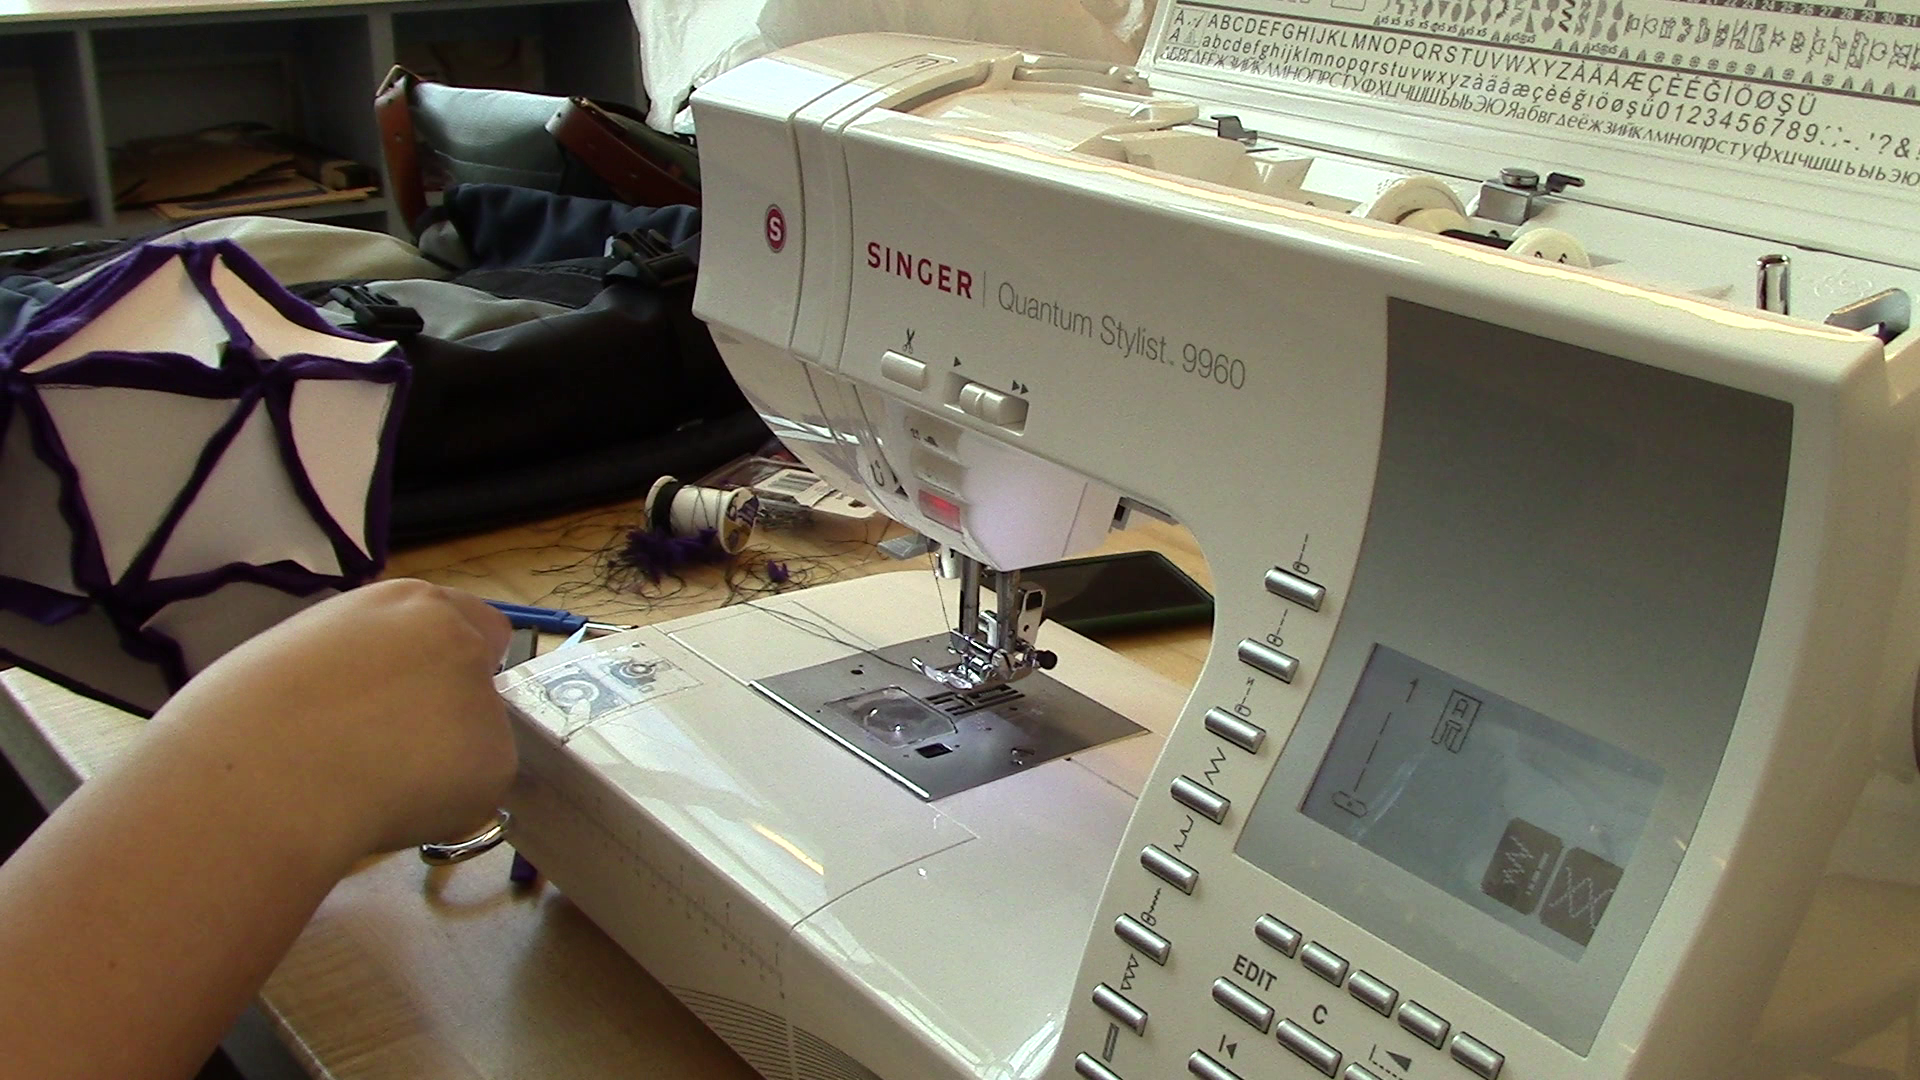
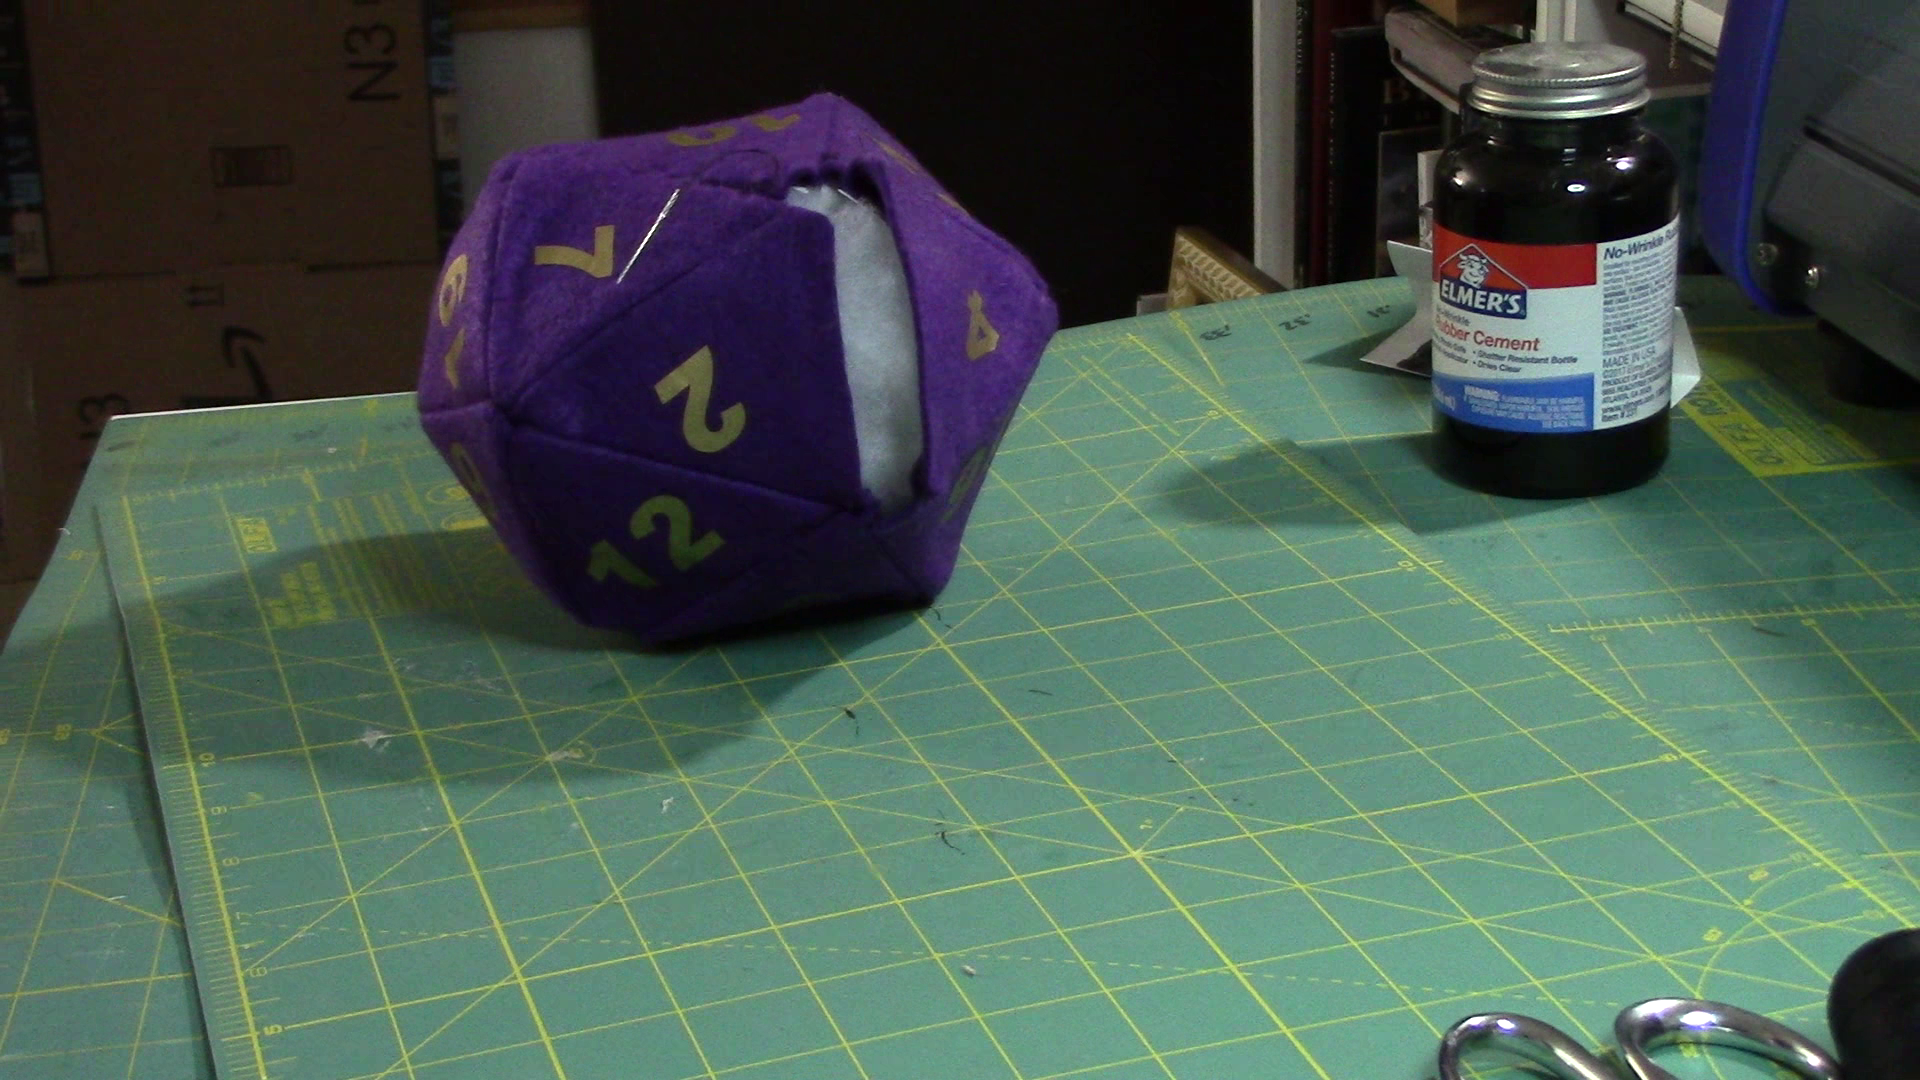
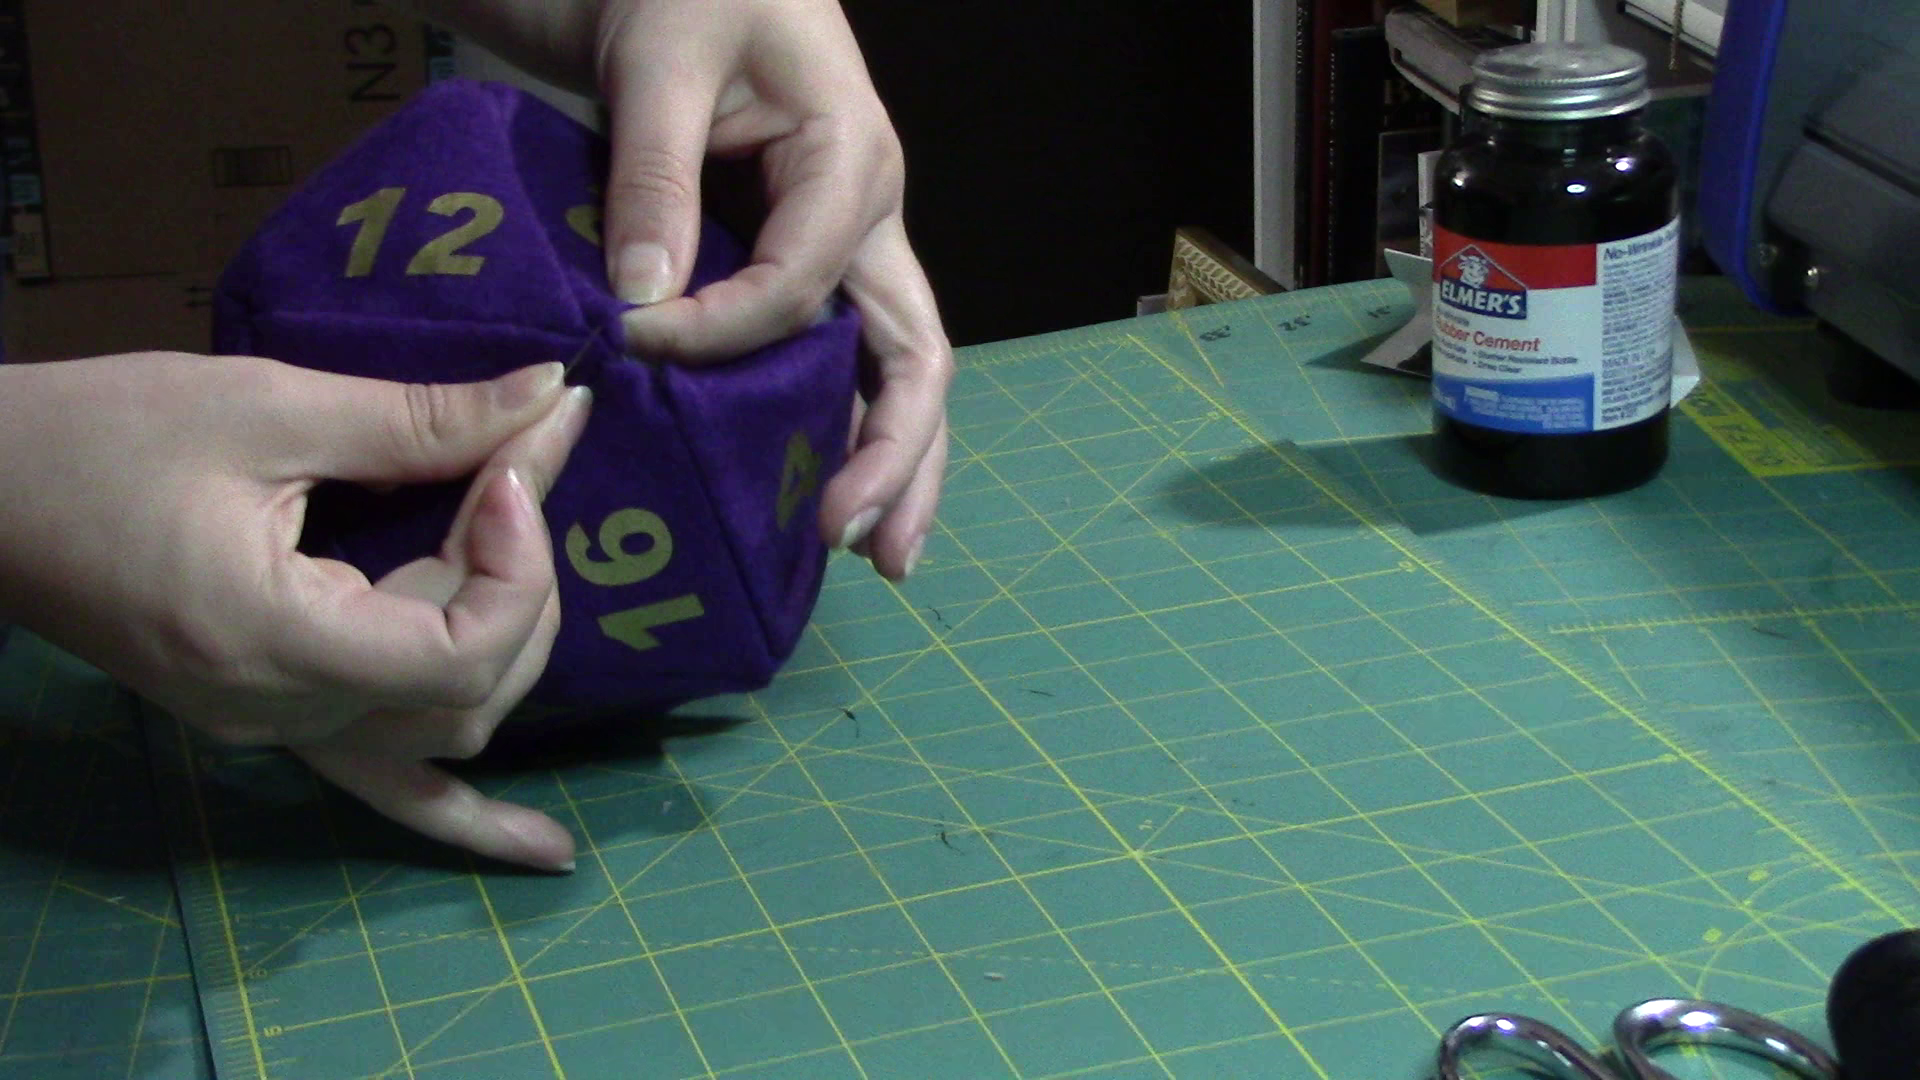
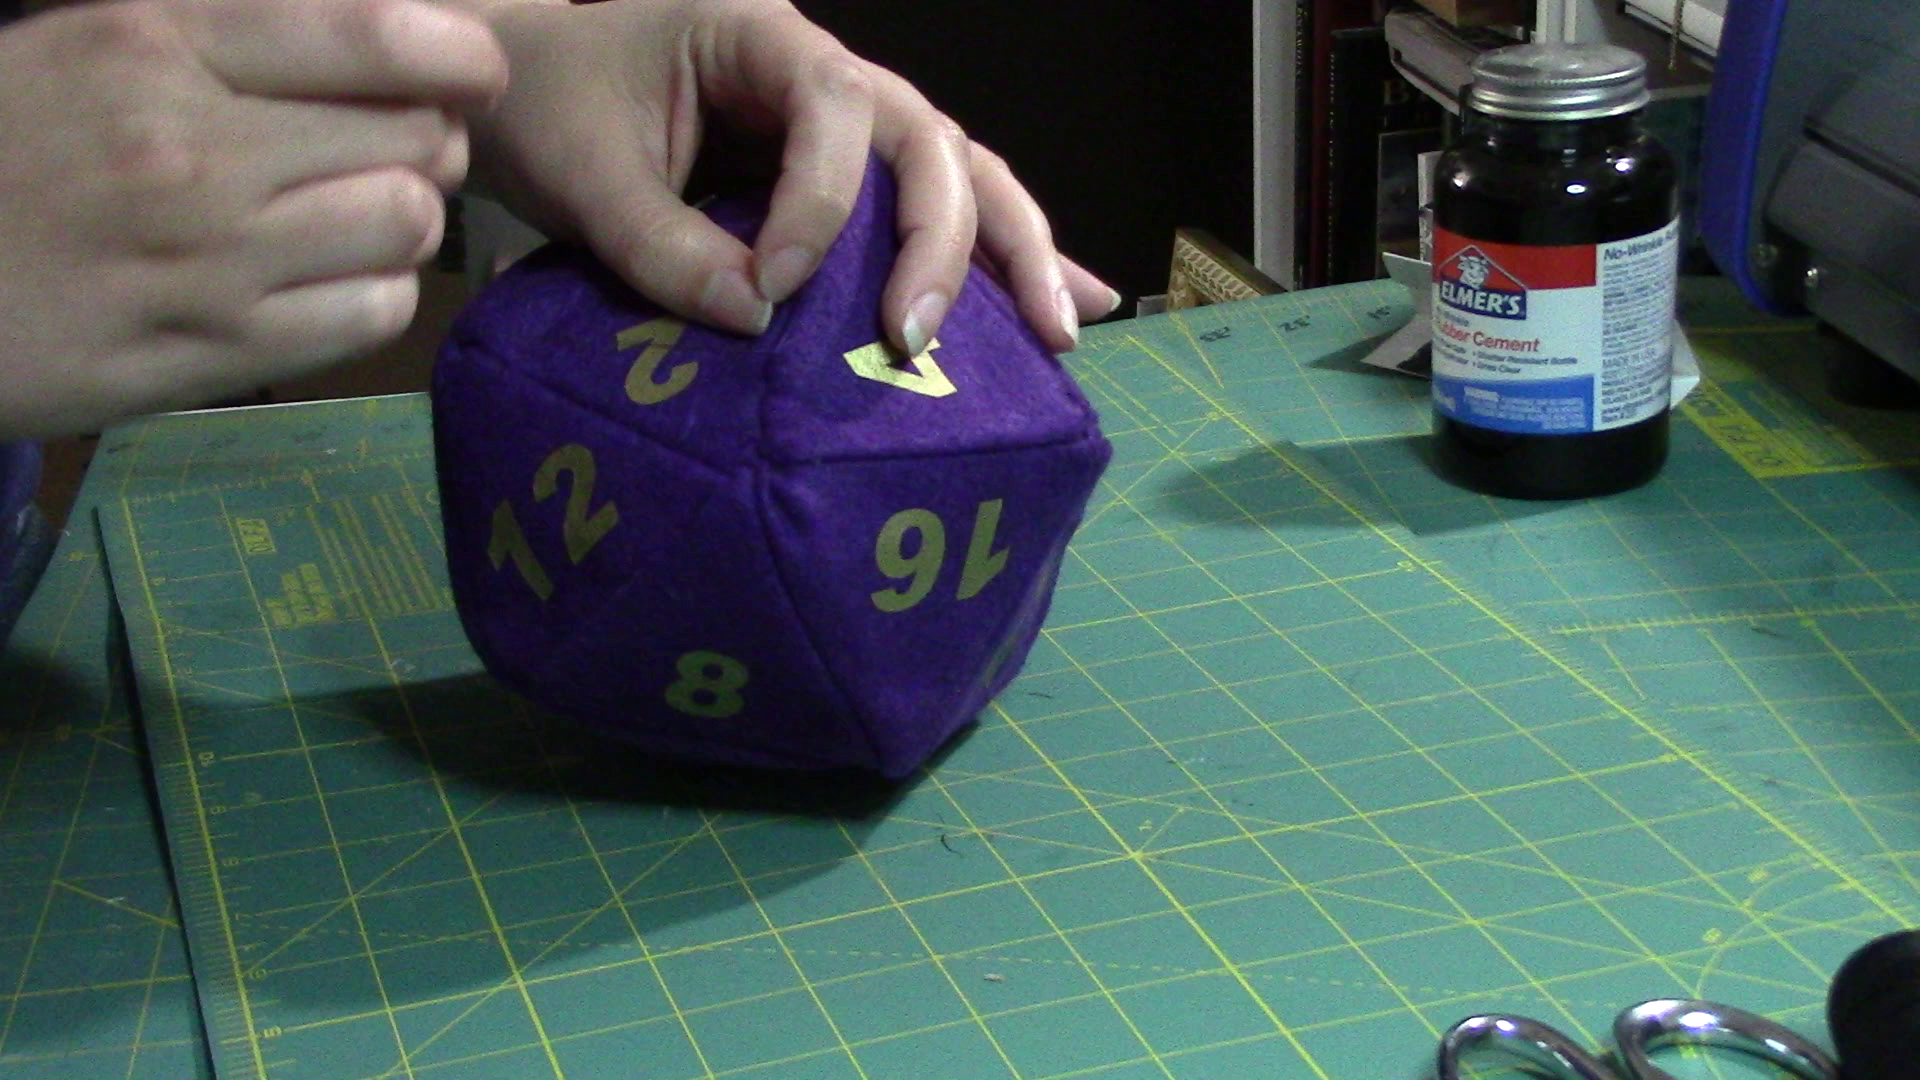
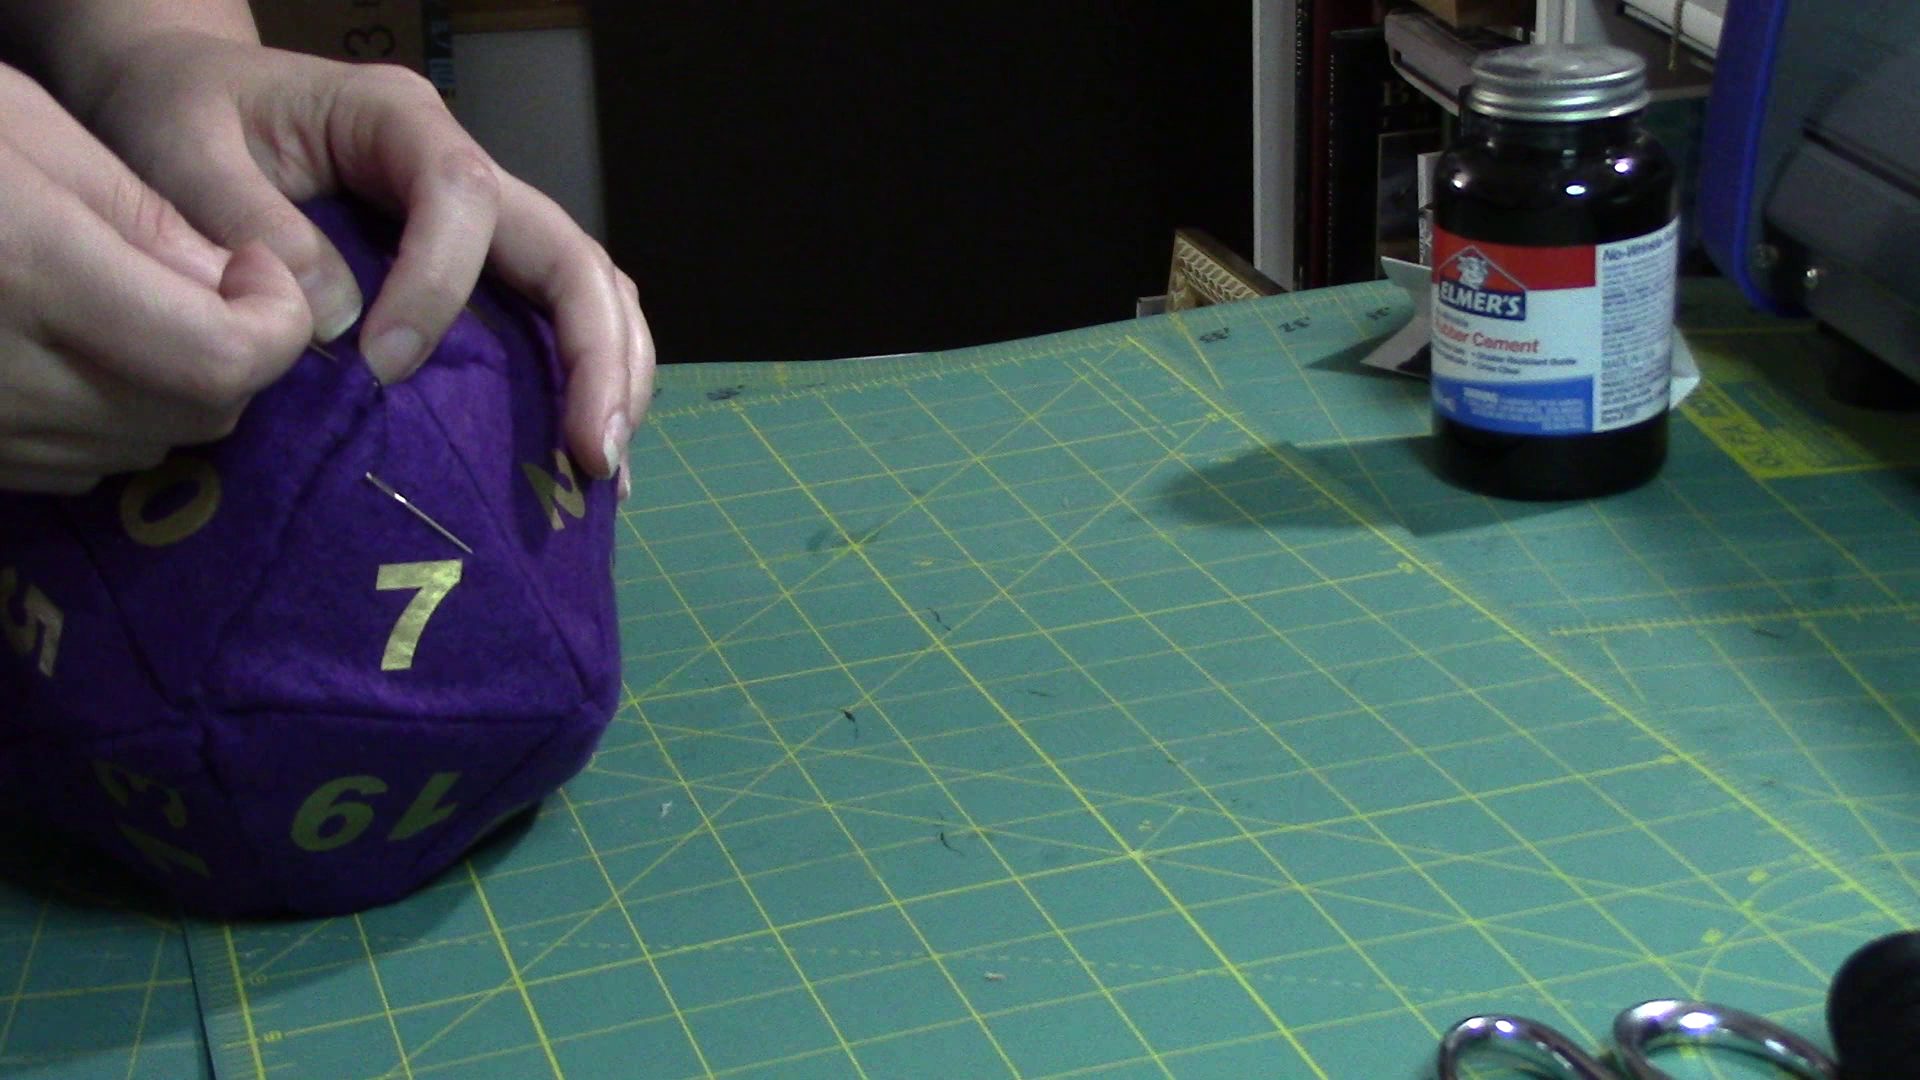
Sewing is our last step which pulls directly from the shapes we were making in papercraft. Here we will try making a felt plush d20.
When starting a project it's great to do a little research beforehand. Sometimes it's appropriate to start from scratch, and other times shared knowledge helps you get started faster. I will be editing from a template made available by the Evil Mad Scientist. Their template is very easy to understand, but they make a bag with a zipper in the shape of a d20. We are going be editing this to just make a closed plush toy.
Their template is here: Large d20 Pattern
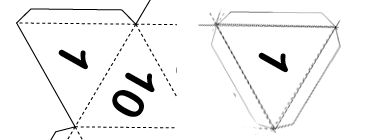
You can tell from the middle shape theirs is very similar to the tabbed shapes we have for the papercraft. It's simply scaled up, and repeated on each side allowing for easy sewing allowance. You could resize, and make what you'd like, but as this is already available I decided to use it to test with first.
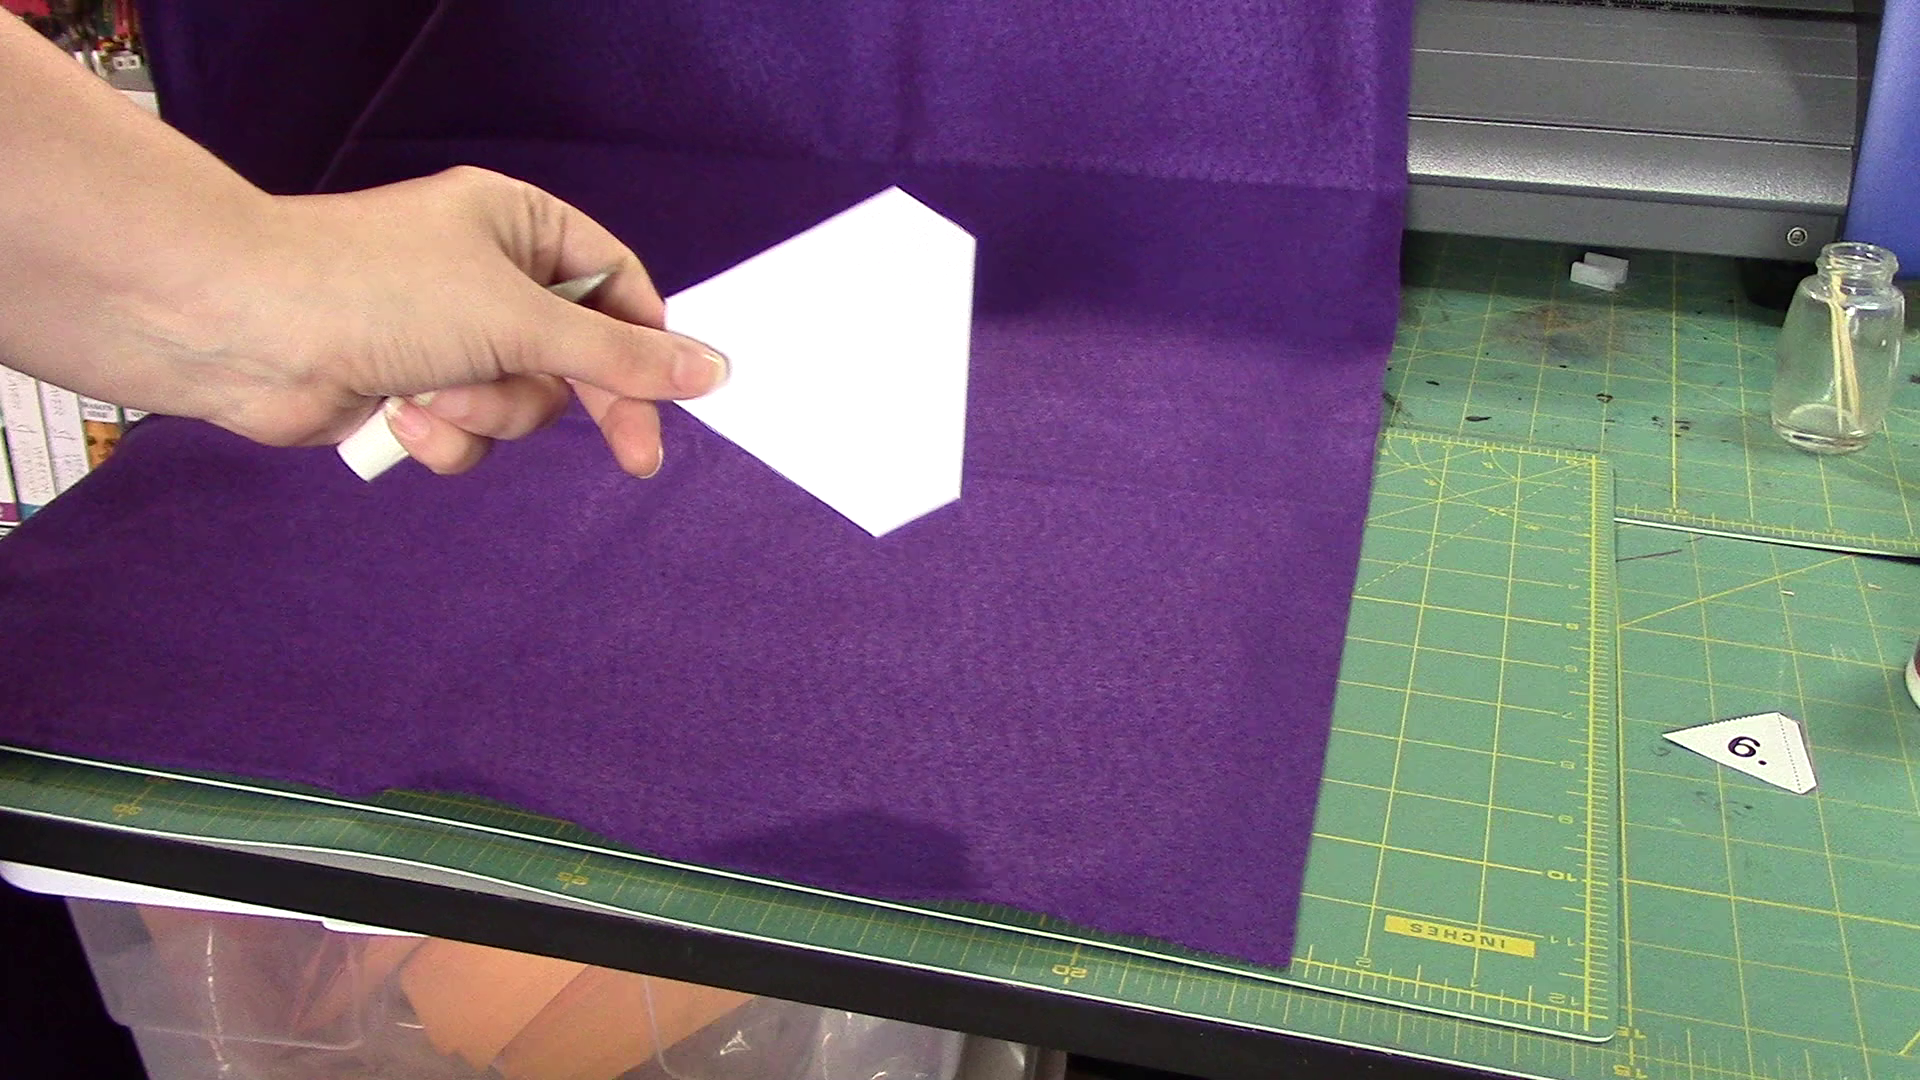
1. Print out the template from Evil Mad Scientist, and cut out the middle shape.
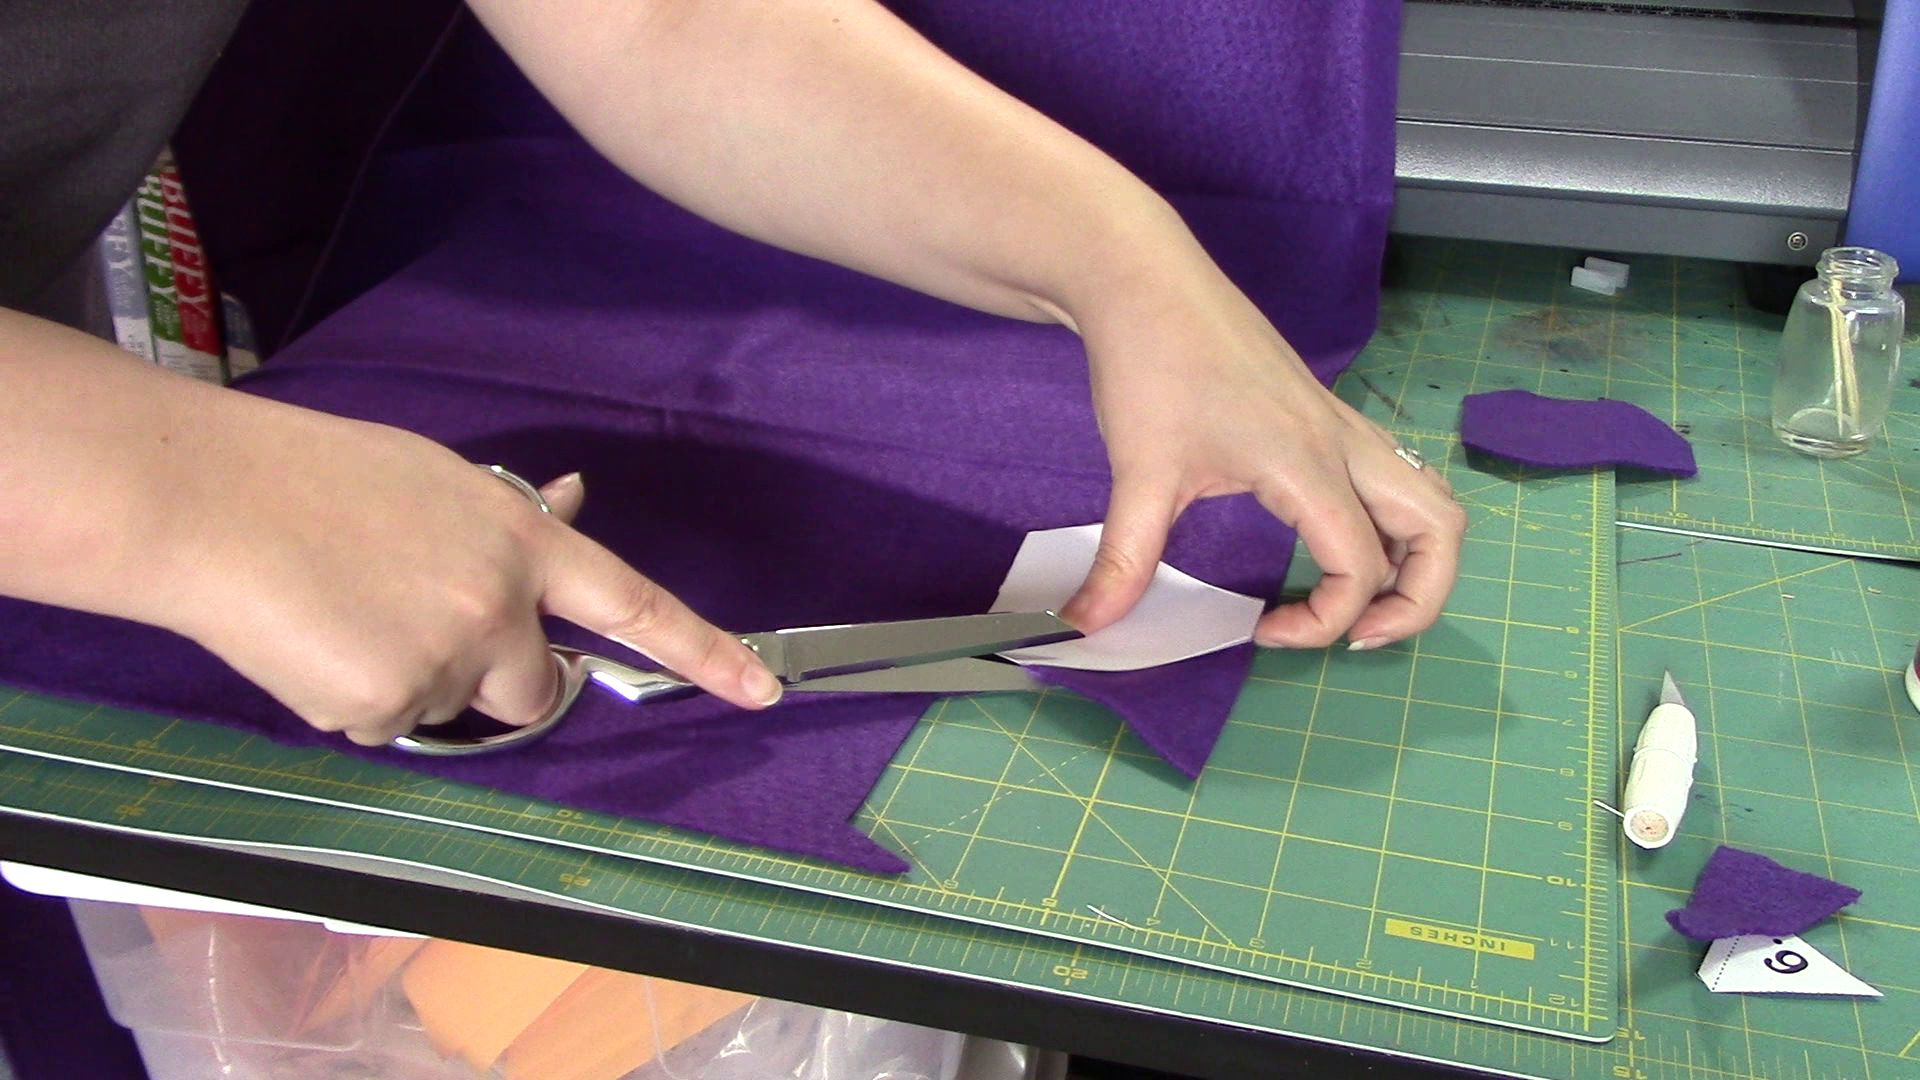
2. Cut out 20 of these in any fabric you like. I used felt because it has more structure, and it's cheap.
3. Next if you are going to use heat transfer vinyl go to your preferred program, and set up numbers 1-20 make sure to mirror them before cutting. Heat transfer vinyl works in just the reverse way most vinyl decals are made. I made my numbers no larger than .8mm tall.
You will want to do this step before number 4, but only if you are doing heat transfer vinyl. If you plan to use markers or paint I would suggest waiting until you have completed the whole process and put the numbers on last so they are centered better.
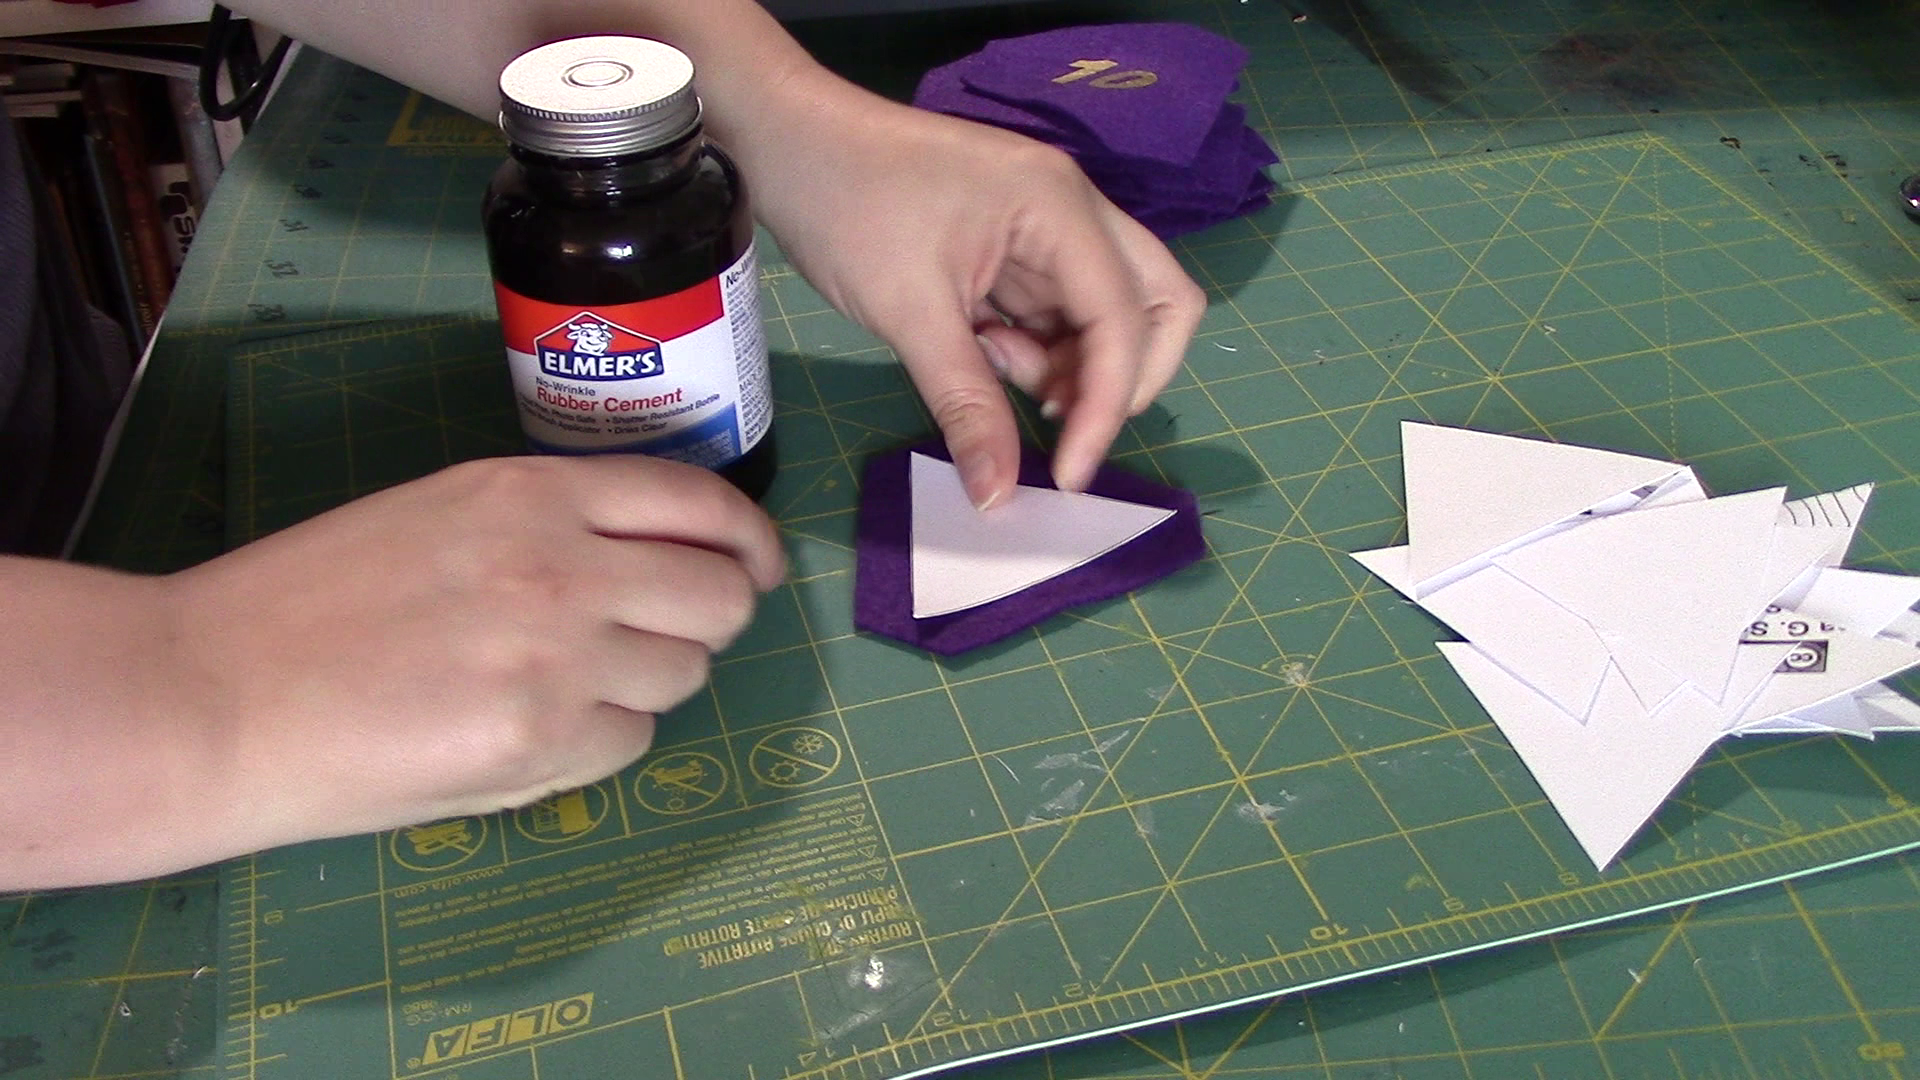
4. Next cut out the top triangle on the template from Evil Mad Scientist. This triangle is your inside triangle shape, it will make sewing easier, and give you some rigidity to keep the shape of a d20. Make sure to cut out 20 of this shape. I used scrap pieces of cardstock which have some give when sewing all of the pieces together.
5. Using glue place the cardstock in the middle of the felt shapes.
6. Time to sew all the parts together. I used the sewing machine at my local library makerspace following a similar pattern as they did for the tutorial from Evil Mad Scientist. As this is not a bag I skipped several of their steps but assembled as those the zipper wasn't there or the lining.
I sewed 10 across and then 5 on top and bottom much like theirs.
Make sure that you have the correct sides face each other. So number to number and not number on one side and the next piece having the cardstock touching the number. I did this a couple times and had to back track.
7. Leave two flap areas not sewn shut, you can now turn the whole thing inside out. It will look a little like an inside out Pacman. Don't worry if you bend some of the cardstock turning it inside out, it will still remain quite rigid.
TIP: If you notice any holes at the corners of your design you will want to try and hand sew those before you turn it inside out.
8. When it is right side out you can add in your polyfill. For a toy that might be used a lot, I would try to fill it as much as possible.
9. Use a slip stitch or a ladder stitch to close the two flap areas you left open.
I enjoy this video from Made to Sew which explains how to do it: How to: Invisible Stitching
Now that you are finished be proud of it! Mine is a mess, but it is my mess and I love it.
This was the first time I've sewn a plush toy ever. I learned a lot from the process and am sure my second try will be even better. But this just goes to show how much learning you can do going from one medium to another. I wouldn't have know quite where to start before.
Once you can think of how things are constructed the world opens up. Technology and hobbies that seemed too difficult to try are now much more approachable. I hope you've learned something from this workshop and keep on rolling!