The Ultimate Guide to Furnishing Your House in Minecraft
by JakeAS in Design > Game Design
6137 Views, 5 Favorites, 0 Comments
The Ultimate Guide to Furnishing Your House in Minecraft
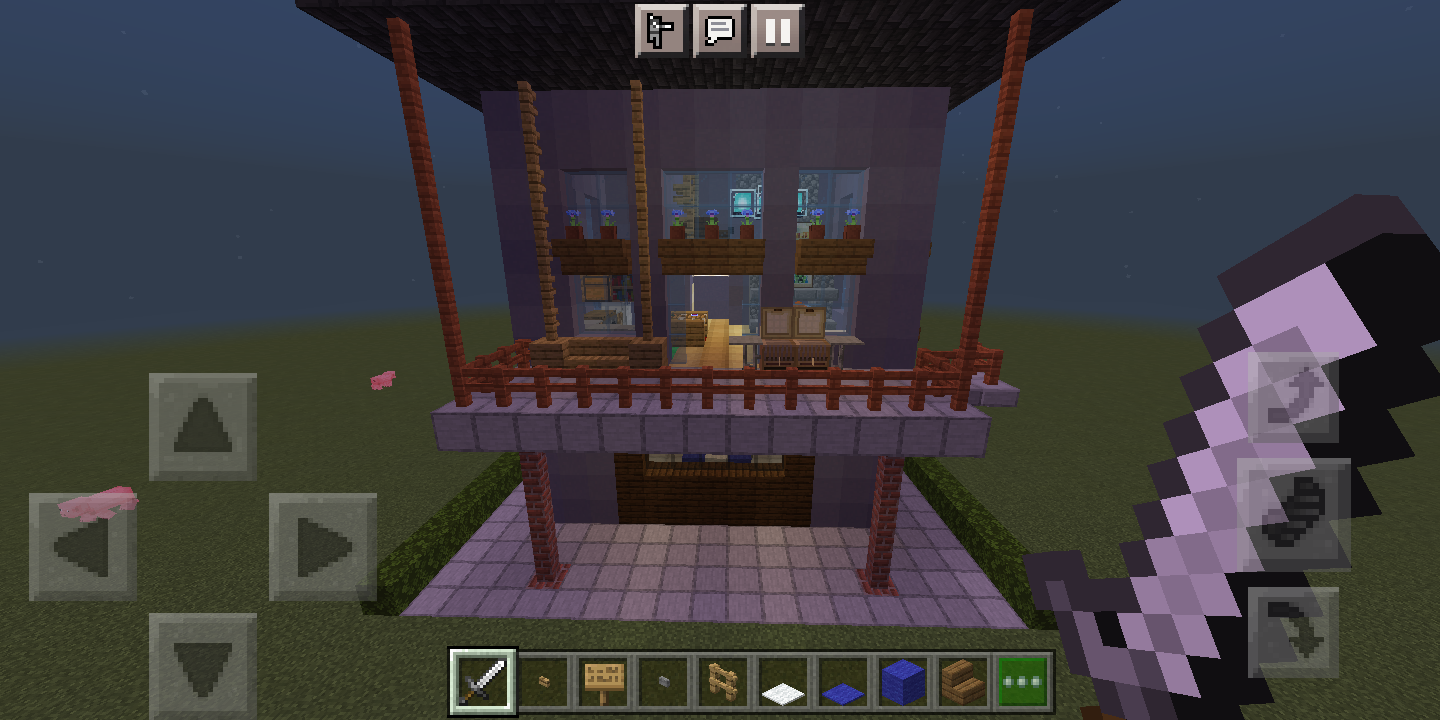
Hello, I am back with another Instructable, and a quite long one at that. I don't know if or not you've read my previous Instructable telling how to build a Minecraft street lamp, I posted it not long ago at all, but it is very short compared to this one.
I will be telling you (and showing you) how to furnish your house in Minecraft. Most of these furniture pieces will work in any house, and they look nice, and also you could even change them up a bit if you like, to better fit with the type of house that you have.
Also note that I will be using the Invisible Item Frame in a few pieces of furniture. This can only be obtained in Java Edition of Minecraft, the one for computers only, but I used an add-on for that since I am on Android. If you cannot obtain the Invisible Item Frame, feel free to replace it with a normal item frame.
So, without any further ado, let's get right into it; because as I said, this is going to be a long one.
The Living Room
We will start this tutorial by furnishing our living room. For best results, I would suggest that you use a two-story living room because of the deer head, the fireplace, and the chandelier.
Chandelier
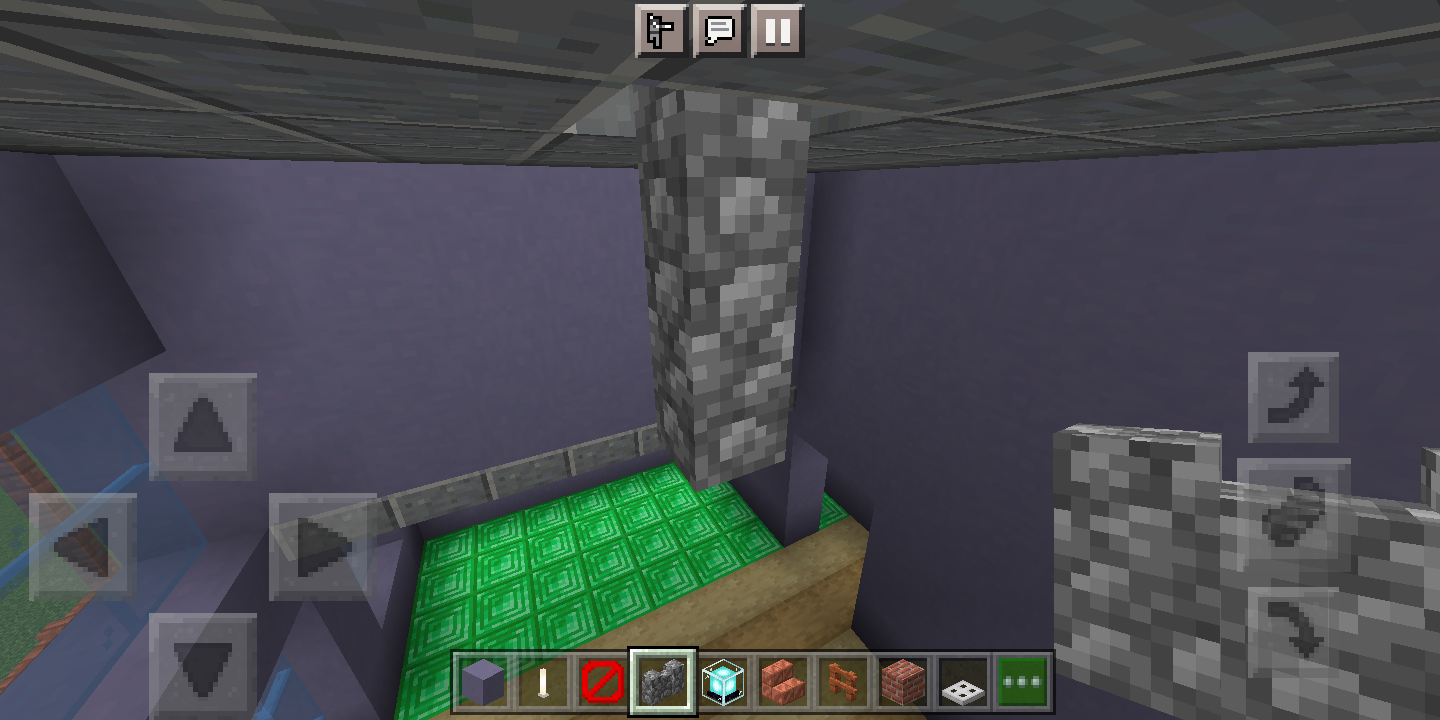
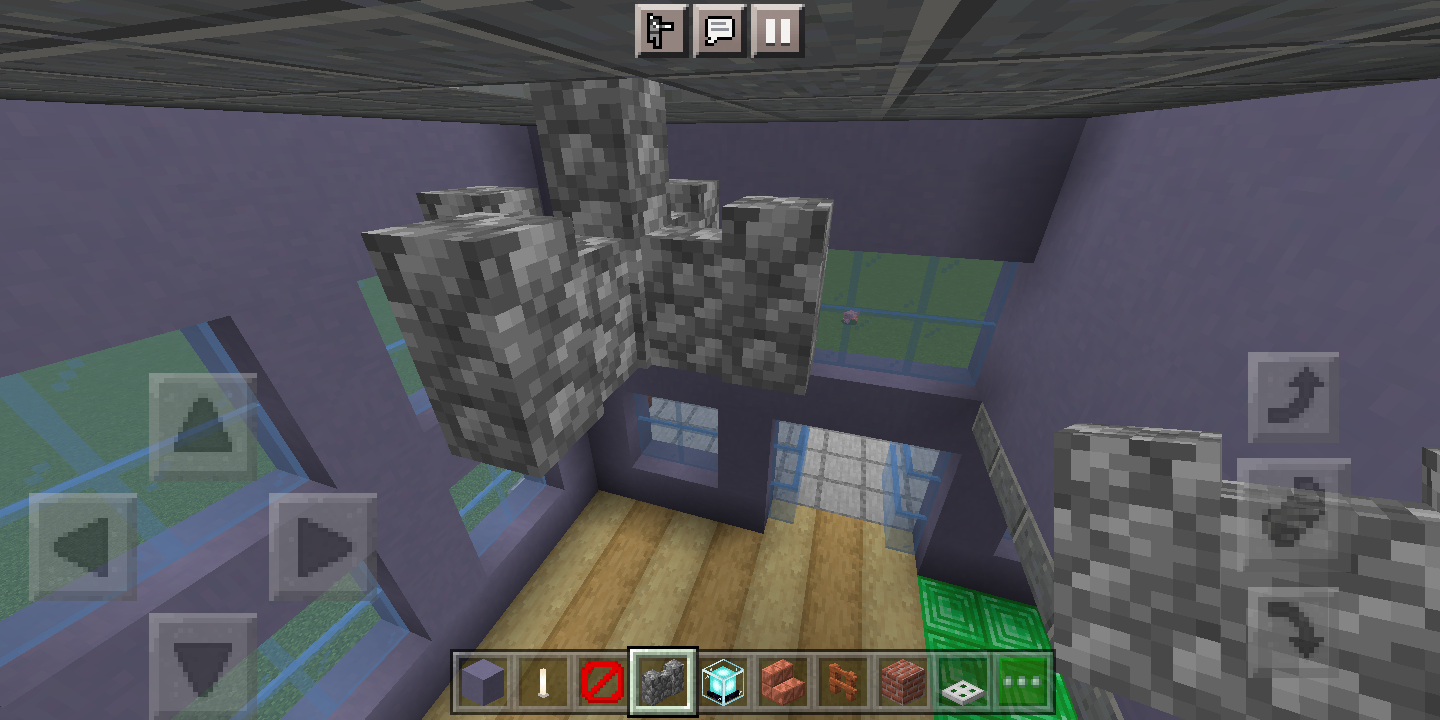
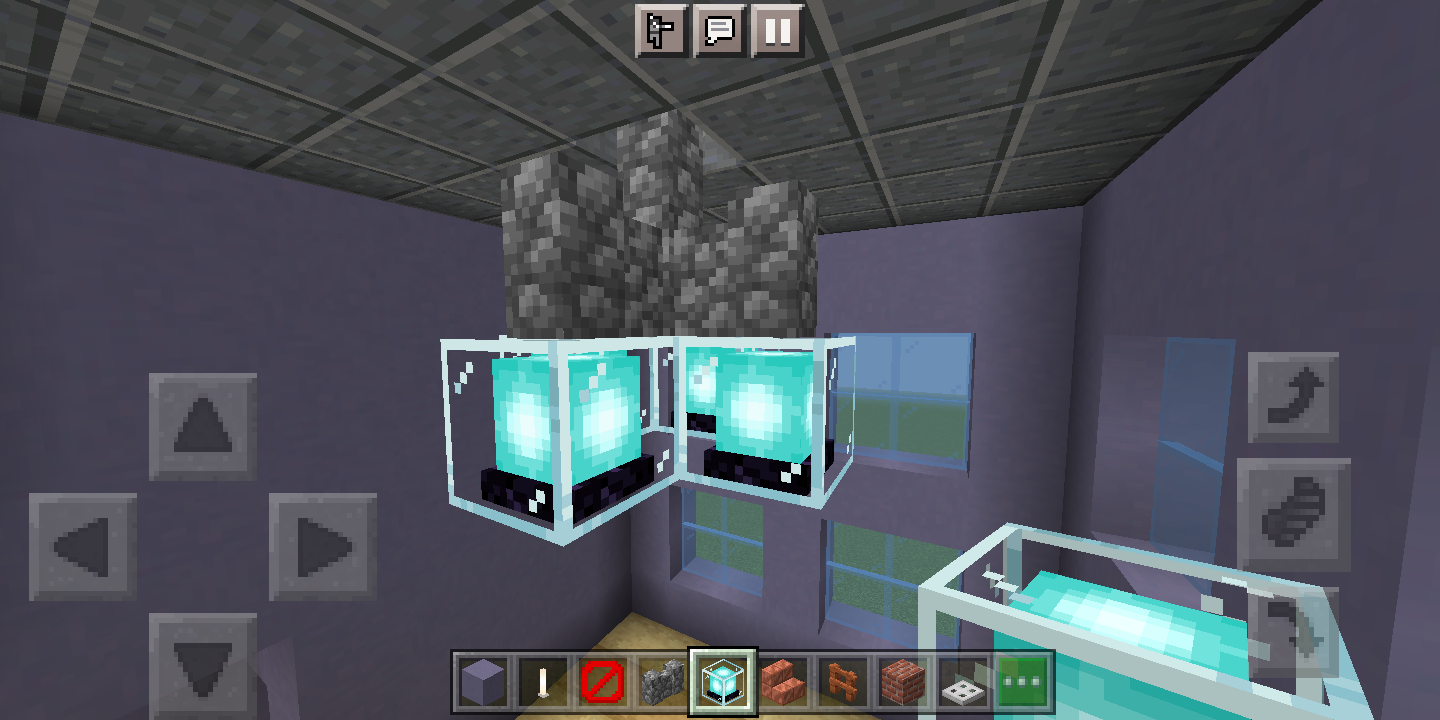
Let's start by lighting up our living room with a beautiful chandelier.
YOU WILL NEED:
Cobblestone walls
Beacons
PICTURE #1: Find the center of your ceiling and place two cobblestone walls. If you have a slab ceiling like me, you can break the slab in the center and place the cobblestone walls in the hole.
PICTURE #2: Place a cobblestone wall on each of the four sides of what you just made. (This is hard to explain, so just look at the picture.)
PICTURE #3: Place one beacon on each of the four cobblestone walls (but not the one in the center.)
You now have a beautiful chandelier!
Fireplace
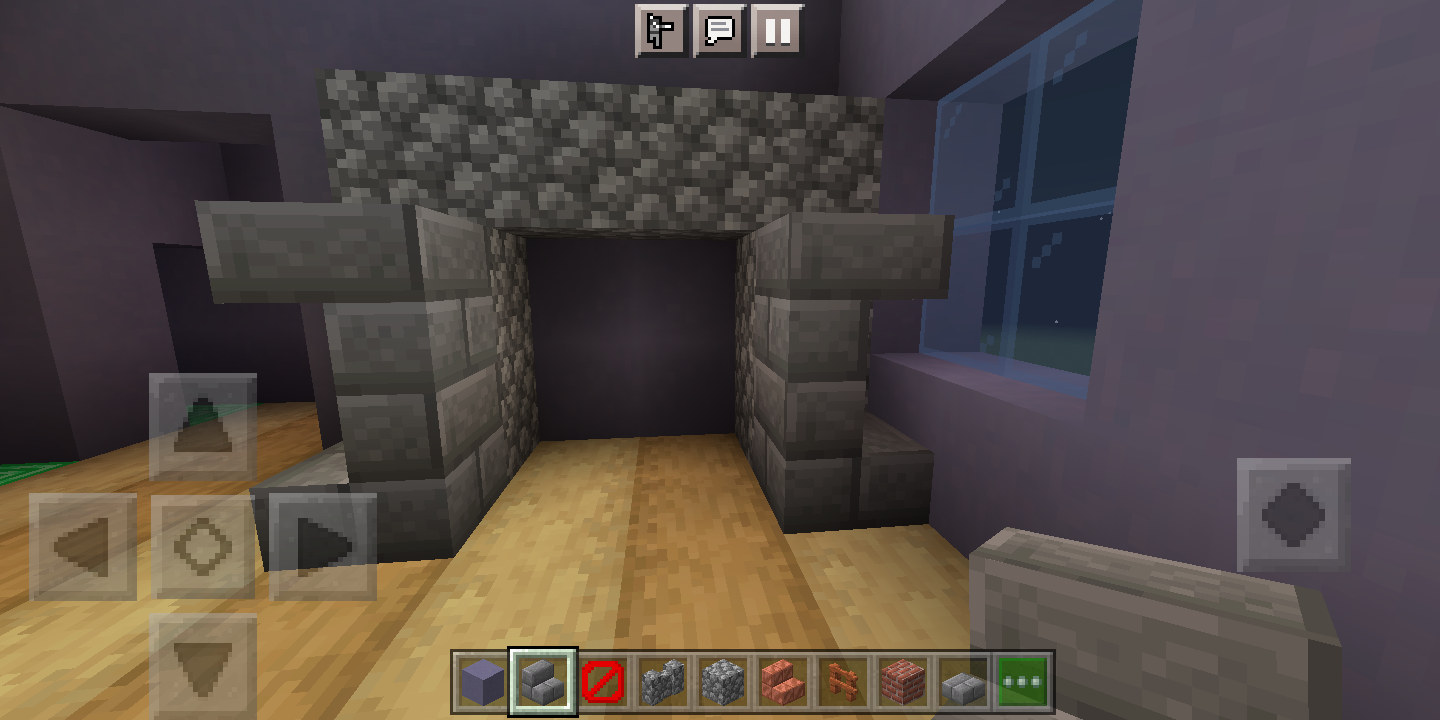
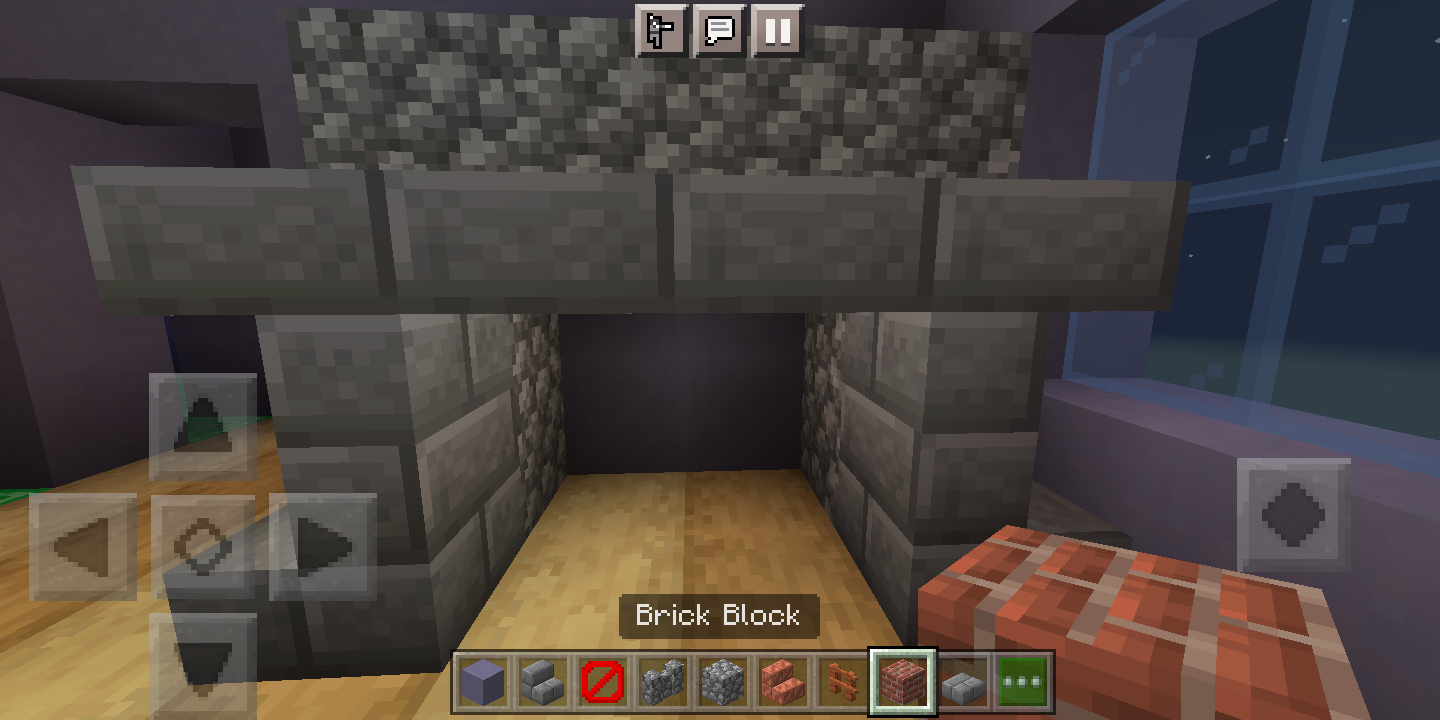
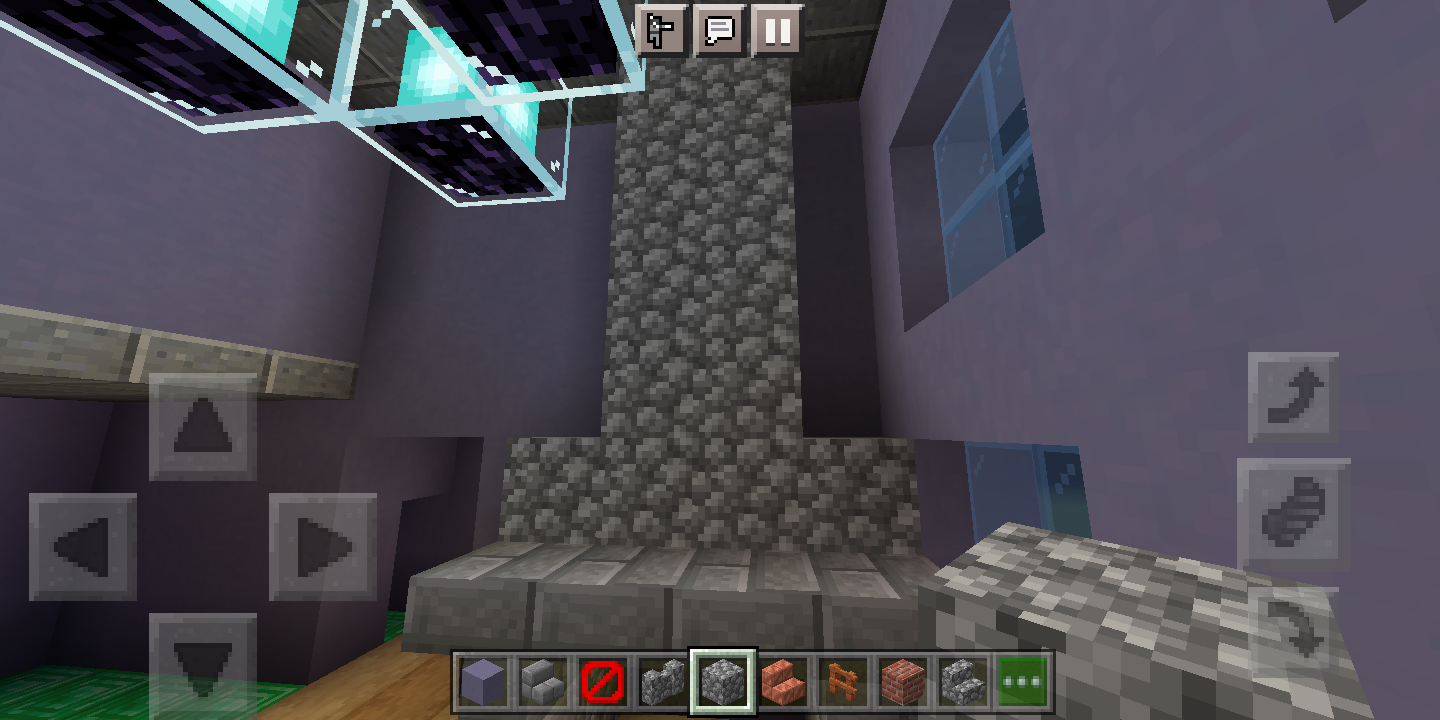
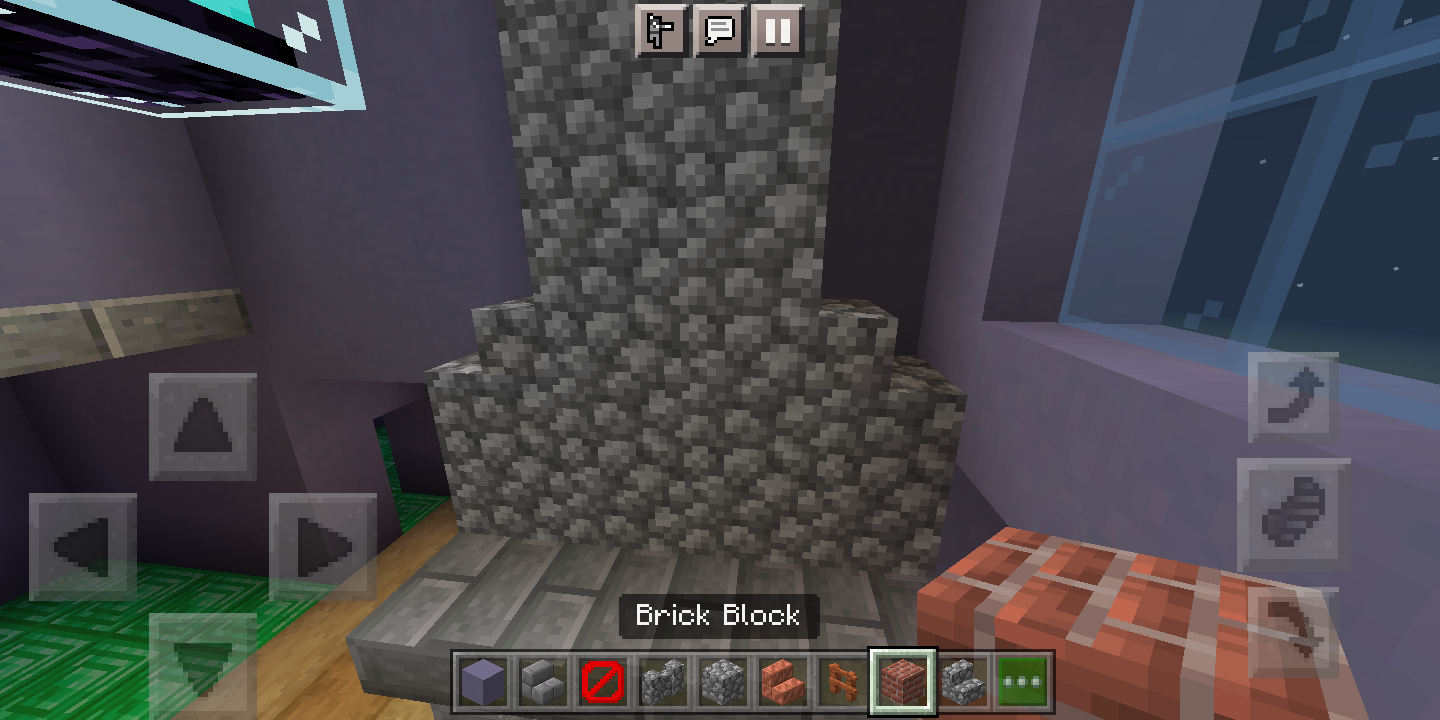
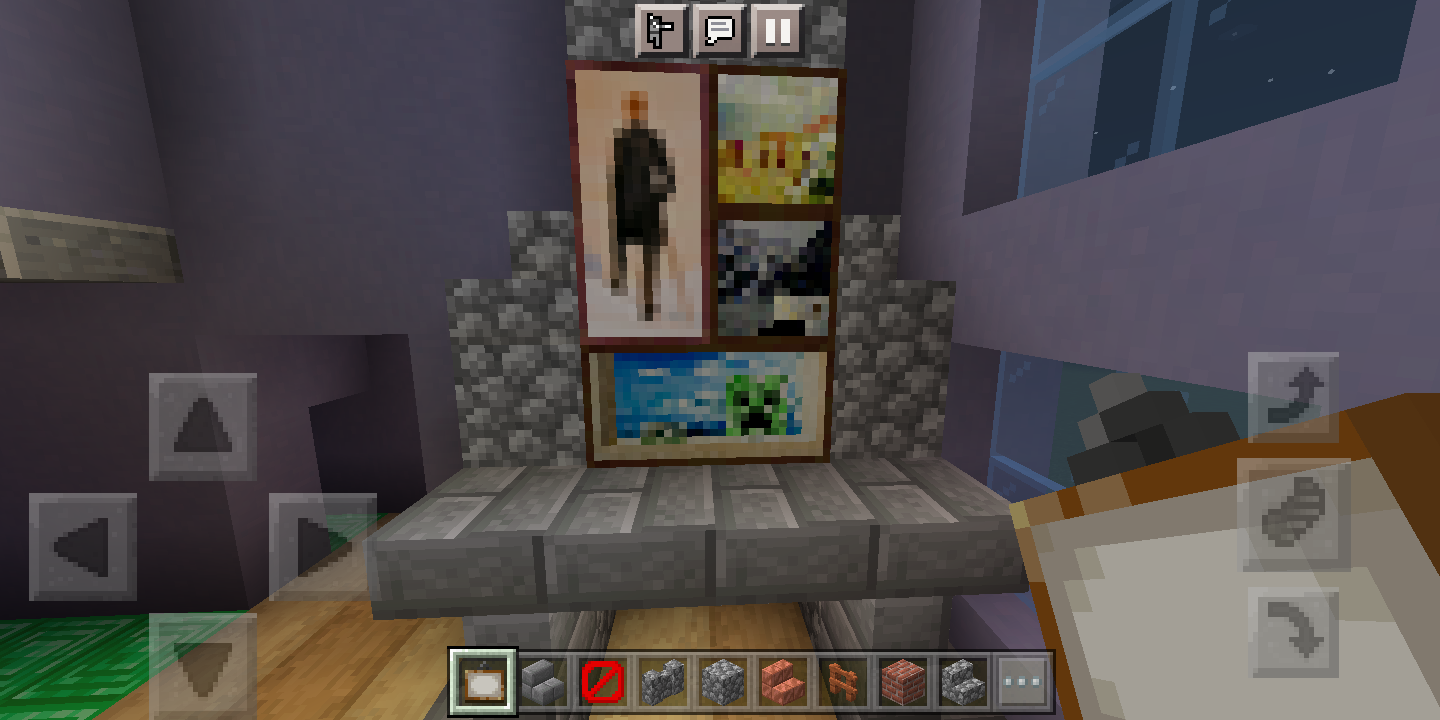
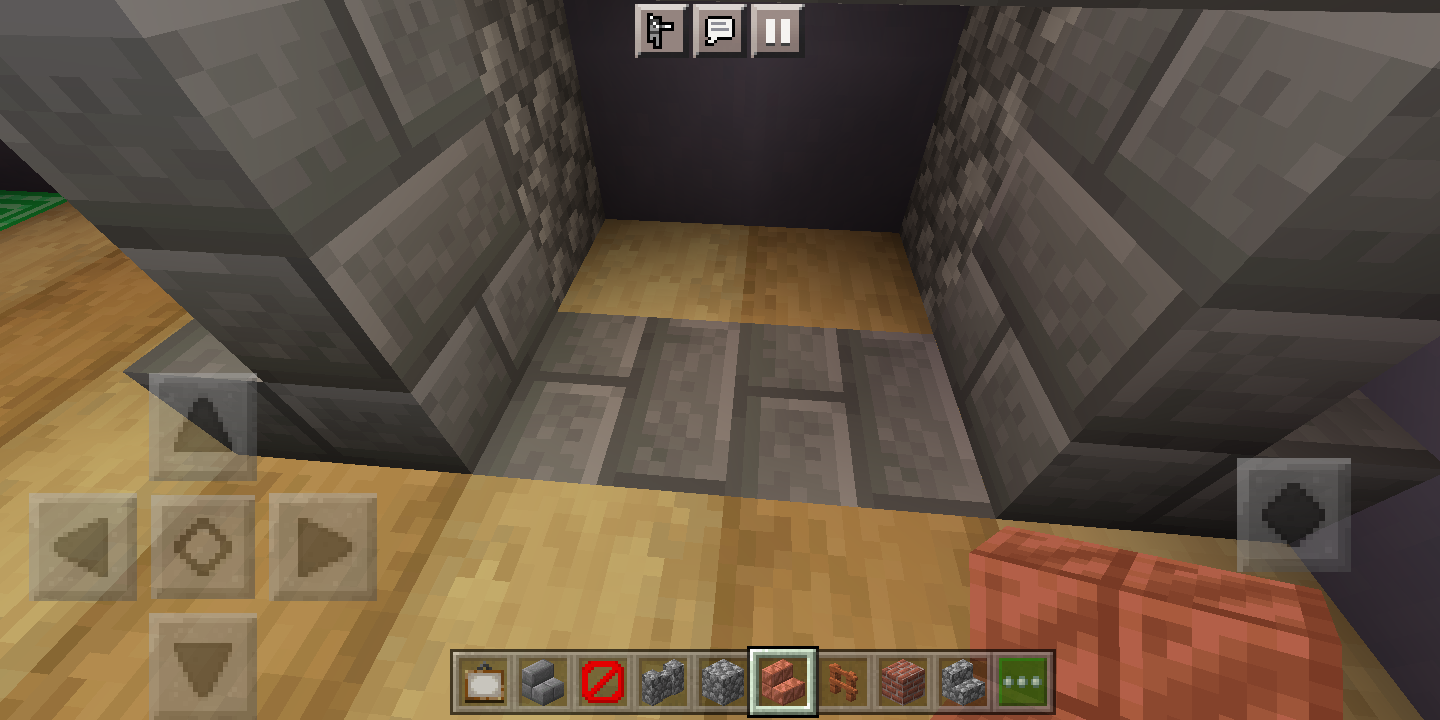
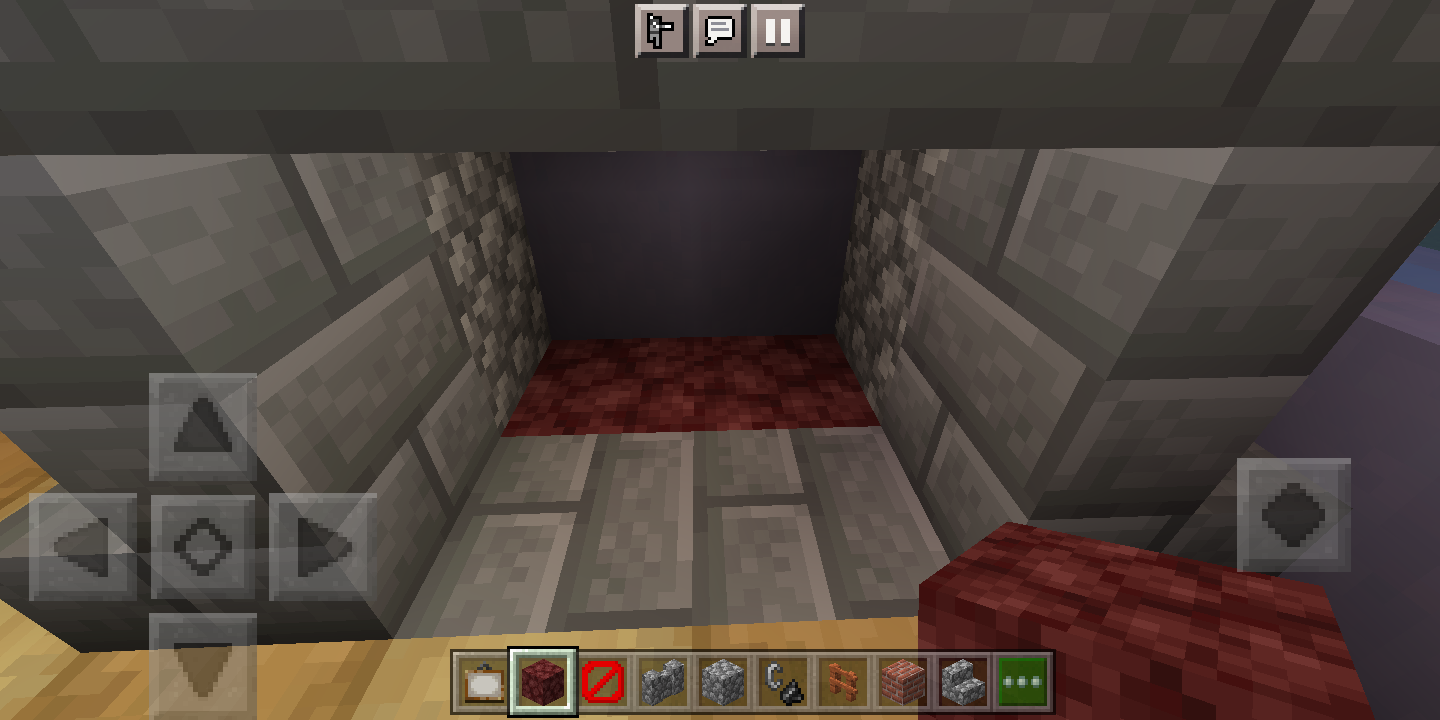
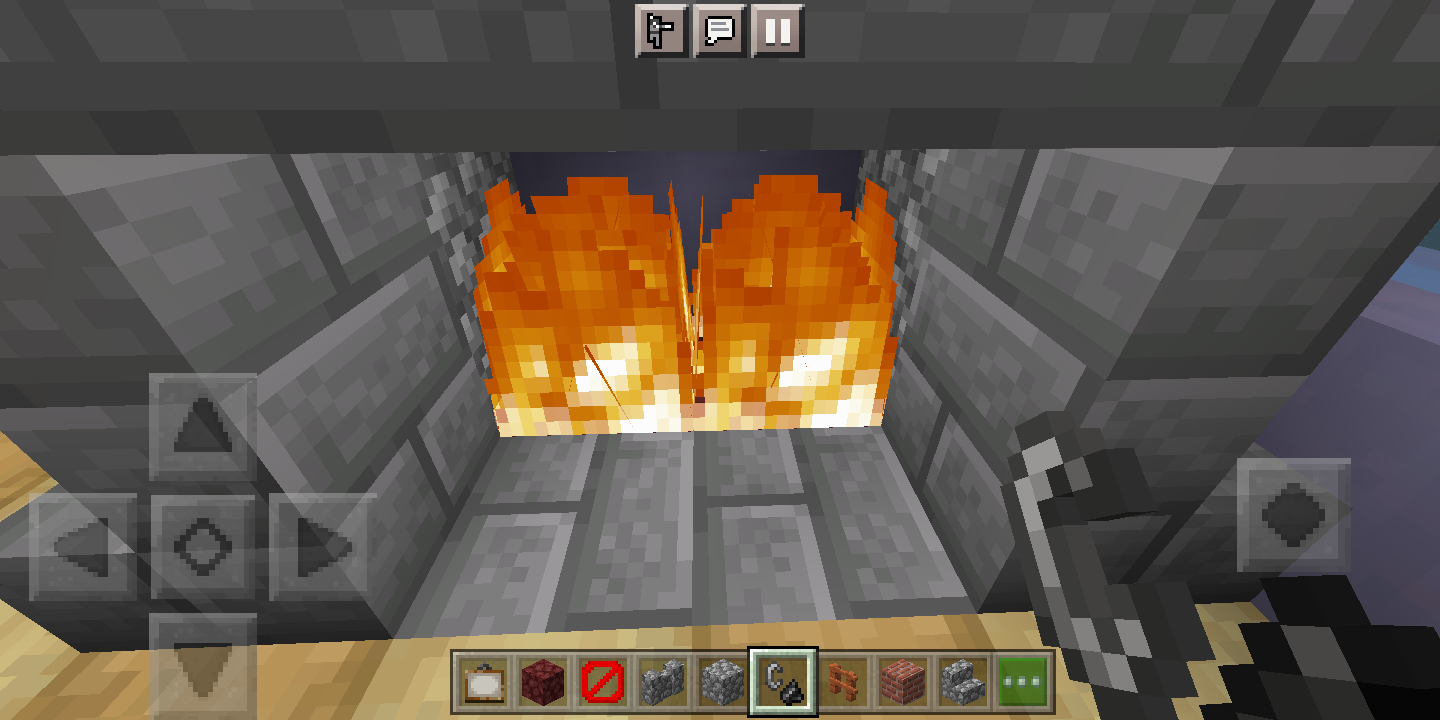
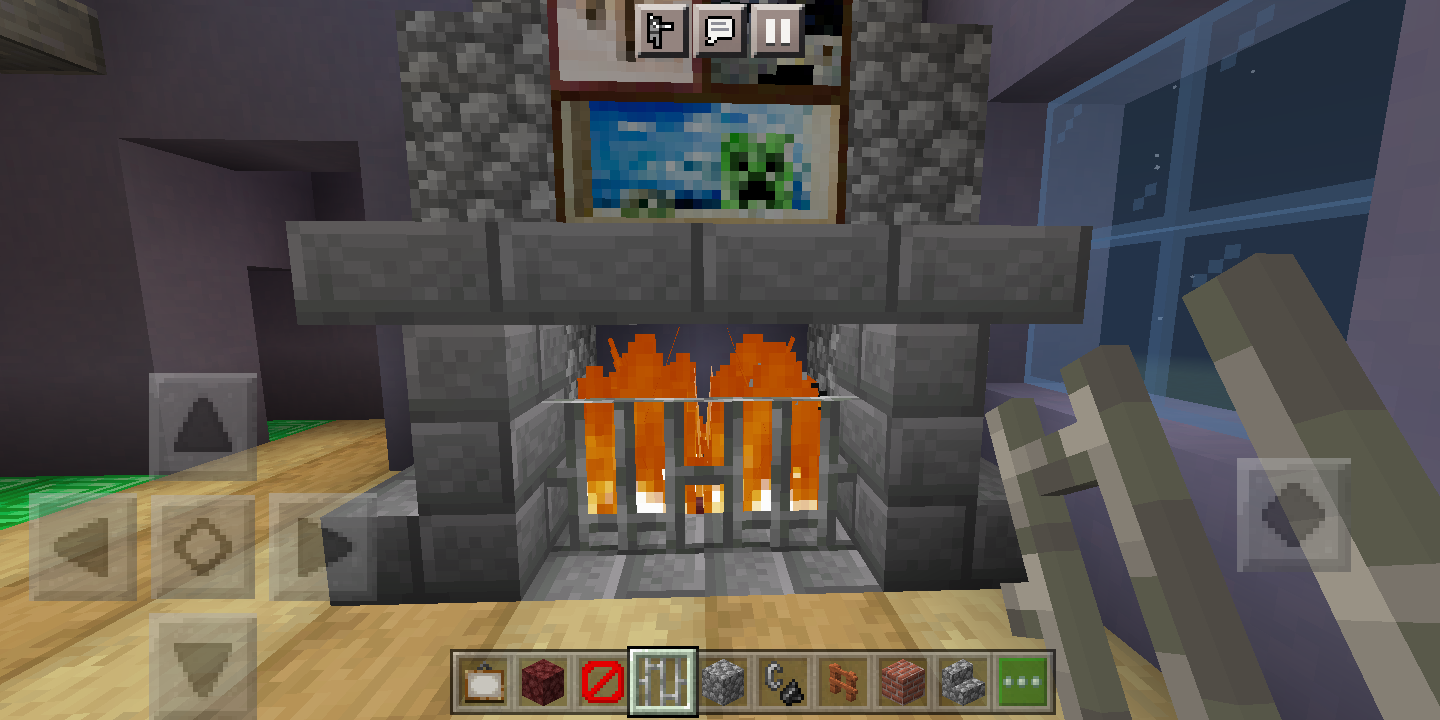
The focal point of most living rooms these days is the television, but I made my living room a genuine and cozy one with a fireplace. You know, a place where the family can go and sit down, and talk, and spend some quality time together. But feel free to build a TV in yours if you want, only I built a fireplace in mine. If you want a fireplace in your living room, follow the steps.
YOU WILL NEED
Cobblestone
Stone brick stairs
Stone brick slabs
Stone bricks
Cobblestone stairs
Paintings
Netherrack
Flint and steel
Iron bars
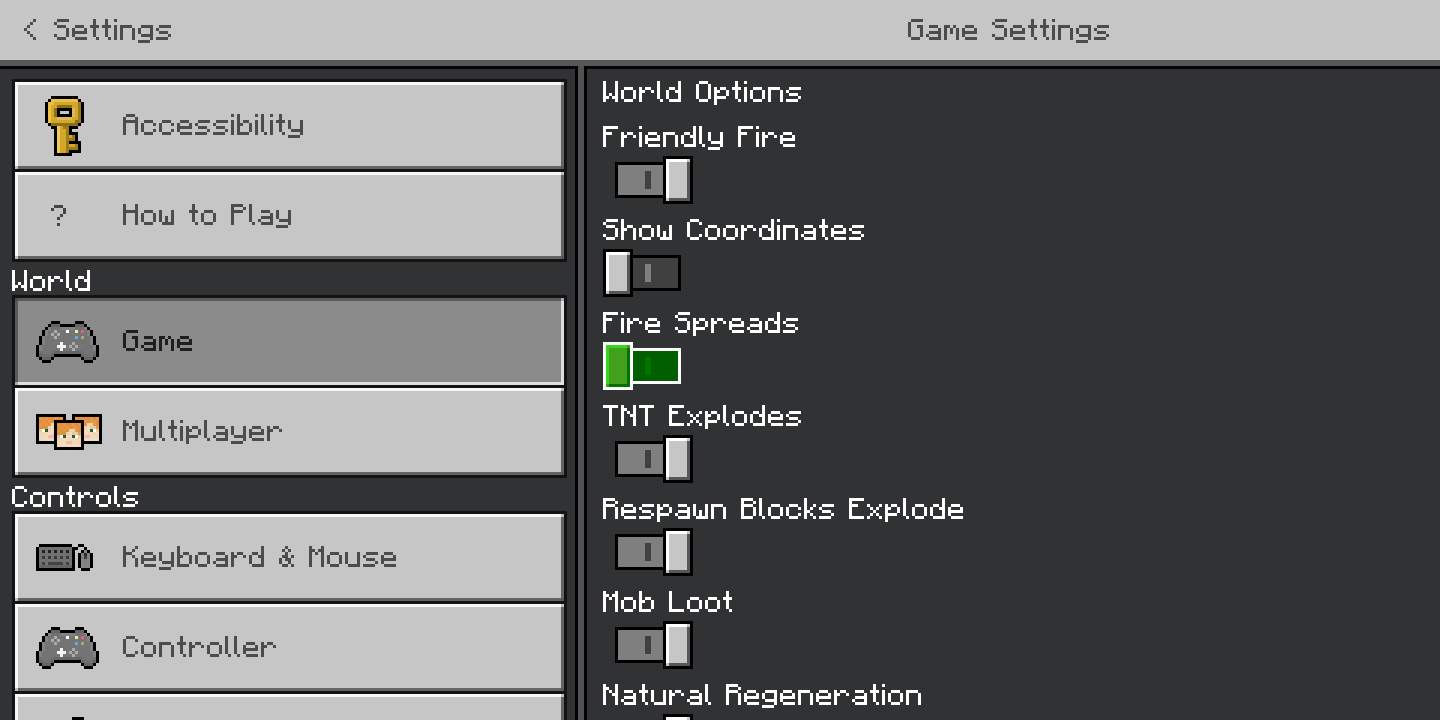
PICTURE #1: If you have a wooden floor and/or a wooden wall, I would highly suggest turning fire spread off. To do this (in Bedrock Edition of Minecraft), pause your game and go to Settings > Game > World Options and tap on the "Fire Spreads" setting to disable that. Now it should be safe to build your fireplace.
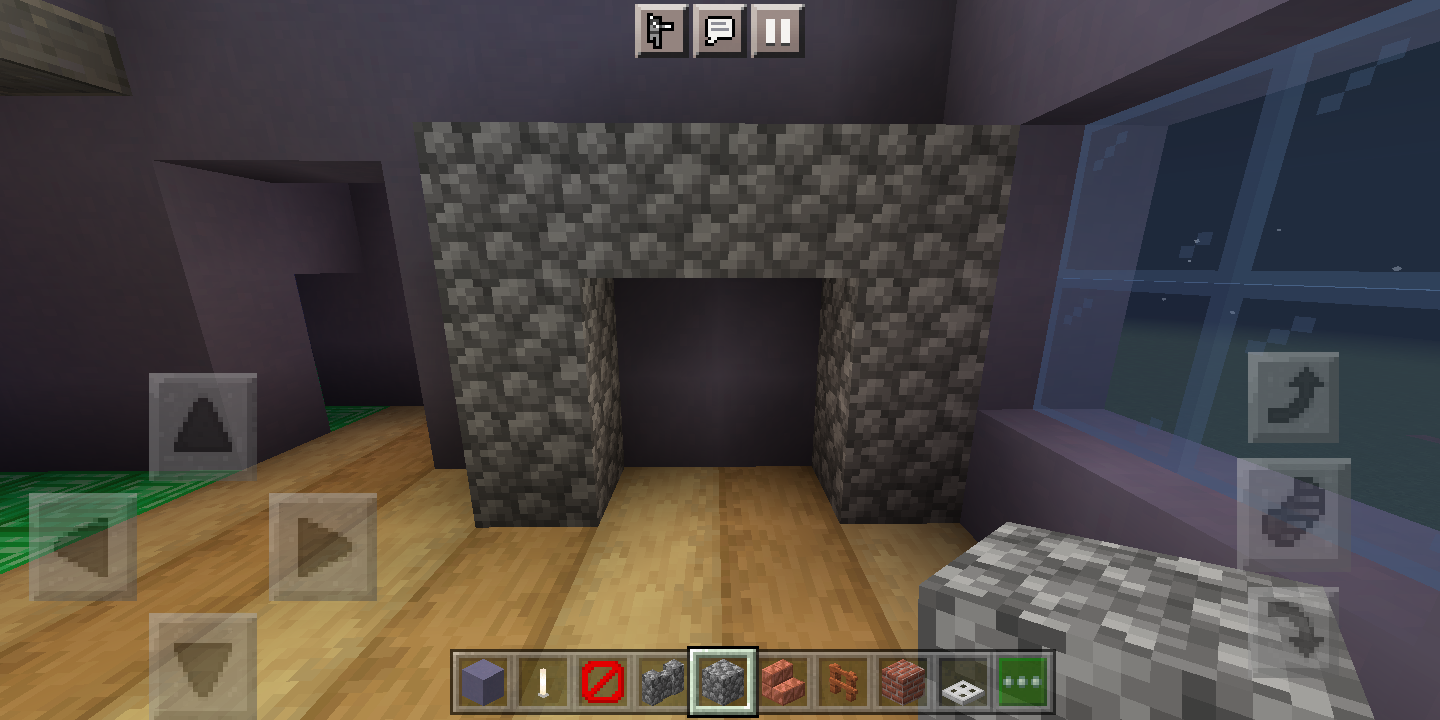
PICTURE #2: Find an empty wall of your living room, with no windows or doors to get in the way, then use cobblestone to build a 3 blocks high, 4 blocks wide arch (make sure that you build the arch right up against the wall).
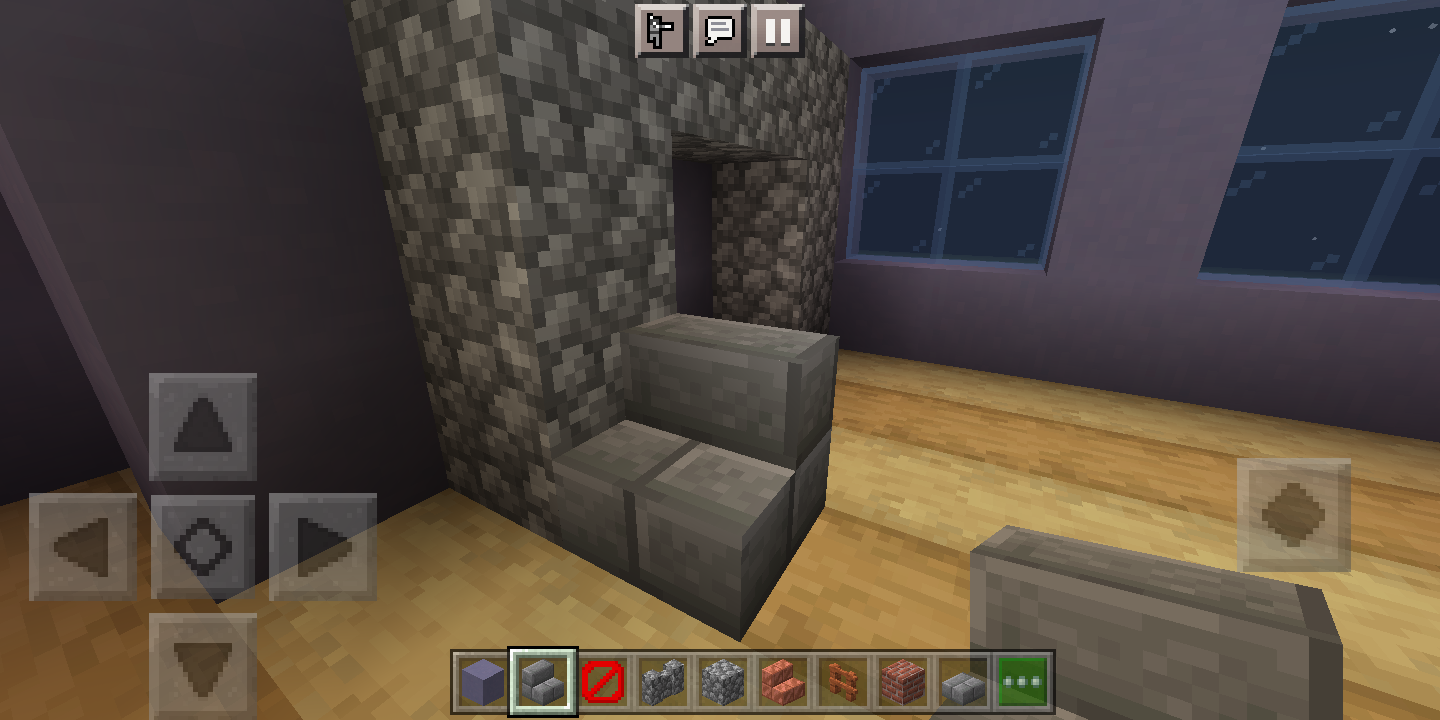
PICTURE #3: Do what you see in the picture; place a stone brick stair against the left side of the arch. It should look like what you see above (it's hard to put into words).
PICTURE #4: Place an upside-down stone brick stair on top of the right-side-up stair you just placed.
PICTURE #5: Repeat steps 3-4 on the right side of the fireplace.
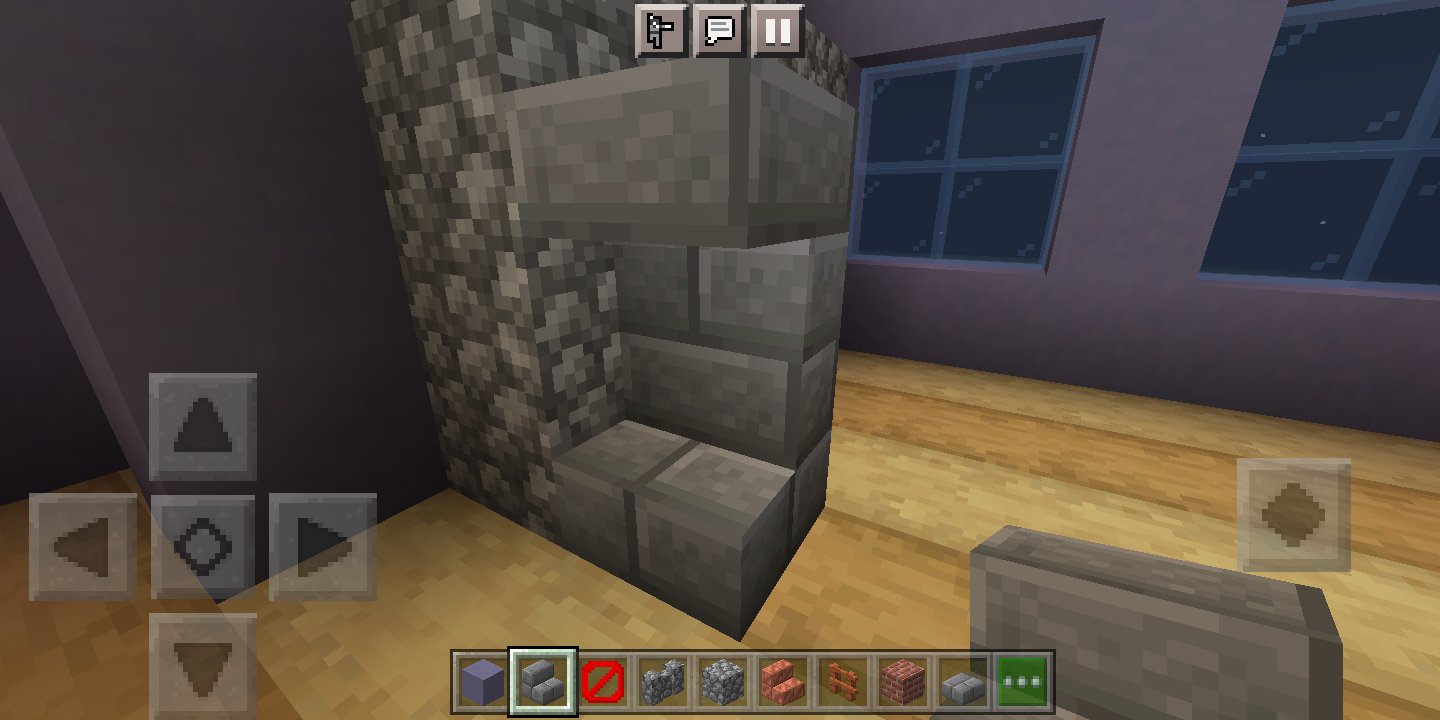
PICTURE #6: Join the two upside-down stairs with two stone brick slabs.
PICTURE #7: One block inward on each side, make a two-wide stack of cobblestone leading all the way up to your ceiling. This makes the fireplace look as if it is connected to a chimney.
PICTURE #8: This step is just an optional aesthetic feature that you don't have to do if you don't want to, but you can place a cobblestone stair on either side of the "chimney." This just makes it look like the transition from the fireplace to the chimney isn't so blocky. (I don't know if I am wording it right; it's quite hard to put into words, but you probably know what I mean.) It also adds a touch of realism.
PICTURE #9: Again, just an optional feature for aesthetic purposes. I made a collage of paintings on the "chimney" because usually in a real-life house people would put pictures on the mantle. Also, feel free to add flower pots with flowers on the mantle itself, I didn't do that though because I just realized that right now.
PICTURES #10 AND #11: Dig out the floor inside the fireplace and replace it with stone bricks in the front, and netherrack in the back.
PICTURE #12: Light the two netherrack blocks on fire. Another option would be to place two campfires on the netherrack blocks (because the fire doesn't spread from campfires and also some people think they look nicer than actual fire), but I usually avoid doing that because then, smoke will build up and it just looks kind of bad to me.
PICTURE #13: I suggest adding iron bars on the stone bricks in front of the fire, because it looks nice and it also prevents animals and villagers from walking into the fire and dying. You could replace the iron bars with fences or even glass panes if you think it looks better.
You now have a very cozy and warm (haha, get it, warm) fireplace in your living room.
Couch
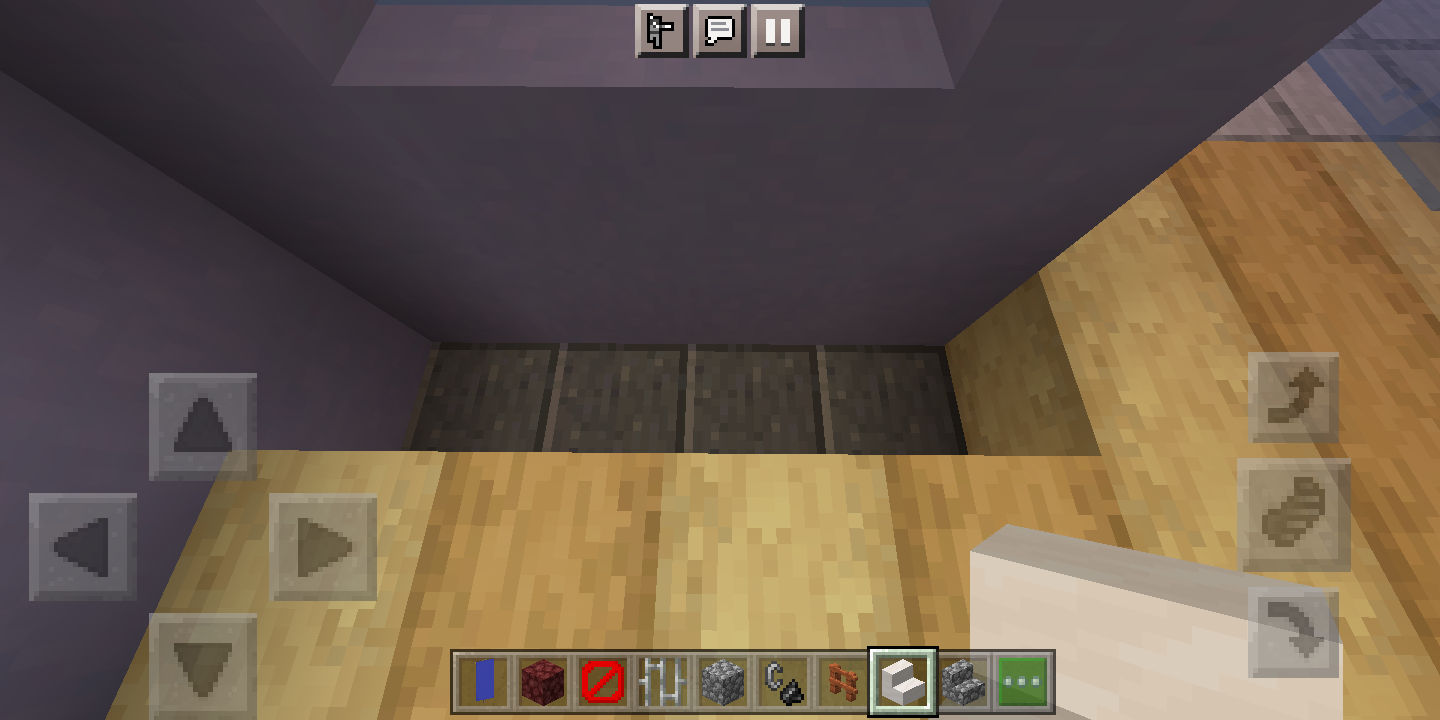
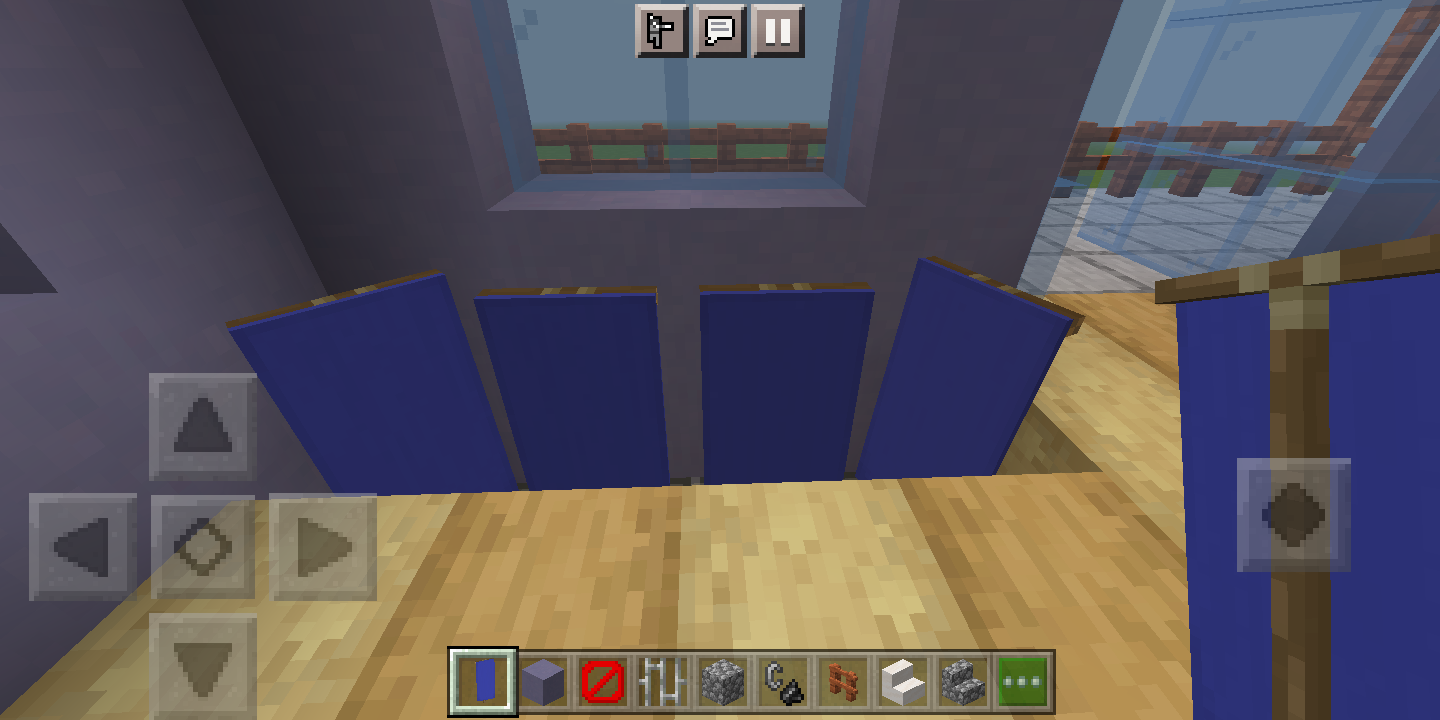
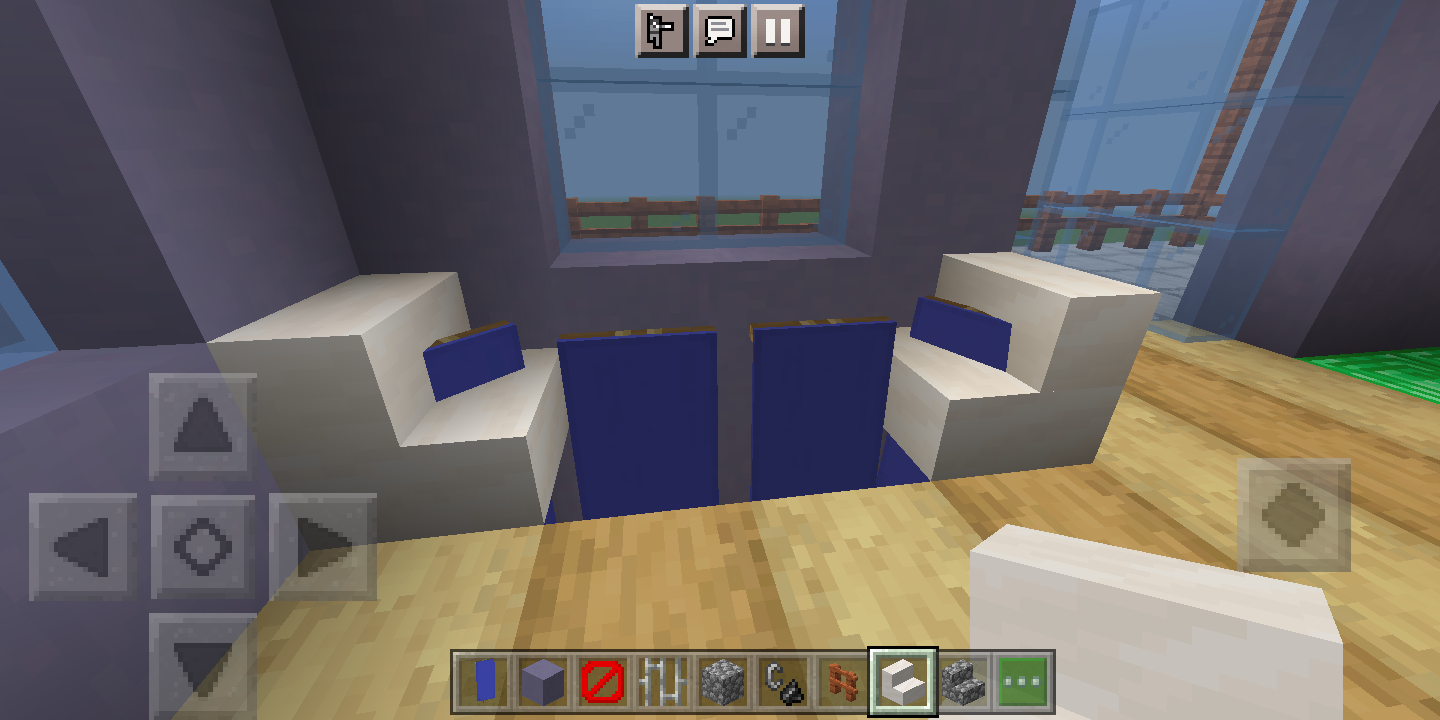
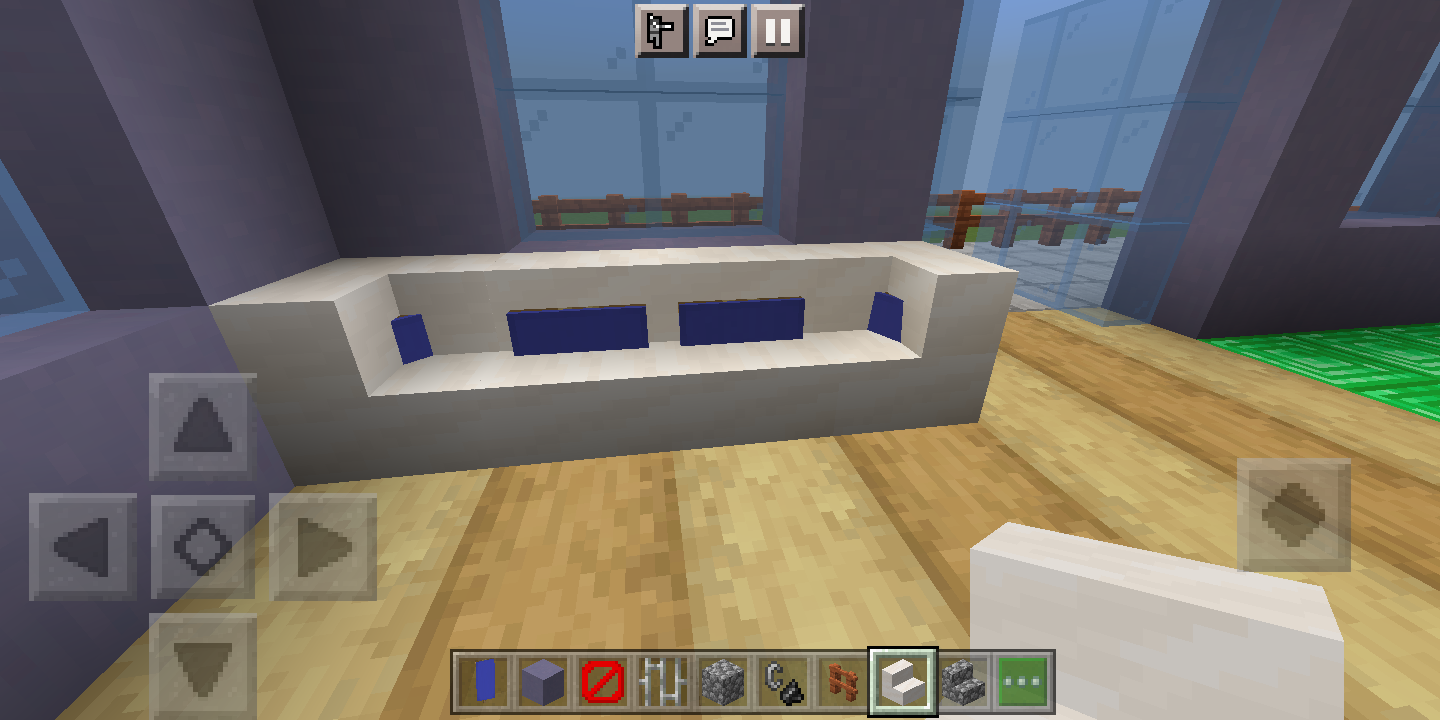
Did you know that you can have a couch with soft and cozy-looking pillows in Minecraft? Well, actually the pillows are banners, but the finished couch looks very neat. Read on to find out how to make it!
YOU WILL NEED
Banners
Quartz stairs
PICTURE #1: Find a good part of your living room to build your couch. Then, dig a hole in the floor that is 4 blocks long and 1 block deep. I know, tearing up part of the floor does sound like a weird way to make a couch, but it works.
PICTURE #2: Place four banners of your favorite color in the hole. Make sure that the two banners in the middle are straight, but the two outer banners should be slanted.
PICTURE #3: Place two quartz stairs (or any stair you like) facing each other, on the two outer banners. (Hard to explain, so look at the picture.)
PICTURE #4: Connect those two stairs with two more stairs, as shown.
The result is the typical Minecraft couch, only with banners as pillows! You can also feel free to use different patterns on the banners (like stripes, for example) to have different kinds of pillows.
Coffee Table
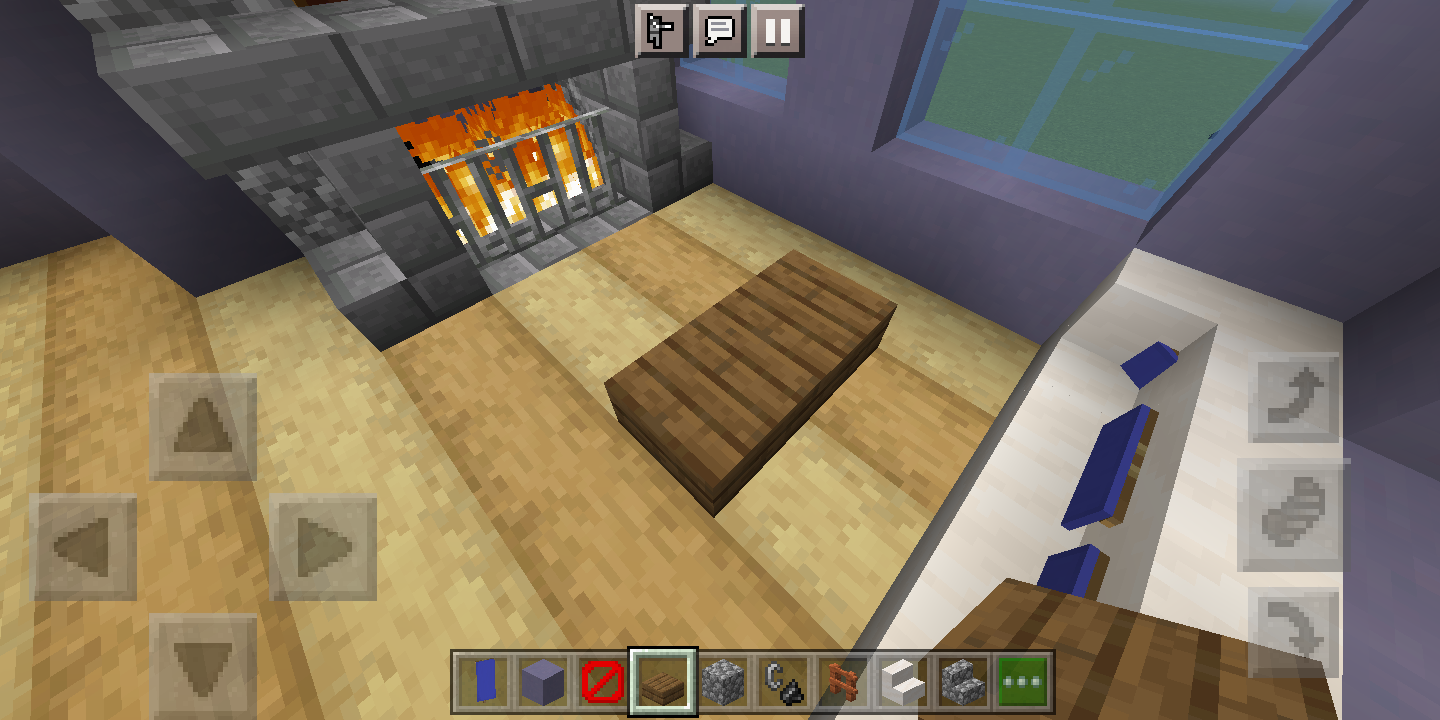
Probably the simplest piece of furniture in the entire build. Just pick any kind of wood slab, (I used spruce because it contrasts with my floor), and place two of them side-by-side, one block in front of the couch. Very small and simple, but it really can add to an empty living room floor.
Deer Head
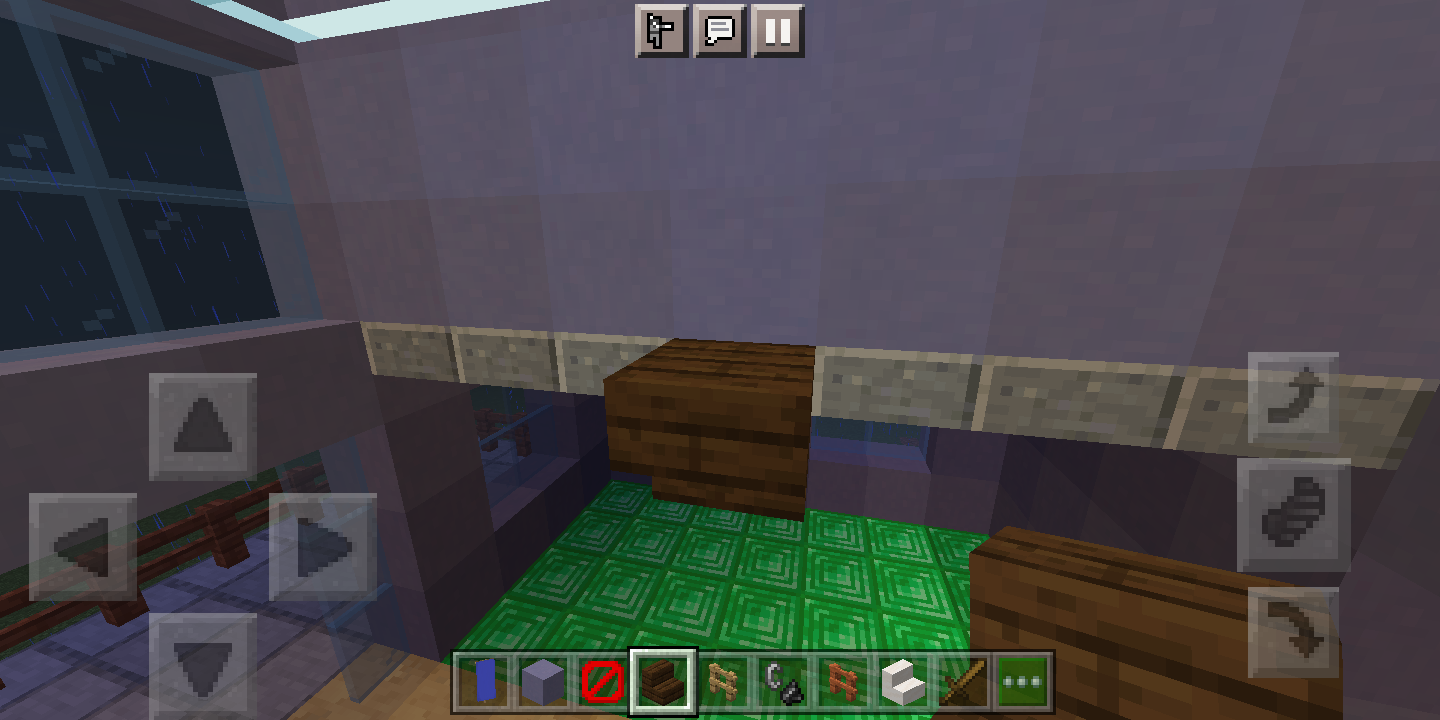
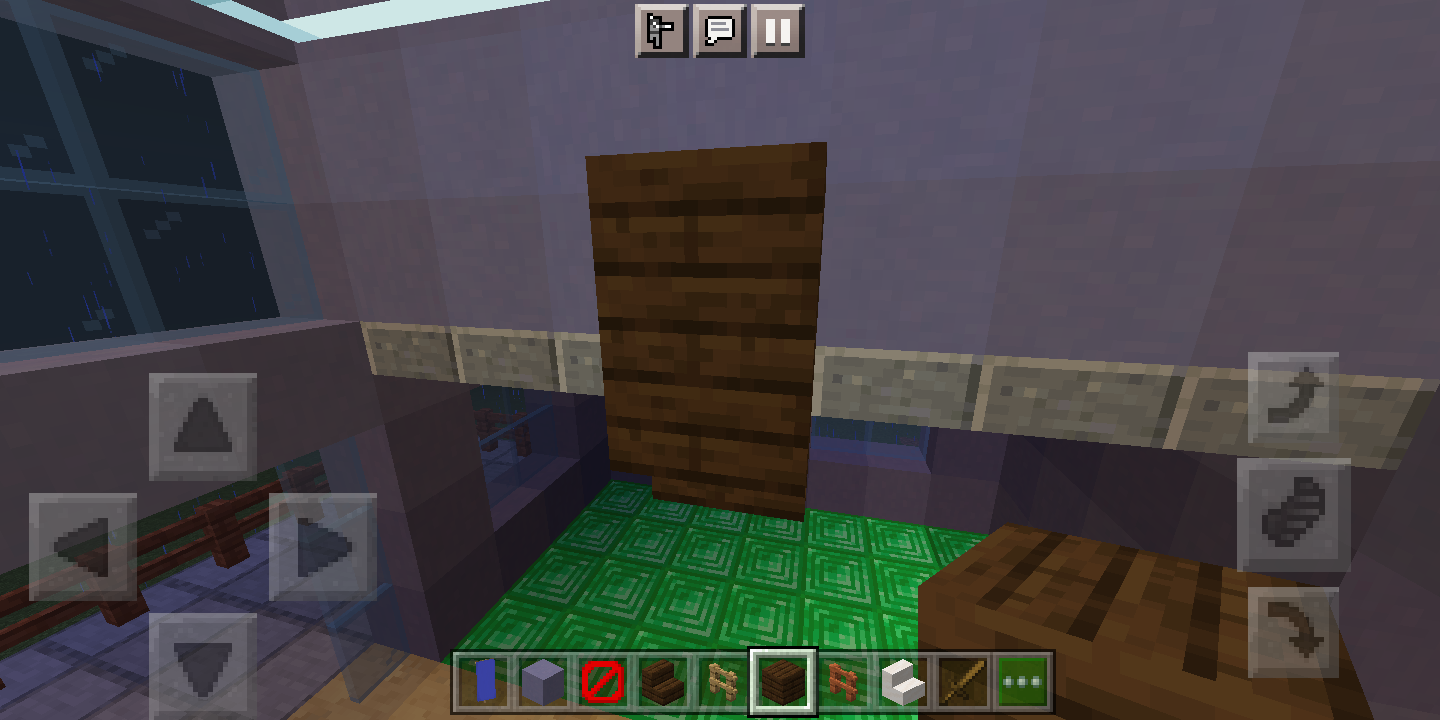
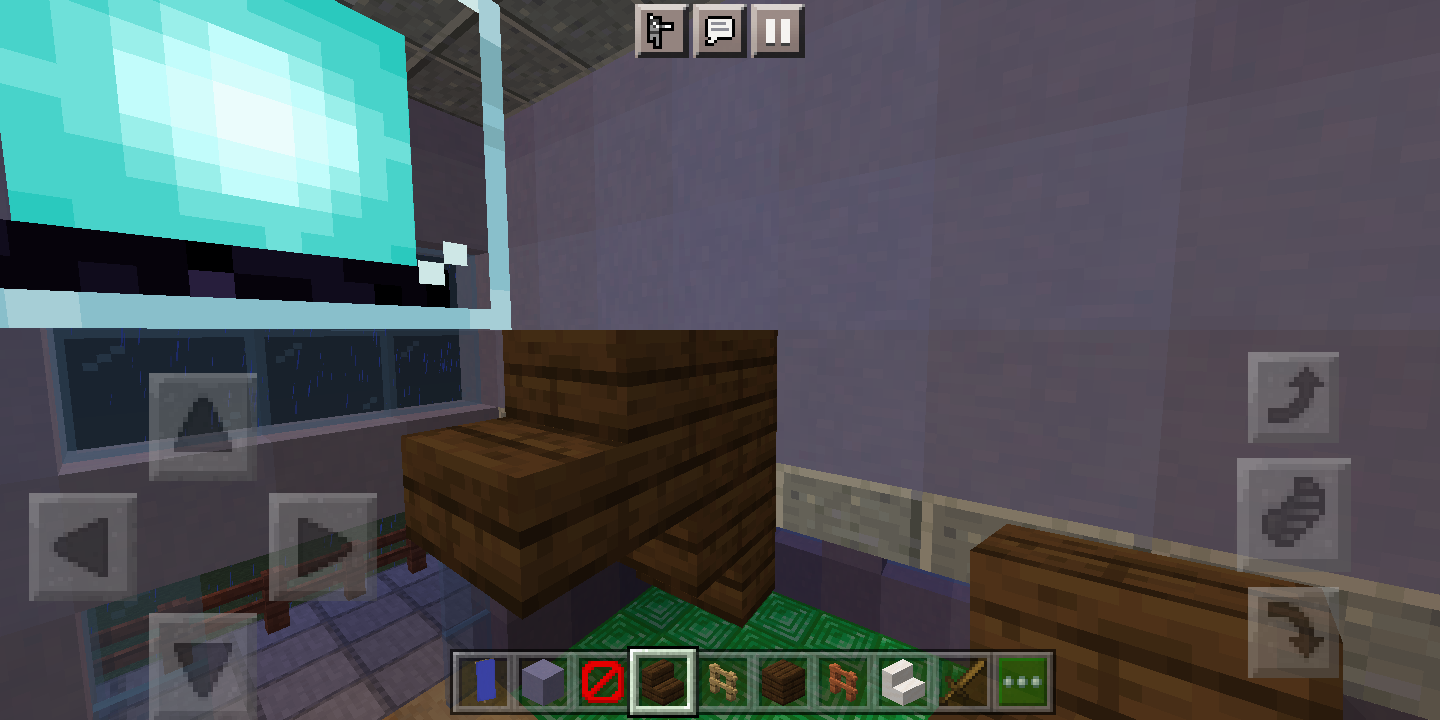
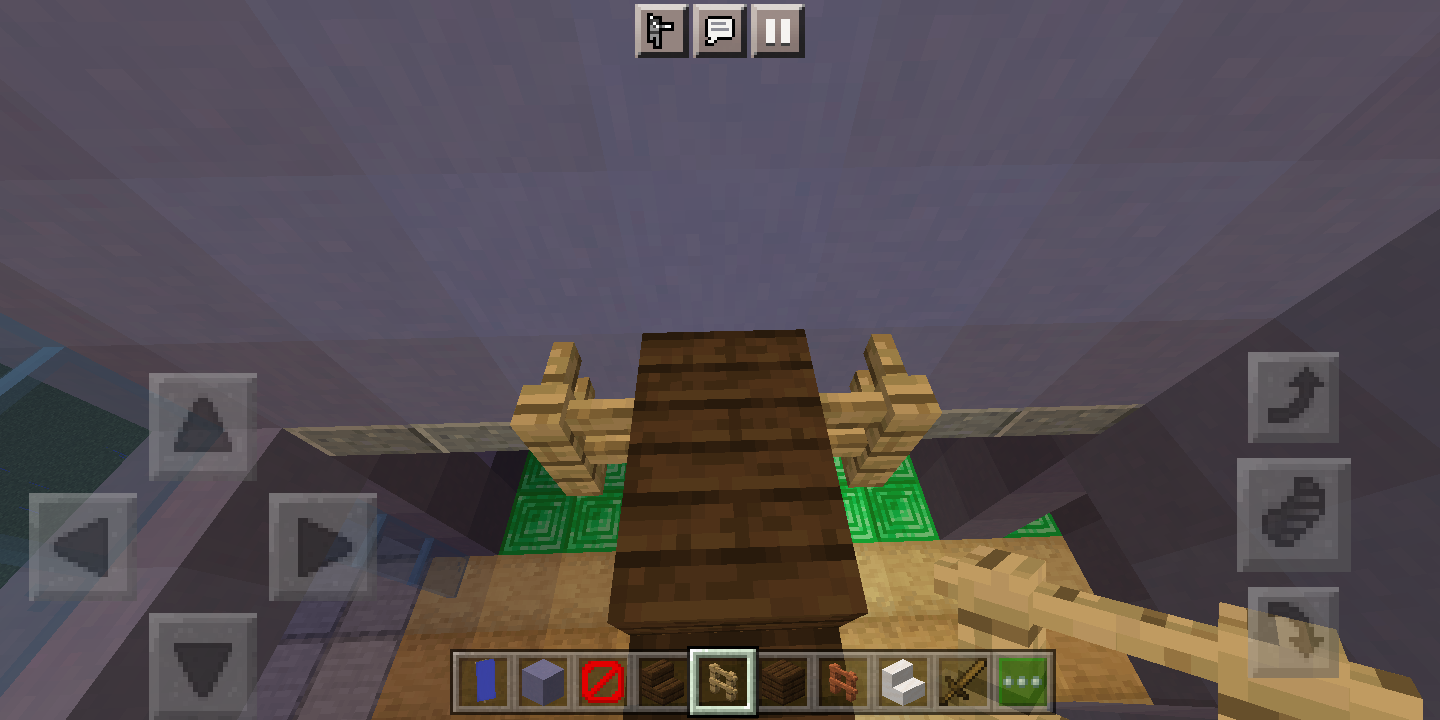
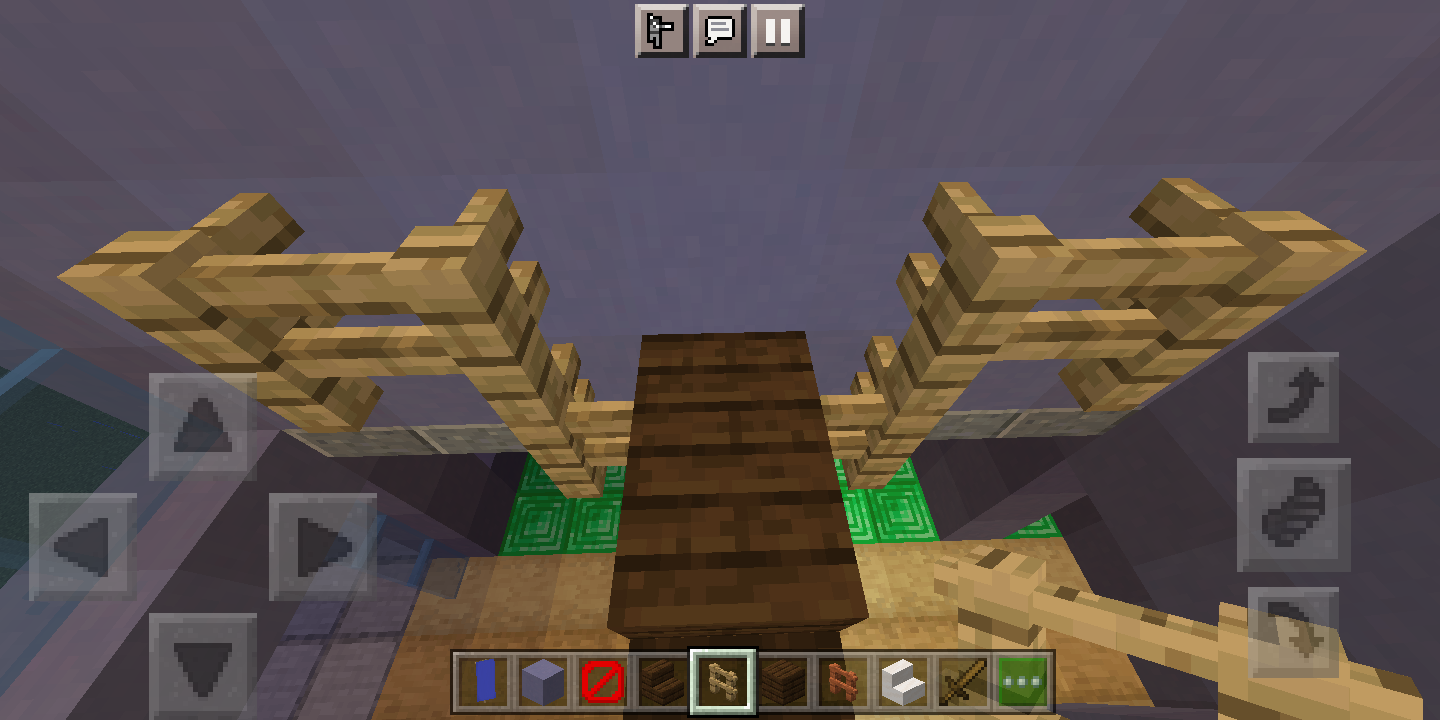
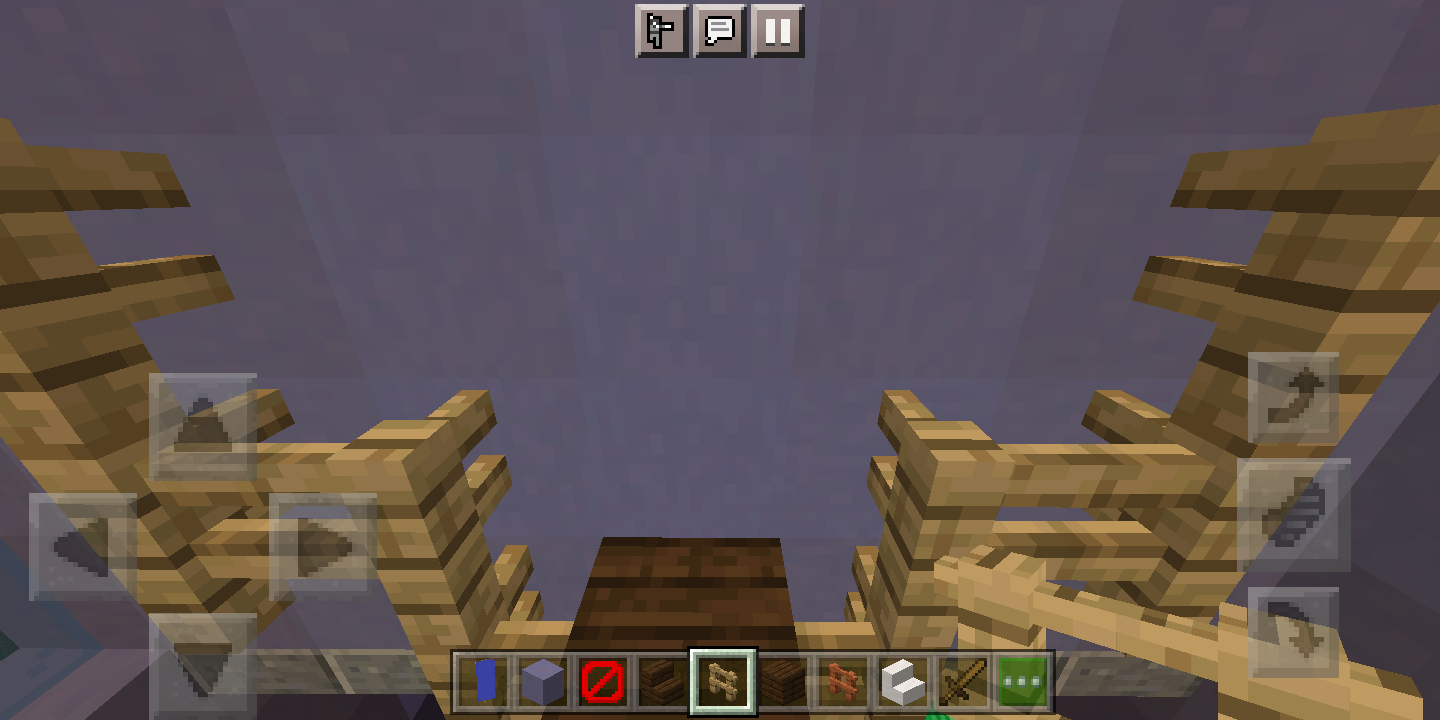
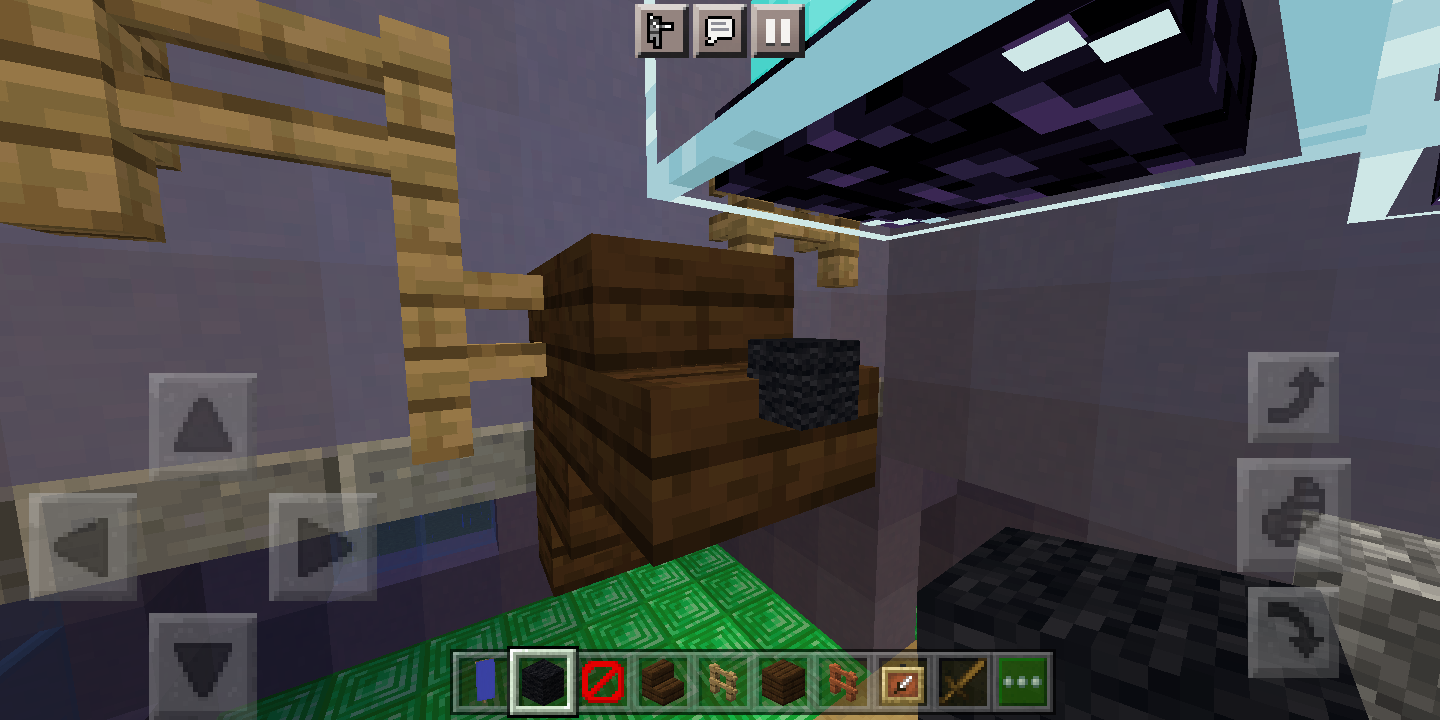
So you know how some people mount deer heads high on their living room wall? Well, you can now mount one on your wall in Minecraft without spending hundreds of dollars. Follow the steps.
YOU WILL NEED
Dark oak stairs
Dark oak planks
Oak fence
Invisible item frame
Black wool
PICTURE #1: On the center block of an empty part of your wall, place one upside-down dark oak stair.
PICTURE #2: Place a dark oak planks block on top of that stair.
PICTURE #3: Place a right-side-up dark oak stair on the front of that planks block.
PICTURES #4 - #6: This step is super hard to explain. Just place oak fences in the way that you see in the pictures.
PICTURE #7: As a small detail, and only if you have access to the Invisible Item Frame that I mentioned earlier, you can place one on the tip of the stair block in front, and put a block of black wool in it.
You now have a deer head on your wall! Enjoy looking at this "taxidermy" decoration, and showing it off to your friends.
Bedroom
We are now done with the living room, so it is time for us to move onto the bedroom.
Bed
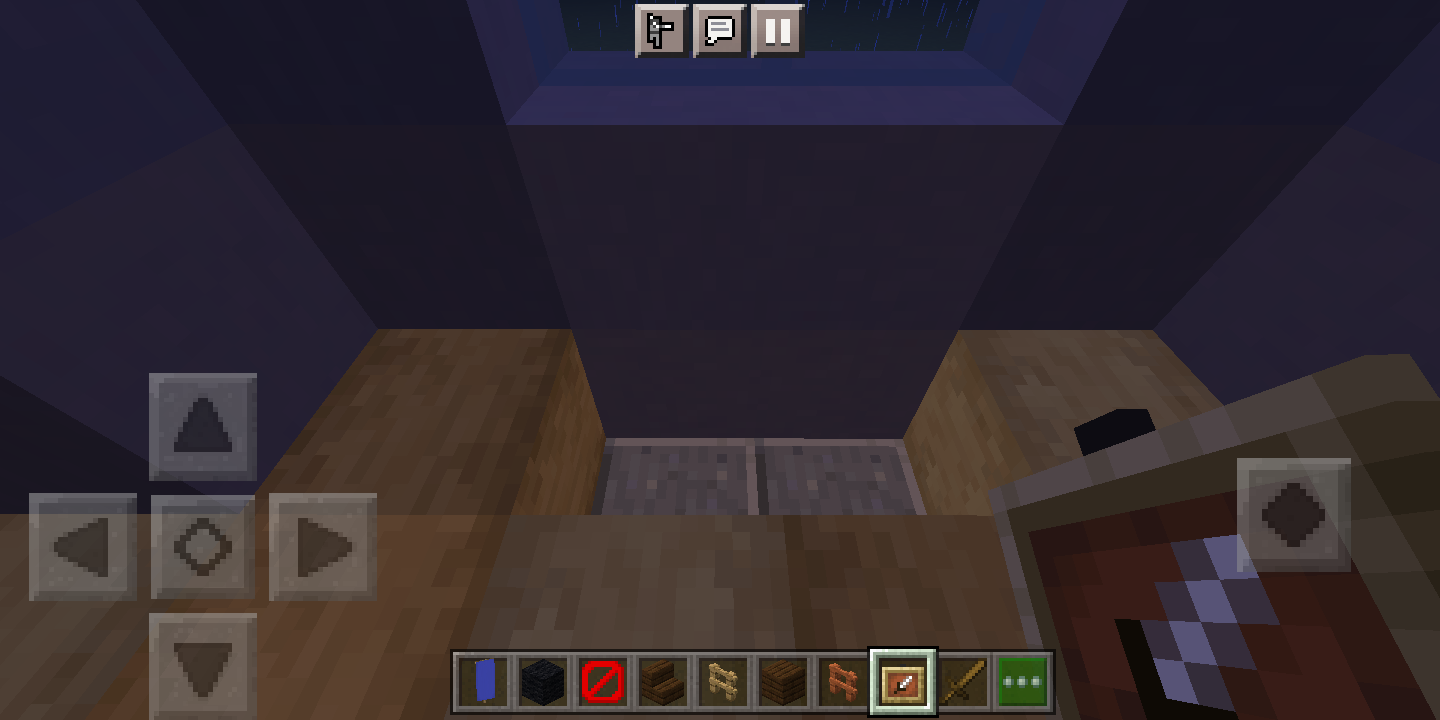
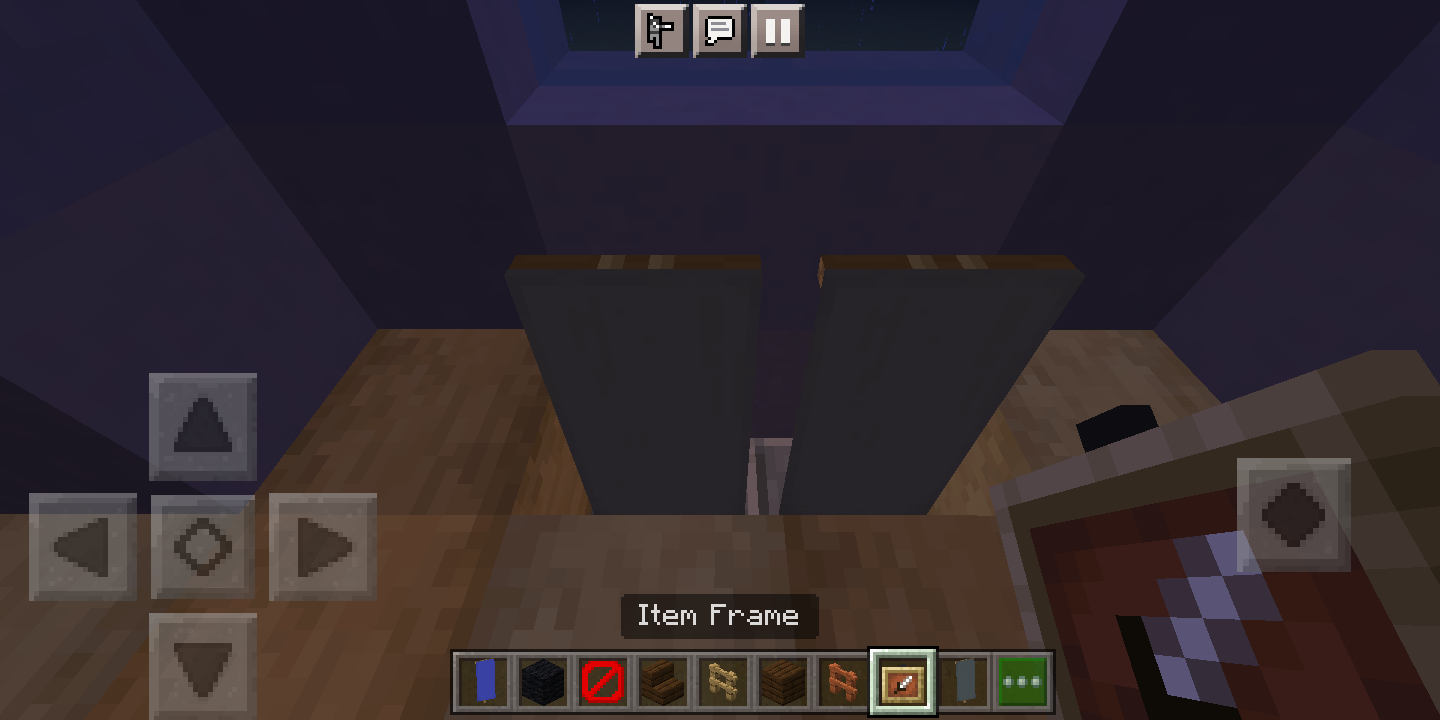
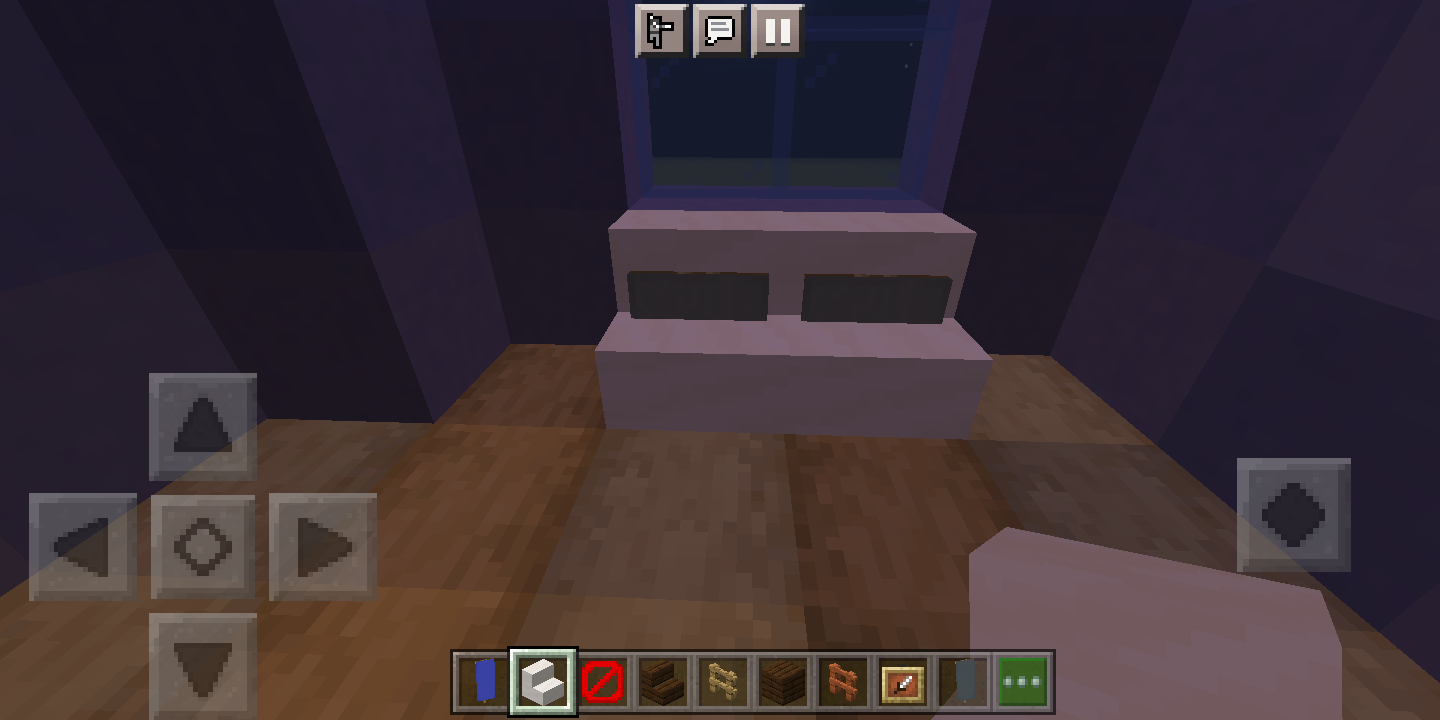
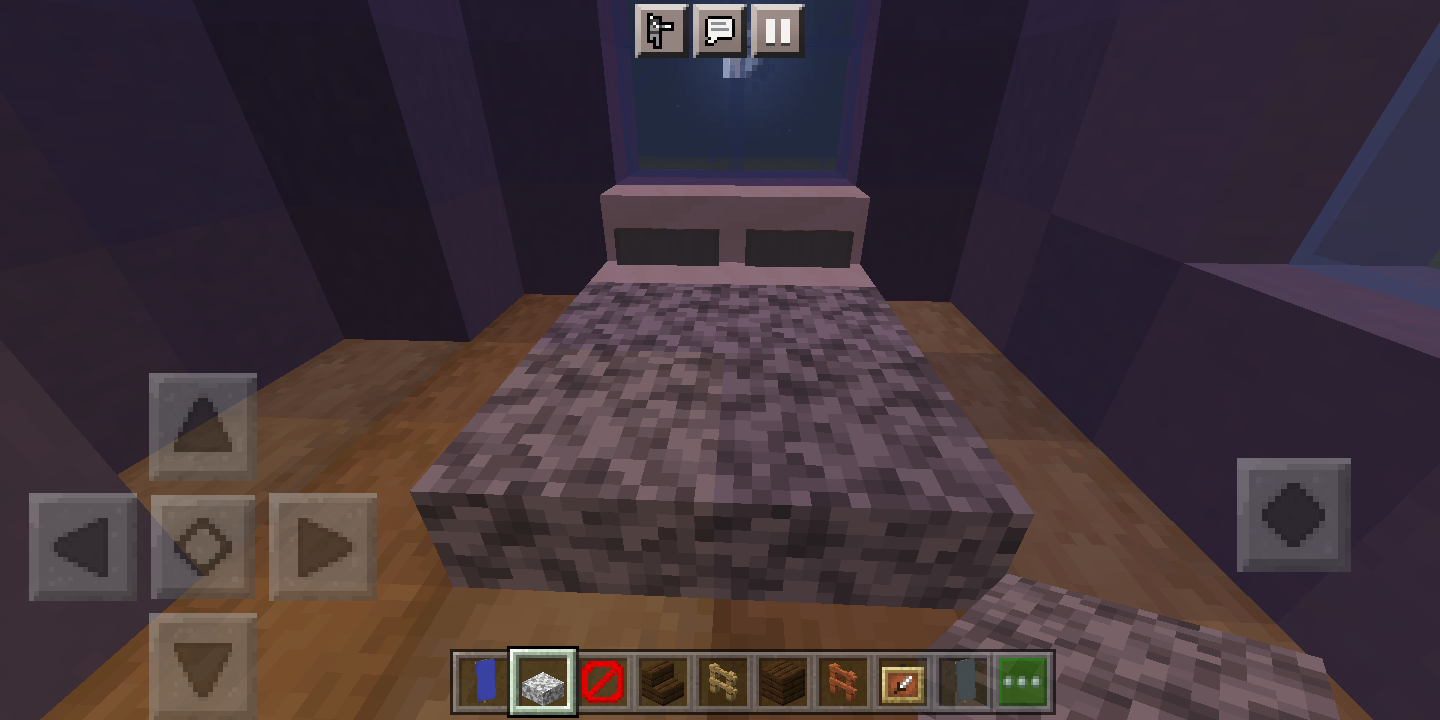
Before starting, please know that this bed that you are about to build is not functional; it can't be slept on. But it looks good for decoration. Feel free to replace this with a functional bed if you like, though.
YOU WILL NEED
Banners
Quartz stairs
Diorite slabs
PICTURE #1: The couch that we built earlier required us to dig a hole in the floor, well the bed does, too. So, find the two center blocks of the wall of your Minecraft bedroom, and dig a hole that is 2 blocks wide, 1 deep.
PICTURE #2: Place two of the color of banner of your choice in the hole. Just like in the couch, these banners will be the pillows. I used gray banners, as you can see above.
PICTURE #3: Place two quartz stairs above the hole, just as you can see in the picture. Again, very similar to the couch.
PICTURE #4: Place four slabs that will go well with the color of banner that you chose, in a 2 x 2 square. I used diorite slabs because I found that they go well with my grey banner "pillows." That square of slabs will be the mattress/blanket.
You now have a cozy-looking bed, that you can relax in after a long, hard day of mining and fighting zombies. Or at least pretend to.
Bedside Cabinets
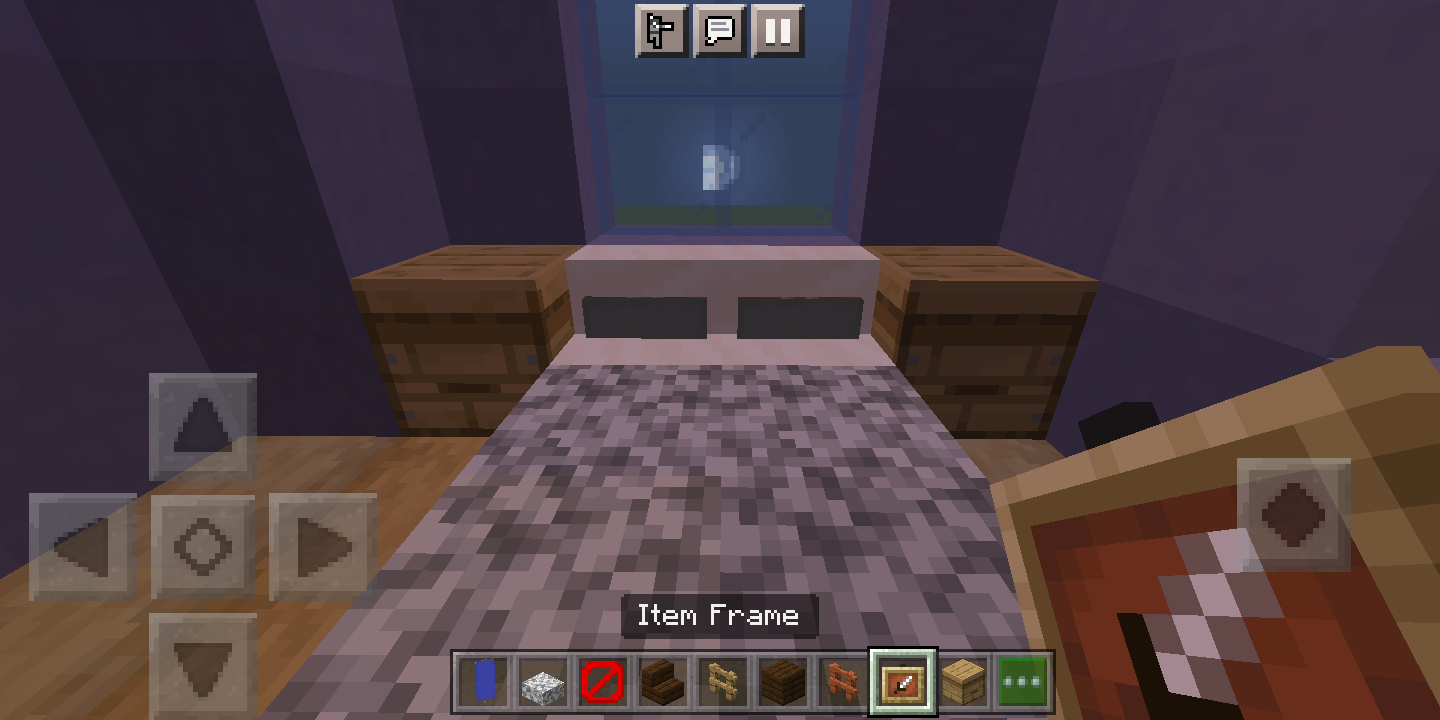
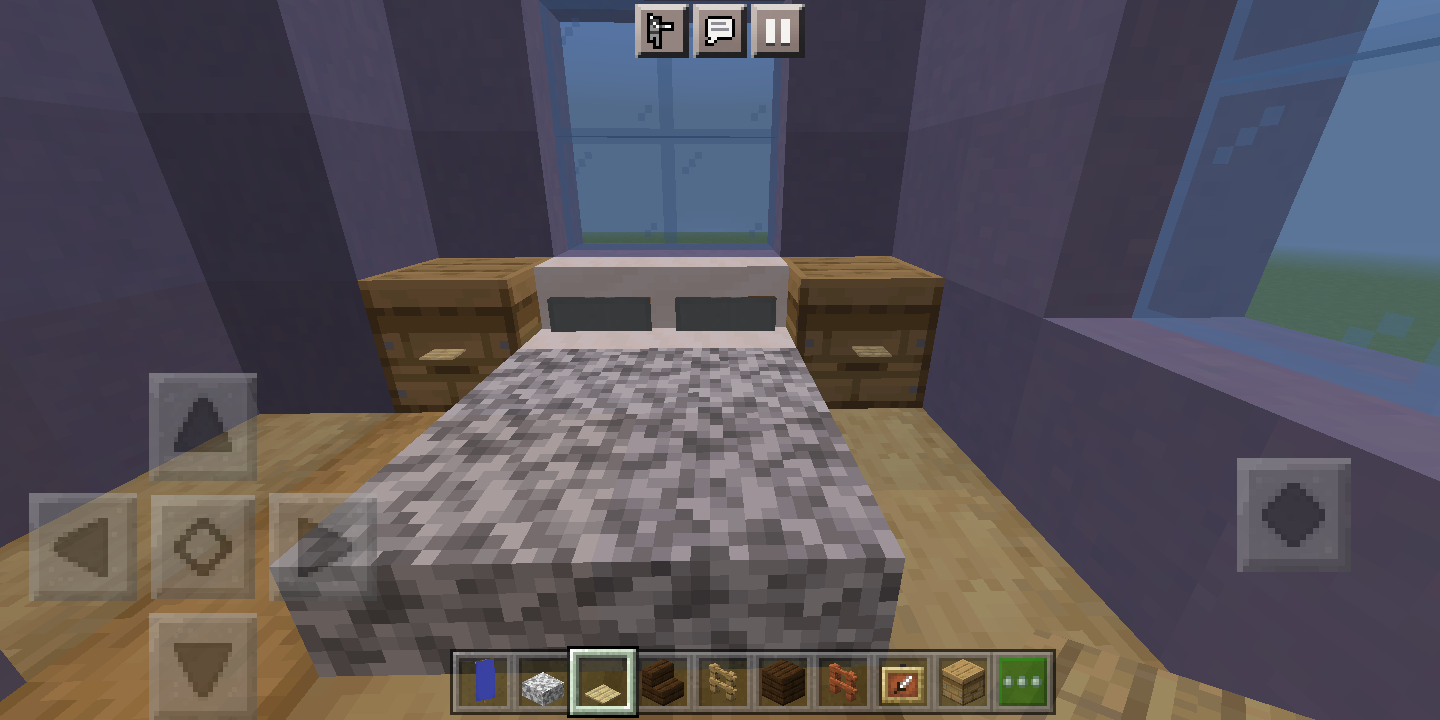
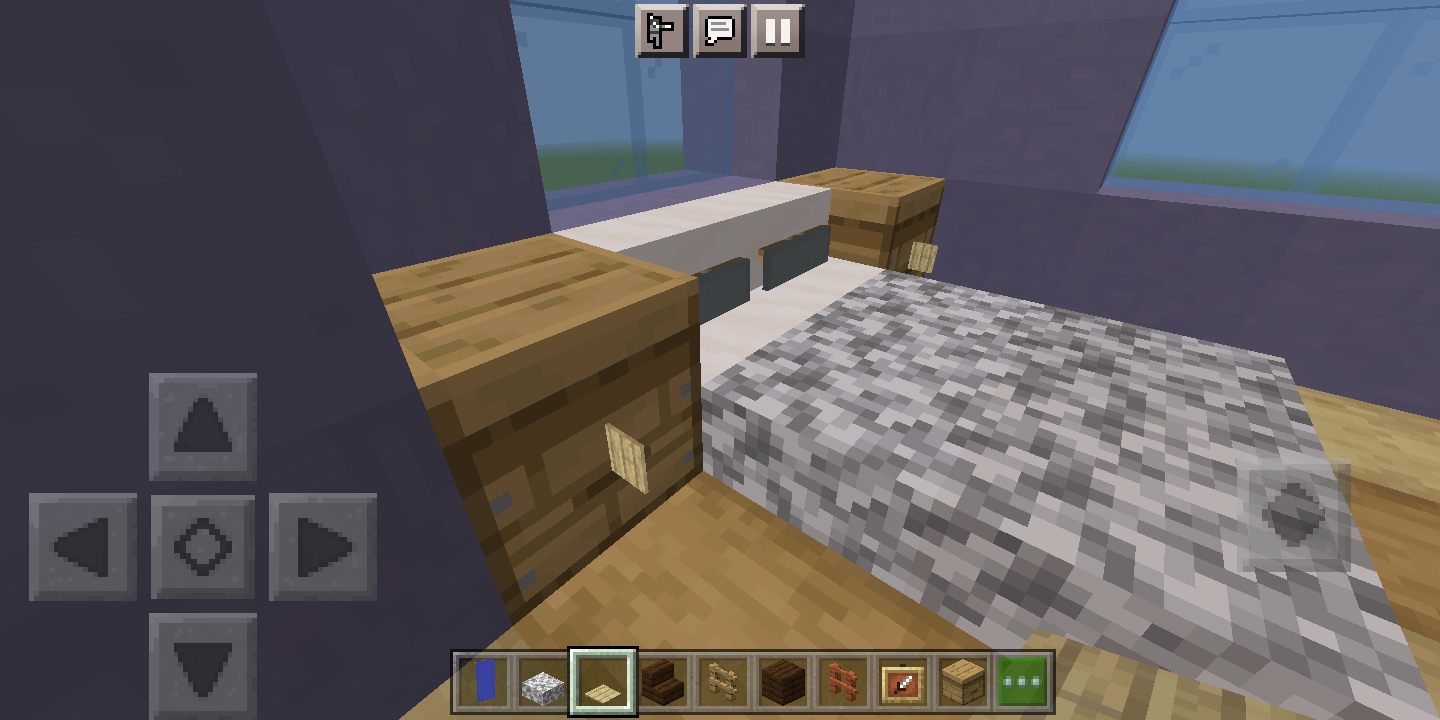
Next to your bed, it is always a great idea to have somewhere to keep your stuff. While you can't exactly keep stuff in these bedside cabinets, they are good for decoration, just like the bed itself.
YOU WILL NEED
Beehives
Invisible item frames
Pressure plates
PICTURE #1: Place one beehive on each side of your bed.
PICTURE #2: If you have access to the Invisible Item Frame, place one on the front of each beehive, and put a pressure plate of your choice in each frame. I used birch. You can leave it like this for bedside drawers, or you could proceed to step three.
PICTURE #3: Rotate the pressure plates until they look like the ones in the picture. They should look like cabinet handles now.
Now you can (pretend to) keep all your stuff in your bedside cabinets, or drawers.
Lamps
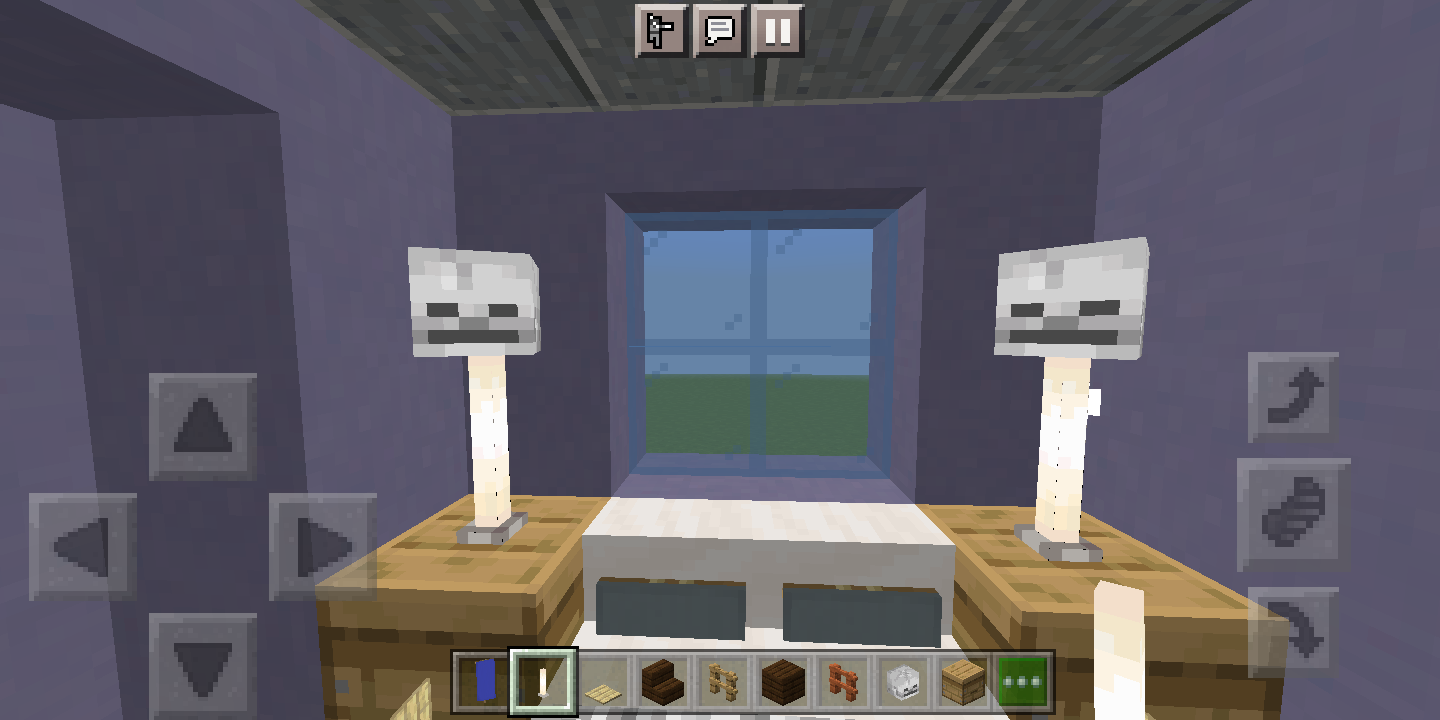
To light up the bedroom, we will be building small lamps on top of the bedside cabinets. To build a lamp in Minecraft, you can place an end rod with a skull (or really any head except for the dragon head) on top. The end rod produces light, though it acts as the lamp stand. The skull looks kind of like a lamp shade, doesn't it?
If you like, you can place the skull with the face towards the wall. This just makes the lamp a bit less creepy. However, I just left the skull facing me because that is the easiest thing to do, and also, it doesn't look that creepy, does it?
Closet
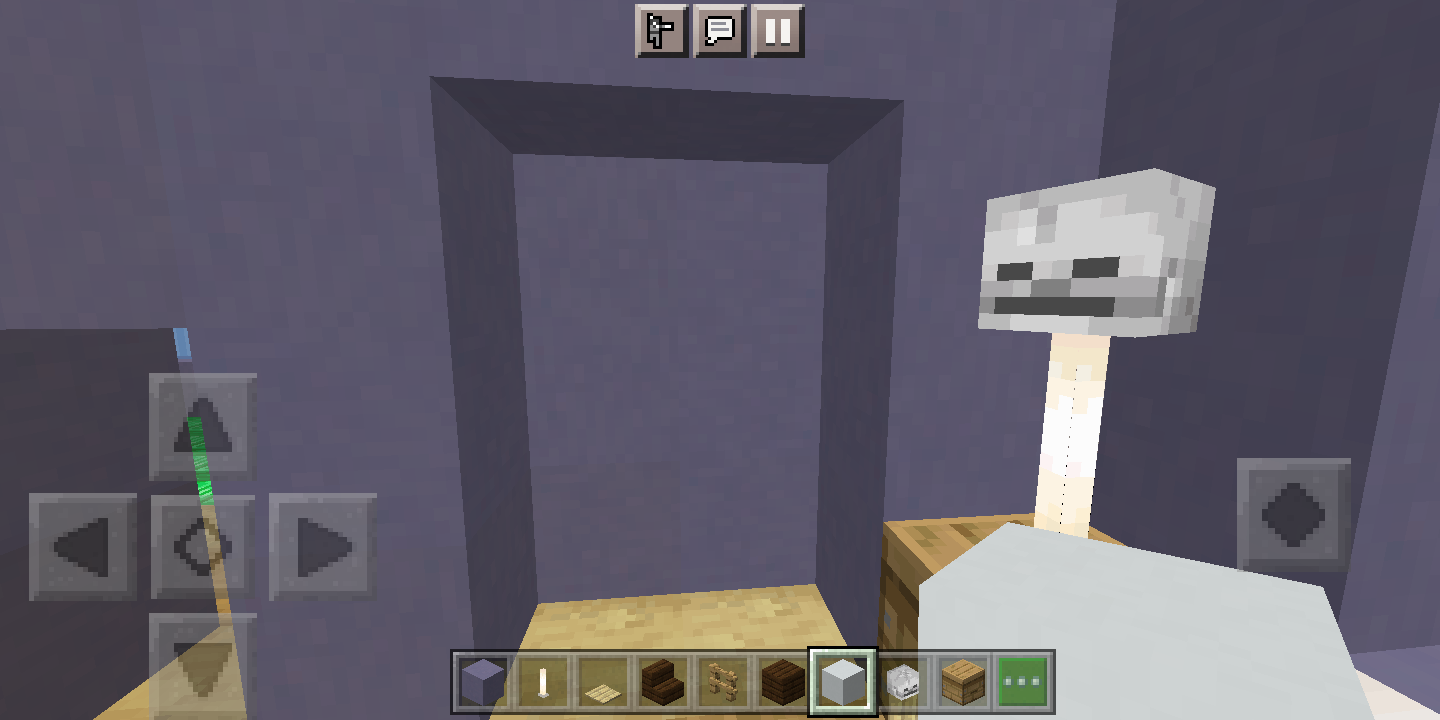
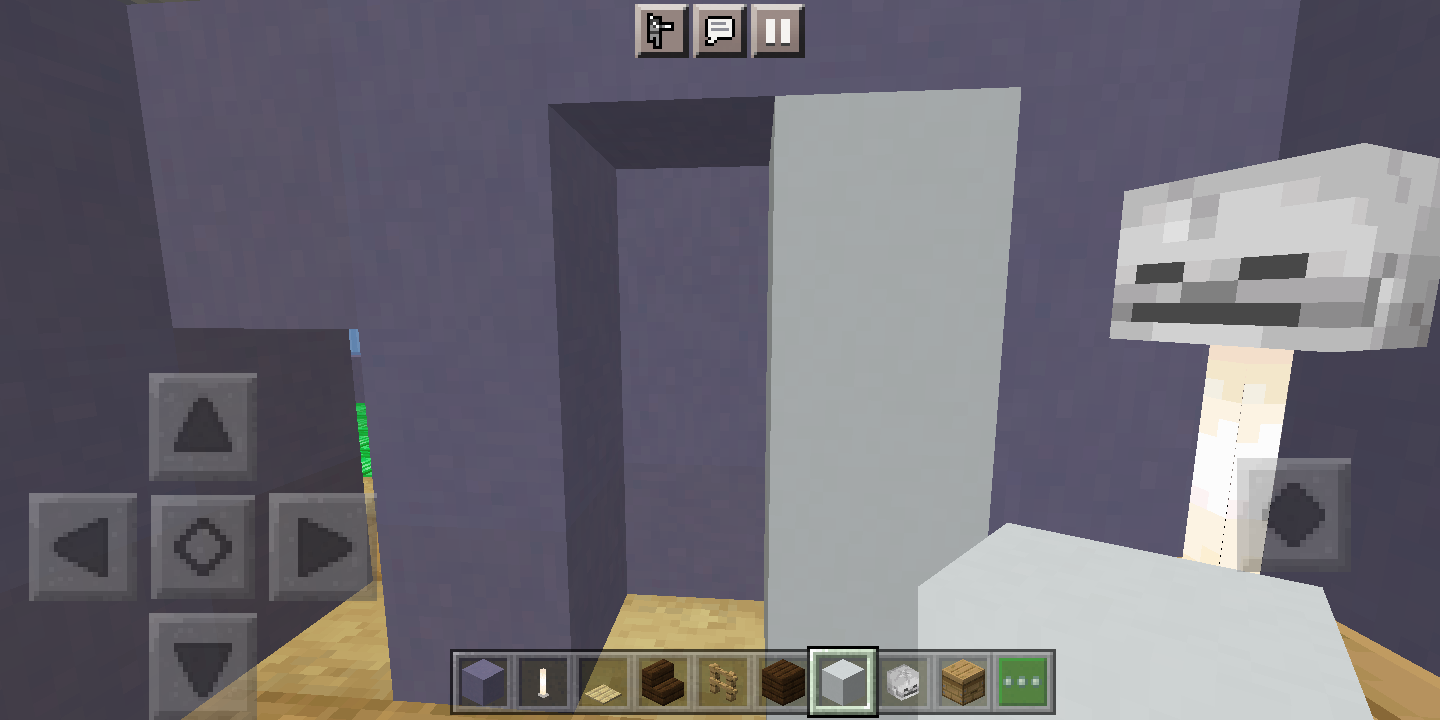
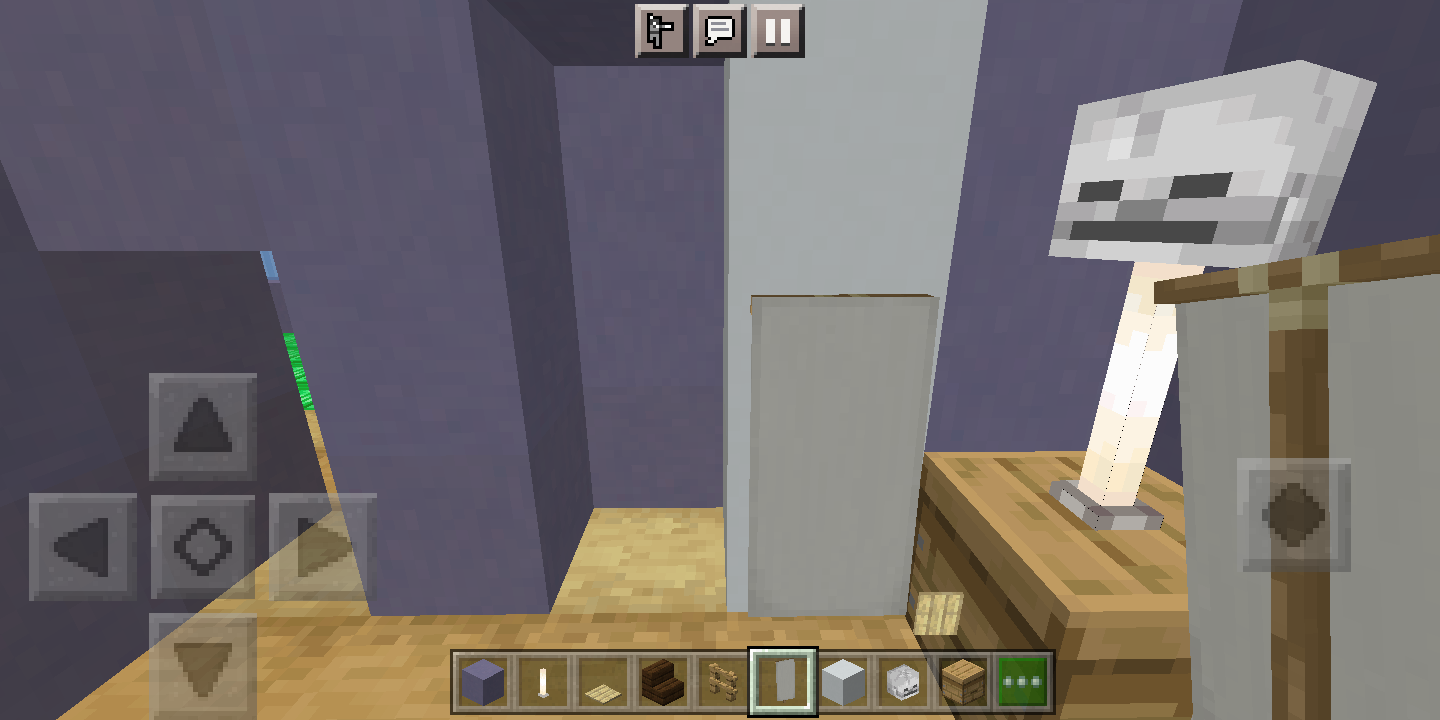
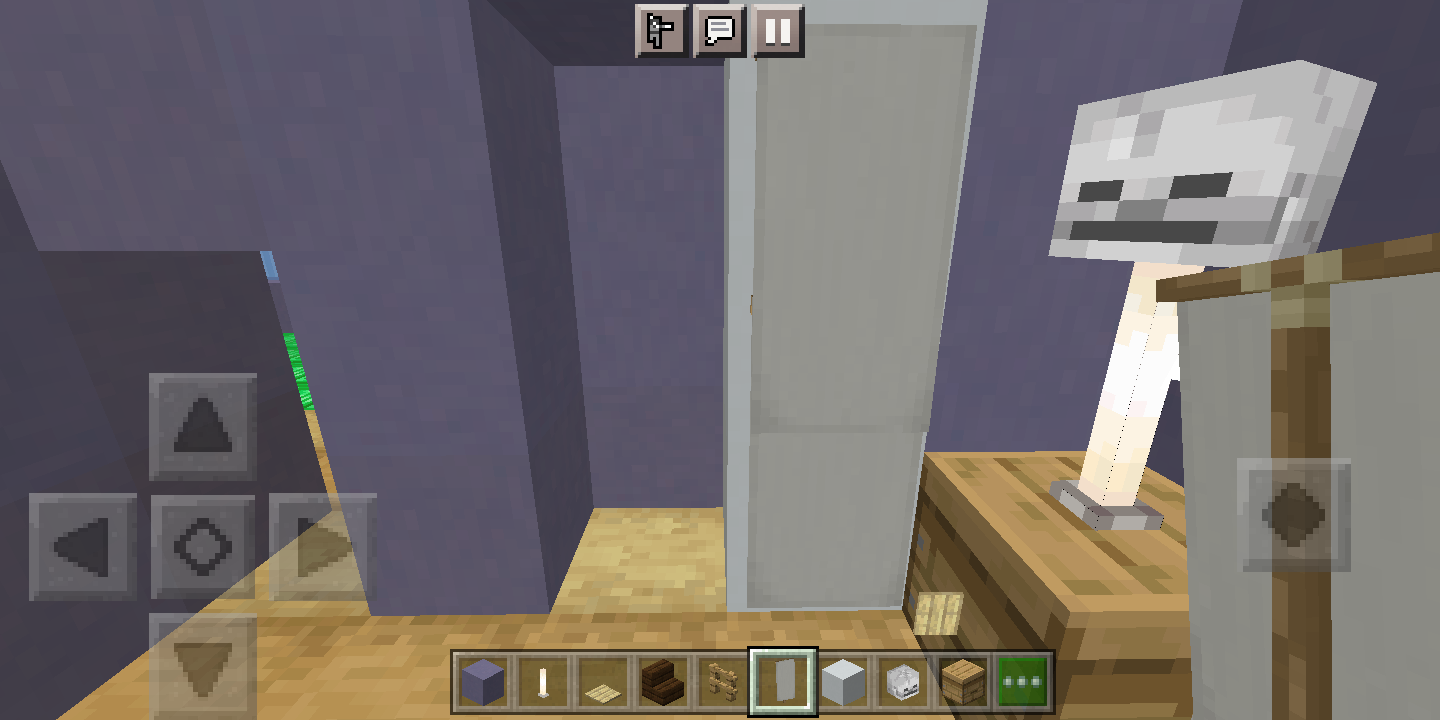
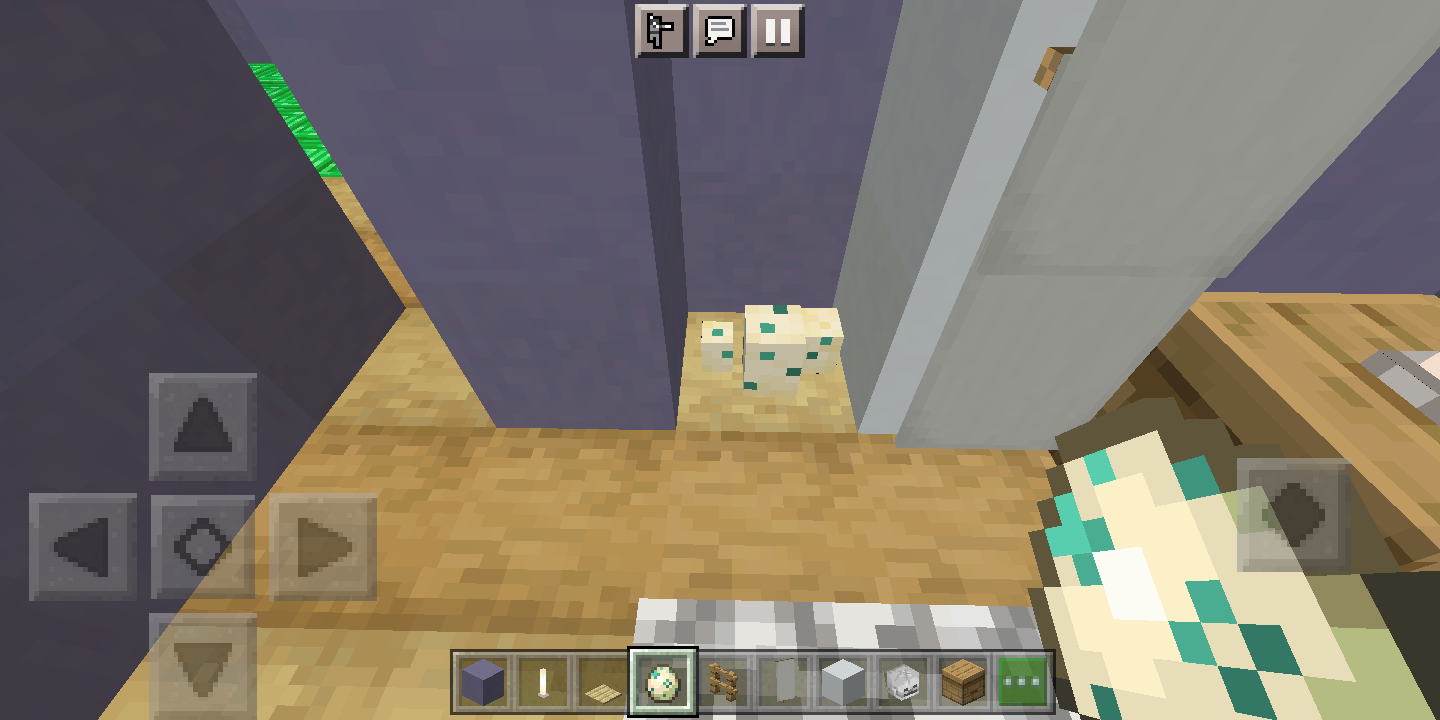
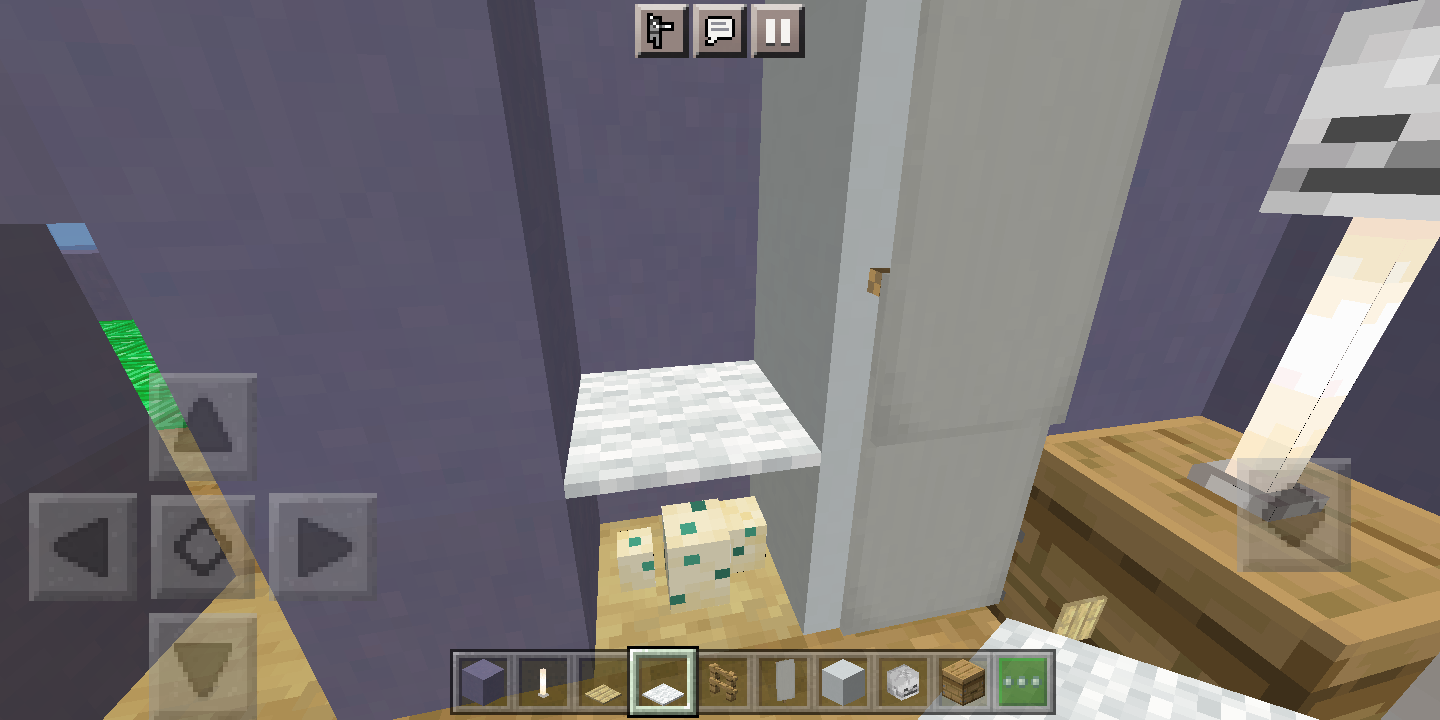
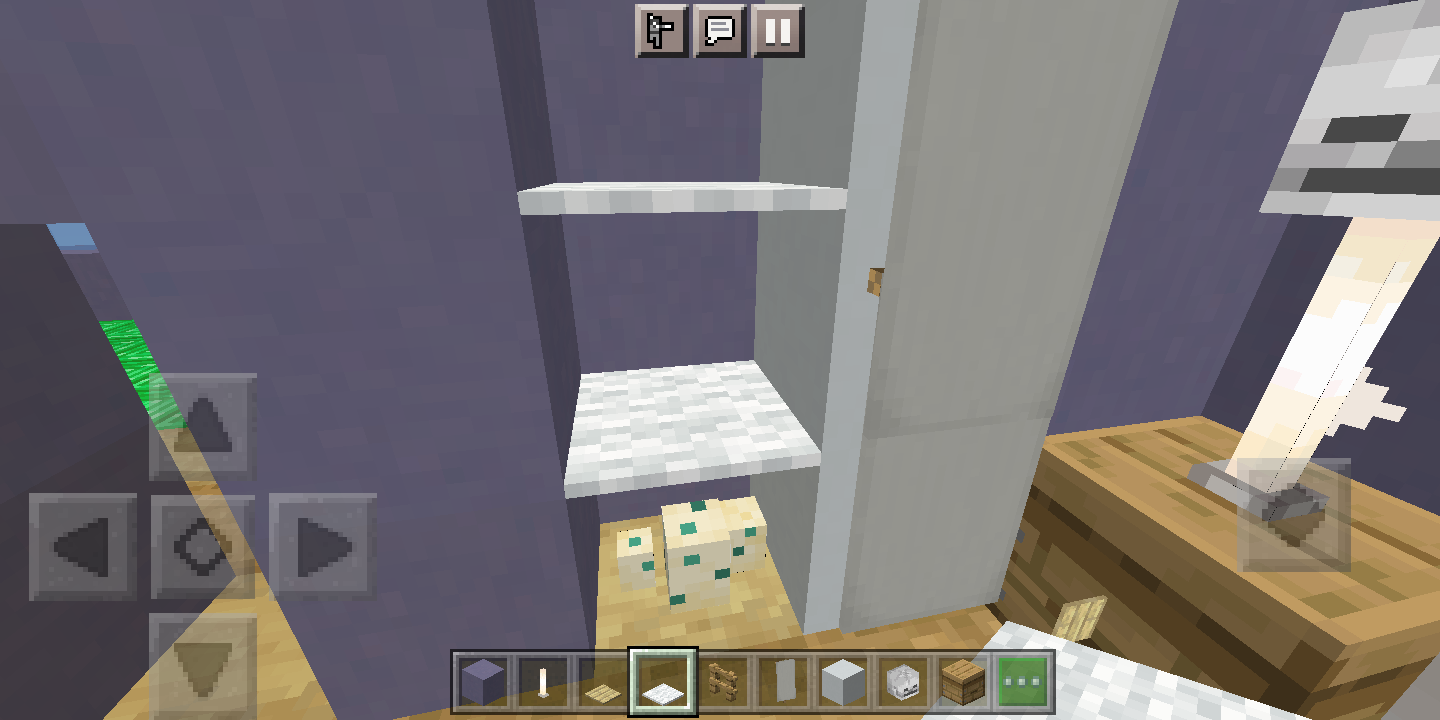
This closet could really look good in any room of the house, but I like putting my closets in my bedrooms. This closet looks like it is built-in with a sliding door, and if you want to build it, read on.
YOU WILL NEED
White concrete
Light grey banners
Turtle eggs
White carpet
PICTURE #1: Find an empty part of your wall, and dig out a nook that is 2 blocks wide, 3 blocks tall, and 1 block inward.
PICTURE #2: On the right side of that nook, stack three white concrete.
PICTURES #3 AND #4: Place a light grey banner on the middle block of concrete. Then, place another light grey banner on the top block above that one.
PICTURE #5: To the left of the concrete, on the floor, place three turtle eggs, or sea pickles, or really anything you like. This will be the items being kept in the closet.
PICTURES #6 AND #7: Place a white carpet on top of the turtle eggs, and then another white carpet on top of the carpet you just placed.
You now have a built-in closet that adds some realism and homeliness to your bedroom.
Television
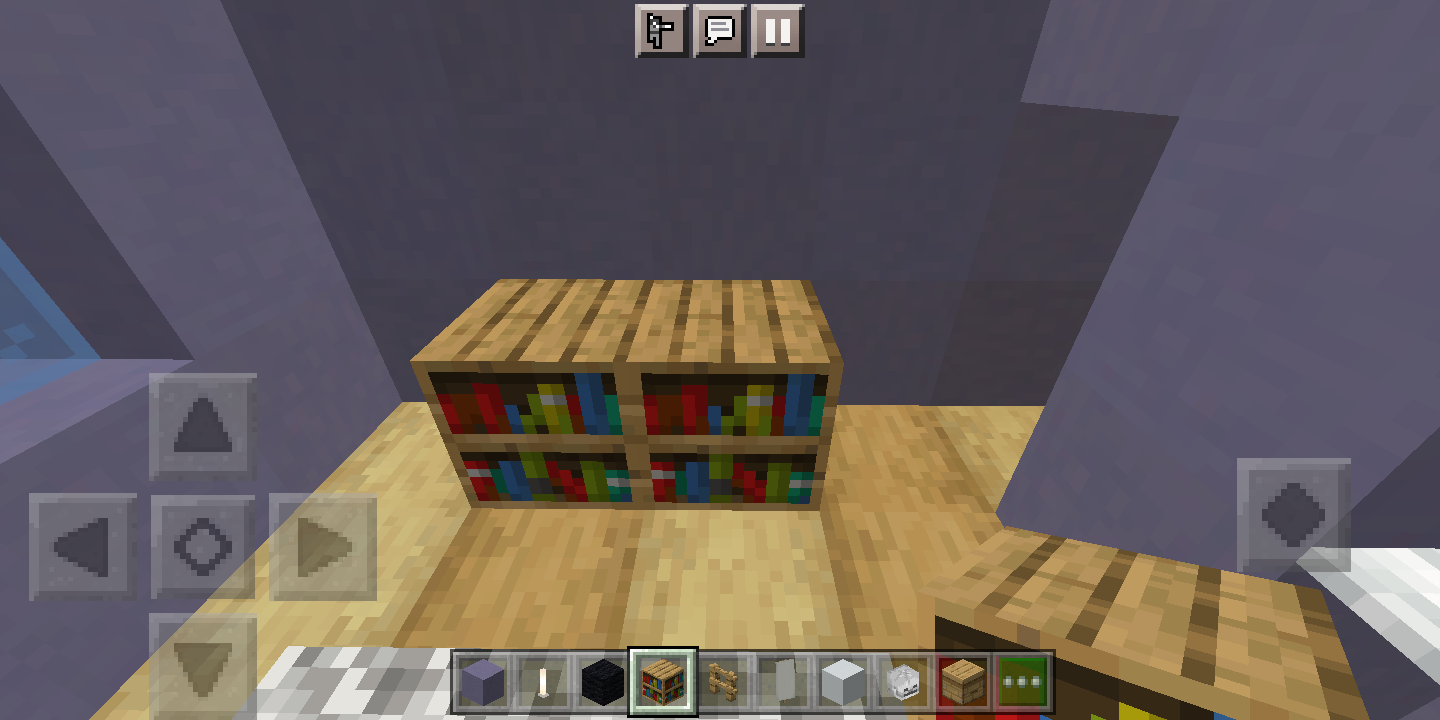
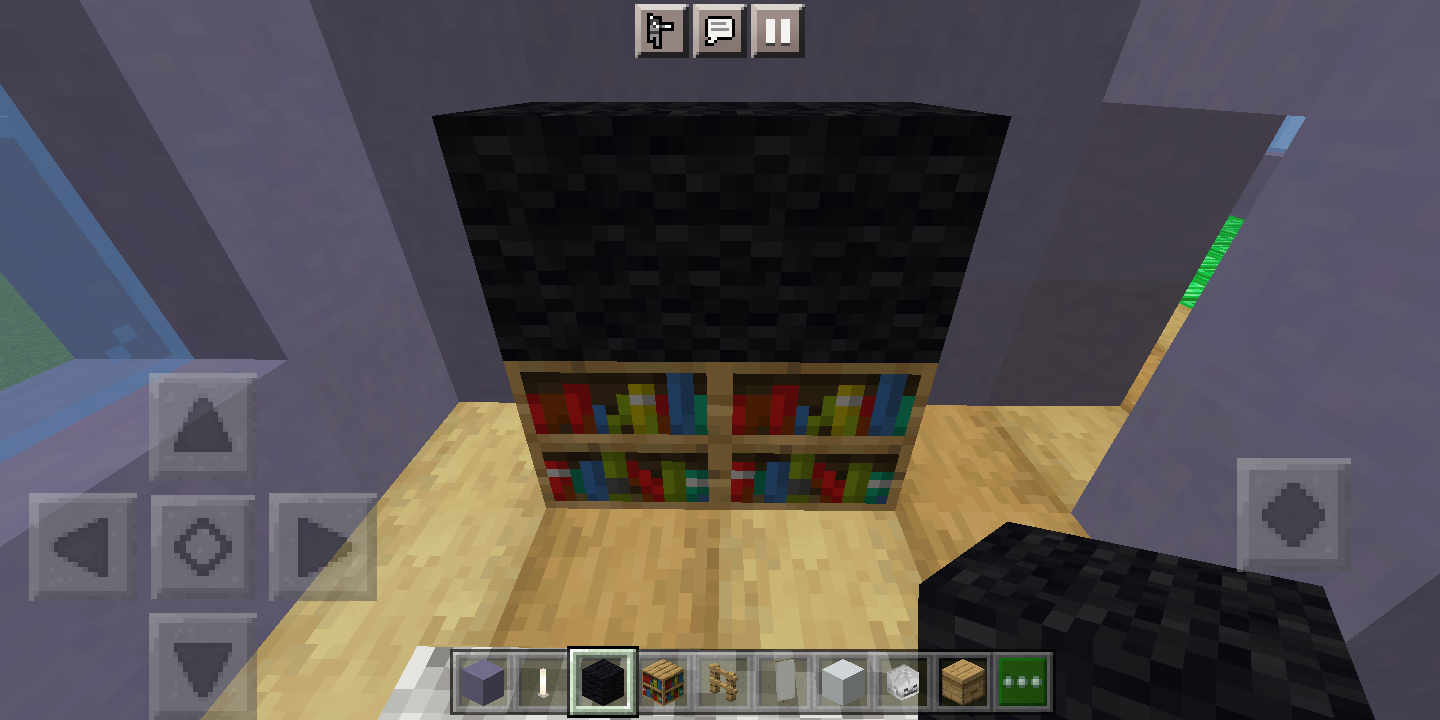
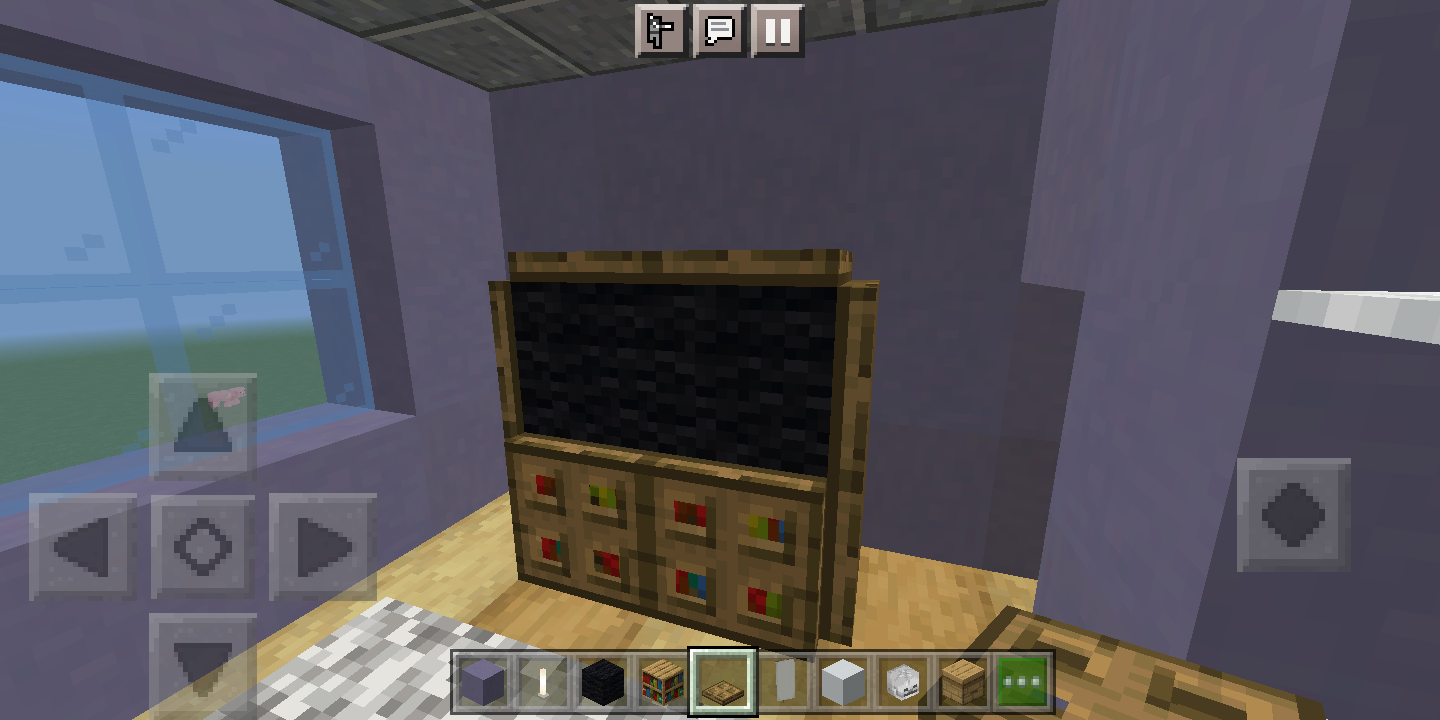
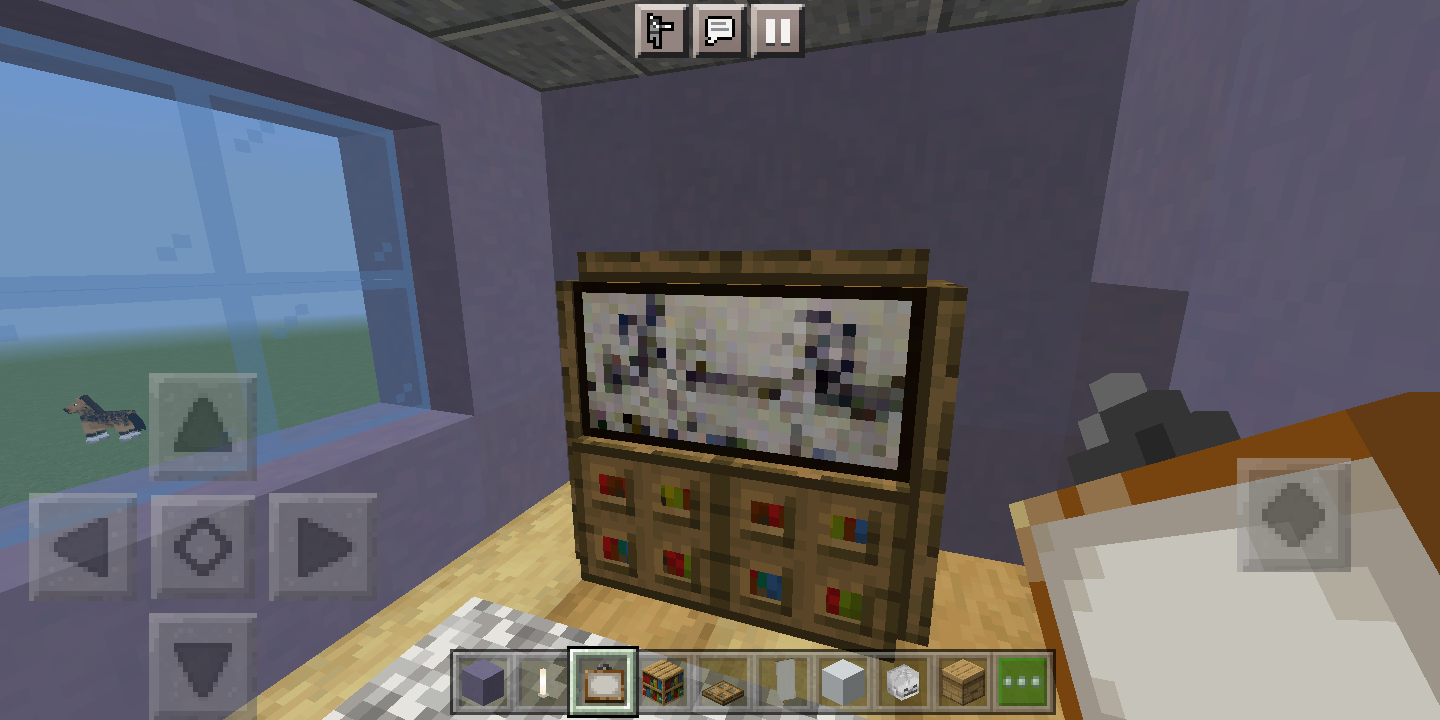
You can't watch TV shows in Minecraft, but you can still build a television for decoration in your house. I am about to show you and tell you how.
YOU WILL NEED
Bookshelves
Black wool
Oak trapdoors
Painting
PICTURE #1: Place two bookshelves side-by-side. I would highly recommend building this TV against a wall.
PICTURE #2: Place one black wool on top of each of those bookshelves. Black wool is a very popular way to make a turned-off TV screen in Minecraft.
PICTURE #3: Surround everything with oak trapdoors (or any trapdoor you like), but leaving the front of the black wool uncovered.
PICTURE #4: To "turn the TV on," just place a 2 x 1 block painting on the black wool.
There you are, a TV in Minecraft that kind of works. When you want to change the channel, just hang up a different painting. When you want to turn the TV off, just break the painting.
Kitchen
It's time to build the kitchen!
Building the Kitchen
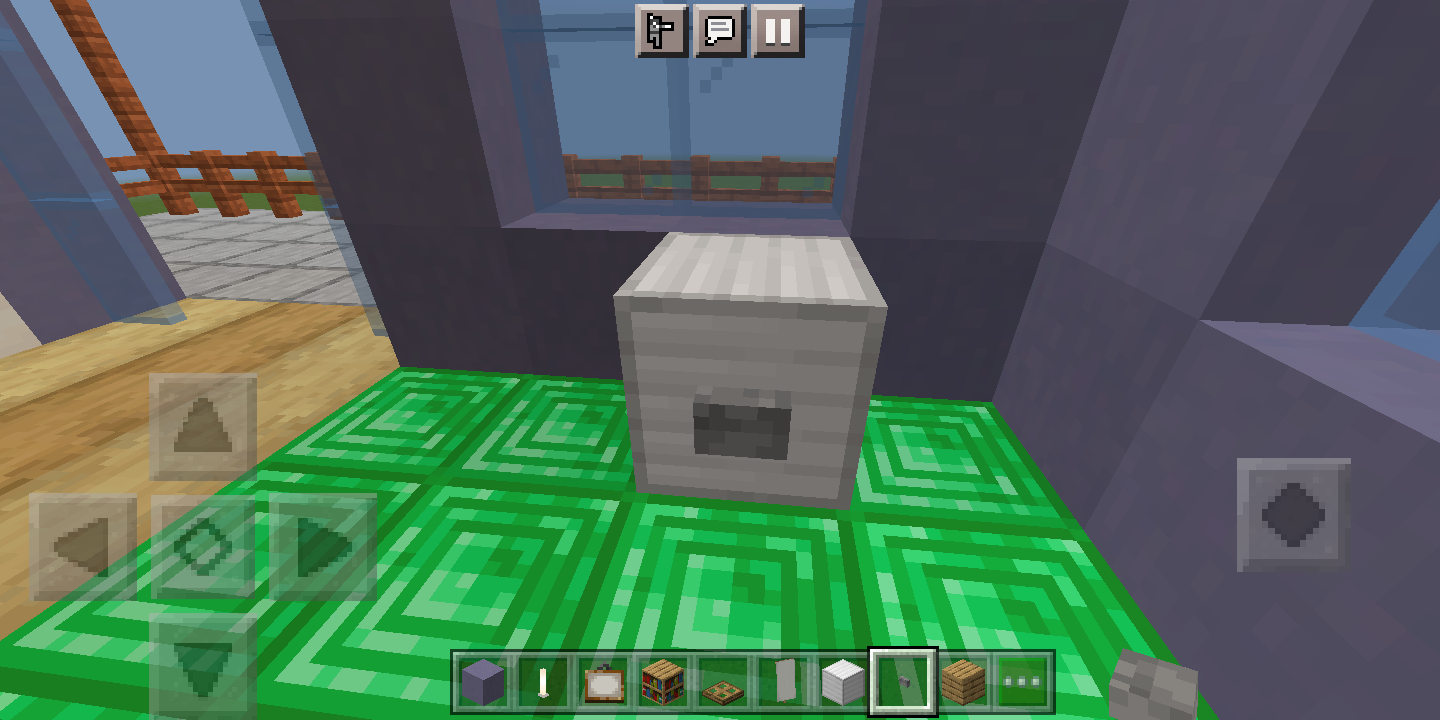
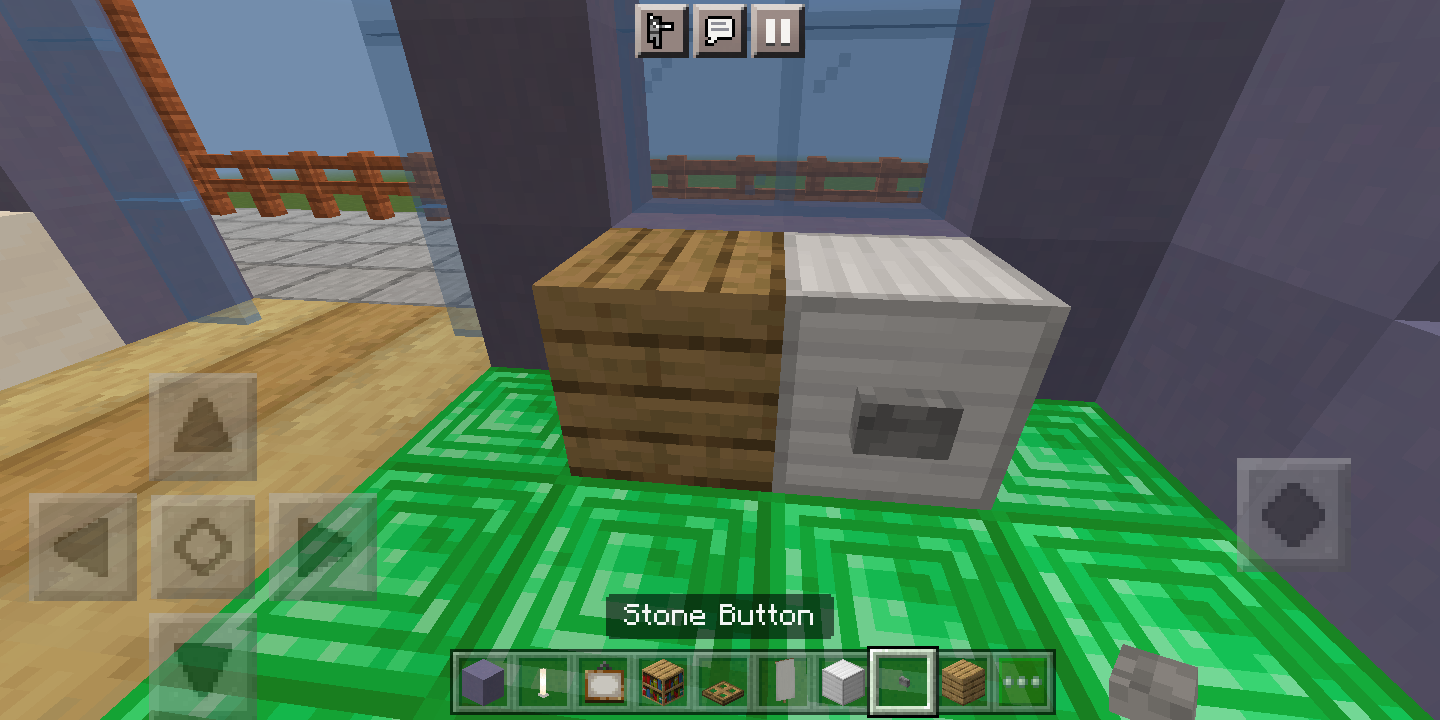
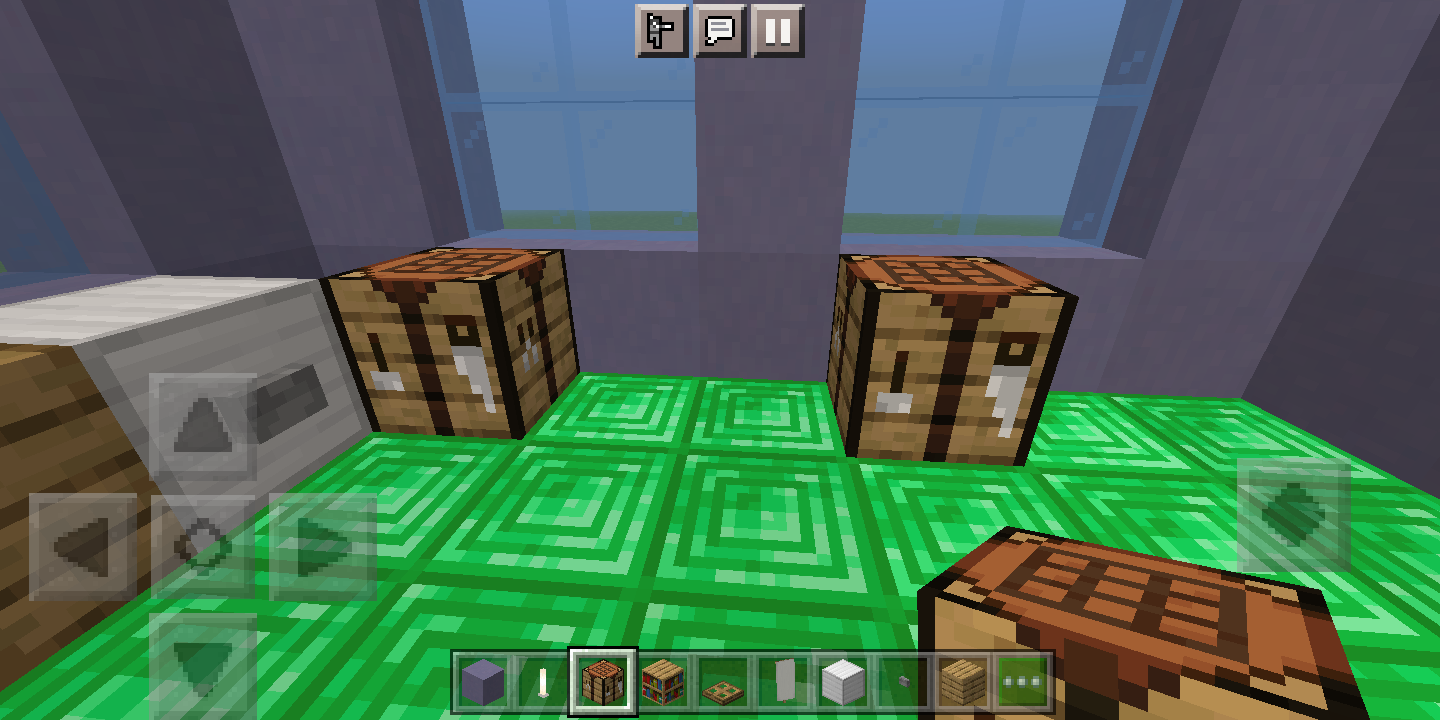
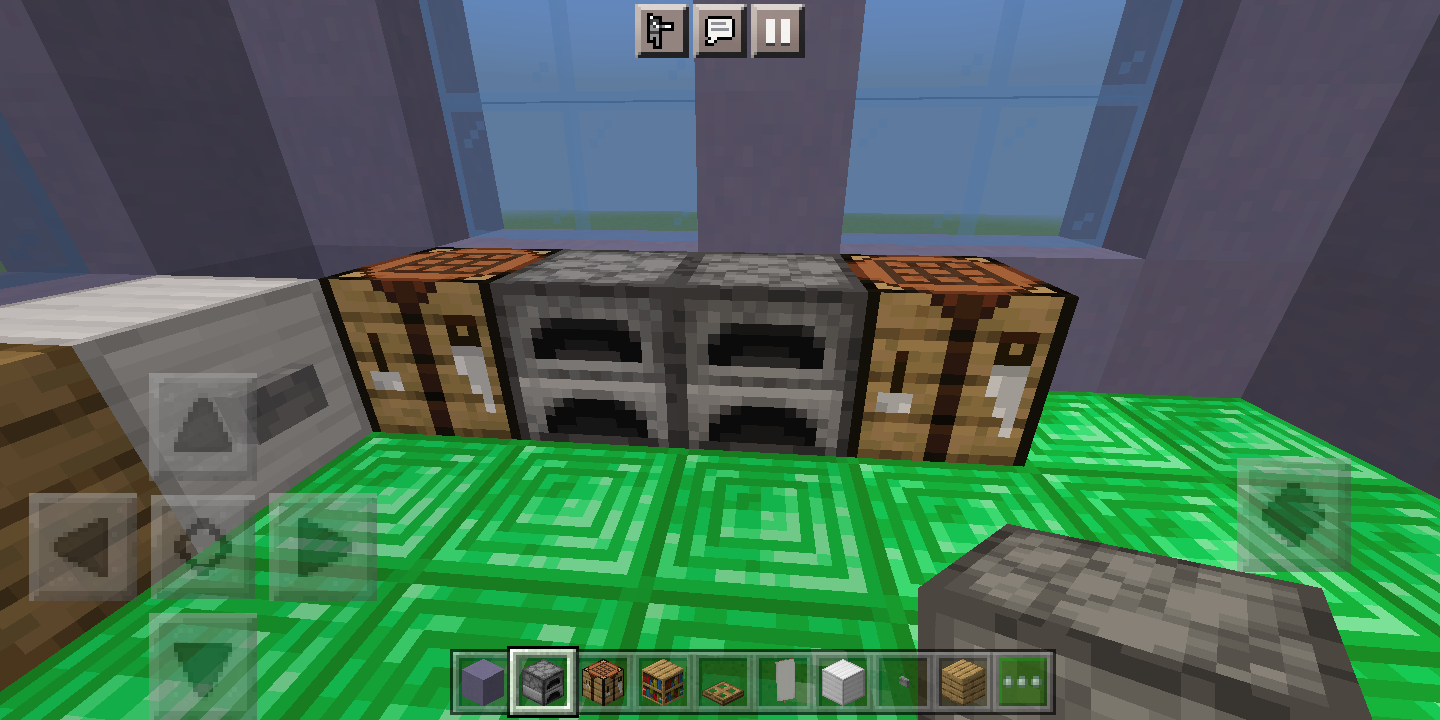
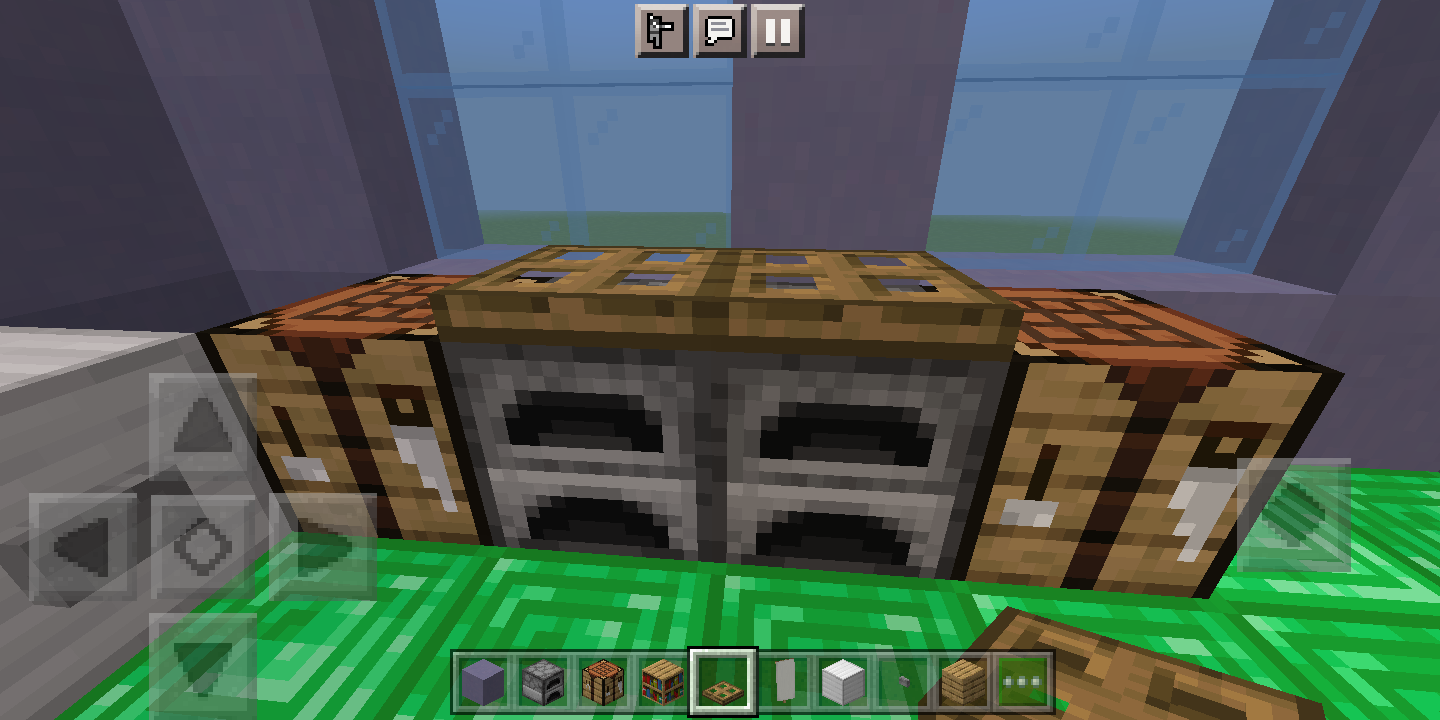
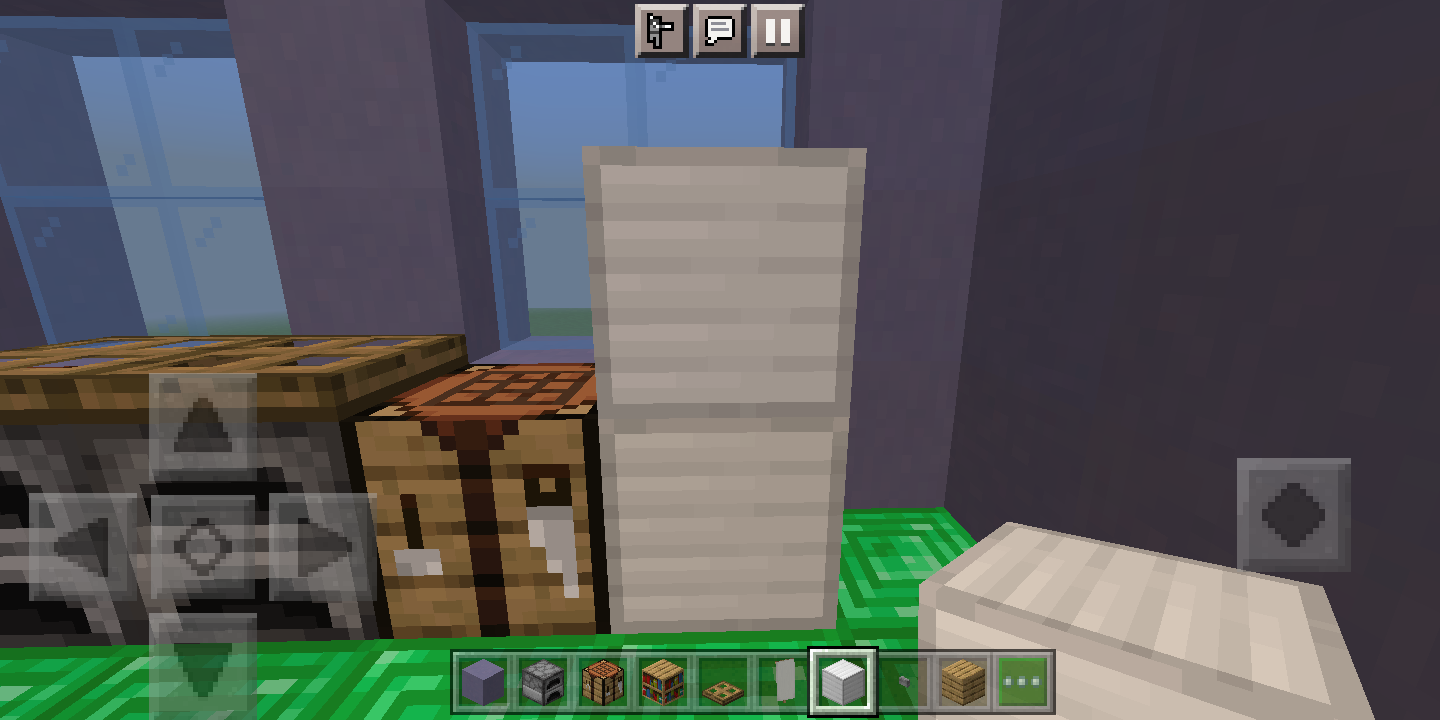
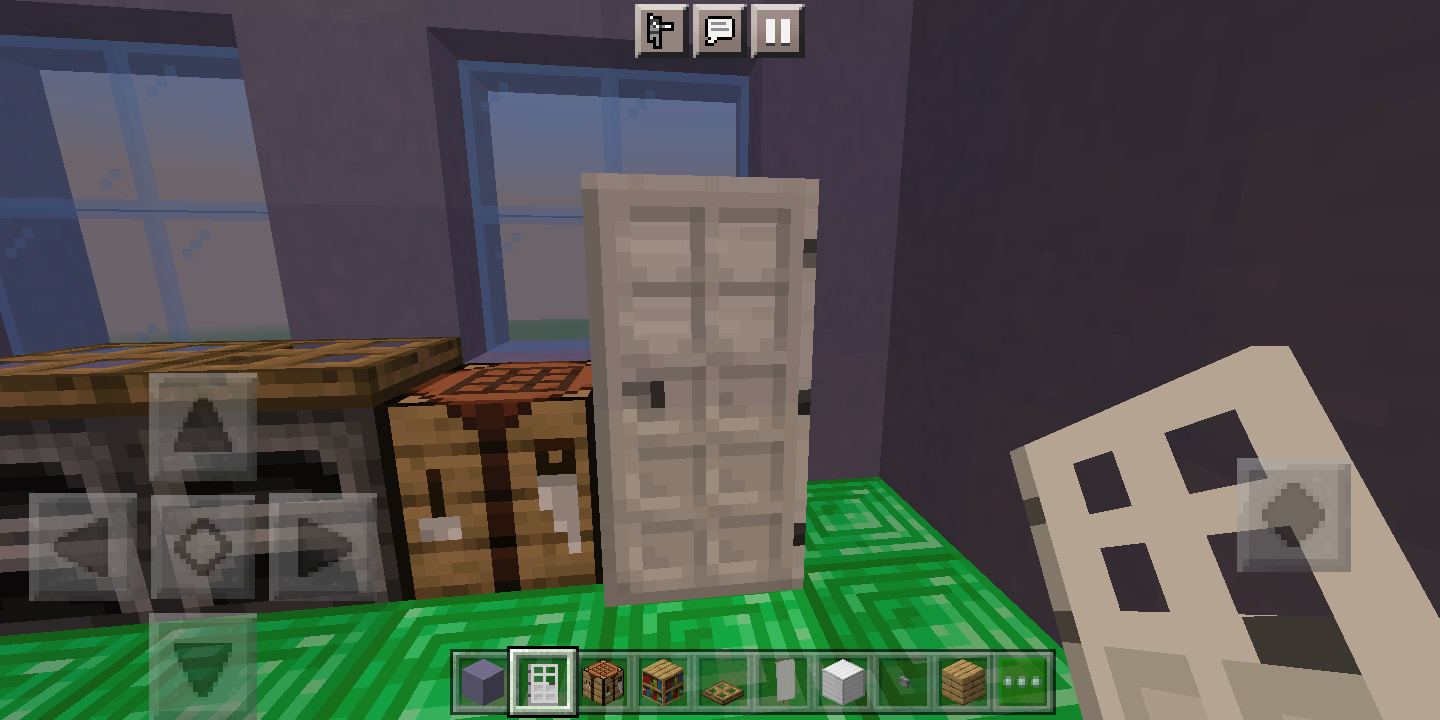
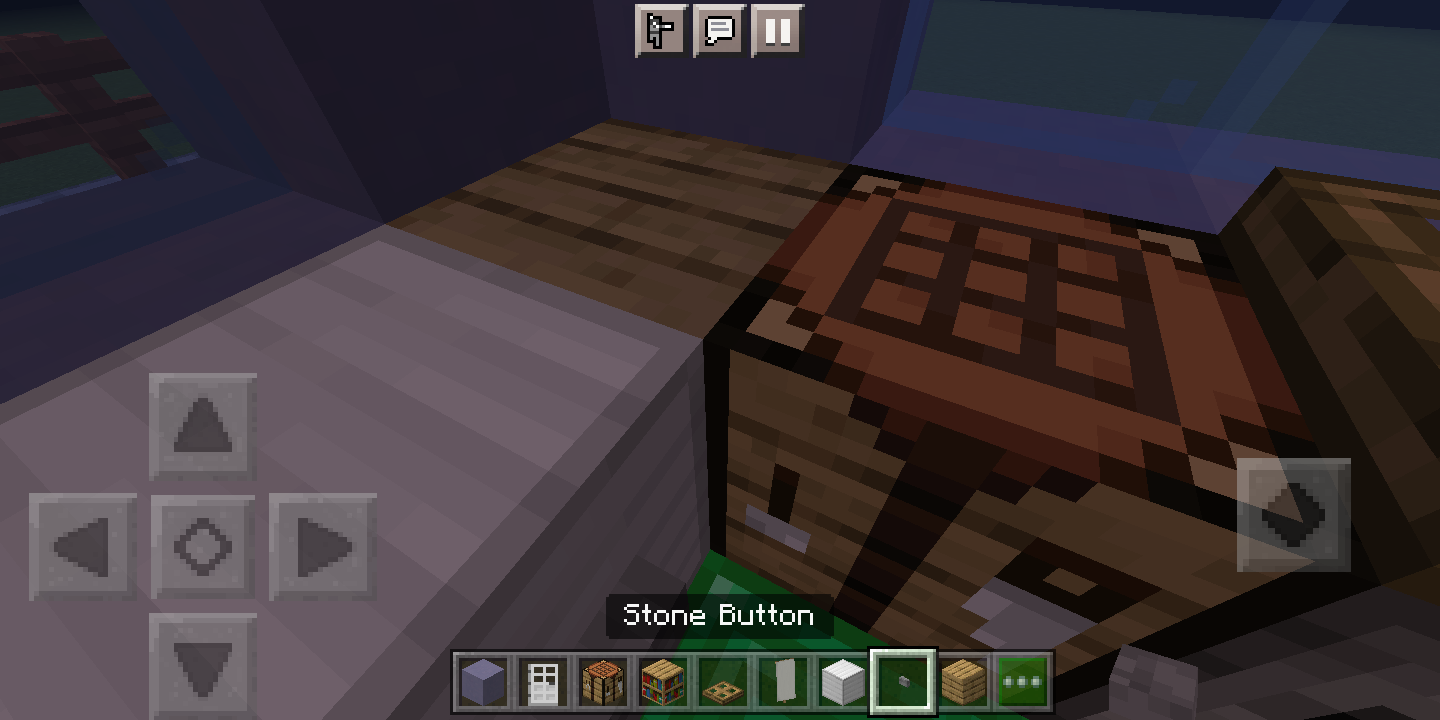
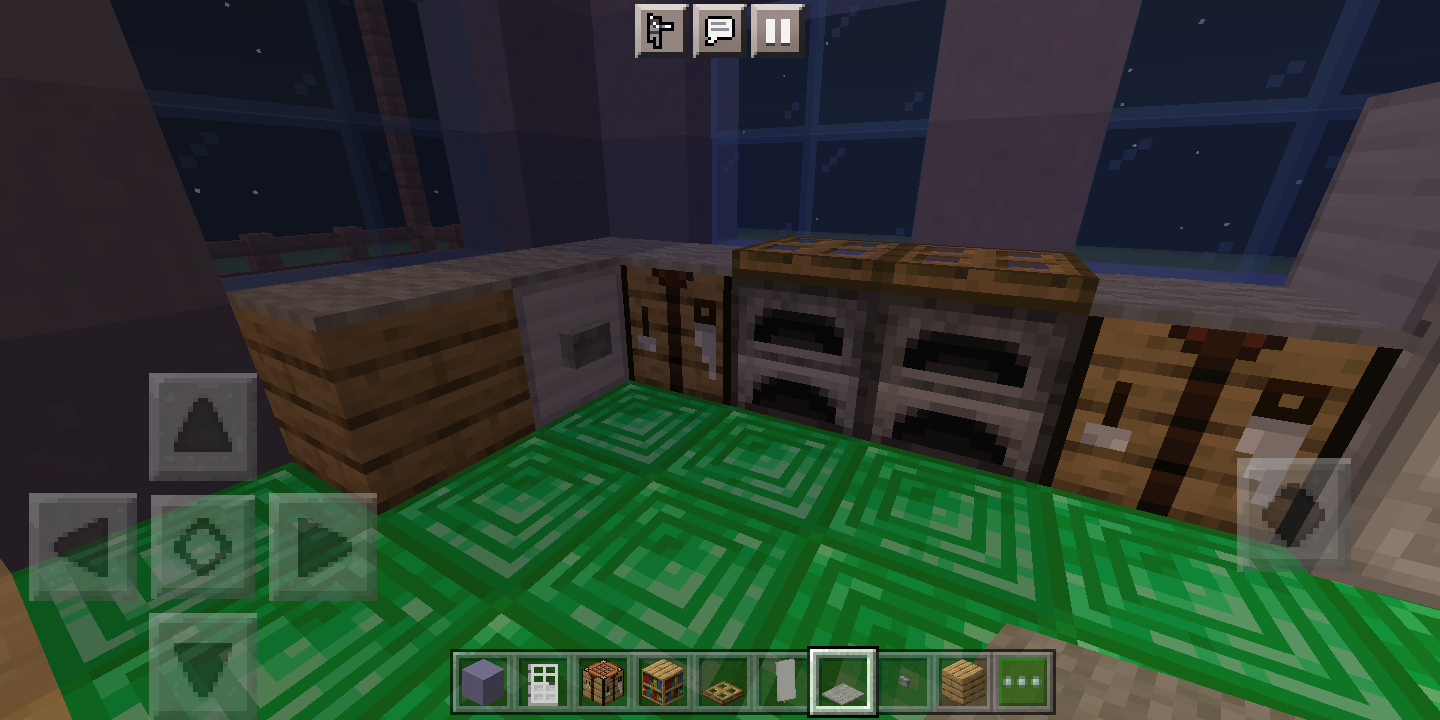
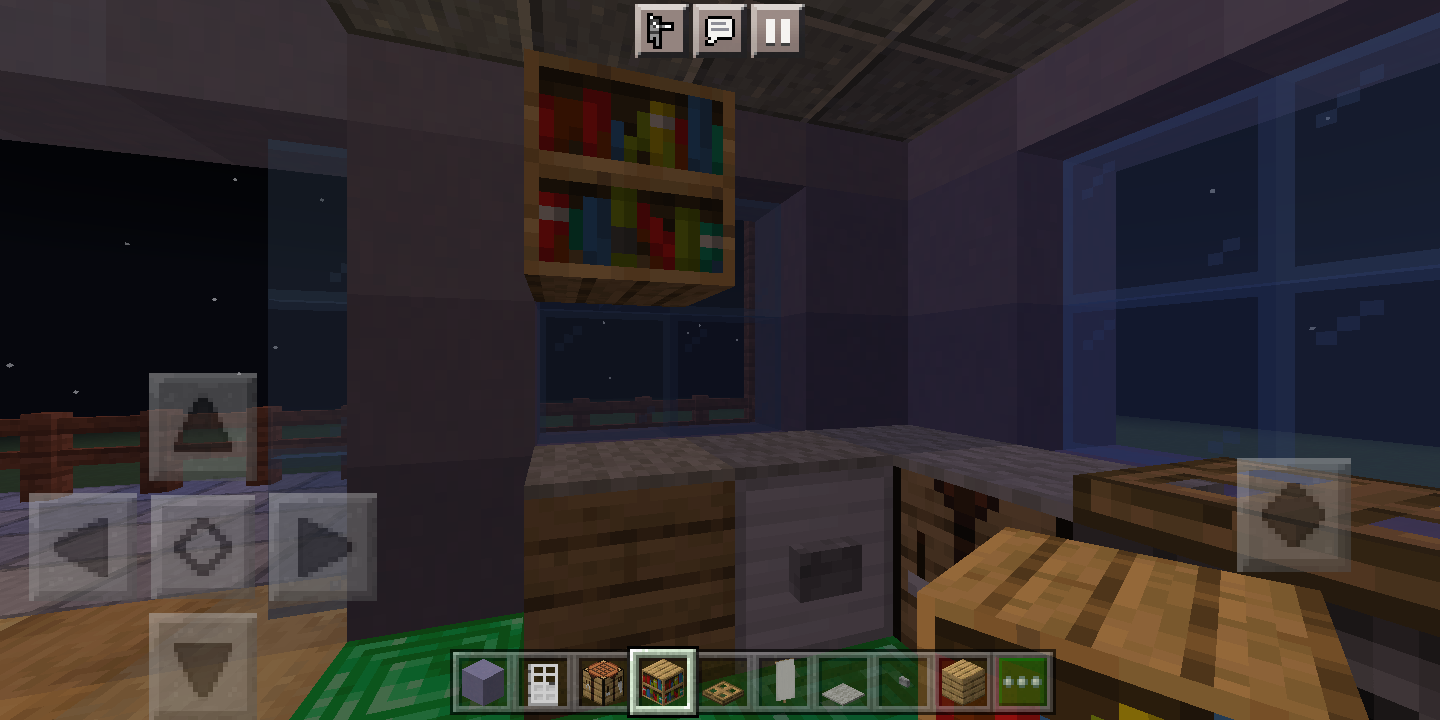
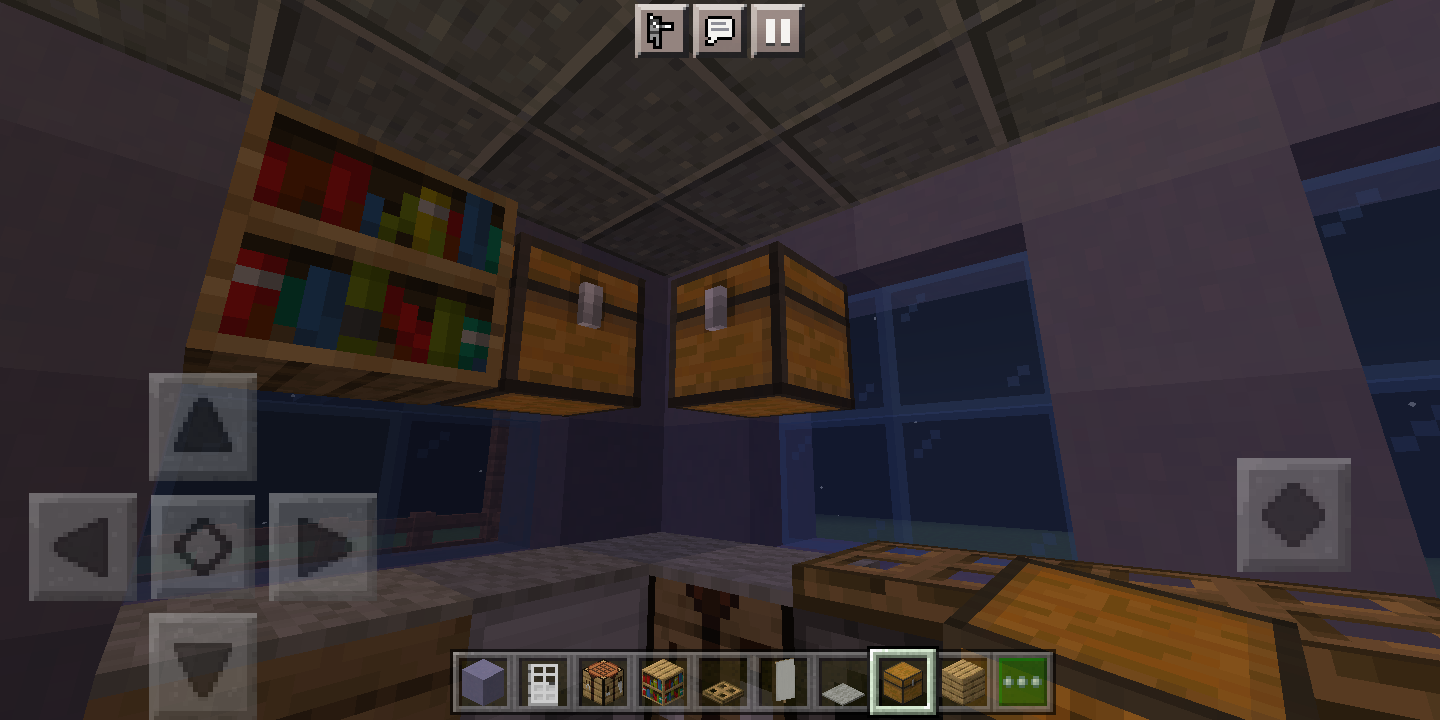
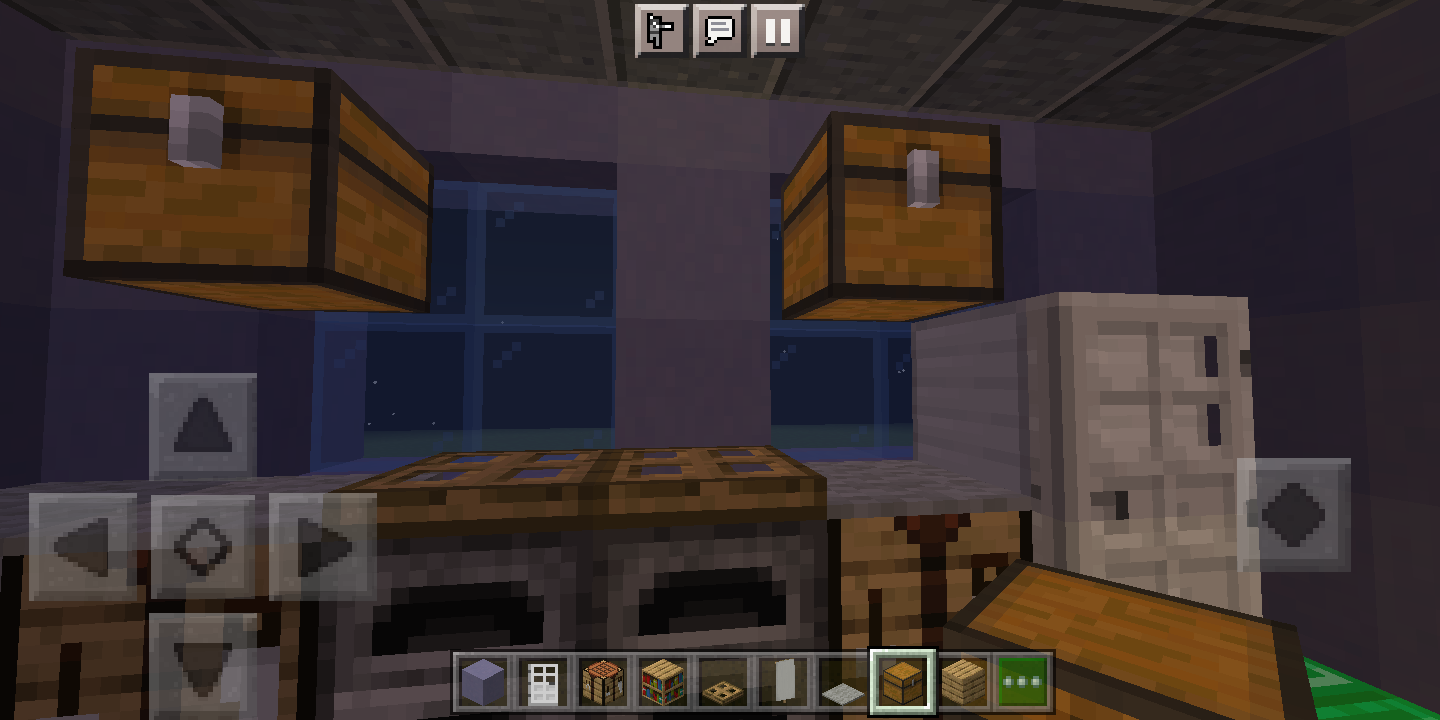
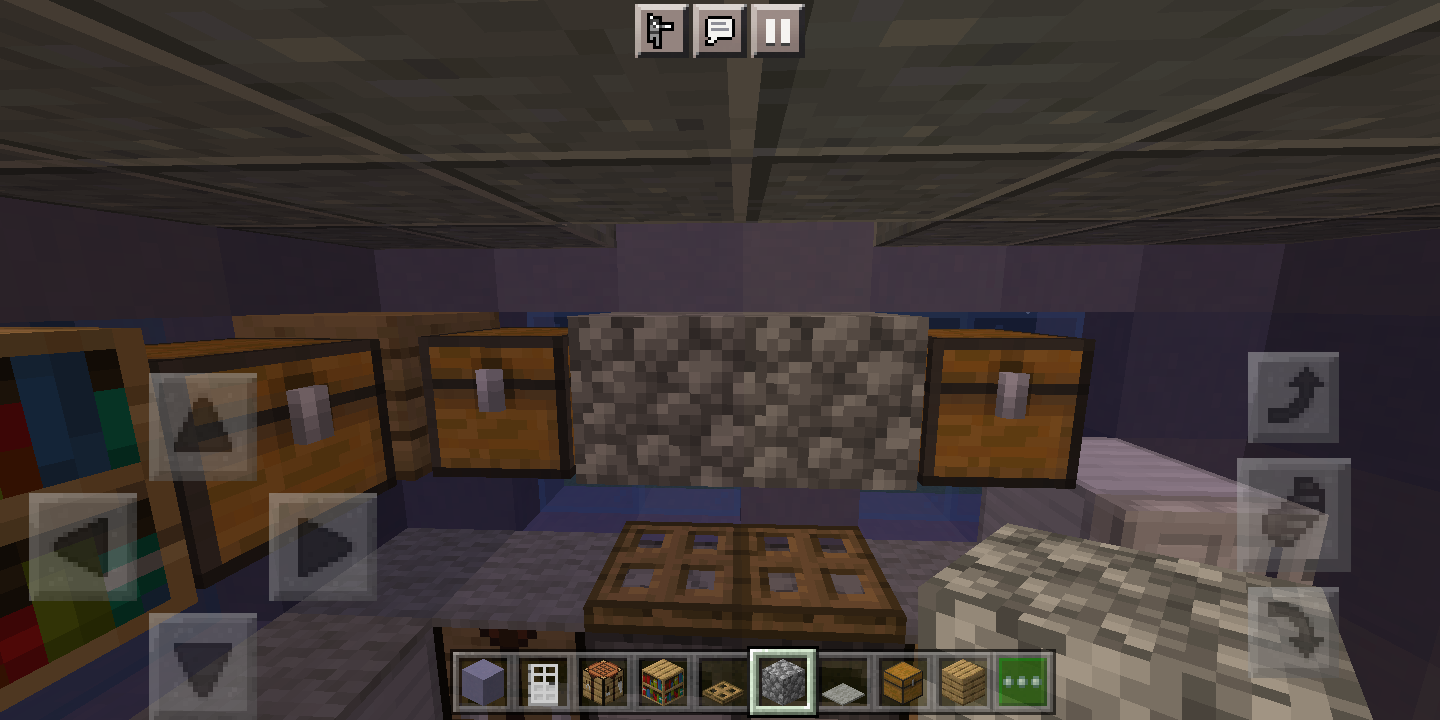
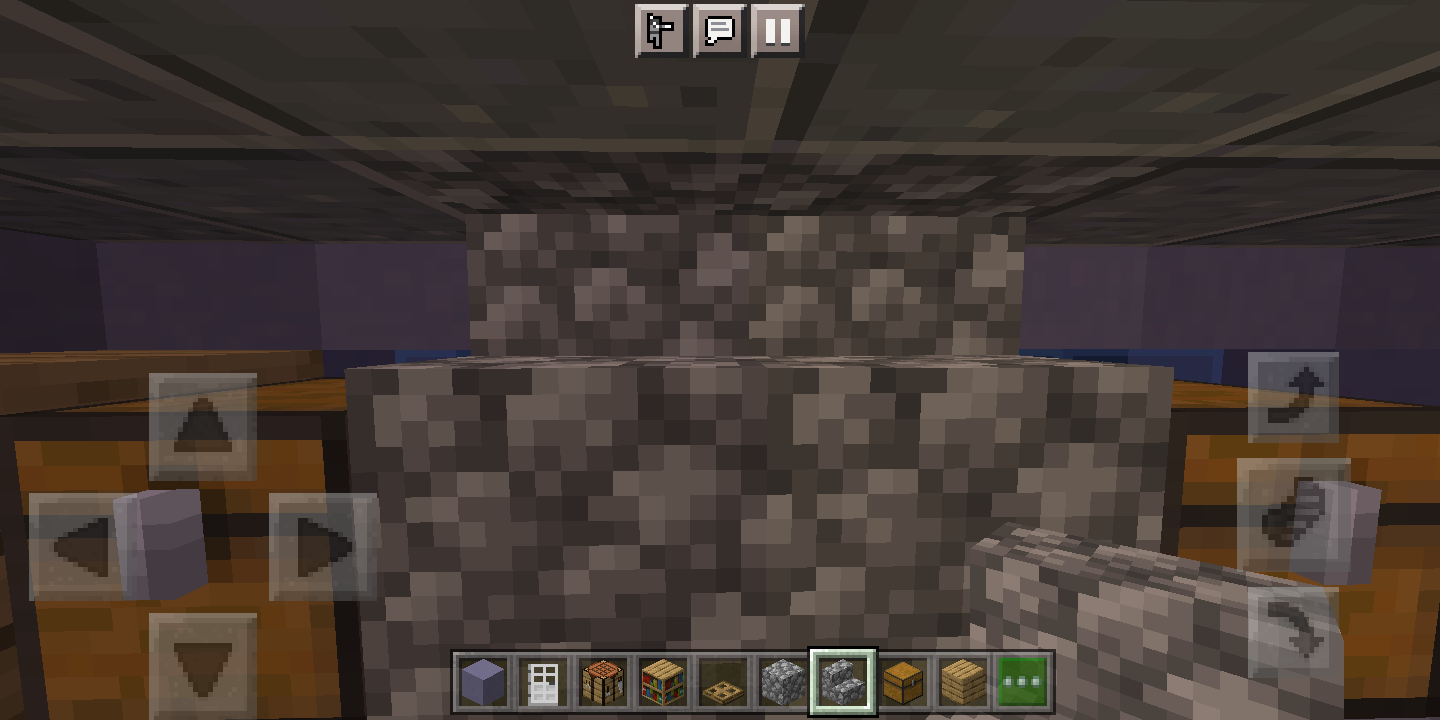
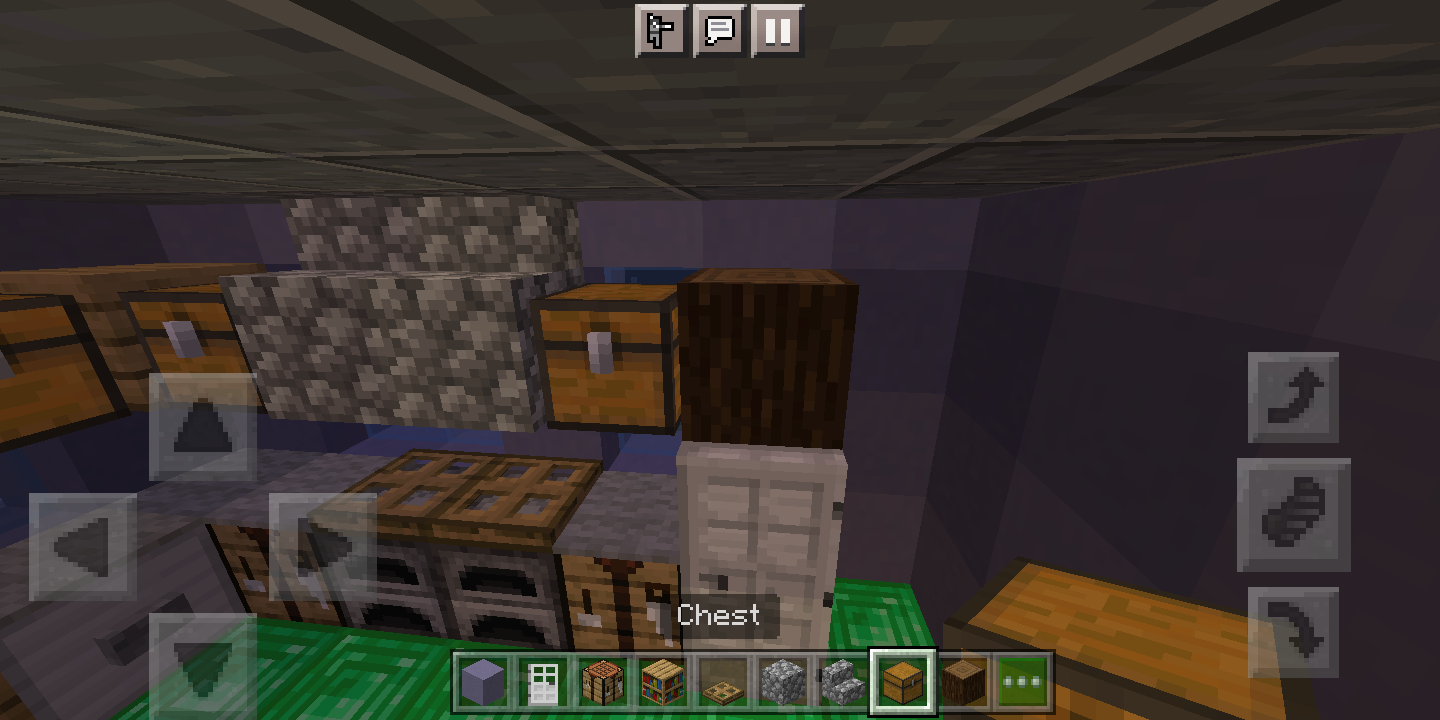
This will take awhile to build. So let's get to it.
YOU WILL NEED
Iron blocks
Oak wood planks
Crafting tables
Furnaces
Oak trapdoors
Iron door
Carpets
Bookshelves
Chests
Cobblestone
Cobblestone stairs
Spruce wood log
PICTURE #1: Against the wall, one block away from the other wall (hard to explain so look at the picture), place one block of iron with a button (I used a stone button) on the front. This will be the dishwasher (actually probably my least favorite part of a kitchen in real life).
PICTURE #2: To the left of the dishwasher, place one oak wood planks block.
PICTURE #3: Diagonally next to the dishwasher, place a crafting table, then another crafting table two blocks away.
PICTURES #4 AND #5: Place two furnaces between the two crafting tables. Add an oak trapdoor on top of each furnace so then it looks like an oven and stovetop.
PICTURES #6 AND #7: Next to the crafting table on the right, stack two iron blocks and add an iron door in front. This is the refrigerator.
PICTURE #8: This is hard to explain, but you need to place oak wood planks in the corner there, between the dishwasher and the left crafting table. This is just a placeholder.
PICTURE #9: On top of all the parts of the kitchen (except for the refrigerator and stovetop), add the carpet of your choice. You will probably need to sneak in order to place the carpet on the crafting tables. This will be the countertops.
PICTURE #10: This step is very hard to explain, so just look at the picture.
PICTURES #11 AND #12: Put chests in the places that they are in in the pictures.
PICTURE #13: Place two cobblestone blocks above the stovetop.
PICTURE #14: If you have a slab ceiling, destroy the two slabs above the cobblestone blocks and place two upside-down cobblestone stairs. If you do not have a slab ceiling, place a right-side-up cobblestone stair on each of the cobblestone blocks. You now have a range-hood.
PICTURE #15: This is optional, but if you like you can put a spruce log on top of the refrigerator.
That was long and hard, but you now have a nice kitchen set.
Dining Table
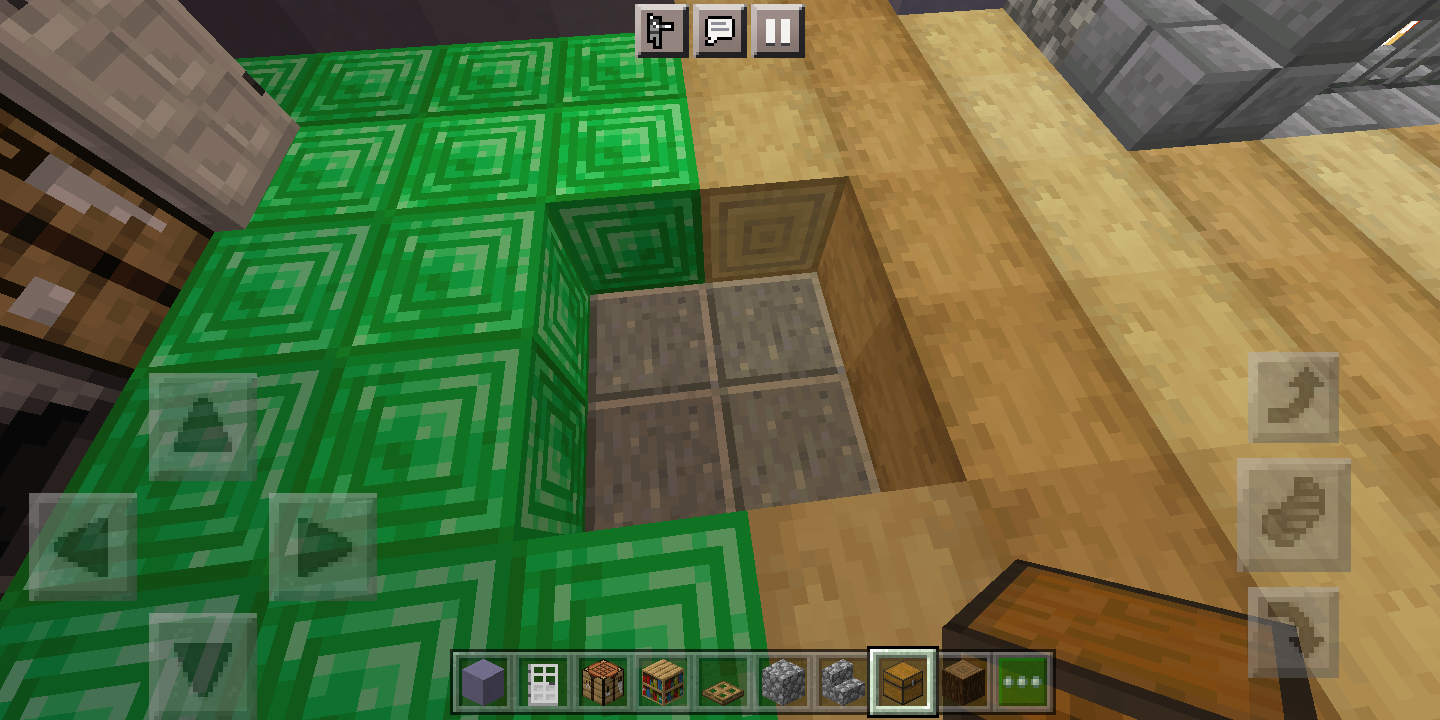
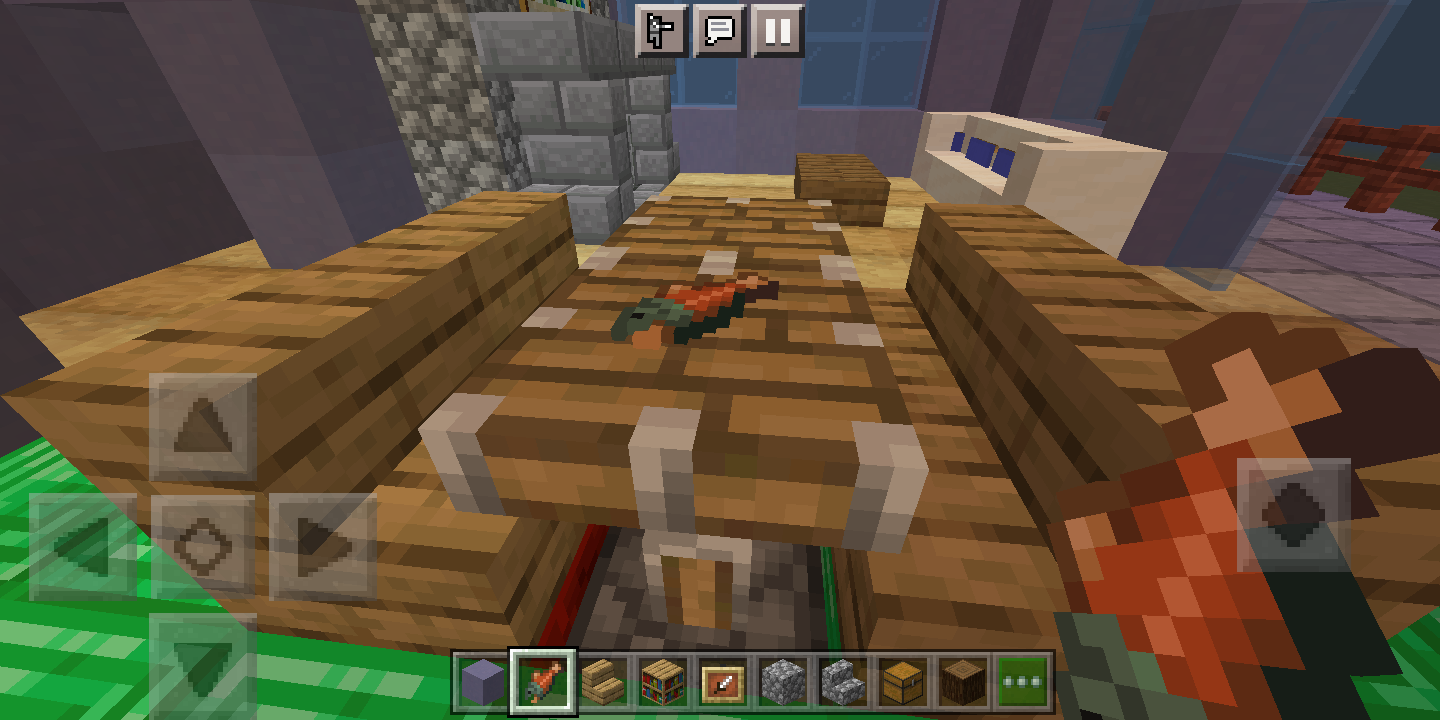
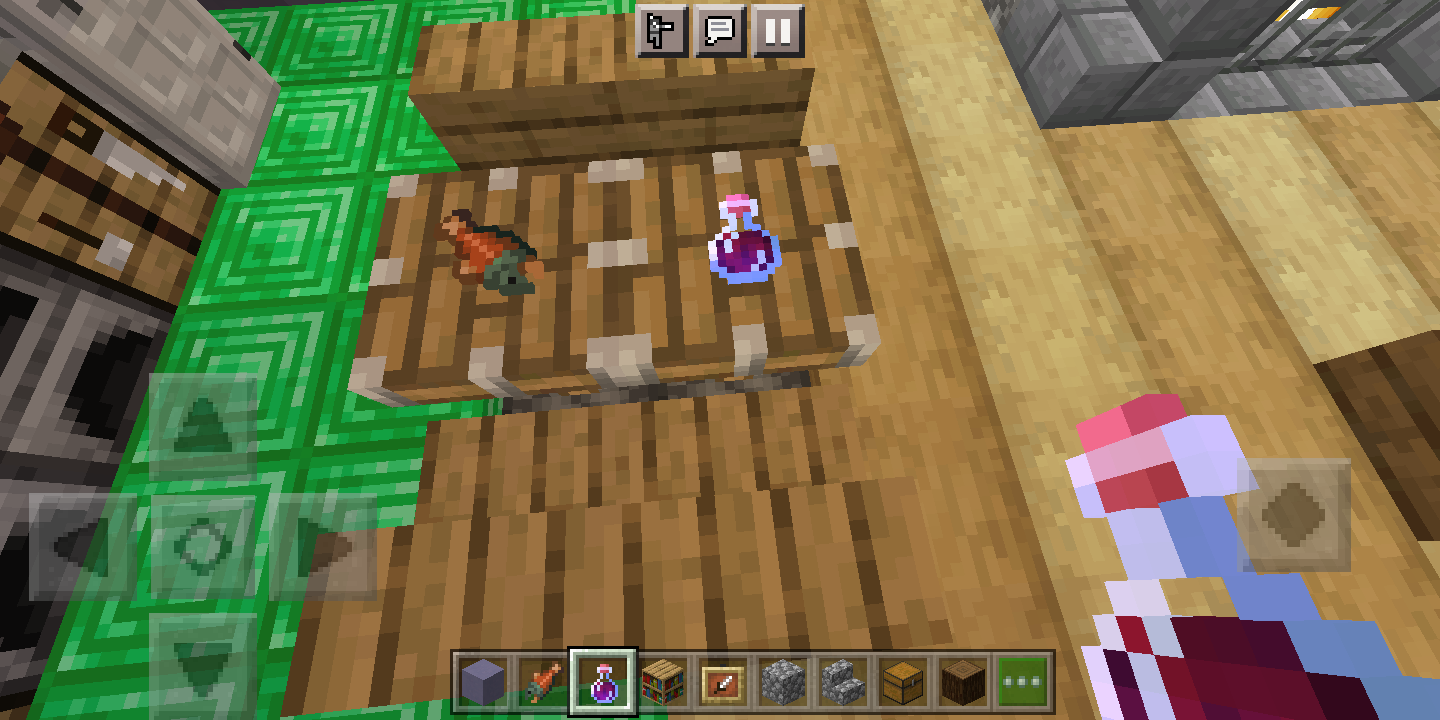
All that the kitchen is missing is a dining table. I will show you how to build one ASAP.
YOU WILL NEED
Redstone blocks
Pistons
Oak stairs
Invisible item frames
One food of your choice
One potion of your choice
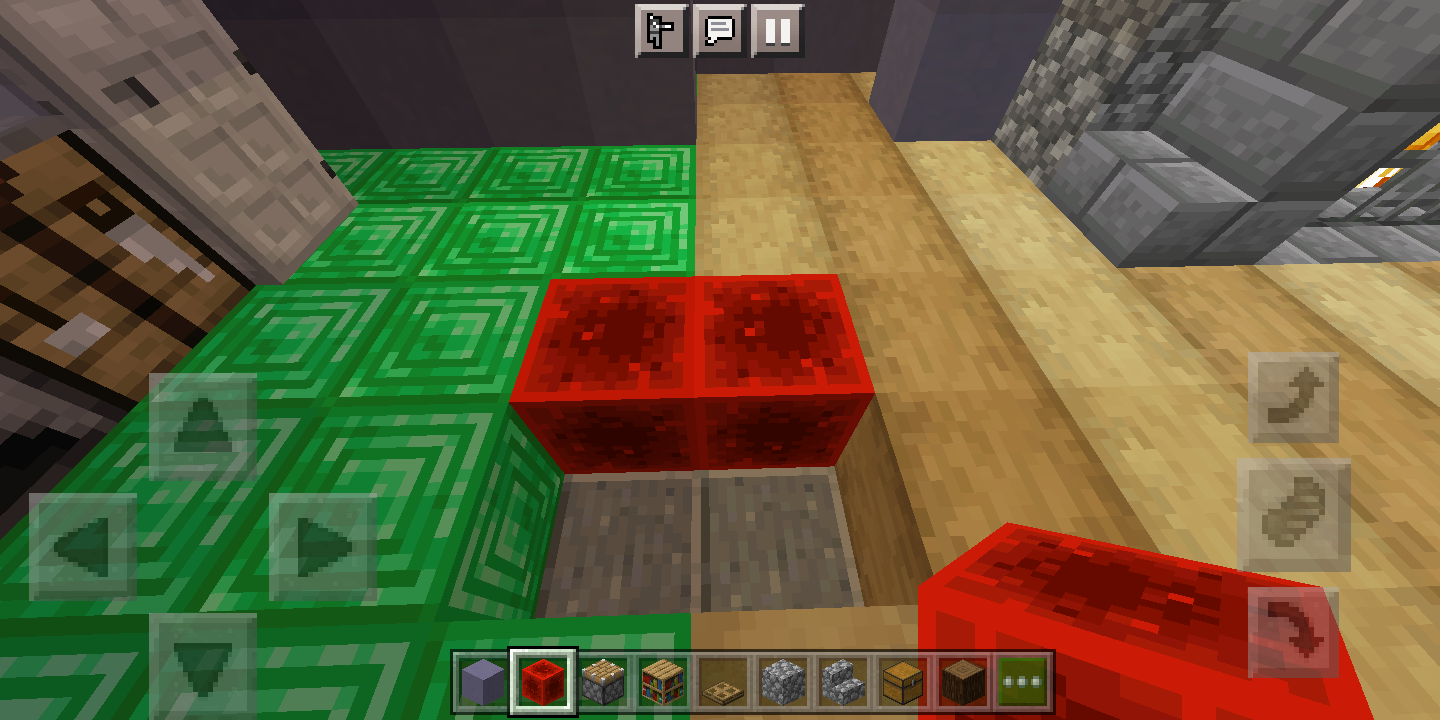
PICTURE #1: Dig a square hole in the floor that is 2 x 2 blocks, and one block deep.
PICTURE #2: Place two redstone blocks on one side of the hole, as shown.
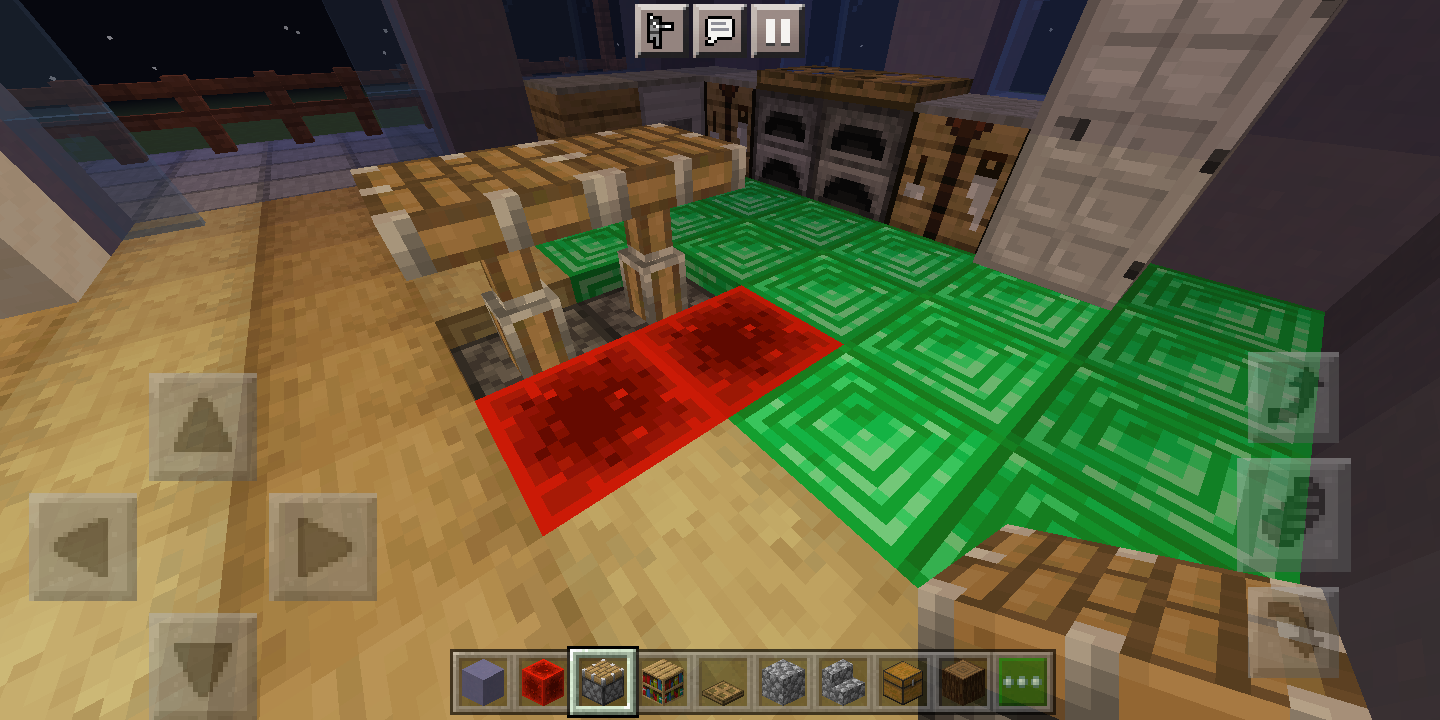
PICTURE #3: Place two pistons on the other side of the hole. The redstone block should power the pistons and cause them to push up, to look like a table.
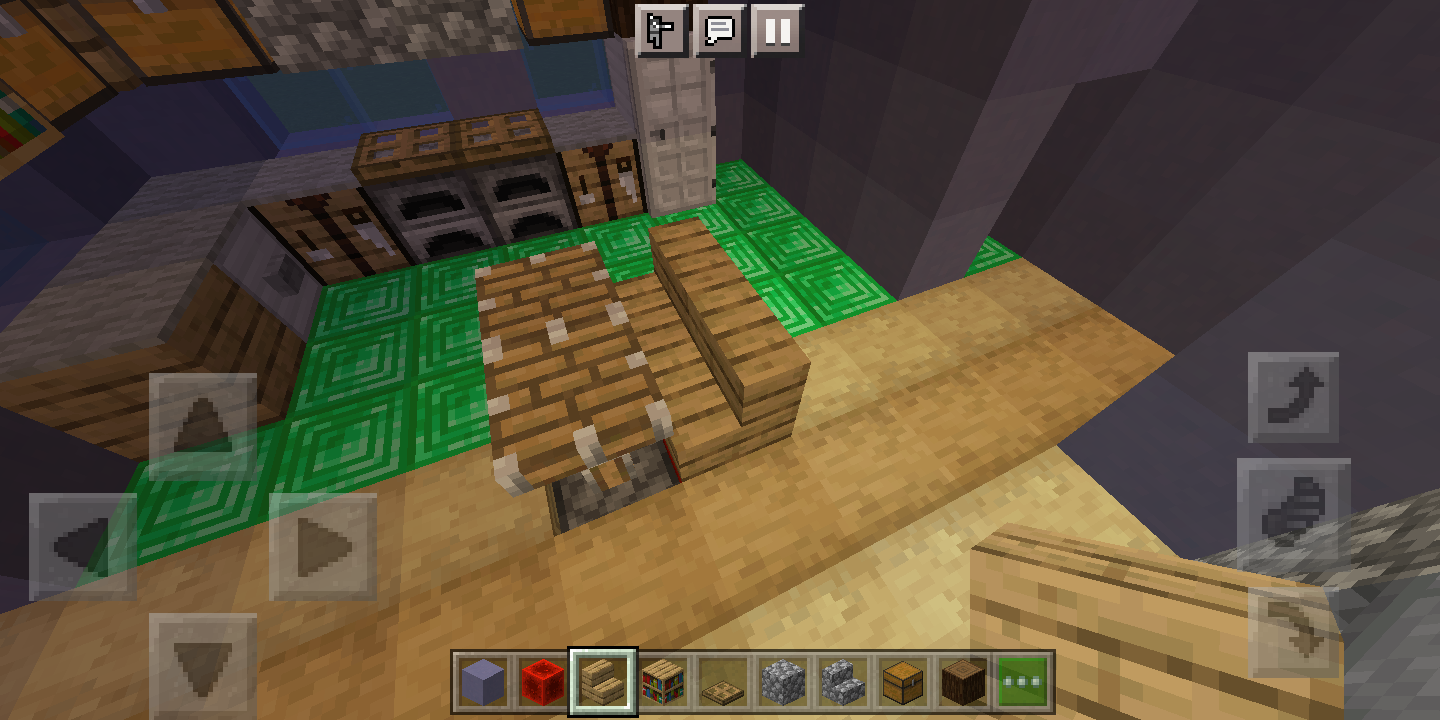
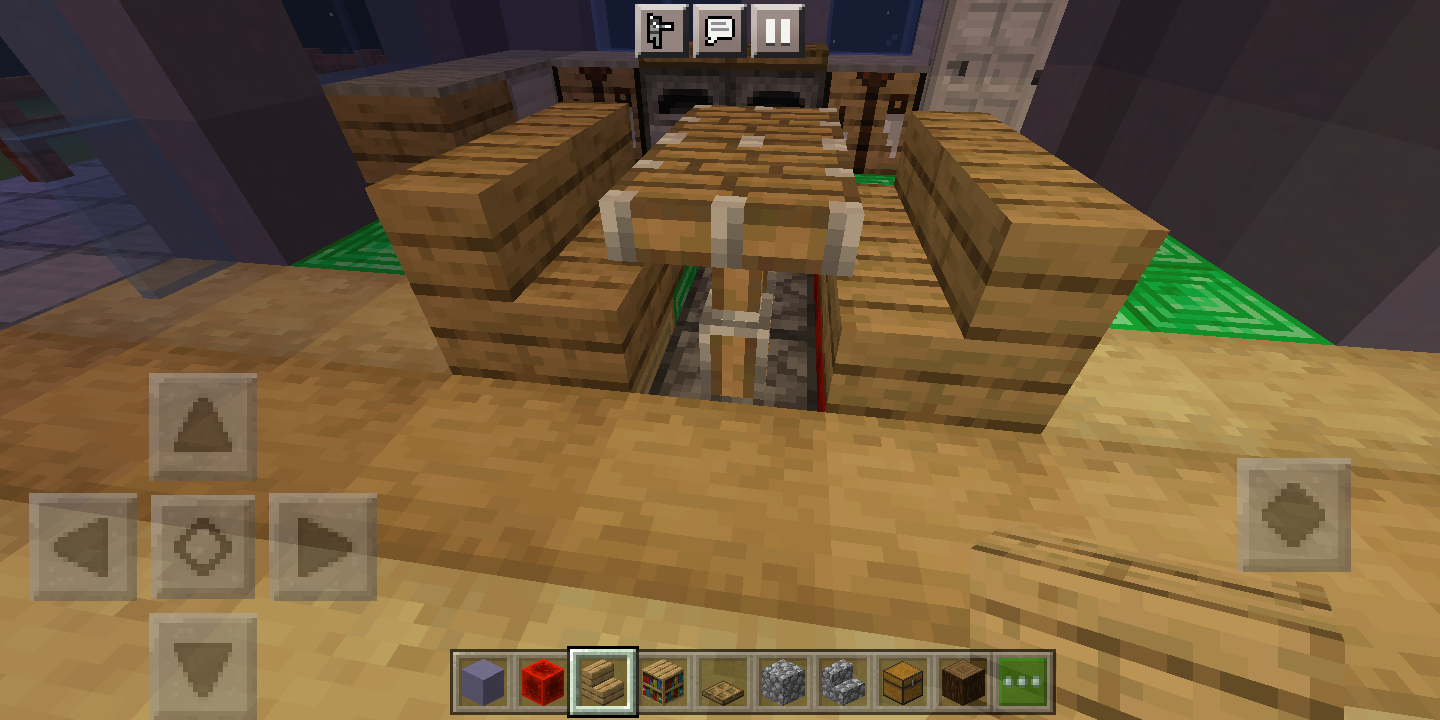
PICTURES #4 AND #5: Cover the redstone blocks with oak stairs. This will not only hide the redstone blocks, but it will also act as seats. You can add another row of oak stair seats on the other side of the table.
PICTURES #6 AND #7: If you have access to the Invisible Item Frame, you can place one on each piston, with your choice of food in one item frame, and your choice of potion in the other frame. The potion is meant to be a drink, by the way.
You now have a compact dining table complete with food and a drink. Oh, and one tip: if you cannot obtain the Invisible Item Frame, you can use a normal item frame instead. It will actually look pretty nice, too.
Bathroom
Probably not a very useful room in Minecraft, but it can add some realism to any house.
Bath-Tub
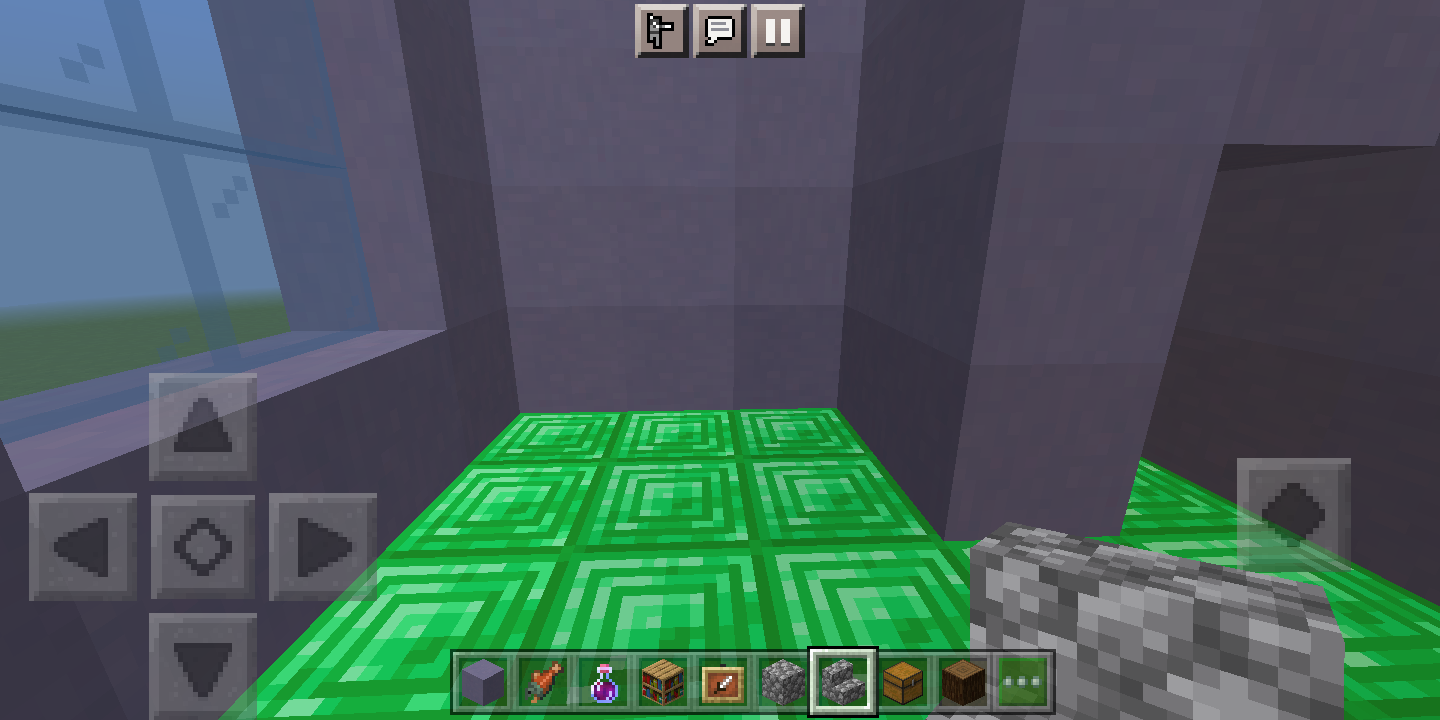
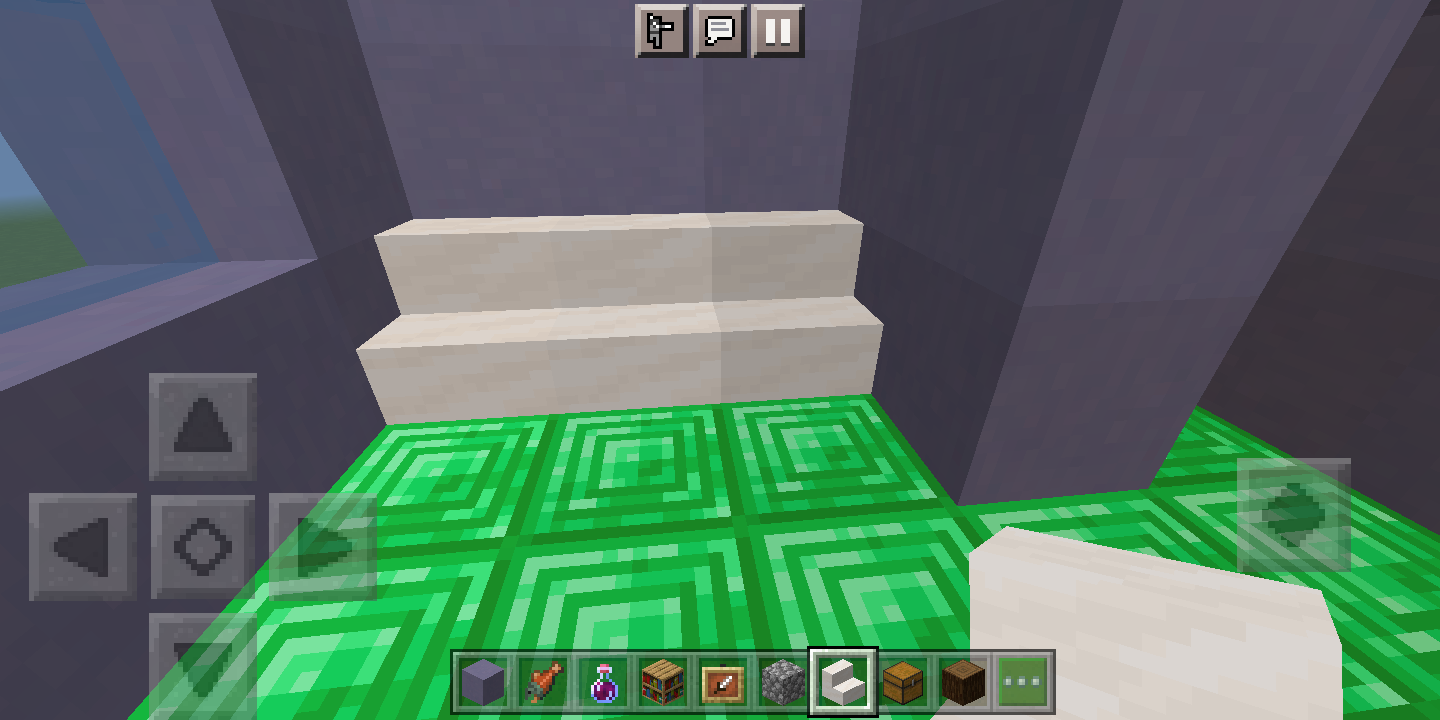
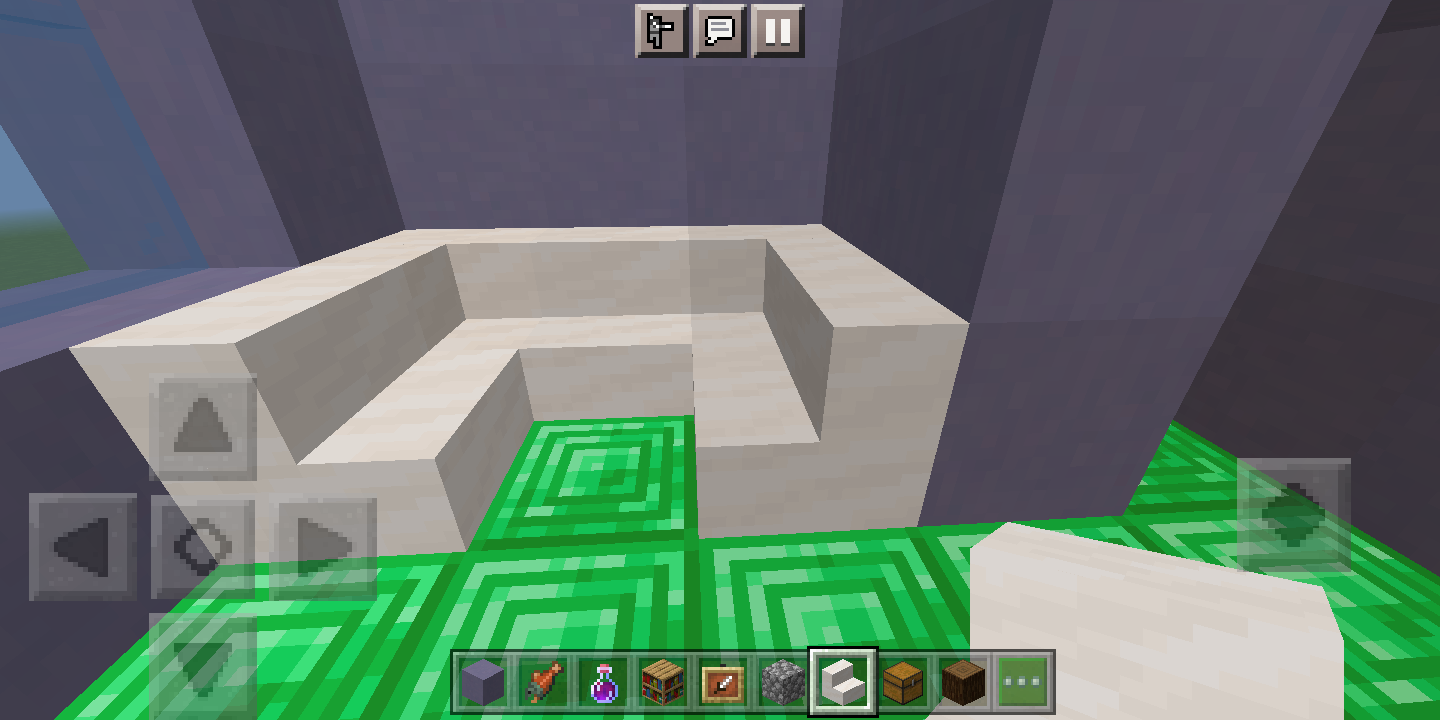
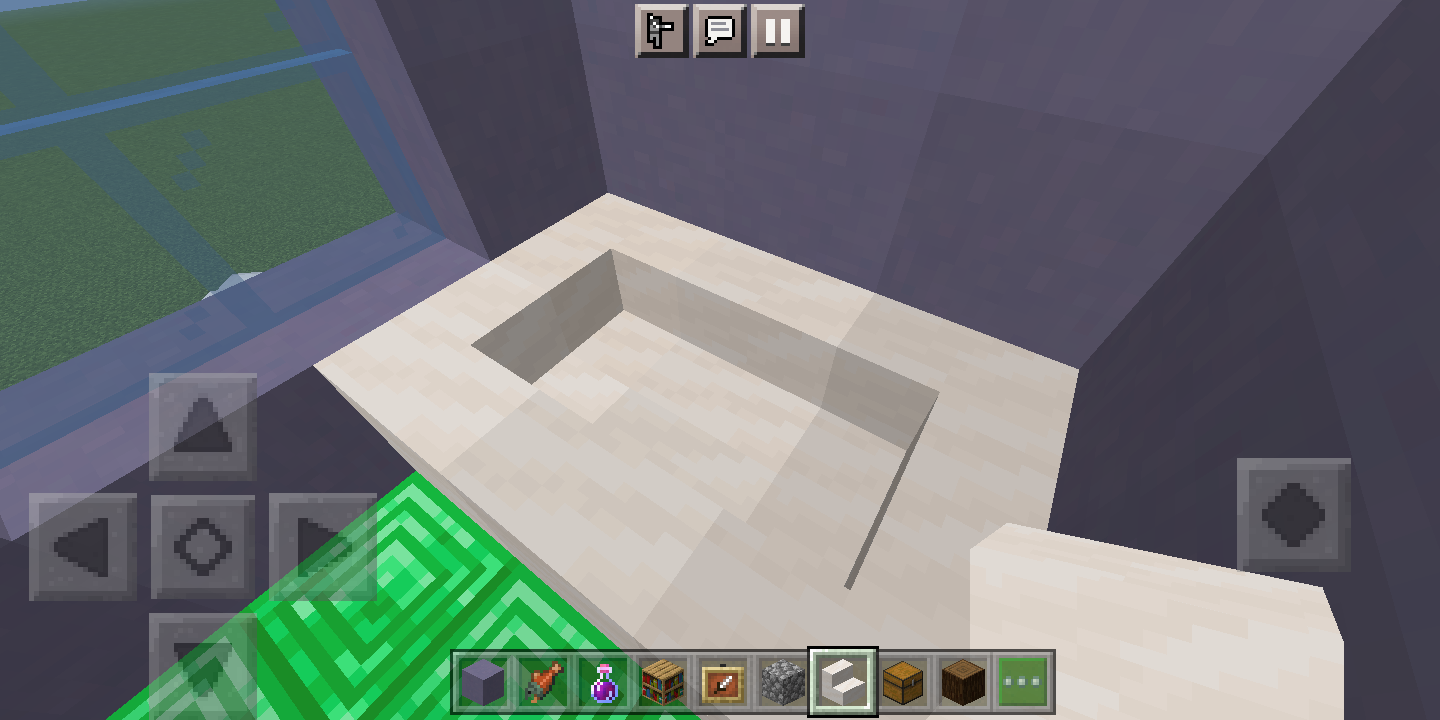
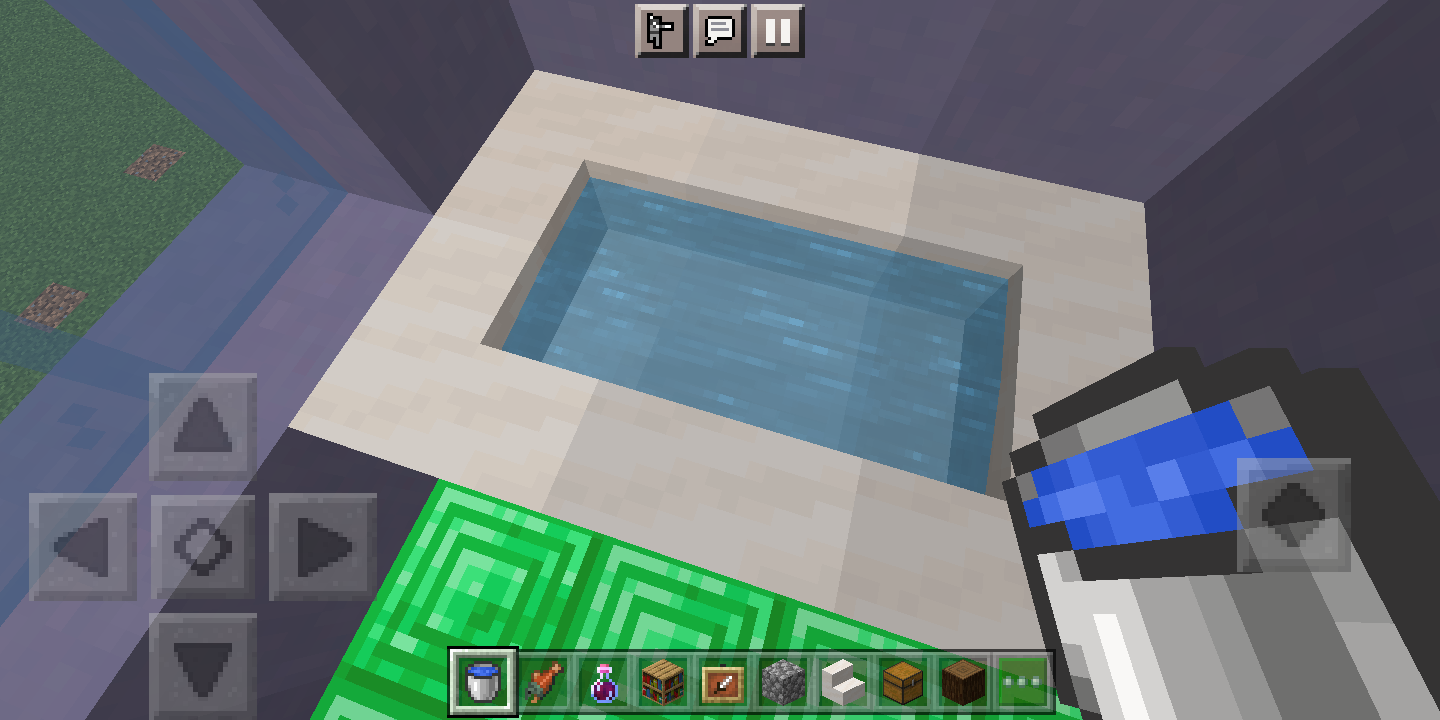
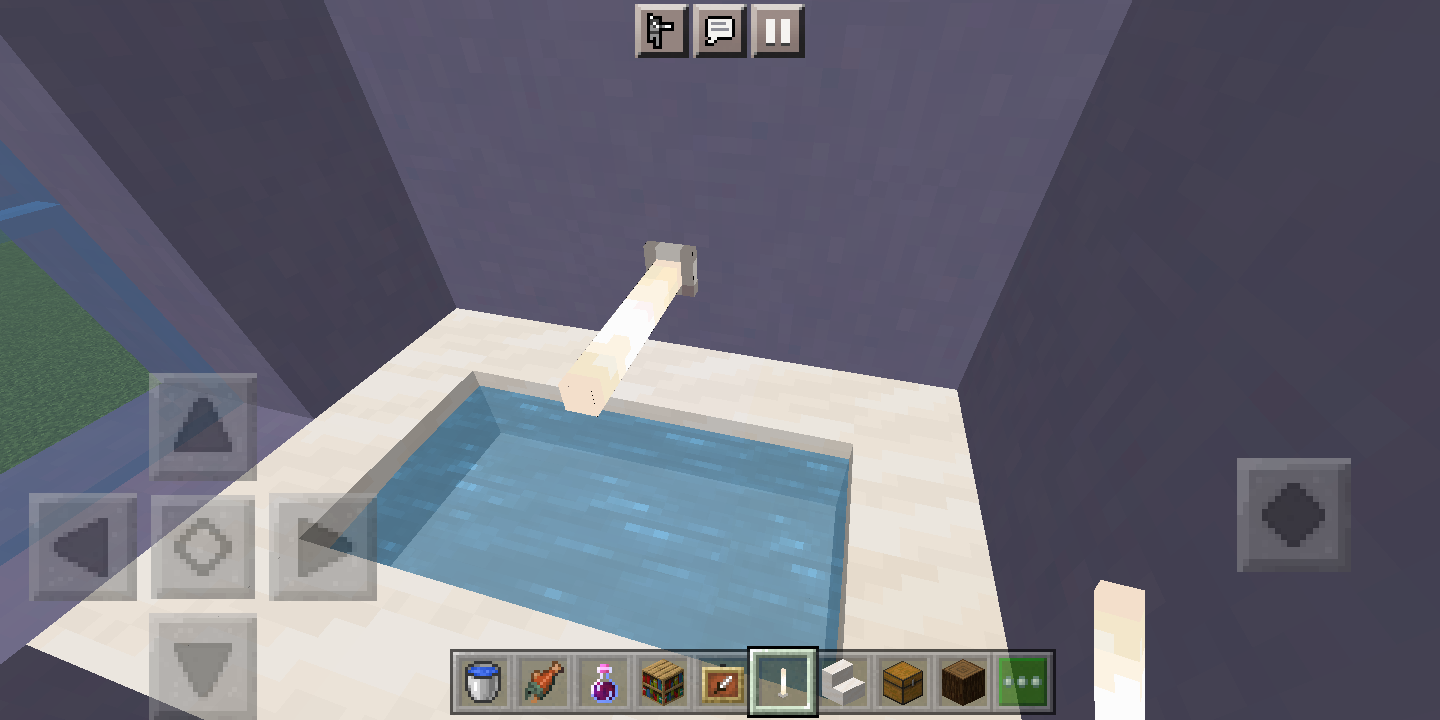
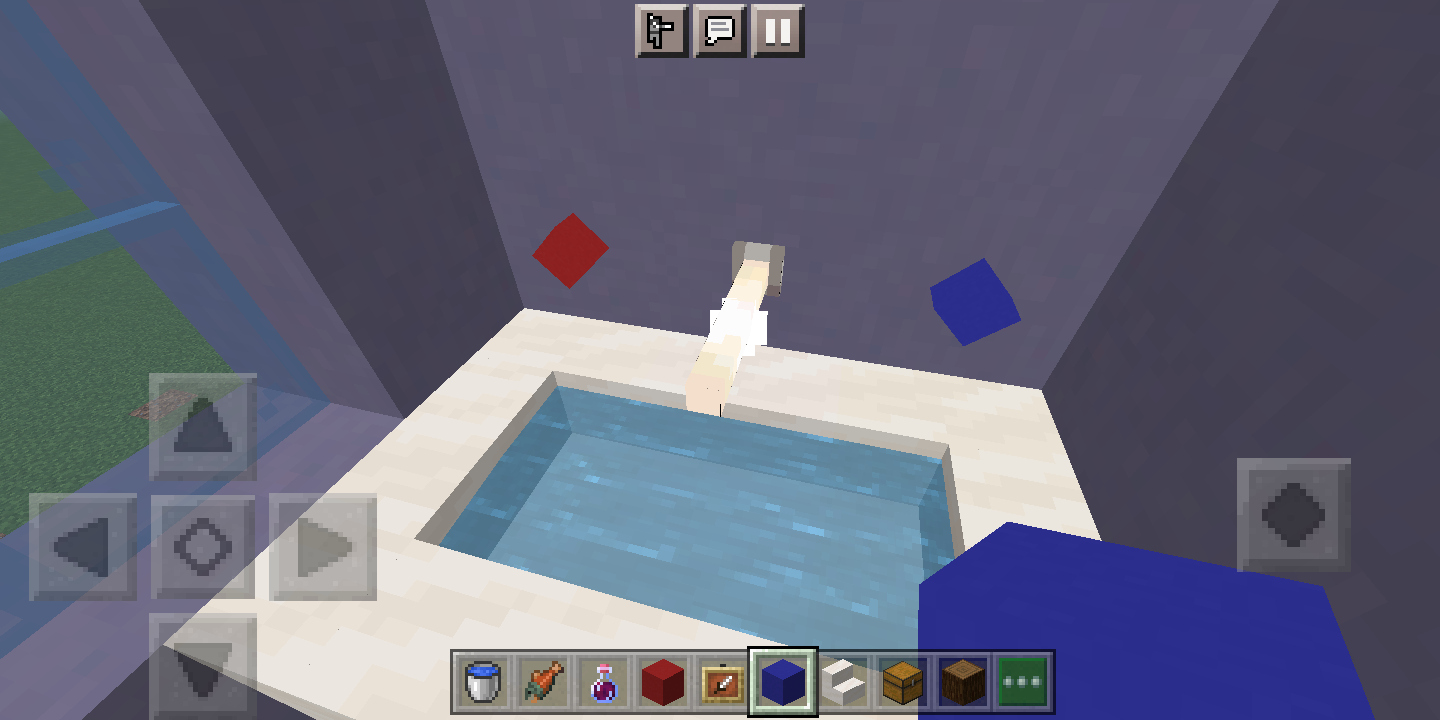
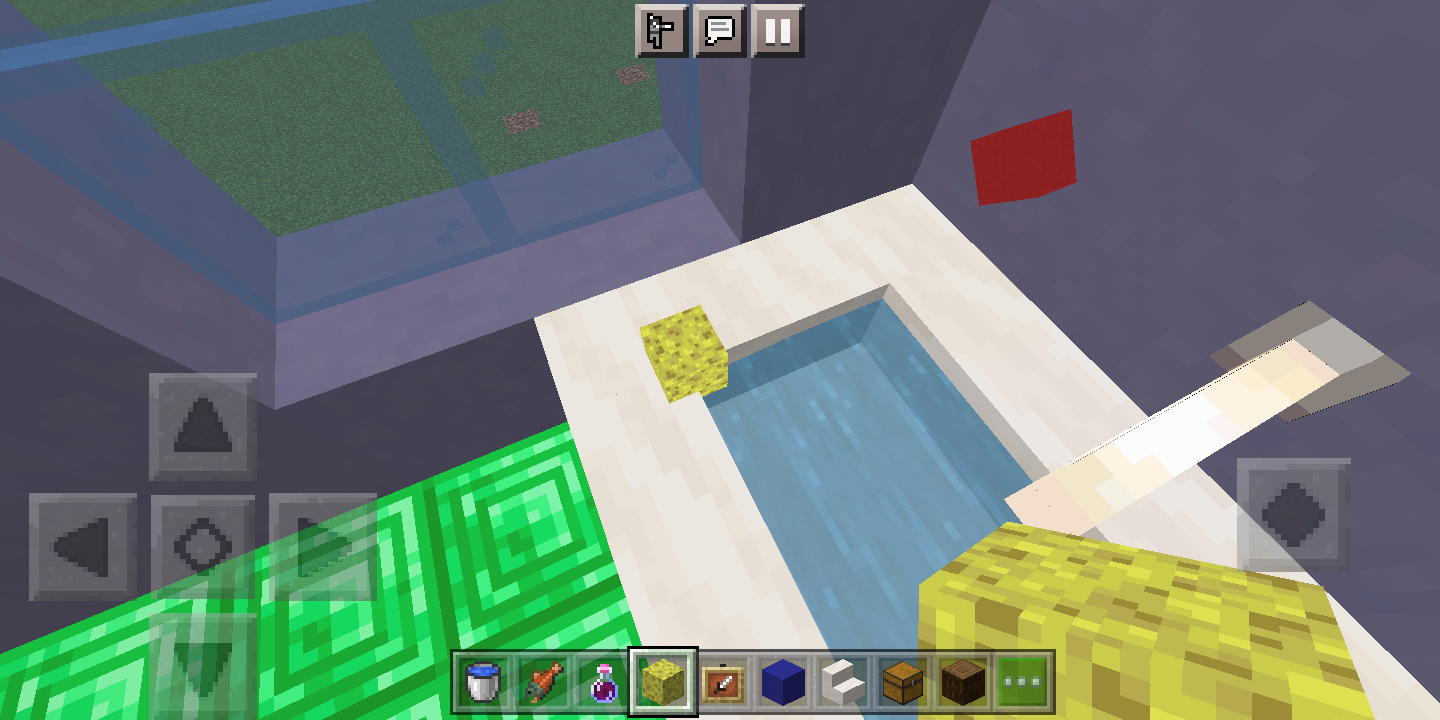
This here is a nice-looking but small and compact bath-tub that you can build in Minecraft. Let's get to work.
YOU WILL NEED
Smooth quartz stairs
Water bucket
End rod
Invisible item frame
Blue concrete
Red concrete
Sponge
PICTURE #1: This bath-tub fits snugly in a 3 x 2 nook in your Minecraft bathroom. If you do not have a nook already, I would suggest digging one out, but if your bathroom is big, you wouldn't have to.
PICTURE #2: Place a row of three smooth quartz stairs.
PICTURES #3 AND #4: Place one sideways smooth quartz stair on each side of the row you made. (Somewhat hard to explain.) Then, join them using another smooth quartz stair.
PICTURE #5: Fill the tub with water.
PICTURE #6: Use an end rod as a faucet. It not only looks like a nice faucet, but it also gives off some light!
PICTURE #7: If you have access to the Invisible Item Frame, place one on either side of the end rod, with blue concrete in one, and red concrete in the other. This looks like hot and cold taps. The fun part is that you can even turn them!
PICTURE #8: You can also place an invisible item frame with a sponge in it on the corner of the tub to look like just that: a sponge.
You can now take a nice, warm bath after a long, hard day of finding diamonds or whatever.
Sink
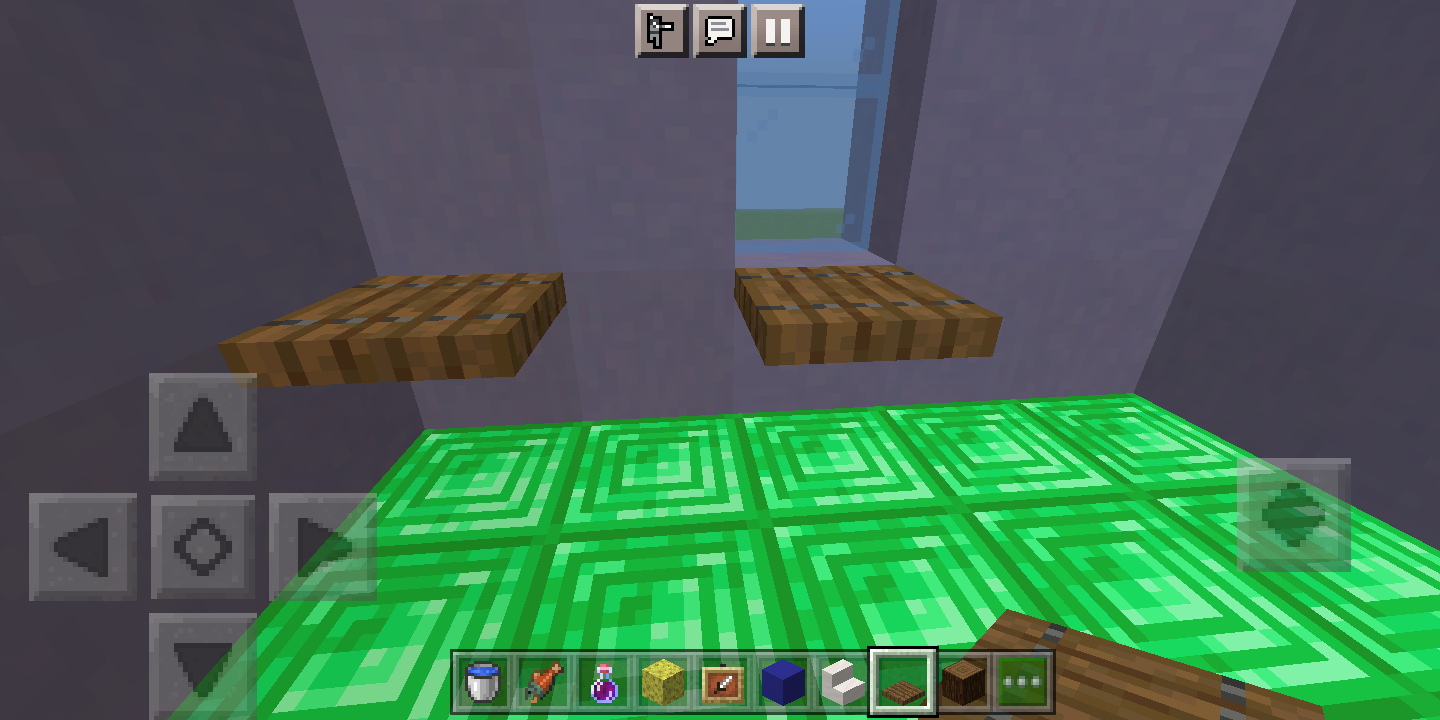
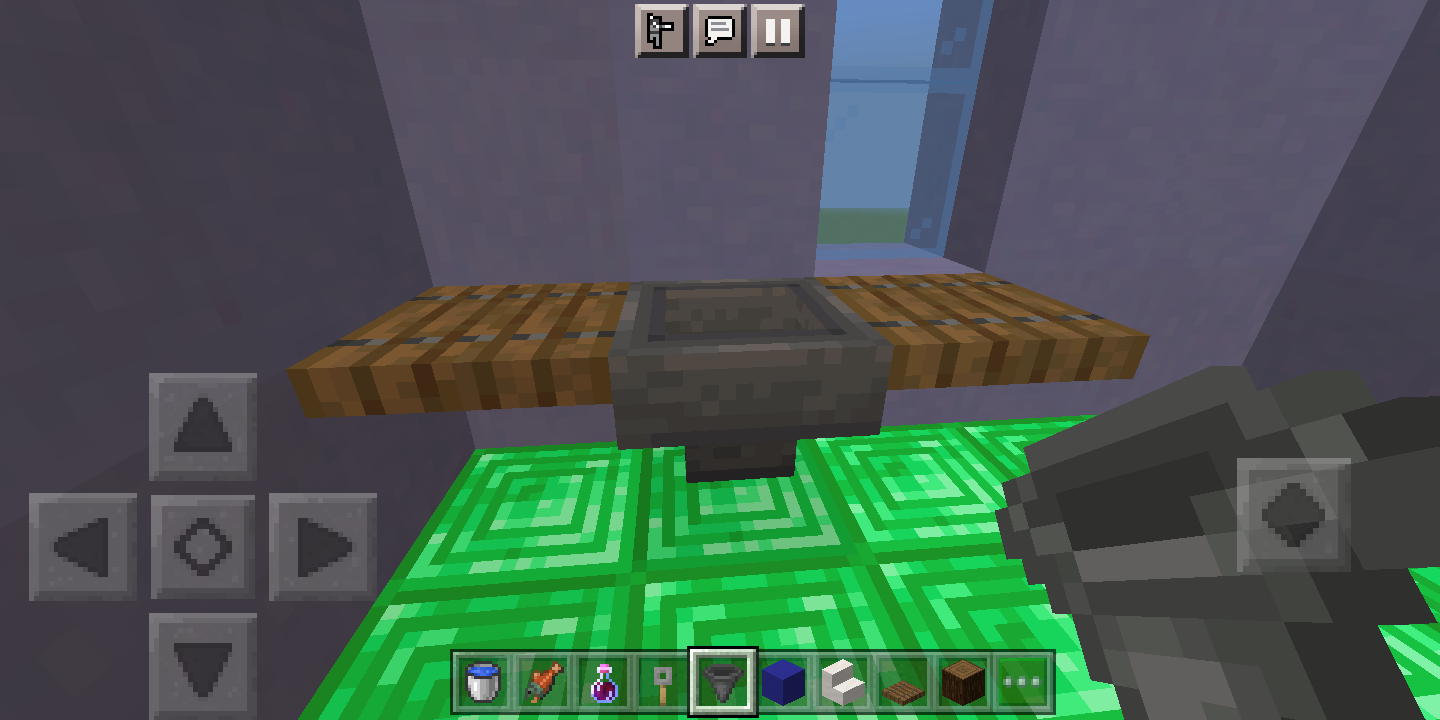
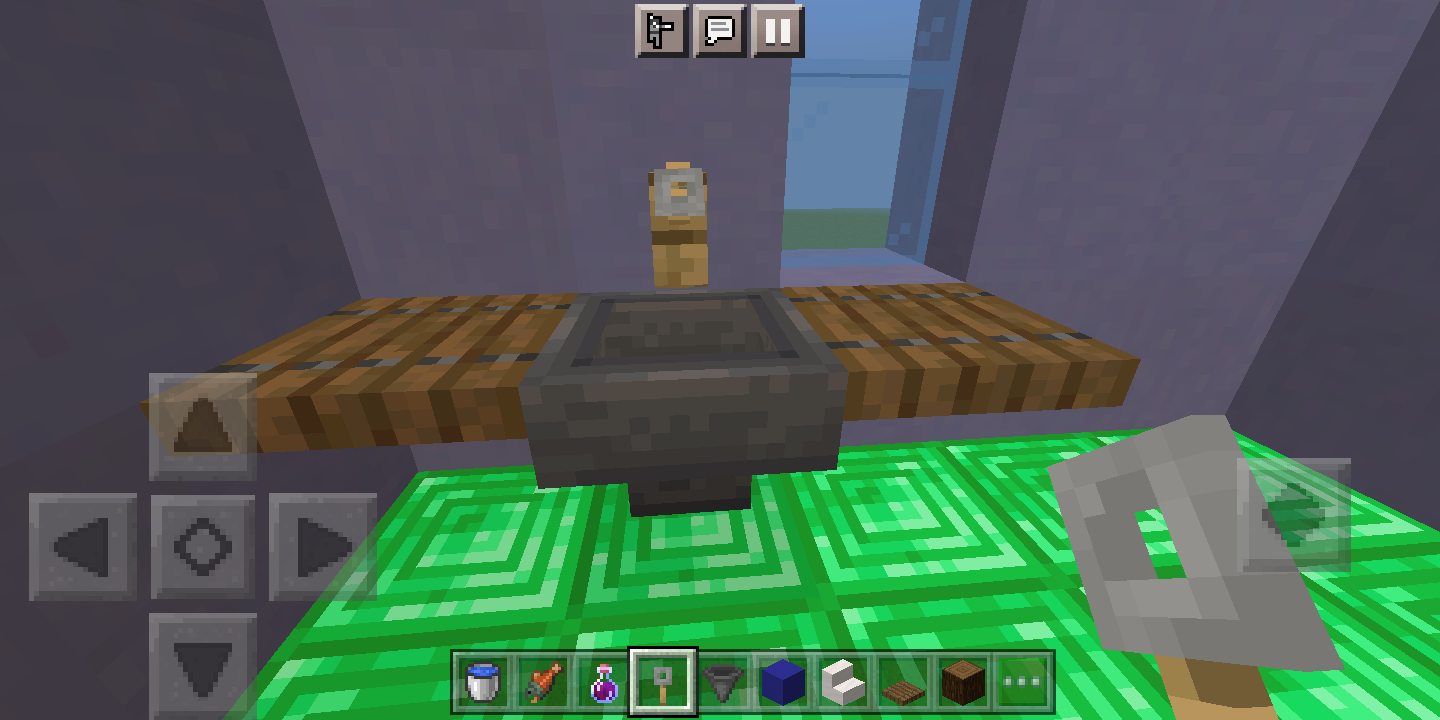
Every house needs a sink. So why don't you follow these steps to build one for your Minecraft house?
YOU WILL NEED
Spruce trapdoors
Item hopper
Tripwire hook
PICTURE #1: Place two spruce trapdoors as shown, one block away from each other.
PICTURE #2: Place an item hopper on the wall between the two trapdoors. It won't produce the same effect if you put the hopper on the floor.
PICTURE #3: Complete your sink by adding a tripwire hook as a faucet.
Now your bathroom has a sink that comes with counter space (the spruce trapdoors).
Mirror
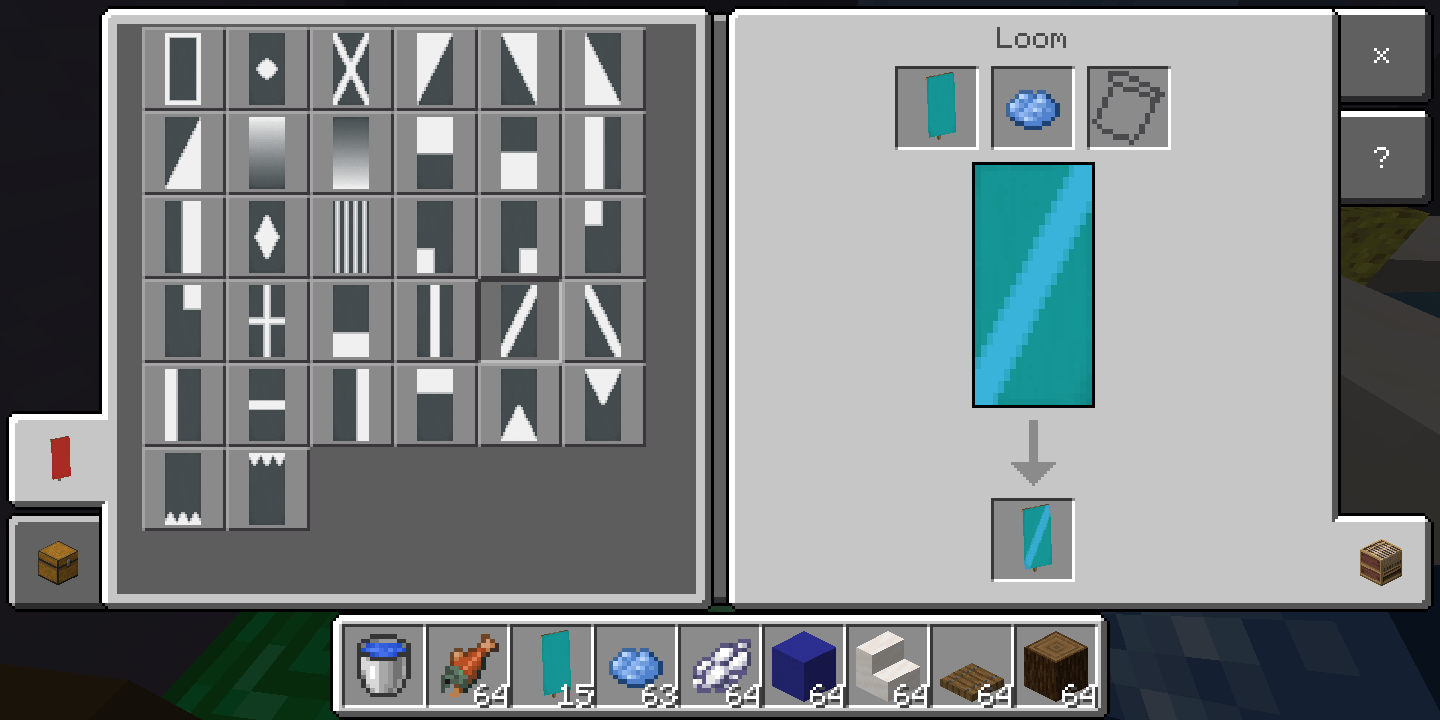
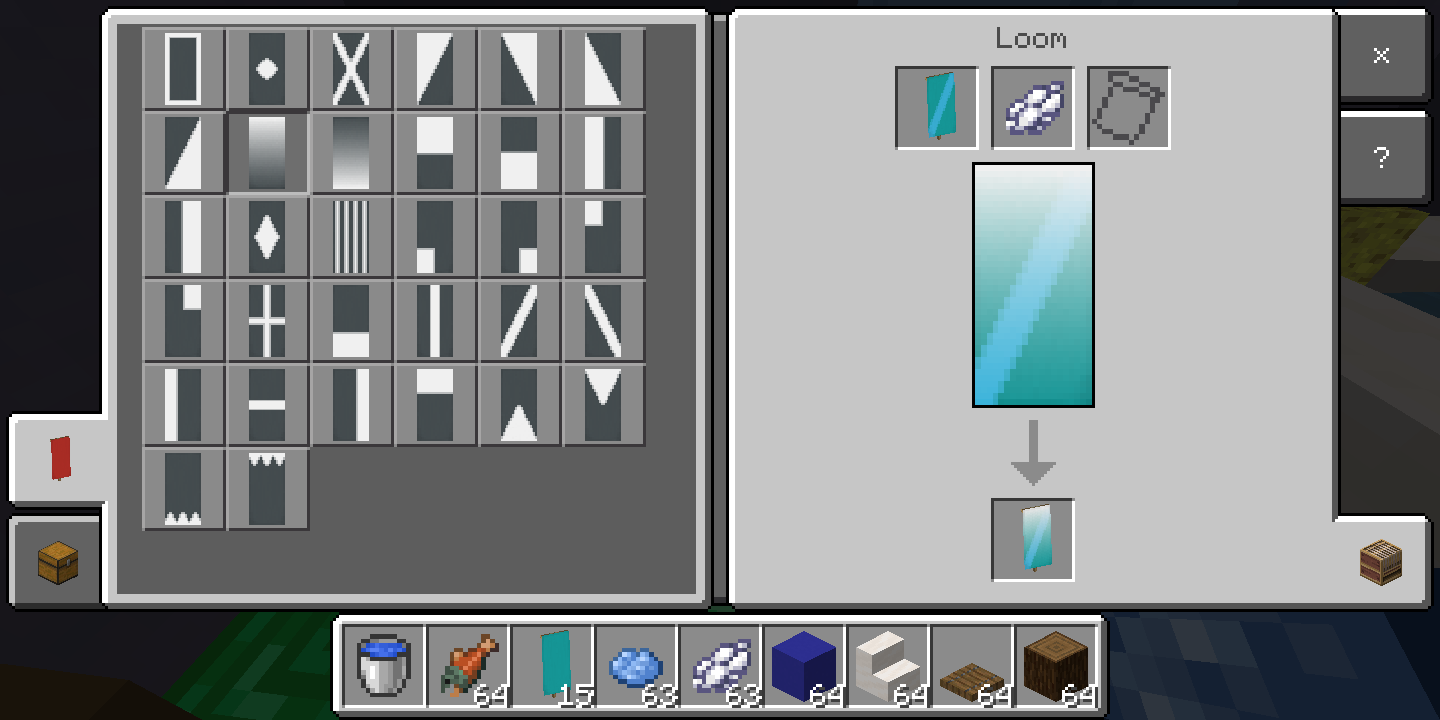
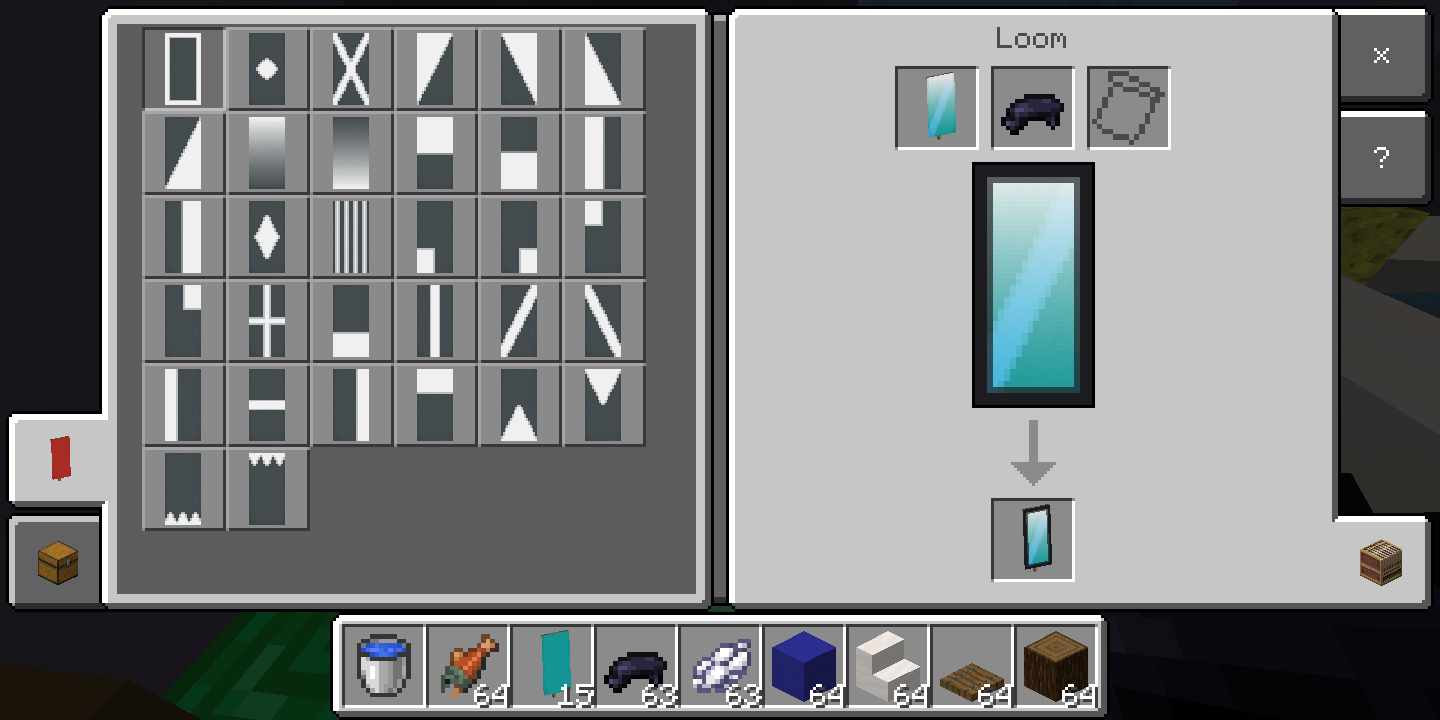
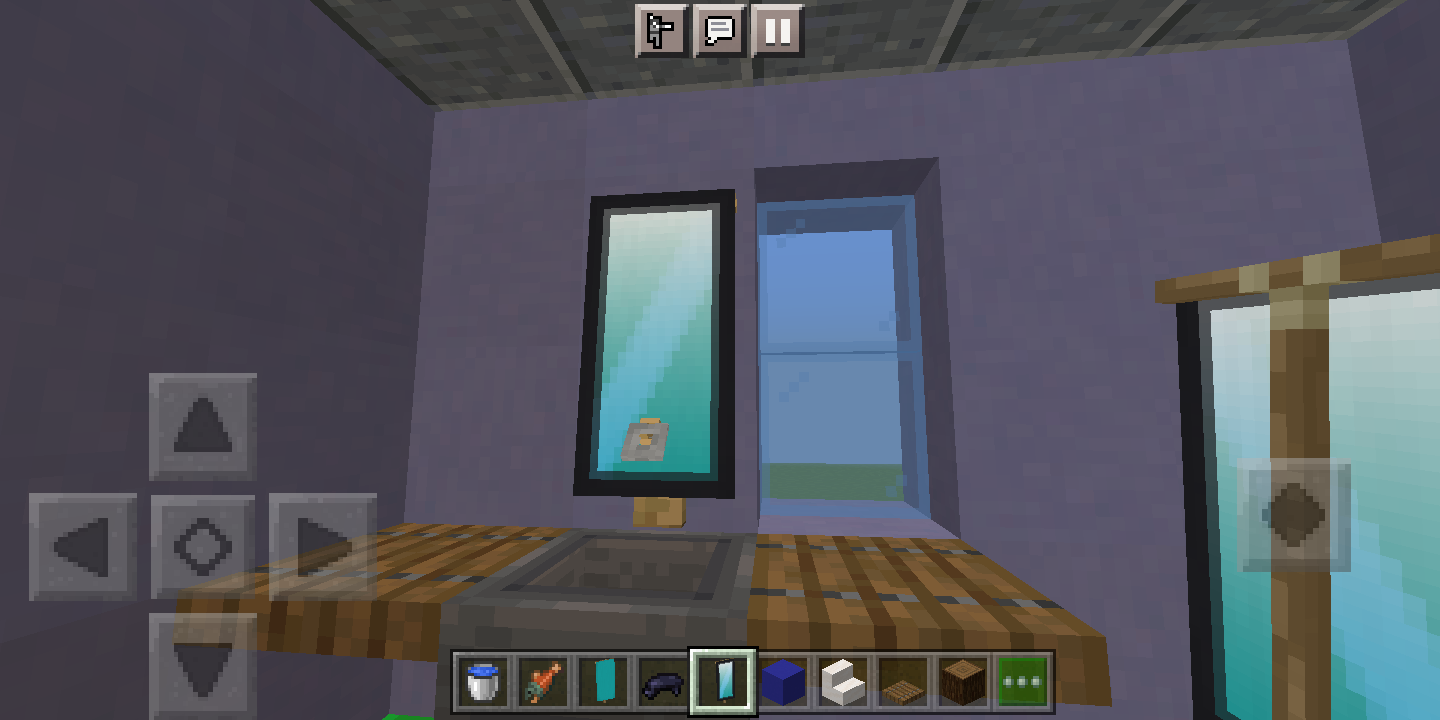
This step is very hard to put into words, so I will let you follow the pictures instead.
After making the banner, and finding that it looks like a mirror, you can hang it right above the tripwire hook faucet, as seen in Picture #4.
YOU WILL NEED
Loom
Cyan banner
Light blue dye
White dye
Black dye
Toilet
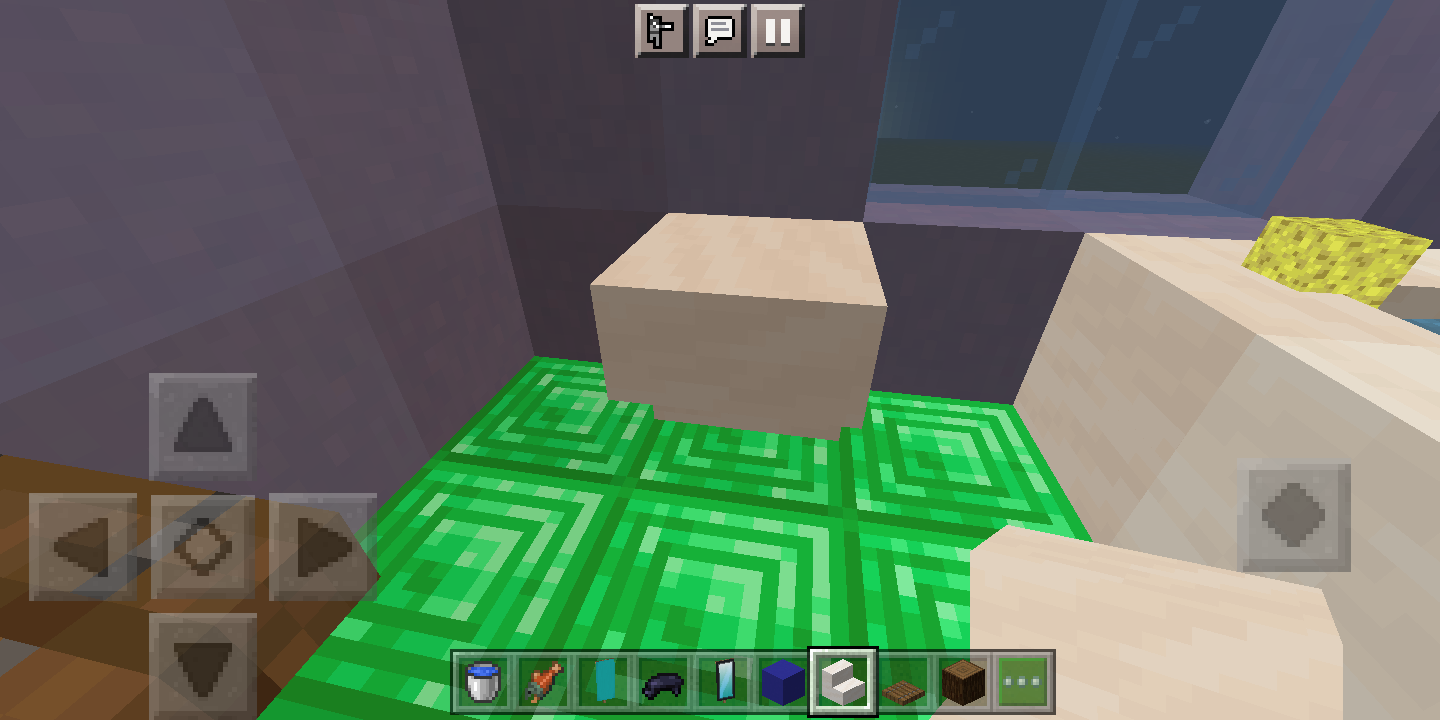
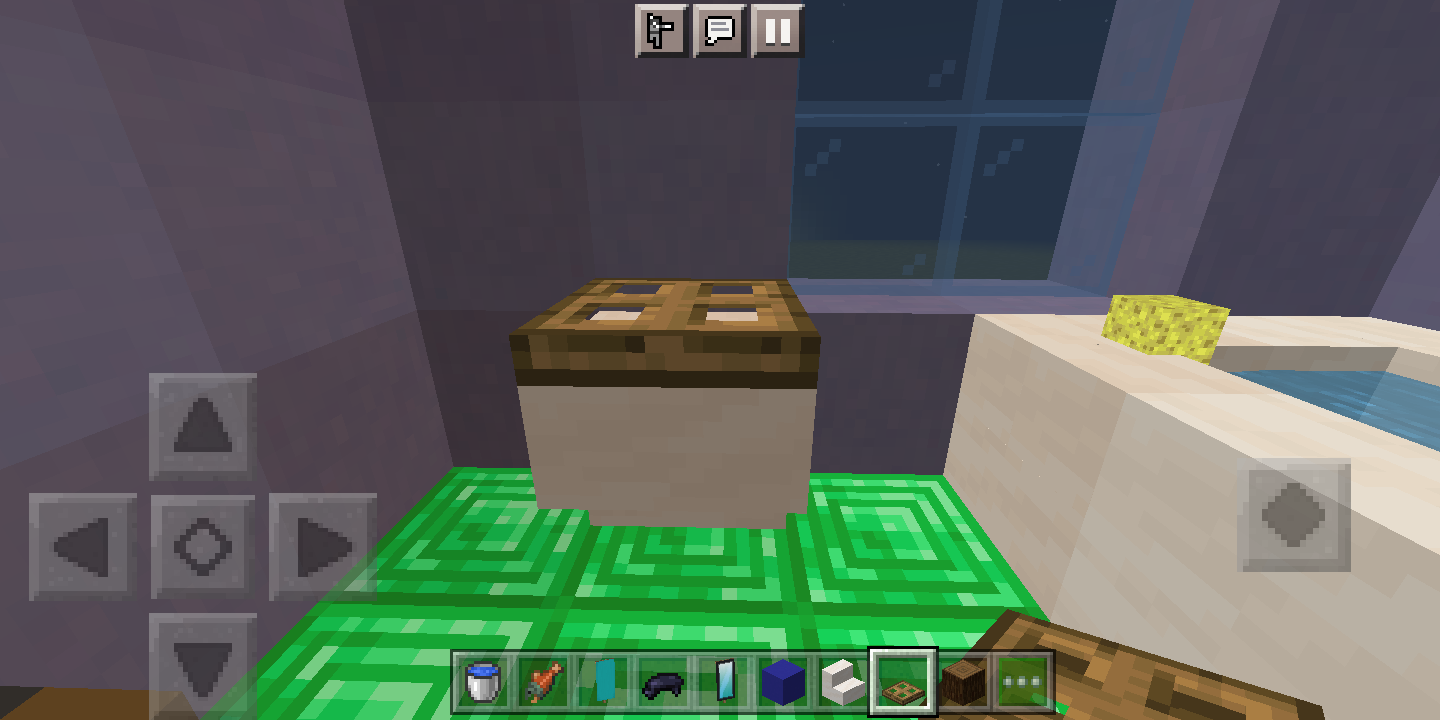
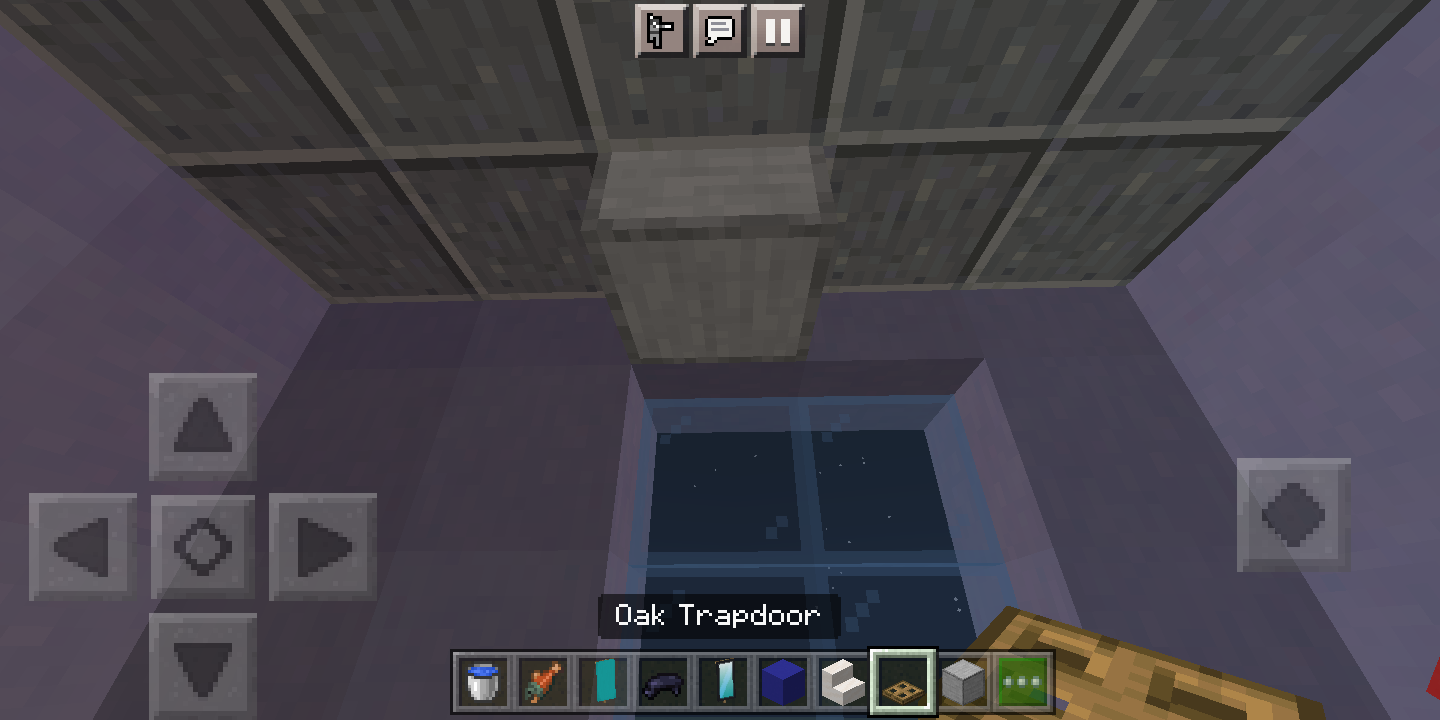
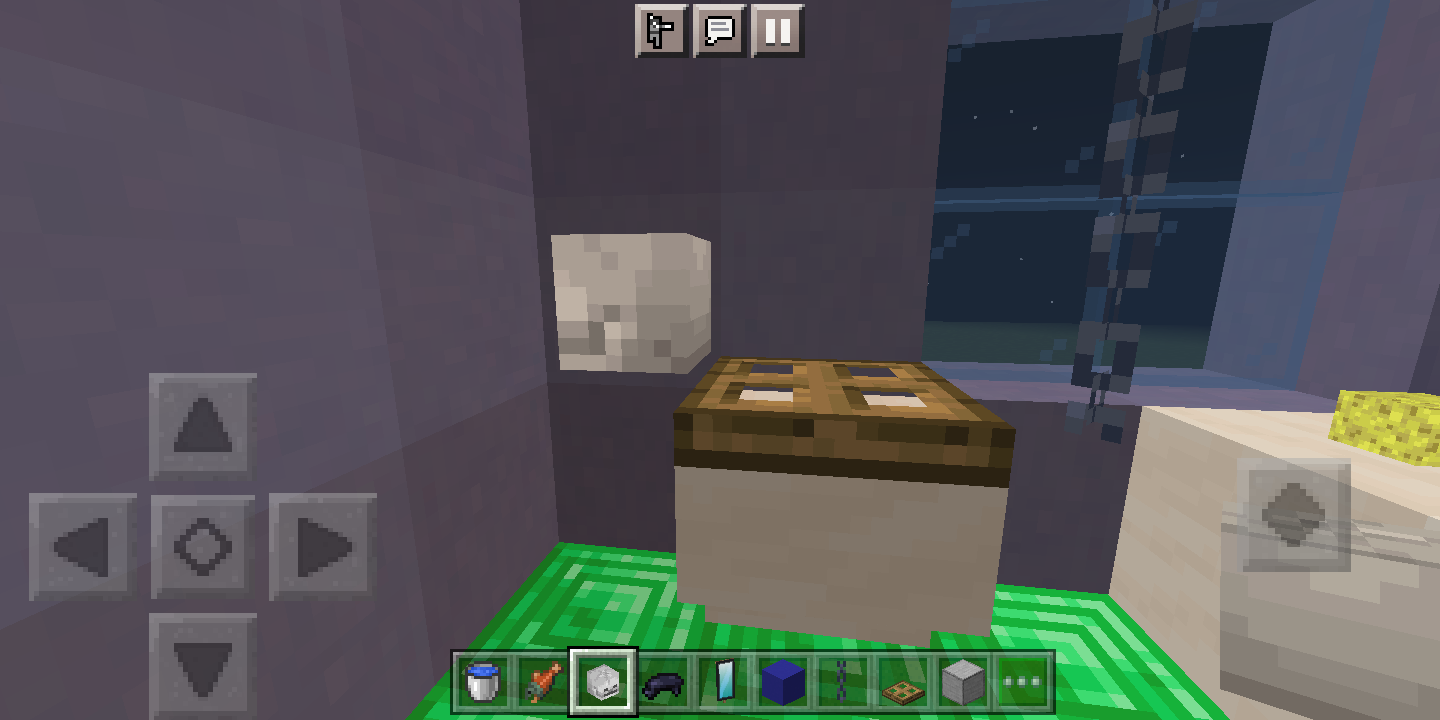
Although being a very not-so-useful thing to have in Minecraft, a toilet is good decoration. Read on to learn how to make one.
YOU WILL NEED
Quartz stair
Oak trapdoor
Skull
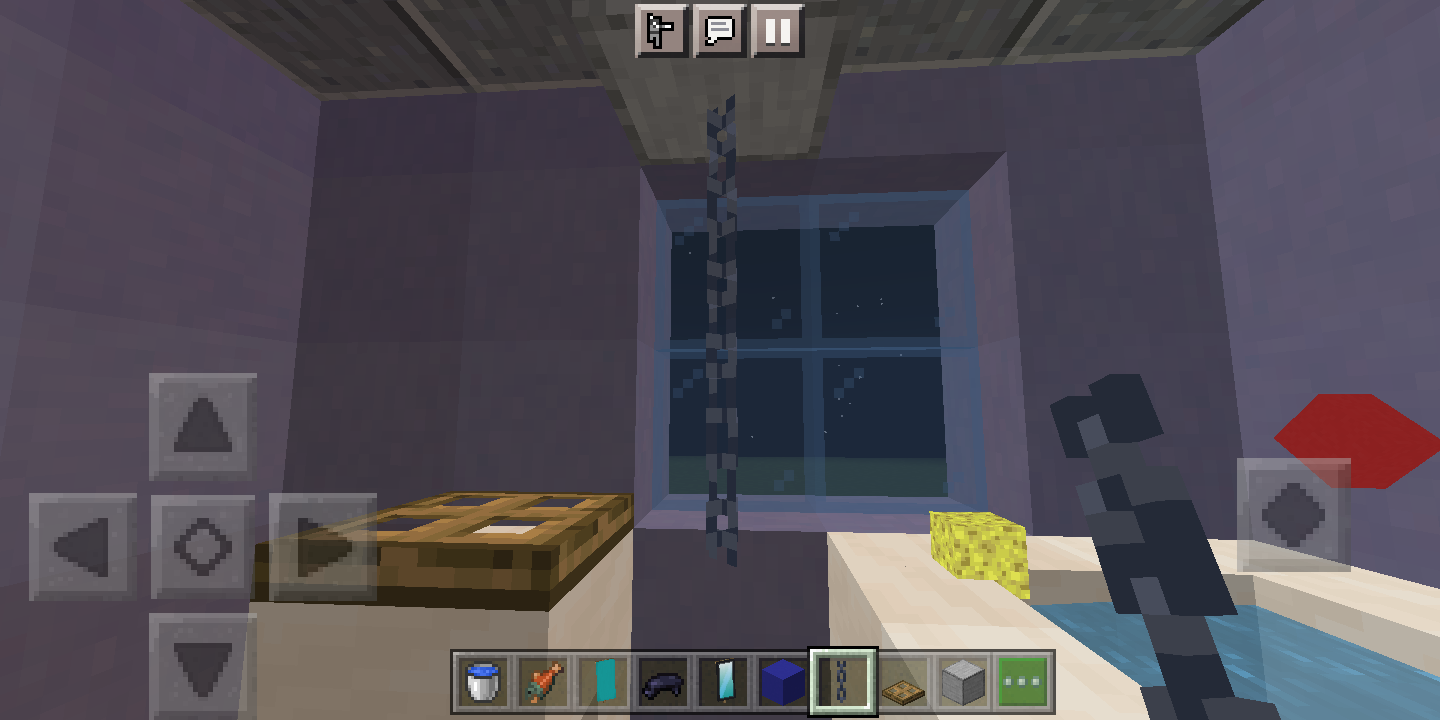
Chains
PICTURE #1: Place an upside-down quartz stair.
PICTURE #2: Add an oak trapdoor to the top, to be the toilet lid.
PICTURES #3 AND #4: We will be adding a rope flusher to this toilet. I had to dig out one of my slabs, because as I said earlier, I made a slab ceiling in my house, and I replaced it with a block of smooth stone. But if you have a normal ceiling, that won't be necessary. Just hang however many chains you need from the ceiling until there is one block between the floor, and the bottom chain.
PICTURE #5: Place a skeleton skull facing away from you, and towards the wall. This will be the toilet paper.
You have completed the entire Minecraft bathroom!
Exterior
Let's move on to decorating the exterior of the house.
Porch Swing
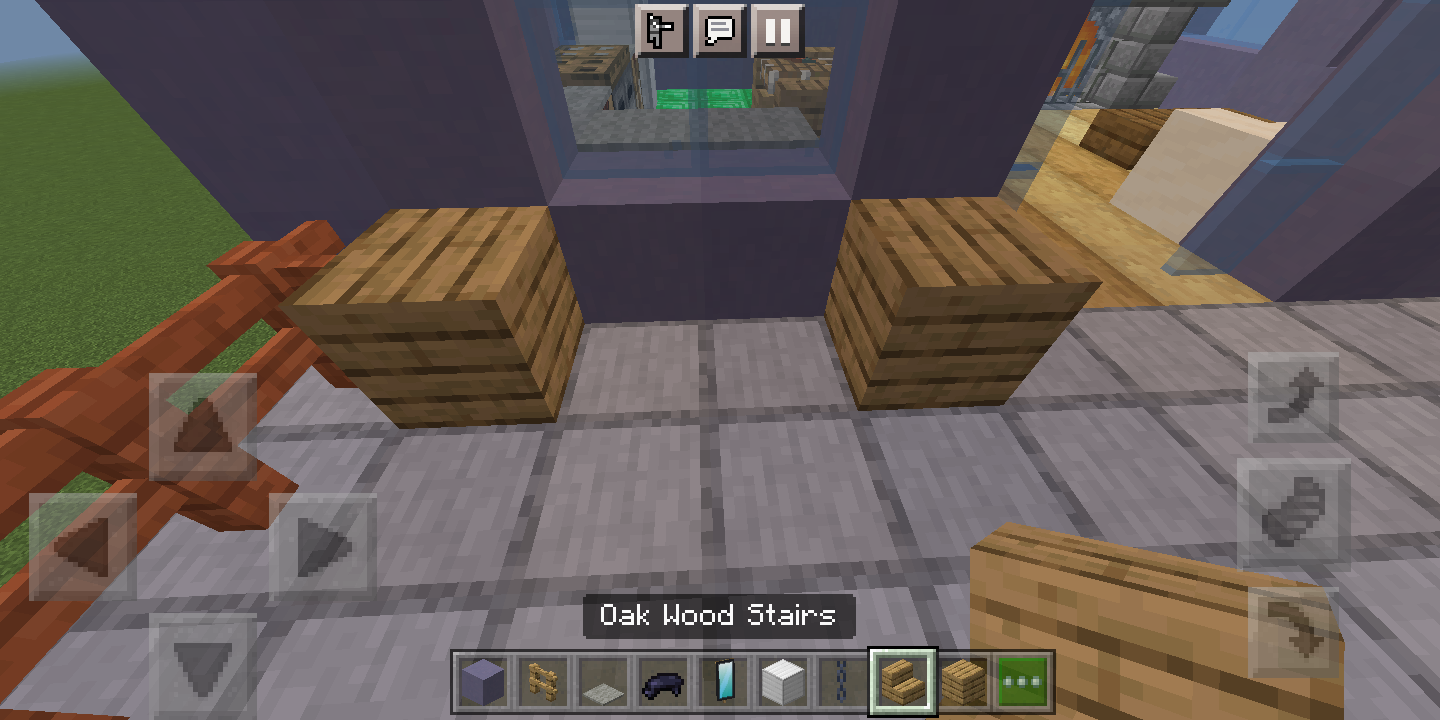
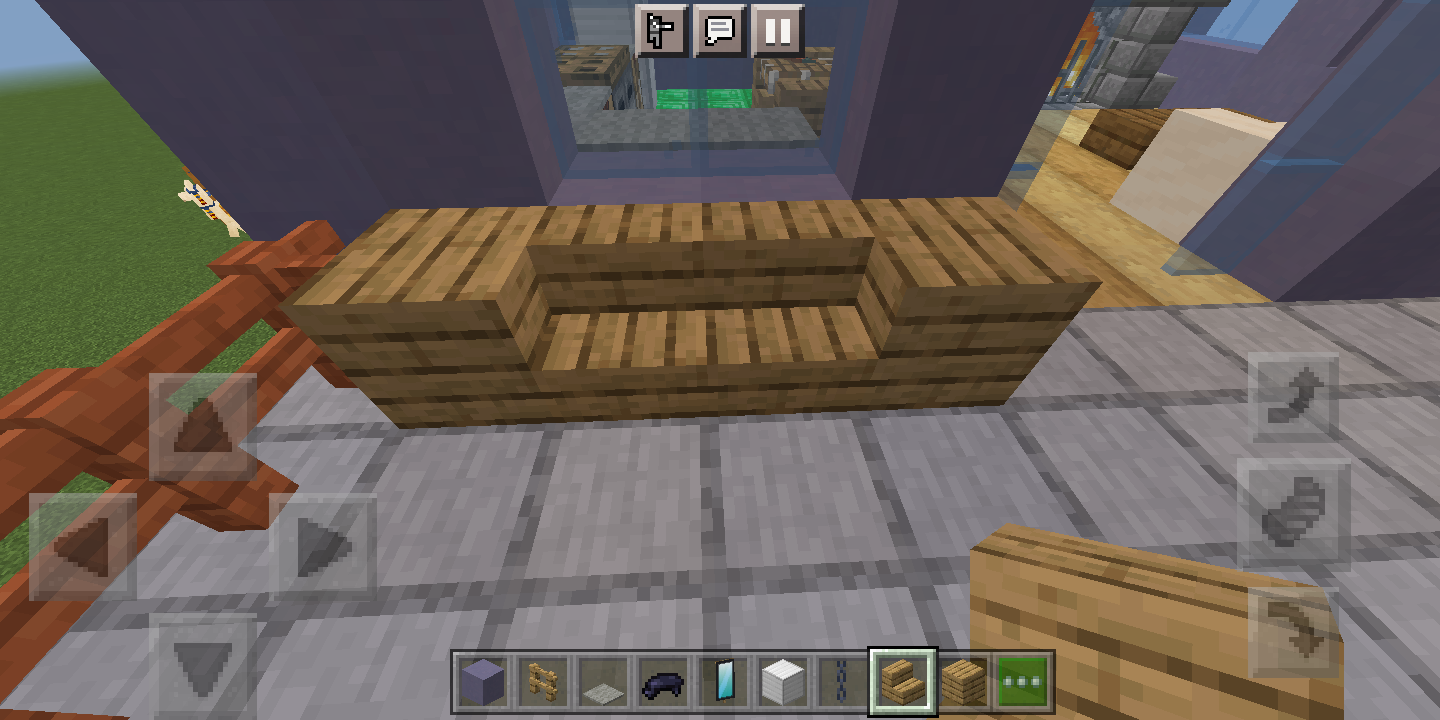
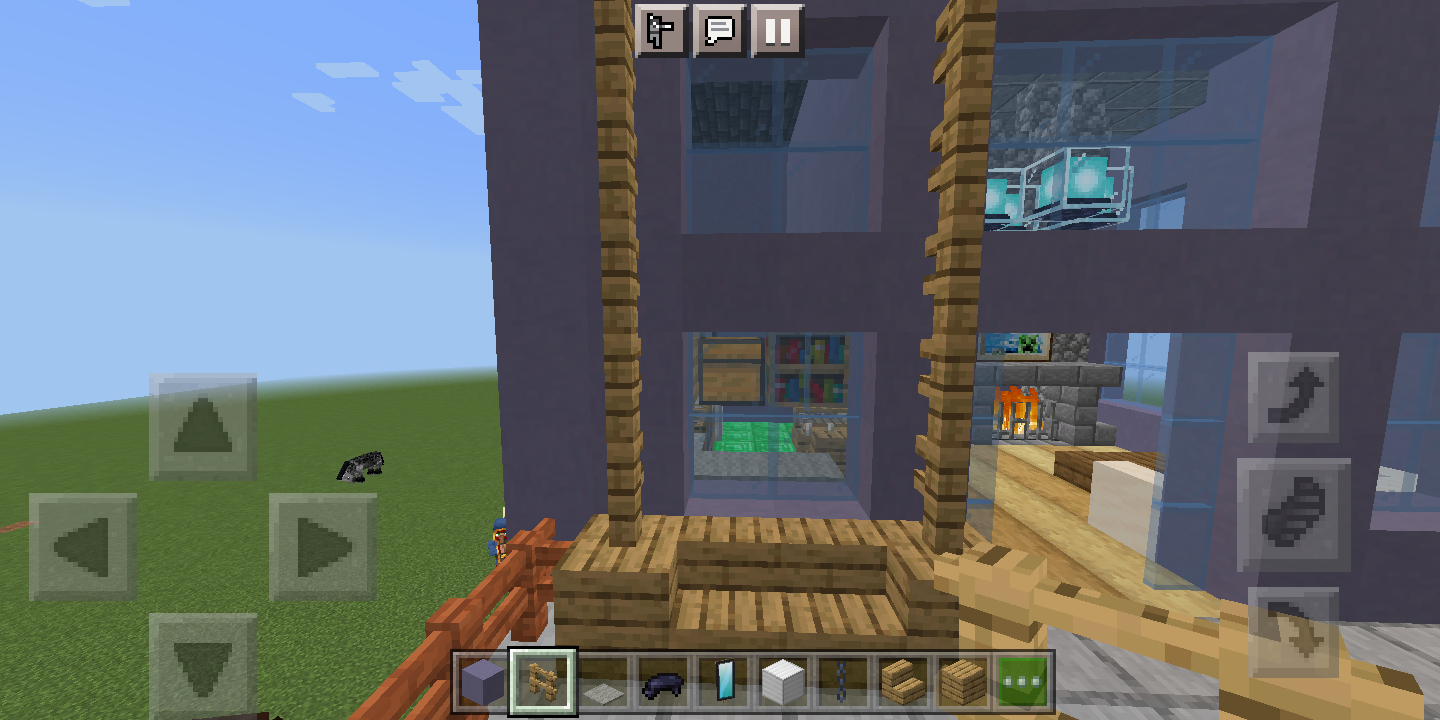
A porch swing is definitely a nice place to sit and chill out on a nice, sunny day.
YOU WILL NEED
Oak wood planks
Oak stairs
Oak fences
PICTURE #1: Place two oak wood planks blocks, two blocks away from each other. I was able to get mine to align with my window! Feel free to replace the oak planks with spruce, mangrove, warped, any kind of planks you like.
PICTURE #2: Fill in the empty space between the planks with oak stairs. Again, feel free to use any kind of wood stairs that you want.
PICTURE #3: Hard to explain, but just use oak fence (or any fence you like) to go from the sides of the bench, all the way to the top of the porch (or balcony, in my case).
Now sit back, relax, and enjoy the sights and sounds of nature. Done taking a break? OK. Let's move on to the next thing.
Barbeque
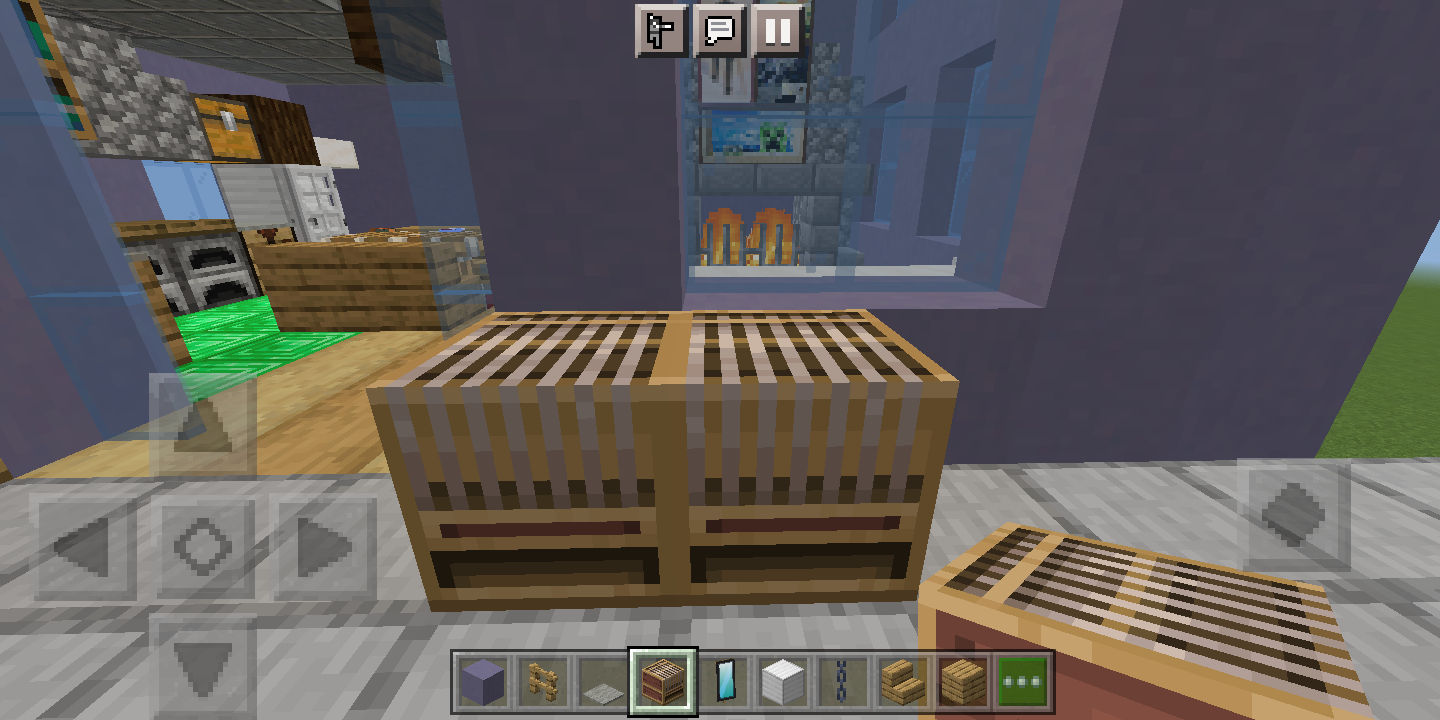
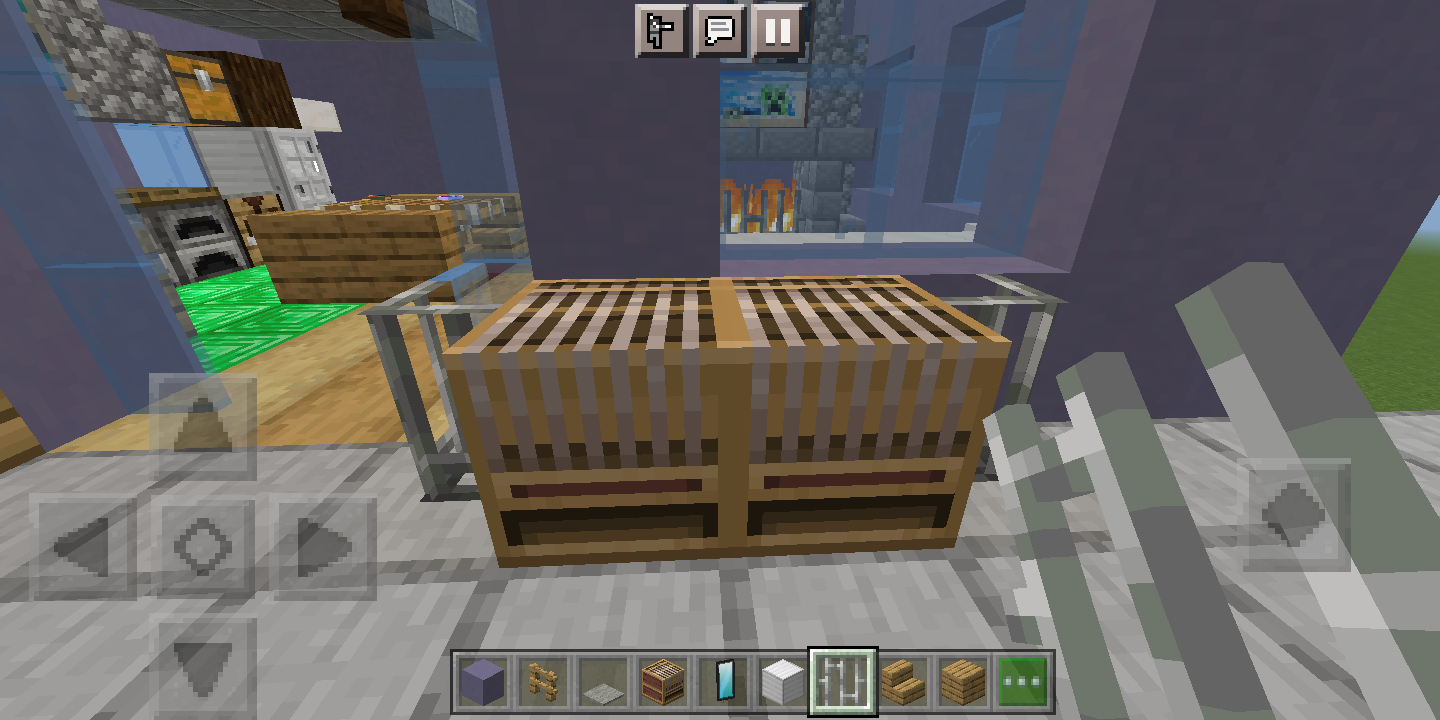
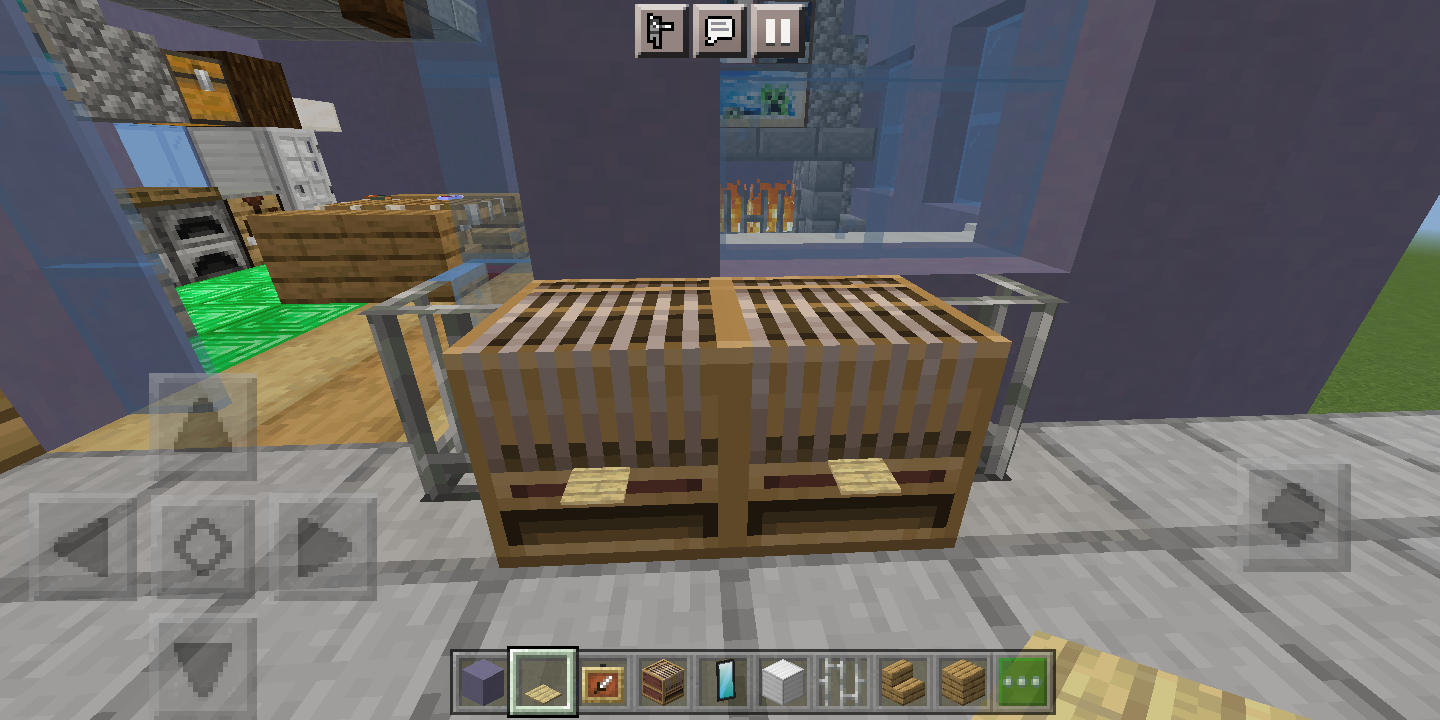
A very fun part of summer is having a barbeque. I really enjoy grilled hamburgers, hot-dogs, and chicken. You can enjoy some nice grilled food in Minecraft if you just follow a few simple steps.
YOU WILL NEED
Looms
Iron bars
Invisible item frame
Pressure plates
Birch trapdoors
Carpet
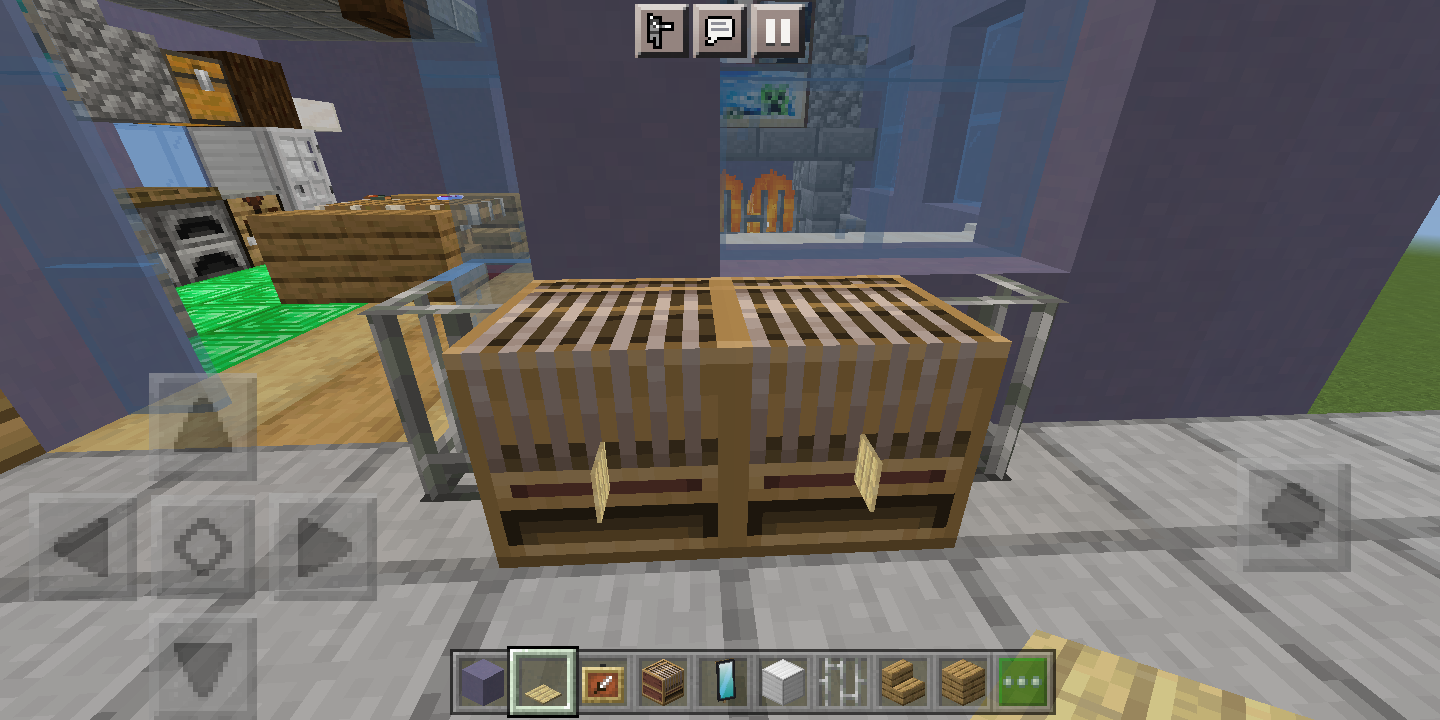
PICTURES #1 AND #2: Place two looms on the ground, with iron bars on either side.
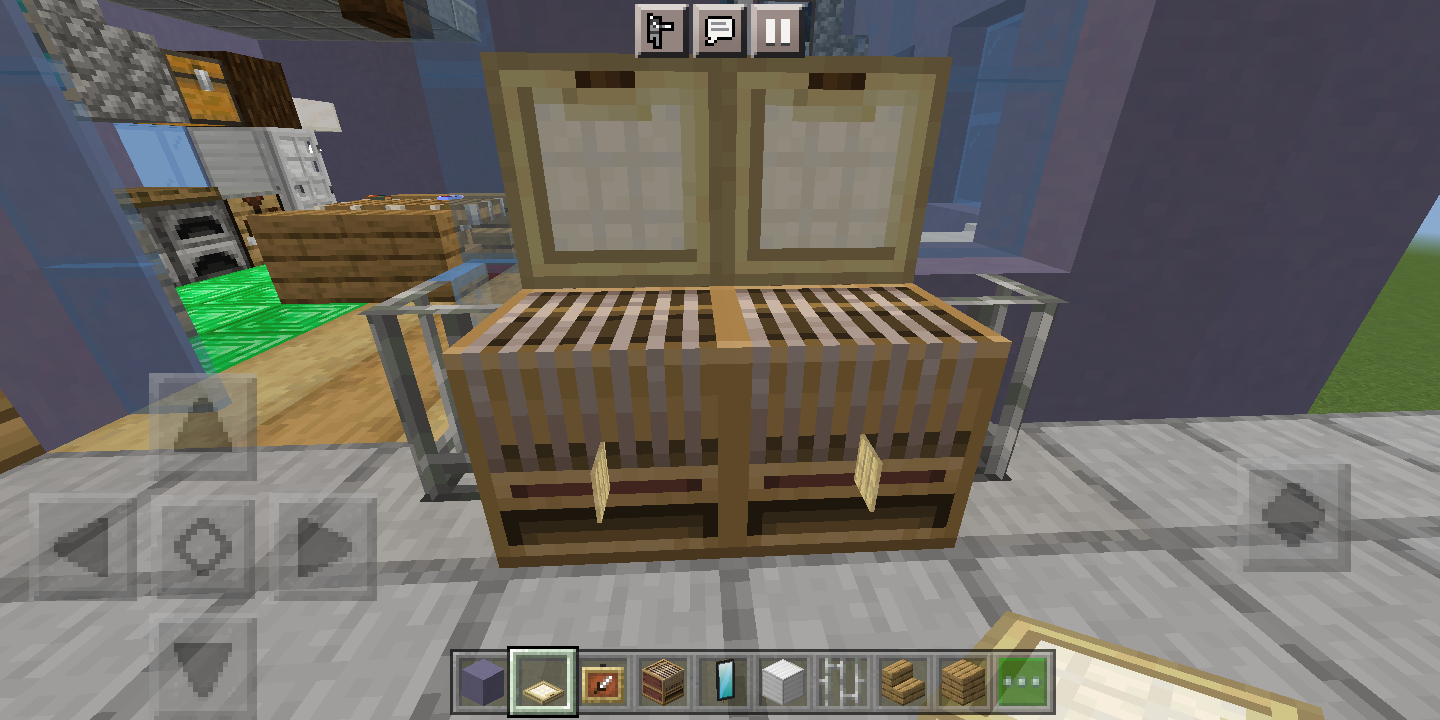
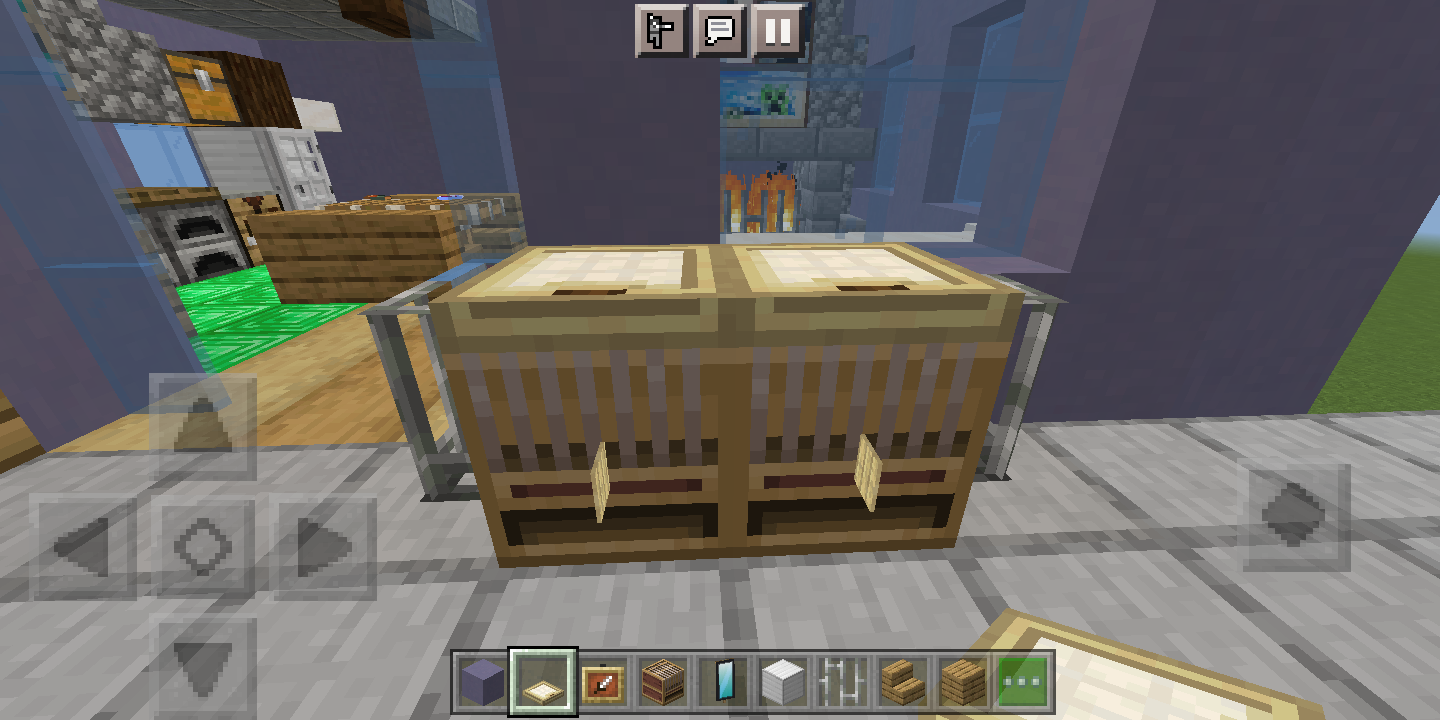
PICTURES #3 AND #4: If you can obtain the Invisible Item Frame, place one on each loom, with a pressure plate in each of them. Rotate the pressure plate so that it is vertical, unless you like how it looks horizontally.
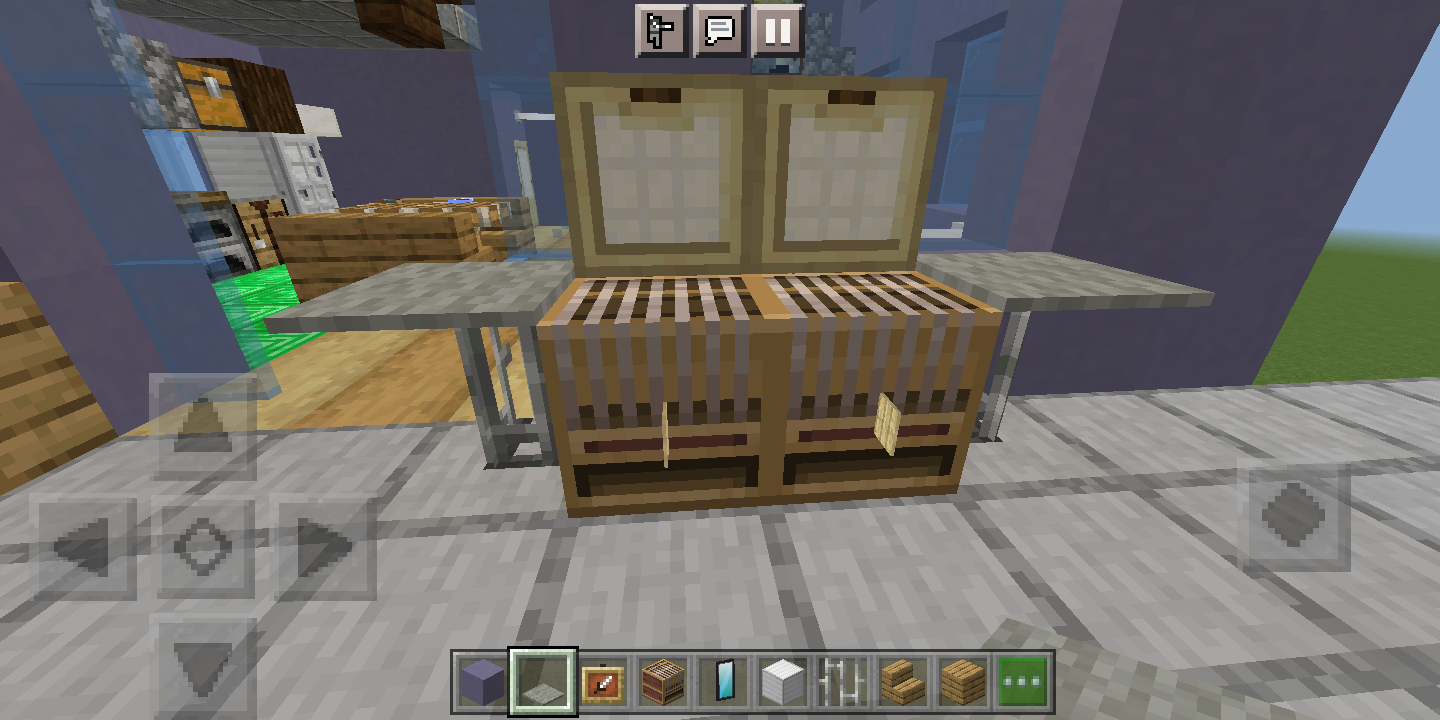
PICTURES #5 AND #6: Place a birch trapdoor on top of each of the looms. This is the grill's hood, and since it is made of trapdoors, you can even open and close it!
PICTURE #7: Set your choice of carpet on each one of the iron bars.
Now go out there and have a summer barbeque party!
Window Boxes
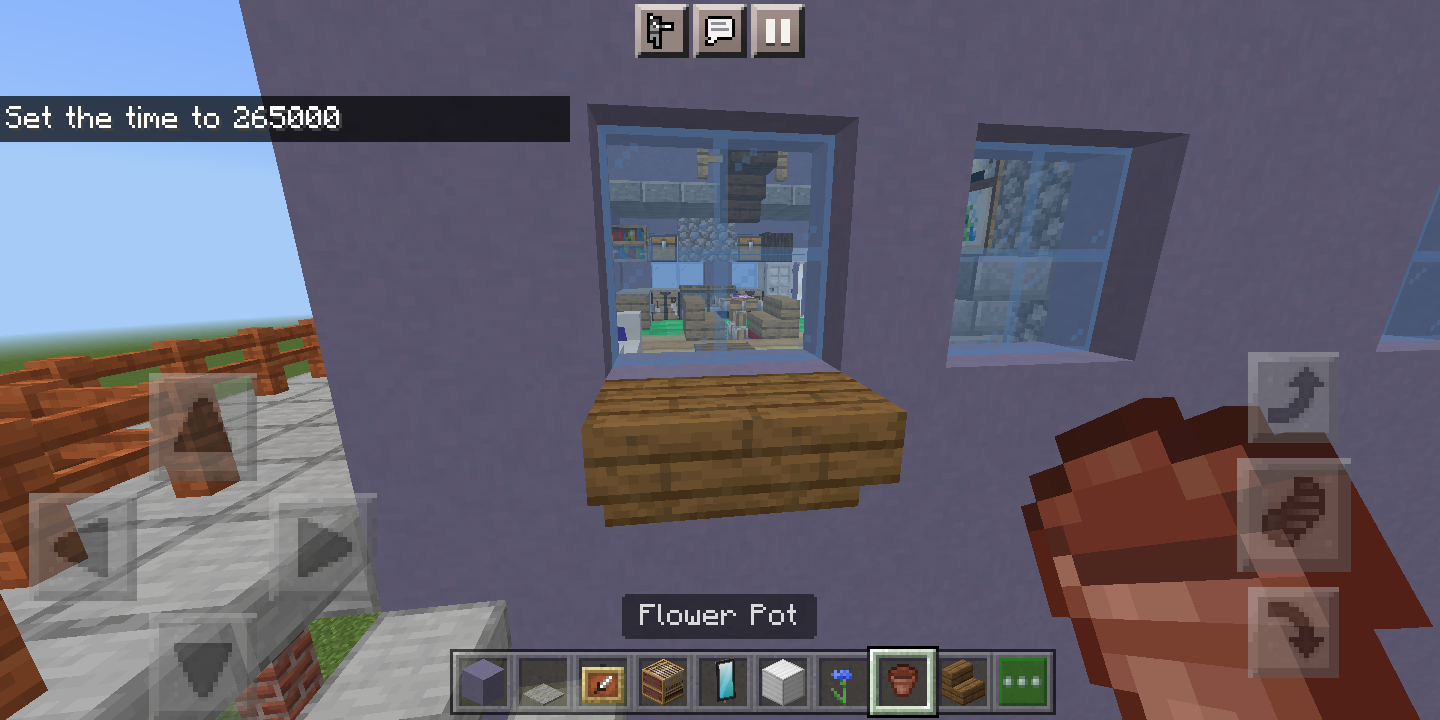
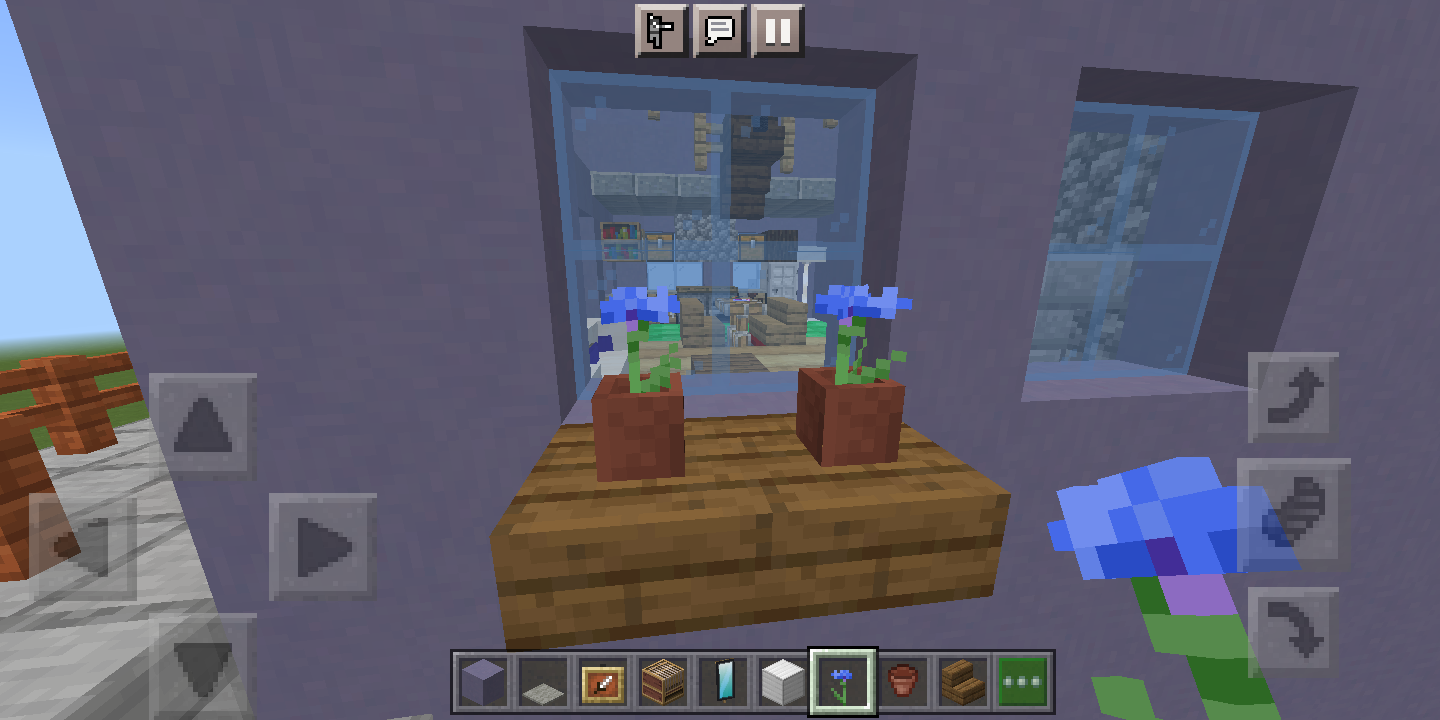
A window box of pansies is such a lovely thing
A window box of wallflowers is a garden for a king
A window box of roses makes everyone stand still
Who sees a garden growing on a windowsill
Have you ever heard that poem? Anyway, let's get into this; we will build some window boxes.
YOU WILL NEED
Spruce stairs
Flowerpots
A plant of your choice
PICTURE #1: Place however many upside-down spruce stairs you need, under your window. For example, if your windows was two blocks wide, you would place two stairs.
PICTURE #2: Place a flowerpot on each stair, containing the flower or plant of your choice. I used cornflowers, but you could use tulips, cactus, lilies, saplings, or even mushrooms.
Now you have your windows boxes of [insert plant name here] that is "such a lovely thing." I added these to all of my windows in my house.
Garage
The last part of furnishing a house in Mnecraft is the garage. Let's start on it immediately.
Workout Bench
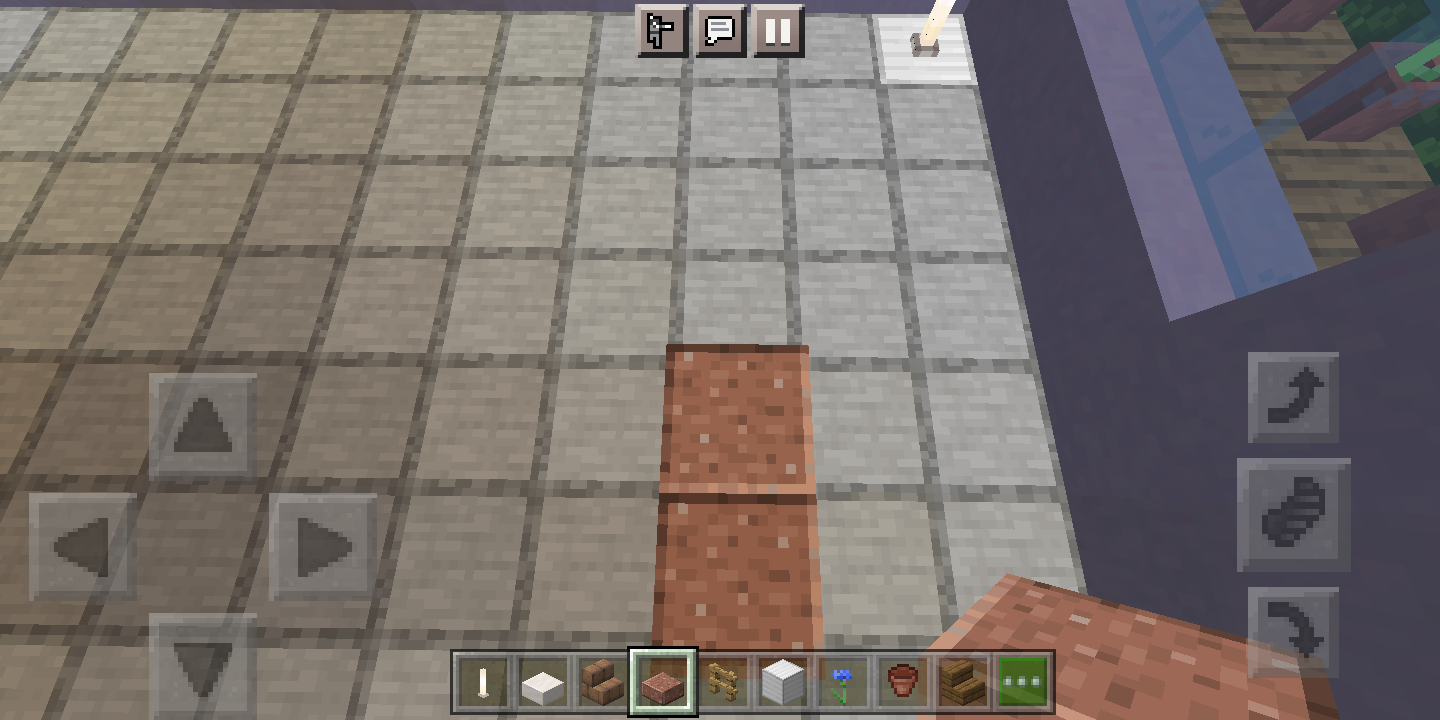
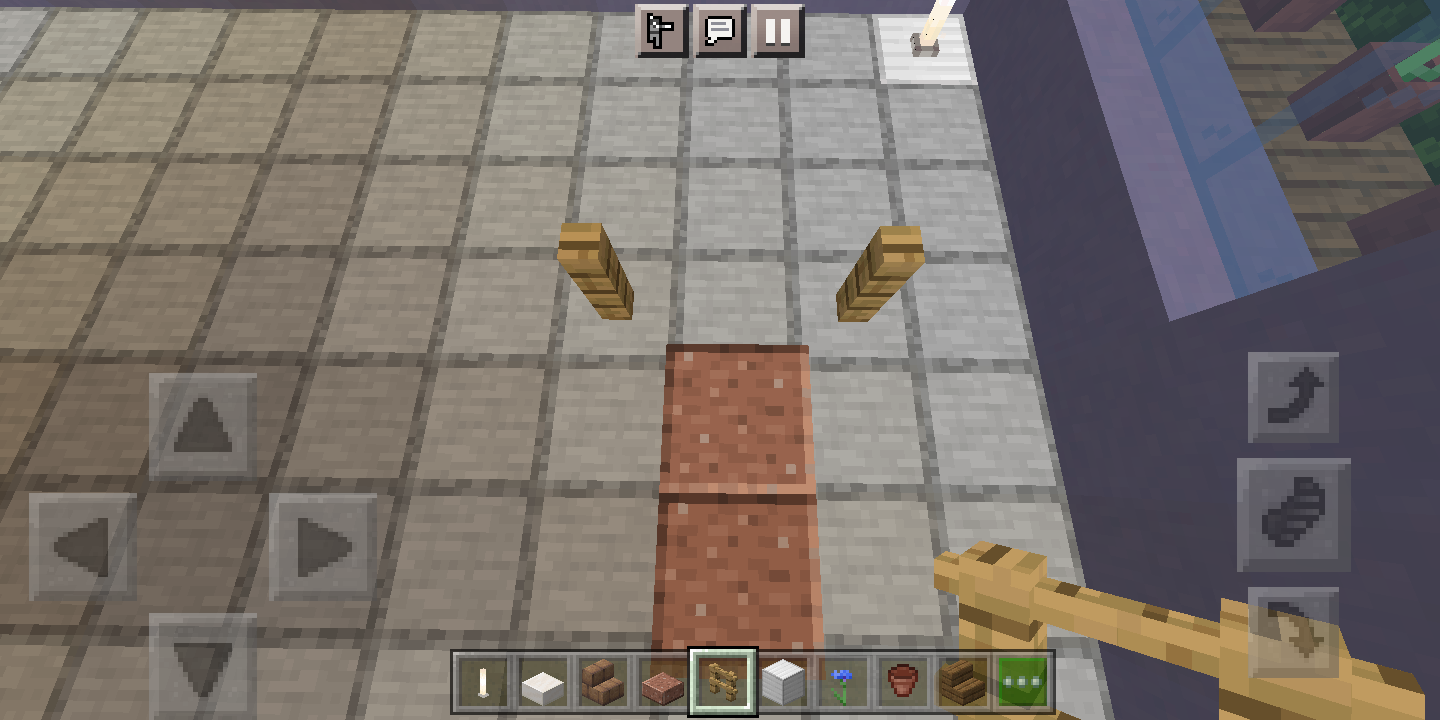
Some people keep working out equipment in their garages of their real-life houses. So let's build a workout bench in our Minecraft garage.
YOU WILL NEED
Polished granite slabs
Oak fences
PICTURE #1: Place two polished granite slabs (or any slab, really) side-by-side.
PICTURE #2: This one is hard to explain, so look at the picture.
Now you can get stronger so you can punch trees faster :)
Punching Bag
You can practice punching trees with this punching bag (haha!).
YOU WILL NEED
Oak fence
Wool
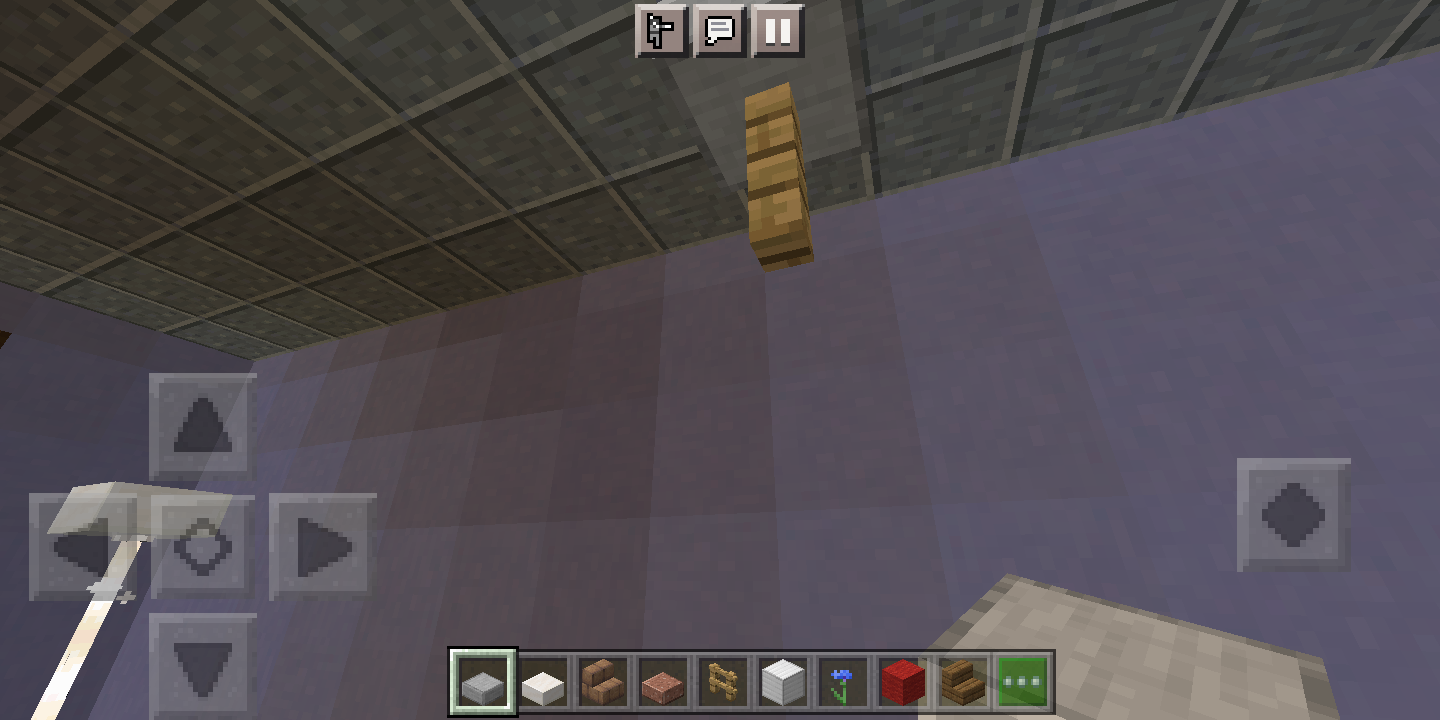
PICTURE #1: Place an oak fence on the ceiling. Again, I had to replace a slab from my slab ceiling with smooth stone.
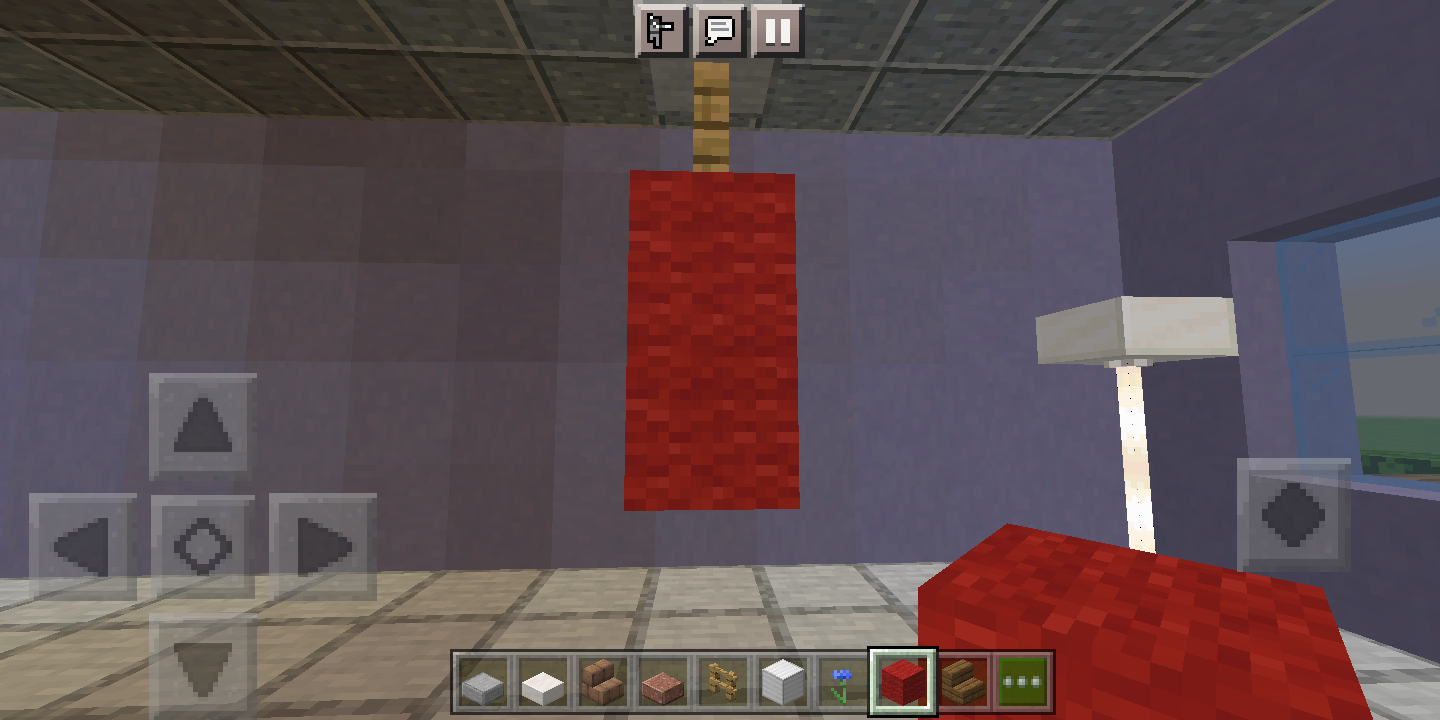
PICTURE #2: Place two of any color wool underneath that oak fence. I used red.
Now, get to punching practice then go on to step 28!
Water Cooler
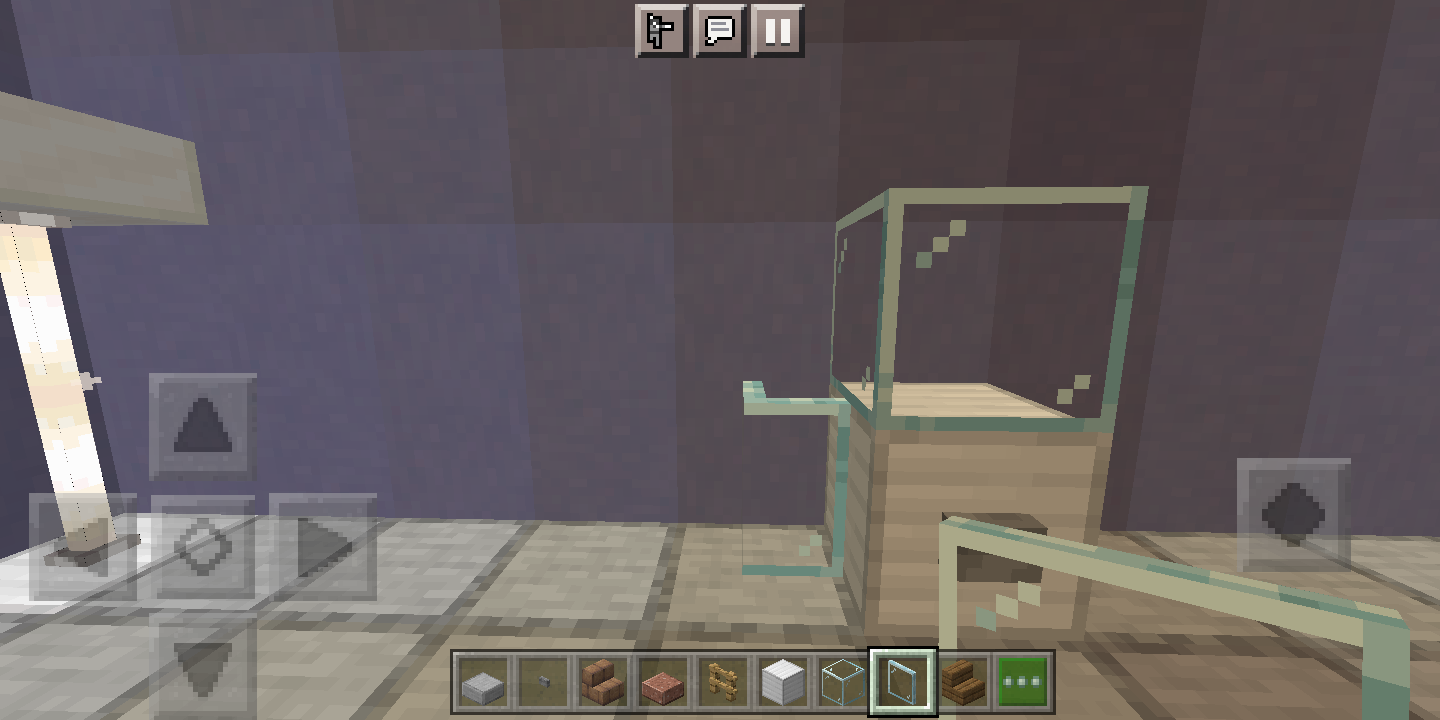
No gym area is complete without a place to grab a cup of cold water! Read on.
YOU WILL NEED
Iron block
Button
Glass block
Glass pane
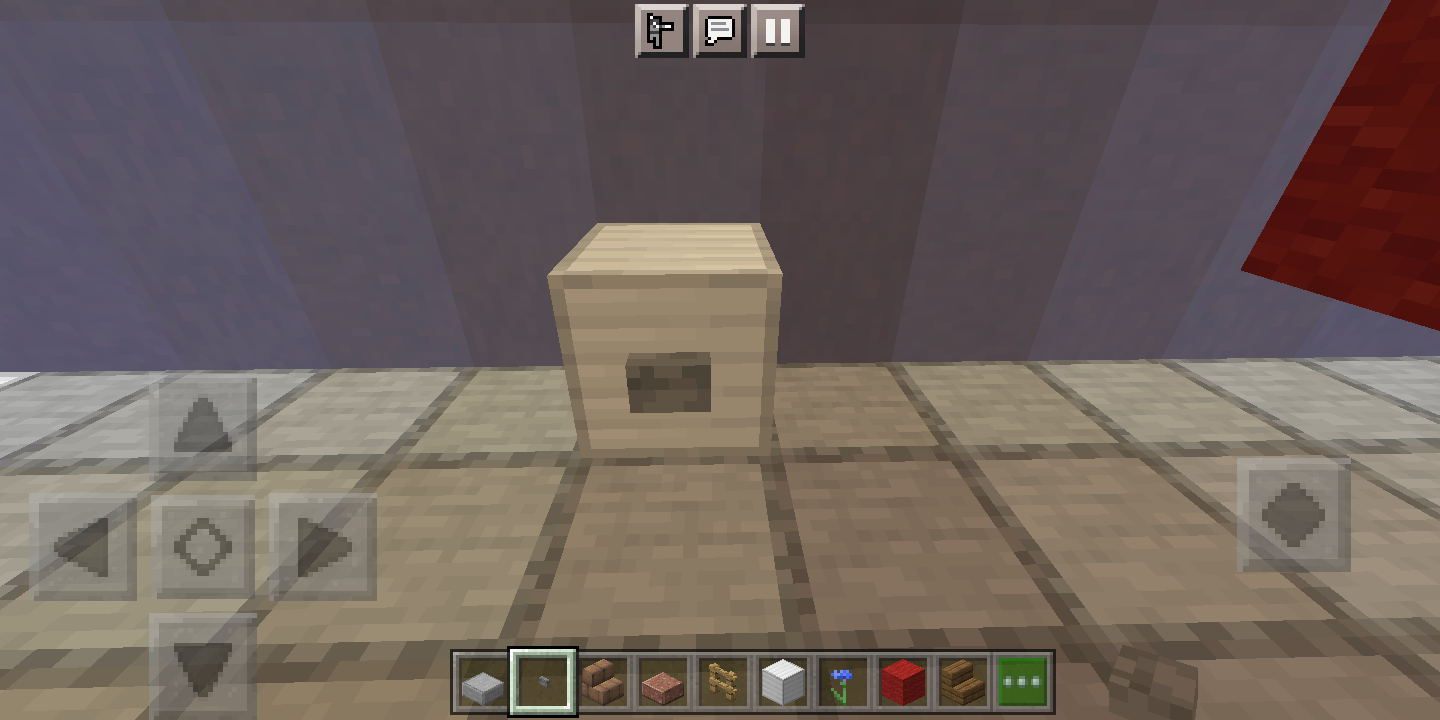
PICTURE #1: So you remember how earlier we built a dishwasher in the kitchen? Build another dishwasher: simply an iron block with a button of your choice in the front.
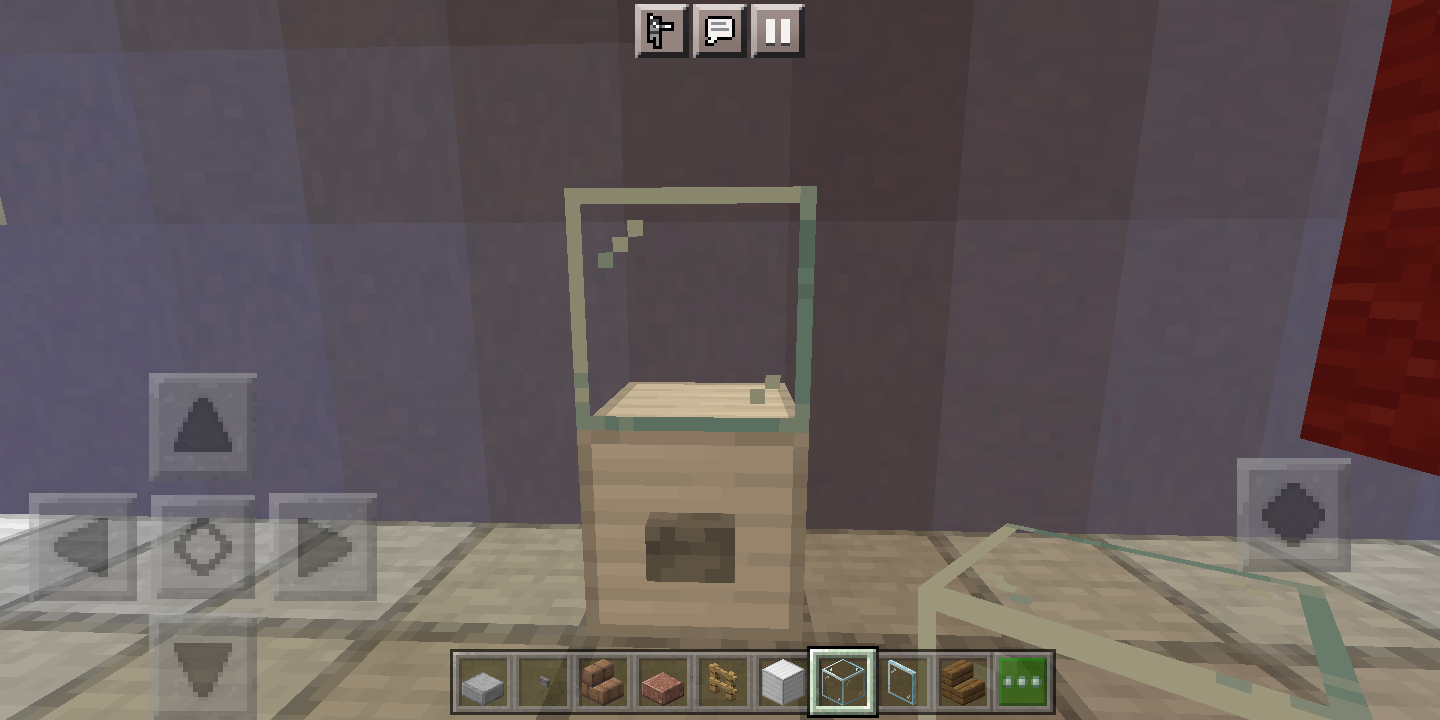
PICTURE #2: Place a glass block on top. If you like, you can replace it with blue stained glass so it looks like there is water inside. I just now realized that, hours after I built it.
PICTURE #3: Add a glass pane to the left of the cooler.
Grab a drink of cold water, then go on to the next step.
Car
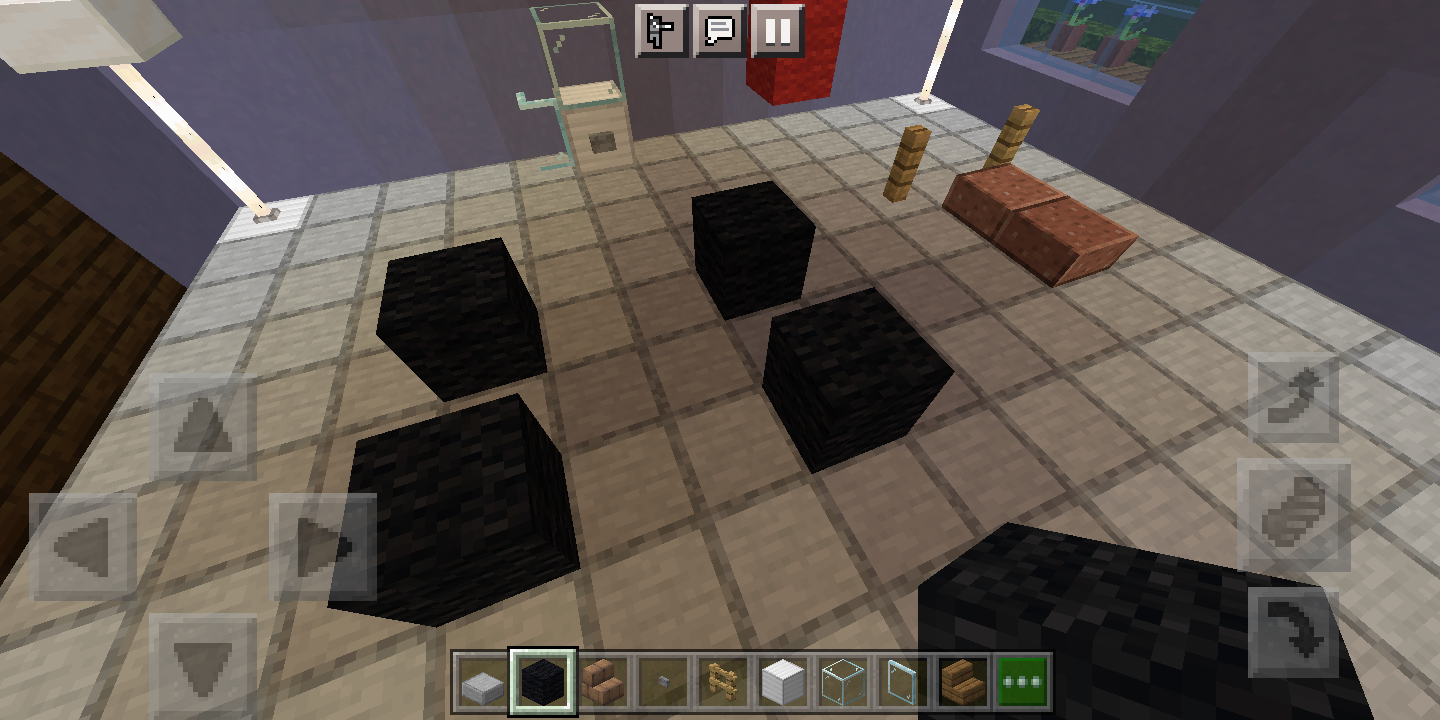
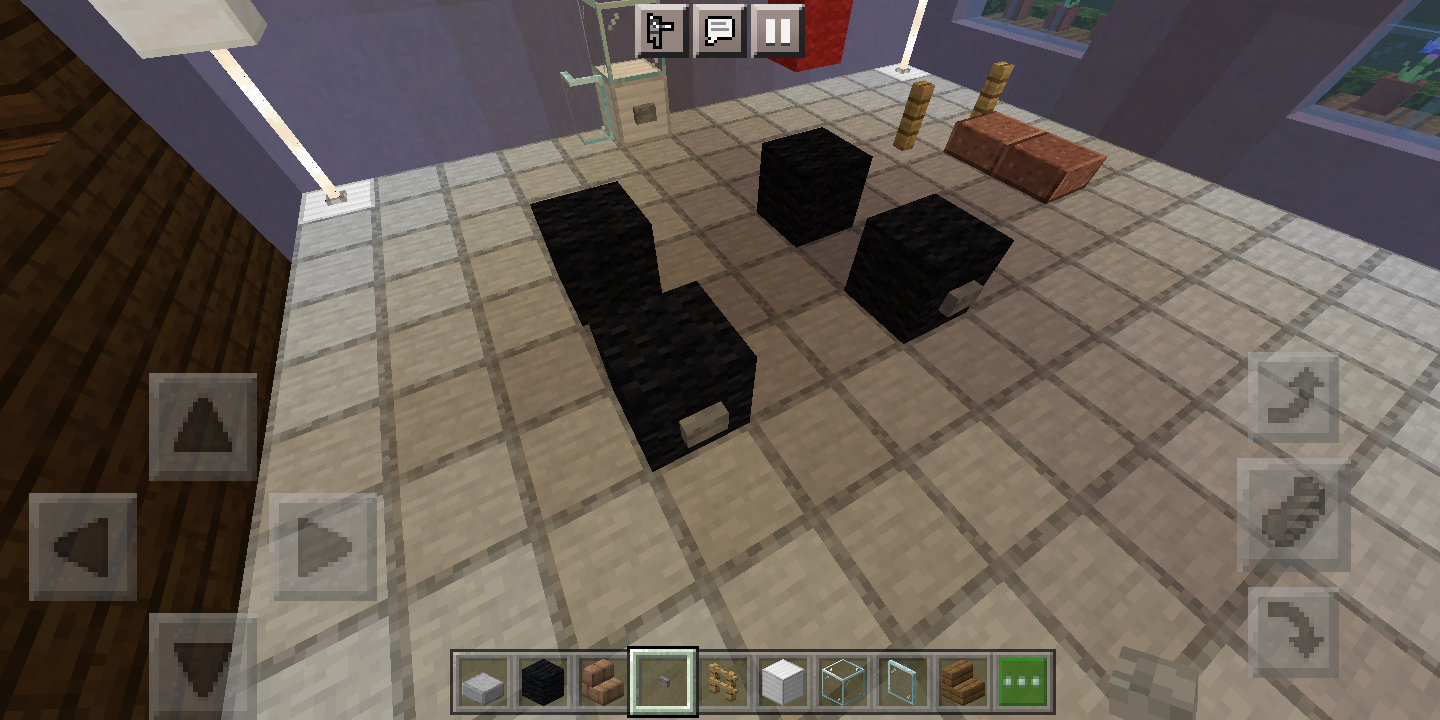
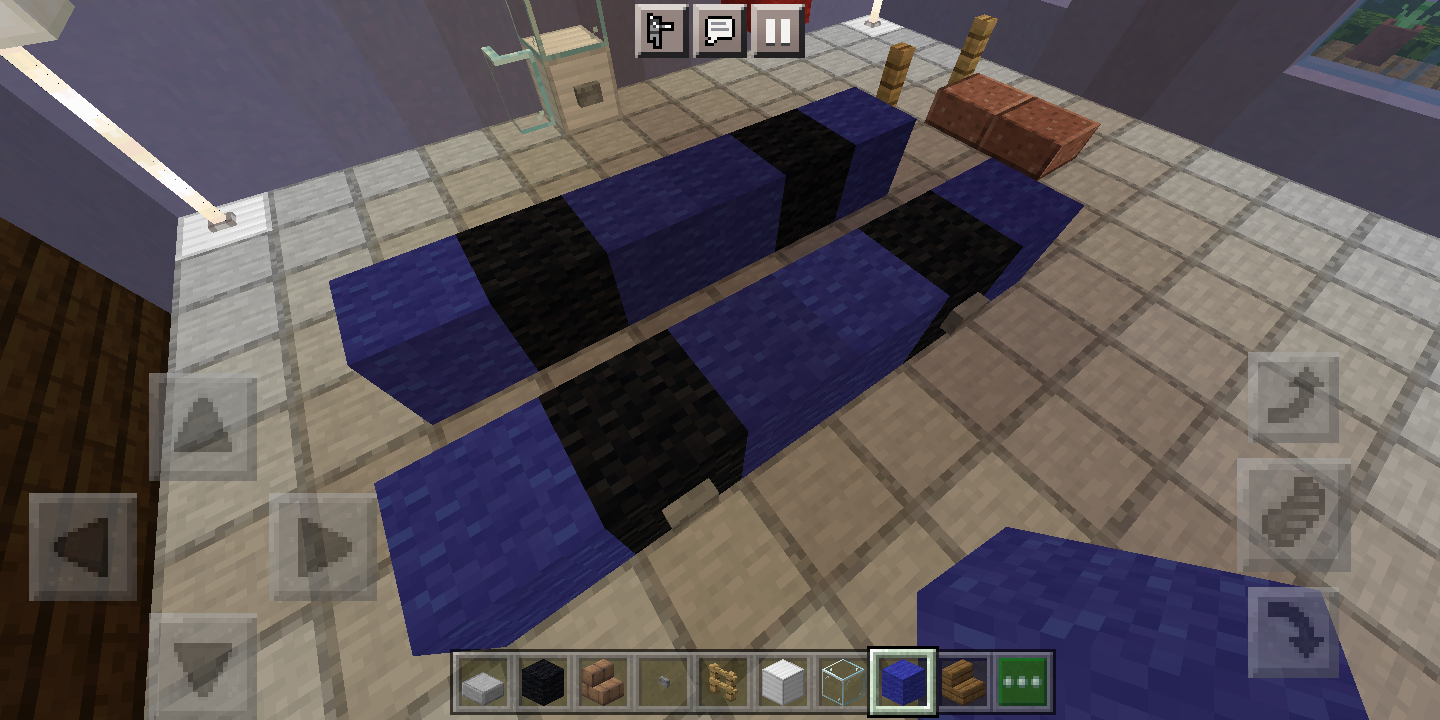
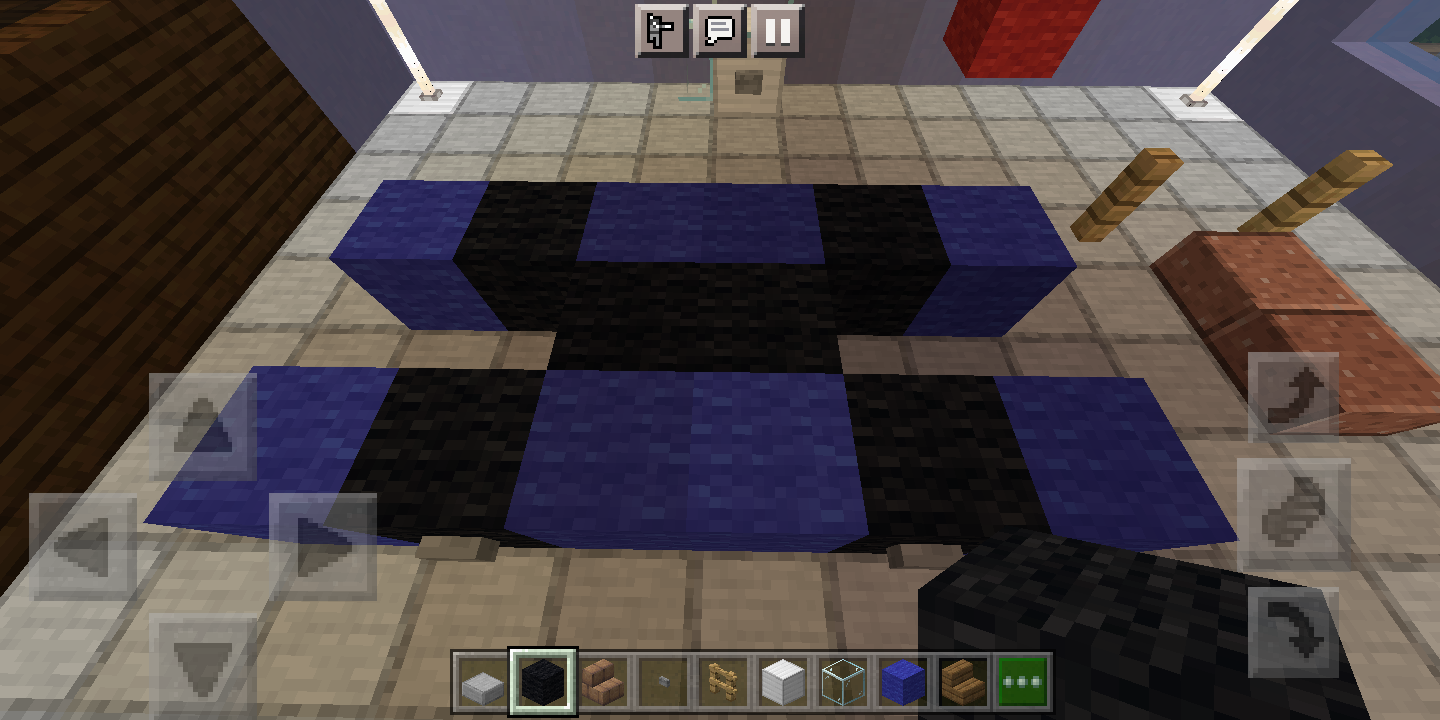
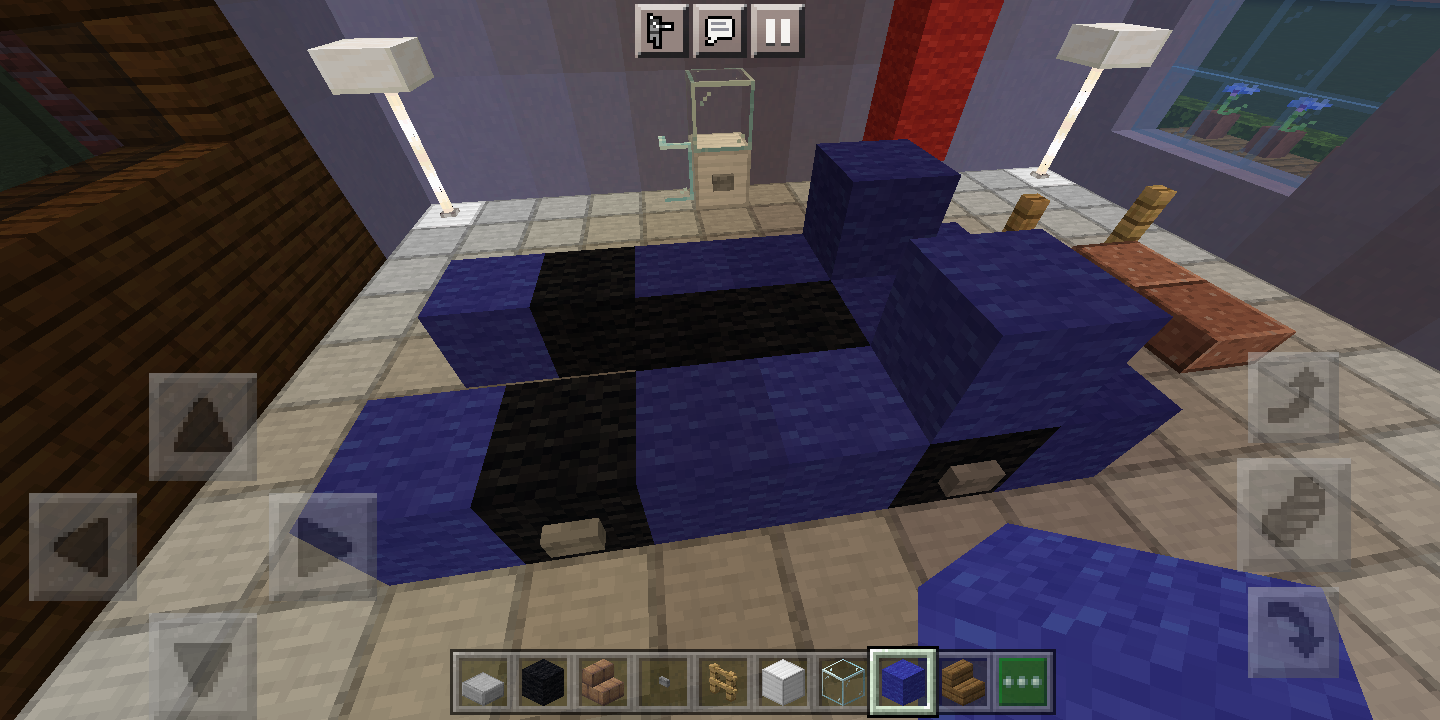
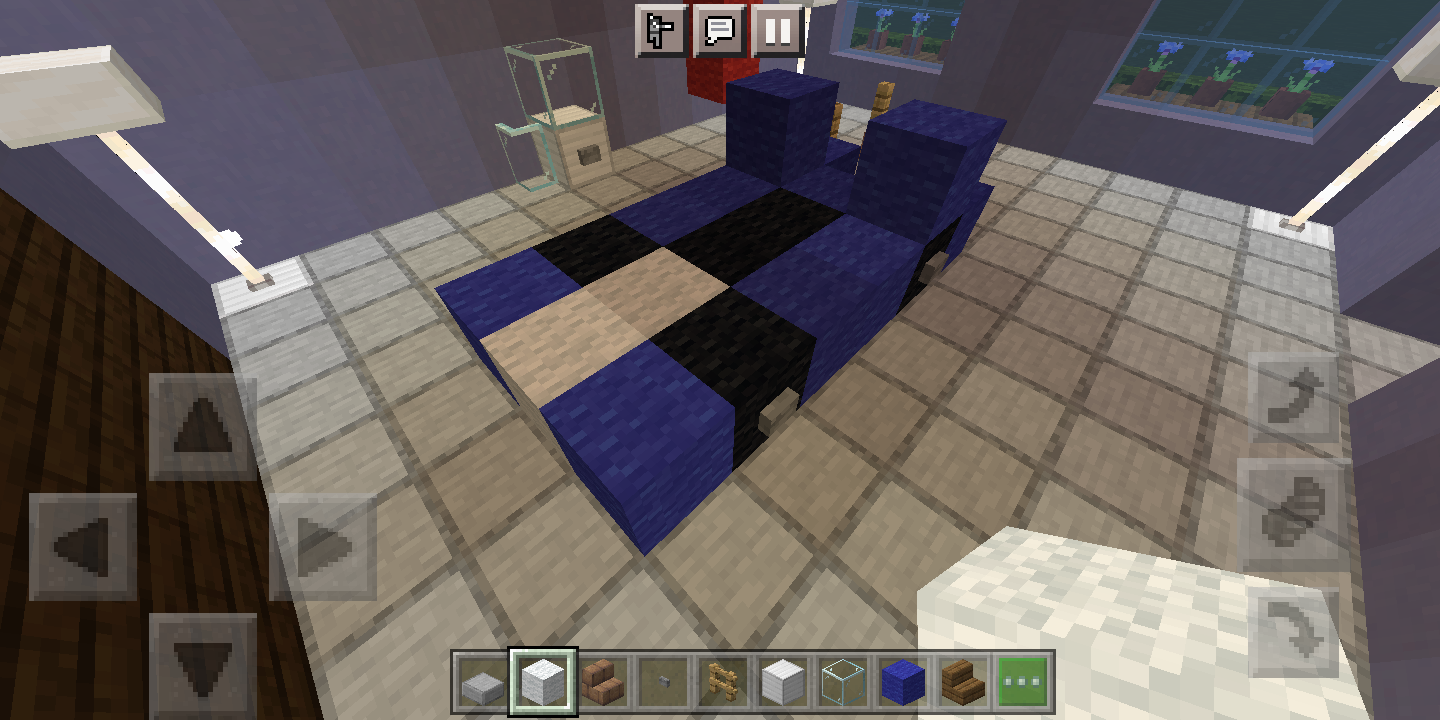
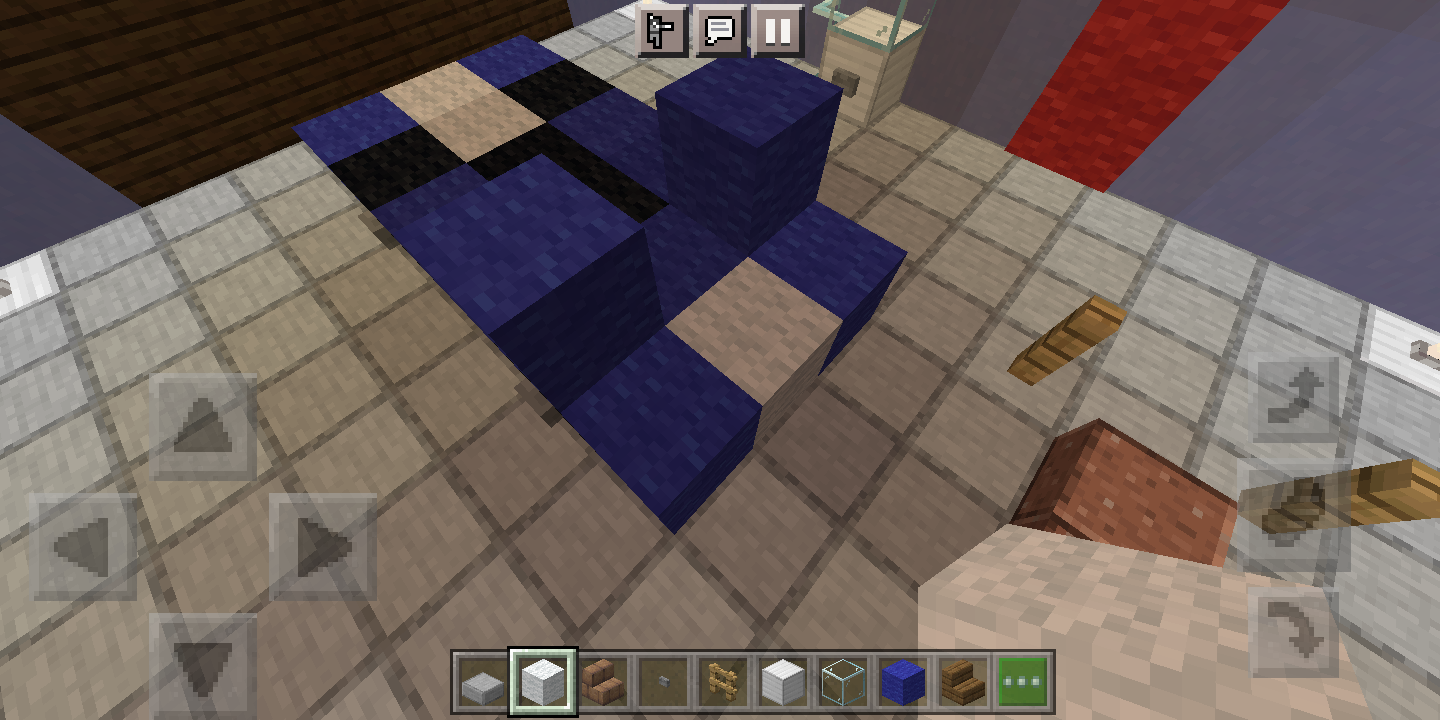
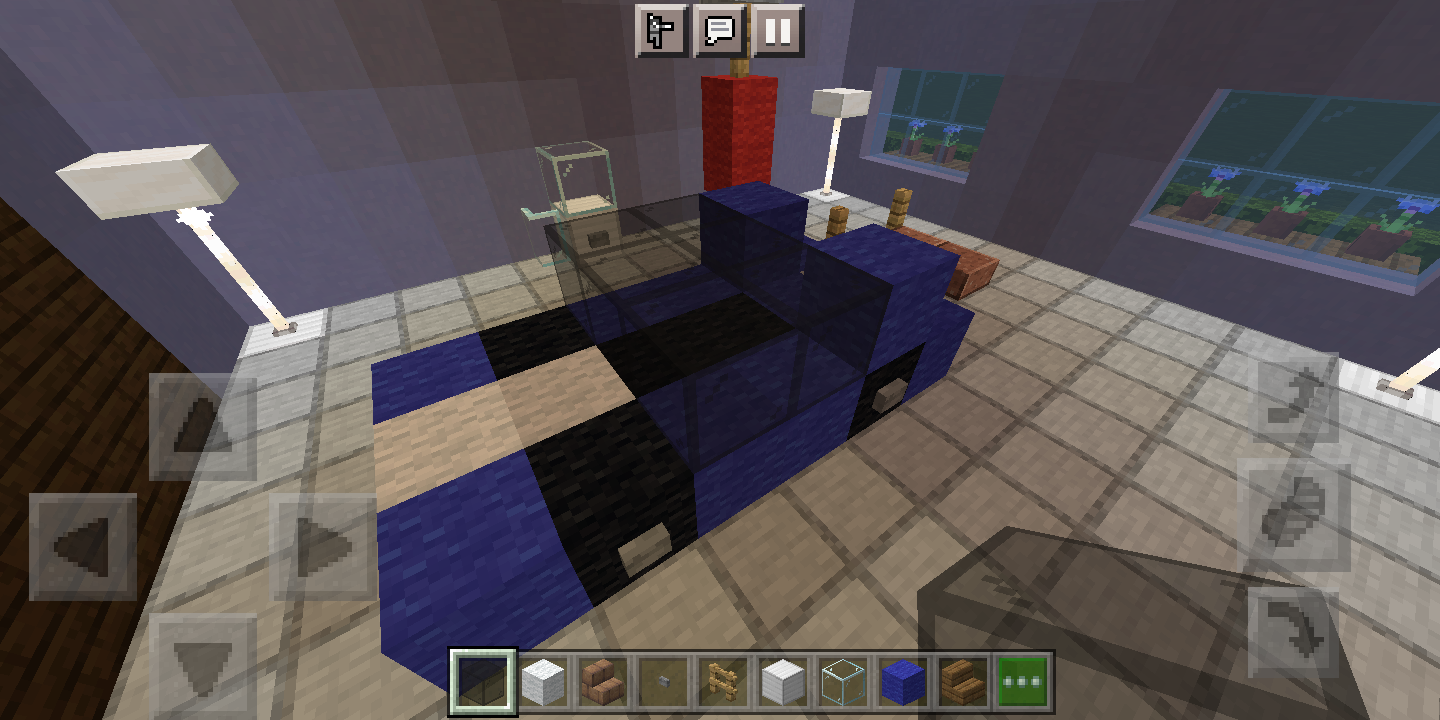
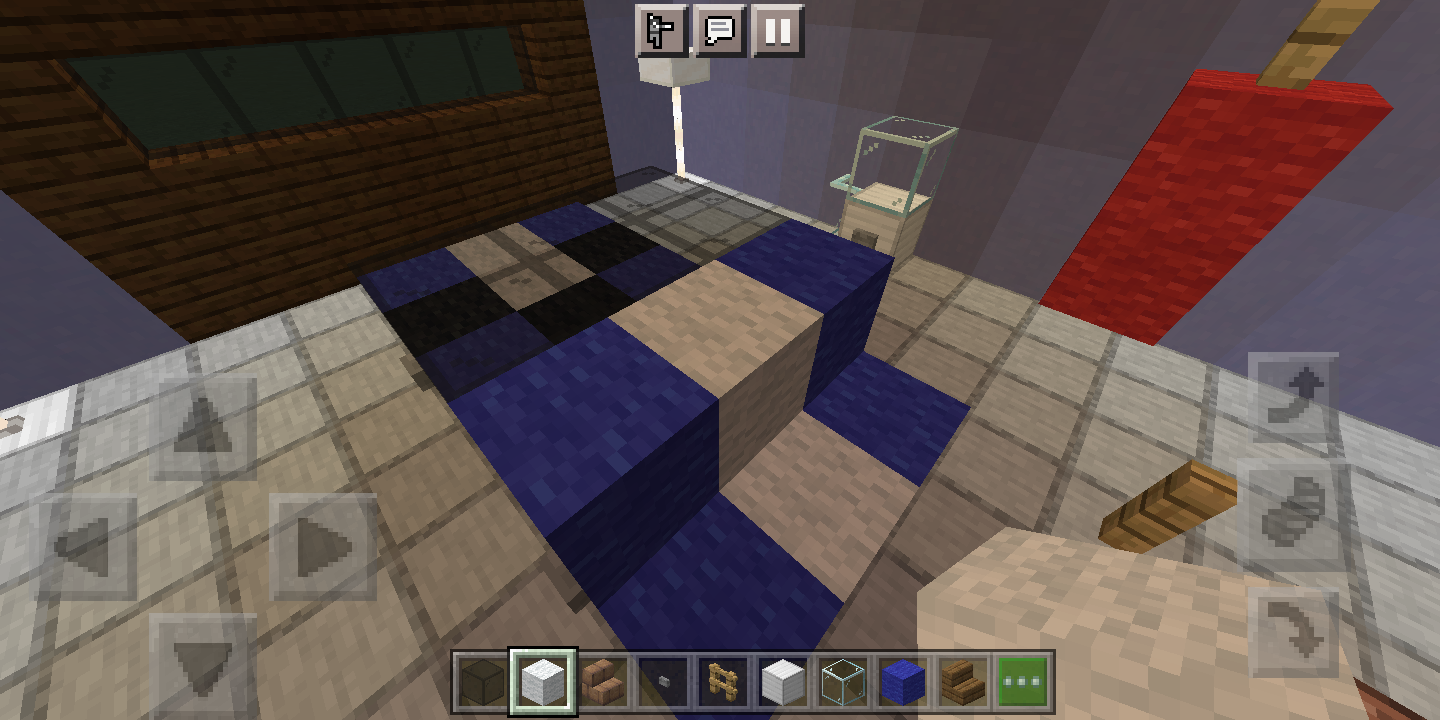
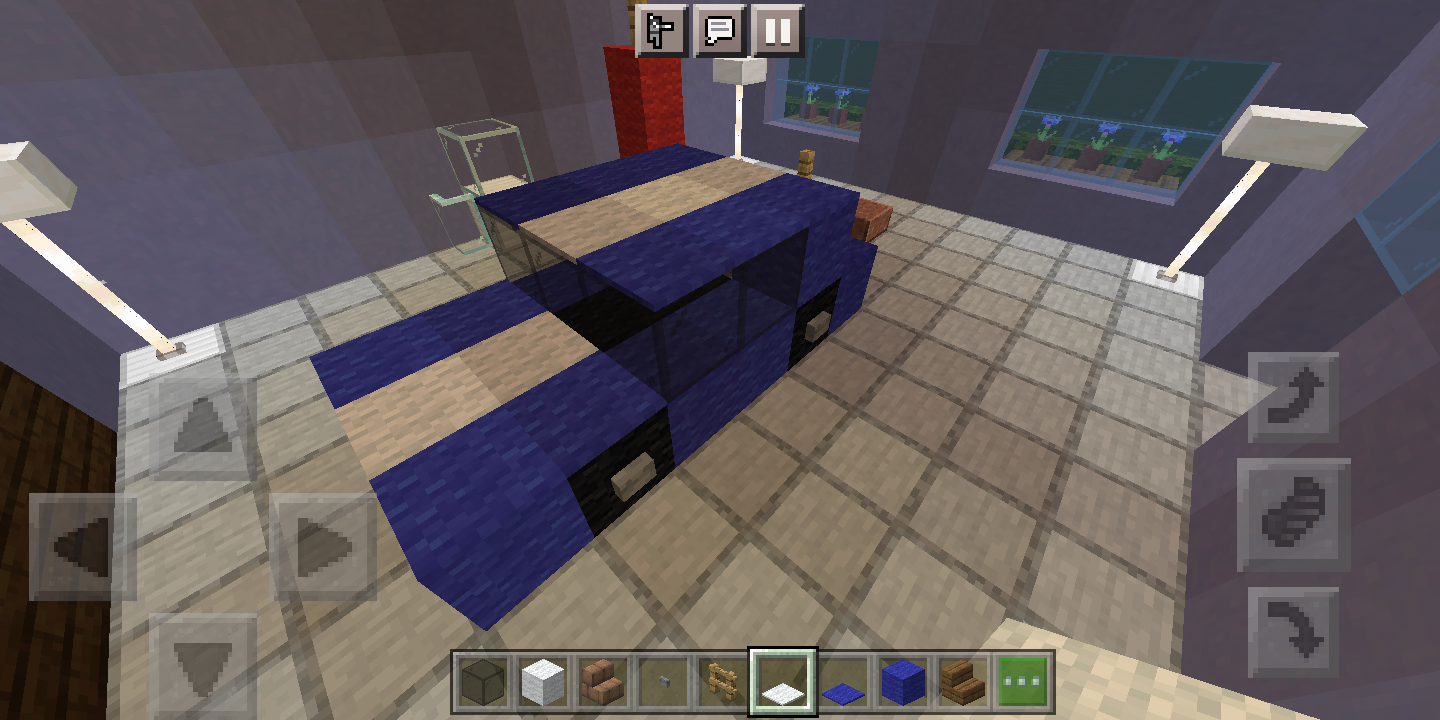
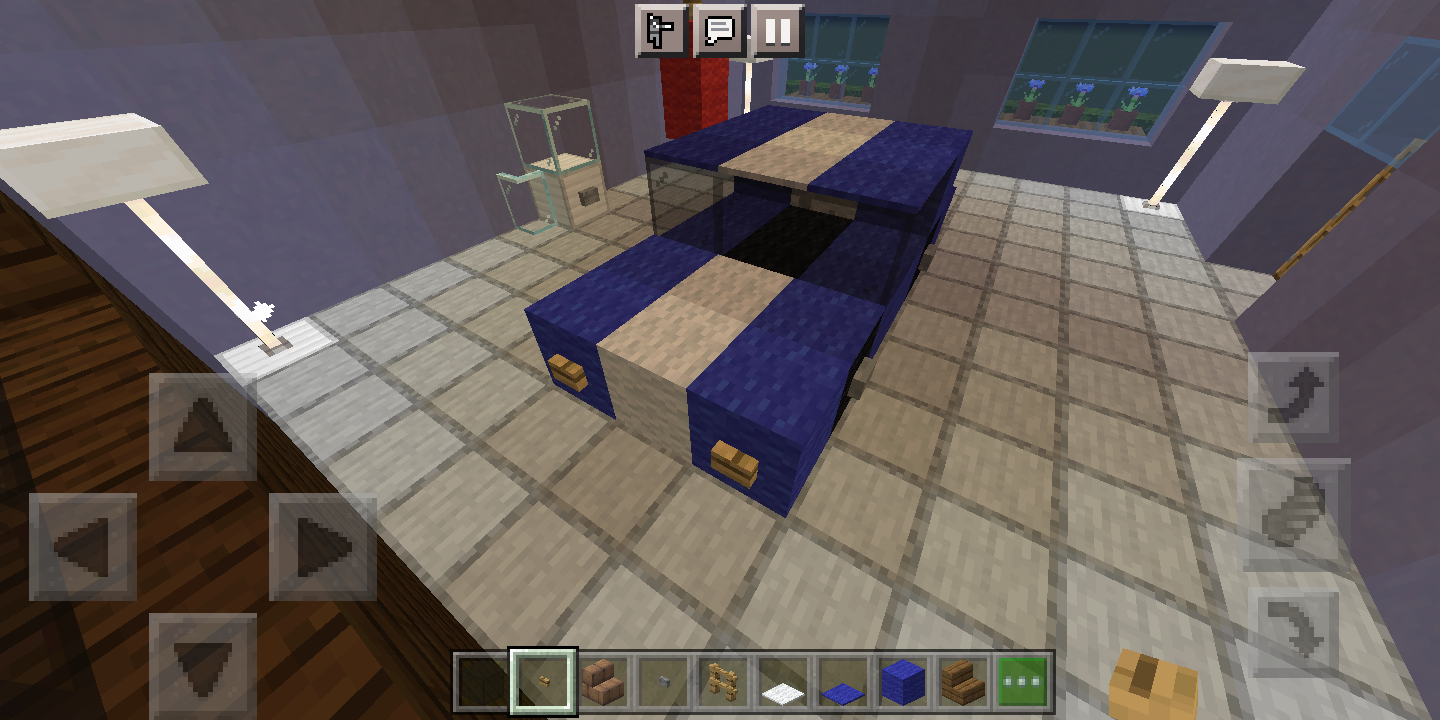
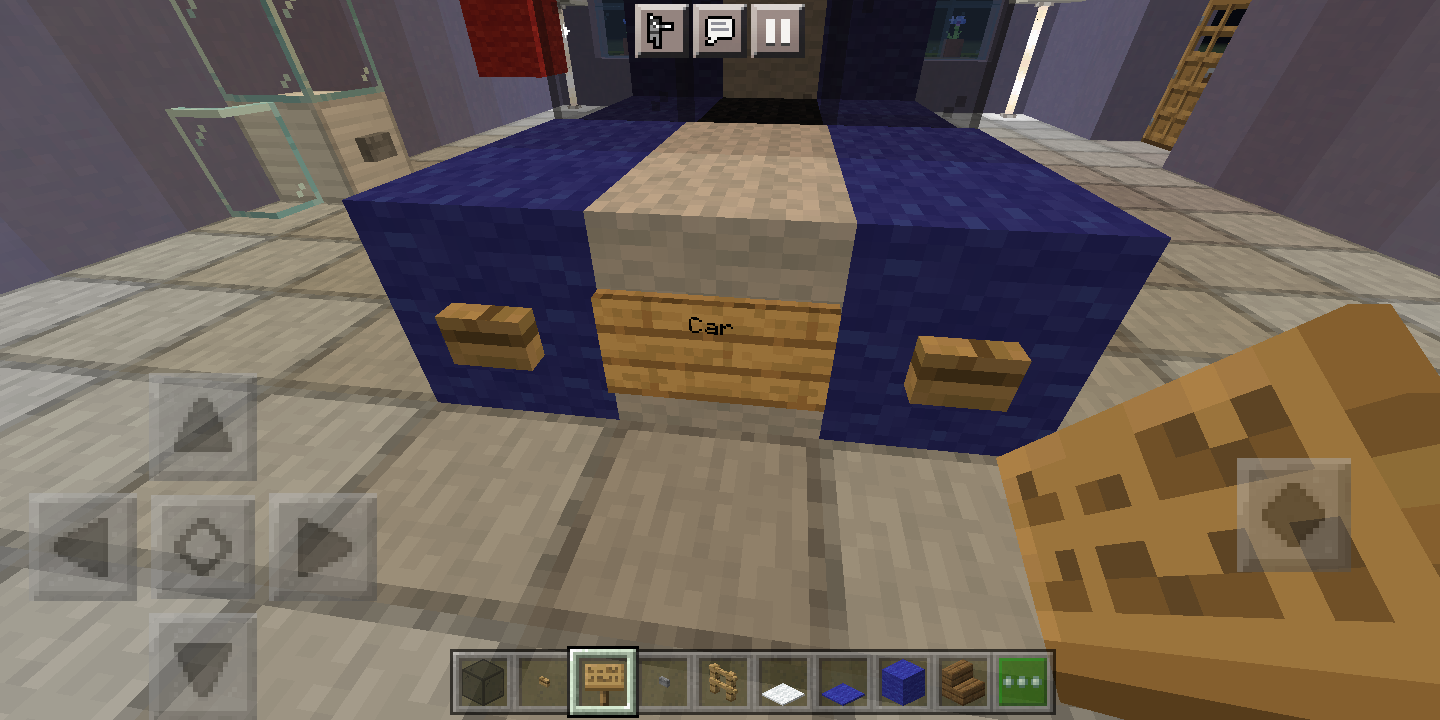
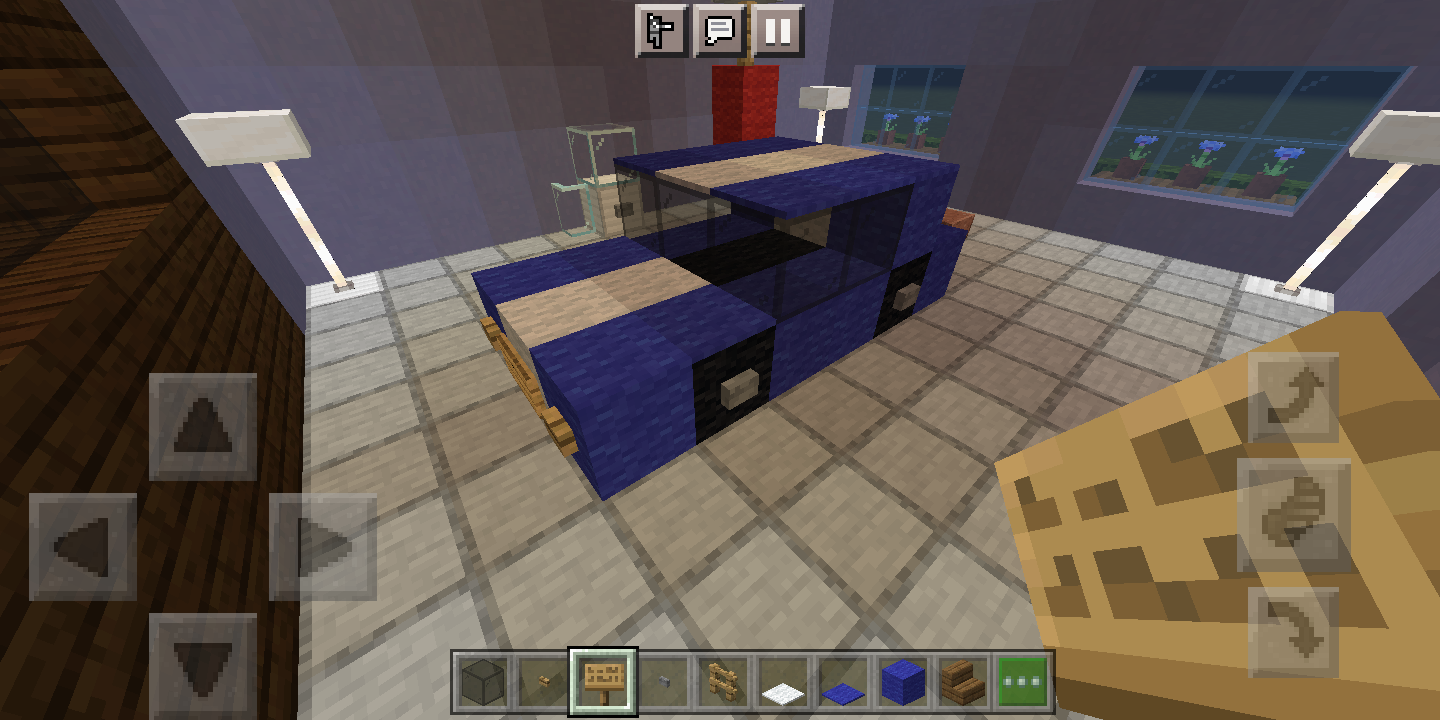
The car is very easy to build, but very hard to explain, so please just follow the pictures.
YOU WILL NEED
Black wool
Stone buttons
Blue wool
White wool
Blue carpet
White carpet
Black stained glass
Oak buttons
Signs
Bonus: Security Cameras
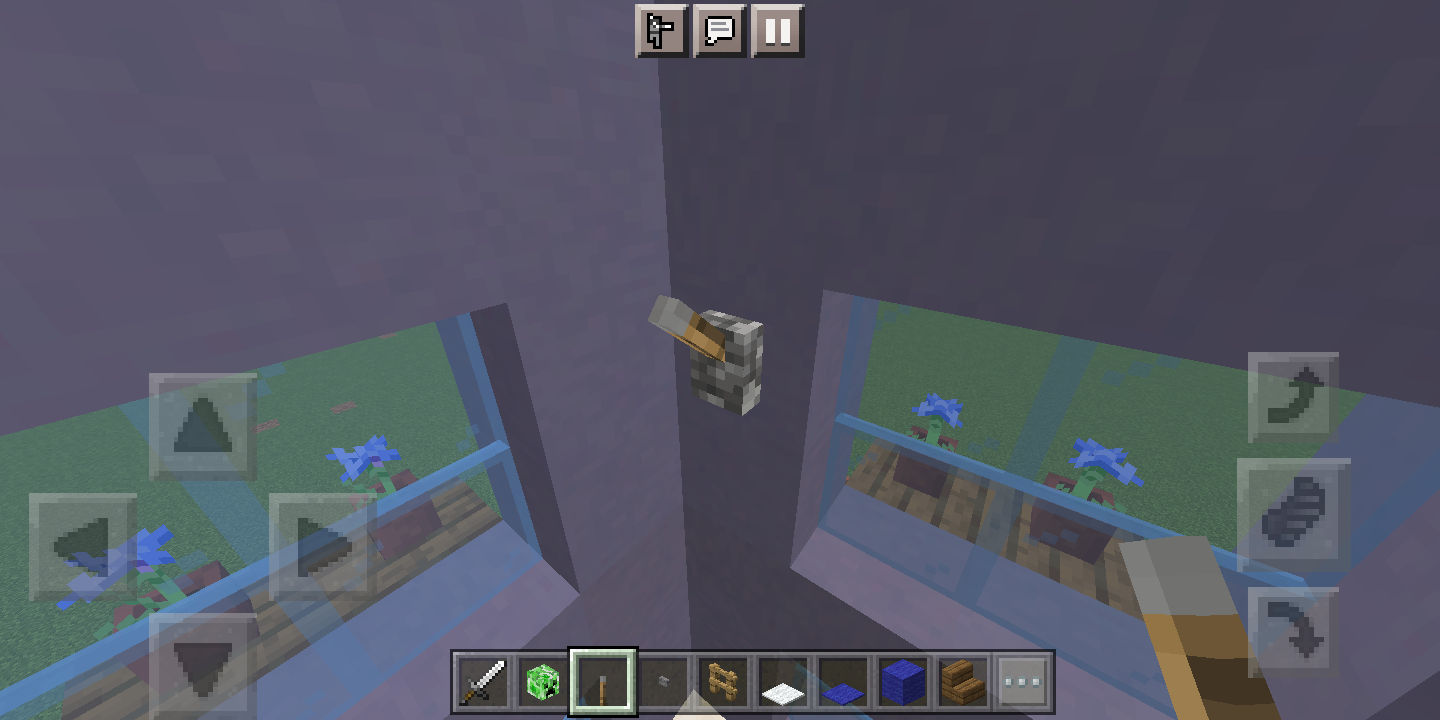
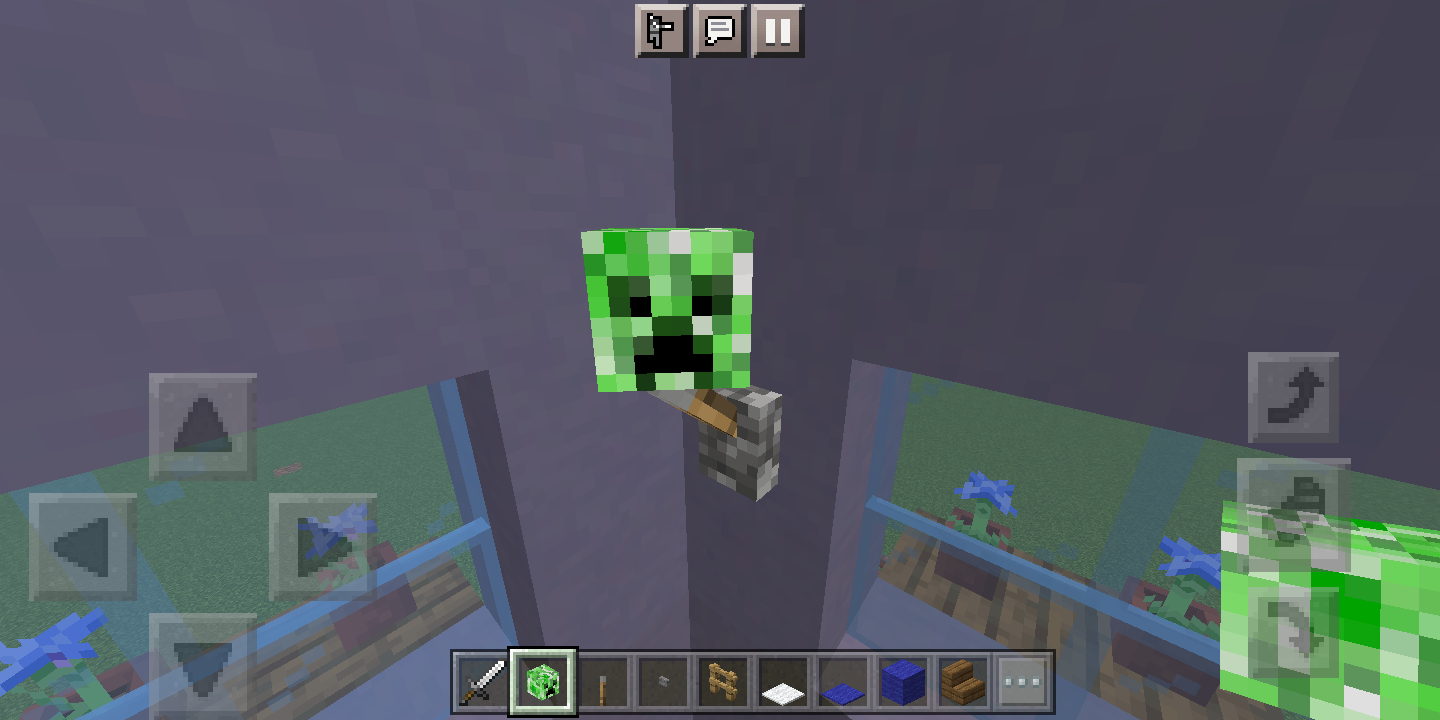
These security cameras are very easy to make and will definitely spice up any boring, empty corners of your house. Simply place a lever (flicked up, not down) with a creeper head on top. Now, the creeper is watching you so remember not to try anything! :)
Thanks for Reading!
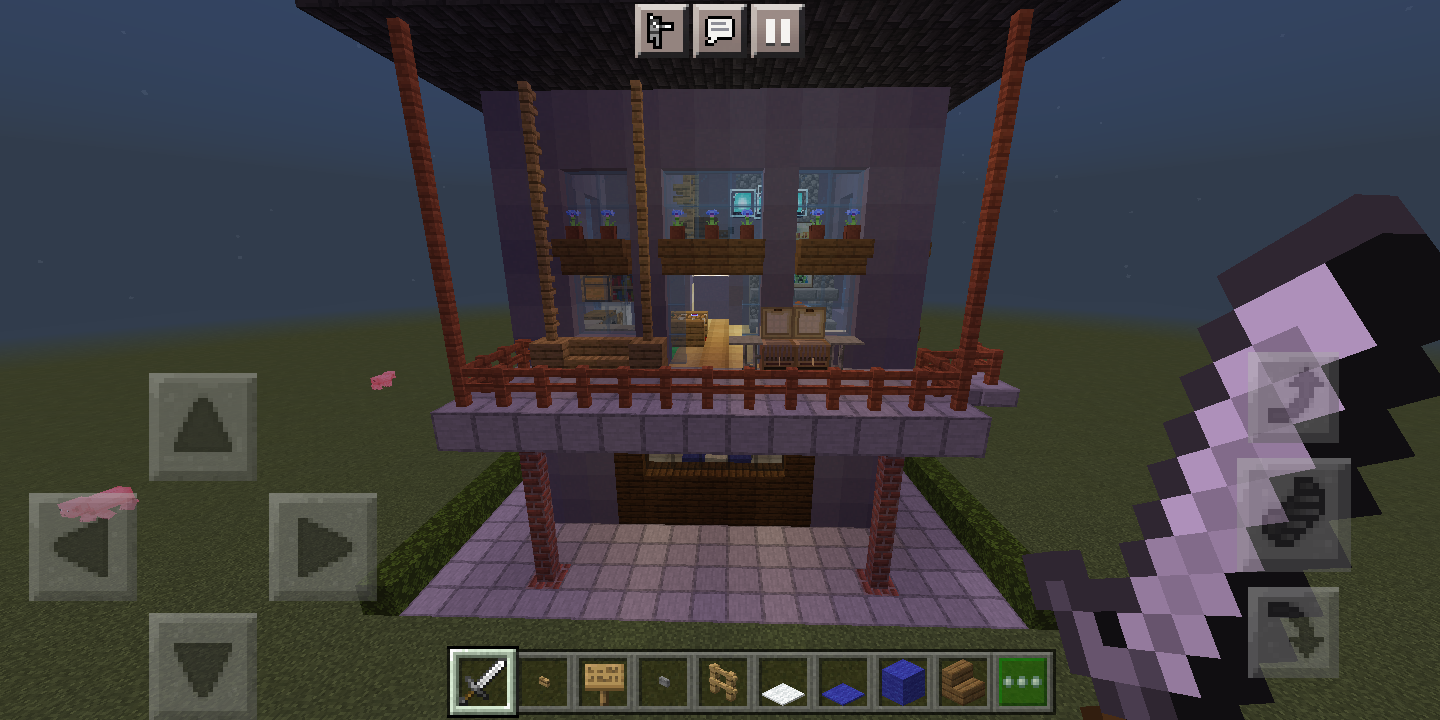
Thank you very much for reading this tutorial. It is probably the longest Instructable that I ever wrote, but it is definitely worth it to help you with your Minecraft interior and exterior design.
Oh, and another nice thing that you can do is adding a hedge around the sides and back of your house. This kind of separates it from the world and makes it a more peaceful place to live/hang out.
Anyways, thanks for reading all these 31 steps (I guess 32 including the introduction)!
Bye!