The Science of Digital Cameras & Photography
by Left-field Designs in Circuits > Cameras
5771 Views, 12 Favorites, 0 Comments
The Science of Digital Cameras & Photography
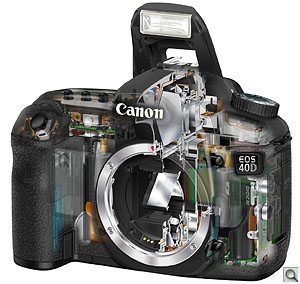
Let me start out this instructable with a couple of clarifications:
- I love photography but am a strict amateur.
- This instructable is more of a how does it do it than a how to, but I feel that the key to good photography is knowing your equipment.
- This instructable is aimed at digital photography but some of the sections will also apply to traditional analogue photography and cameras.
- A few years ago I worked on a PhD which dealt with the photometric analysis of still images grabbed from high-speed video streams.
- I don't take credit for ANY of the images in this instructable, they are all pulled from google images wherever I could find one that best illustrated my point.
- This instructable may get a little heavy so I will provide links so you can jump to sections that are of interest to you.
- If you feel I missed something or you want more detail on one of the sections, feel free to drop it in the comments and I will try to clarify.
- Finally, I am planning to enter this instructable in the Photography Contest so if you like this one please vote in the top right corner, thank you.
Sections are as follows:
Digital Imaging Sensors

The digital imaging sensor is the 'film' of the digital camera. This is a device that converts the incoming light and converts it to a voltage for each pixel. The voltage from each pixel is addressed and stored for processing (more on this later).
The first concept to understand is that of a pixel. A pixel is a color dot, typically made up of a cluster of three readings filtered for Red, Green, and Blue (RGB) light. When the light intensity for each of these colors is encoded, digitized and then decoded, it will translate to a digital representation of a real-world color. Pixels are stored in a matrix format. The number of pixels in an image is known as the resolution, the more pixels the higher the resolution and the better the quality of the image. Currently, sensors (even cheap ones) work on the order of 10's of megapixels per image.
There are 2 major flavors of digital imaging sensors:
- Charged Coupled Device (CCD)
- Complementary Metal Oxide Semiconductor (CMOS)
As stated above, both sensor types convert incoming photons to electrons and stored as an analog voltage. The voltage is proportional to the light intensity (brightness) and this will be used later to define the brightness and when primary colors are mixed for a pixel, will form the color data.
A CCD passes analog data in batch form through an Analog to Digital Converter (ADC), this means that the process is quite slow. Depending on the quality of the sensor, there may be one ADC per pixel row or in really cheap sensors there may be only one ADC for the entire chip with the pixel rows being processed in sequence.
CCD's produce images with a high degree of uniformity, this means that in many ways they respond to light in a similar manner to the human eye: when there is an intense light in one part of an image, the human eye will respond by contracting the iris, letting in less light. This protects the eye from damage but also has the effect of darkening the entire image, losing detail in the areas of the image with lower light intensity. This is similar to the effect you get when you take a photograph with the sun in the background and the rest of the image looks washed out.
CCD's can be manufactured to be more sensitive to particular areas of the light spectrum (again more on this later), this makes CCD's a more obvious choice for applications where a tuned spectral response is required.
CMOS devices process each pixel individually, the ADC process for each pixel is far slower that the ADC's used in a CCD, however, the process is fully parallel so the 'slow' process takes place all at once rather than a sequence of 'slow' processes.
Because of their segregated processing, do not produce particularly uniform images, this is advantageous where scene lighting may be inconsistent. Bright areas may be bright without washing out other pixels.
CMOS sensors have been widely adopted by manufacturers of mobile devices for the reasons that they are cheap, relatively simple to manufacture and their lower power requirement.
The spectral response of CMOS sensors reflect that of the human eye, this is a green centered spectra described in the CIE 1931 color space. This means that the human eye and CMOS sensors respond stronger to green light than red or blue, this makes the images taken in visible light truer to their actual color but the CMOS sensors are not as useful for near infrared or ultraviolet applications. *CIE (1932). Commission internationale de l'Eclairage proceedings, 1931. Cambridge: Cambridge University Press
Lenses
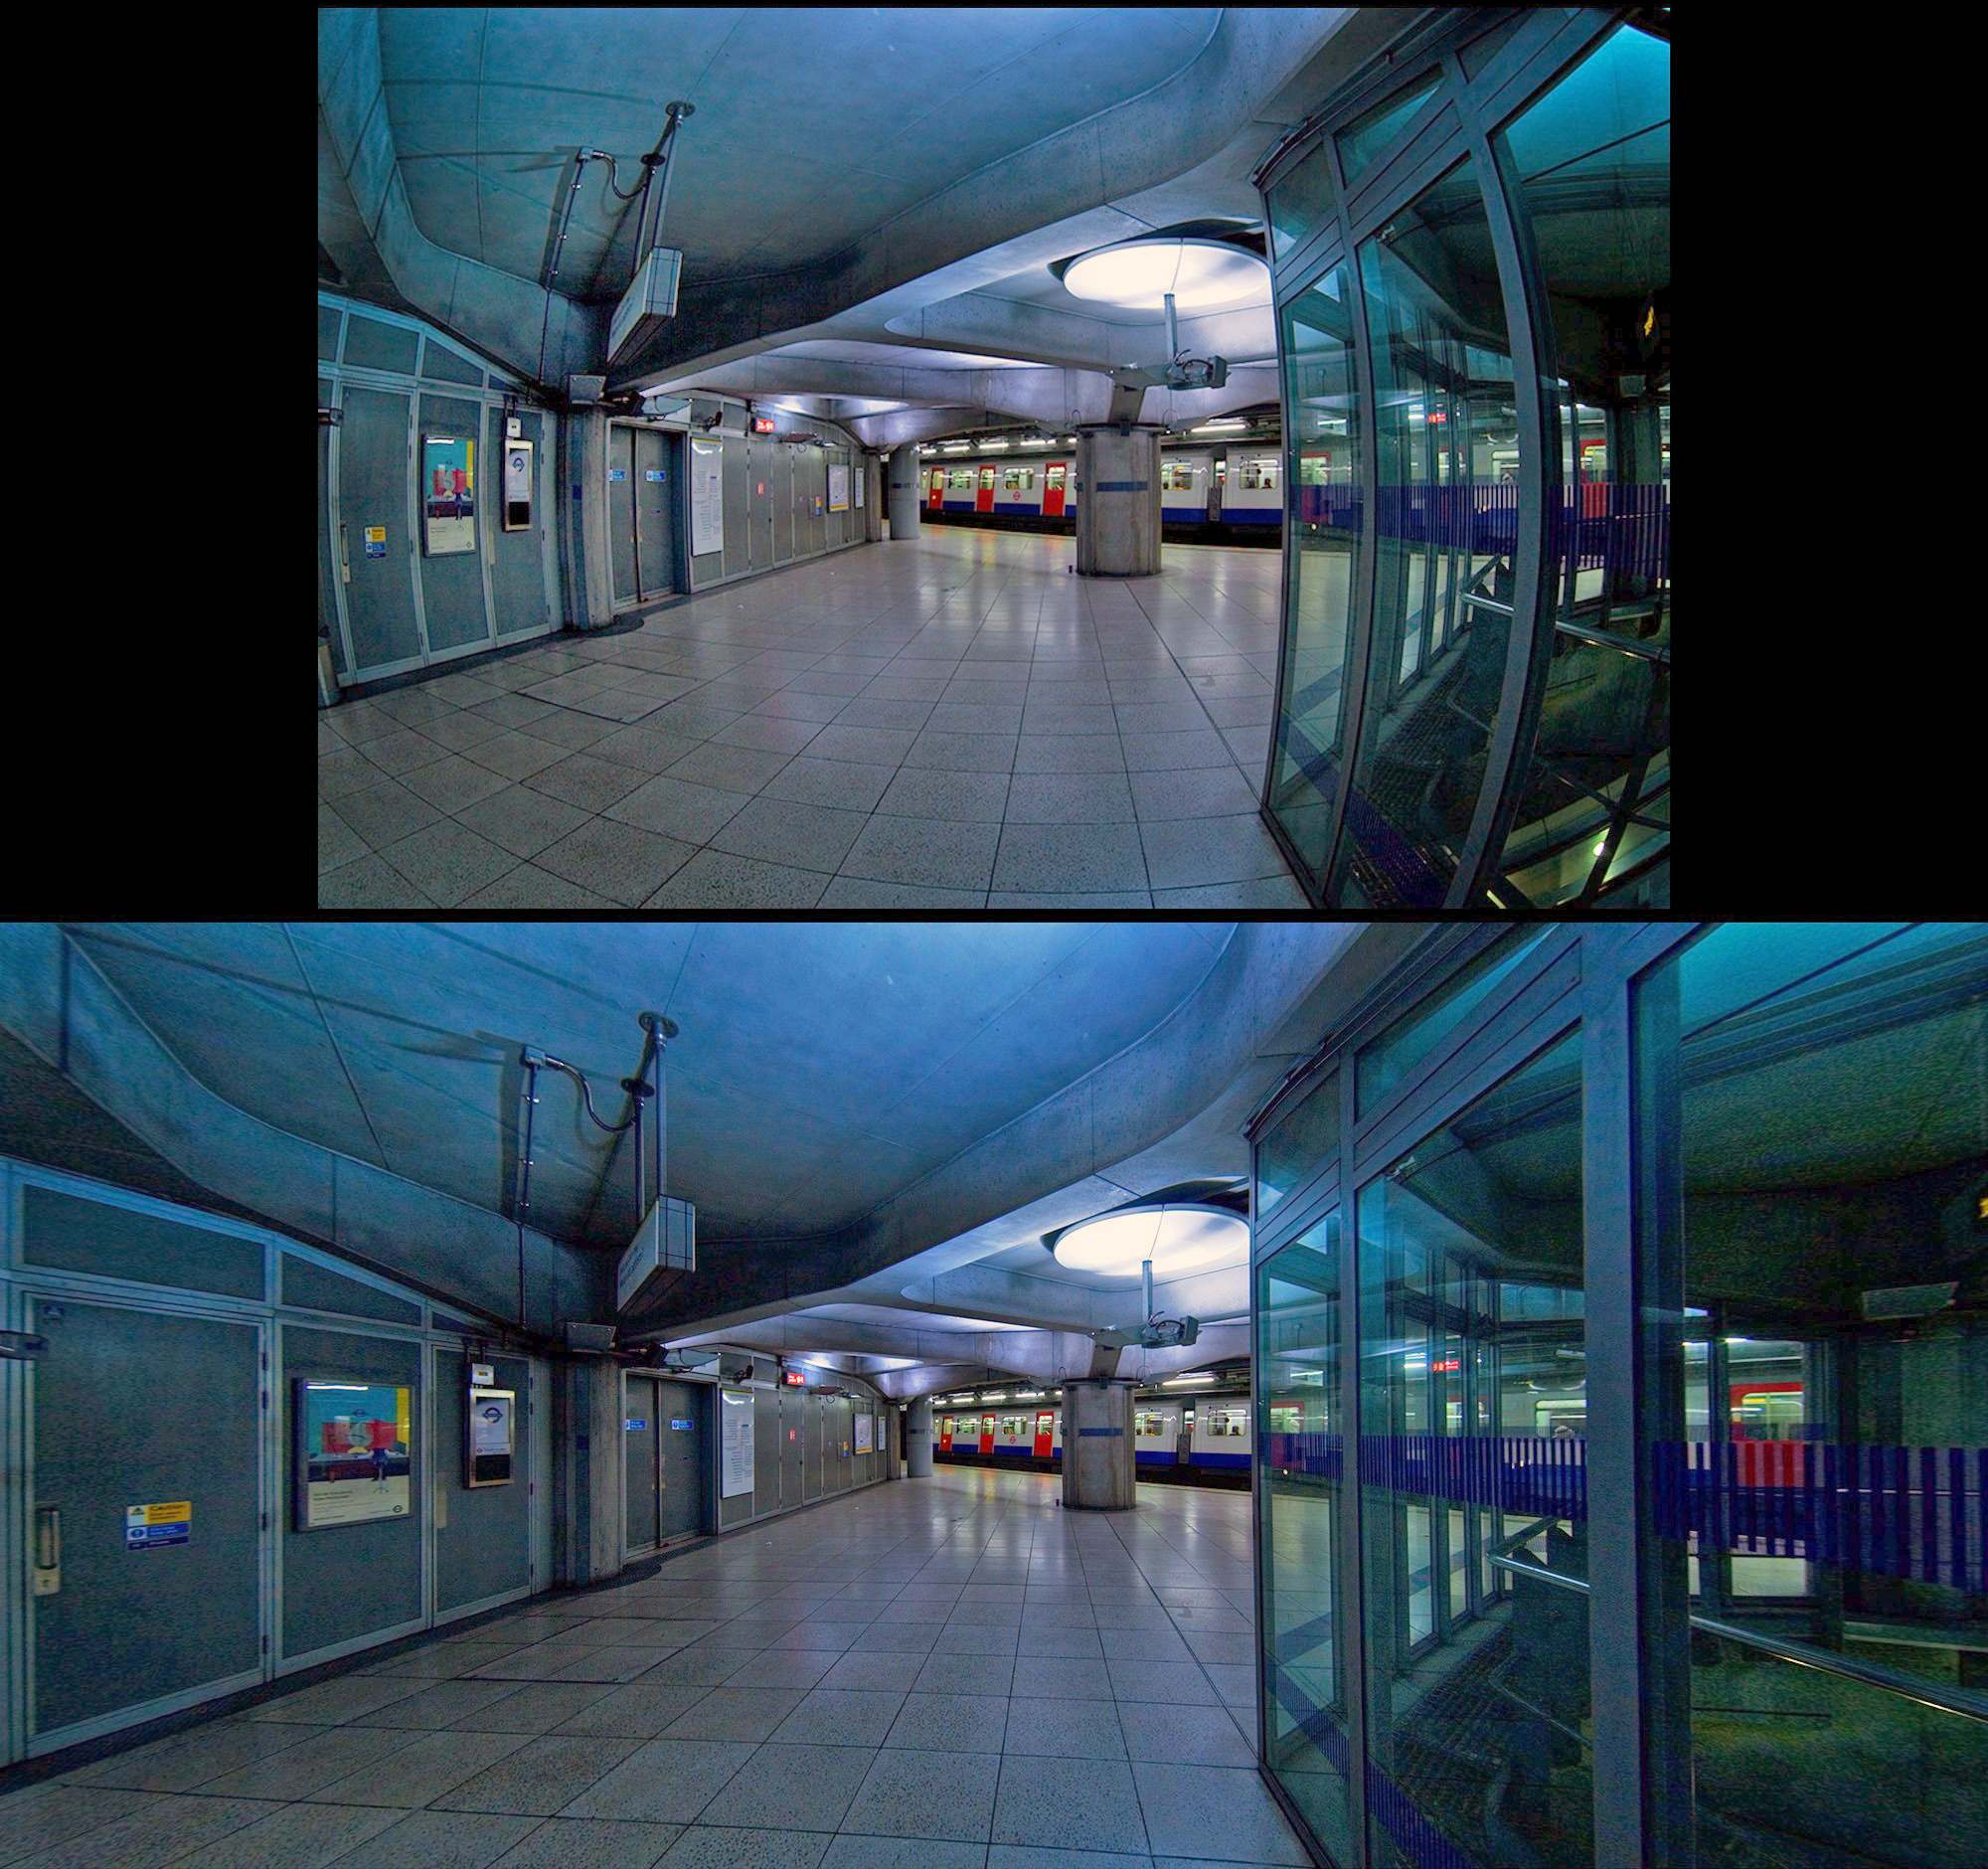
The lens of the camera can be as simple as a pinhole, in fact, the simplest representation of a camera is a pinhole camera. see this instructable
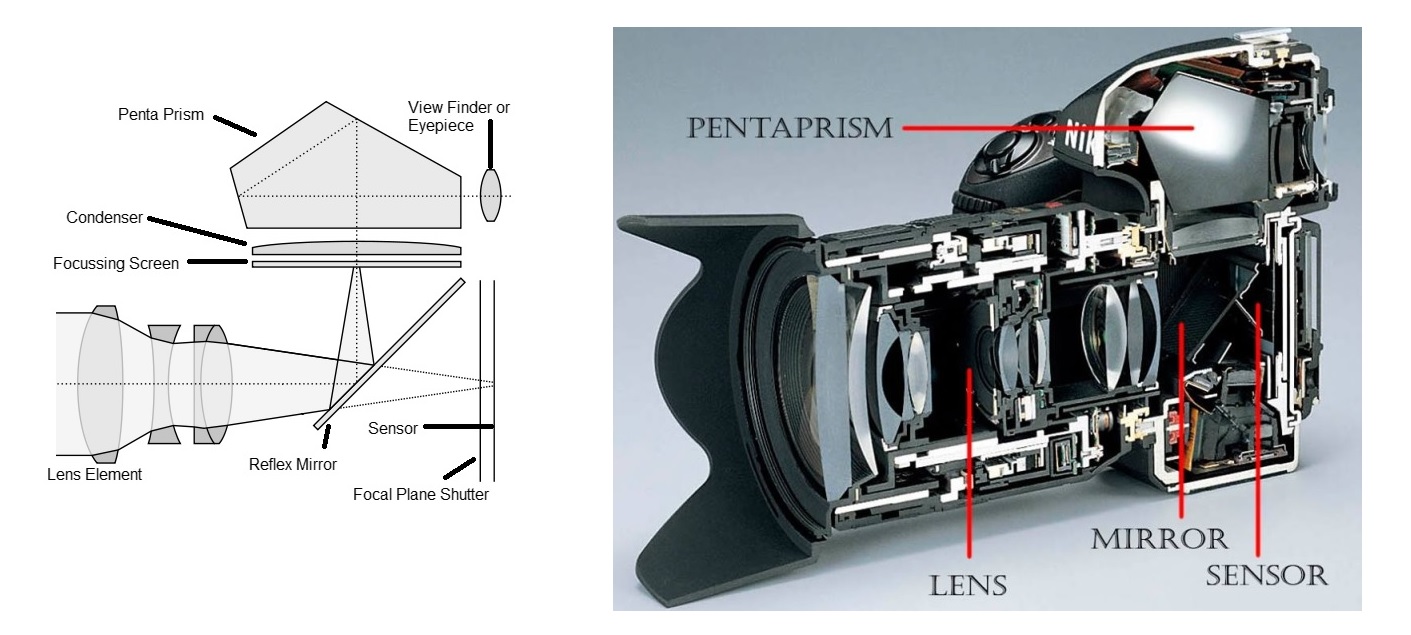
More typically the lens of a camera will be a glass (or similar material, quartz, and acrylic are also common). The lens is used to focus the light on the image plane, in the case of a digital camera, this is the CCD or CMOS imager.
Lenses used in cameras are rectilinear, this means that they are shaped to maintain the appearance of straight lines, without this addition, images would appear distorted and curved.
The design of a lens depends on several factors, these are the required focal length (distance to the imager), the refractive index of the lens material and the radii of the inner and outer surfaces of the lens. The lens properties are calculated using the lens makers equation:
1/f = (n-1)(1/R1-1/R2)
Where f = focal length, n = refractive index, and R1 & R2 are the radii of the lens surfaces. *see here
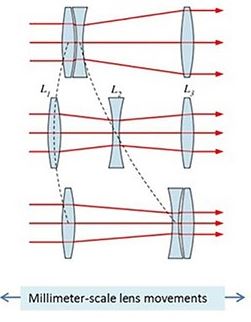
Lenses for digital cameras may be as simple as a single fixed lens, however, in order to add adjustable zoom and focus, it is required to manufacture complex lens combinations which are capable of movement relative to each other. This will adjust the relative size and focus of the image on the imaging sensor. Some of the lenses may even be concave rather than convex.
It is important to remember that the image will be inverted as is passes through the lens so the captured image on the imaging sensor is actually upside down.
There are many lenses designed for specialised applications, for example:
- Telephoto lenses for long distance photography
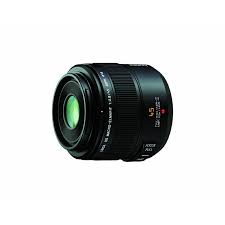
- Macro lenses for taking photos of very small, very close objects
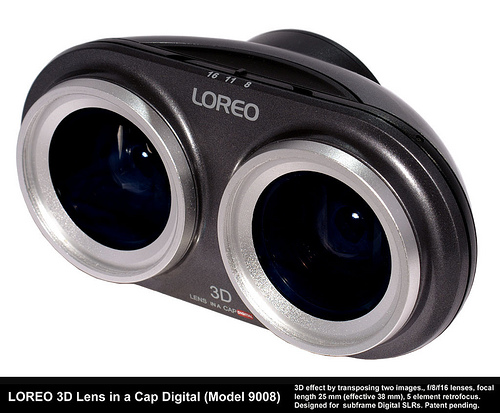
- Stereoscopic lenses used in pairs to create a 3D representation of an object
- Many more...
Apertures
.jpg)
The light has to enter the camera through a hole, this hole is known as an aperture.
It stands to reason that the larger the aperture, the more light enters the camera and strikes the imager.
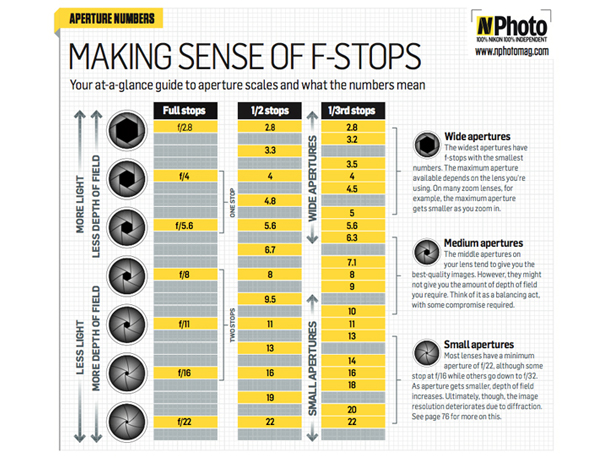
The size of the aperture is known as the f-stop. Some lenses have a fixed f-stop, while others (typically more expensive ones) allow the photographer to manually adjust the f-stop by opening or closing the iris.
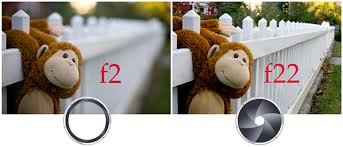
There is another effect of adjusting the aperture size and that is the change in the depth of field within your image.
Depth of field is the differential in focus between objects in the foreground and the background. The greater the depth of field, the more blurry the background will appear when the foreground is sharp.
Each f-stop is half the area of the previous one, for example, f/4 is half the area of f/2.8 the f-stop numbers are standard for most lenses, though some offer different intervals.
Exposure Time
We have just discussed how the aperture controls the amount of light reaching the image plane. Another way to do this is by controlling the exposure time.
The image sensor is screened by a small trap door called the shutter, the shutter rapidly opens and recloses when you press the shutter release button on the camera.
The shorter the shutter speed, the less exposure time the imaging sensor will experience and the darker the image will be, however, if you use a shorter exposure time you effectively capture a shorter moment in time and so will see less motion blur. Times where this is desirable would be for action photography such as sports. Longer exposure times are good in low light situations but due to the inherent blurring effects, it is recommended that you support the camera on a tripod and if possible use a remote shutter release to prevent the camera being disturbed.
ISO
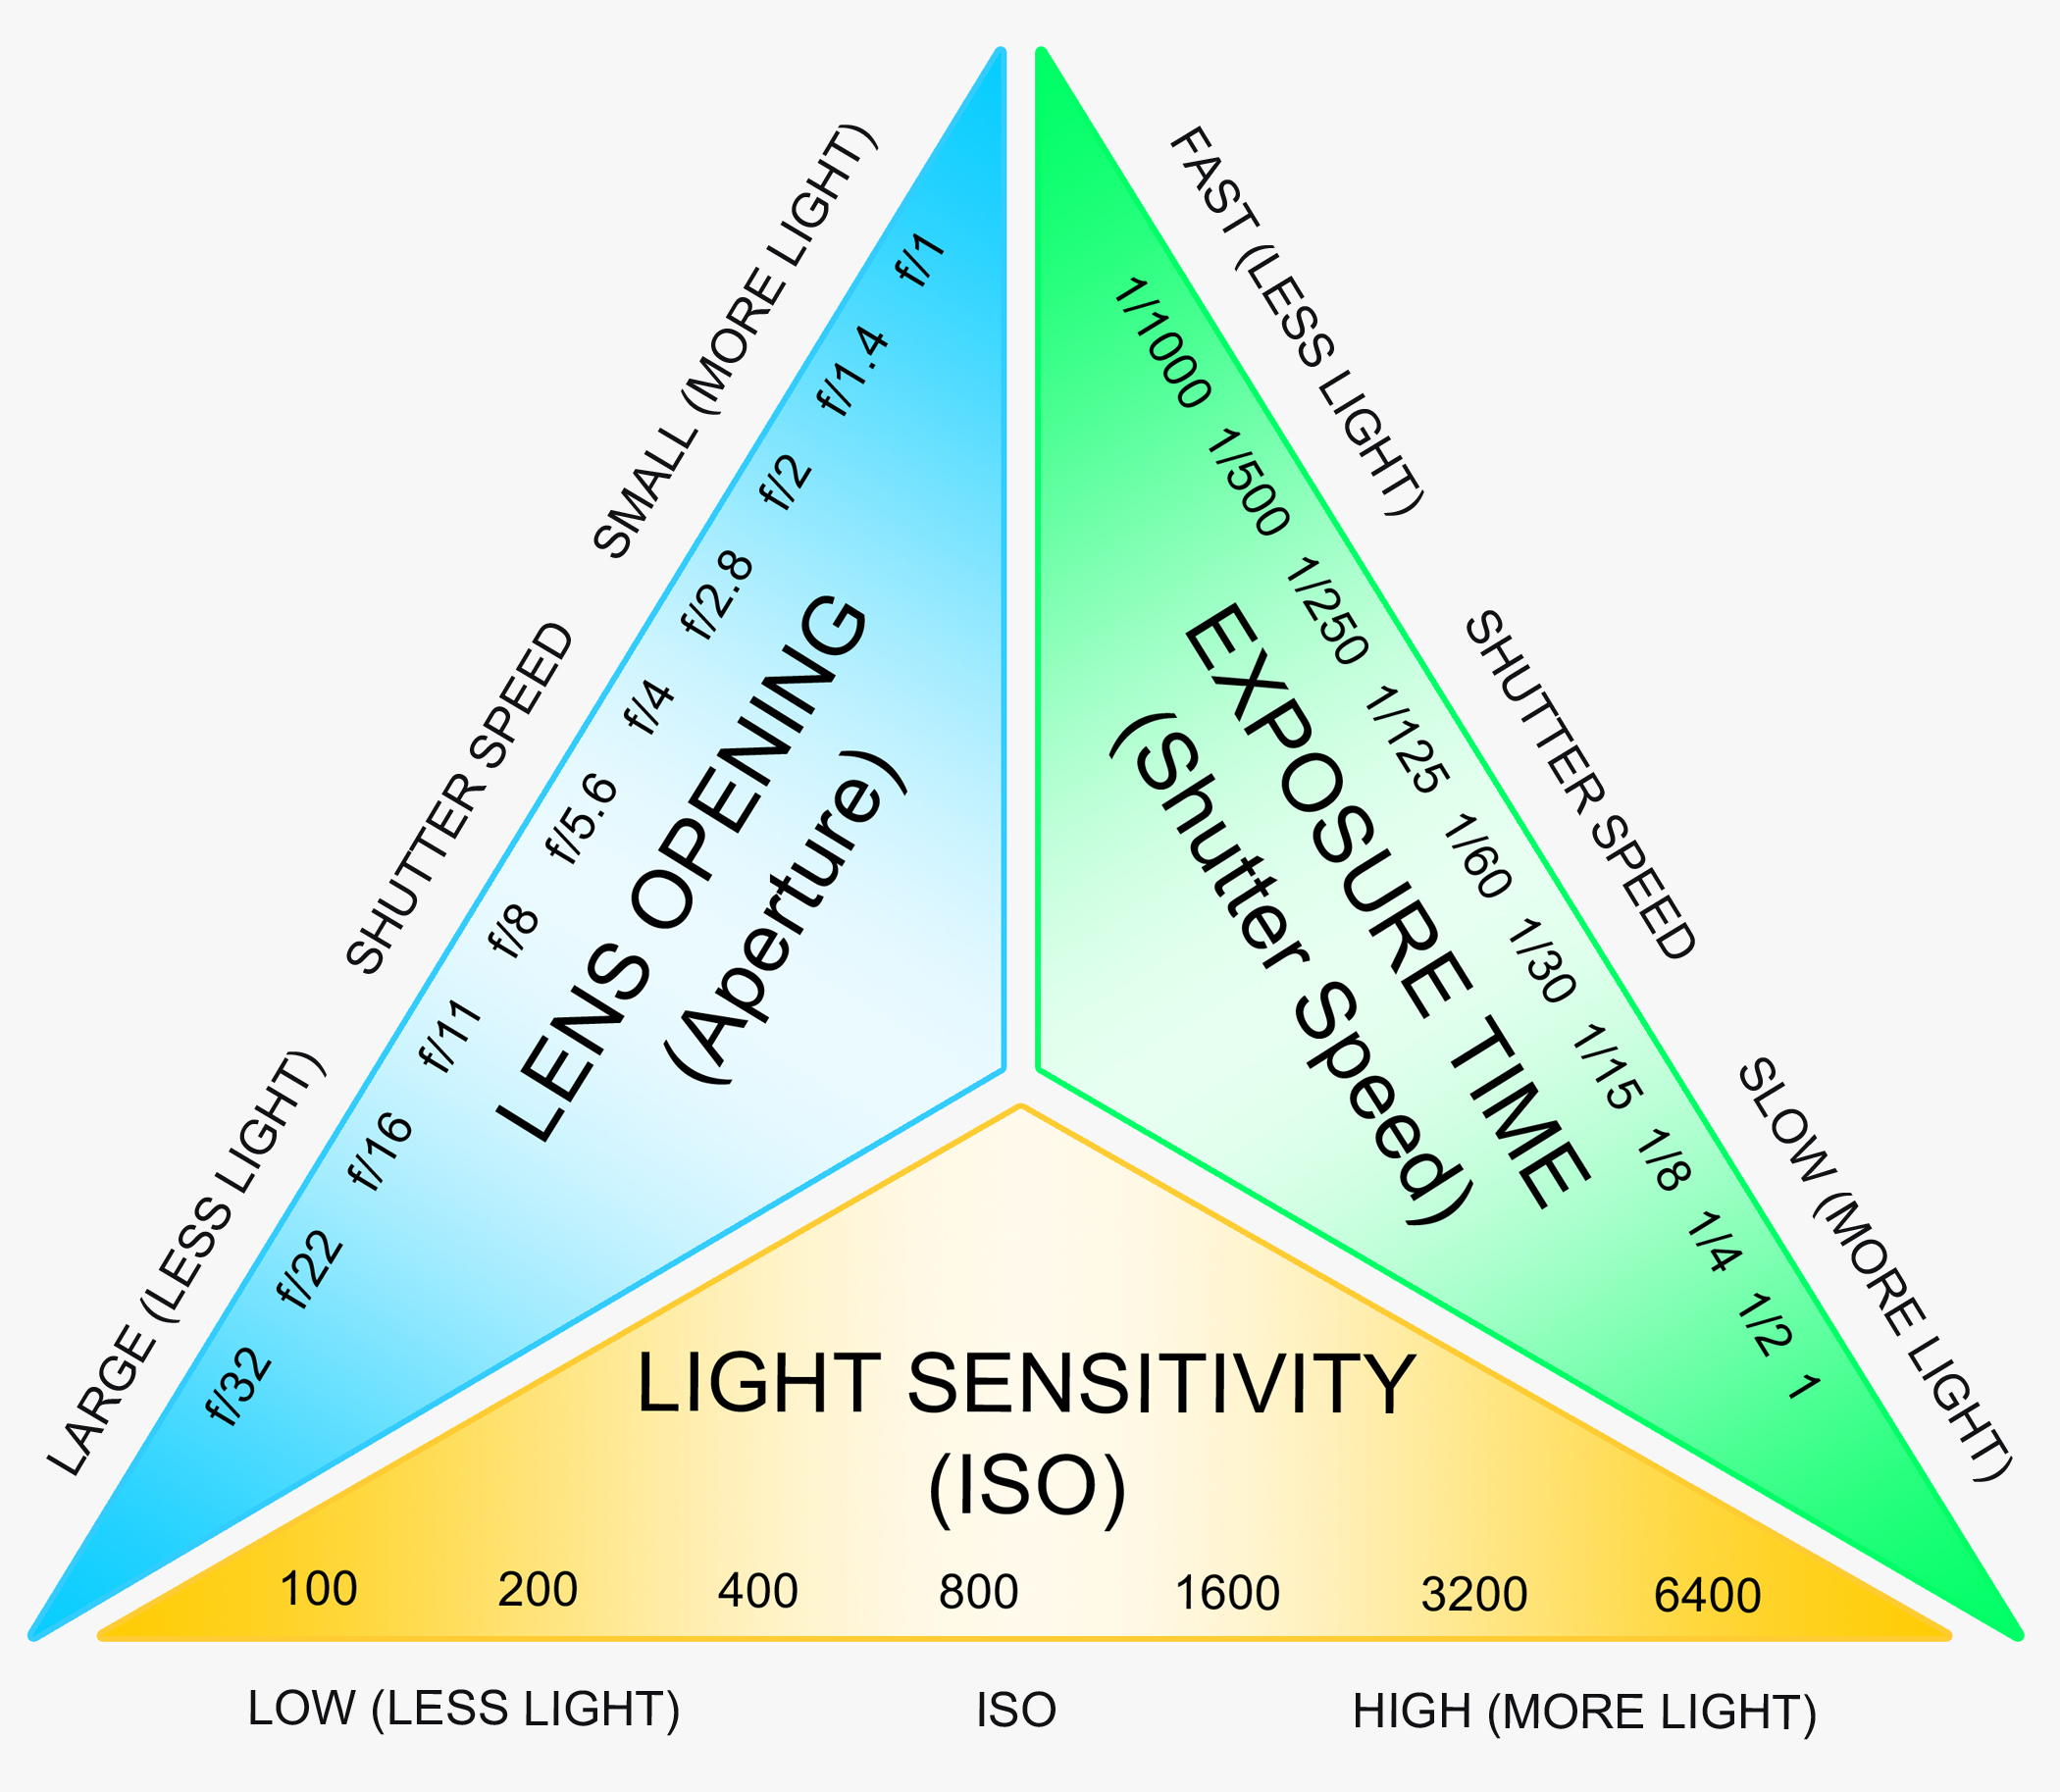
ISO is a commonly misunderstood camera parameter. This is the setting which controls the light sensitivity of the imaging sensor. I know it seems like the last 2 sections have dealt with this very subject but it is important to understand the exposure triangle.
For any desired result, there are multiple combinations of aperture, exposure time and ISO, this gives the photographer a great deal of control over how an image is actually captured and what the final image effect is. I recommend that all photographers take some time to become familiar with these settings.
Light Spectra
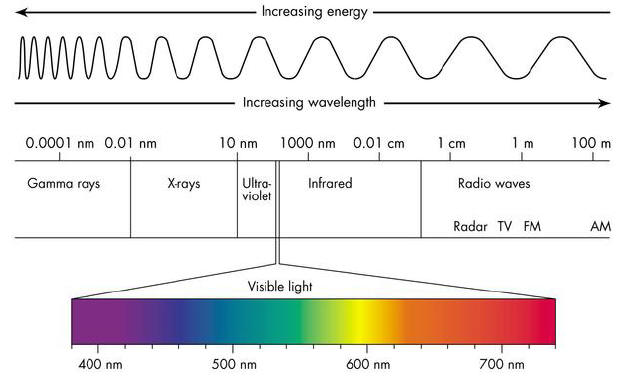
There are a massive range of wavelengths all around us, from long wave radio transmissions, through sound, light, x-rays and into radioactivity, this range is known as the electromagnetic spectrum. The visible light spectrum forms only a small part of this range (approx. 350 - 750nm).
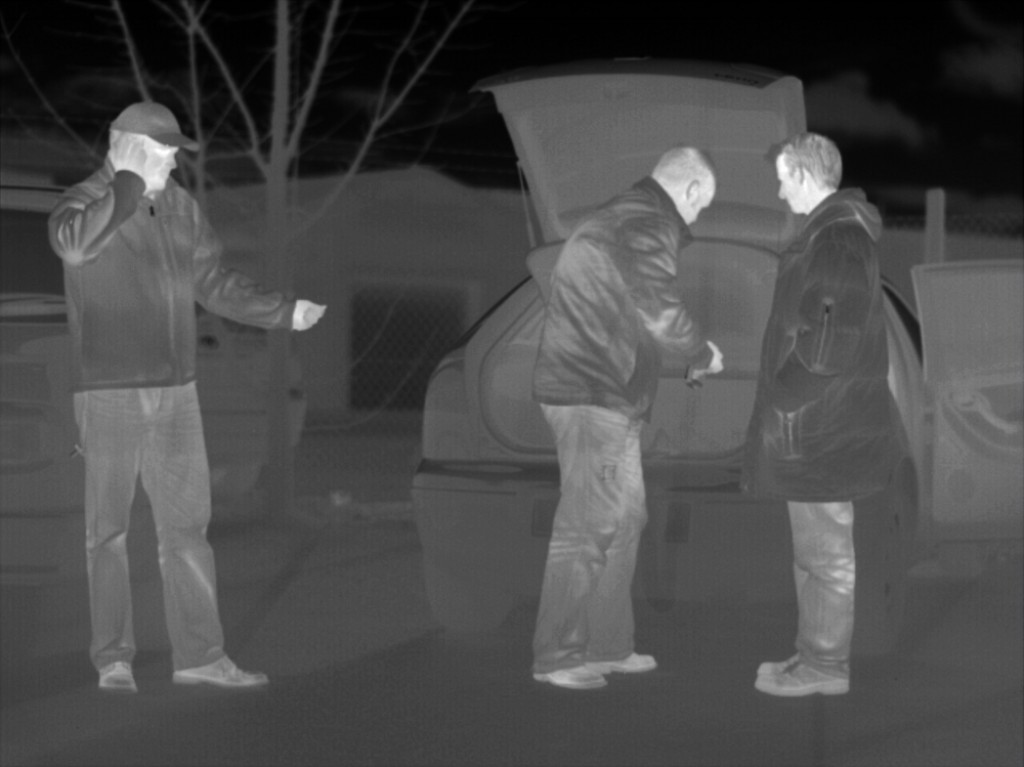
For the most part, digital cameras are concerned with capturing images within this range, after all, why would most people want photographs that don't look like what they see? Most cameras actually contain an infrared (IR) filter over the sensor to prevent this distortion. There are cool Instructables like this one that will show you how to remove this filter and when coupled with and IR illuminator you get a night vision camera!
However, as I stated earlier, CCD's are particularly good at peeking into the ends of the spectrum that are just beyond human perception. In fact this can be quite advantageous, for example, CCTV cameras can utilize IR sensitivity for capturing better nighttime images when coupled with an IR illuminator around 800nm, however some bad guys would see a slight glow at this wavelength so this is known as semi-covert. There are illuminators available at 900nm and beyond that are completely invisible to the human eye and are knows as fully covert. This region of the electromagnetic spectrum is called near IR.
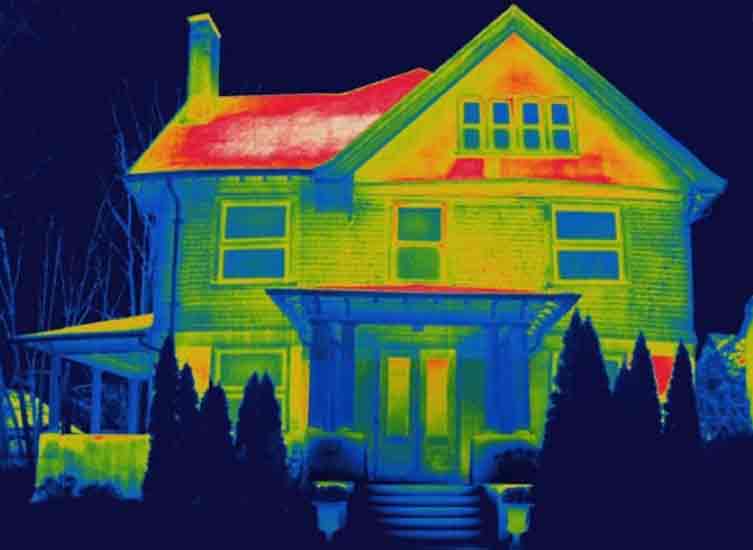
As you extend further into the IR end of the spectrum to the far IR you start to detect thermal activity, FLIR cameras are used as a visual temperature gauge and can be very useful in scientific applications, plus the images look cool.
Optical Zoom Vs Digital Zoom
There are 2 types of zoom available to you on a digital camera (as opposed to 1 on an analogue), these are:
- Optical zoom
- Digital zoom
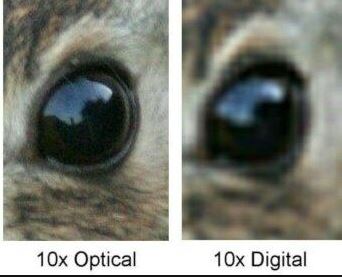
Optical Zoom is true zoom, this is created within the lens assembly by moving lenses relative to each other, this creates a differential in the image size formed on each of the lens surfaces as the light passes through the lens assembly creating a scaled final image on the imaging sensor.
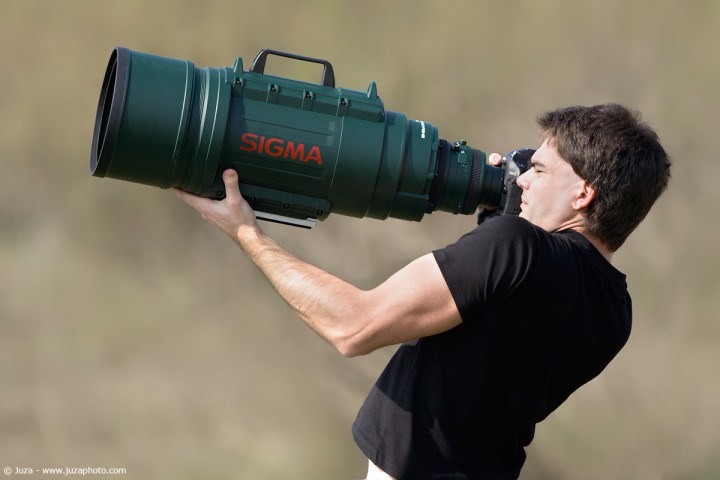
You will find that digital SLR cameras are capable of much larger optical zoom magnifications as longer lenses may be added with greater distances to change the focal length. Some telephoto lenses are so large they rival small telescopes and require tripods or other supports to maintain a clear final image.
When using a long lens there is more of a balancing act between zoom and focus when a subject is far away, small focus adjustments make a big difference to image sharpness. Also when working at this range more attention to the exposure triangle is required.
Digital Zoom is a common feature across digital photography equipment from mobile devices and cheap compacts to high-end DSLR's. On cameras that support optical zoom, digital zoom will reside as an extension to the zoom range. Digital zoom, however, is not true zoom, it is an onboard image processing technique whereby the image is stretched. This means that for every 1x of digital zoom used, the quality of the image degrades. The best advice for zooming in with a device that supports digital zoom is to walk closer to the subject or to take the image at full resolution and use cropping and enhancement through a computer software package to zoom in later.
Image Stabalisation
Images will blur if not properly stabilised, there are several methods of mitigating this blurring effect using software, internal hardware, accessories and good old fashioned technique.
It is obvious that when you introduce zoom, small movements on the camera body will result in large movements in the image field causing blur. Digital camera manufacturers have helped to make life easier for us by introducing Imag Stabilisation.
Optical Stabilisation is common in digital cameras, it utilizes gyroscopes in the camera body to read the photographers movements and adjusts the lenses and in some cases the orientation of the imaging sensor in order to compensate and isolate blur. It is important to note that this will only protect against small shakes and tremors in the camera body and will not help with wild motions such as driving off-road...
The advantage of optical stabilisation is that it does not require any adjustment to the ISO if the imaging sensor so does not affect final image quality.
Digital Stabilisation makes adjustments to the ISO of the imaging sensor pushing the ISO beyond what is required for the ambient light conditions, this allows the imaging sensor to form the image with less light. If we remember the exposure triangle, this allows us to shorten the exposure time, therefore leaving less time for the subject to move during the capture and mitigating the blur.
Accessories the easiest way to reduce blur in a zoomed image is to physically restrain the camera using a tripod mounted on a stable surface. If you can work with a remote shutter release this will stop you from moving the camera during capture.
Techniqueif a tripod and shutter release are not an option there are some things you can do yourself to snap clearer images.
- Hold the camera with both hands
- Lean against something to stop your body moving
- Use the viewfinder rather than the screen- this I have found is the number 1 method for getting a blur-free image...