The PANIC Button

Ok, bit of explanation first. We have a PC set up as a 'democratic jukebox' at Hackspace Manchester. The idea being that anyone can put music on it, and it plays the entire library on shuffle during our hack sessions for a bit of background music.
The problem is, of course, some people have an... odd taste in music, so sometimes the jukebox ends up flipping between Aqua and Cannibal Corpse for ten minutes, and the horror of this was just too much!
Enter the PANIC button.
The problem is, of course, some people have an... odd taste in music, so sometimes the jukebox ends up flipping between Aqua and Cannibal Corpse for ten minutes, and the horror of this was just too much!
Enter the PANIC button.
Minimus USB AVR.
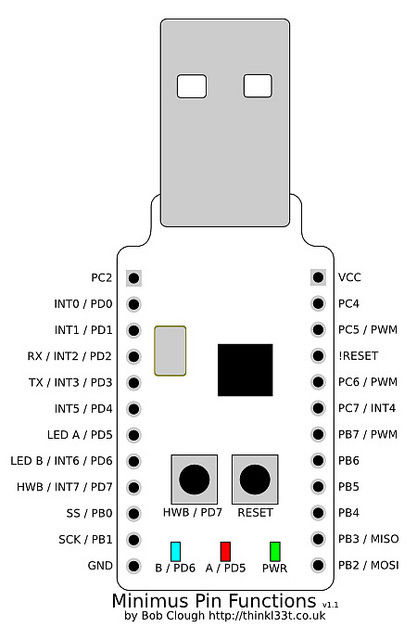
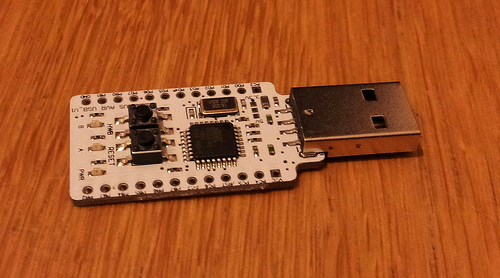
The button uses a minimus board. The minimus is a carrier for the AT90USB162, an AVR microcontroller with onboard USB hardware, which means it can be programmed to show up as any USB device.
Before getting the button I modified one of the pieces of LUFA demo software, a media keyboard, and stripped it down to just read the one button on the minimus. When the button is pressed, it sends the keycode for next track.
To install this on a minimus:
Before getting the button I modified one of the pieces of LUFA demo software, a media keyboard, and stripped it down to just read the one button on the minimus. When the button is pressed, it sends the keycode for next track.
To install this on a minimus:
- Plug it in
- Hold down the HWB button, then press reset
- It should show up on the PC as an atmel DFU device
- On a linux box with avr gcc and dfu-programmer installed, just type 'make dfu'.
Downloads
The Button
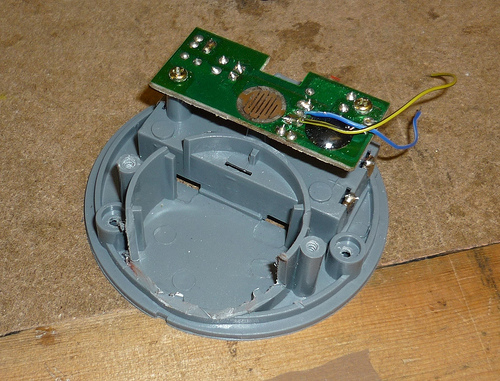
The button's housing is a joke button that plays an alarm and flashed when pressed.
Rip its guts out to get to the switch. After finding the switch contacts on the original board, solder on two wires to connect to the AVR.
Rip its guts out to get to the switch. After finding the switch contacts on the original board, solder on two wires to connect to the AVR.
Solder the Minimus to the Button.

Next, strip off the USB connector from the minimus, and add a USB lead directly to the pads.
Connect the leads from the button to PD7 and GND on the minimus, so it is in parallel witht he HWB button.
This has the handy side effect that if the button is pressed while the button is being plugged in, it boots into DFU mode, allowing you to upgrade the firmware easily.
Cut a slot in the casing for the wire to escape, and add a couple of cable ties for strain relief.
Done!
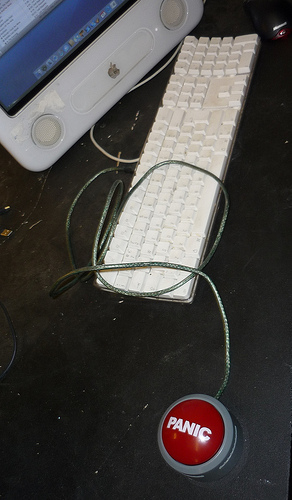
Press Button, Song Skips, Panic averted!