The Midas Touch; Turning Your Object to Gold in Photoshop
by DefwareN7 in Craft > Digital Graphics
12337 Views, 17 Favorites, 0 Comments
The Midas Touch; Turning Your Object to Gold in Photoshop

This is my (relatively) simple way of making a believable gold texture in Adobe Photoshop. If you've ever wanted to turn any part of your digital art project into gold, I hope this helps!
NOTE: I'm using Mac OS X for this instructable, so when I say "command," that would mean "ctrl" for Windows users.
Step 1: Construct Your Document
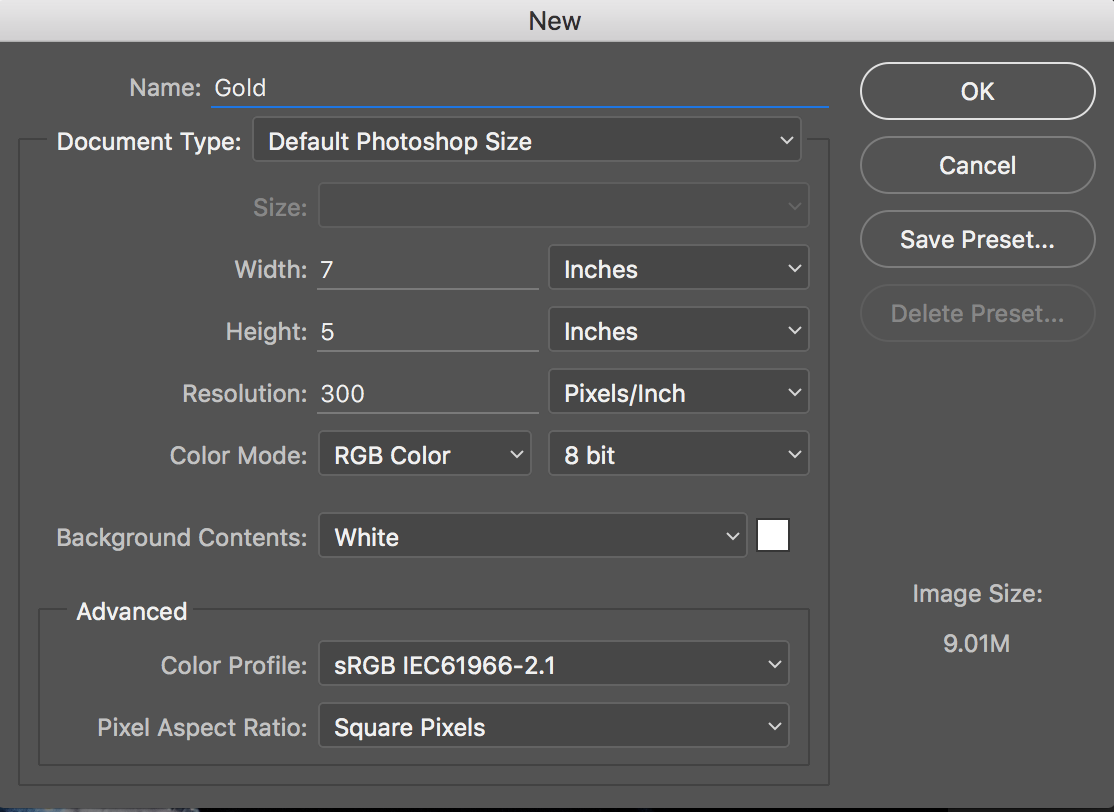
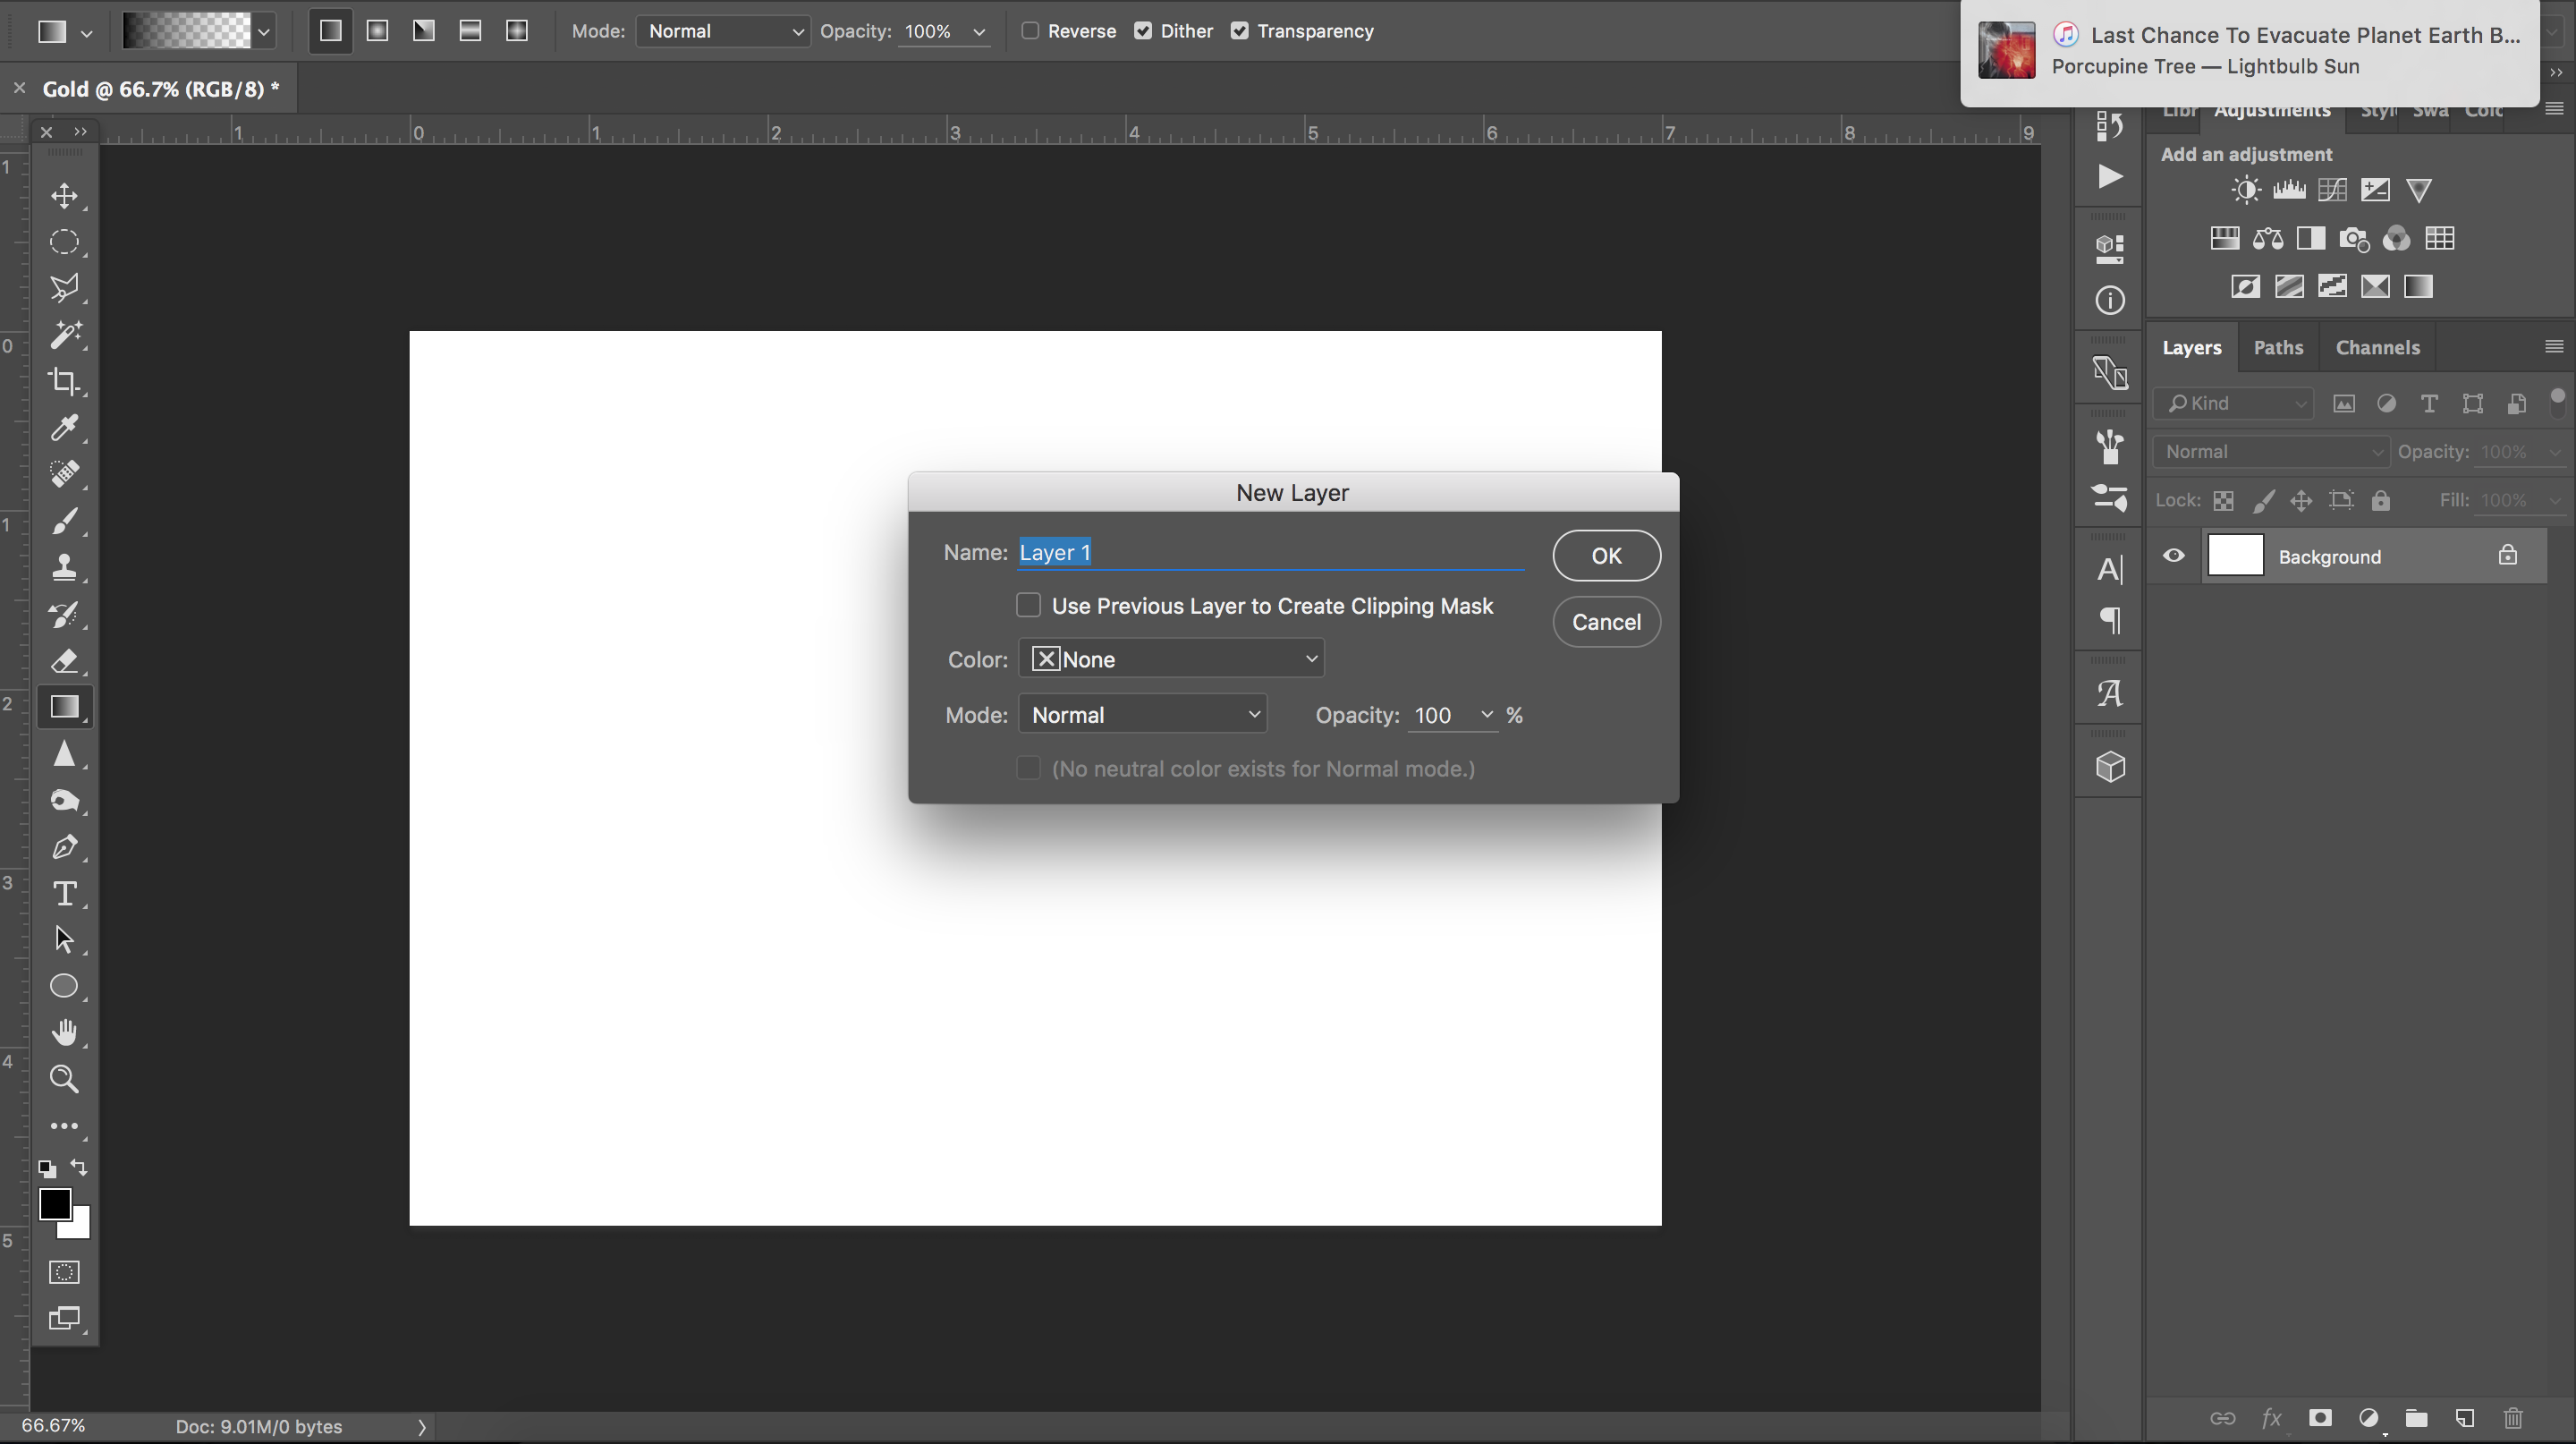
The basic first step here, as with any art project, is getting your canvas ready!
- Set up your document in Photoshop however you would like. I'm using a 7 in by 5 in document for this.
- Make sure your resolution is 300pixels/inch. This will ensure best image and print quality.
- Use RGB color, as it will be used throughout the document.
- You can also youse CMYK mode if you are comfortable, just as long as it's consistent throughout the document.
- Create a new blank layer (shift+command+N). This will be where you do your work.
Step 2: Establish Your Base Image
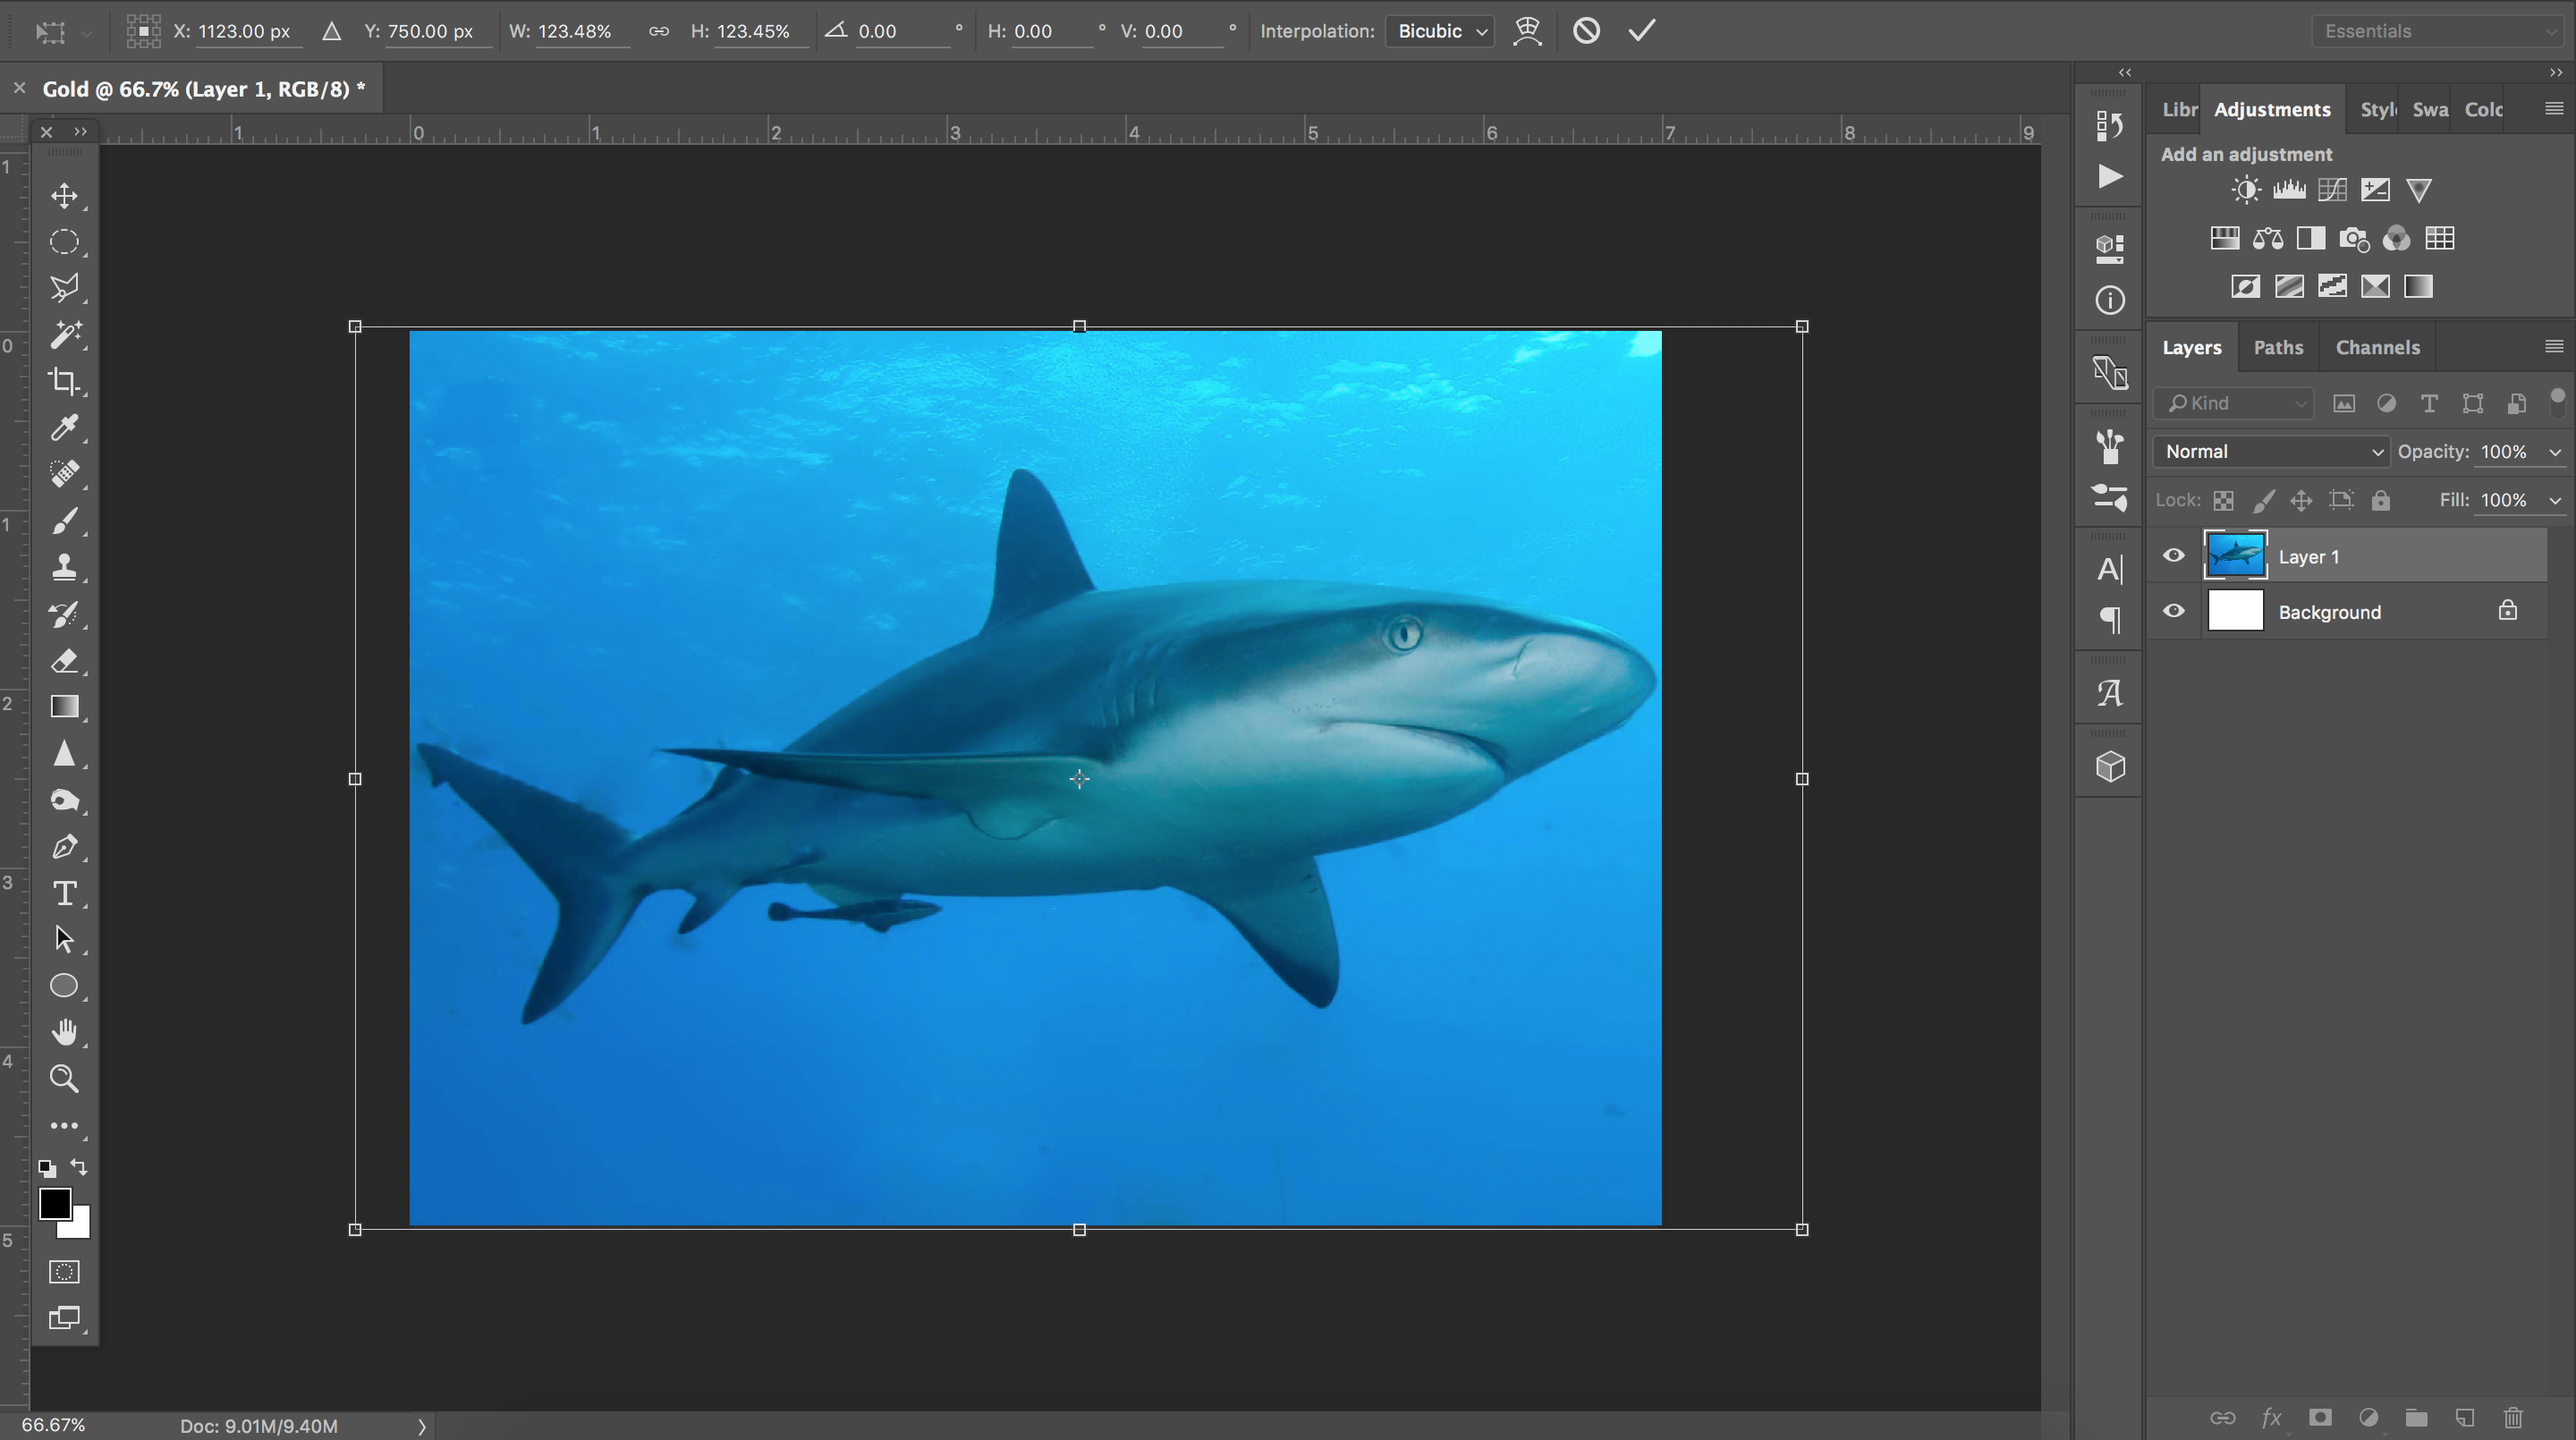
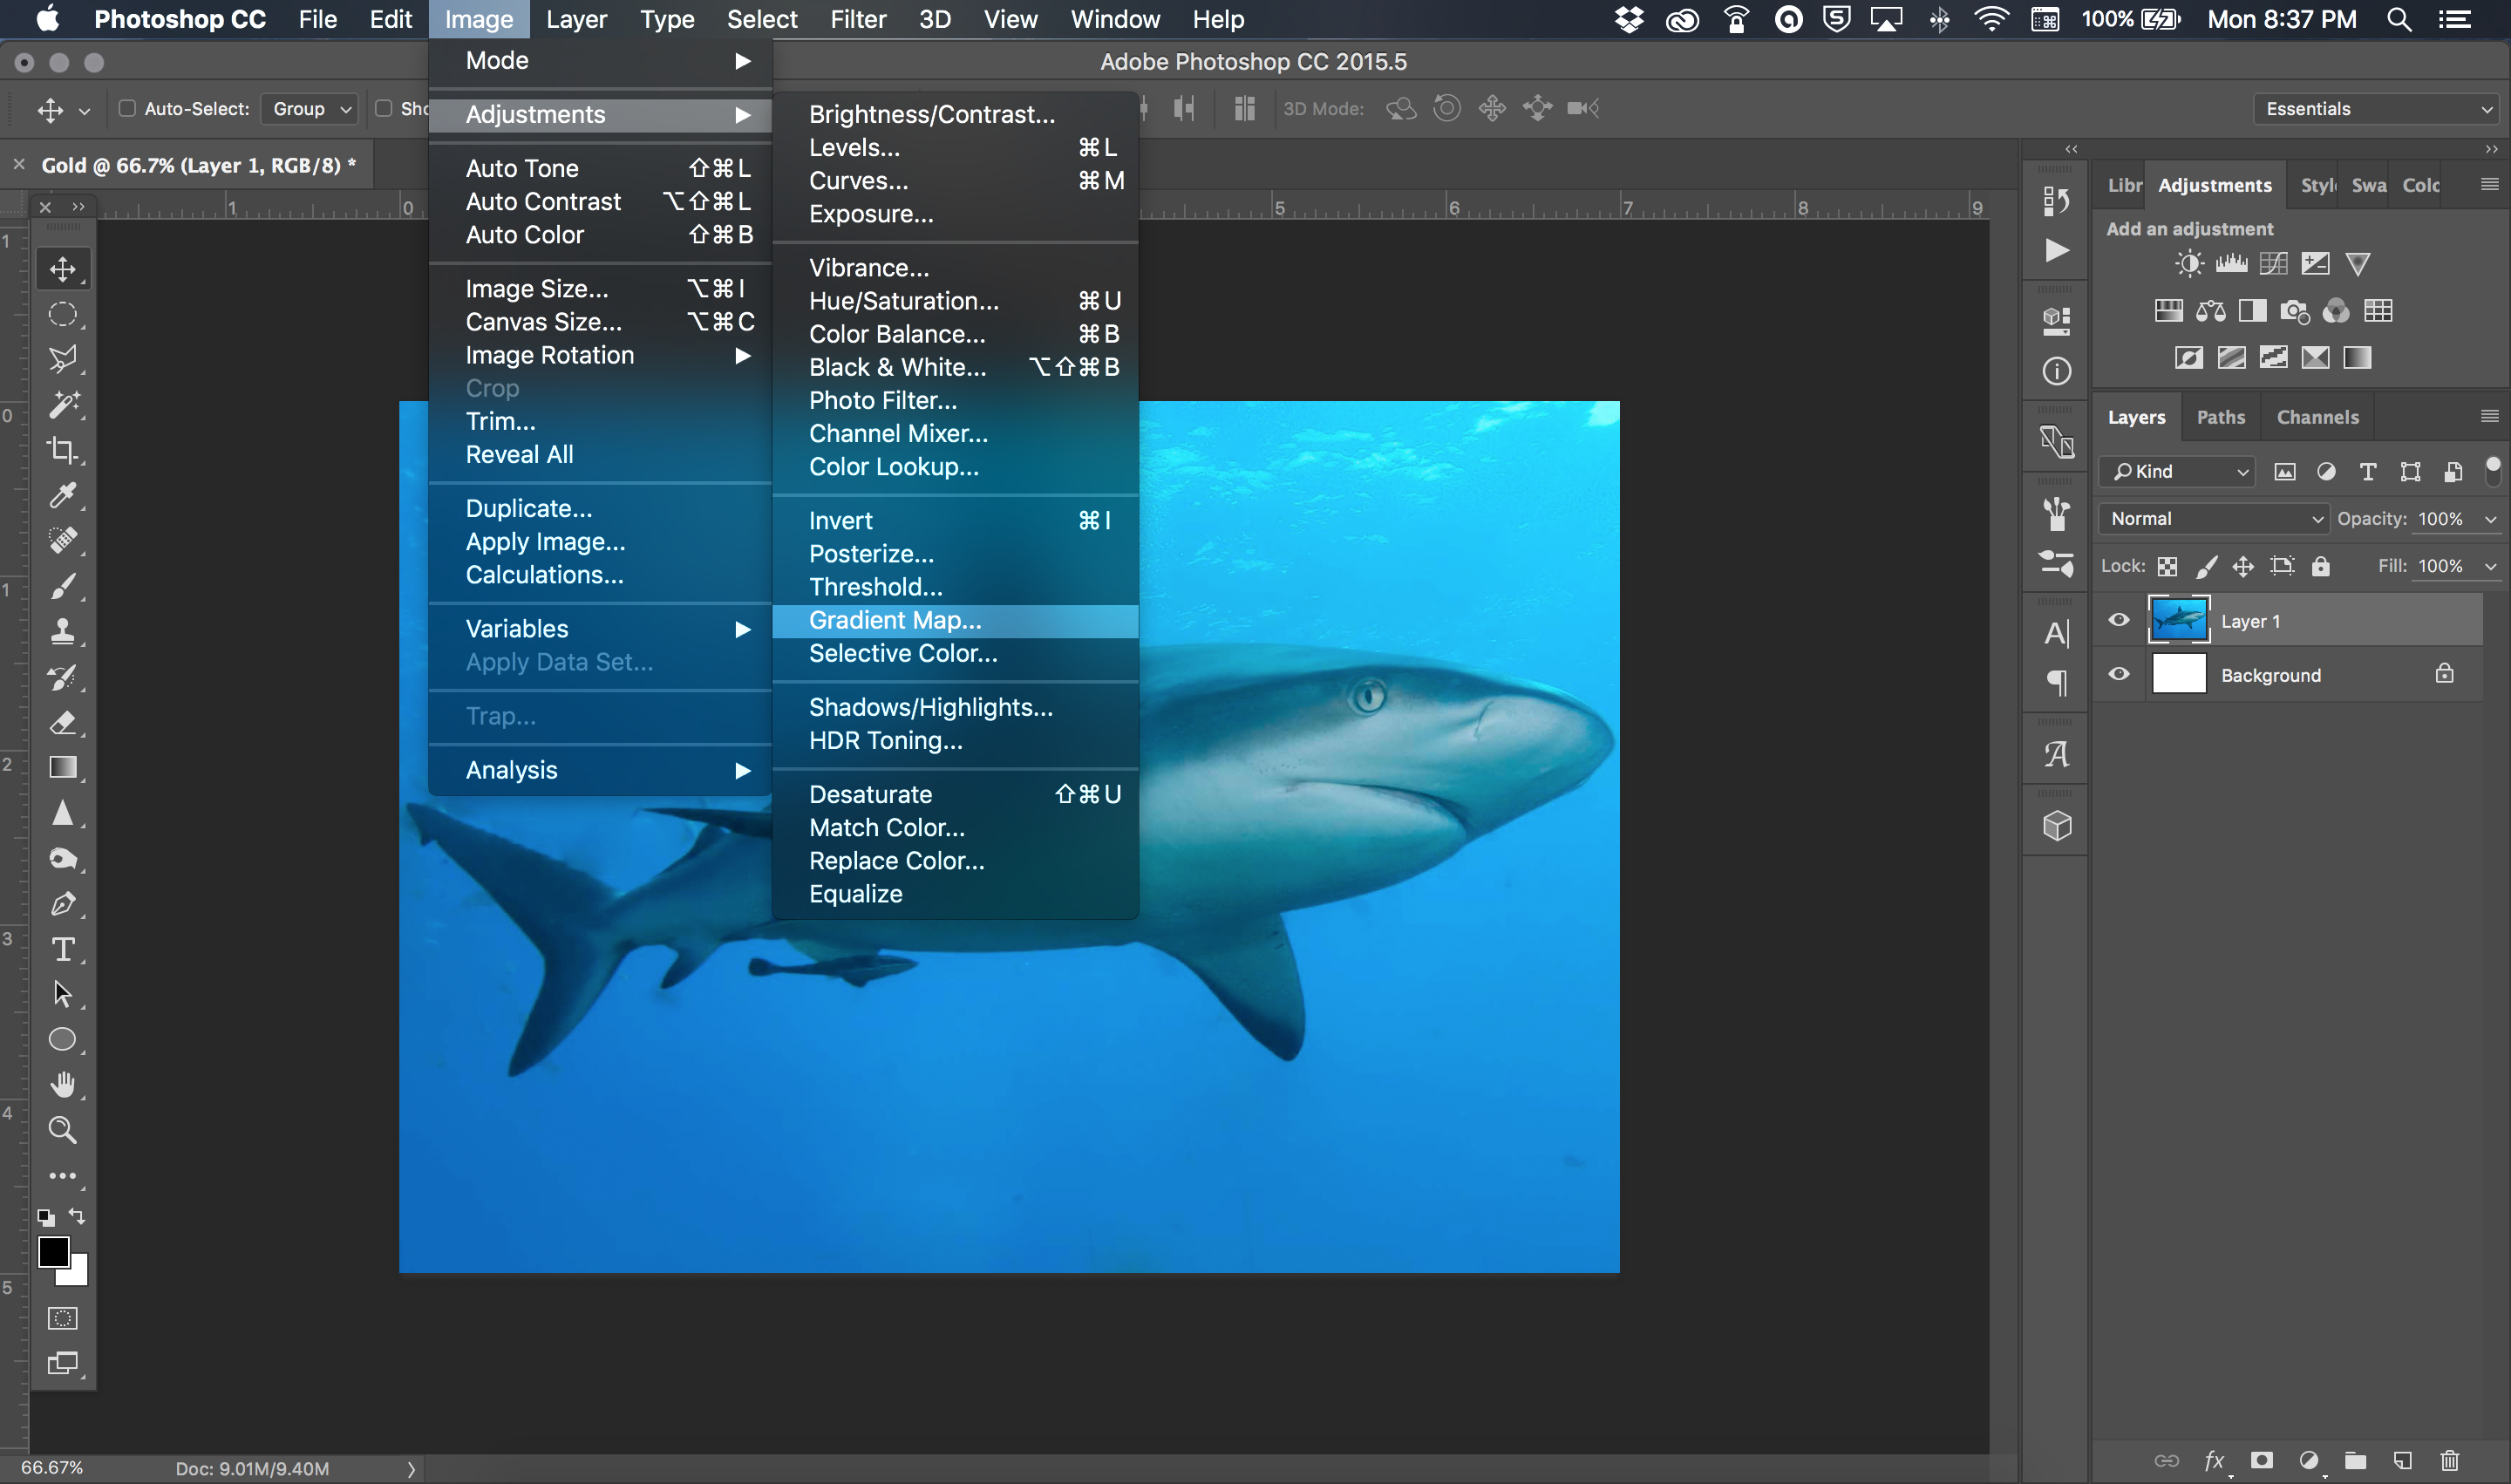
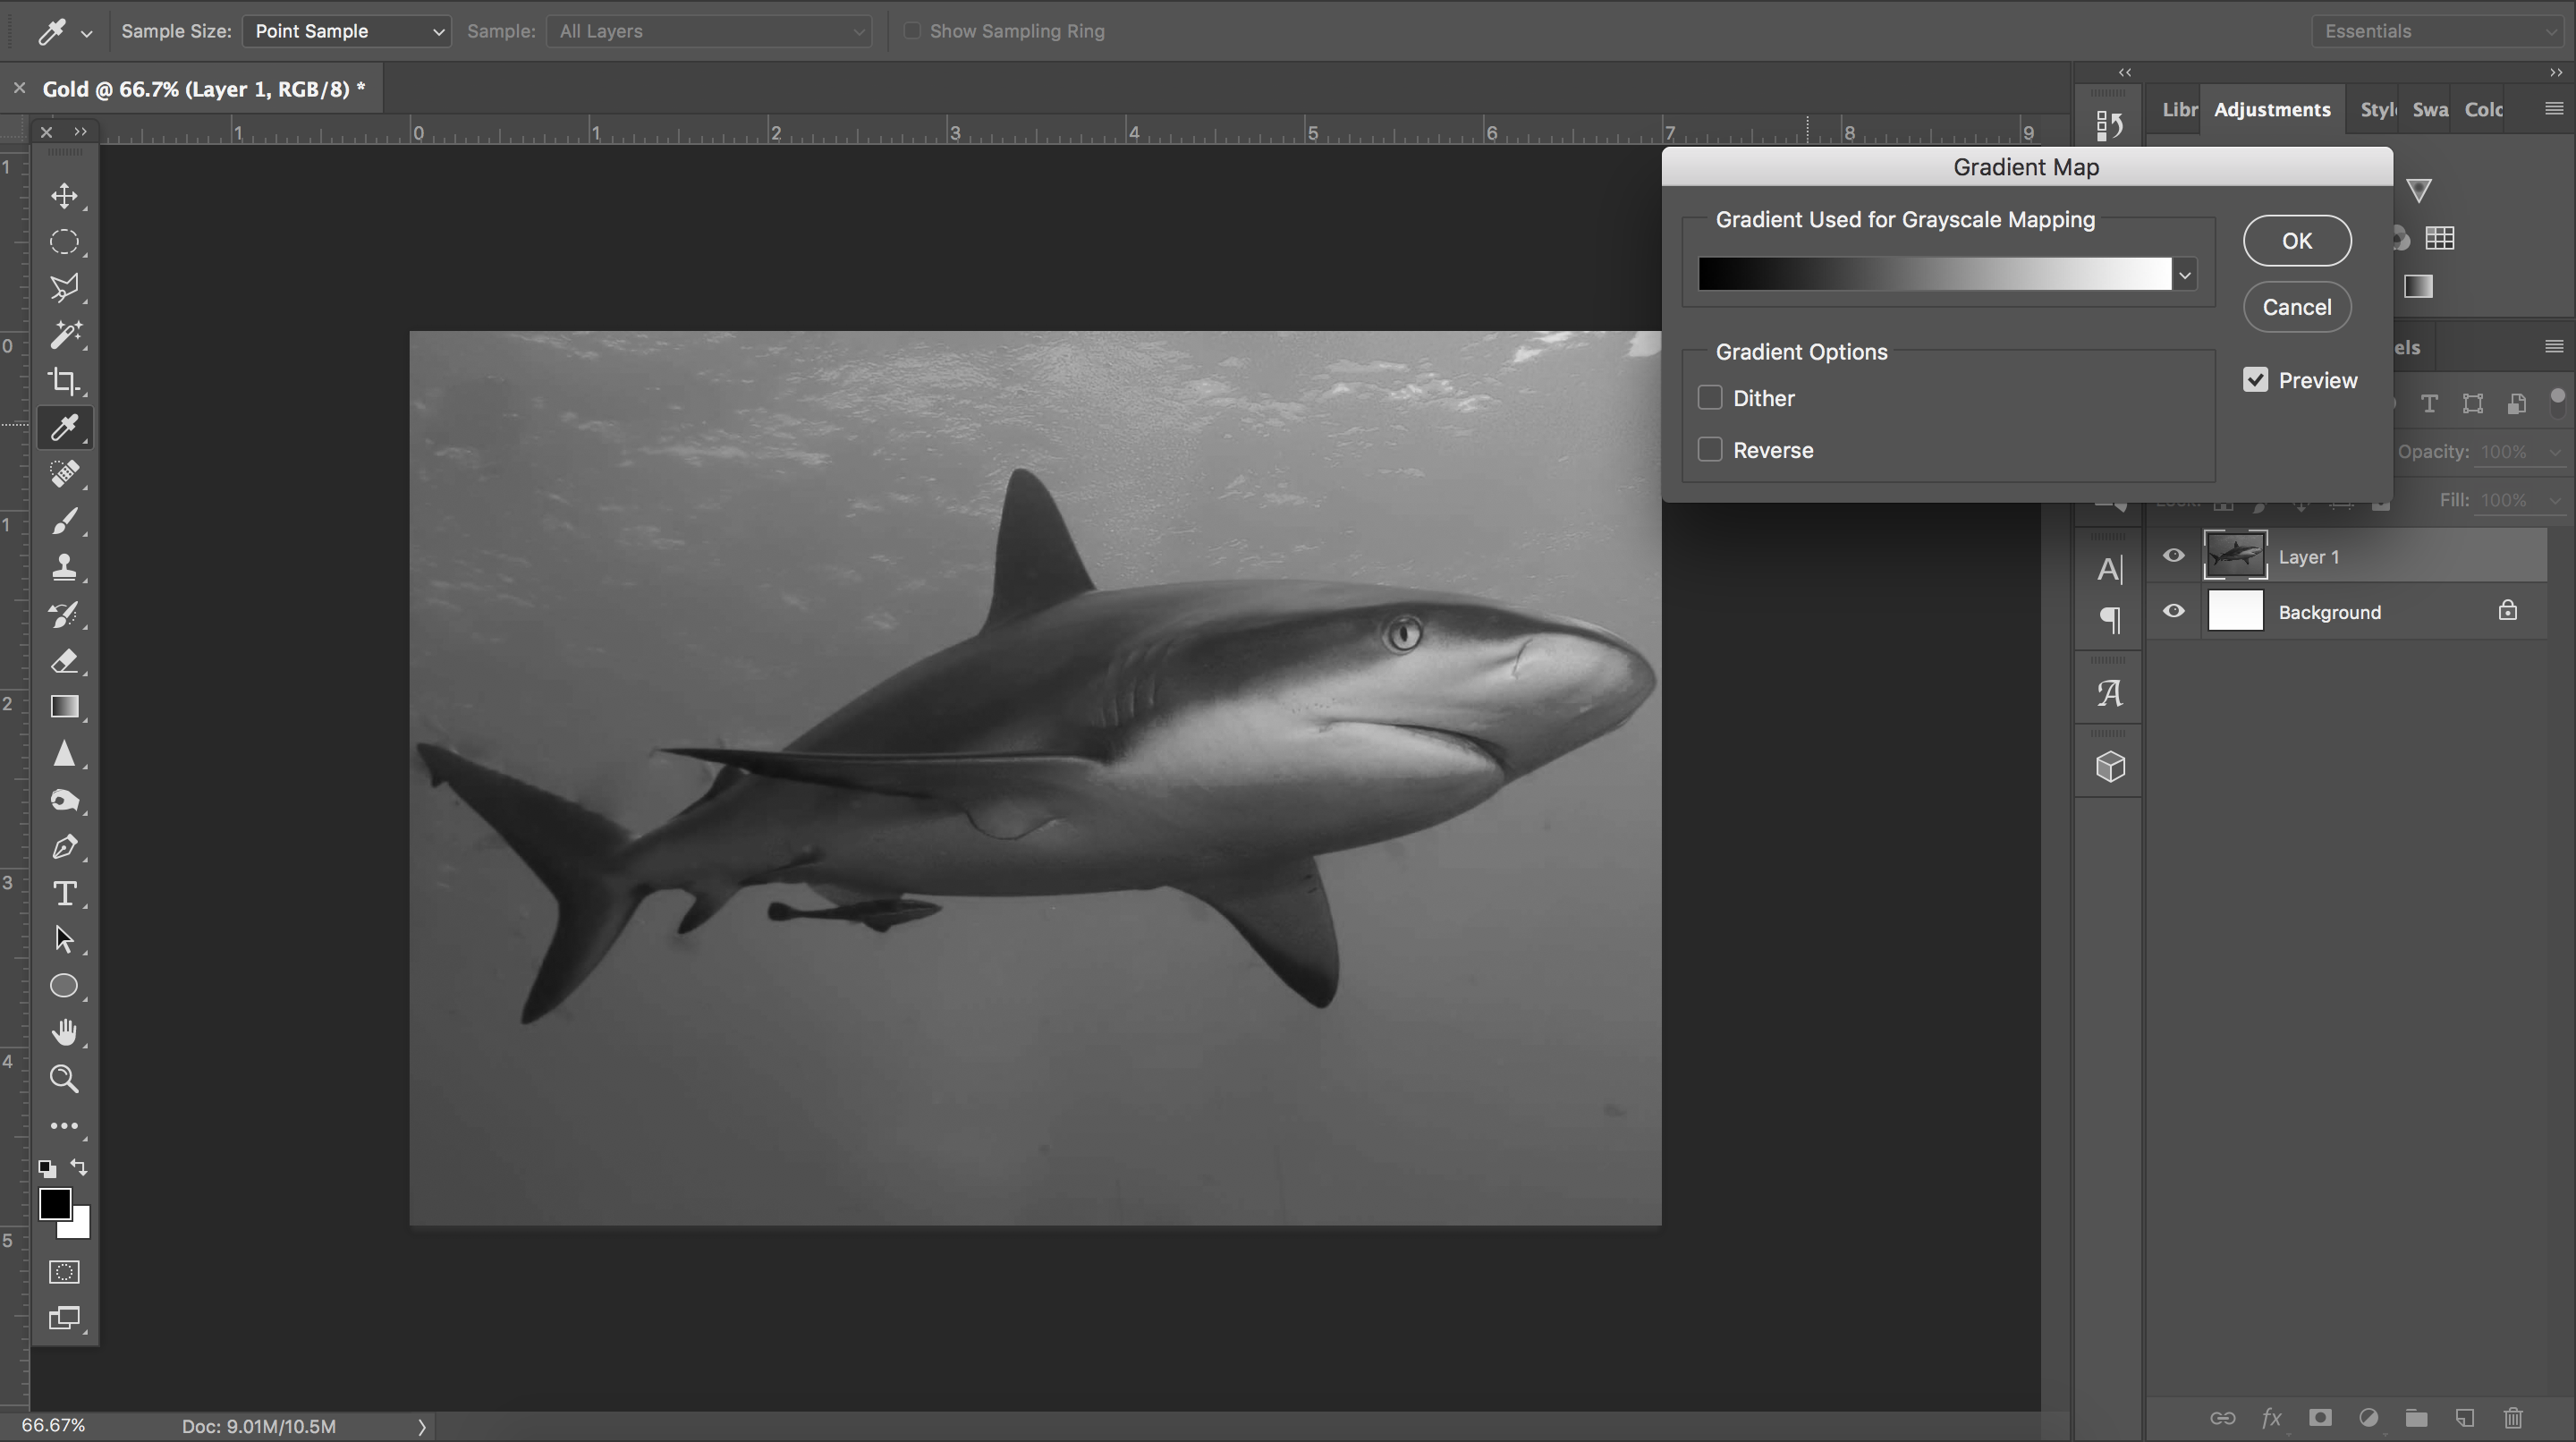
For this step, the sample image is a shark stock image. With variation, this instructable should work with any image you choose.
- Drag and drop your image into your document.
- If the image isn't up to size with your canvas, use the transform tool (command+T) to enlarge it to the document margins.
- Apply a gradient map filter: Image > Adjustments > Gradient Map.
- The final product should have your foreground and background color as the gradient shown on screen. For this document, it would be black and white. Leave the gradient window open.
Step 3: Make It Gold!
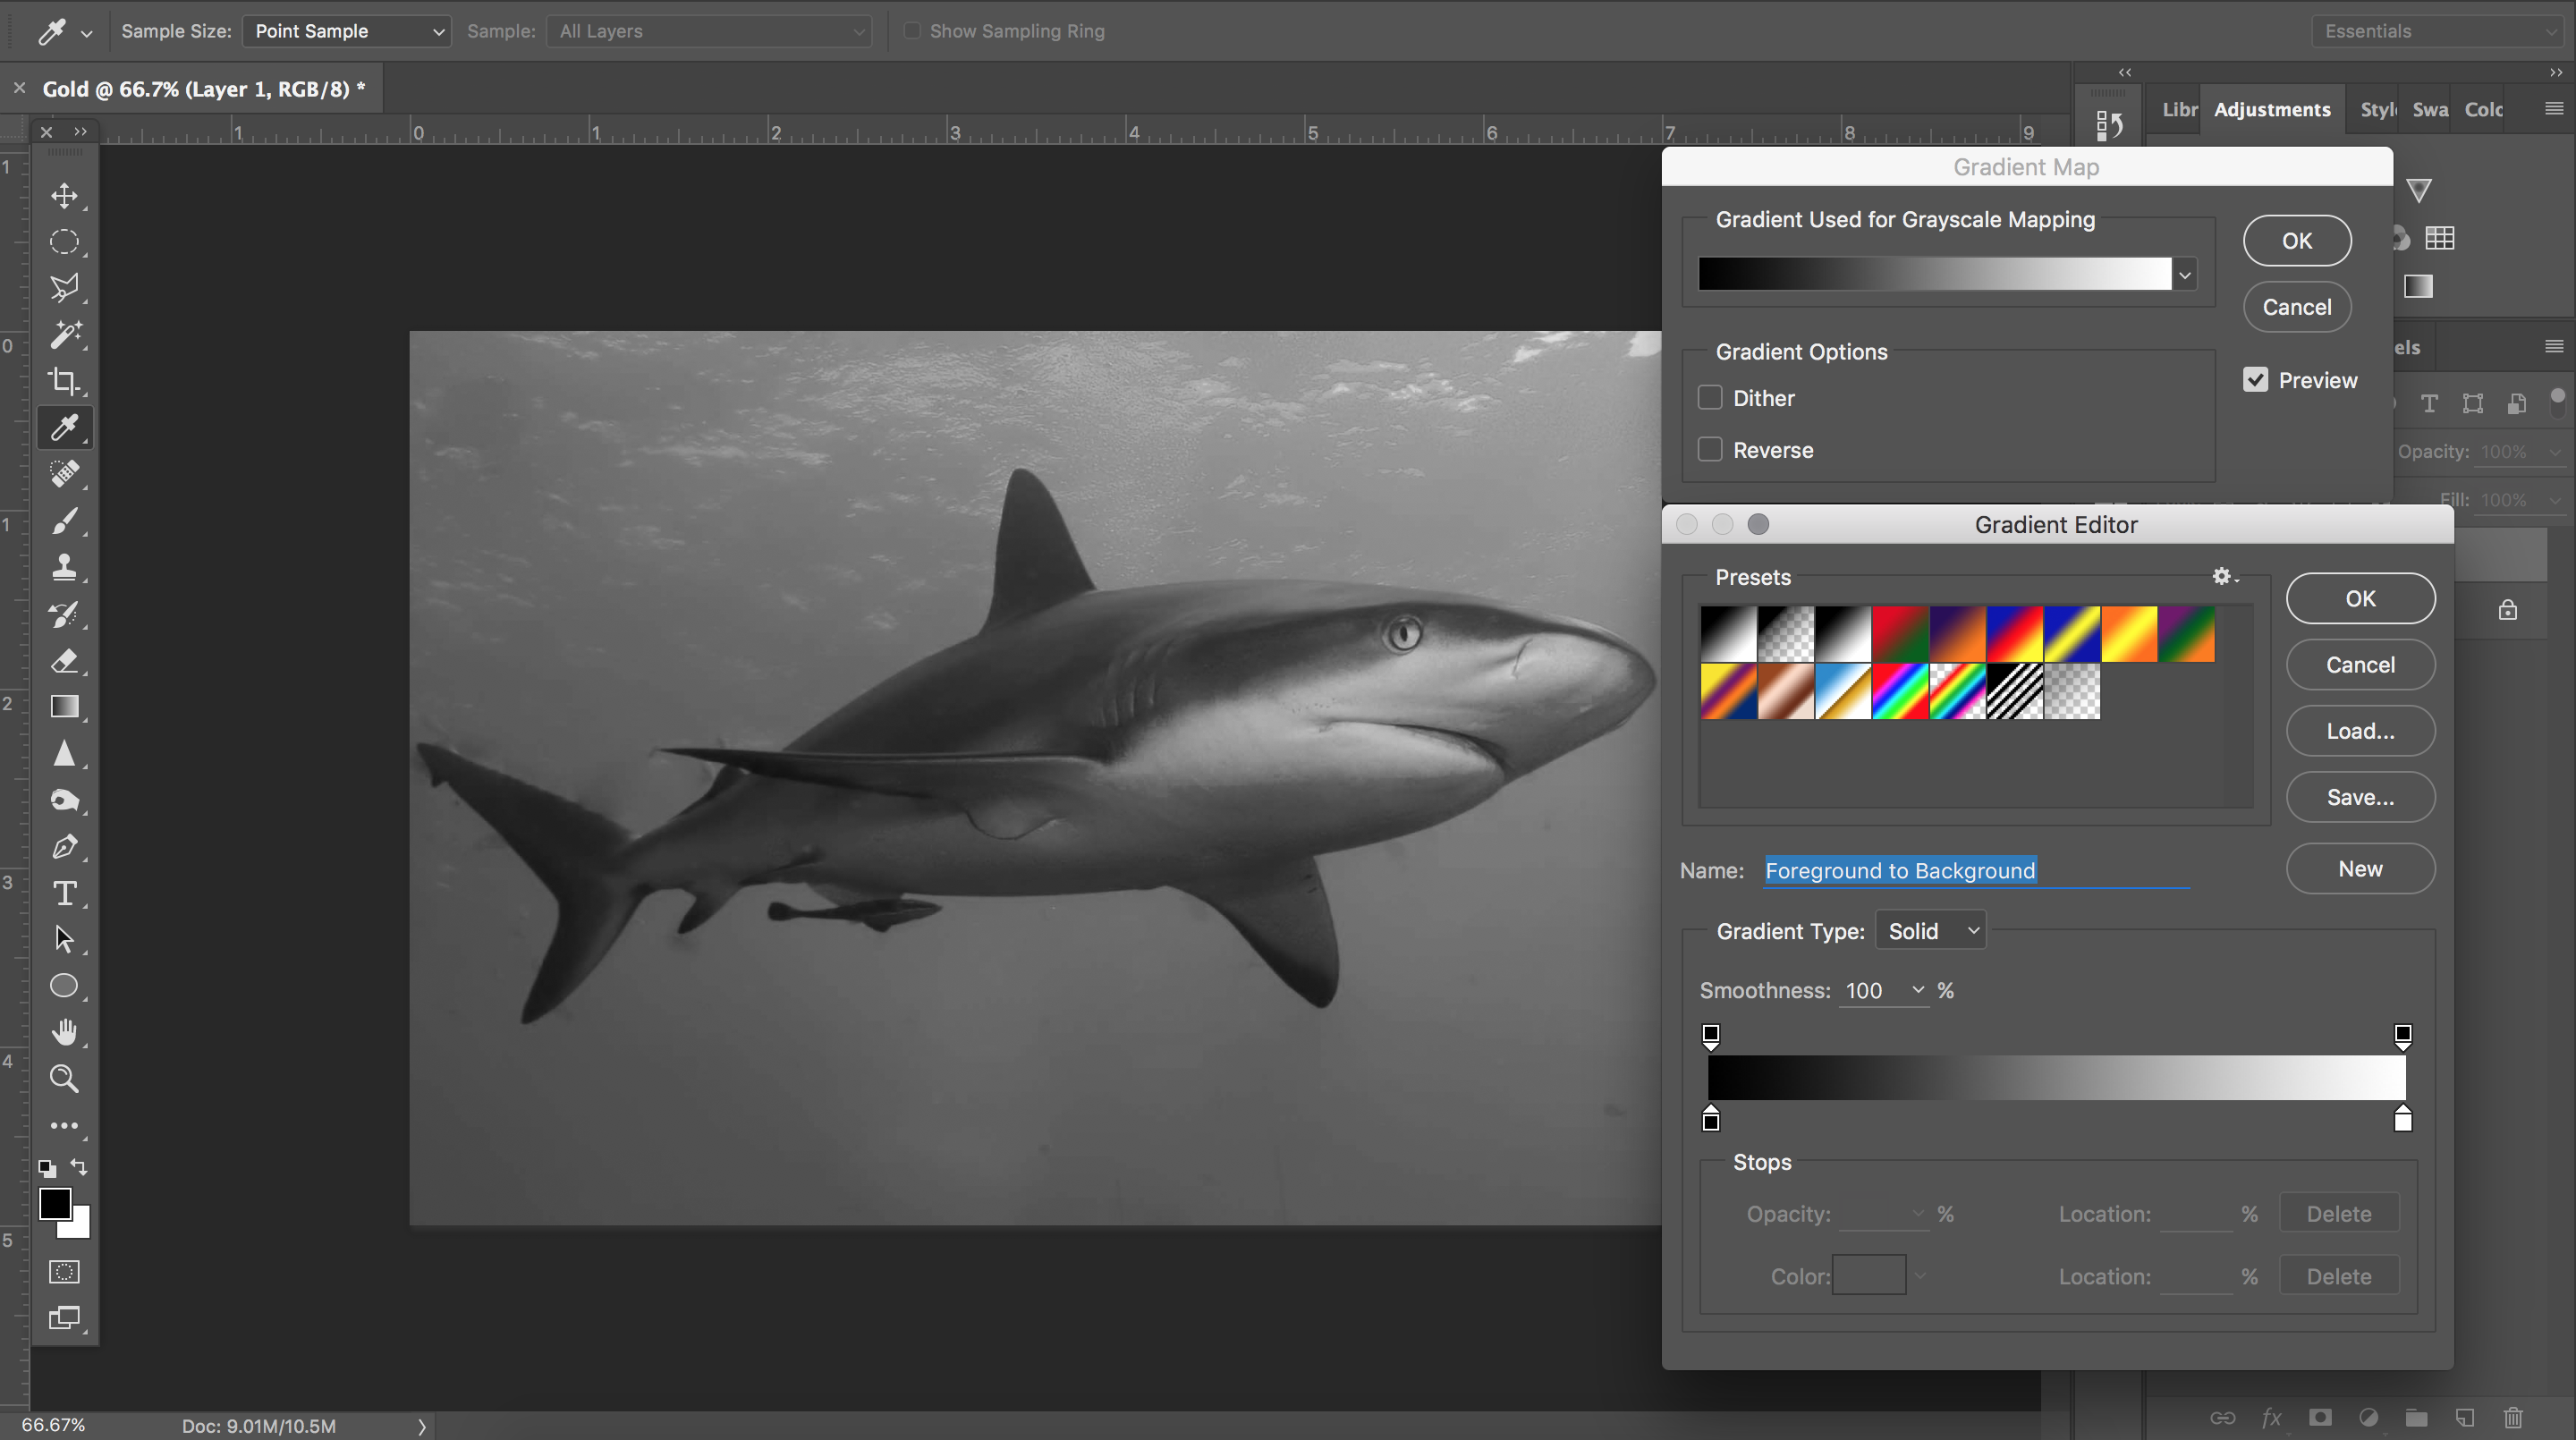
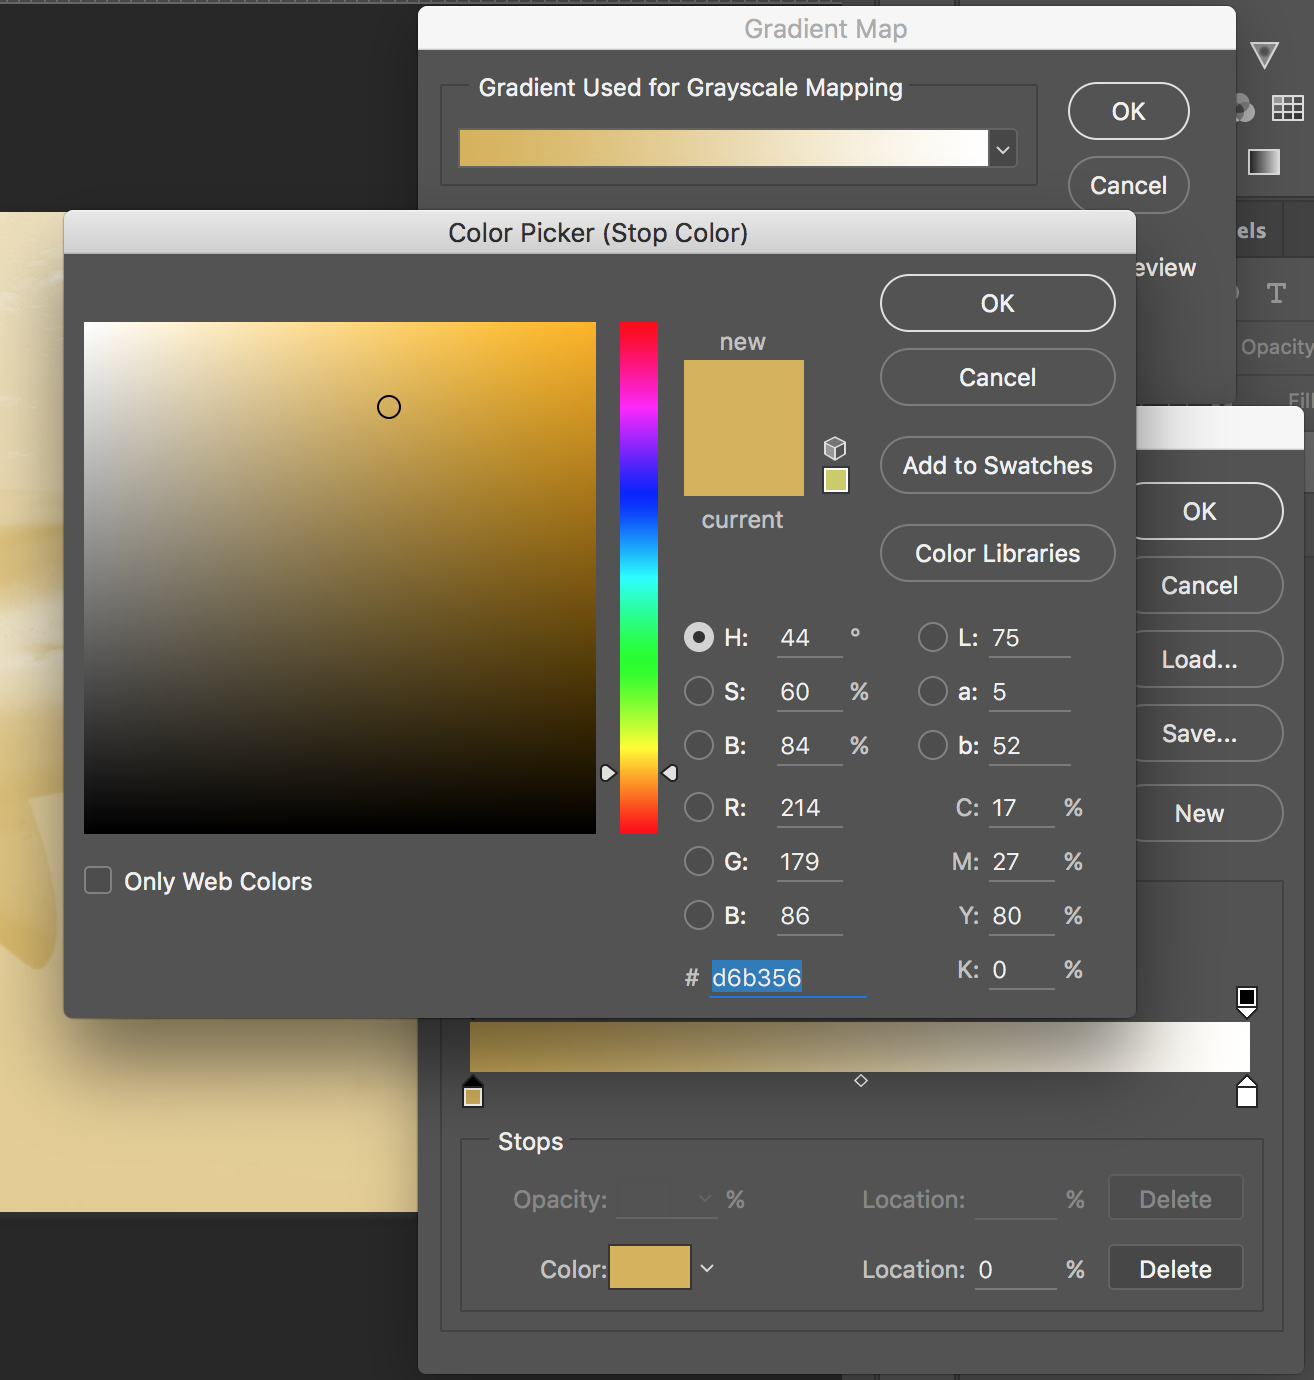
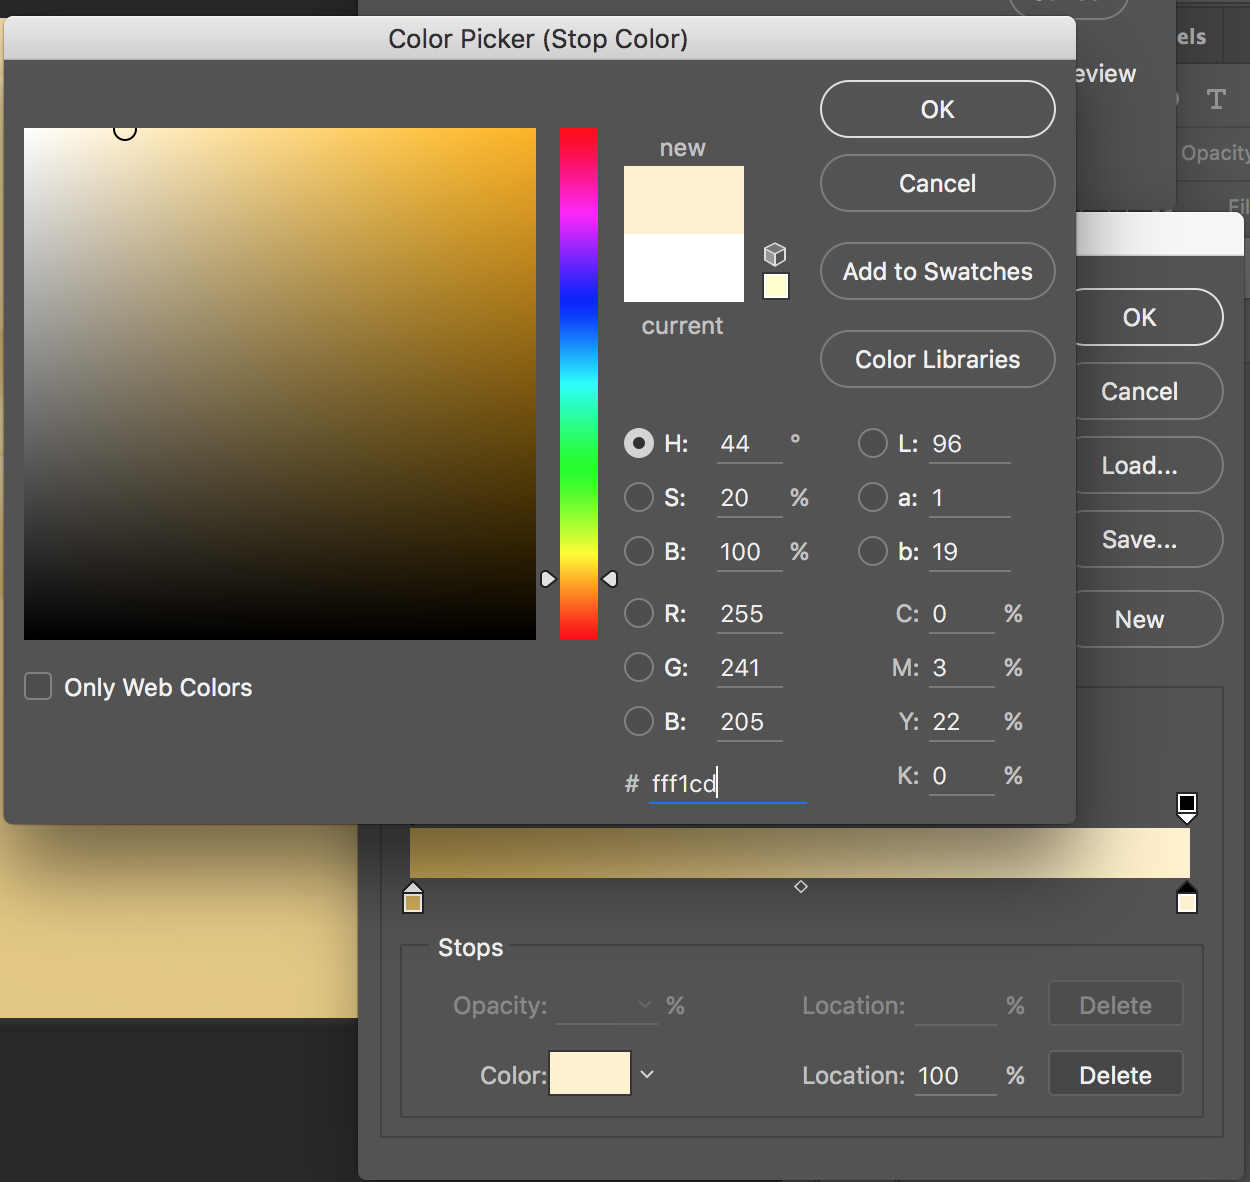
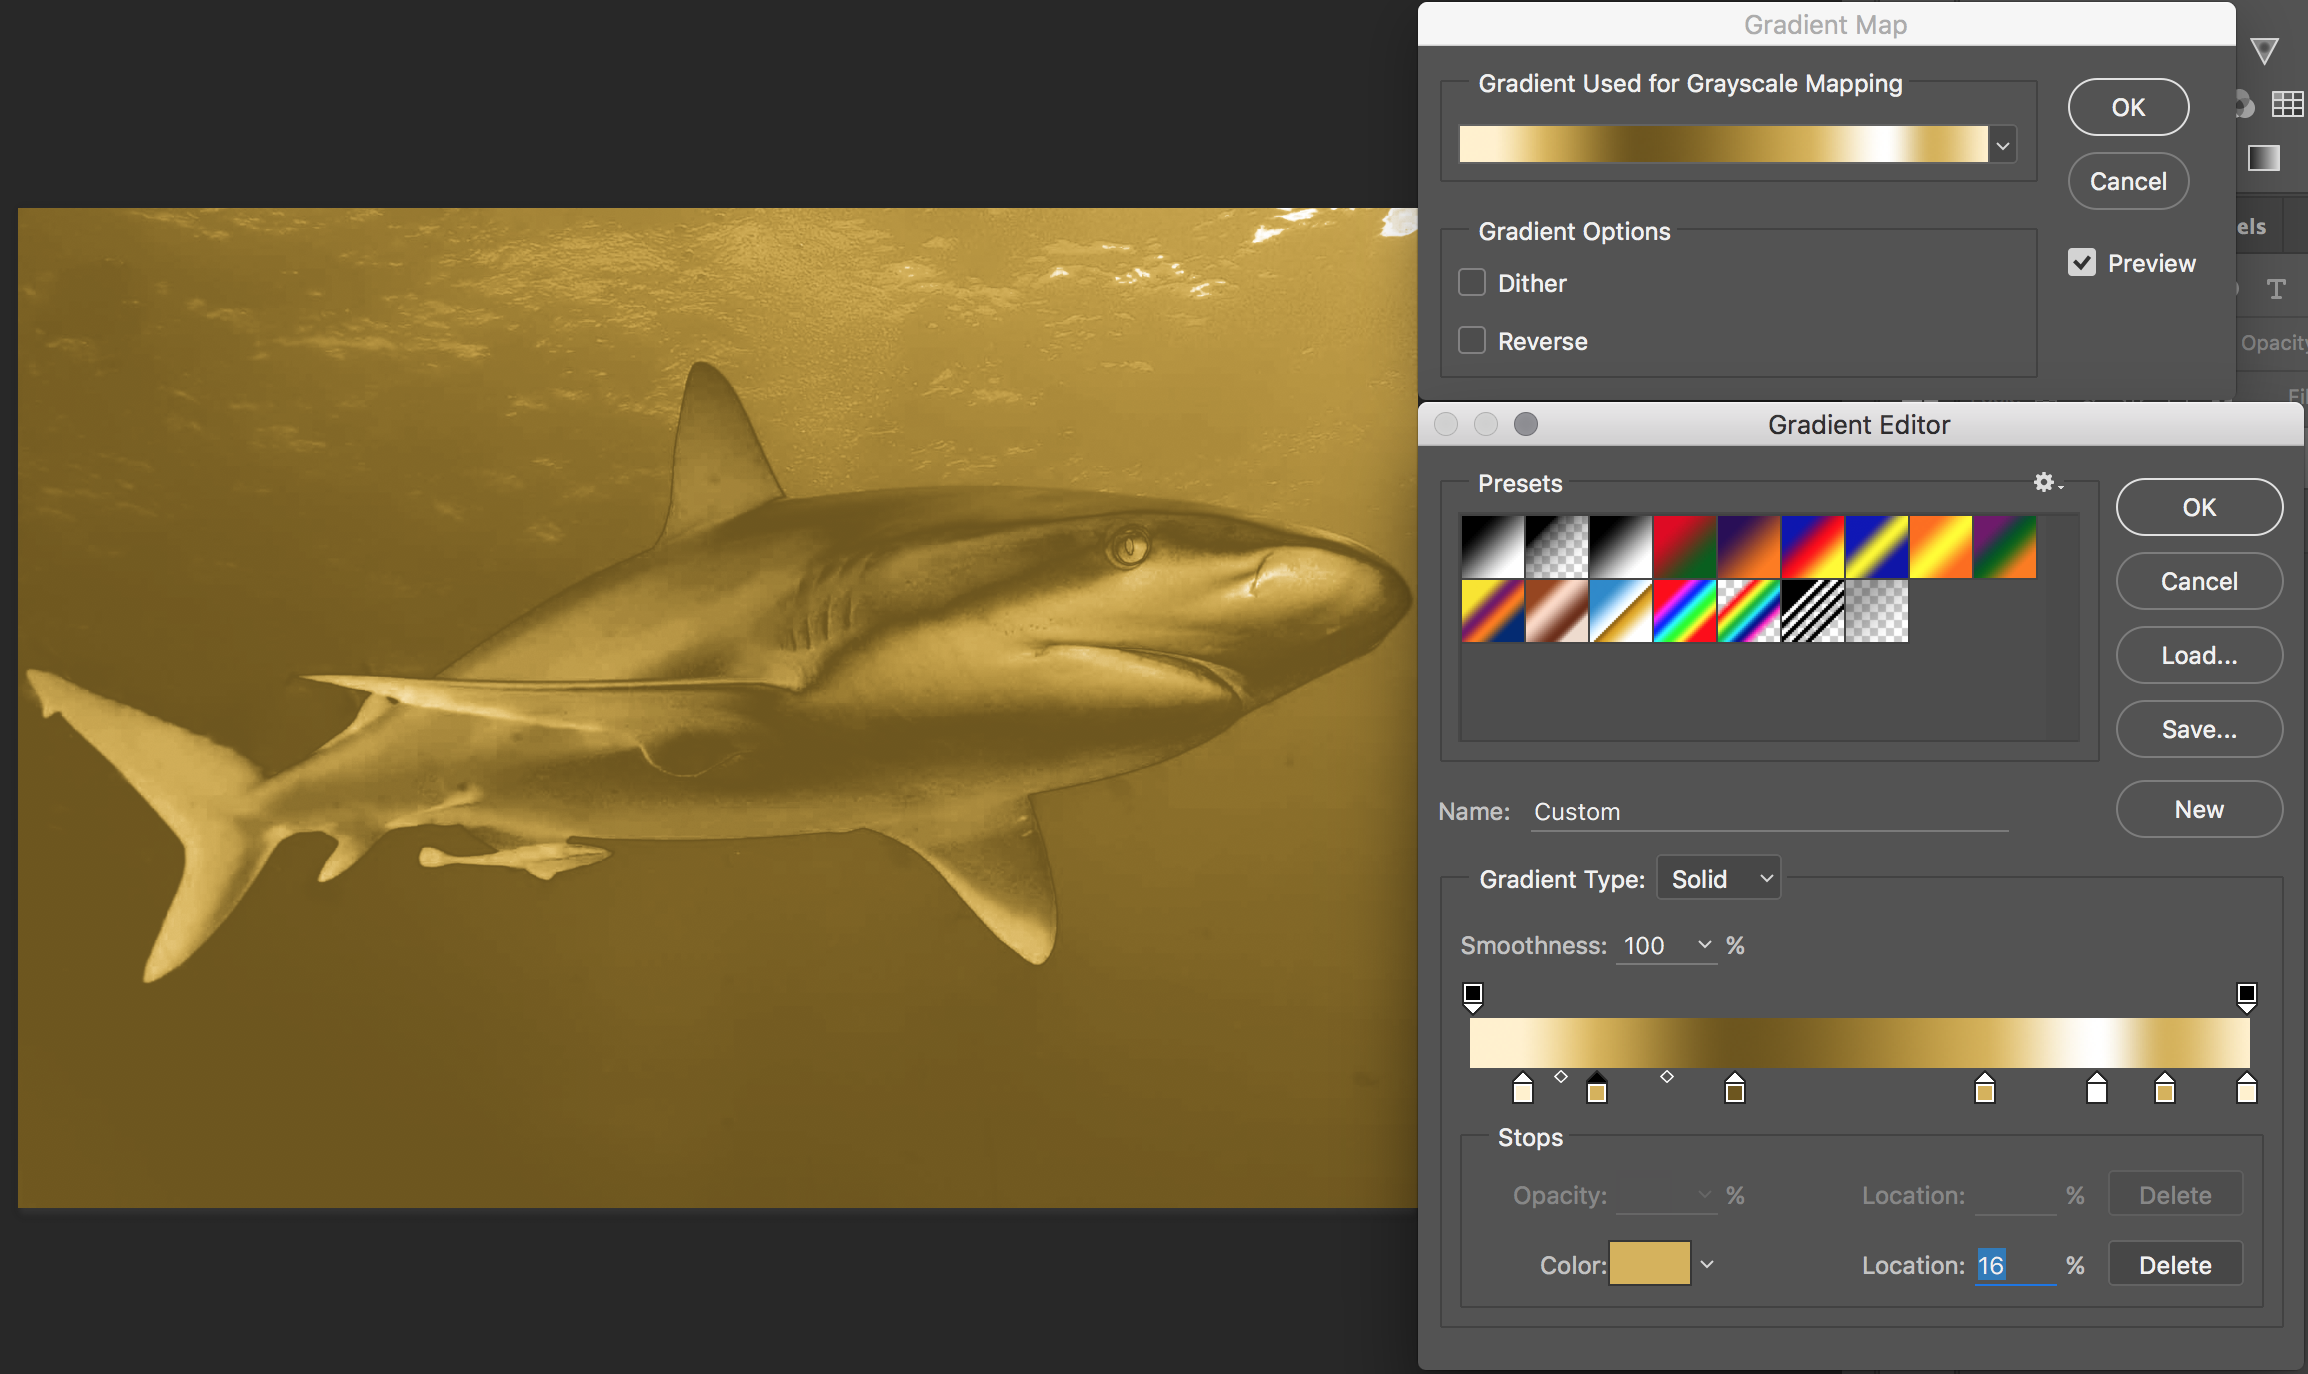
This step will require patience and some work with the gradient map function itself.
- Click on the gradient in the gradient map window. This will bring up a new window for gradient adjustments.
- Click on the 0 point of the gradient bar (the black box below the far left edge of the gradient). This will bring up the color picker window.
- Using the color picker window, set your base hue of gold using the color sliders and value box.
- IMPORTANT: copy (command+C) the hexidecimal value of the color at the bottom of the window (highlighted in blue).
- Click "OK" to exit.
- Click the opposite end of the gradient and repeat steps 2-4, but with a different color.
- Paste (command+V) the hexidecimal value of the previous color into the new one. This will make the color the same as the previous hue selected at the opposite end of the gradient.
- Use the interface to create a lighter hue. Click "OK" to exit.
- Select below the middle of the gradient and repeat steps 6-8 to create a darker shade of the base color.
- Experiment with this tool however you choose.
- Make sure that you have appropriate value placement on the gradient map, or else the final image will look weird. A good rule of thumb is to keep the darker values in the center of the gradient, leaving the lighter ones on the outside.
- Click "OK" to exit from the gradient map window.
Step 4: the Final Touches
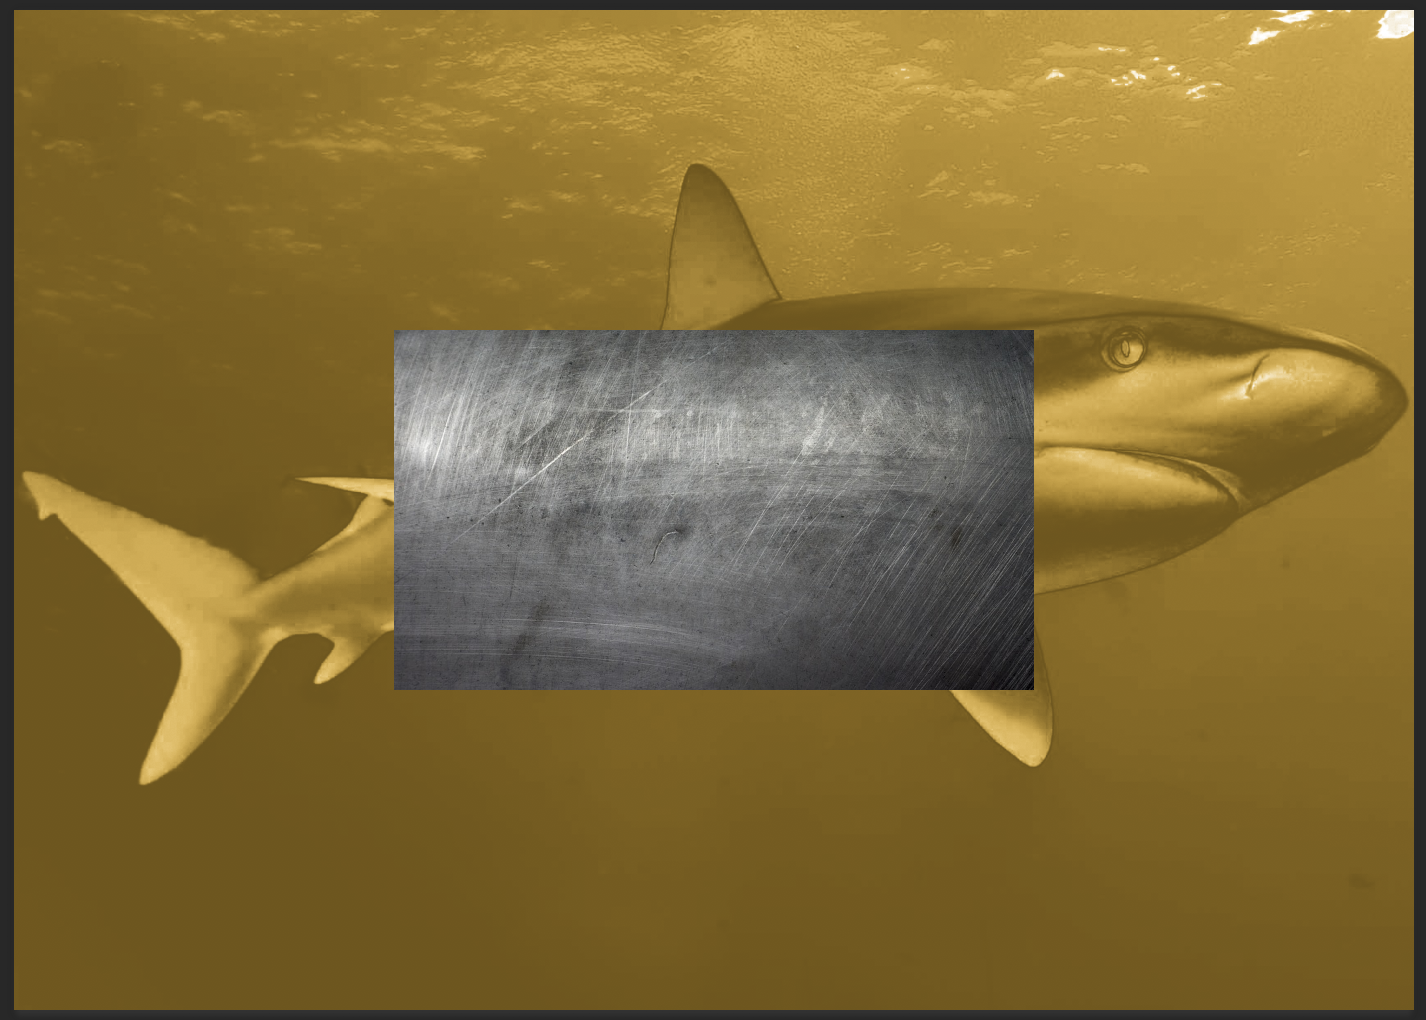
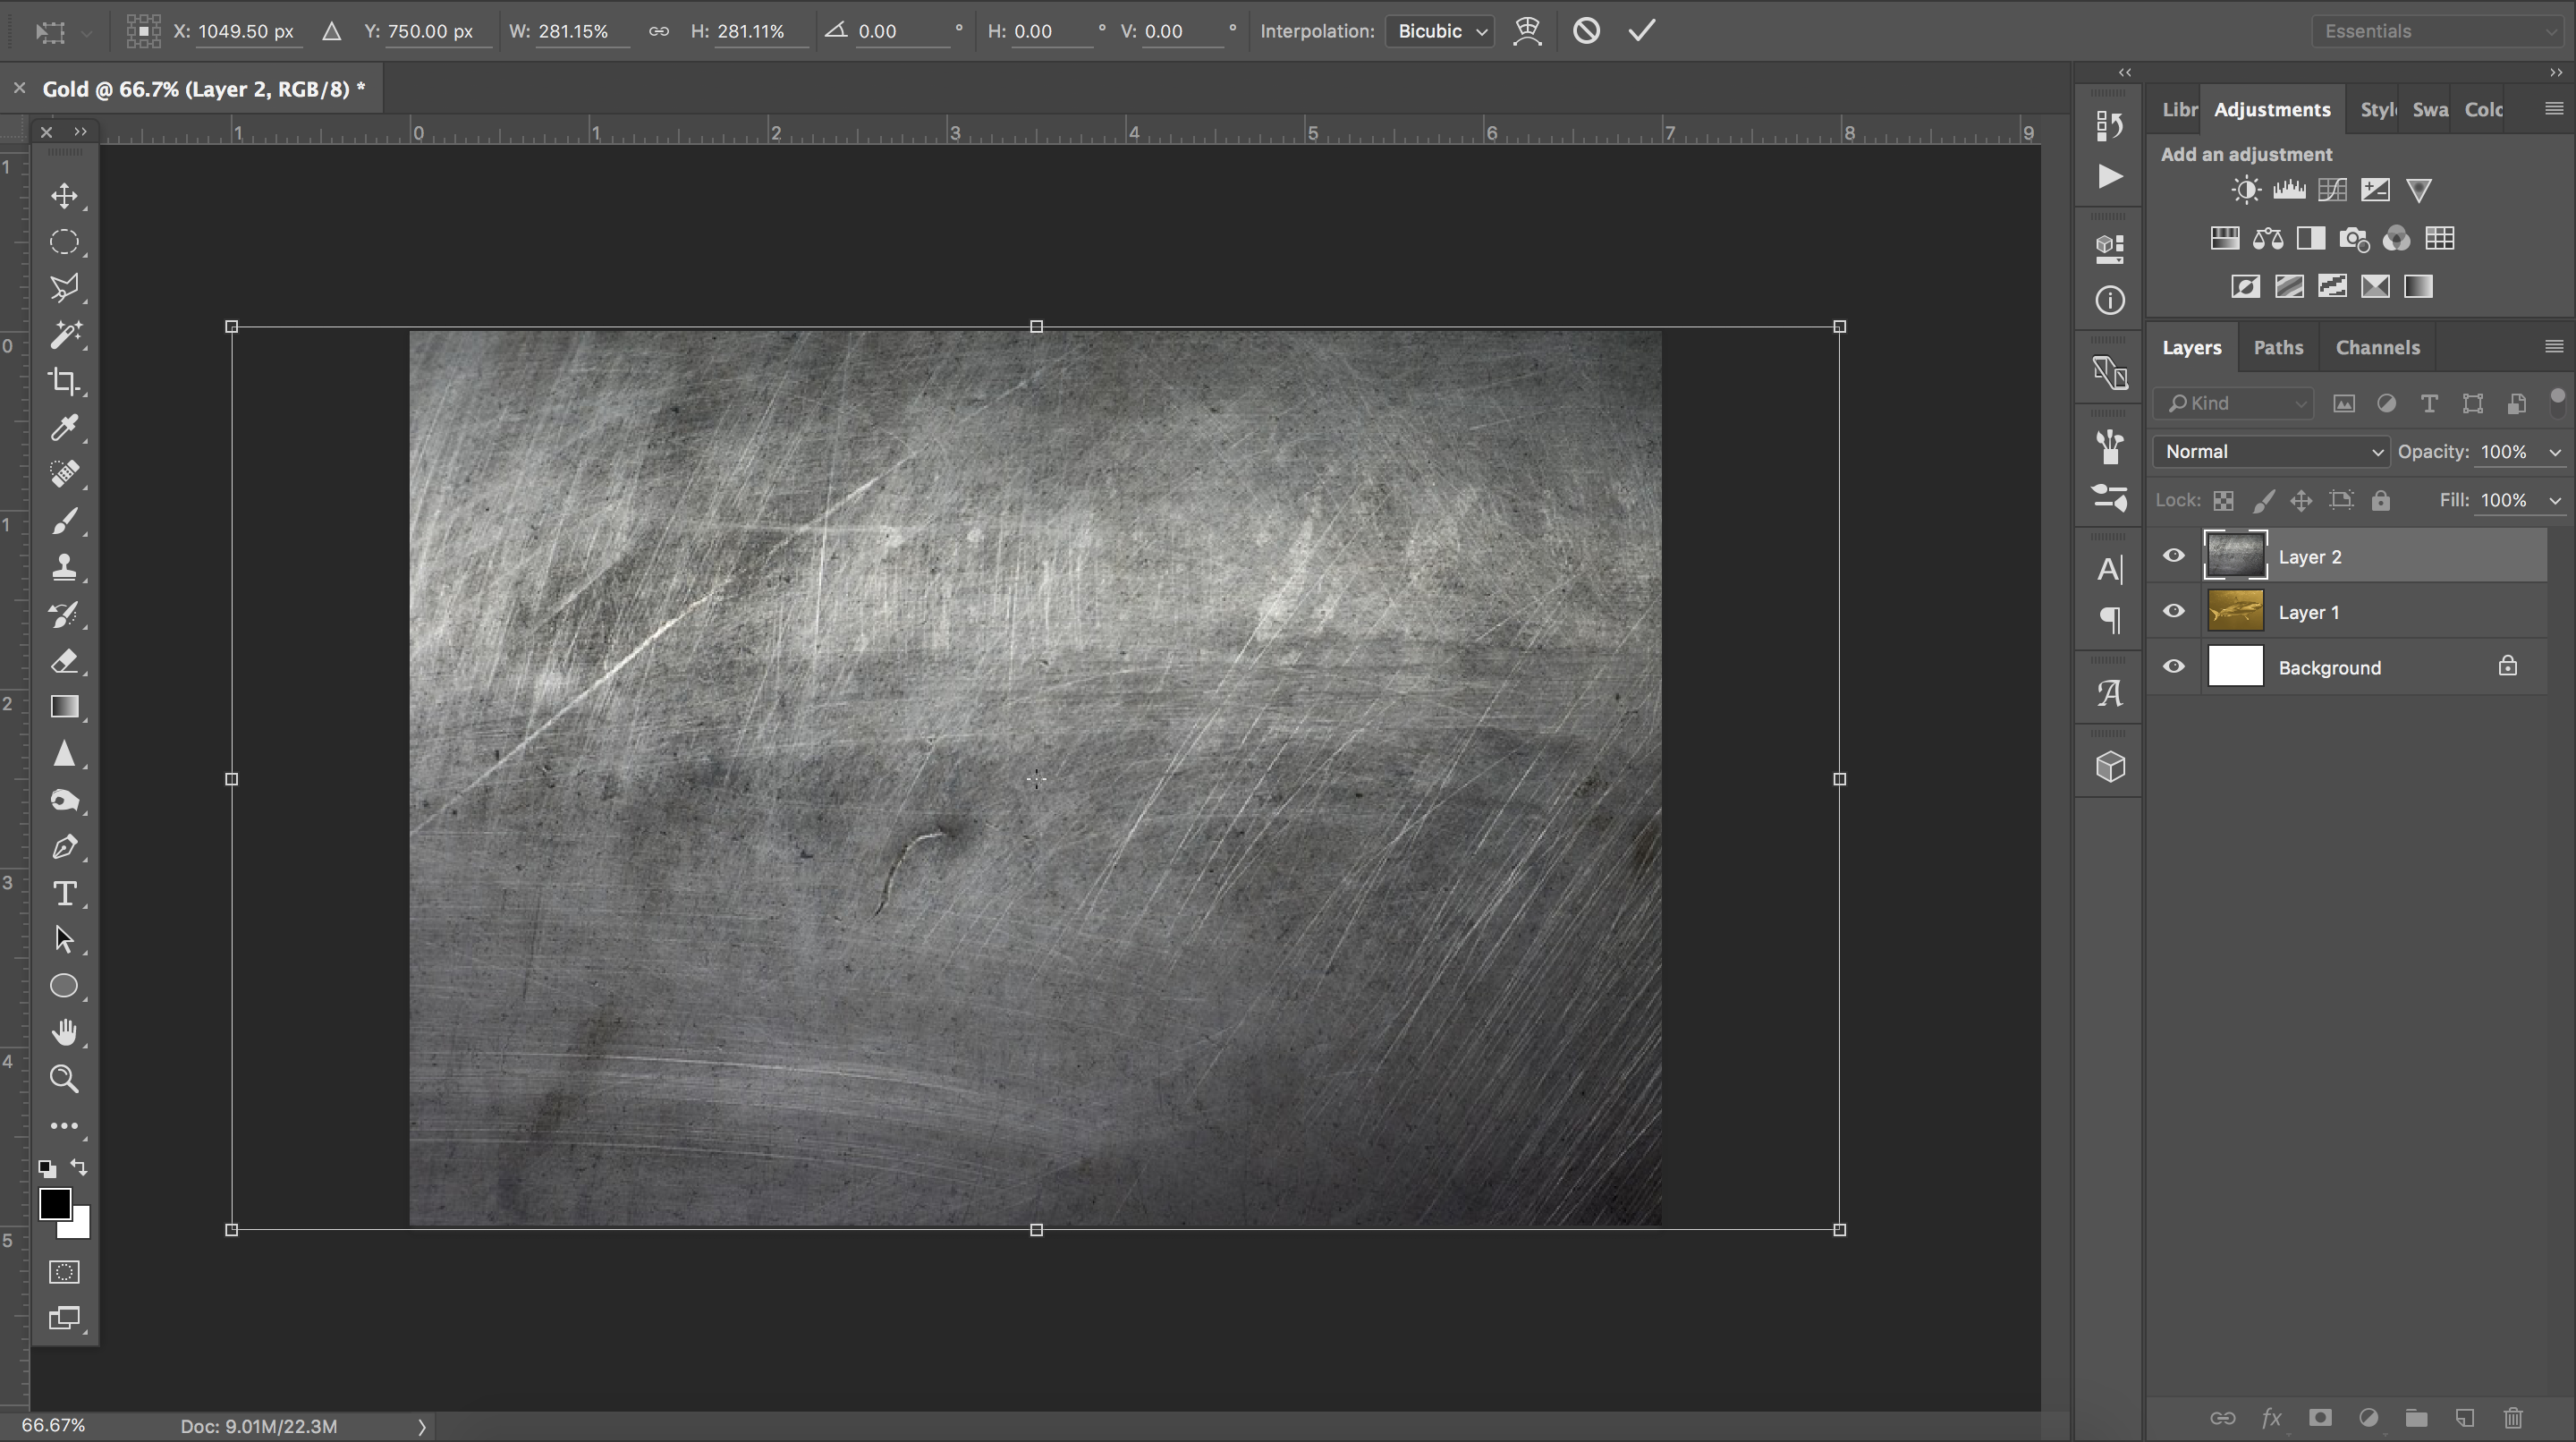
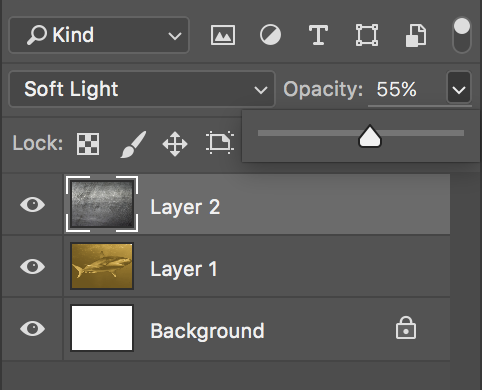

To make your gold look more convincing and realistic, you will want to add texture to it.
- Use a texture stock image (labeled for reuse). Drag and drop the image into the canvas. This will place it as a layer on top of the base image.
- Use the transform tool to enlarge the document to cove the whole area.
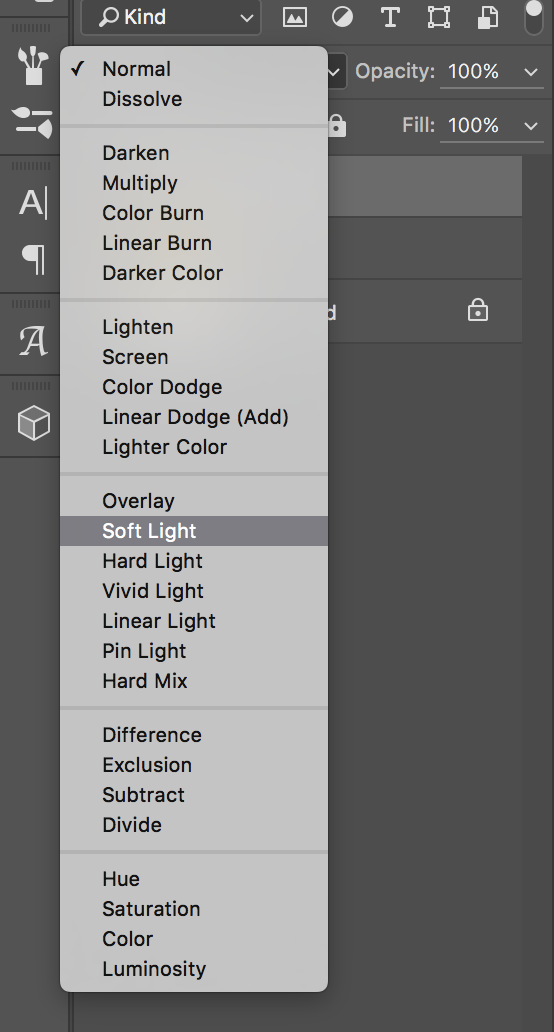
- Click the drop-down menu for the "blending styles" above the layer pallete.
- Apply the "soft light" blending mode.
- You may want to adjust the opacity of the texture layer to soften the impact on the base image.
- Bask in awe at the brilliant golden image you have created.