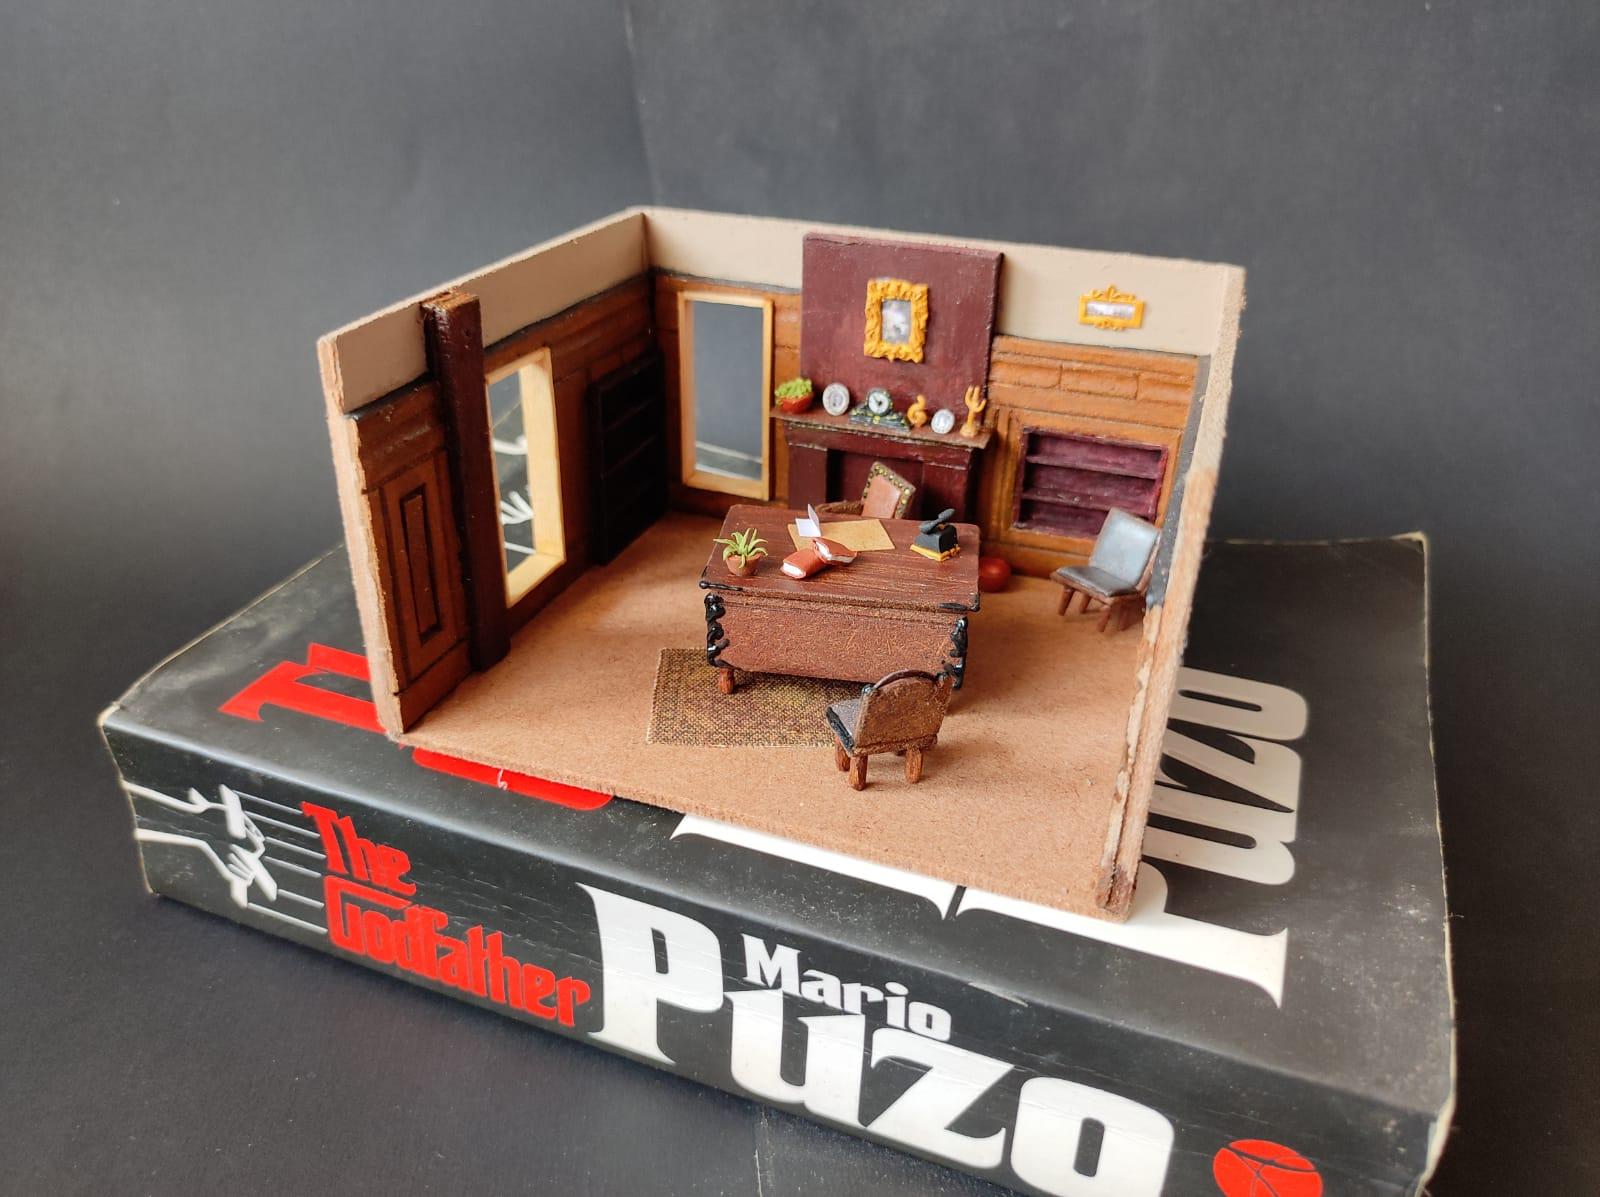
The Godfather's Office: 1:50 Scale Diorama
by Ahona Mukherjee in Design > Art
4217 Views, 36 Favorites, 0 Comments
The Godfather's Office: 1:50 Scale Diorama

.jpeg)
The Academy award winning "The Godfather" (Dir. Francis Ford Coppola starring Marlon Brando, Al Pacino, Diane Keaton, James Cann) takes us into the mysterious, dangerous while lucrative, thrilling and dark underworld of the Italian mafioso... A trip that I personally just cannot forget. The movie, one of my absolute favorites, made me fall in love with everything it portrayed... The characters, their stories and of course their spaces and lives. In this Instructable, I recreated Don Vito Corleone's office, the place which represented all that thr patriarch stood for. And as this iconic piece of cinema celebrates its 50th anniversary, I decided to make the diorama in 1:50 scale!
So here is a project you just cannot refuse!
Supplies
.jpeg)
.jpeg)
.jpeg)
.jpeg)
.jpeg)
I divided the making into two components:
The Woodwork (and faux woodwork)
- Materials:
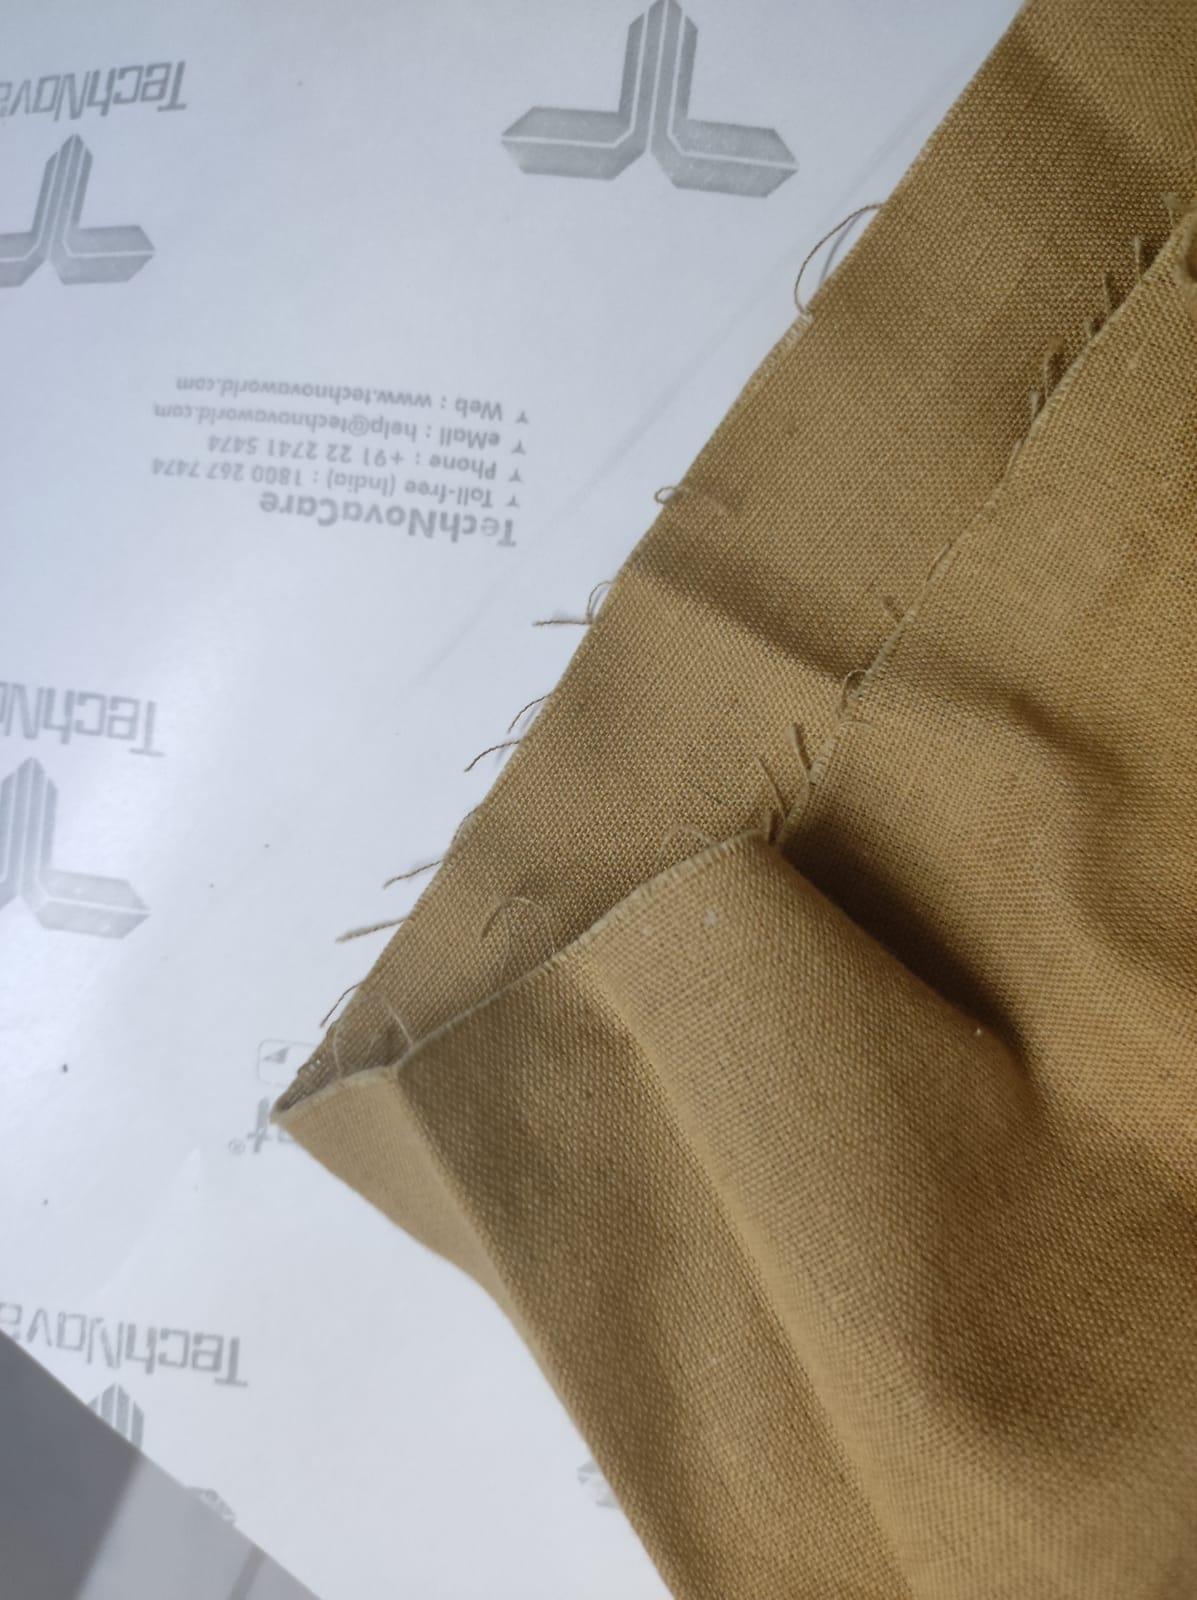
- MDF (Medium Density Fibre)/LDF (Low density fibres) : I used a variety of sheet thickness and sometimes even blocks of these throughout the project. All that i used are collected scraps from my college XD. If you are looking to source these, you can get yourself some sheets of 2-5mm thickness. Alternatively, you can use scrap wood, cardboard and balsa sheets.
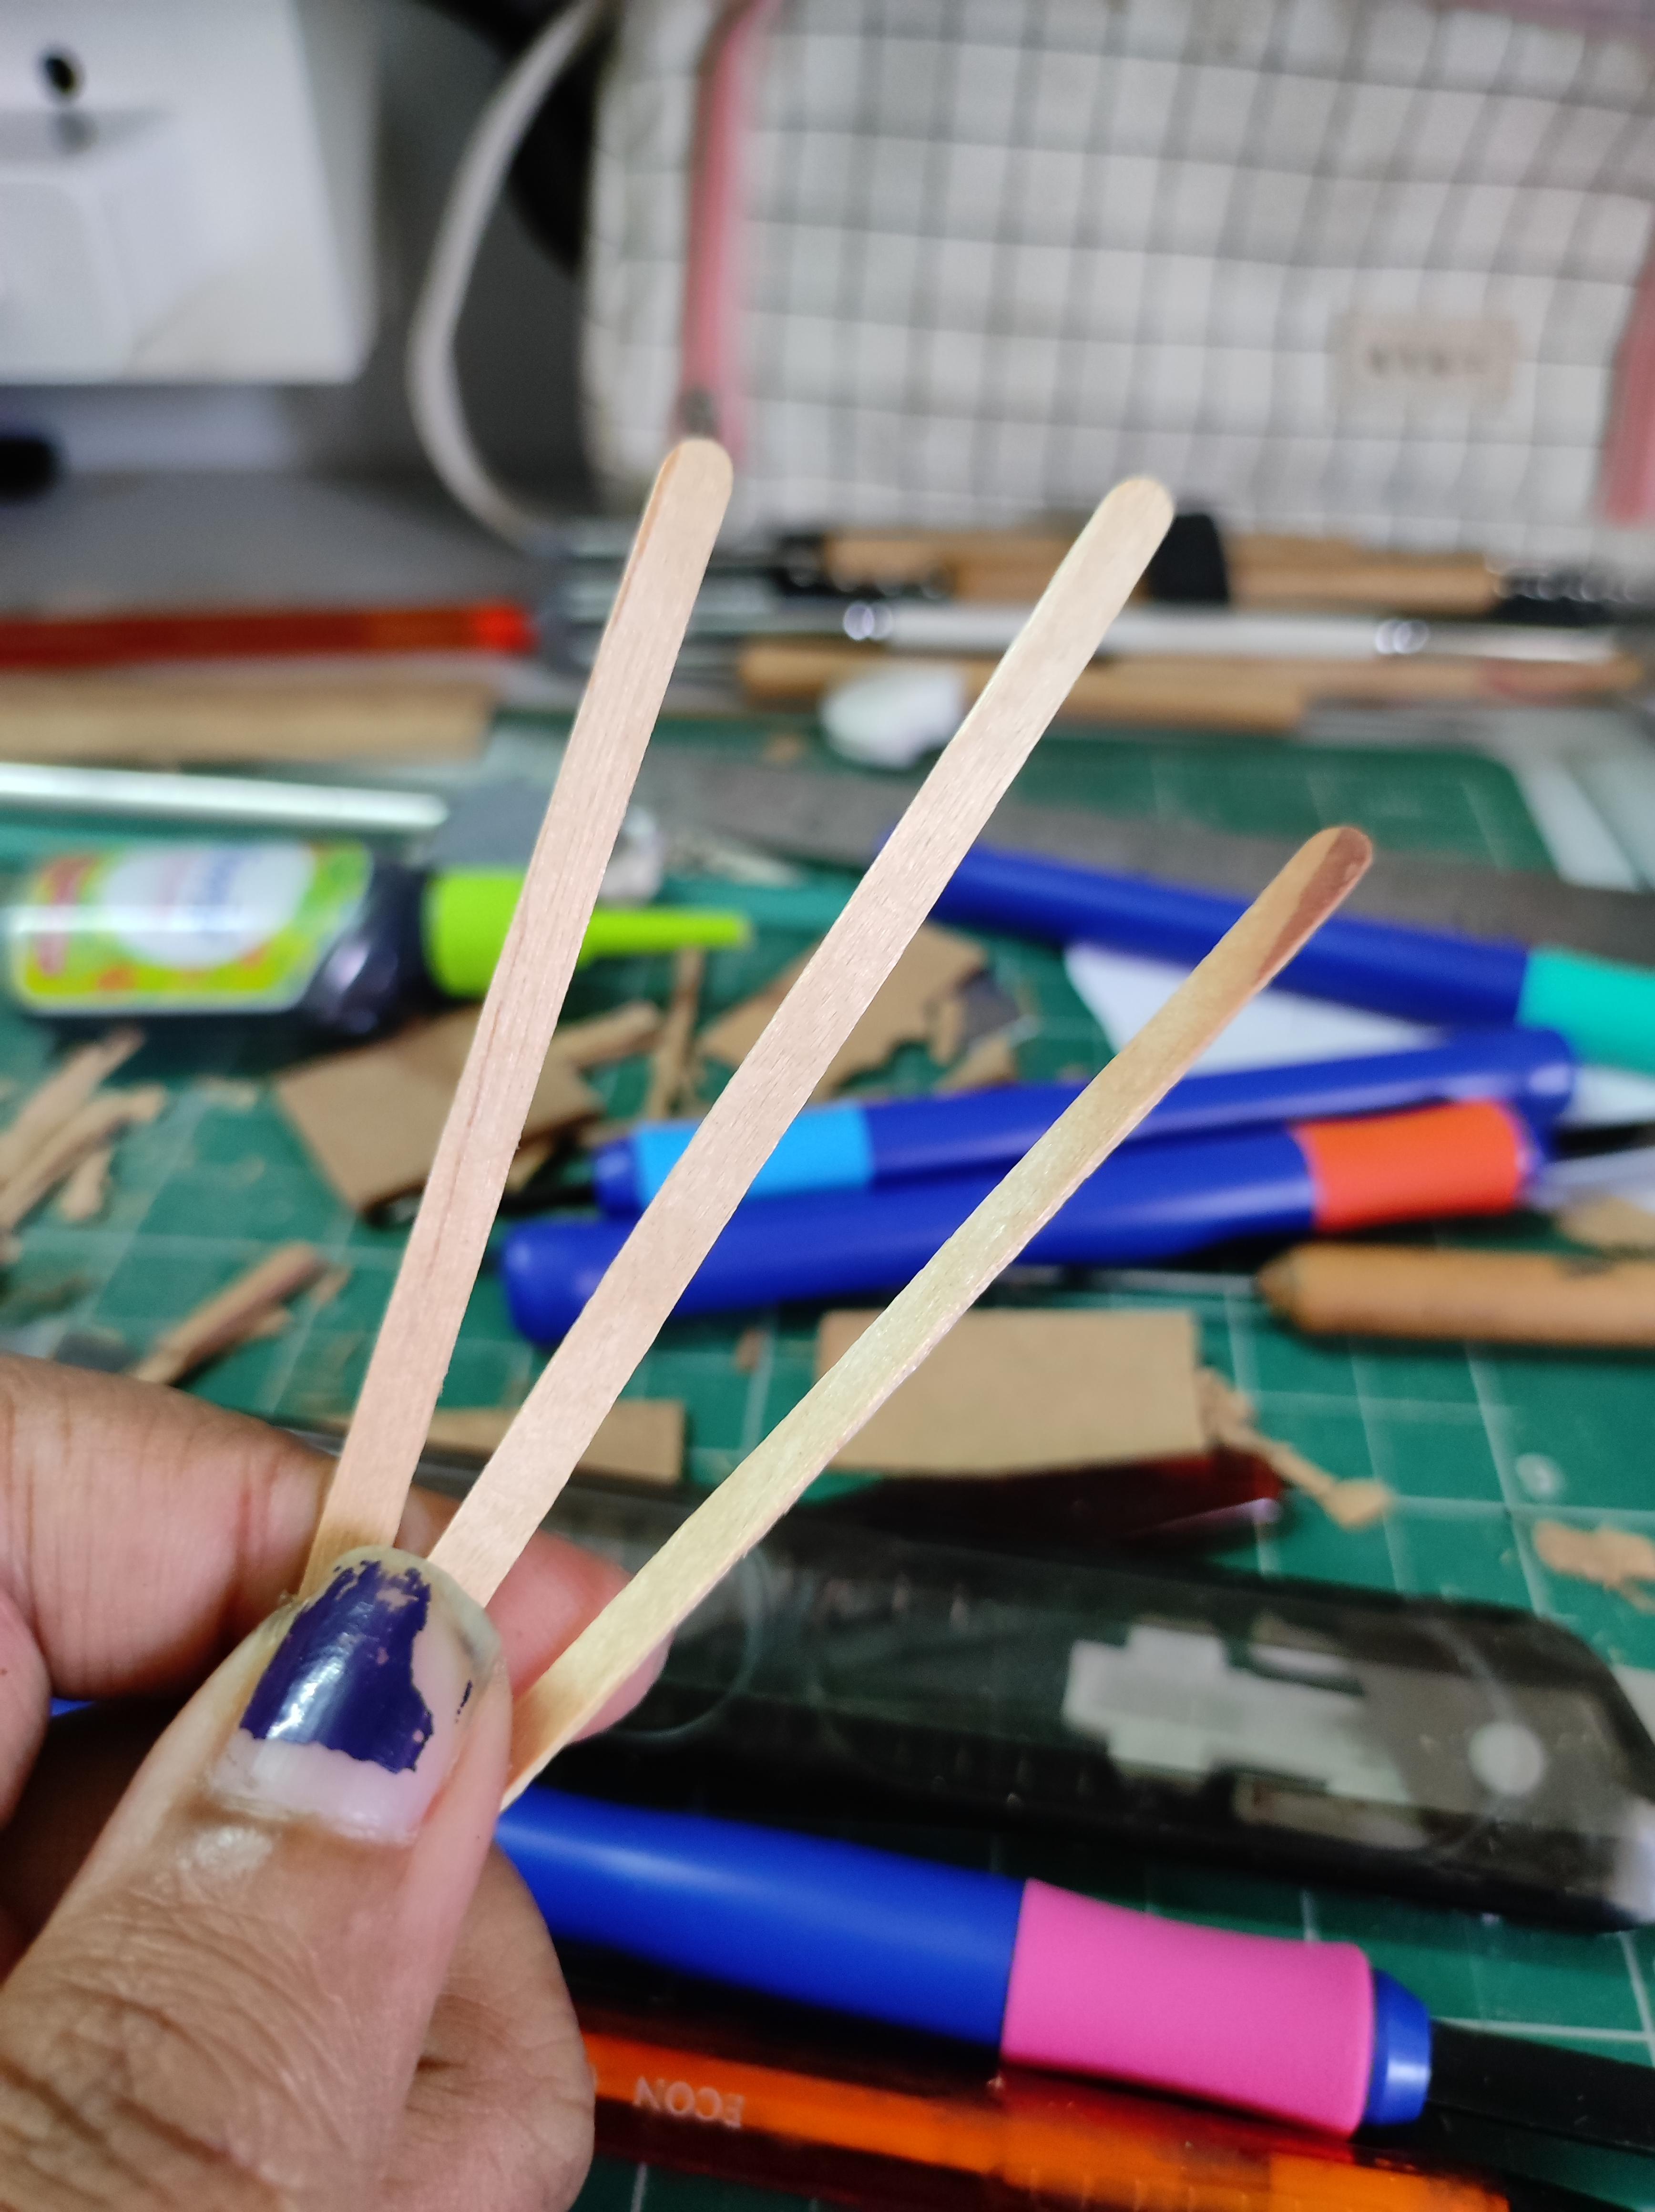
- Coffee stirrers: I have a pack of these thin popsicle sticks which I find very very useful! If you can't buy them, I'm sure you can pick some up from out local cafe.
- Paper: In some places I used thick Kraft paper for adding details.
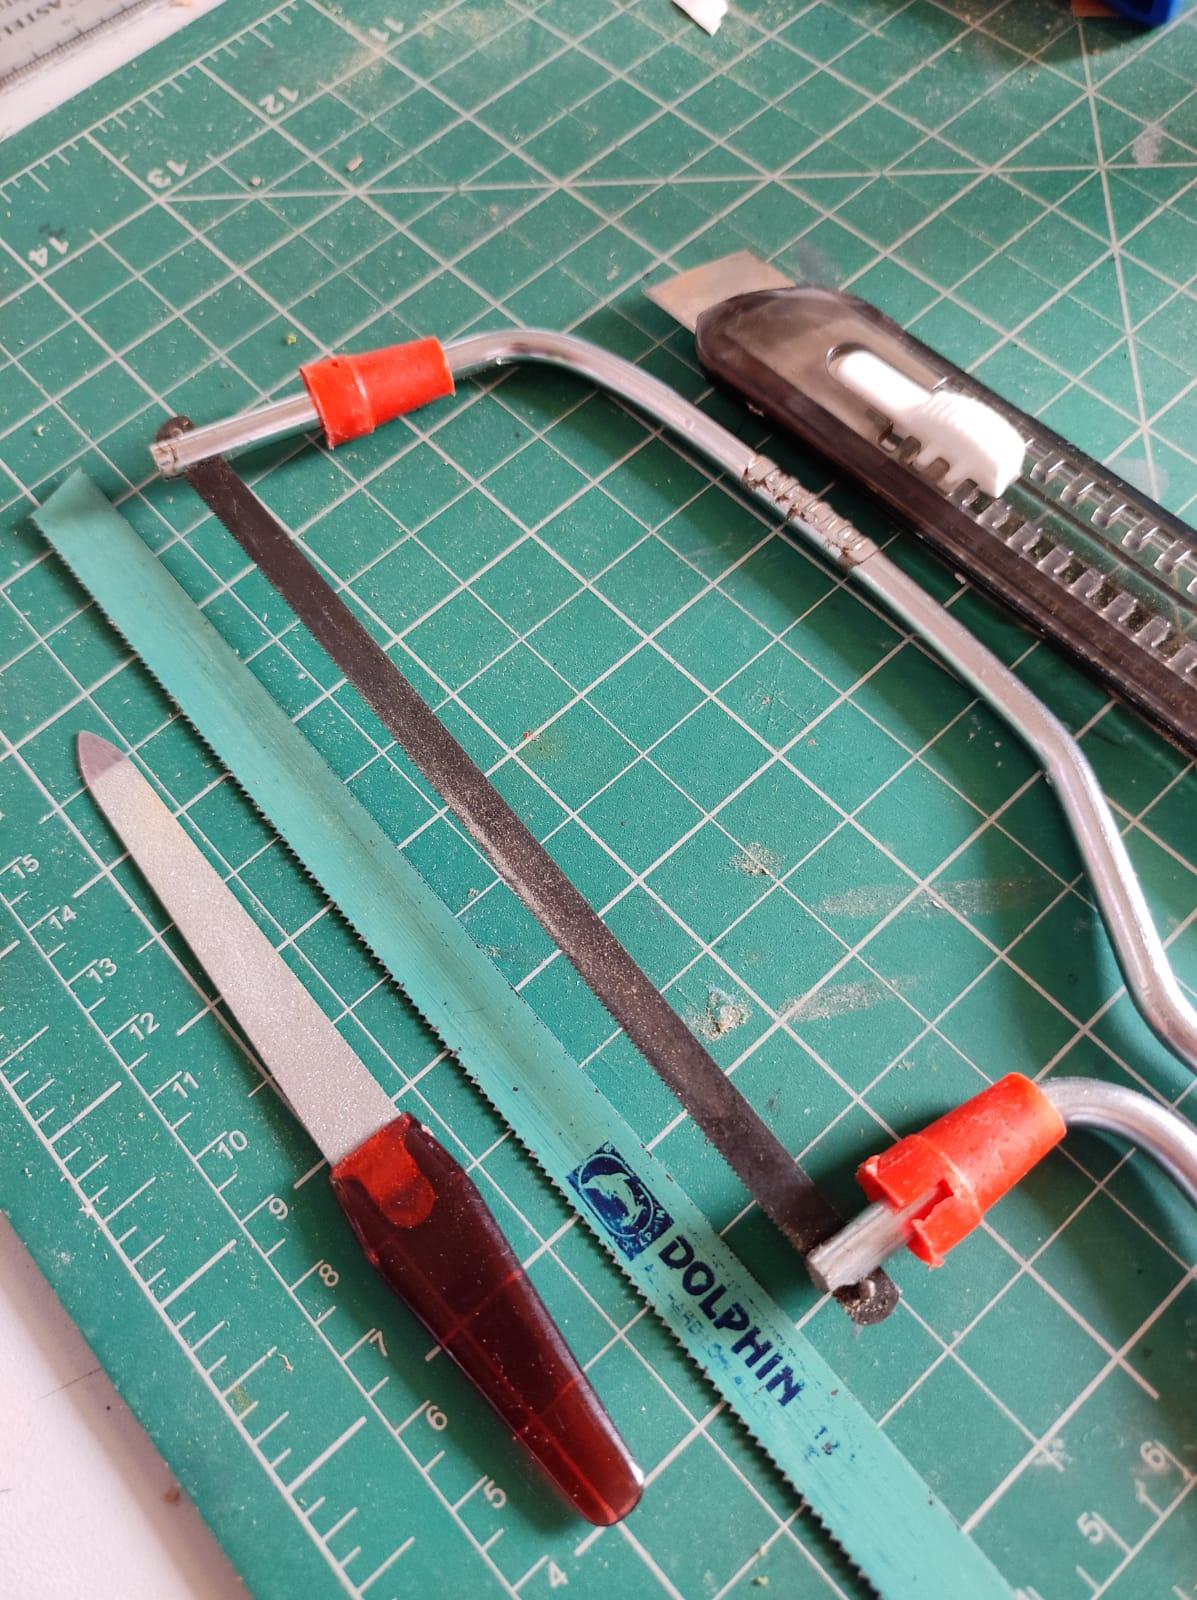
- Tools:
- Mini Hacksaw/ hacksaw blade: I got these from a local hardware store
- Box cutter: A common paper cutter from a craft store will do. Keep some extra blades handy so you don't run out of sharp edges.
- Nail file: A normal nail file I picked out from the make up section is a department store.
- Wood carving tools: Optional: I purchased a set of proper carving tools to explore and perfect the carving. This was expensive and isn't a necessary investment.
- Sandpaper: Having different grits of sandpaper is always handy.
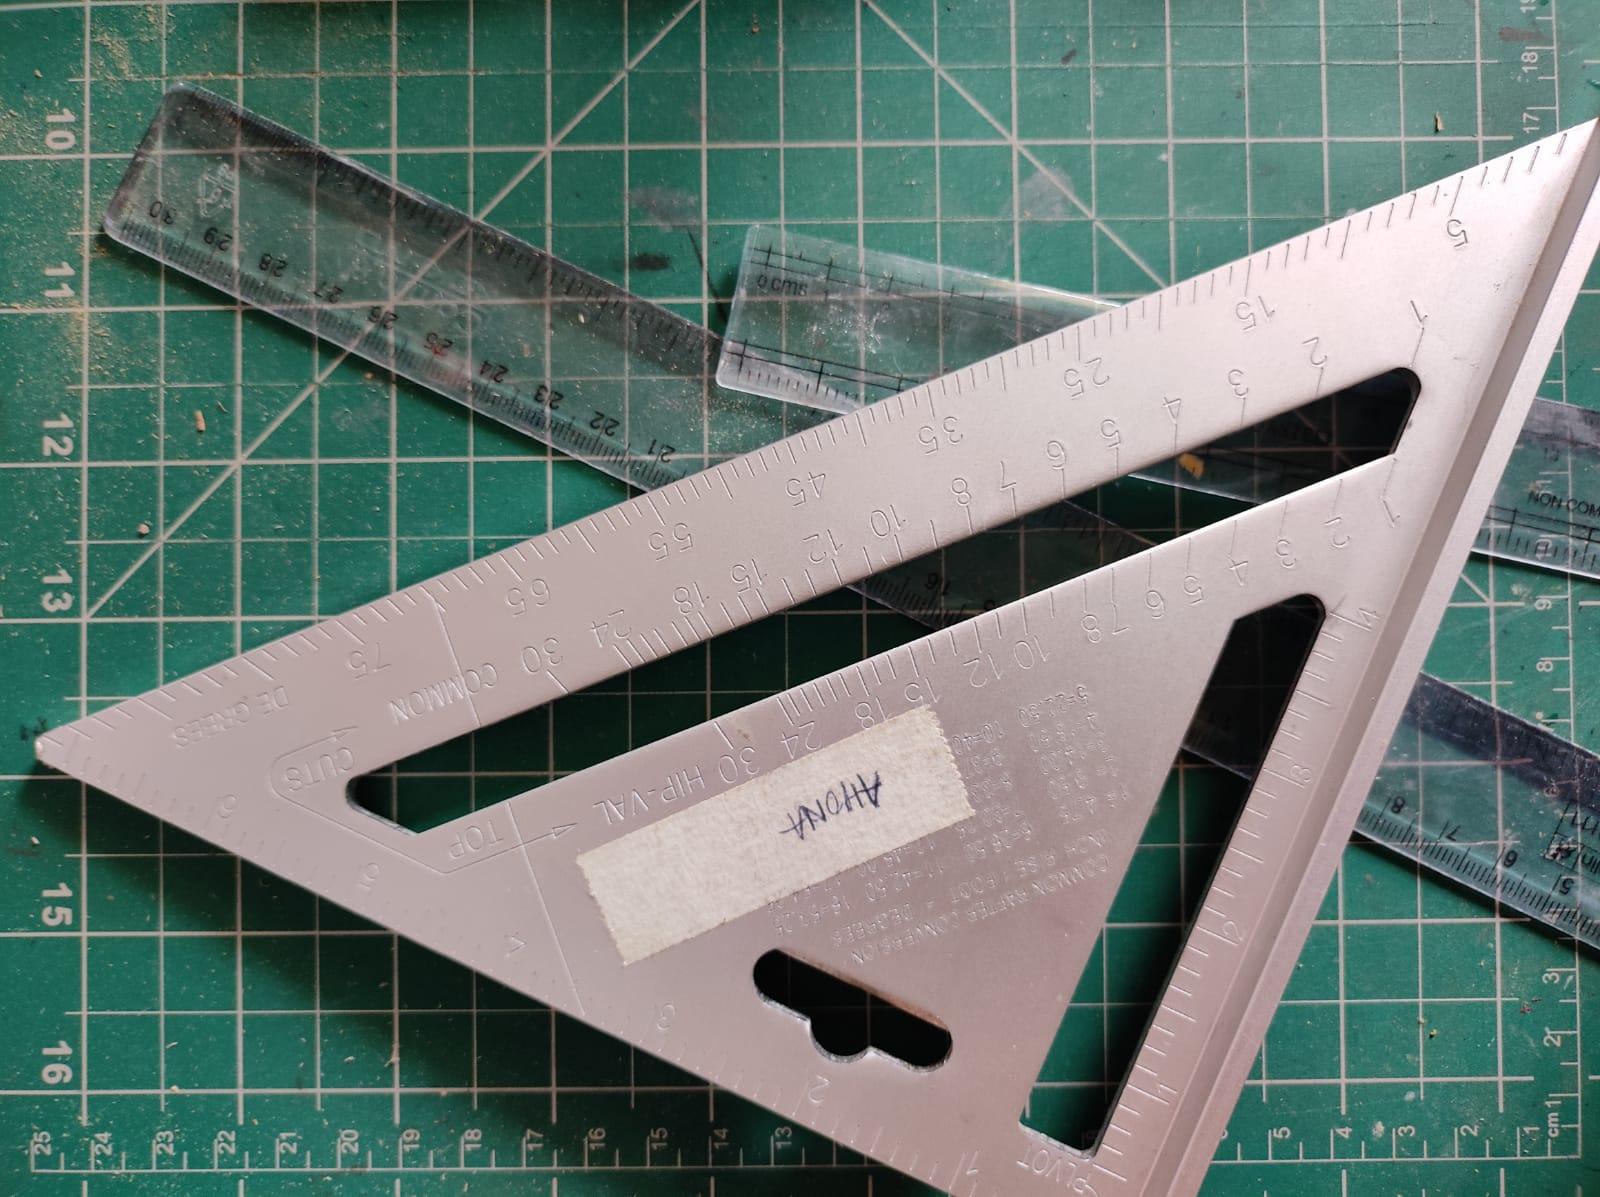
- Tri-squares, Set Squares and Rulers: these are of course for the measurements and the accuracy.
The Detailing
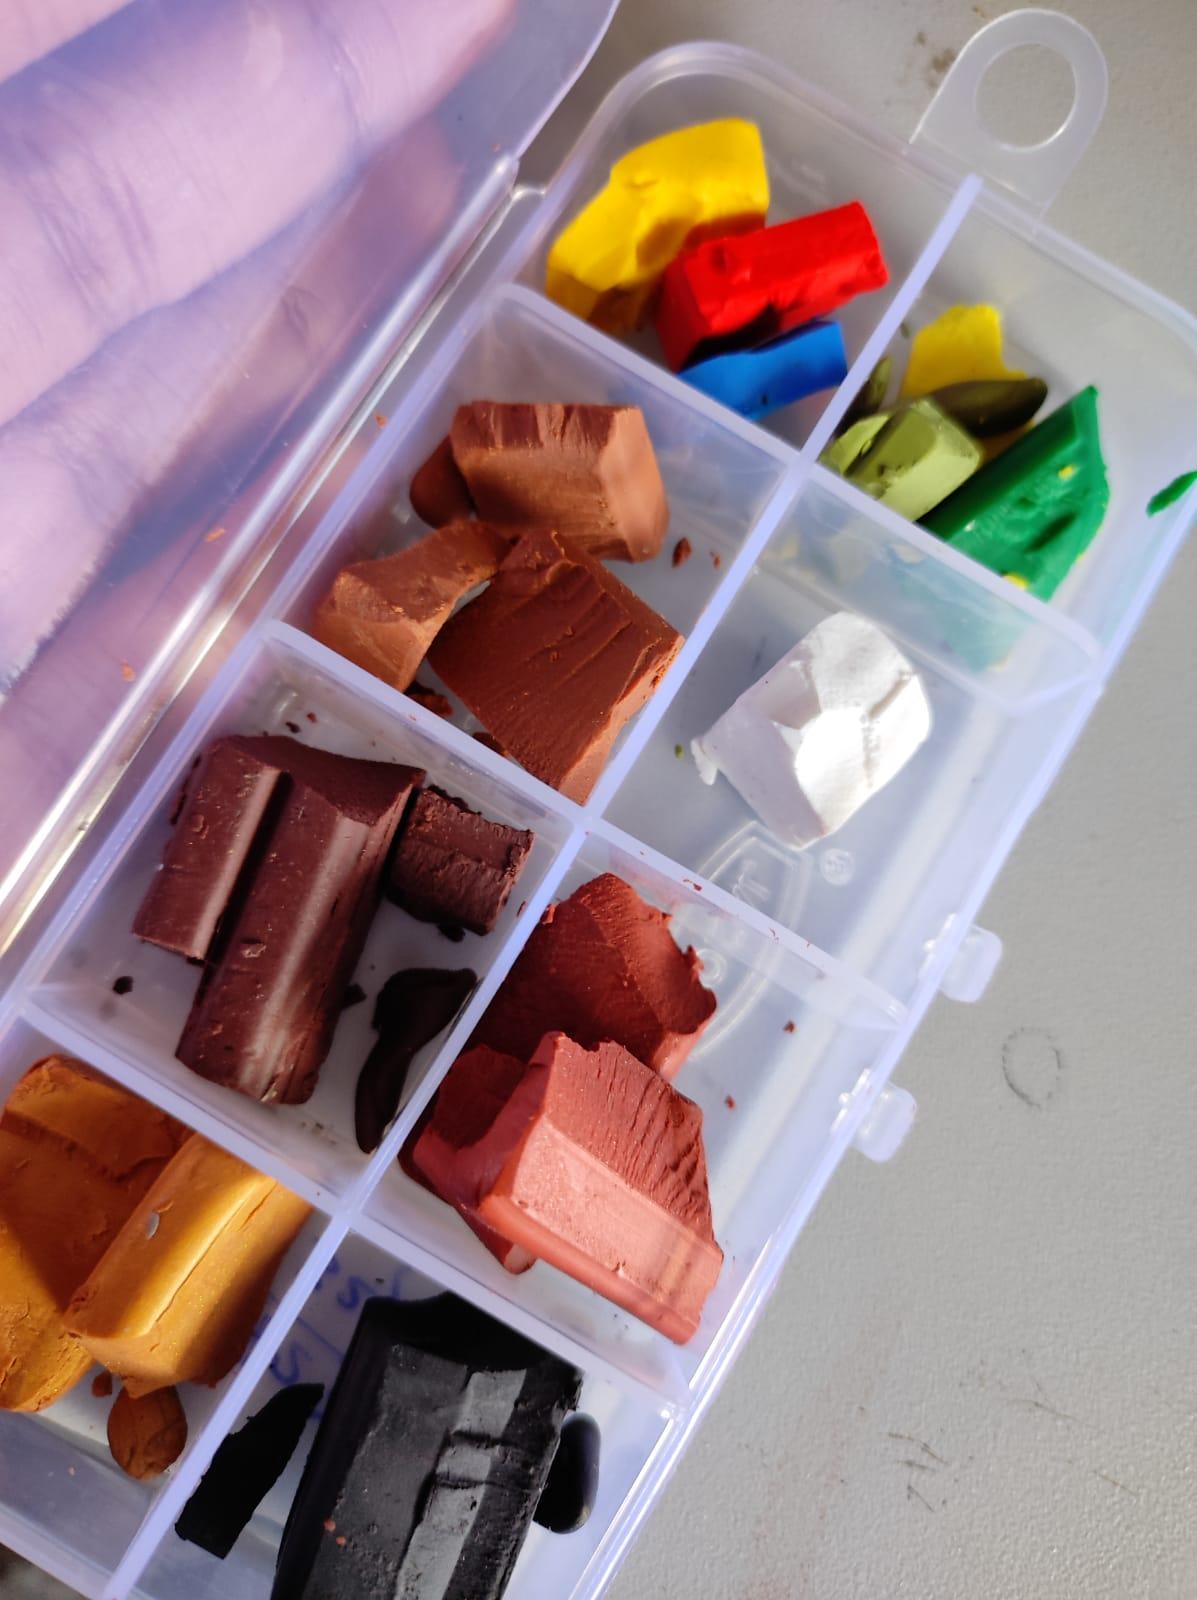
- Materials:
- Polymer clay: I use Fimo and Sculpey Premo. The colours I needed are shown in the photo
- Sticker Paper/Fabric for the Carpet
- Paper and if possible a printer.
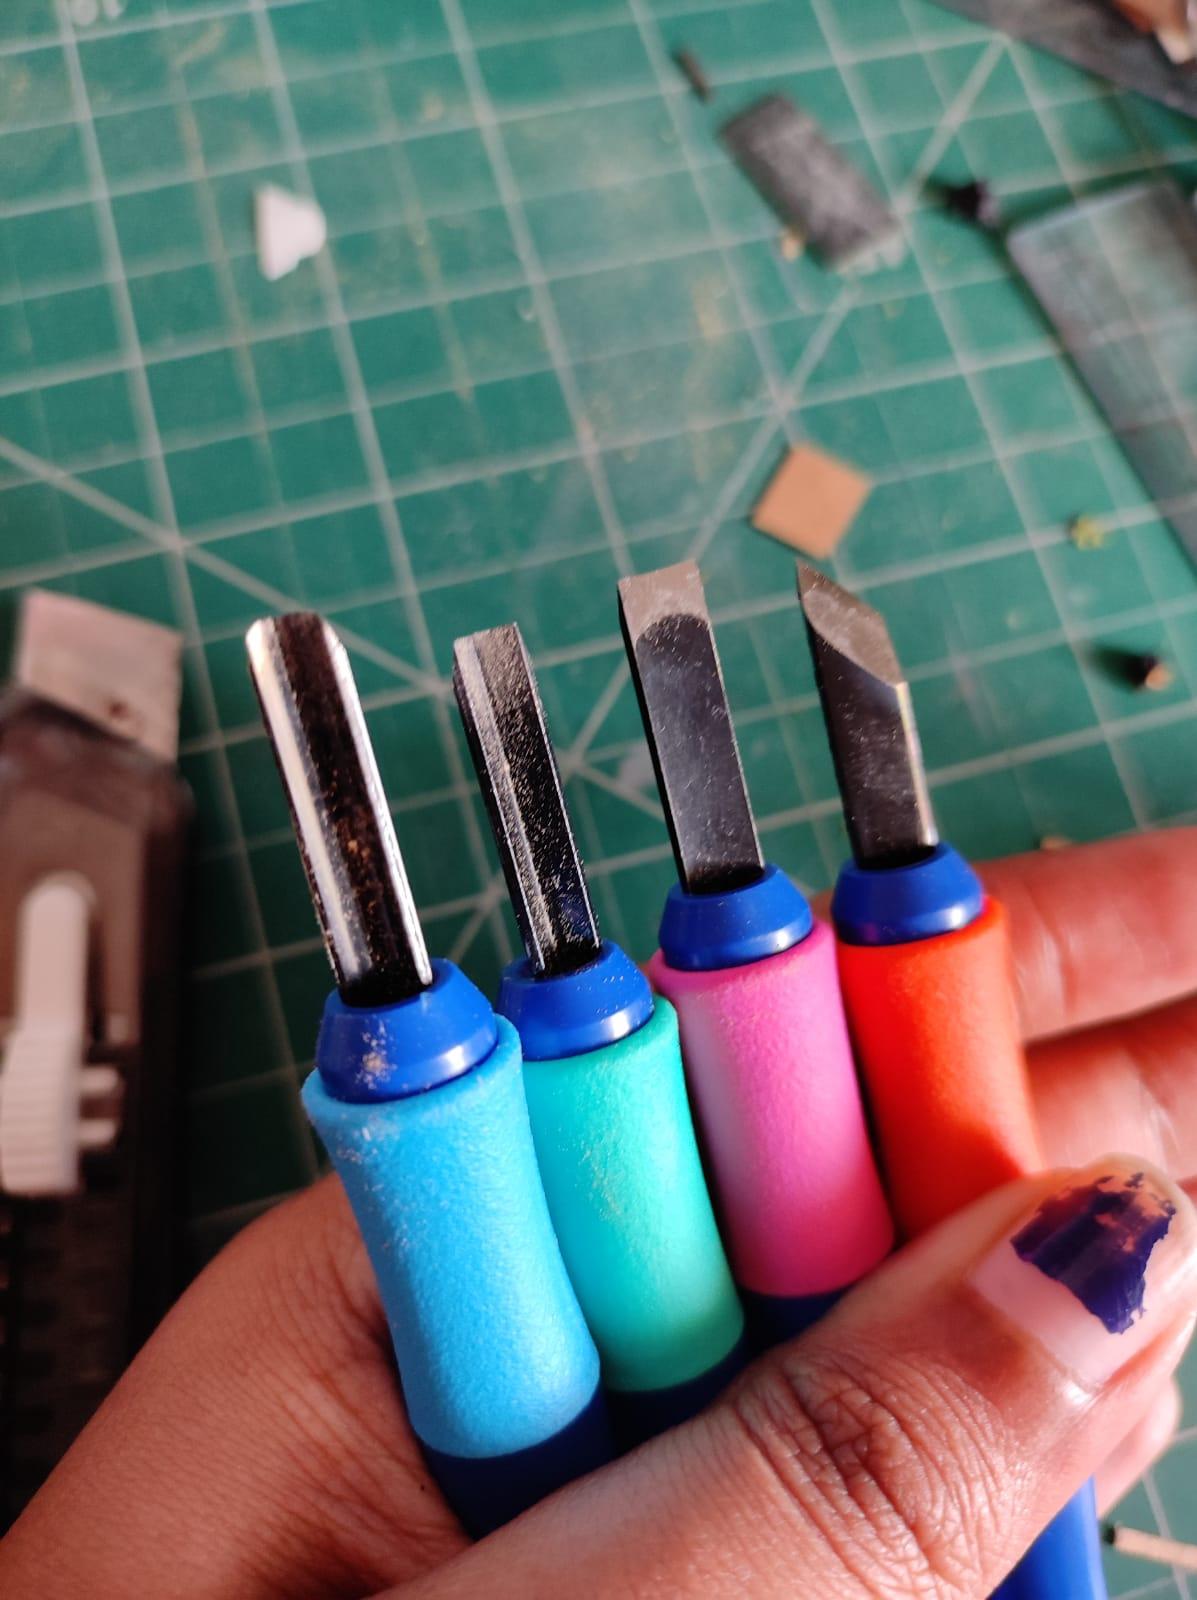
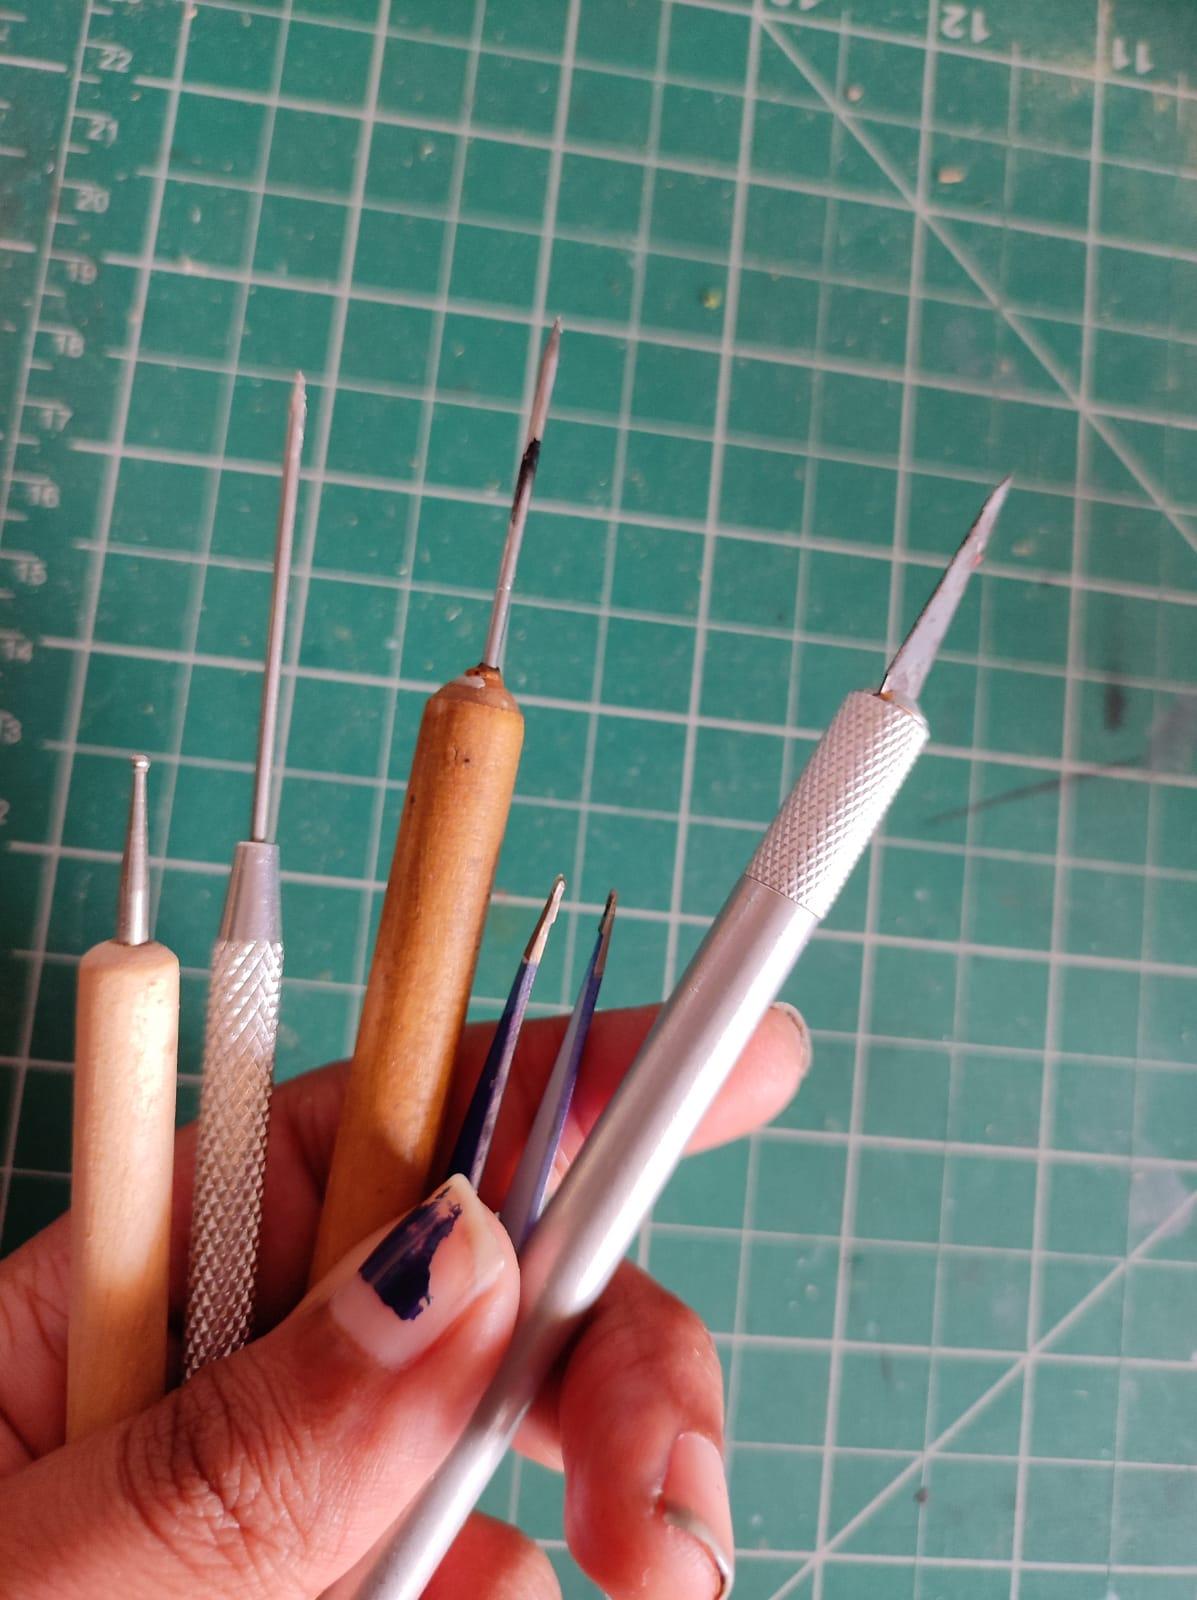
- Tools:
- Detail Knife/ X-acto cutter: Can be used for clay or paper
- Needle tools
- A small ball tool
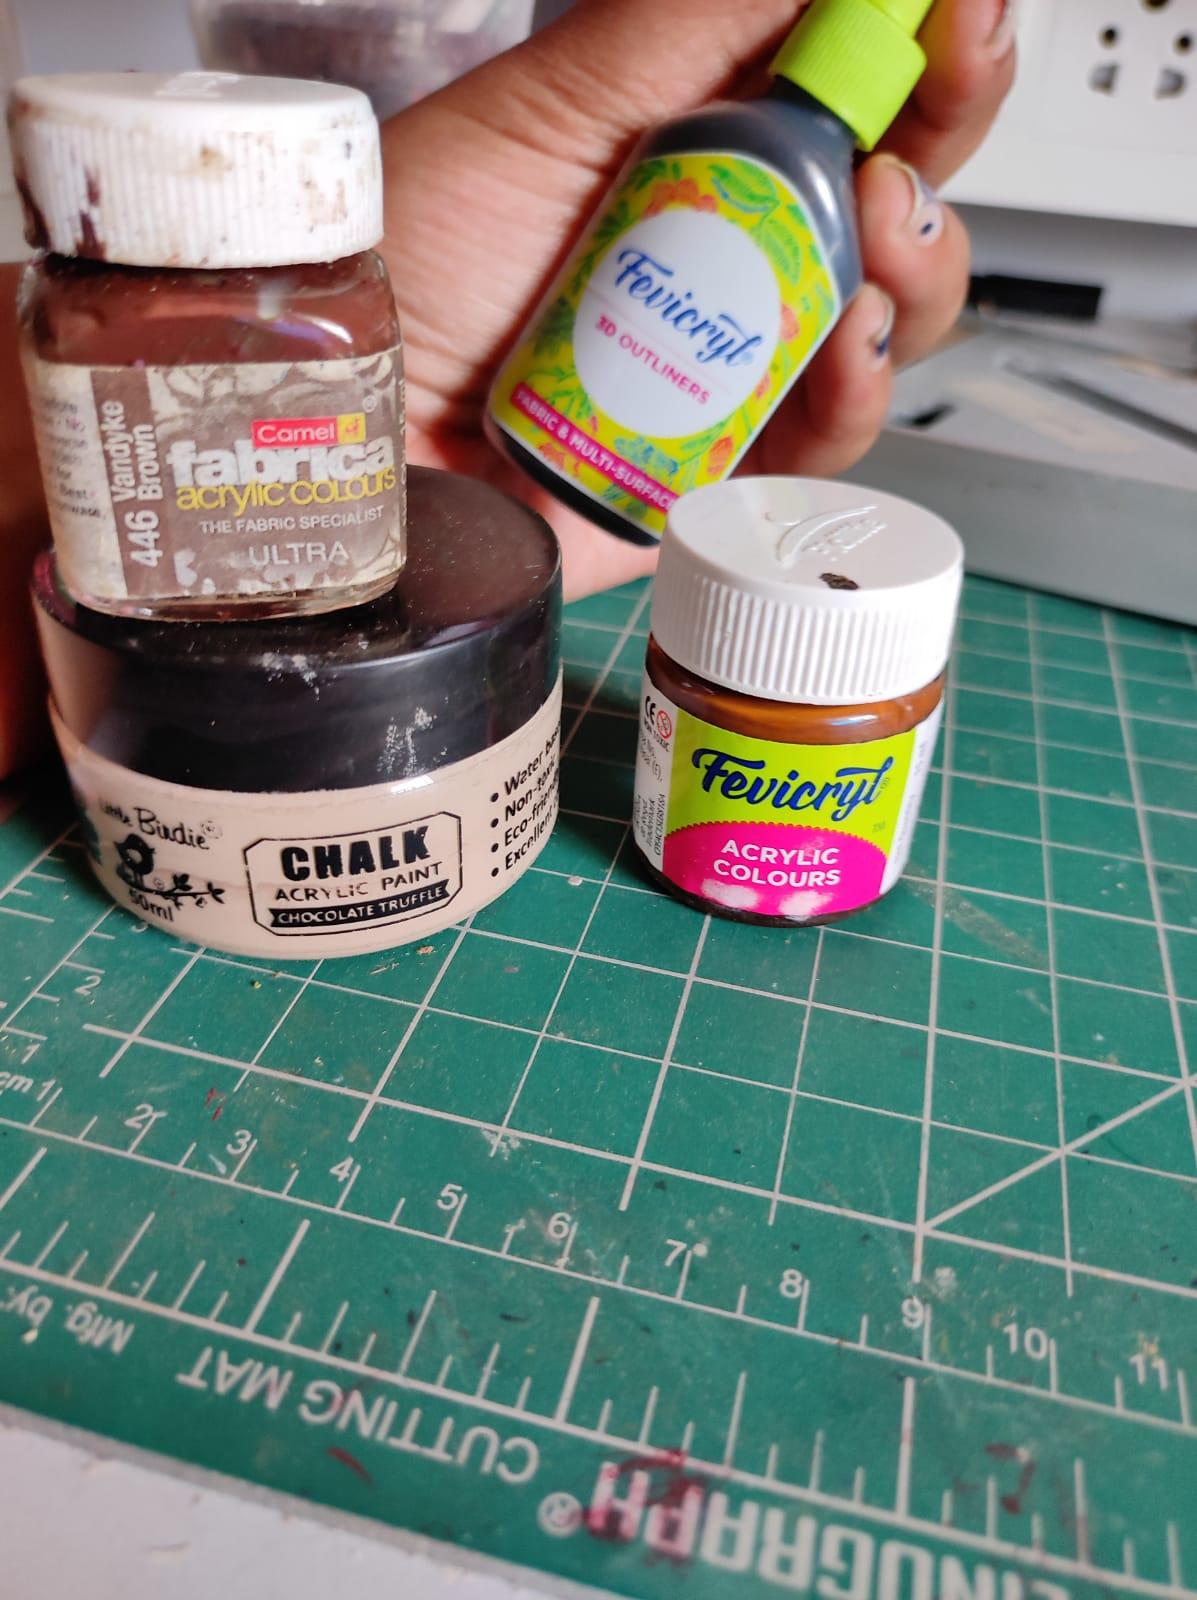
- Paints:
- Brown acrylic paints: Having a bunch of different shades are a good idea!
- Chalk paint: For the walls, so a light pale shade will do
- 3D markers for detailing.
- Brushes and water
Planning & Research
.png)
Before starting work on a diorama, I always find it helpful to sketch, take notes and look in detail as references. Its easier to refer back to these notes and measurements later when we start making the elements.
Try dividing the notes into the following headings so you capture as much details as possible:
- The Layout: How the room is, the dimensions, where are the doors and windows and lights, are all the walls equally thick so on.
- The Furniture: The chair, table, bookshelves
- The Details: Things that give the room character, the wall hangings, the photos, the plants... all the props.
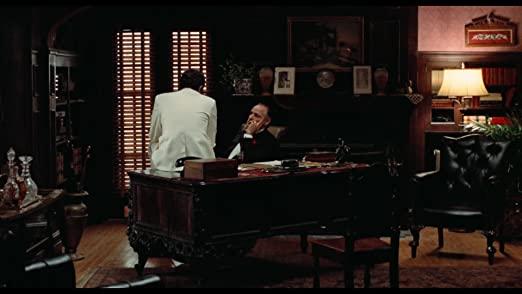
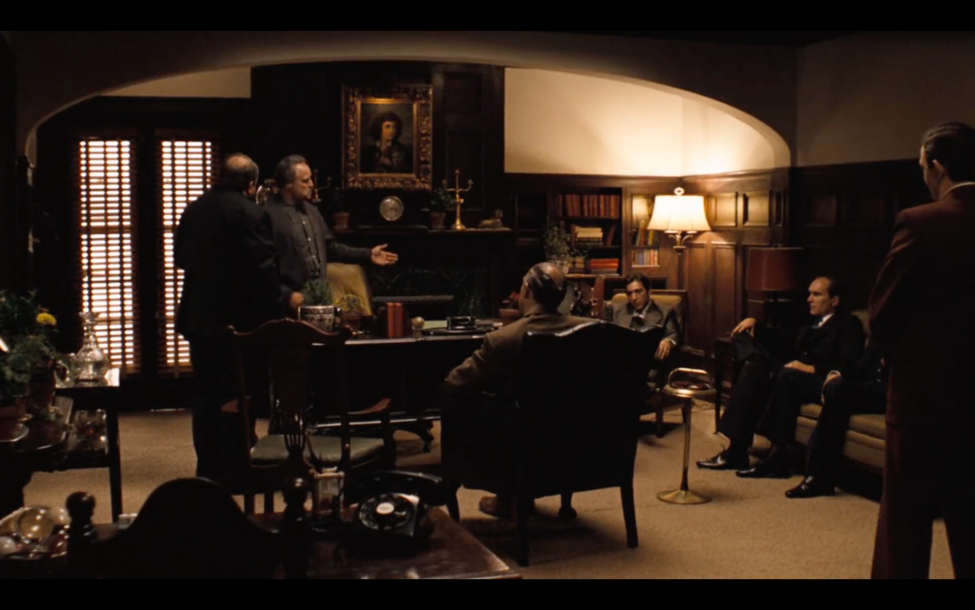
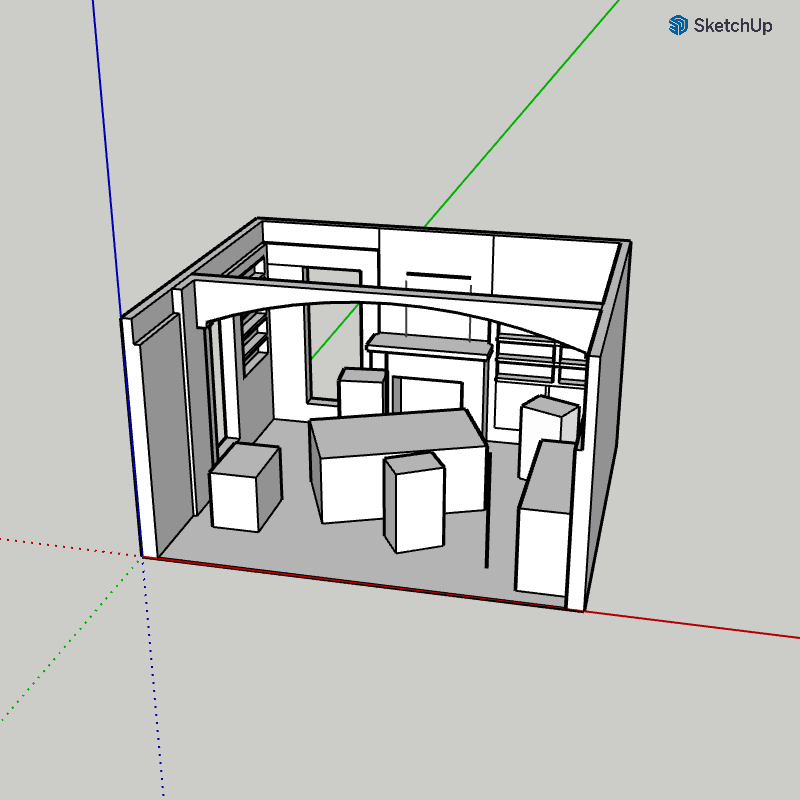
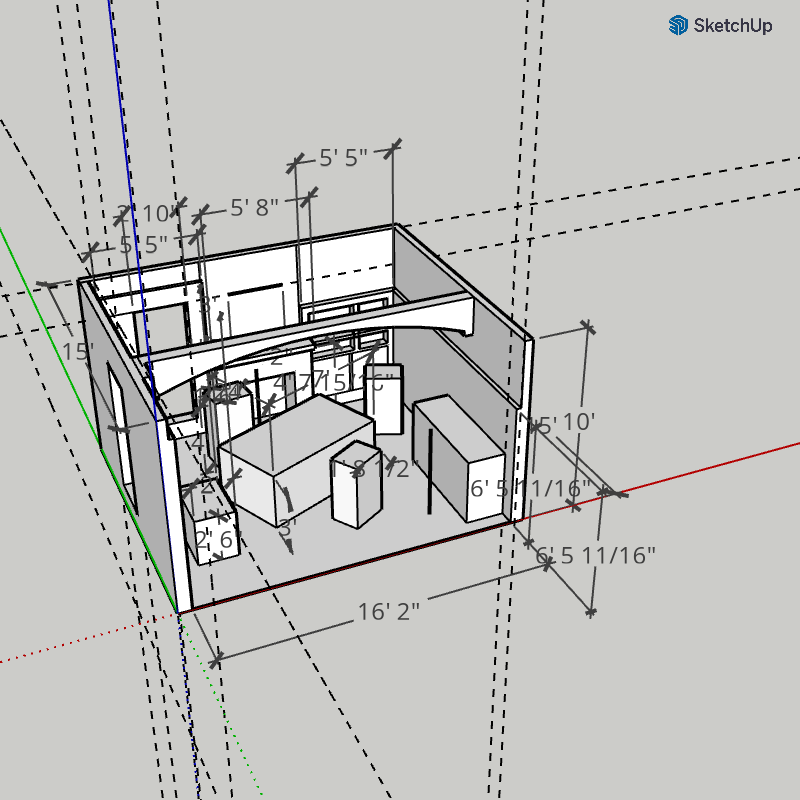
I started with looking back at the scenes where the office was features prominently. The opening scene HERE can be a lovely reference to begin with. Once I had the scene fixed in my mind, I went ahead modelling it in 3D using Sketchup.
The 3D modelling helps me visualize the size of elements in reference to the others and cross check if the scaling was done correctly. This is an optional step and you don't have to do this. But in case you wish to, Sketchup is a quite easy software to pick up and use for free online, You can refer these tutorials if you would like to pick up this skill!
The scale I made this mini diorama in is 1:50 (which means for every 50 units, the scaled version would be 1 unit). I use this calculator to help me with the scaling. In case you wish to make this in a different scale, feel free to adjust the dimensions accordingly.
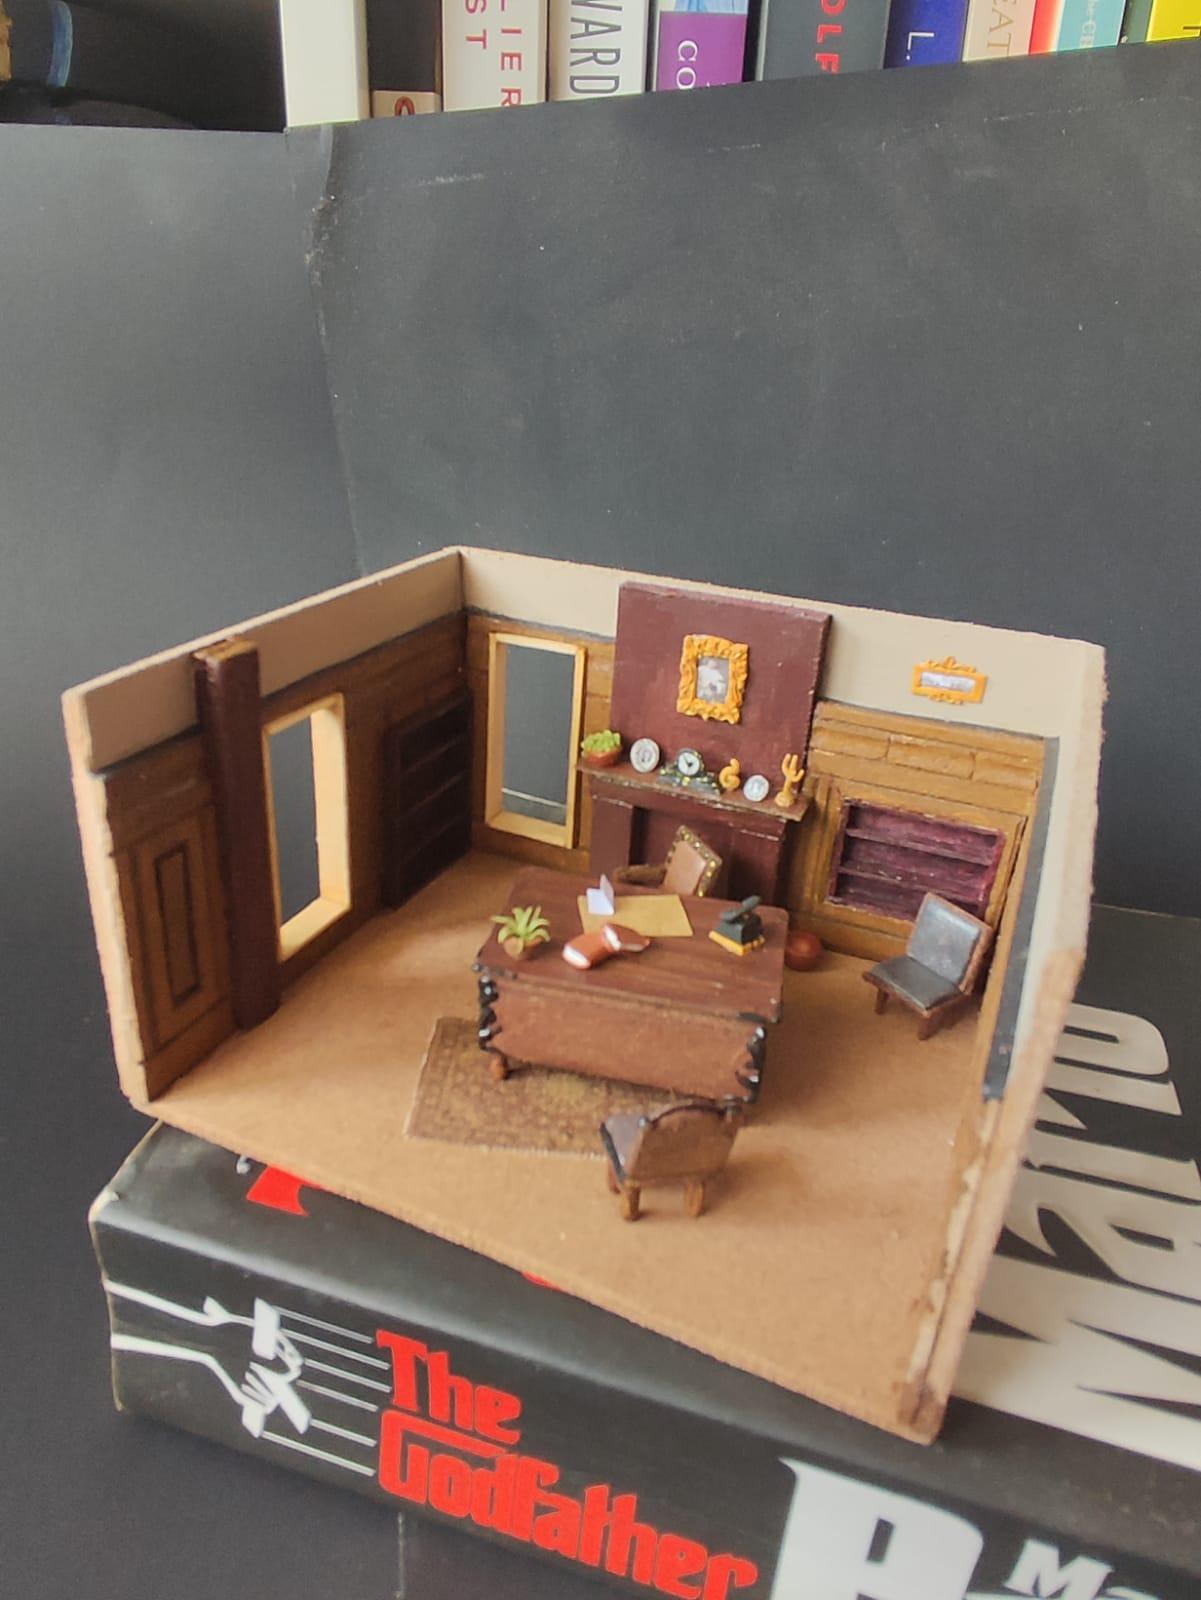
The Room
As the whole scene will play out within the room, making the box-like structure carefully and neatly is very important.
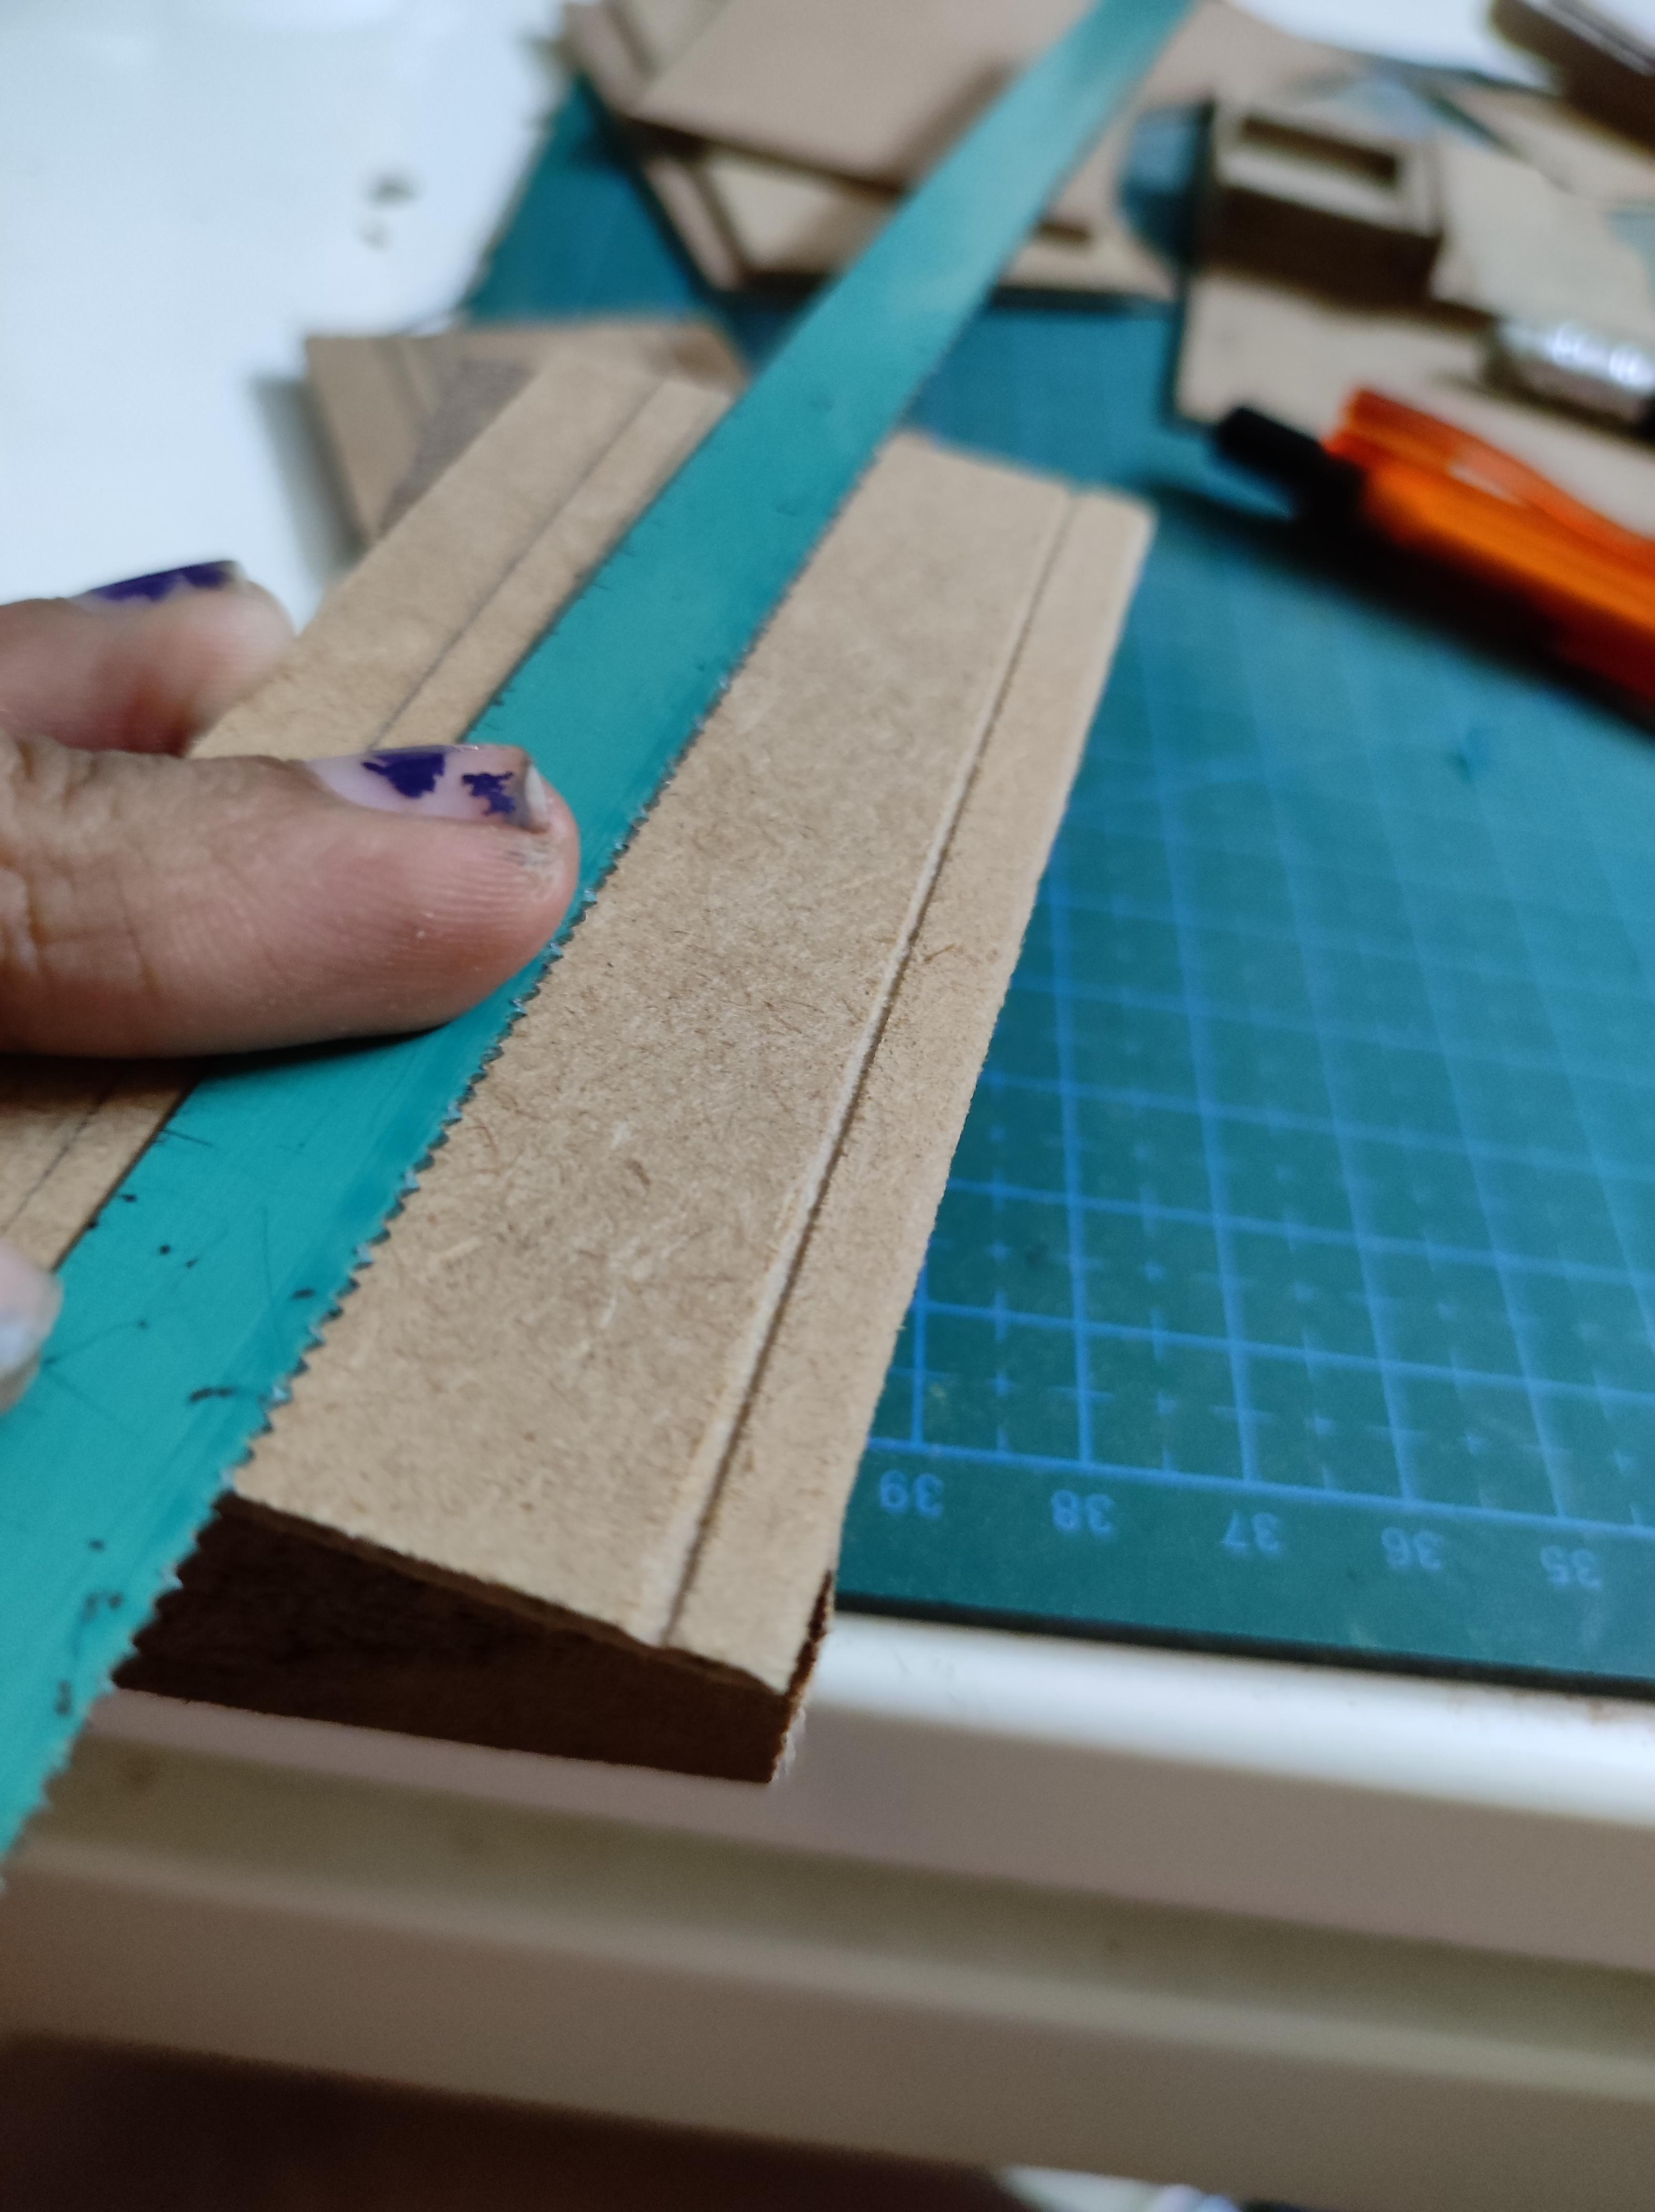
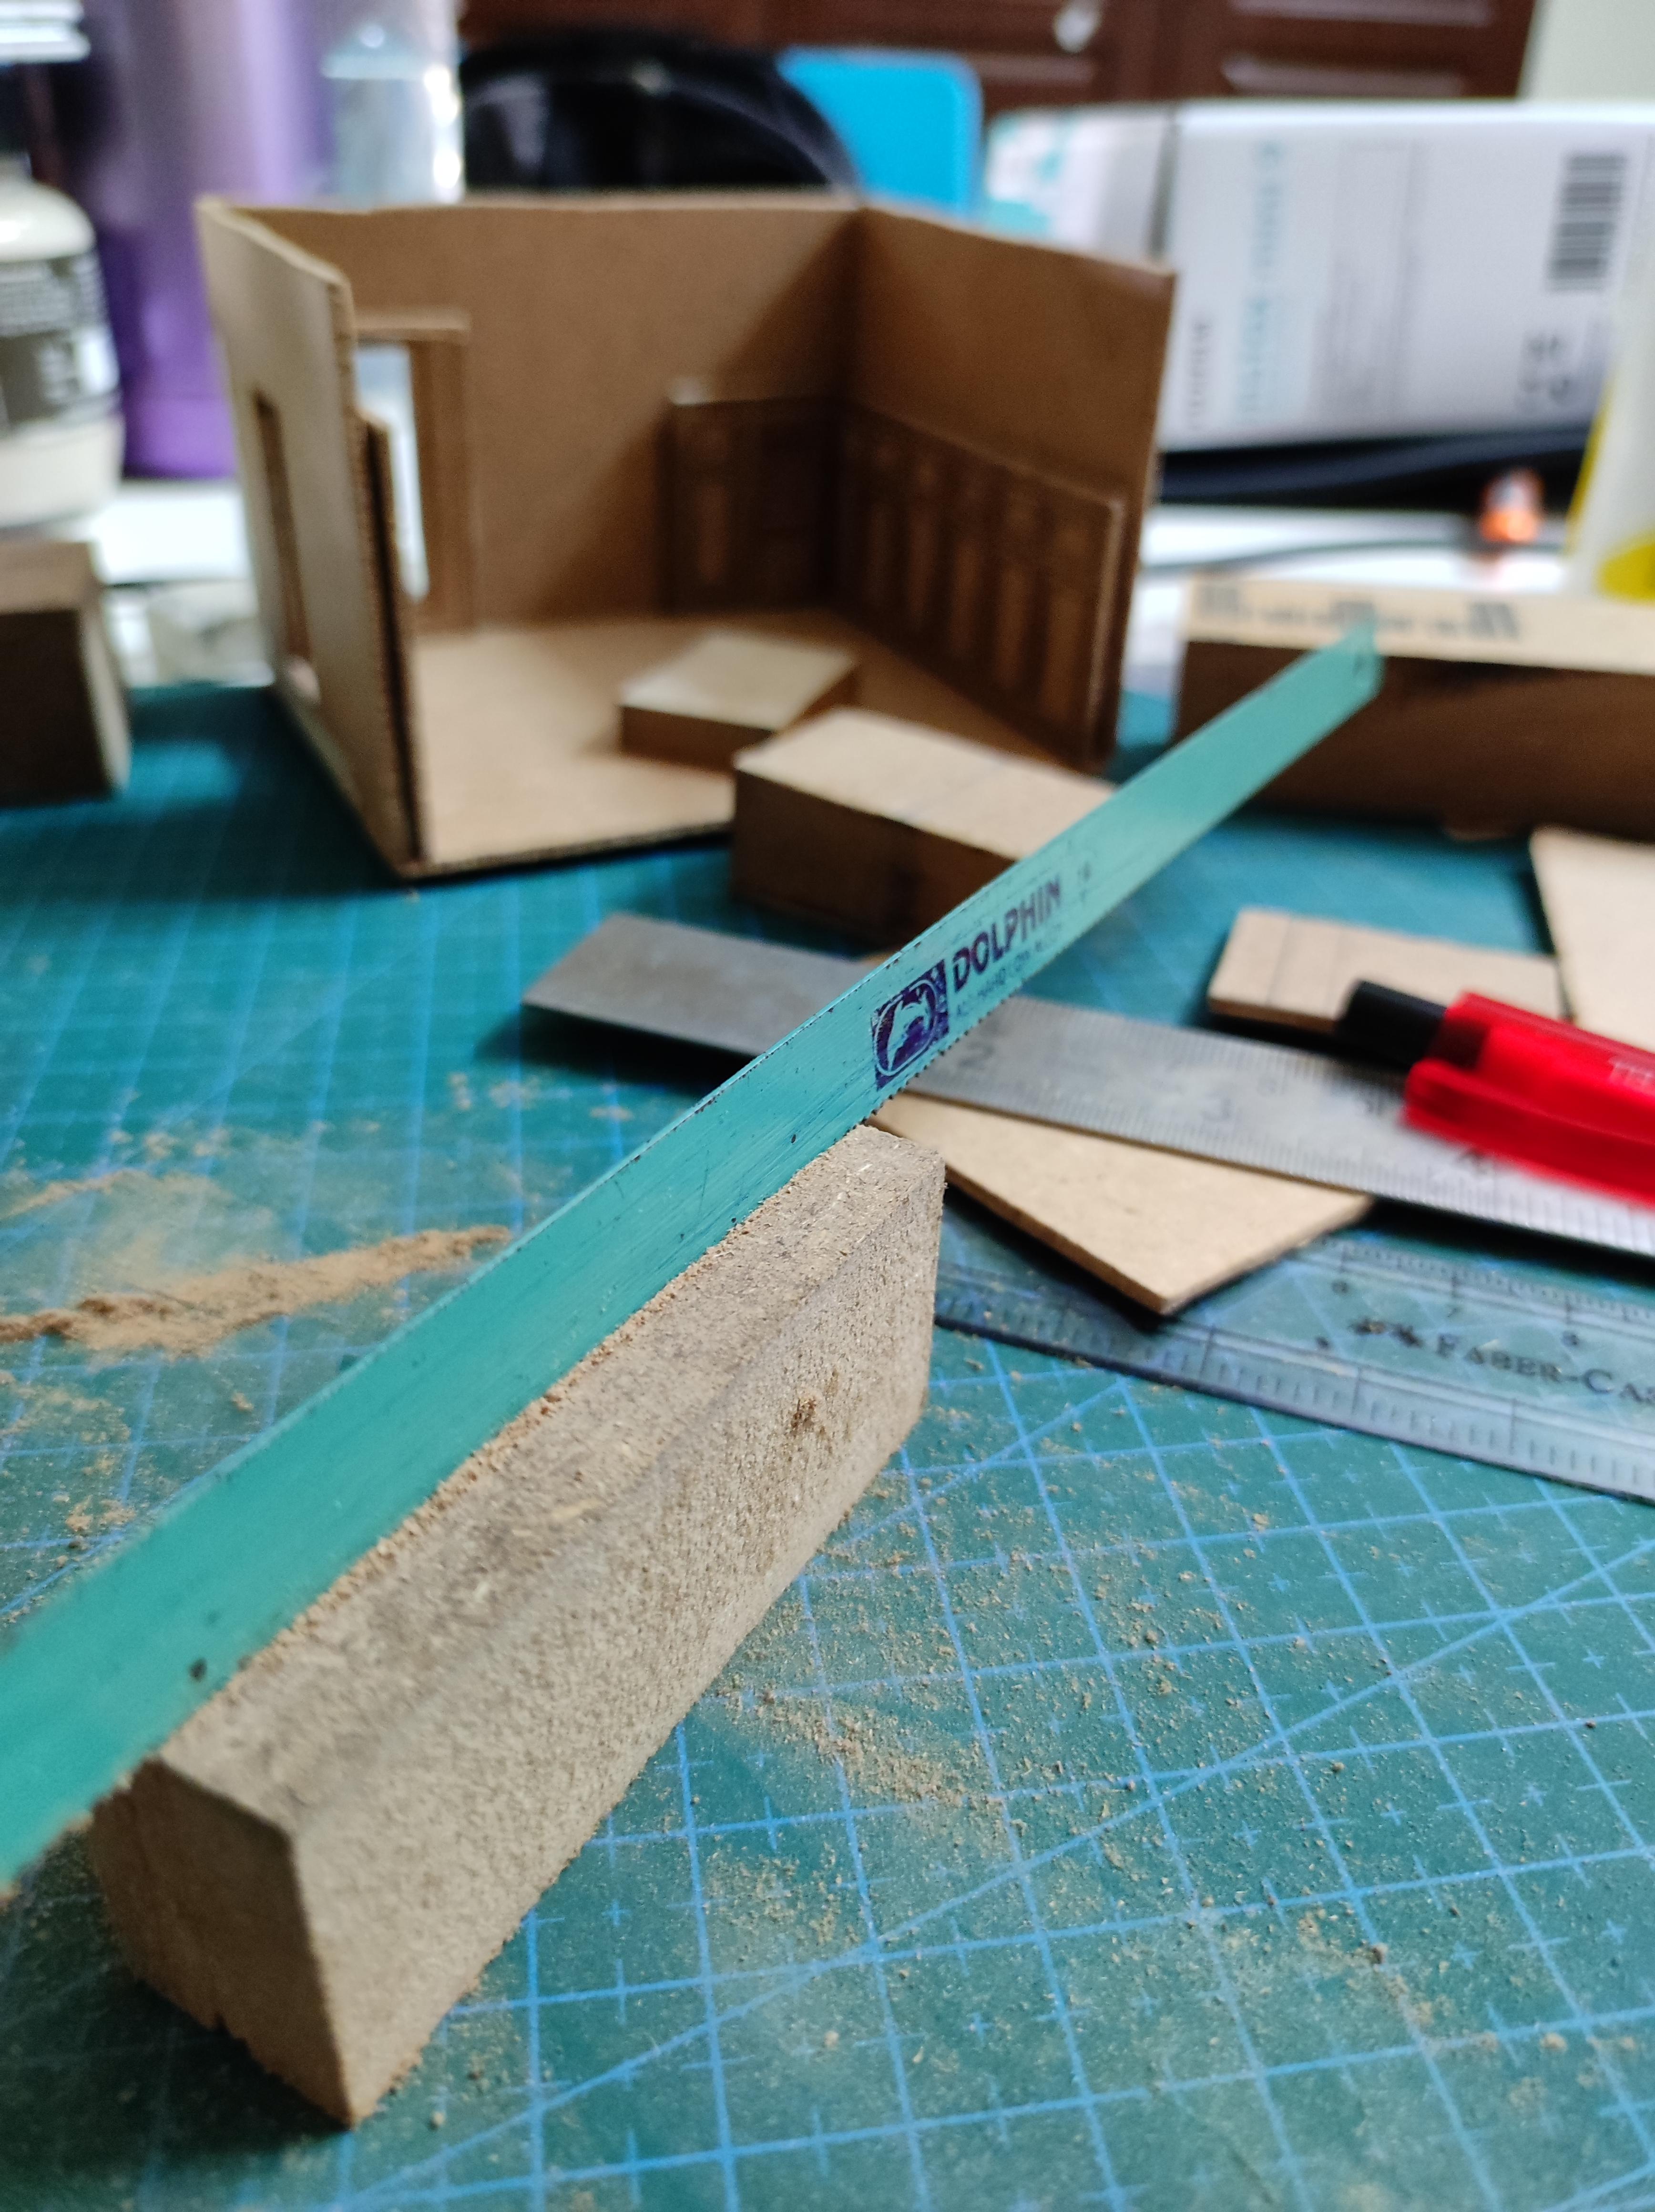
I used MDF sheets of 2mm thickness. These can be cut by hand (it takes a little effort but is possible). I had access to a table jigsaw and used that instead.
Steps:
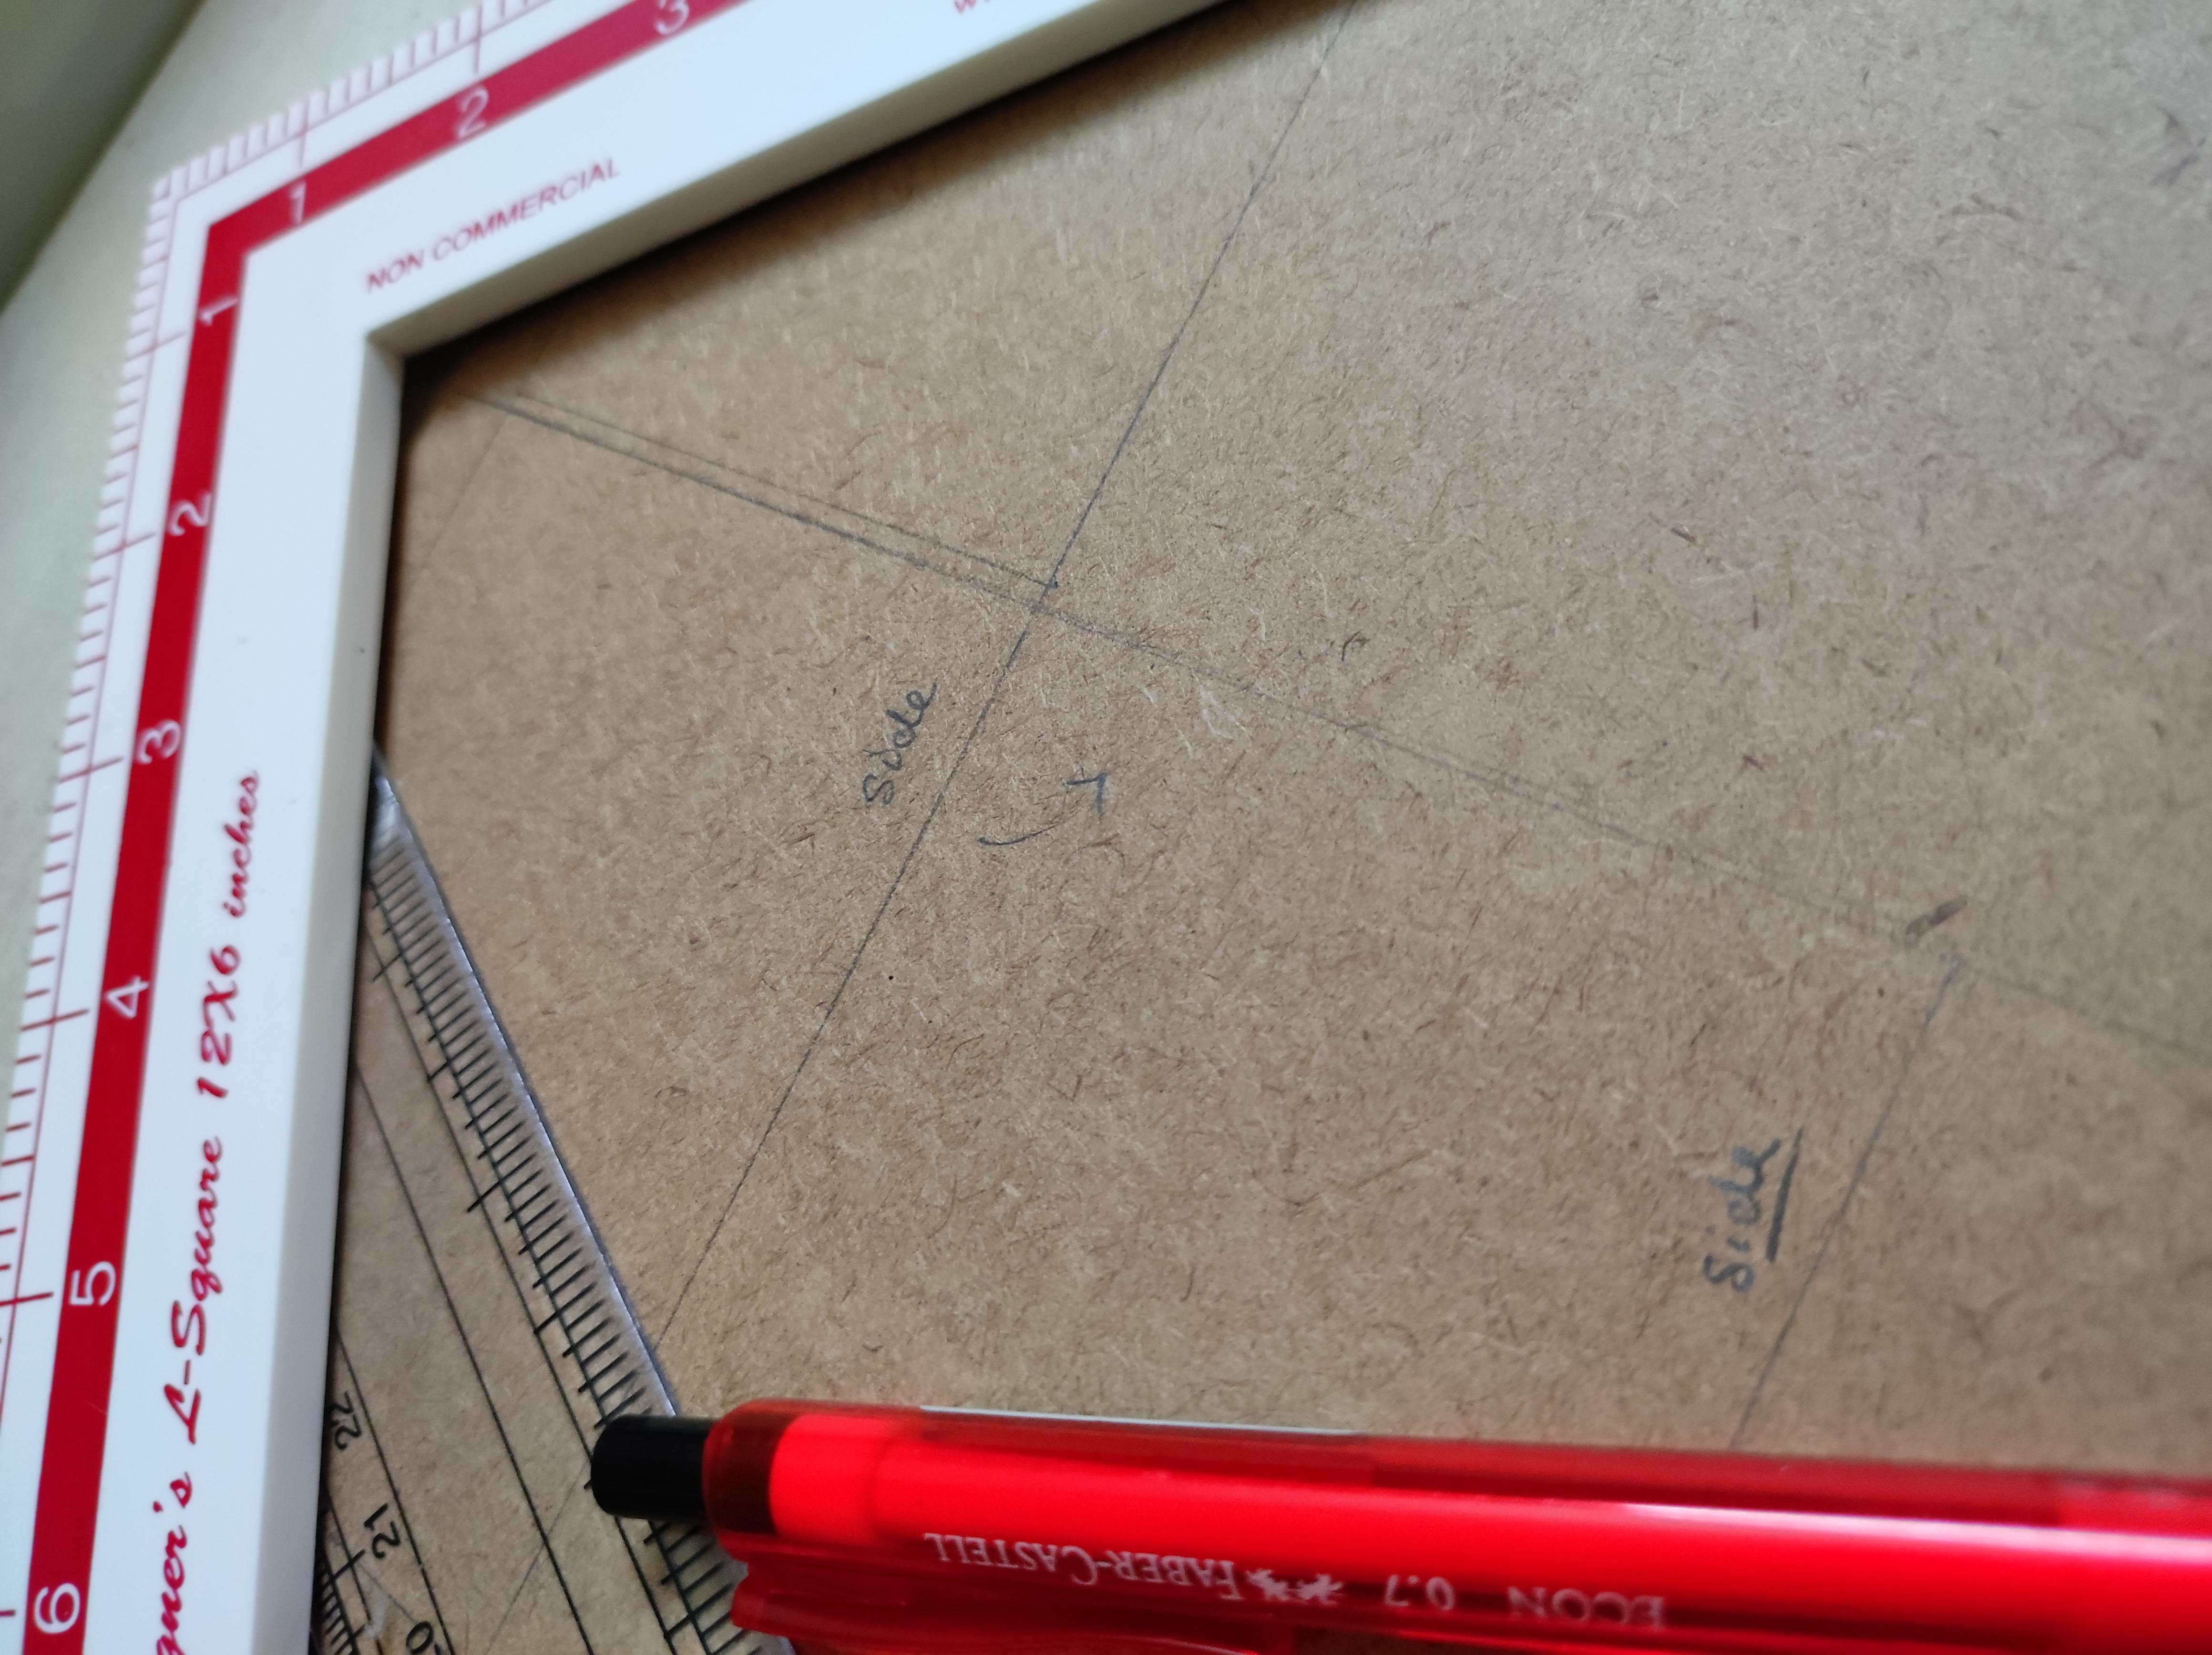
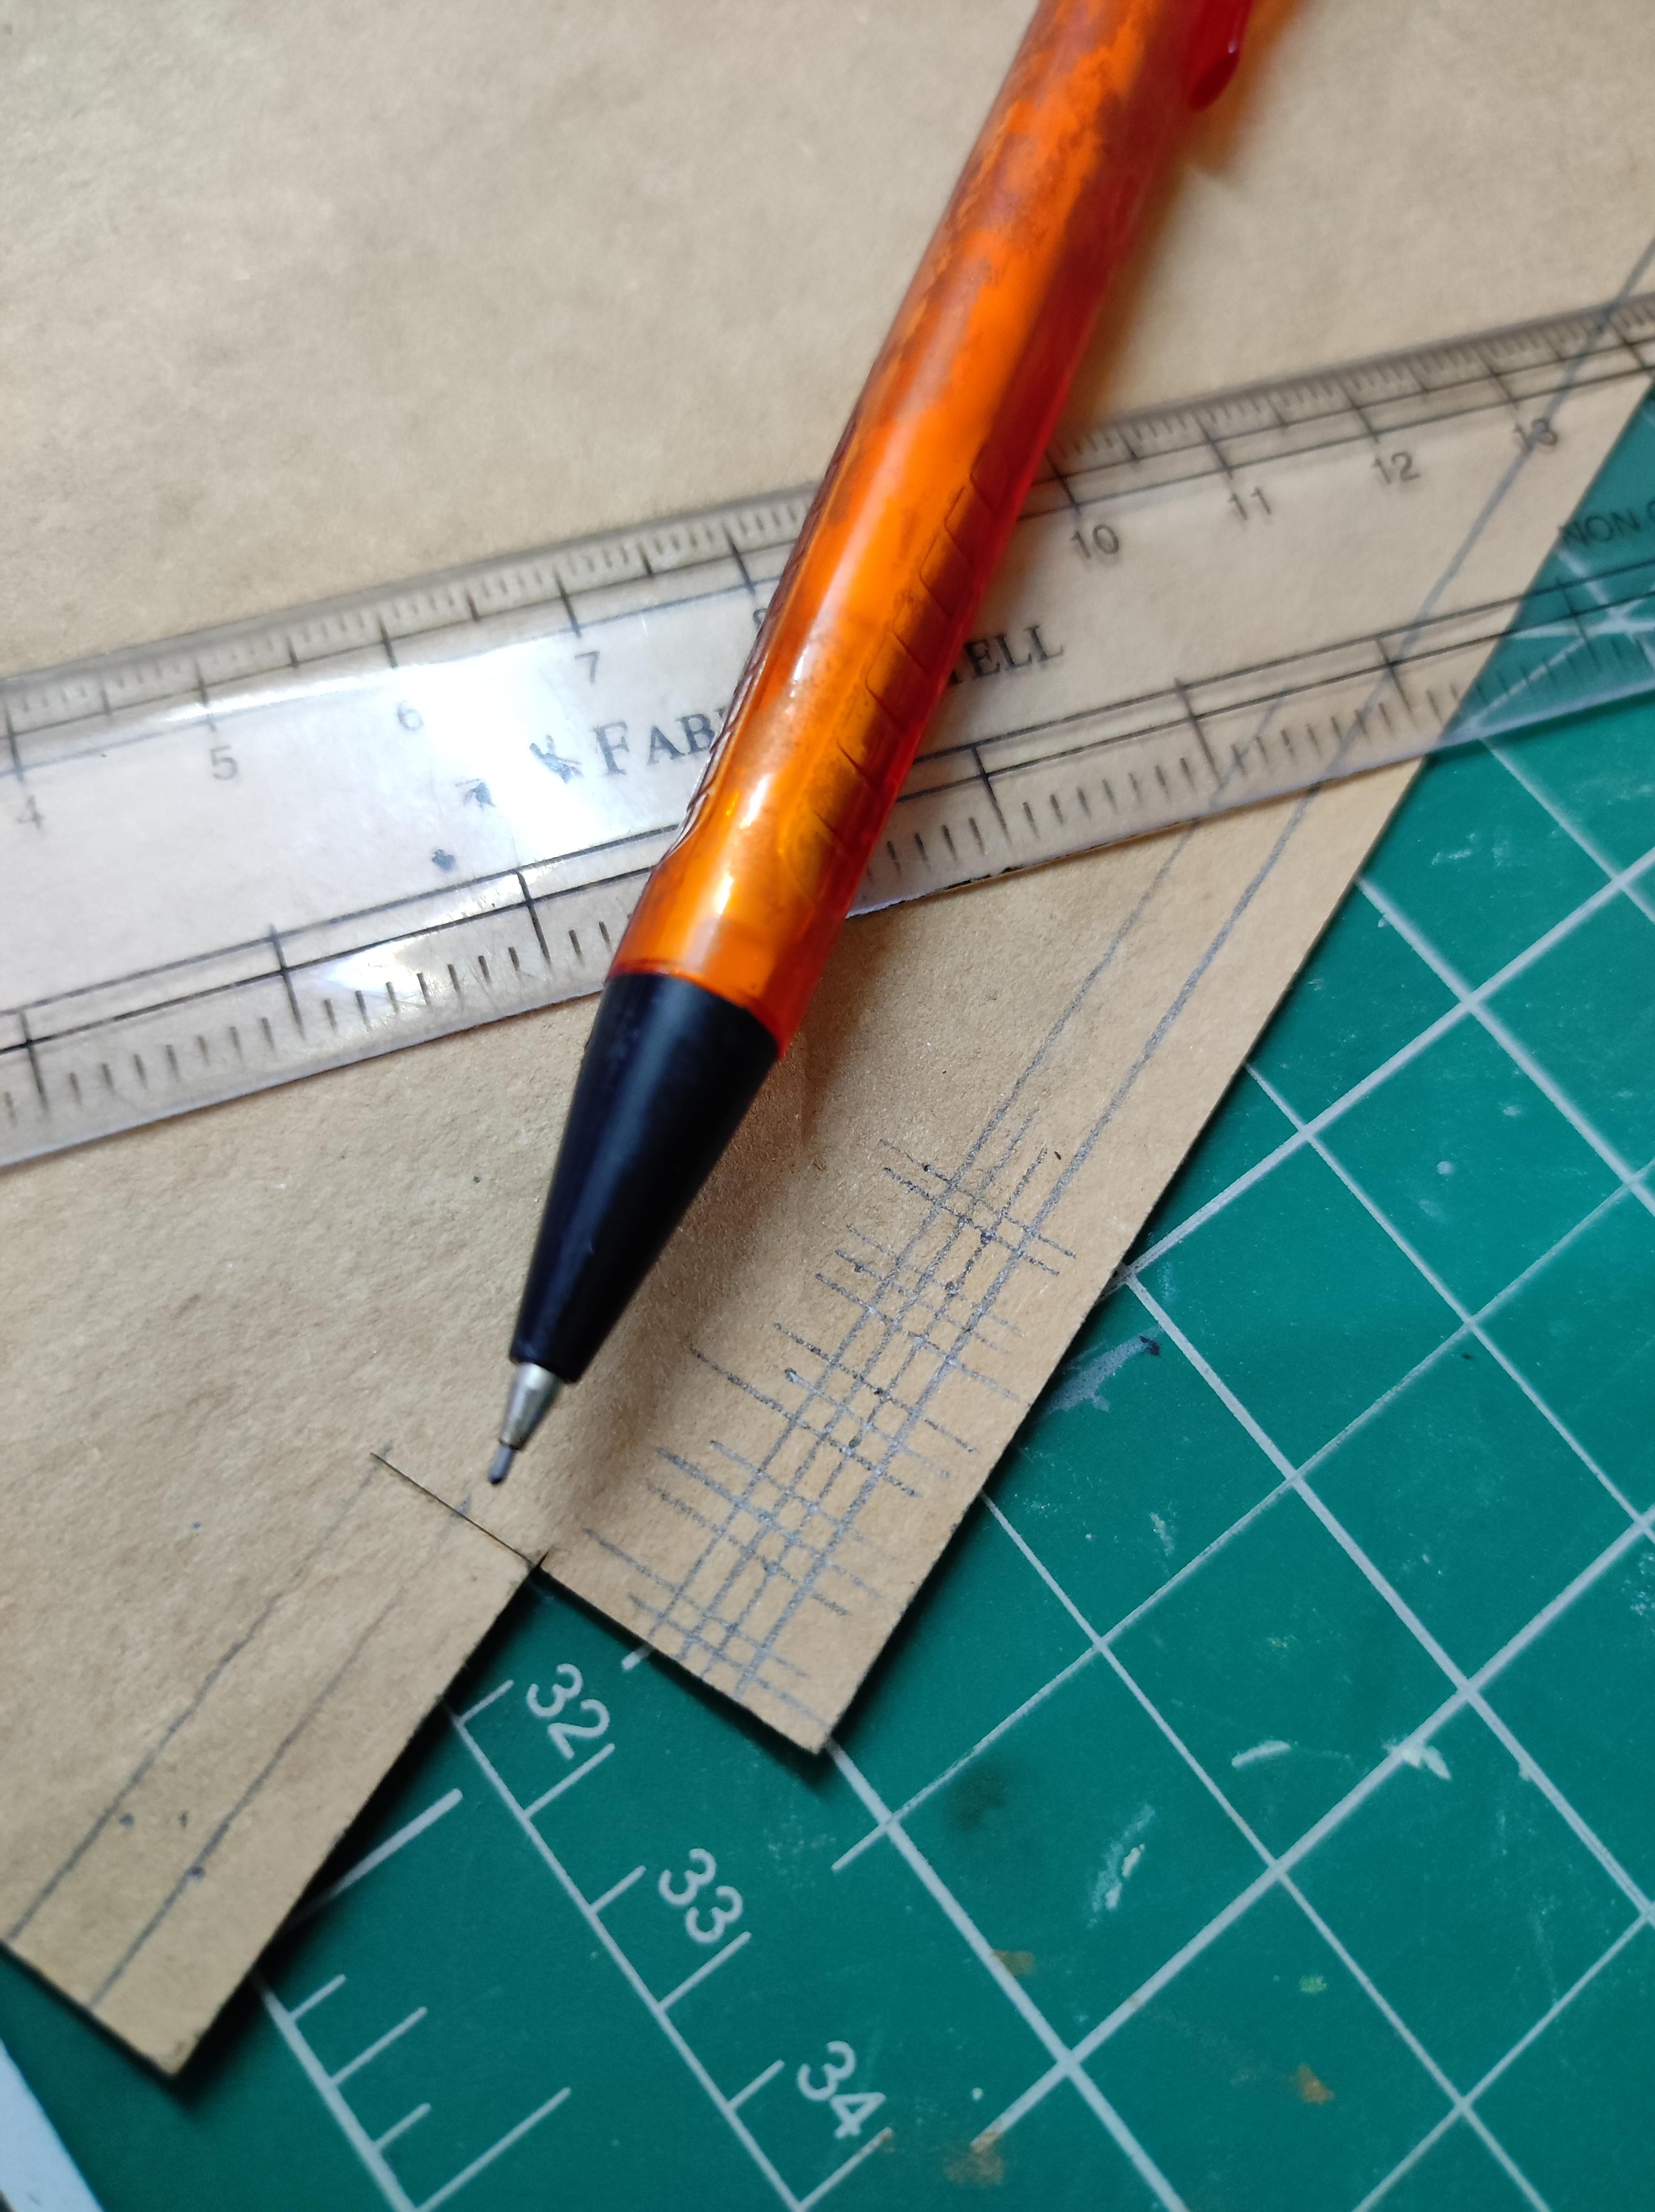
- Carefully mark out the the dimensions on the MDF board. Using a Tri-square and Set square can help get the corners sharp and right angled. Make sure you use a new ruler (old ones might be chipped or not straight. As the scale is so small, even minor errors show prominently) and a sharp pencil or mechanical pencil (so the lines drawn are thin and do not distort the over all measurement even by an mm).
- Cut out the pieces using a mini hacksaw or a simple box cutter (or power tools if you have one). While using the hacksaw, make sure you put a block of scrap wood underneath the sheet so you have some space to work and don't damage the surface below. For the box cutter, using a sharp new blade is a game changer. Instead of applying a lot of force in each cut (you might end up going off the reference line or damaging the wood) make repeated yet consistent cuts over the same line. This will give you a nice sharp cut with minimum error although it might take some time.
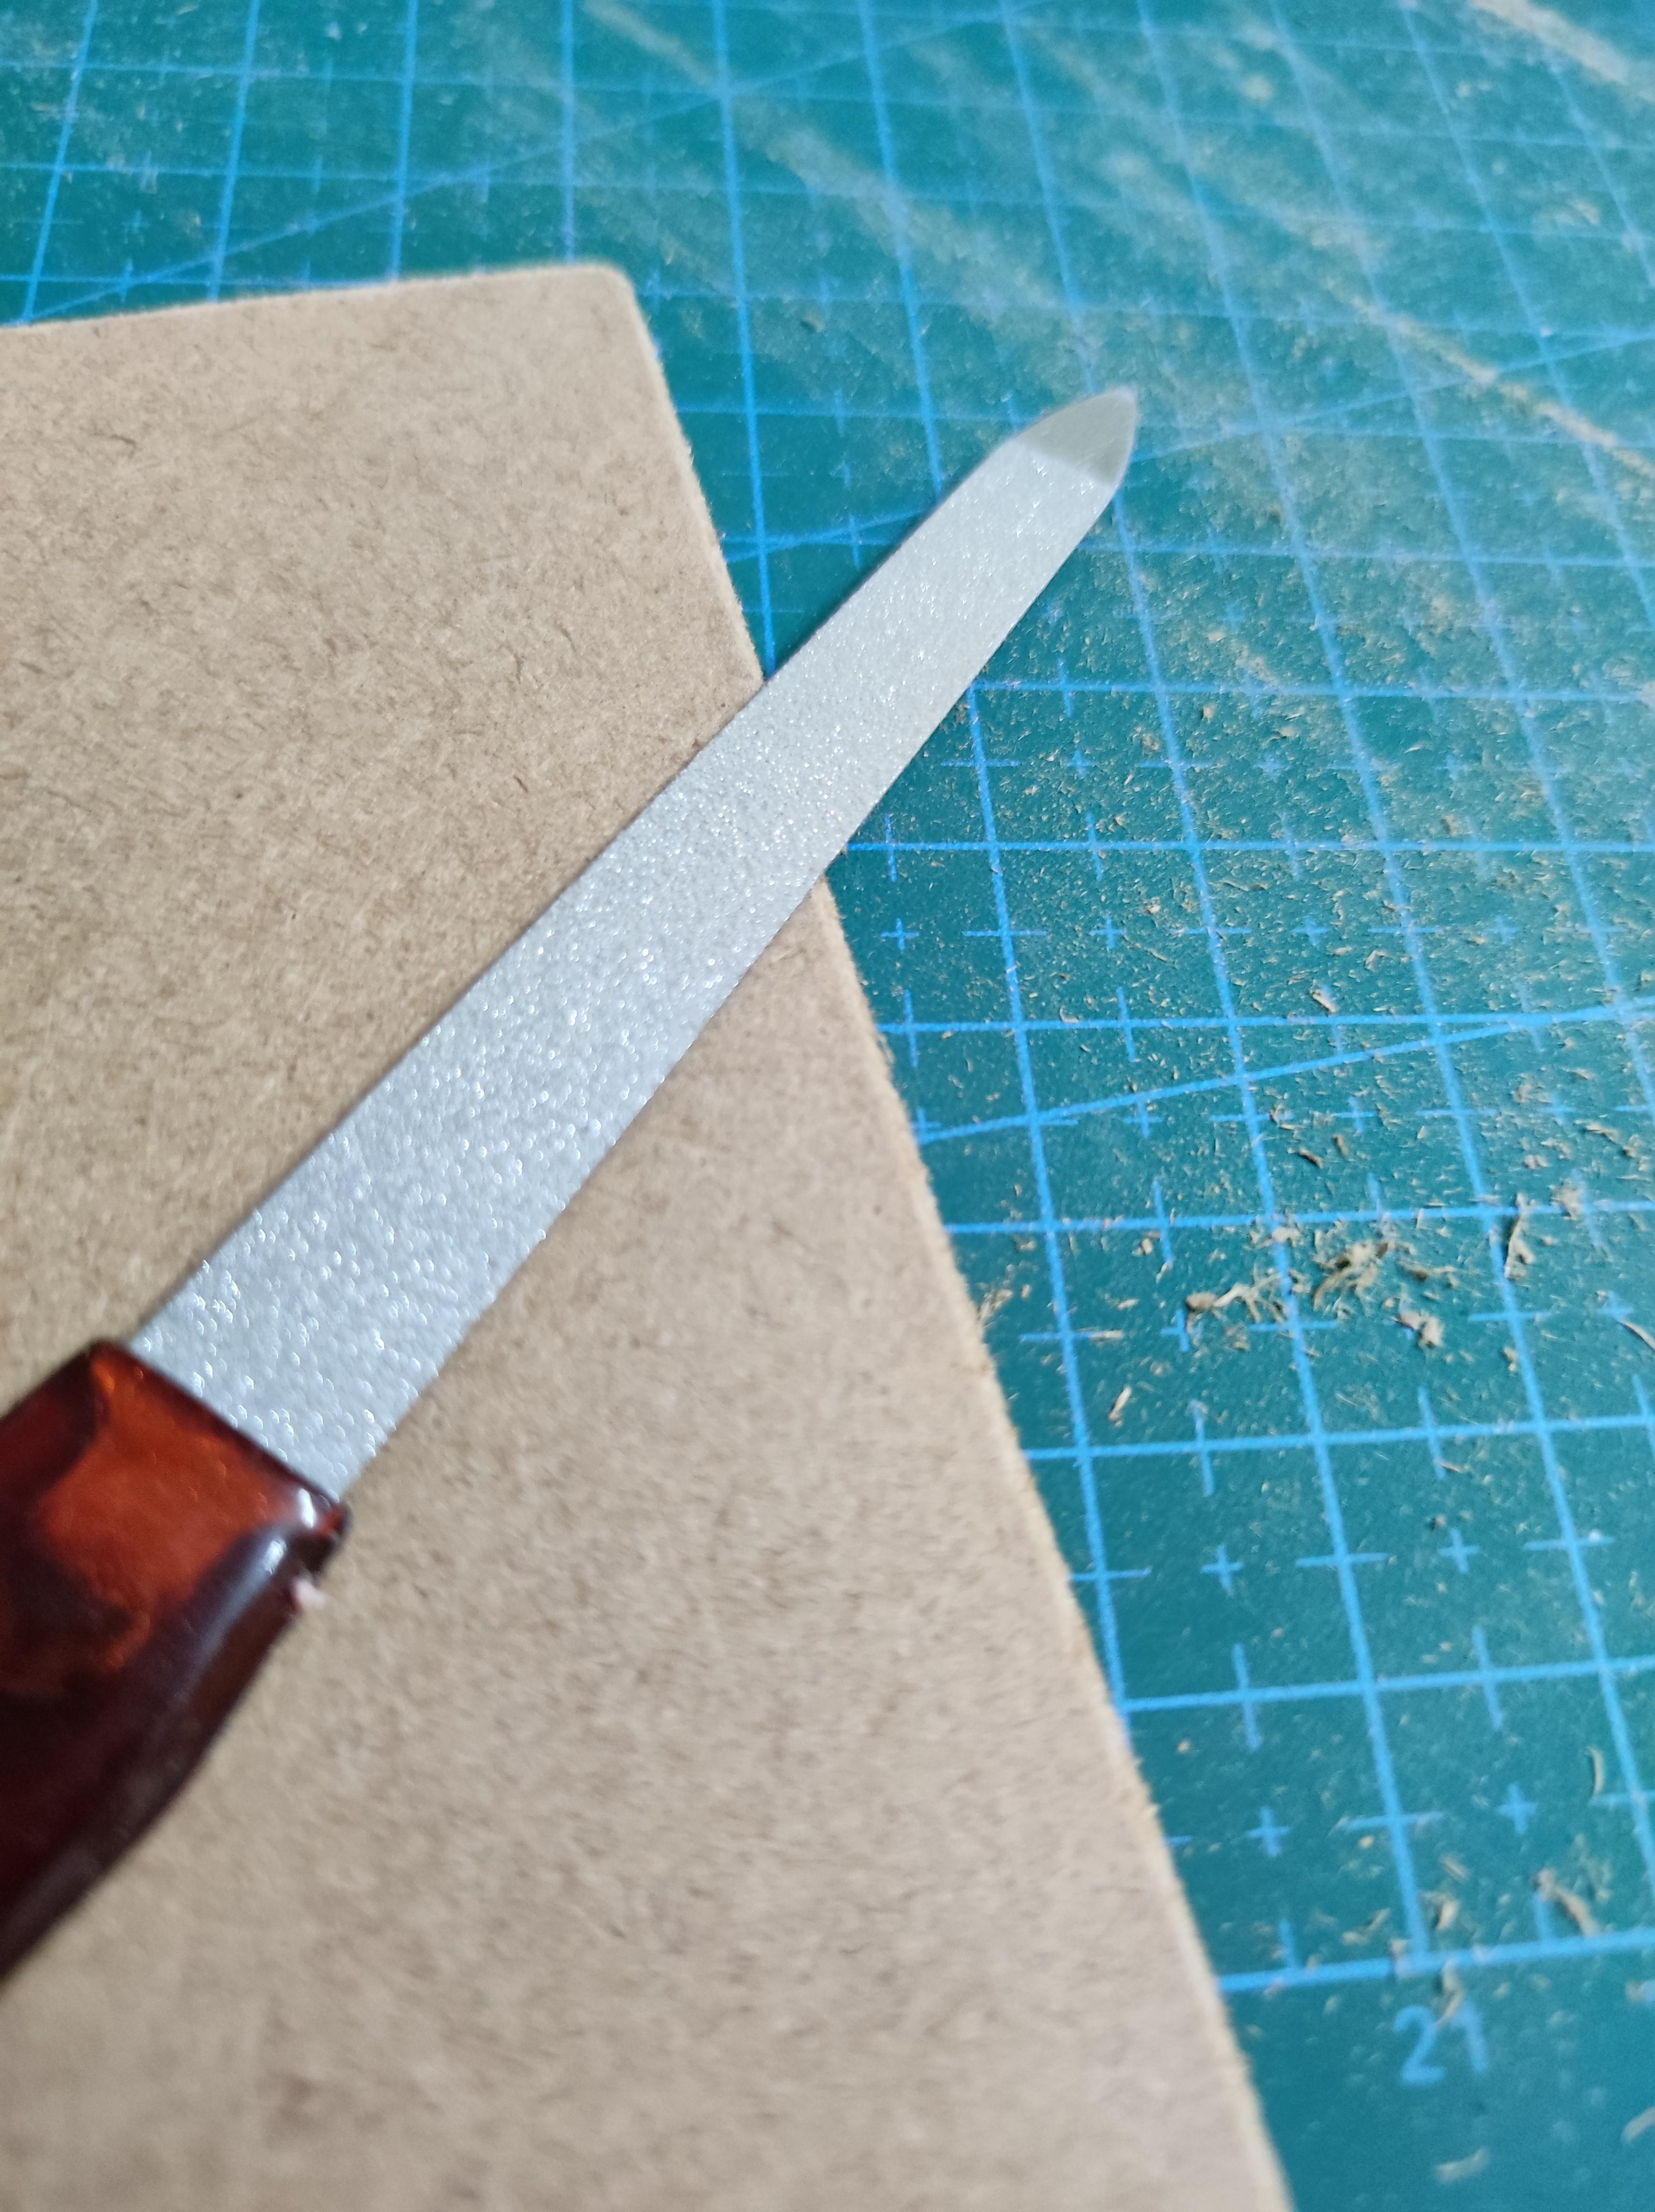
- The pieces once cut out might have stray or rough edges which you can smoothen and clean with the help of a nail file. You can also use a fine grit sandpaper for this bit.
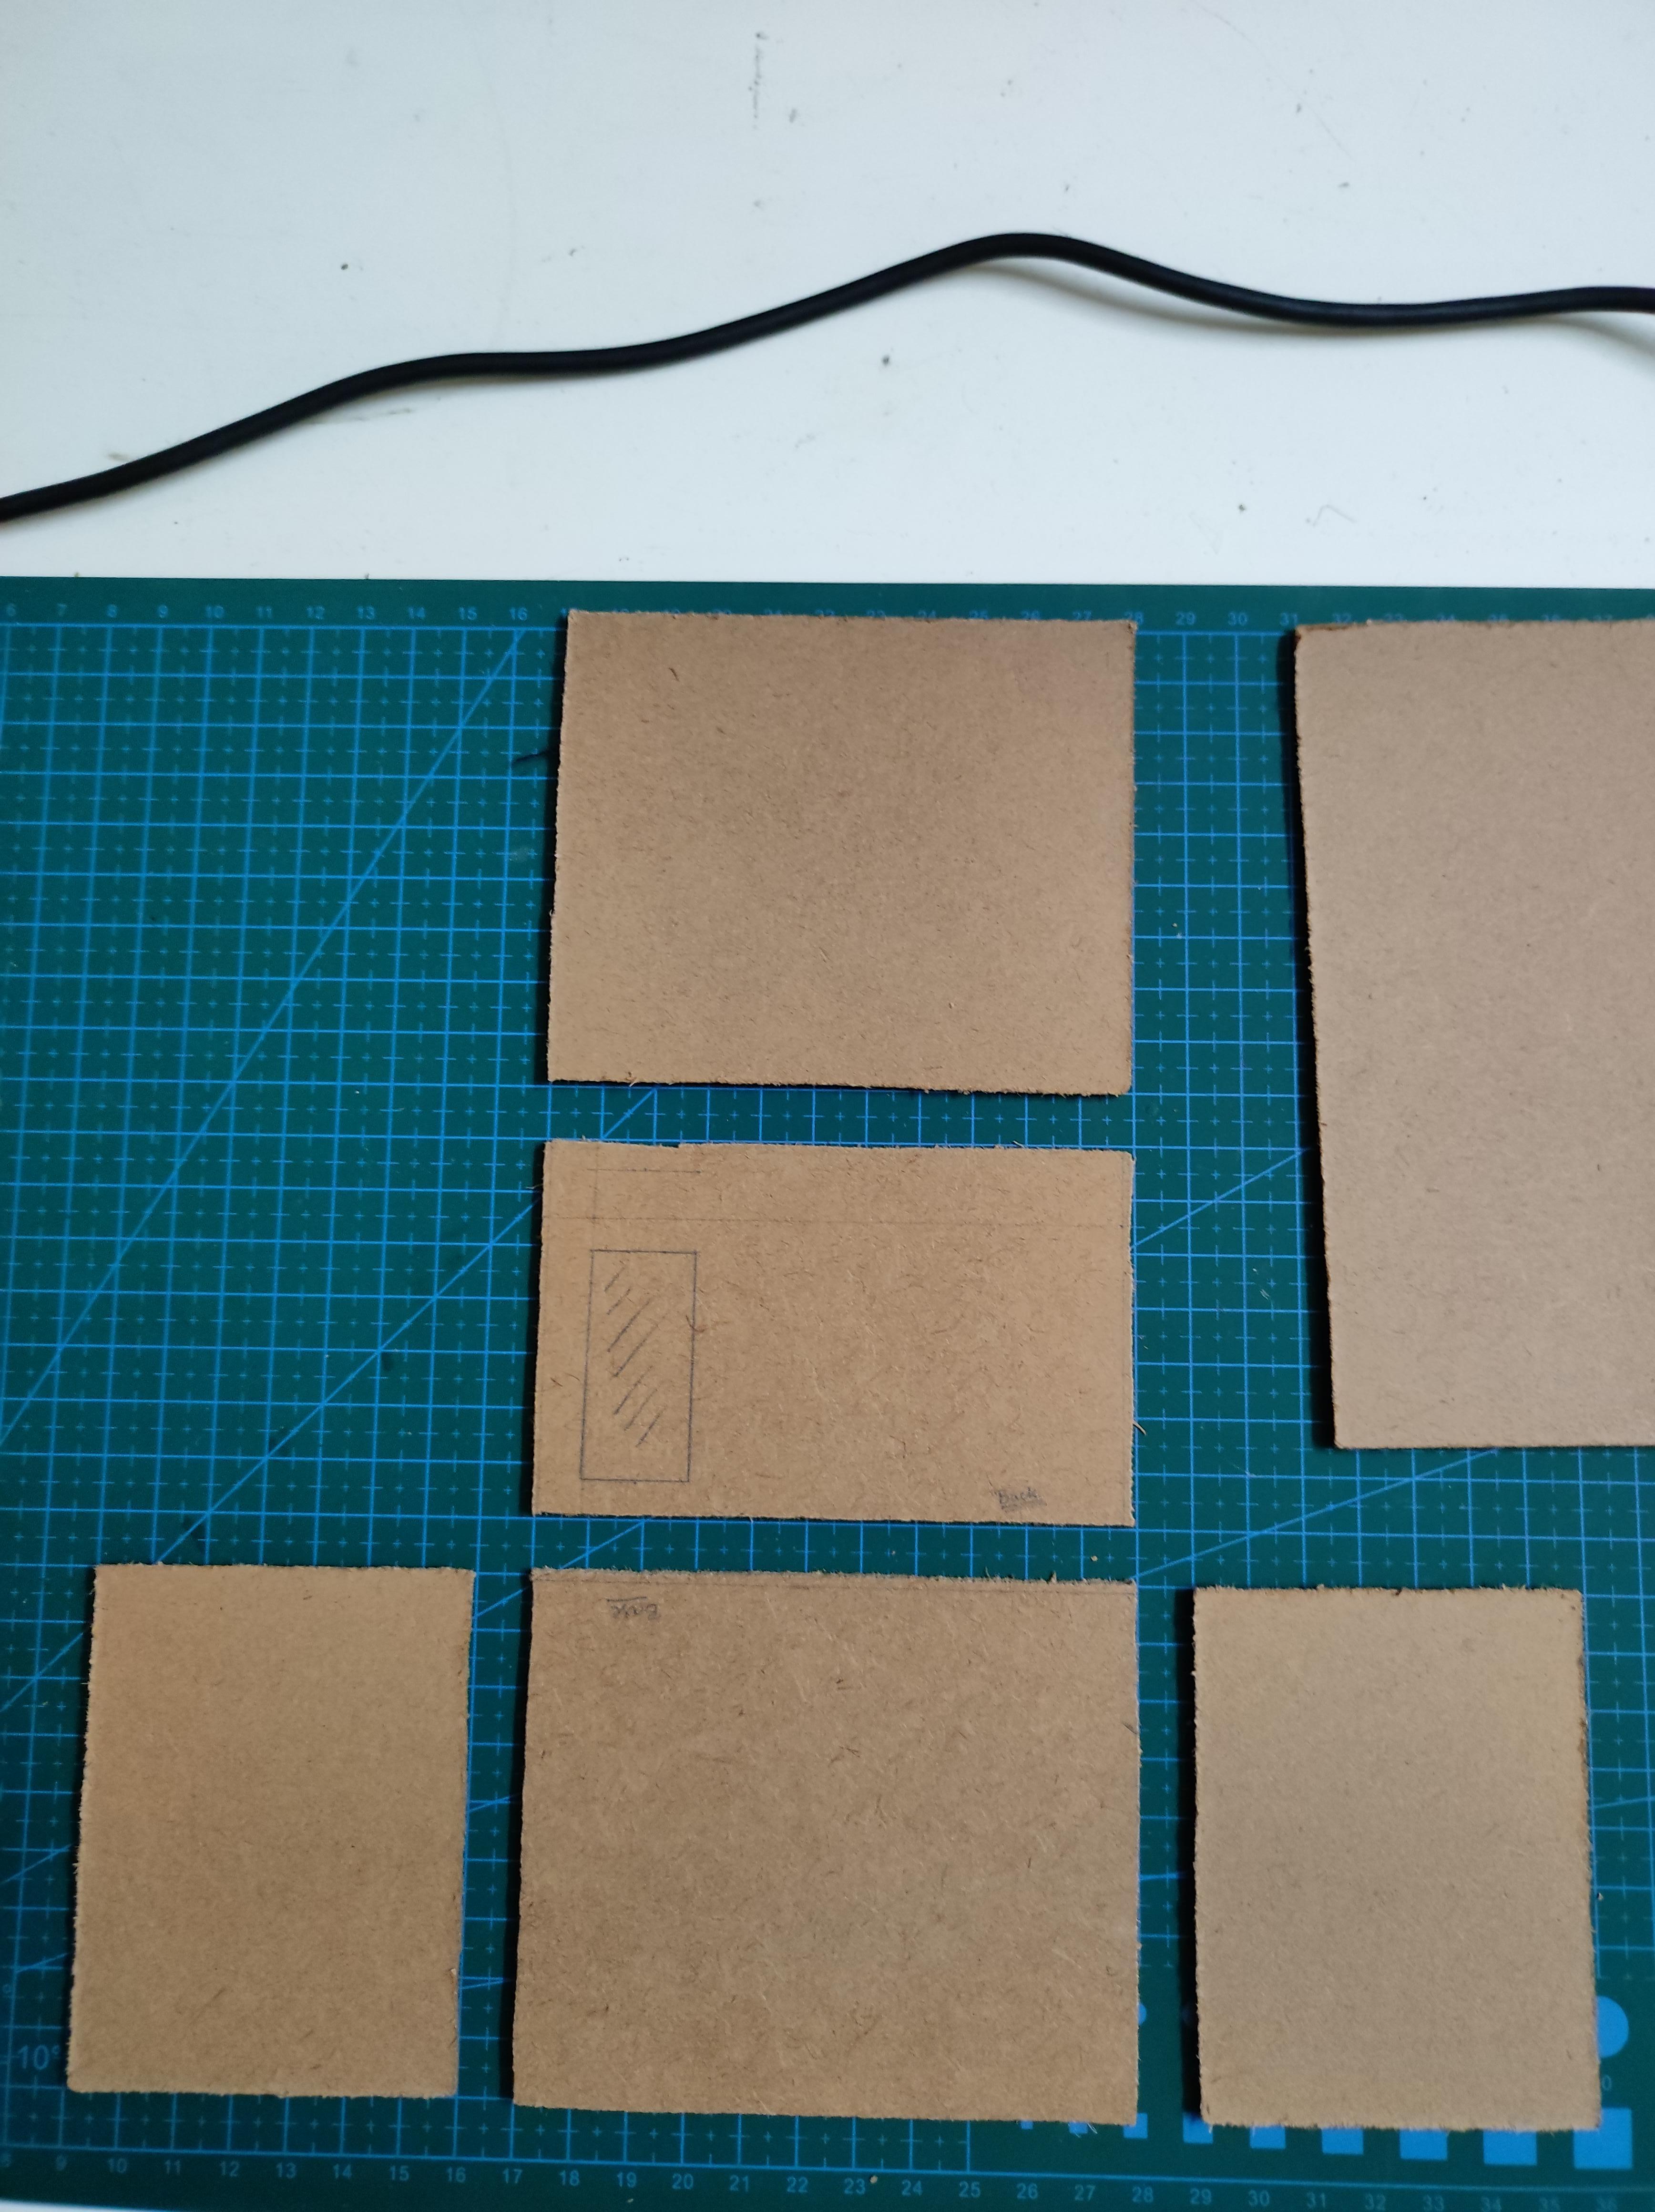
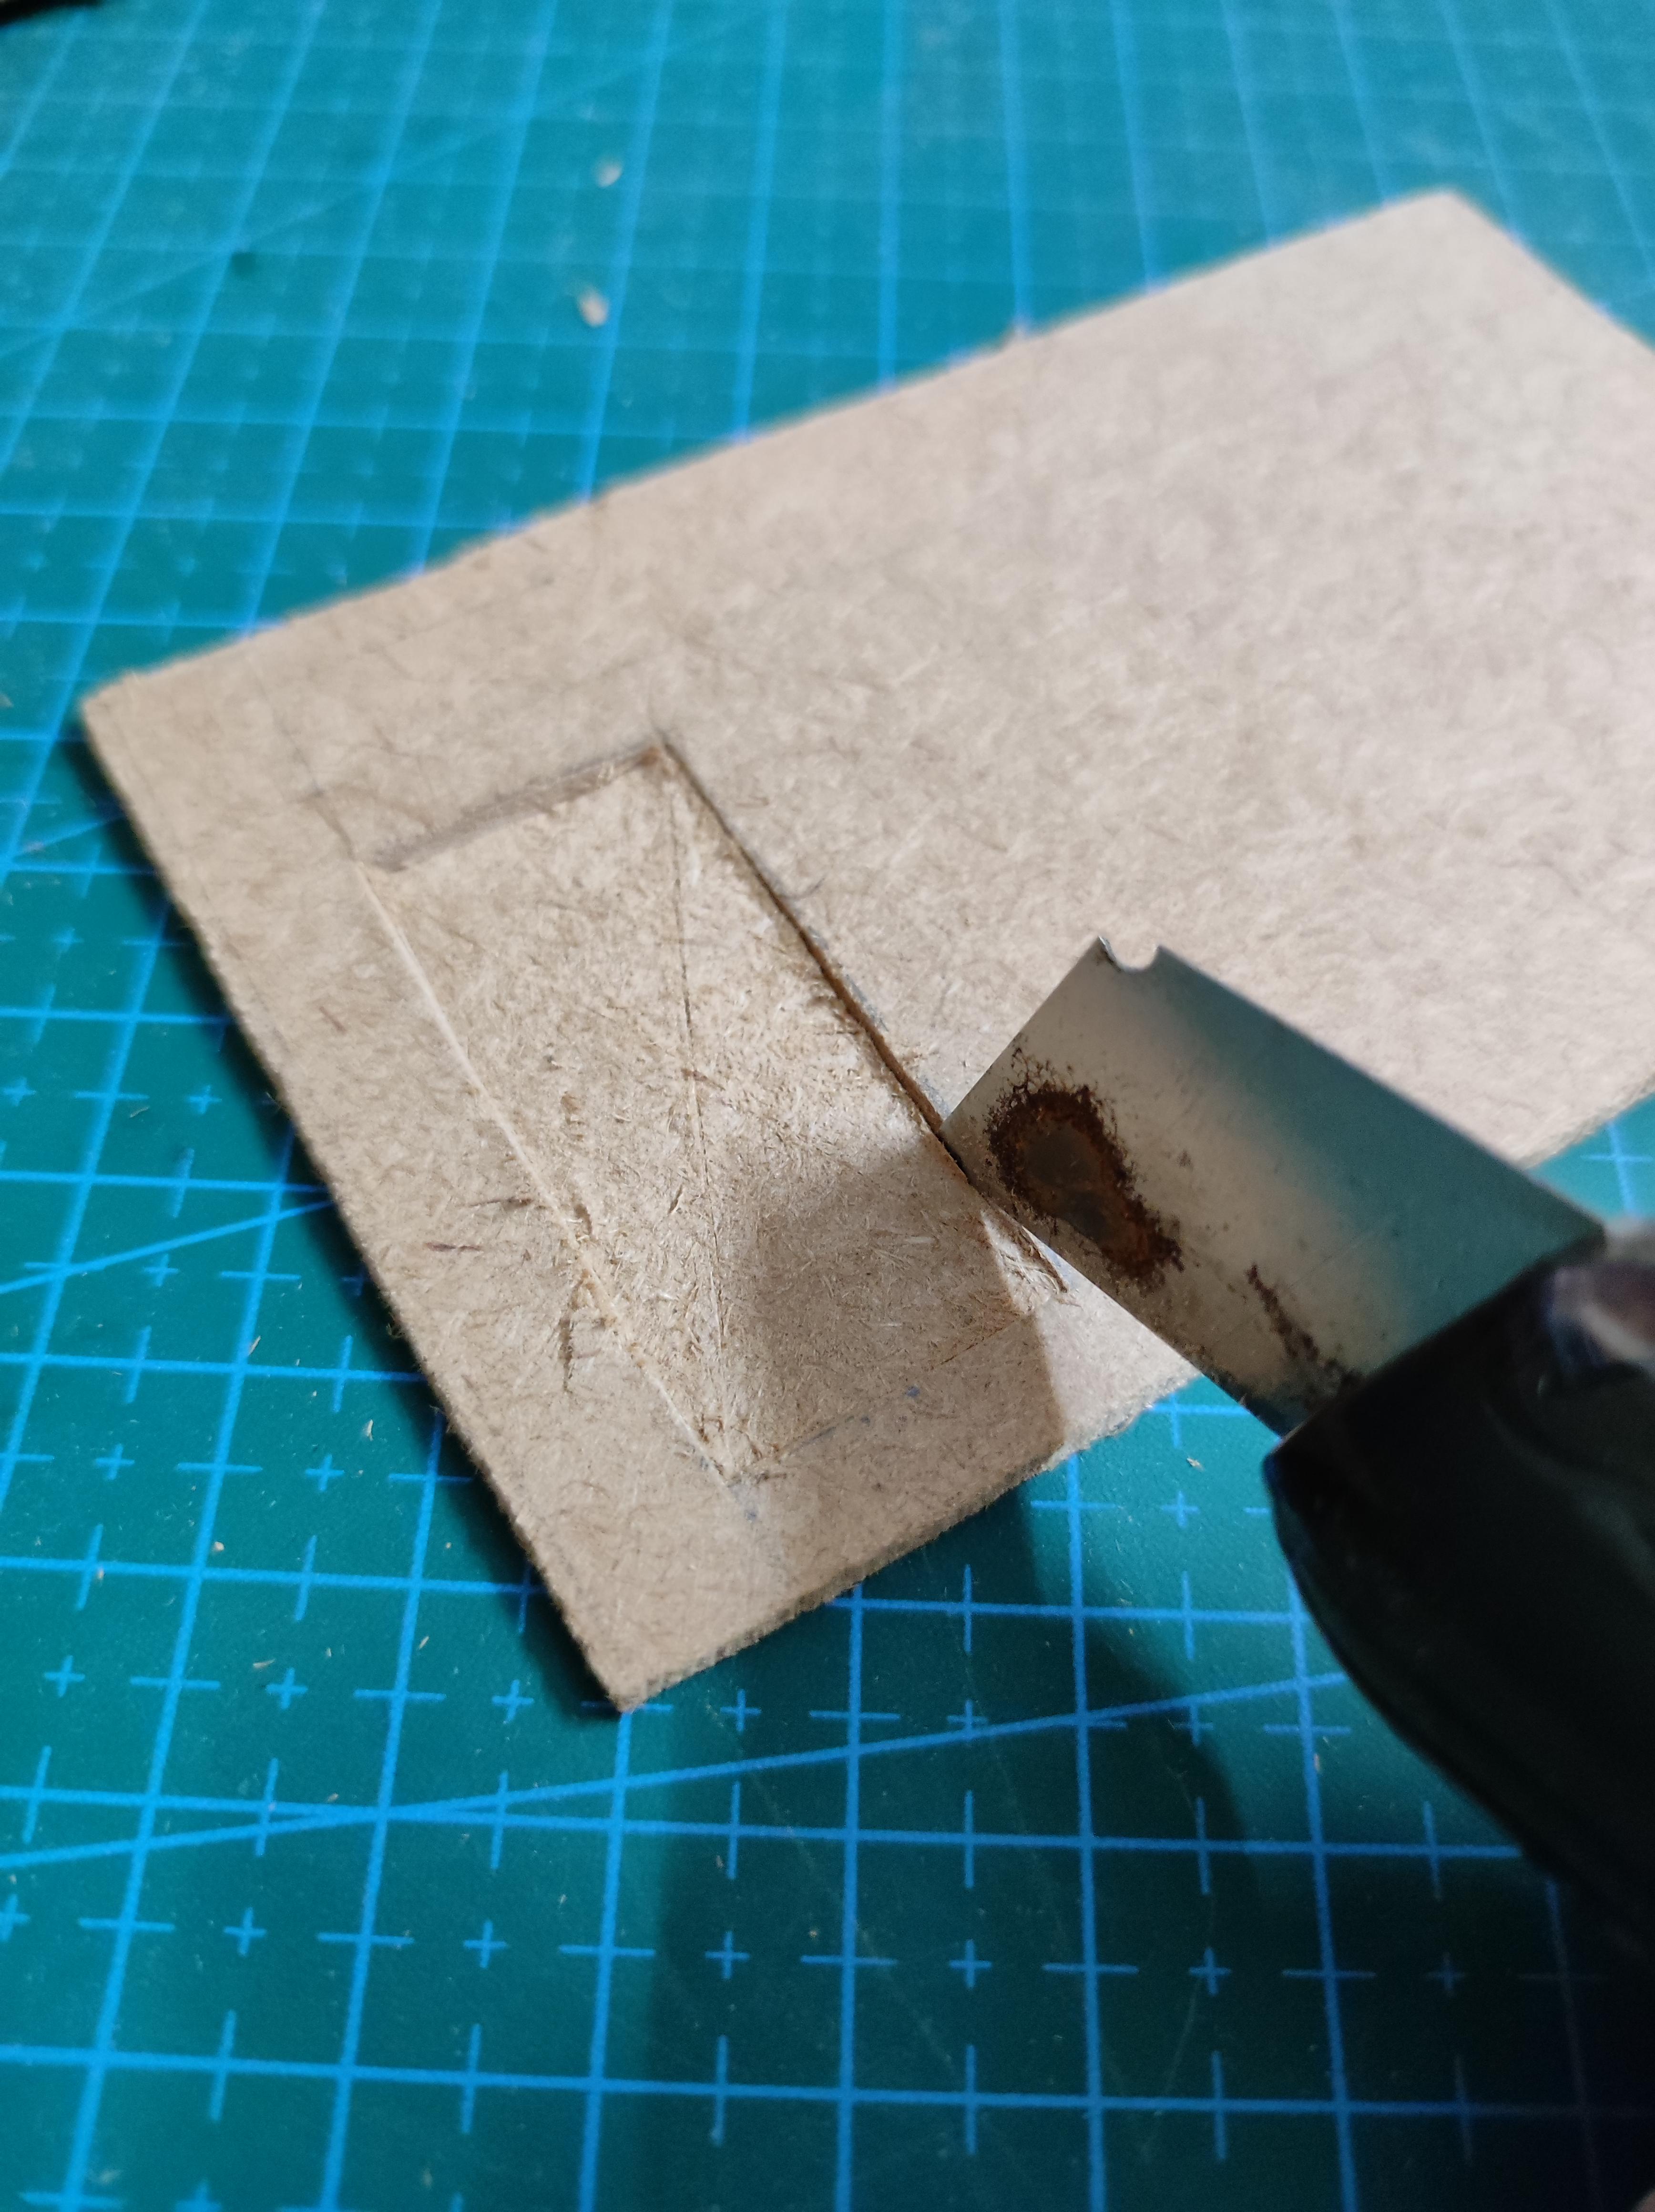
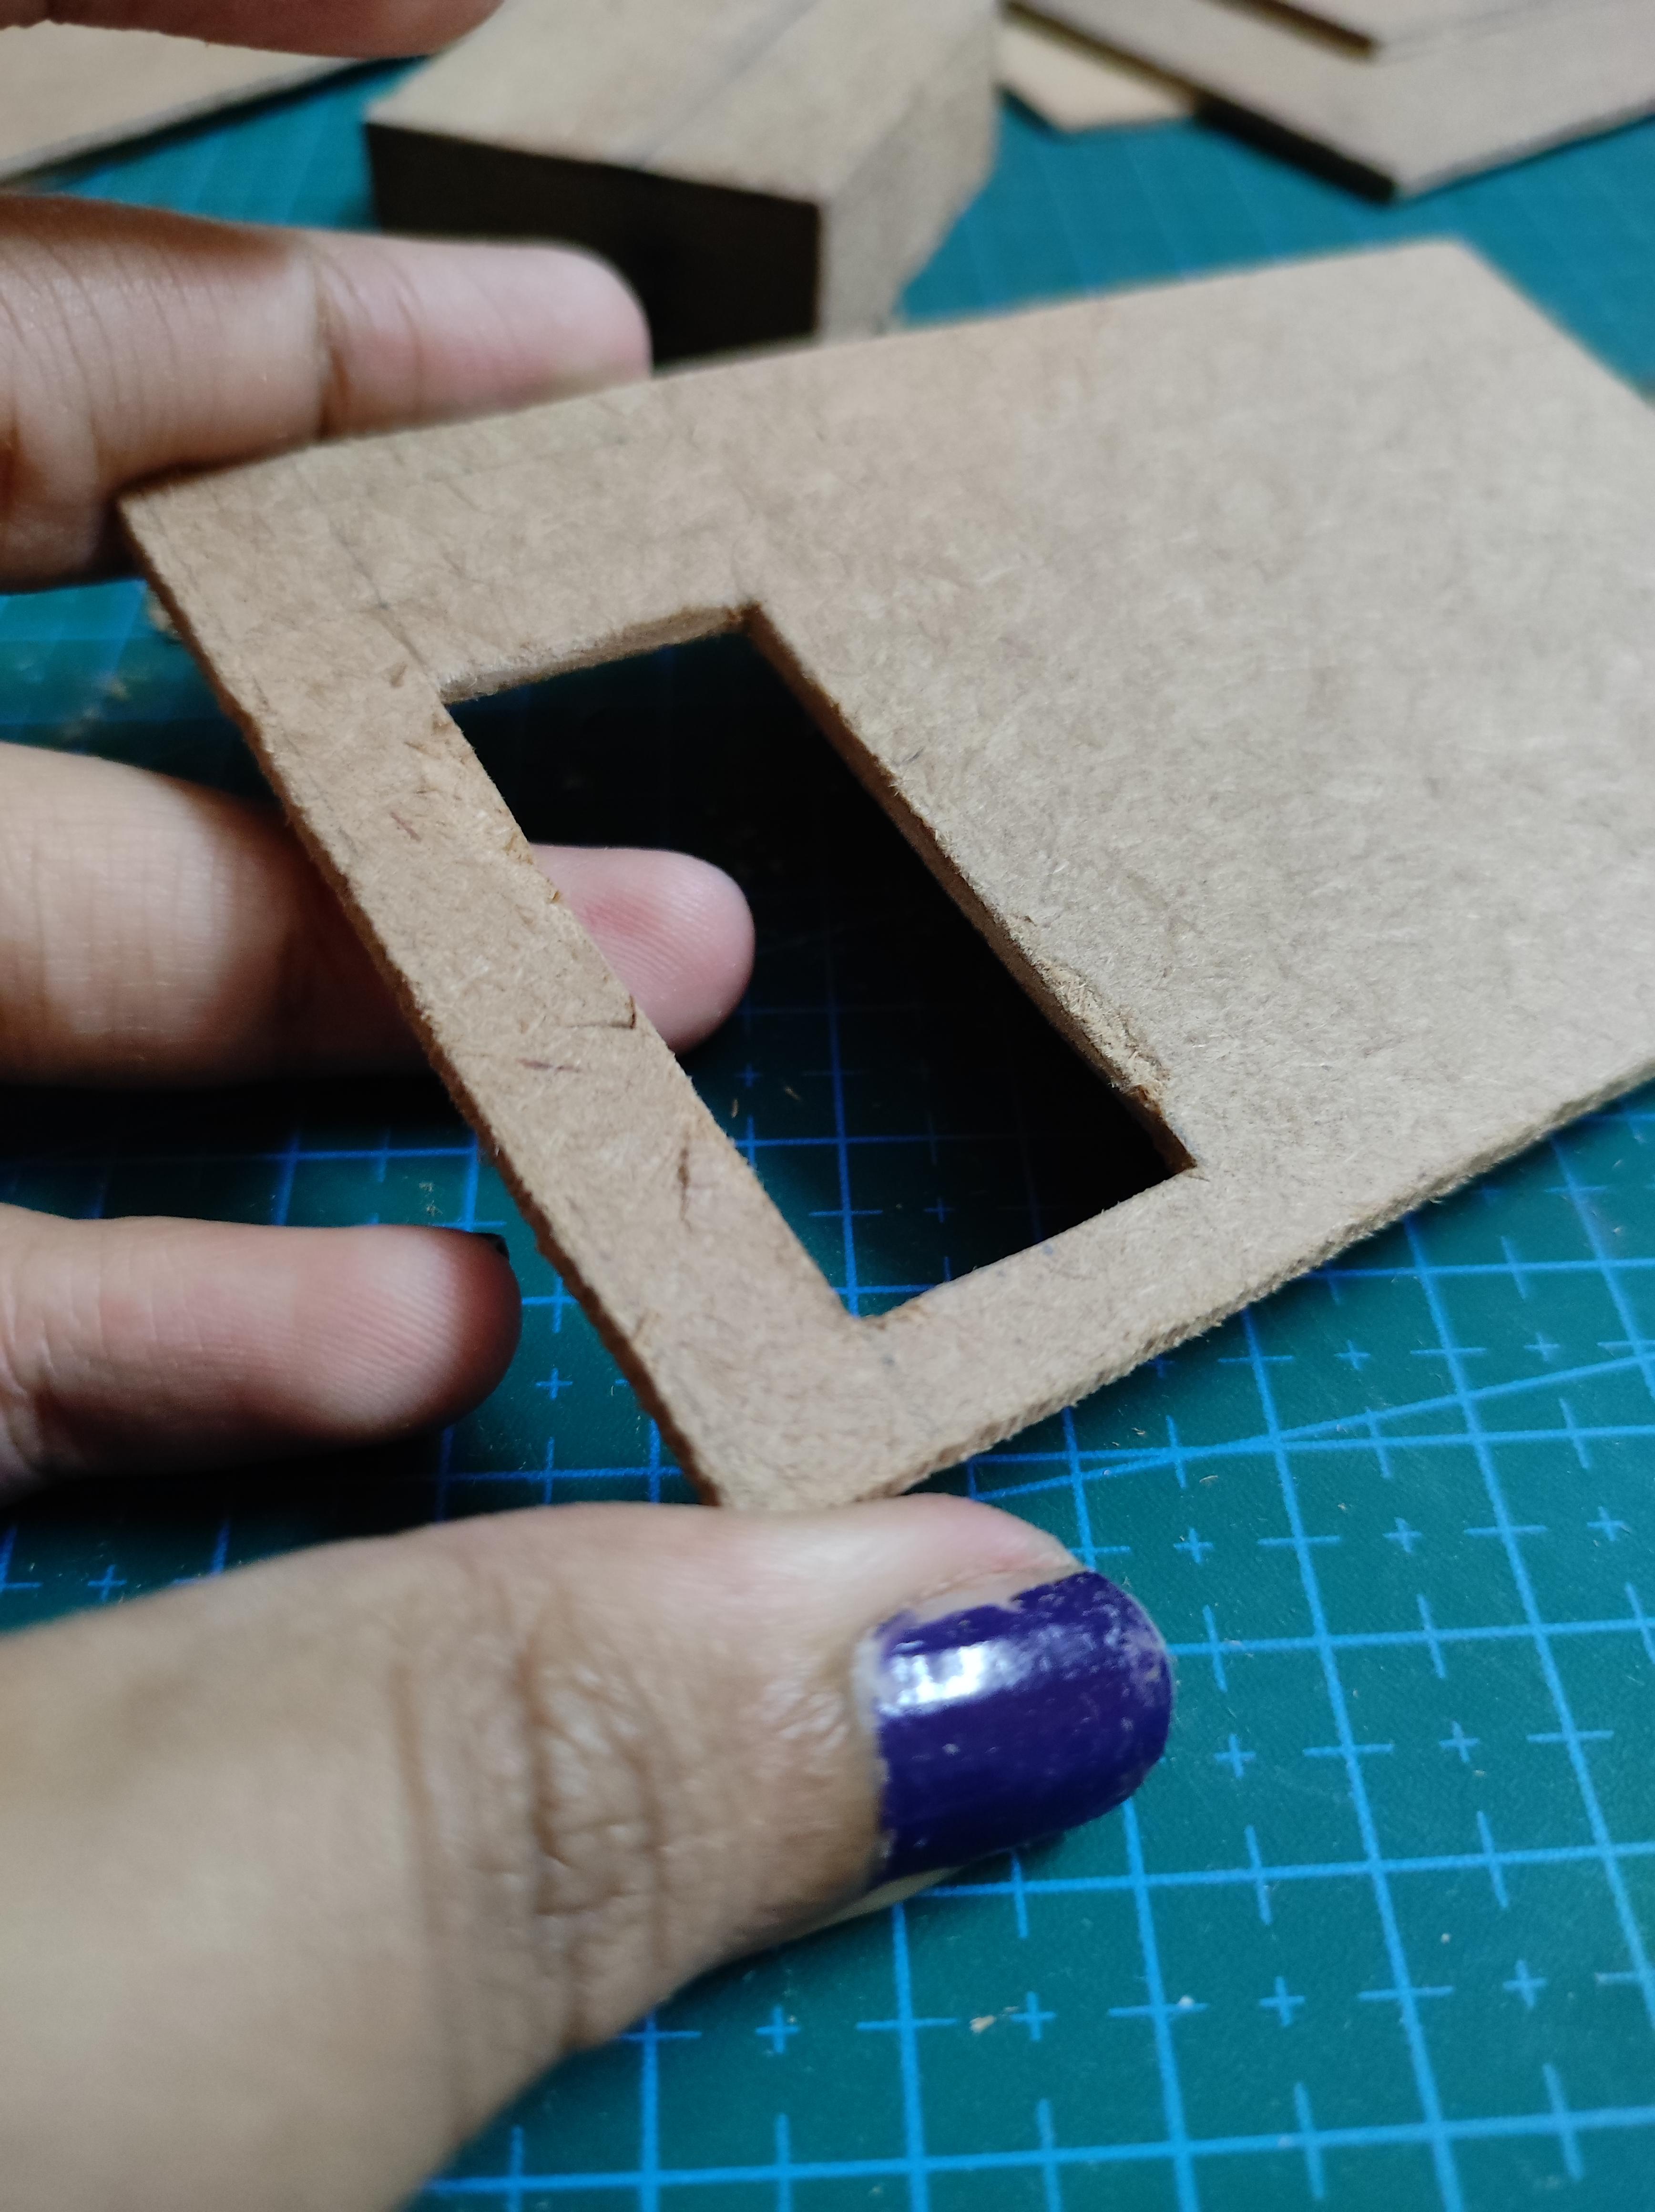
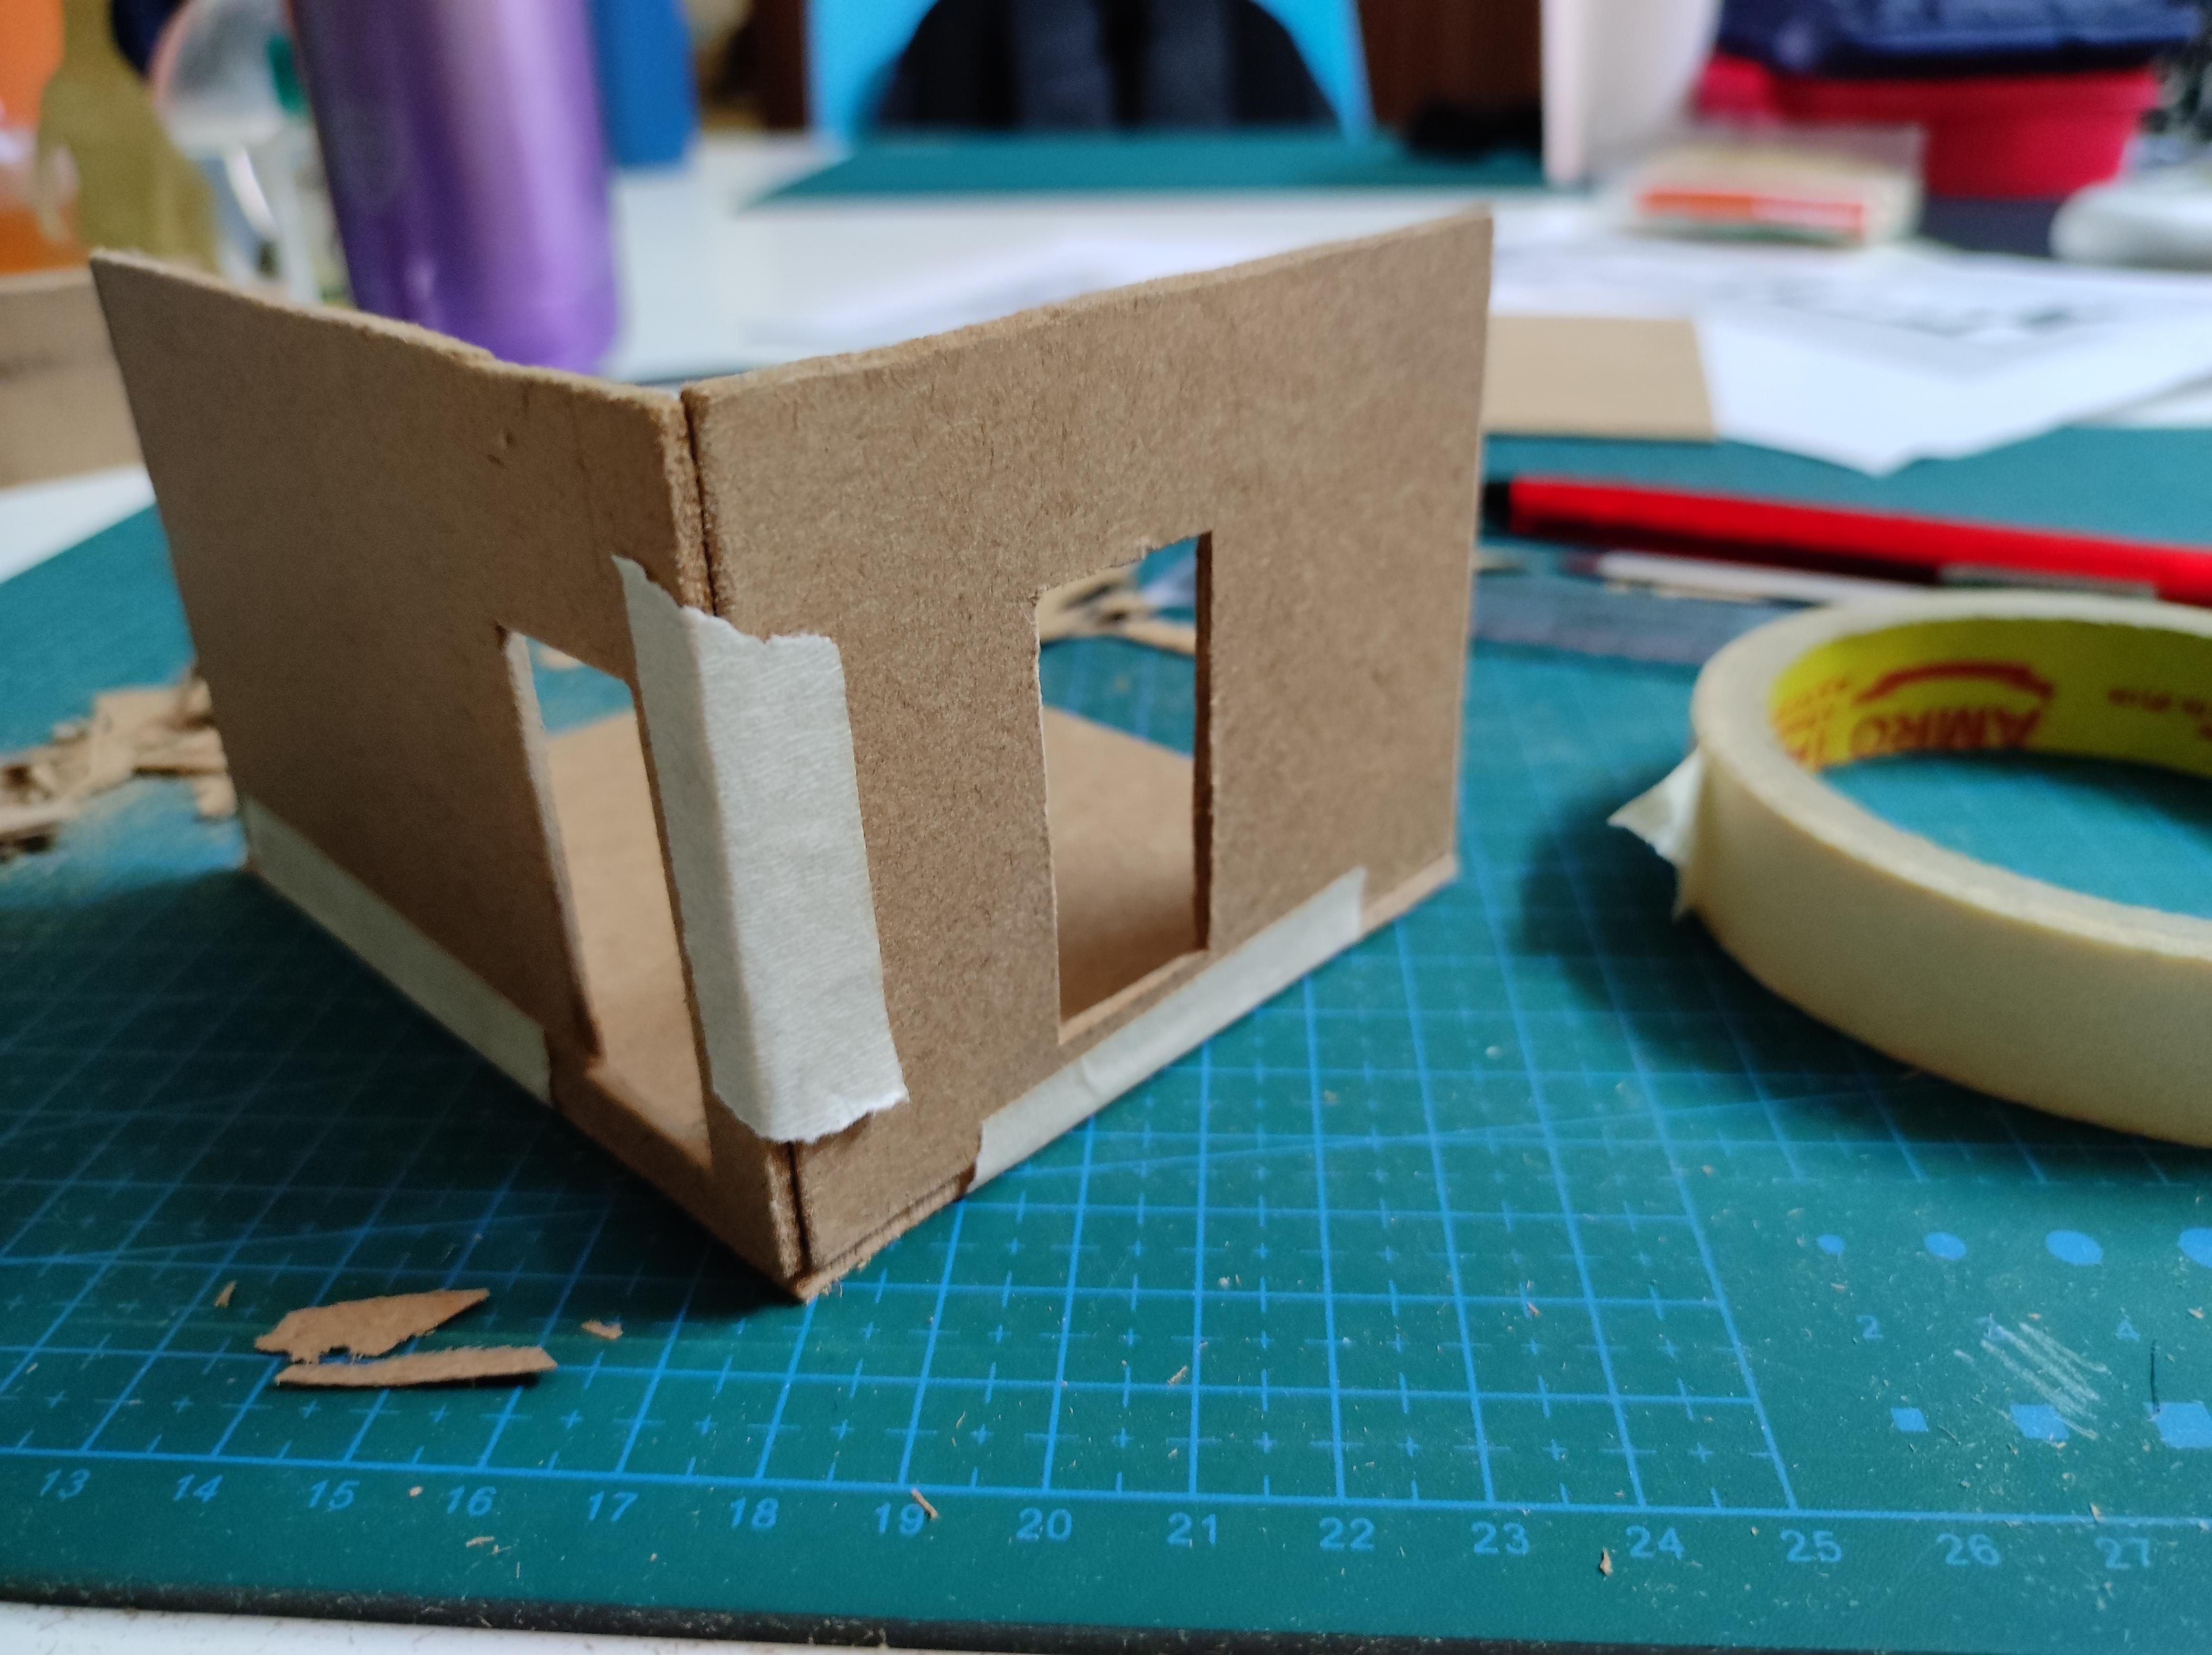
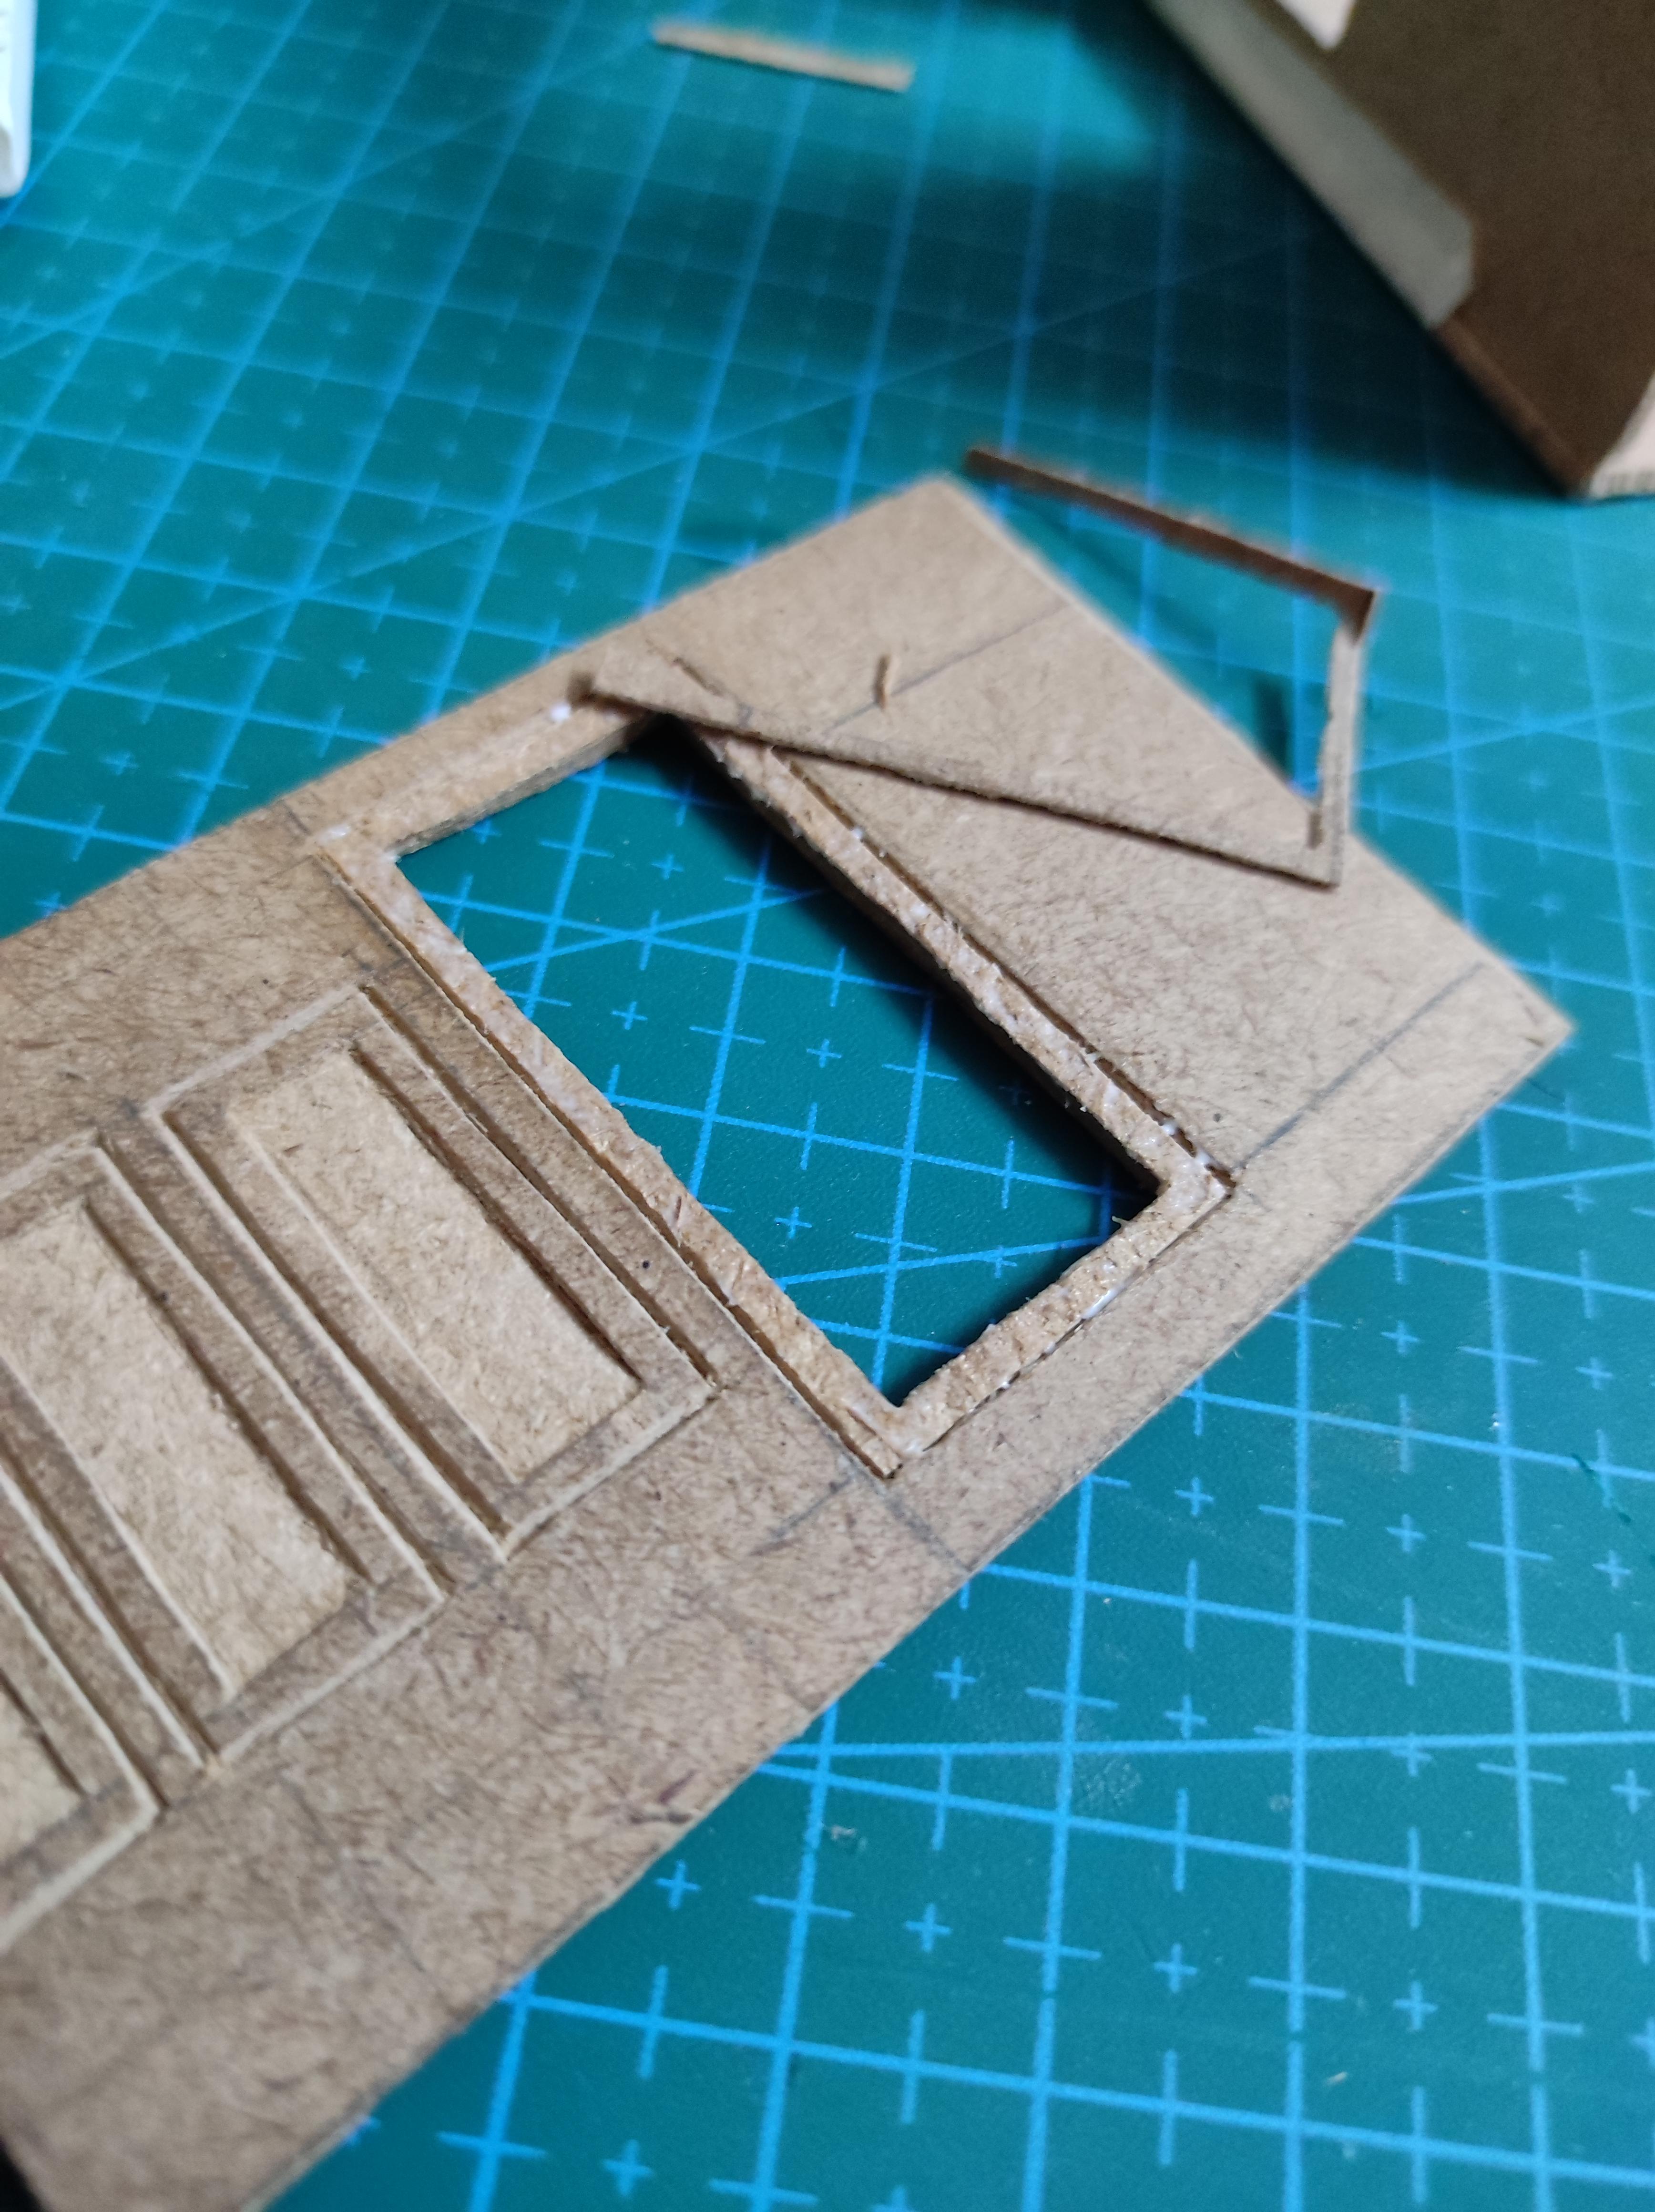
- Once all the pieces are ready (5 in total), you can begin working on the window holes. Mark out the dimensions very carefully again before cutting it out with a box cutter. I would first lightly etch out the edges of the rectangle with the knife and then make two diagonal cuts connecting the opposite corners. Ones that'd in place, I would bend the blade at an angle and scrape out the material inside. It is kind of like peeling the layers out. Once the whole thing is cleared, you can file the edges and make the hole neater.
After the two windows are cut out, you can use some making tape to hold the pieces in place. This will give you an idea of how its coming along helping you to visualise.
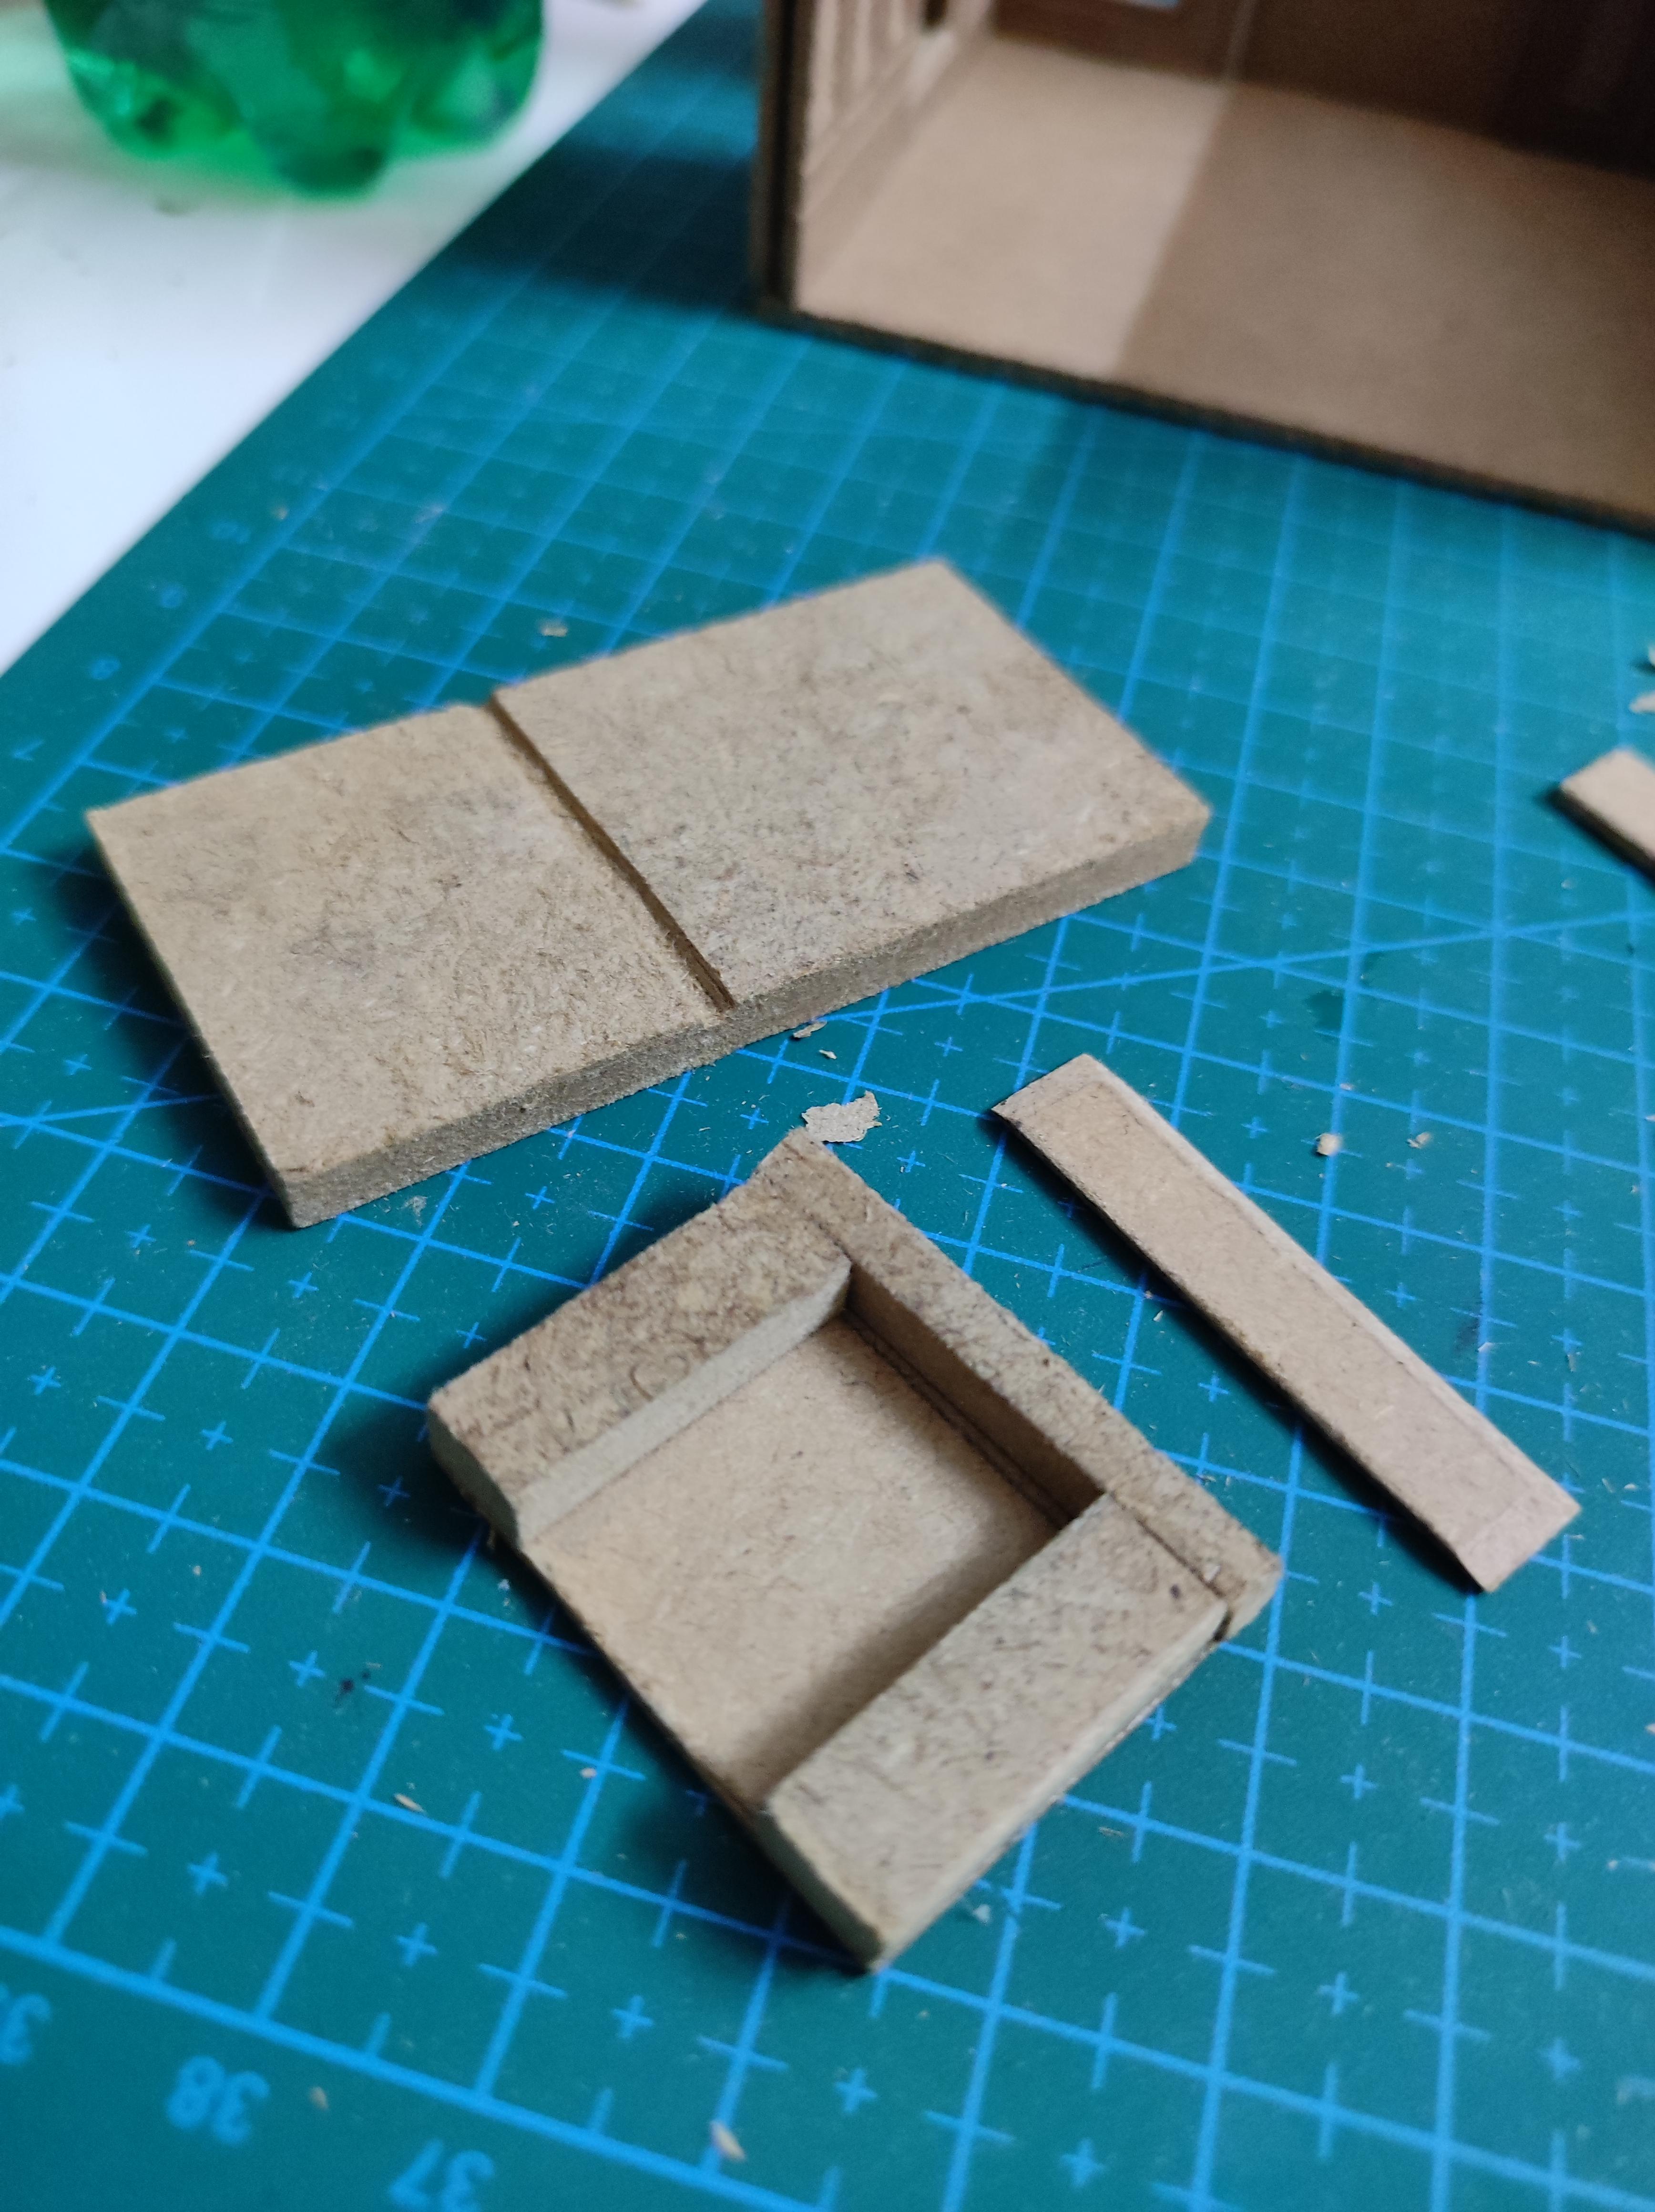
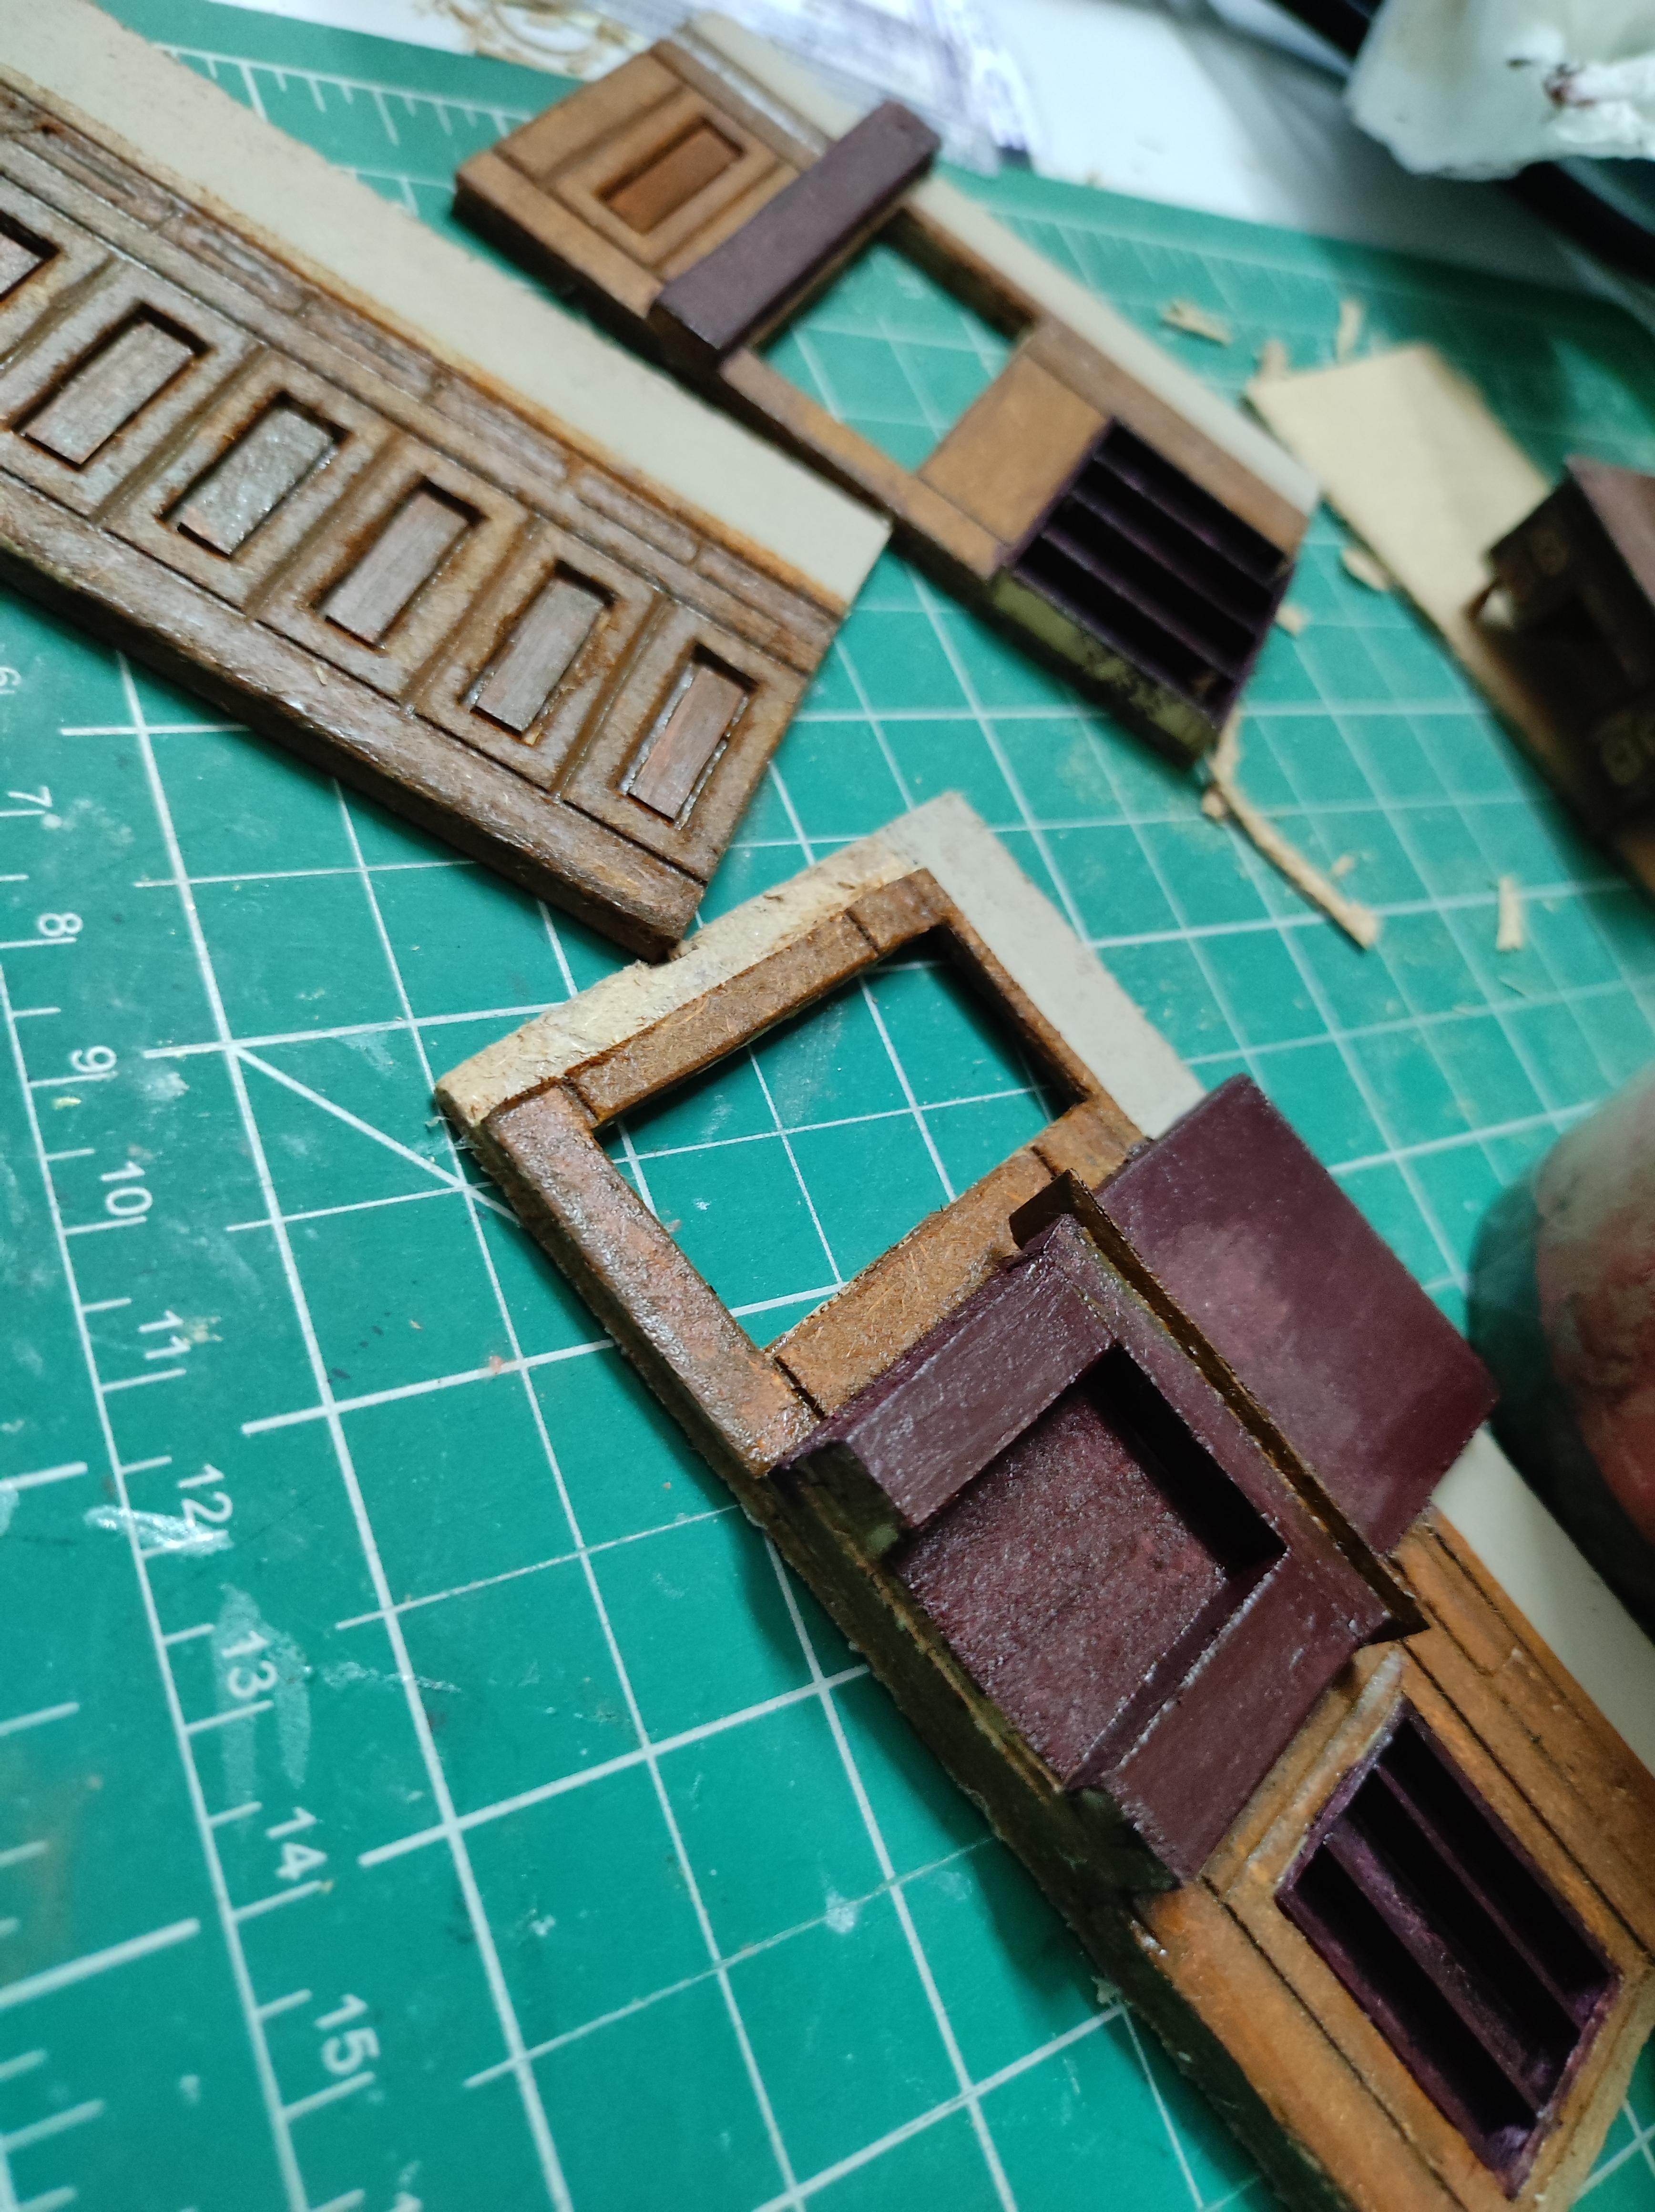
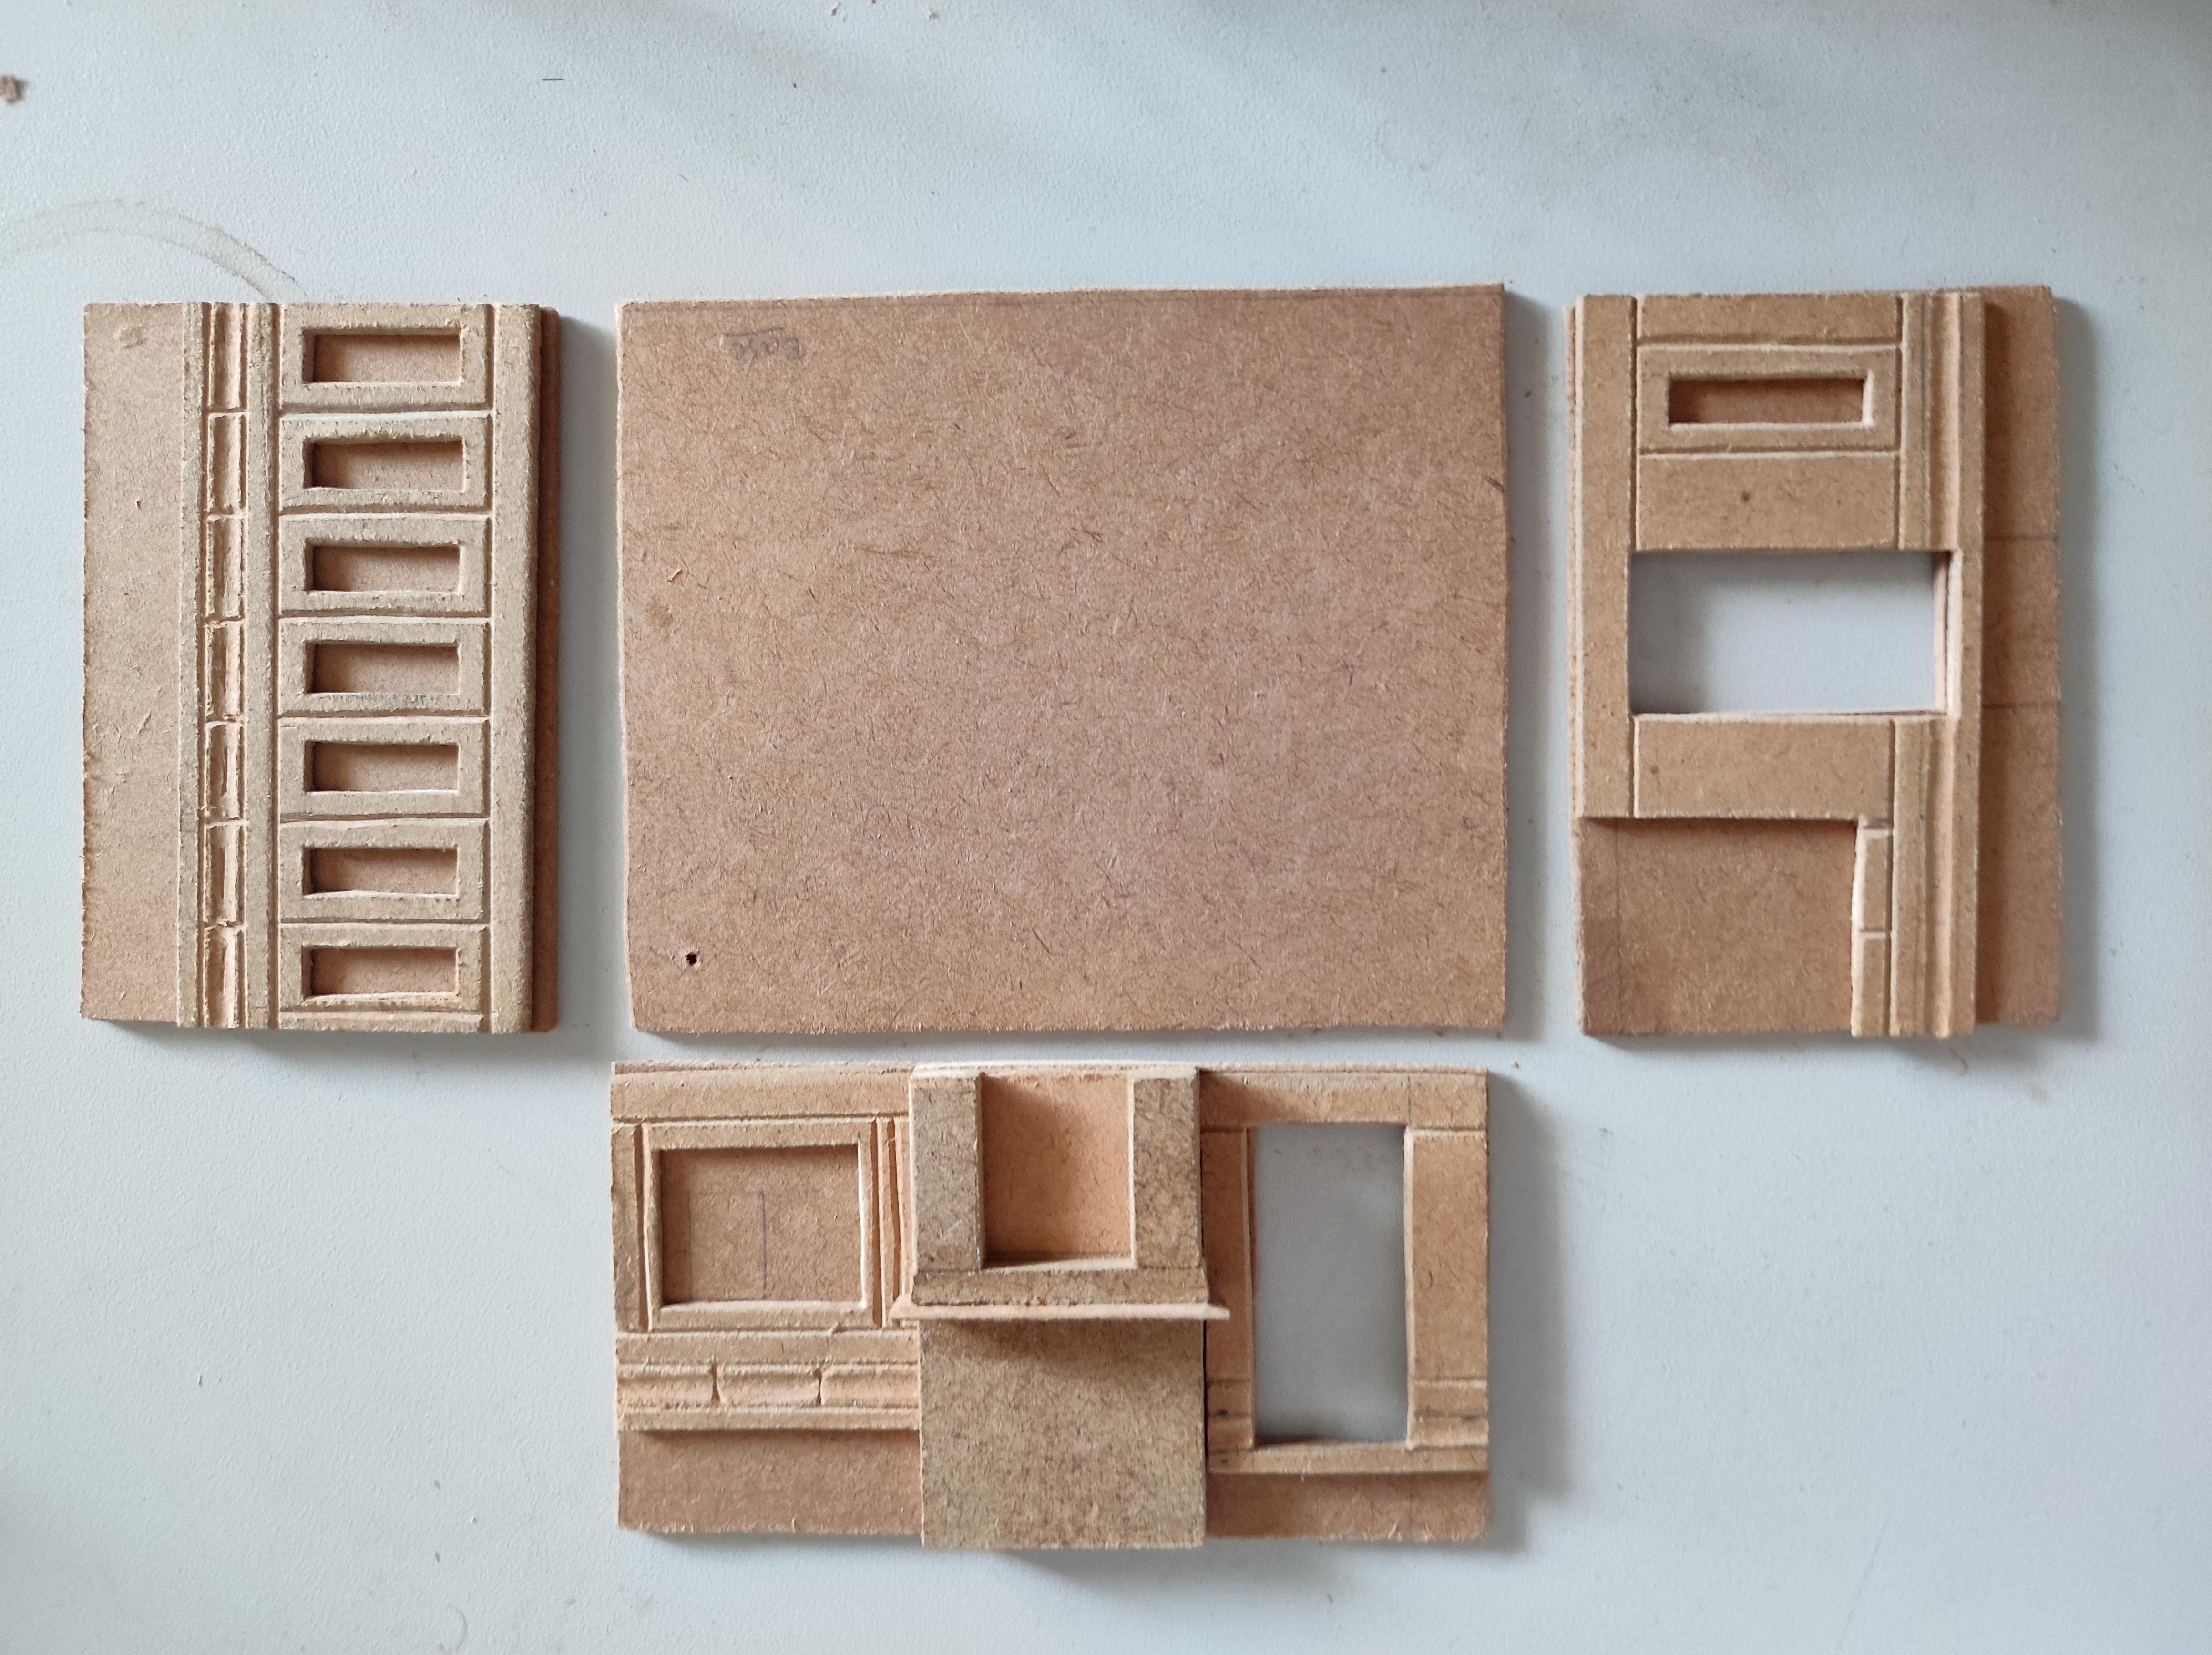
The Panels

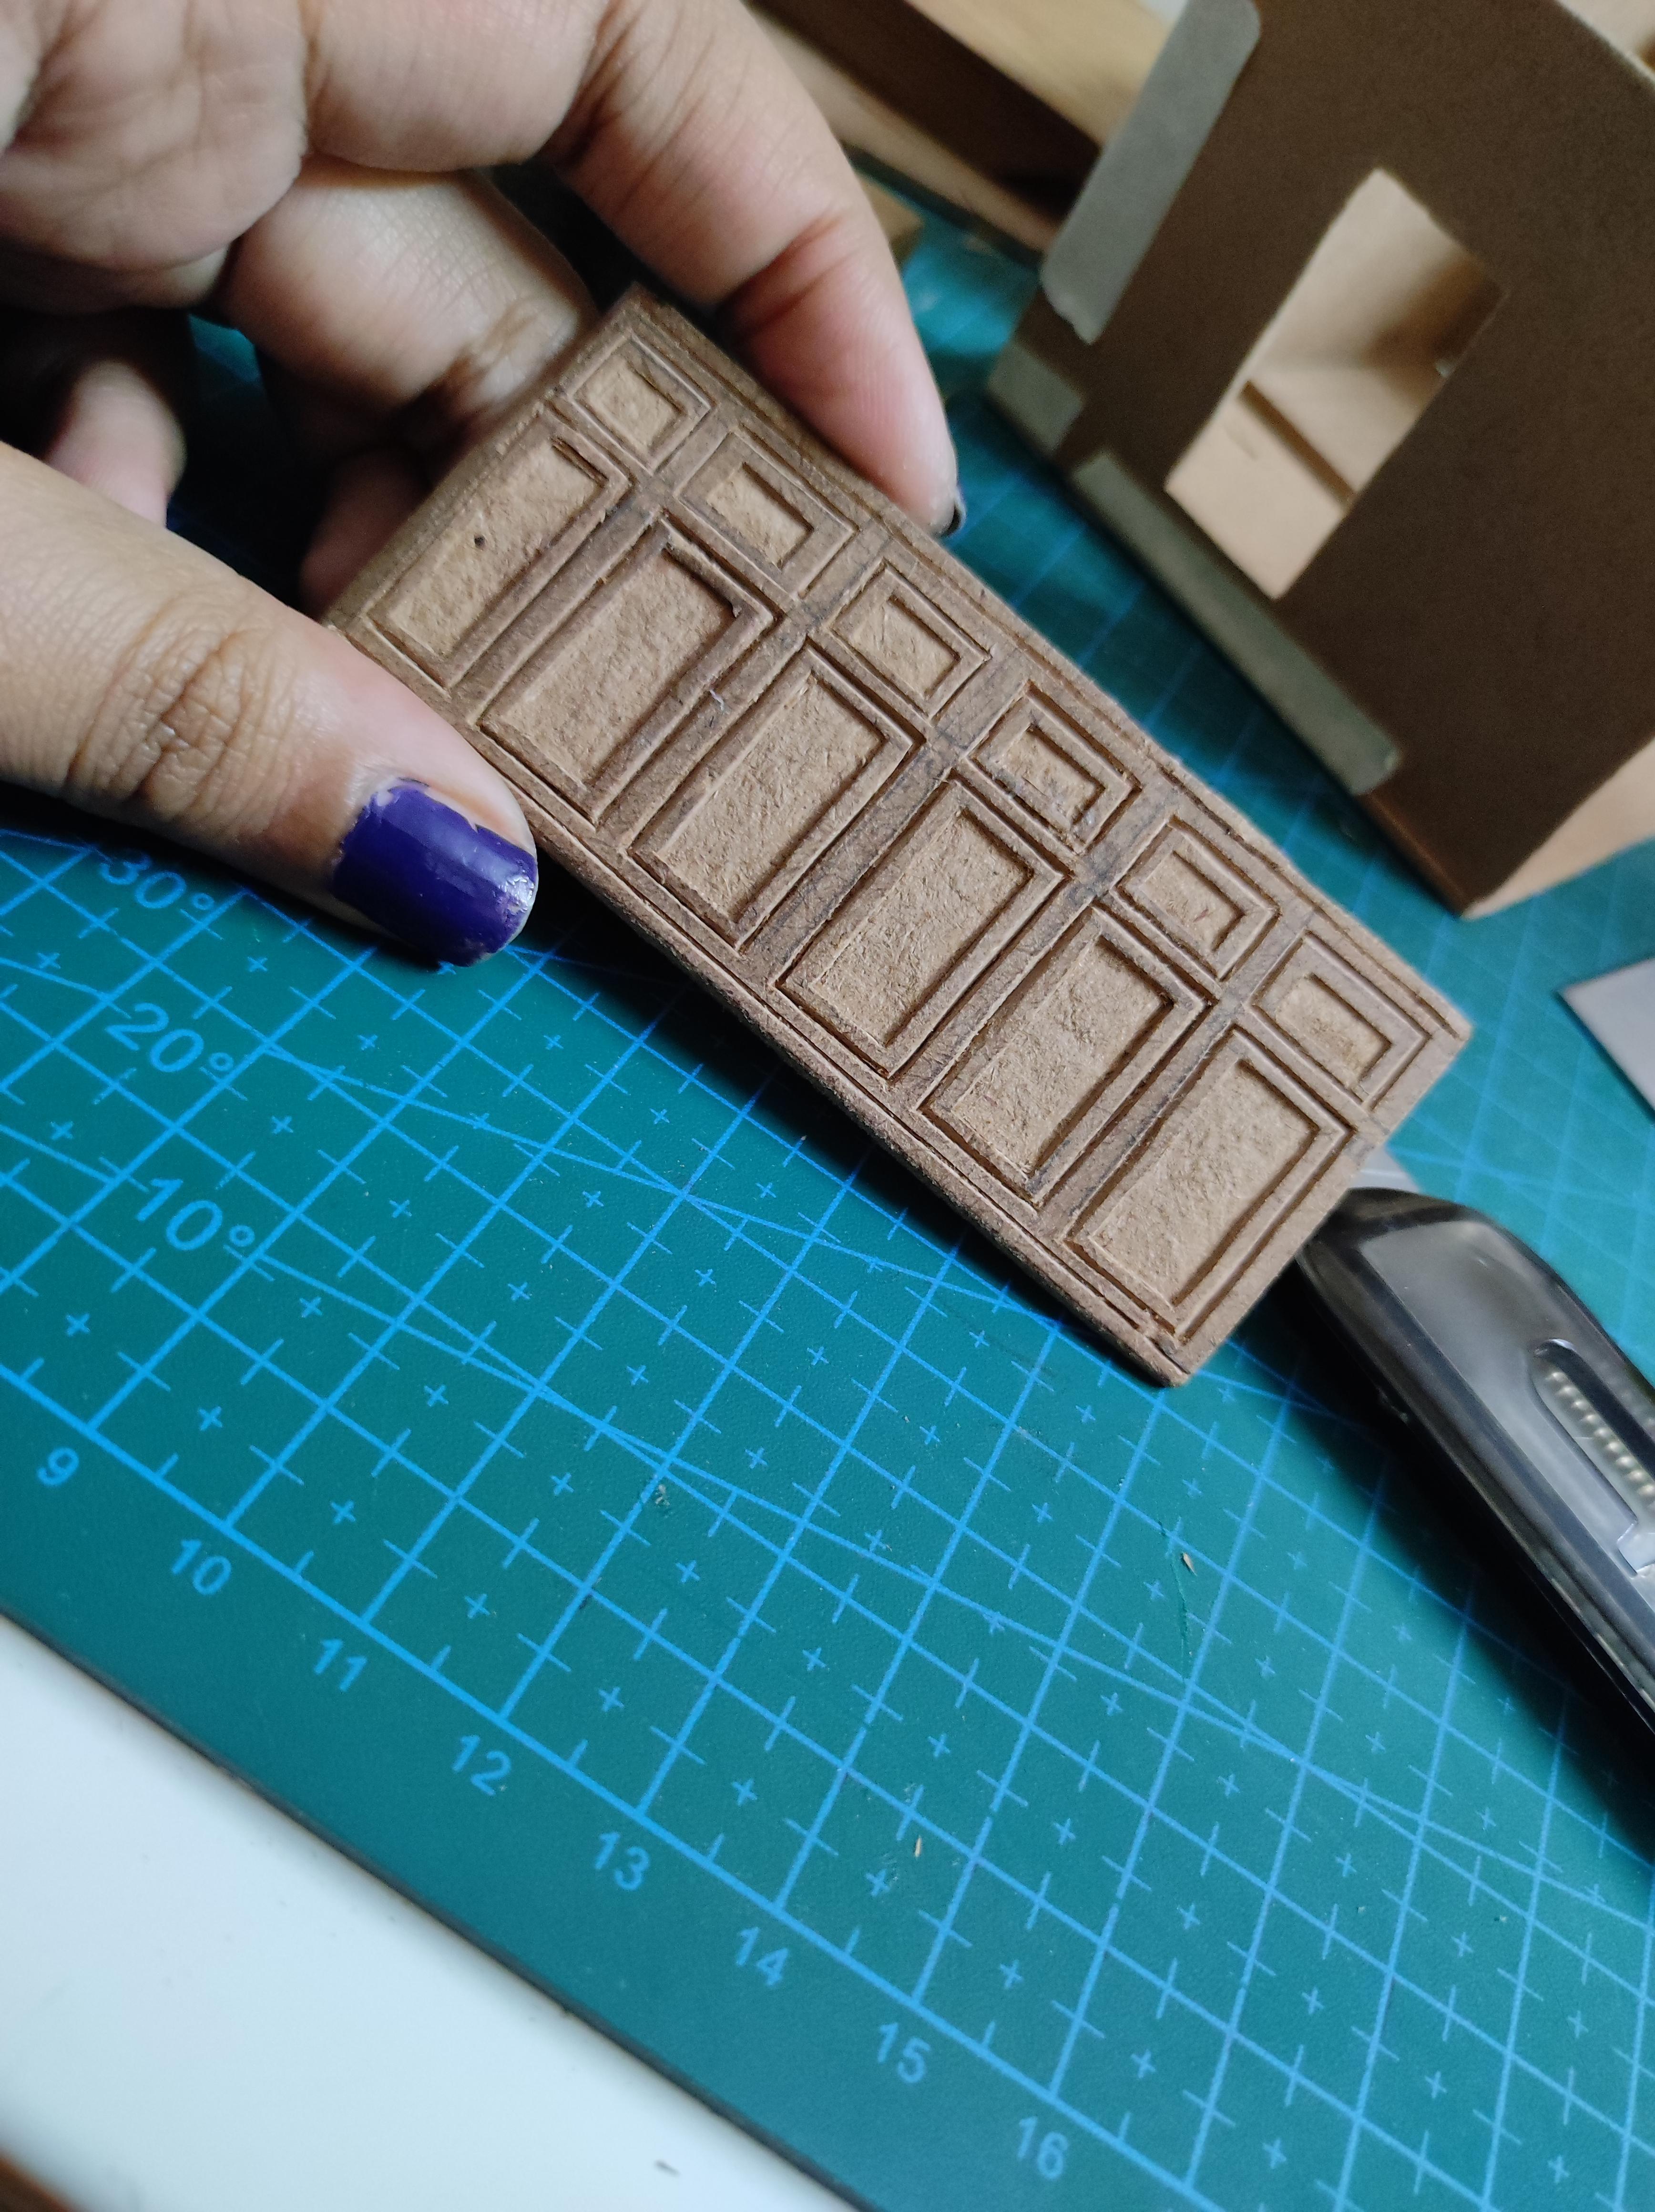

The walls of the room had a nice panel detail. I made them separately and later glued it along the walls made in the previous step.
Steps:
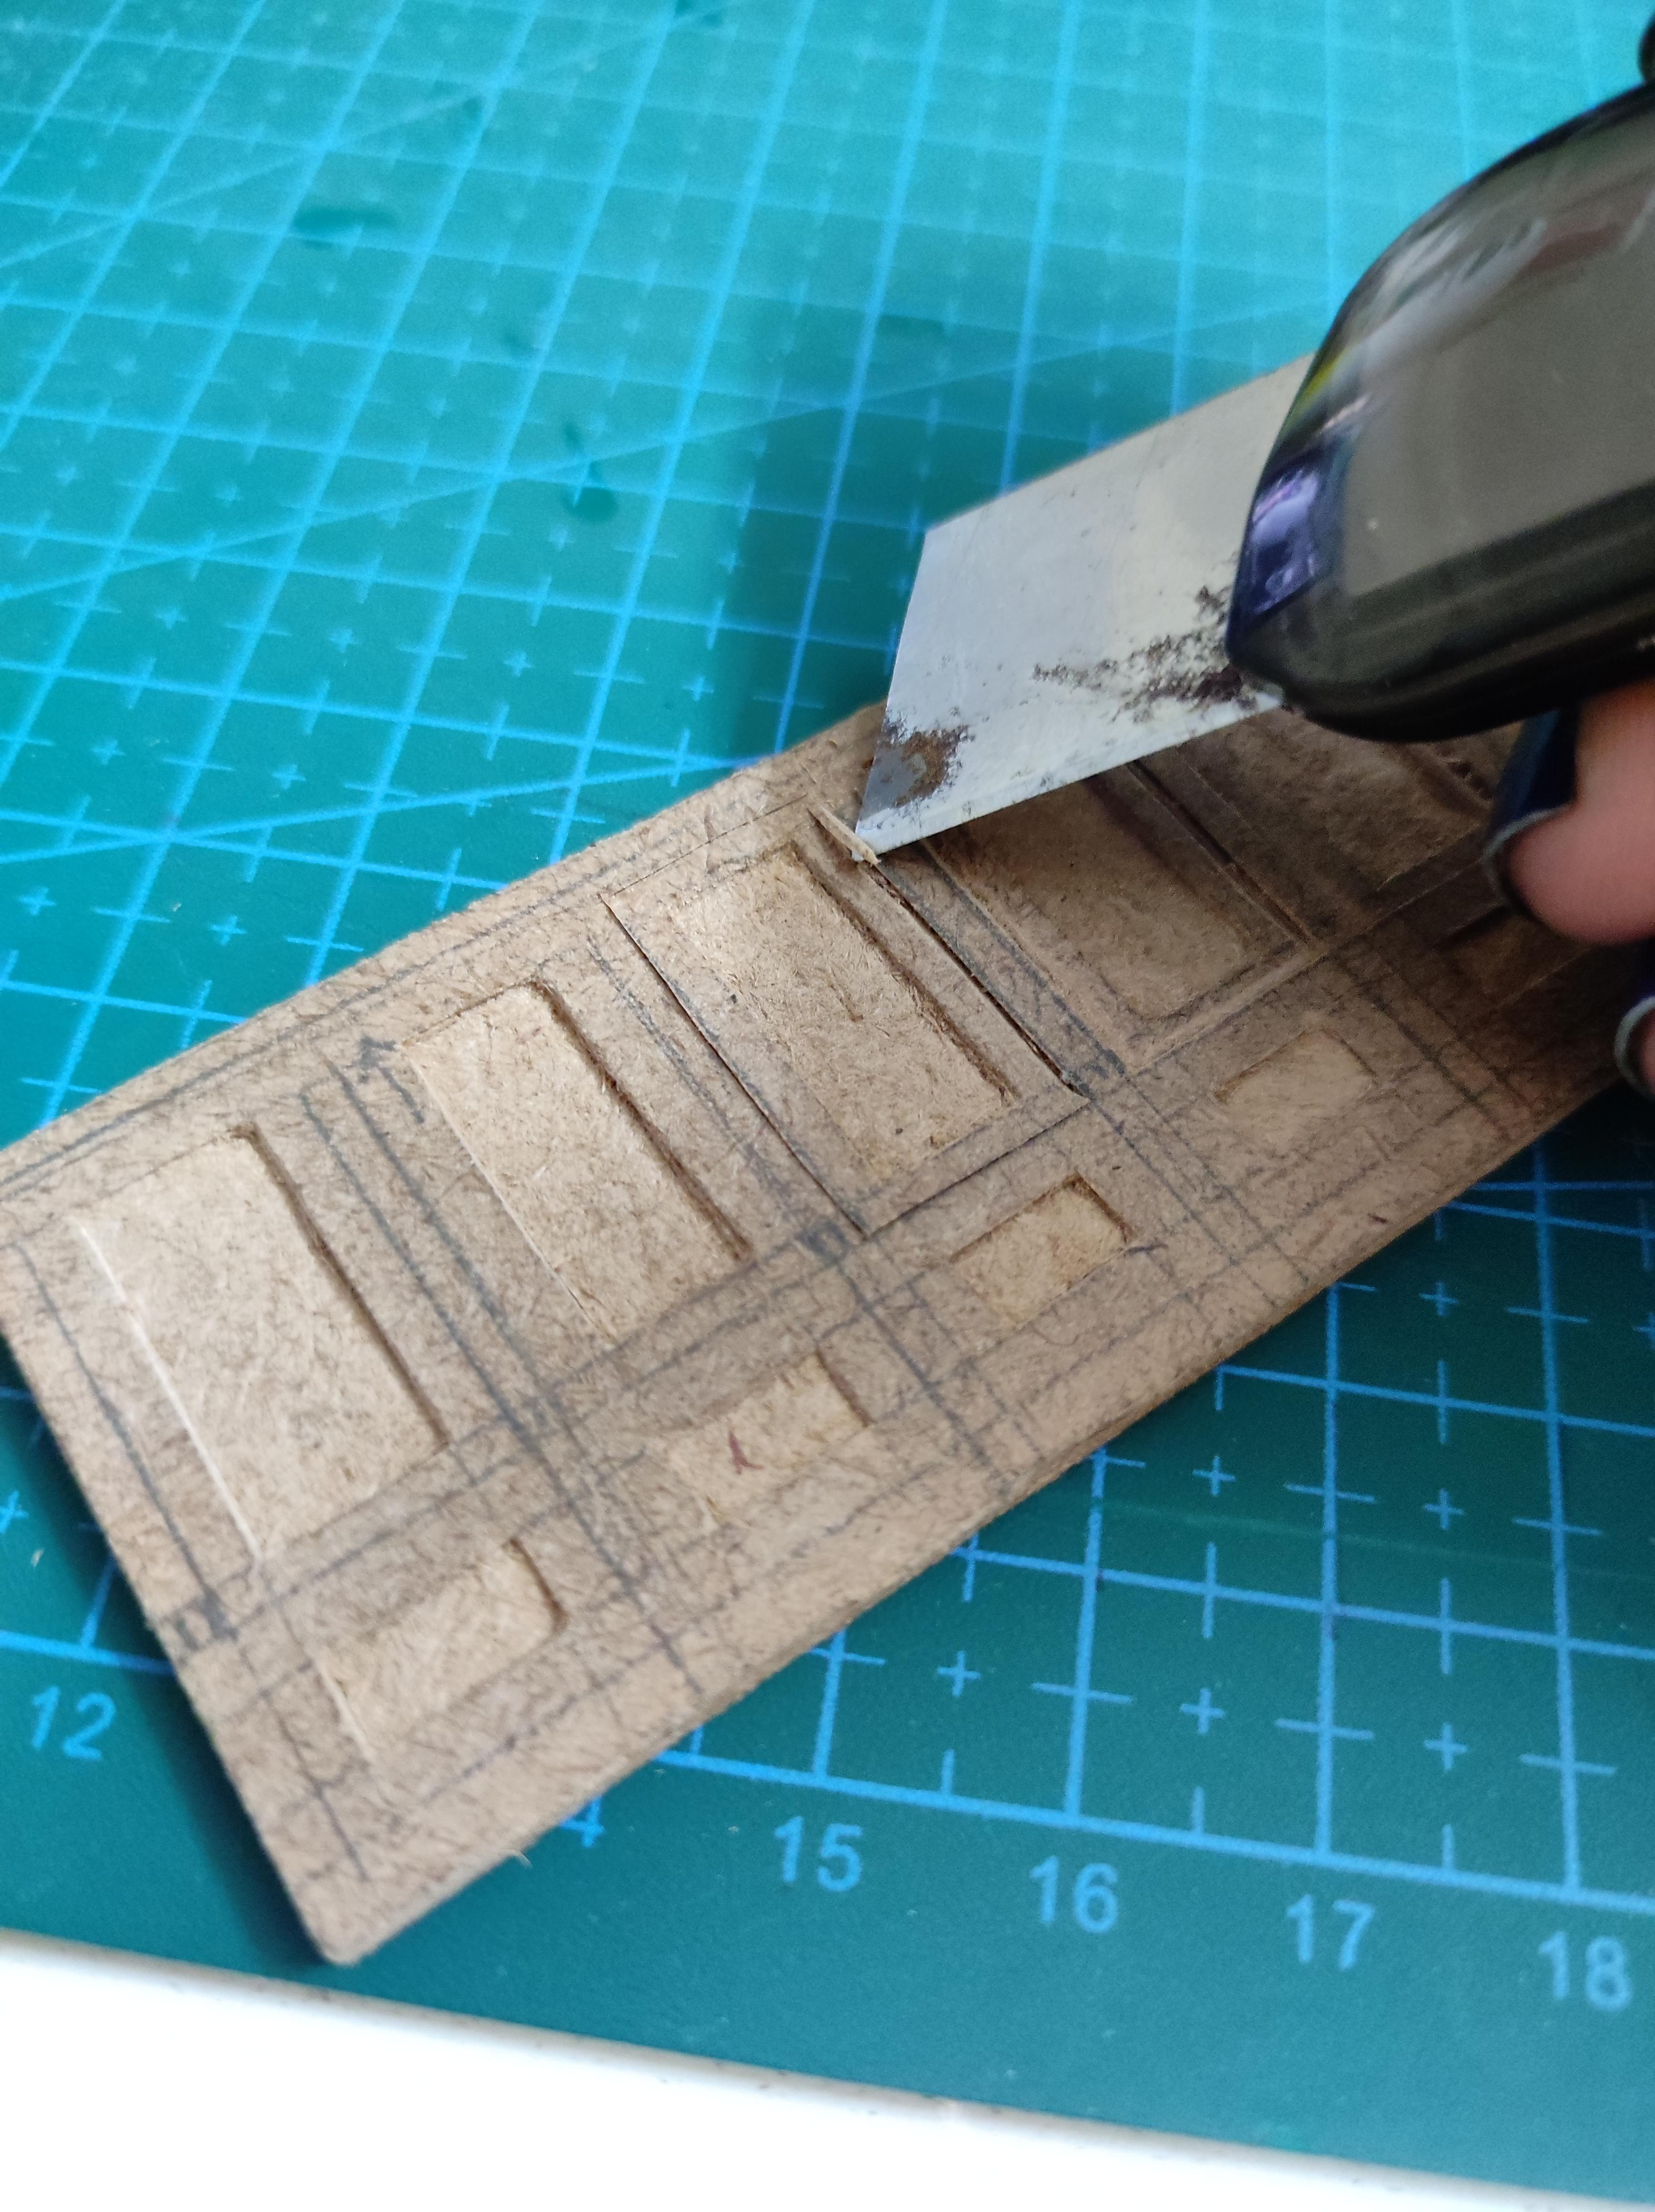
- Cut out the rectangles of the whole panels the same way as we did in the last step but in different dimensions.
- Then go ahead to mark the individual debossed panels and other details. I used the triangle ruler and set squares to ensure the lines where properly parallel and perpendicular.
- The deboss details can be done in two ways:
- The first way I tried was using just the box cutter. Like we would peel out the layers while removing the window spaces, I peeled out one or two layers for the debossed panels to create a difference in height. I made a frame around the window the same way.
- This method works well with very commonly available tools and gives you a lot of freedom to detail and carve. But as its done by hand the accuracy and smoothness might not be perfect and the lines a little crooked.
- You could try this out on some scrap wood to get a hang of the technique. Although it isn't totally accurate, I like how flexible this method was.
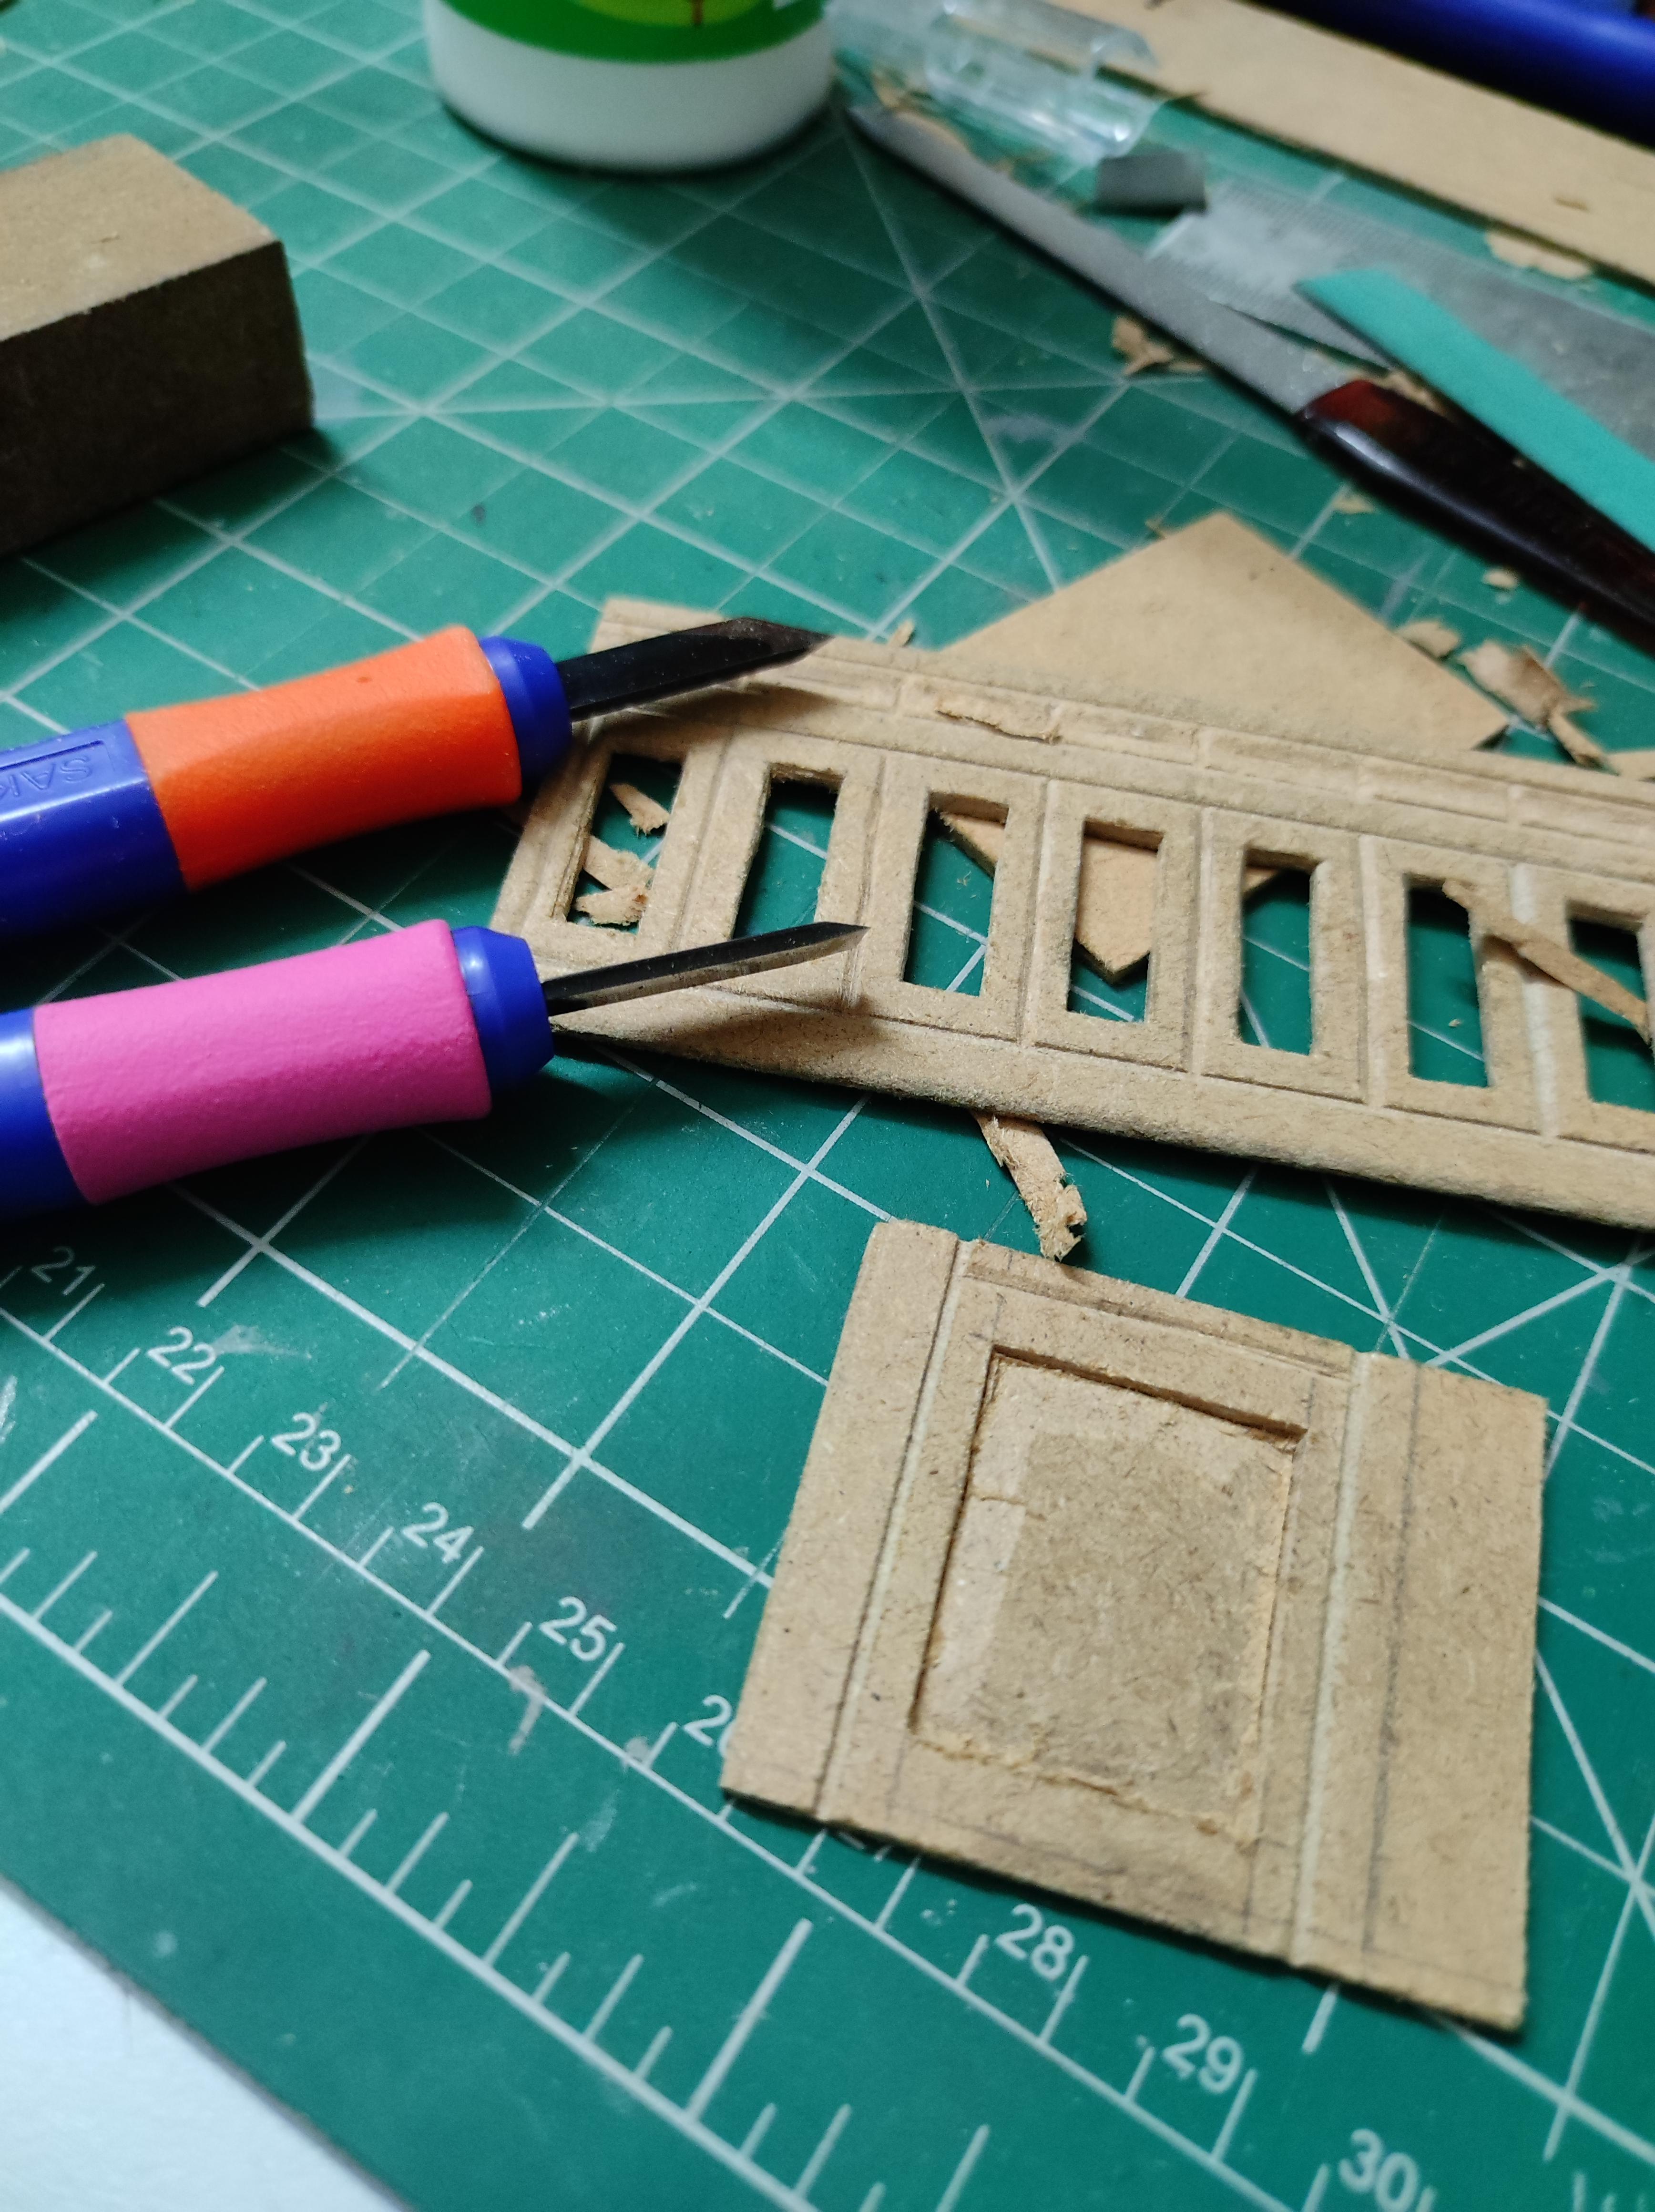
- The other way is using MDF carving tools (tools used in MDF printmaking). I managed to lay my hands on a set of these tools later in the project and could not help but give it a try.
- Although I don't know how to use these tools to their full potential yet, I will share what I learnt here with you guys.
- The kit I got had 4 types of tools, 2 sweeps (1 flat, 1 angled) and 2 scoops (1 U-Shaped and 1 V-Shaped). I mainly used the V-shaped tool to carve out the vertical ridges.
- For the horizontal ridges, I used a hacksaw blade cutting into the wood but not all the way. This gave me a very even and straight ridge which I really liked.
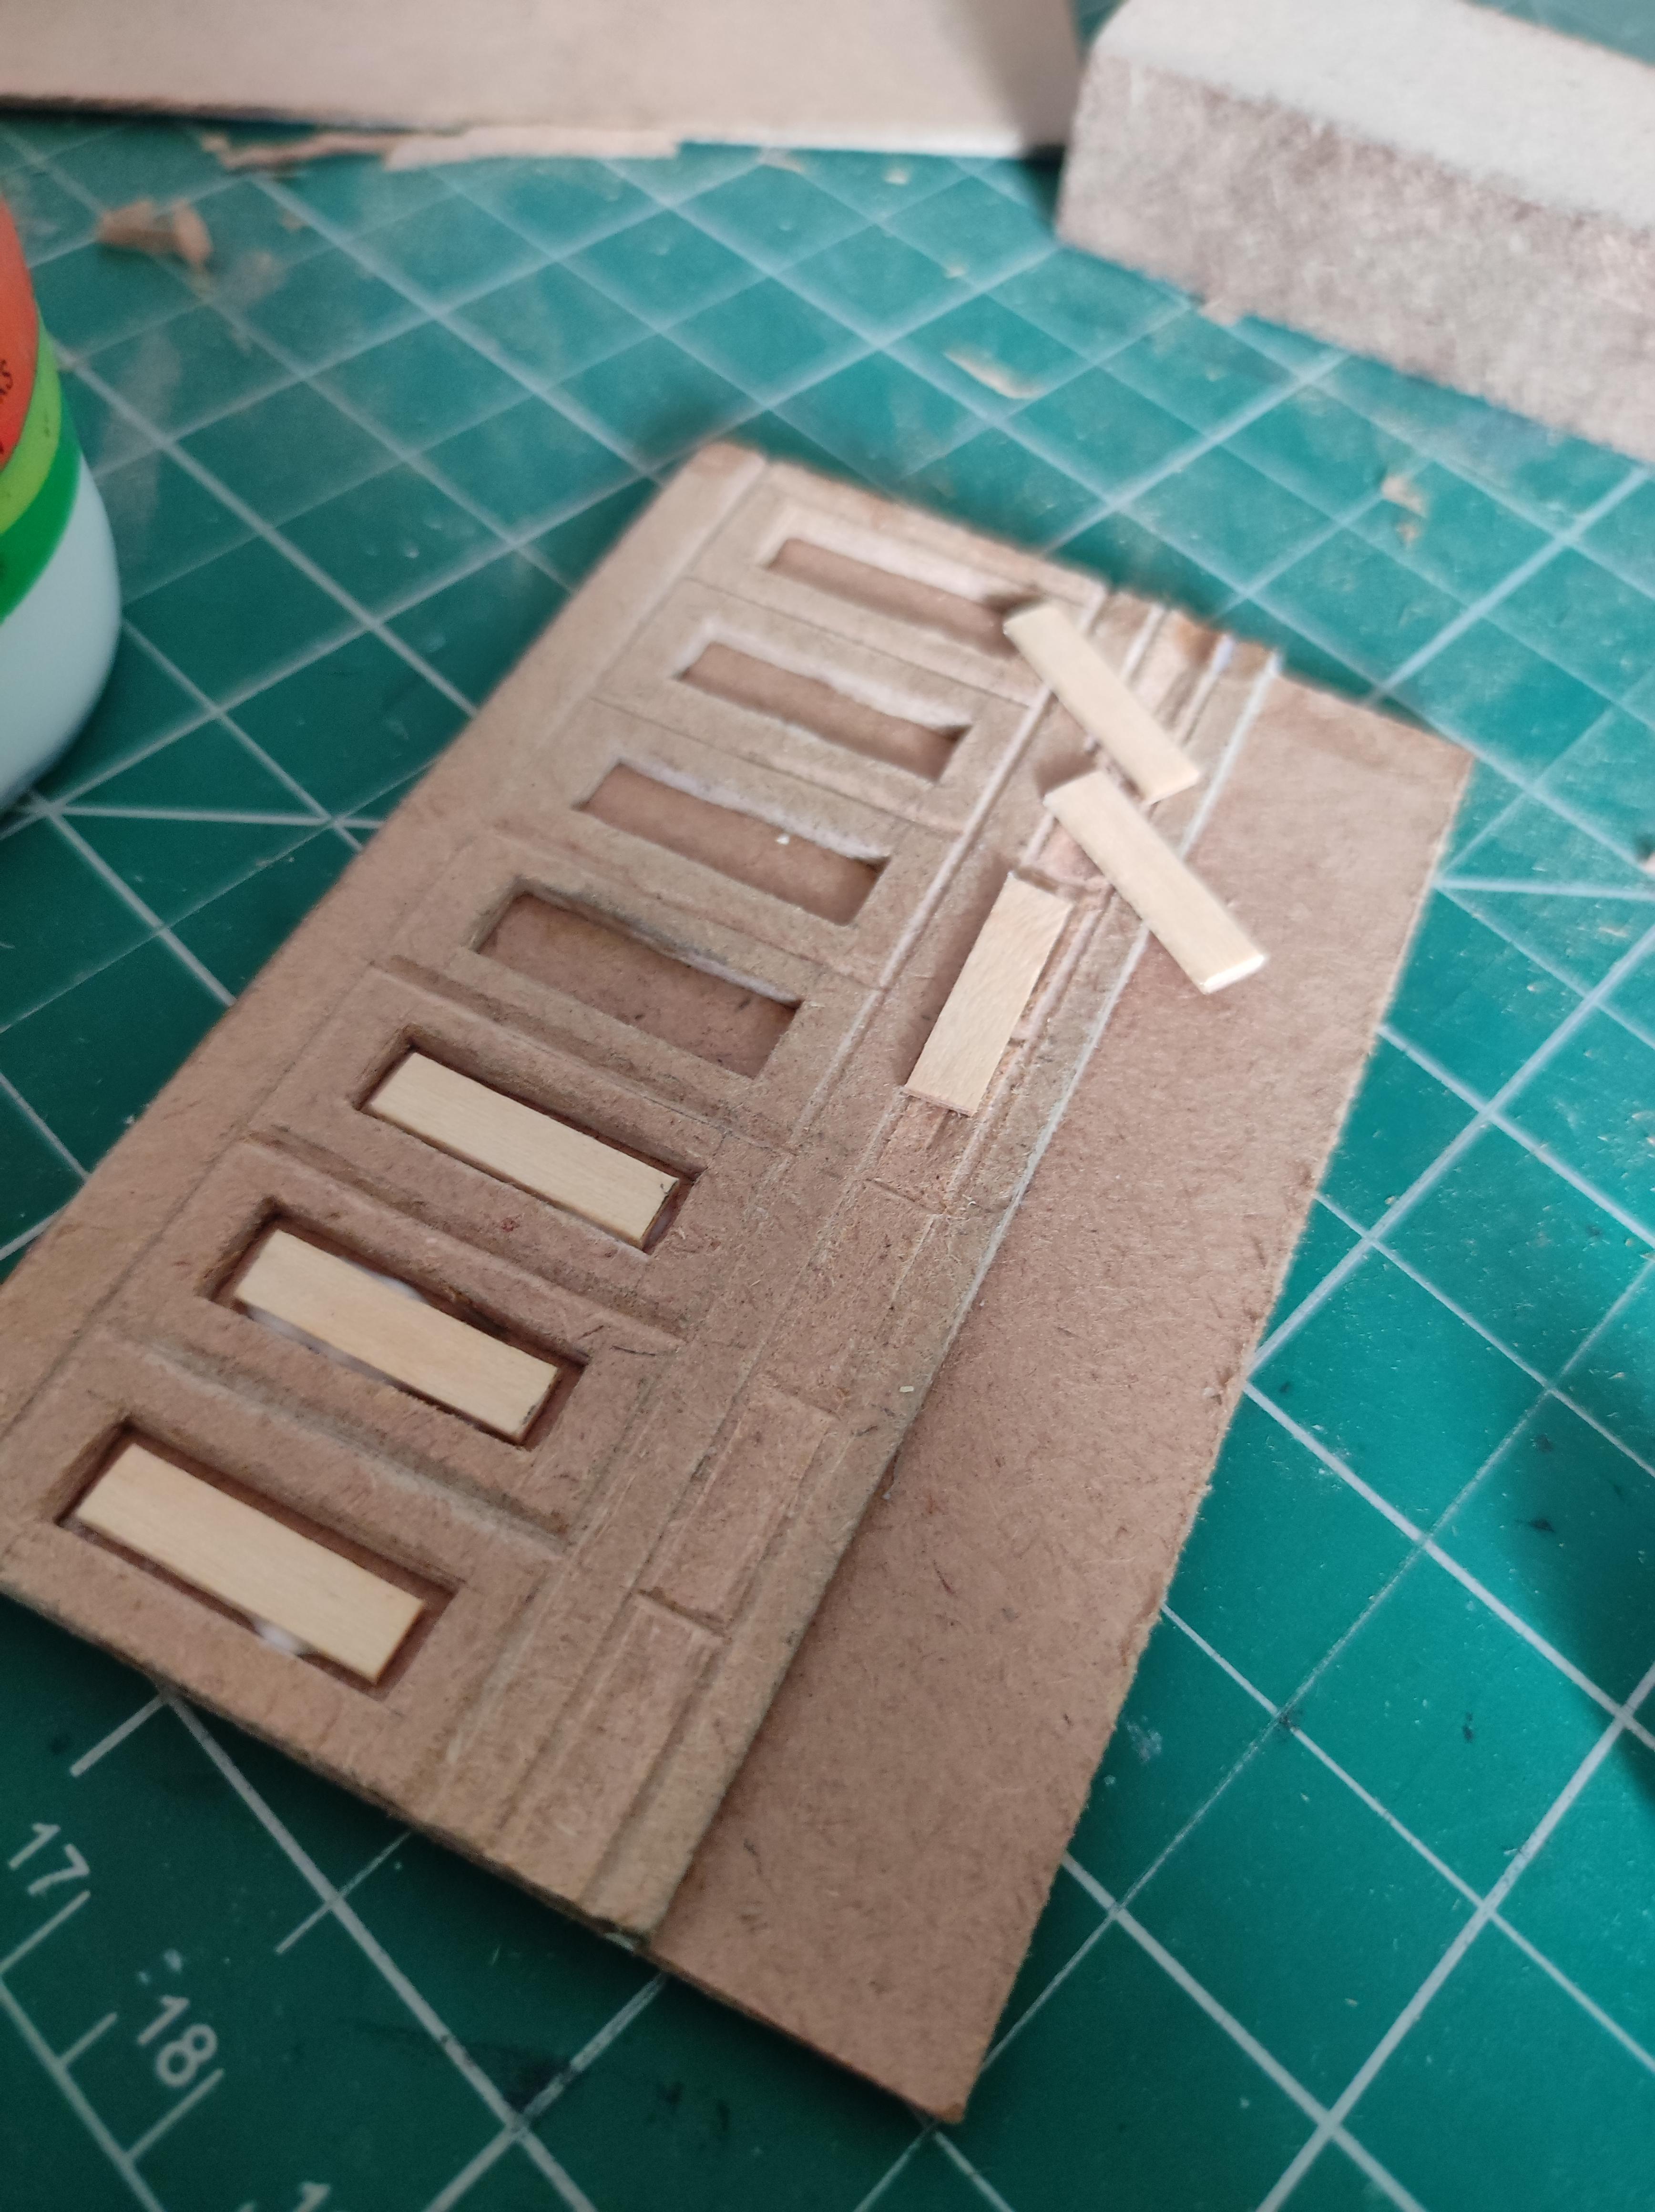
- Also for this attempt I went ahead and completely cut out the debossed areas with the sweep tools later adding some thin popsicle or coffee stirrer pieces inside to create a variation.
The panels where a set of experiments and I would have loved to explore it more. However there was a time constrained so I just went ahead with the results of the second attempt.
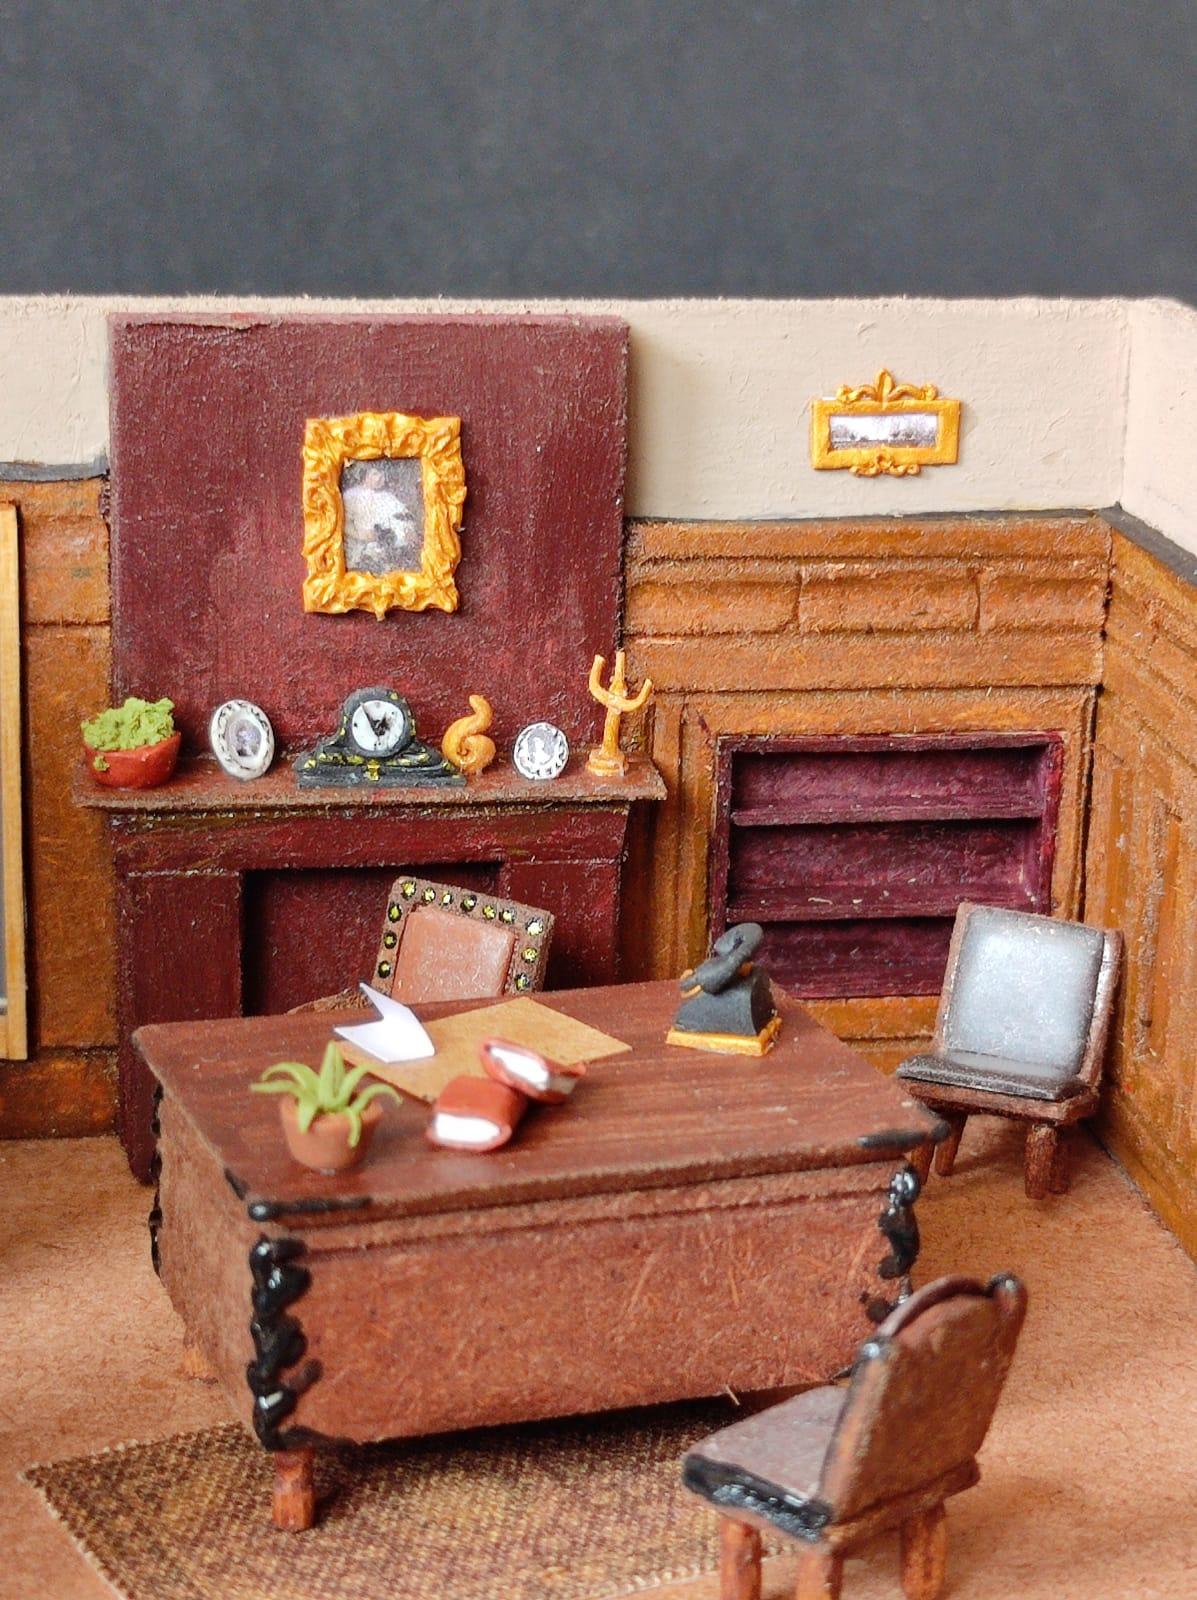
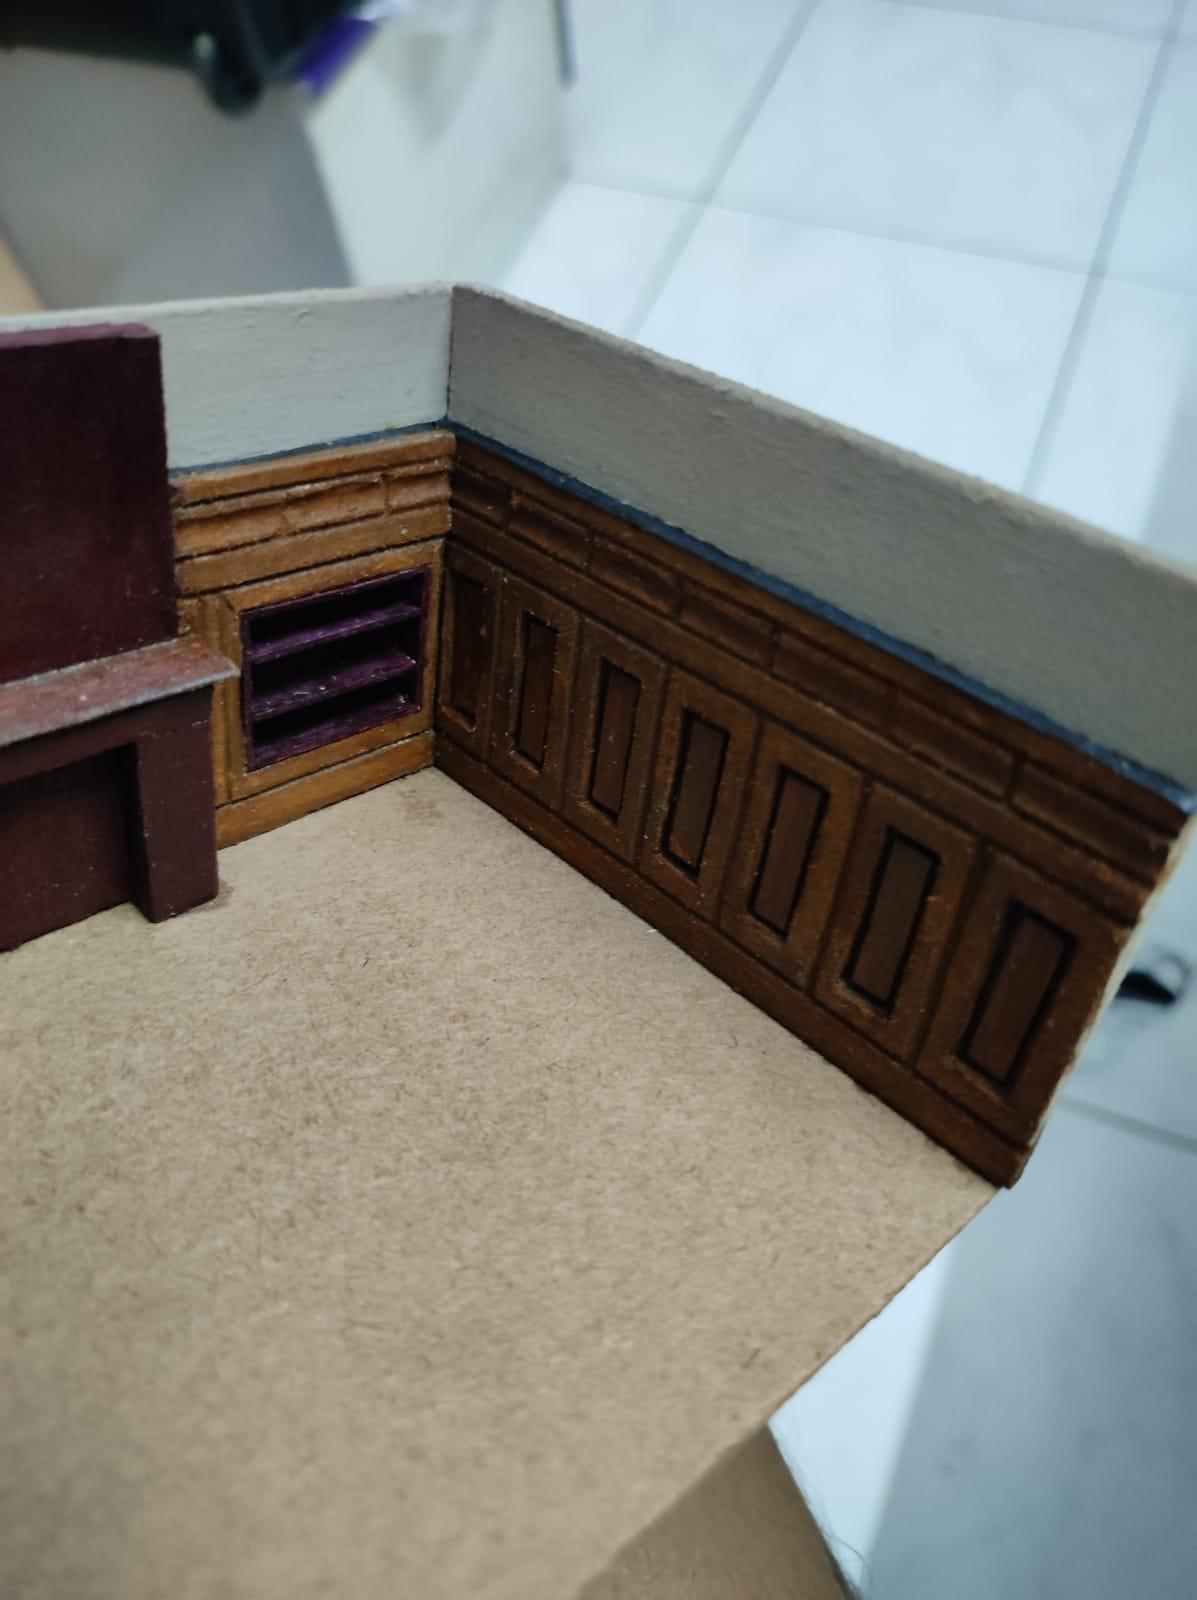
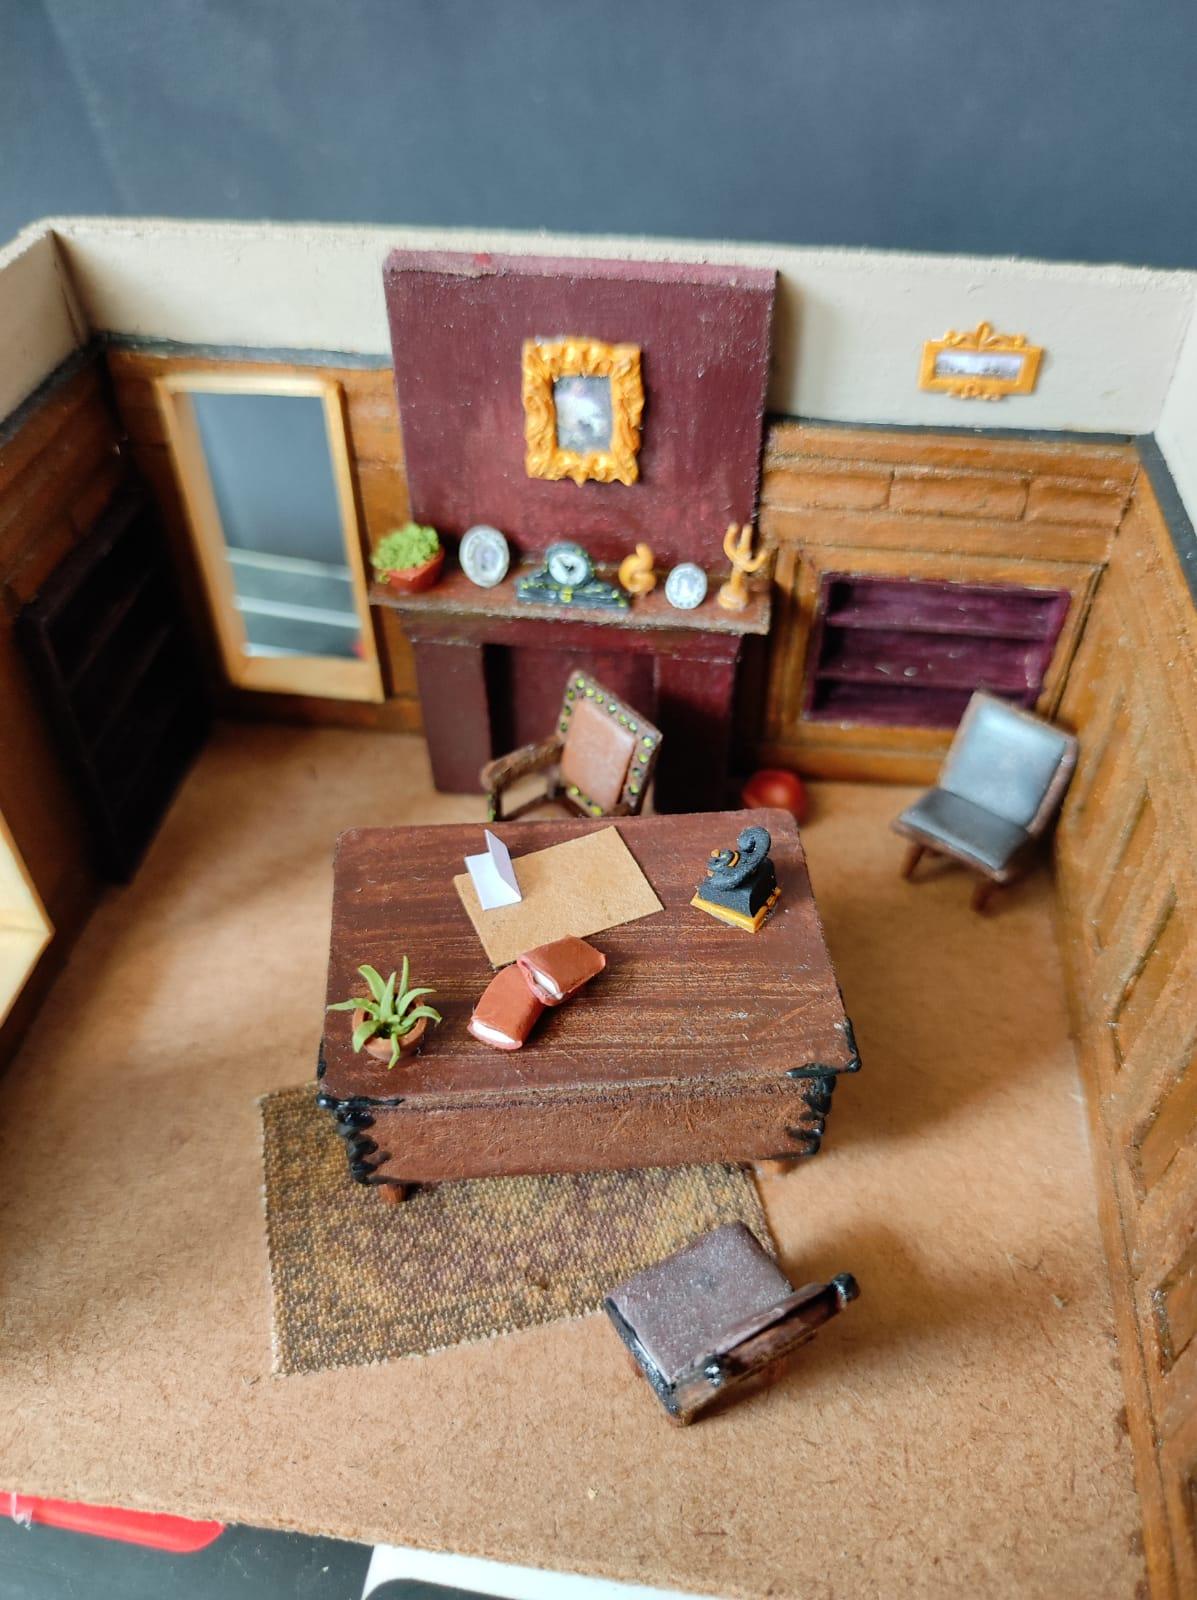
The Fireplace and Book Shelves

.jpeg)
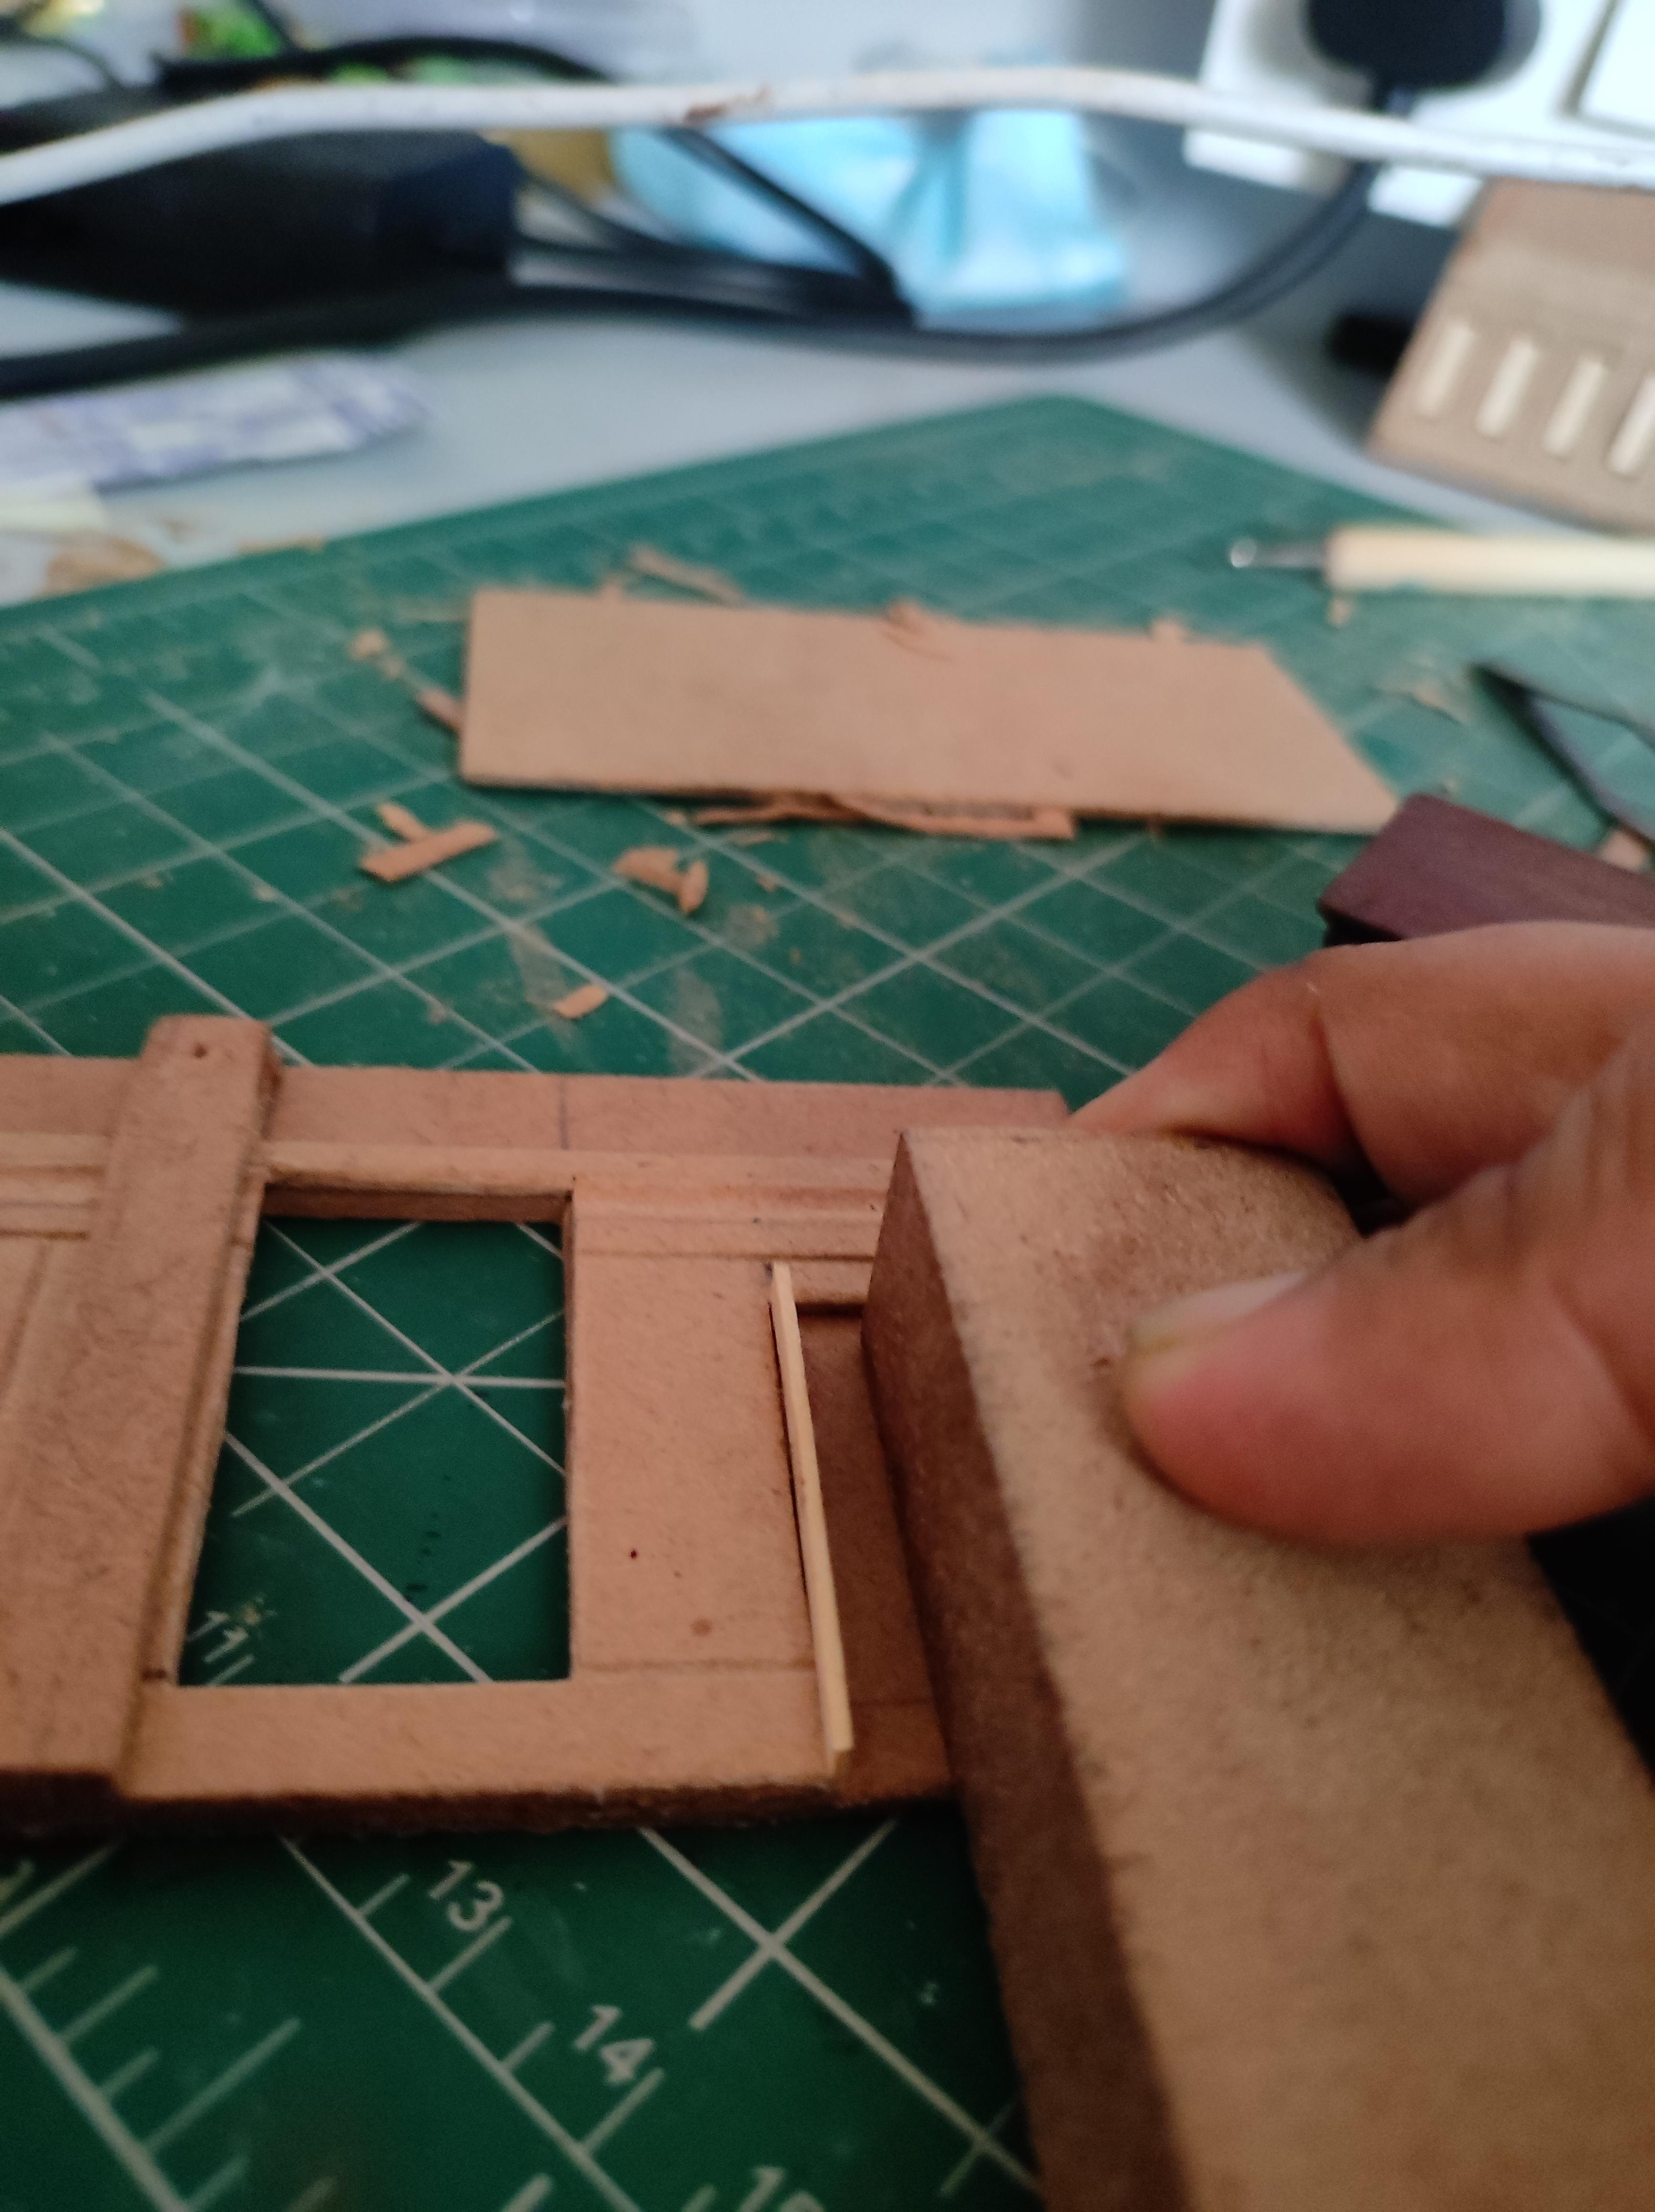
The wall facing us had a nice little fireplace and mantle.
Steps:
- To make that I used some thicker MDF sheets (4-5 mm). I cut out with the mini hacksaw the two sides and then the top piece. These were of the same thickness. I glued them along a thin MDF sheet so I could ensure the angles were as close to 90 as possible (its easier to install a fitting like this rather than making it entirely on the main wall)
- From the same thin sheet I cut out a strip for the mantle detail. I added the champers or angled edges be sanding and filing.
- Using the hacksaw grooving method, I made a small cut to insert this piece into the wooden accent piece right above the fireplace. Once all the pieces where ready I glued it in.
- For this step (and actually any at all) make sure you keep cross checking the measurements to ensure it fits properly.
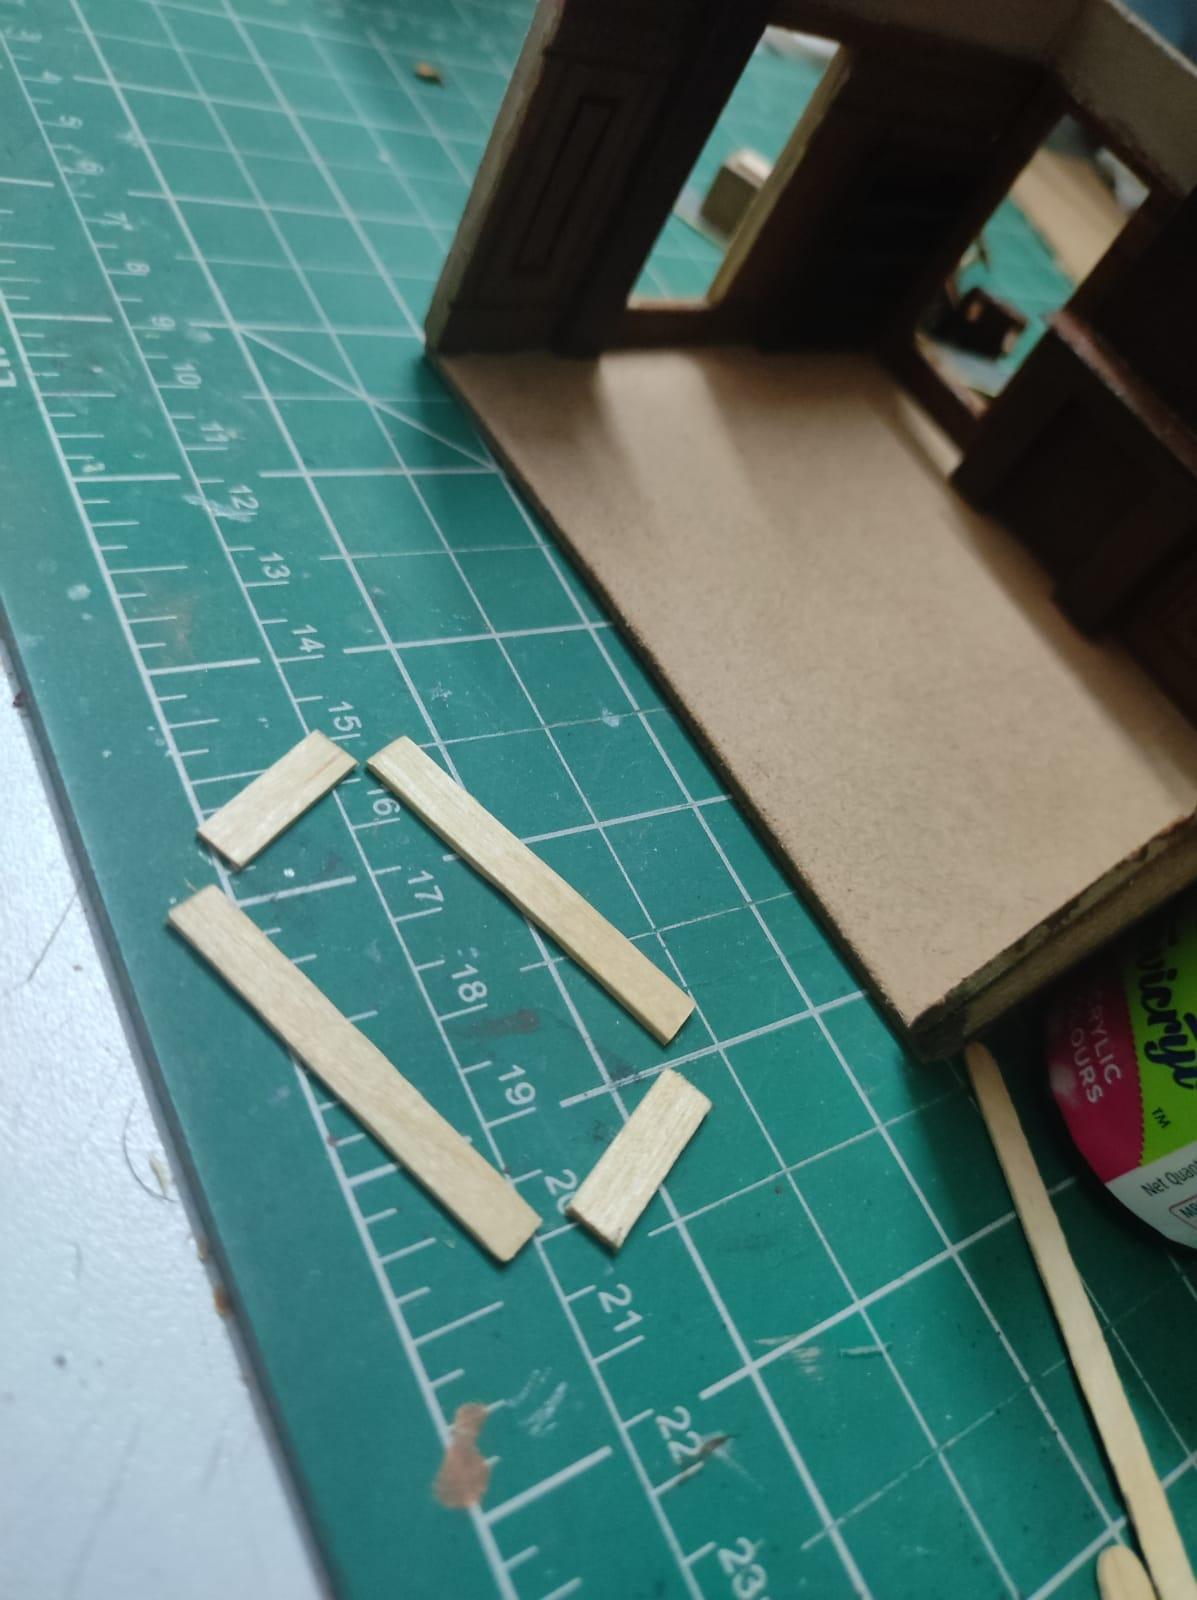
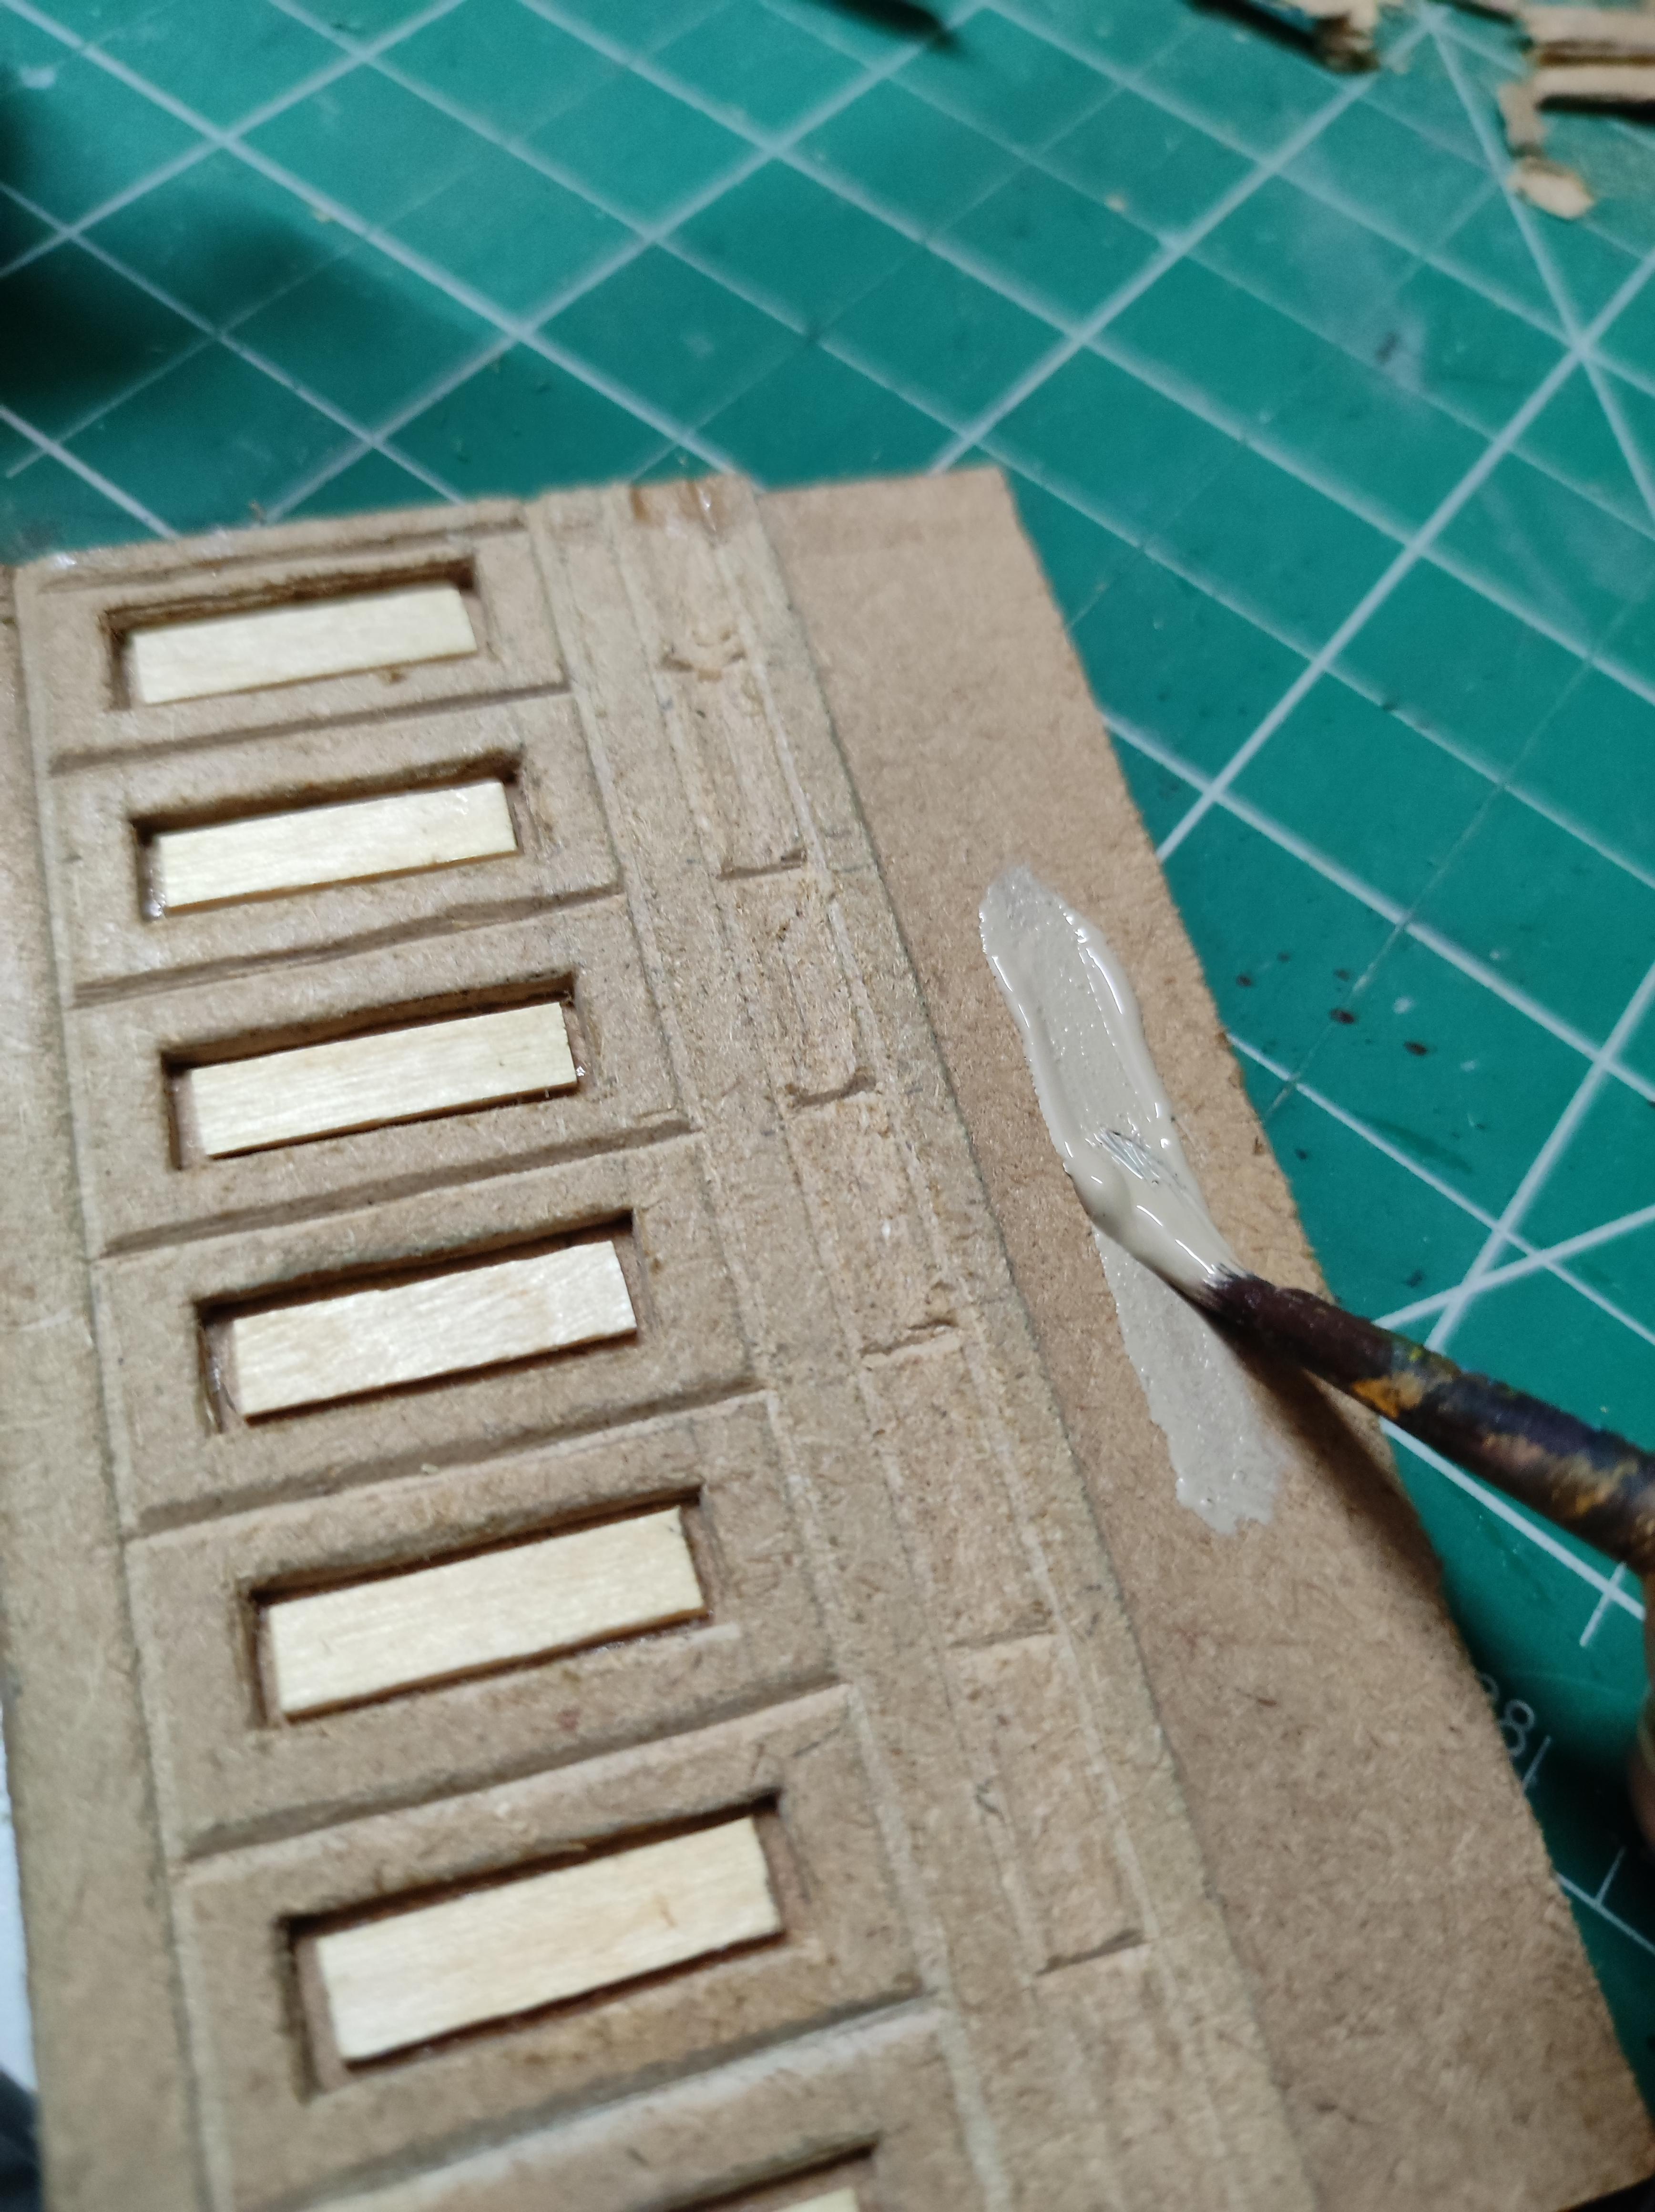
The two bookshelves I made using coffee stirrer sticks or thin popsicle sticks. I like using these as they come precut in 5mm thickness (that worked just right here) and have an uniform thickness of about 1mm. This makes it not only easier to work with but also yields neat and clean results. I attached the bookshelves after I had glued the panels to the walls.
Steps:
- First I cut out the sticks in the required sizes (keeping in mind the little overlap in the corners to ensure a snug fit. So basically the top and bottom pieces would be a little smaller than the original measurement of the top and bottom as the thickness of the side pieces have to be considered)
- Then I went ahead to glue the pieces in place (the space that was precut in the panels before).
- TIP: while gluing and adjusting the frame for the bookshelves, using a block of wood ( or anything with a right angle) as a reference helps lot! Keep pressing it into the corners aligning the the angles to it.
- For the shelves inside, I cut out a small rectangular piece of MDF and used it as a spacer between the sticks while gluing them in.
Just like the bookshelf frames, I cut out some window frames as well. But keep these aside for now until step 8.
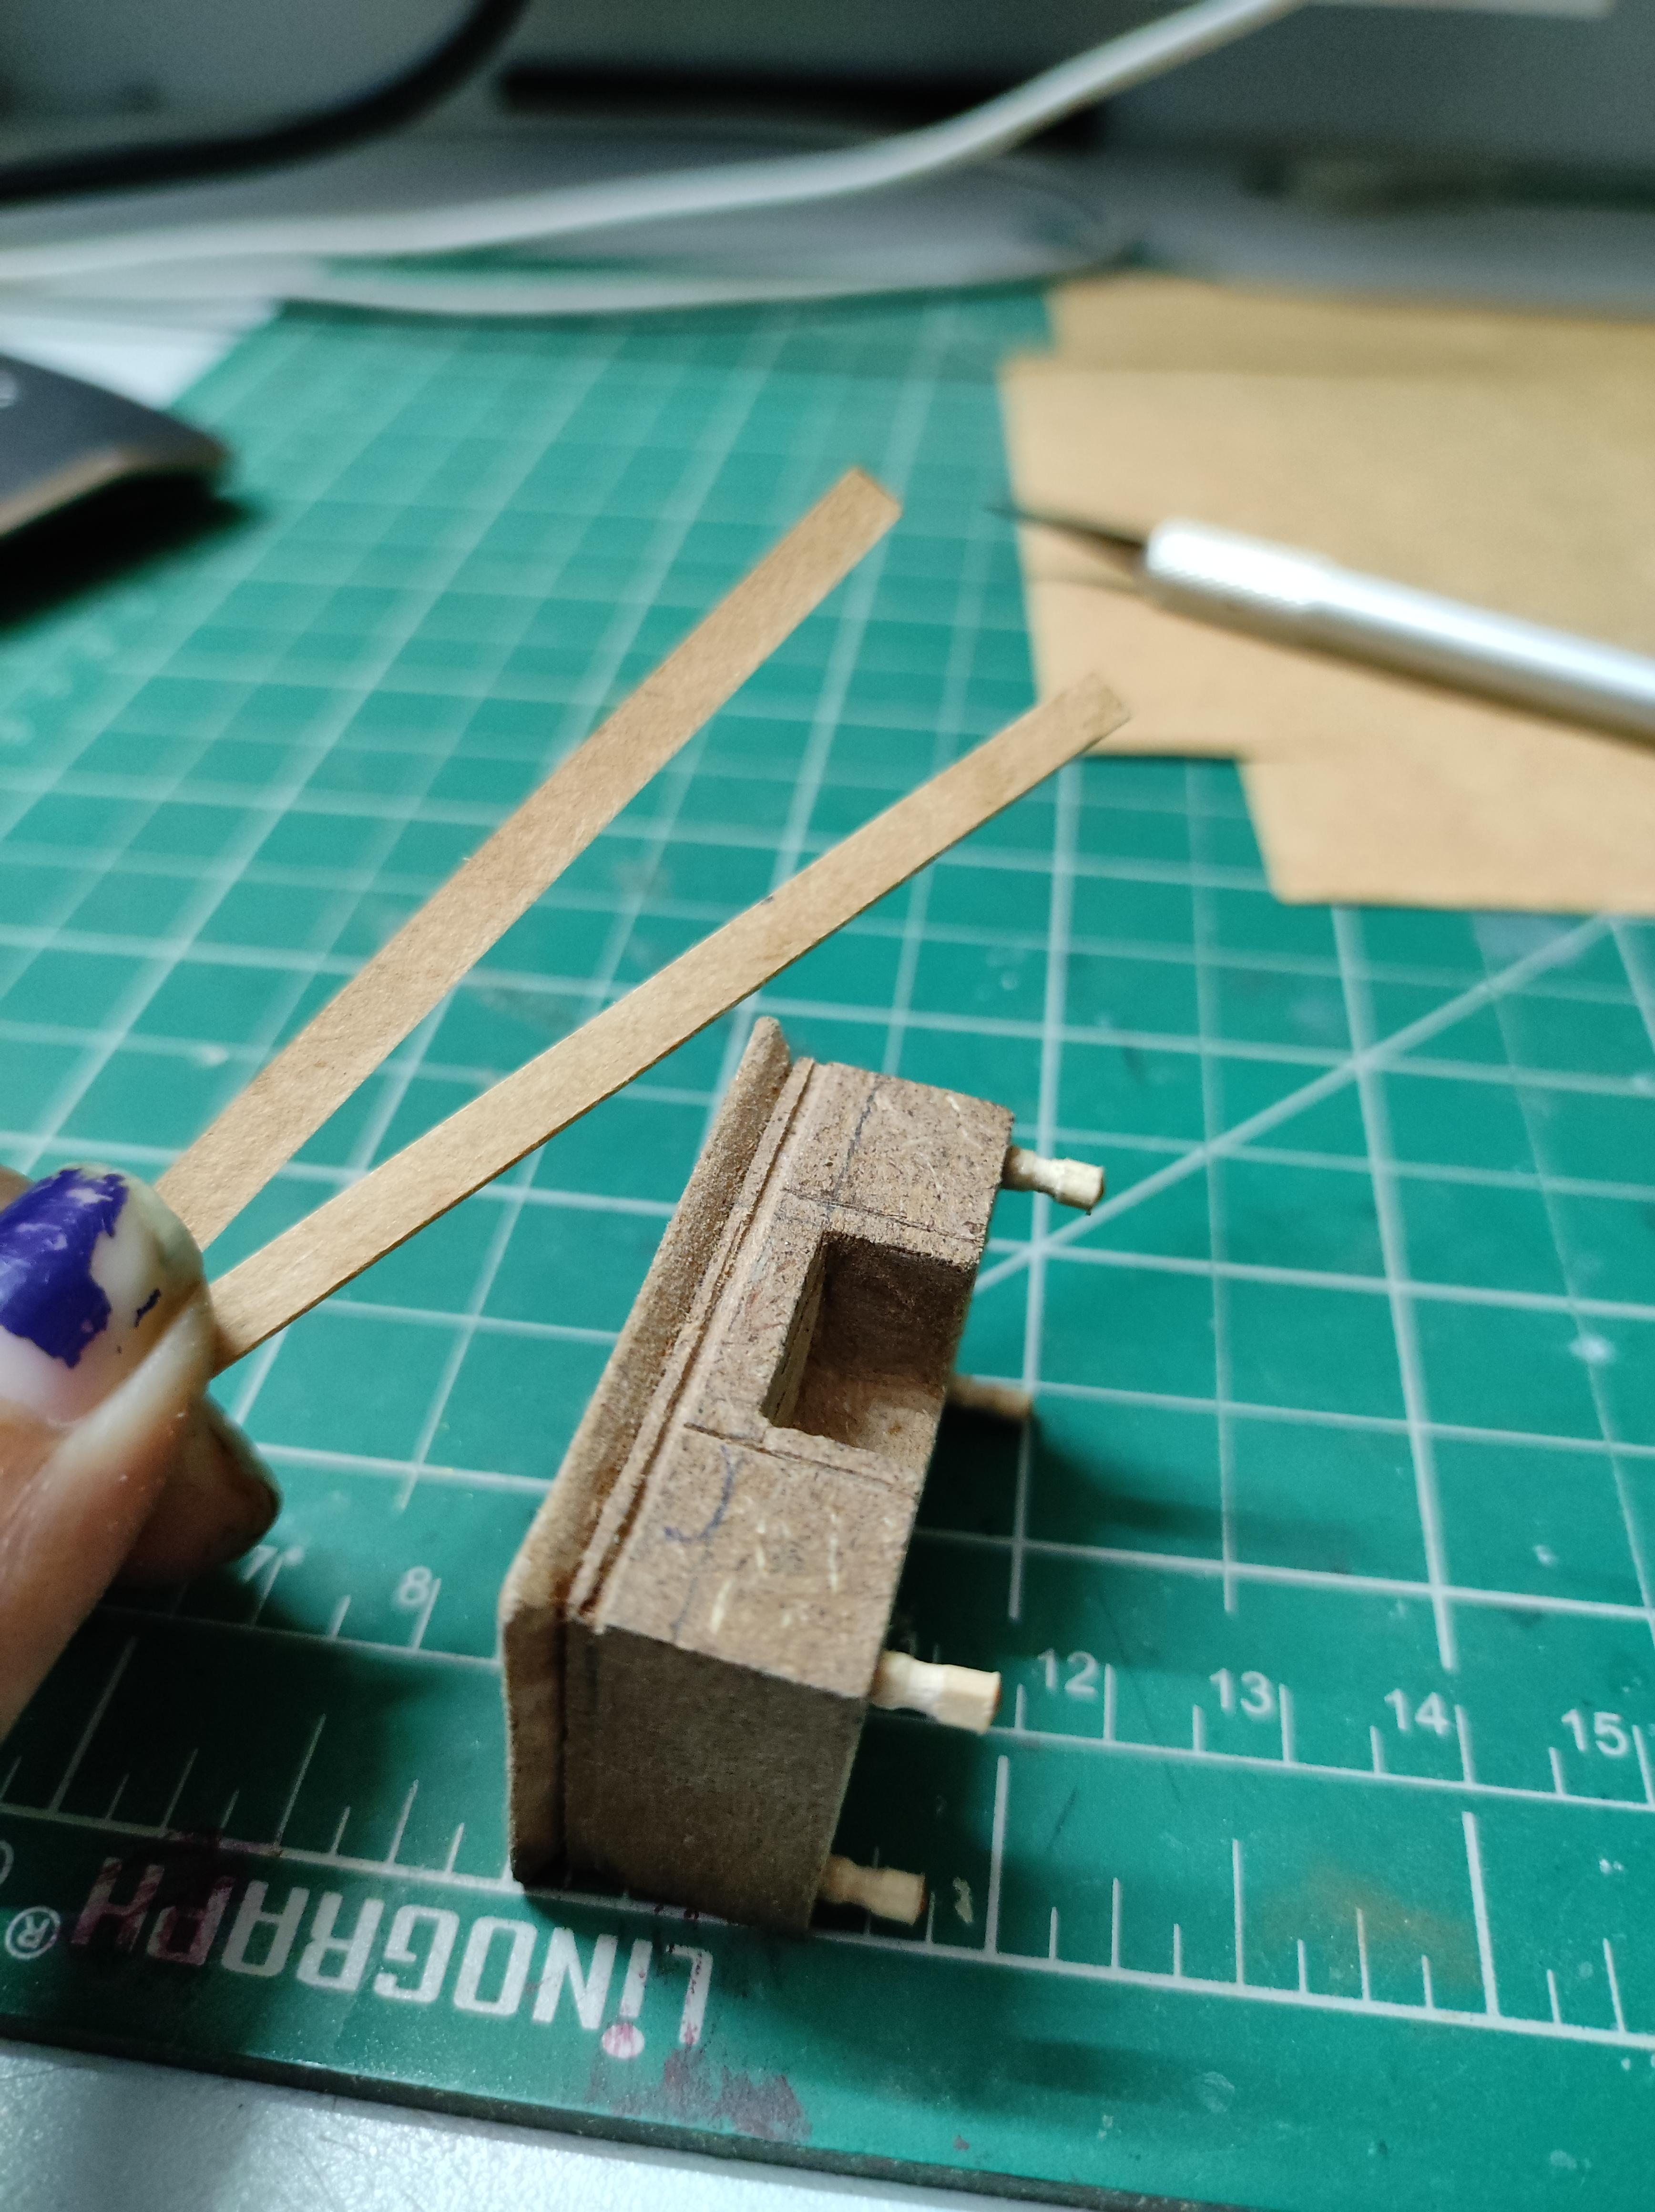
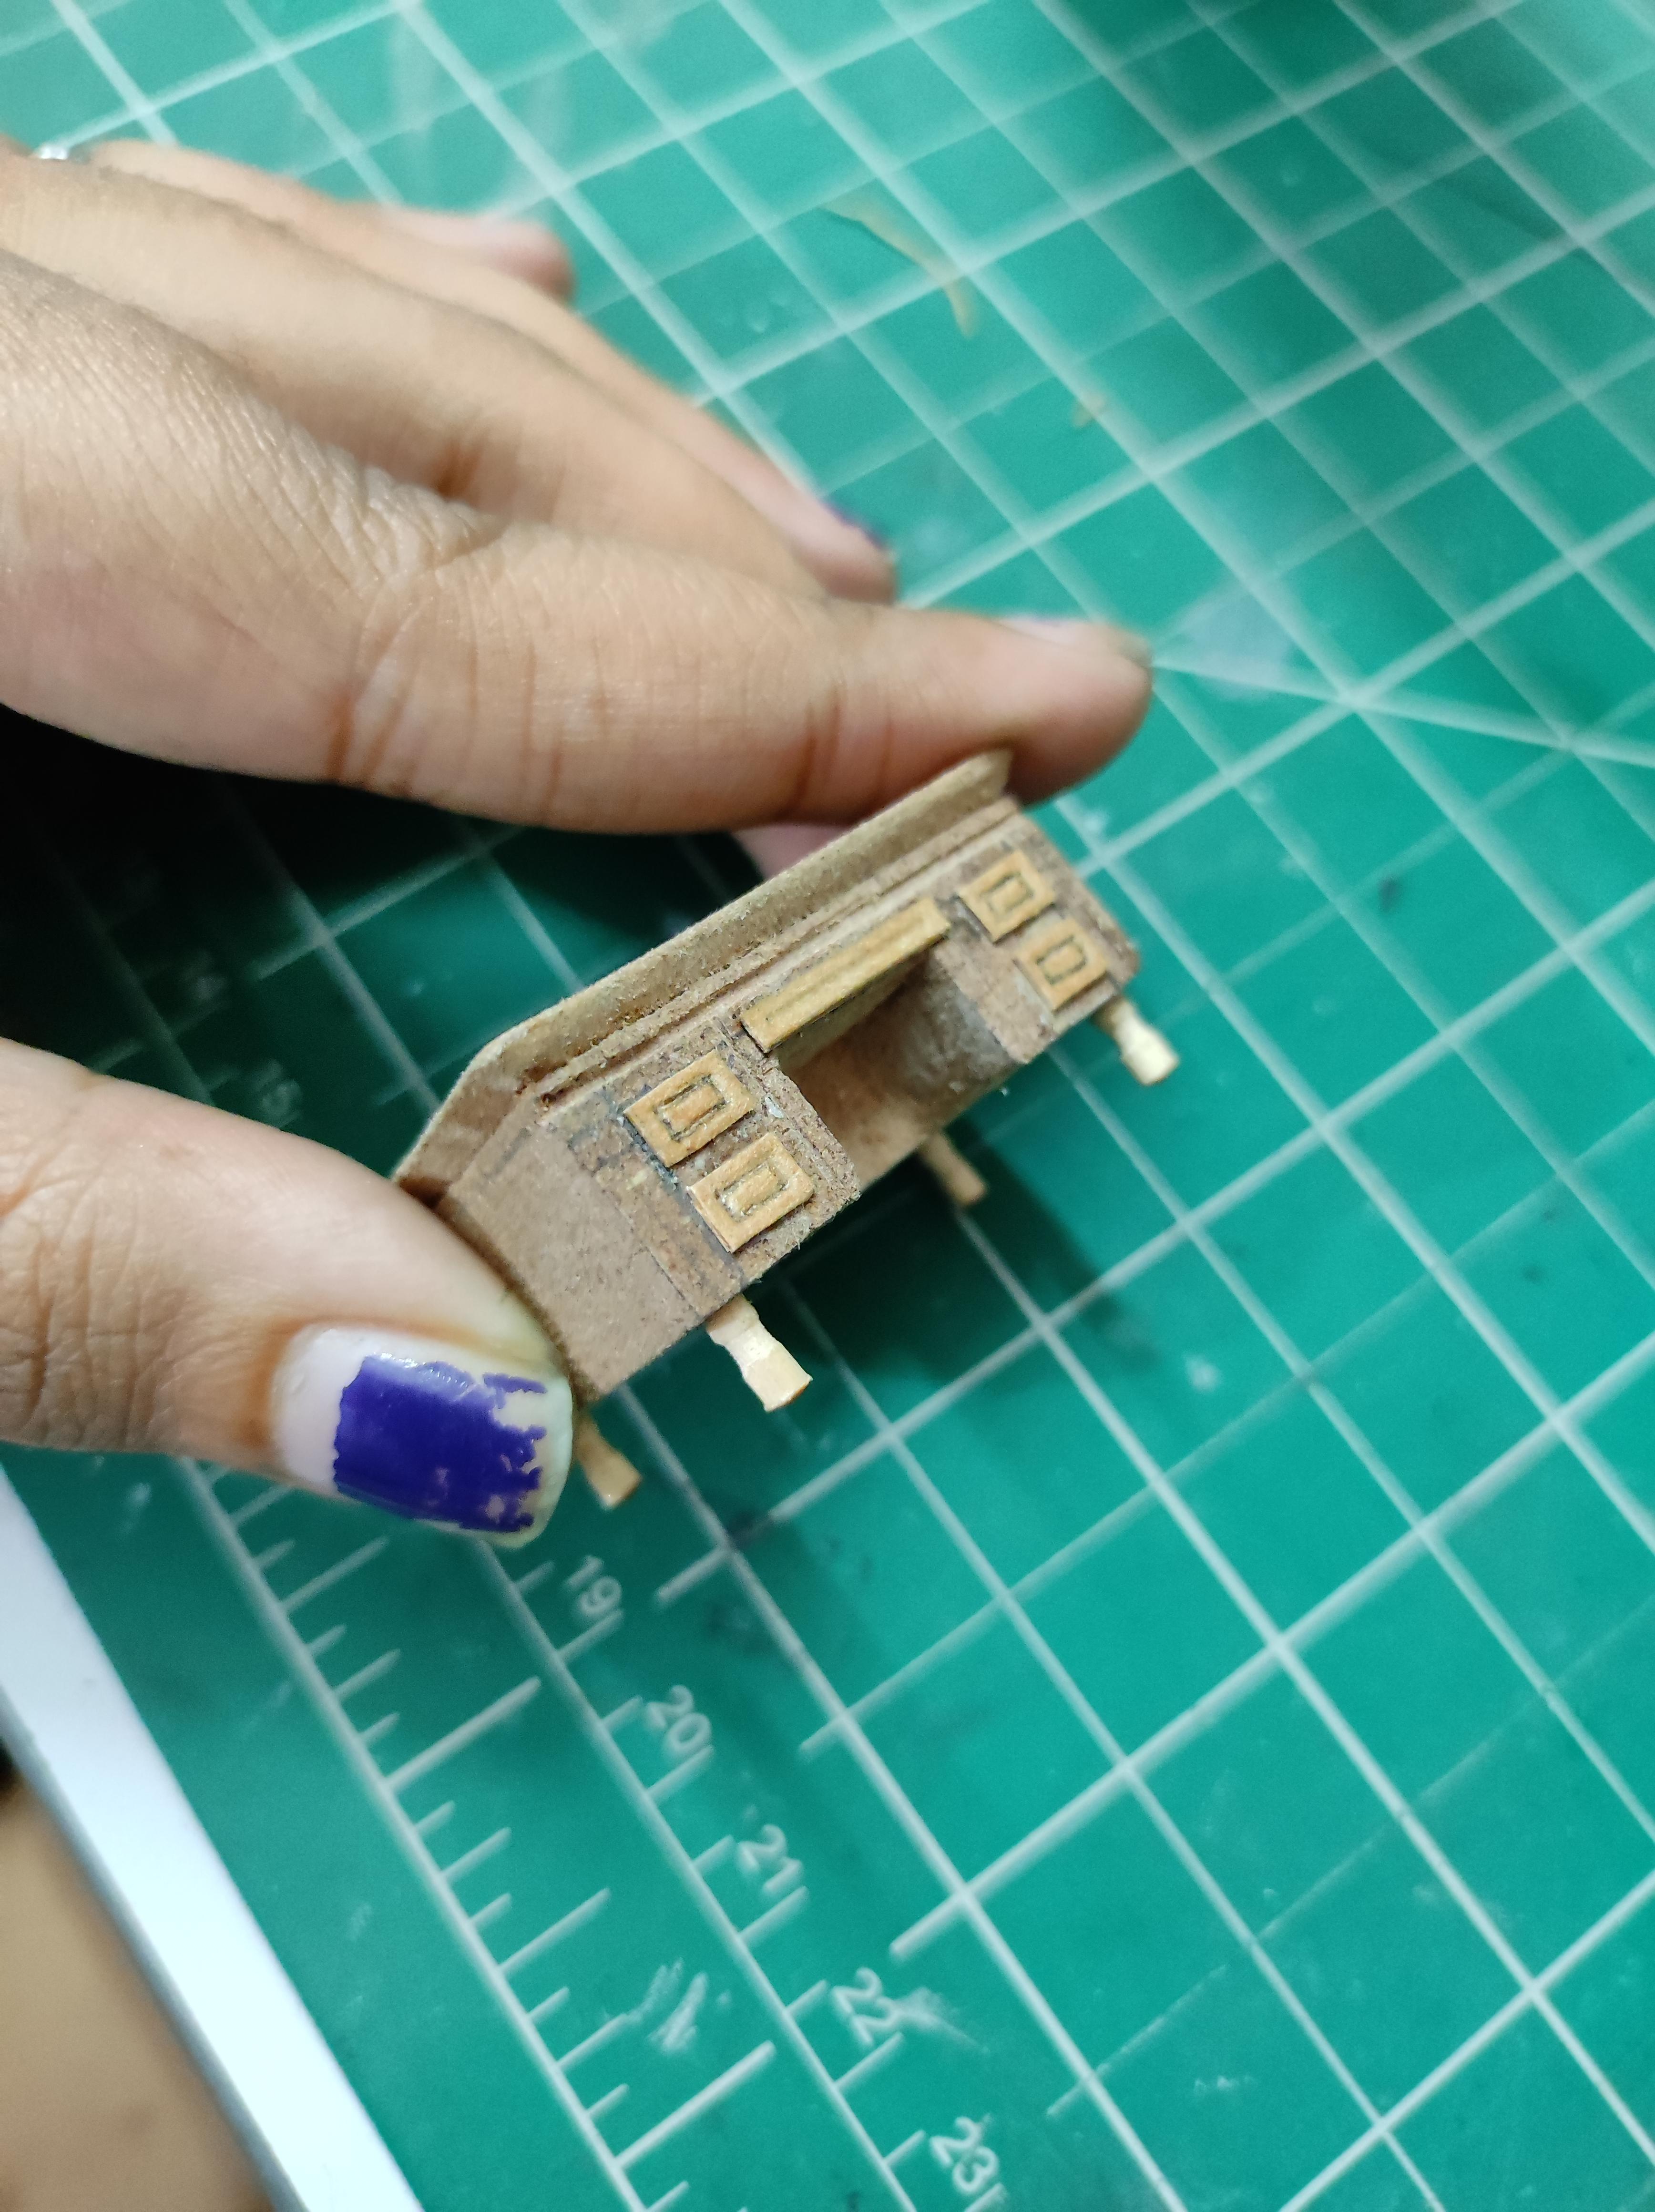
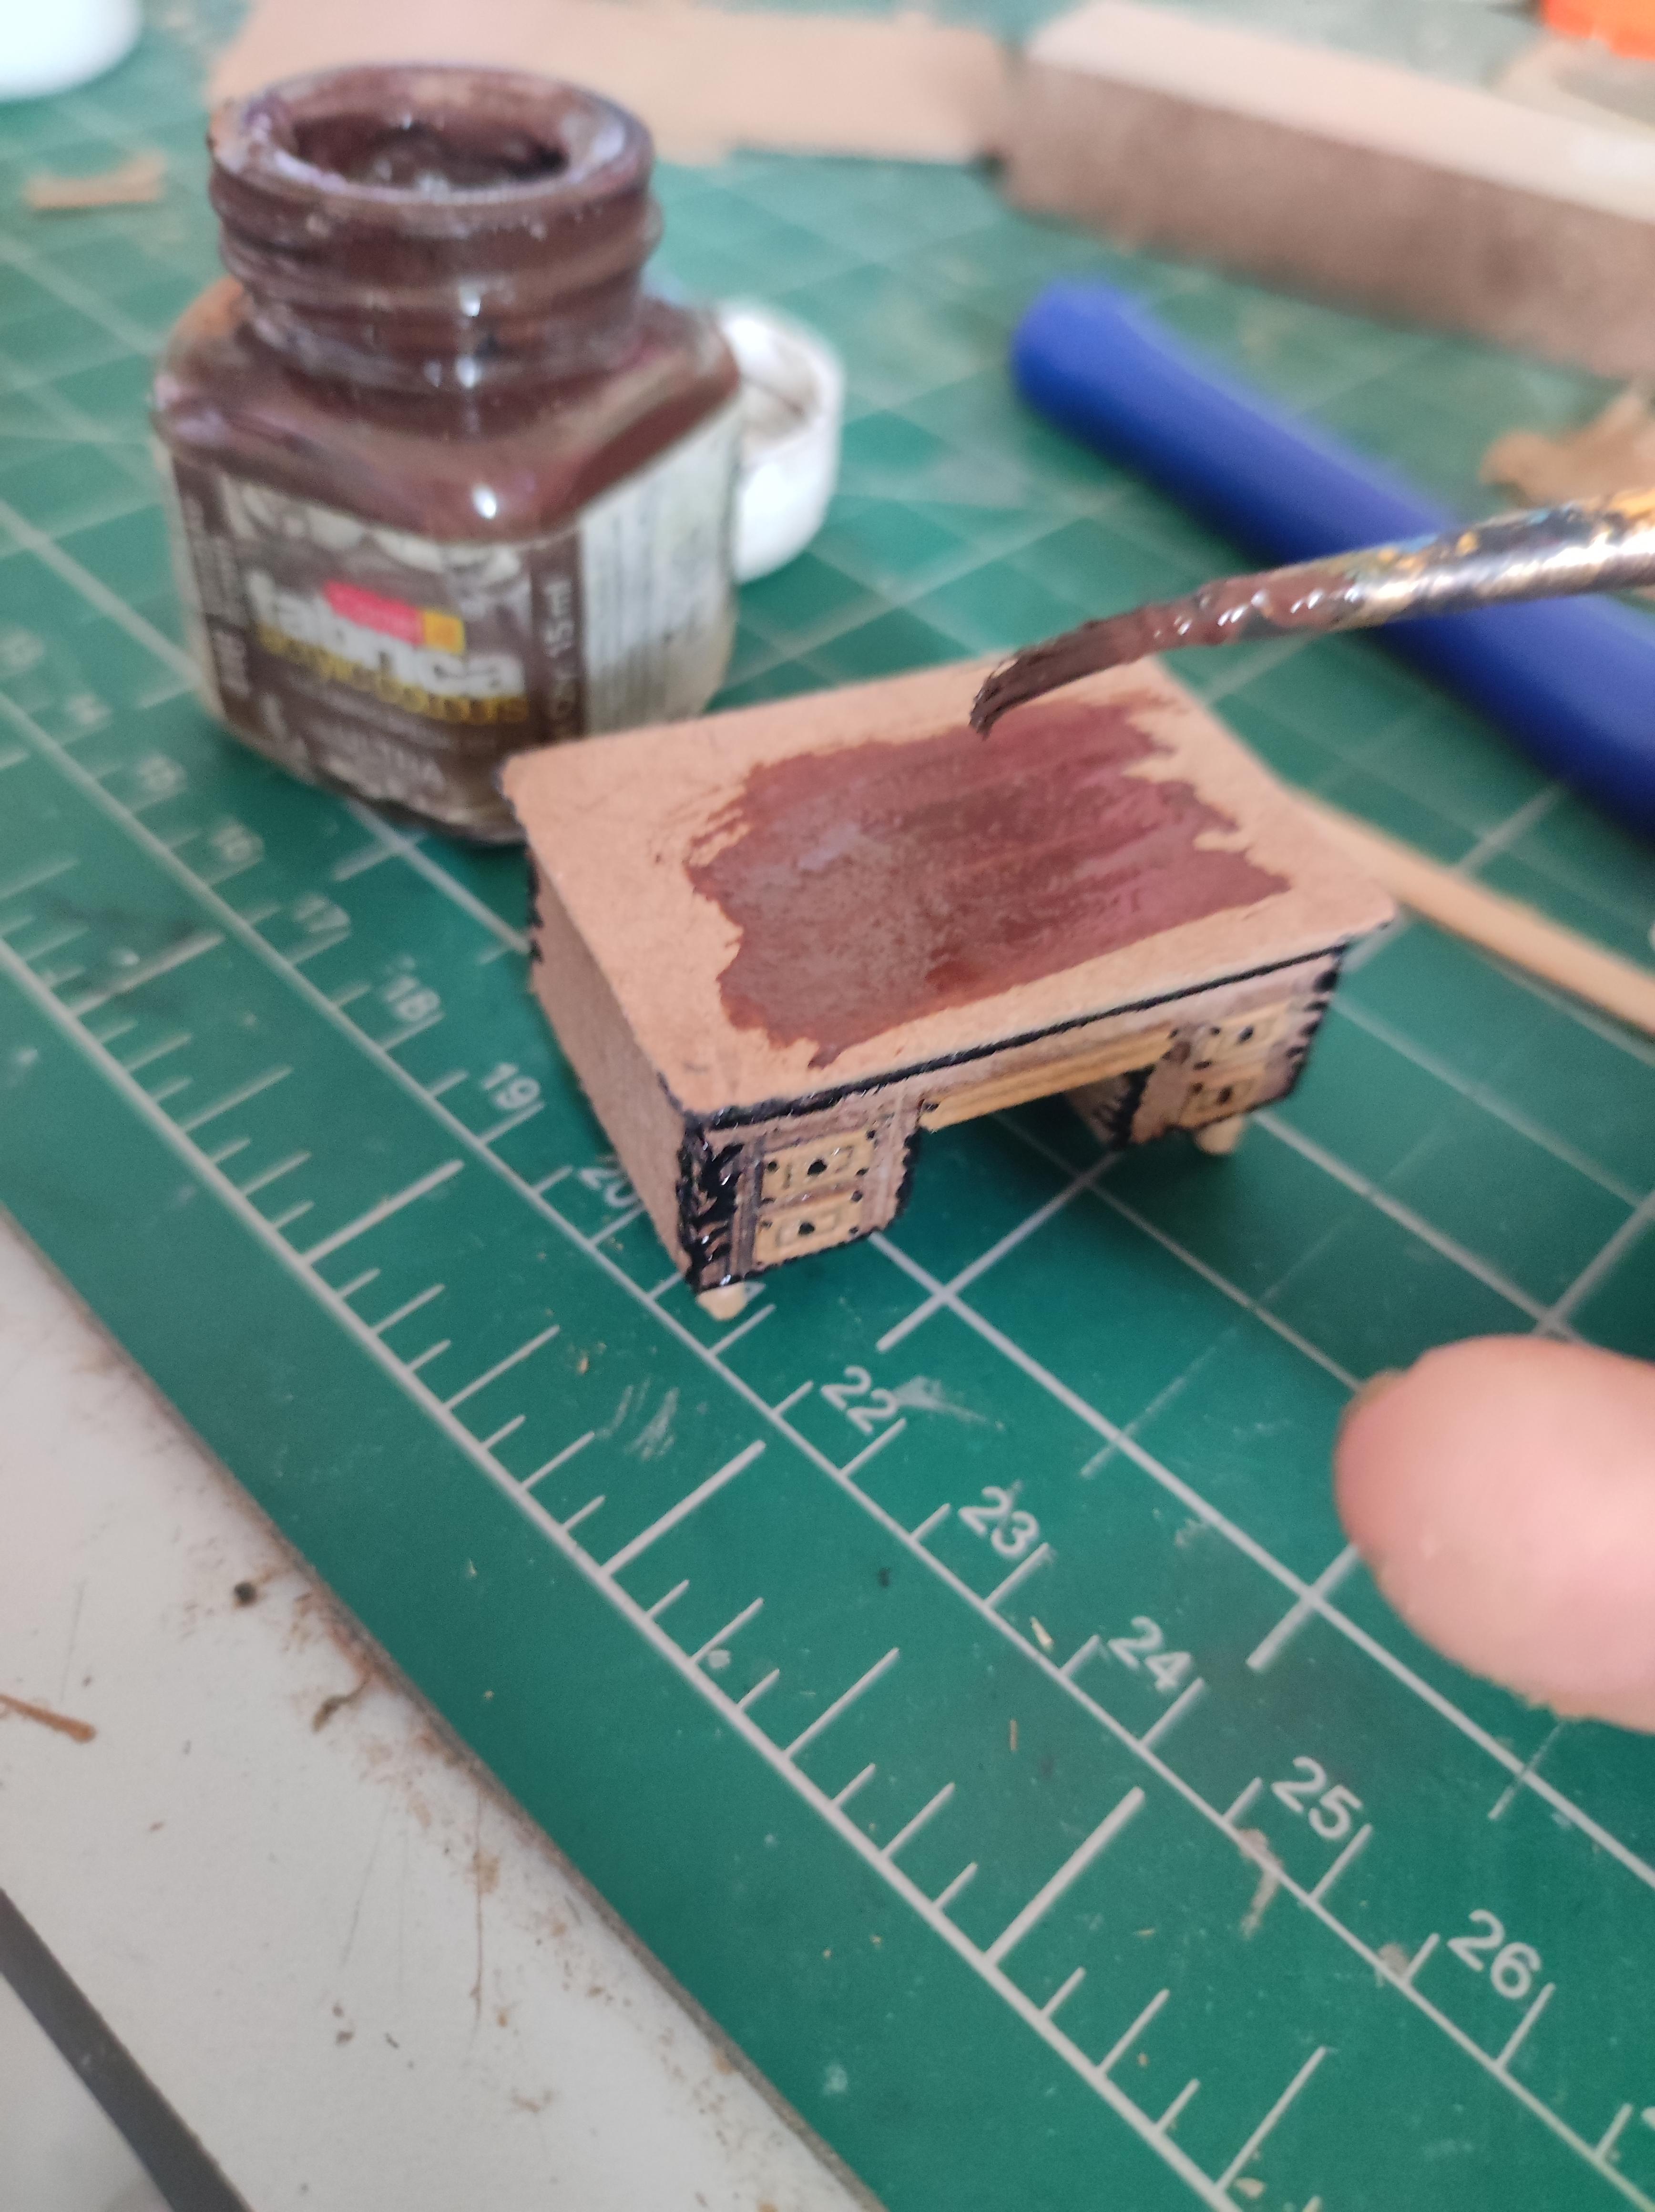
The Main Table
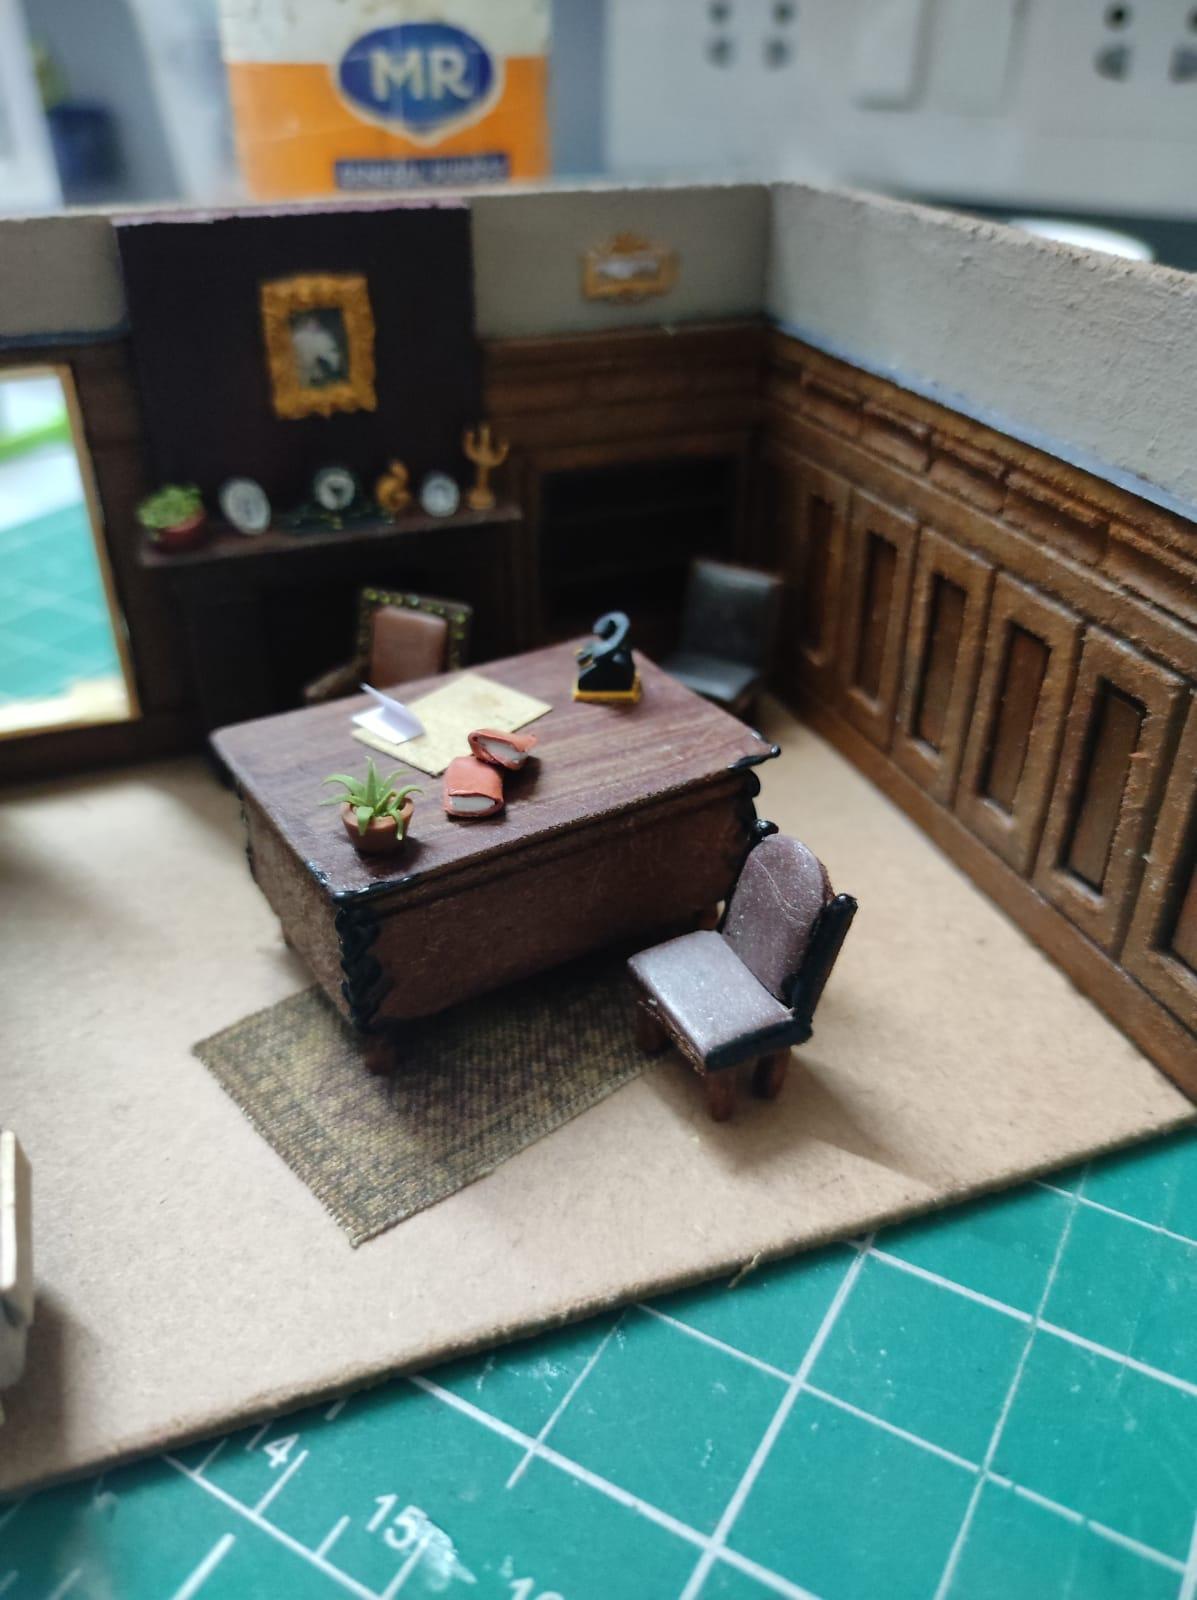
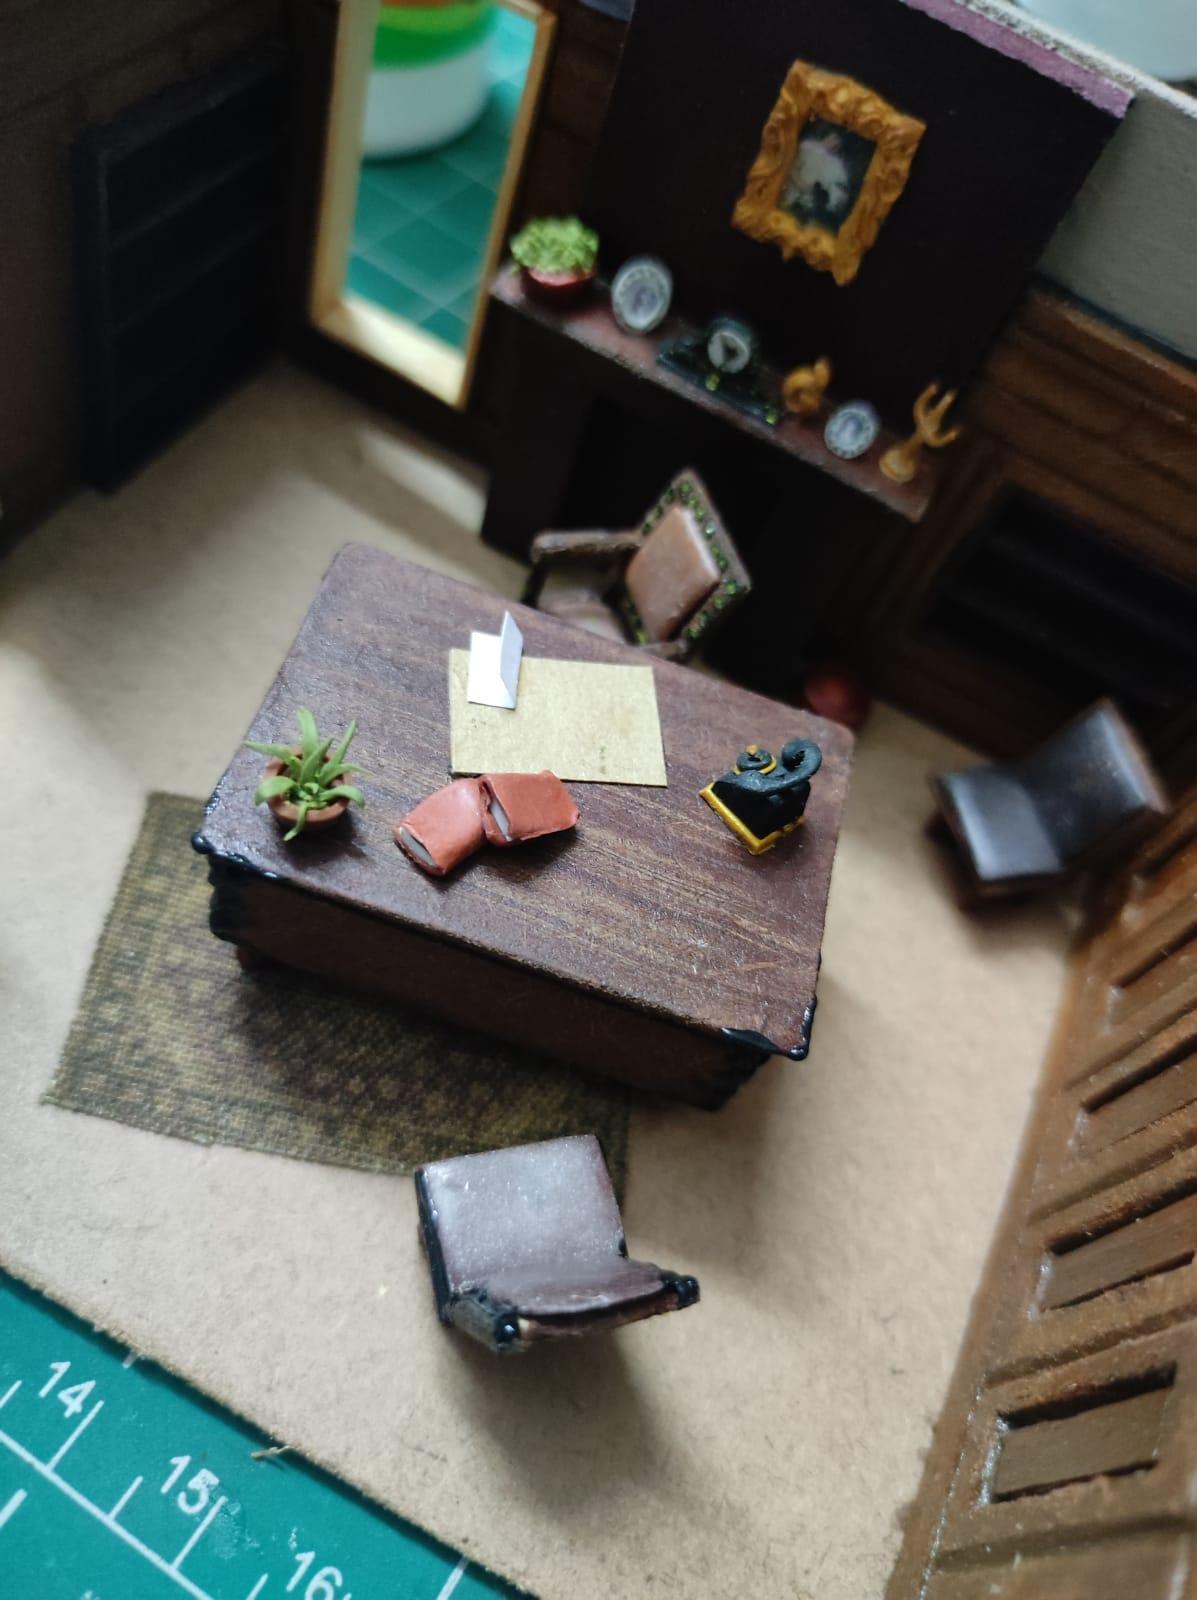
The office space was dominated by the Don's massive table.
Steps:
- This too I made from MDF but instead of sheets, I cut out a block of the required dimensions from a larger block I had. I used the mini hacksaw for this.
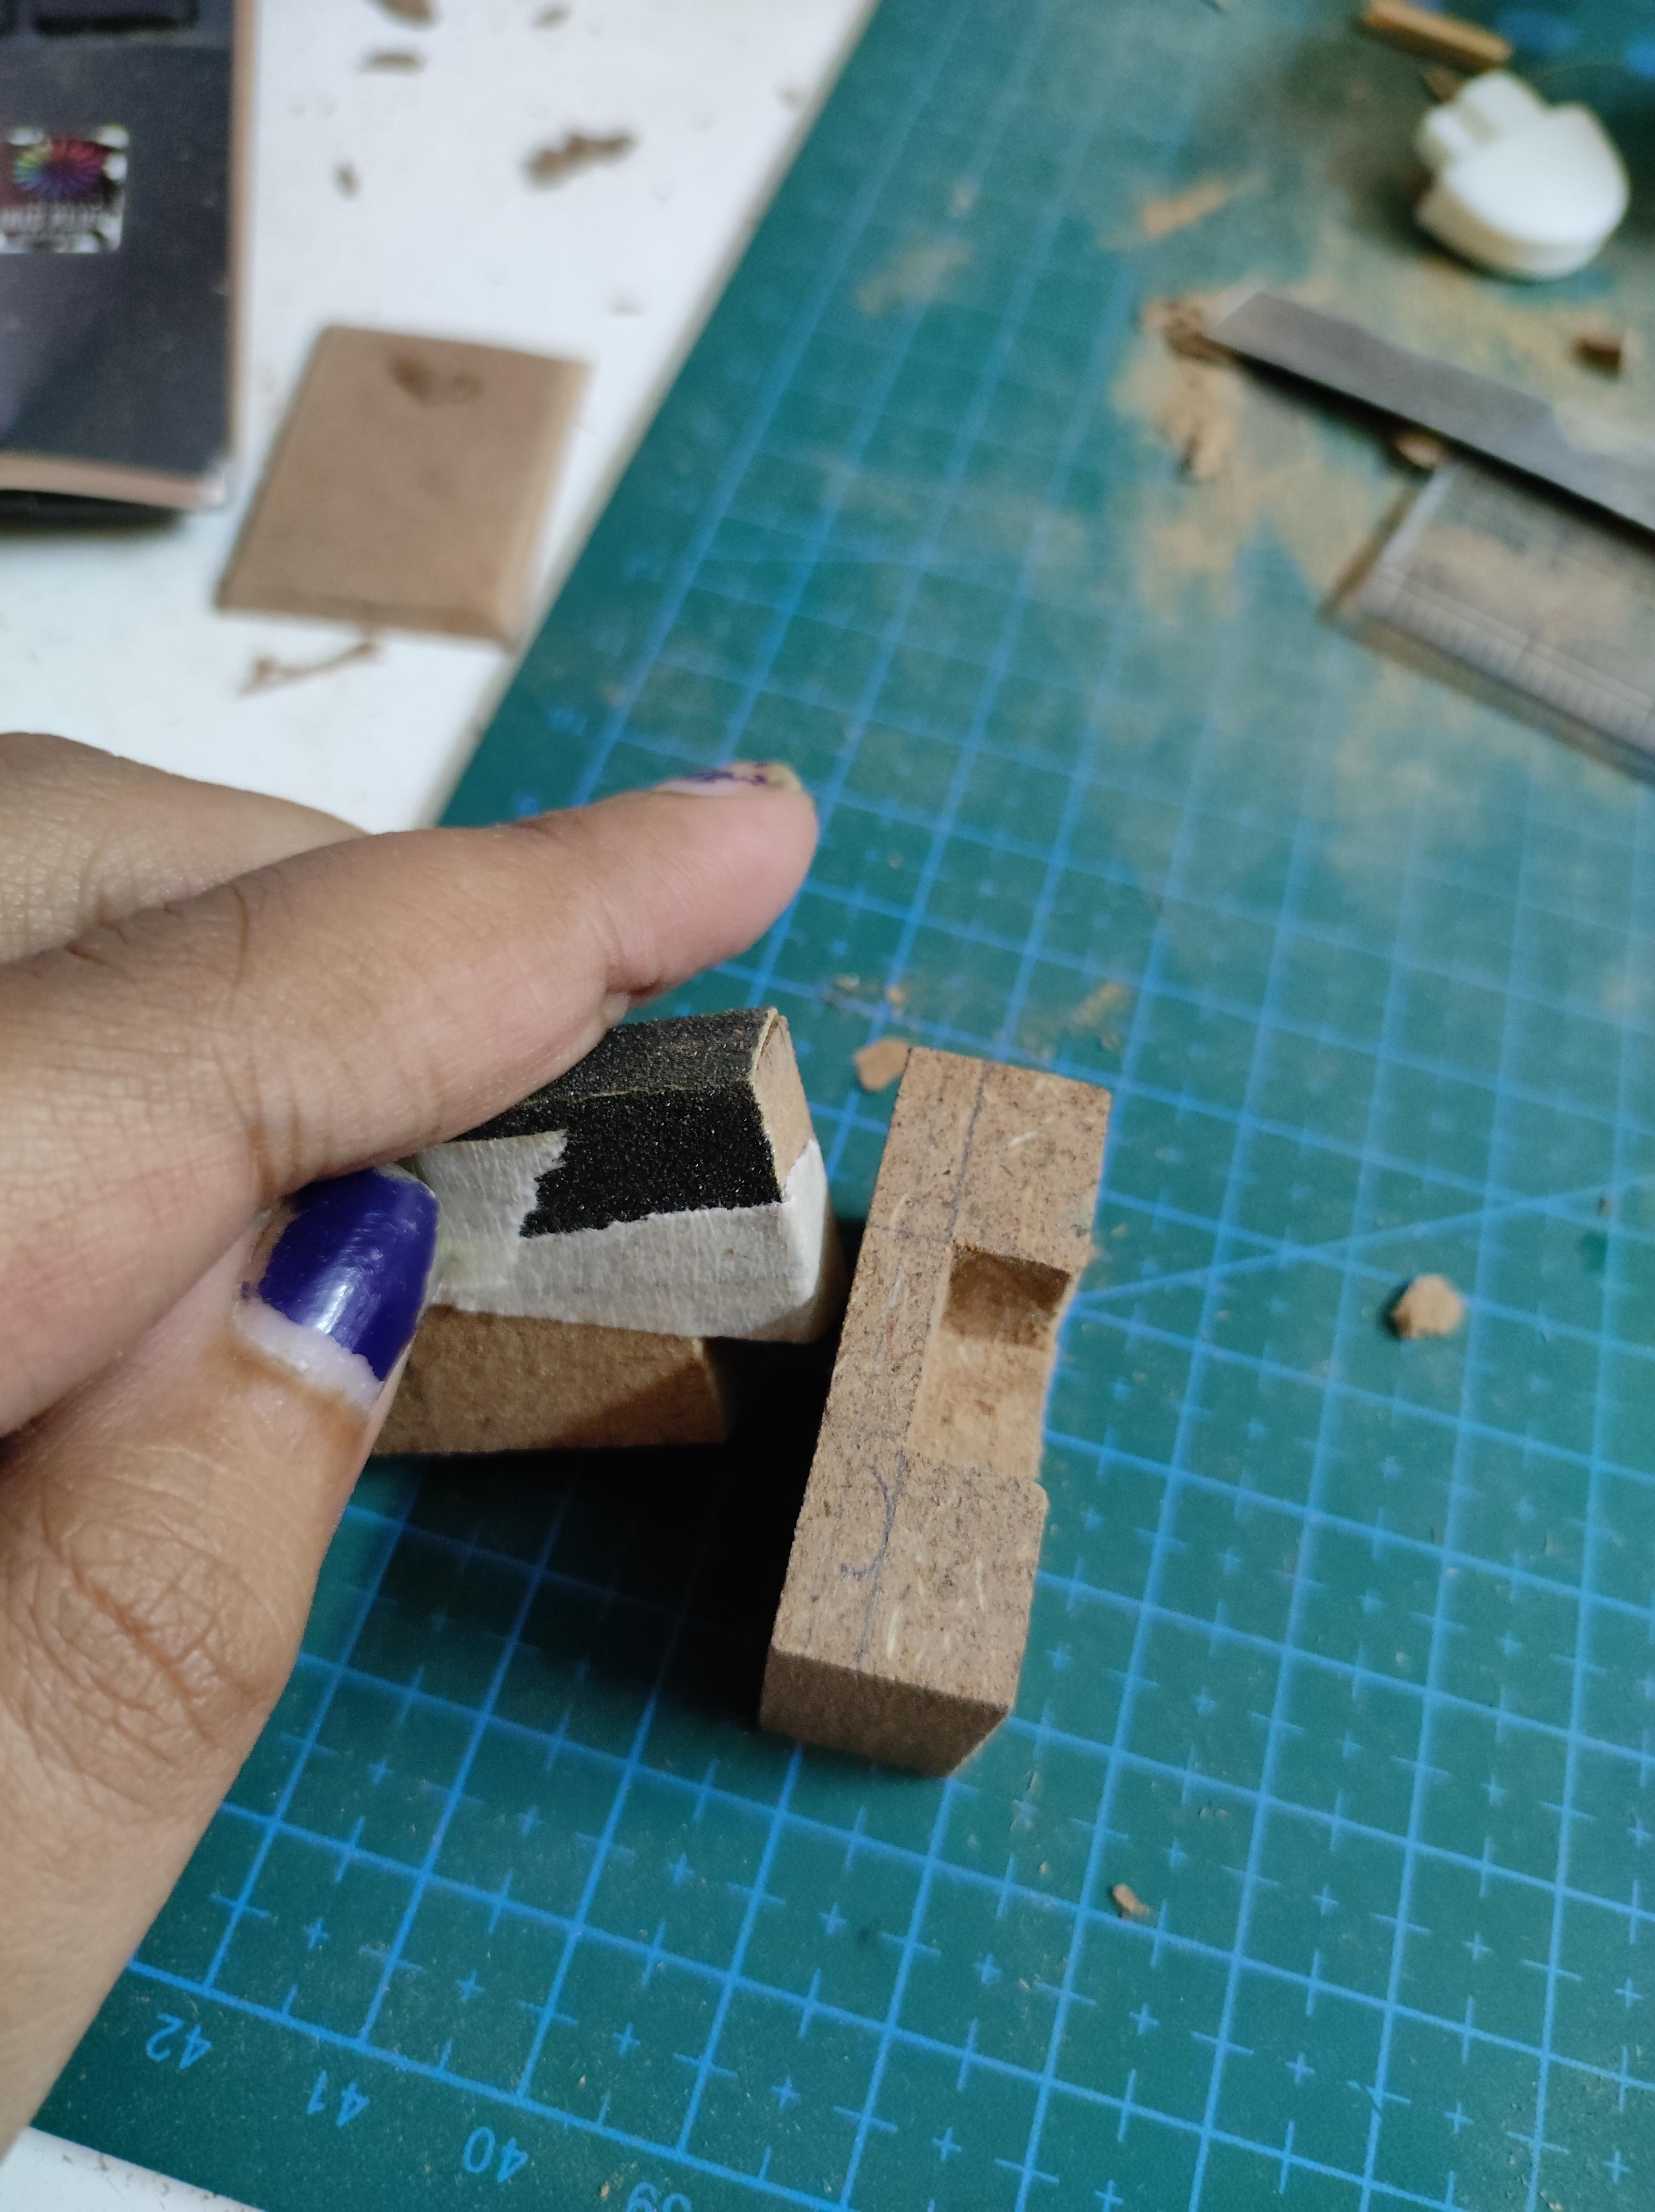
- There is a small gap between the two sets of drawers on either sides for the chair to go in and that I carved out using the carving tools previously mentioned. You could also cut it out using the box cutter. TIP: You could wrap a piece of sandpaper around a rectangular block and use that to sand inside this space we just cut out.
- Like we did for the mantle, I cut out a rectangular top for the table with champers.
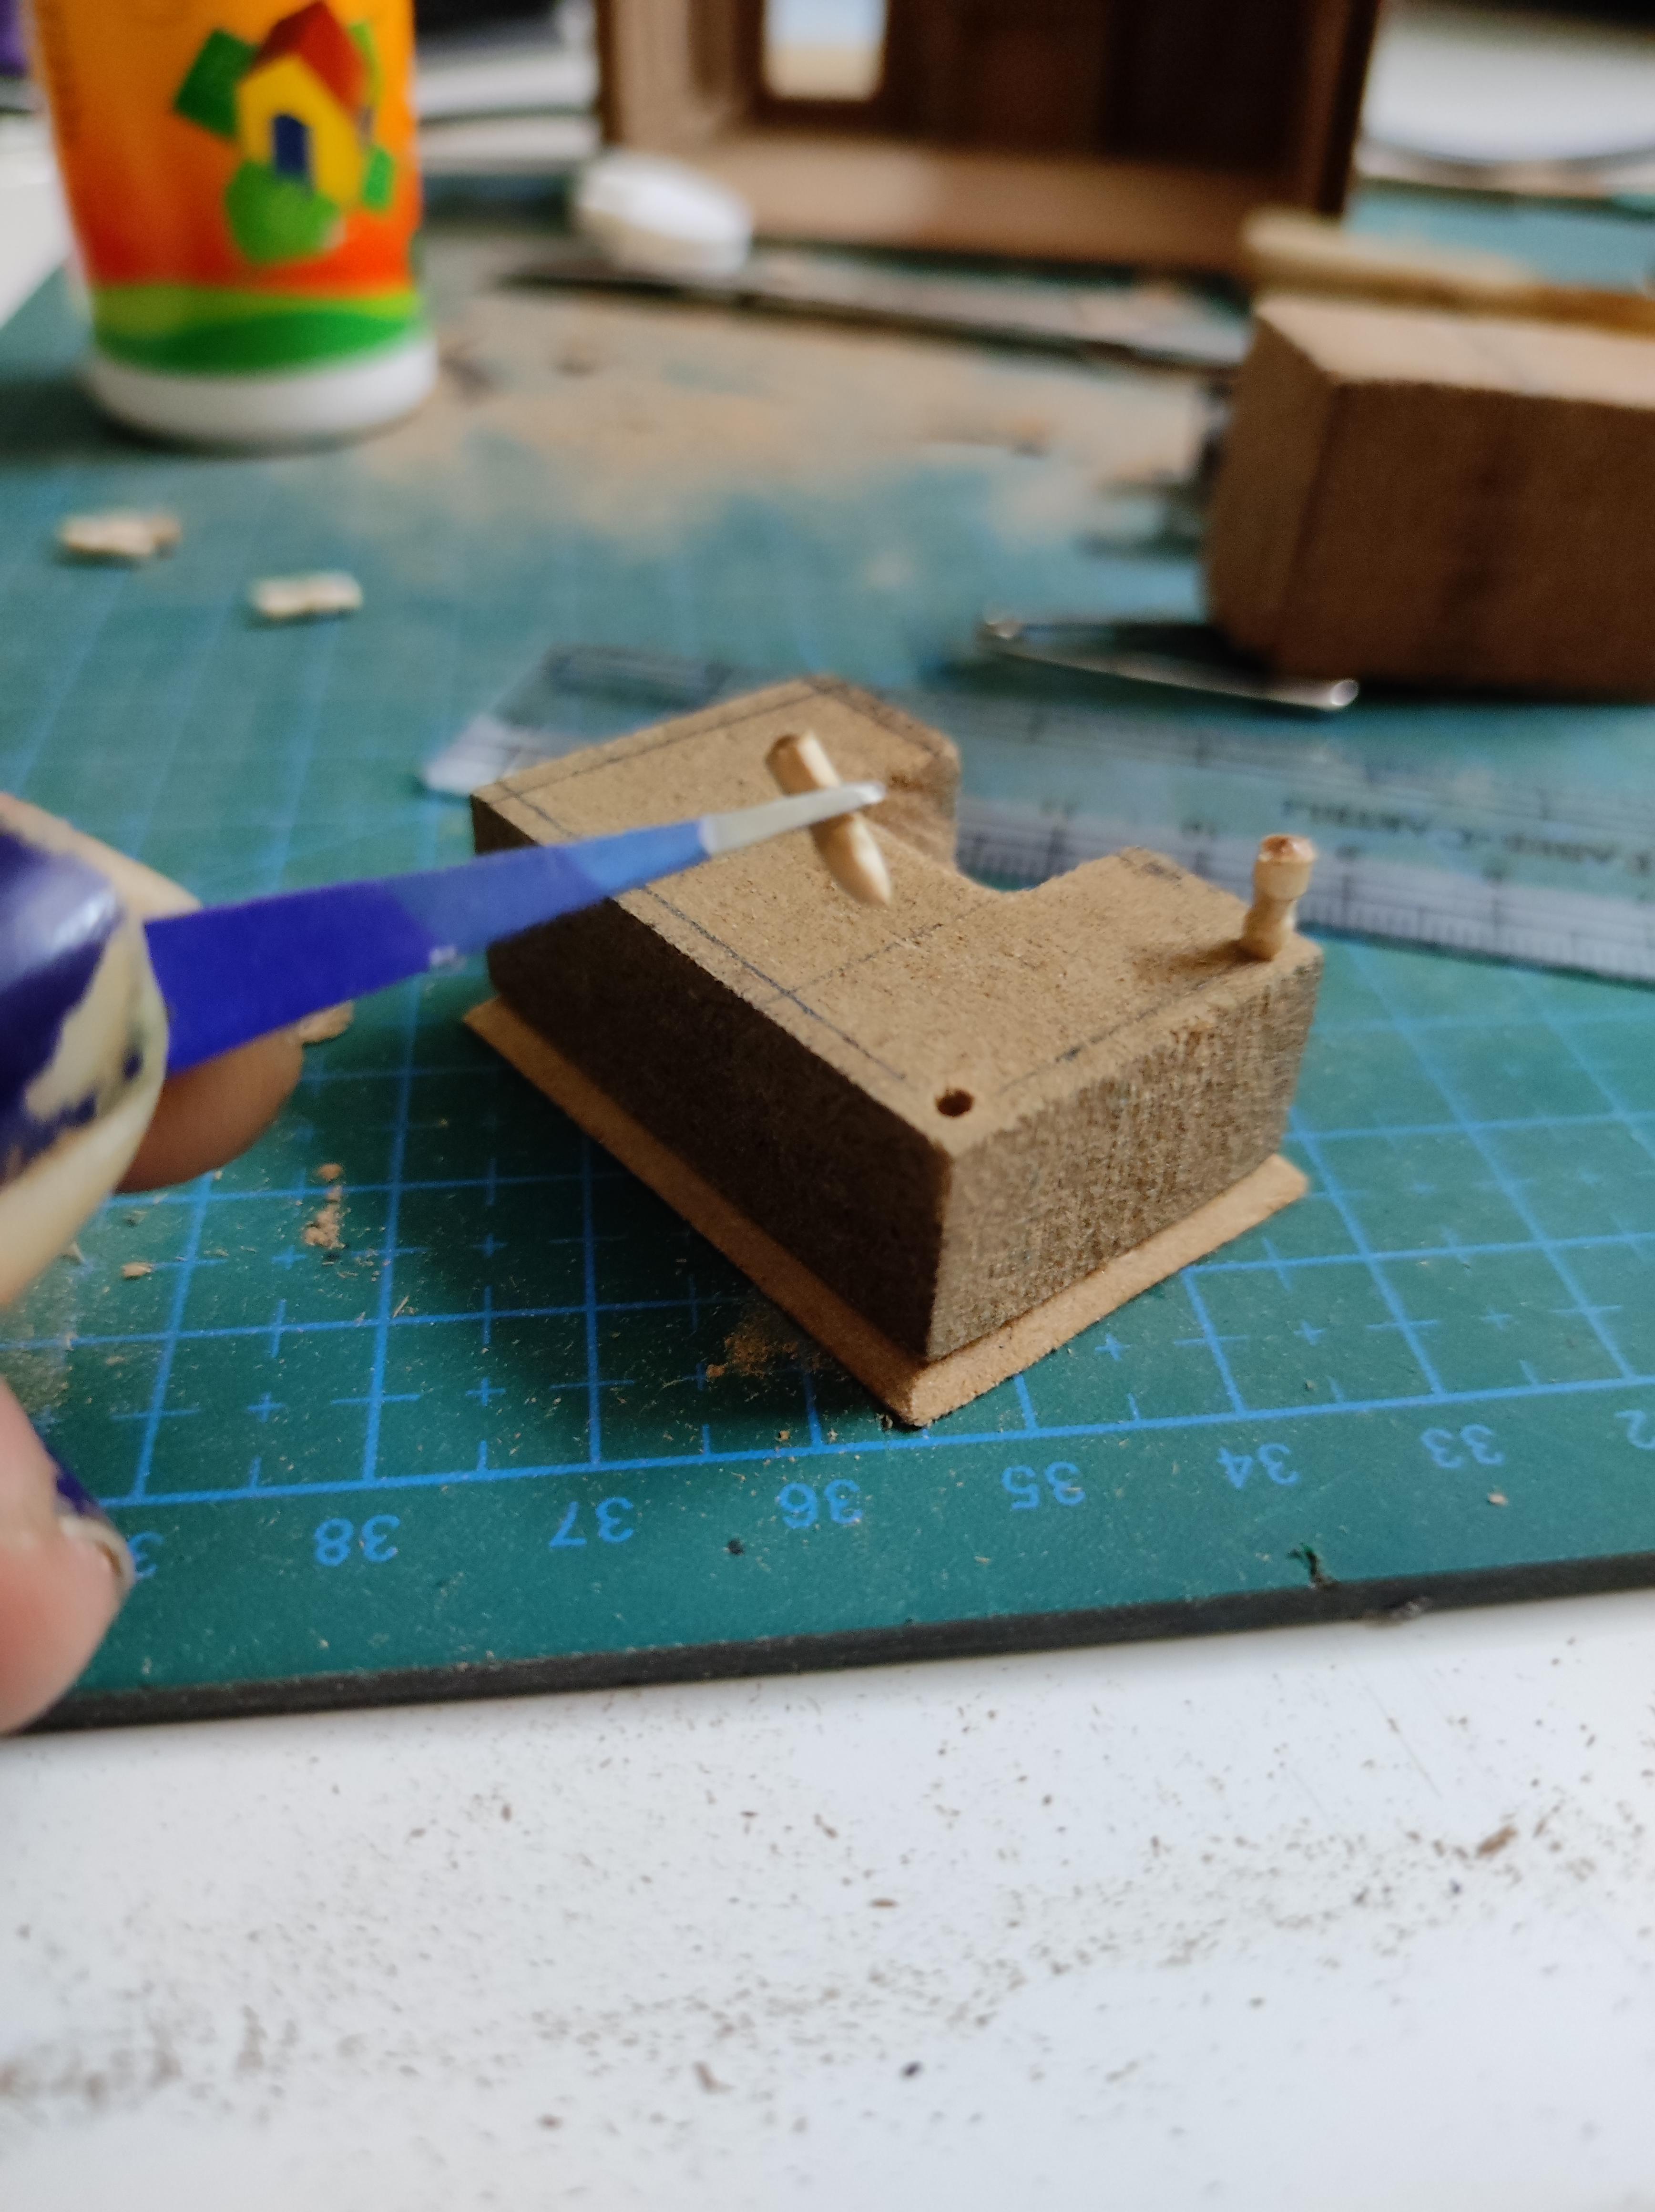
- The legs of the table I made using the carved bit of the toothpick heads. You can clip out the required height using nail clippers or cutters.
- I drilled tiny holes in the corners where I wanted the legs to go in and glued/hammered the toothpicks into these.
- For the drawers, I cut out the required size rectangles from a sheet of thick Kraft paper and added some detail with a dry ballpoint pen pressing into it to create a deboss. These I glued onto the table again.
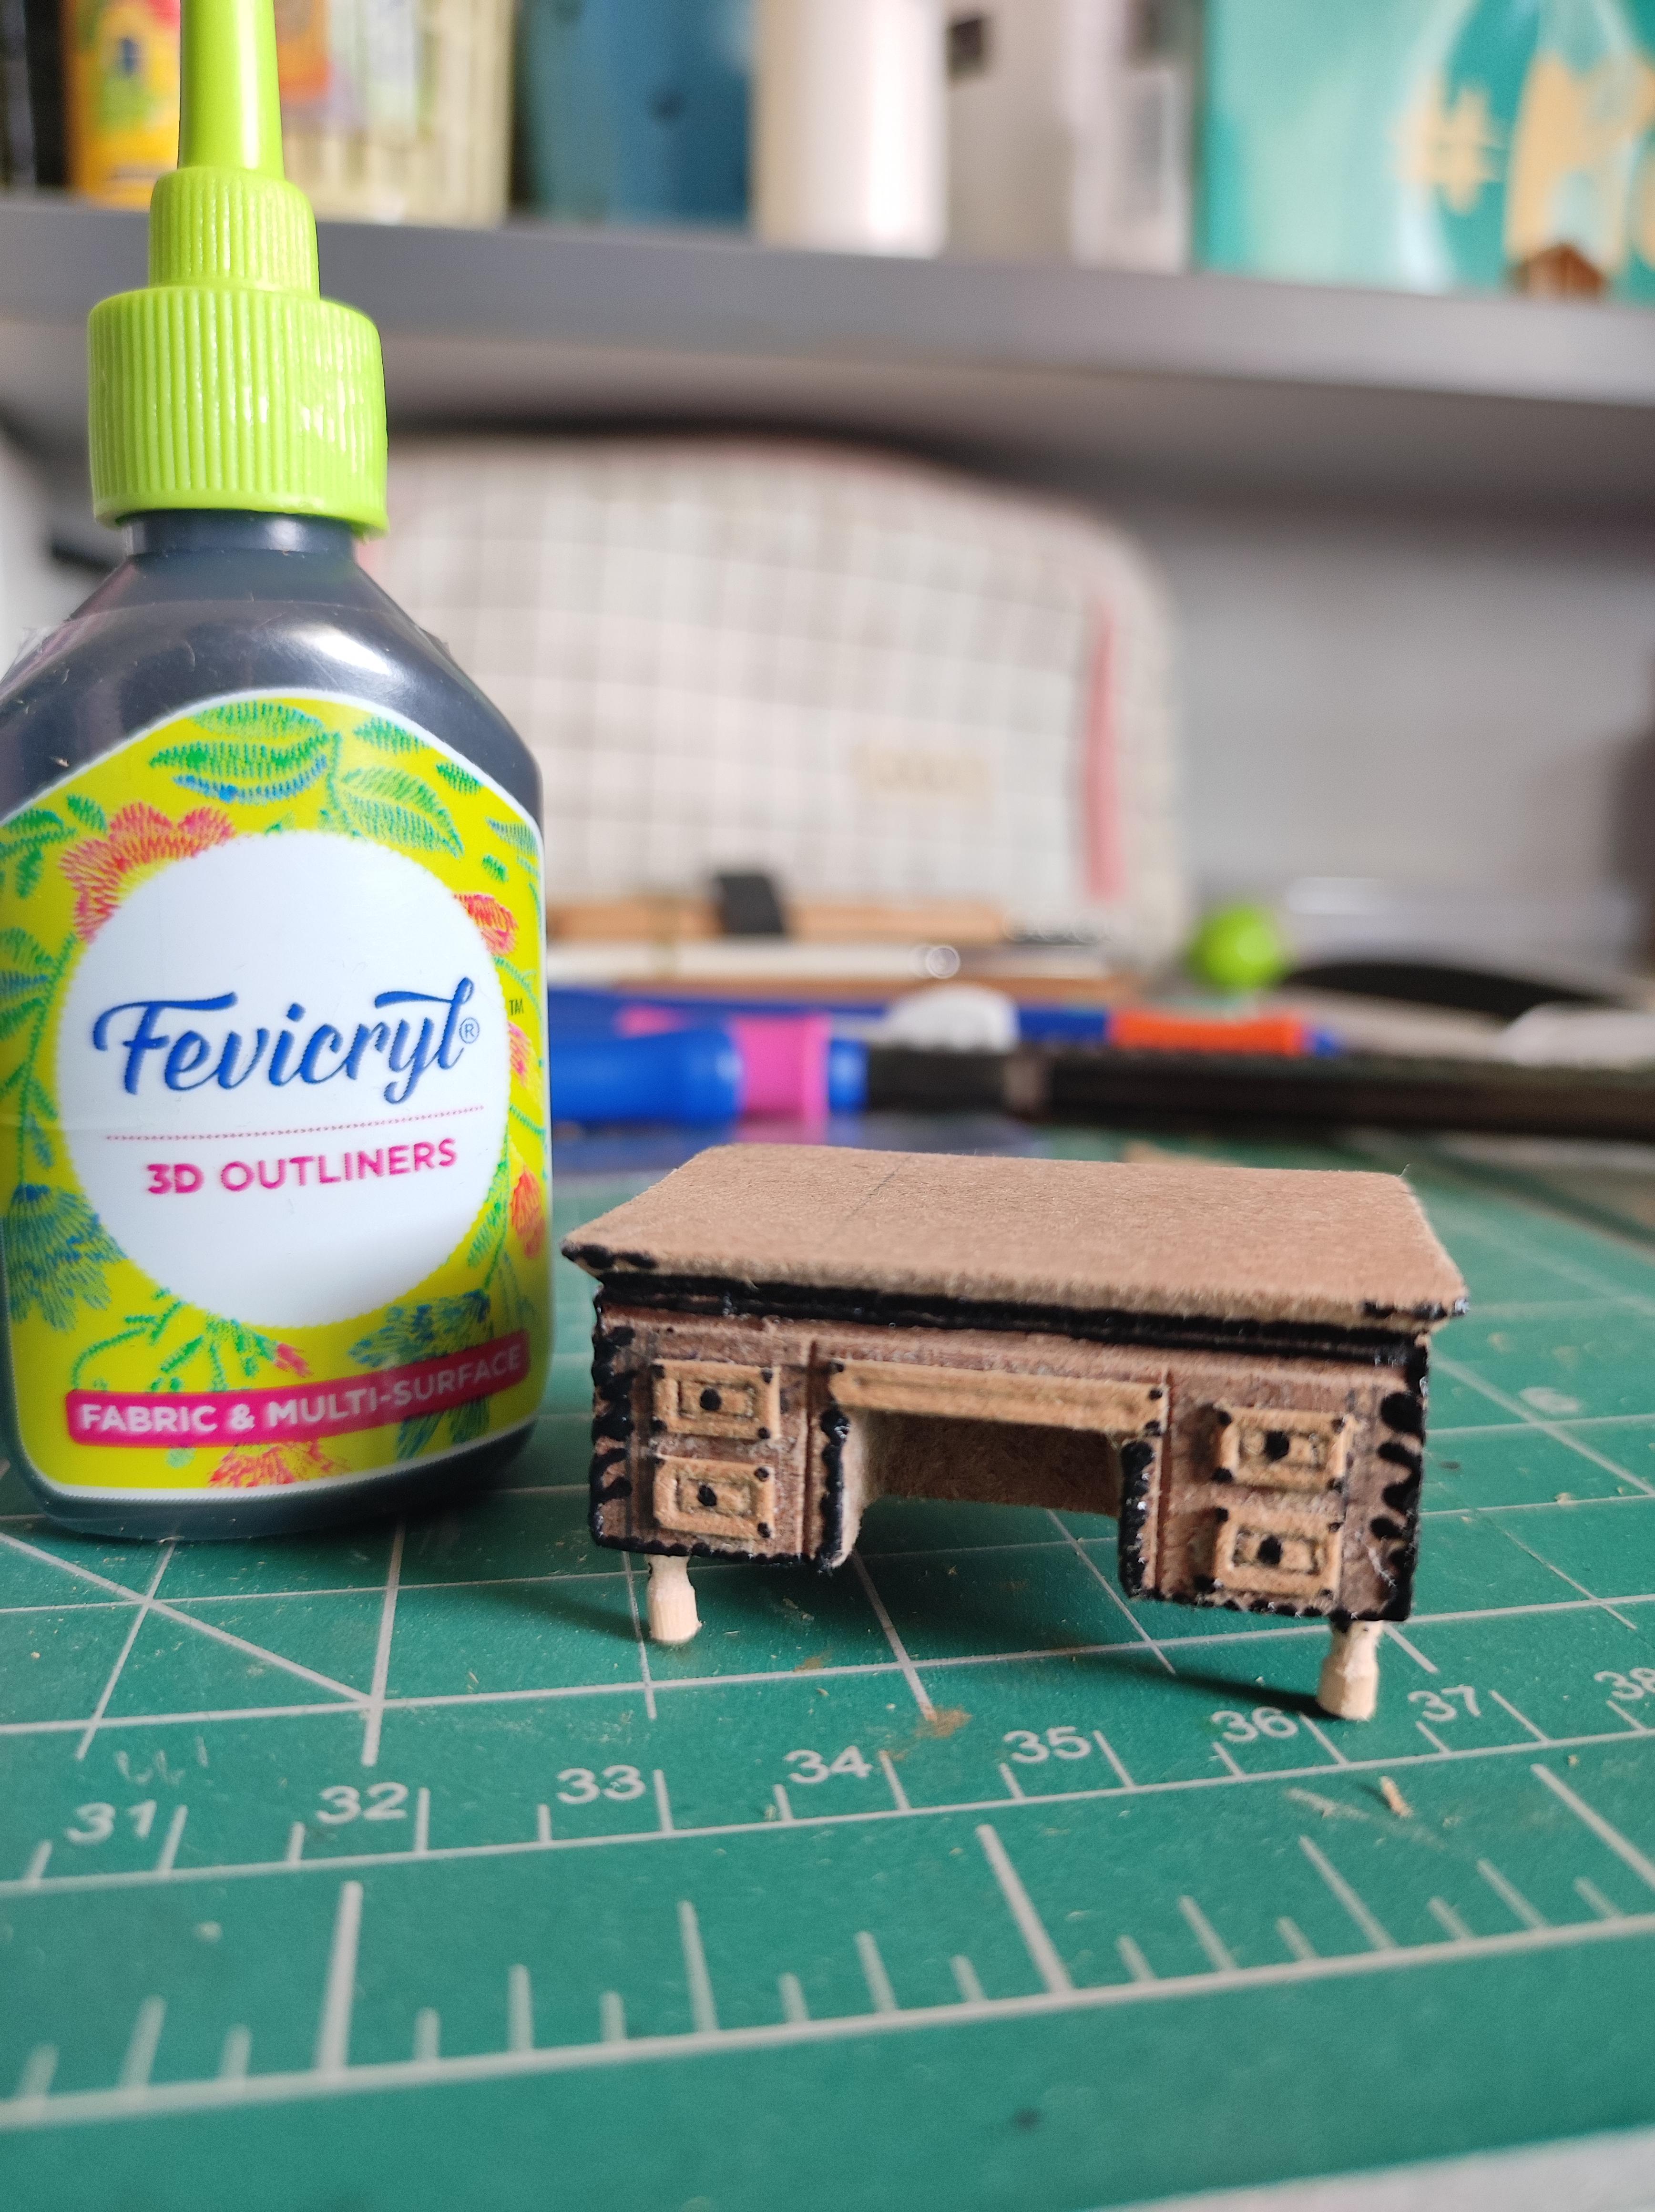
- The table had some black details and engraving on the sides and this I just made with some 3D craft outliner.
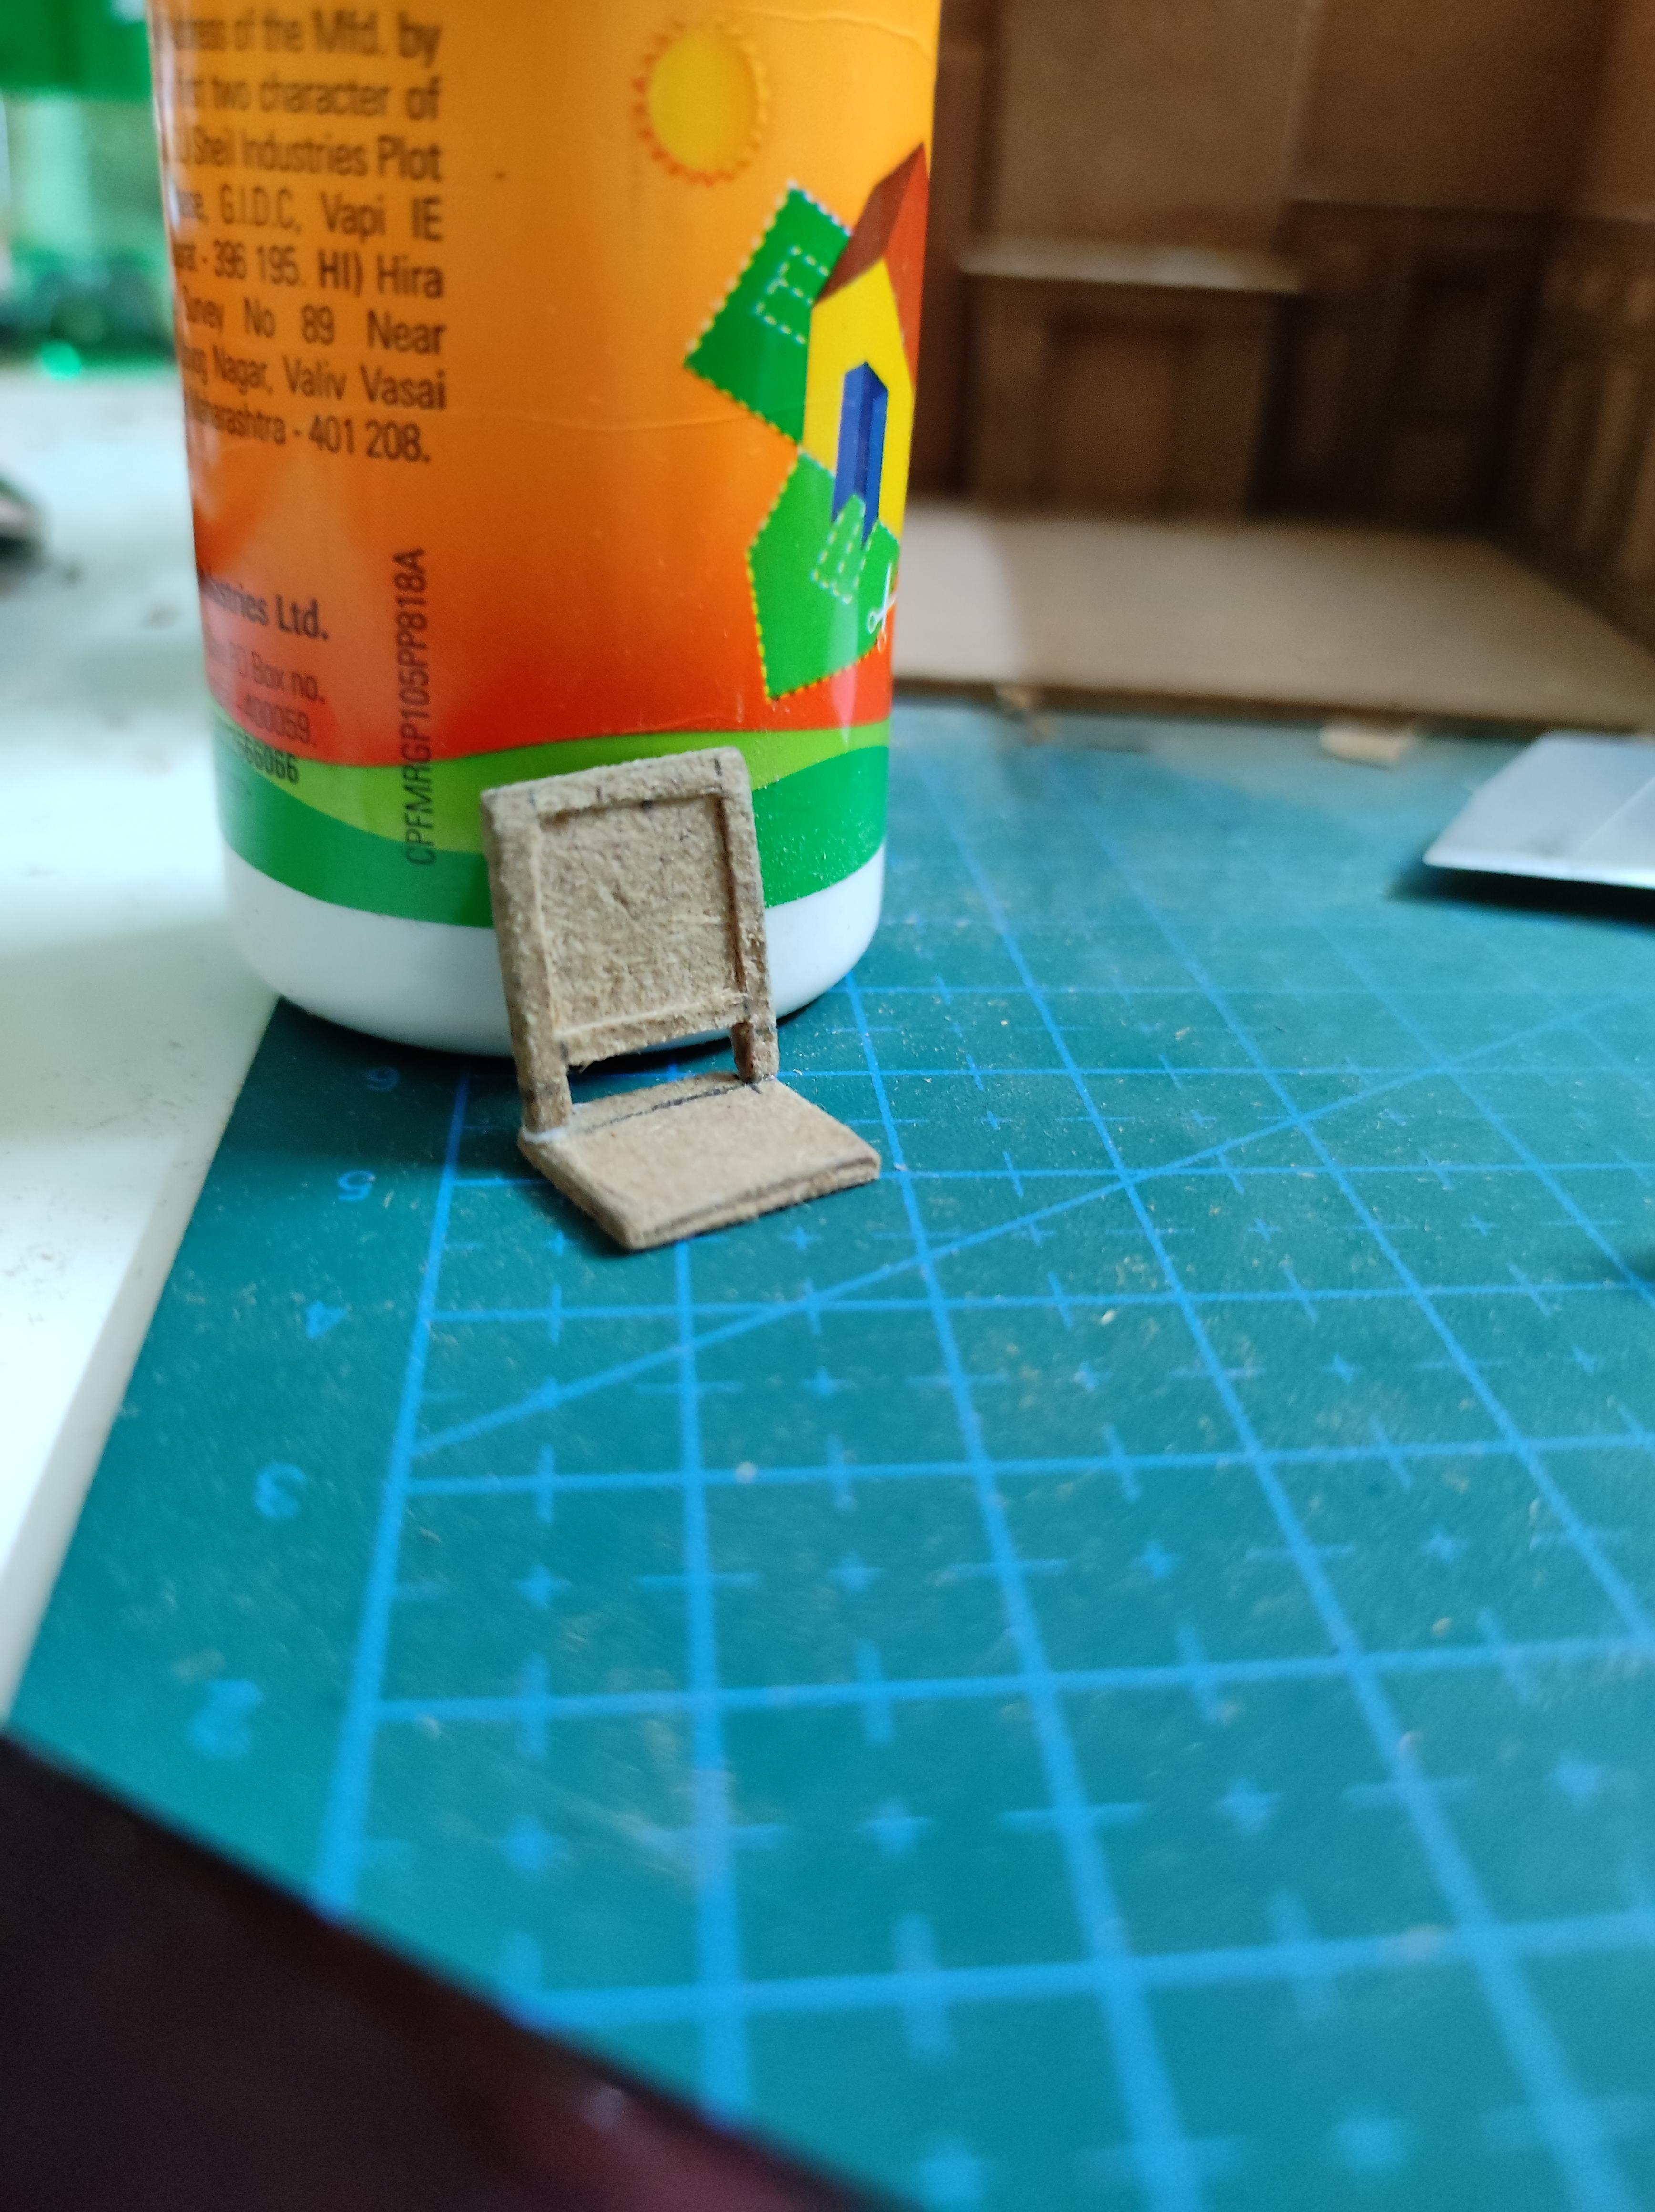
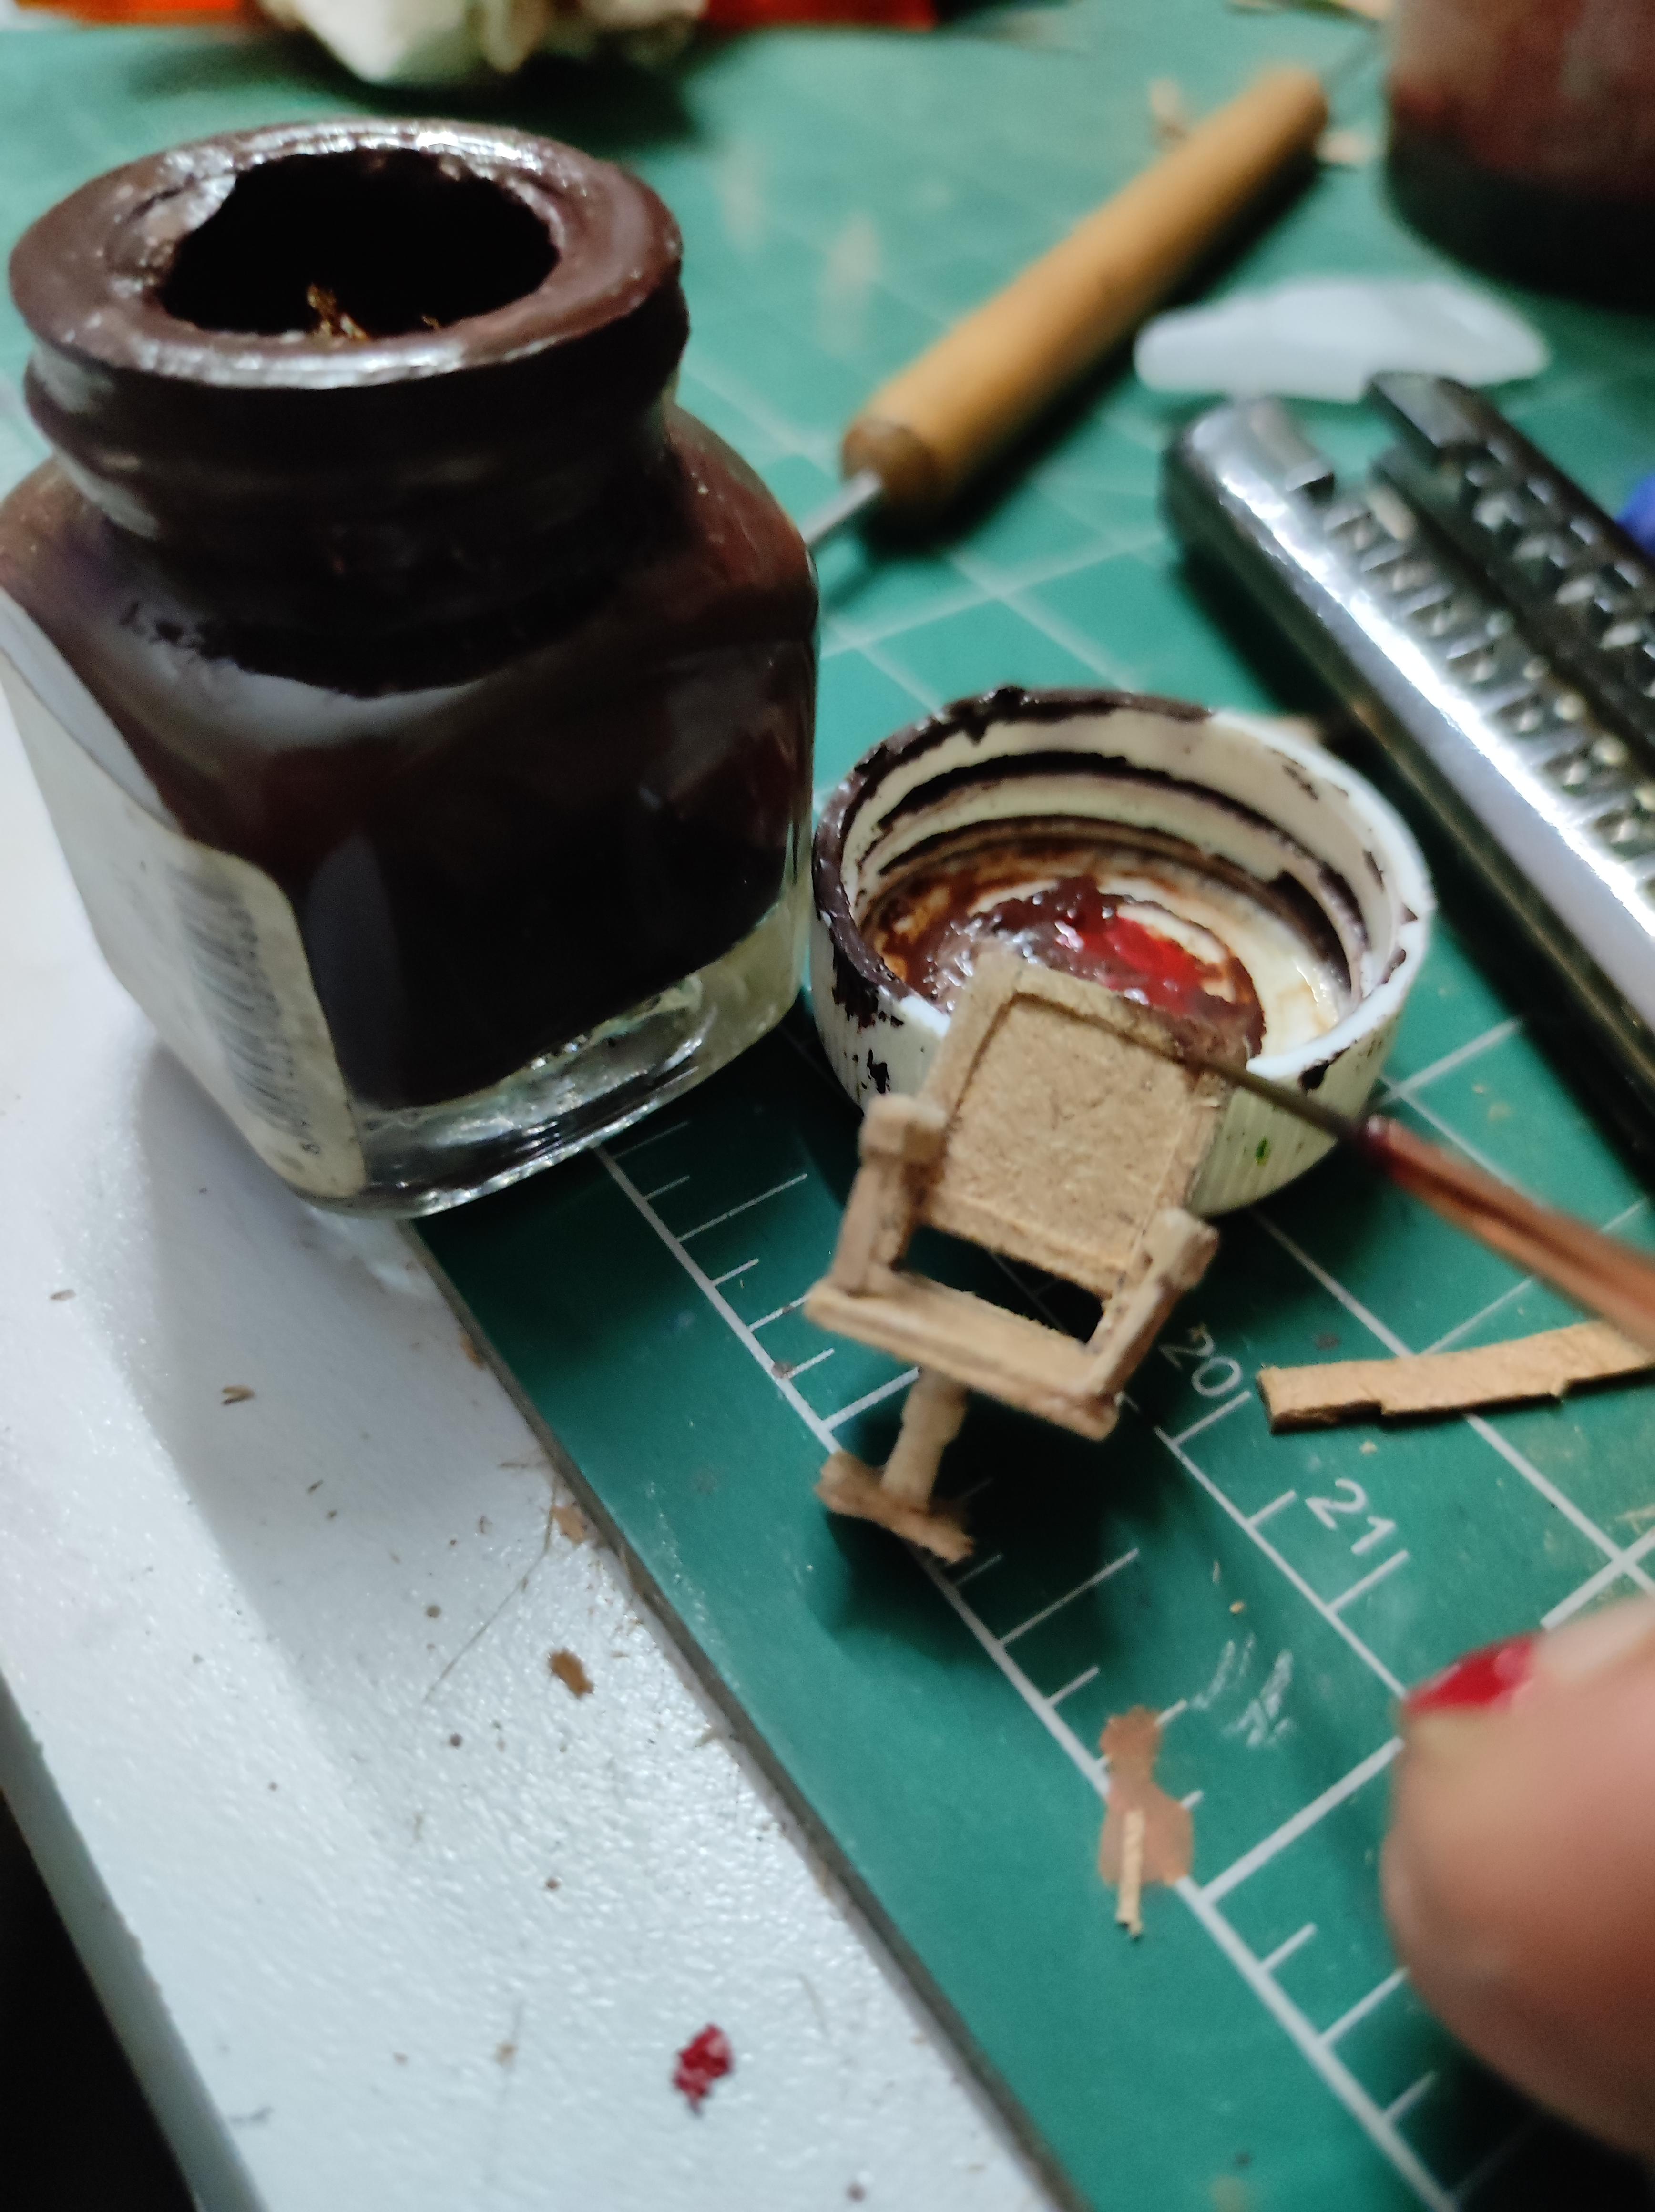
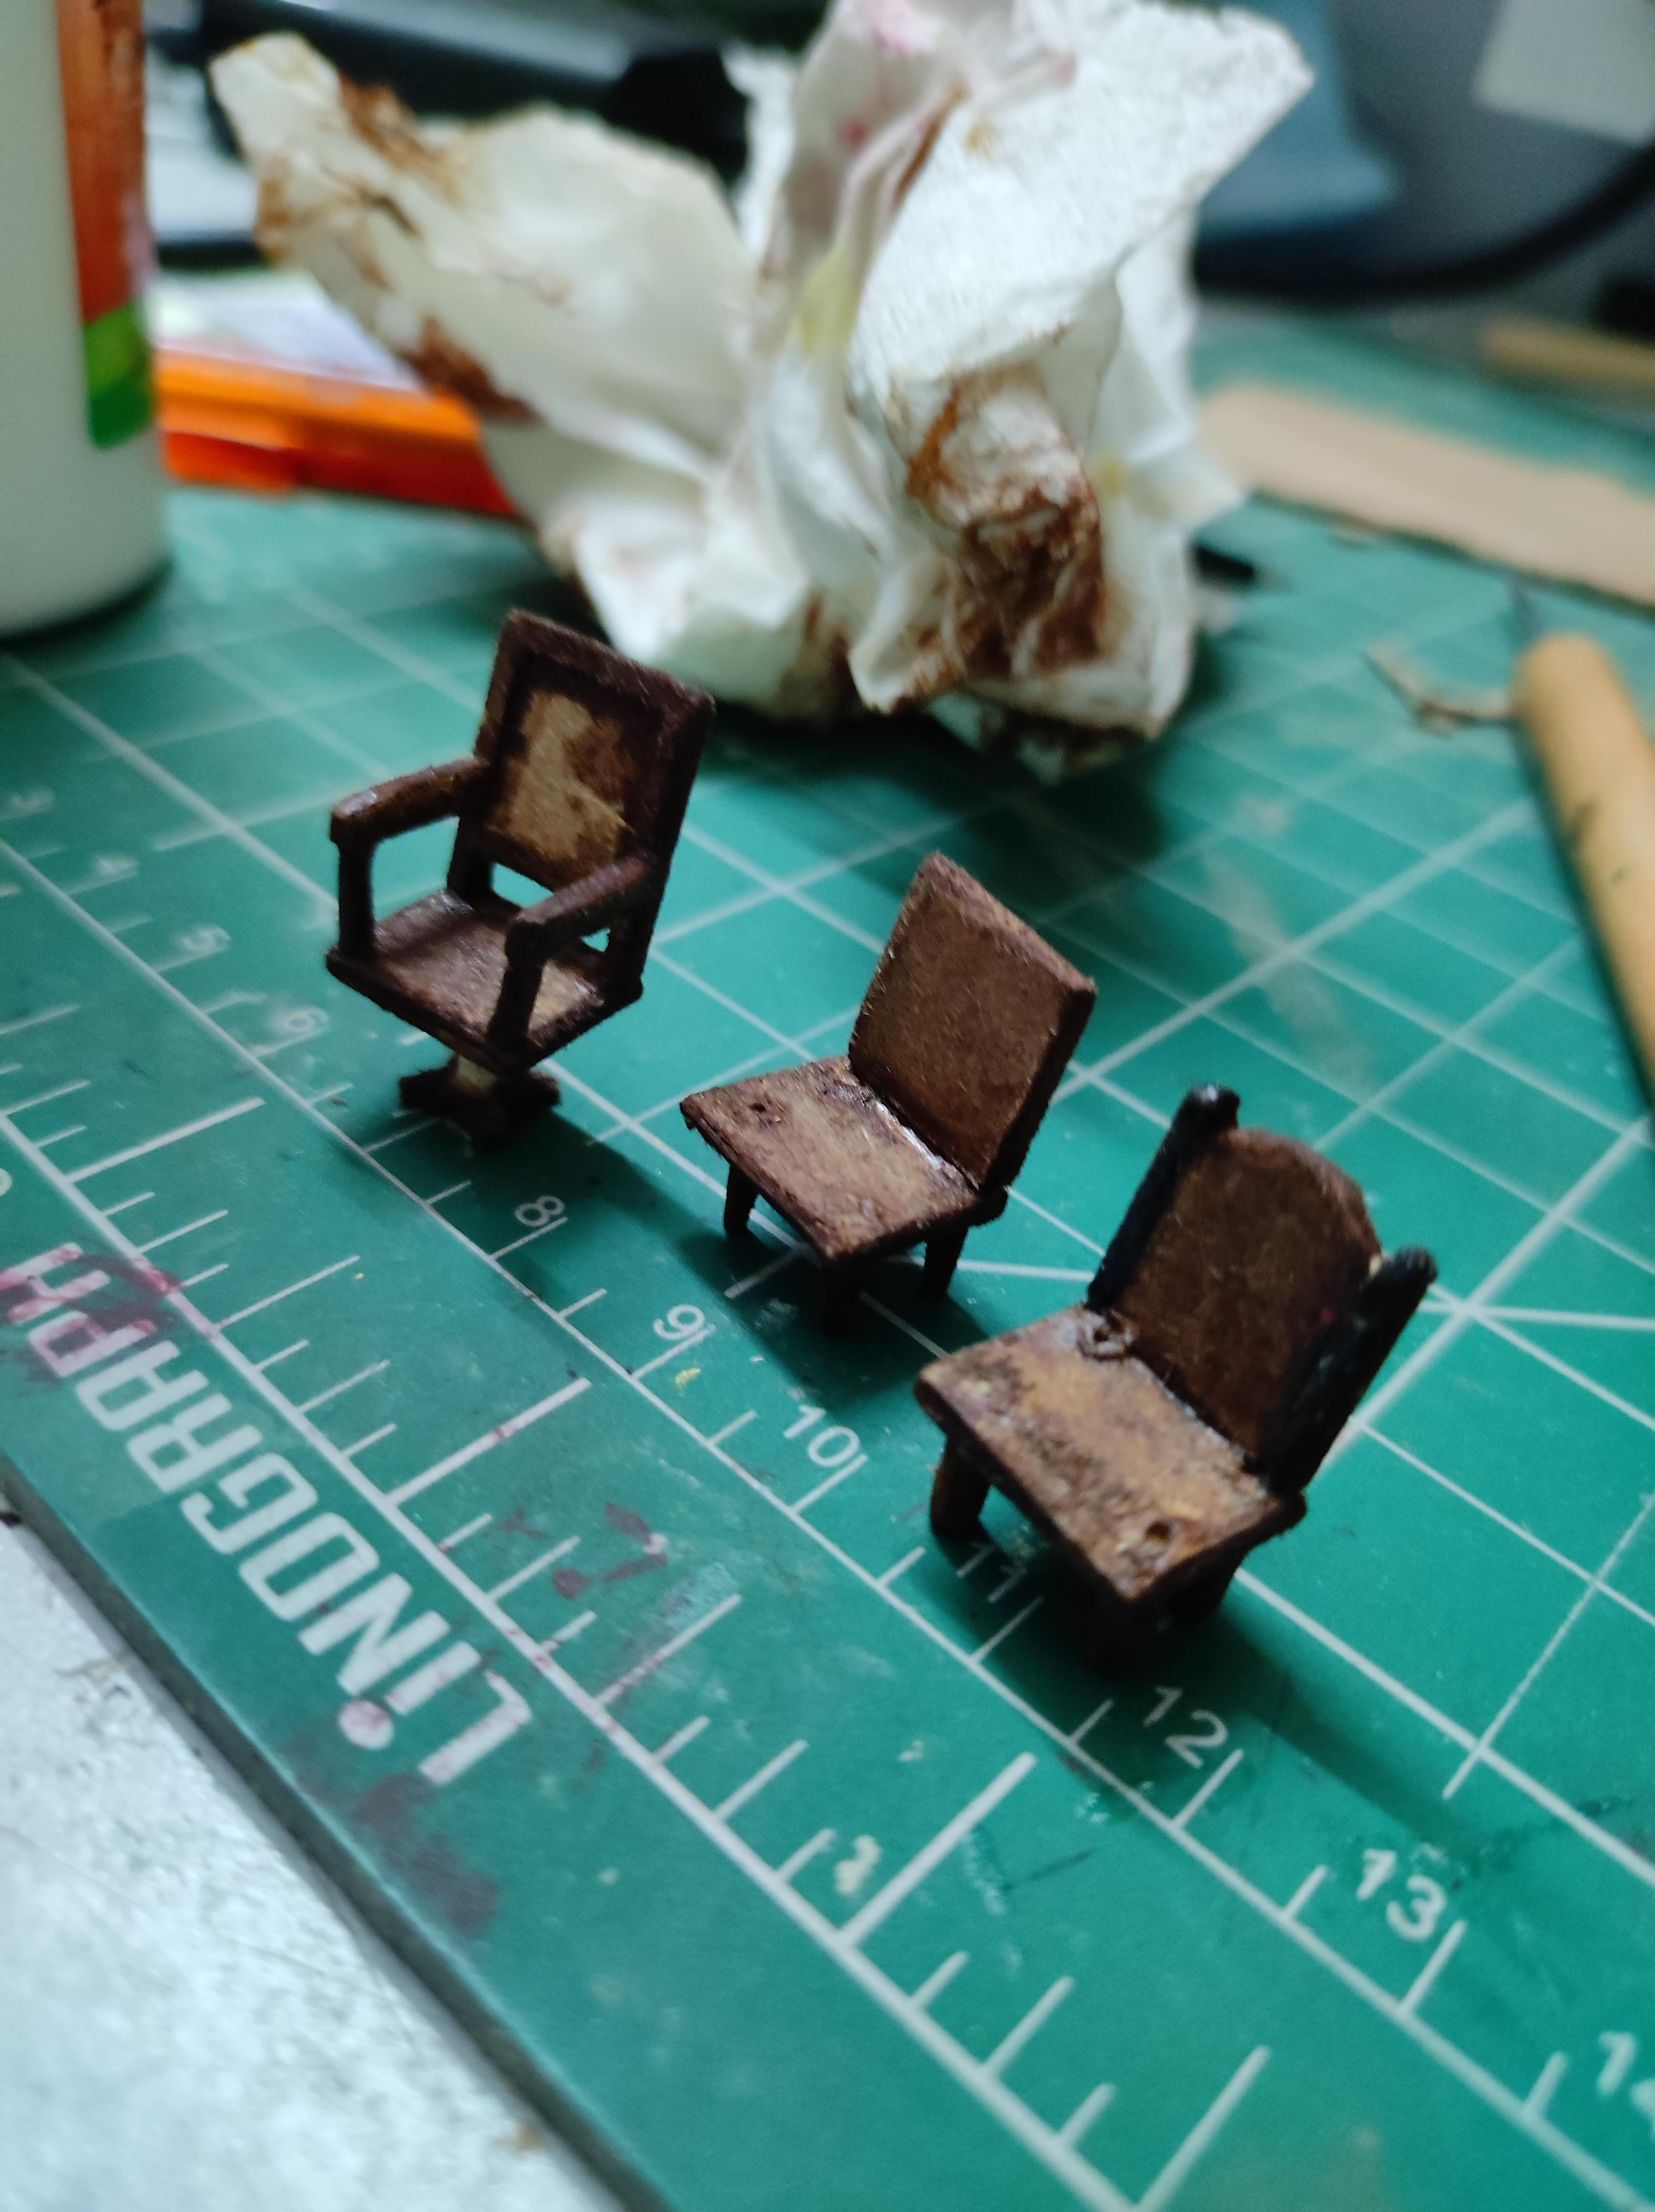
The Chairs


The number of chairs in the office varied based on the scenes but I decided to make 3 for now. The techniques used where same for them all so you could choose to make more if you like. I explained the process for making the main chair that of Vito Corleone over here.
Steps:
- From the thinnest sheet of MDF I had (about 1mm thick) I cut out the the back rest and the seat. I debossed the backrest the same way we did for the panels before. I glued those together.
- For the leg I again used a bit of a toothpick than I drilled/glued into the seat. Make sure you cross check the height of the chair with reference to the table.
- The cross type stand below I made but cutting out a small square, dividing it into equal 3X3s and then cutting out the corner four smaller squares to get the cross inside. This I glued to the leg (already attached to the seat with super glue.
- The handles I made by cutting out two rectangles and then carving out a smaller one from inside to get the L shape. This I glued into place.
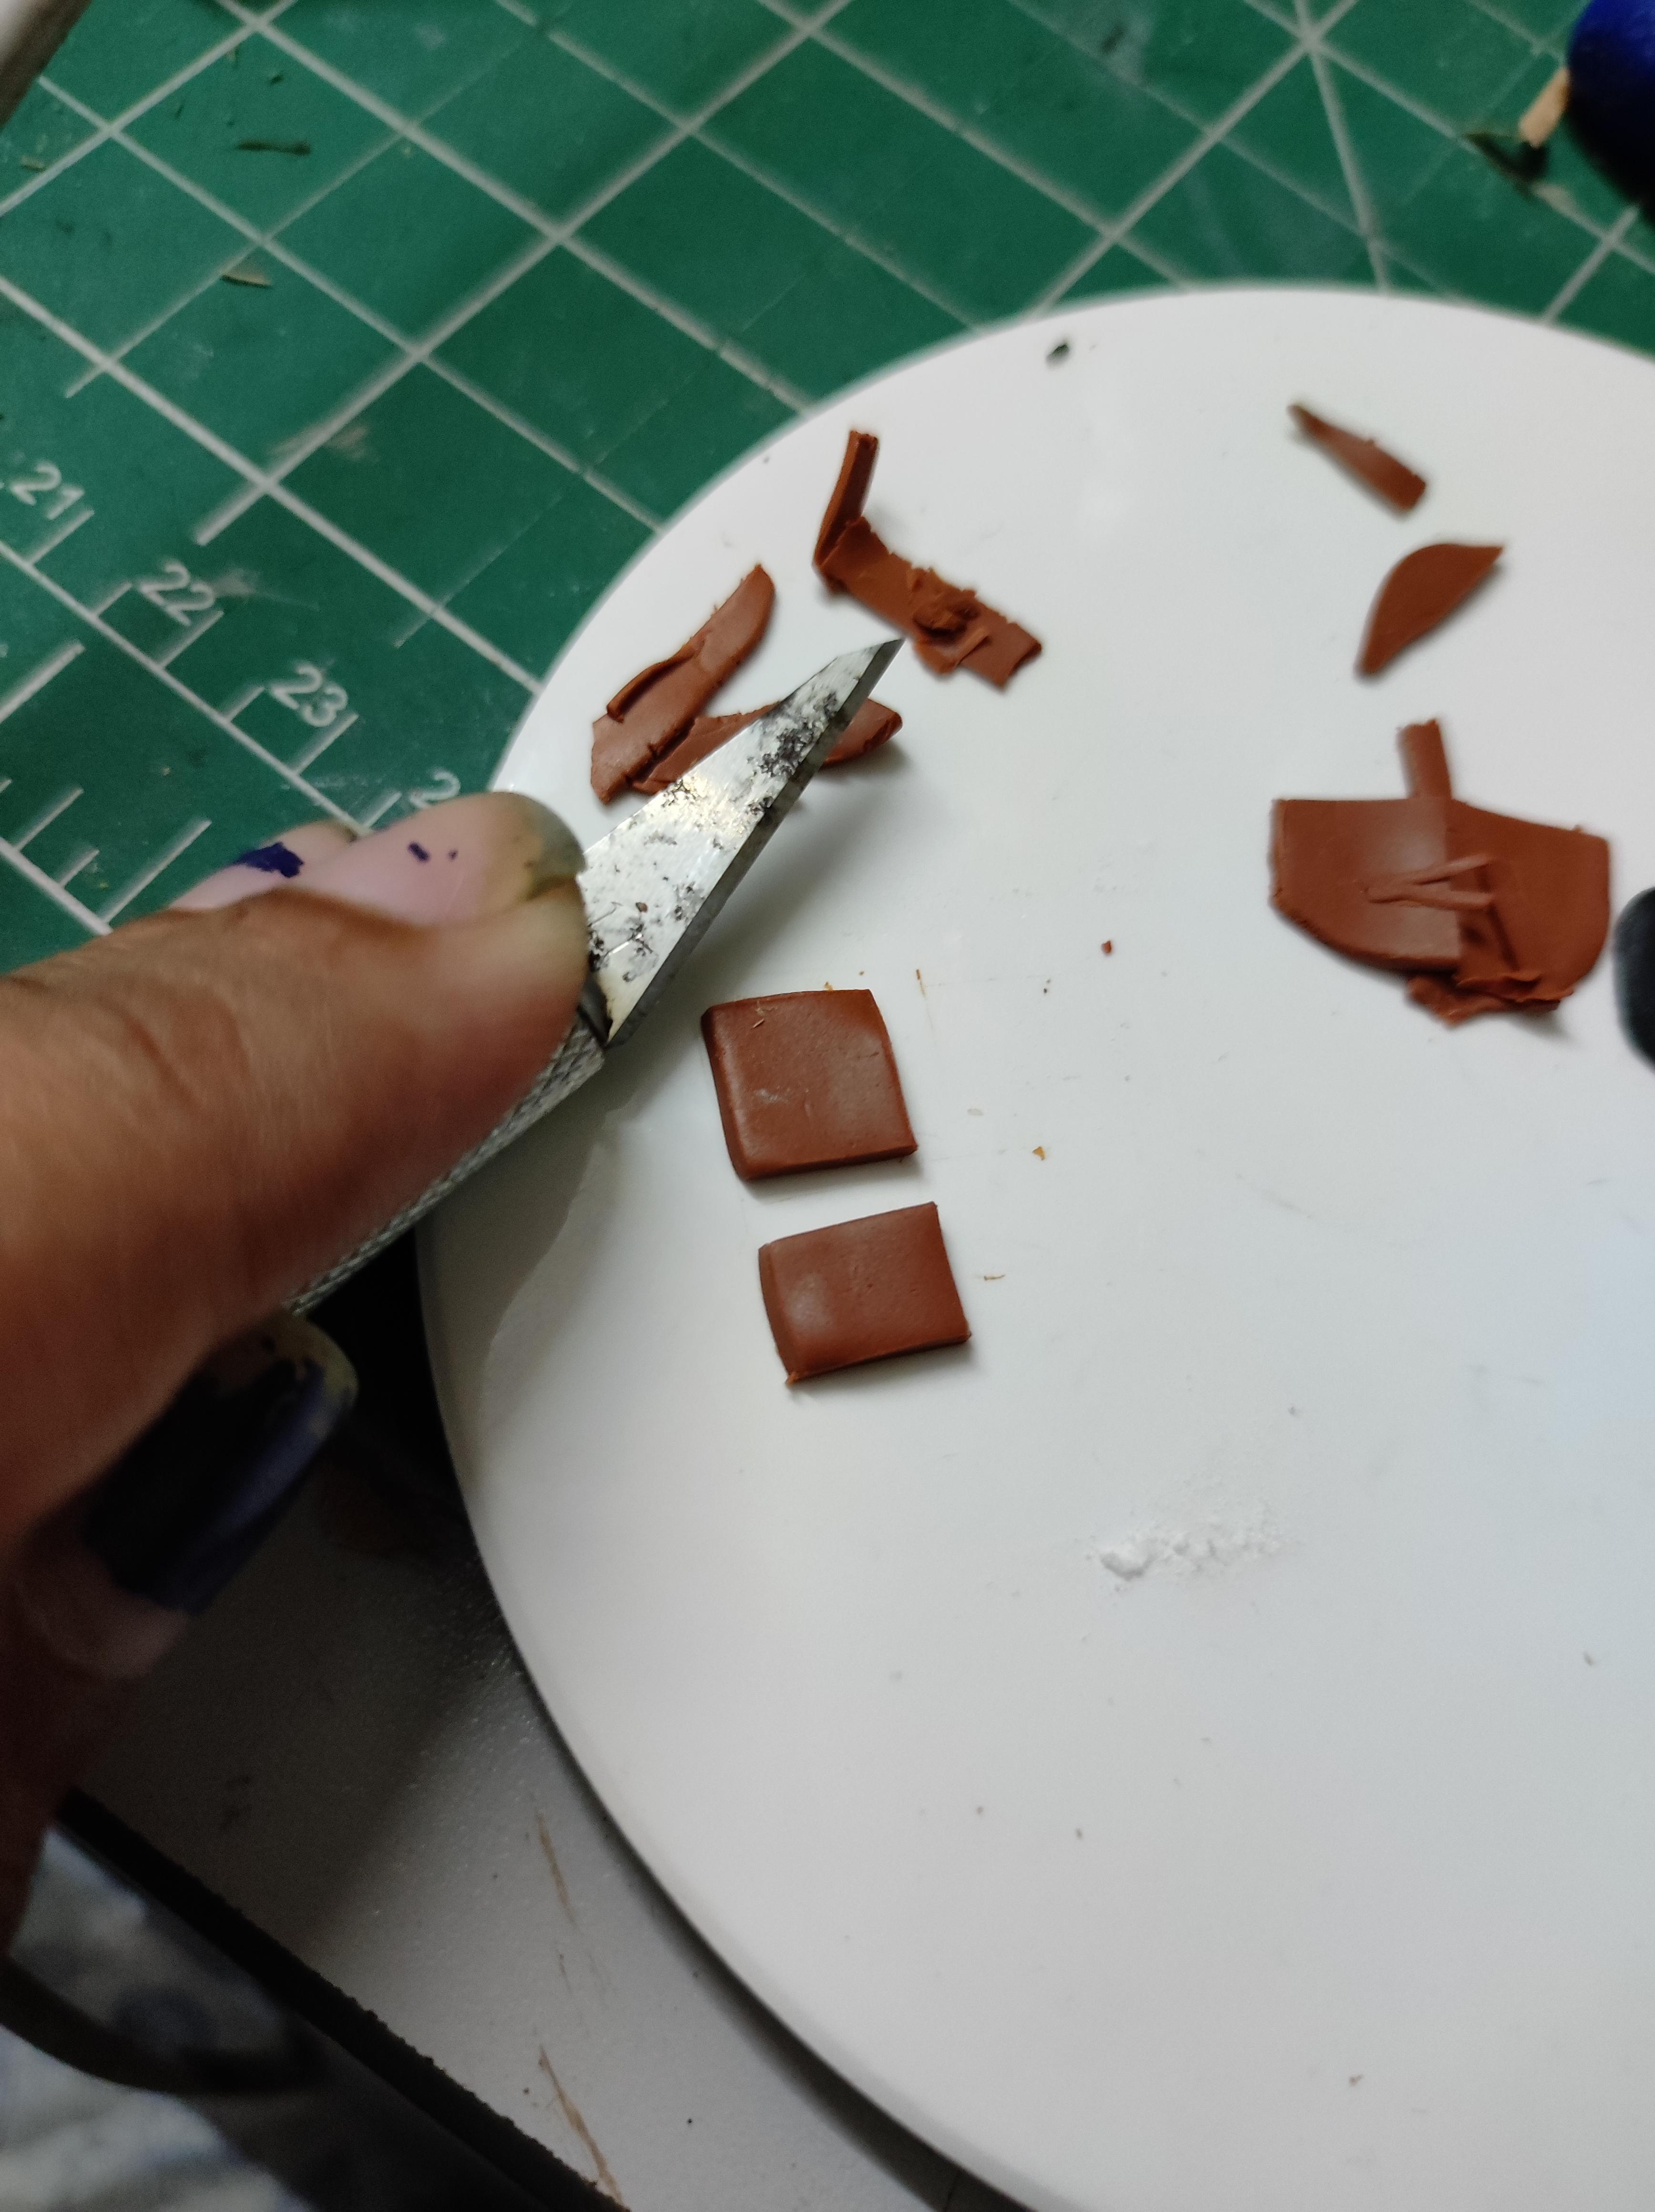
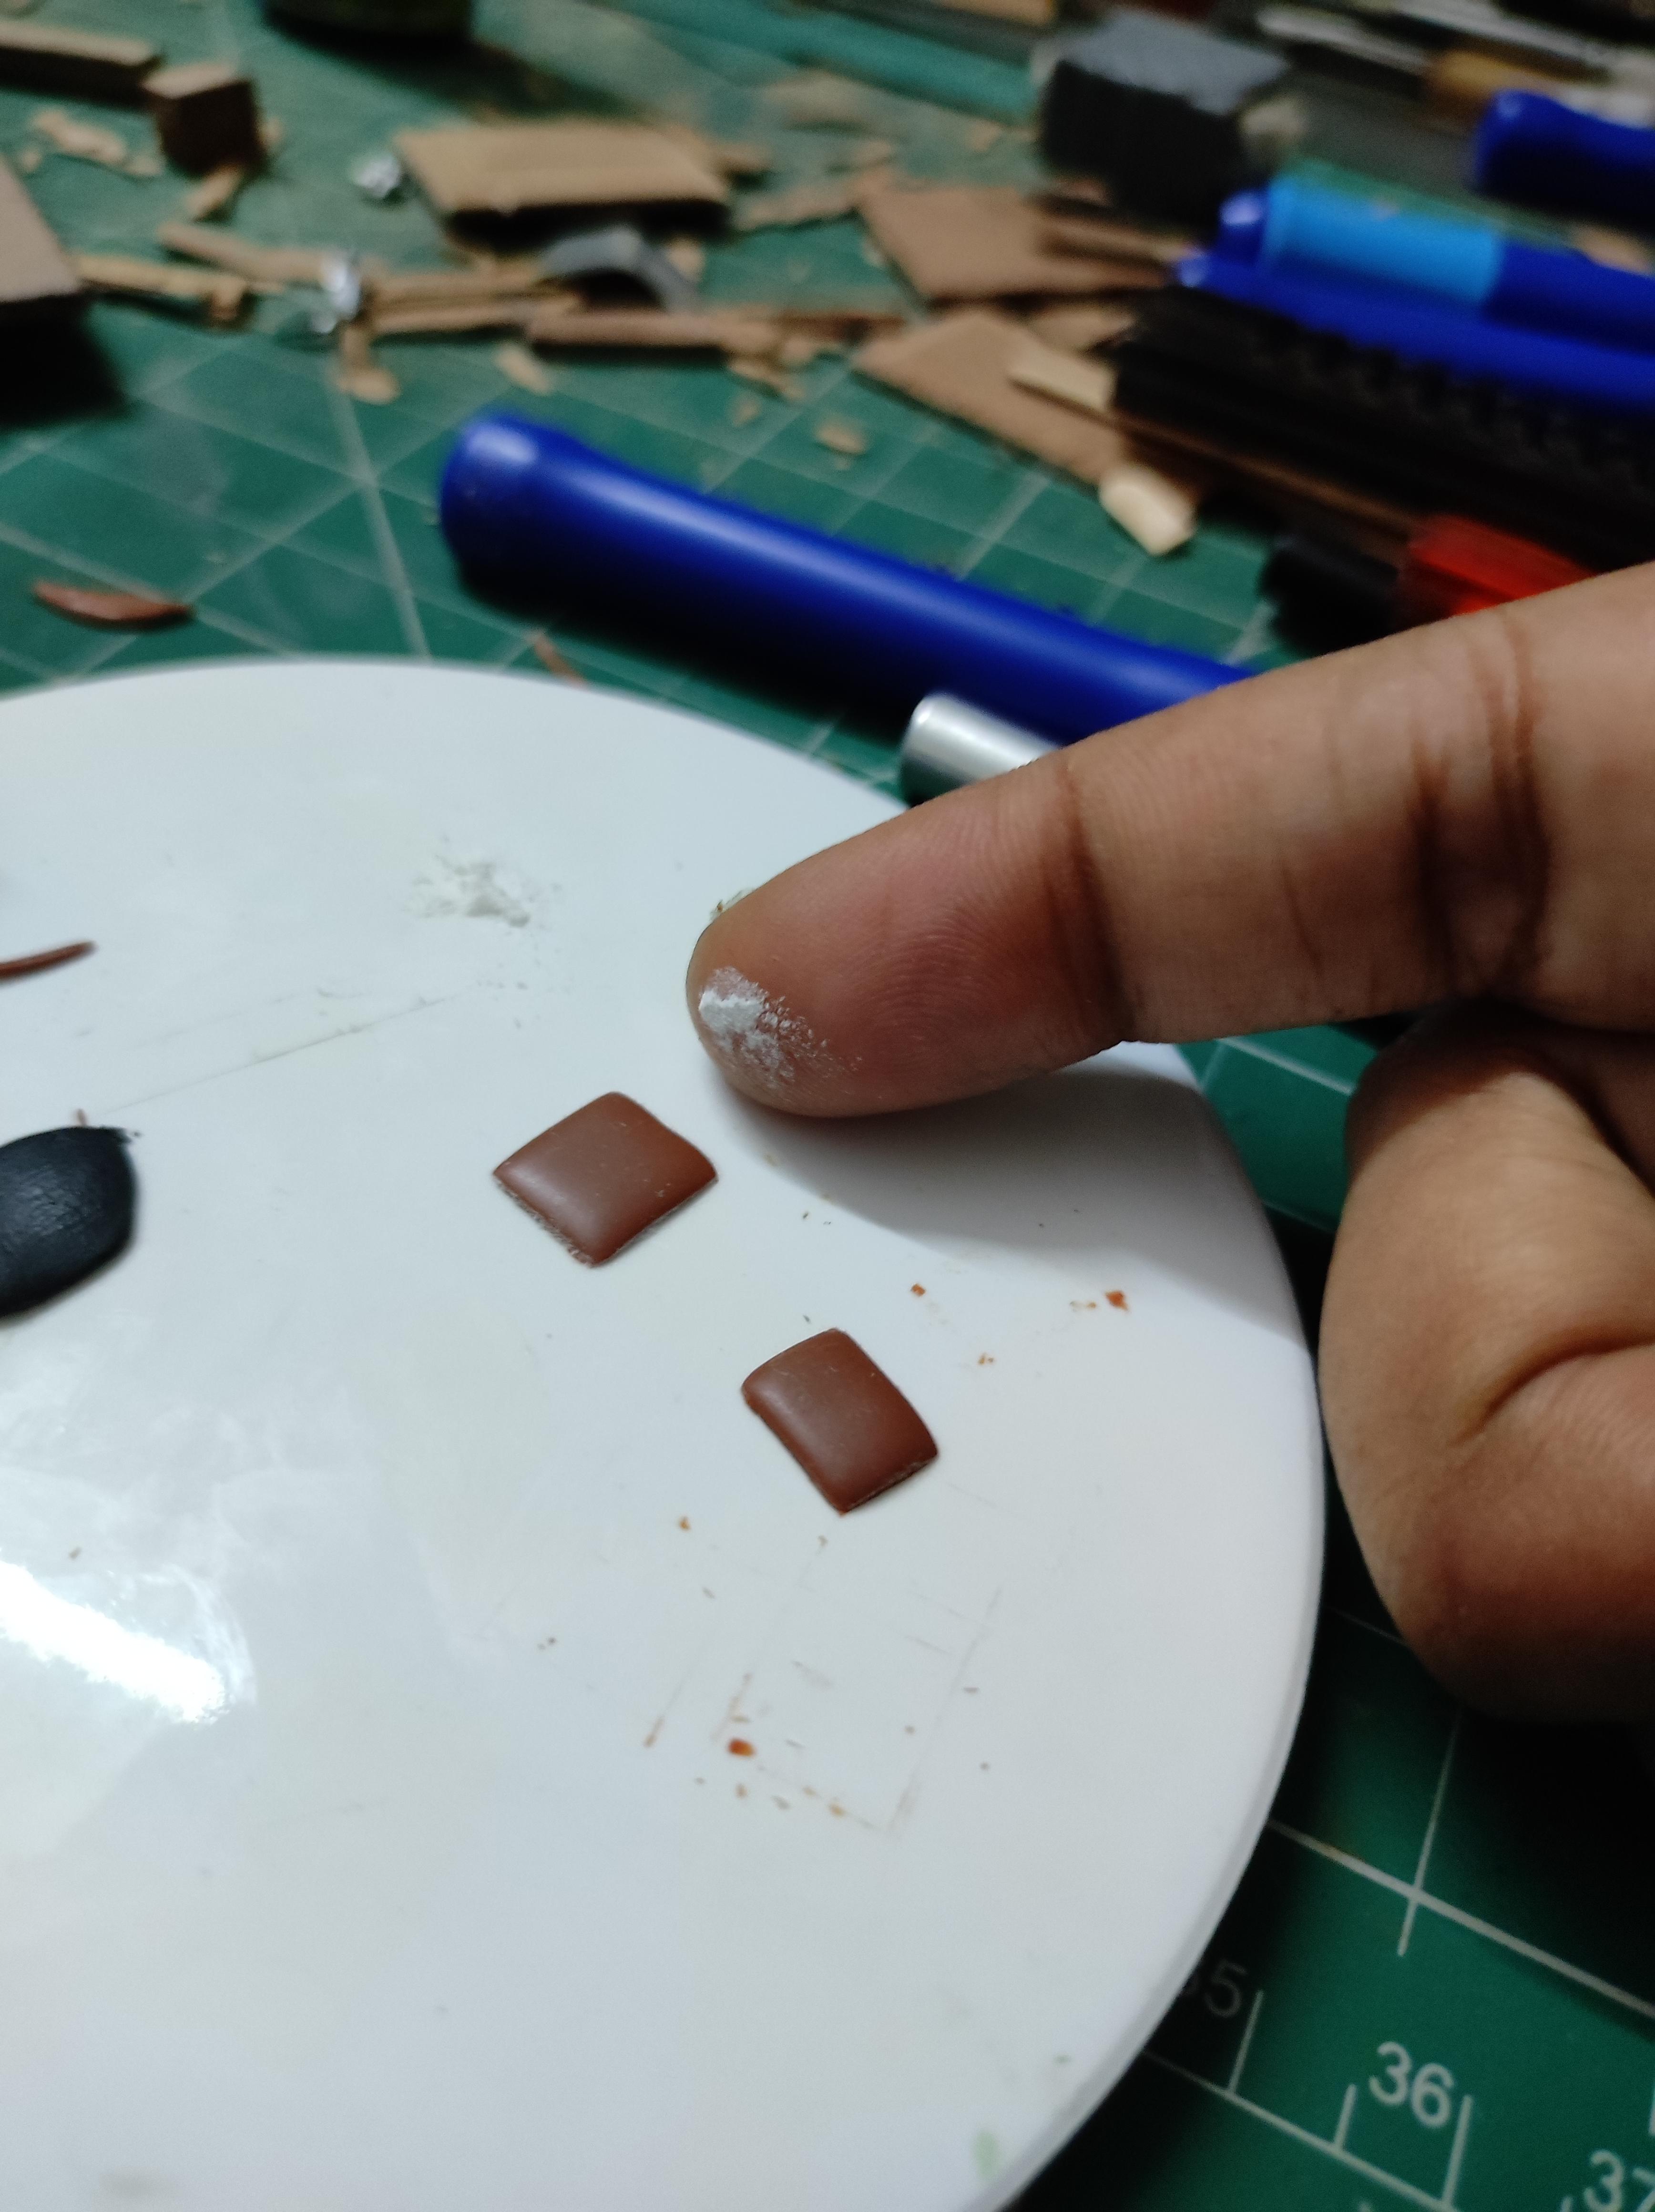
- Once the wooden structure of the chair is ready, I made the leather cushions out of polymer clay (I use Fimo and Sculpey Premo). I cut out the rectangles of the required size from a thinly rolled out sheet of clay.
- Then I softened the edges and the surface with a finger dipped in baby powder. The soft edges mimic the cushions very nicely. Once that was done I baked it as per the instructions of the clay.
- Don't glue the cushions to the chair just yet!
The Painting
This is probably the most fun part of the project, the part where it all begins to come together.
Steps:
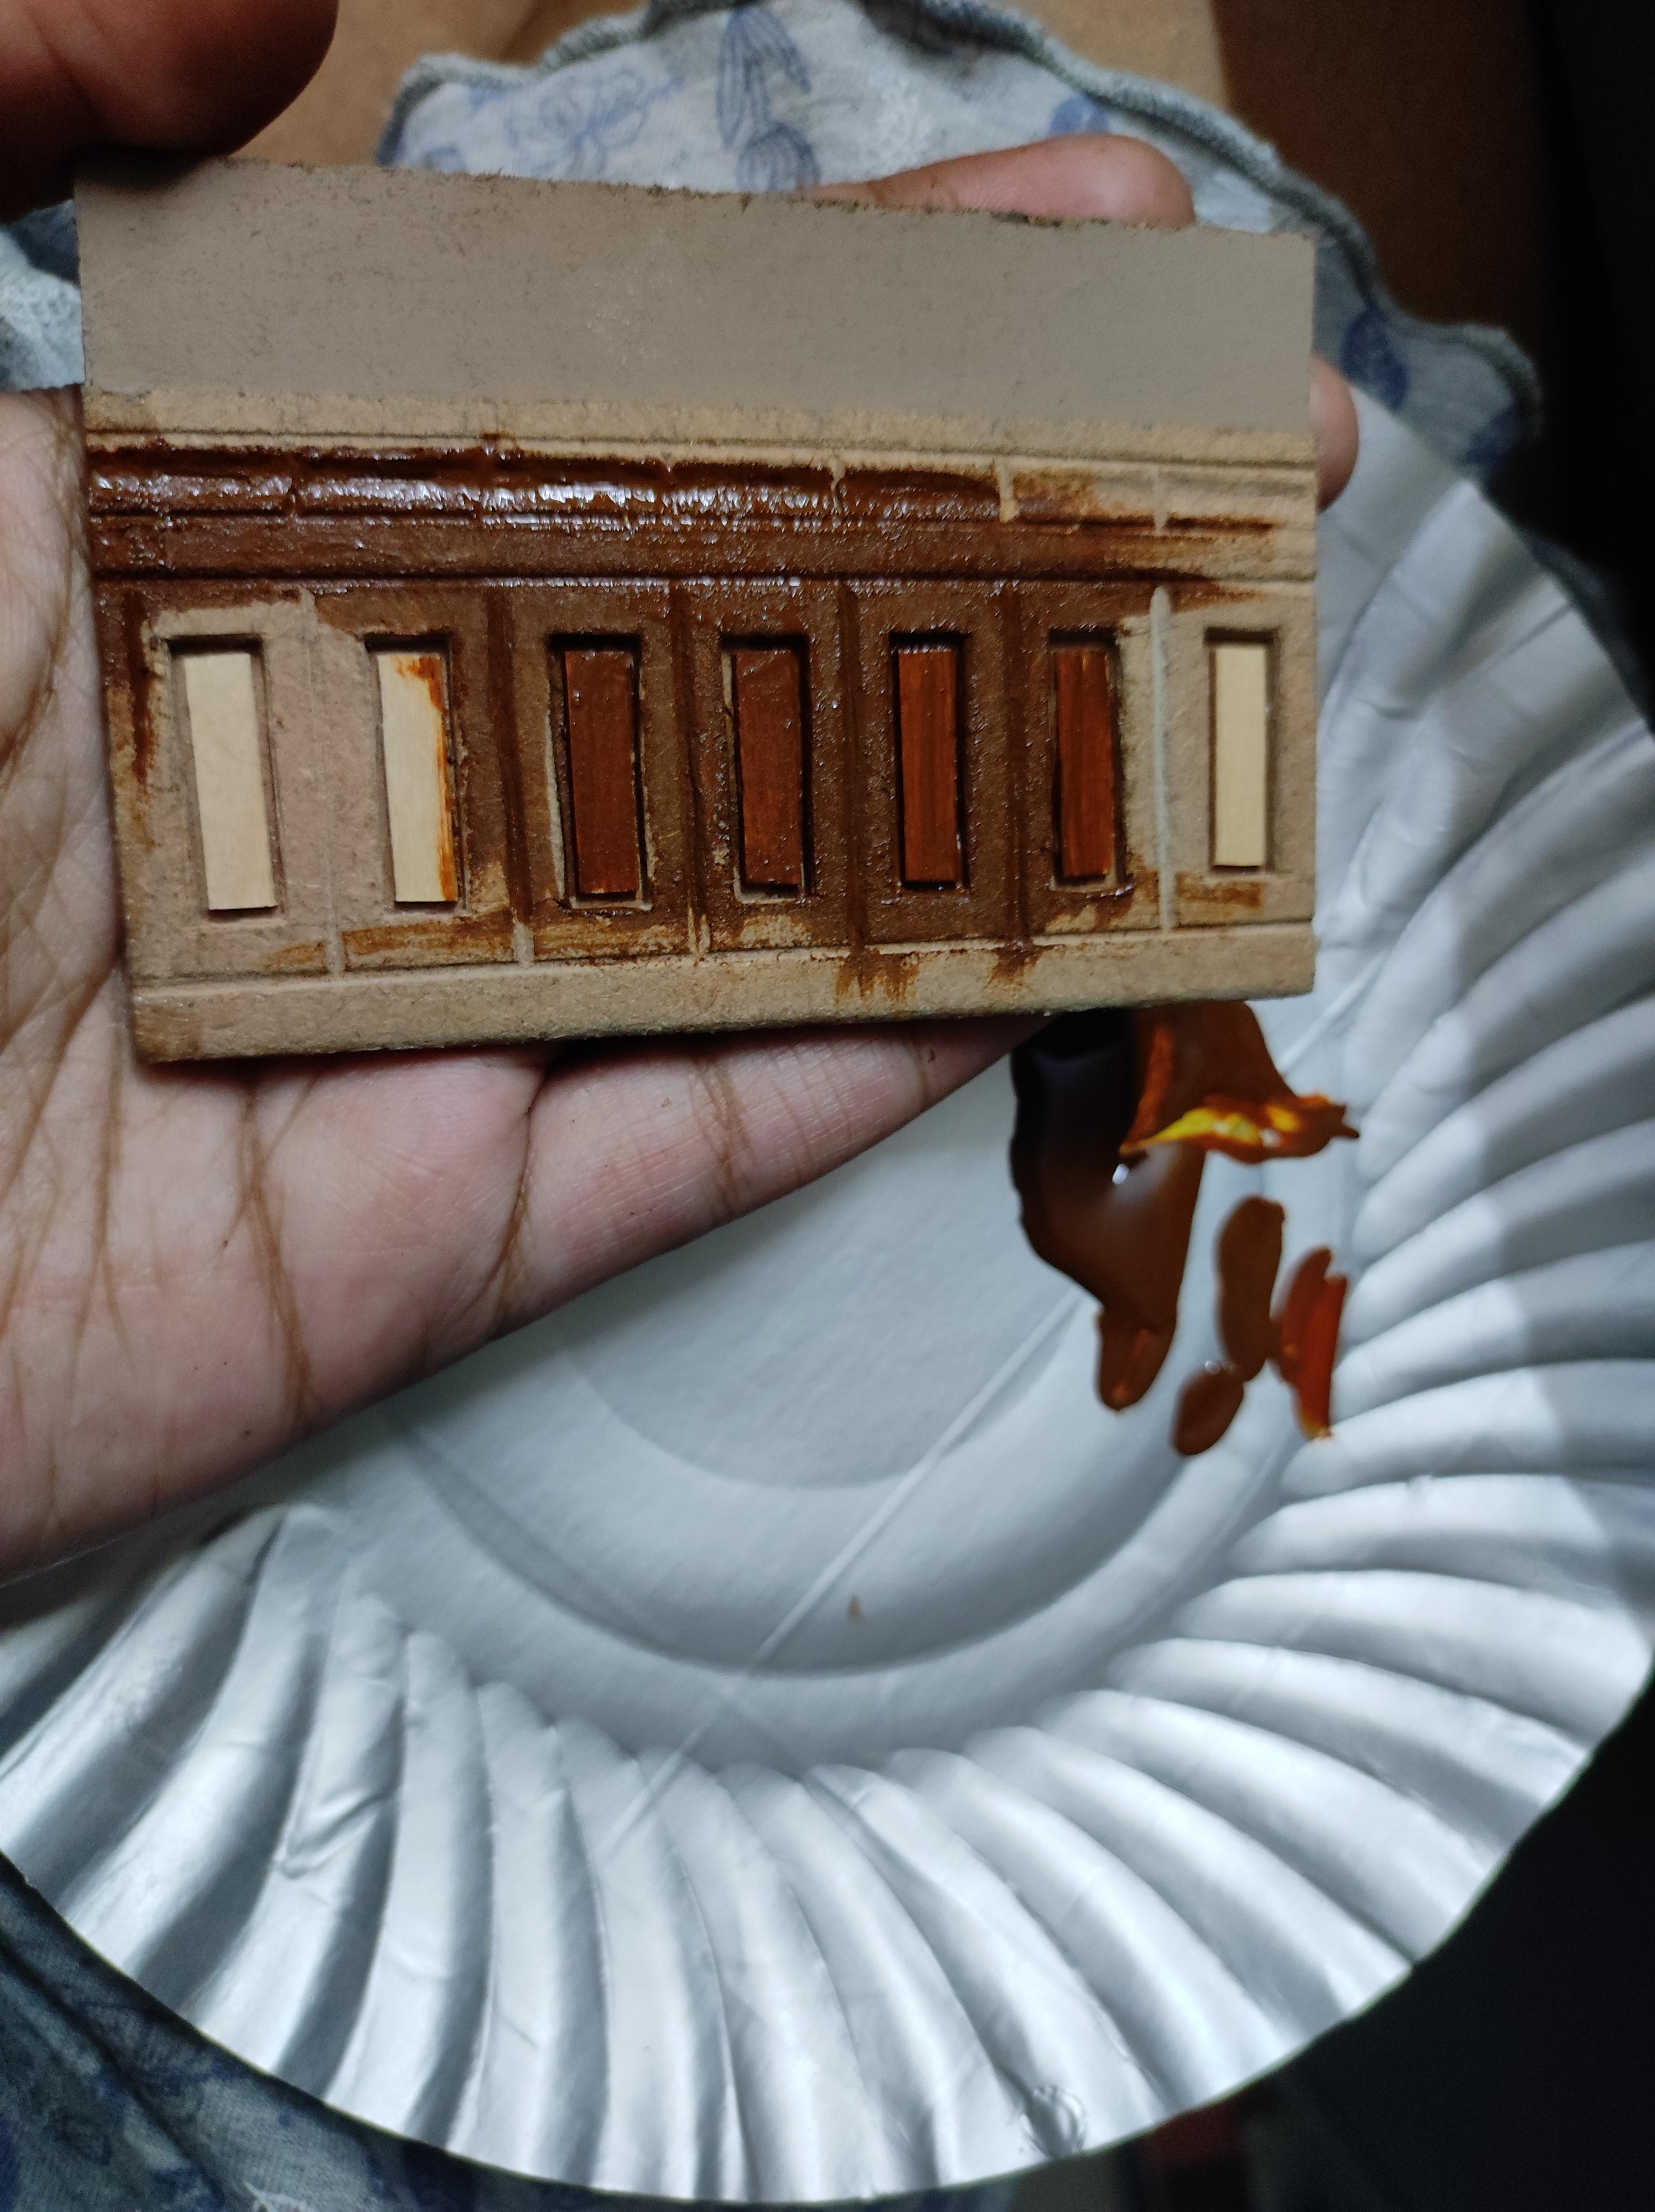
- For the walls peaking above the wooden panels, I used some chalk pain in a warm brown colour. The chalk paints give a nice matte and powdery finish that makes it seem like plaster.
- For all the wooden works, I used acrylic paints. I painted the wooden panels in burnt sienna and the other details like the fireplace and bookshelves I painted in a sort of reddish brown colour (I mixed some Crimson with Vandyke Brown)
- The main table as well I painted in a dark brown shade. For the top of the table I wanted a nice wooden grain. For this I painted it with a watery brush with strokes in the same direction. The inconsistency of the paint and water gives a nice texture.
- The chairs I painted in a variety of browns. Once the paint had dried, I glued the cushions in place.
The Room Assembly
With all the elements painted and ready to go, it is time for finalizing the attachments. I try to push the assembly towards the end always as once glued in place, any change becomes difficult and messy. But I keep checking whether or not the assembly is working through out the making process.
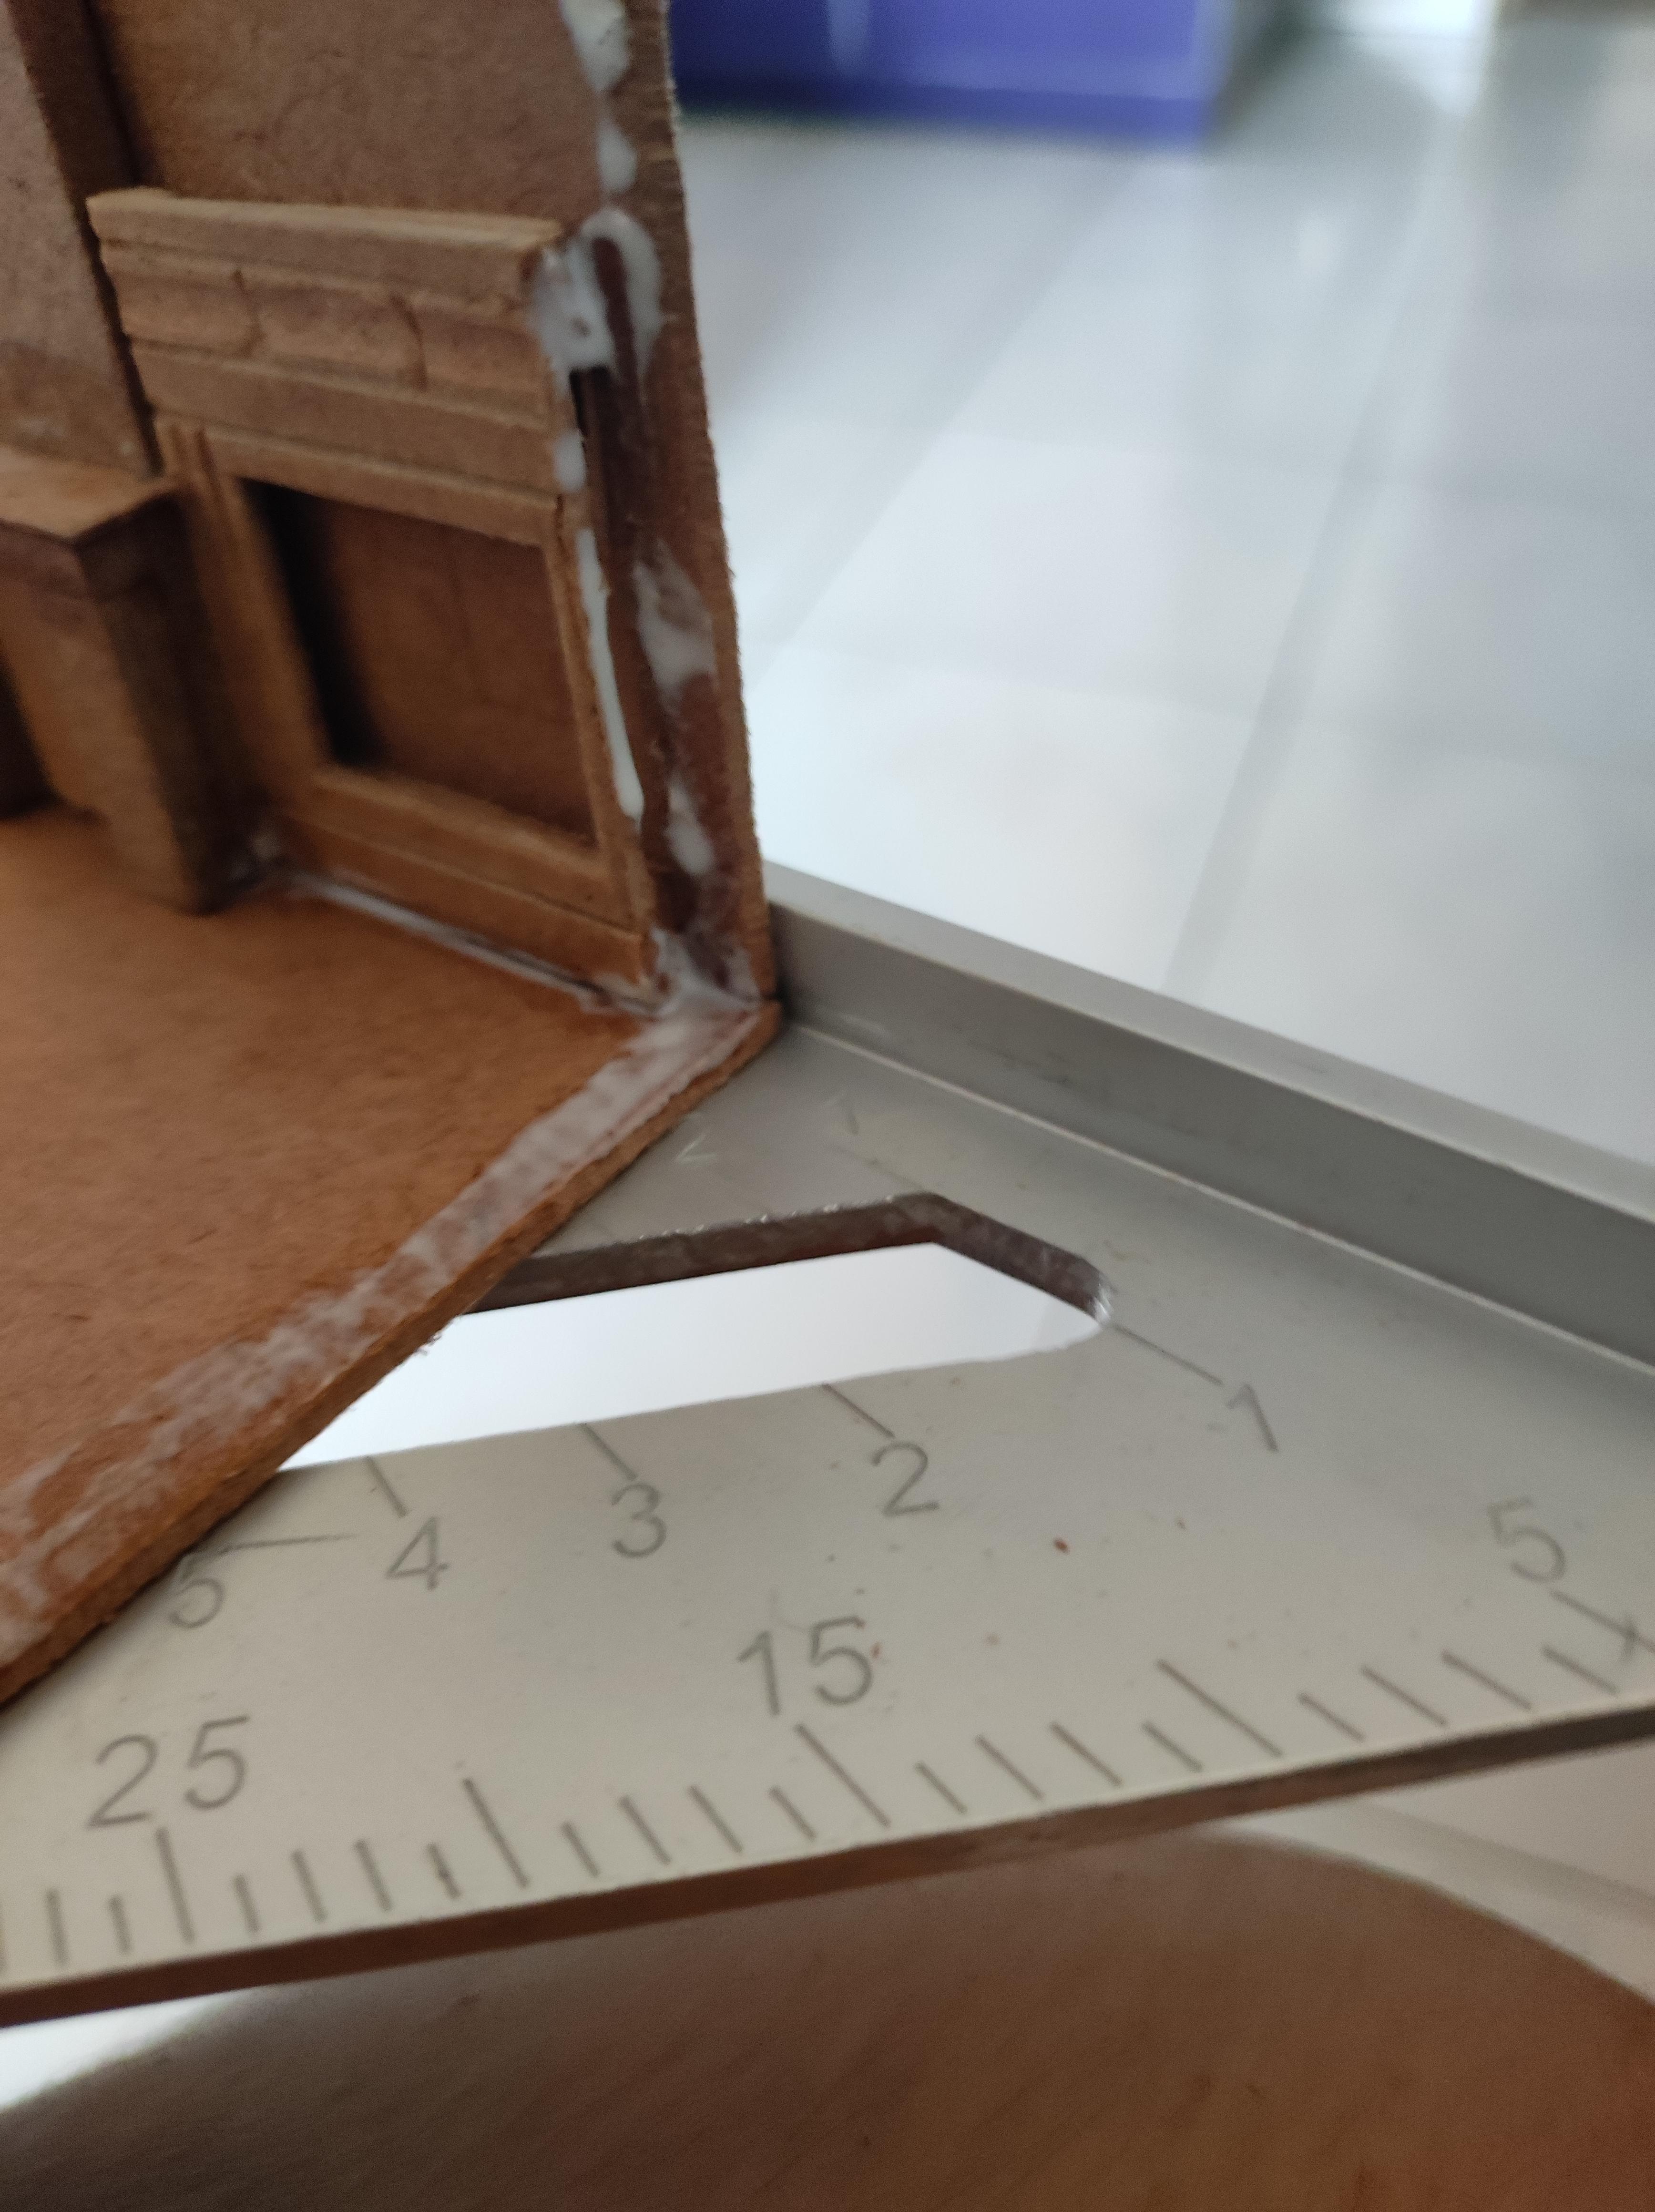
To ensure right angles and align the walls with the base, I put the two pieces along the edge of the tri-square and glued it down with super glue (as this dries quickly, it reduces the chance of the walls getting wobbly or losing the right angle). Be careful not to glue the Tri-square to the project!
Once all this was glued together and assembles, I finally put the window frames in place. (From step 4). The reason for doing this was that I did not want to stain the frame while painting by mistake. At this stage with all the paint job done, it is safe to glue it in.
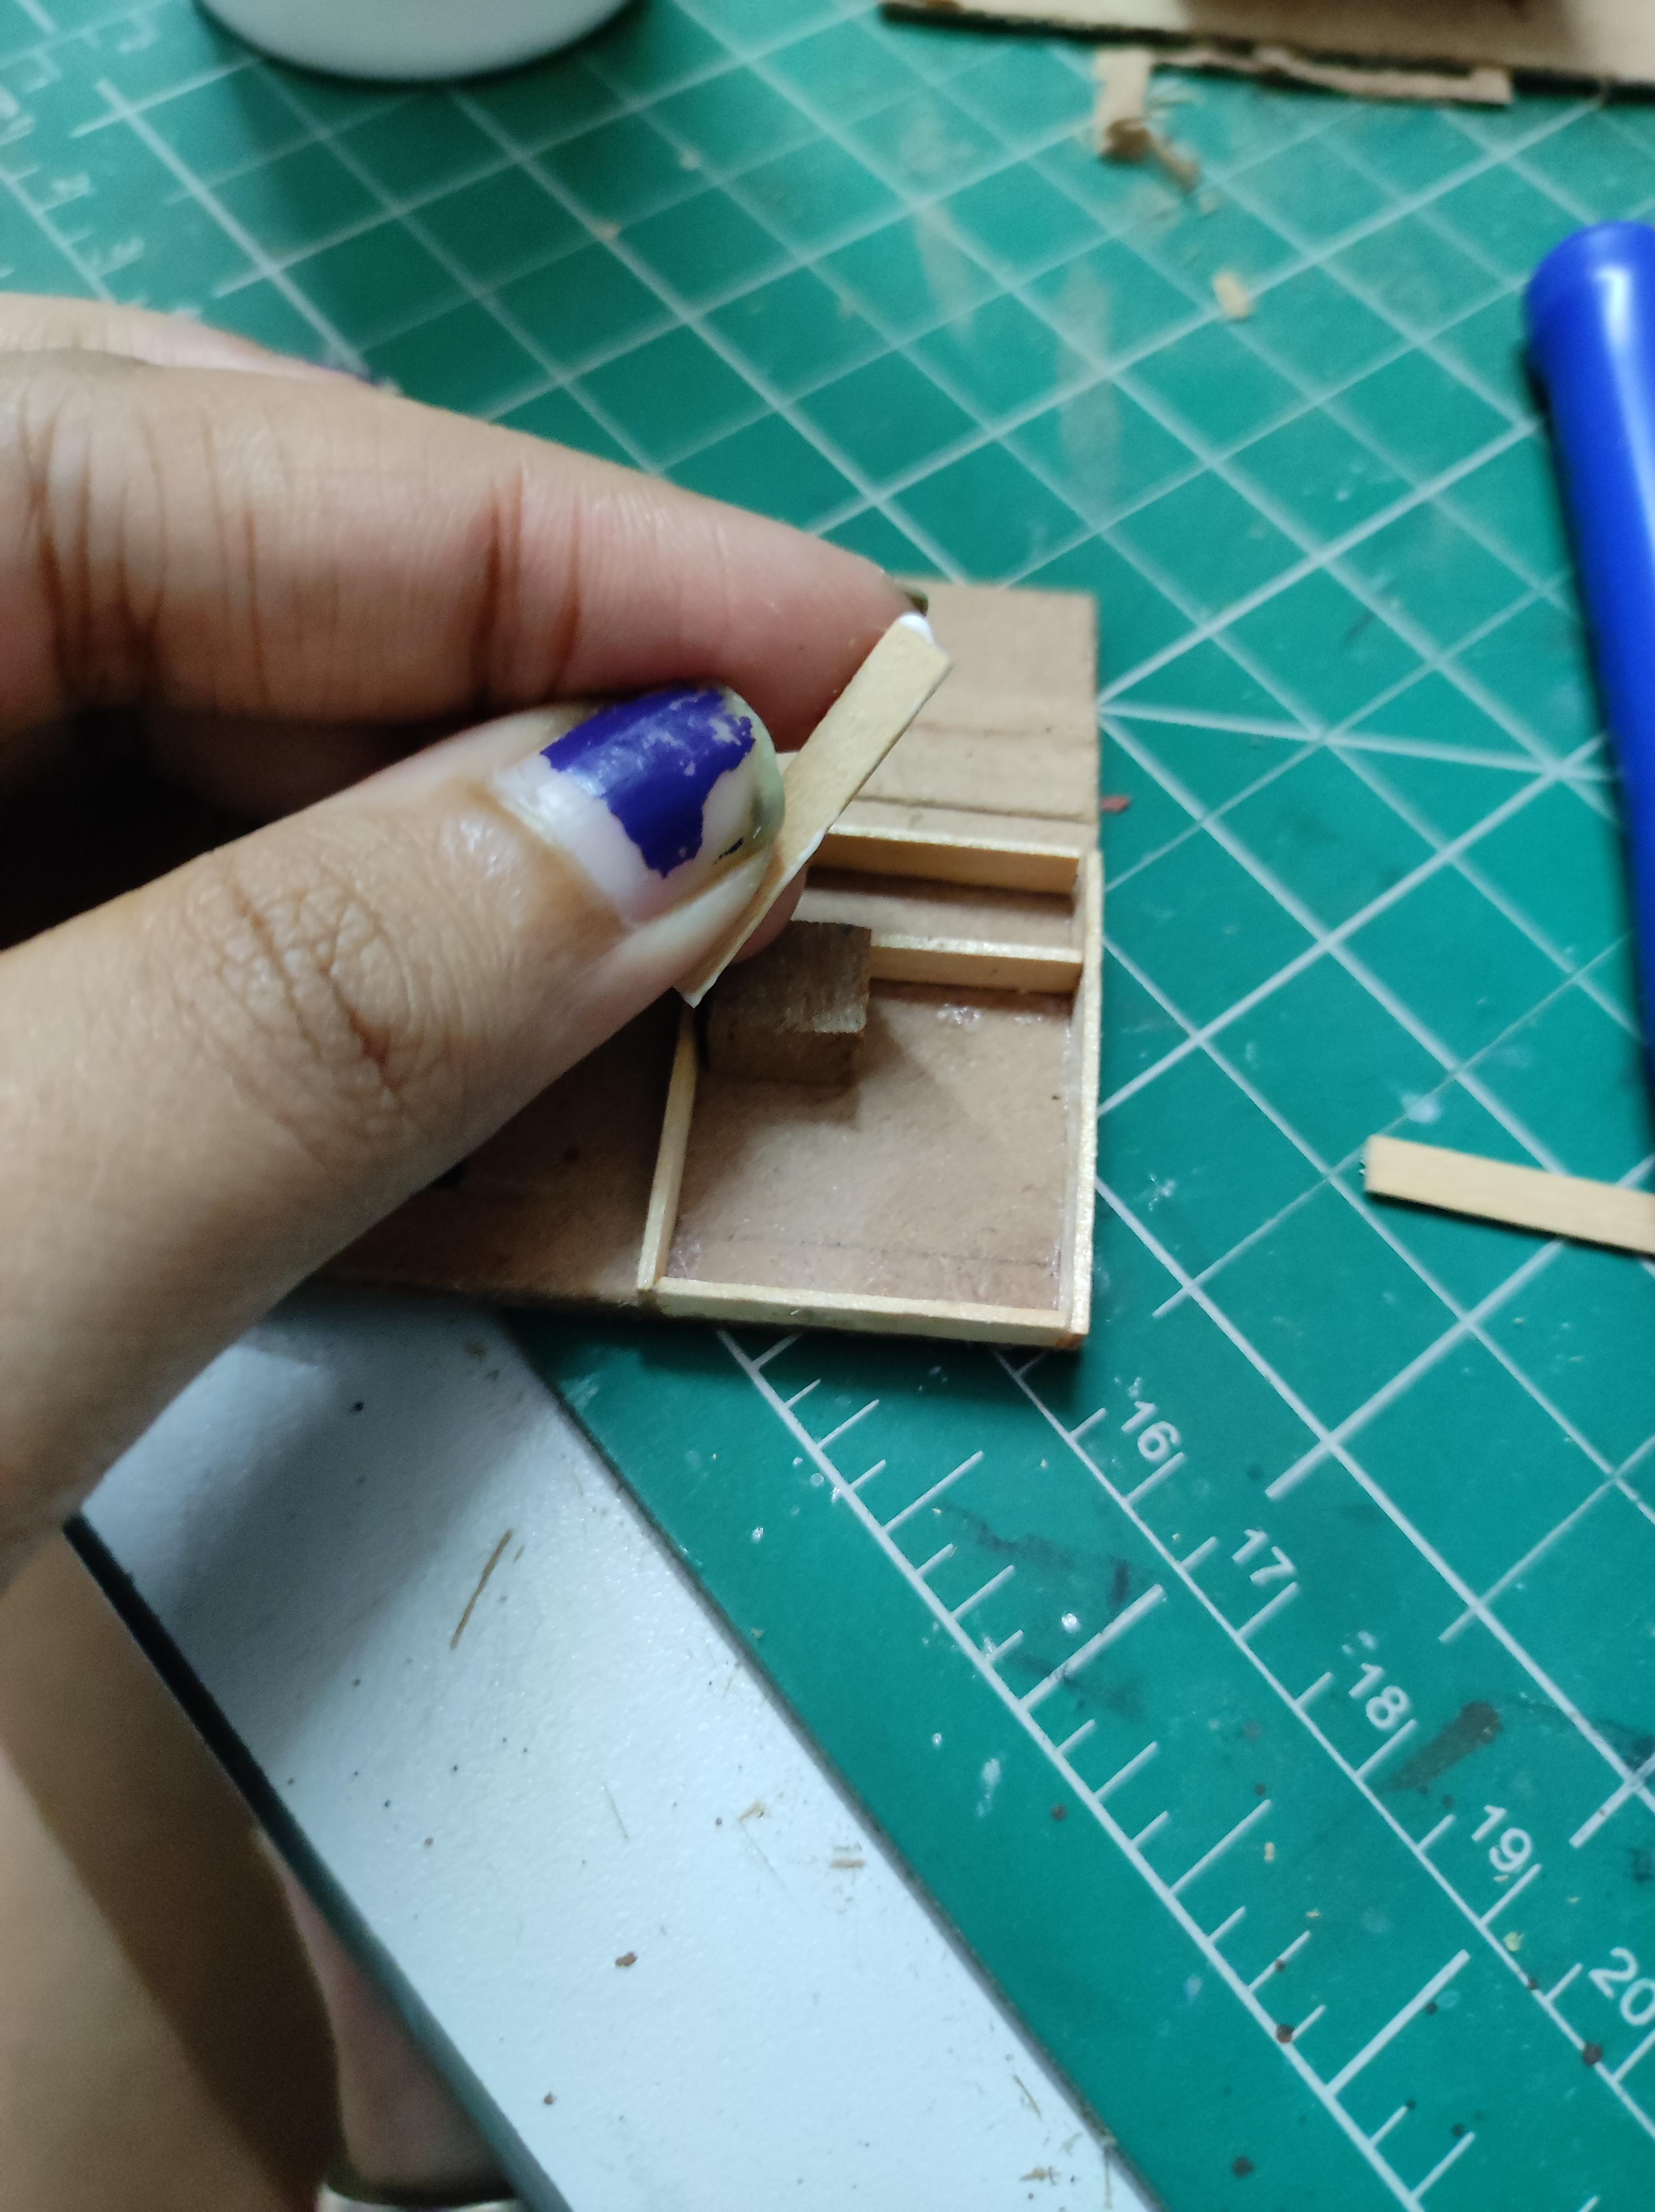
Details & Props
.jpeg)
.jpeg)
There is a lot of teeny tiny details in the office that gave it the final look. It wasn't possible for me to document the making of all the little elements but I have listed here what all I made and in brief how. Feel free to modify the decor and props however you like for this step!
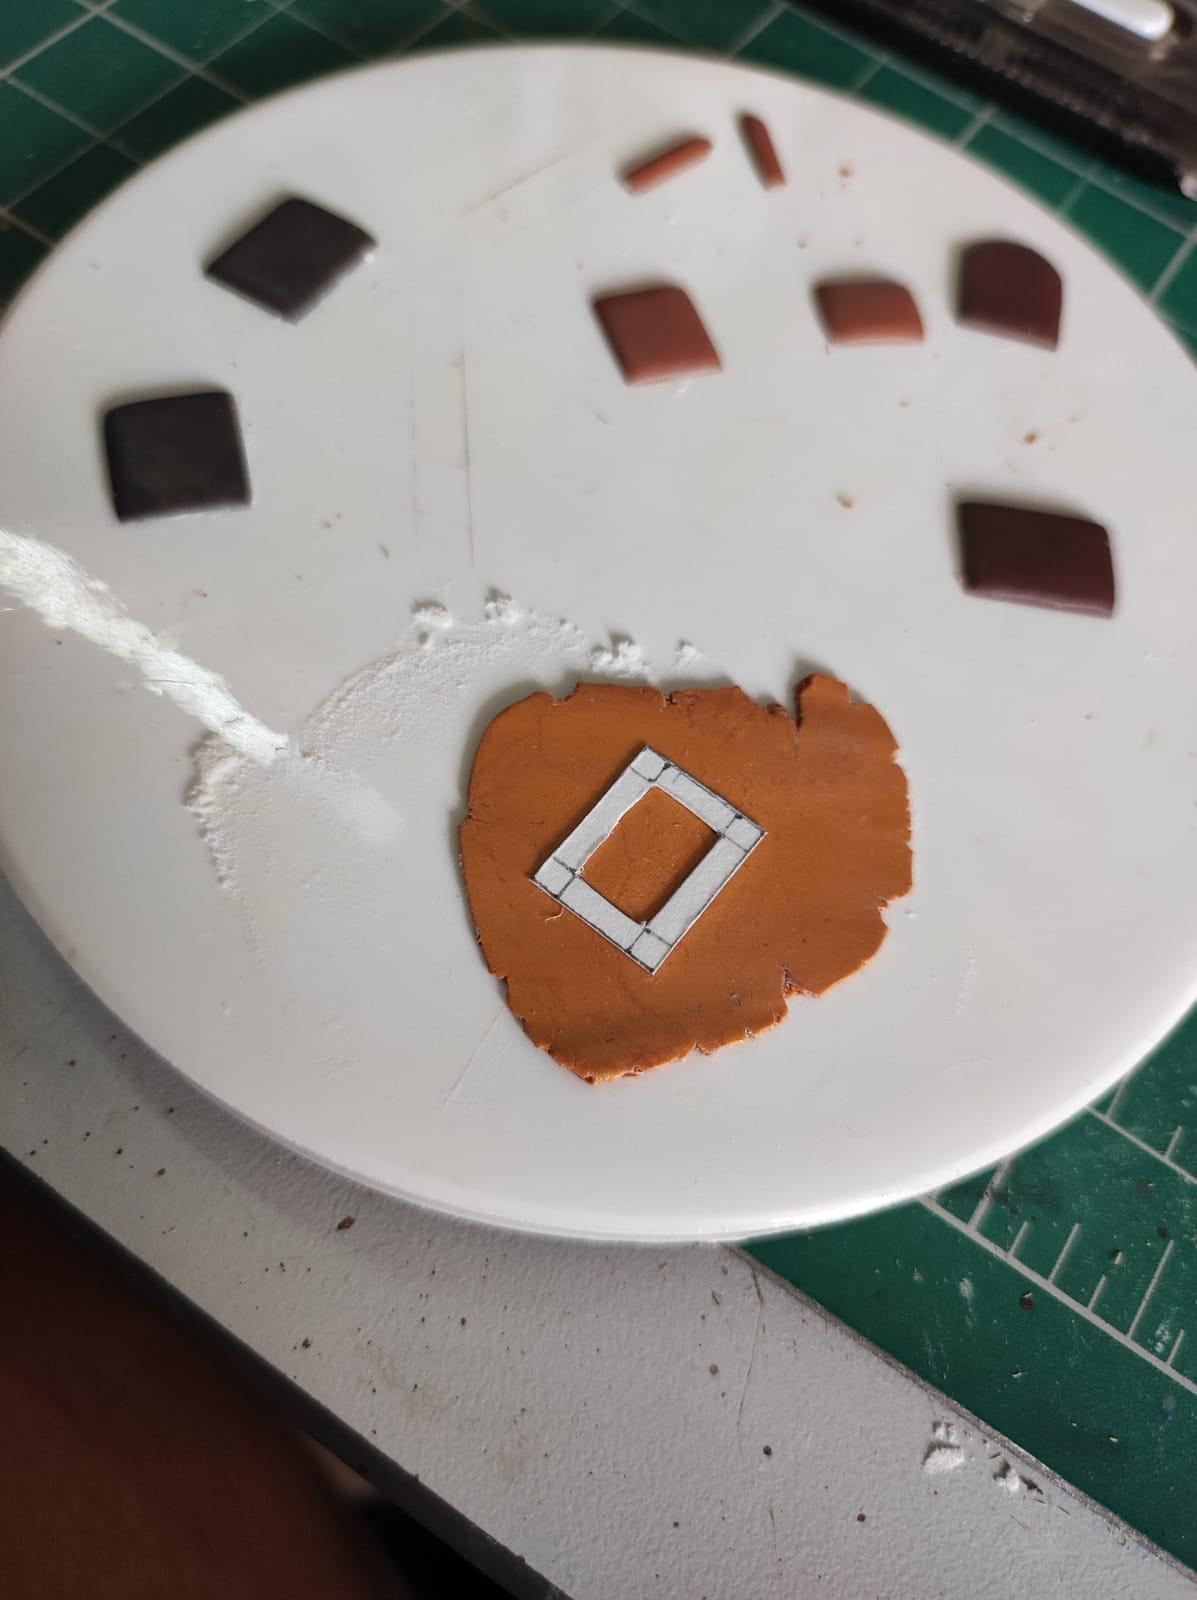
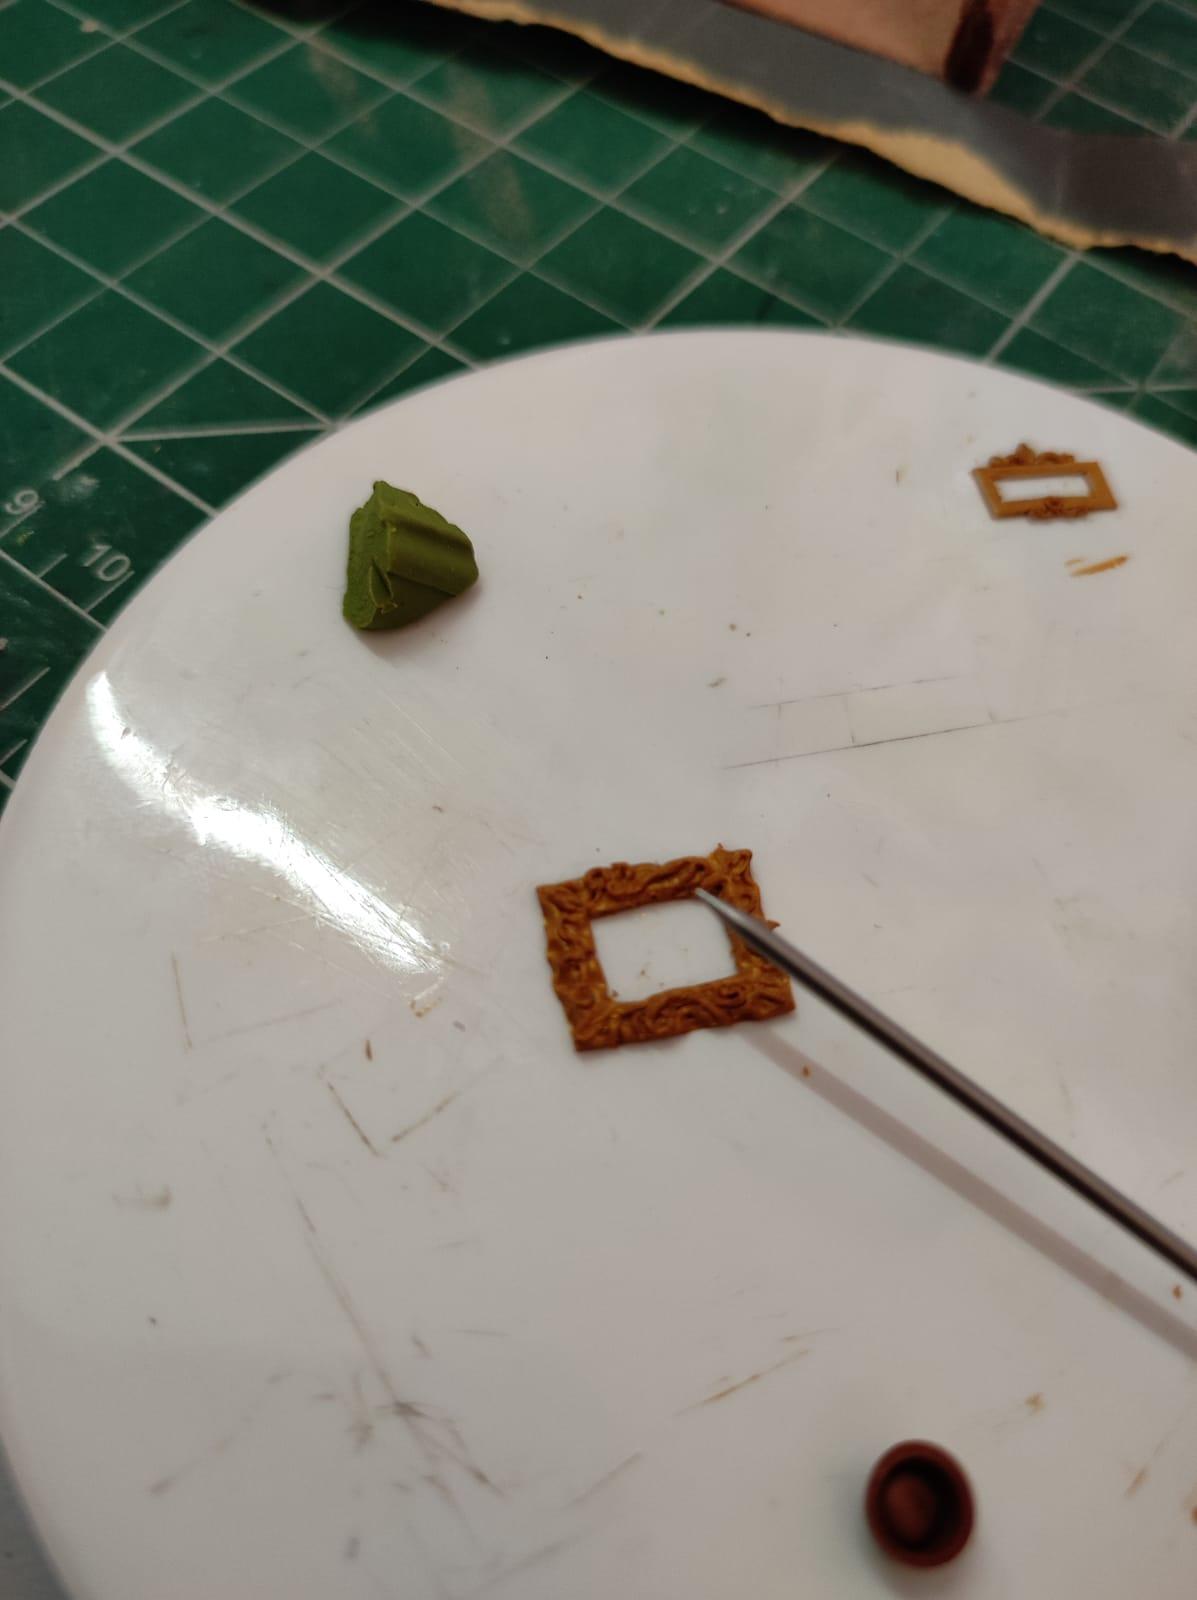
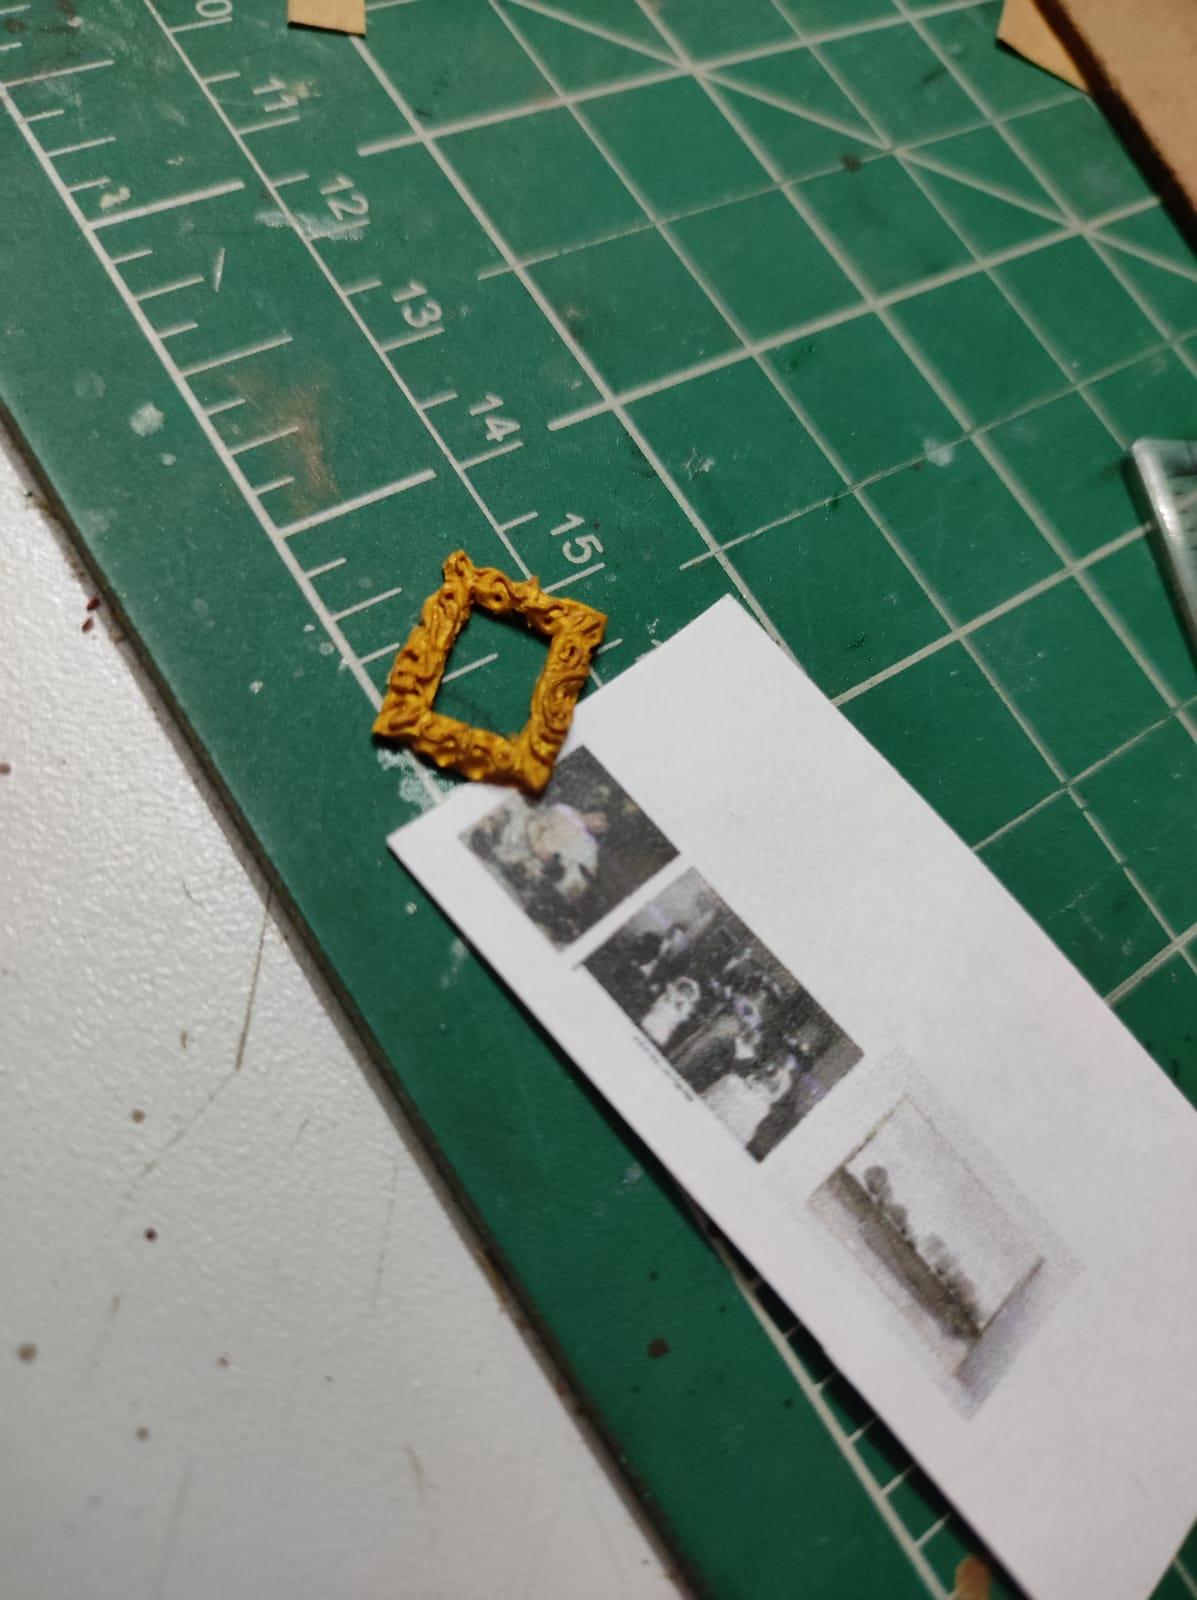
- The frames on the walls:
- There were two golden frames on the wall facing us, one above the mantle piece and one above the bookshelf.
- I made these with polymer clay. I cut out the frame from a thin sheet of golden clay using a precut reference from paper. Then I sculpted the details into the frame with thin snakes of clay I placed with the help of the needle tool. Once baked, I glued a painting I had printed out (Caravaggio's Bacchus) into the frame and attached it to the wall. The other one I did the same way as well.
- Details on the mantle: All made from polymer clay
- A potted plant
- A few framed photos
- A mantle clock
- A sculptural piece
- A candelabra
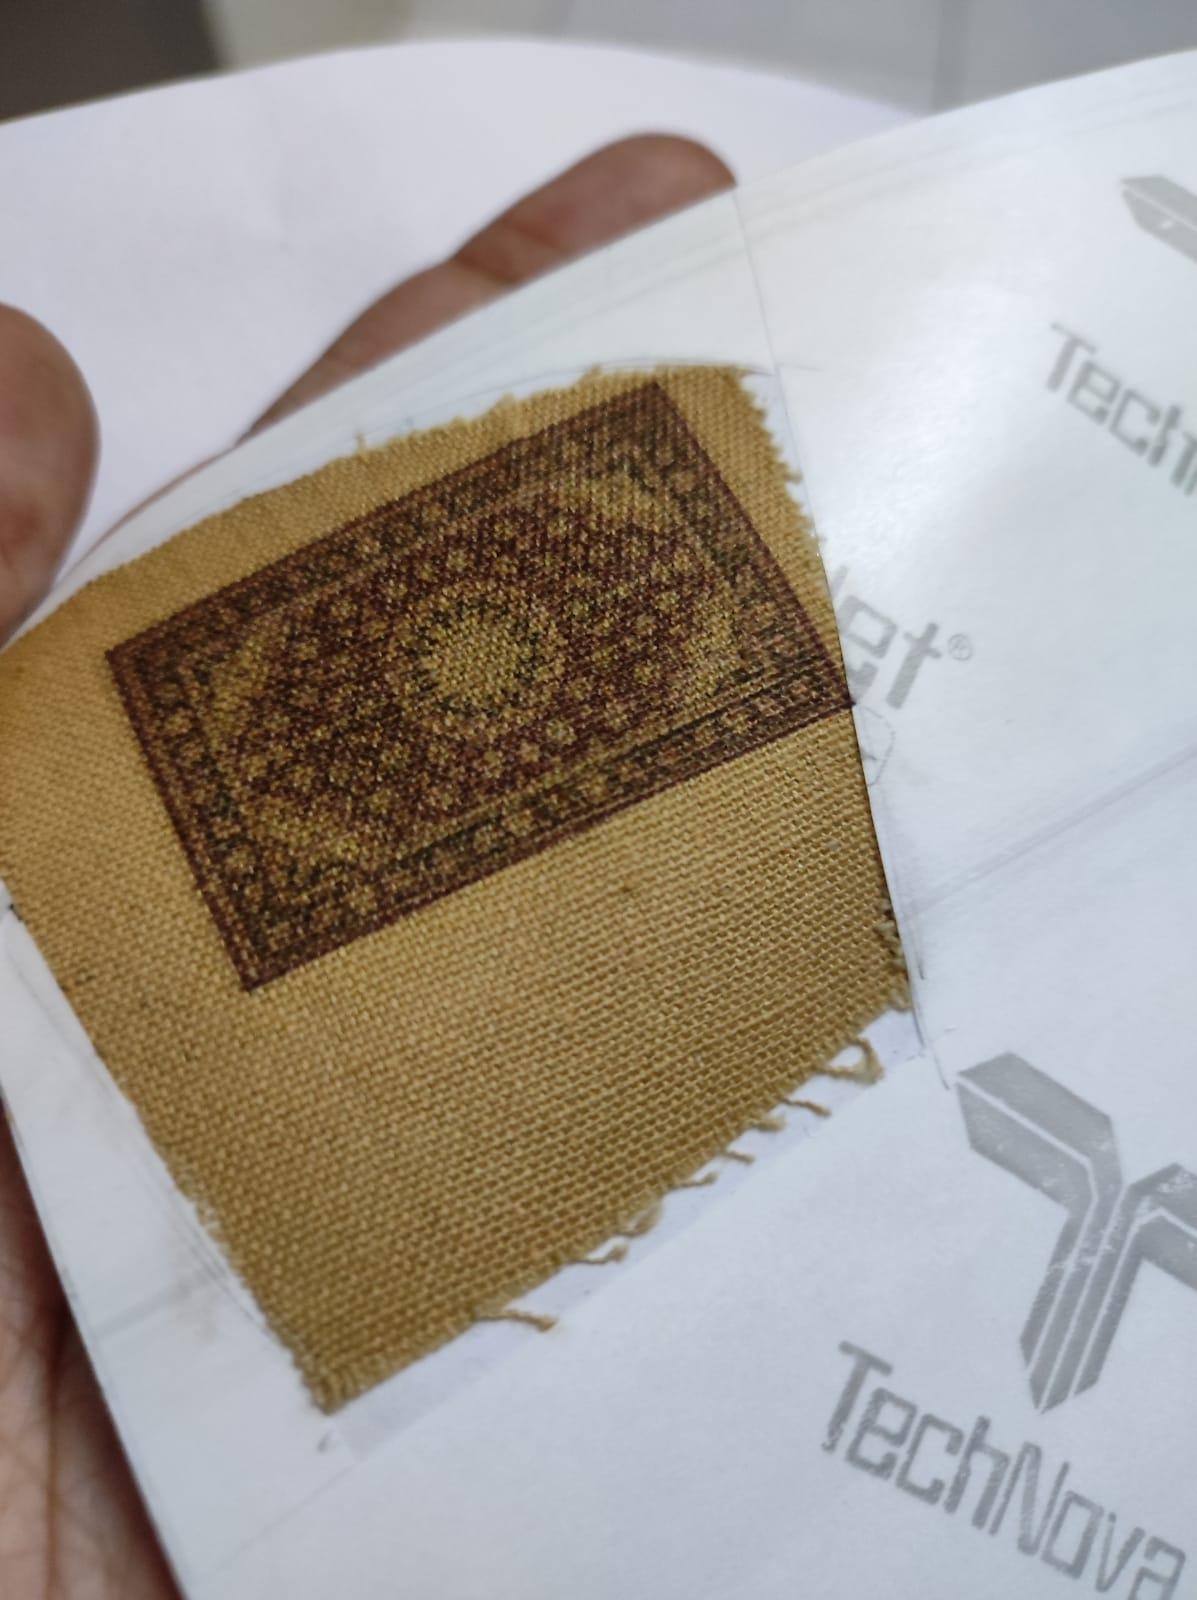
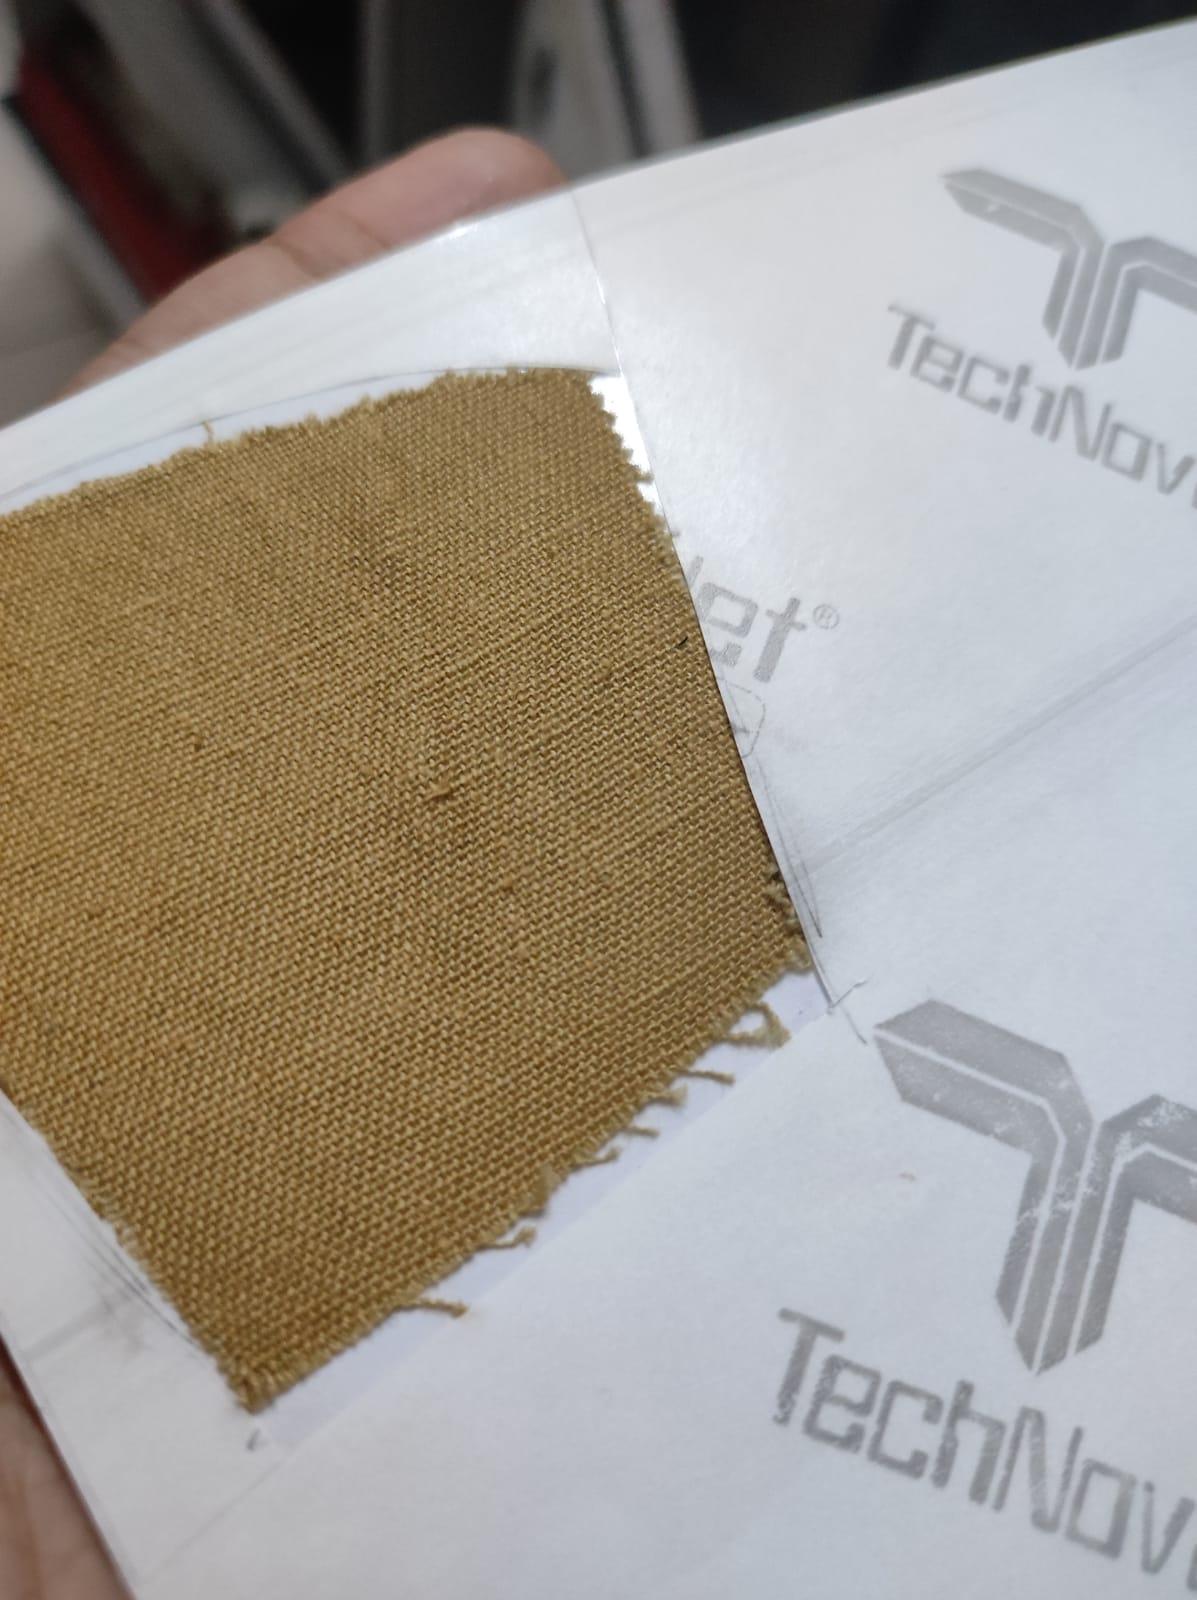
- The Carpet:
- A few scenes featured a carpet and I really wanted to add this detail.
- For this I cut out a piece of cotton cloth (any tightly woven fabric of light colour will do) and attached it firmly to a piece of sticker paper. This paper I ran through the printer and printed out a stock image of a carpet. I cut this out and added it to the scene.
- Details on the table: All made from polymer clay
- A potted plant
- A telephone
- Few books
- Few scrap papers (not clay).
There are so many tiny details I still plan to add like books in the bookshelves, a small wine cabinet and whiskey glasses and so on. If you guys would like, I could make a dedicated instructable sharing how I make these props individually. Let me know!
What Next
.jpeg)
.jpeg)
The next step I wish to take for this project is to add some electrical magic to it. The light and shadow of the Godfather cinematography is very iconic and I wish to mimic that in this diorama as well. I will be dedicating an entire instructable to that aspect where I intent to cover the stand lamp, the blinds and the wall mount lights as well. Stay tuned!
Until then, I think this diorama in itself is delightful and I love having it on my table top. Like a small connection into the dark fascinating world of the Cosa Nostra.
Looking forward to seeing you guys try this out! If you have any doubts and need clarifications, feel free to reach out in the comments here or DM me on Instagram.
Until Part II, Ciao!!