The Amazing Maze
.jpeg)
Hi, I'm Santiago Gómez Correa. I'm 15 years old. I study at the virtual unicab institution. I have been working on this project for over a month. I hope you enjoy.
Can you imagine creating a 3D maze that is like a puzzle but that you can play with your hands, but only by moving a few wheels? Well here is your solution.
Follow the steps to create it.
Supplies
- 3d printing (If you do not have a 3D printer, you can look for the service in the place where you live and ask them to help you print the parts you need.)
- Your brain
- Fusión 360
- Adobe illustrator or other digital design program (Adobe illustrator has 30 days free)
Desing the Maze
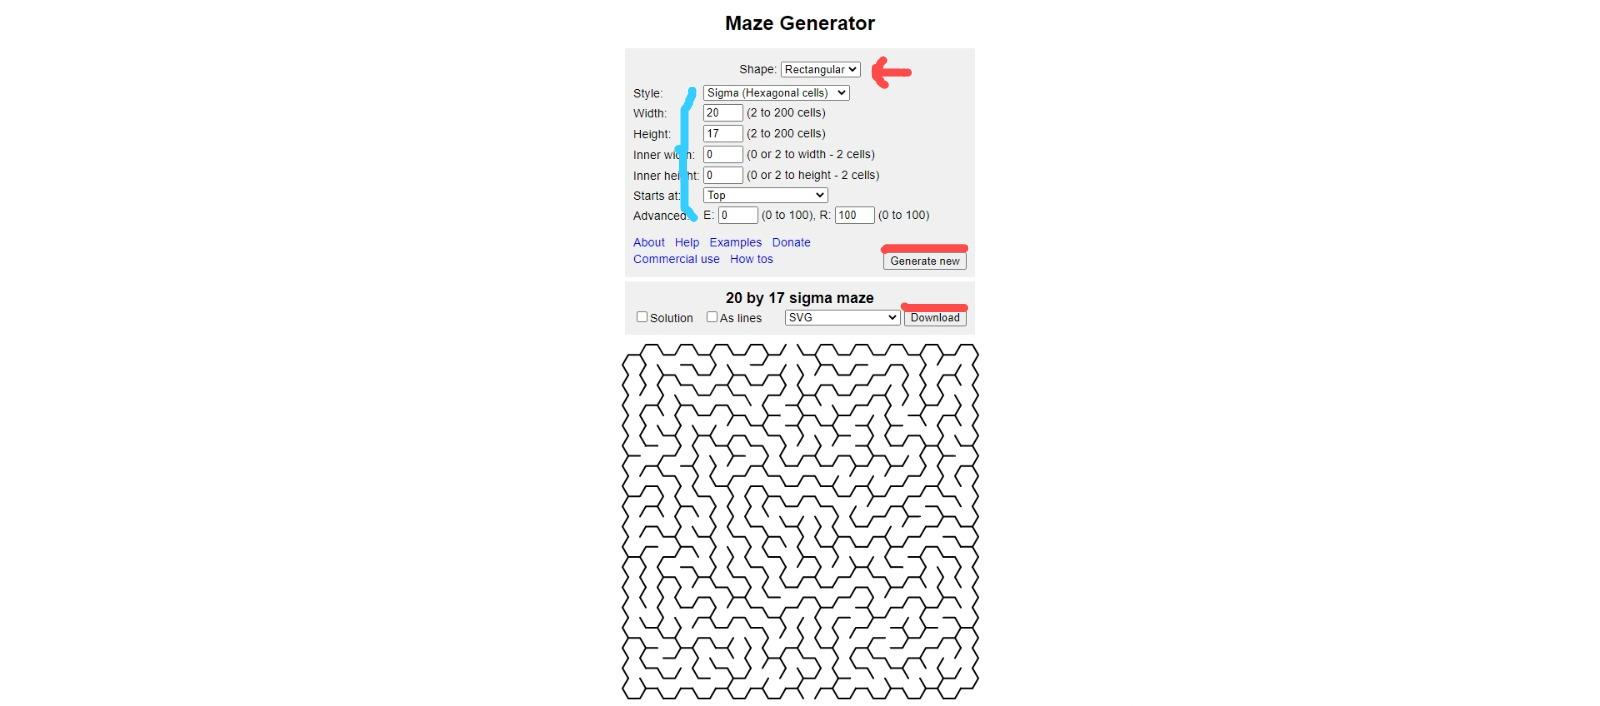
Go to https://mazegenerator.net/
Put the following data.
Shape: Rectangular
Style: Sigma
Width: 20
Height: 17
Inner width: 0
Inner height: 0
Starts at: Top
Advanced: E: 0 , R: 100
Select -SVG to Export and download.
It should look like it does in the picture.
Important: You must have exactly the same height and width data in order to make it work later.
Adobe Illustrator
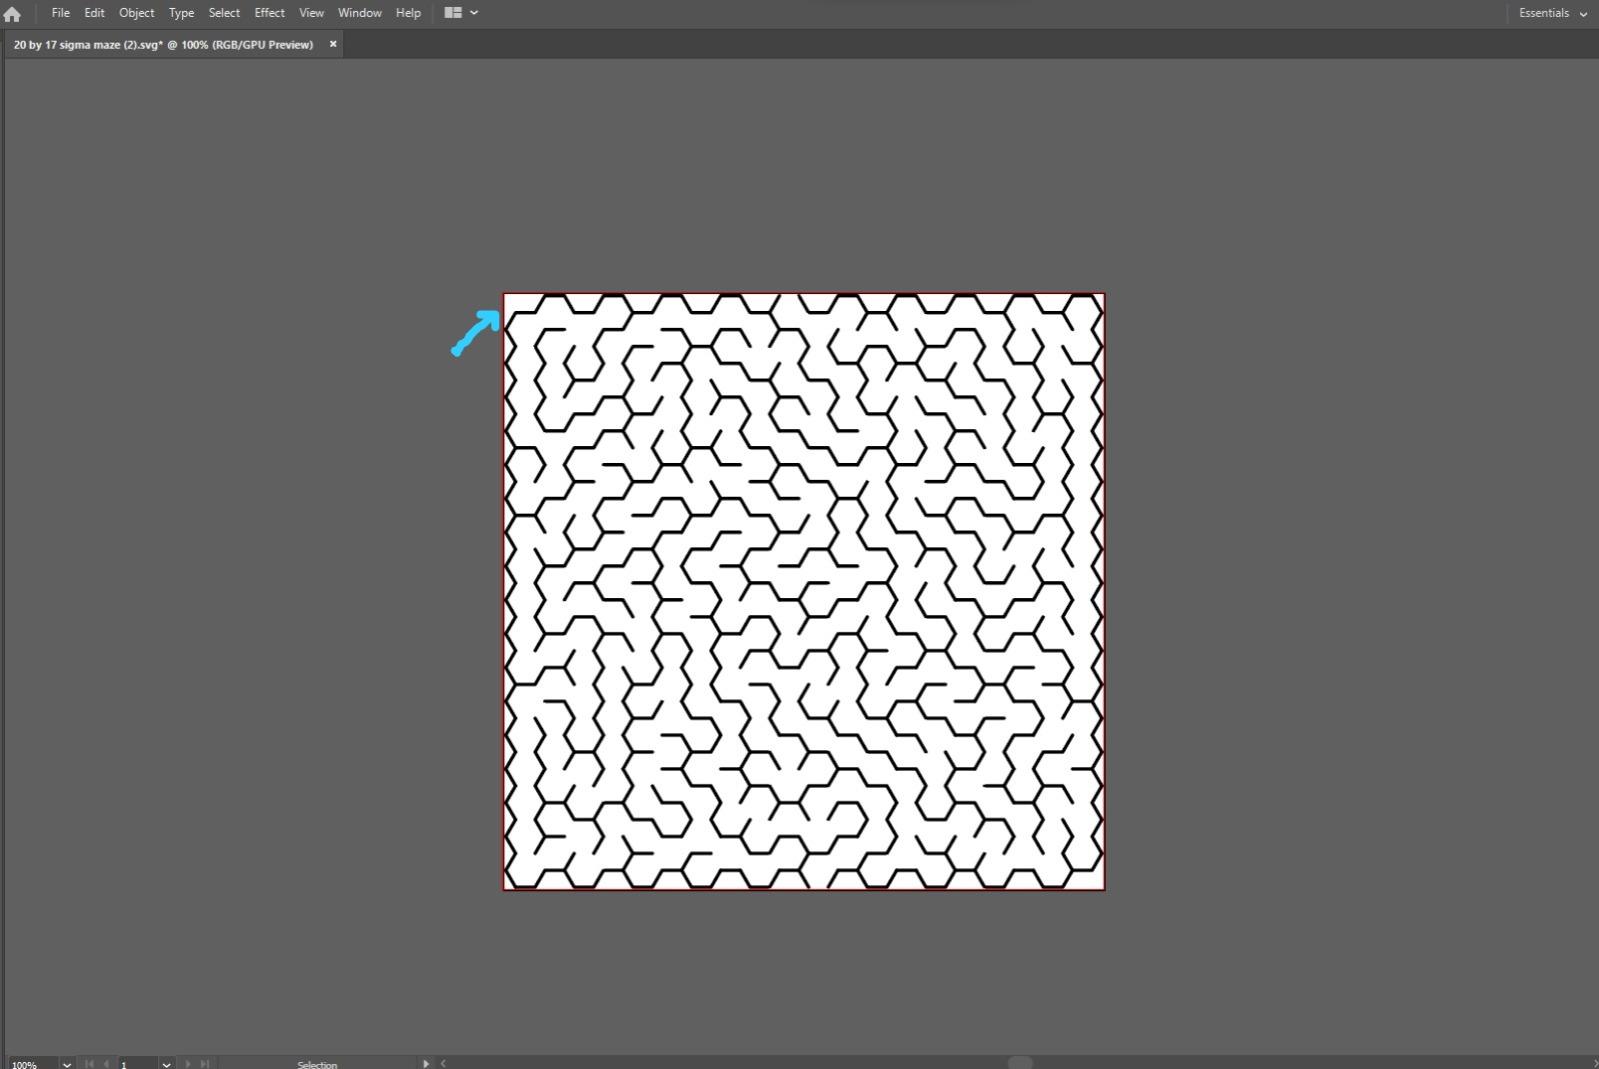

Go to Adobe Illustrator and insert your svg.
First create a rectangle around the maze.
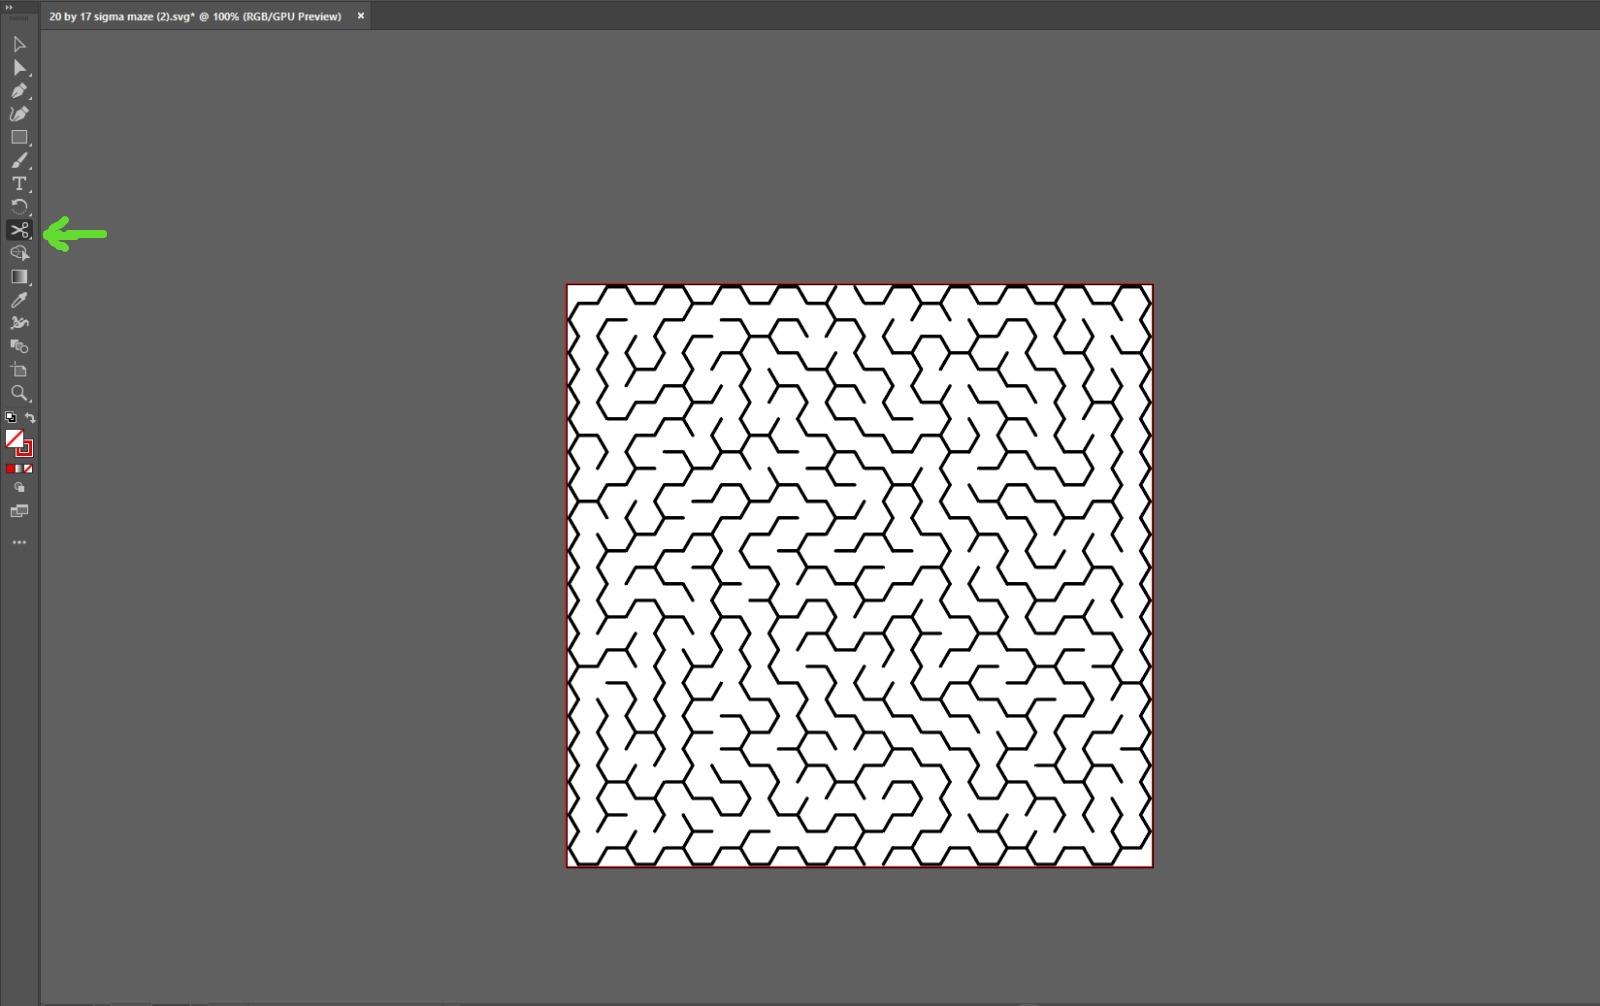
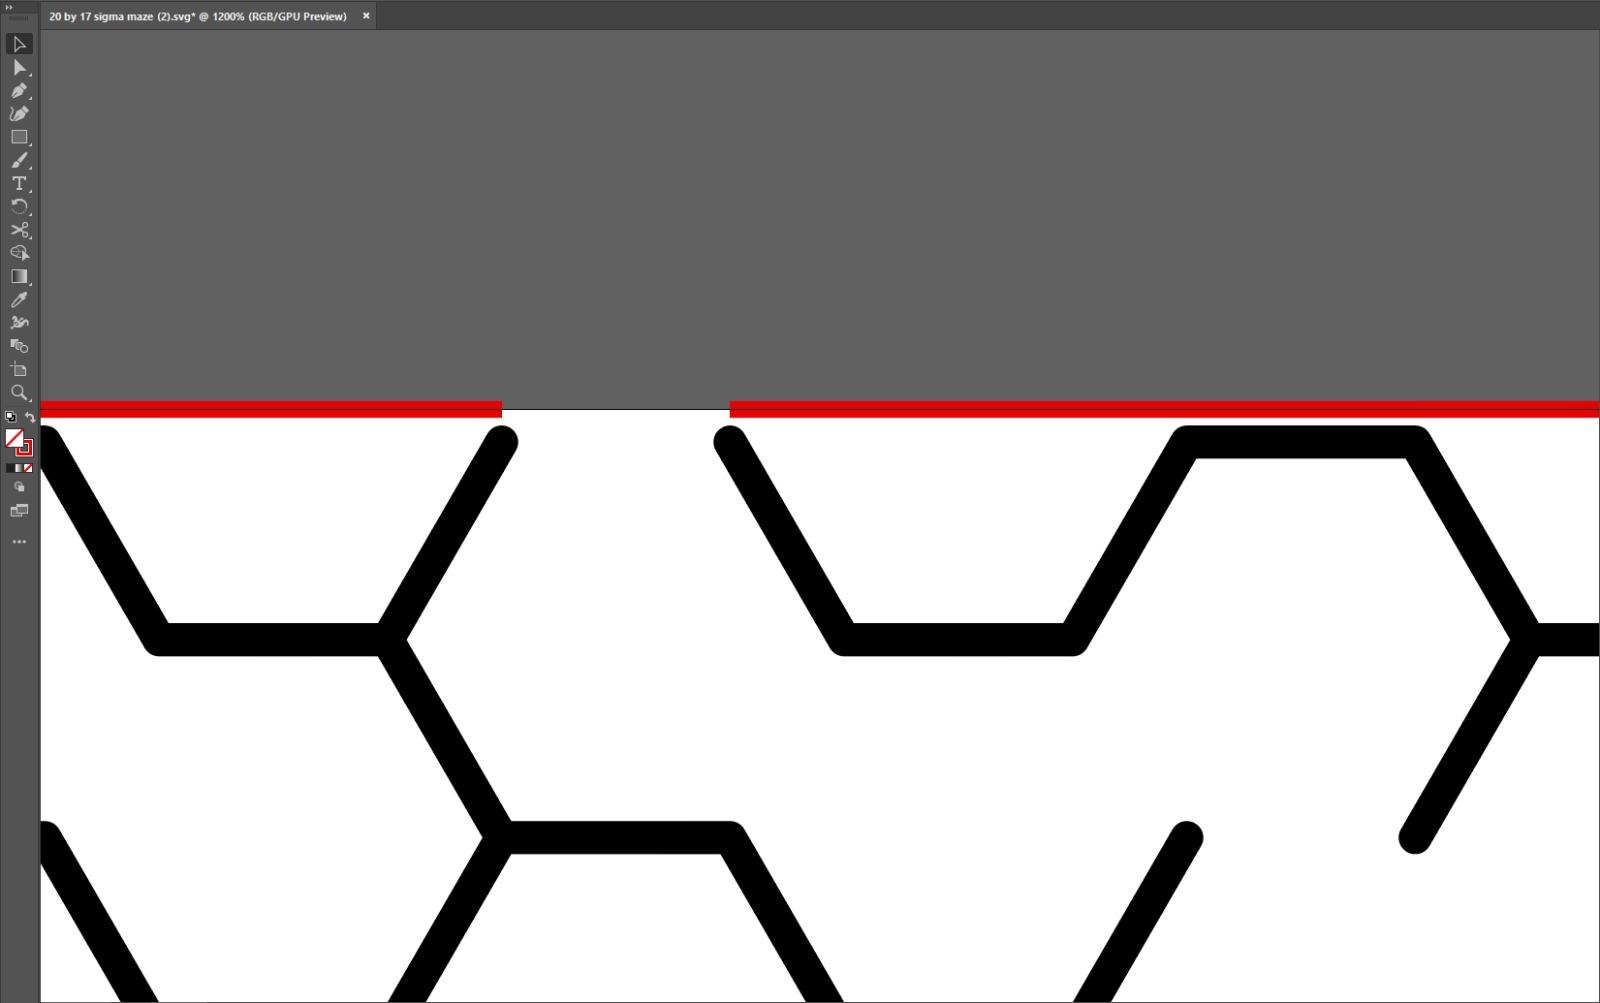
Now go to the toolbar and select the scissors tool
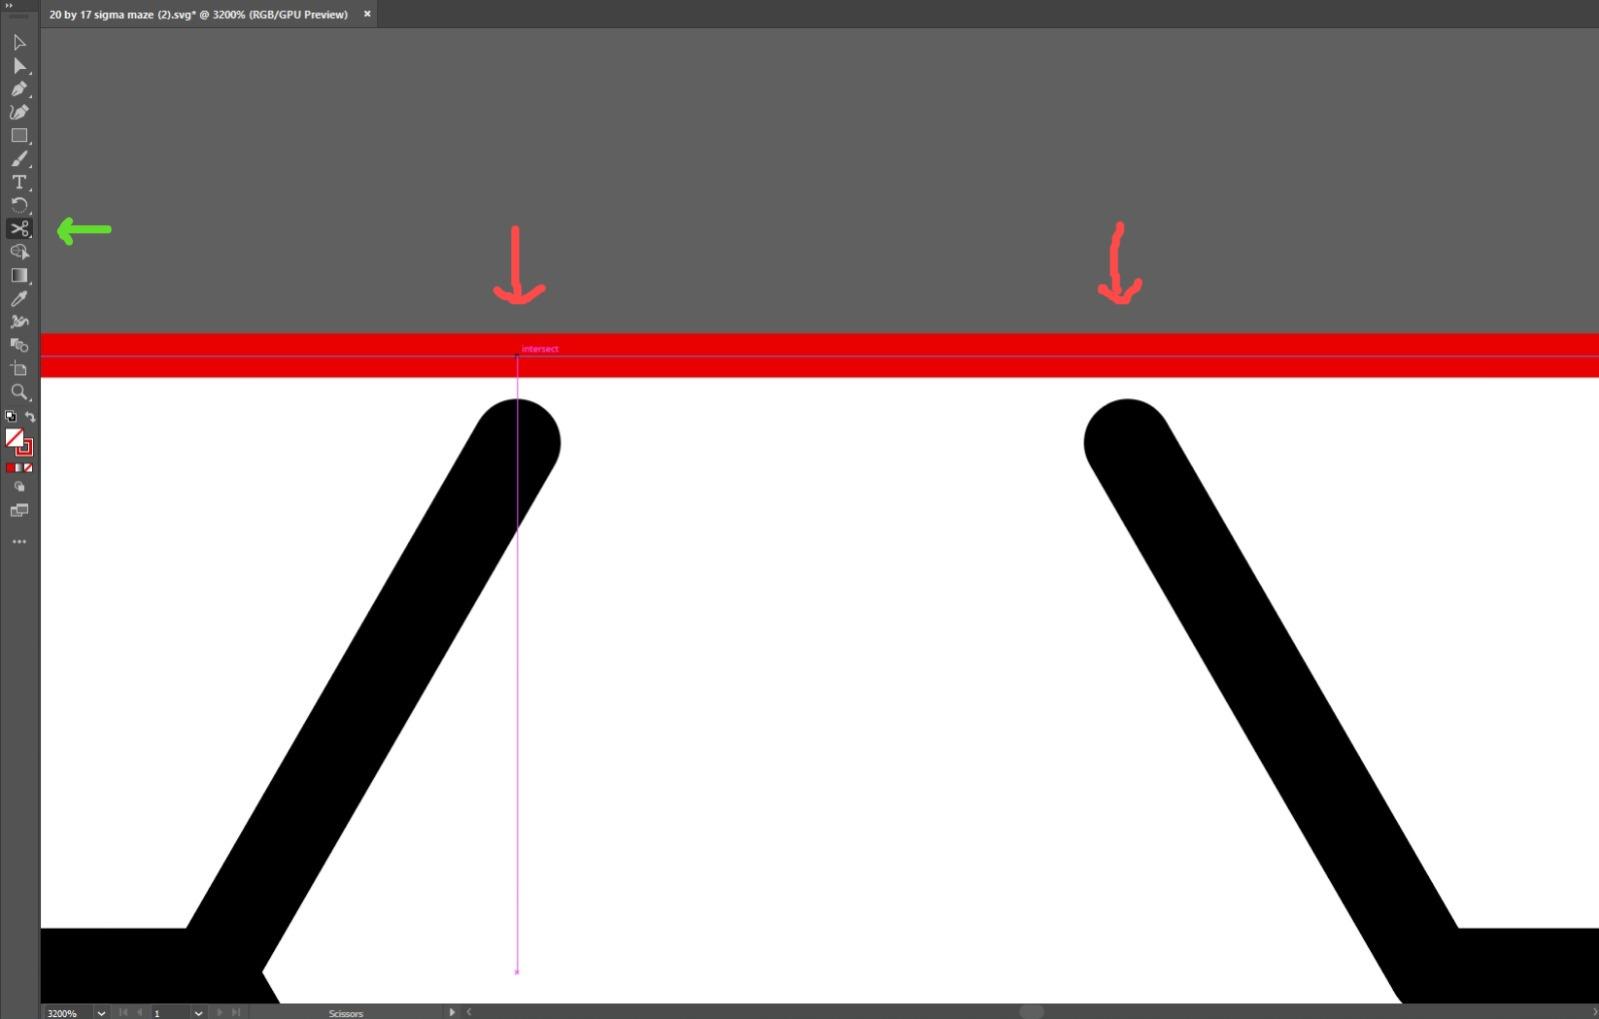
Go to the end and beginning of your maze and cut the entrances in the rectangle. (And delete)
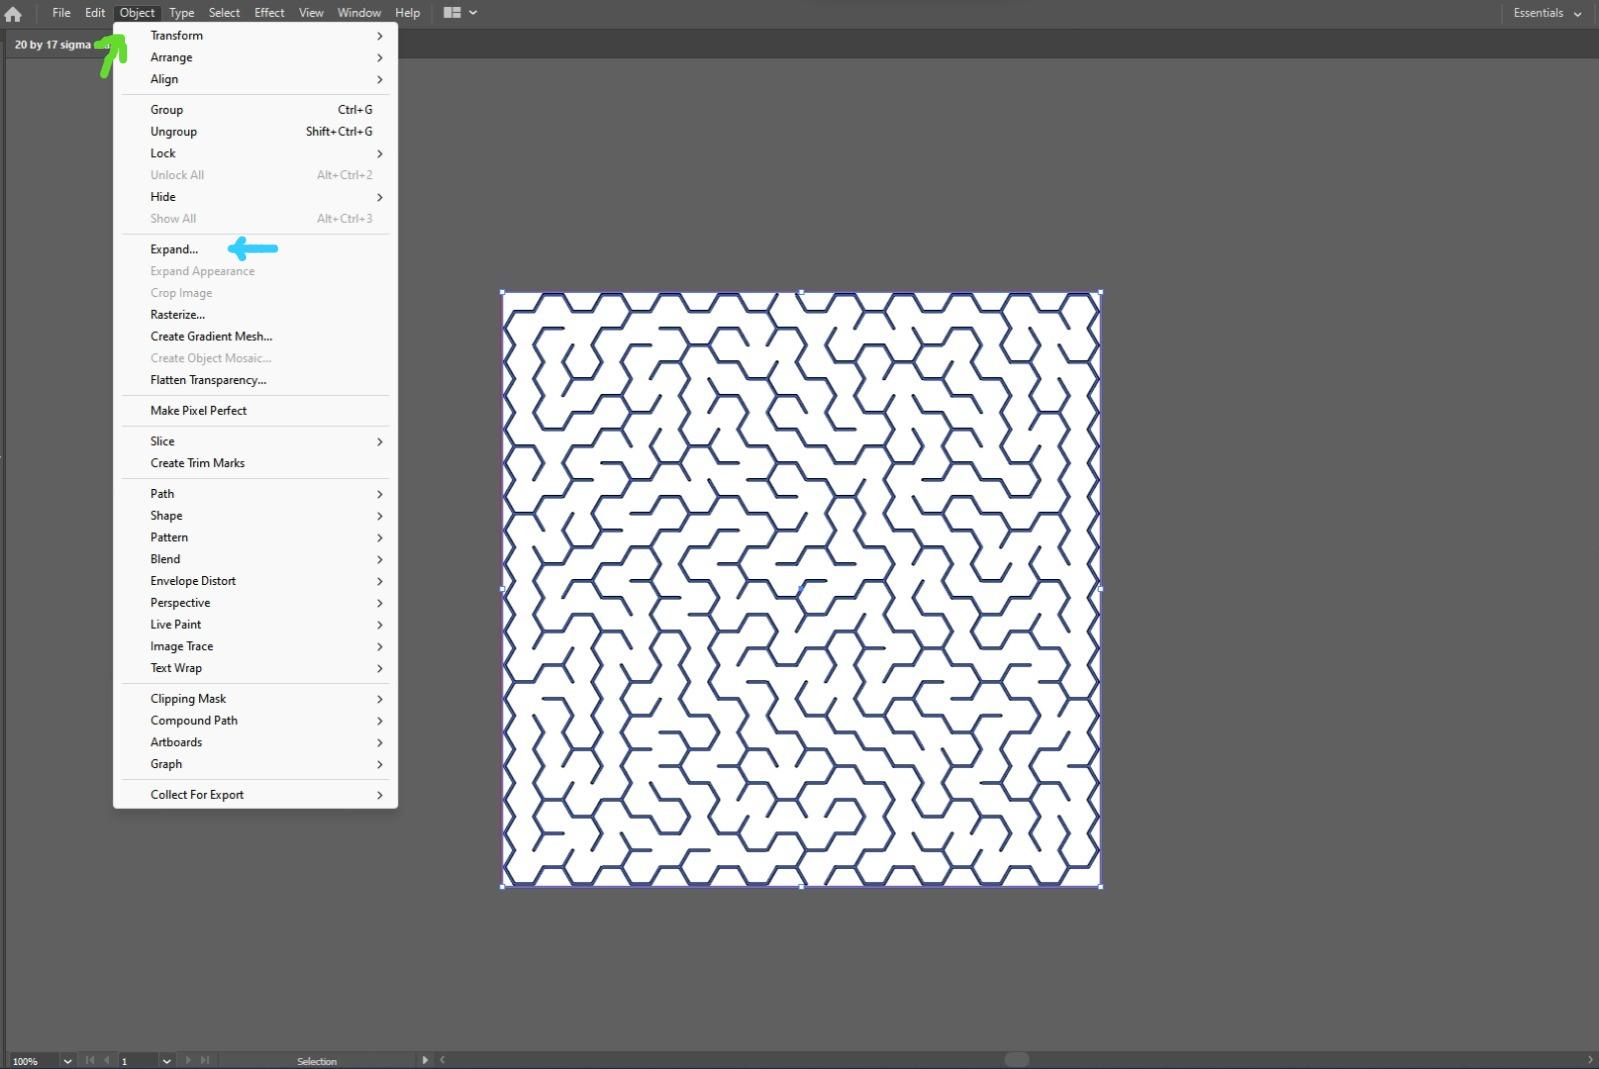
Select all, Go to object and select expand.
Then click "OK"
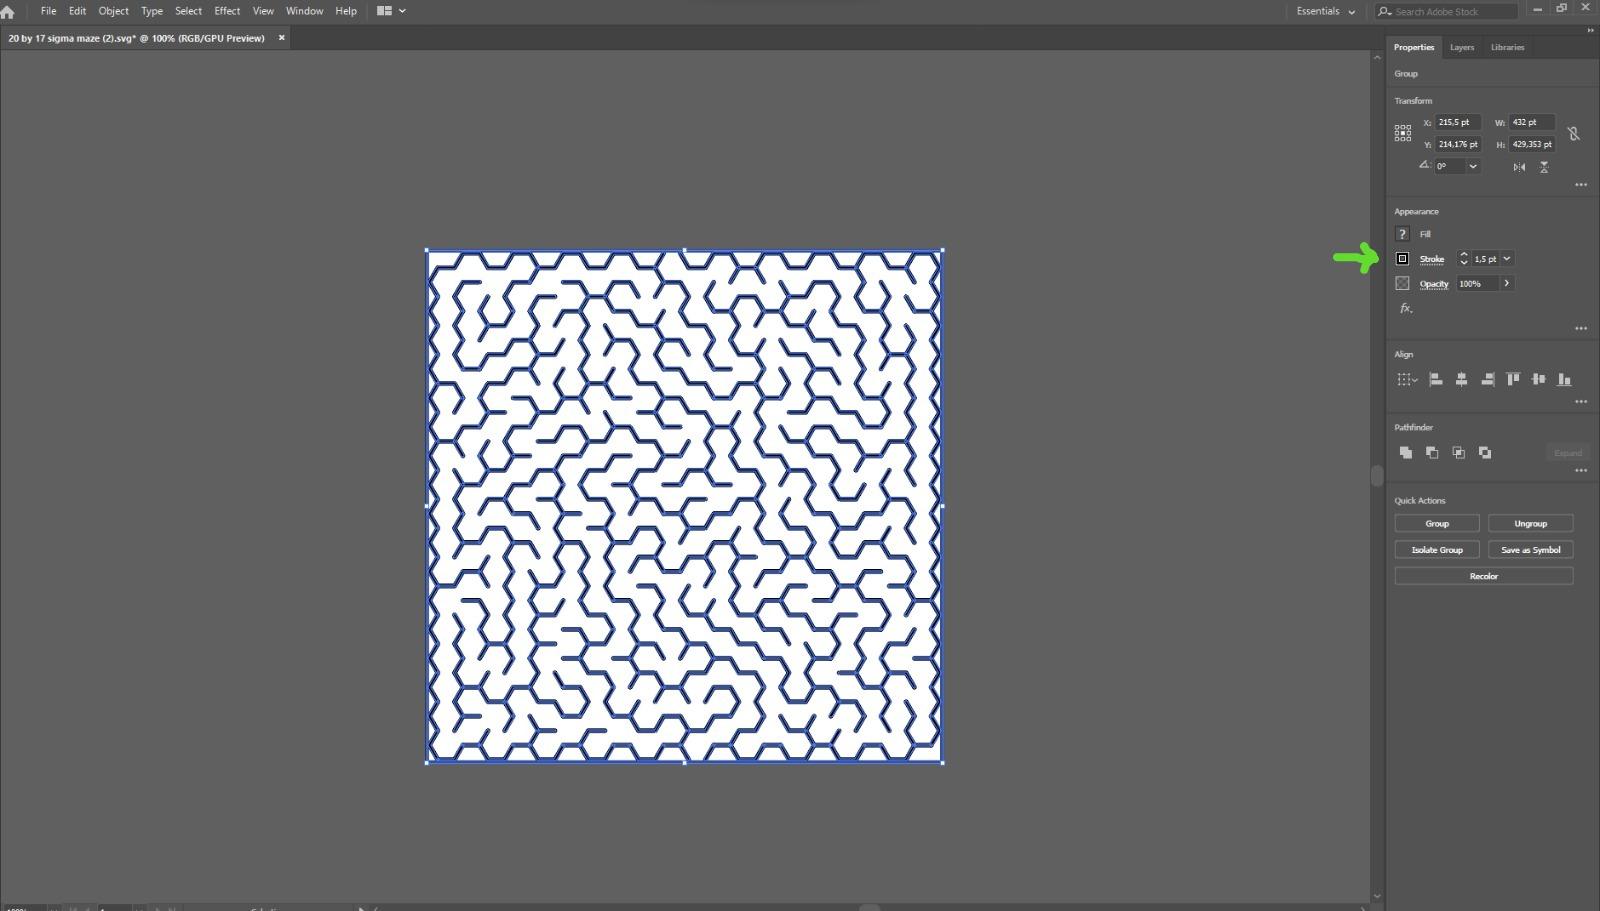
Then go to the stroke and write 1.5.
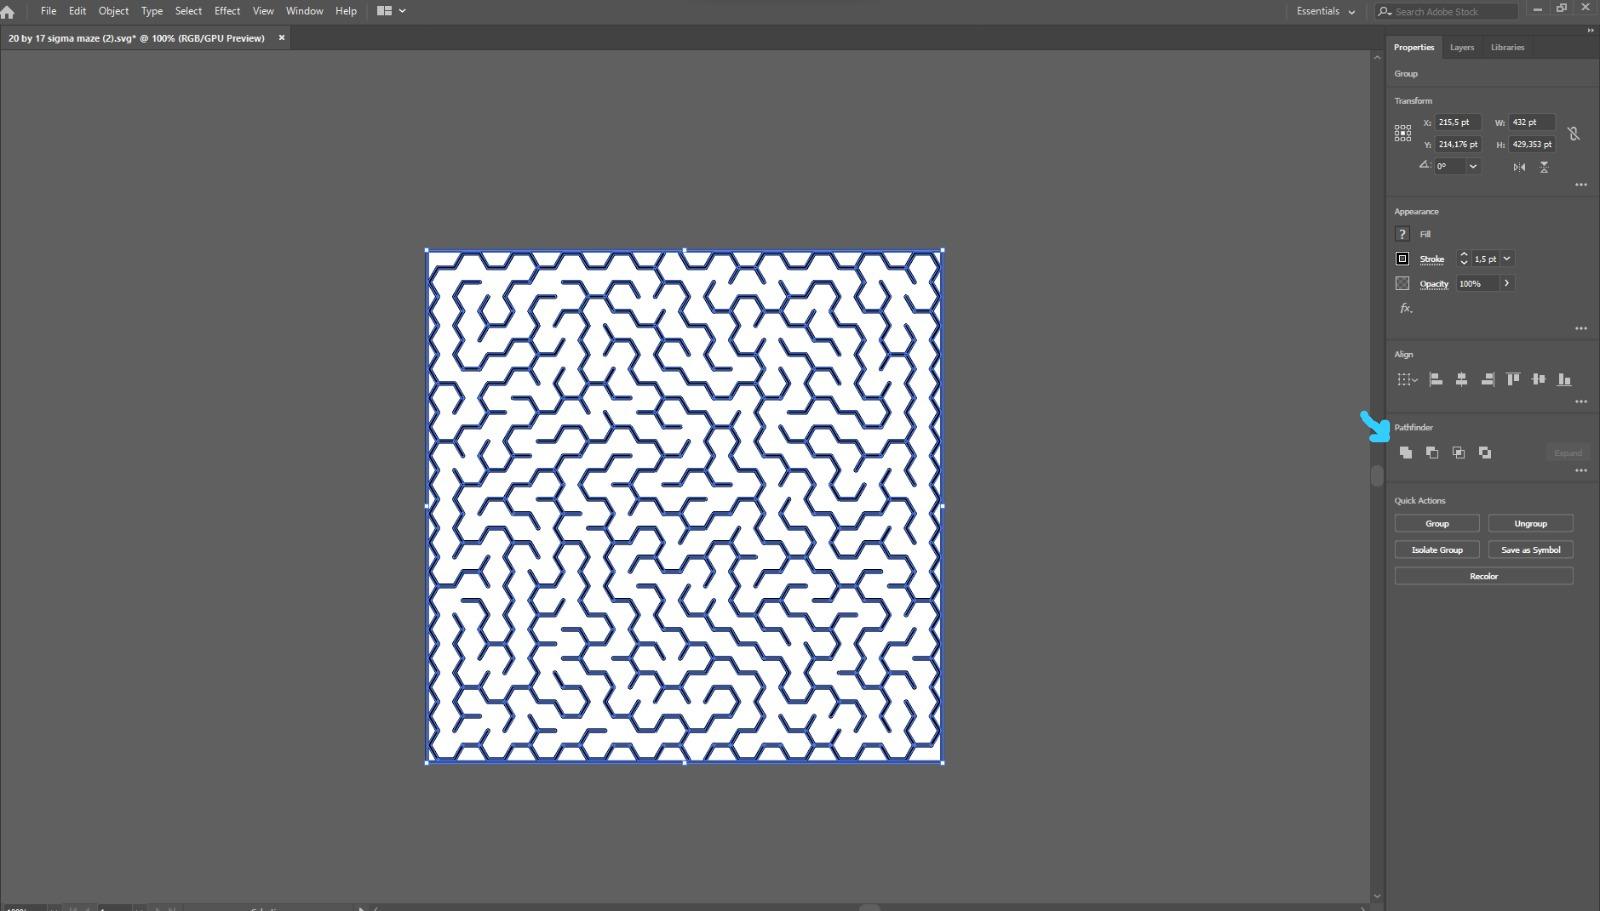
Then go to "pathfinder" and select the first option
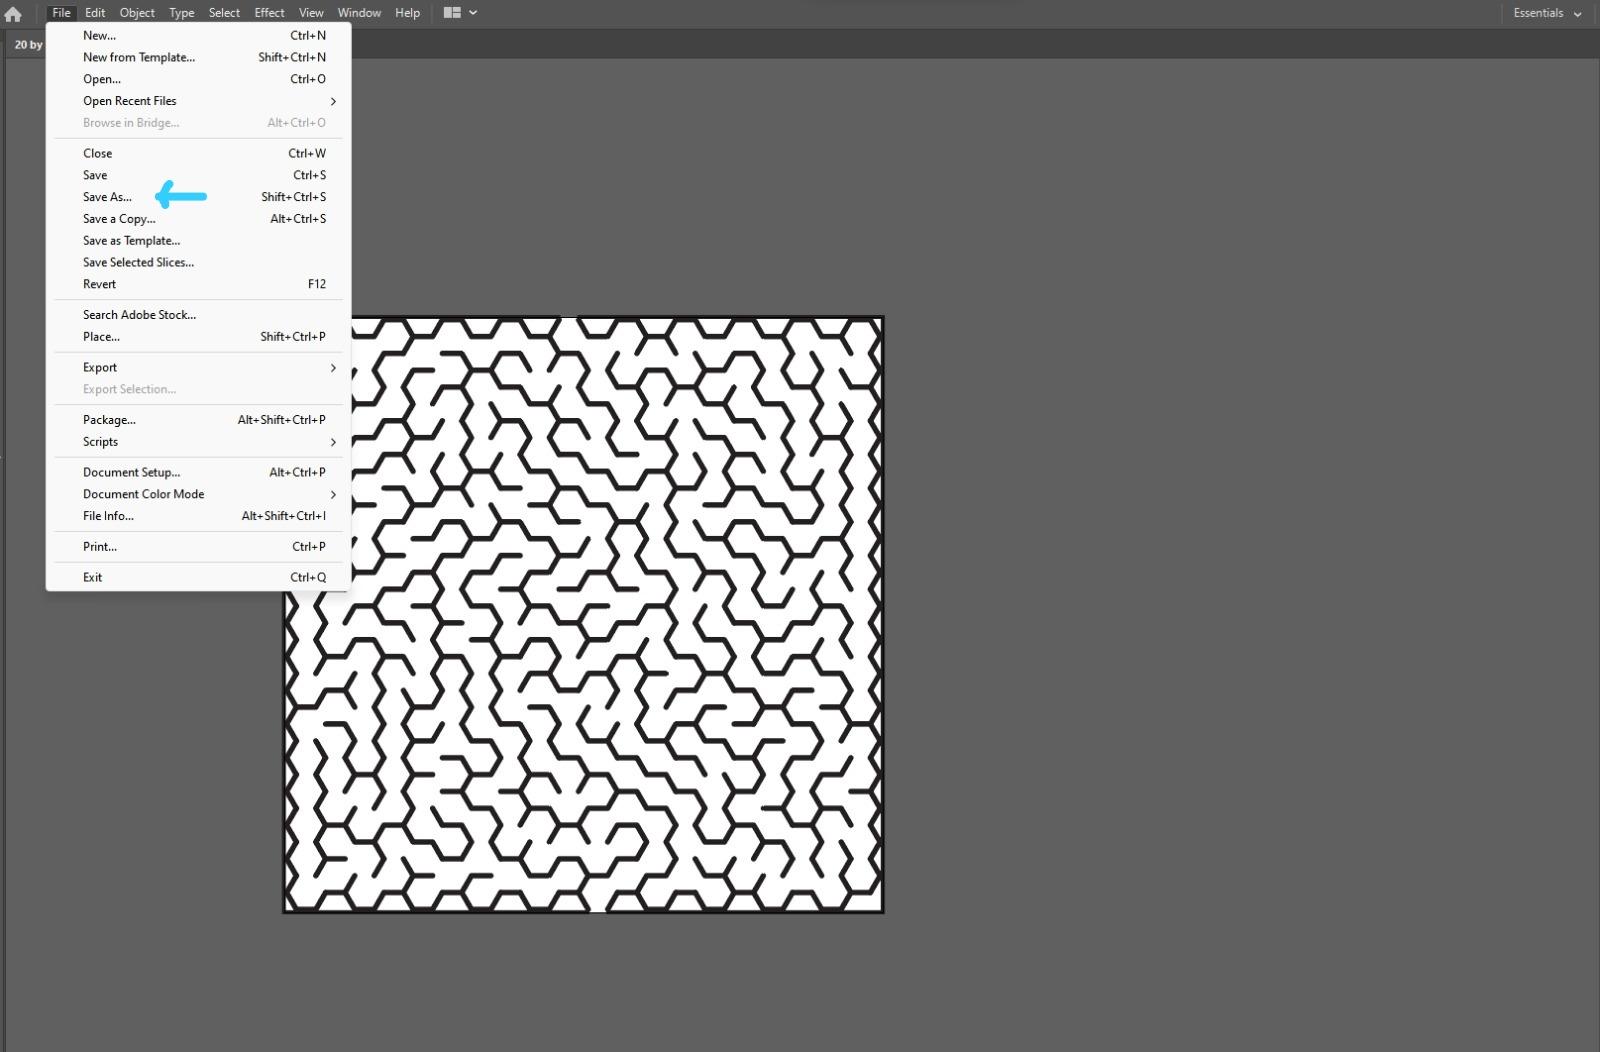
To finish go to "Save as" and save it on your computer with whatever name you want, such as SVG.
Fusión 360
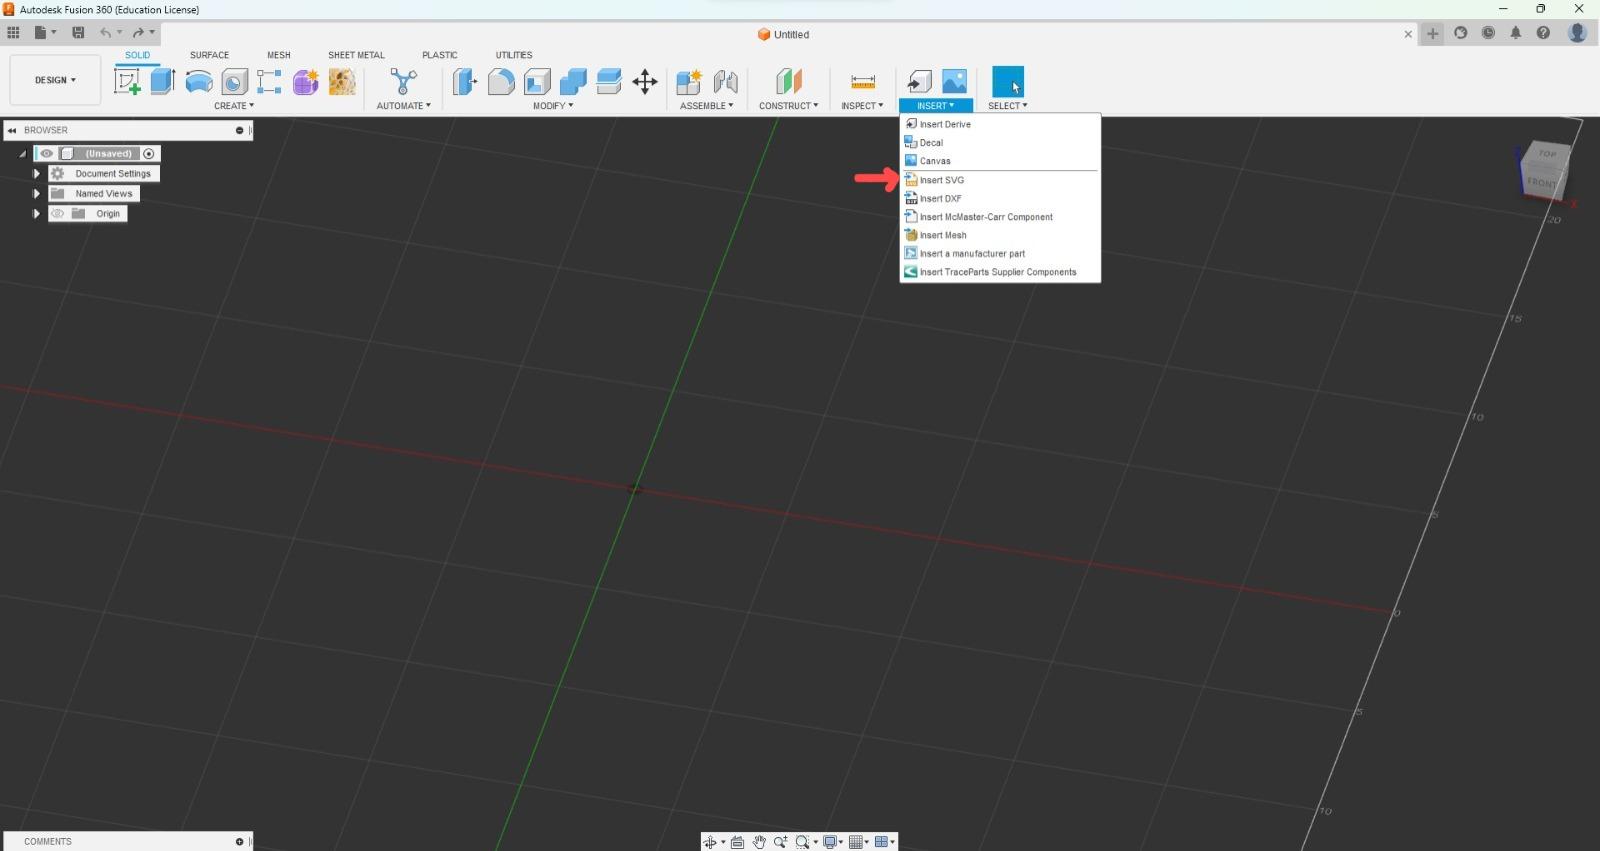
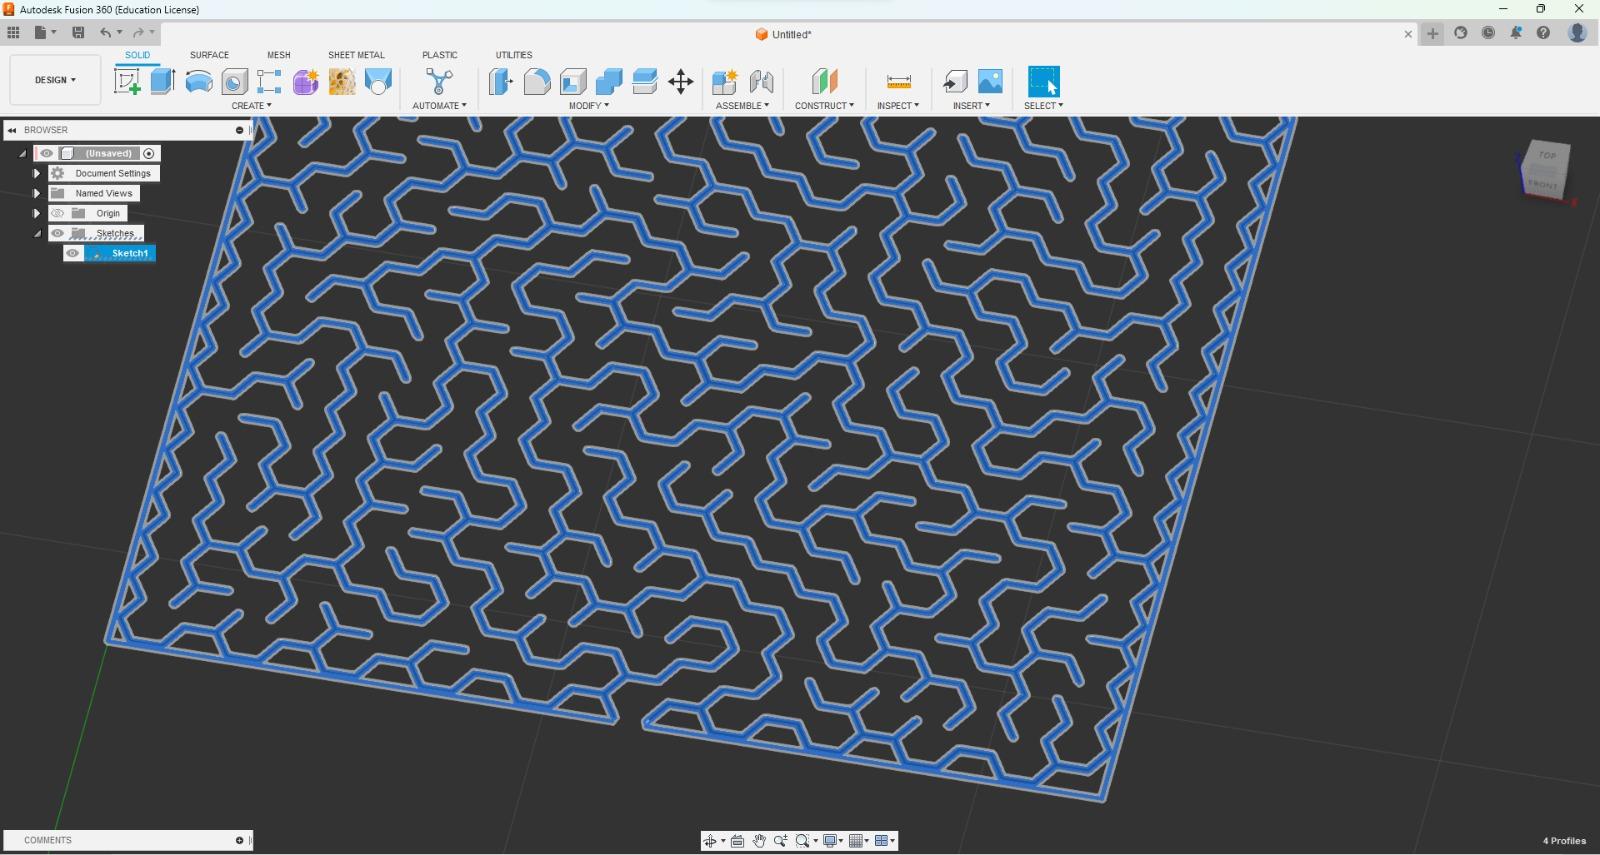
Insert your svg into Fusion 360.
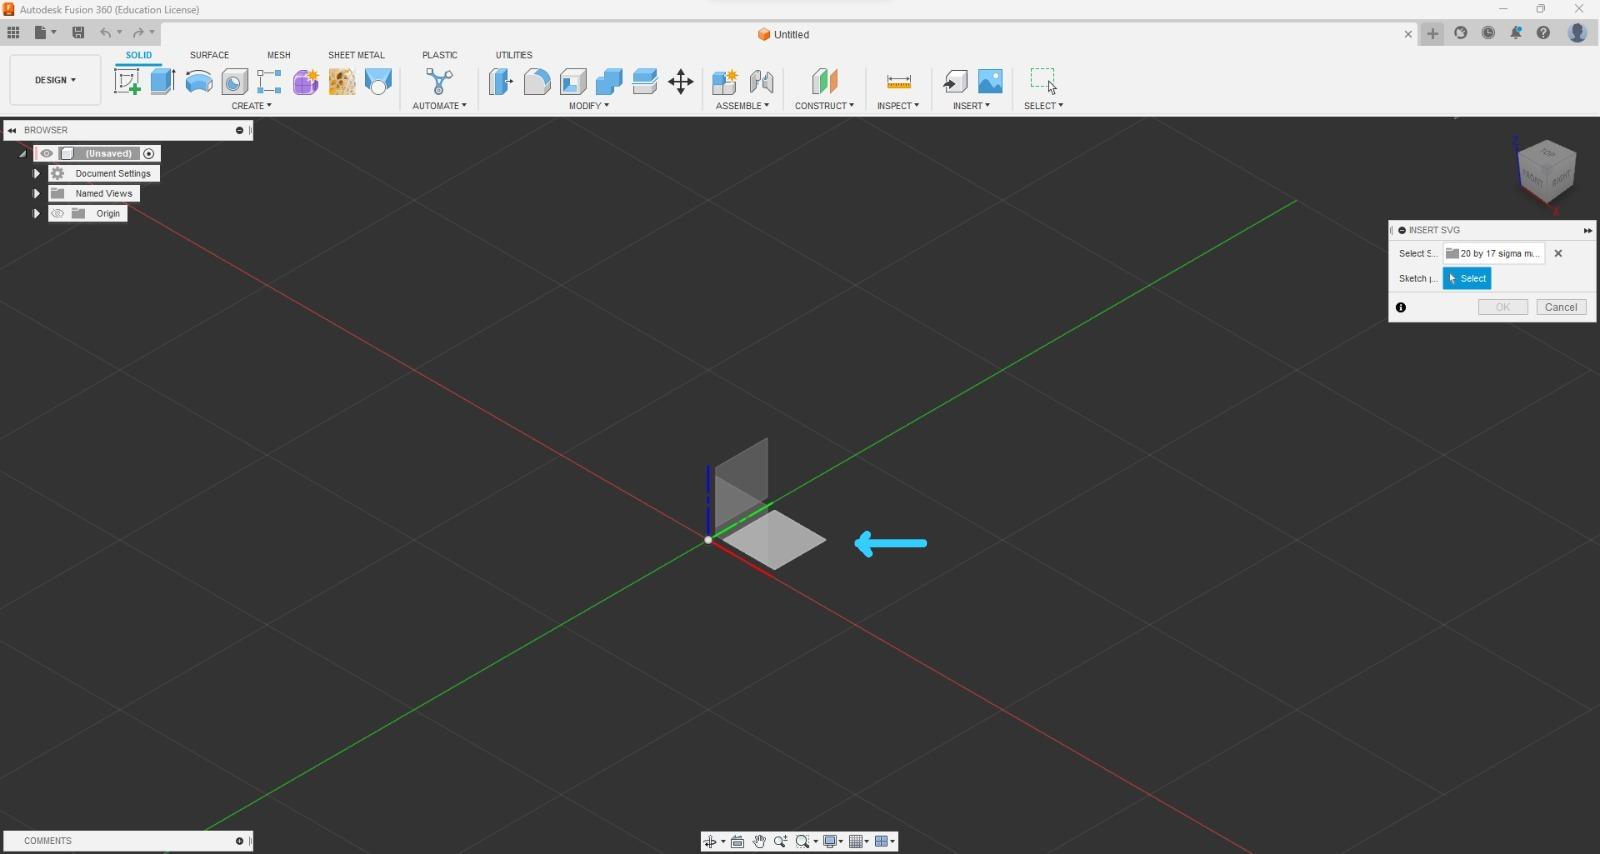
Select the plane at the top, click "OK".
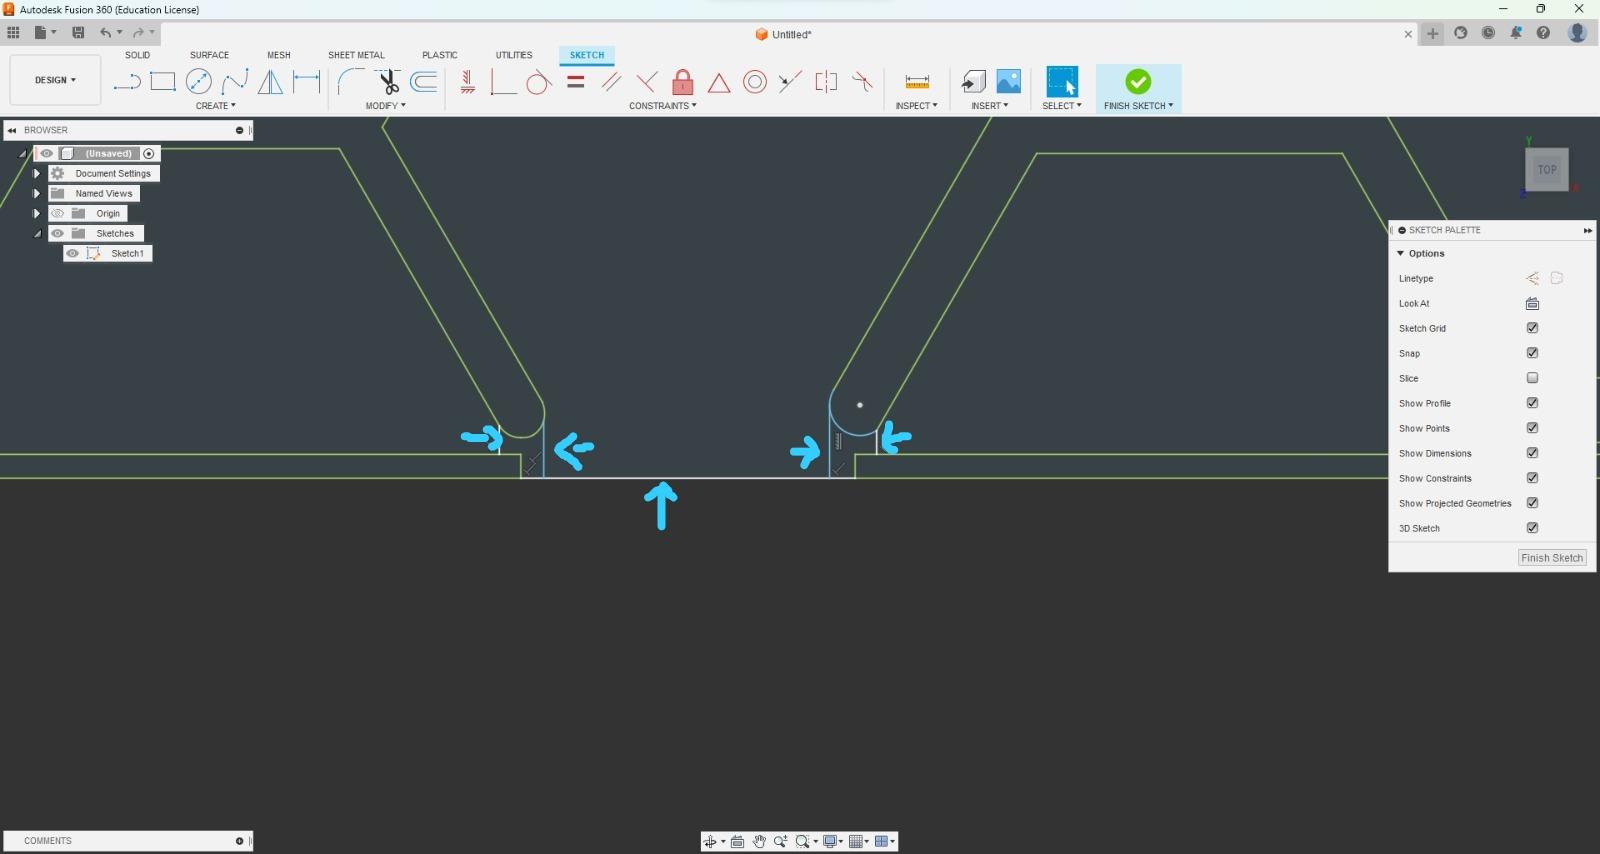
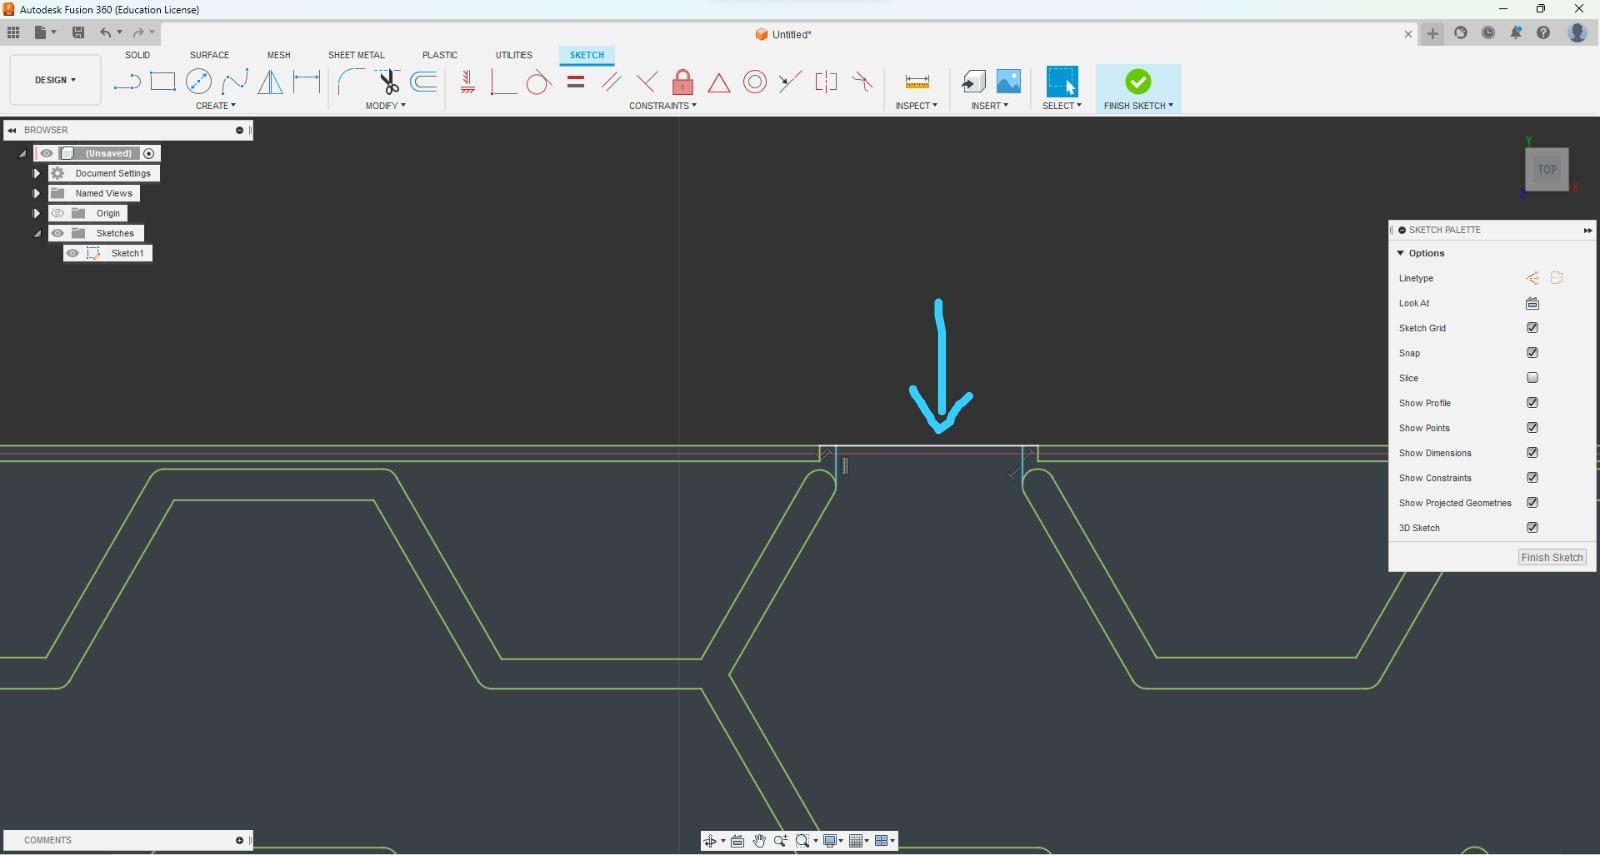
Join the parts that come out of the edge.
Do the same with the other side and finish the sketch.
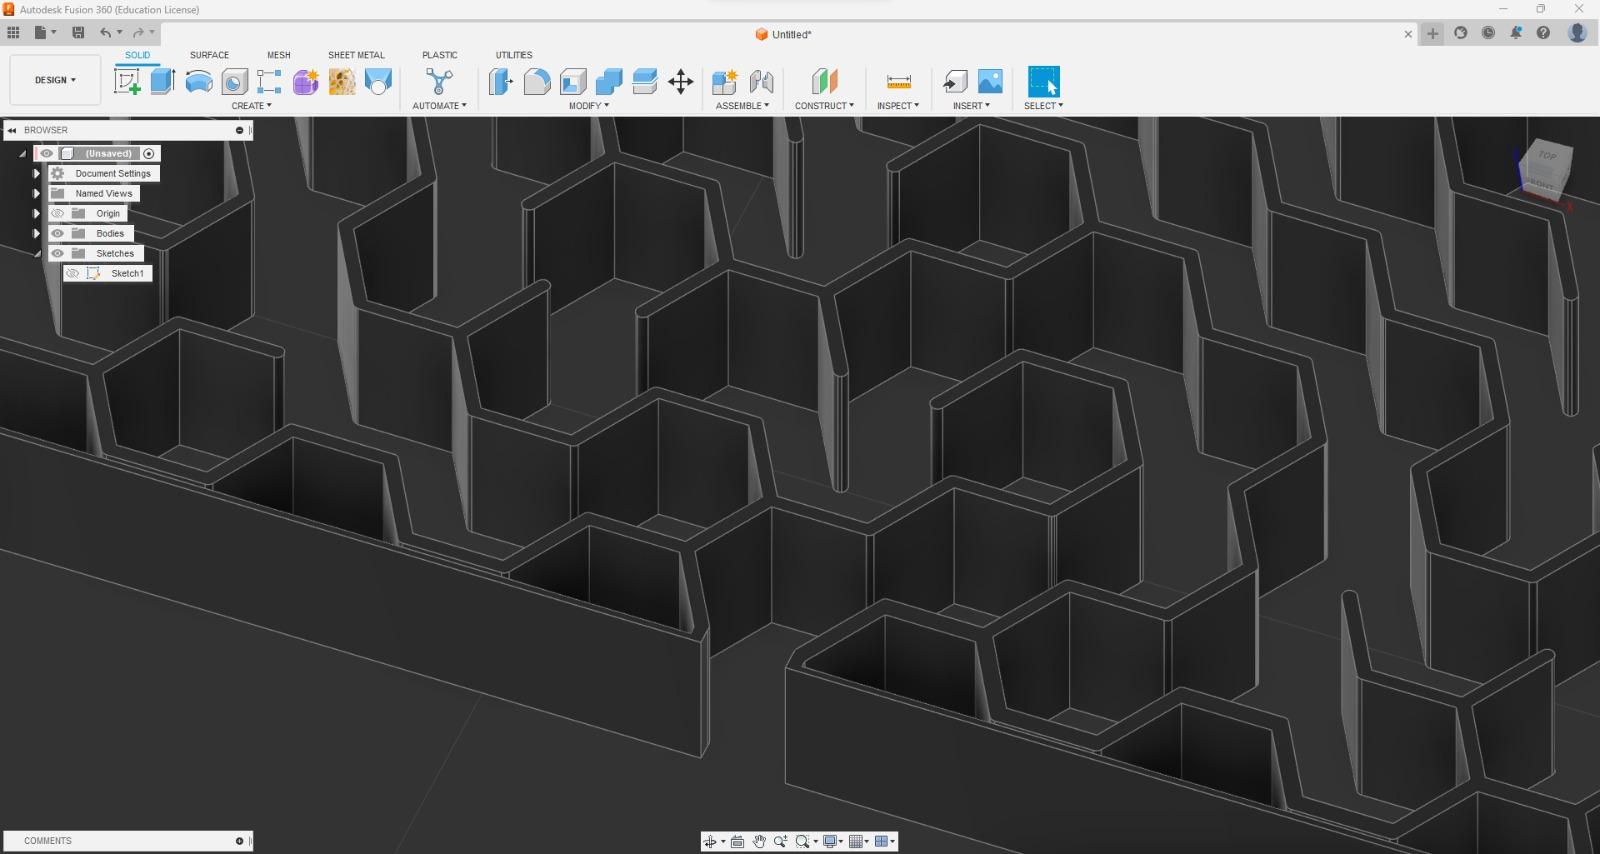
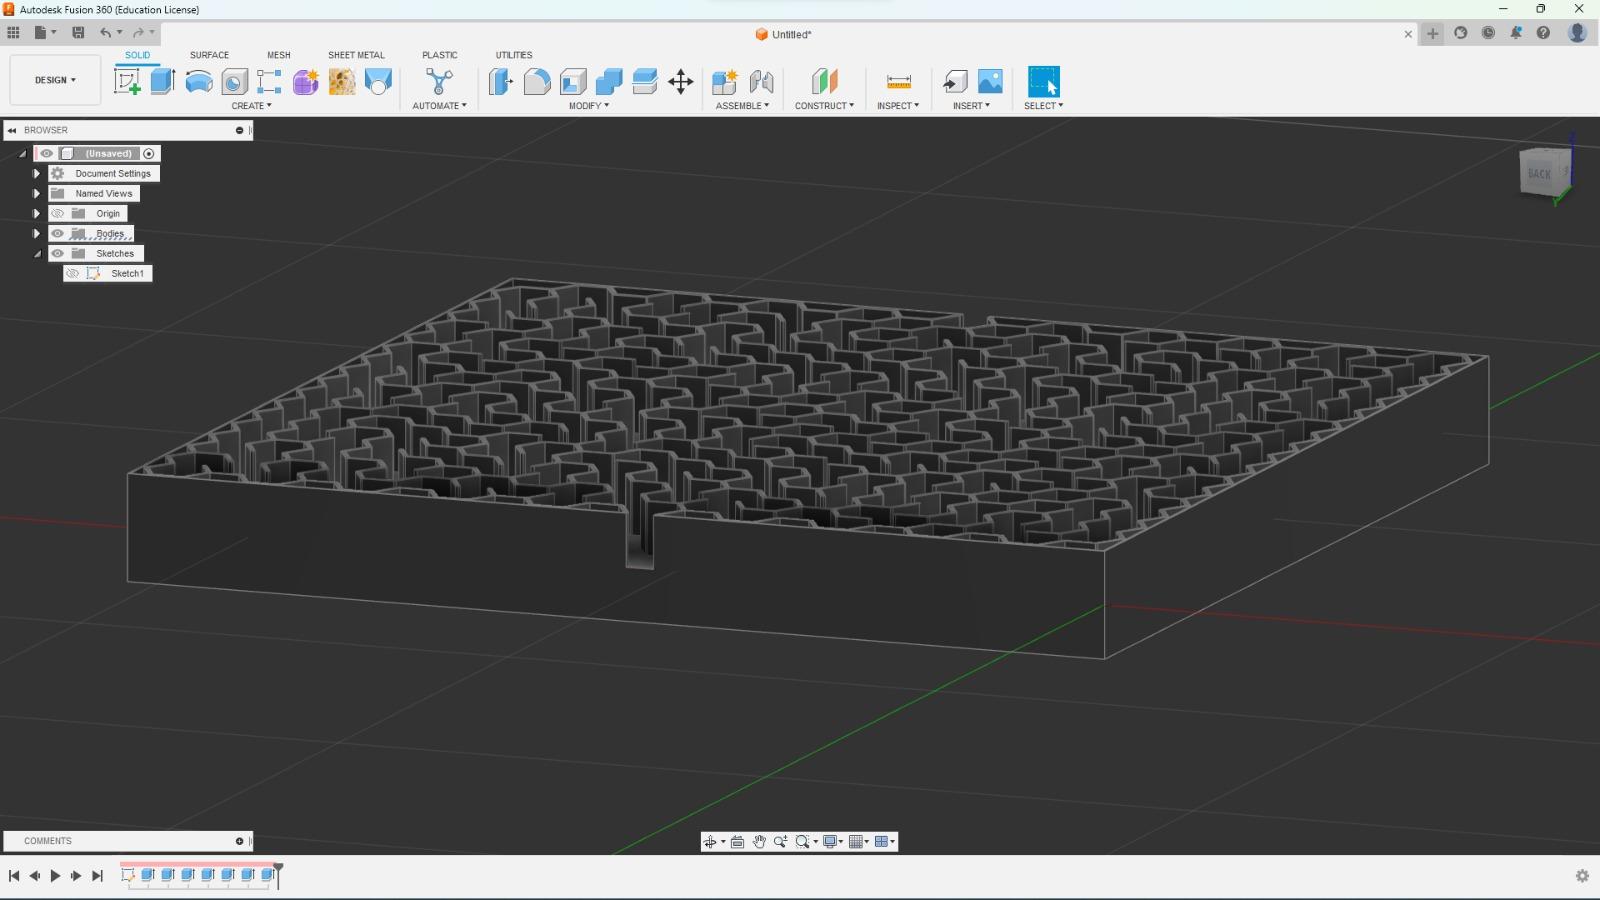
Now select the inner edge and walls and extrude 0.6 cm.
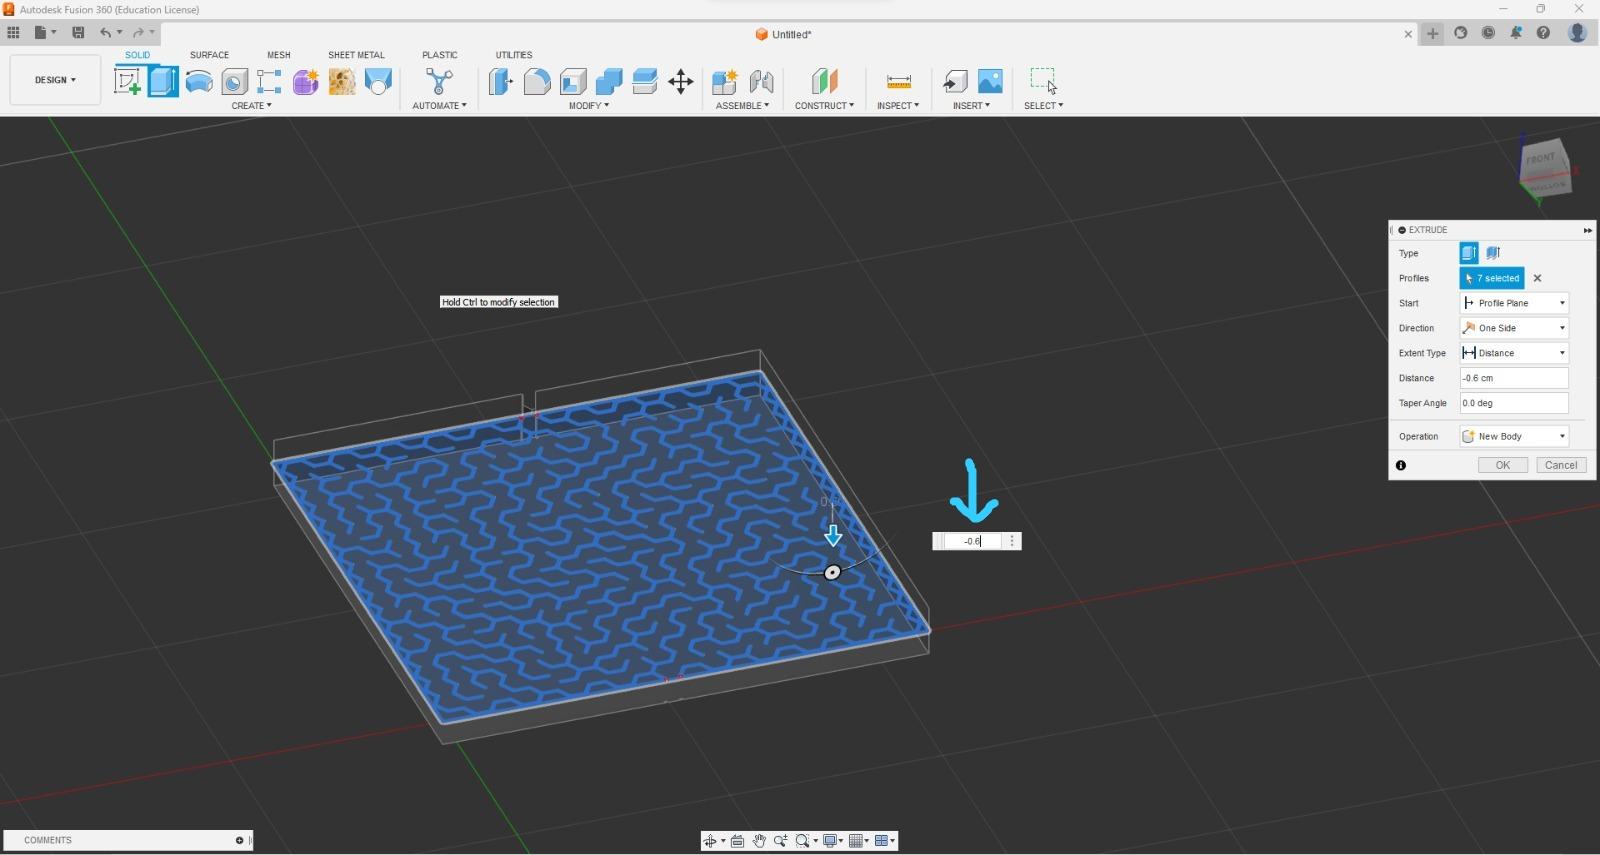
Next, select the entire sketch and extrude -0.6 cm
It should look something like image 8.
Done that's all.
You can download it now.
But...
Let's Make This More Challenging
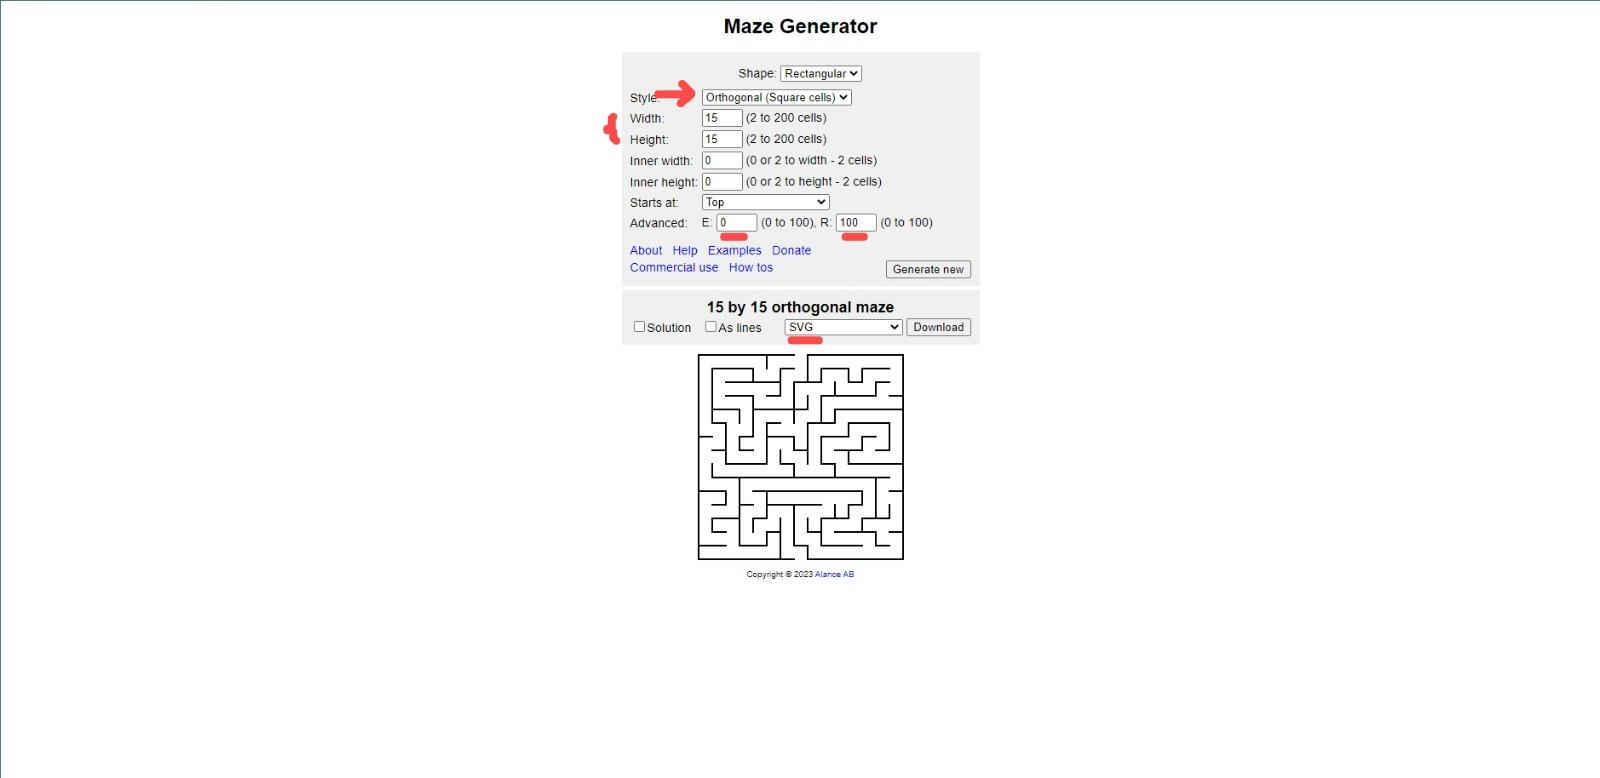
- Create 3 15 x 15 mazes, orthogonal type.
- Insert your svg into fusion 360 but before extruding scale it 1.4718 to fit the size of the base. (I'll also leave the files below)
- Do the same procedure as in the previous steps but when extruding it, extrude it 0.6 up and 0.2 down.
- Now create holes as if they were inputs, in the parts you want.
Save them for later.
The Base
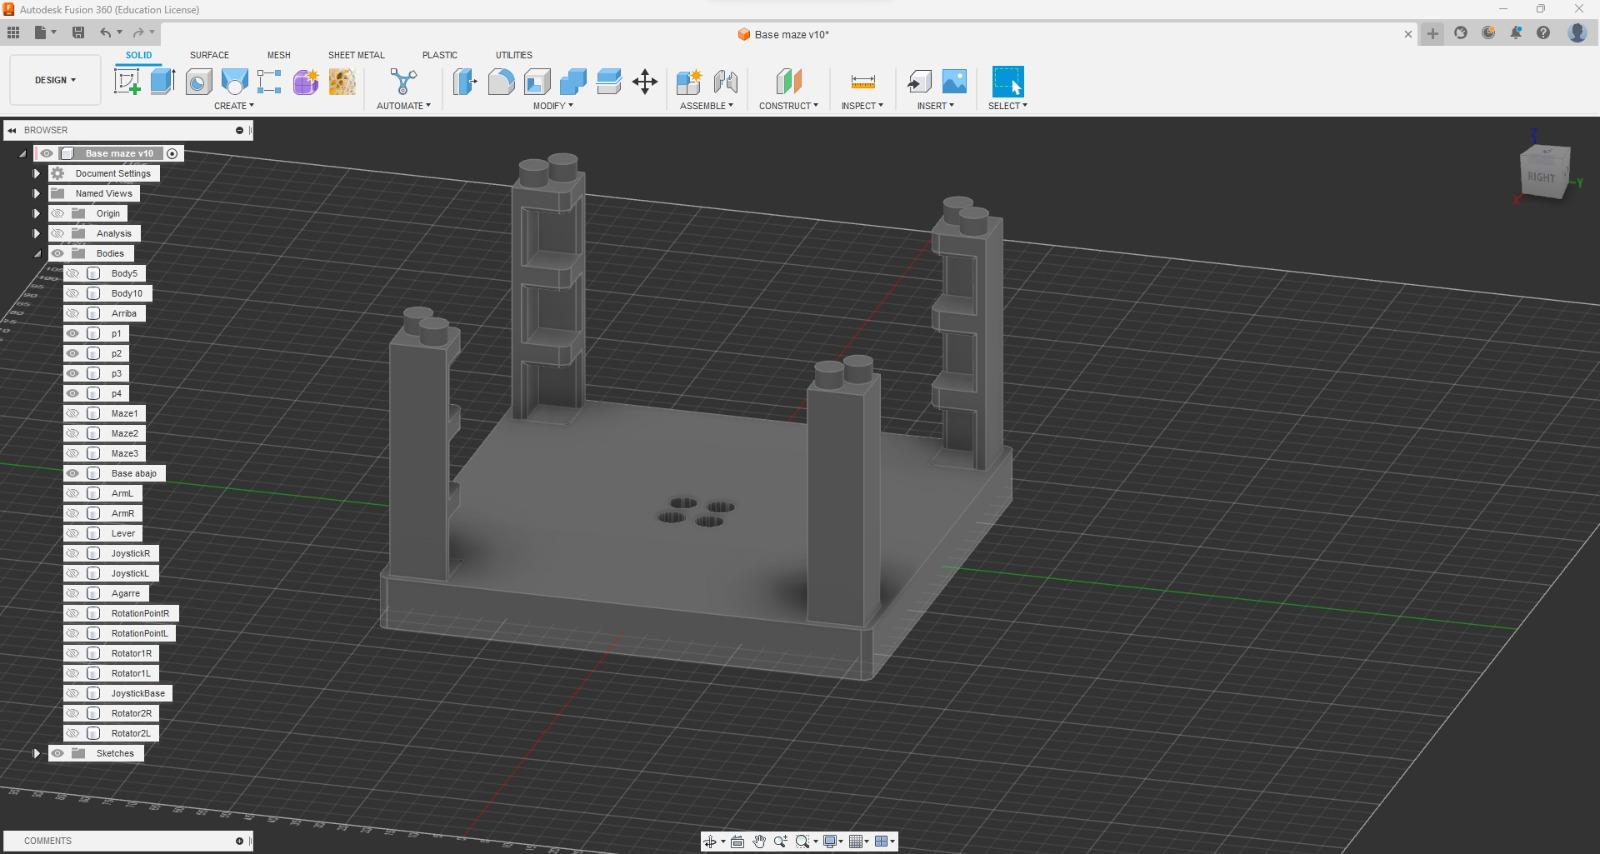
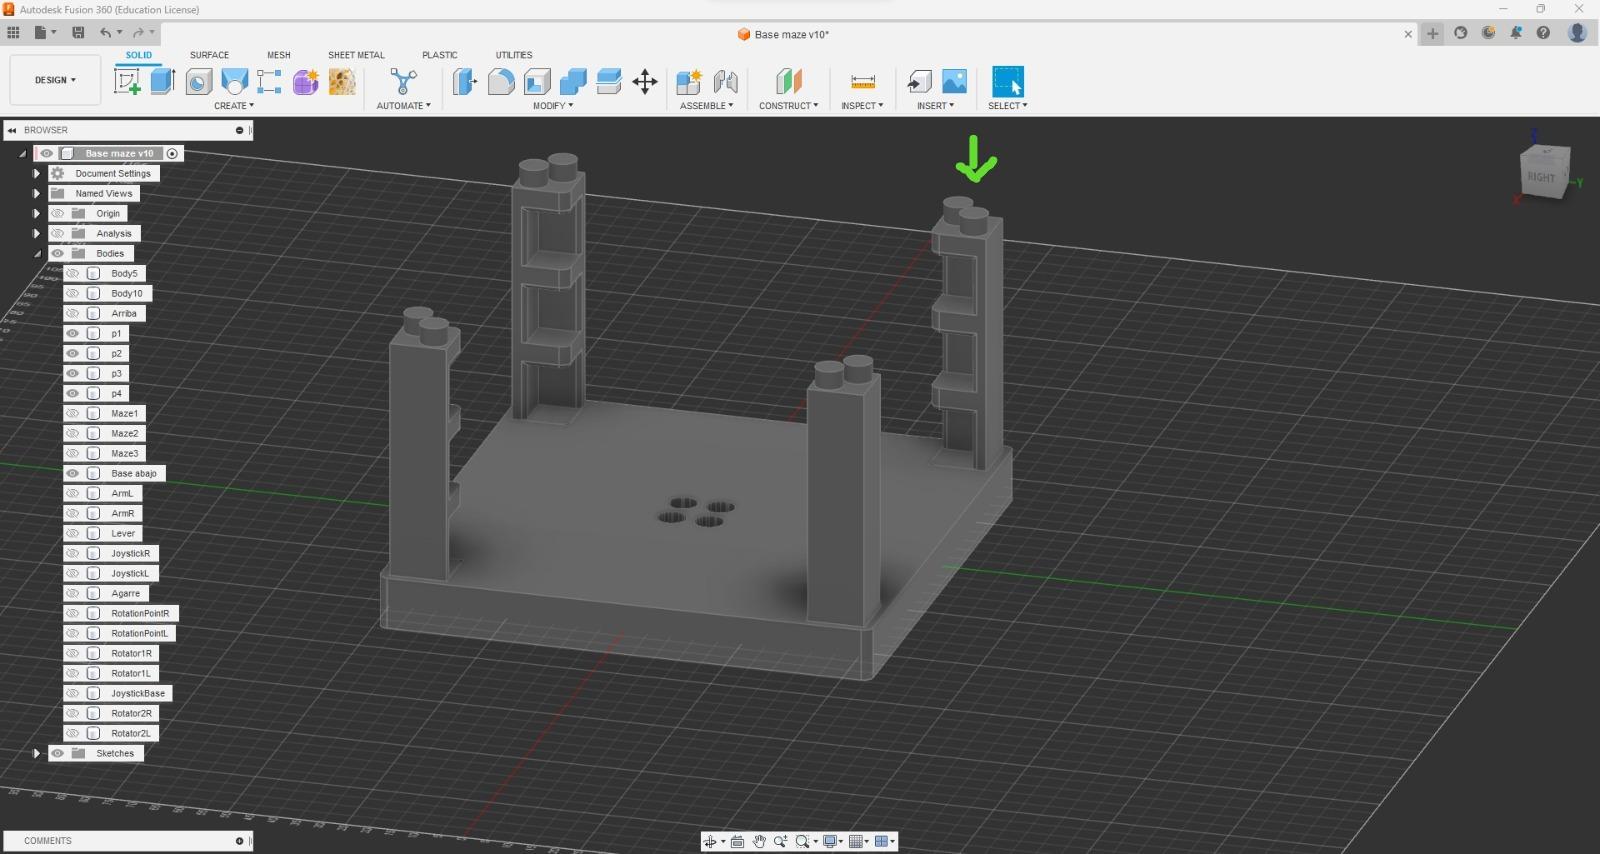
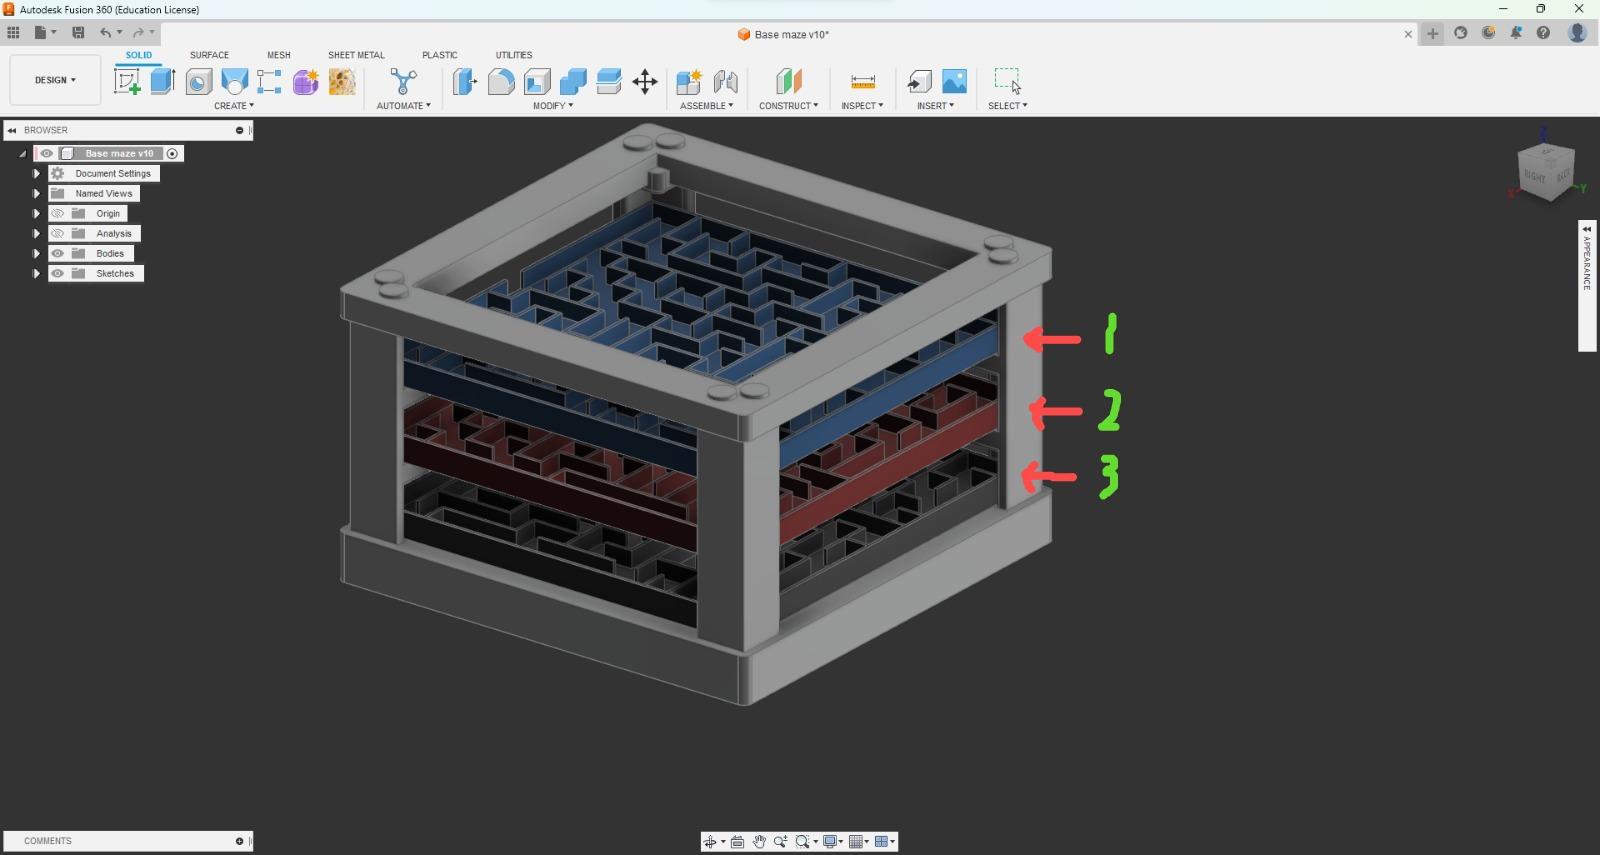
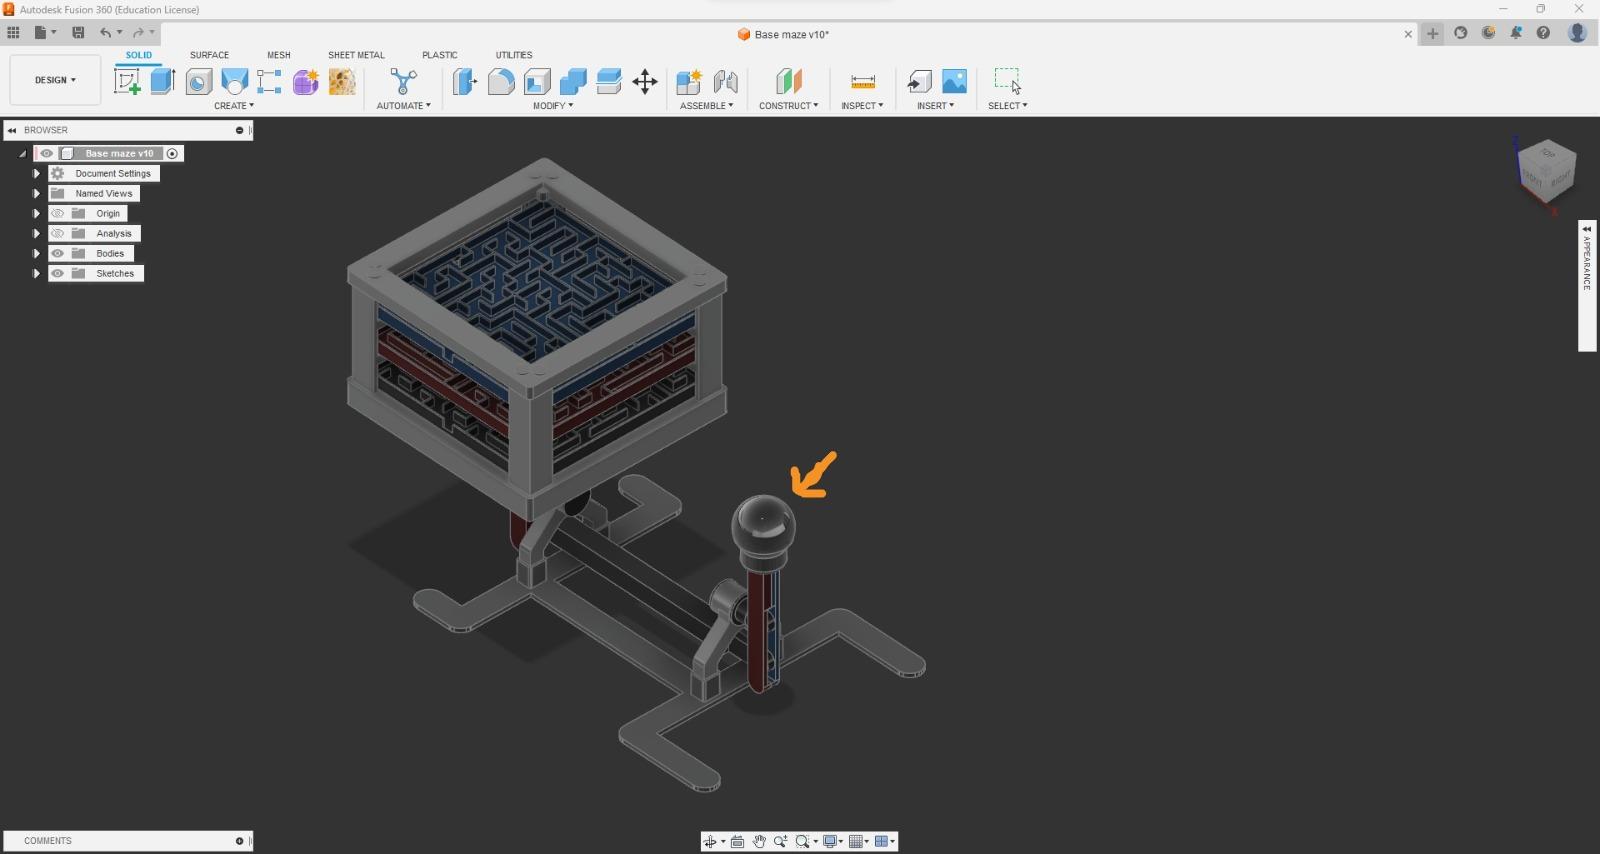
Here I am going to put some images of how I made the base and the different pieces to build the 3-level maze.
I also leave the files so you can download and print them.
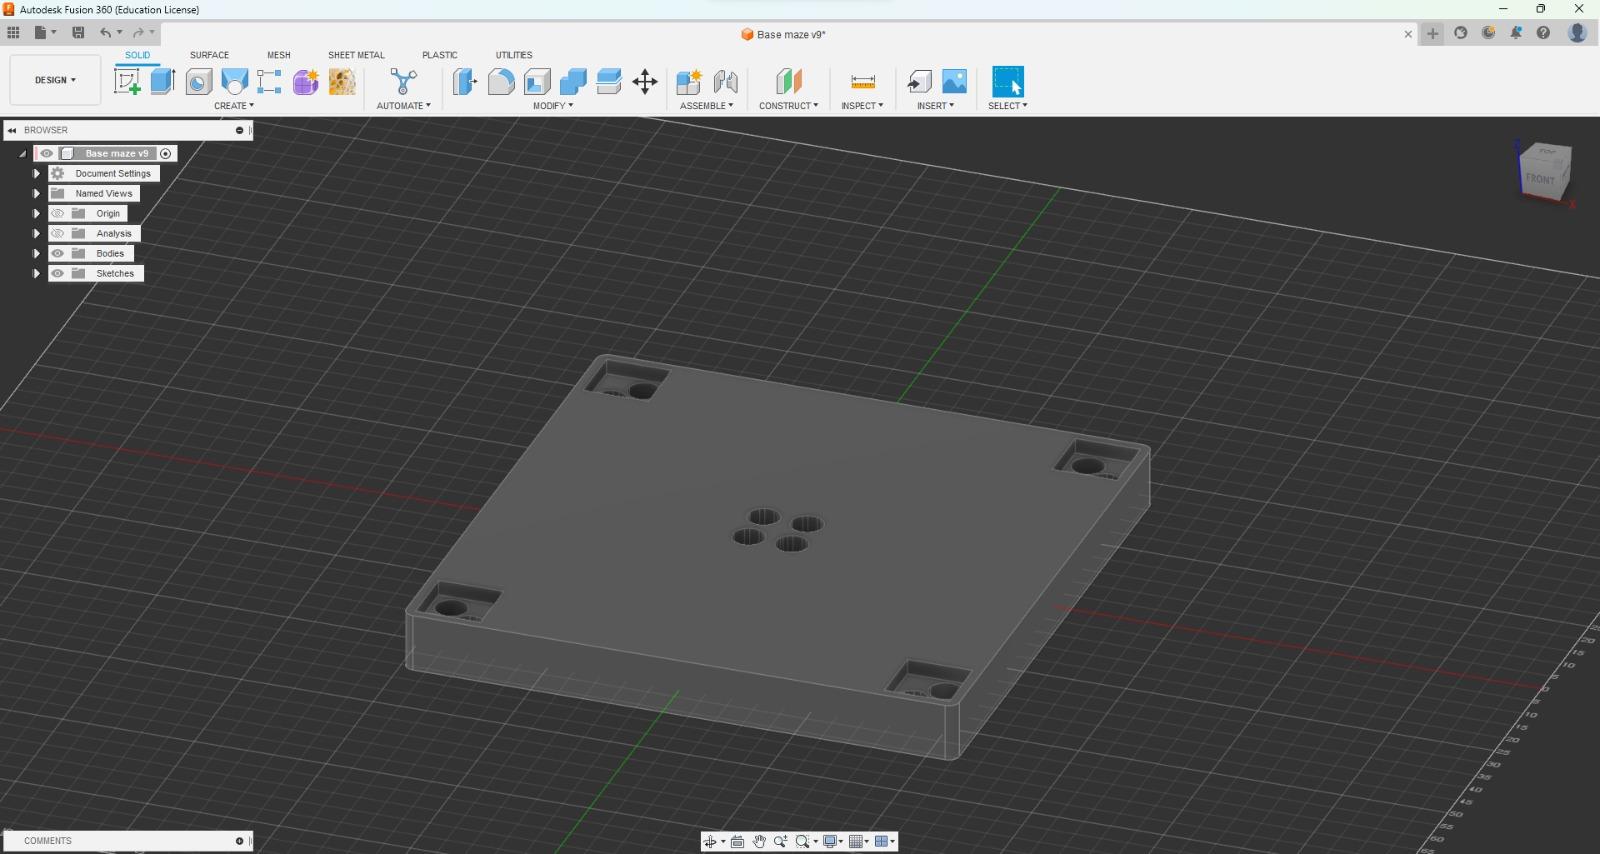
- First create the base
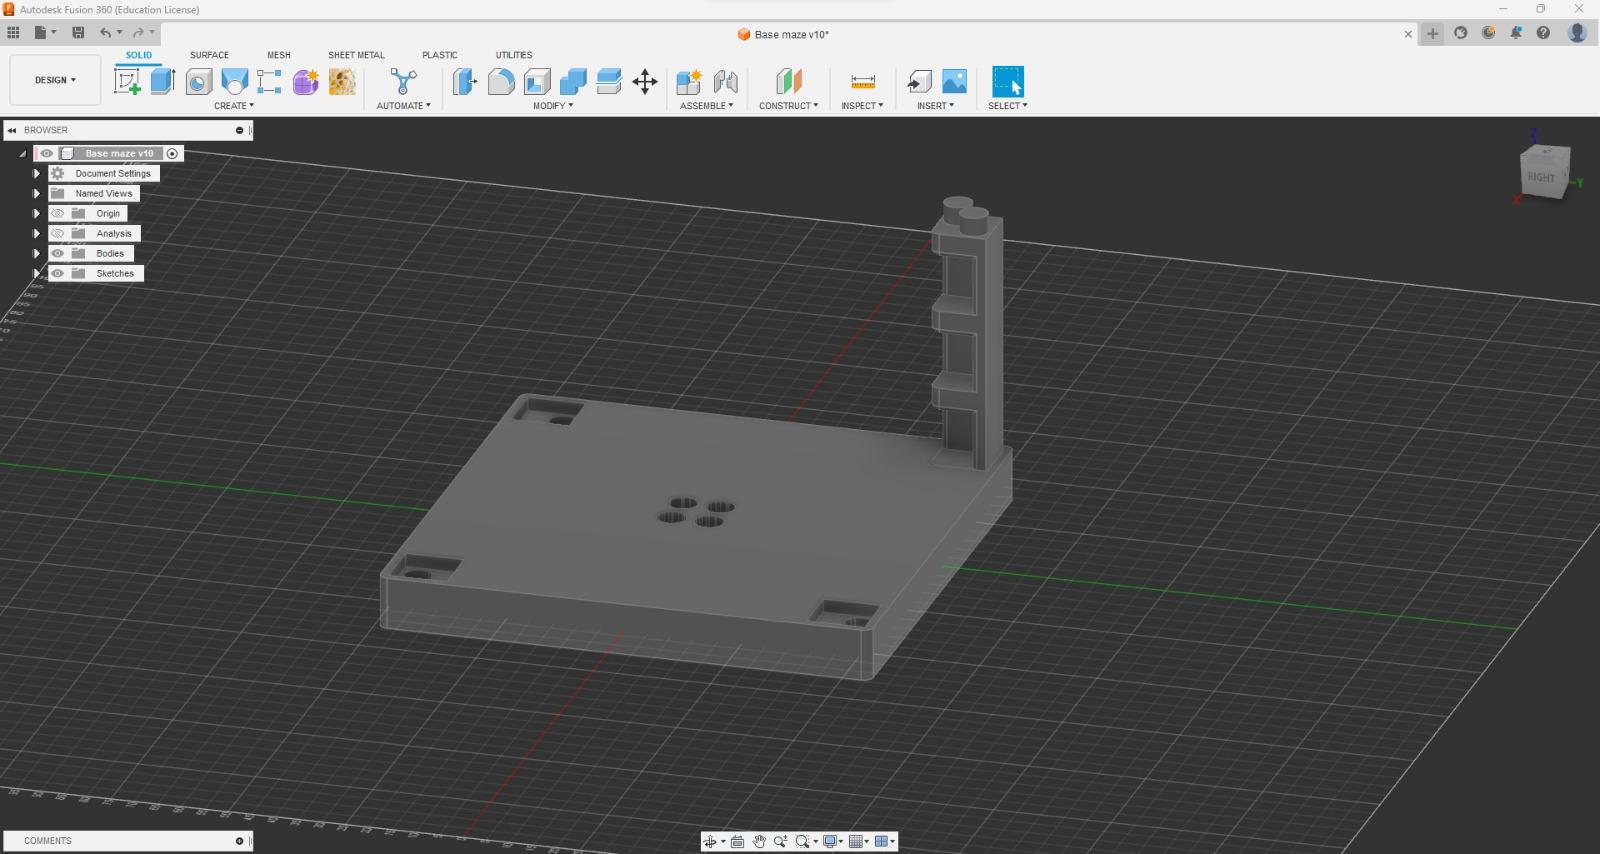
- Second, I made one of the studs and then folded it over.
- The studs look like cylinders, those are the ones that are attached to the base and the upper edge
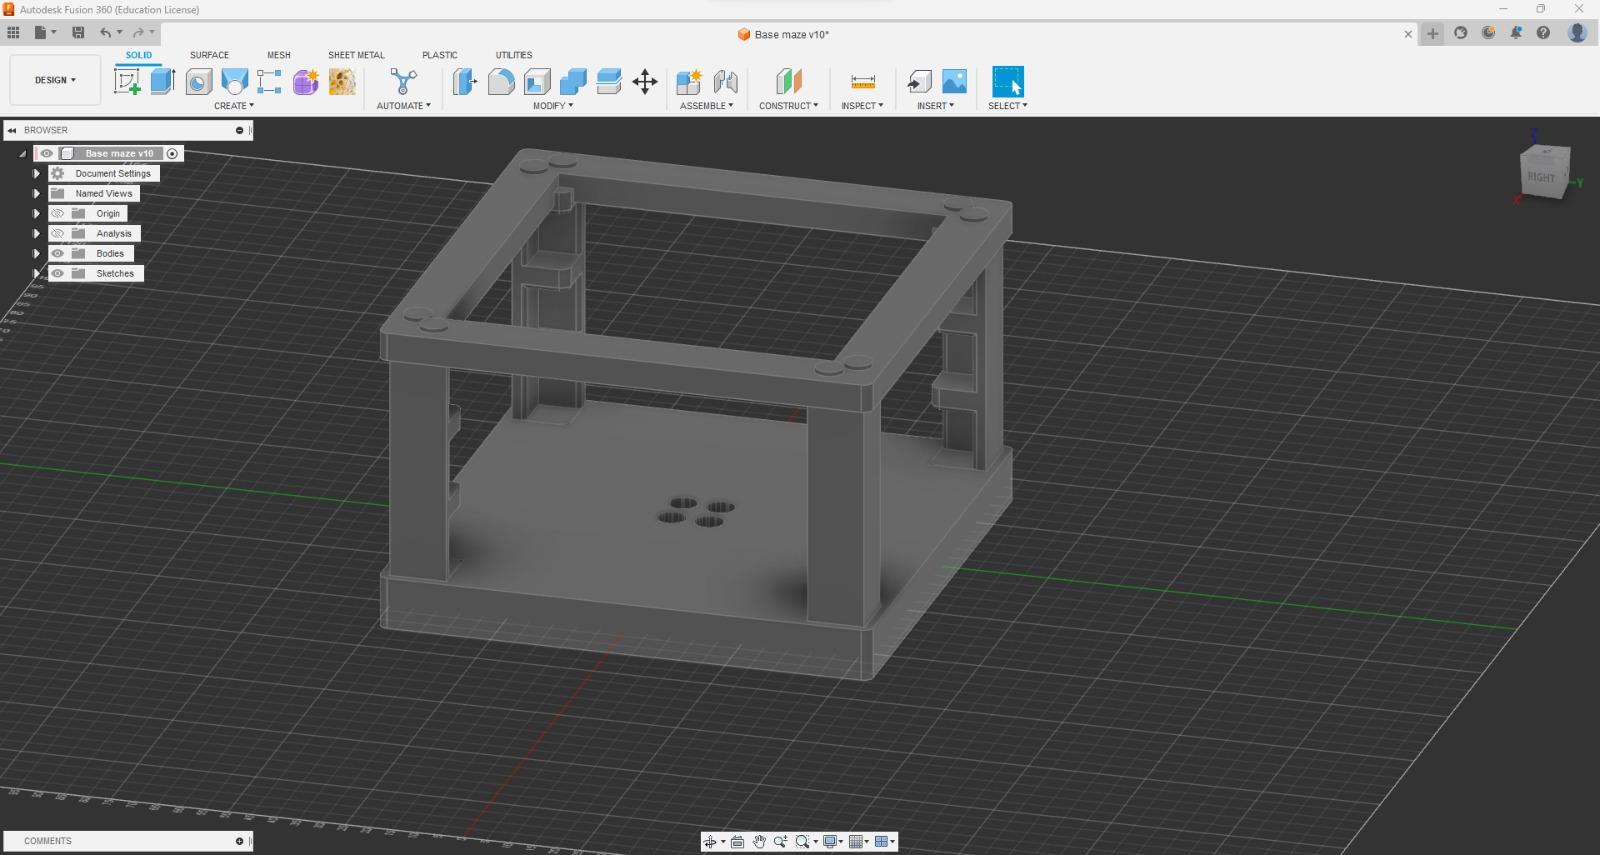
- Then I made a border on the top to make it firm
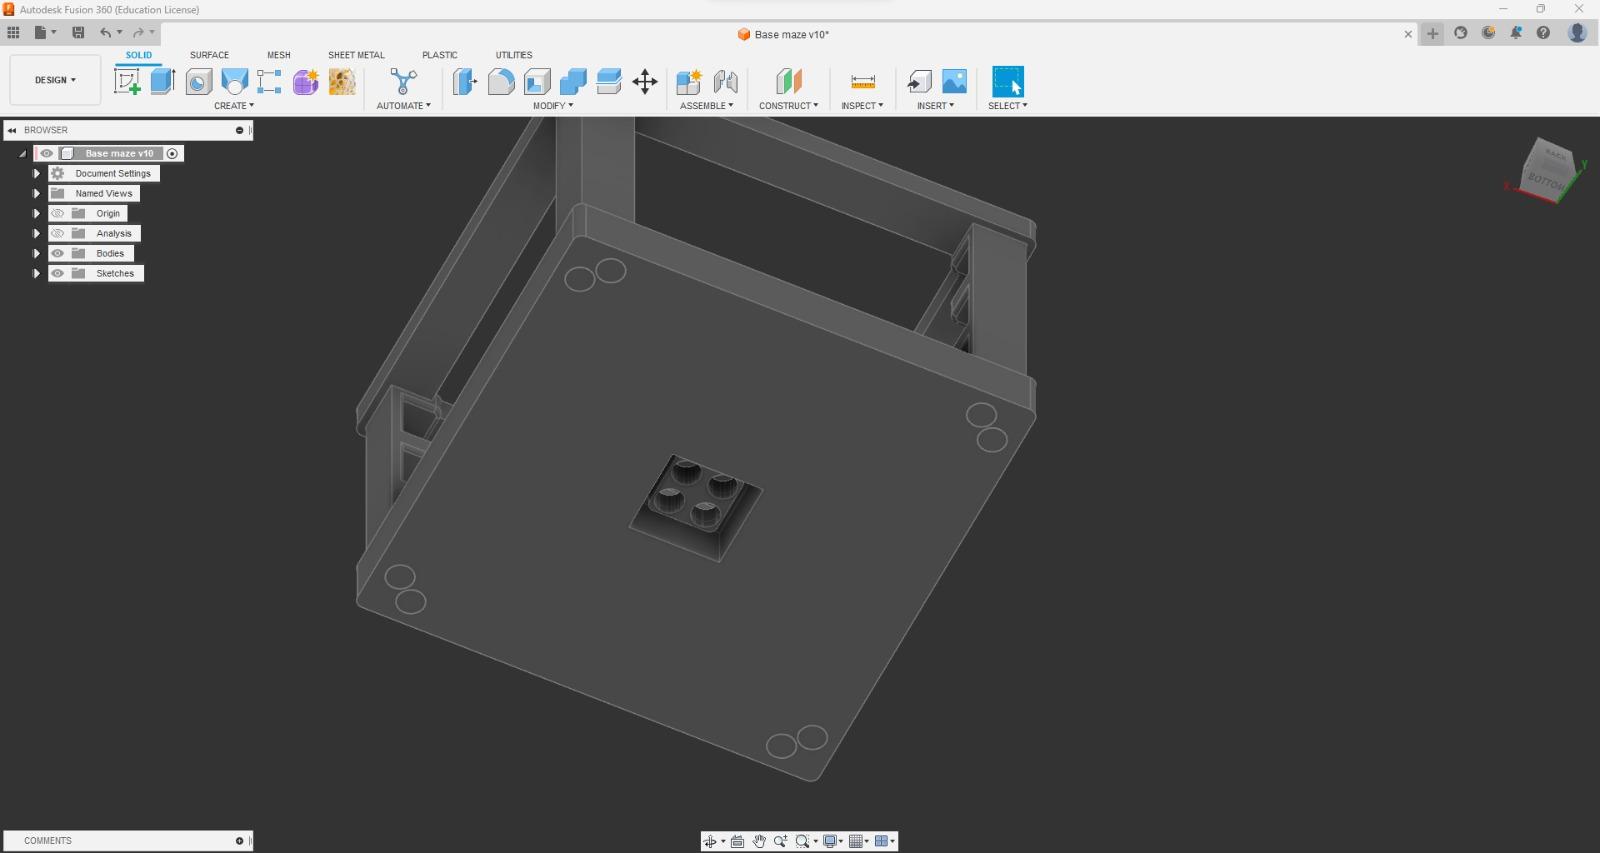
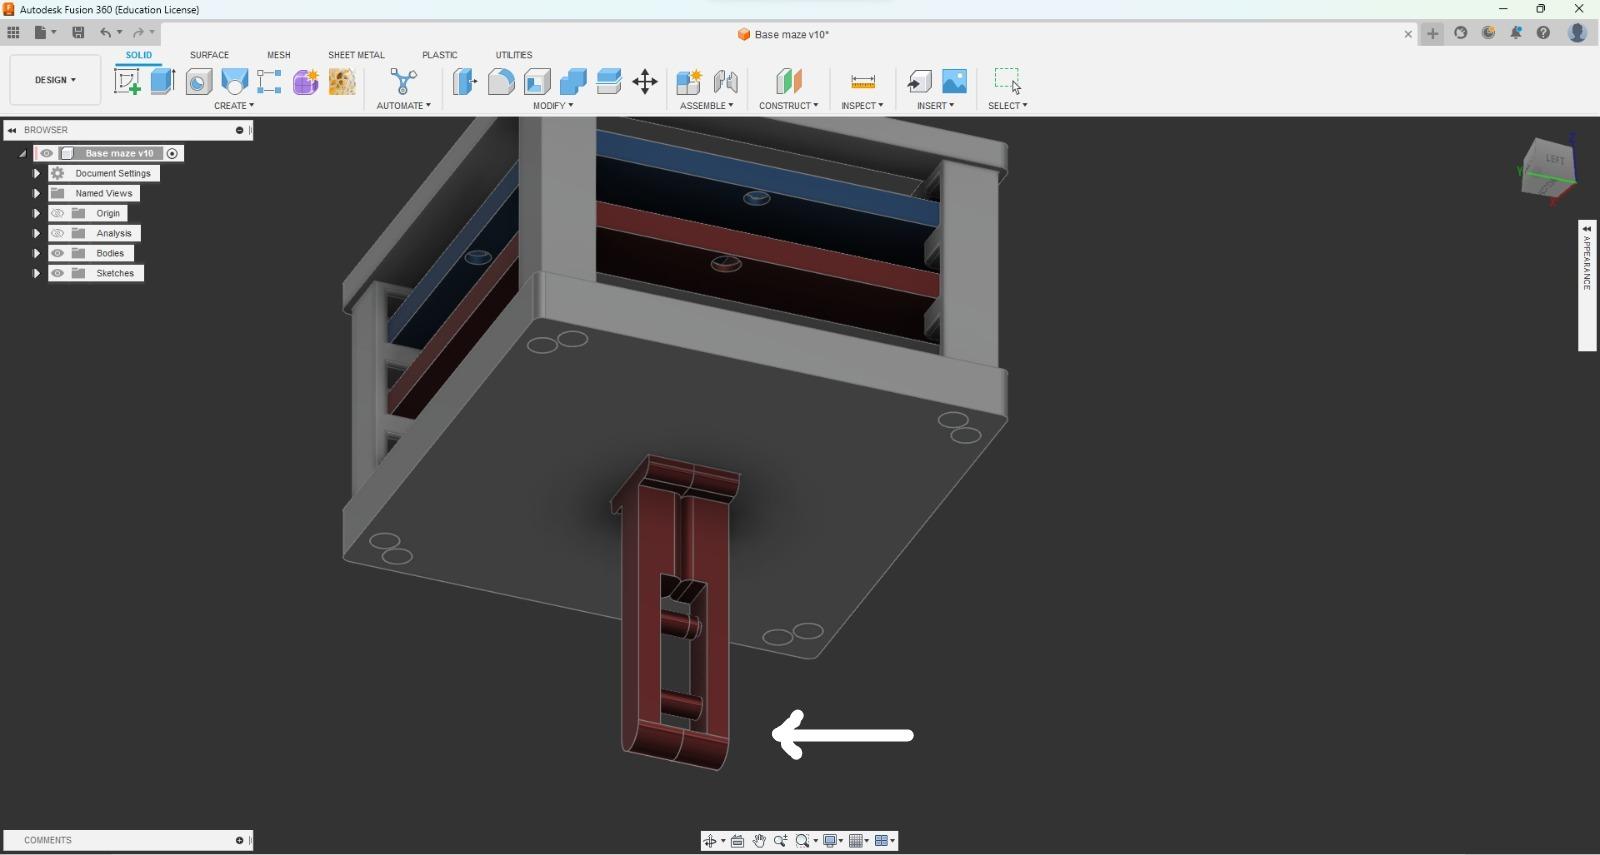
- Then in the bottom part I made some little holes and a square that are for another piece to enter
- Then, create the 3 mazes that you made in the previous step.
- Then create the piece that is going to move our maze.
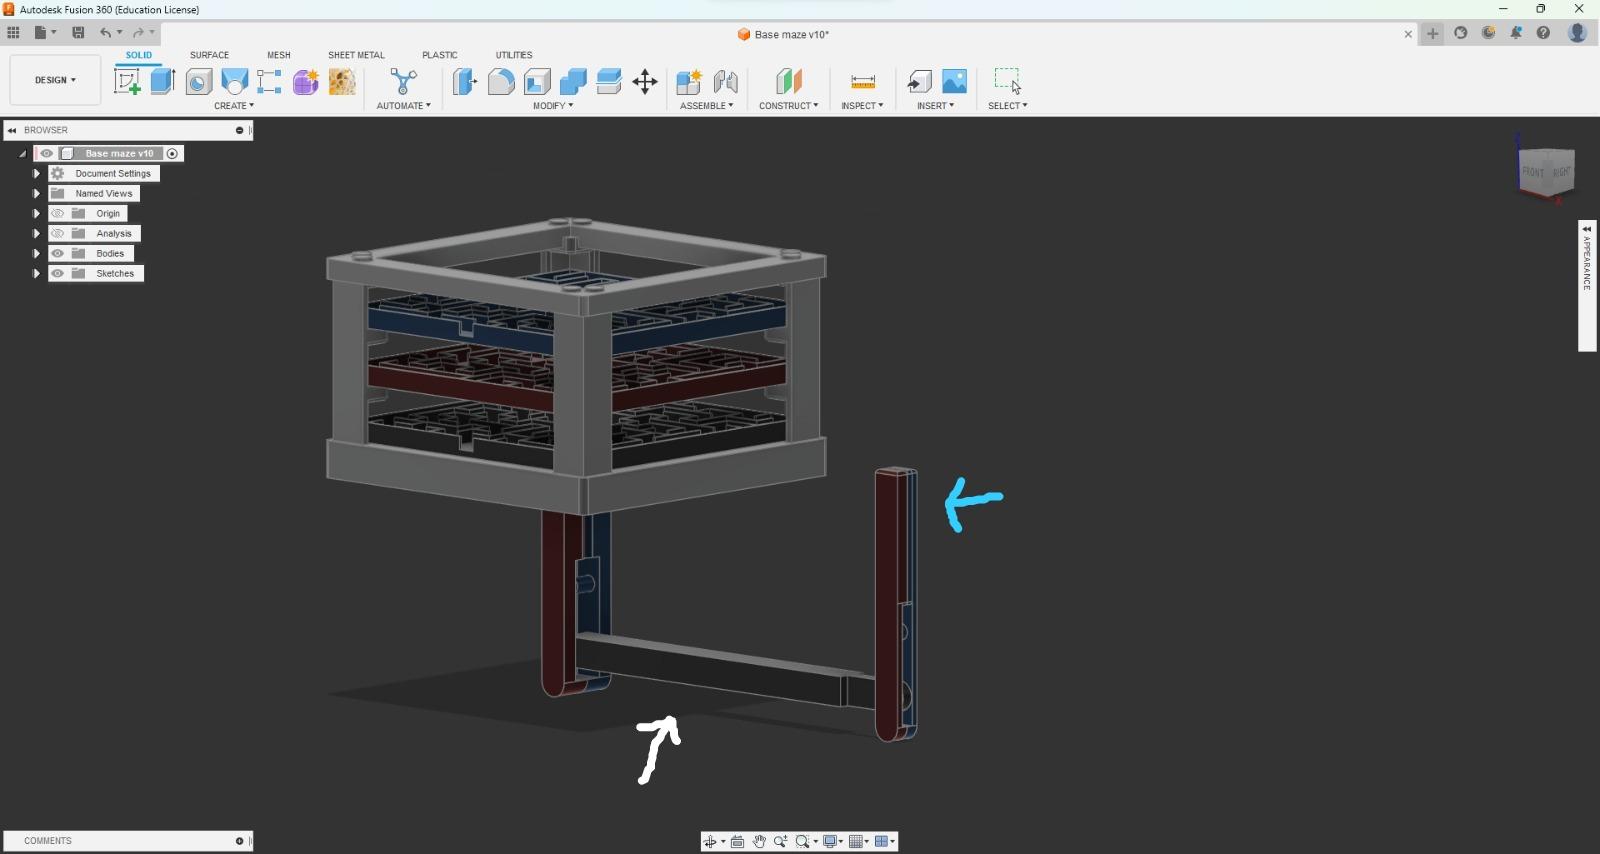
- Then create a stick that will move the previous piece with the piece that is in front of the maze.
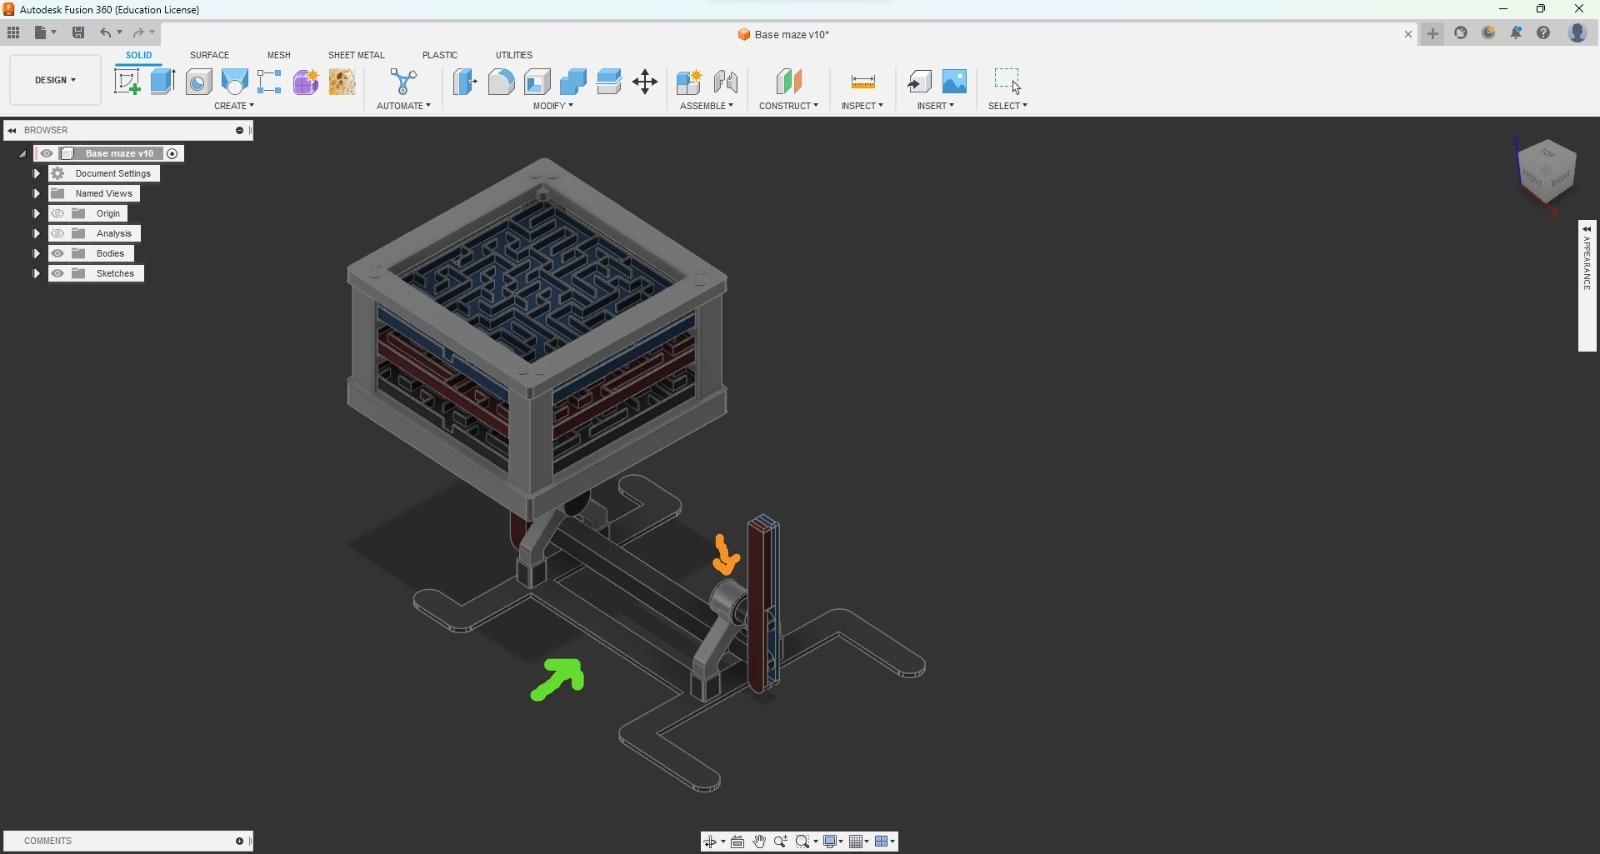
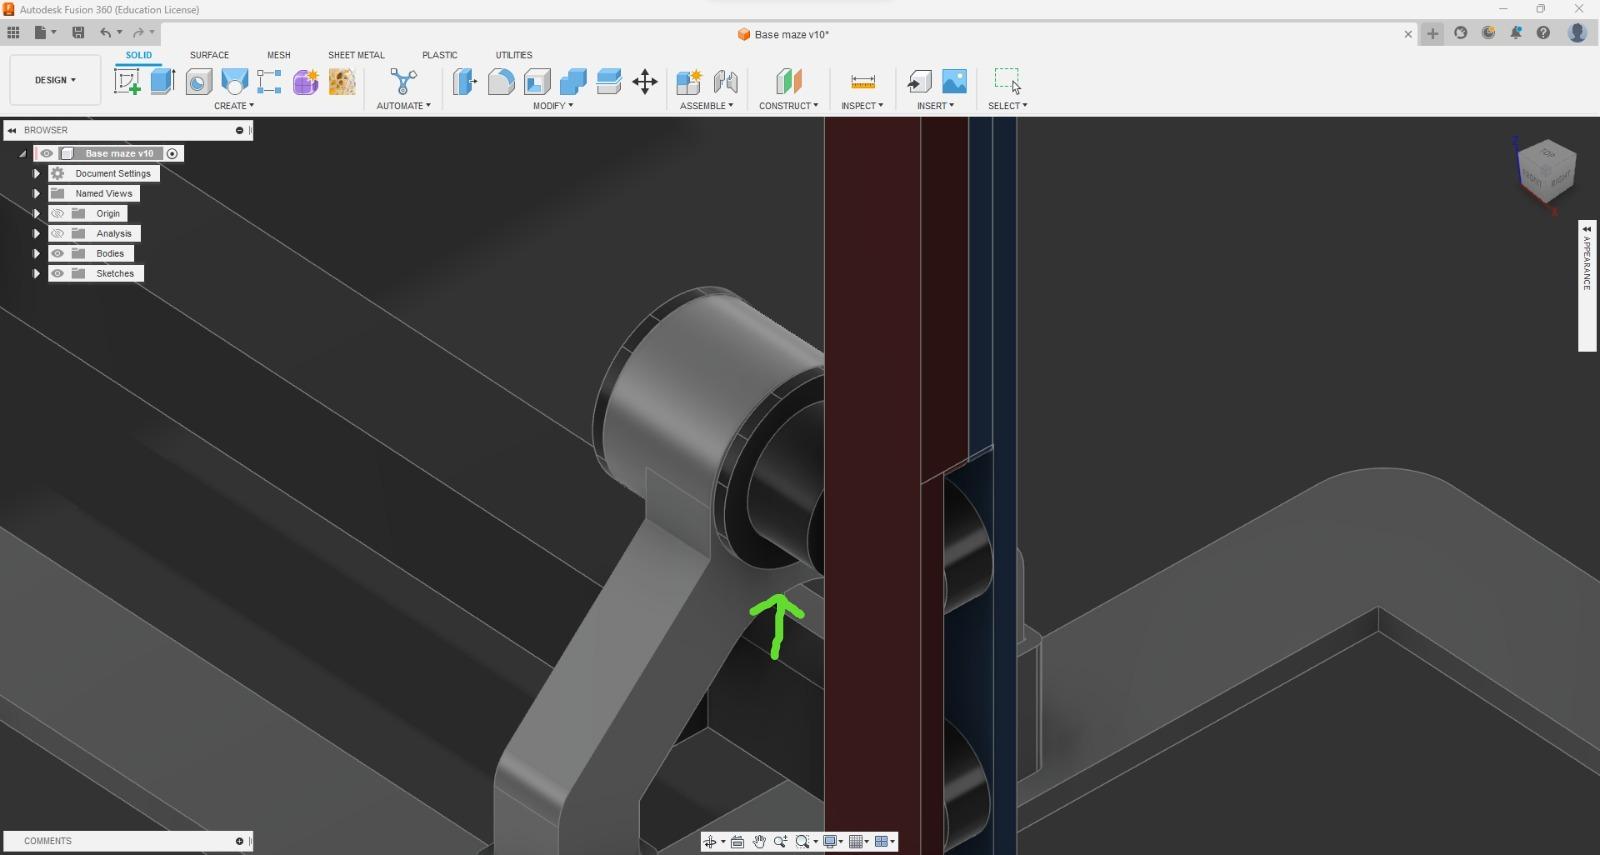
- When I finished that I started to think about how I could support this "mechanism" So I created a base and some studs to support it and at the same time resist the weight of the maze.
- And finally, I created some rotation points and a grip to make it easier to control.
Final
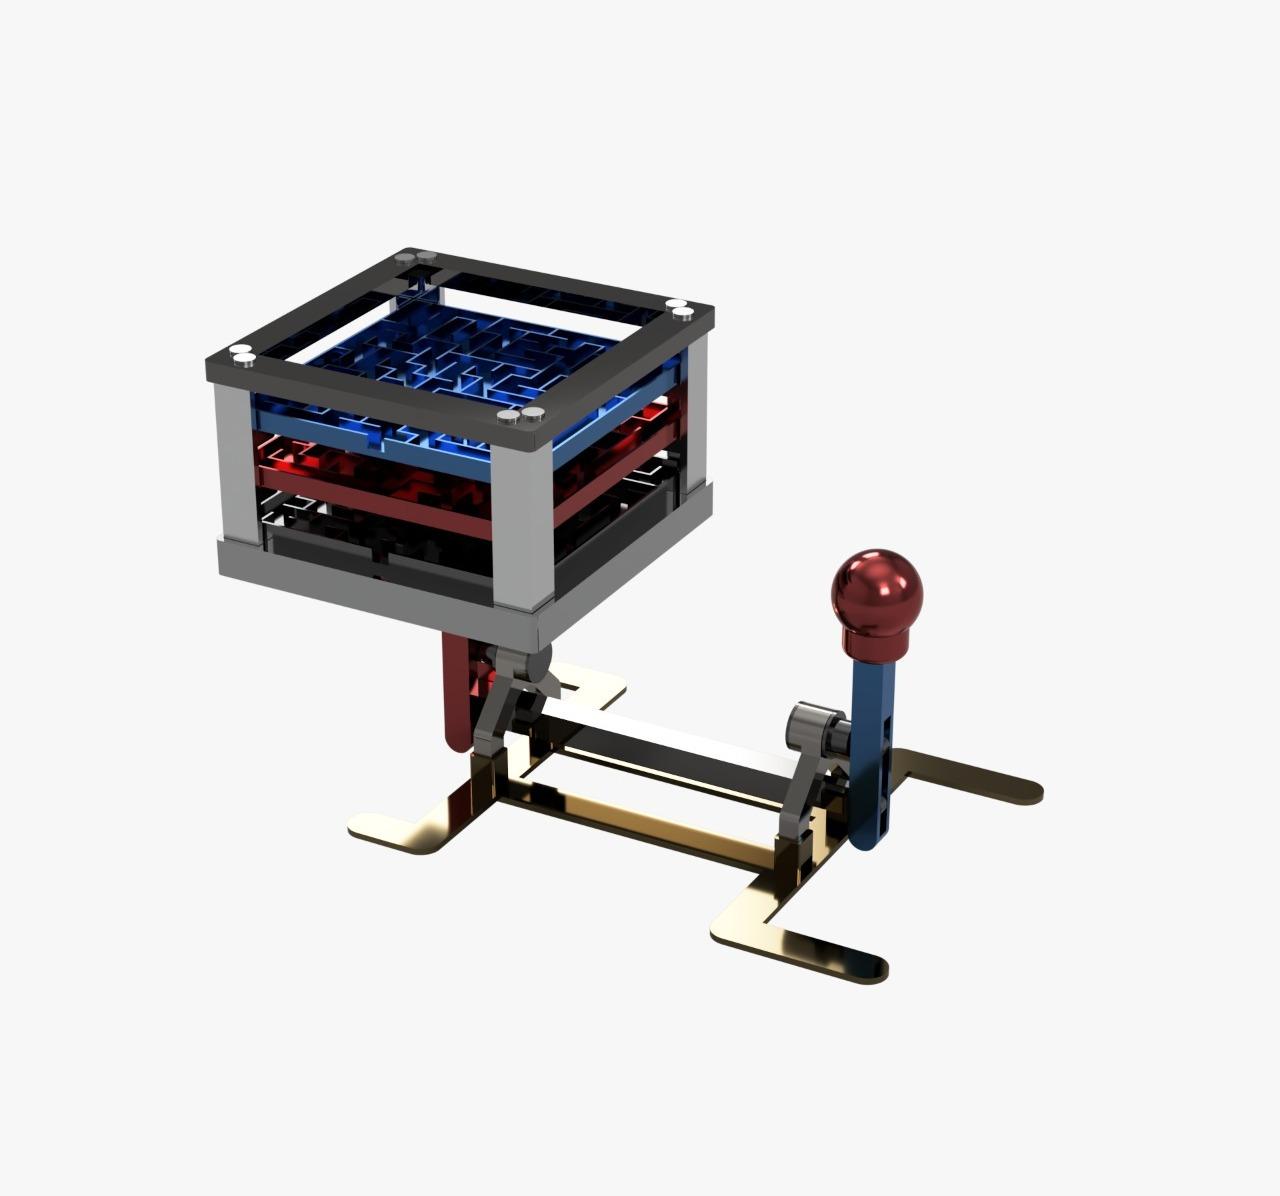.jpeg)
I'm going to edit this file little by little to show the assembly of the pieces, for the moment I'm going to leave it that way because I don't have enough time.
Thank you so much!
3D Print
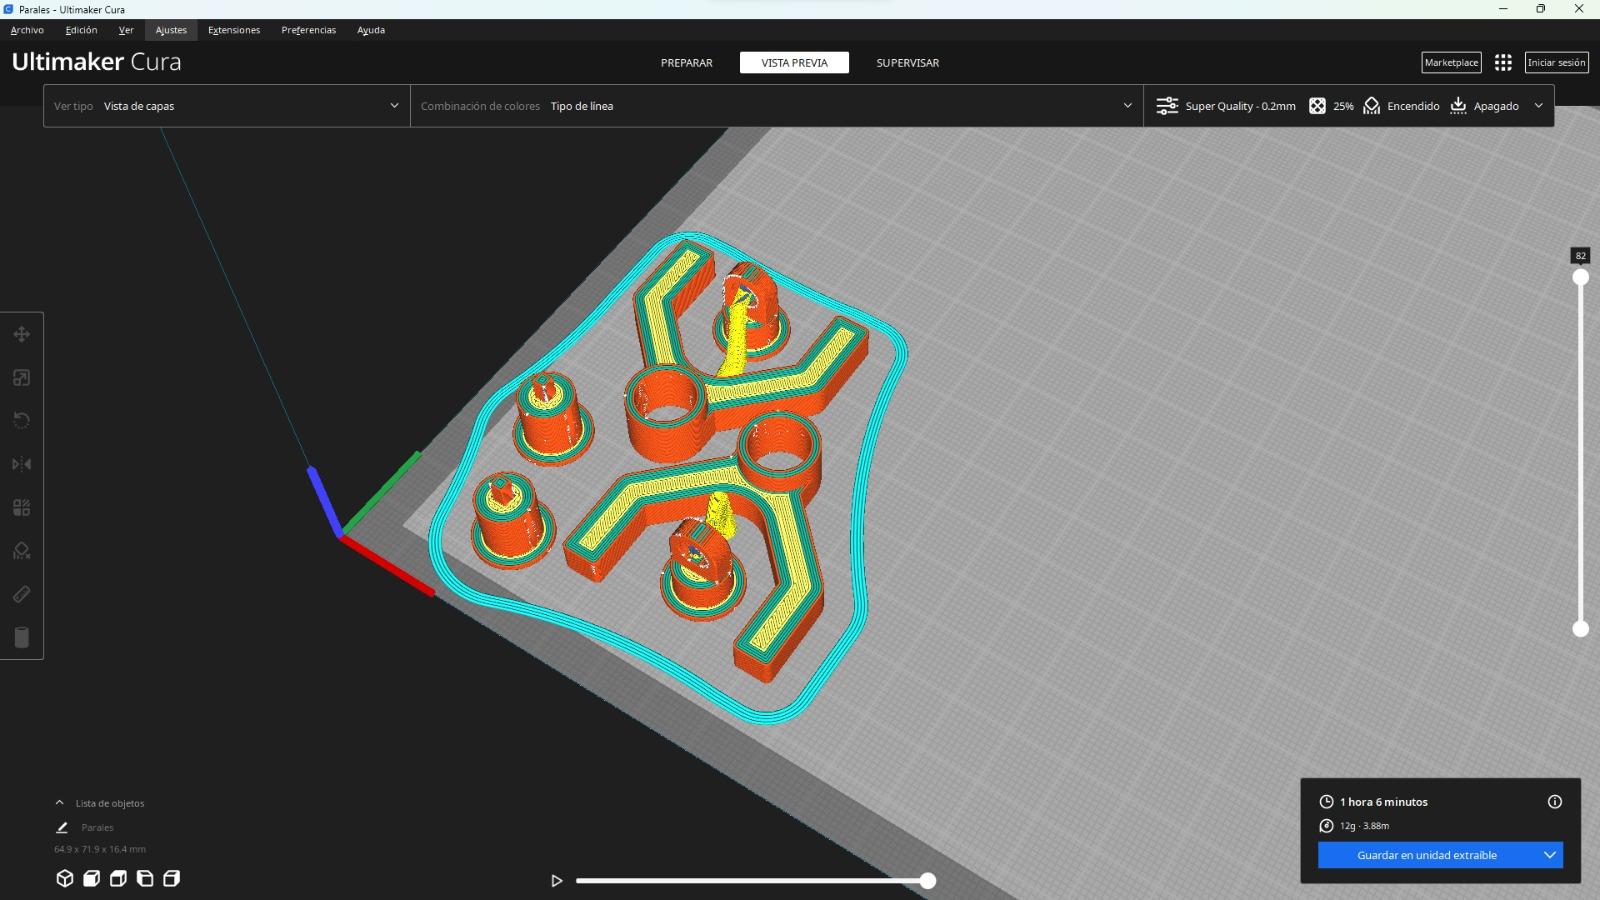
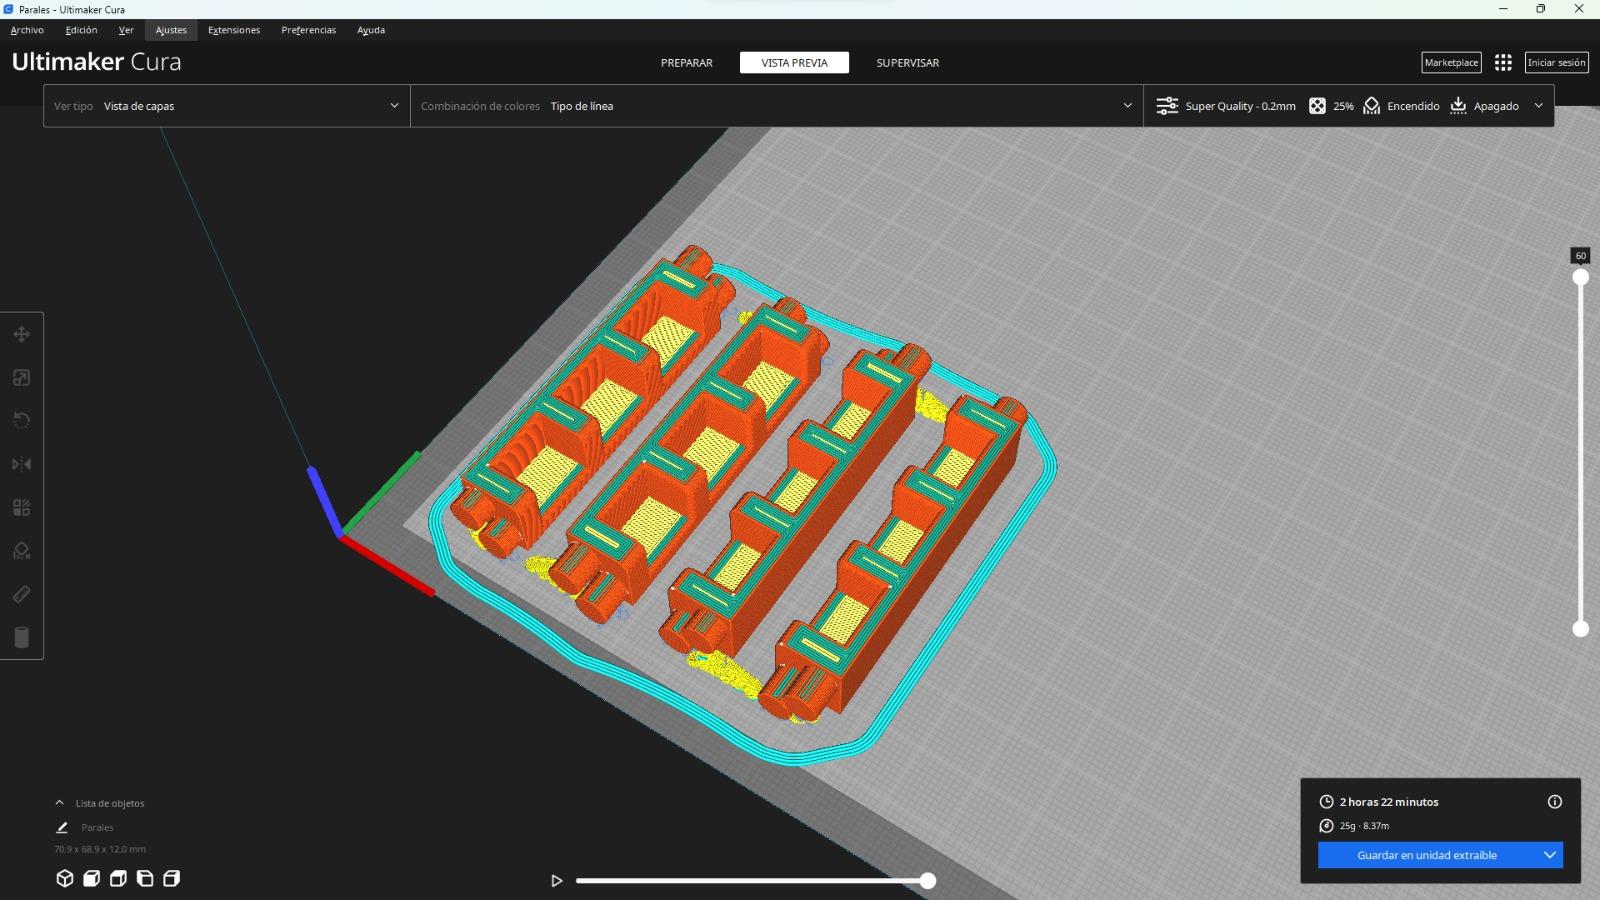
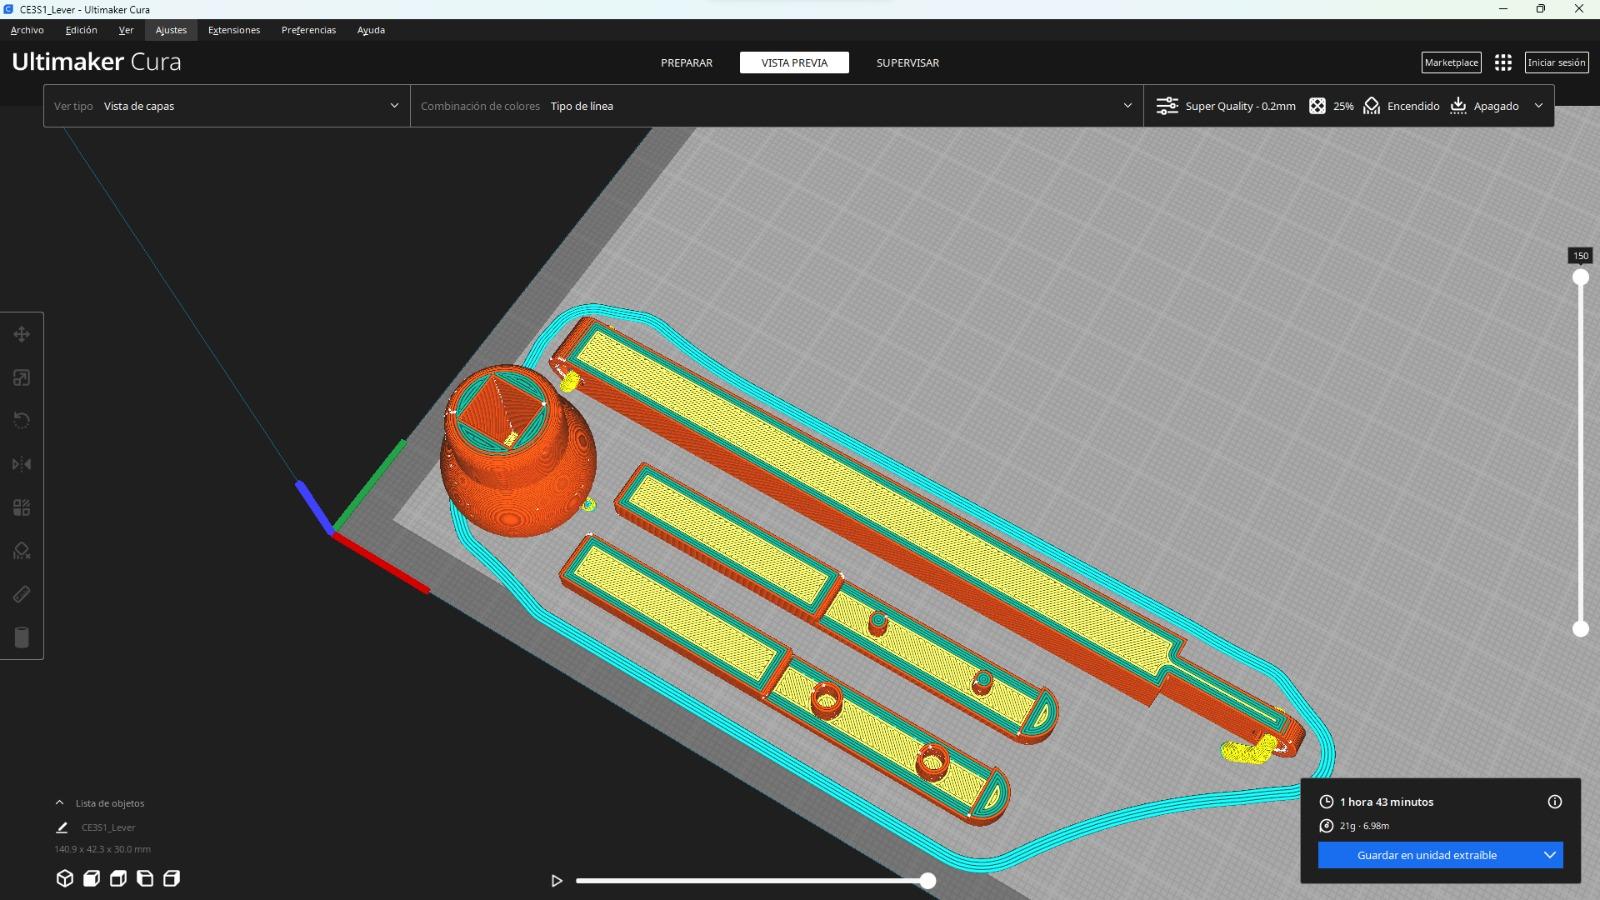
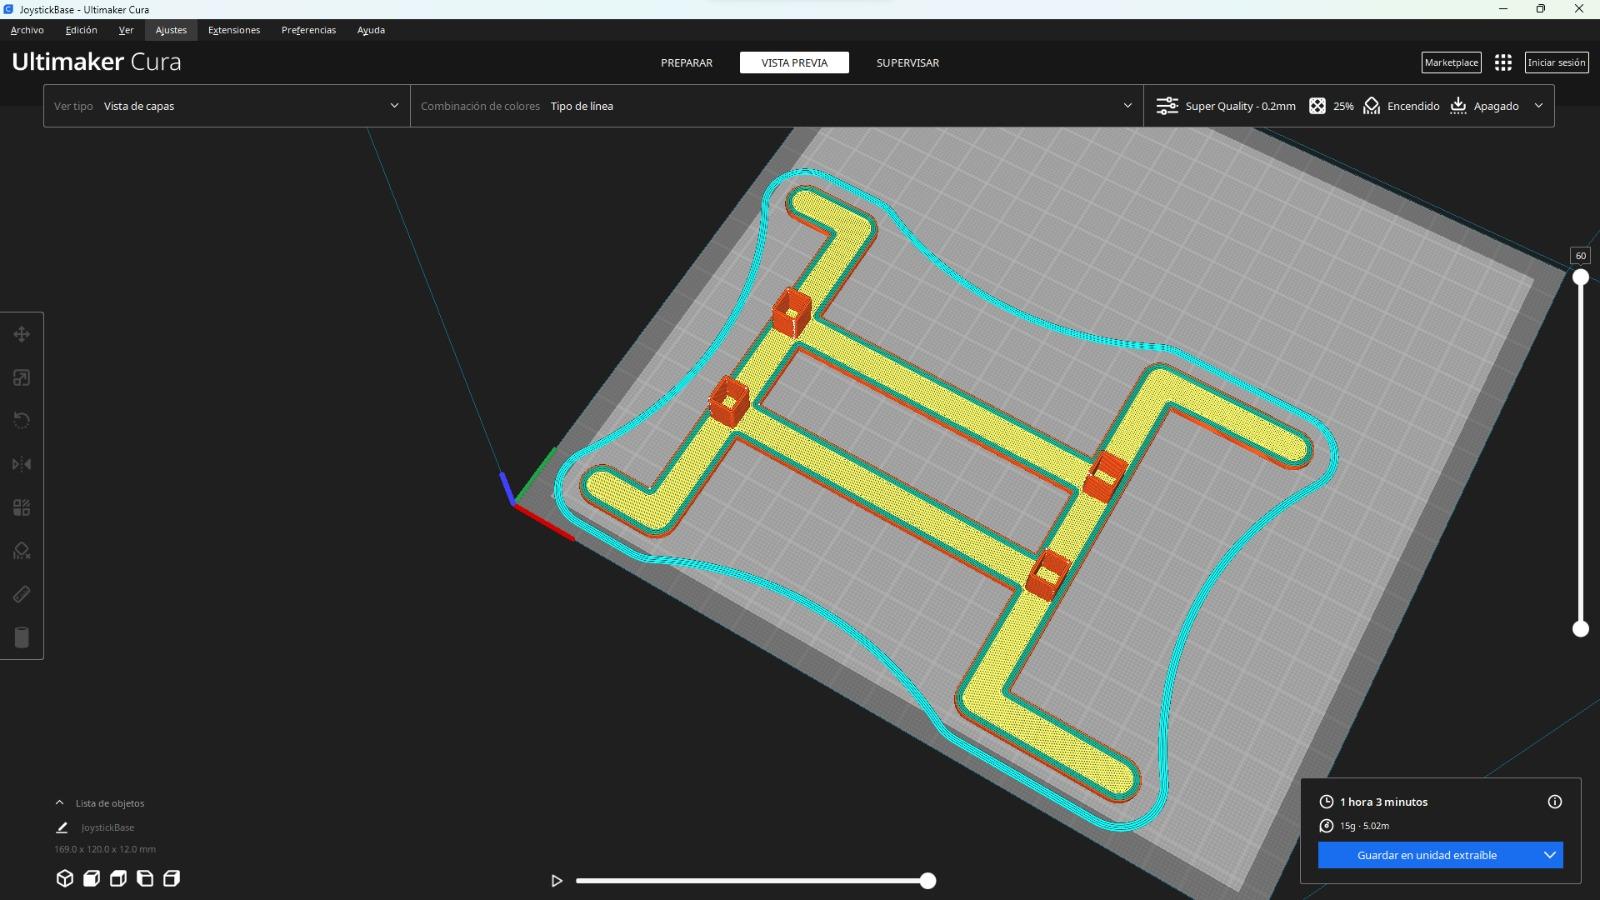
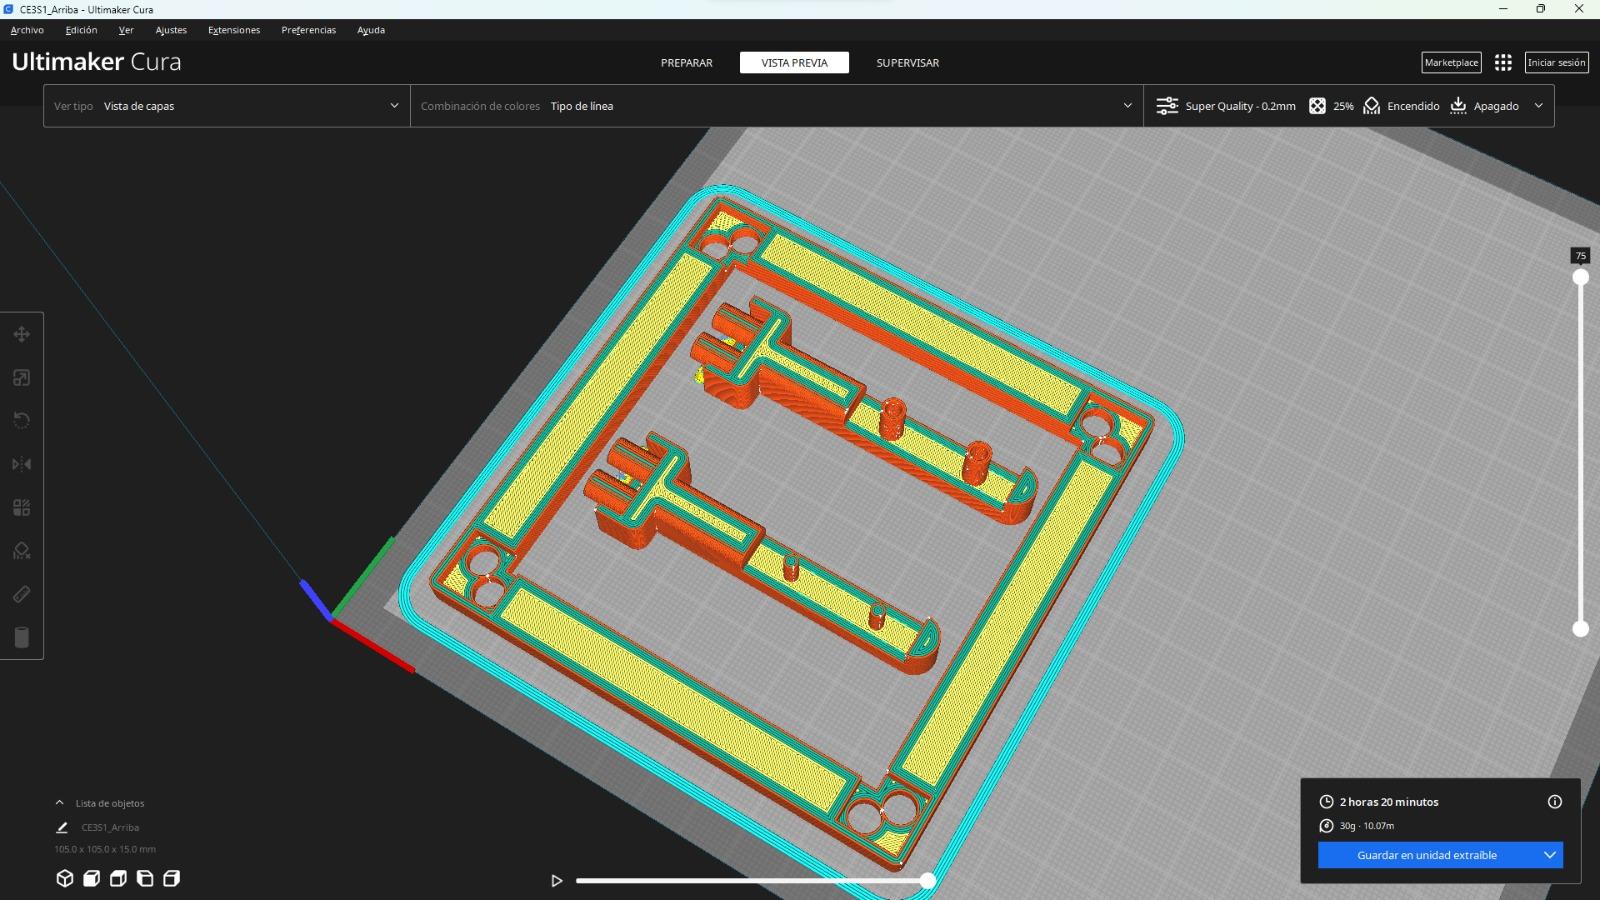


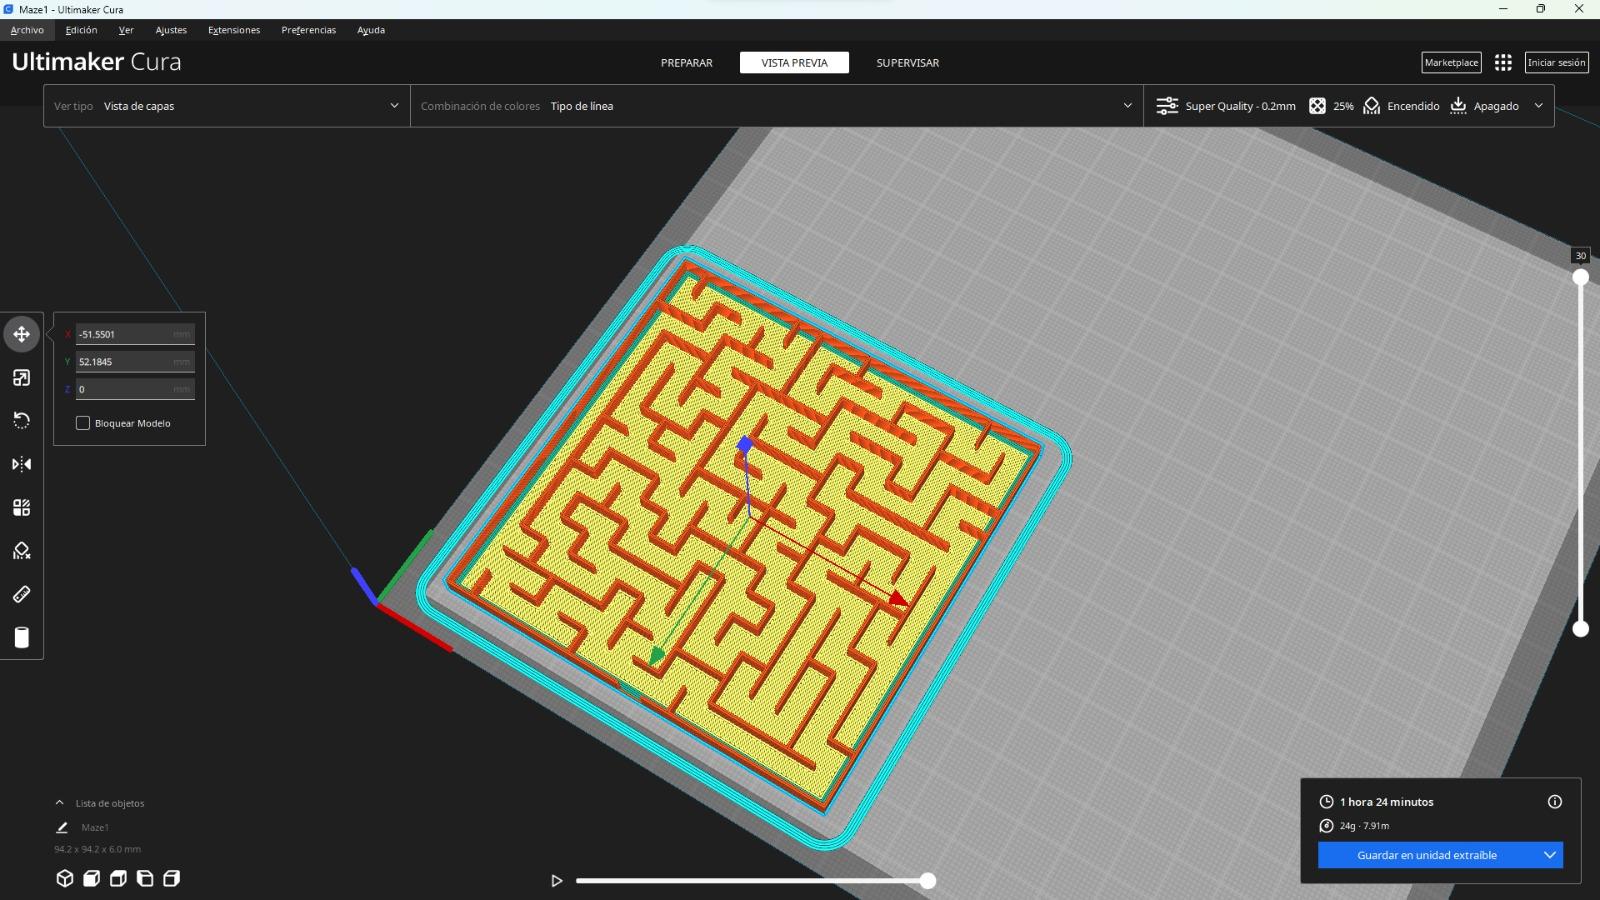
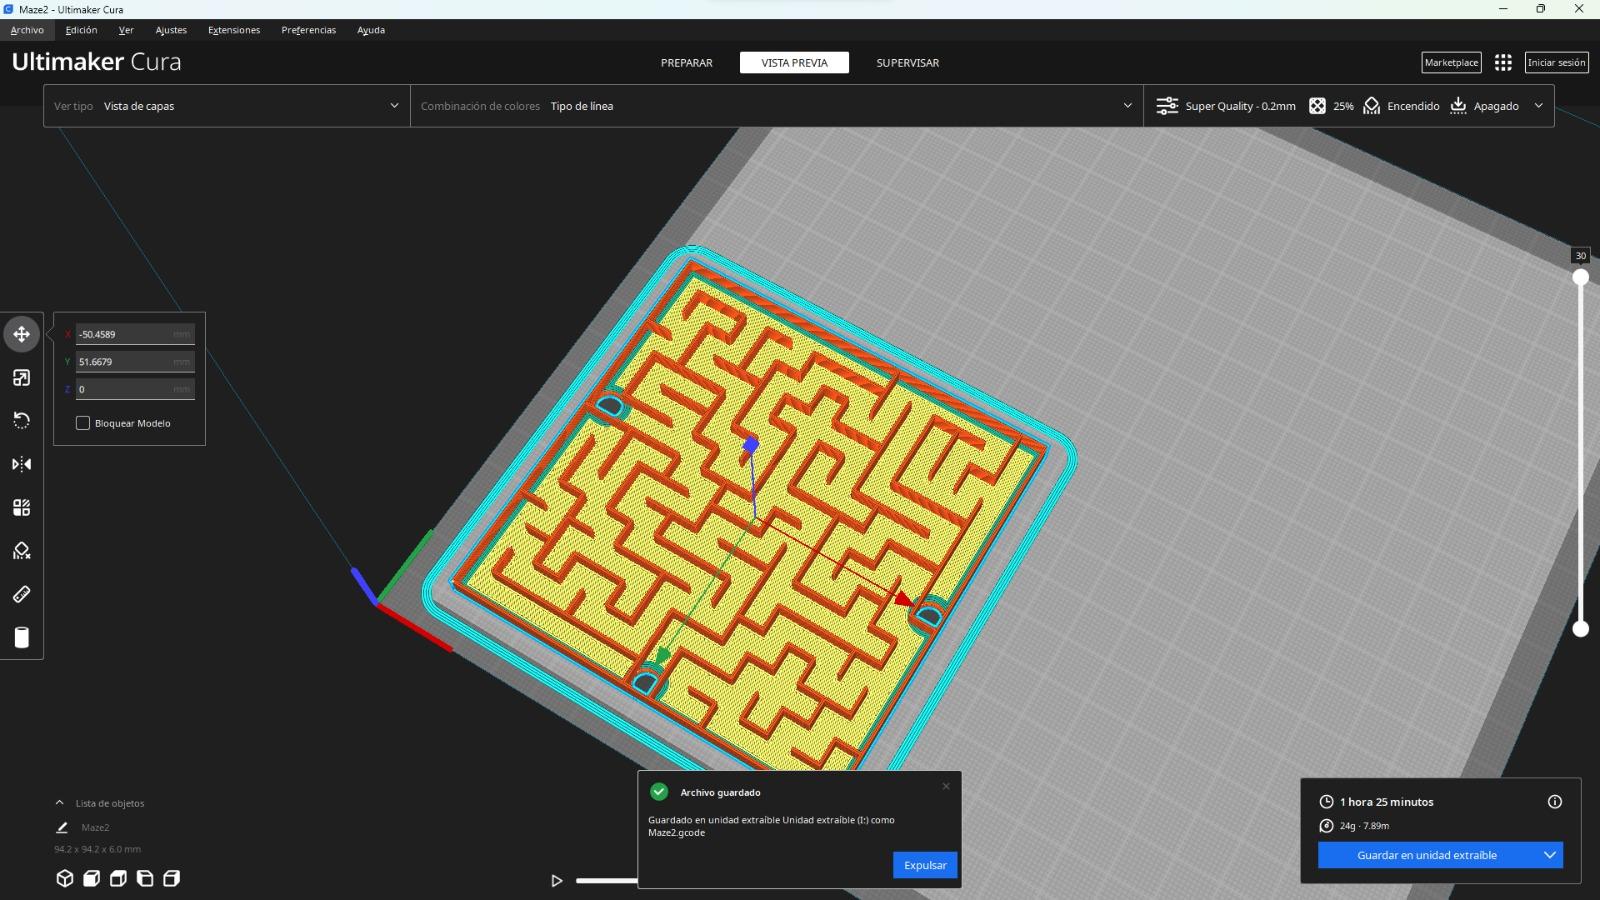
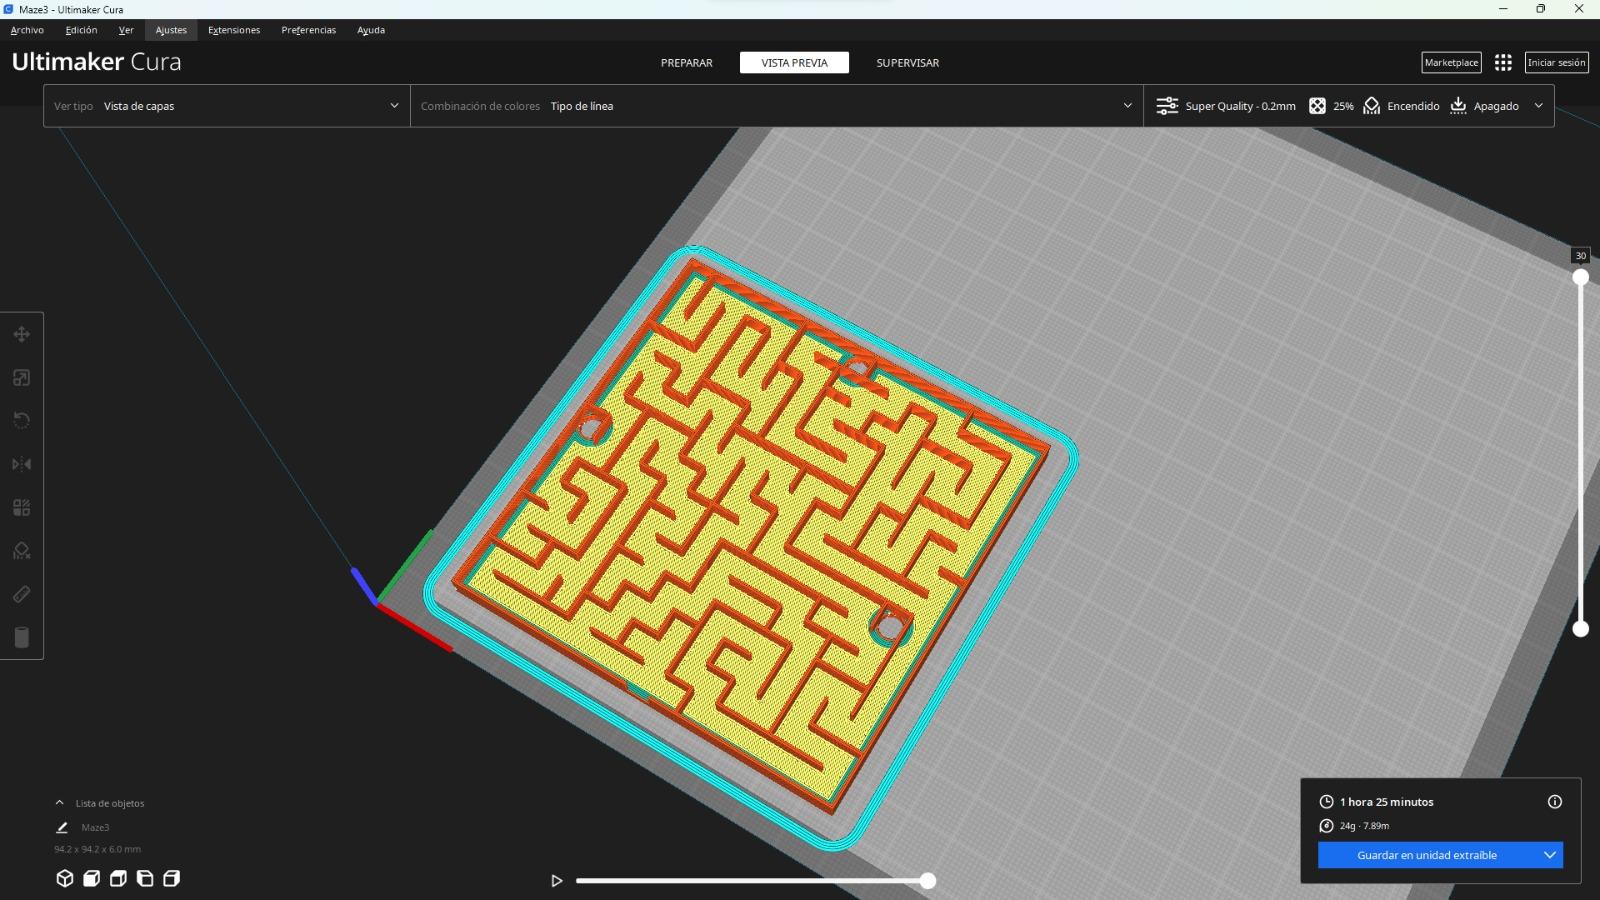
In this step I am going to put the files with the printing parameters that I use, but if you want you can put the ones that you use
Note: The base can be printed in 2 ways, with holes and without holes, you choose which one you prefer.
The mazes are some mazes that come by default but remember that you can create your own.