The $5 3D Printer

You're interested in 3D printing but you don't have a printer of your own because it's too expensive. You're in luck! This Instructable shows you how to build one for a measly $5 (or less if you already have some parts).
The results might not be as good as a $2,000.00 printer, but along the way you'll learn how 3D printers work (hint: they are not magic), gain an enhanced appreciation for what these machines do and maybe even decide to build a better one!
Here's what you'll need:
- A piece of graph paper
- A hot glue gun
- Hot glue sticks (several)
I'd also recommend printing out a hardcopy of the code provided in step 5, it's a lot easier to work with on paper.
Prepare the Build Platform

What is a build platform?
The $5 3D printer uses a flat, mostly stationary table to construct the printed model. In some designs, the table is moved by motors and can be heated to prevent defects from forming in the model due to uncontrolled cooling.
For your build platform you'll need some graph paper with numbered lines. You can do this by hand or you can download and print a PDF of a pre-numbered graph paper from here:
* http://www.printablepaper.net
Once you have the numbered graph paper, you'll want to affix it to something so it won't move around by accident. Taping it to the table works, but using something like a piece of cardboard will allow you to move it when you want to without having it wander around on its own.
Make sure you setup the build platform in a comfortable work area.
Select a Model

What is a model?
In this context, a model is an electronic file that contains instructions that describe a 3-dimensional object to print. Models can be designed in a number of ways - including 3D scanning. 3D scanning captures physical objects in three dimensions like a camera captures physical objects in two dimensional files.
The model is "sliced" into a file containing a language a 3D printer understands. This language is called Gcode, and we'll be looking at it more closely later. This Gcode is interpreted by the printer's control electronics and firmware, and translated into movement.
In the $5 3D printer, you are the printer's electronics and firmware (no Arduino required)!
You'll be reading the model's Gcode directly, so I recommend starting with the simple model included in this Instructable. Of course if you're ambitious, you can select something more complex or create a design of your own. The key is that you have a Gcode file to work with.
As mentioned earlier, printing a hardcopy of the Gcode allows you to mark it up and having your computer go to sleep in the middle of the printing process is frustrating.
Select a Hot End and Extruder

What is a hot end? What is an extruder?
The printer's hot end is a nozzle which heats the material being printed (typically plastic, in our case glue) and deposits the material on the build platform. The extruder is what pushes the material into the hot end.
In the $5 3D printer, the hot end is a hot glue gun, and the trigger is the extruder!
Any glue gun will work, but I recommend using an inexpensive low-temp gun. The smaller the nozzle the better, but it's really not that important. Also long glue sticks will make things easier (reloading frequently while printing can make things more difficult).
Prepare the Axis
What is an axis?
On a 3D printer, the axis refers to the mechanism that positions the hot end relative to the build platform. The $5 printer uses an axis in which the hot end moves in all three axis (X, Y and Z) using the Cartesian coordinate system. Other printers move the hot end in the X and Z axis and move the build platform in the Y axis, or some combination of each.
In the $5 3D printer, your arm is the axis!
Position yourself close to the print bed (the graph paper) in a position where you can comfortably reach the entire area of the bed with the nozzle of the glue gun pointed down. Make sure you can squeeze the trigger of the gun in any position of the bed, and and also while lifting the gun various heights as well.
Also make sure the cord (if your glue gun has one) isn't going to drag across the surface of the bed as you work.
Print!


Fire up the hot glue gun and get it to temperature. Once it's ready, begin "processing" the Gcode by reading the first instruction and then carrying out that action using the hot glue gun and the grid of the graph paper. It may be easier to mark the start and end points for each line with a pen before laying down the glue.
Here's how to read a line of Gcode:
G1 X57.81 Y13.13 E262.76105
The Gcode starts with G0 or G1. There is a difference, but for the $5 printer hey both mean go.
Next is X, Y and Z. These tell you where to go on the graph paper. This is kind of like a combination of Battleship and connect-the-dots.
Finally there is E. E tells the printer to extrude. Using the $5 printer, that means pulling the trigger of the glue gun to squeeze out some glue as you move from one point to the next. If there's no E, that means move without laying down any material.
There are many other Gcode instructions available, you can learn more about them from Wikipedia.
To execute this line of Gcode, you would start with the X axis and find the 57th line (you can round these numbers, we are not as precise as robots) along the long side of your graph paper. Then, you would find the 13th line on the short side (the Y axis). Where these two lines intersect is where you'll position the nozzle of your hot end (the hot glue gun). Since there is an E on this sample line of Gcode, we would extrude material on the bed as we move from the current location to the destination the code specifies.
Now that you know how to read and execute Gcode, you can start printing the example model by executing each line below one at a time. If the command includes an E value, be sure to extrude glue as you move from the previous to the next location.
I find it's helpful to print off the Gcode so you can cross-off or check each line as you go so you don't loose your place.
G0 F6000 X6.13 Y32.47
G1 F900 X38.47 Y32.47 E240.02457
G1 X57.81 Y13.13 E262.76105
G1 X59.93 Y15.25 E265.25577
G1 X43.95 Y31.23 E284.04527
G1 X44.46 Y32.47 E285.15692
G1 X59.13 Y32.47 E297.35341
G1 X59.13 Y45.47 E308.16296
G1 X55.36 Y45.47 E311.29939
G1 X57.56 Y44.40 E313.33332
G1 X58.16 Y41.77 E315.57717
G1 X56.48 Y39.66 E317.82088
G1 X53.78 Y39.66 E320.06594
G1 X52.46 Y41.32 E321.83098
G1 X52.10 Y41.77 E322.30757
G1 X52.57 Y43.85 E324.08486
G1 X52.70 Y44.41 E324.55722
G1 X54.90 Y45.47 E326.58743
G1 X44.46 Y45.47 E335.26833
G1 X43.95 Y46.70 E336.37998
G1 X59.93 Y62.68 E355.16948
G1 X57.81 Y64.80 E357.66361
G1 X38.47 Y45.47 E380.39950
G1 X6.13 Y45.47 E407.29281
G1 X6.13 Y32.47 E418.10236
G0 F6000 X44.11 Y38.96
G1 F900 X44.51 Y40.98 E419.81559
G1 X44.57 Y41.27 E420.06281
G1 X45.71 Y42.97 E421.76431
G1 X45.88 Y43.22 E422.01245
G1 X47.58 Y44.36 E423.71810
G1 X47.83 Y44.53 E423.96440
G1 X49.84 Y44.93 E425.67094
G1 X51.13 Y45.20 E426.76747
G1 X51.13 Y32.75 E437.11802
G1 X47.83 Y33.40 E439.91812
G1 X46.12 Y34.54 E441.62492
G1 X45.87 Y34.71 E441.87307
G1 X44.73 Y36.41 E443.57756
G1 X44.57 Y36.66 E443.82386
G1 X44.17 Y38.66 E445.52356
G1 X44.11 Y38.96 E445.77404
G0 F6000 X52.57 Y36.85
G1 F900 X52.70 Y37.41 E446.24640
G1 X55.13 Y38.58 E448.48710
G1 X57.56 Y37.40 E450.73152
G1 X58.16 Y34.77 E452.97537
G1 X56.48 Y32.66 E455.21908
G1 X53.78 Y32.66 E457.46414
G1 X52.46 Y34.32 E459.22919
G1 X52.10 Y34.77 E459.70577
G1 X52.57 Y36.85 E461.48307
G0 F6000 X46.27 Y33.54
This completes the outline of the first layer as shown in the third photo. This outline of the layer is sometimes called the wall. Once the wall is complete, material is laid down to fill in the space inside the wall. This material is called infill.
Infill usually takes the form of diagonal lines within the wall of the layer (you can see an example of this in the fourth photo). Infill can take other forms as well, but we'll stick with diagonal lines to keep things simple. The number of lines can also vary, more lines make the part stronger, whereas fewer lines make it lighter, uses less material and may also print faster.
As you can imagine, it takes a lot of lines of Gcode to describe the infill, and as such I've left them out of this example. Instead, I leave it to you to draw the horizontal lines within the wall as shown in the fourth photo. Repeat this process until the layer is completely filled, being sure to leave the mouth and eyes open as seen in the fifth photo.
Once the infill is complete, a line of Gcode typically instructs the printer to move the Z axis up and start the next layer. In our example print, every layer is identical and since we cannot be as precise as a robot, we start on top of the last layer, laying down an identical pattern. Repeat this process 10 times to complete the model.
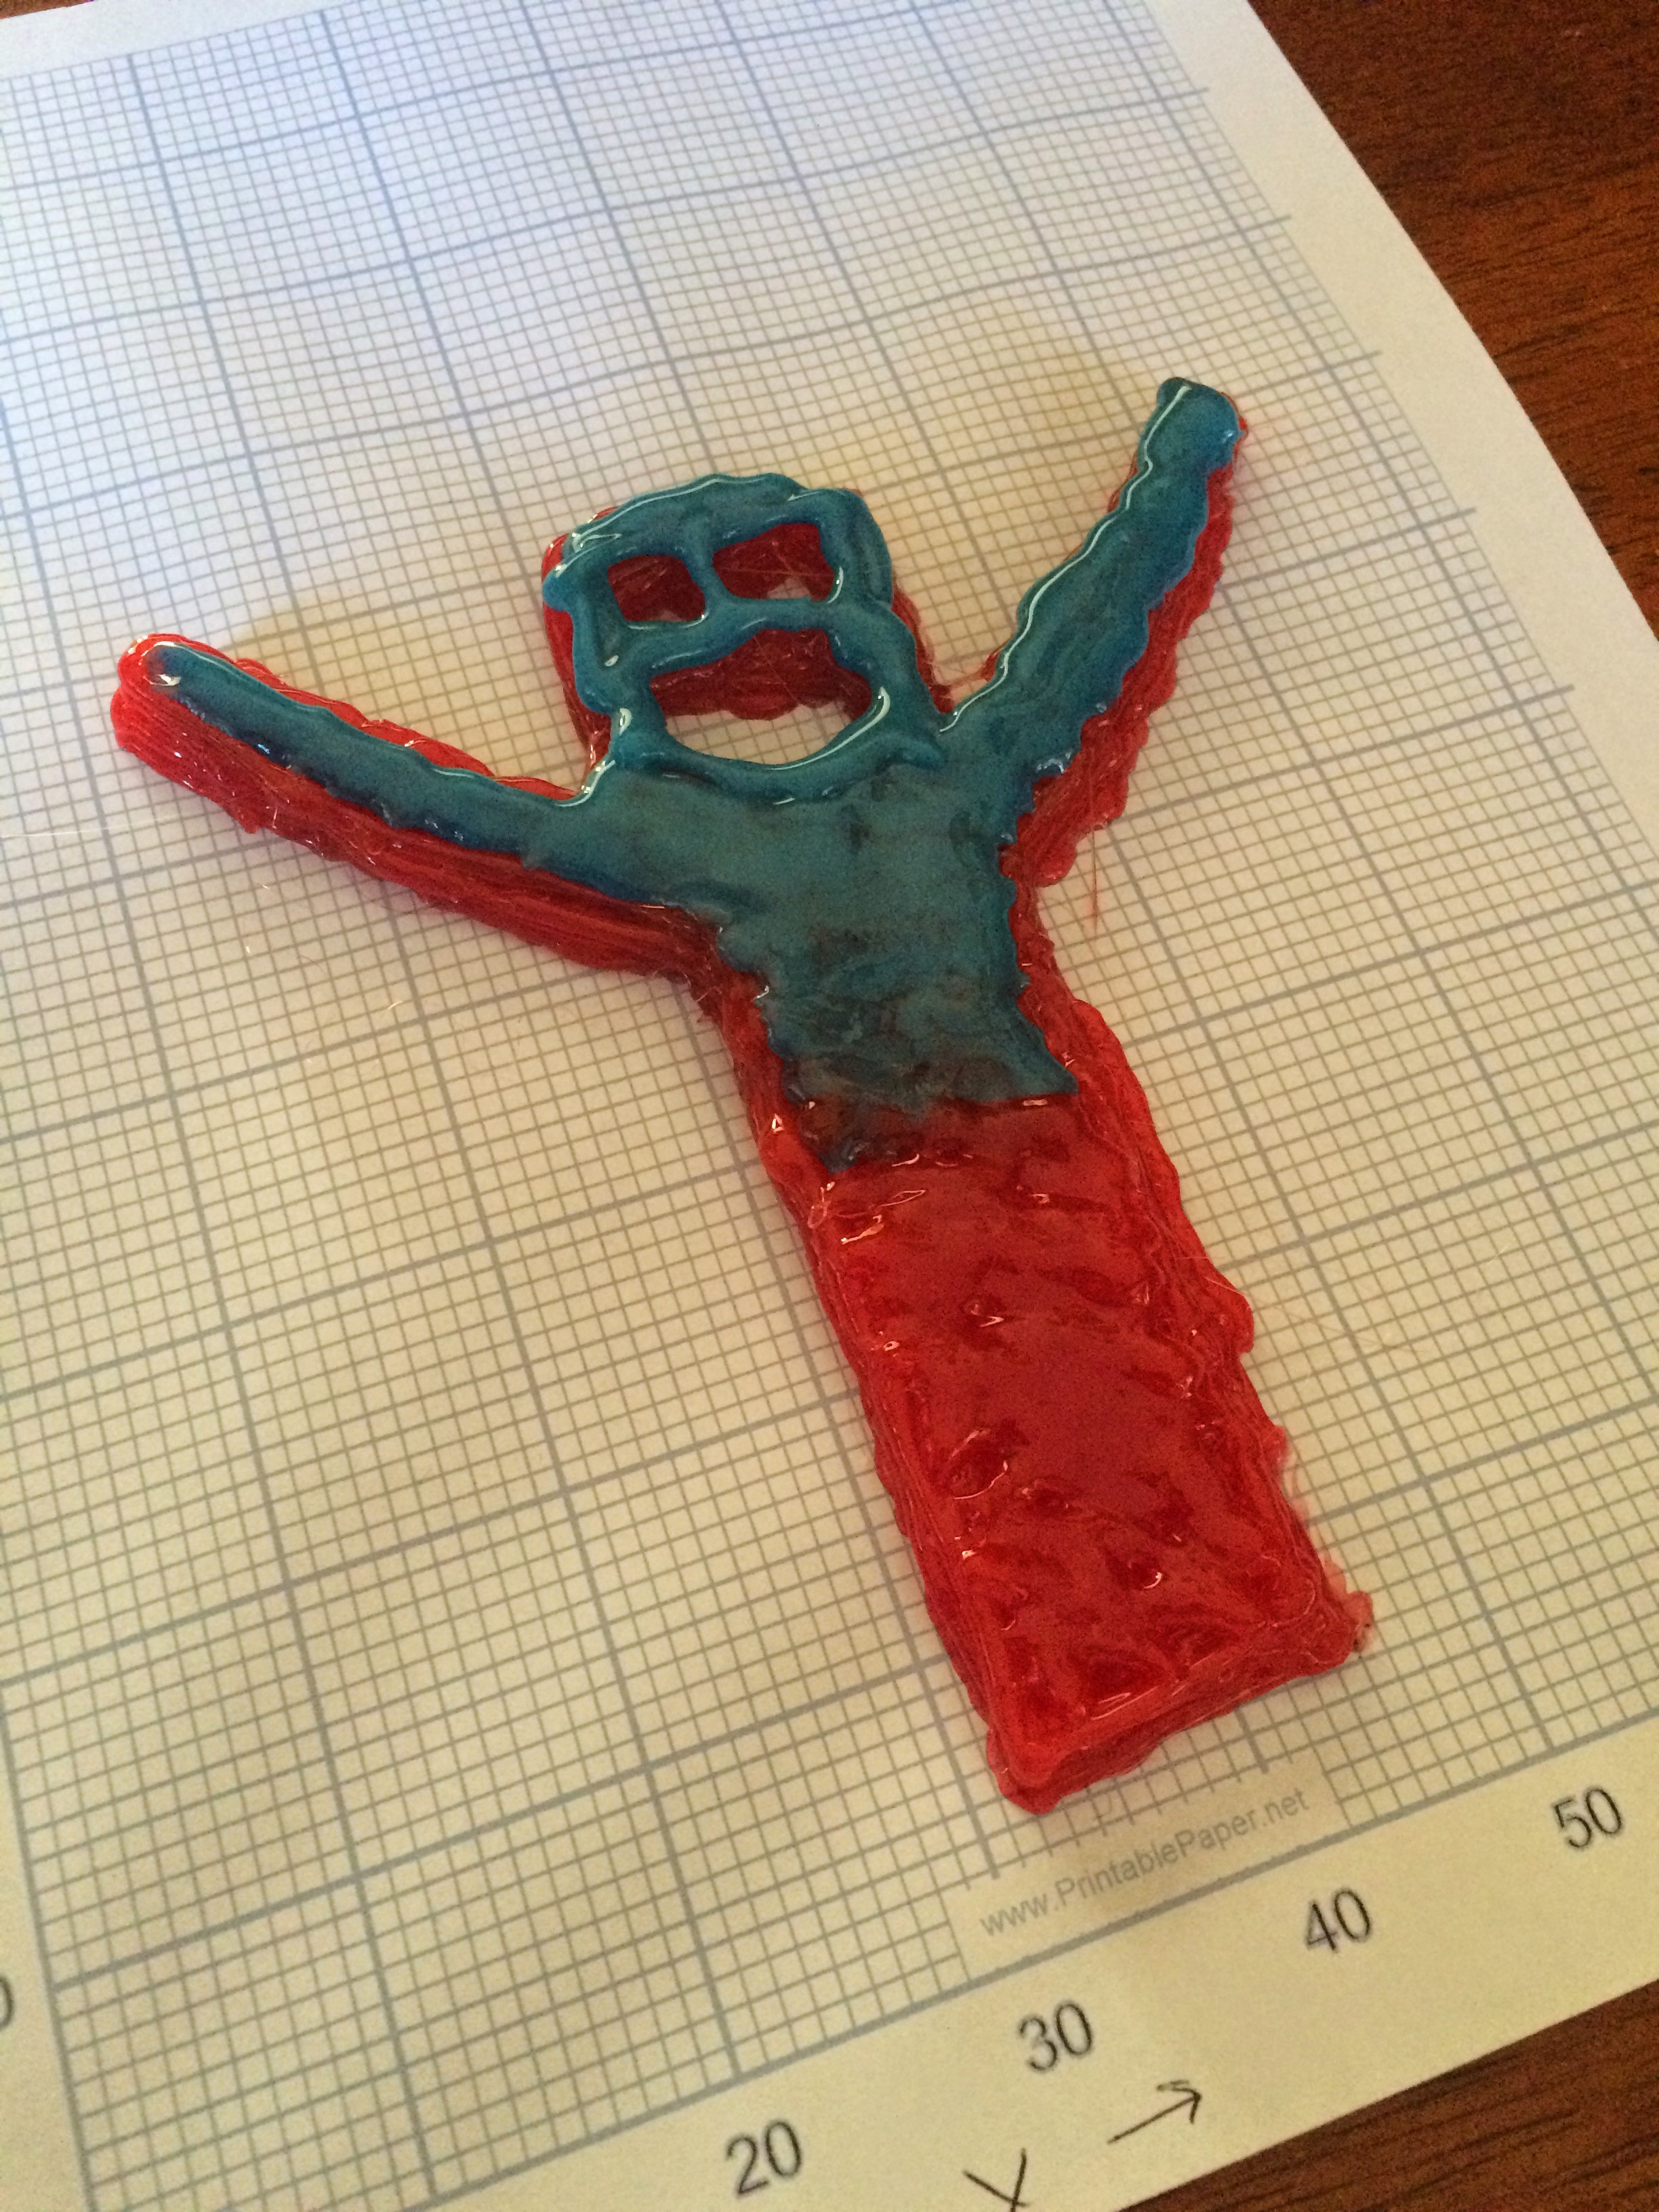
As you can see in the last photo, I ran out red and had to change colors part-way through the print, a technique used by 3D printers to print multicolored or multi-material models.
Once you've laid-down 10 layers, the model is complete!
Results

Even if you're not impressed with the output of the $5 3D Printer, you should now have an understanding of how 3D printers turn digital models into physical objects (as well as a new level of appreciation for the robots that print these models).
You've also learned about the major components of a deposition-type of 3D printer (build platform, controller/firmware, axis, extruder & hot end), and got a taste of the native language these printers speak (Gcode). There are other types of 3D printers that share some of these components, and many machines that understand the Gcode. You can apply what you've learned here to further understand how these other machines work and what areas of 3D technologies you'd like to learn more about.
This Instructable is based on an exercise included in a book I'm writing on 3D printing. If you enjoyed this project and would like to learn more about 3D printing, please visit https://leanpub.com/3dprintingandreprap and sign-up to be notified when the book is published.