Texture Rollers - for Cookies or Clay
by rschoenm in Workshop > 3D Printing
10534 Views, 101 Favorites, 0 Comments
Texture Rollers - for Cookies or Clay
In this Instructable I'll show you how to make 3d printed texture rollers for cookie dough, ceramics, clay, play dough, fondant, or pie crust. Imprint textures, graphics, or text on your creations! Make some unique or personalized cookies, cakes, or pie crust. Make some fun rollers for your kid's play dough! Decorate your ceramics work with unique textures.
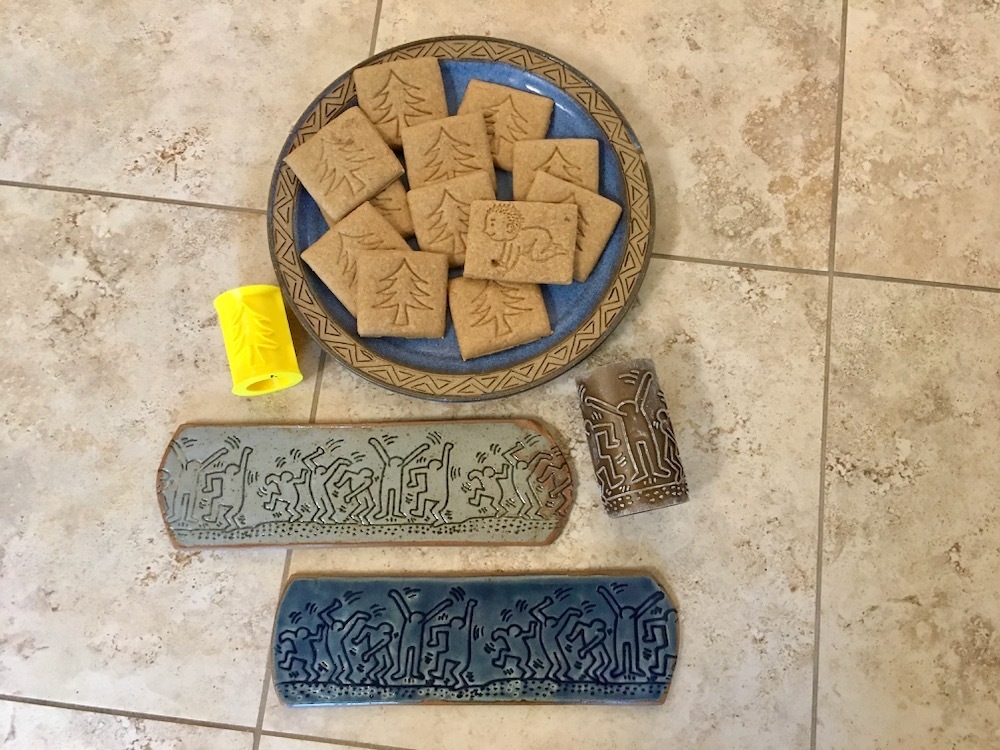
I have included a lot of pictures to give you some ideas of what can be done!
Originally I designed these rollers for ceramics work; then my wife pointed out that with the holiday baking season coming up it seemed that these rollers would be a great addition to any kitchen!
Tools:
Fusion 360 software
3d Printer
Supplies
PLA Filament
Clay, cookie dough, or play dough!
Design the Texture Roller in Fusion 360
For this Instructable I assume that you have a basic understanding of how to use Autodesk Fusion 360 and how to 3d print an stl file.
I also assume that you are familiar with basic ceramic technique. Or baking cookies!
Edit 8/2022:
A while ago Autodesk added an "Emboss" feature in the Solid Design Workspace that makes creating the rollers significantly easier:
- In the 'Solid Design Workspace' create a cylinder (tube) with the axis running in the z direction.
- Create a new sketch on the x,z plane and either draw your texture pattern or import an svg file. You may have to move/scale the svg file to fit on your roller. Finish the sketch.
- Then click 'Create' > 'Emboss' and select the pattern/svg profile, the cylinder face, and enter the desired depth.
- Your pattern is now wrapped around the cylinder.
- This is much easier and quicker now than the approach described below in steps 2, 3, 4.
- Ignore steps 1,2,3,4 and skip directly to step 5.
End Edit 8/2022
Start Fusion 360 with a new file in the ‘Sheet Metal’ workspace.
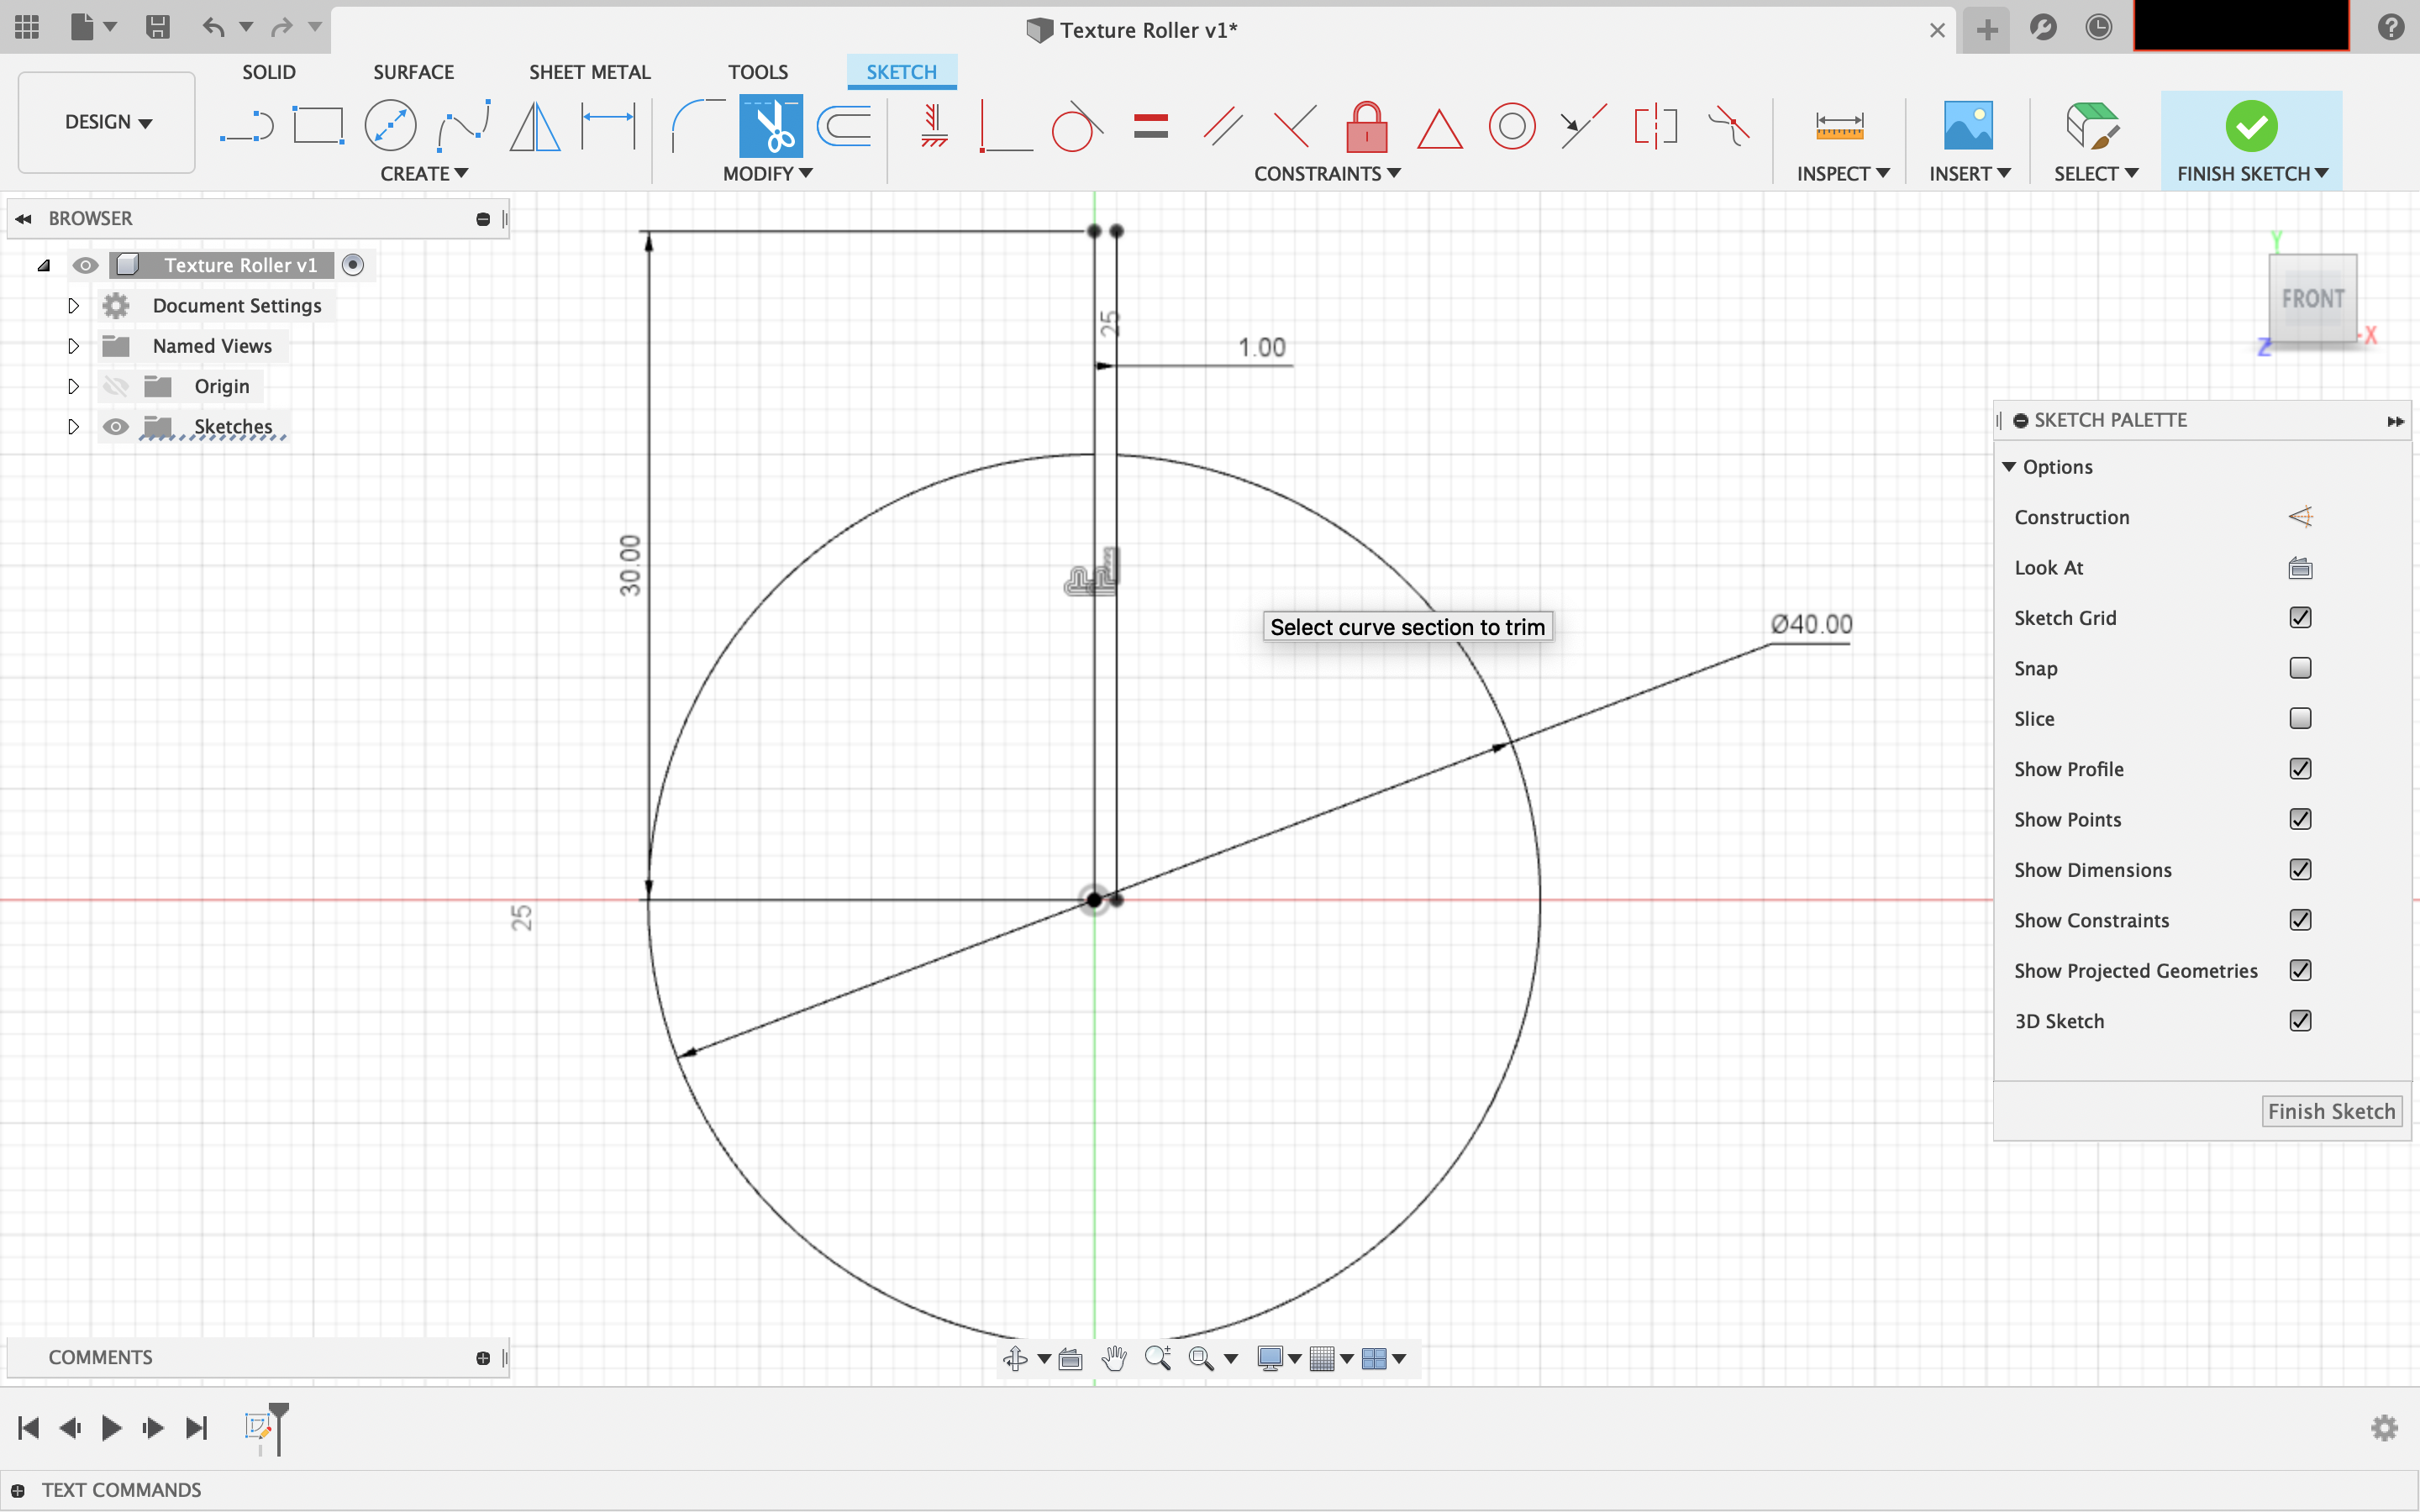
Create a new sketch. This sketch will become the roller with a 40 mm diameter. Feel free to adjust the roller dimensions to your needs.
Draw a 40 mm diameter circle.
Draw a 30 mm long line from the center across the perimeter of the circle. Offset this line by 1 mm. Now trim out the small section of the circle between the two lines. Finish the sketch.
Create the Roller
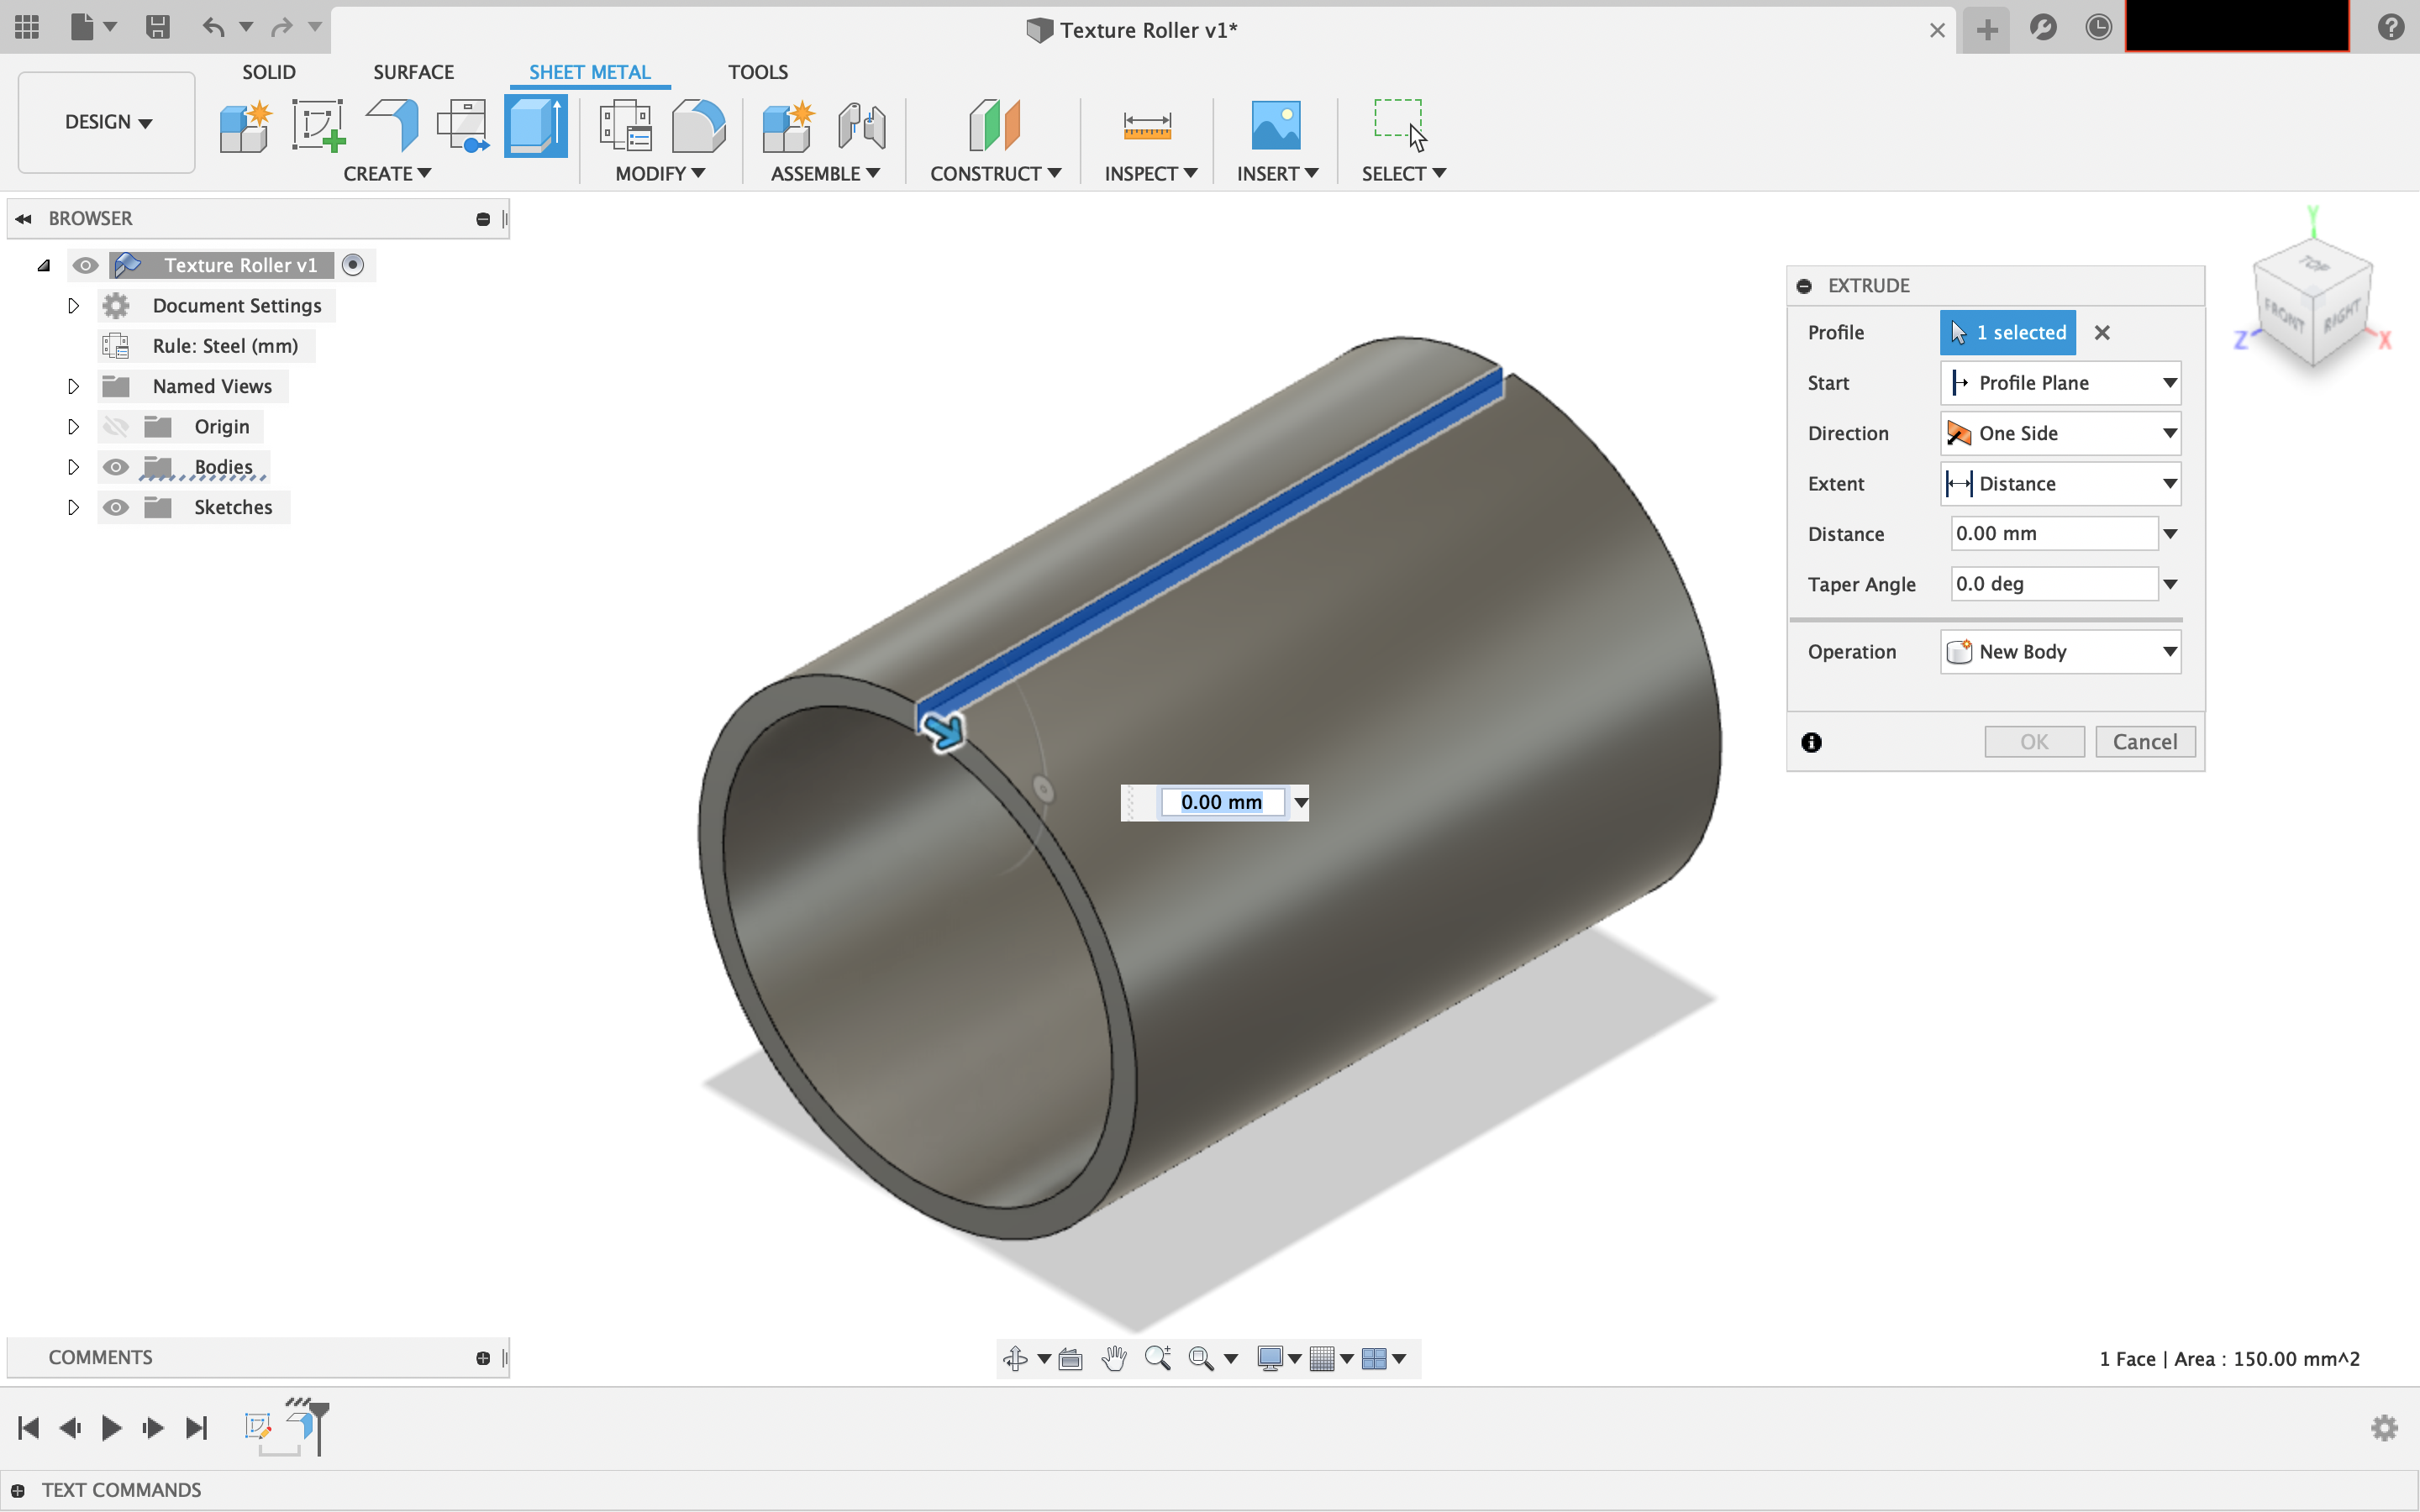
Make sure that you are in the ‘Sheet Metal’ workspace. Create a 60 mm tall flange from the circle sketch ('Create -> Flange'). The default settings create a 2.5 mm wall thickness. You now have a tube/roller that is 60 mm tall, 40 mm ID, 2.5 mm wall thickness, with a 1 mm gap in it.
Extrude one face of the gap by 0.5 mm, see screenshots.
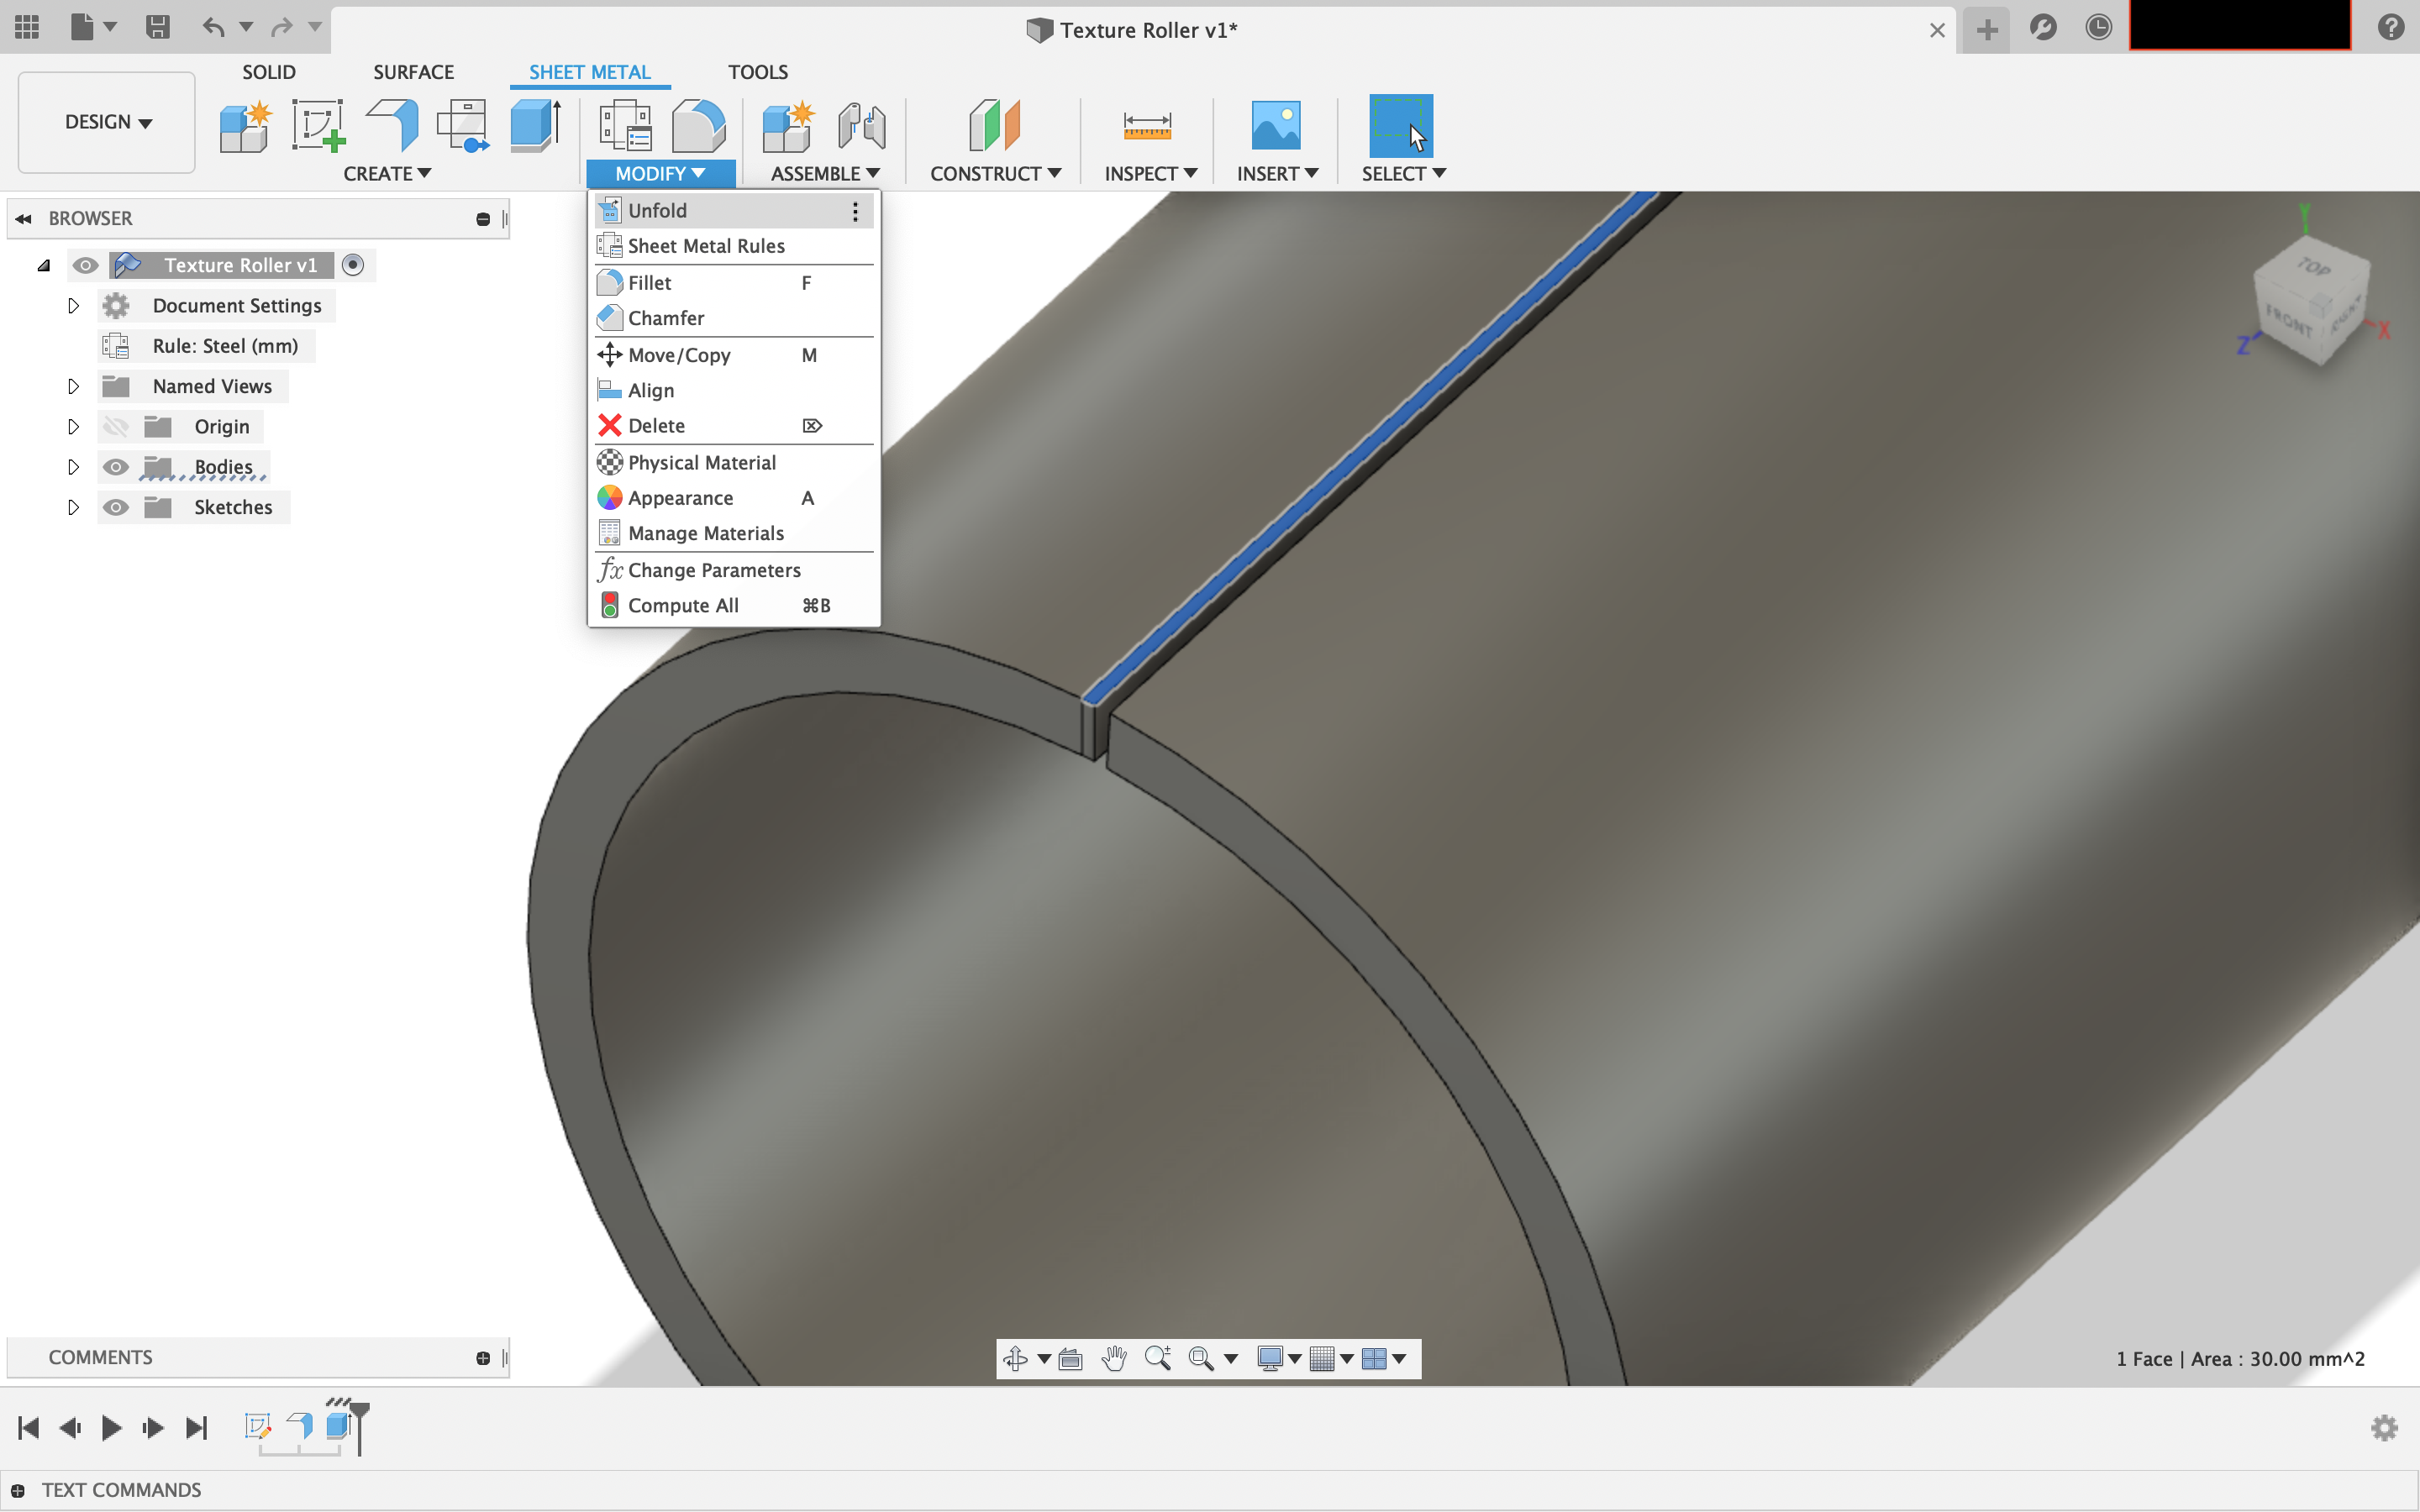
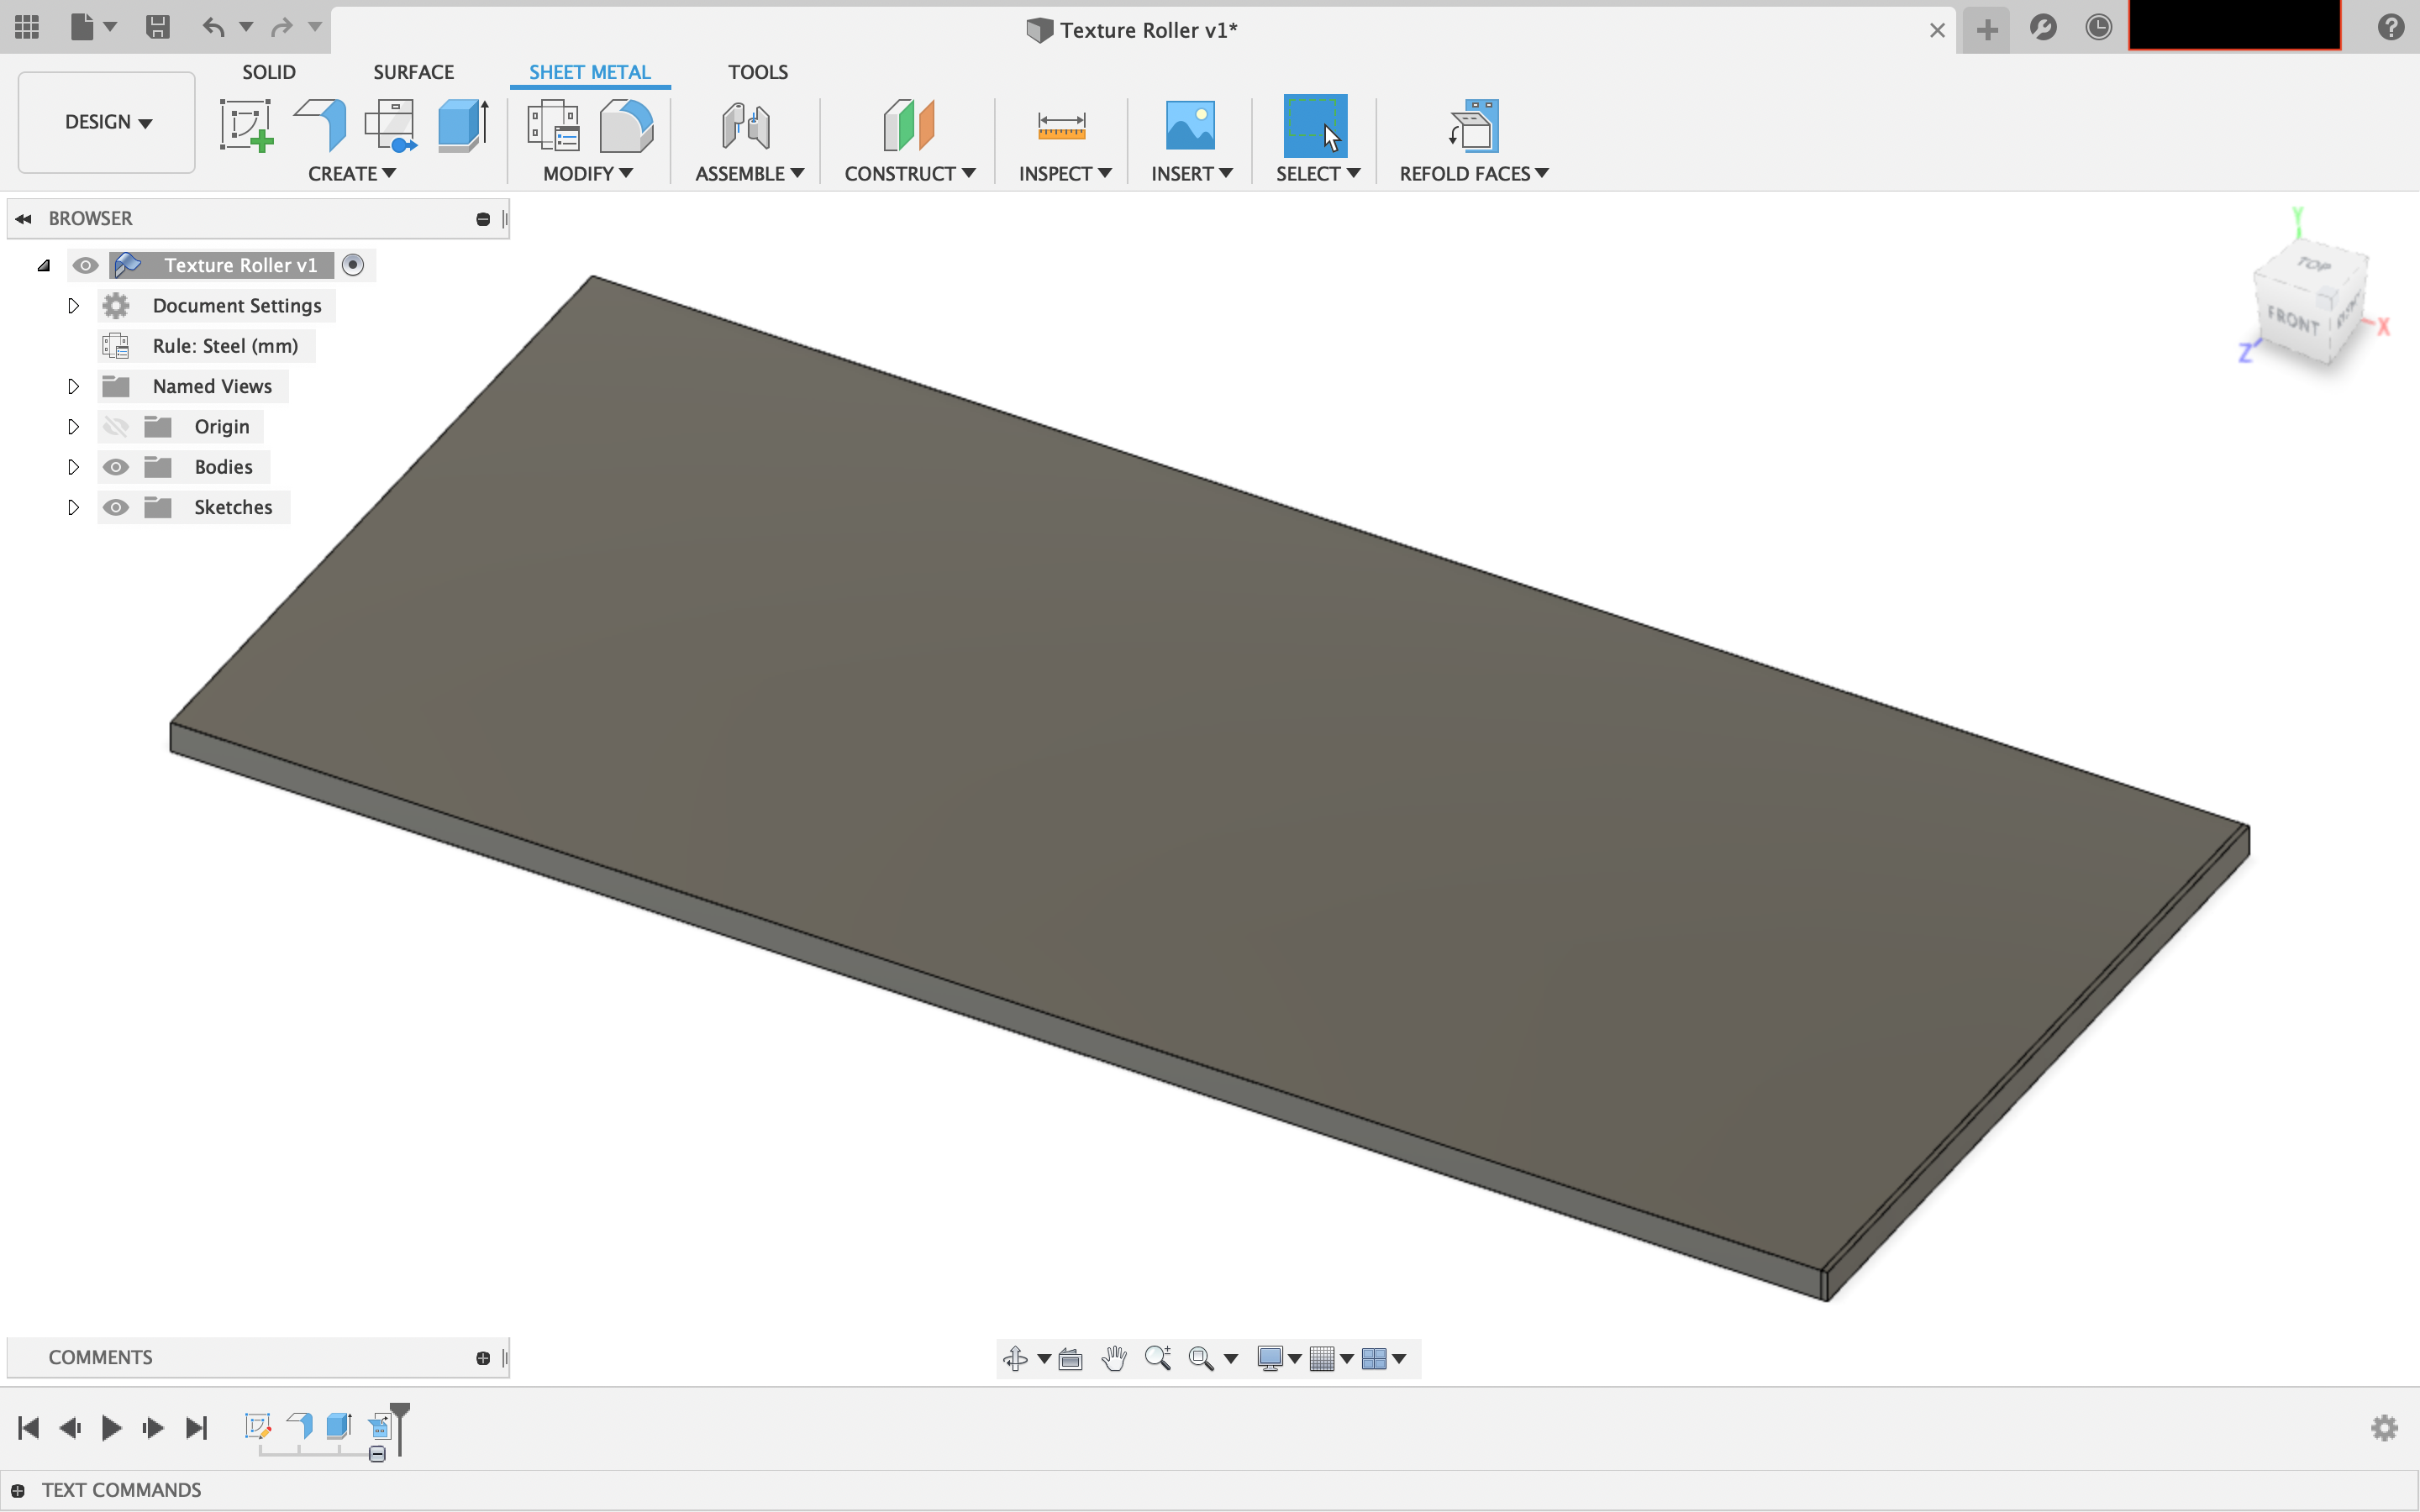
Now select the surface of the extruded piece (the 0.5 mm by 60 mm strip) and go to ‘Modify -> Unfold’. Be sure to click ‘Unfold all bends’. The flange will unroll into a rectangle.
Create the Texture
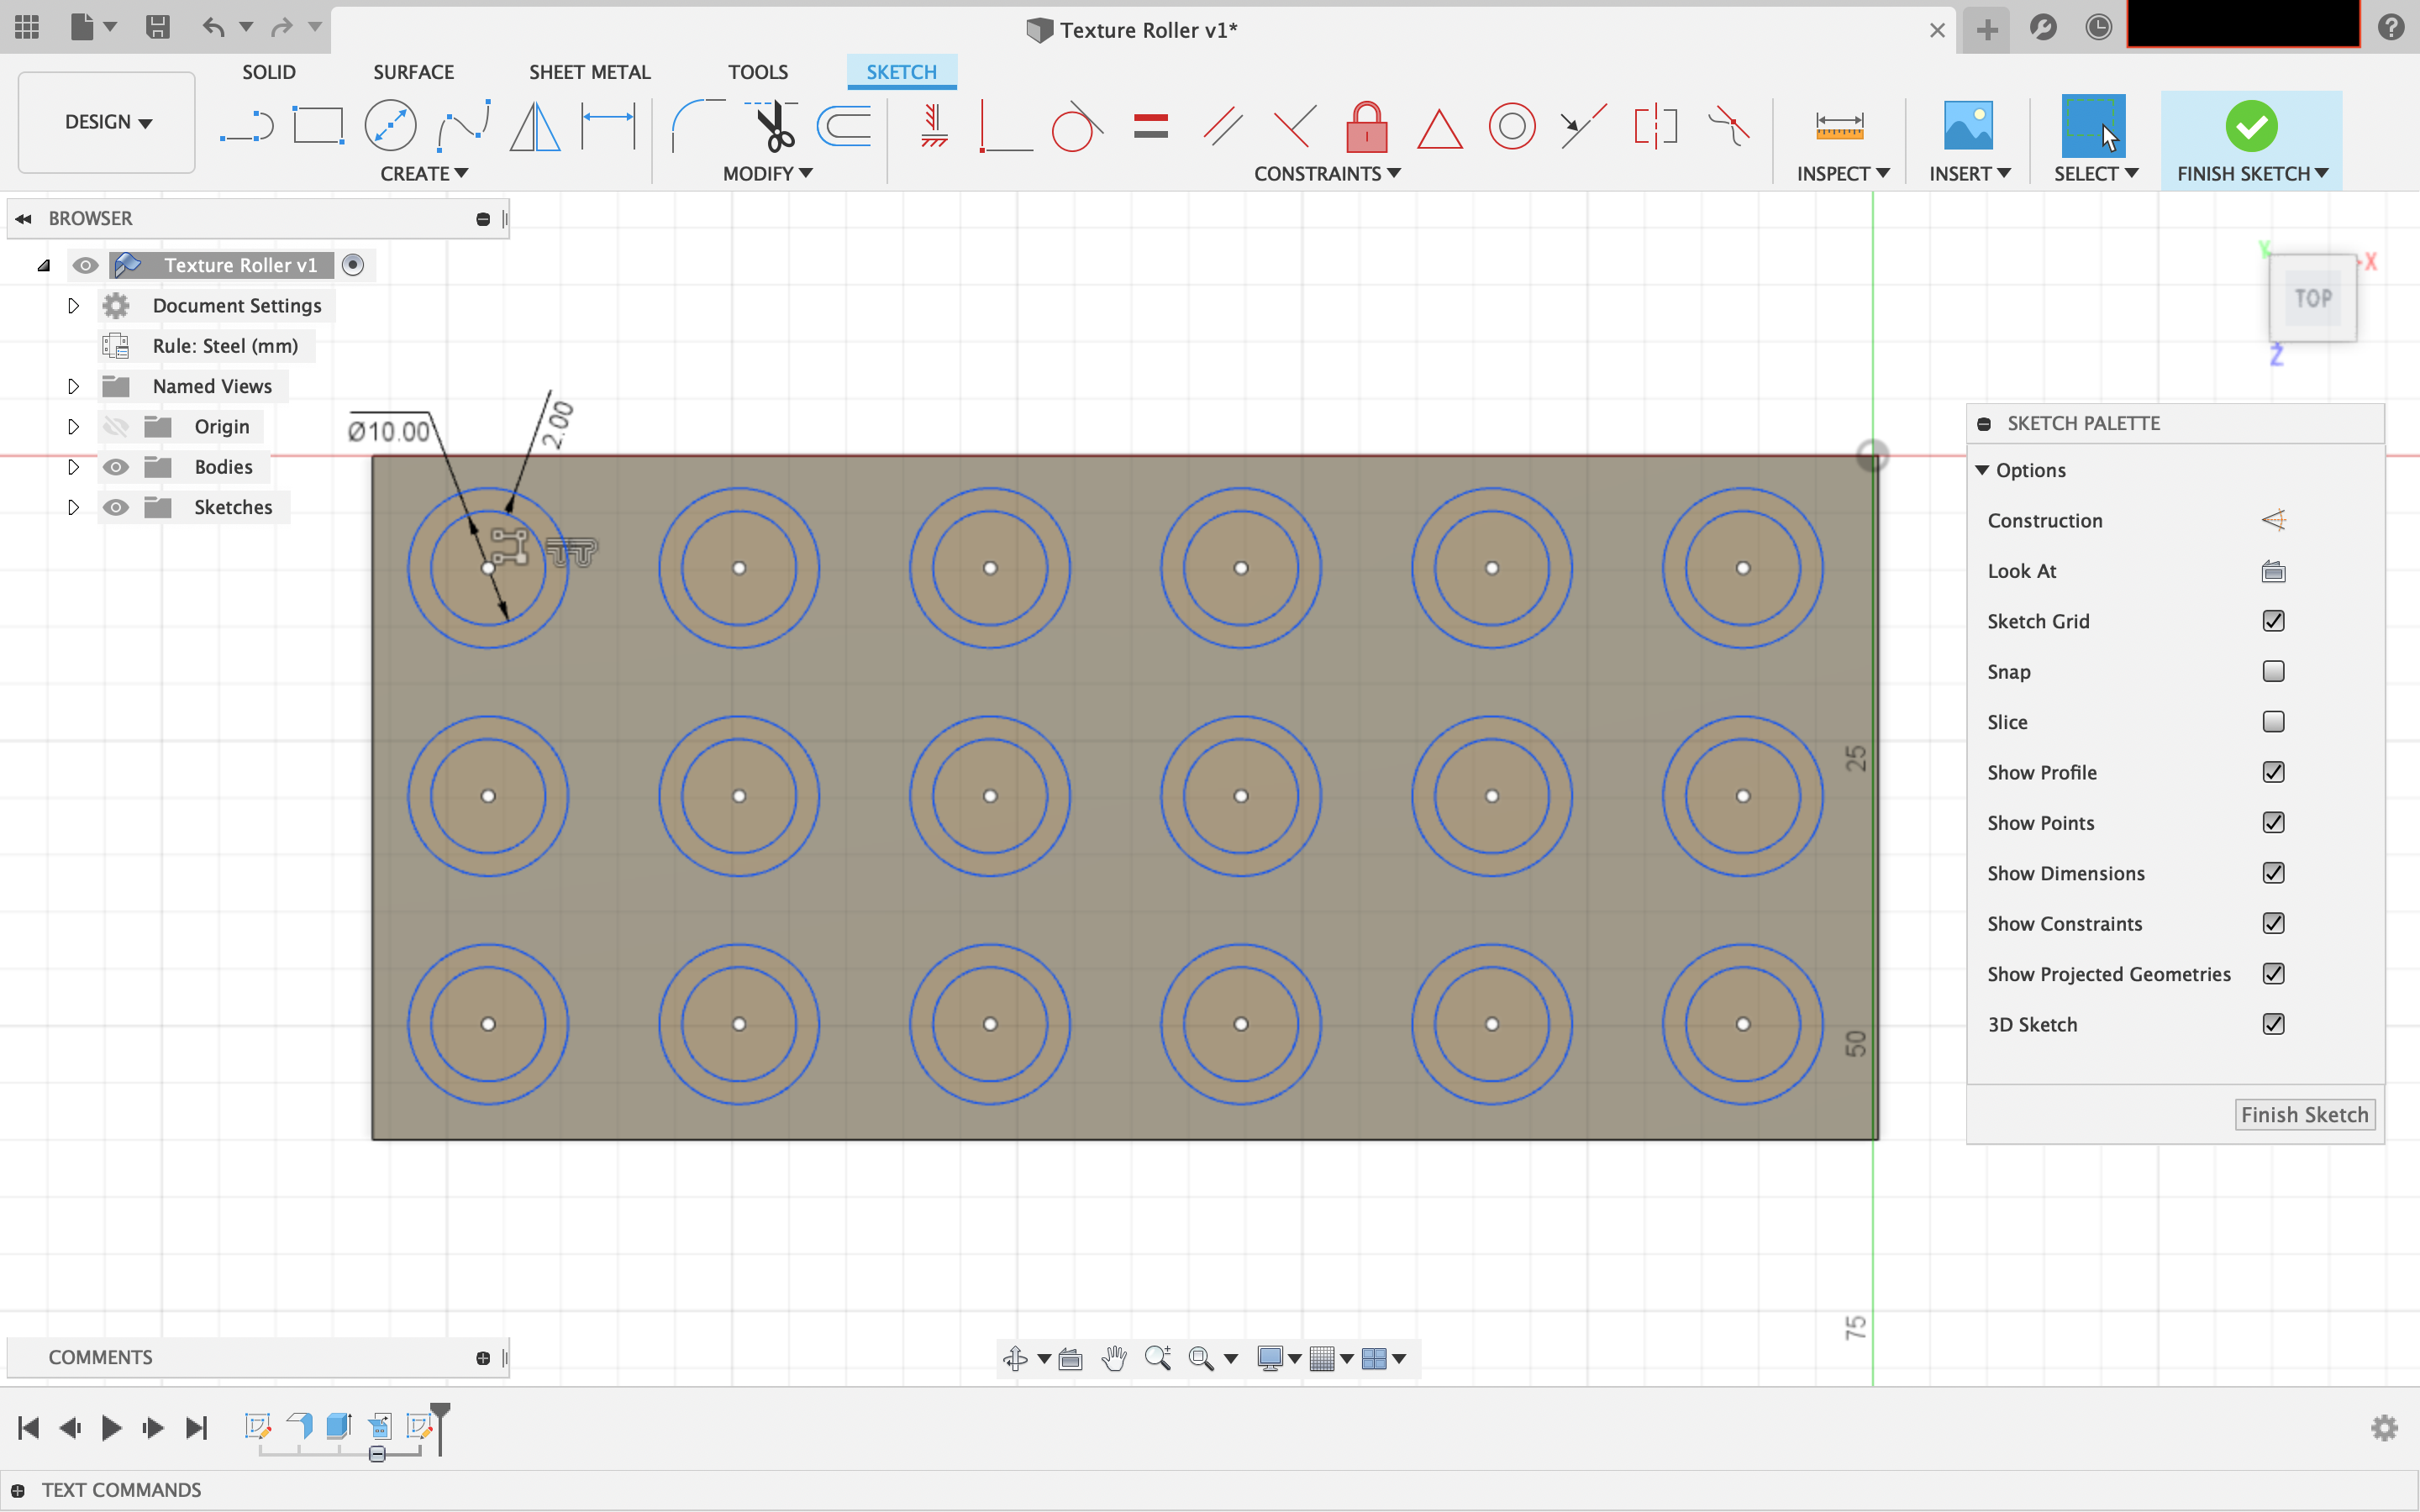
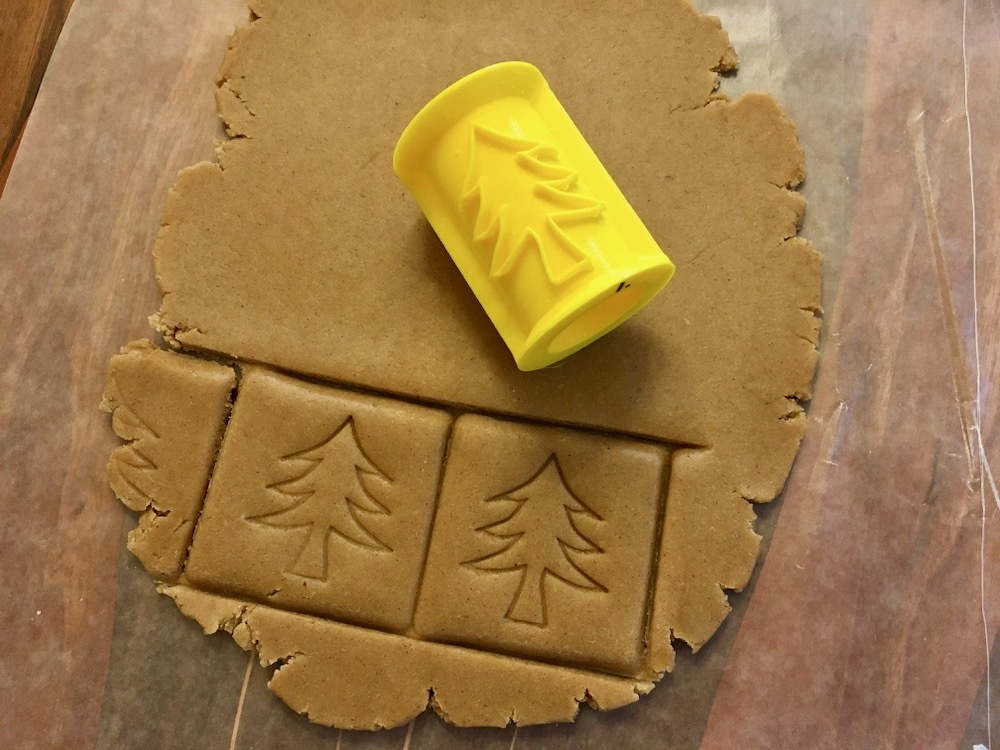
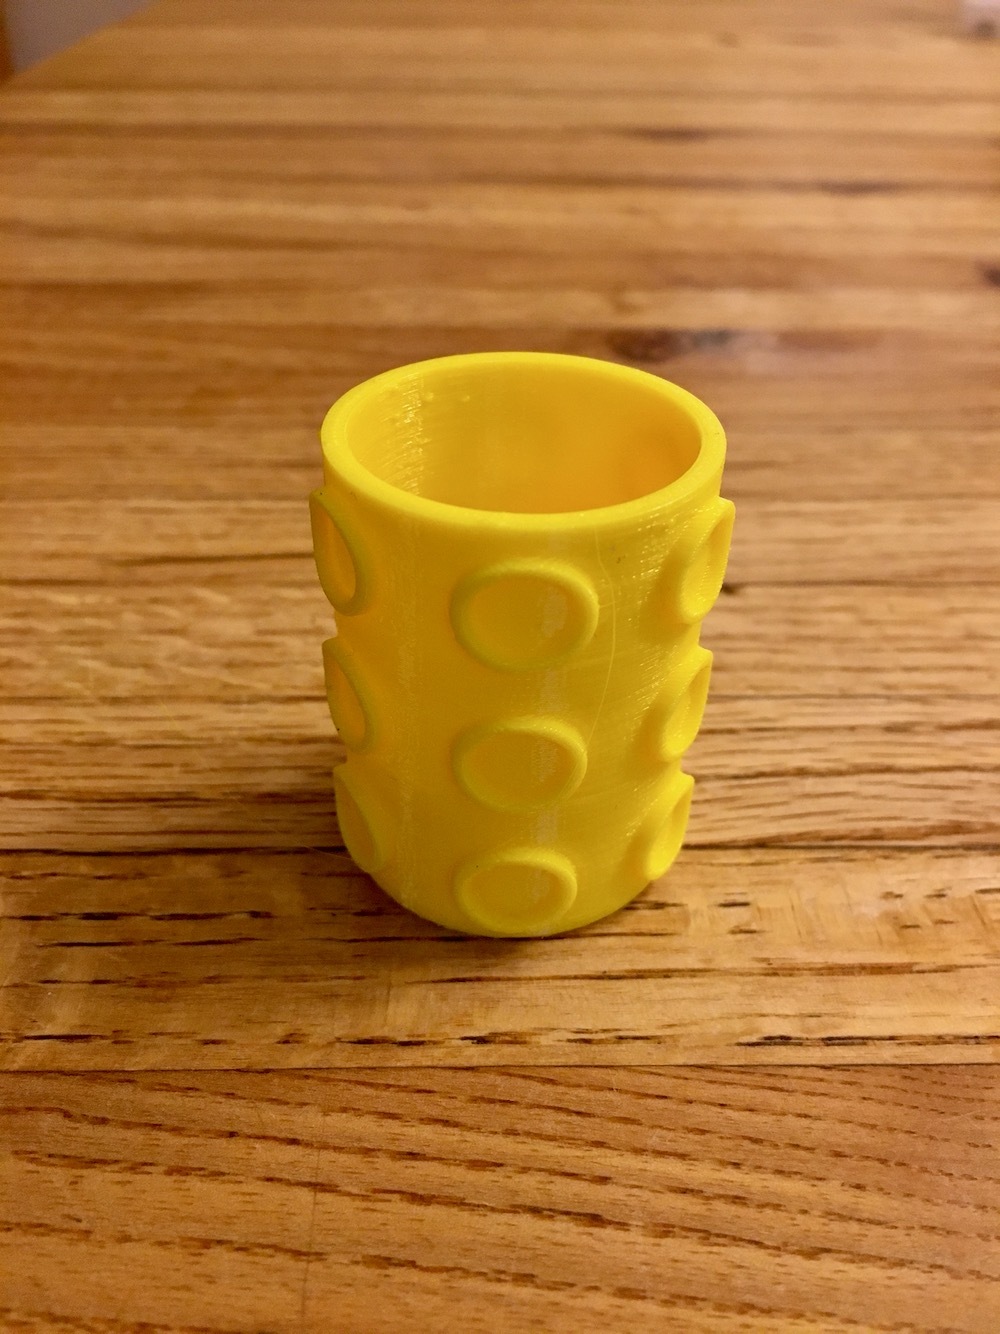
Create a new sketch on the surface of the flange. This sketch will be your pattern or texture, to be imprinted on the cookie dough or clay slab. For this demo, I created a simple array of circles (boring!).
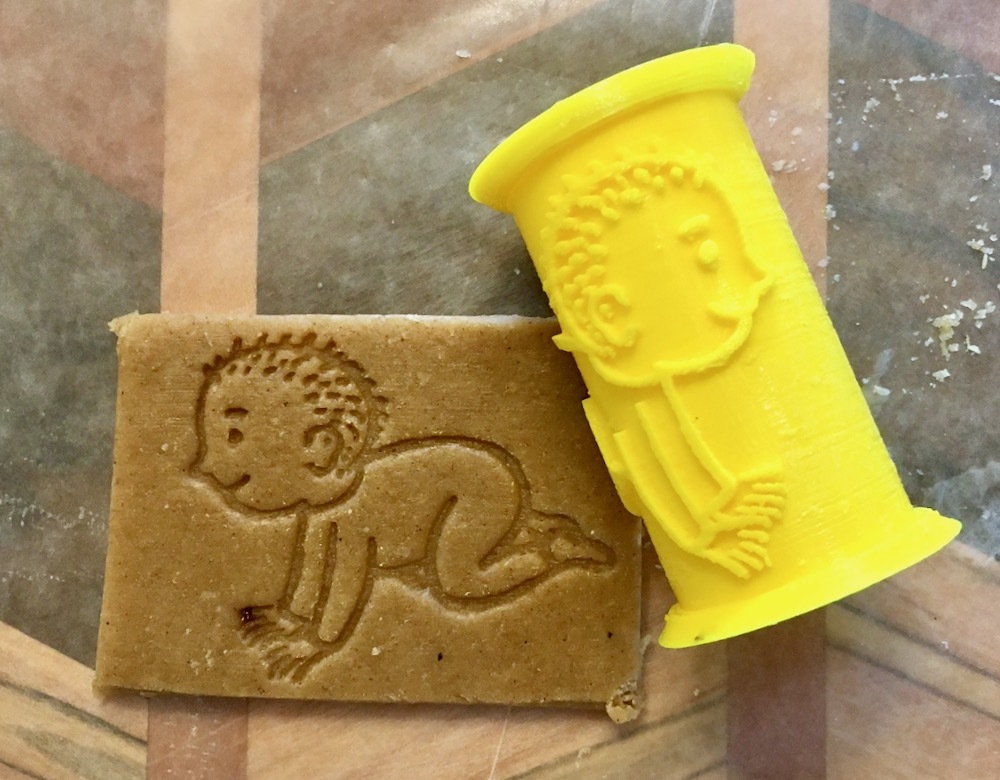
You can also use graphics, text, or letters for your roller. Be aware that drawing and extruding a detailed/complex sketch may slow your computer to a crawl and may take a long time to complete. Also, any detail smaller than a millimeter will probably not show. Keep it simple!
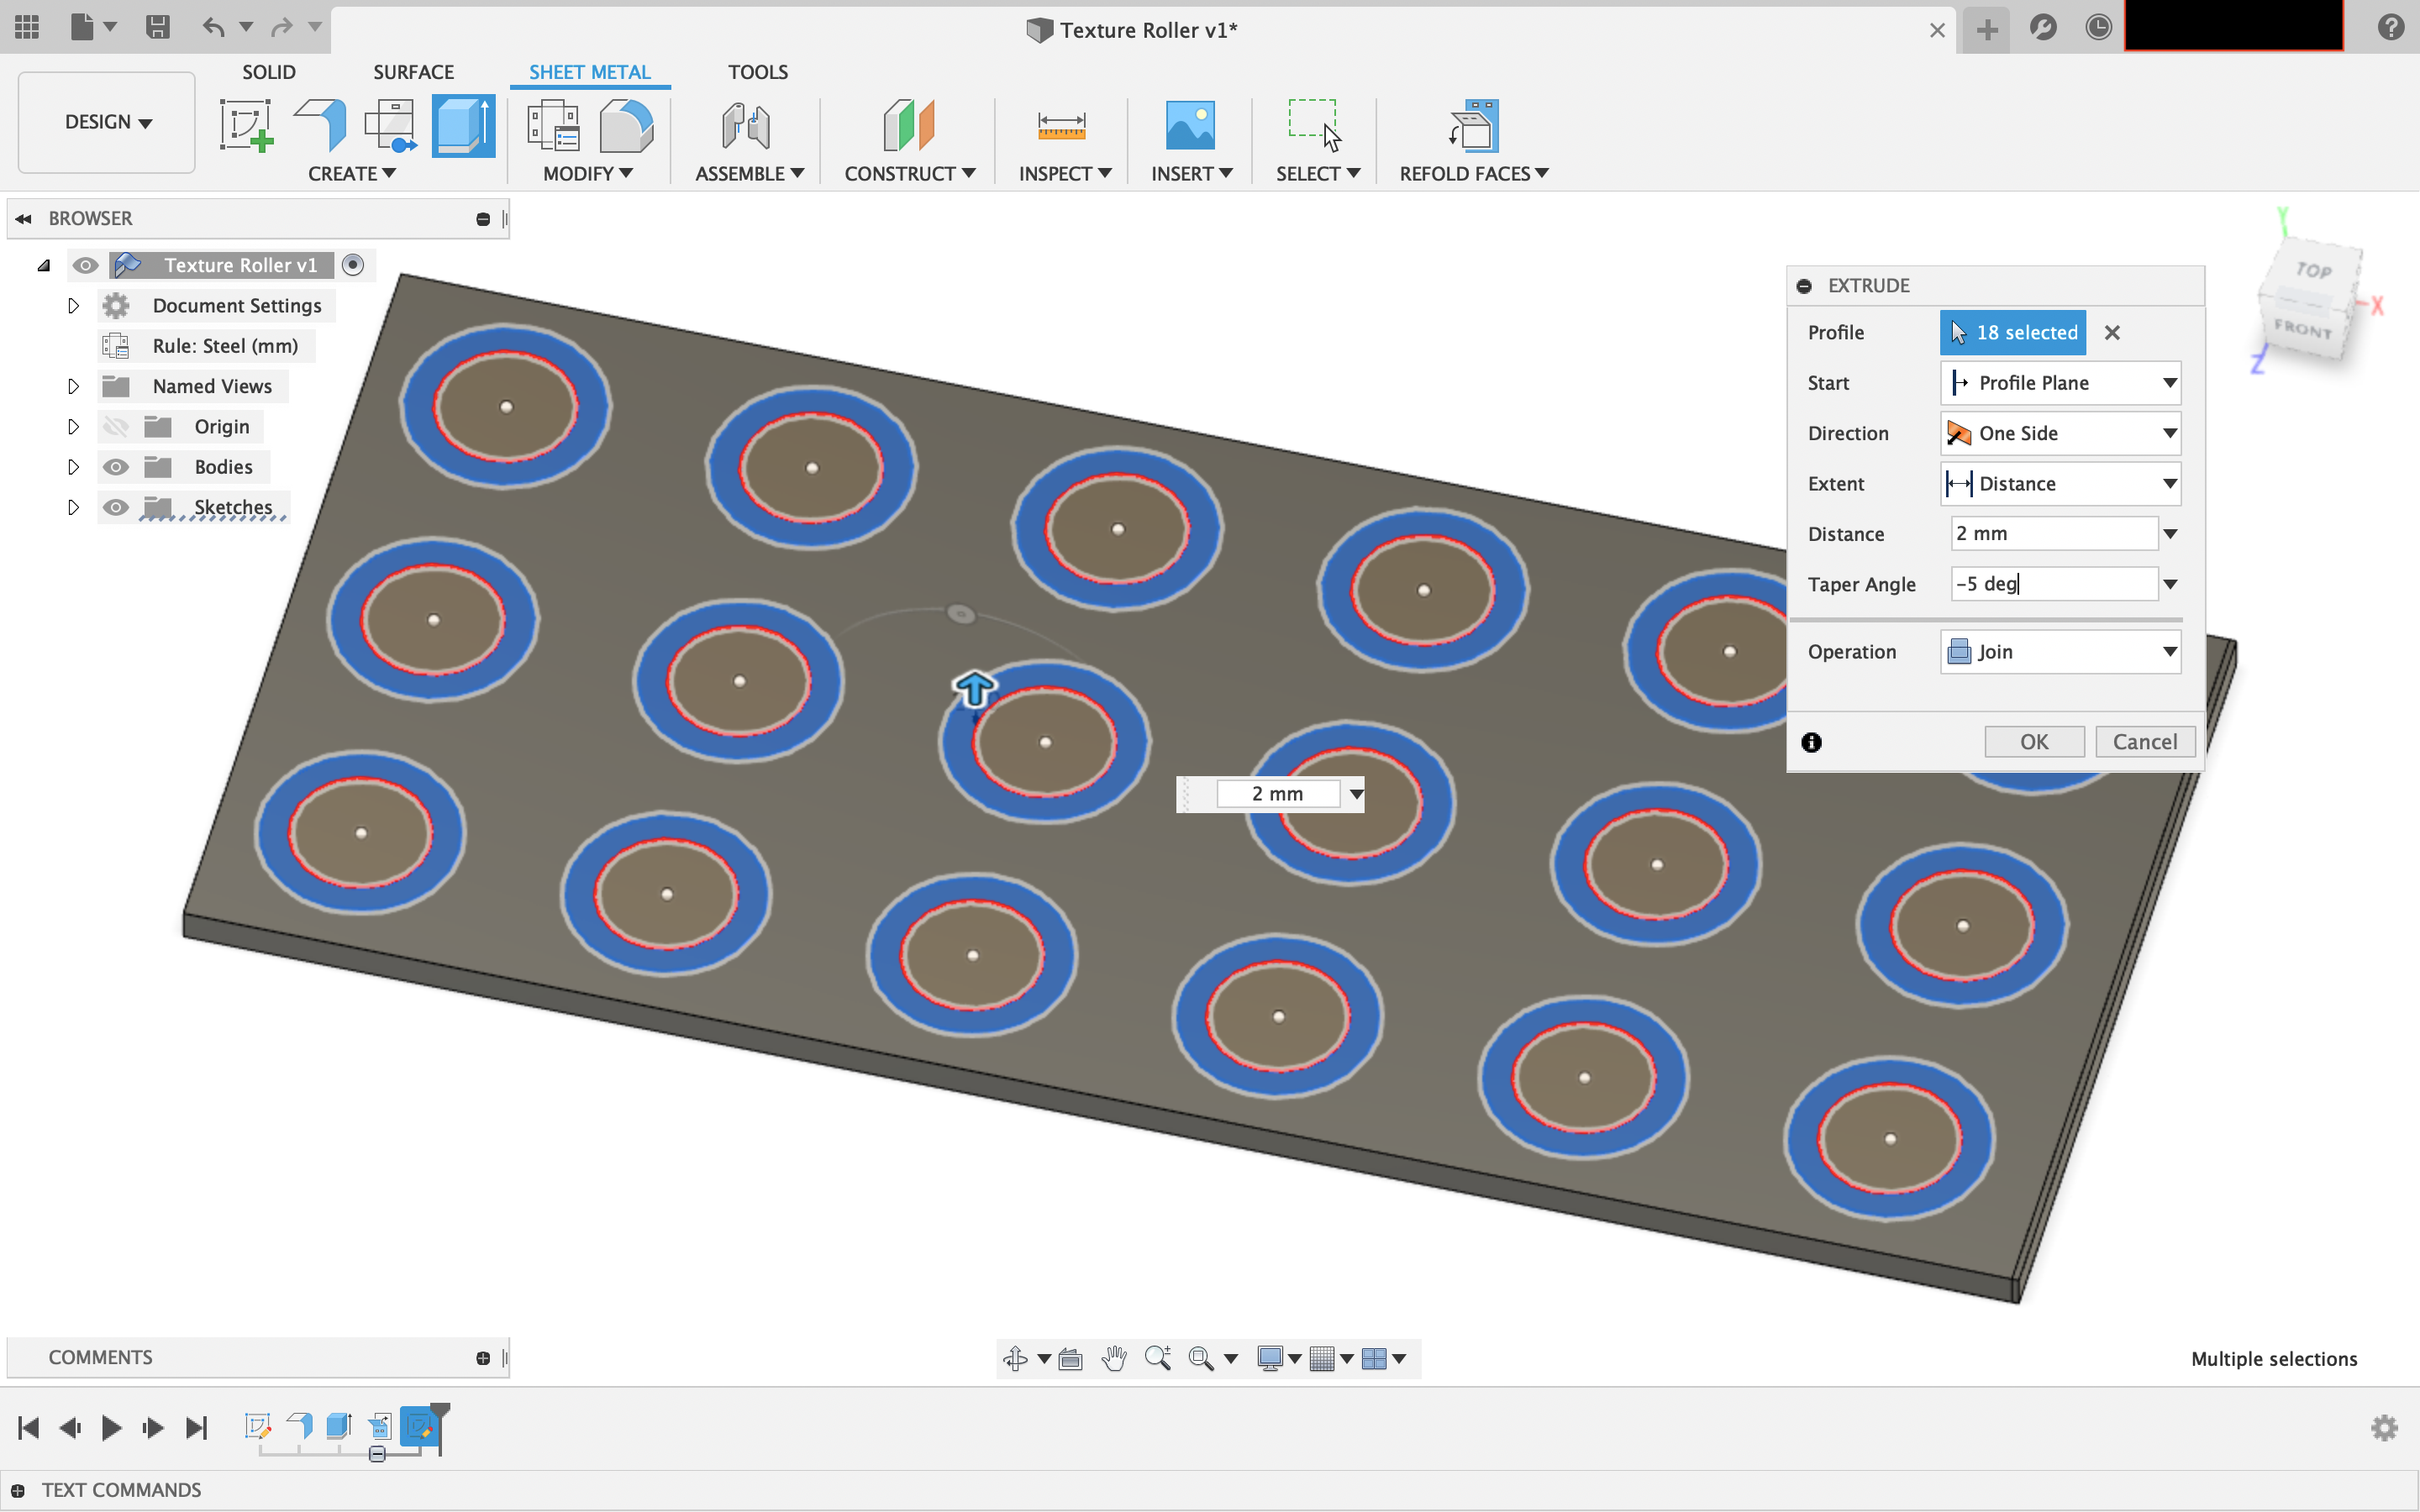
Finish your sketch and extrude your texture by 2 mm. You can set a taper angle of -2 to -5 degrees. This may help with the release of the dough or clay.
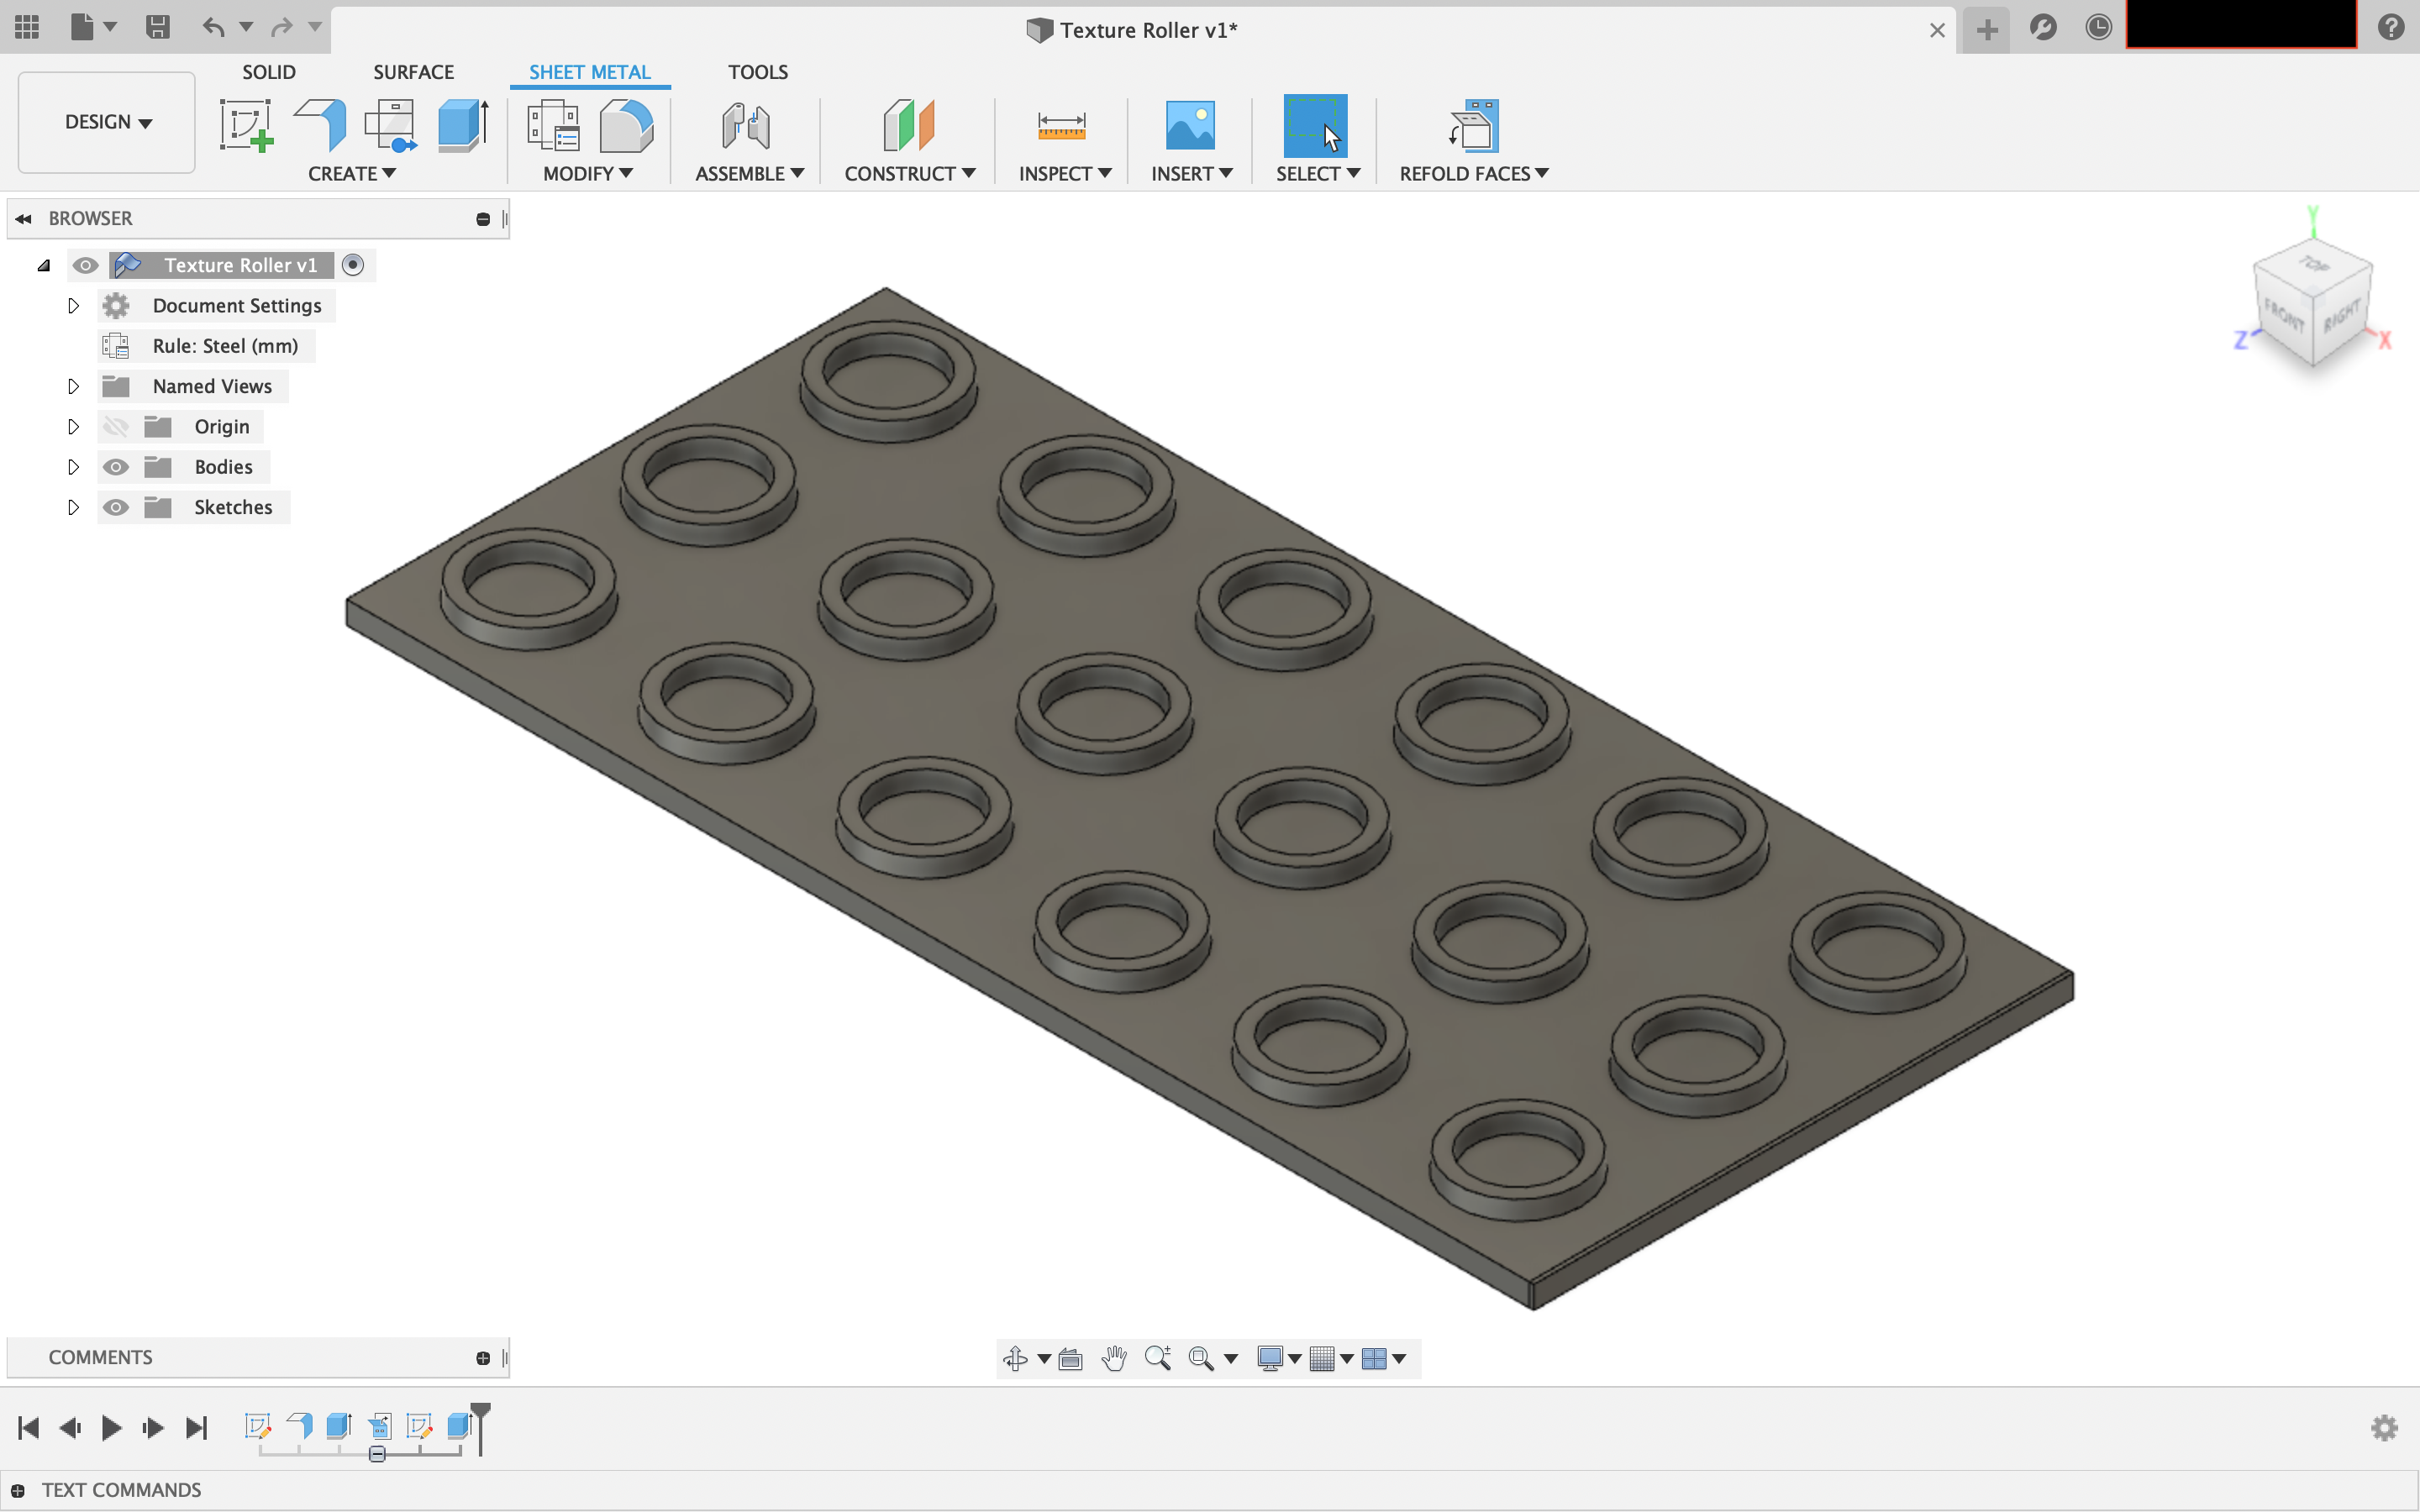
Finish the Roller Design
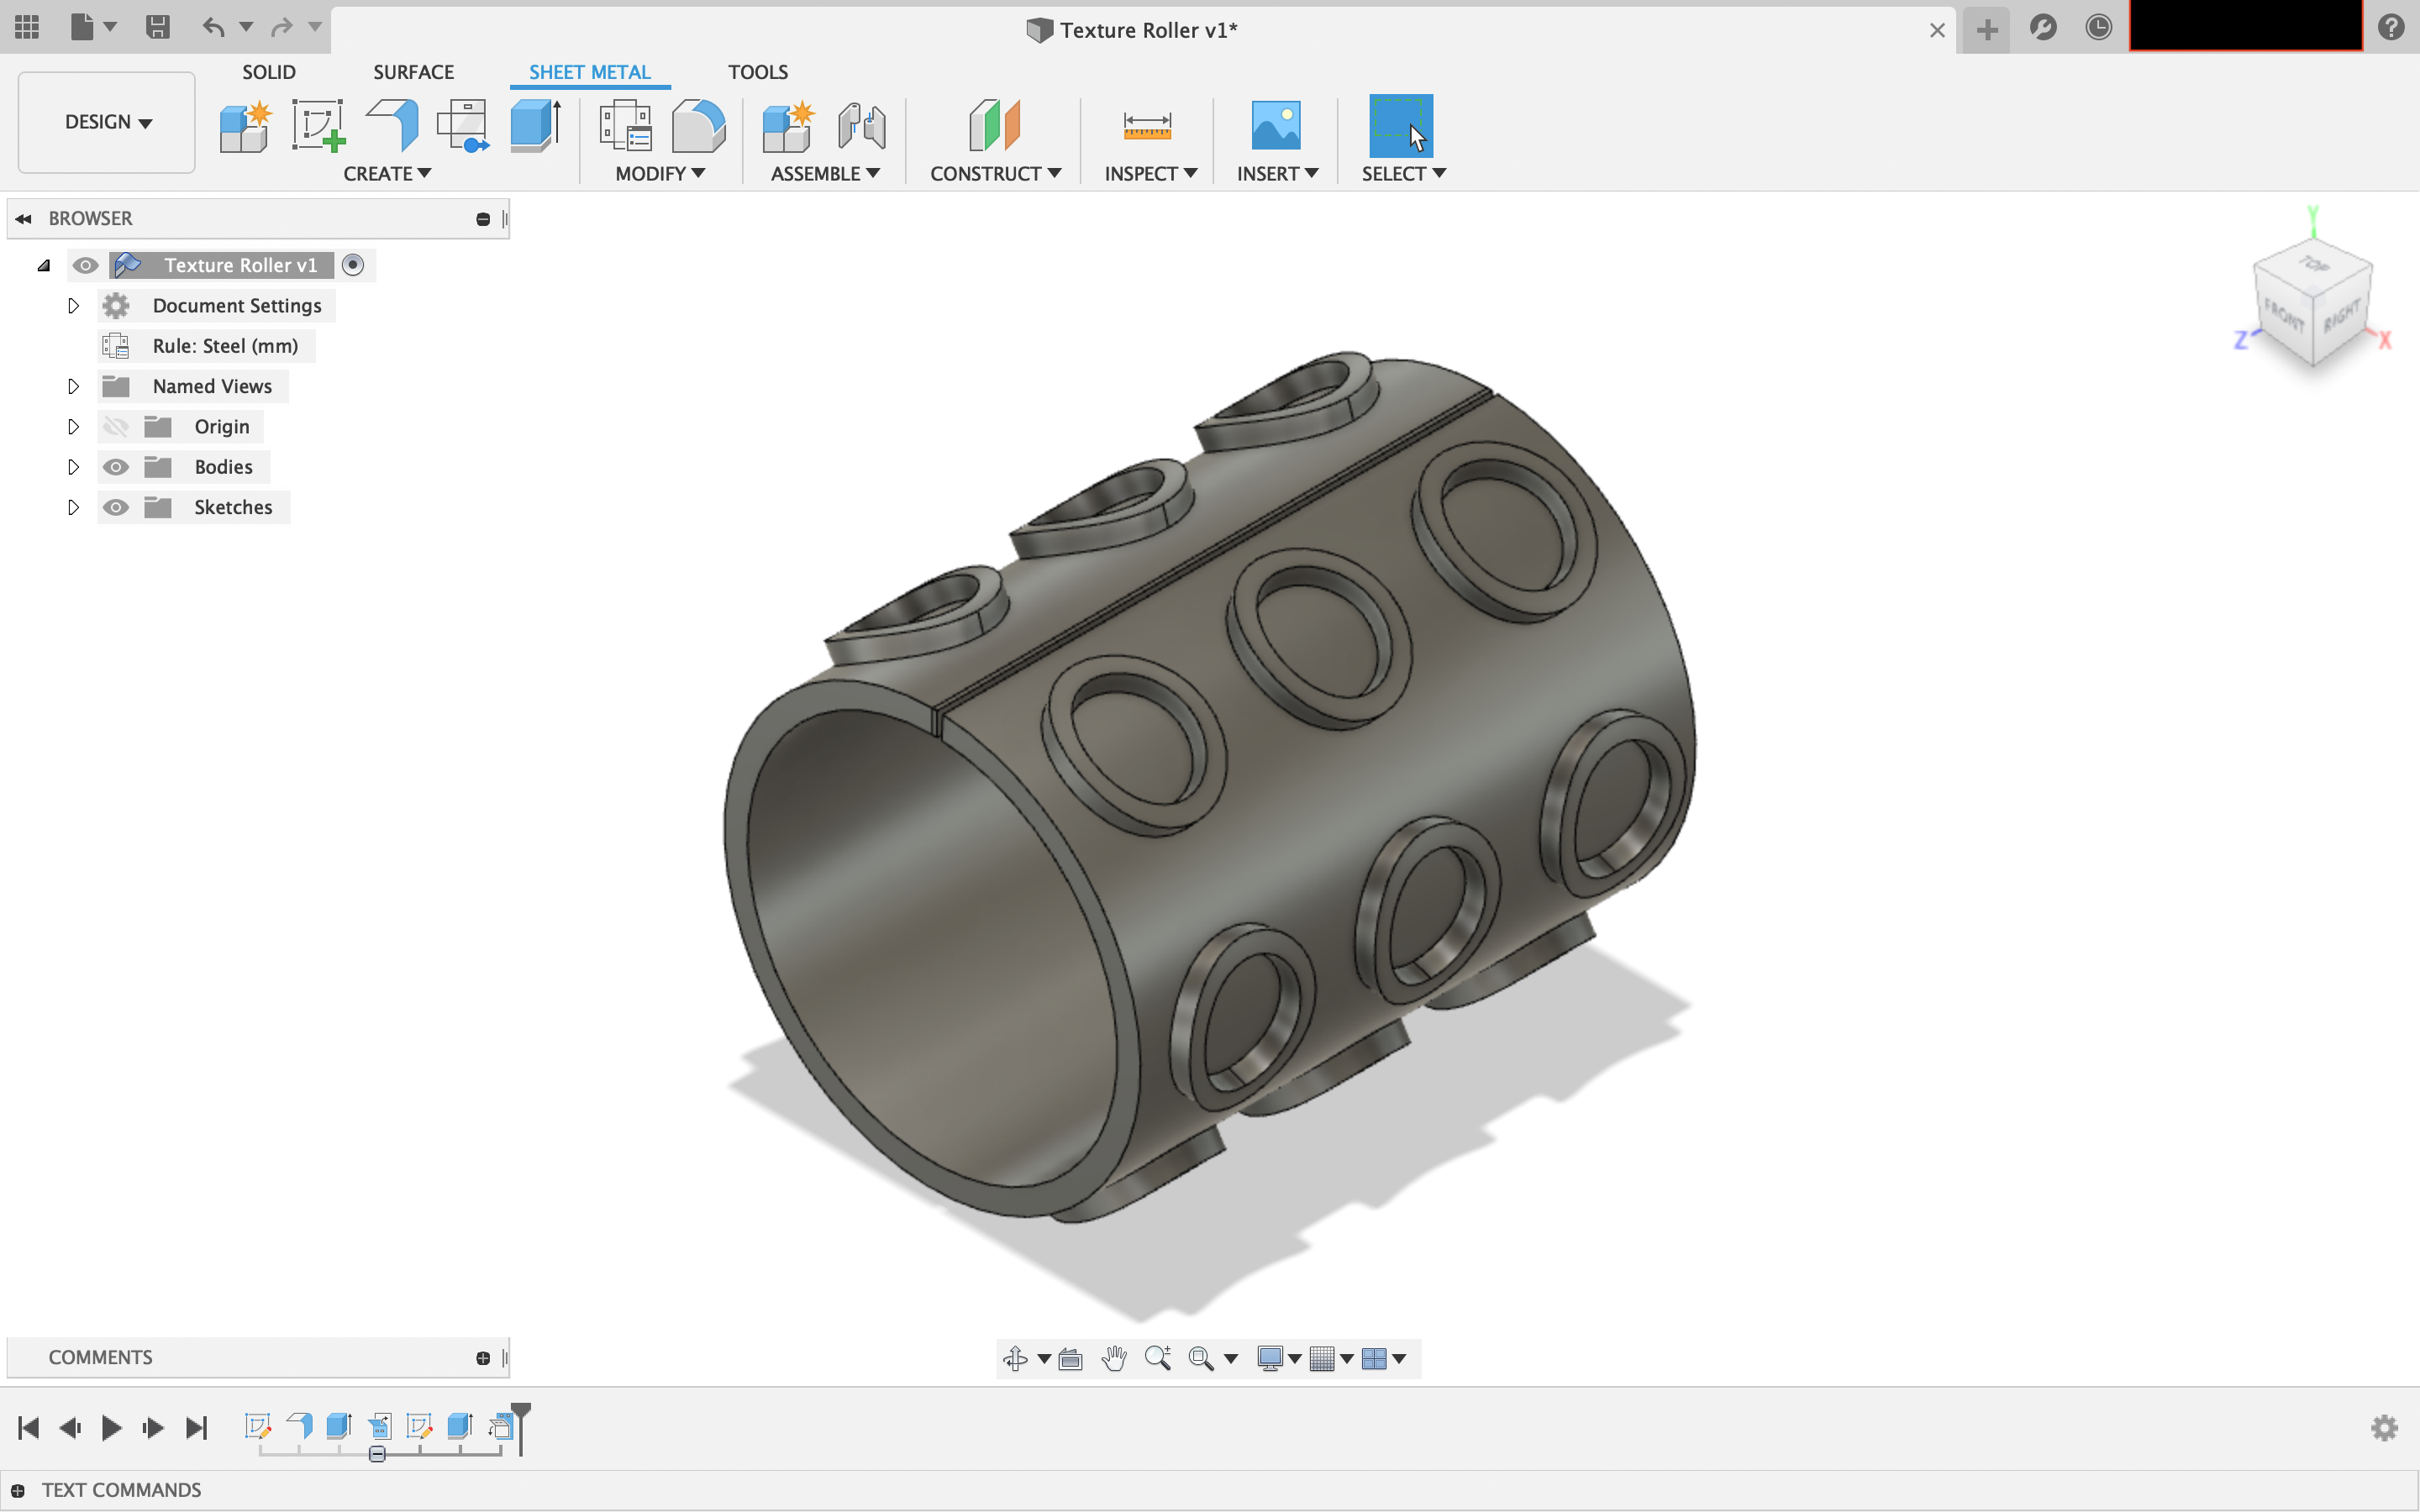
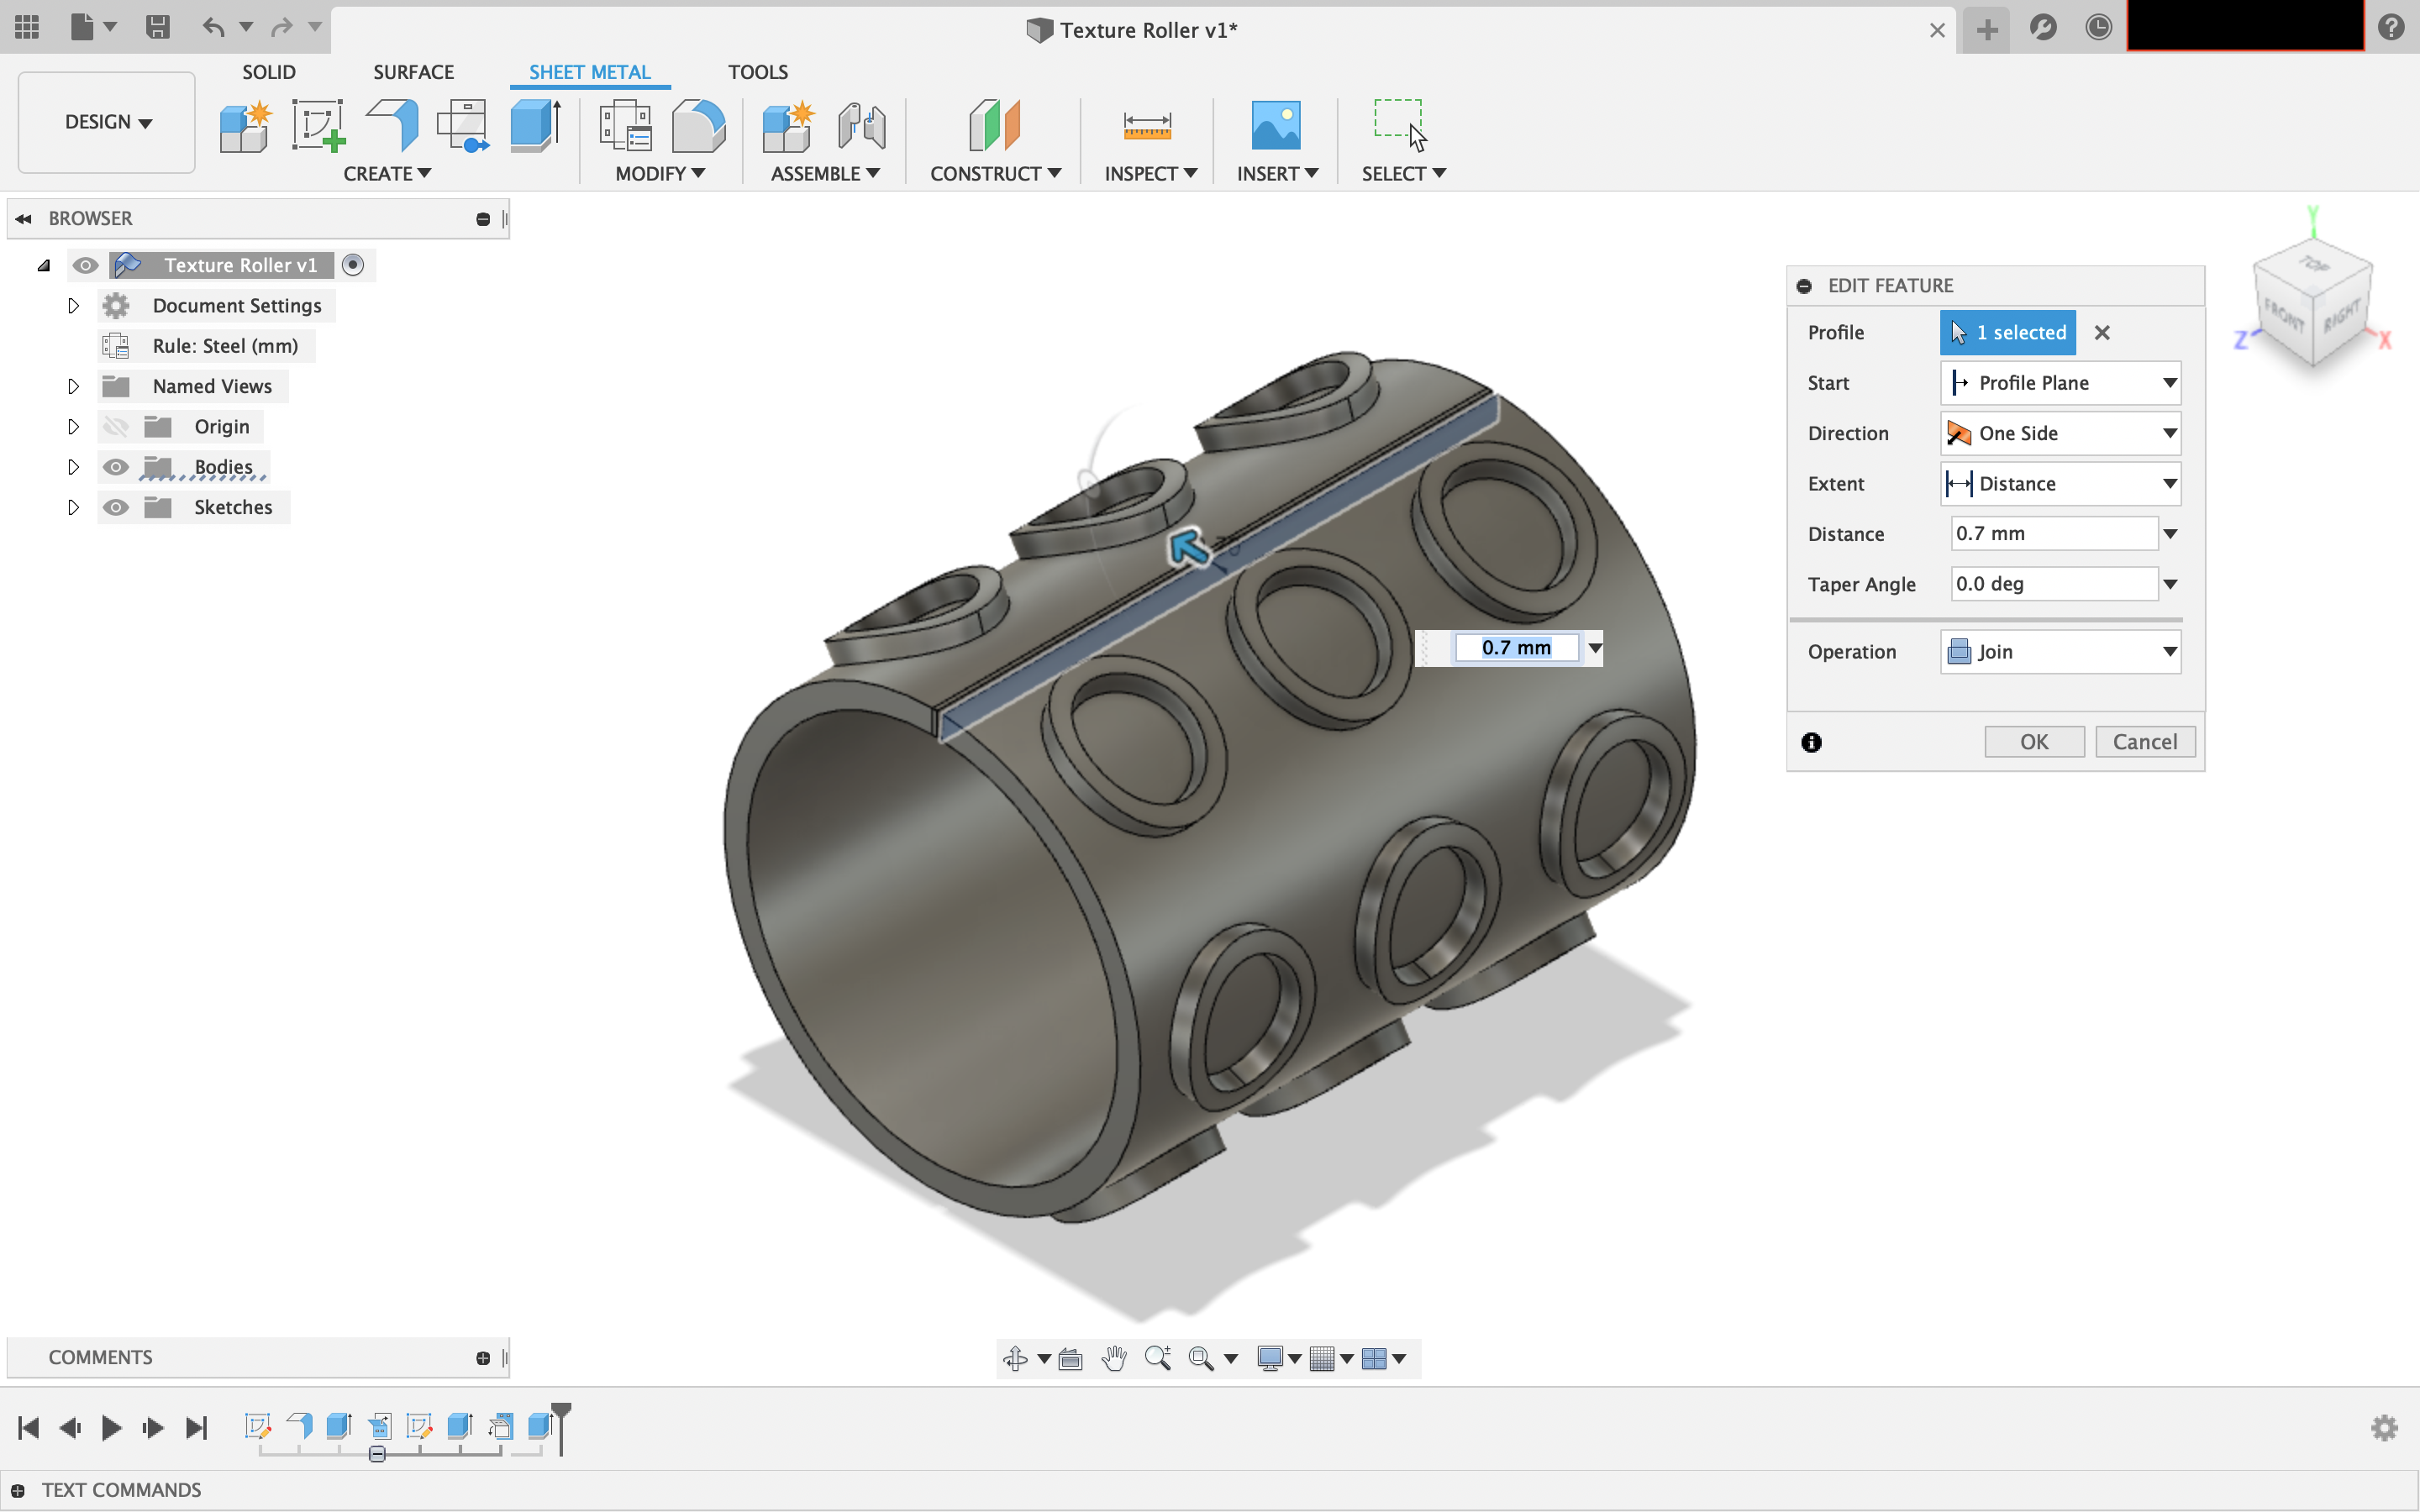
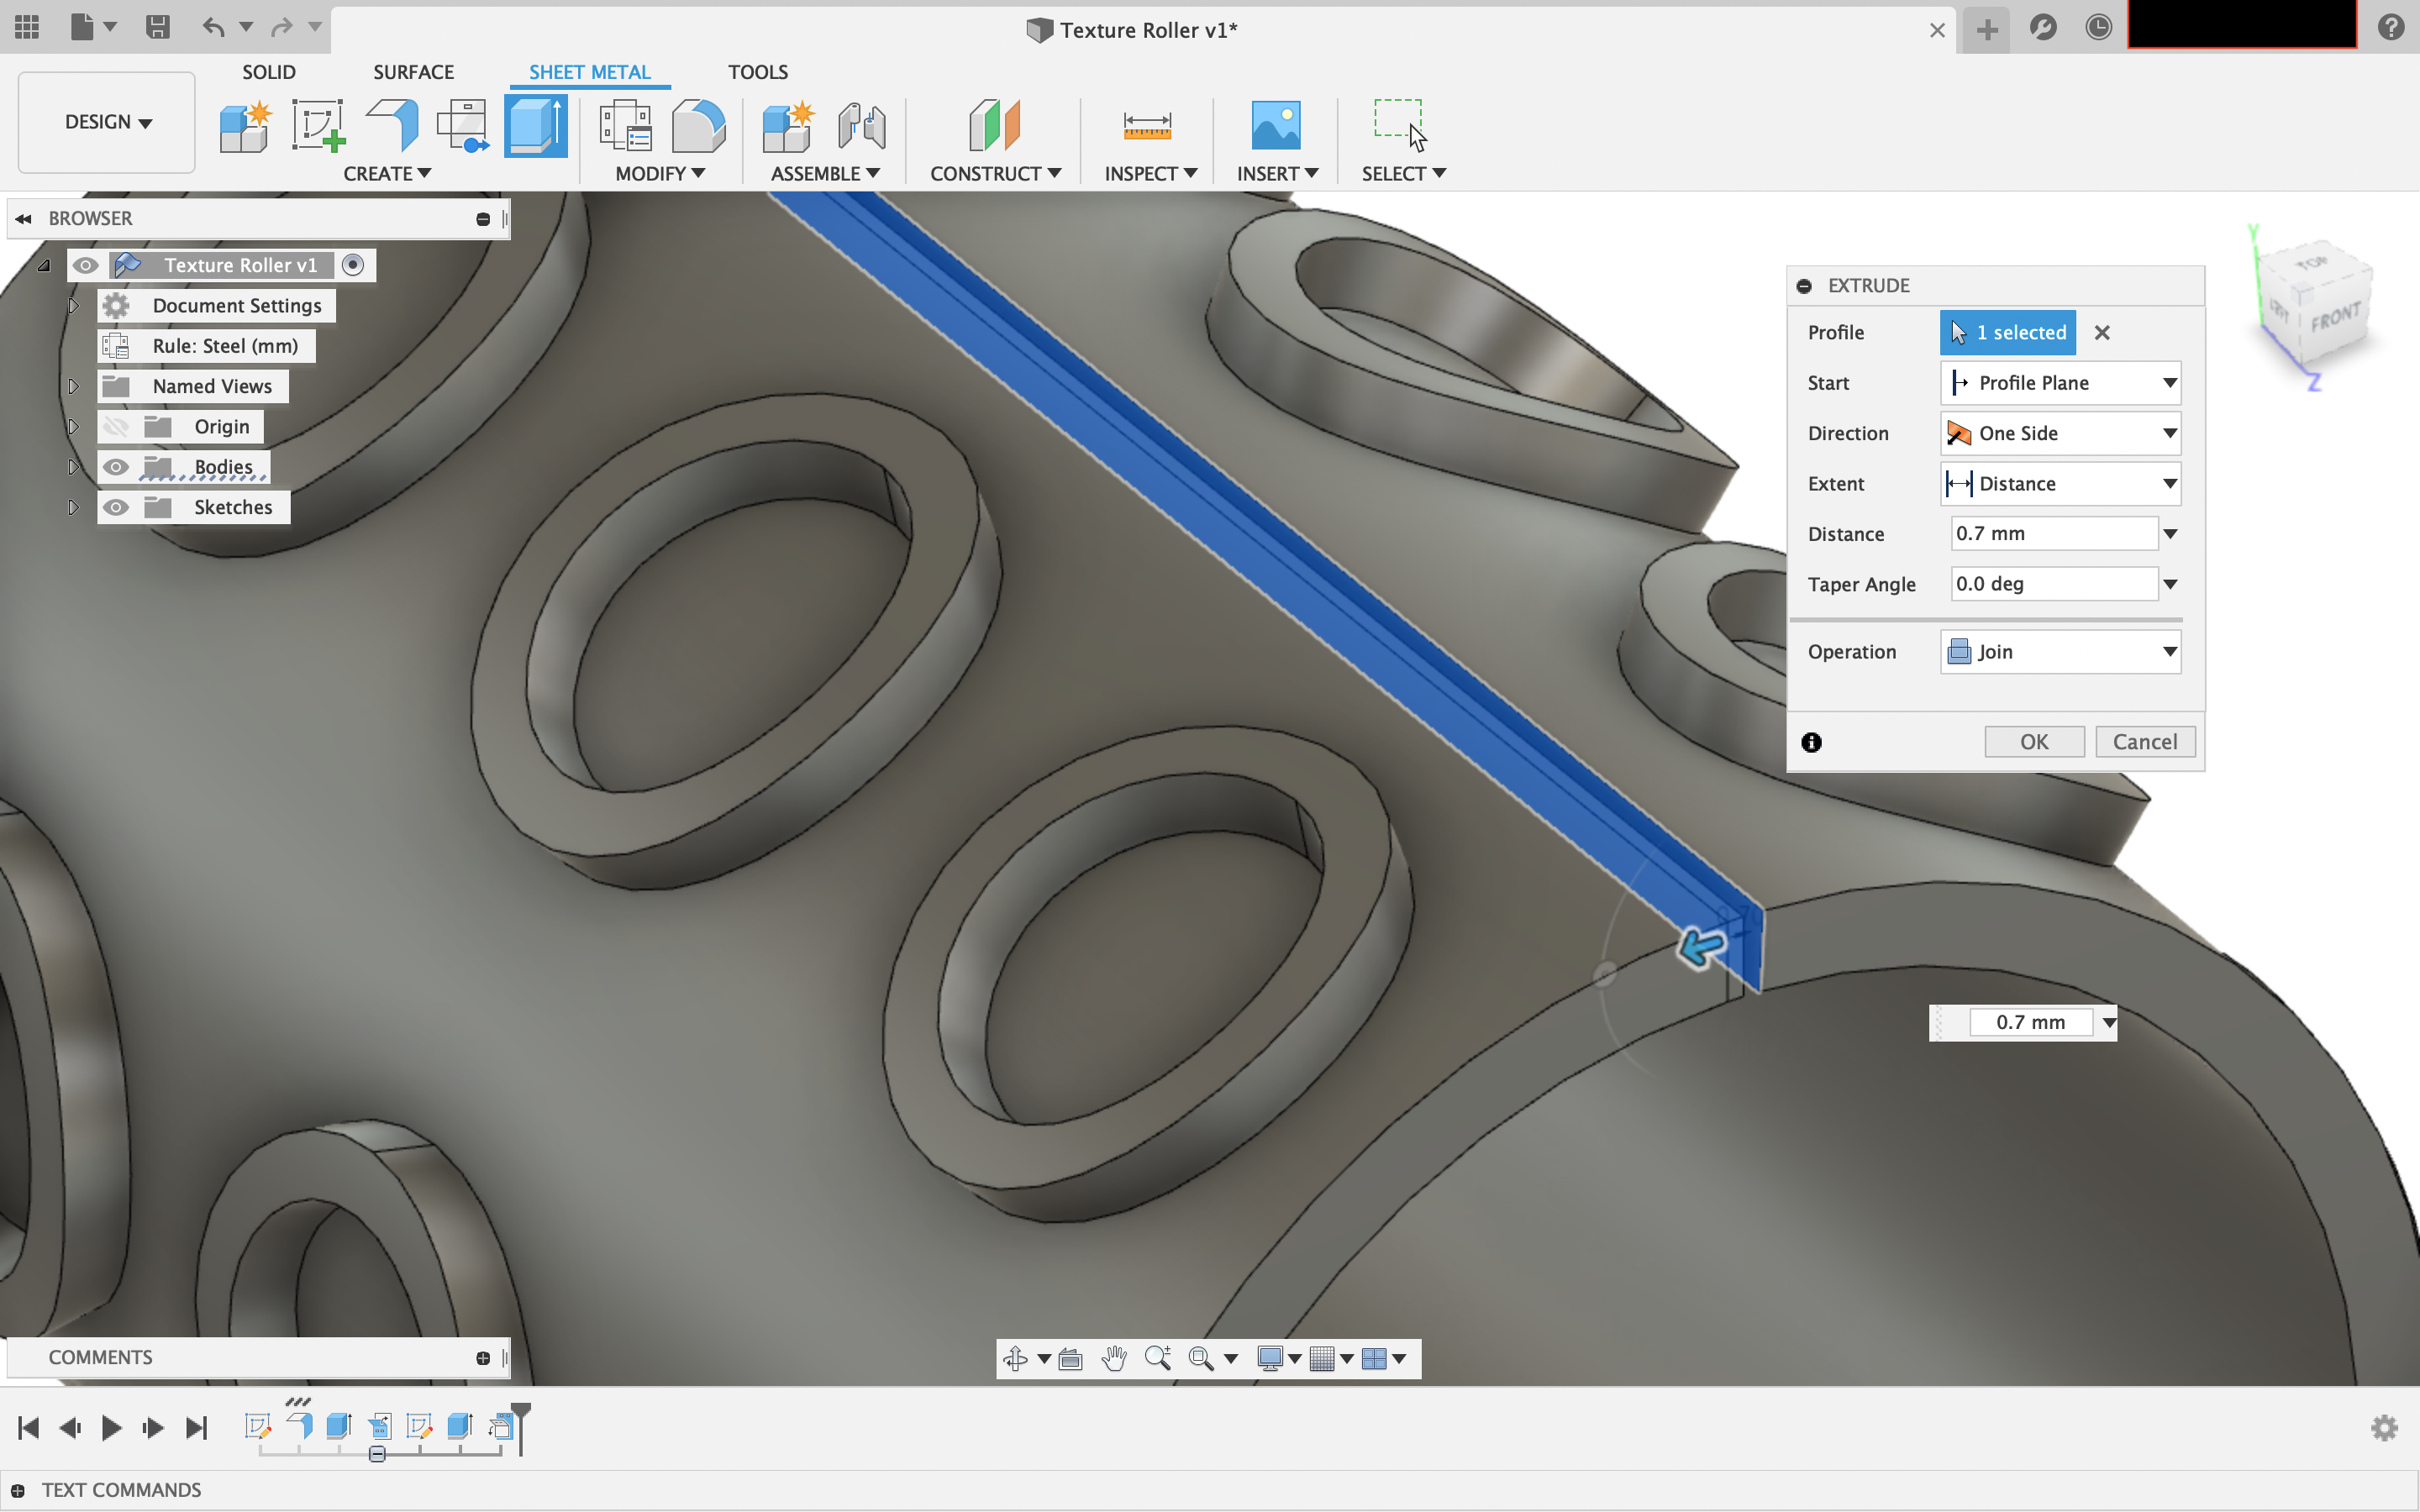

Select ‘Refold Faces’. Awesome! Your pattern is wrapped around the roller!
To finish; close the gap in the roller by extruding one of the faces by 0.7 mm (select ‘Join’!). Save the roller body as an stl file. Now you are ready to 3d print your texture roller.
I have included the Fusion 360 file for your use. Modify Sketch2 for a different pattern!
Downloads
3d Print
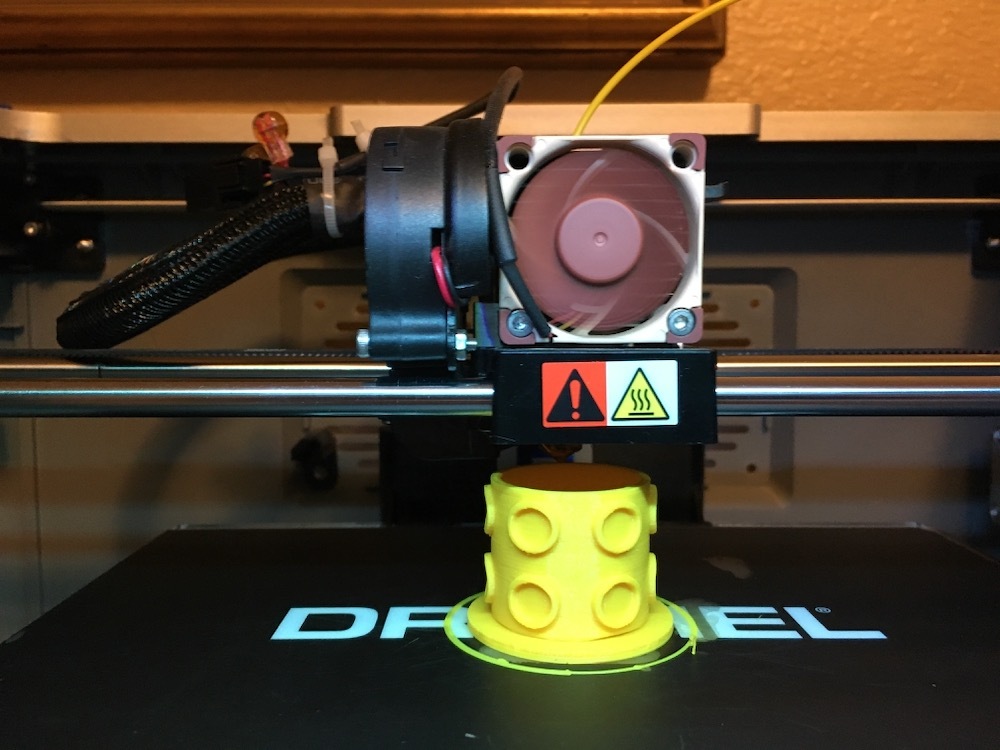
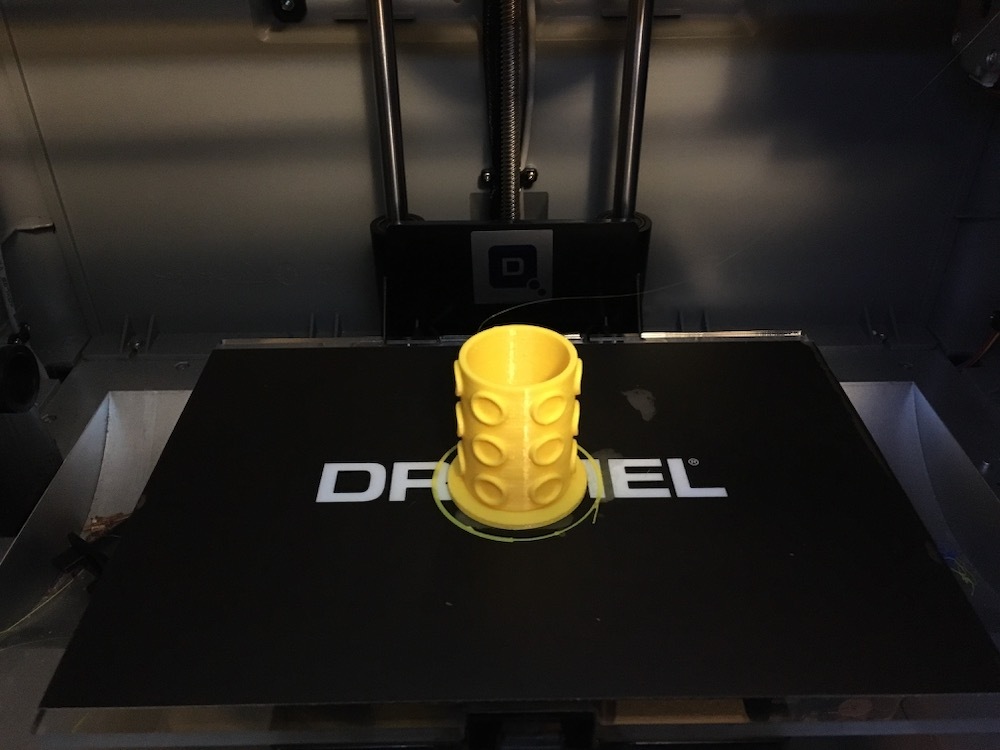
Send the stl file to the slicer software for your 3d printer; and print. I use PLA filament with the following settings: layer height 0.2 mm, infill 30%, temperature 210 Celsius, and using a raft support. The example roller took about 2 hours to print on my Dremel Idea Builder.
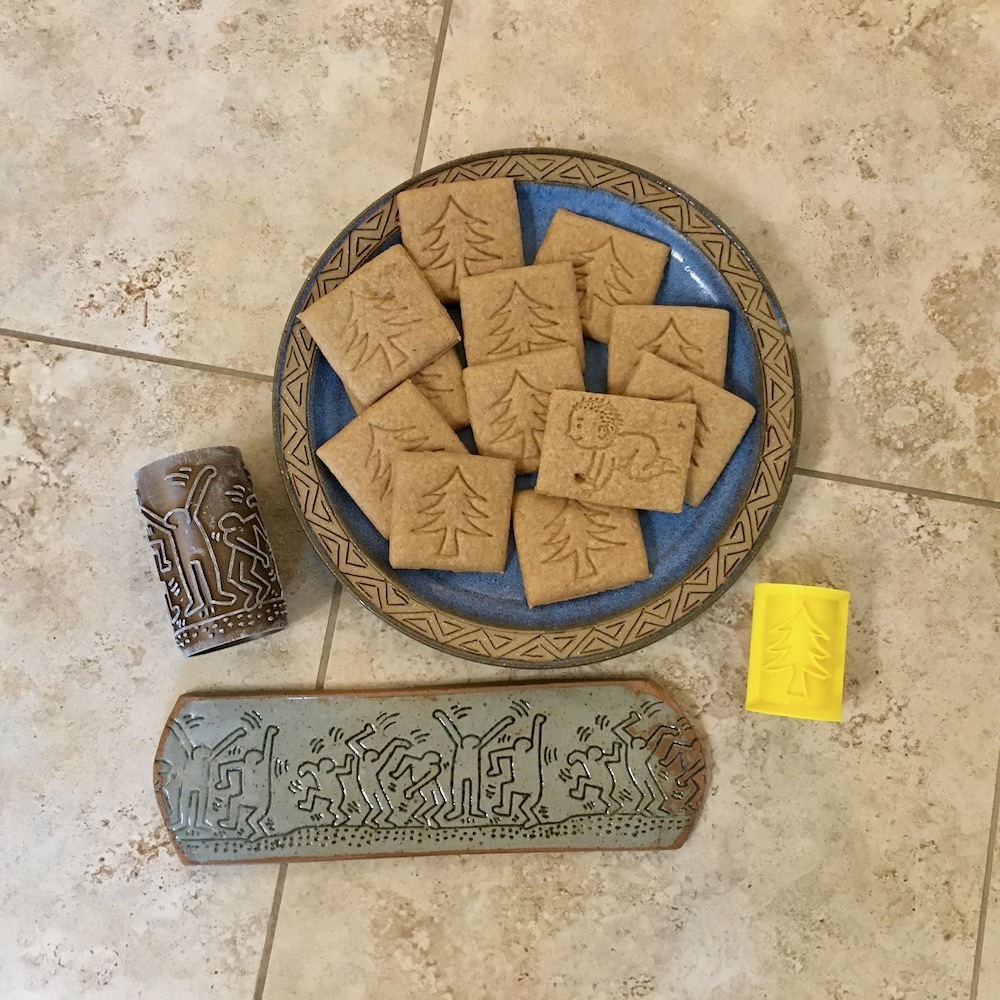
Roll Your Cookies
PLA is considered to be food safe if you decide to texture some cookies!
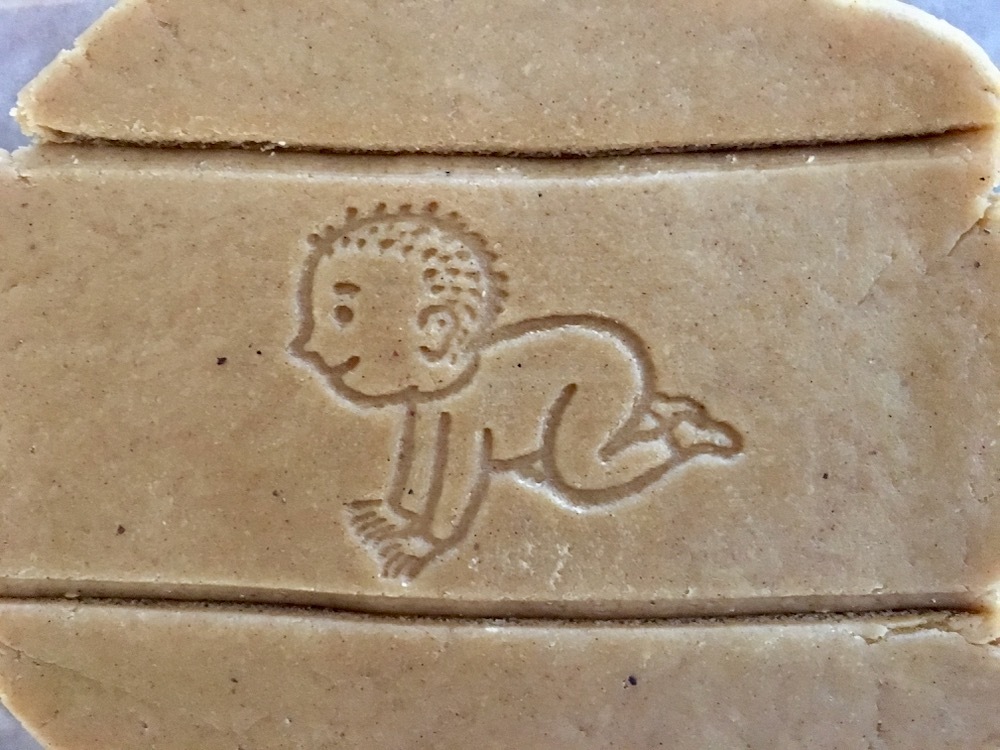
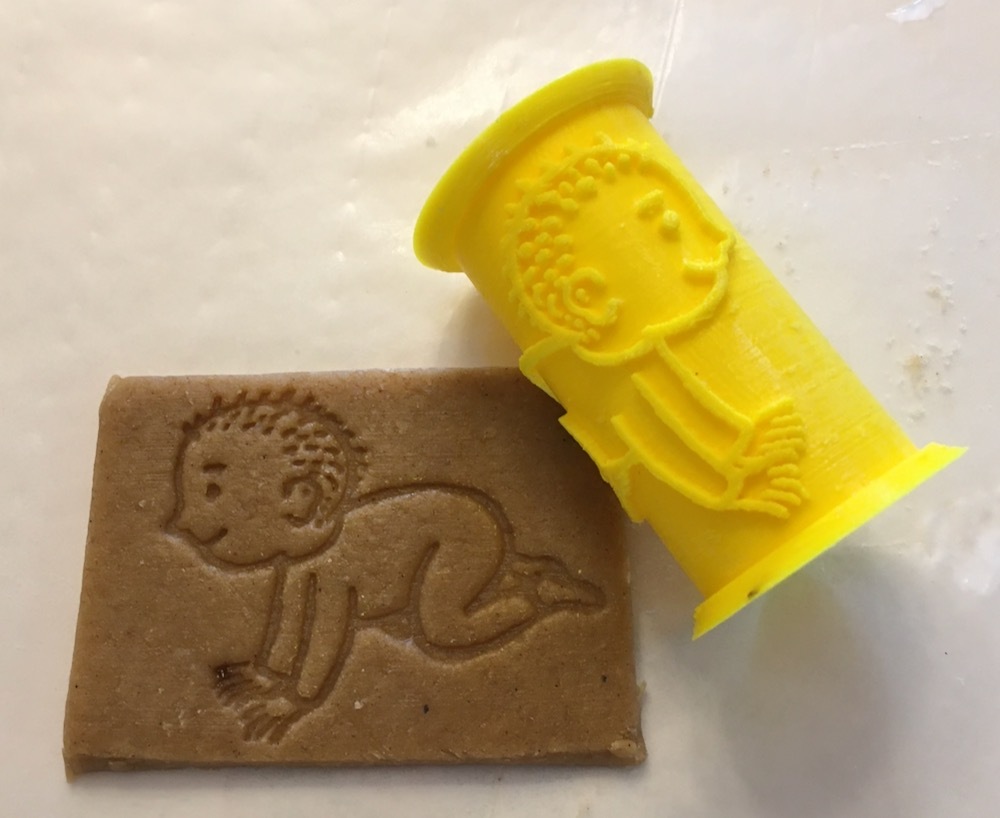
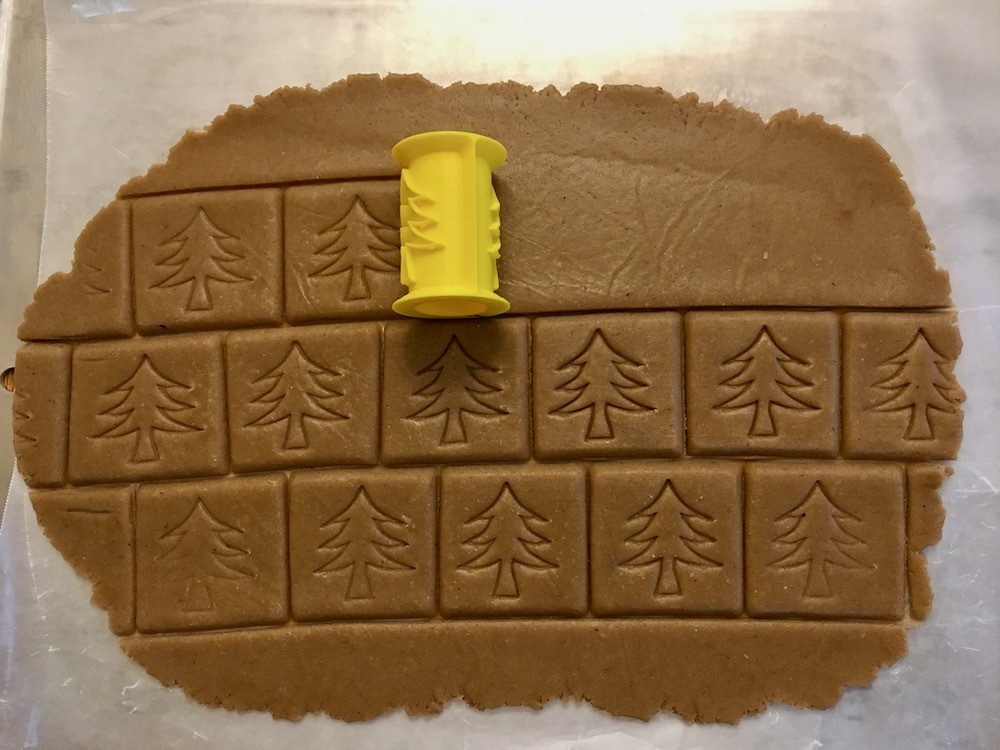
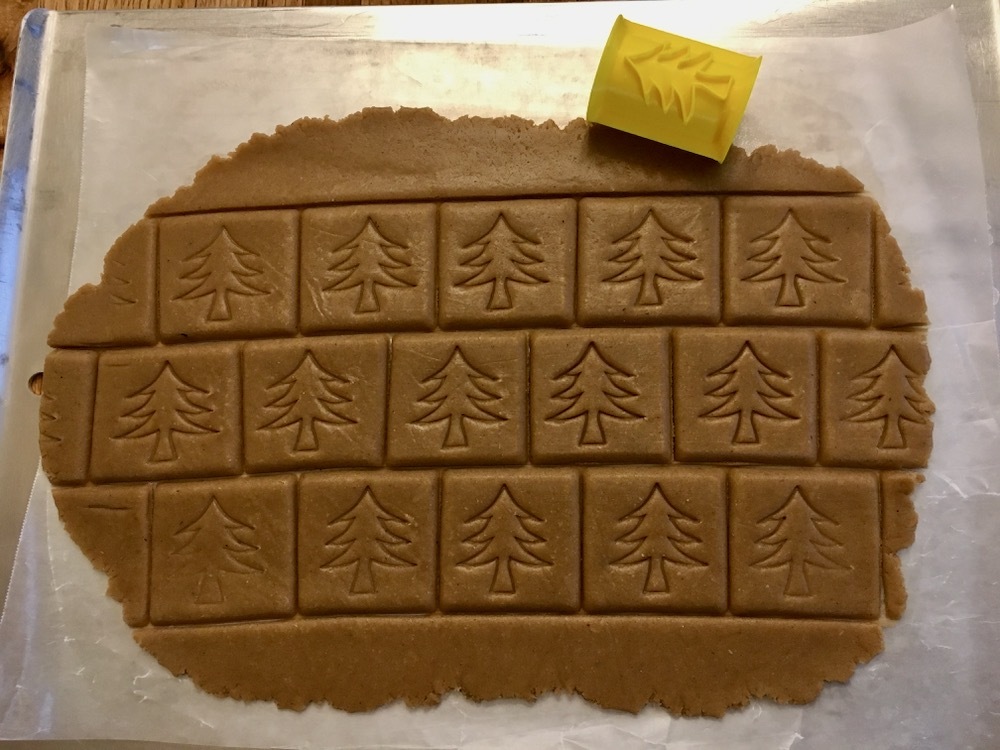
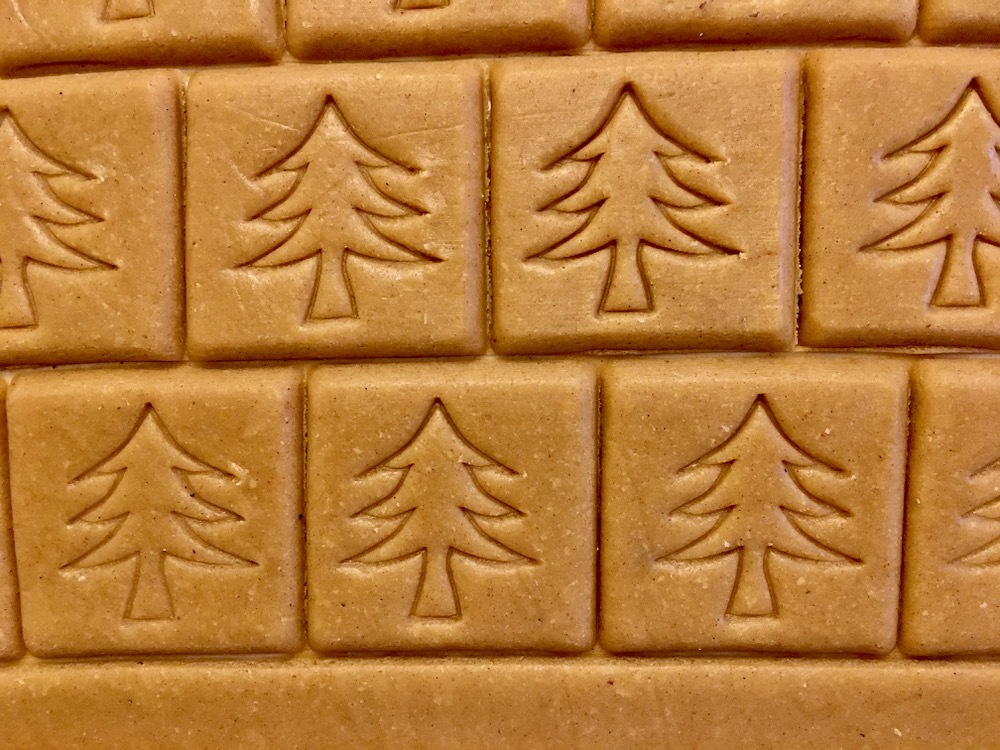
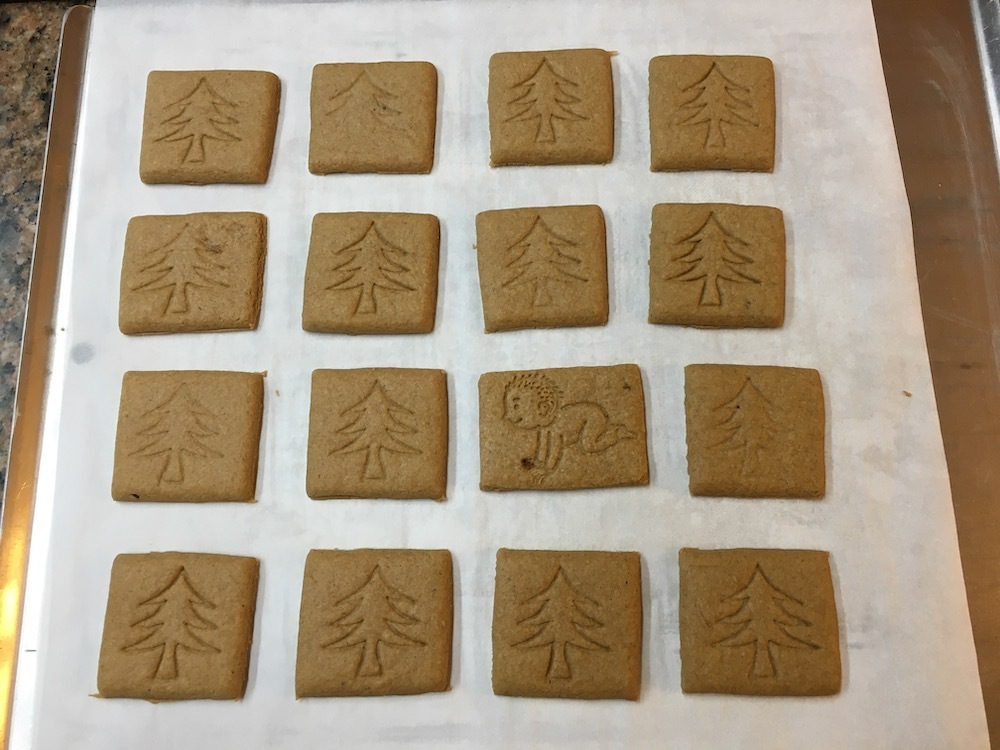
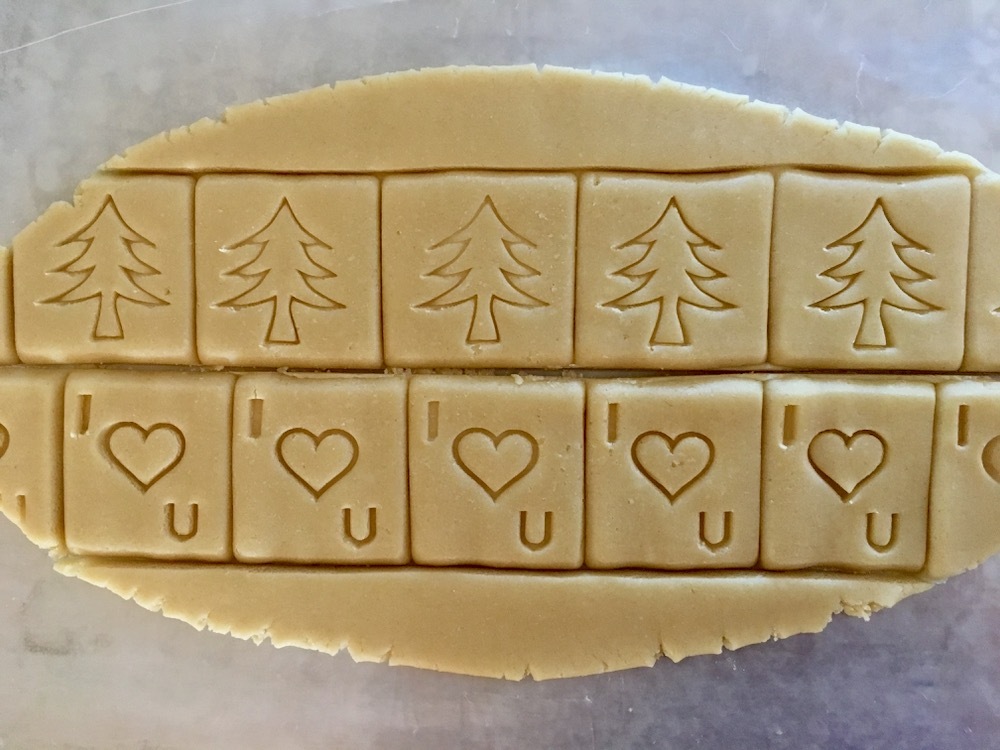
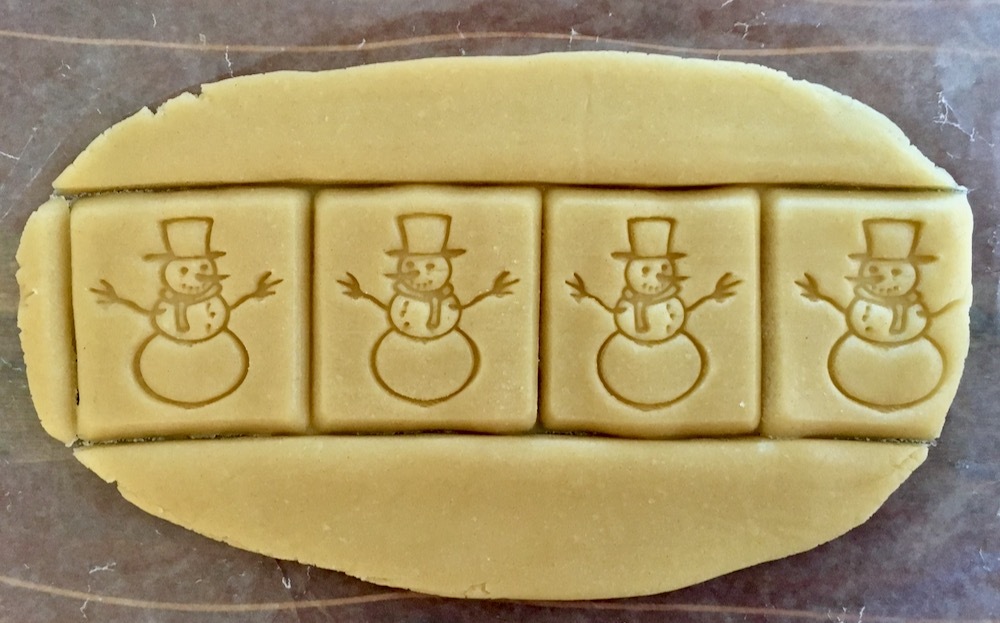
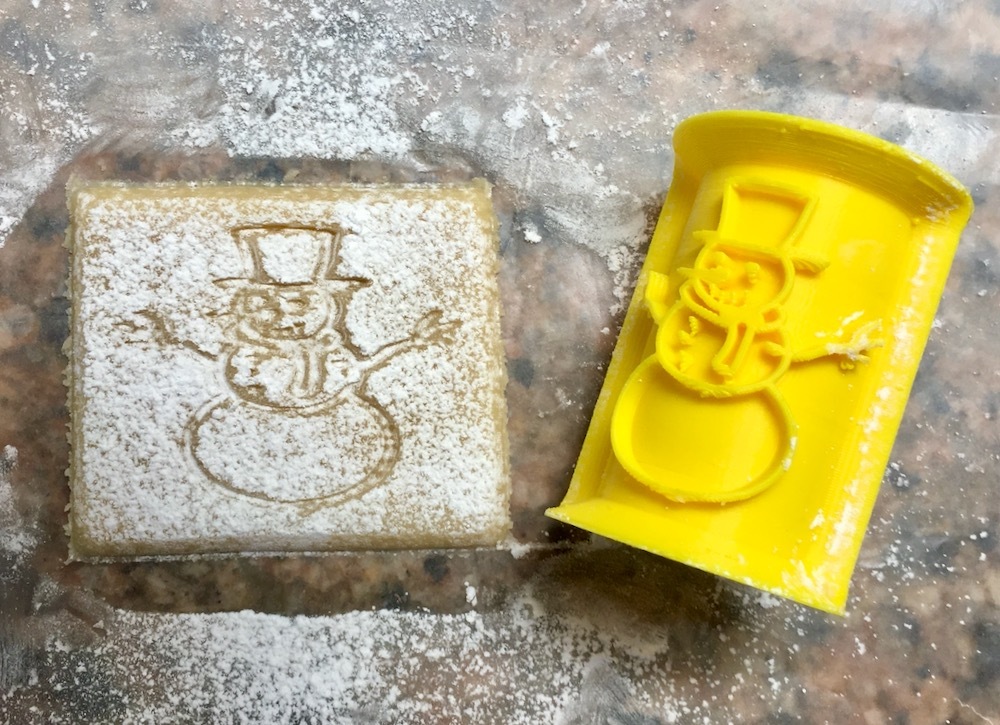
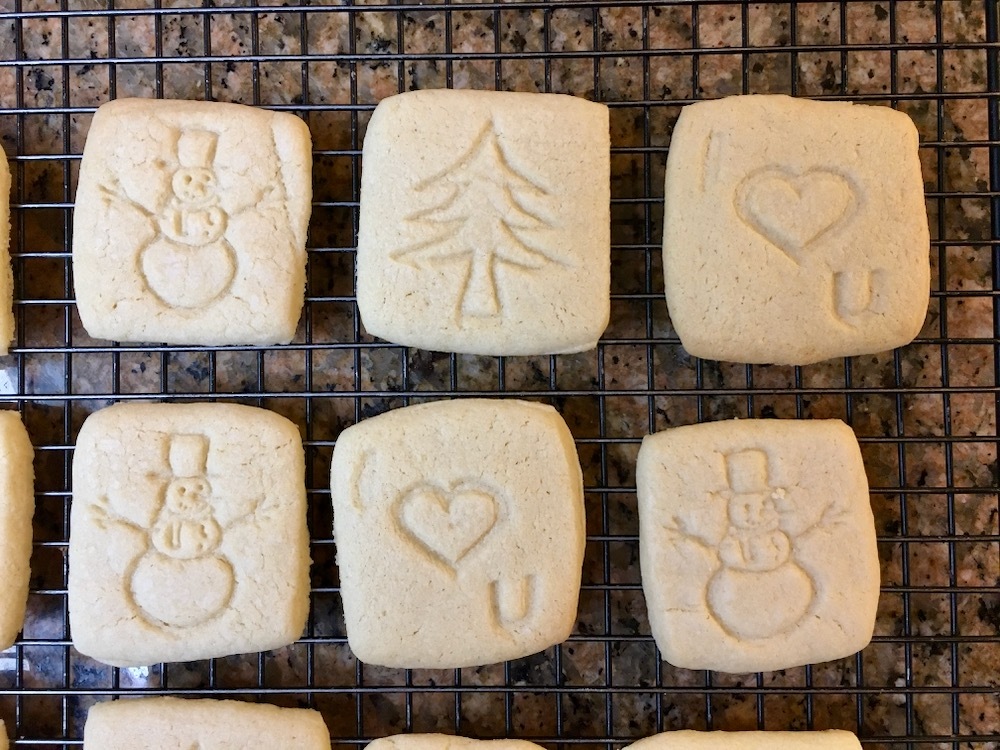
Prepare the cookie dough from your favorite recipe, roll out flat, and chill to prevent sticking. Then use your texture roller to imprint your pattern, and cut your cookies to size. If needed, use powdered sugar to prevent the dough from sticking to the roller. Bake and enjoy! Design holiday themed motives; fill the impressions with food color; name and personalize your cookies; be innovative!
Optional: When designing your cookie dough rollers, you can add 'cutting edges' to imprint and cut at the same time, as shown in the images.
You can also use your rollers on fondant for decorating cakes, or for cute pie crusts!
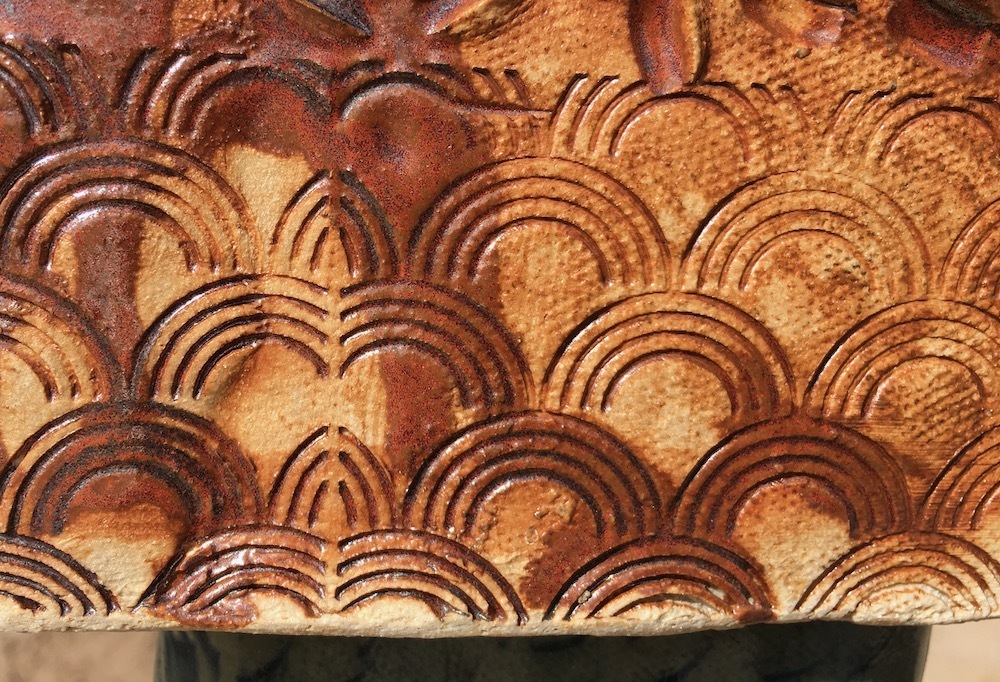
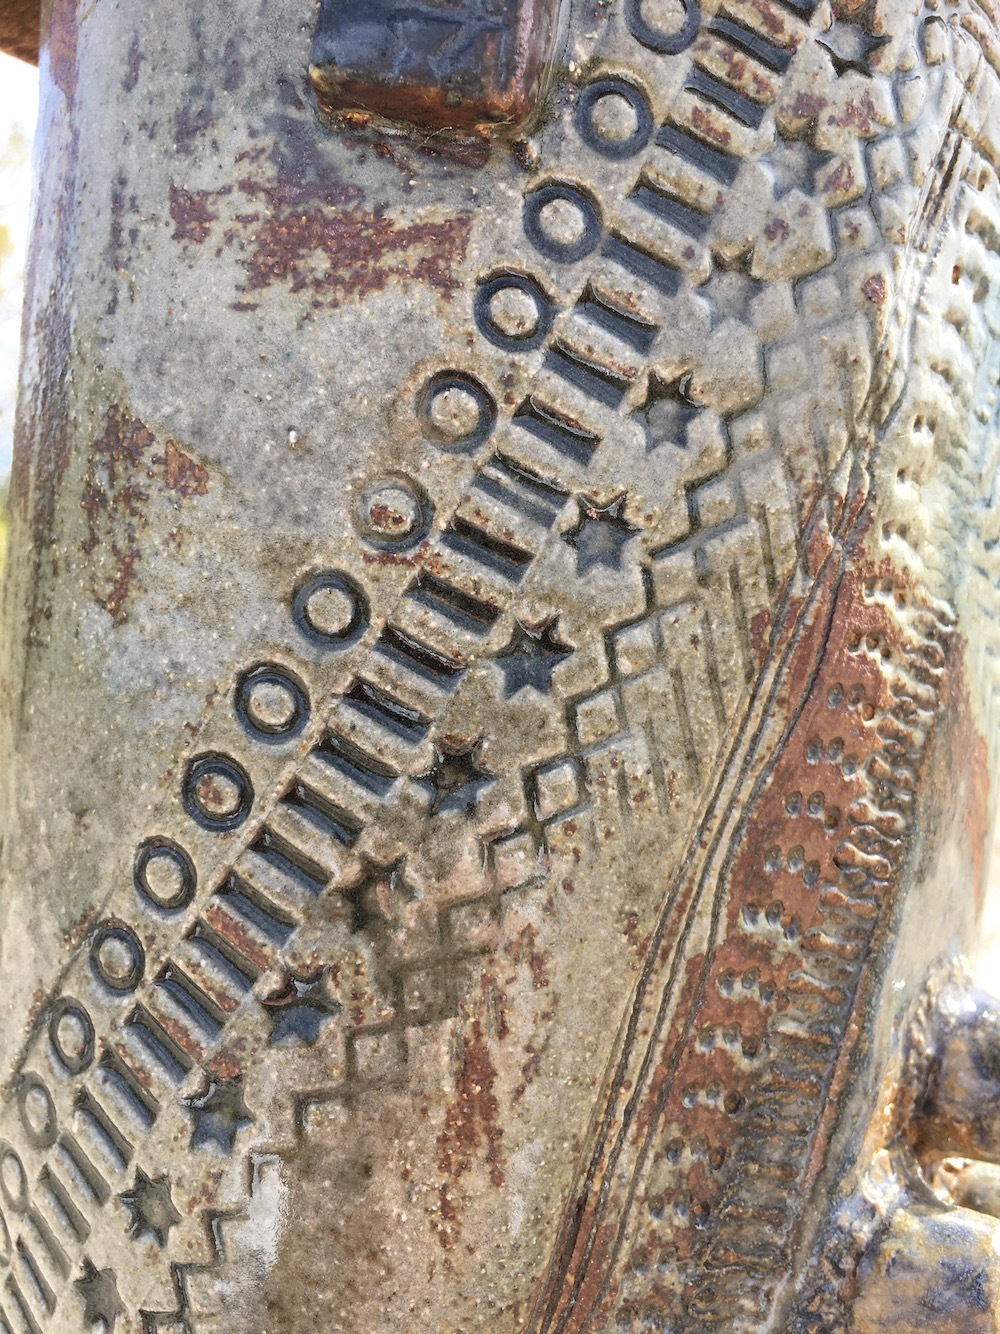
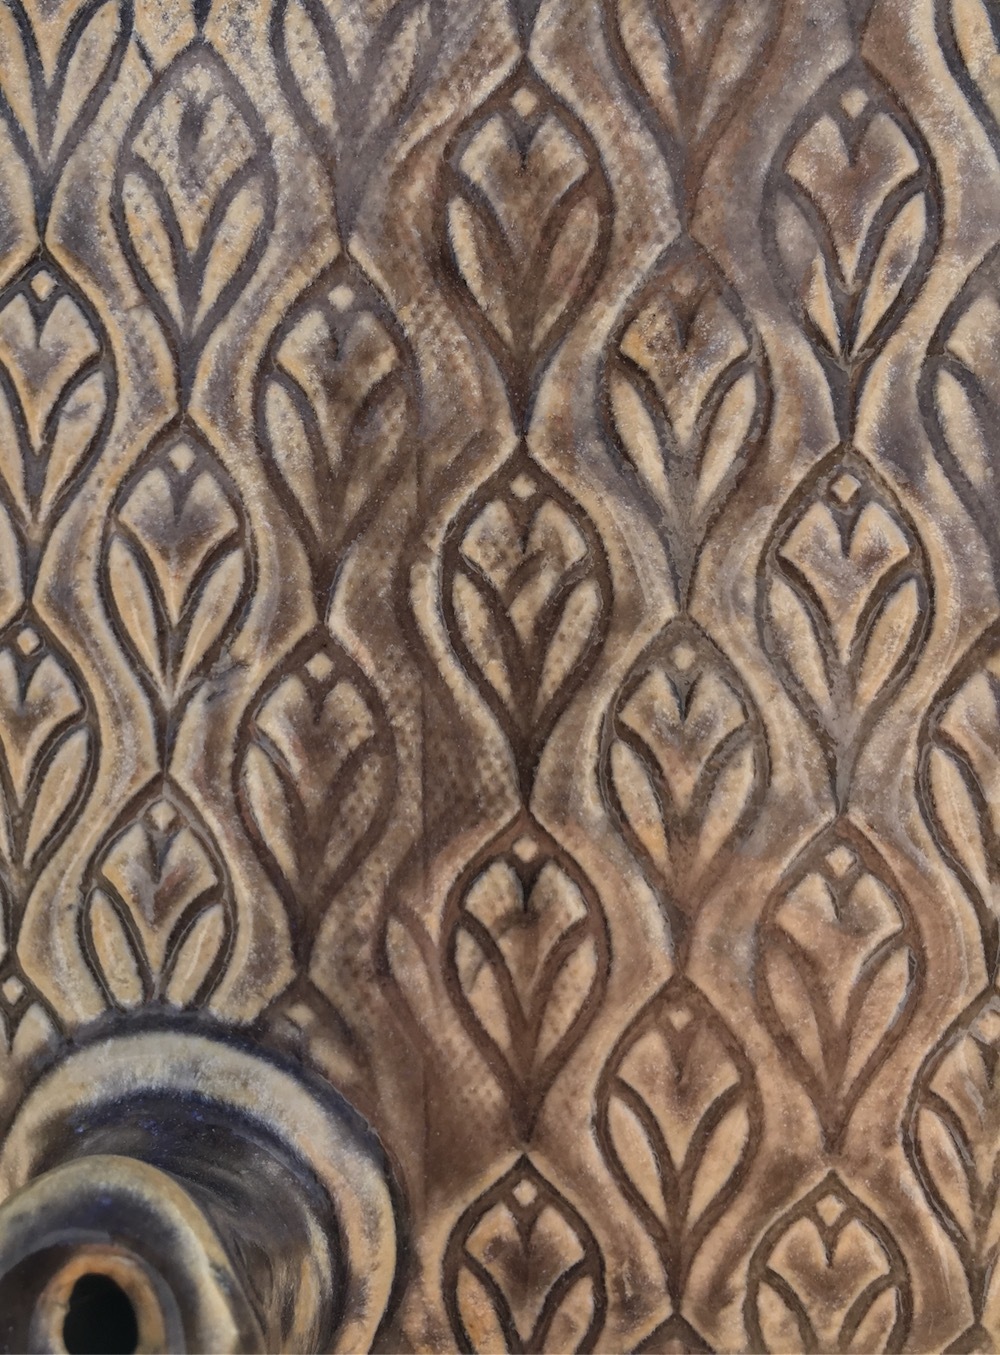
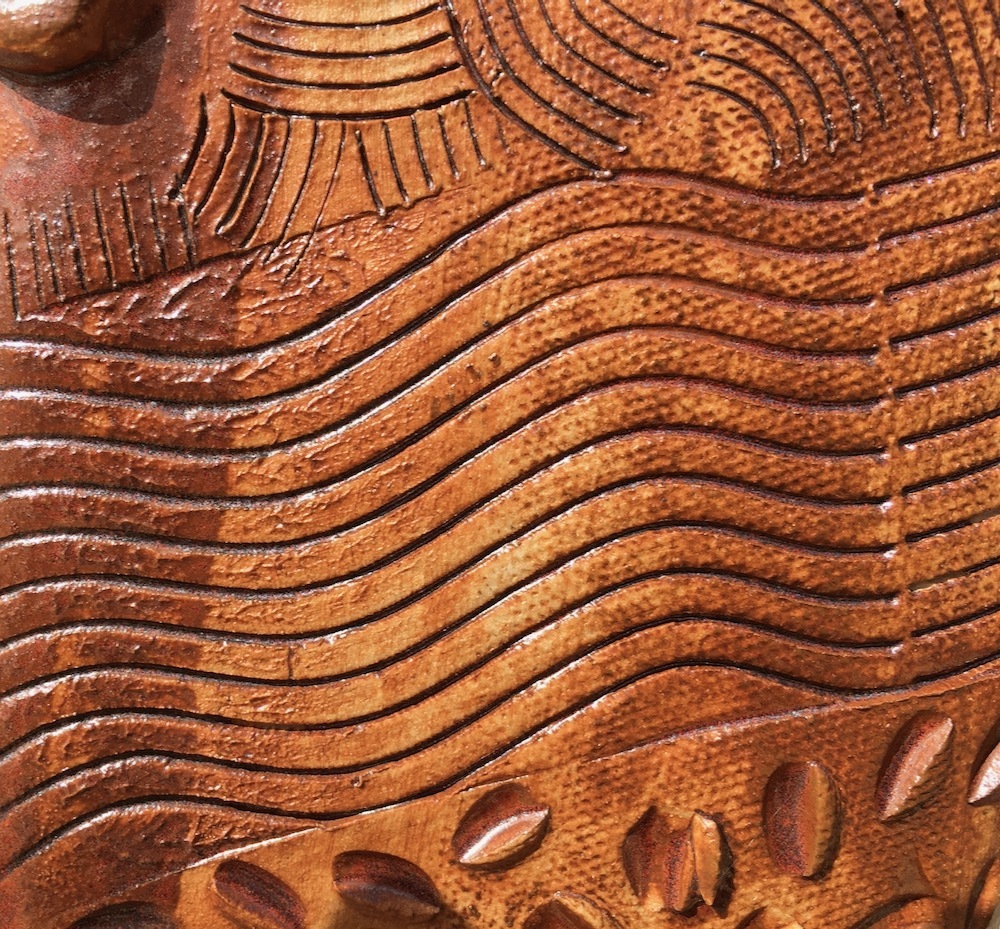
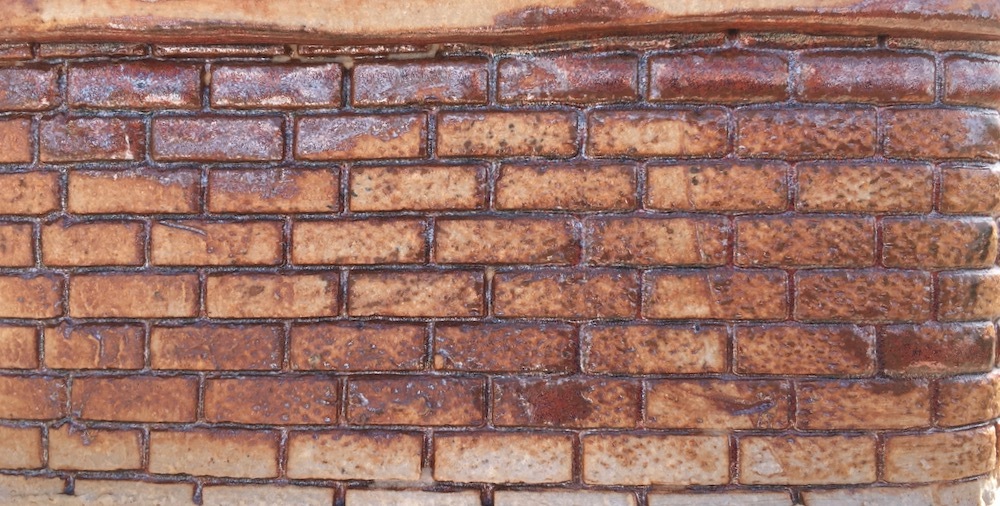
Roll Your Texture in Clay
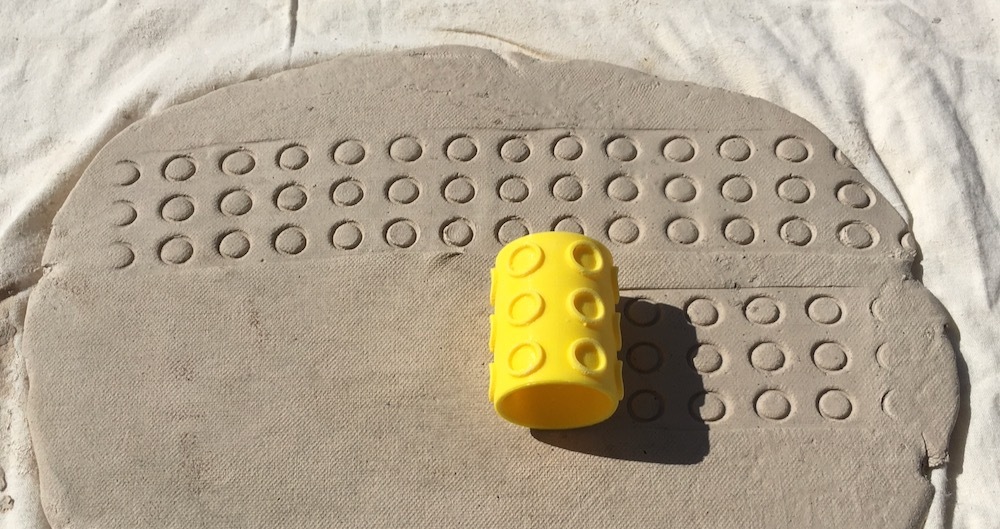
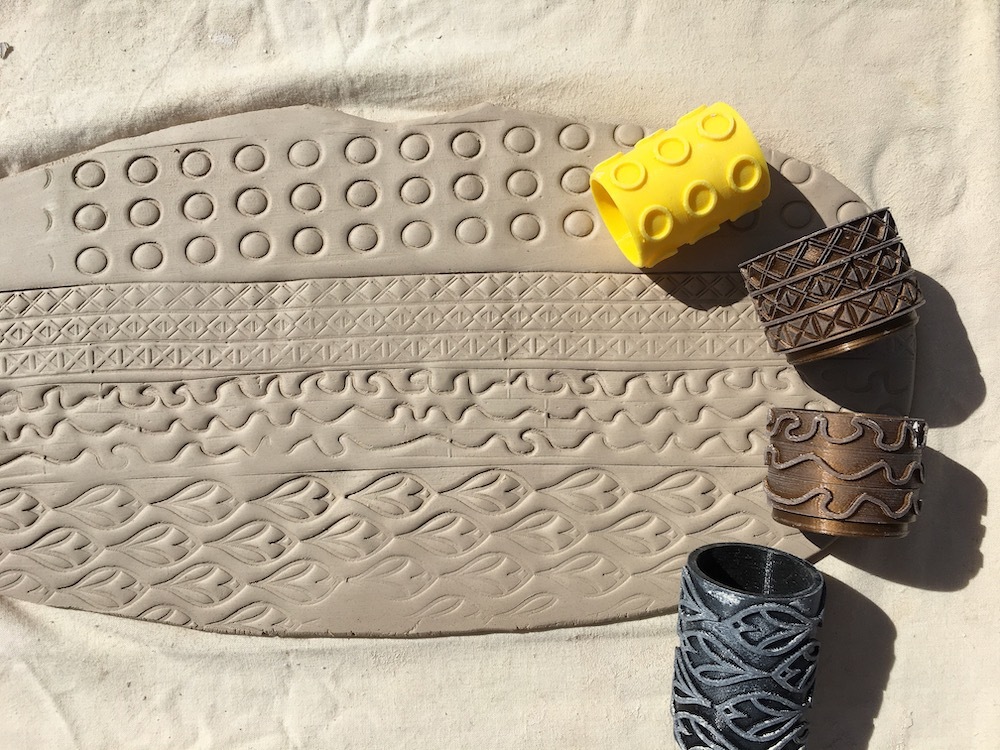
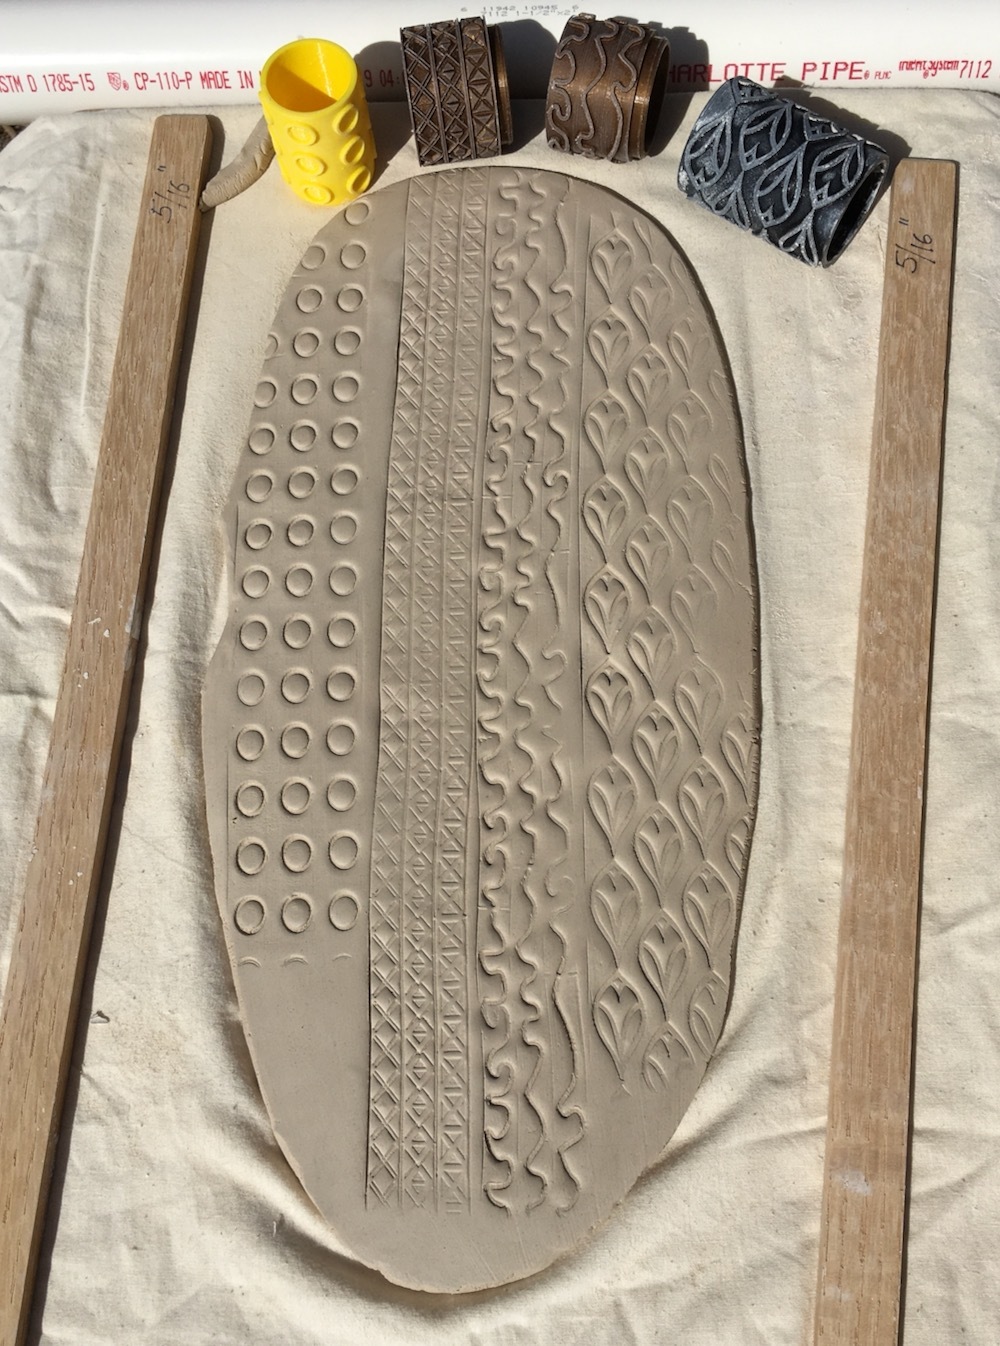
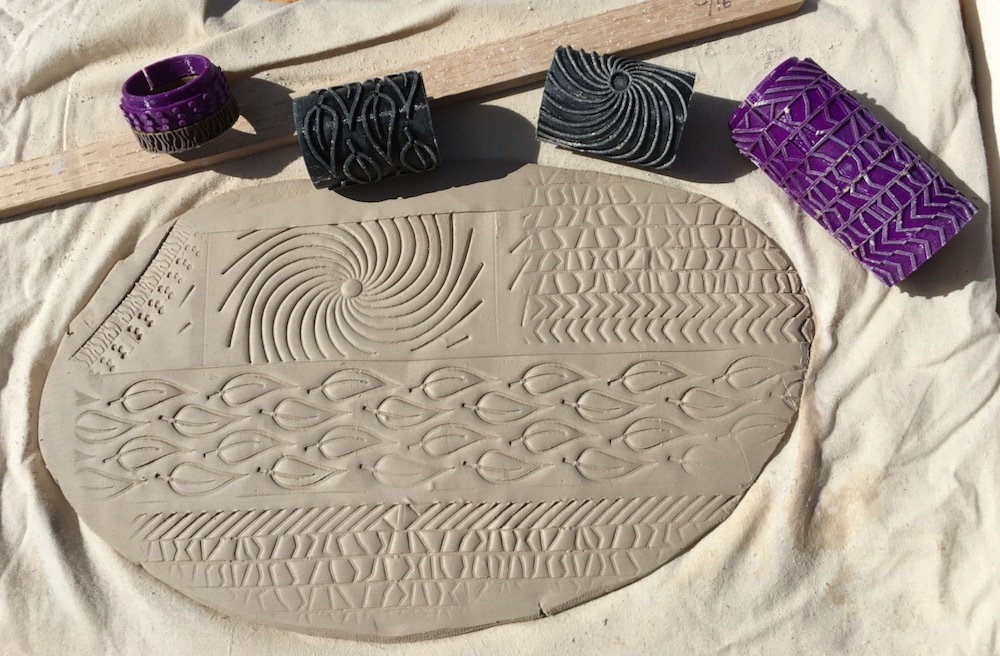
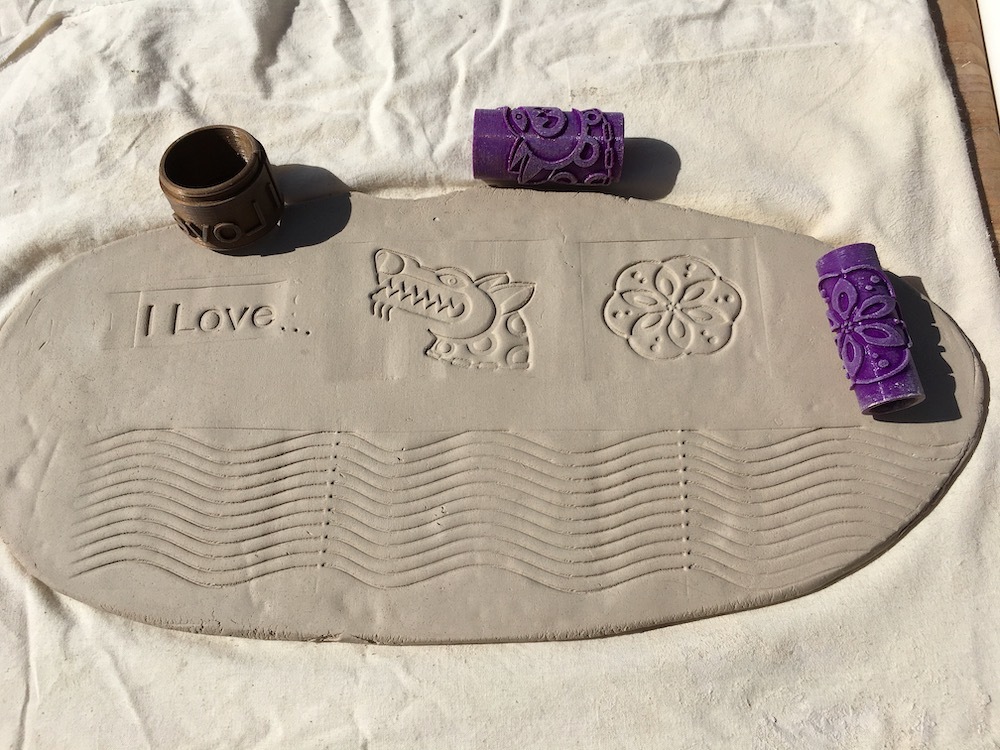
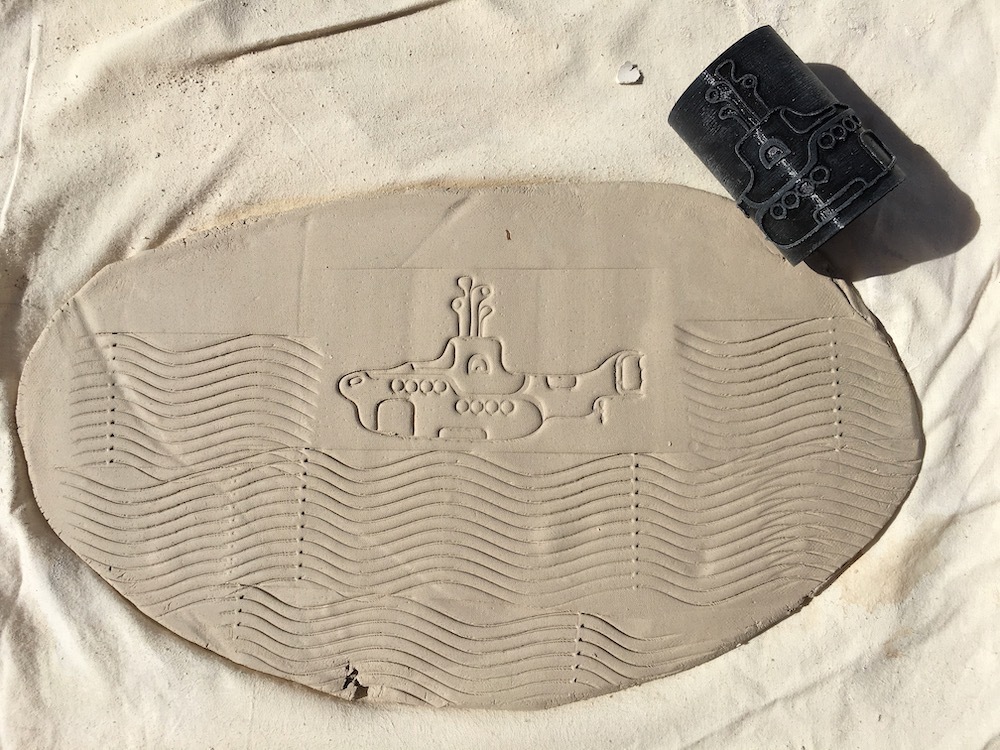

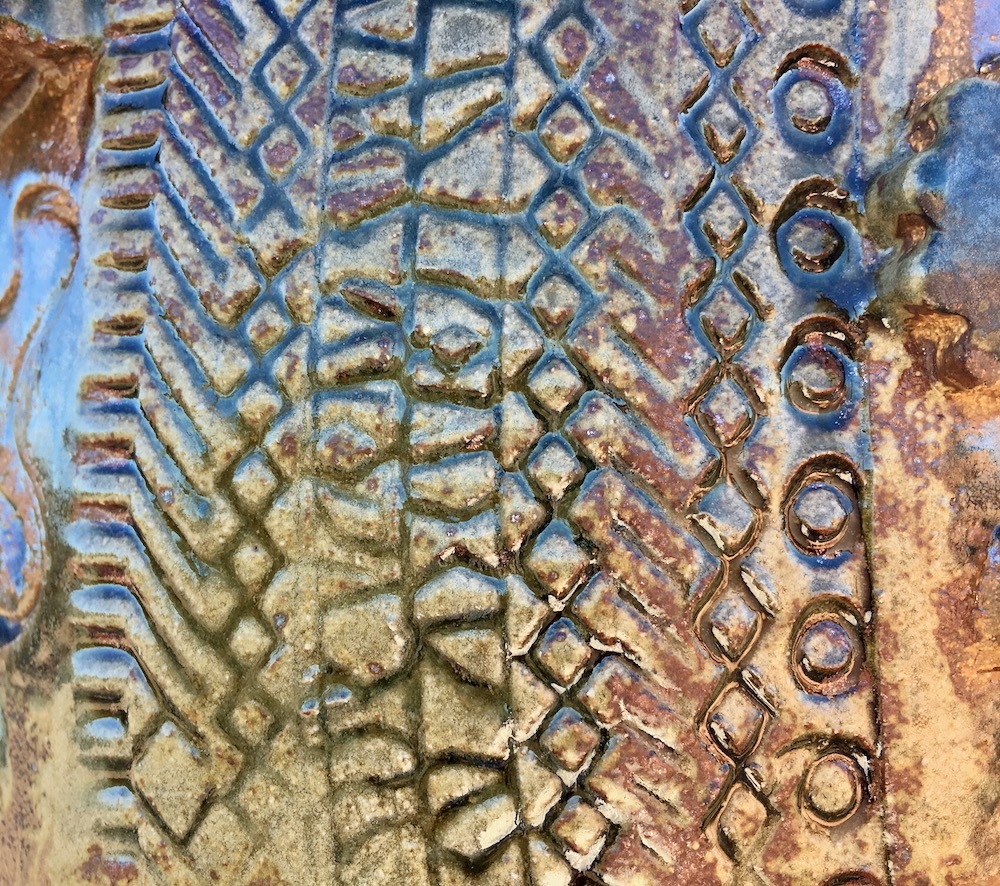
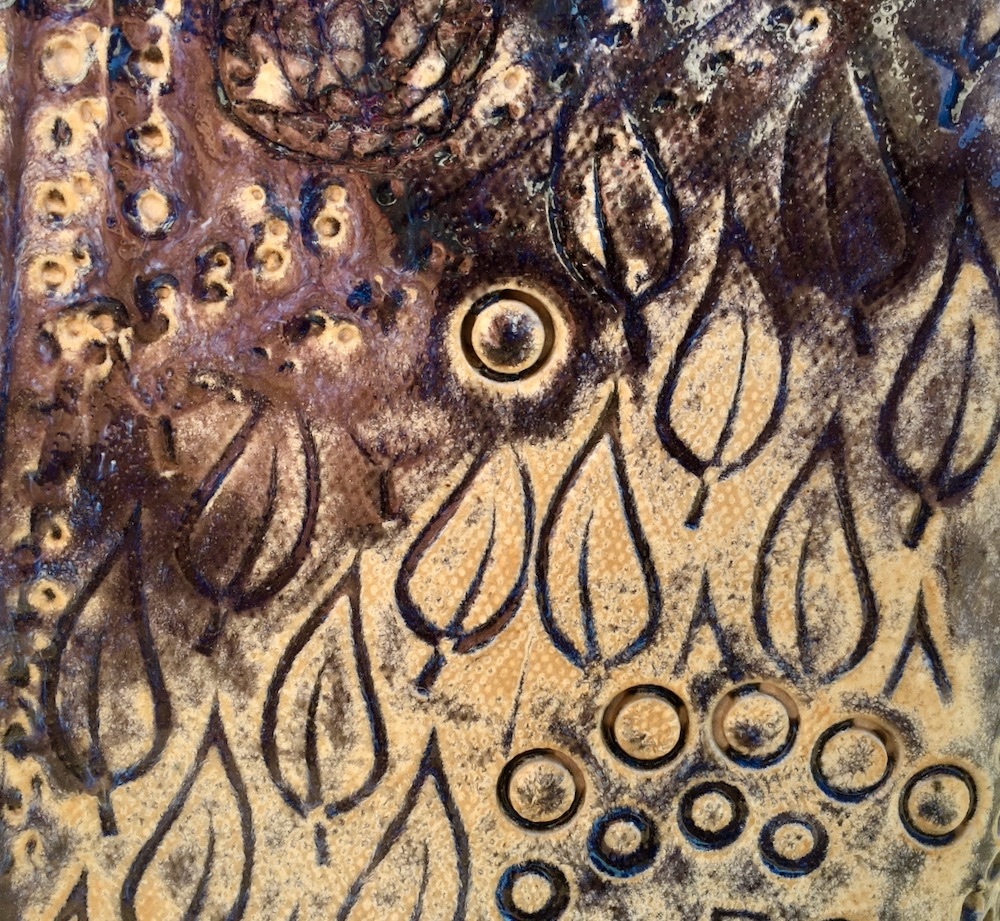
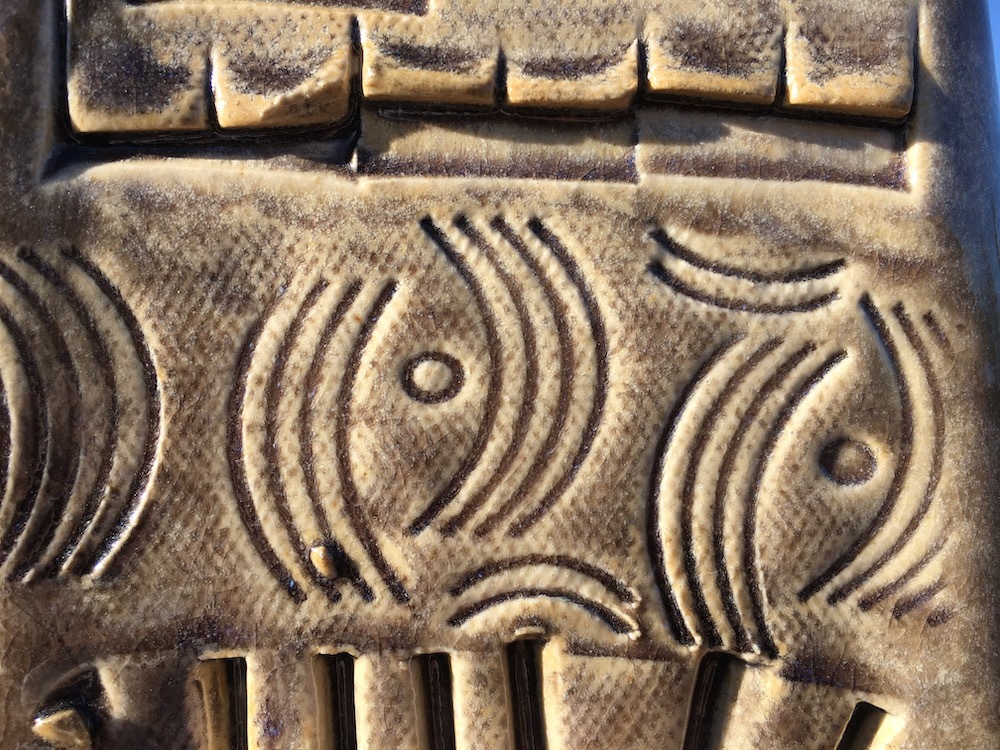
Prepare a damp slab of clay. Push the roller down while rolling across the slab. Fill the pattern with colored slip.
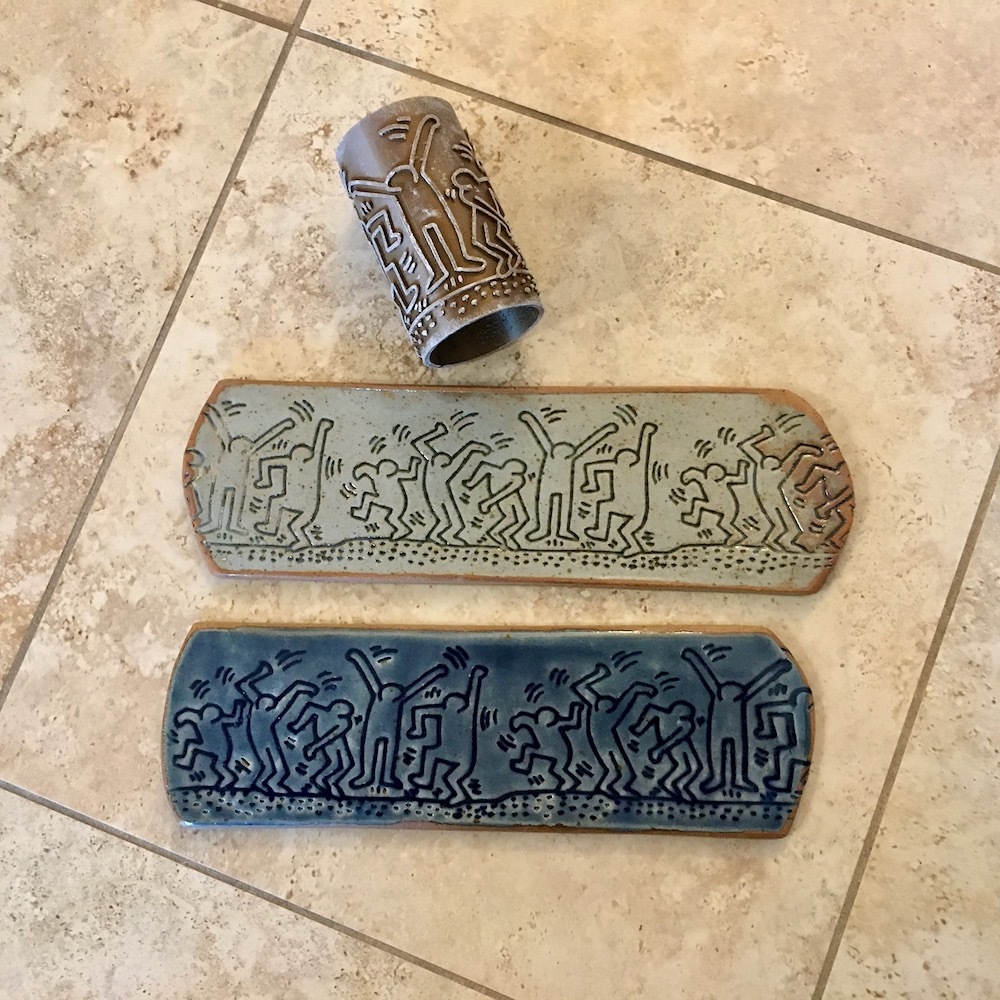
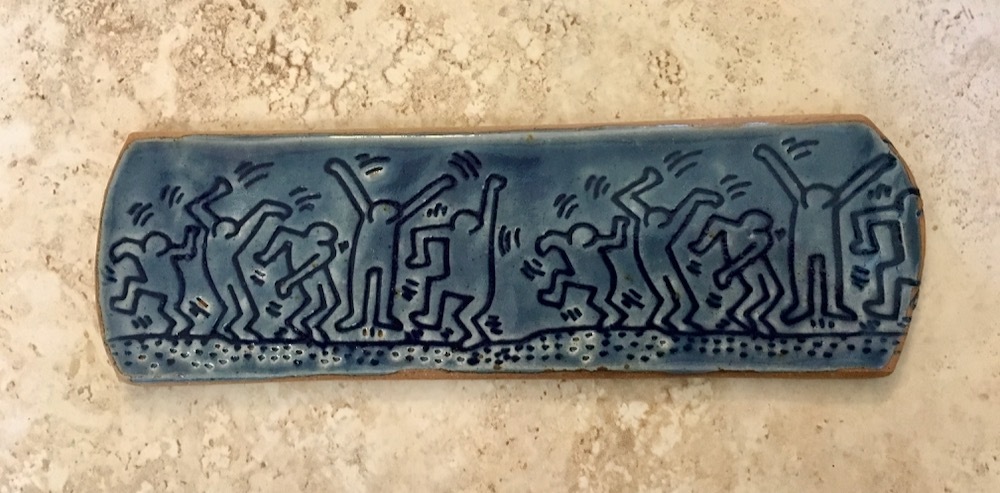
Alternatively, bisque-fire the patterned slab; then fill the pattern with colored glaze and apply a second glaze over it. This is how the blue 'Dancing Men' tile above was done.
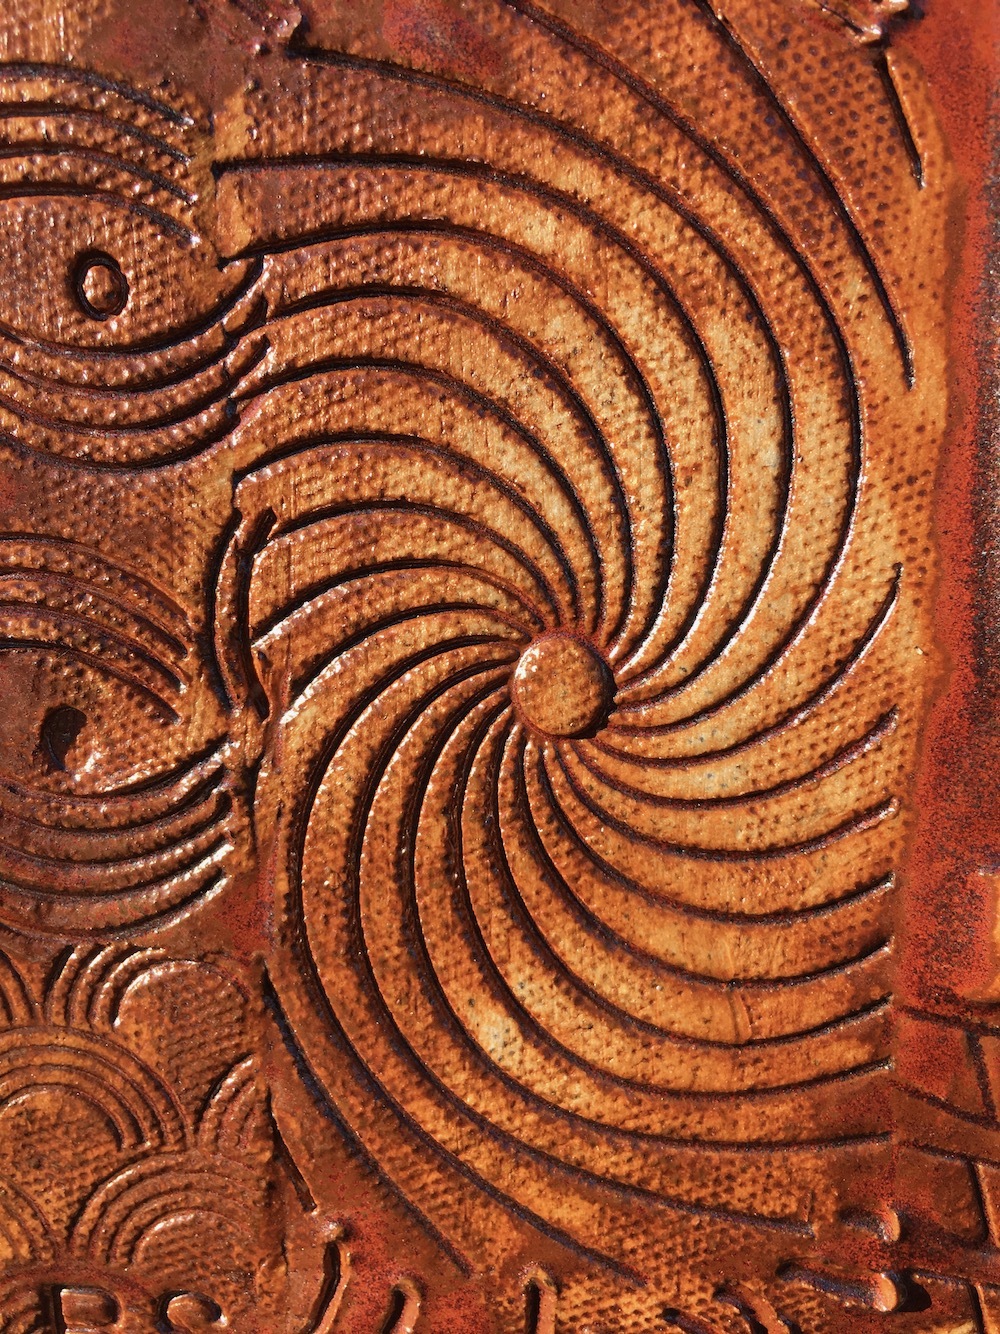
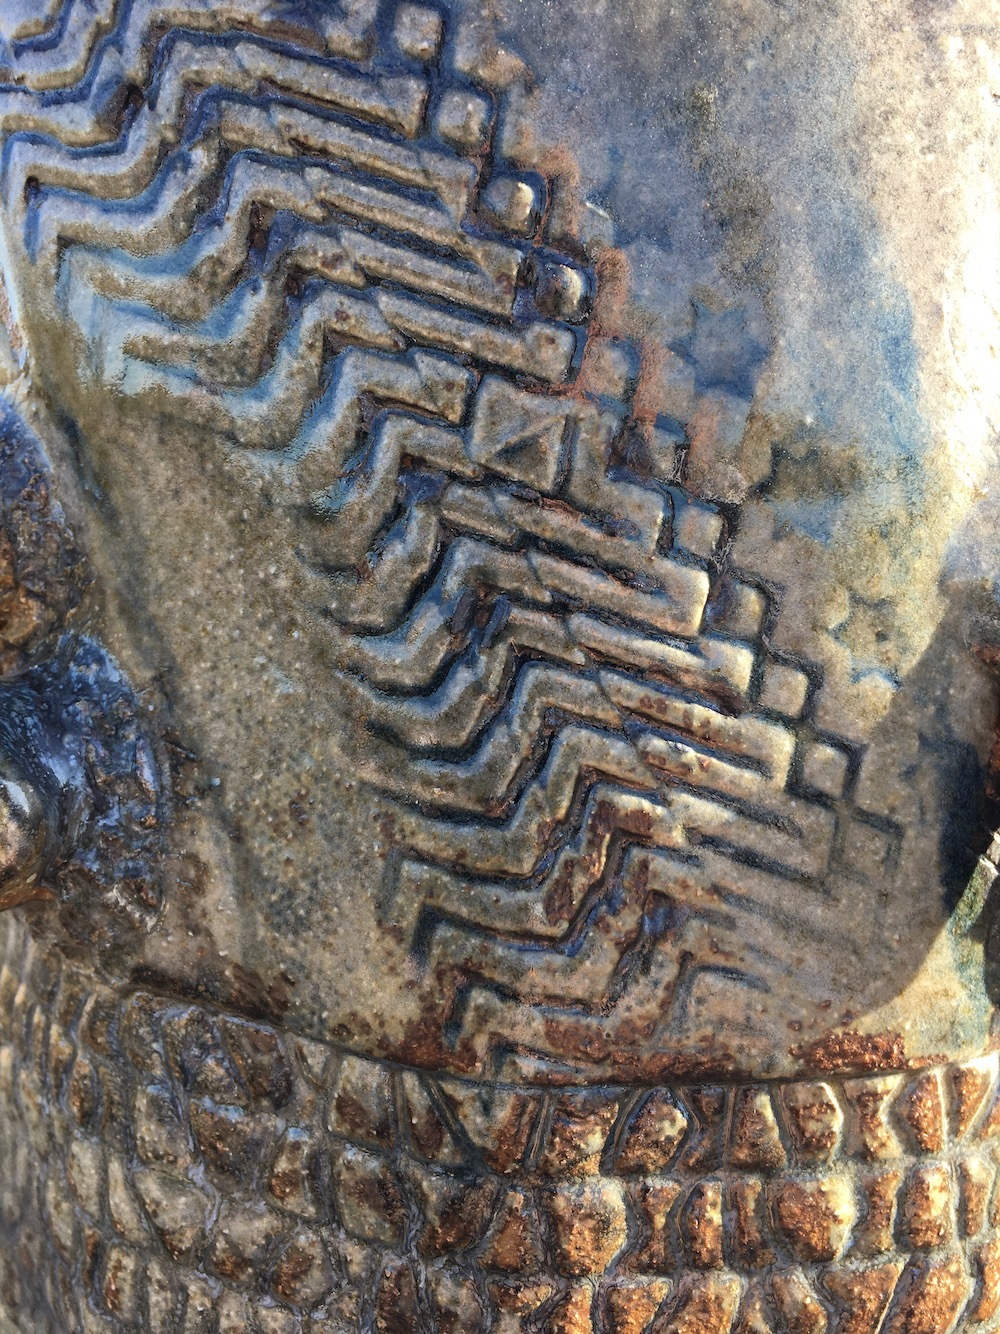
A few more fired textures are pictured above.
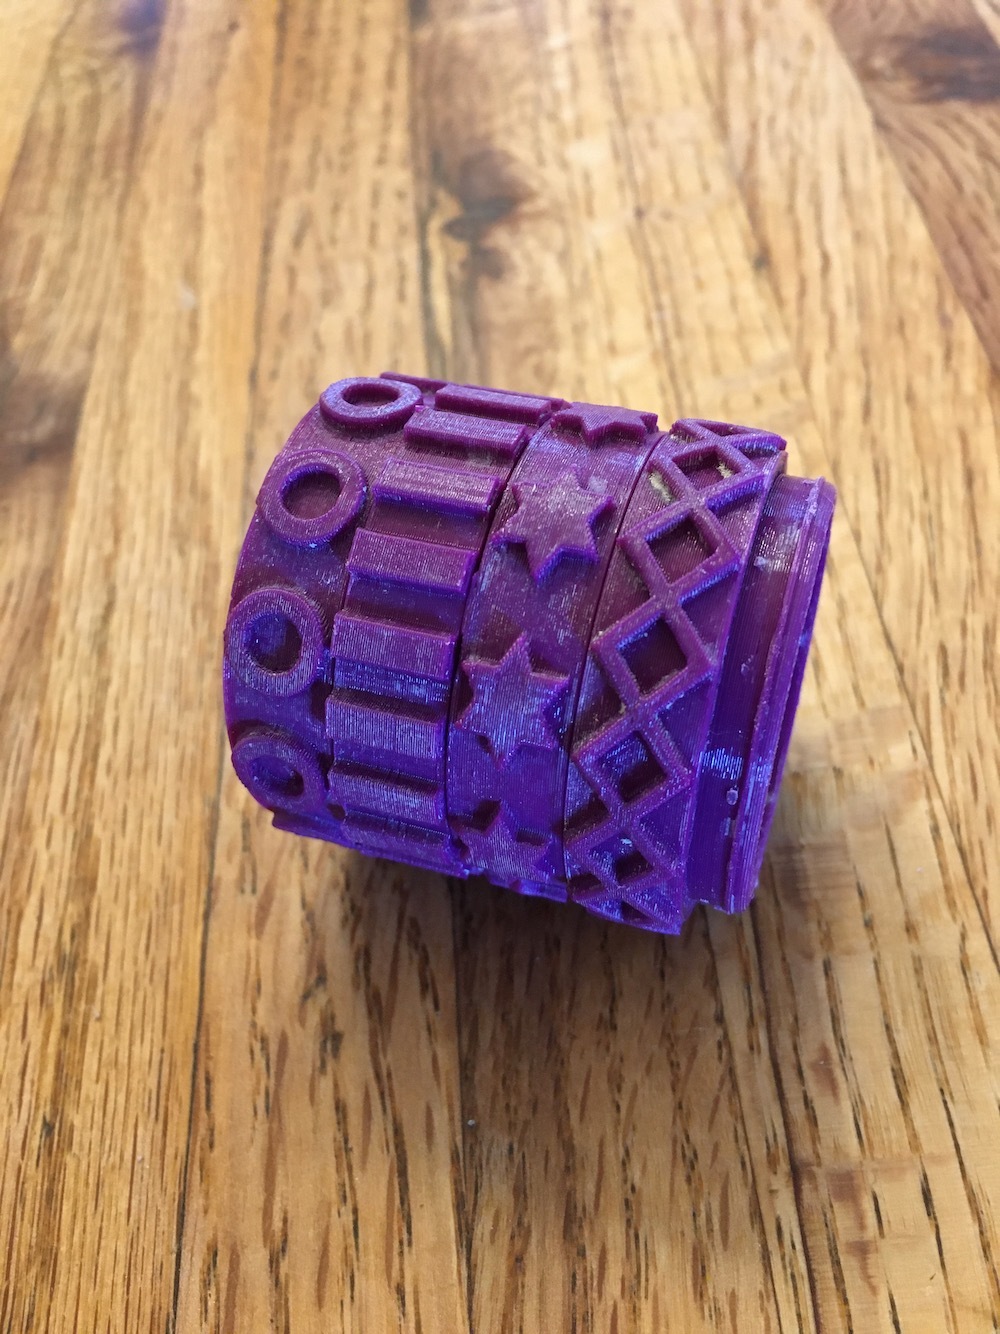
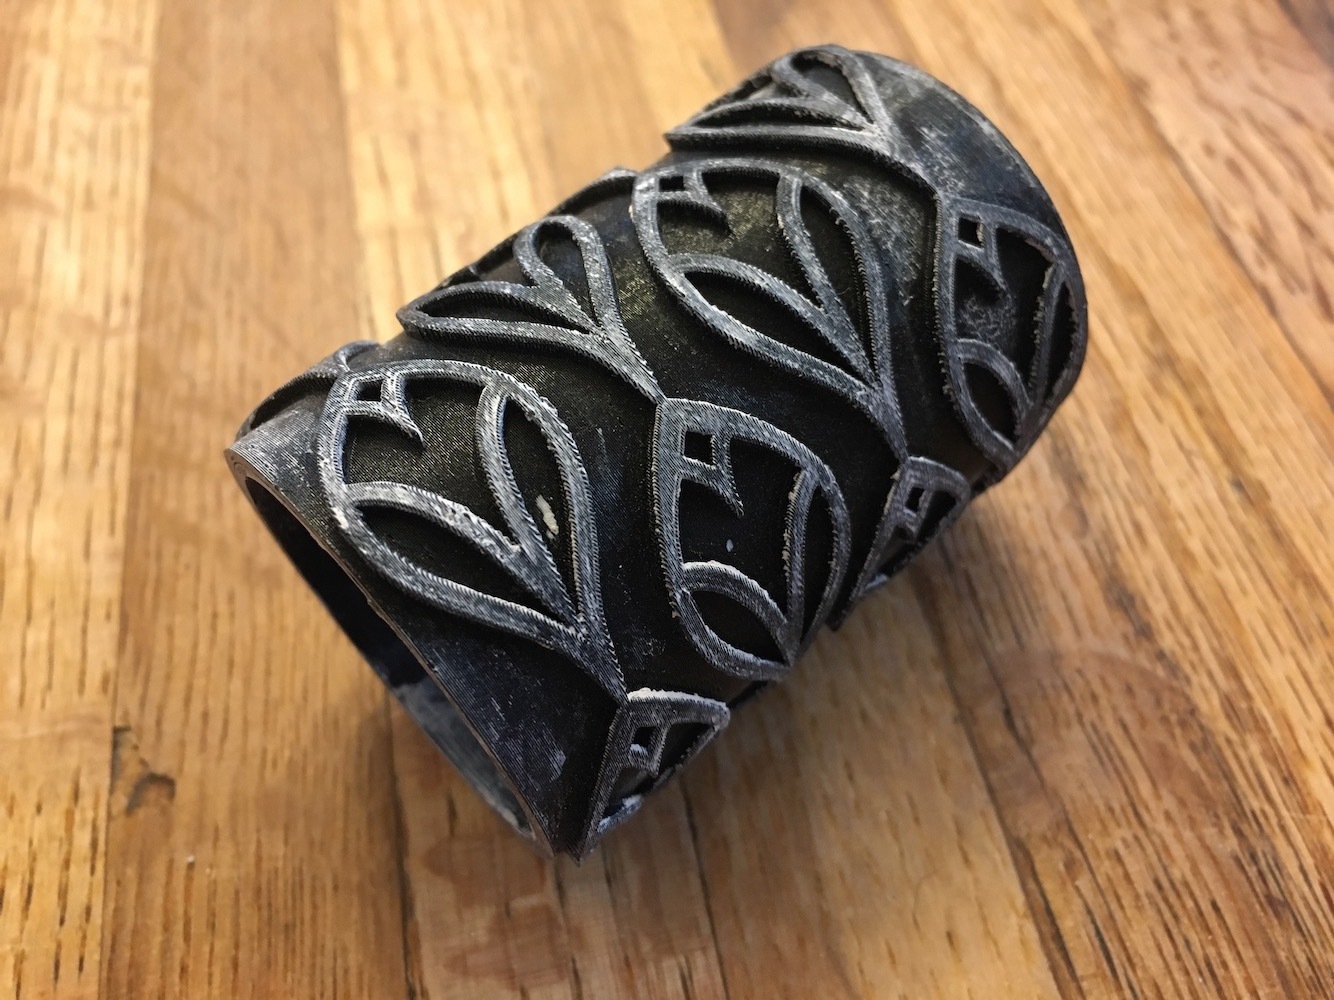
Take This to the Next Level!
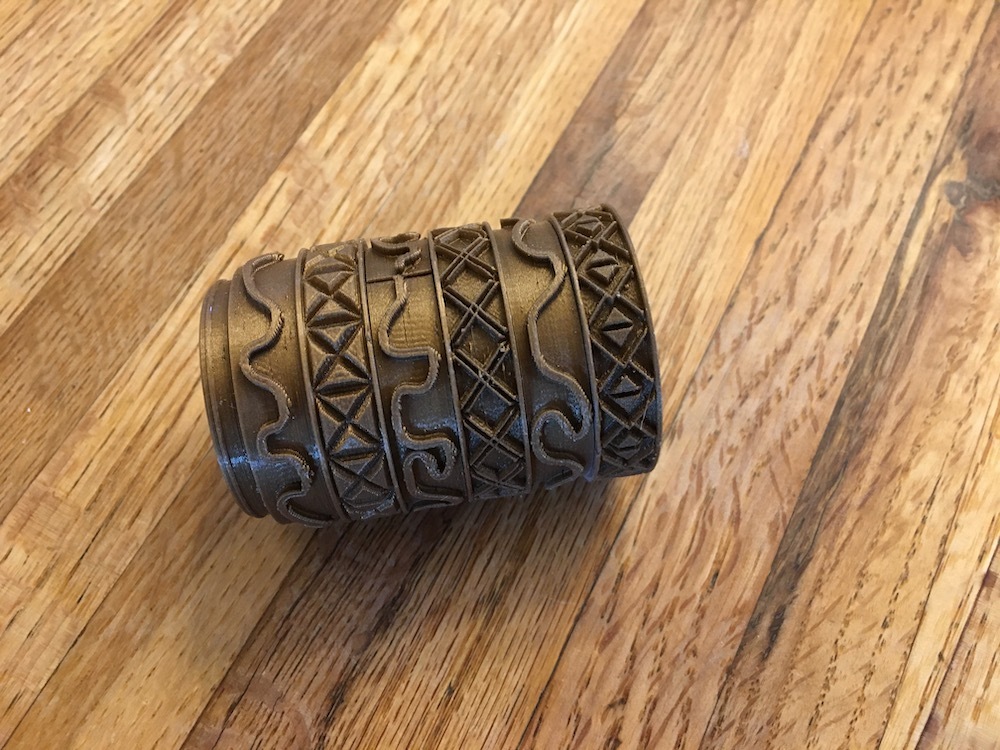
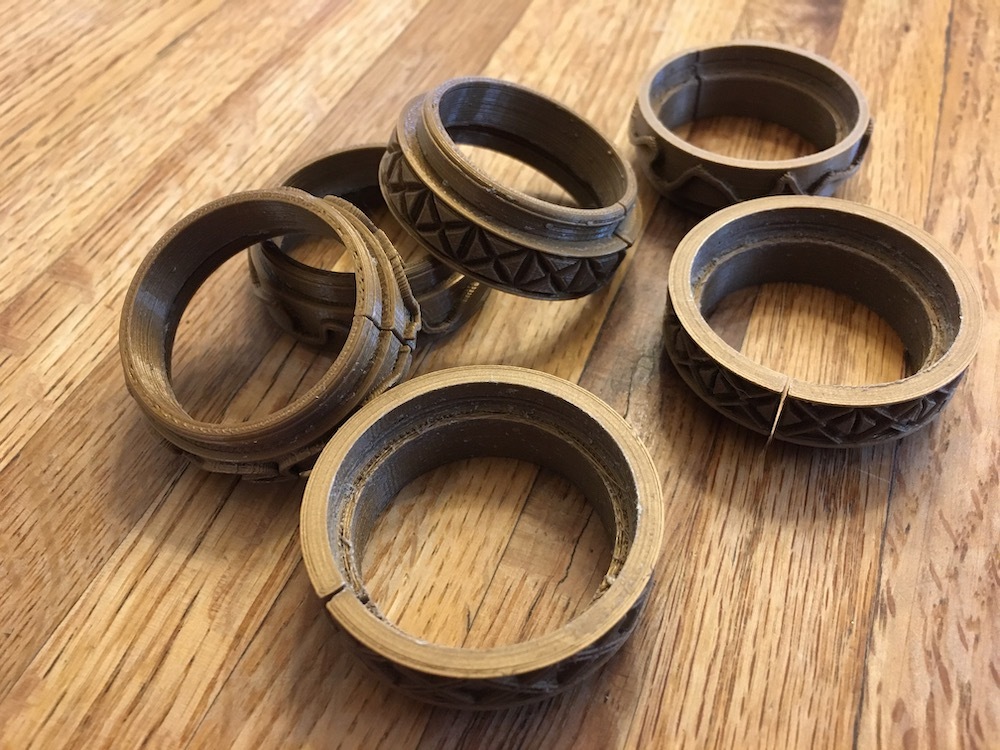
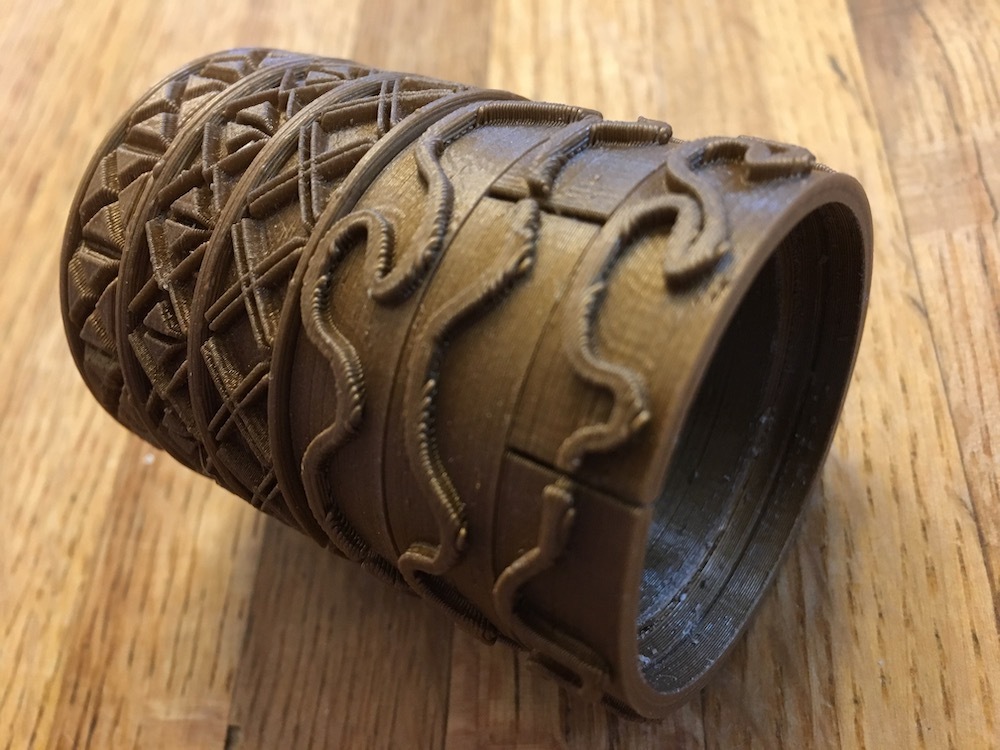
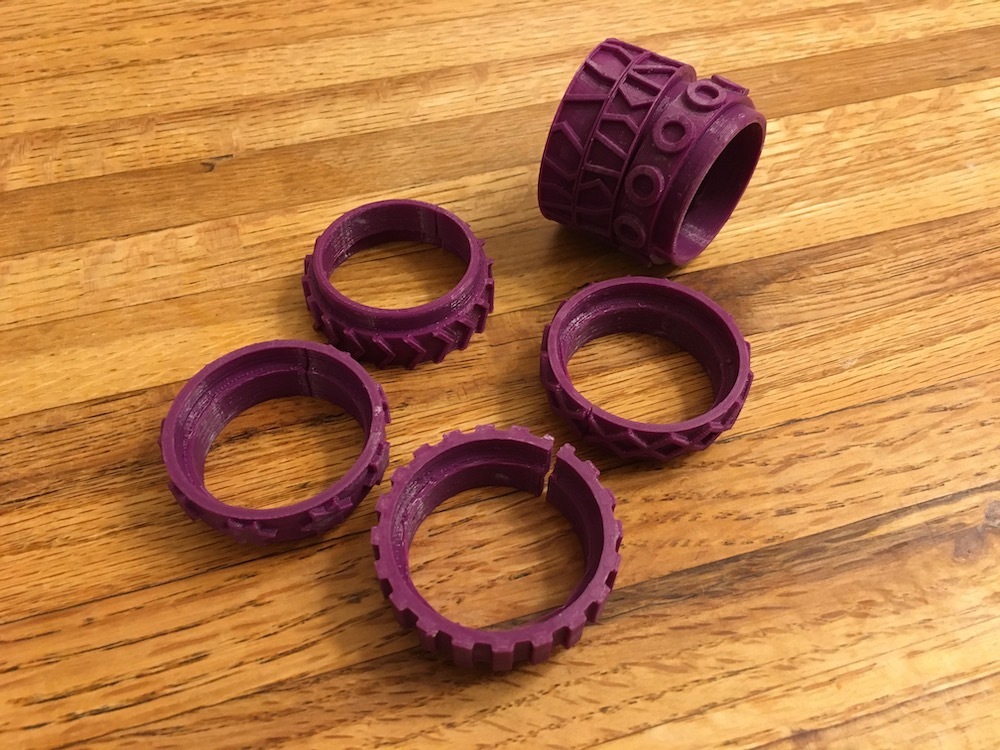
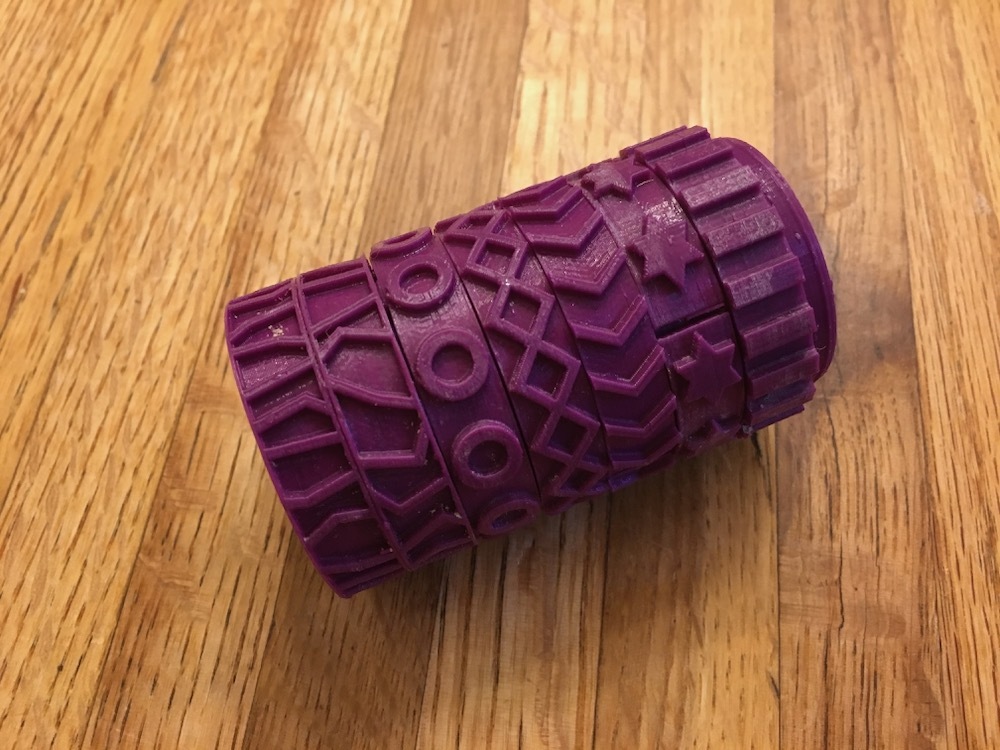
So if these texture rollers work for you, consider this enhancement: make narrow modular split-rings with different patterns that snap together in any order you like! You'll have an unlimited choice of pattern combinations. Look at the pictures.
It would be easy to design a handle for the rollers if you wanted one. Maybe a future Instructable ...