Texas Hold 'Em Poker Set
by Dessert Queen in Living > Toys & Games
544 Views, 5 Favorites, 0 Comments
Texas Hold 'Em Poker Set
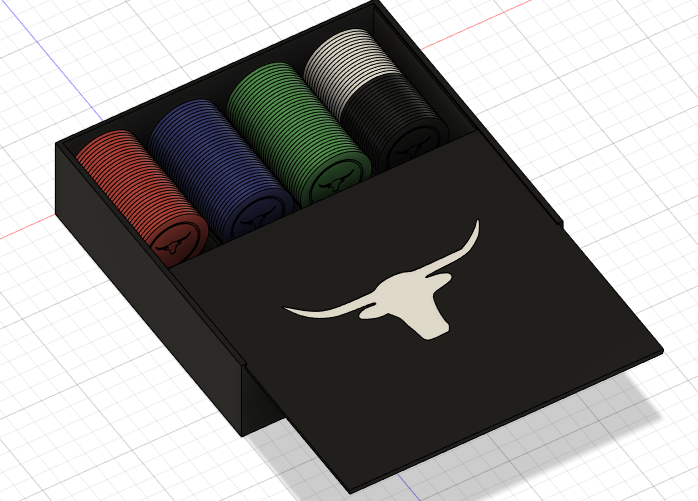
I made a poker set in Autodesk Fusion 360. This is fun and simple, and I think it turned out awesome!
I am a 9th grader attending Bishop Seabury Academy.
Supplies
Autodesk Fusion 360
Getting Started on the Poker Chip
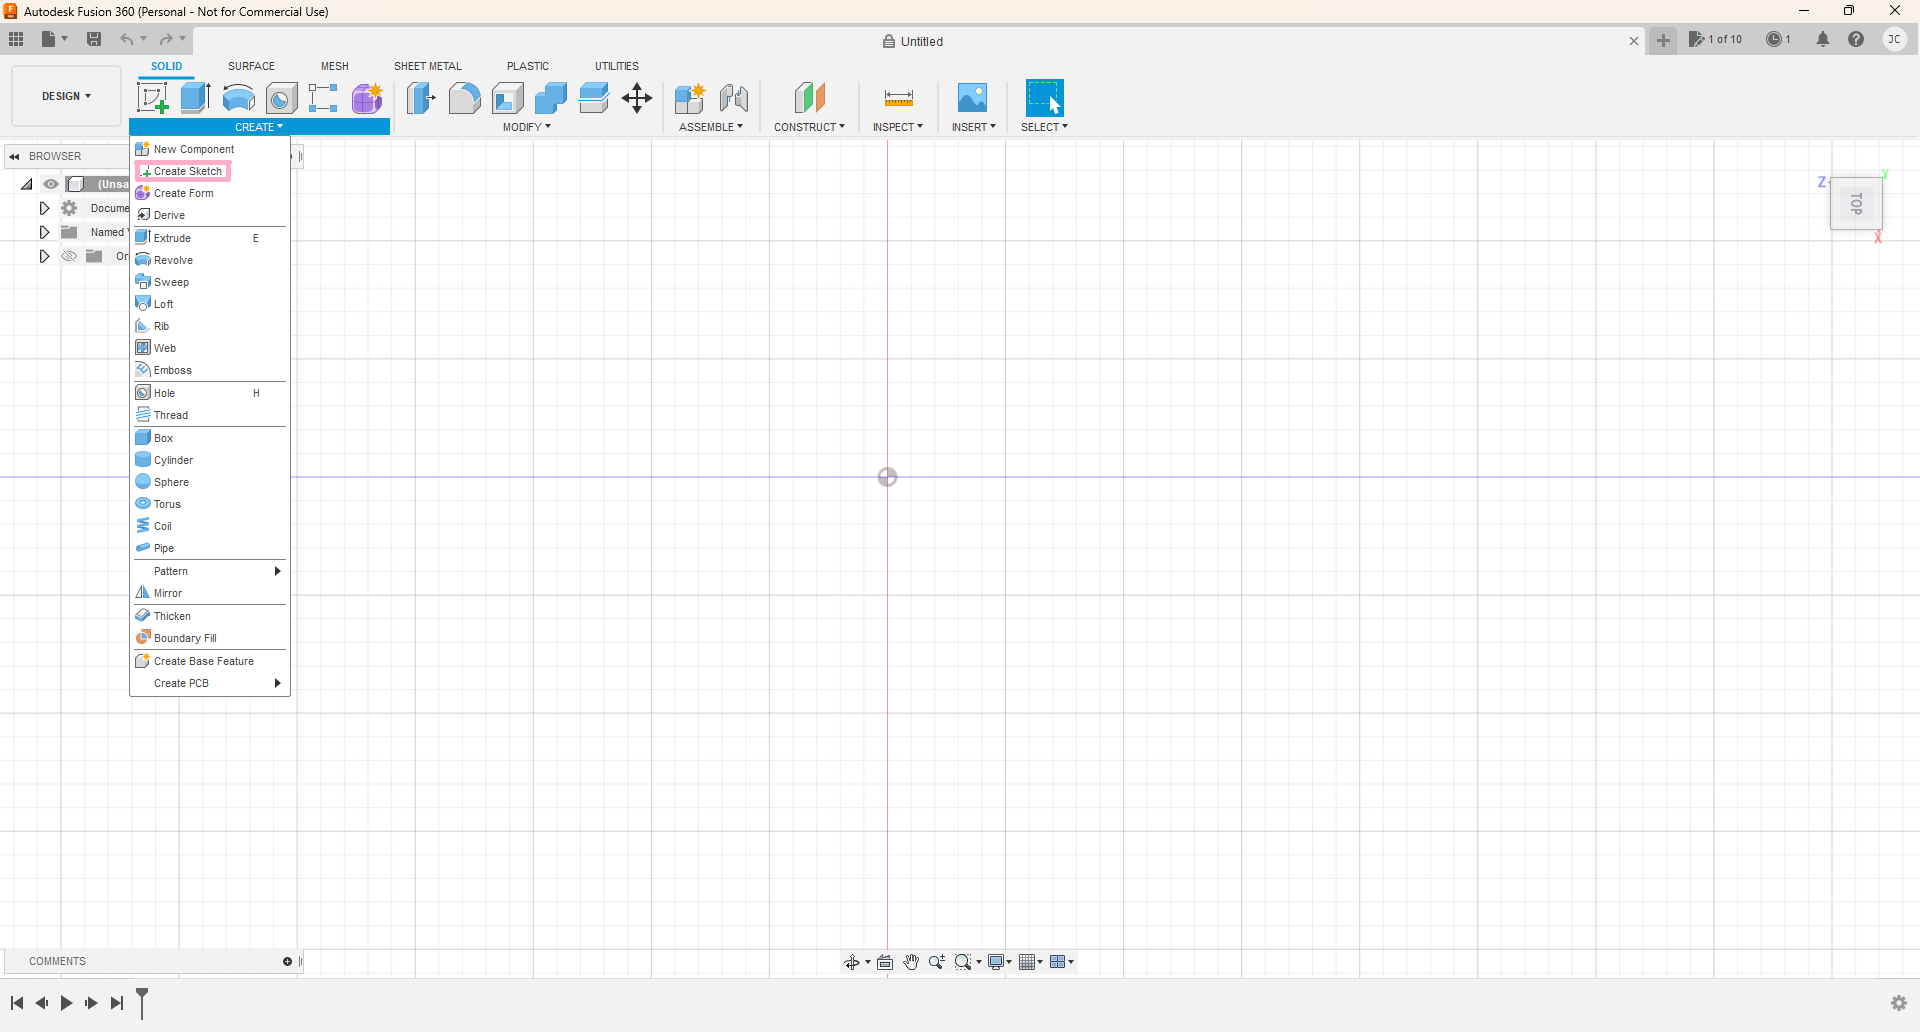
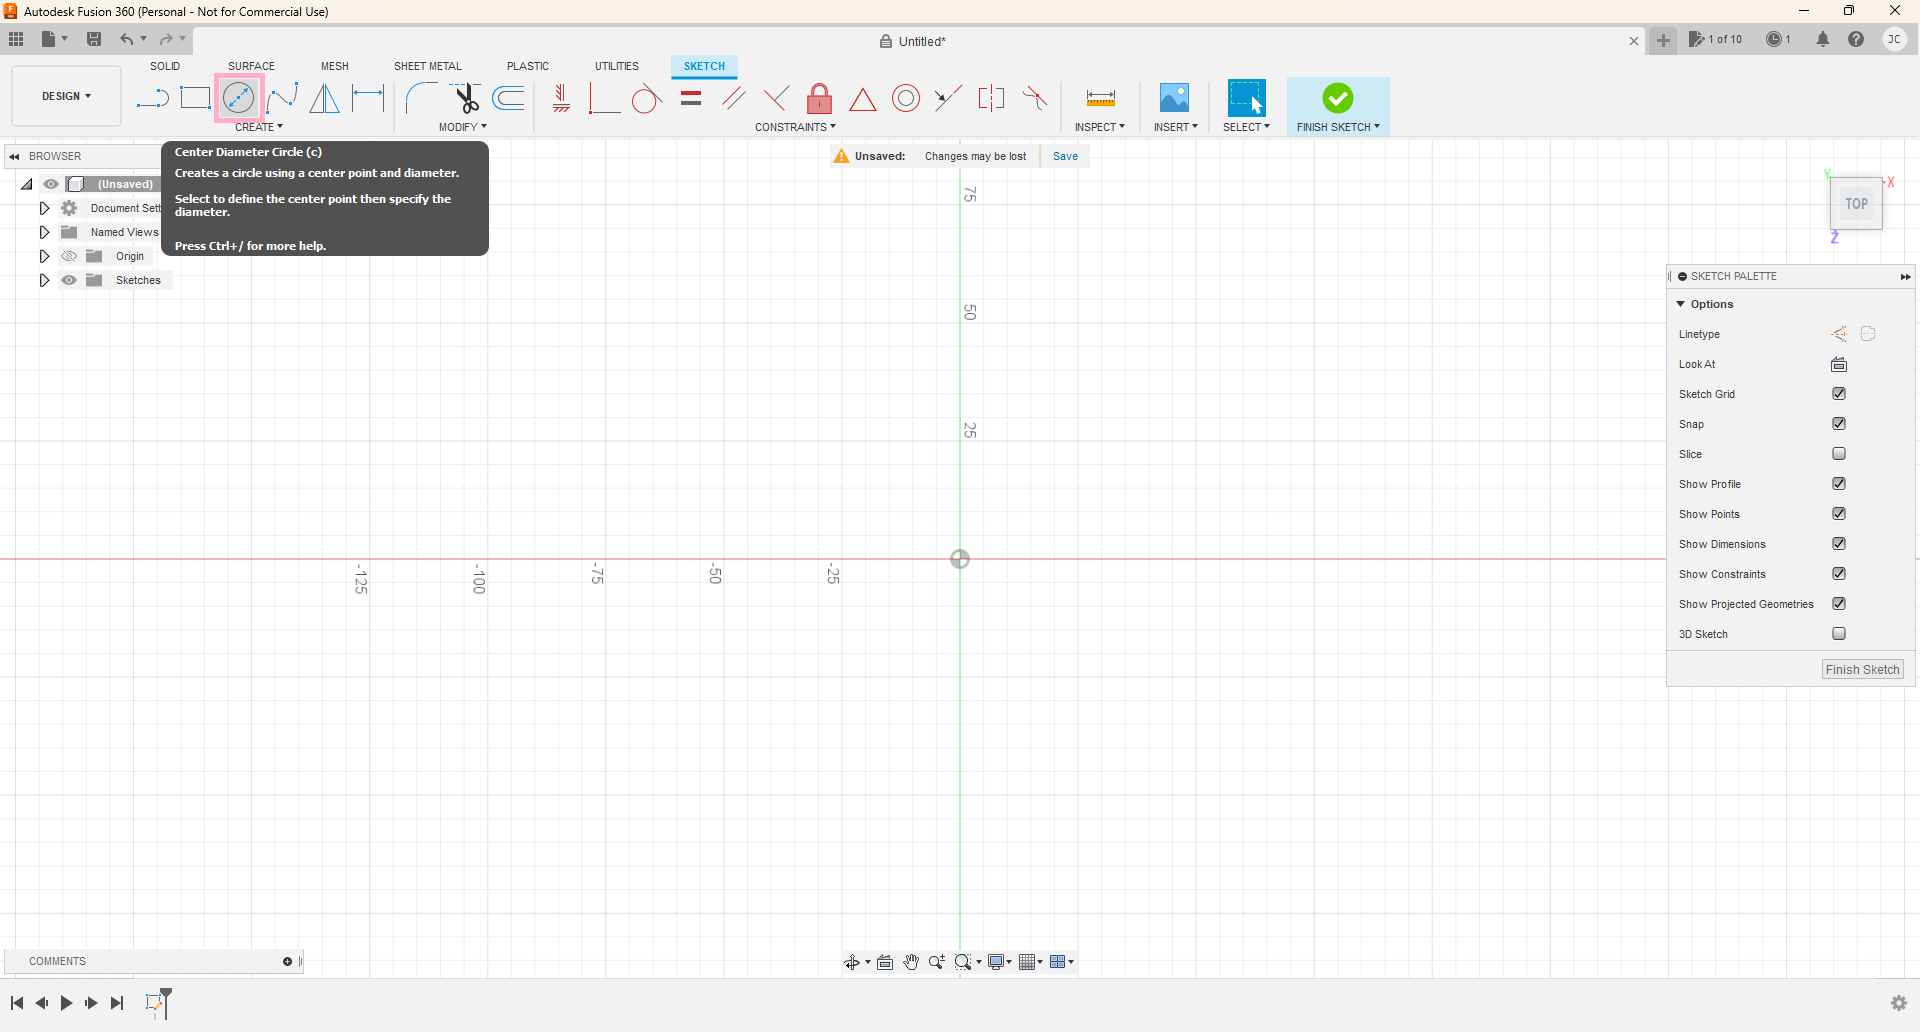
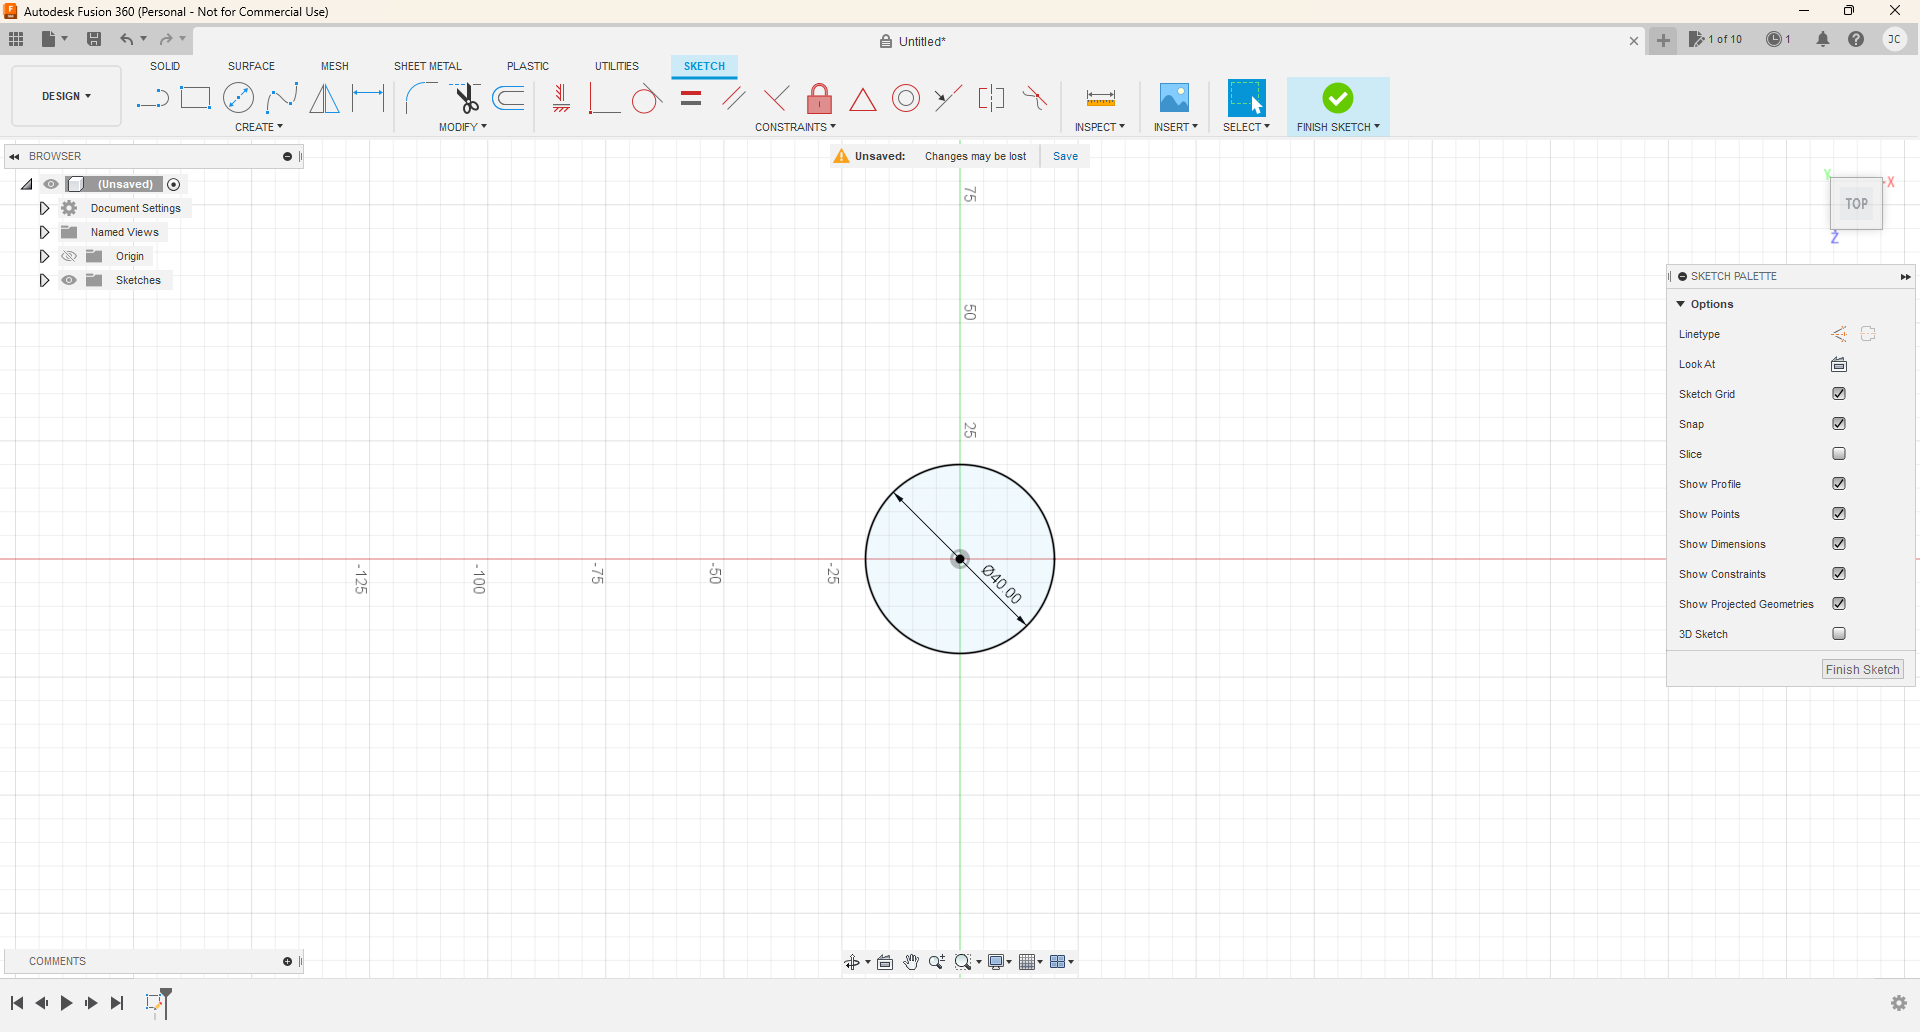
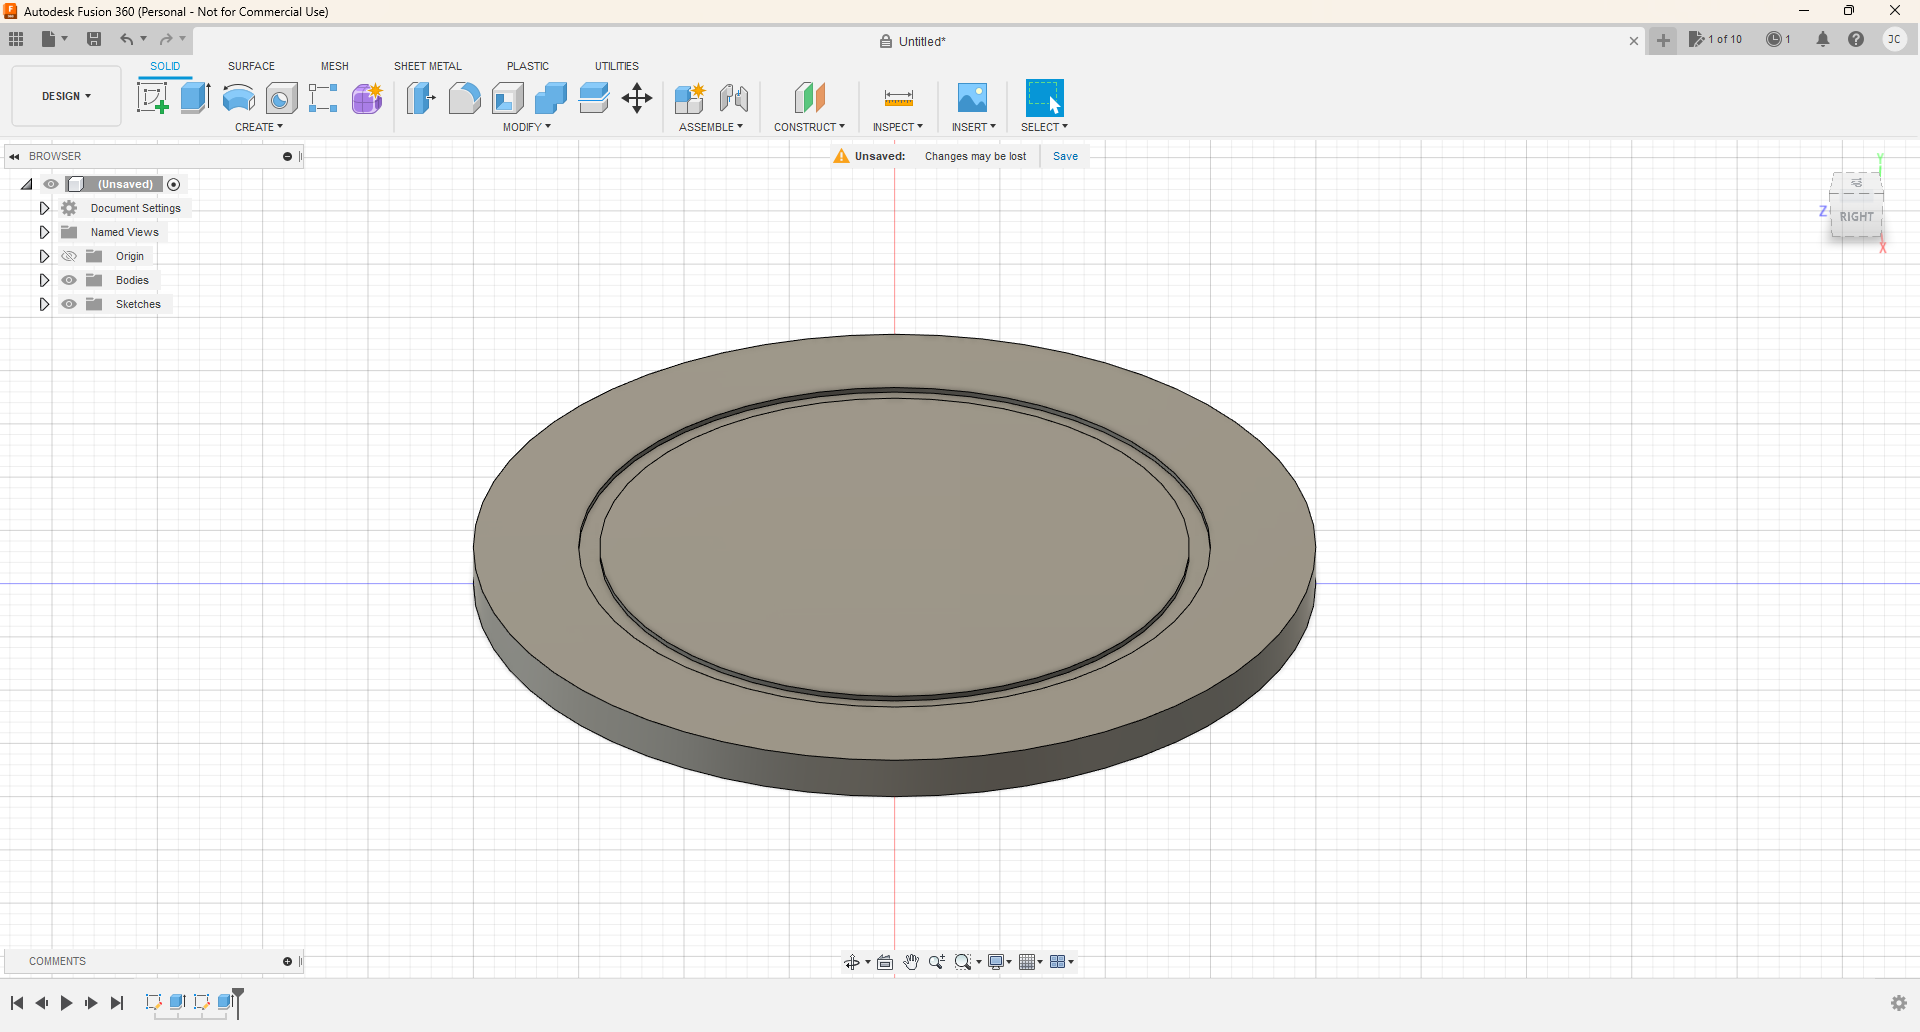
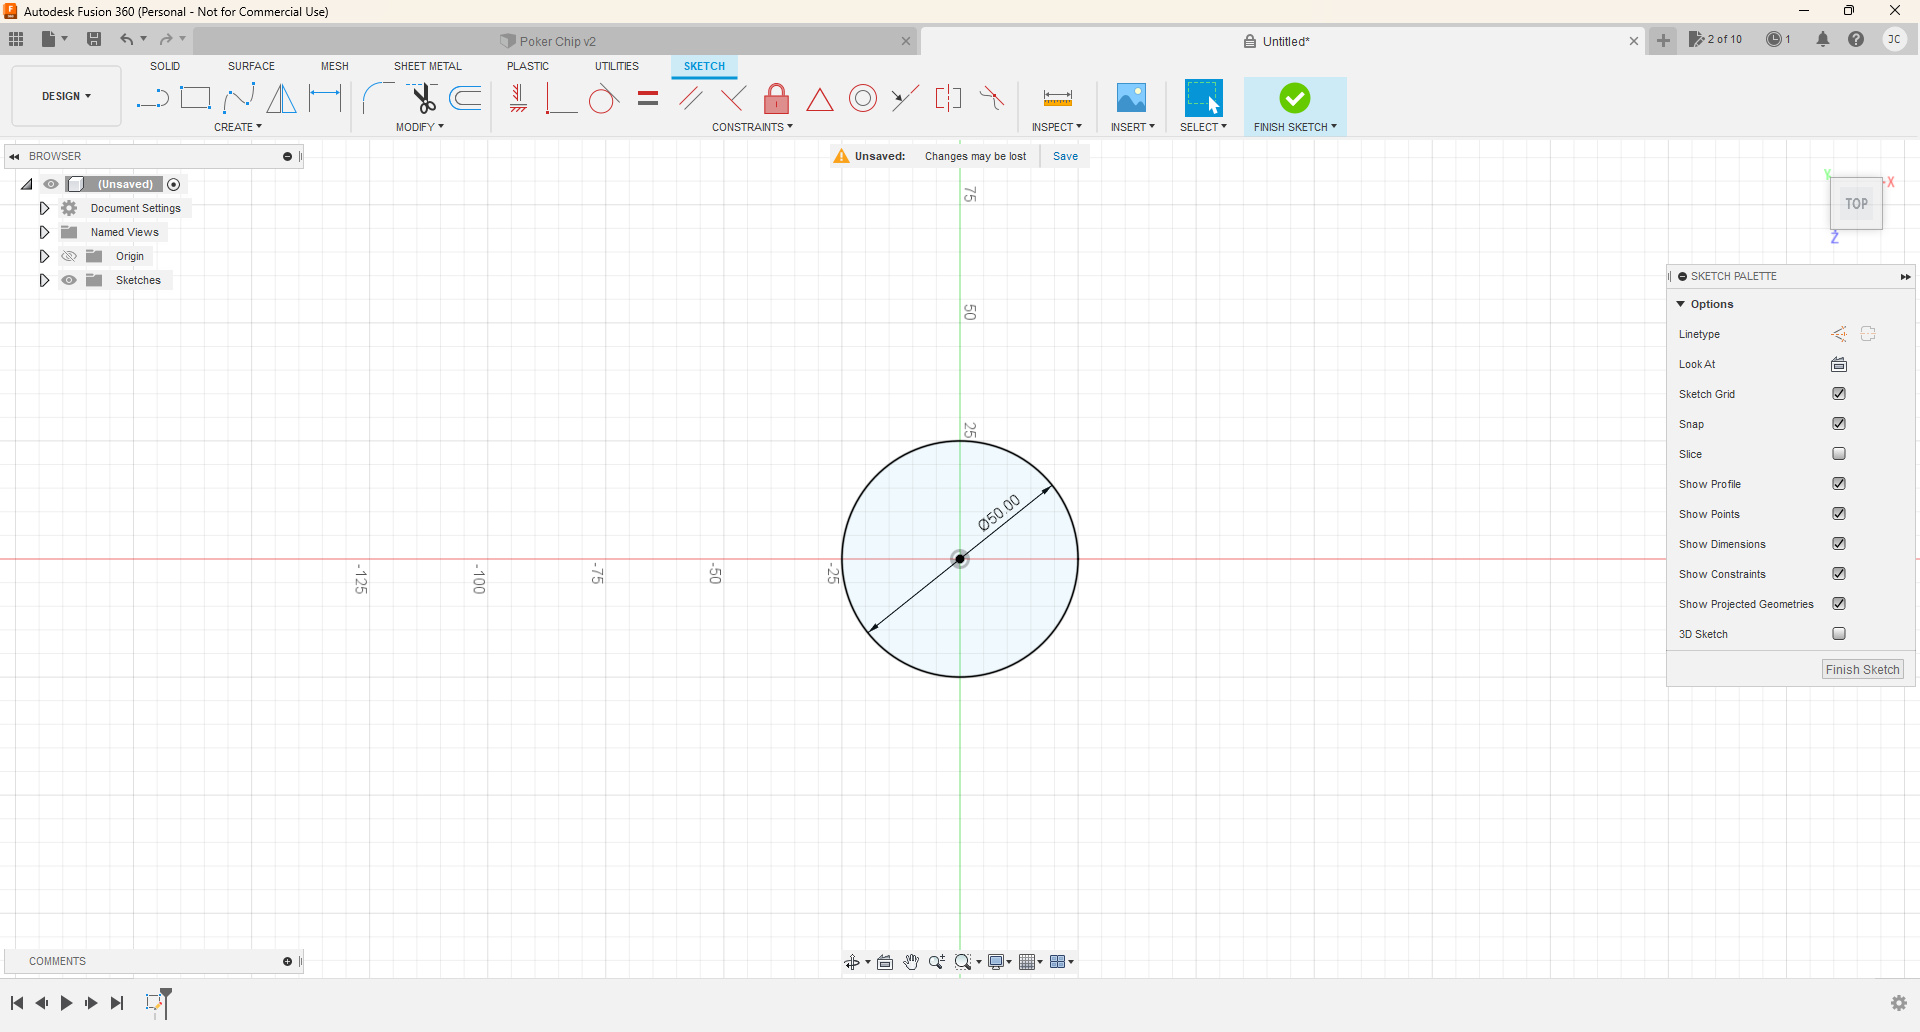
In top view, create a new sketch. Select the top plane for the sketch. Click create circle, and select the center point of the plane, then drag or type in 40mm. Click "Finish Sketch". (Top right)
Adding Details
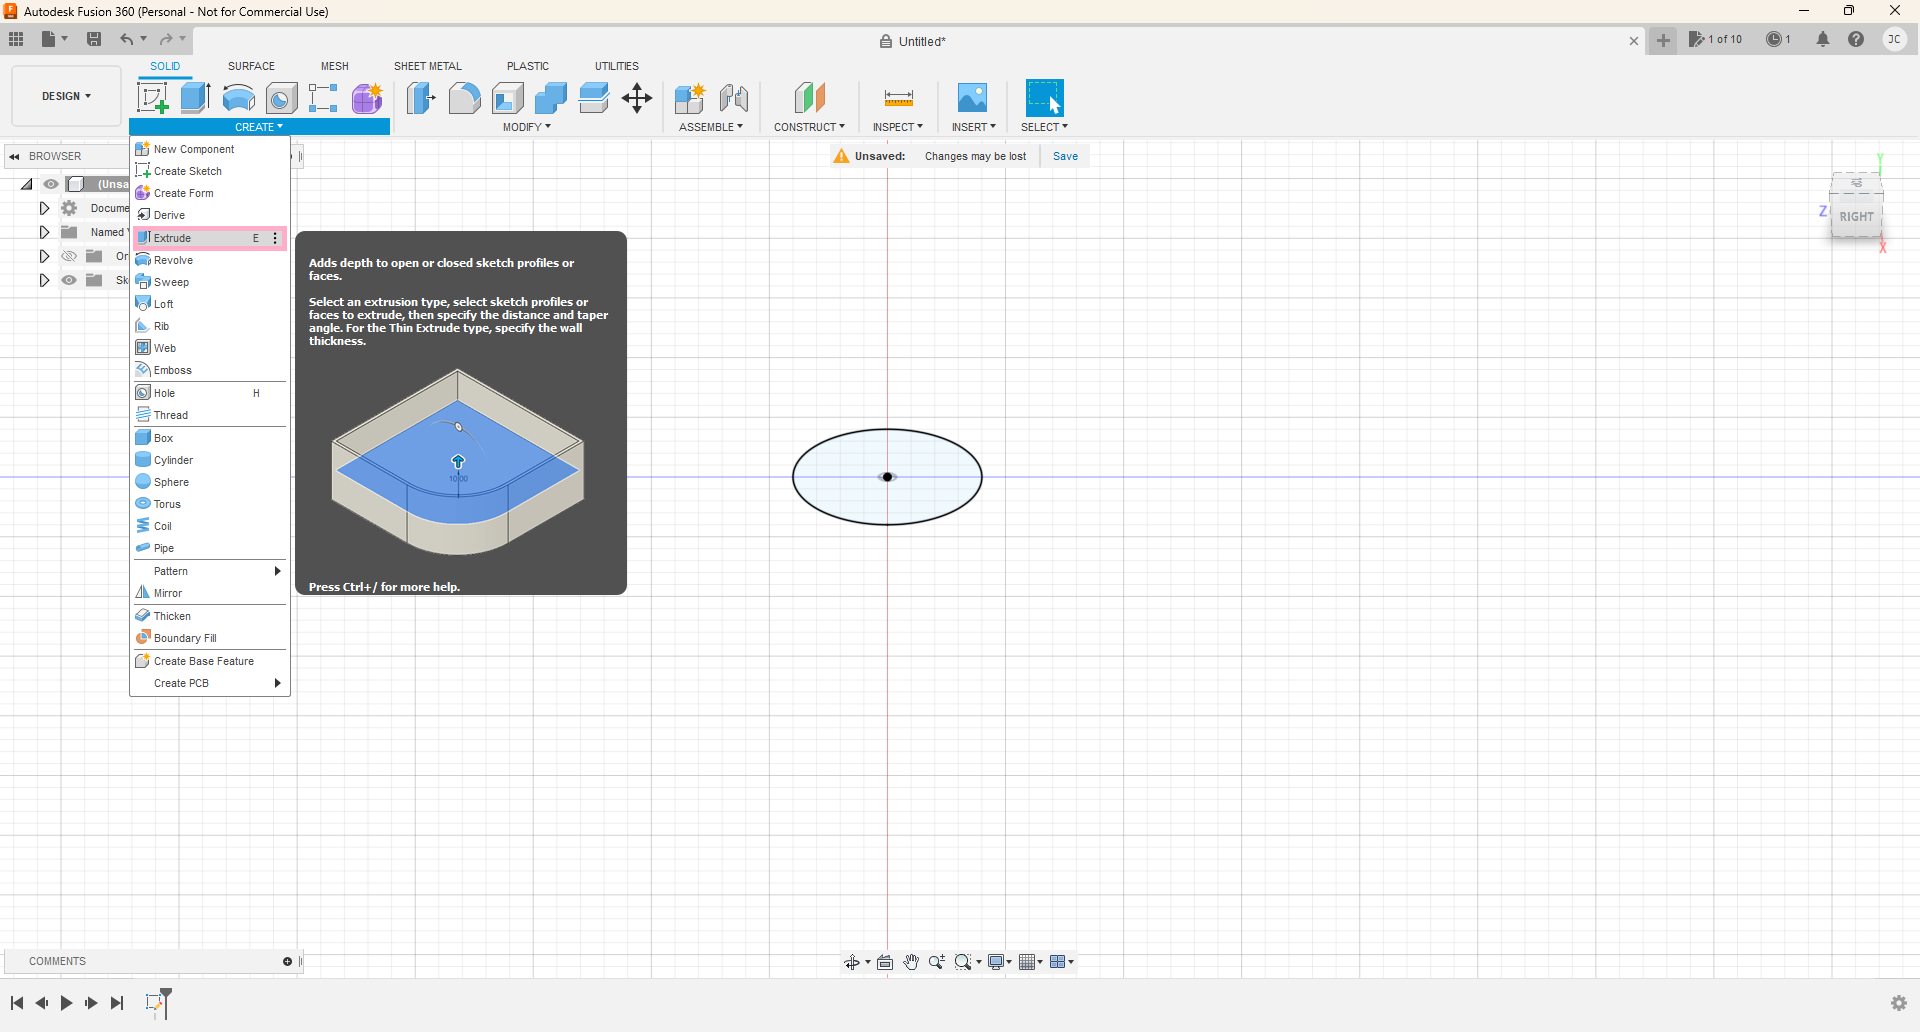
Go to isometric view by holding down shift, clicking the middle mouse button, and dragging upward slightly. Select the circle and hit create, then extrude. -Note: A shortcut to extruding is to just press E on your keyboard. Make the thickness 2mm. Create a new sketch. Create a new circle, and click the top of the chip. Make the circle from the center point 30mm. Click finish sketch.
Adding Even More Details
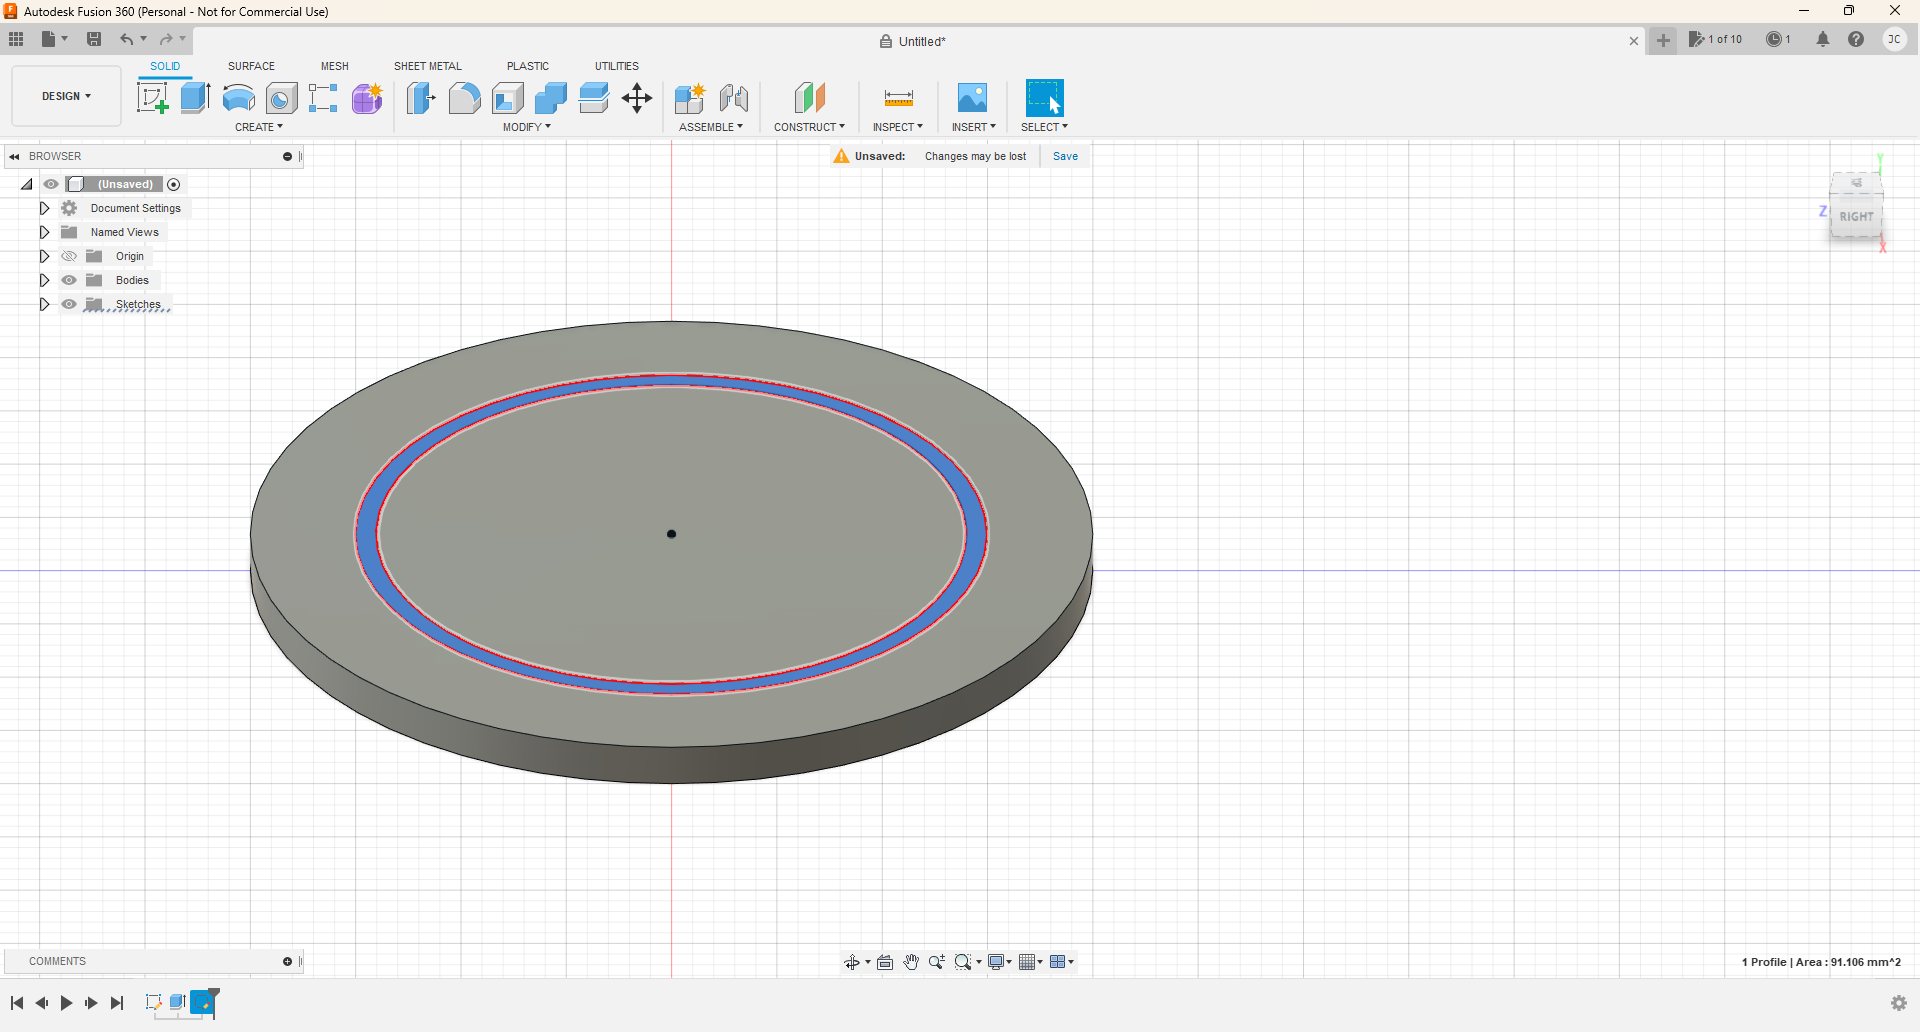

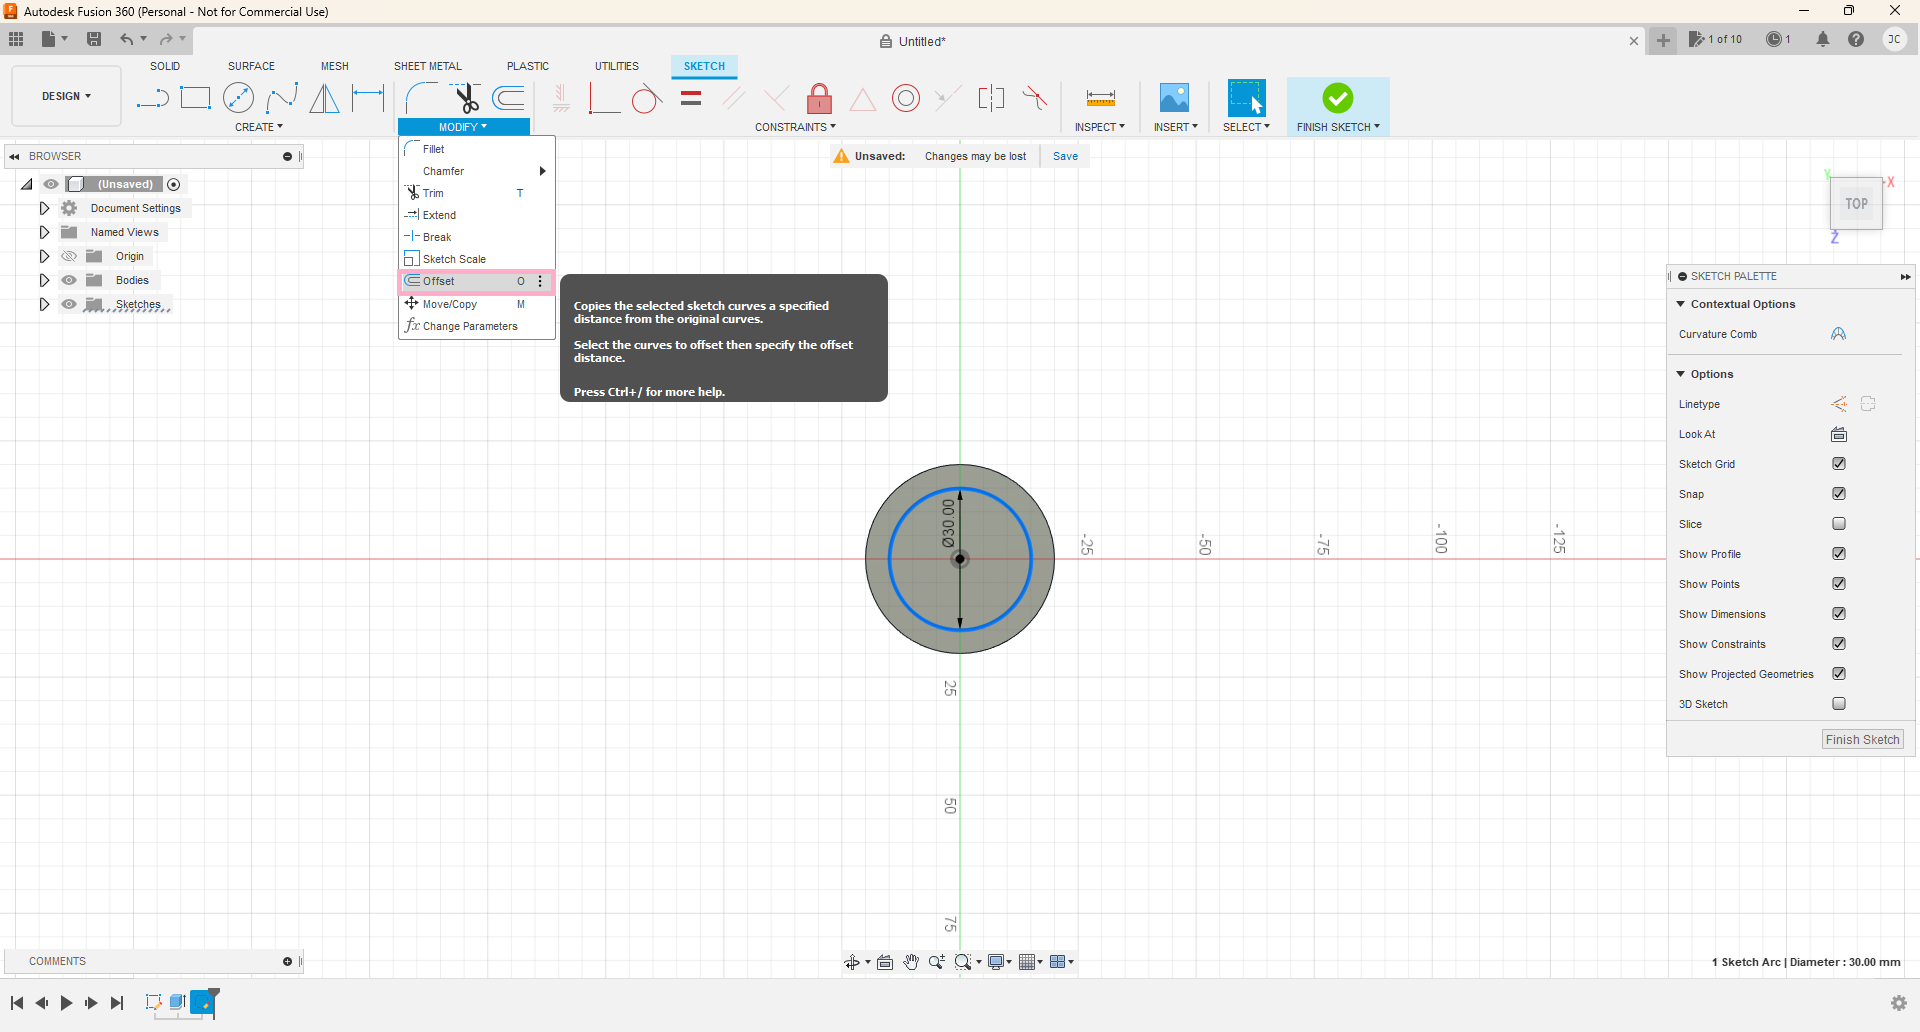
Click on the circle you just made, then click "Modify", "Offset". Make the offset 1mm. Click finish sketch. Select the inner "ring" face. (Highlighted in blue up above.) Extrude it to -0.25mm.
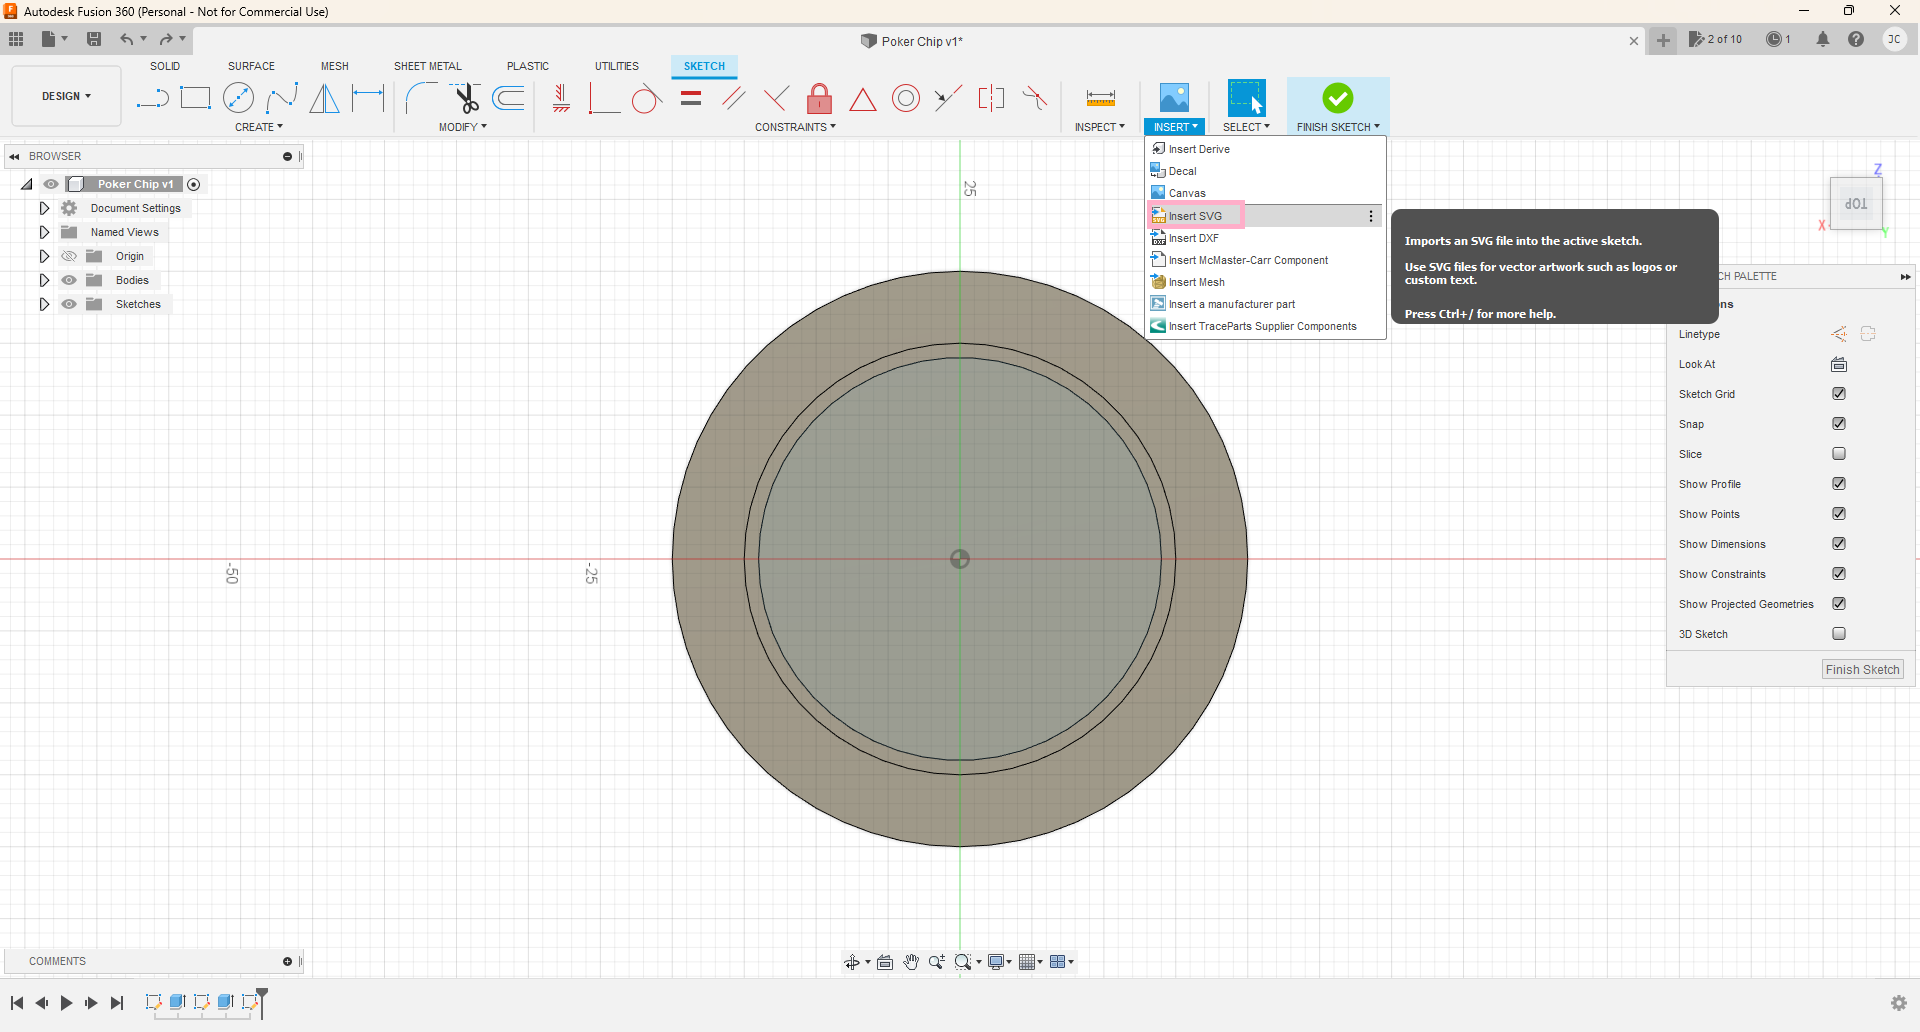
Go to the Clipart Library: http://clipart-library.com/search1/?q=longhorn%20bull%20head#gsc.tab=1&gsc.q=longhorn%20bull%20head&gsc.page=1
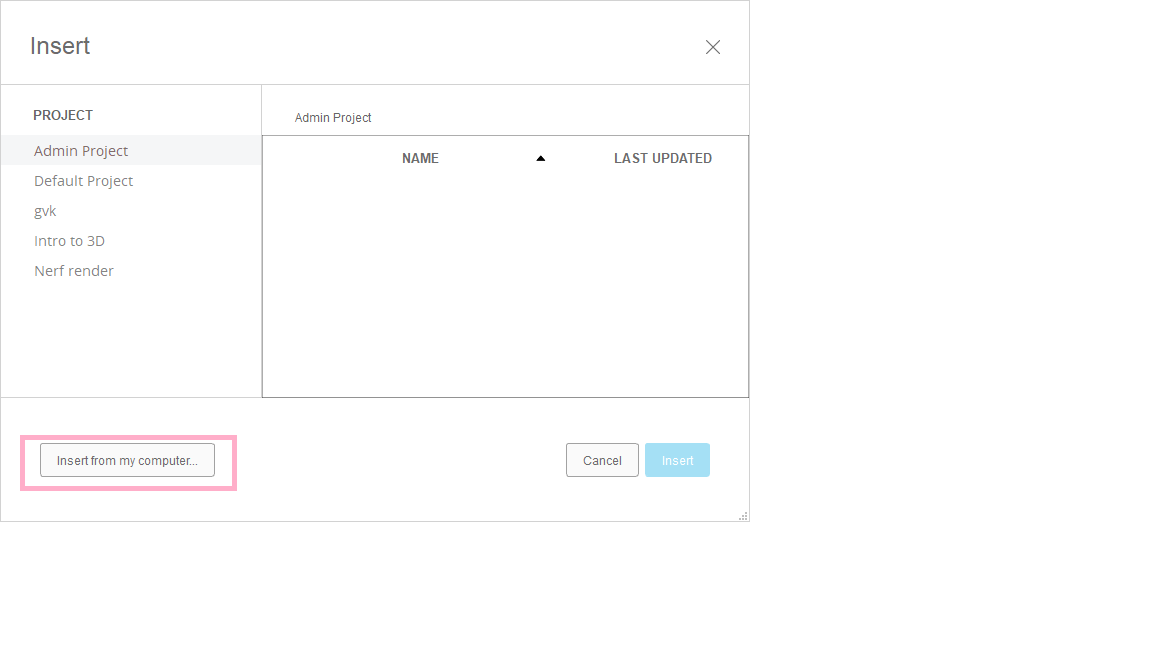
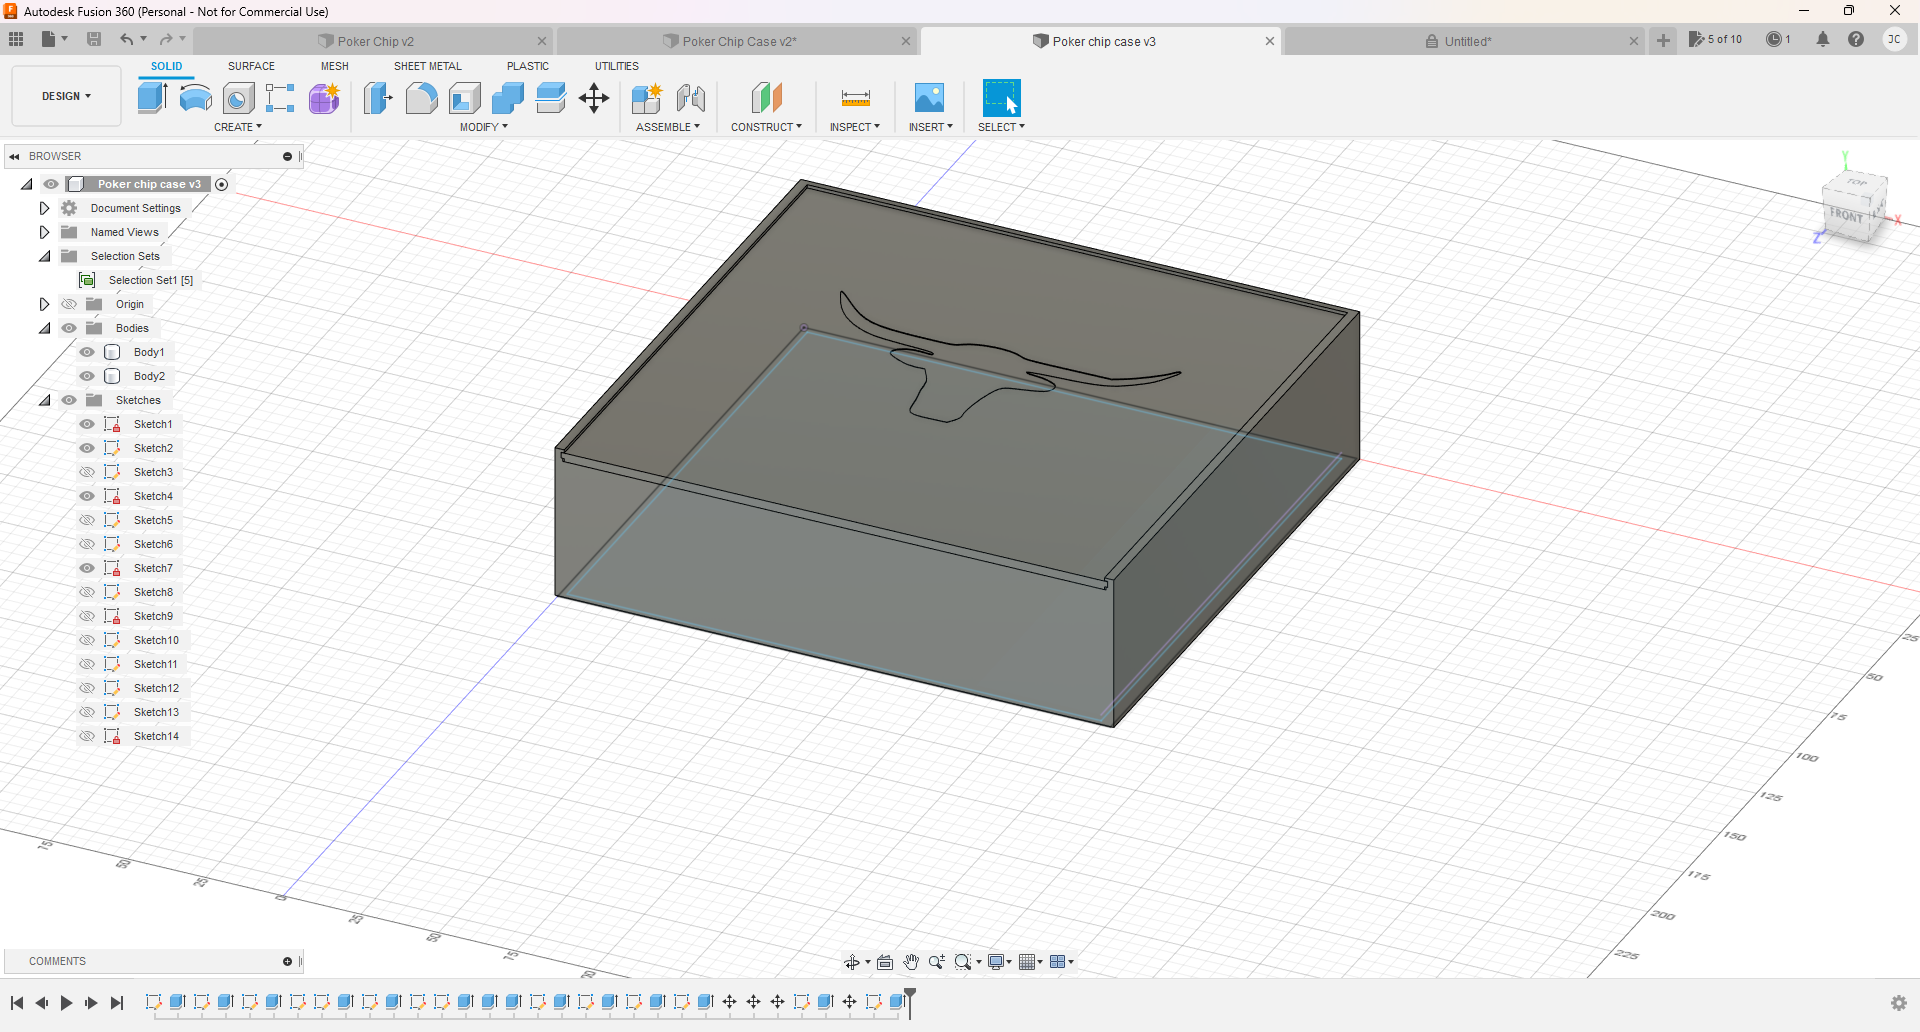
Select the image of a bull. Right click on the image and save the image as. Save the JPEG image into a folder. Now, convert the image to an SVG by going to https://convertio.co/jpg-svg/ . Go to insert SVG, then select insert from my computer, and select the SVG file. You should have something similar to the picture up above.
Finishing the Poker Chip
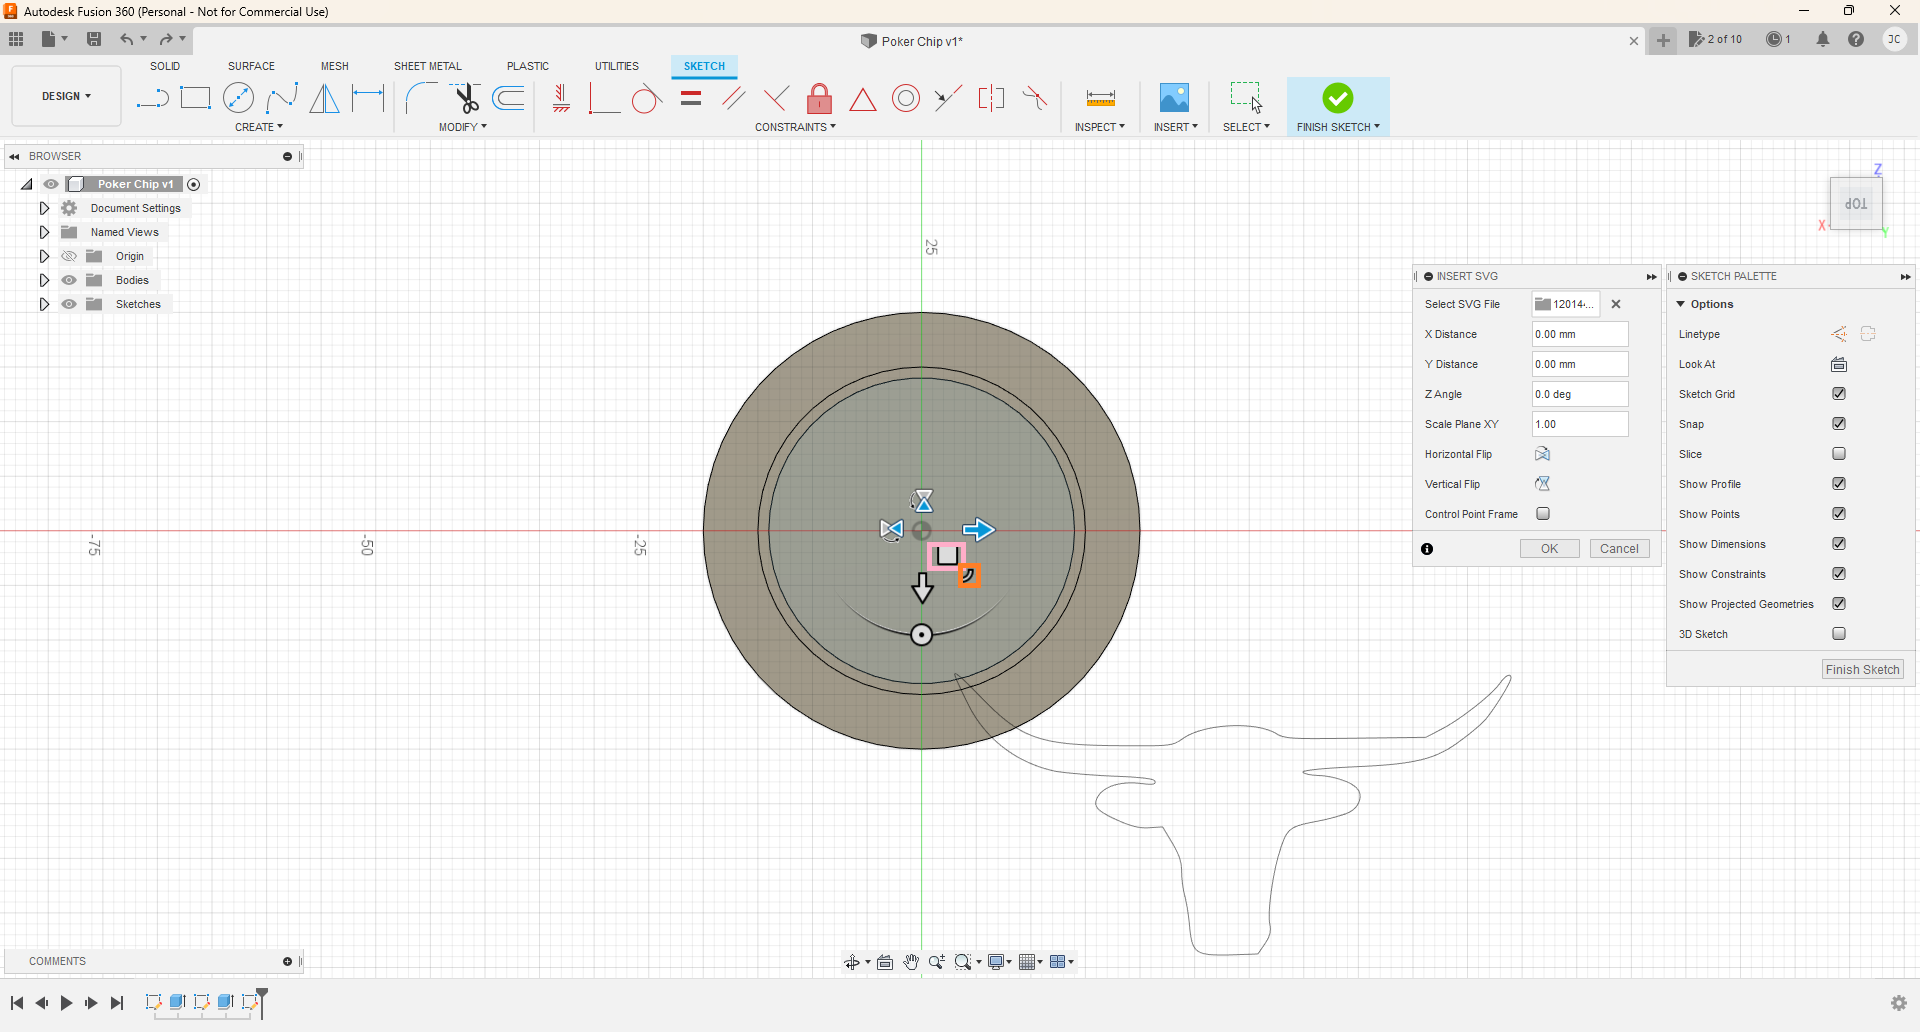
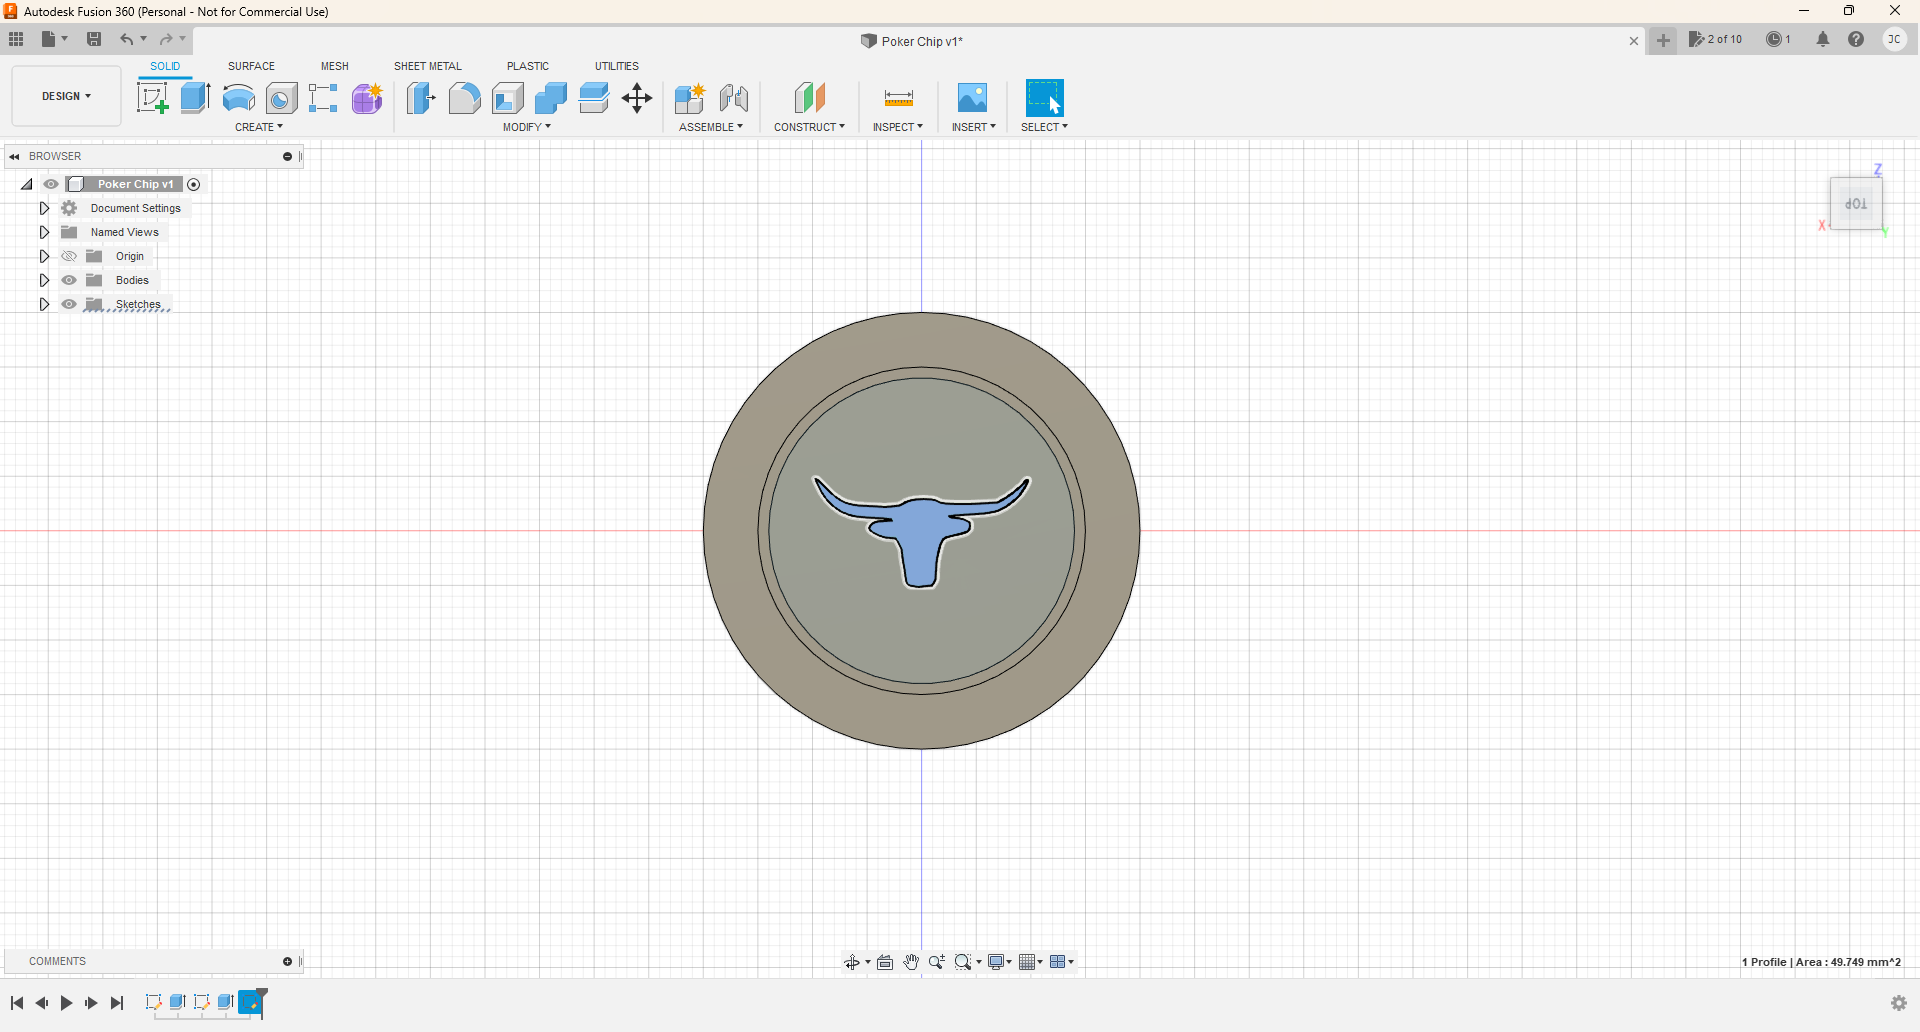
The pink square means that you can move the image around, and the orange square means that you can scale the image. Scale and center to whatever size you would like. Click finish sketch. Select the face of the bull, then extrude it to -0.25mm.
The Dealer Chip
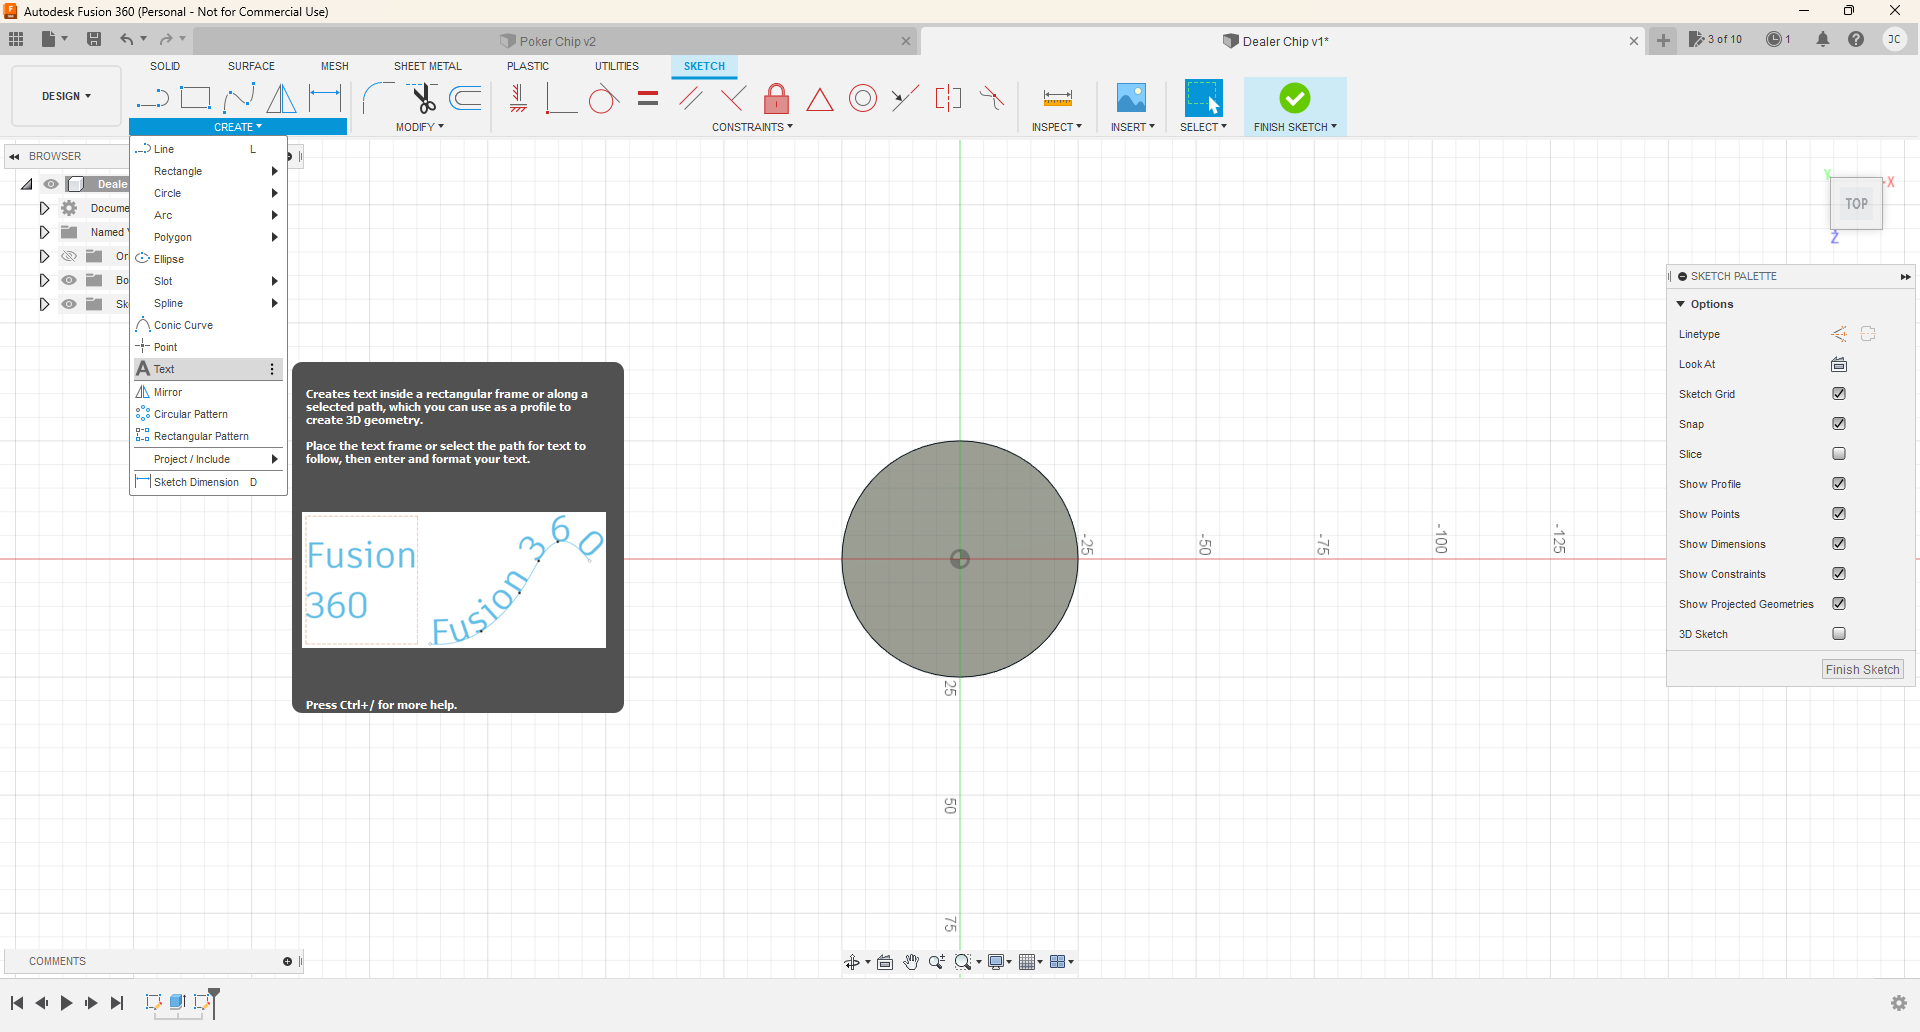
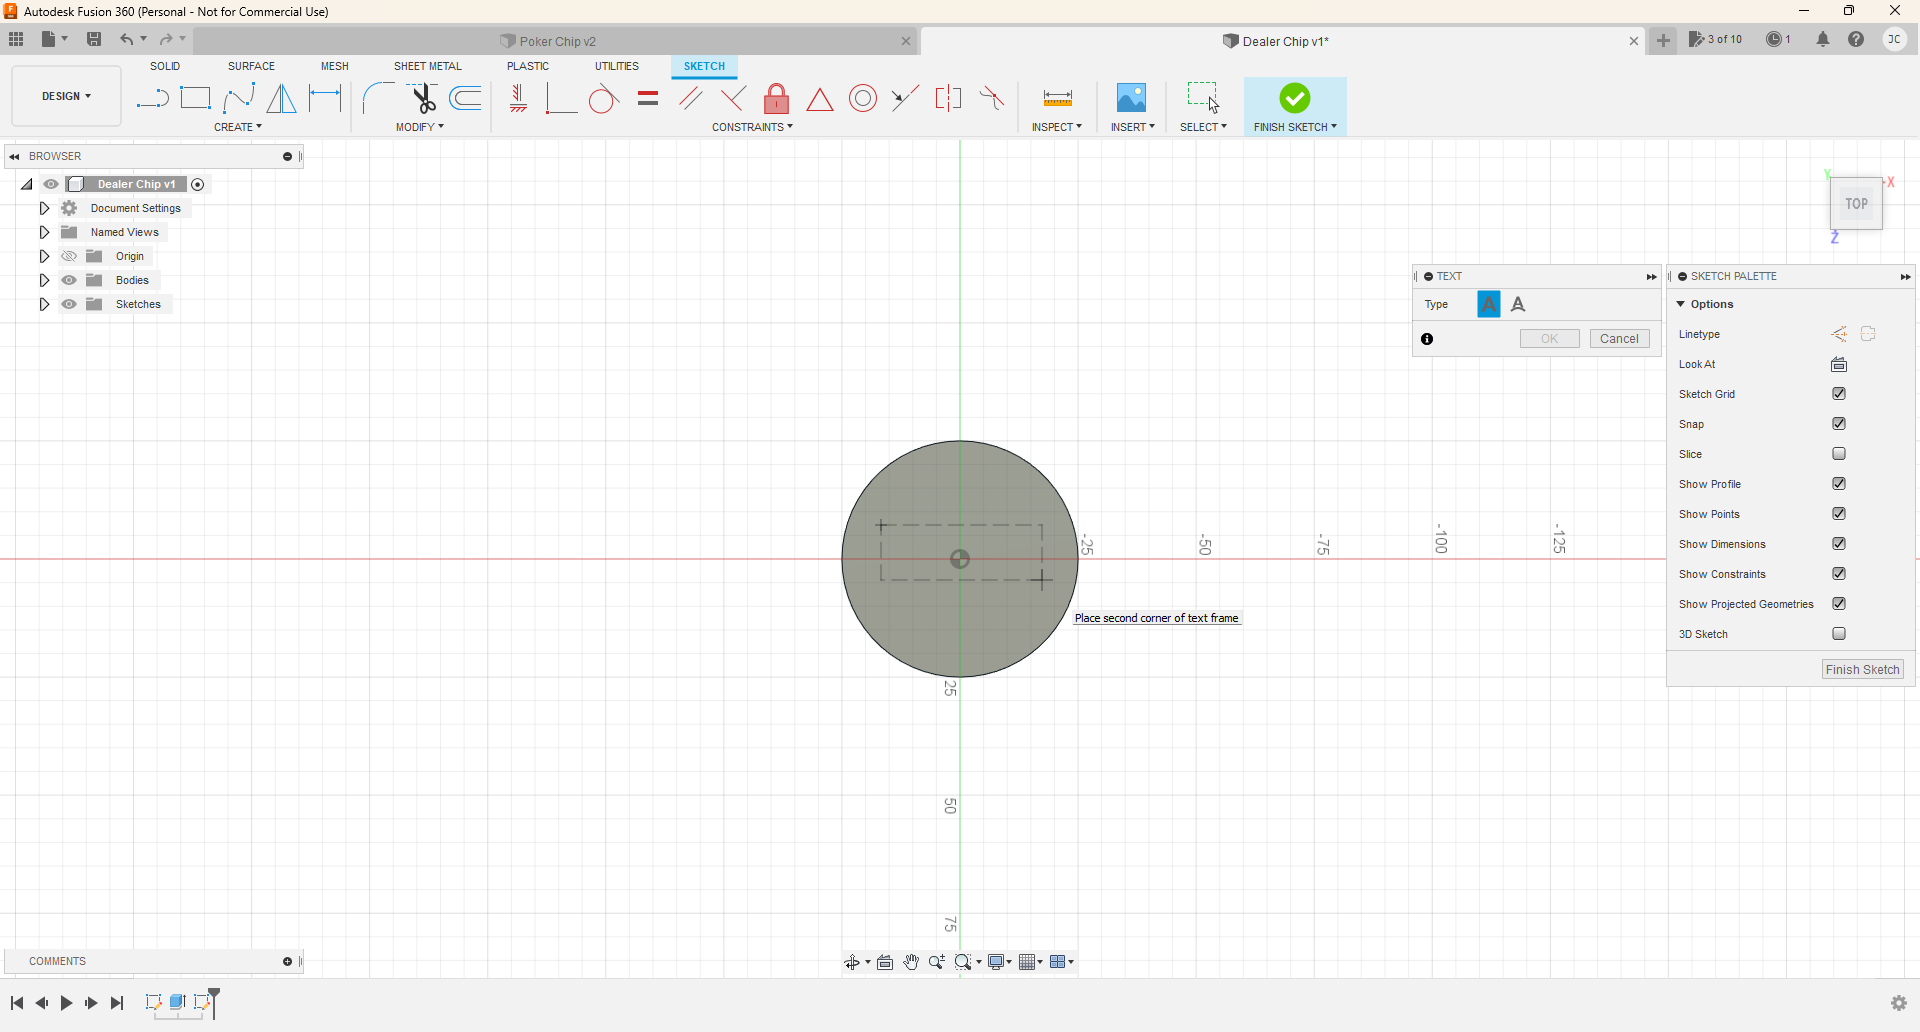
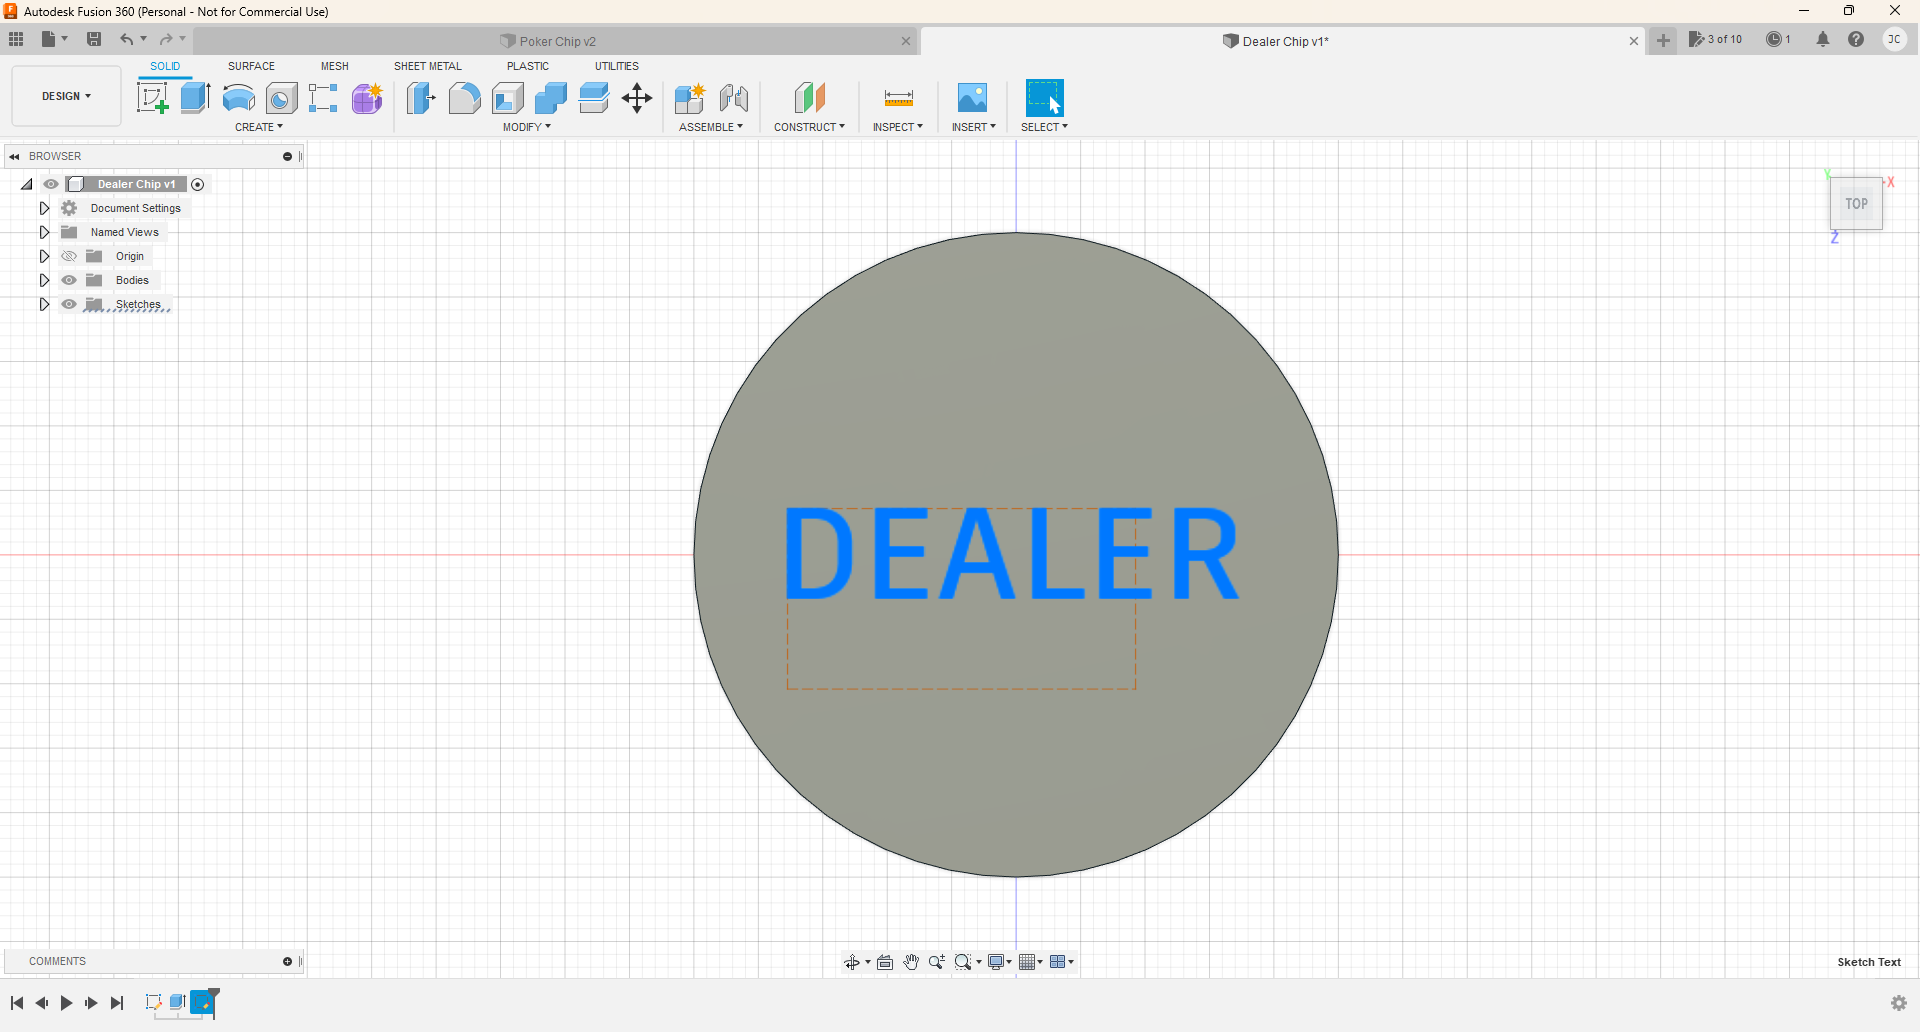
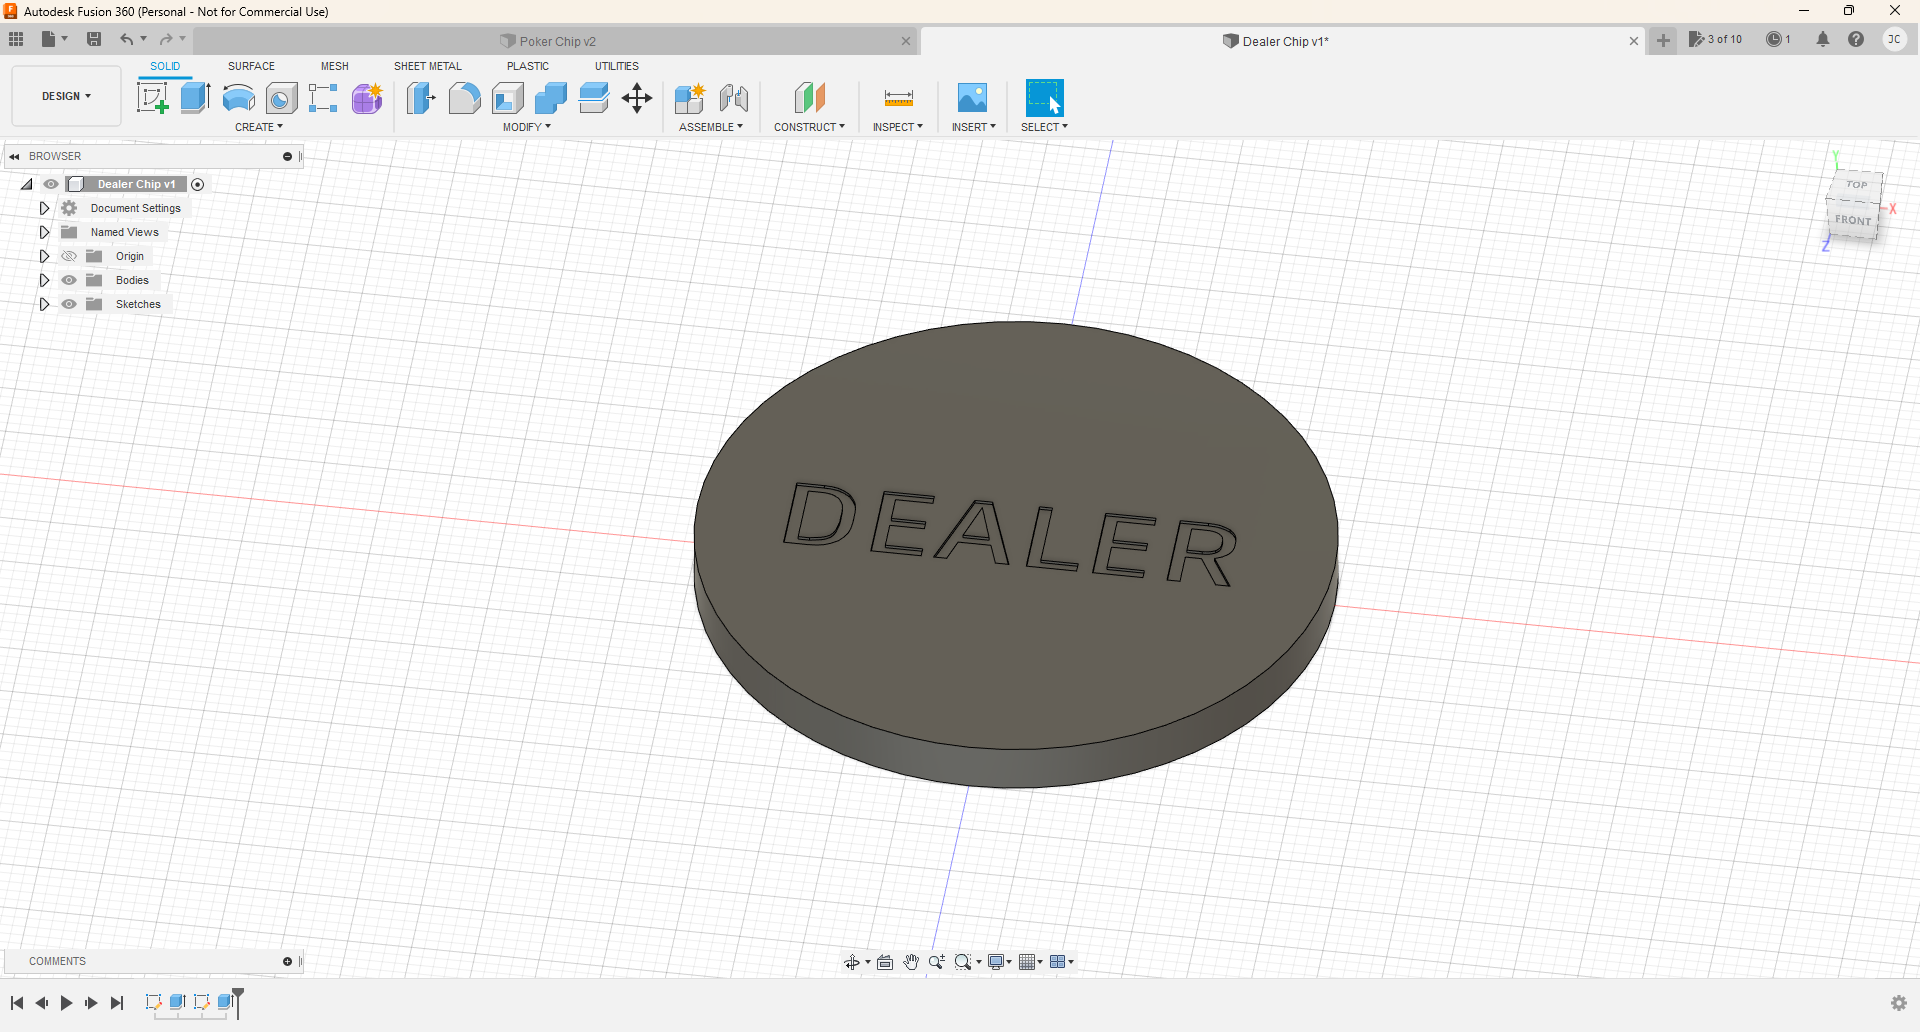
The dealer chip is going to be a very similar process to the poker chip. In top view, create a new sketch. Select the top plane for the sketch. Create a circle, and select the center point of the plane, then drag or type in 50mm. Click finish sketch. Go to isometric view. Click create, and extrude. Make the thickness 4mm. Create another sketch on the face of the chip, and click create text. Type in and adjust the size and font of your text. Here I used "Artifakt Element Medium" for my fond and the size of the letters are 7mm. Click finish sketch. Select the letters and extrude them to -0.25mm.
Getting Started on the Poker Chip Case
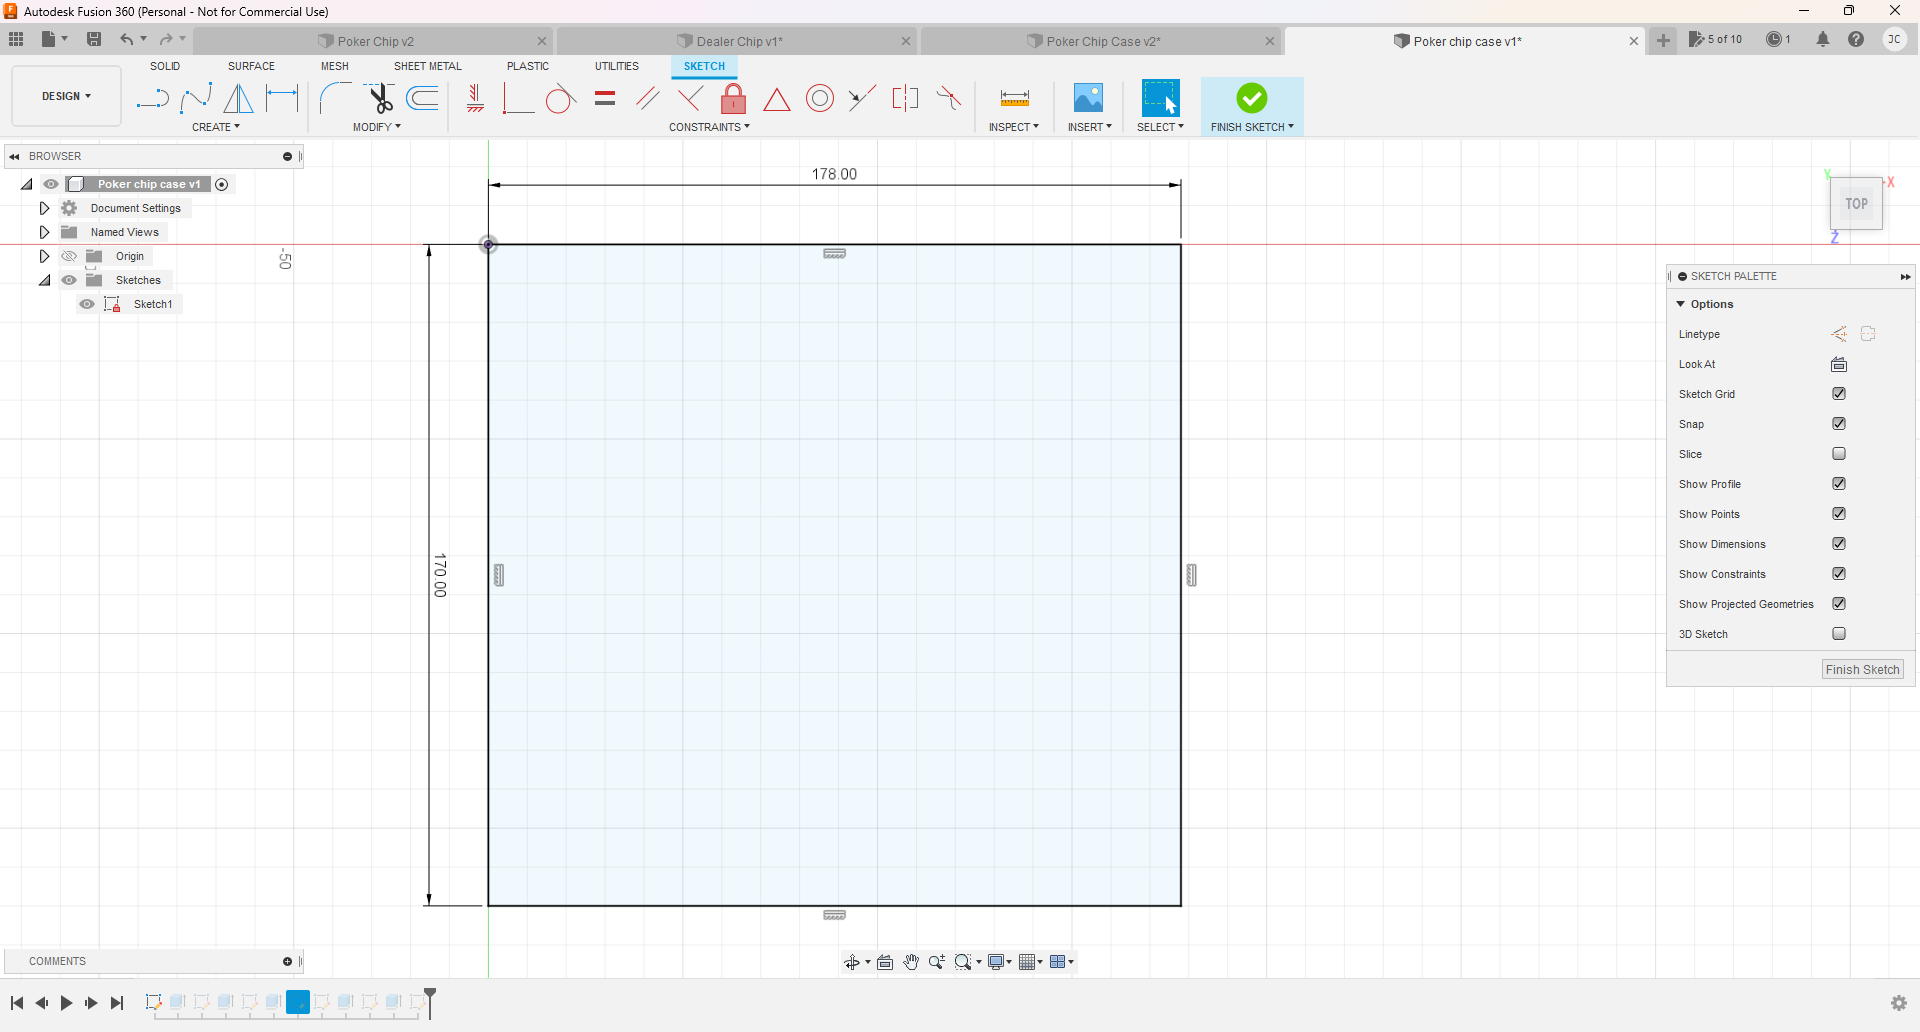
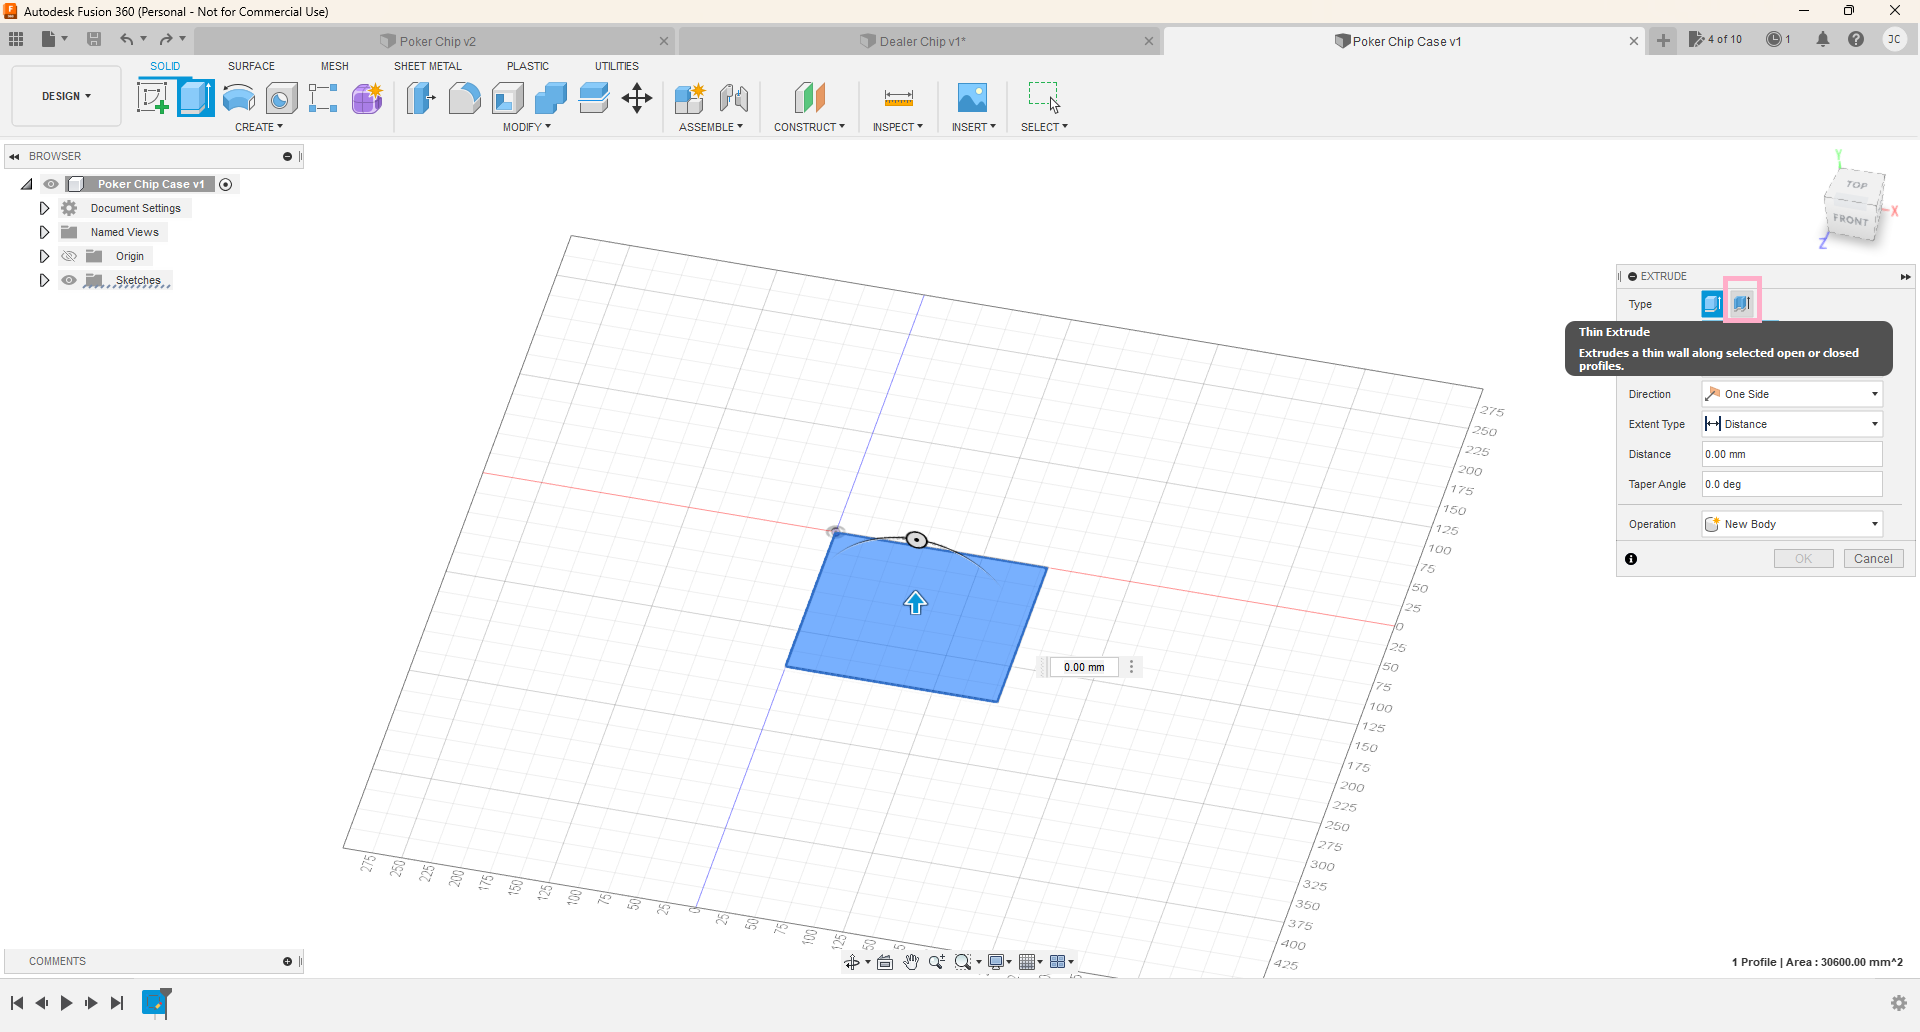
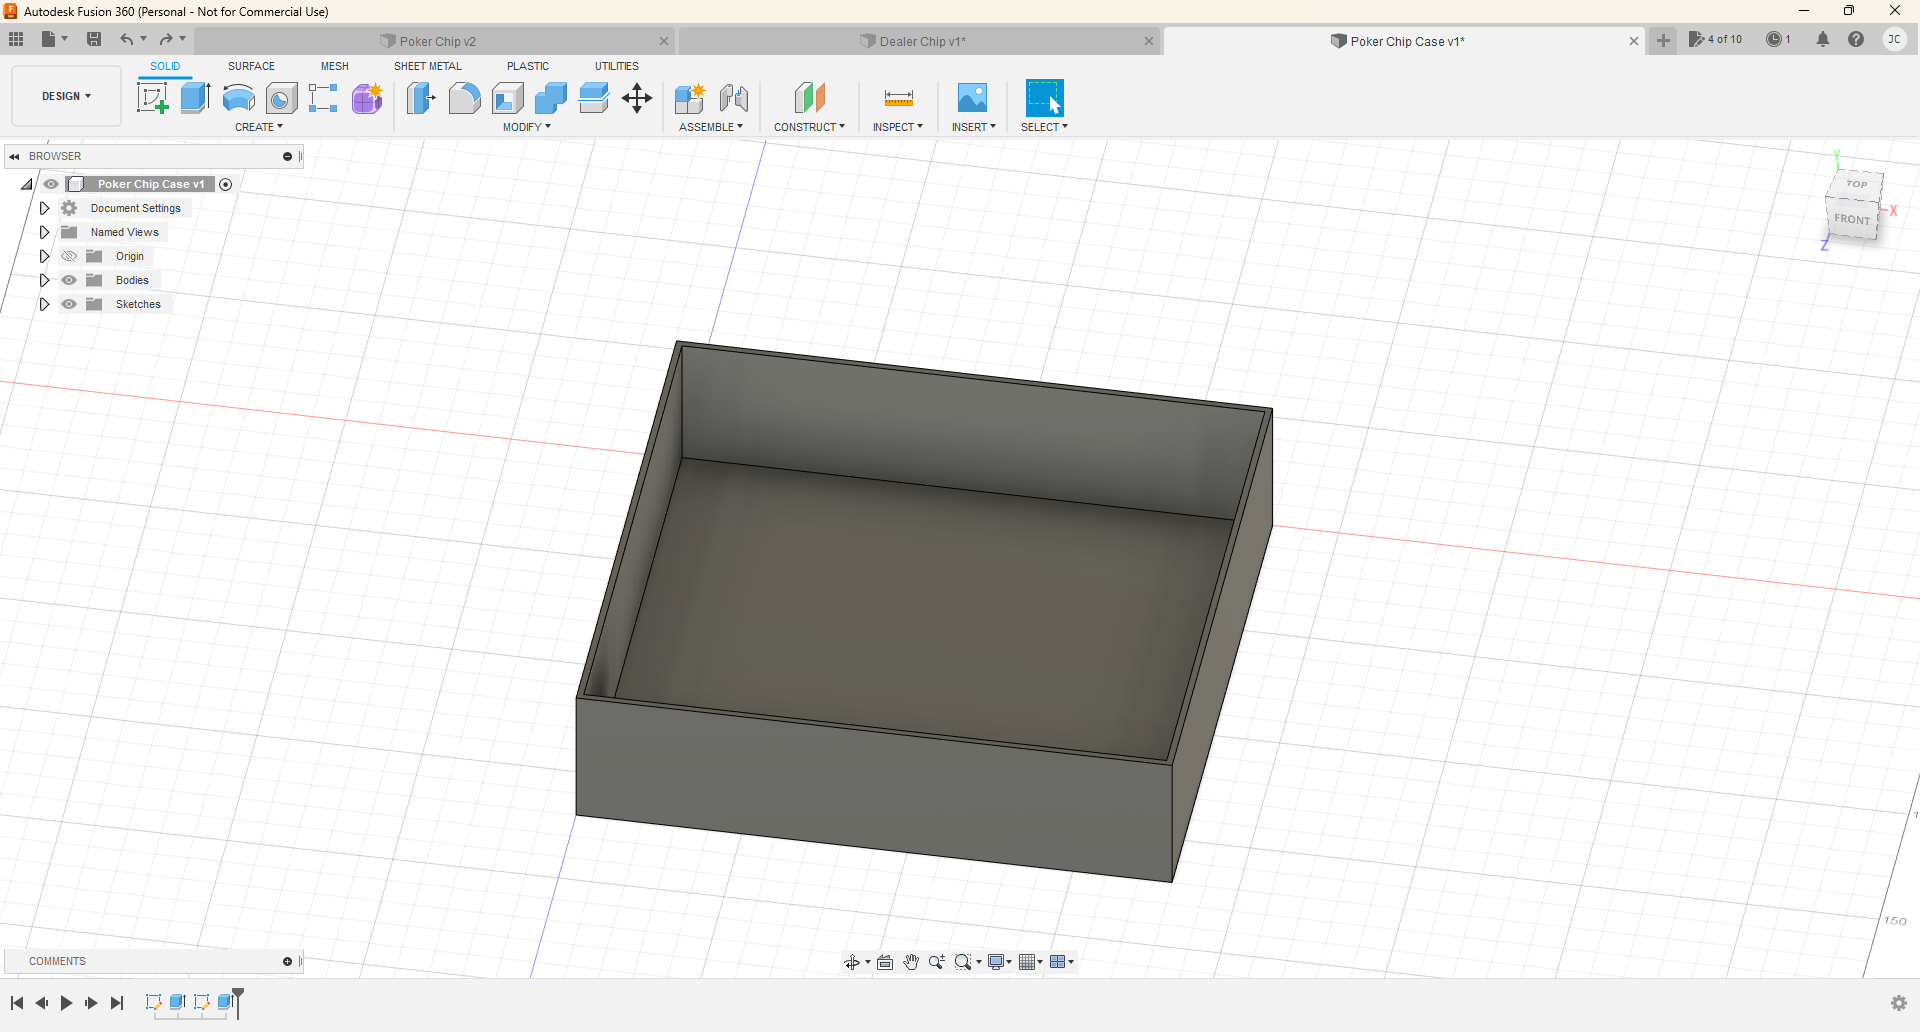
Create a new sketch. Create a 2 point rectangle. Scale the width of the rectangle to 178mm, and the length 170mm. Click finish sketch. Select the top face of the rectangle. Click extrude, and on the extrude options to the right, click "thin extrude". Set the wall thickness to 2mm. For the extrude distance, set it to 50mm. Create a new sketch on the top plane and create a 2 point rectangle. Drag the rectangle from the top left point to the bottom right point. Click finish sketch and extrude it to 2mm.
Adding Details
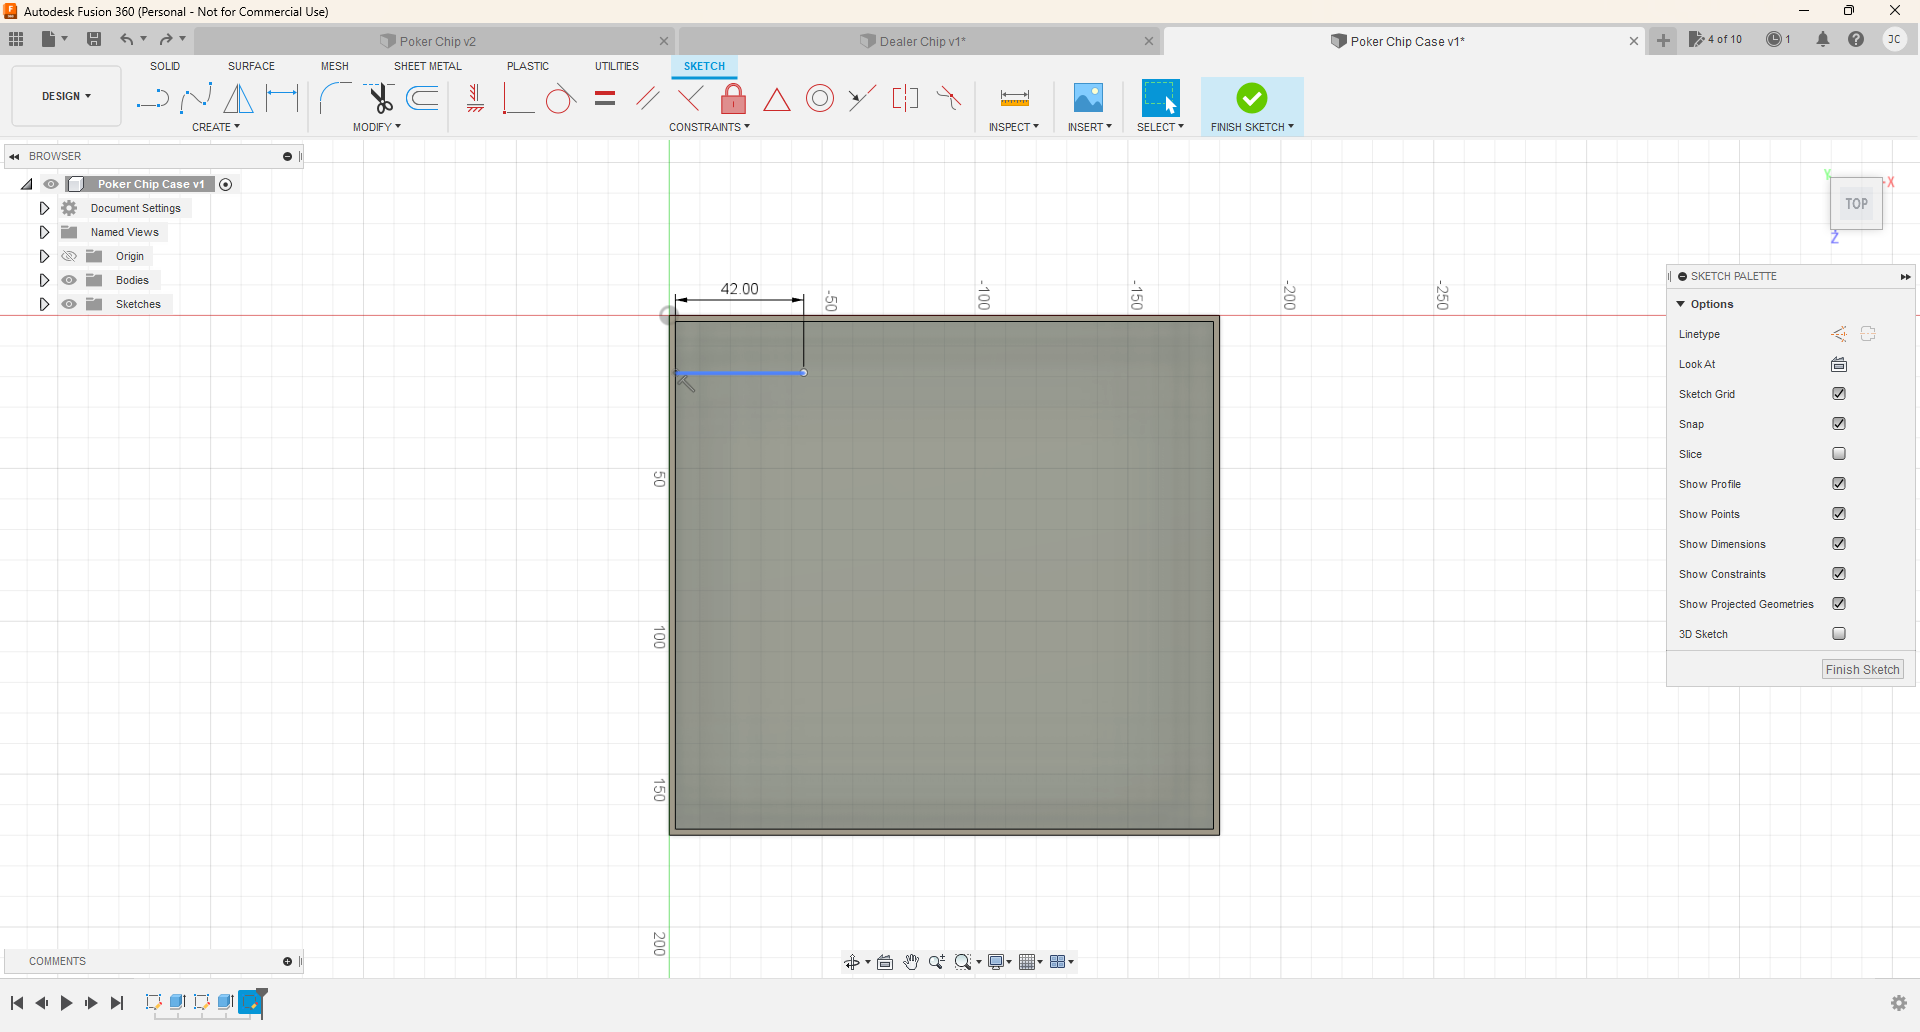
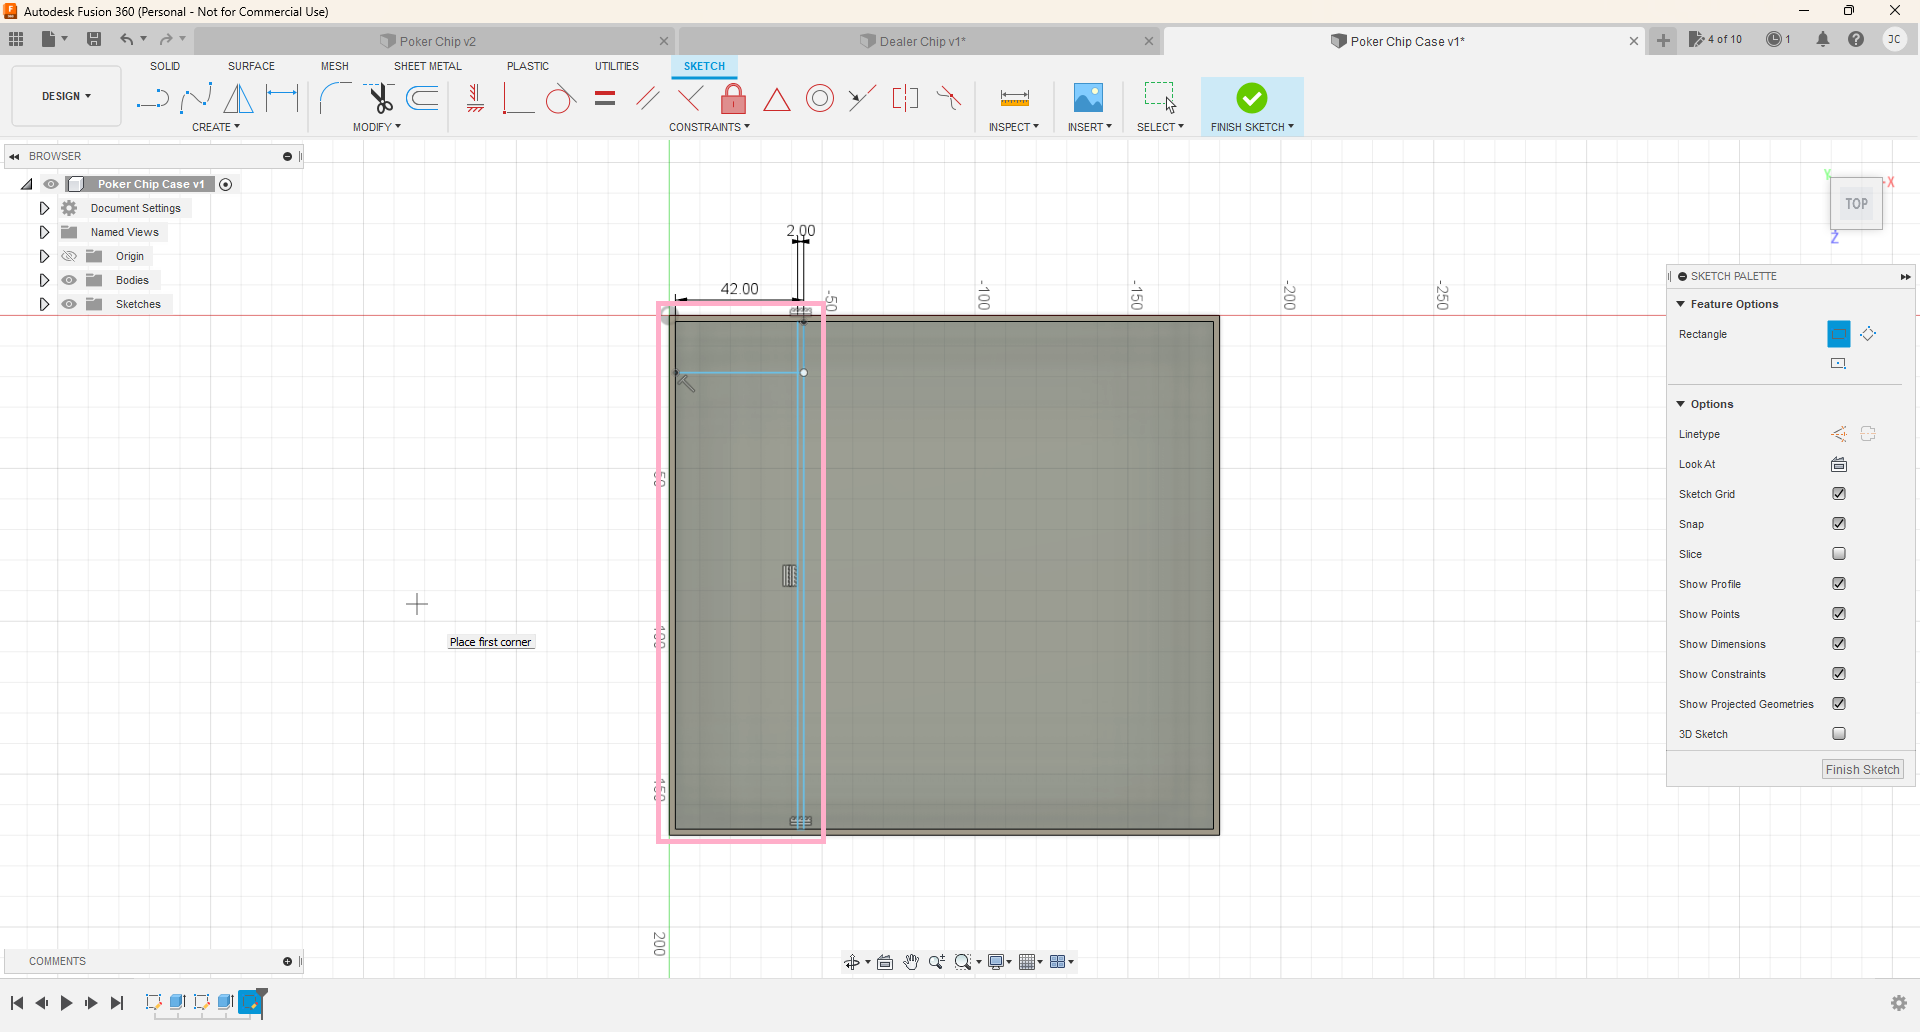
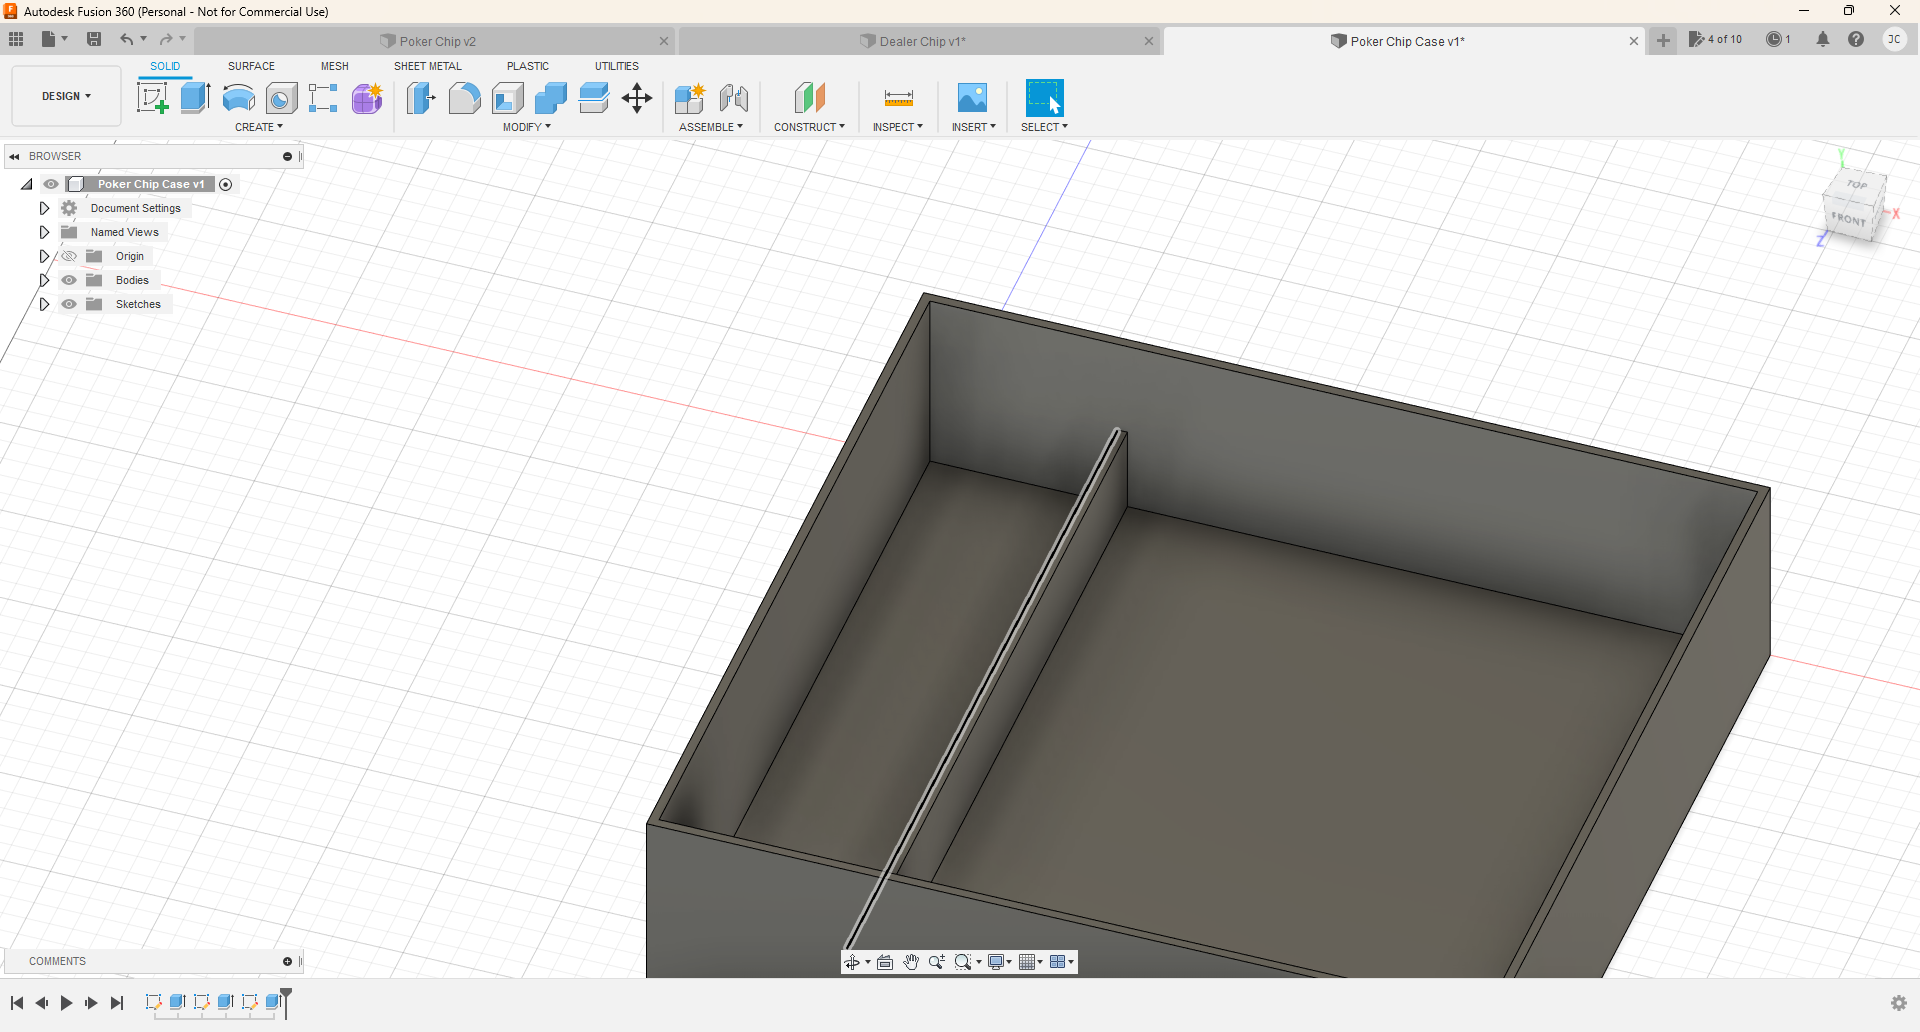
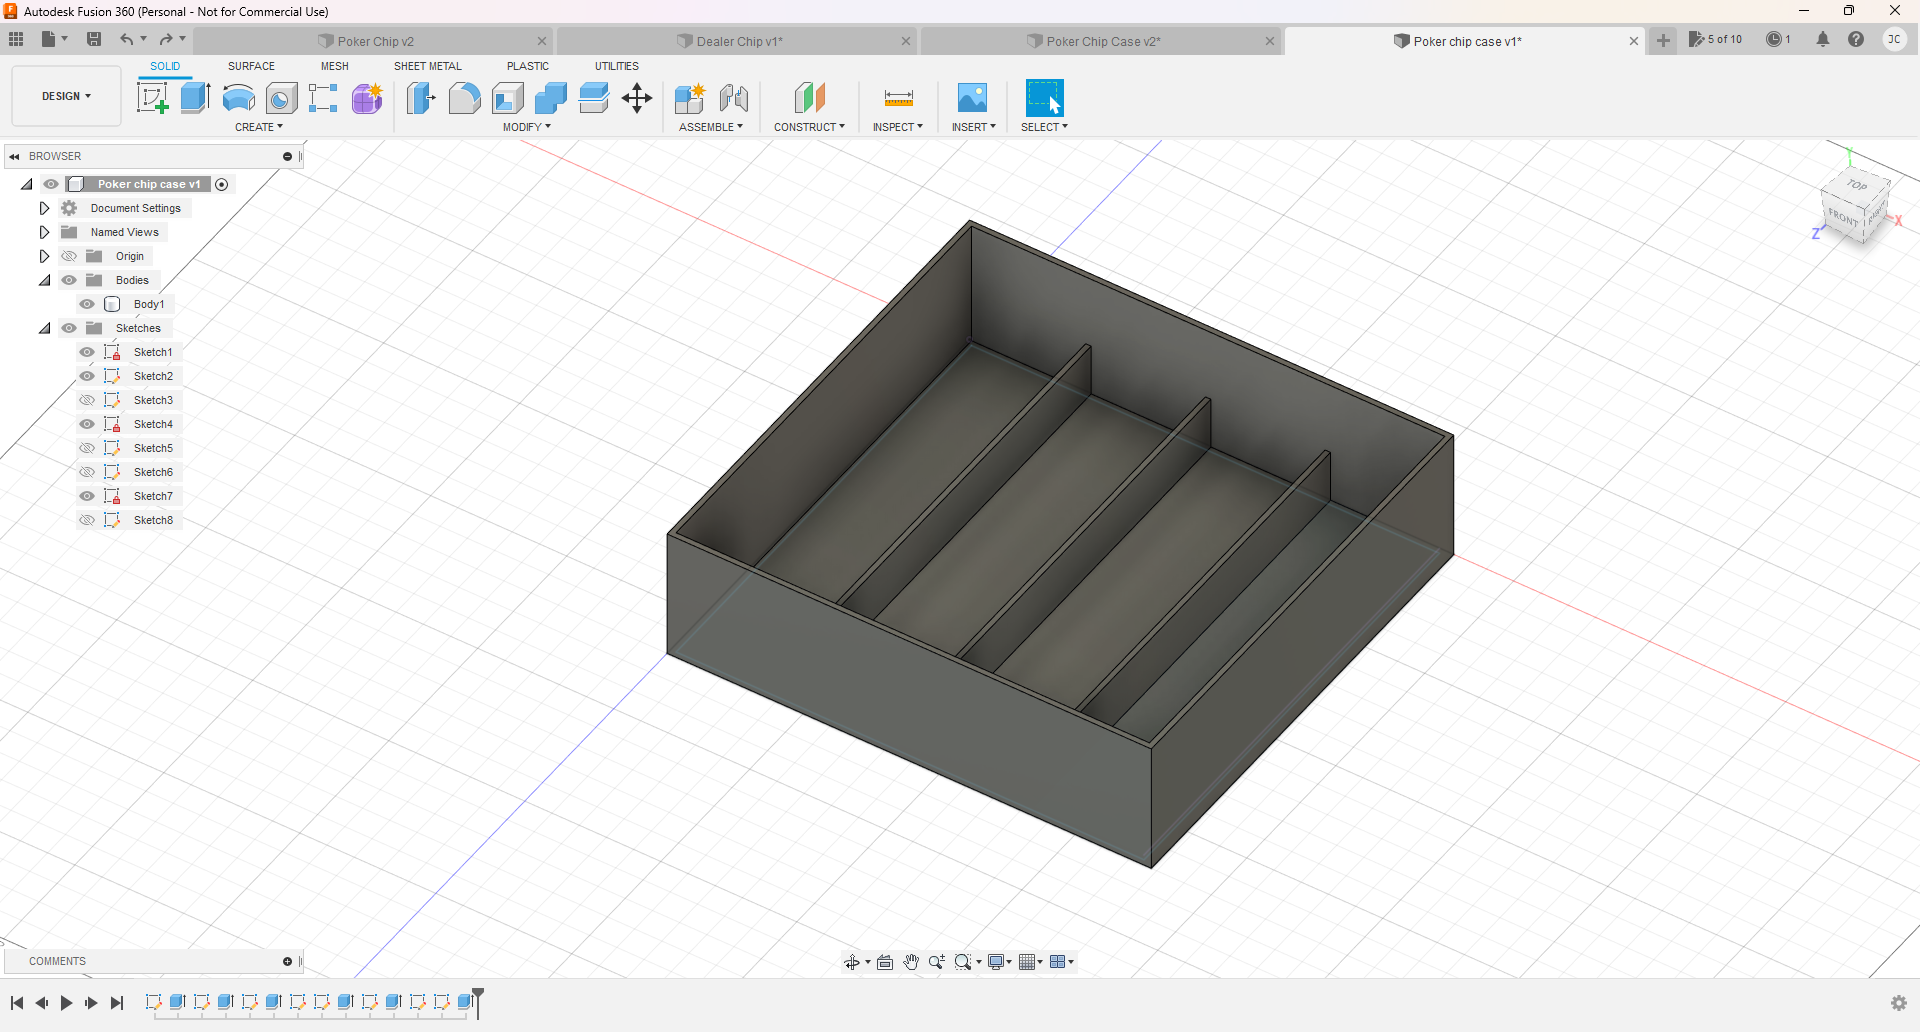
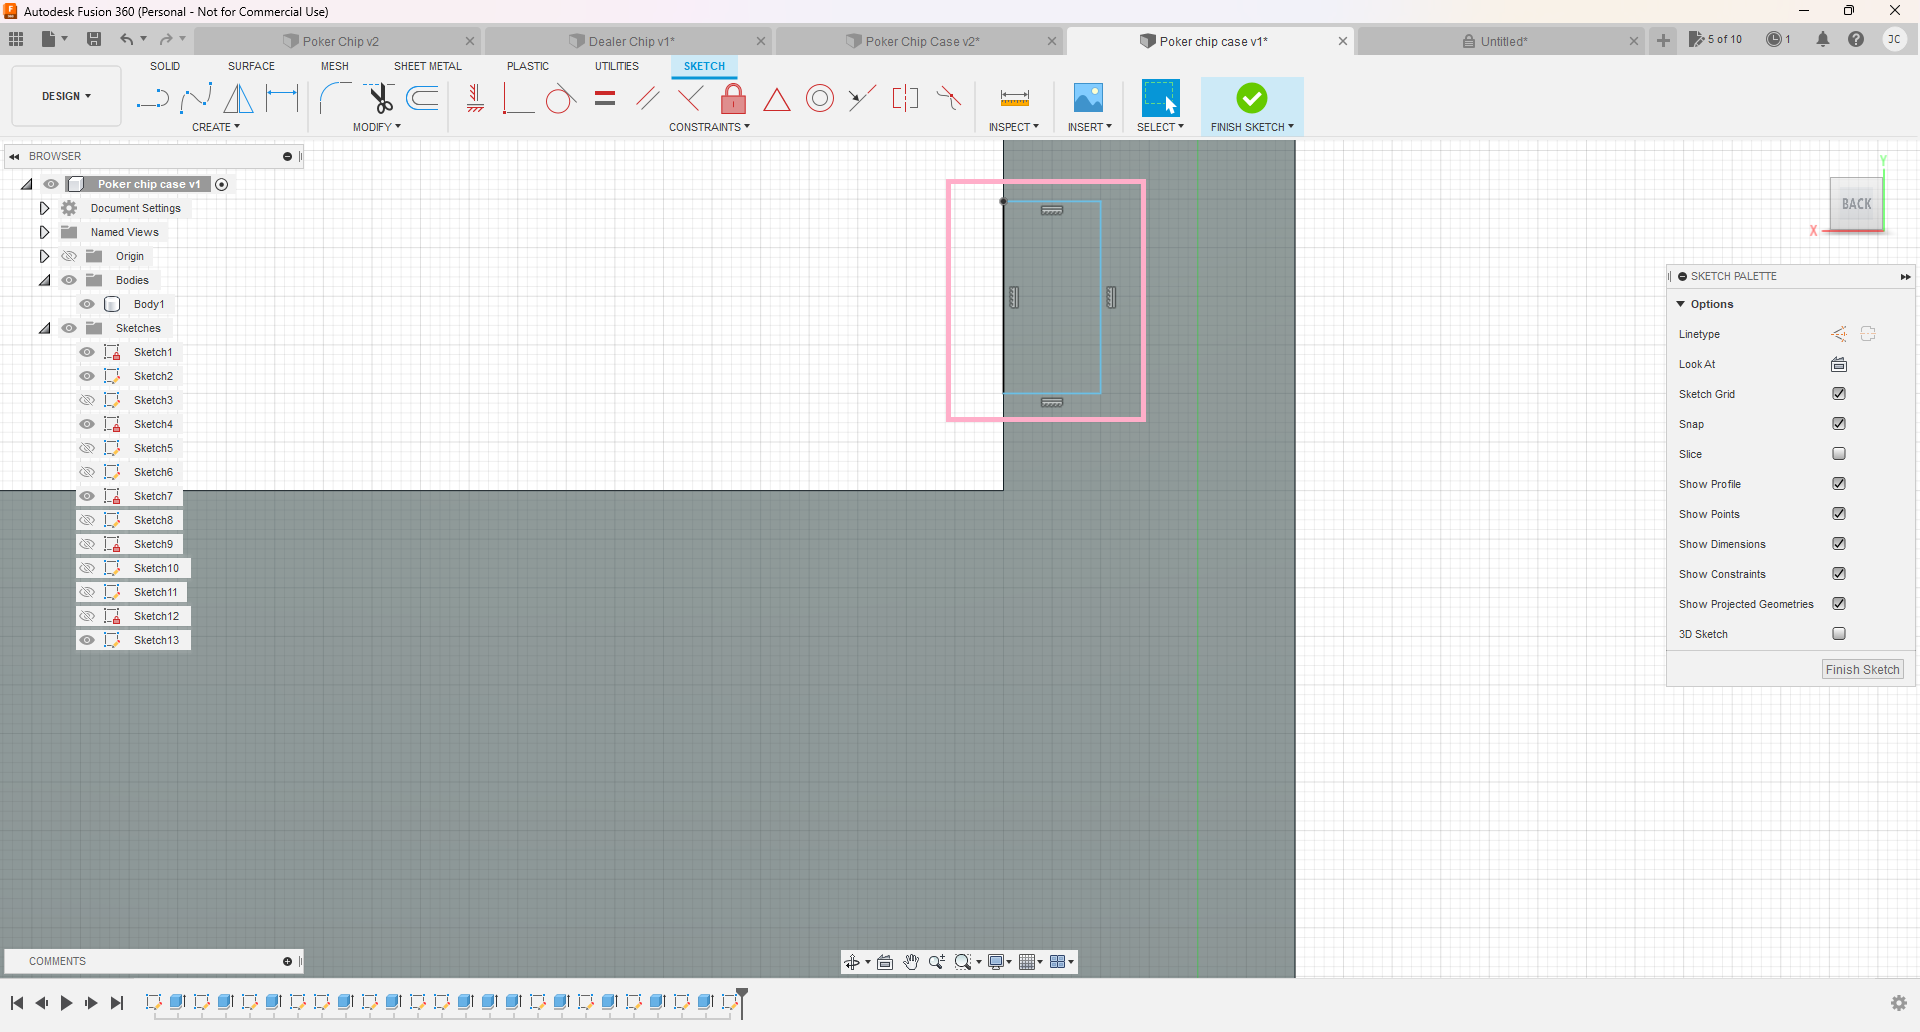
In top view, open a new sketch on the bottom rectangle. Create a line from the left inside wall that is 42mm wide. Create a 2 point rectangle that touches the line at the top. The rectangle should be 2mm wide. Drag all the way down to the other end. Delete the 42mm line. Click finish sketch. Select the line and extrude it to 20mm. Repeat this two more times until you have four columns.
Adding Even More Details
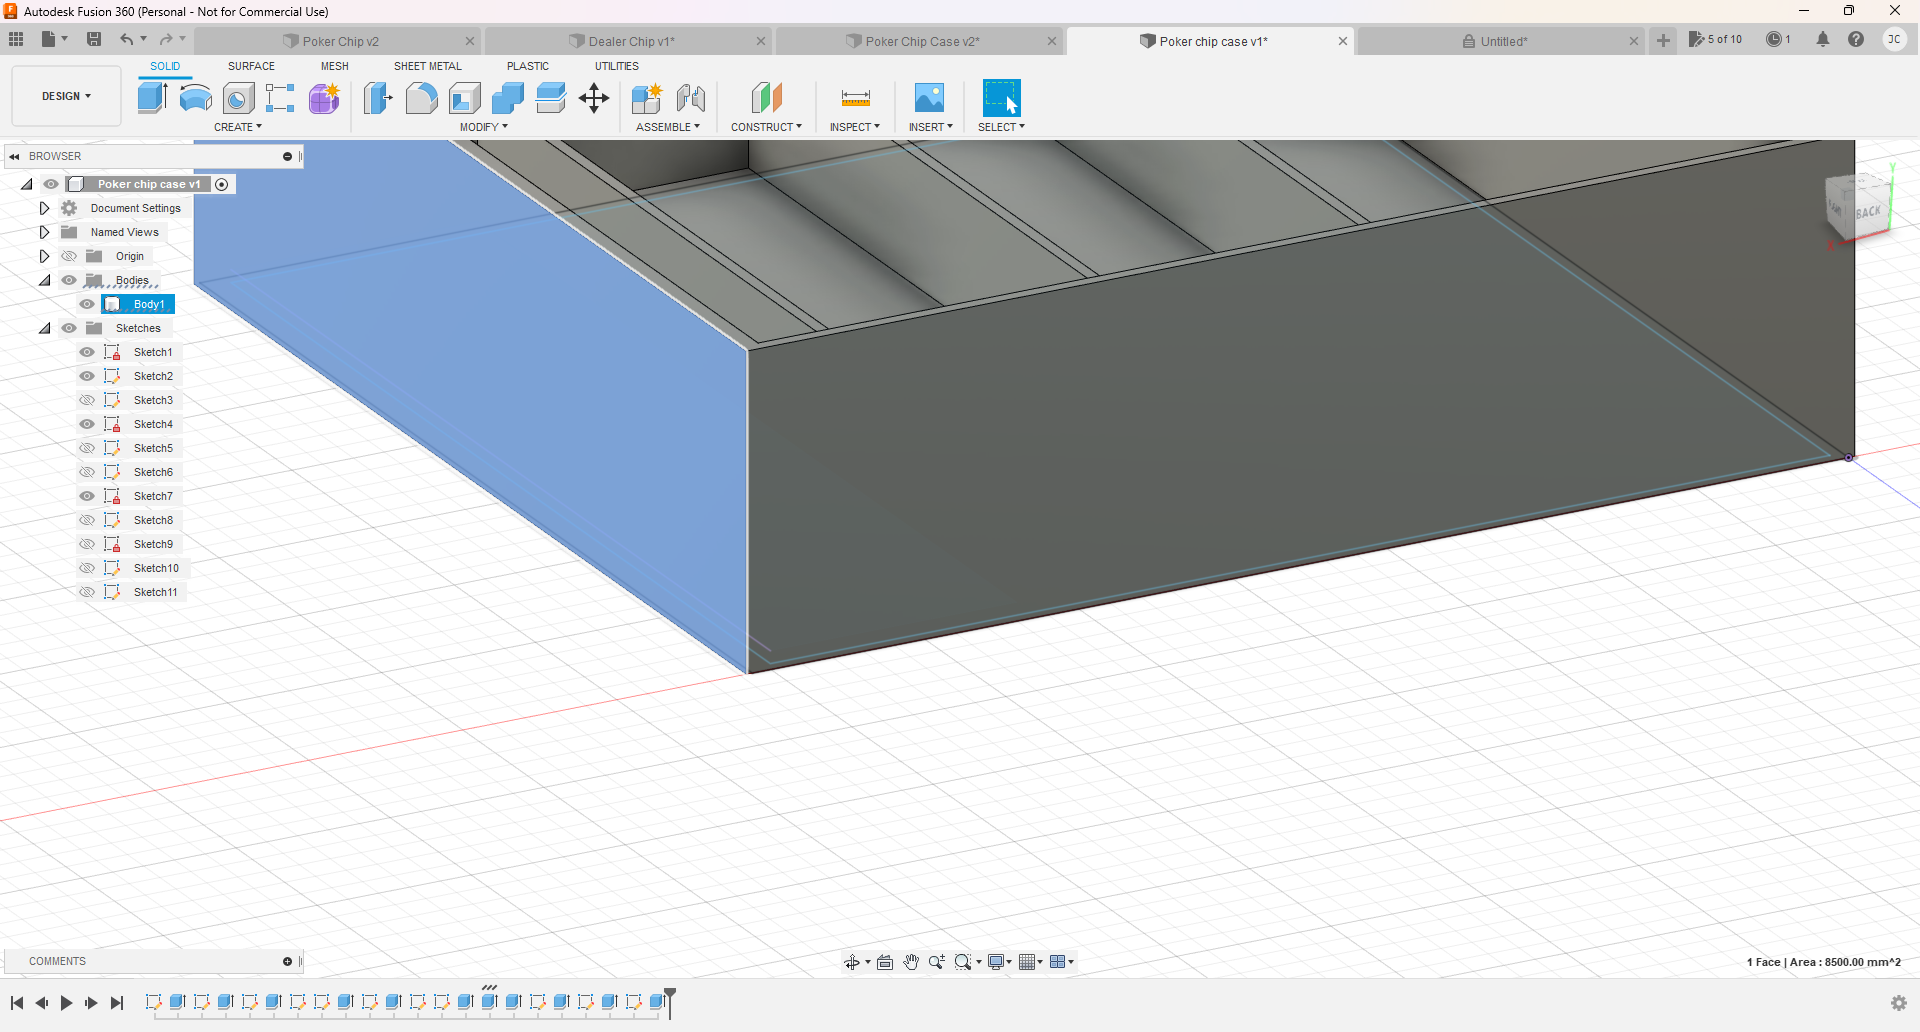
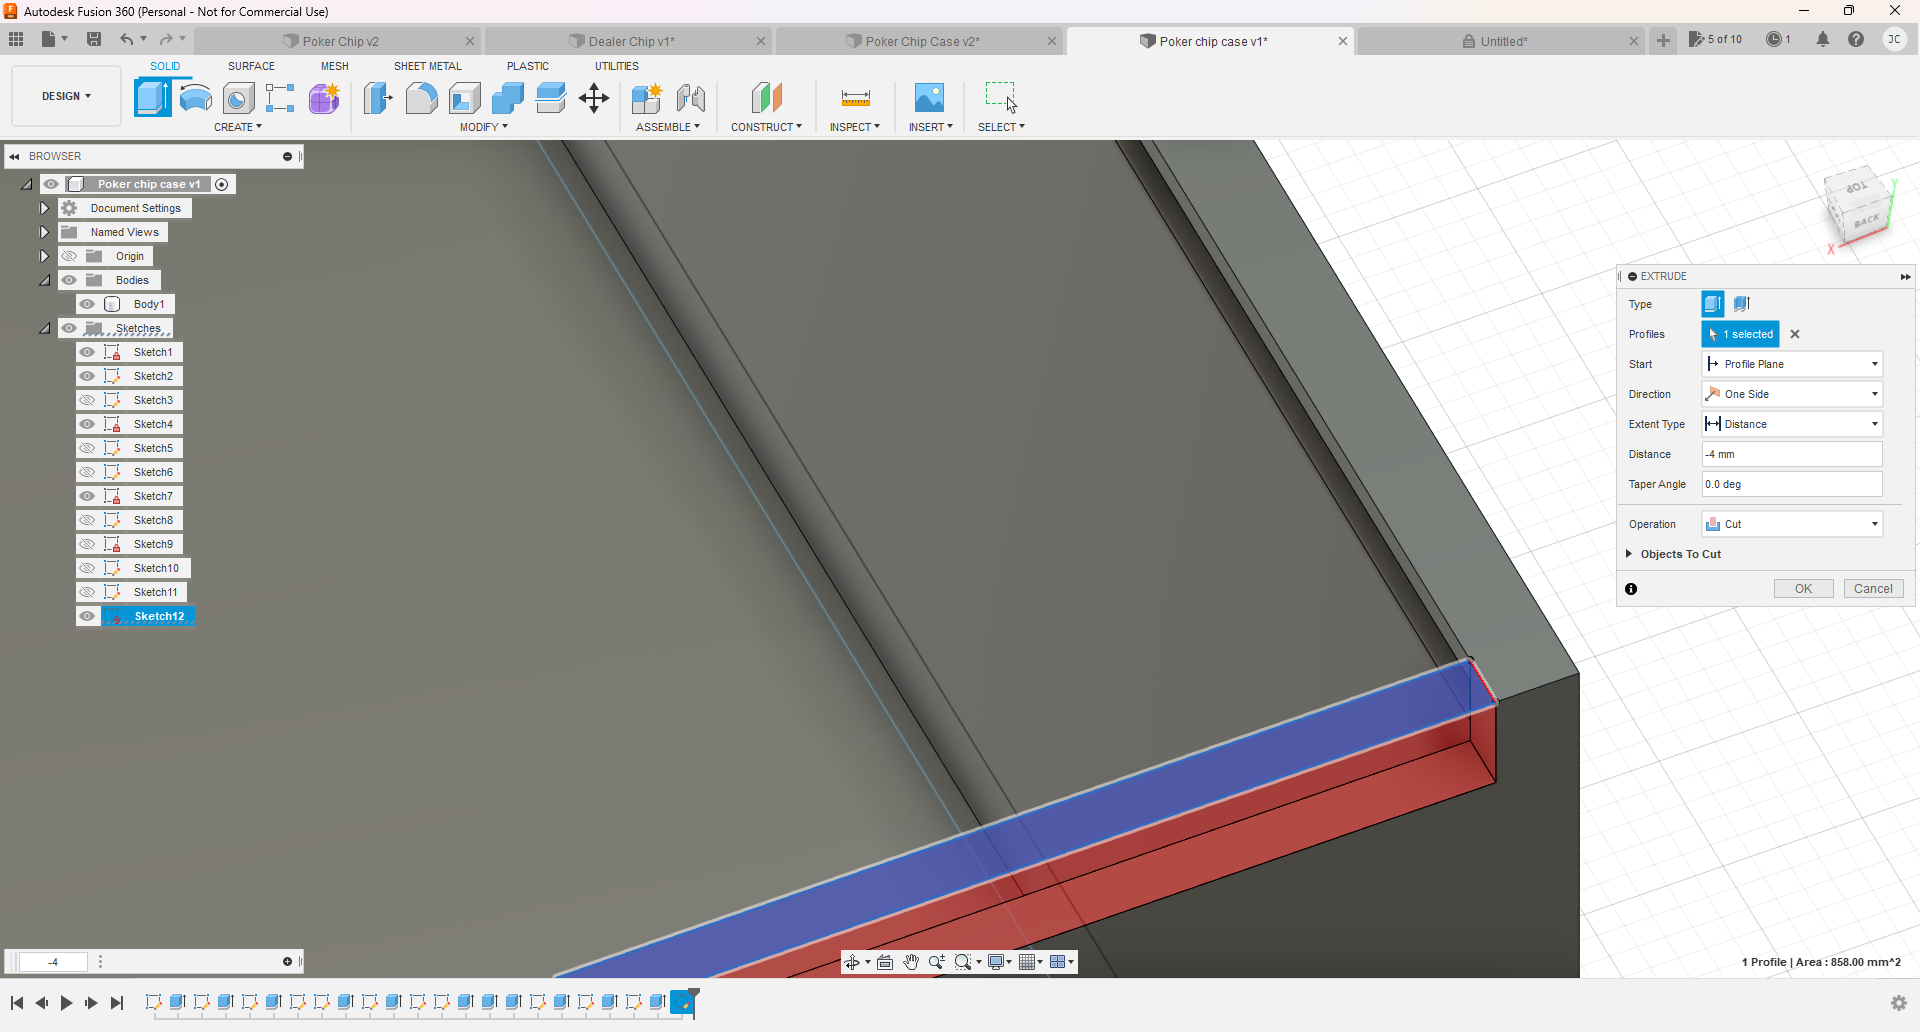
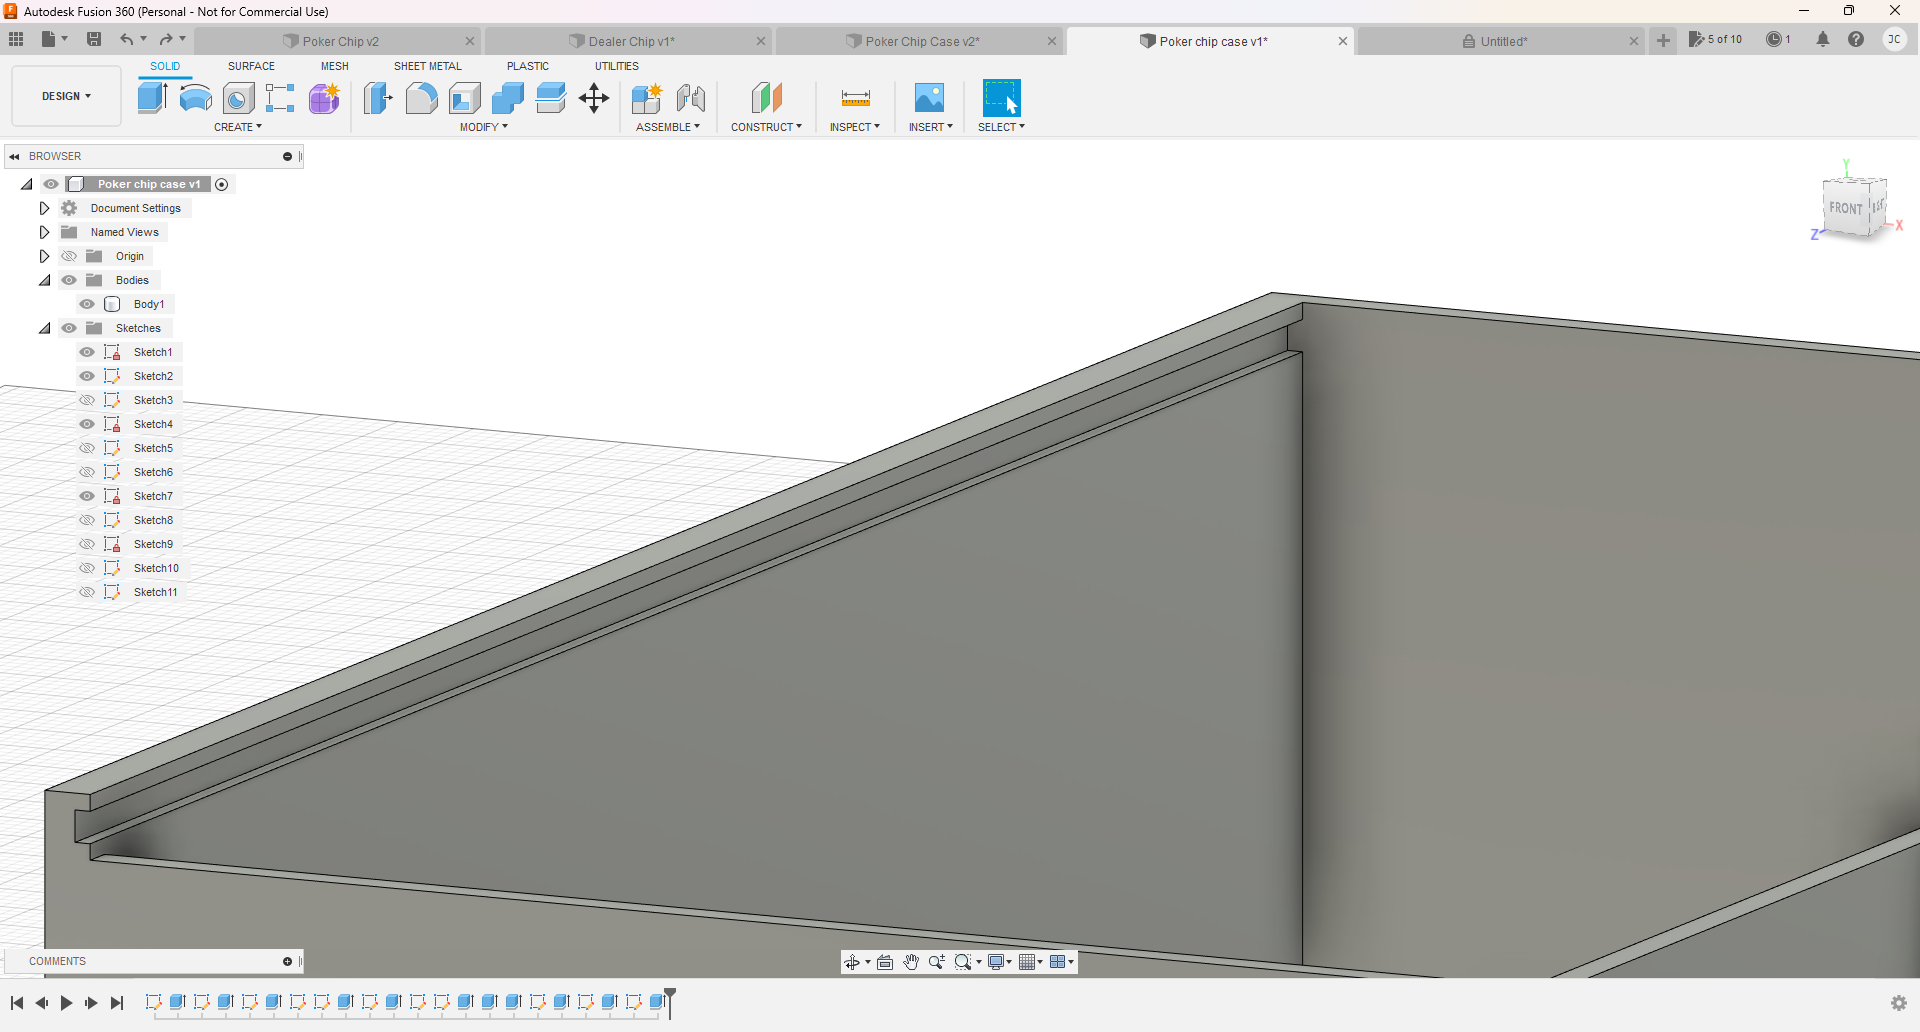
Thicken the outer walls parallel to each other. (Highlighted above). Open a new sketch on the top edge. Create a line splitting the bottom from the side. Do the same on the left Corner. Click finish sketch. Select the face, and extrude to -4mm. Open a sketch on the front face, and create a 2 point rectangle 1mm down from the top edge and outward 2mm. Repeat on the left side. Click finish sketch and extrude them -168mm. It should look like the picture above.
Finishing the Poker Chip Case!!!
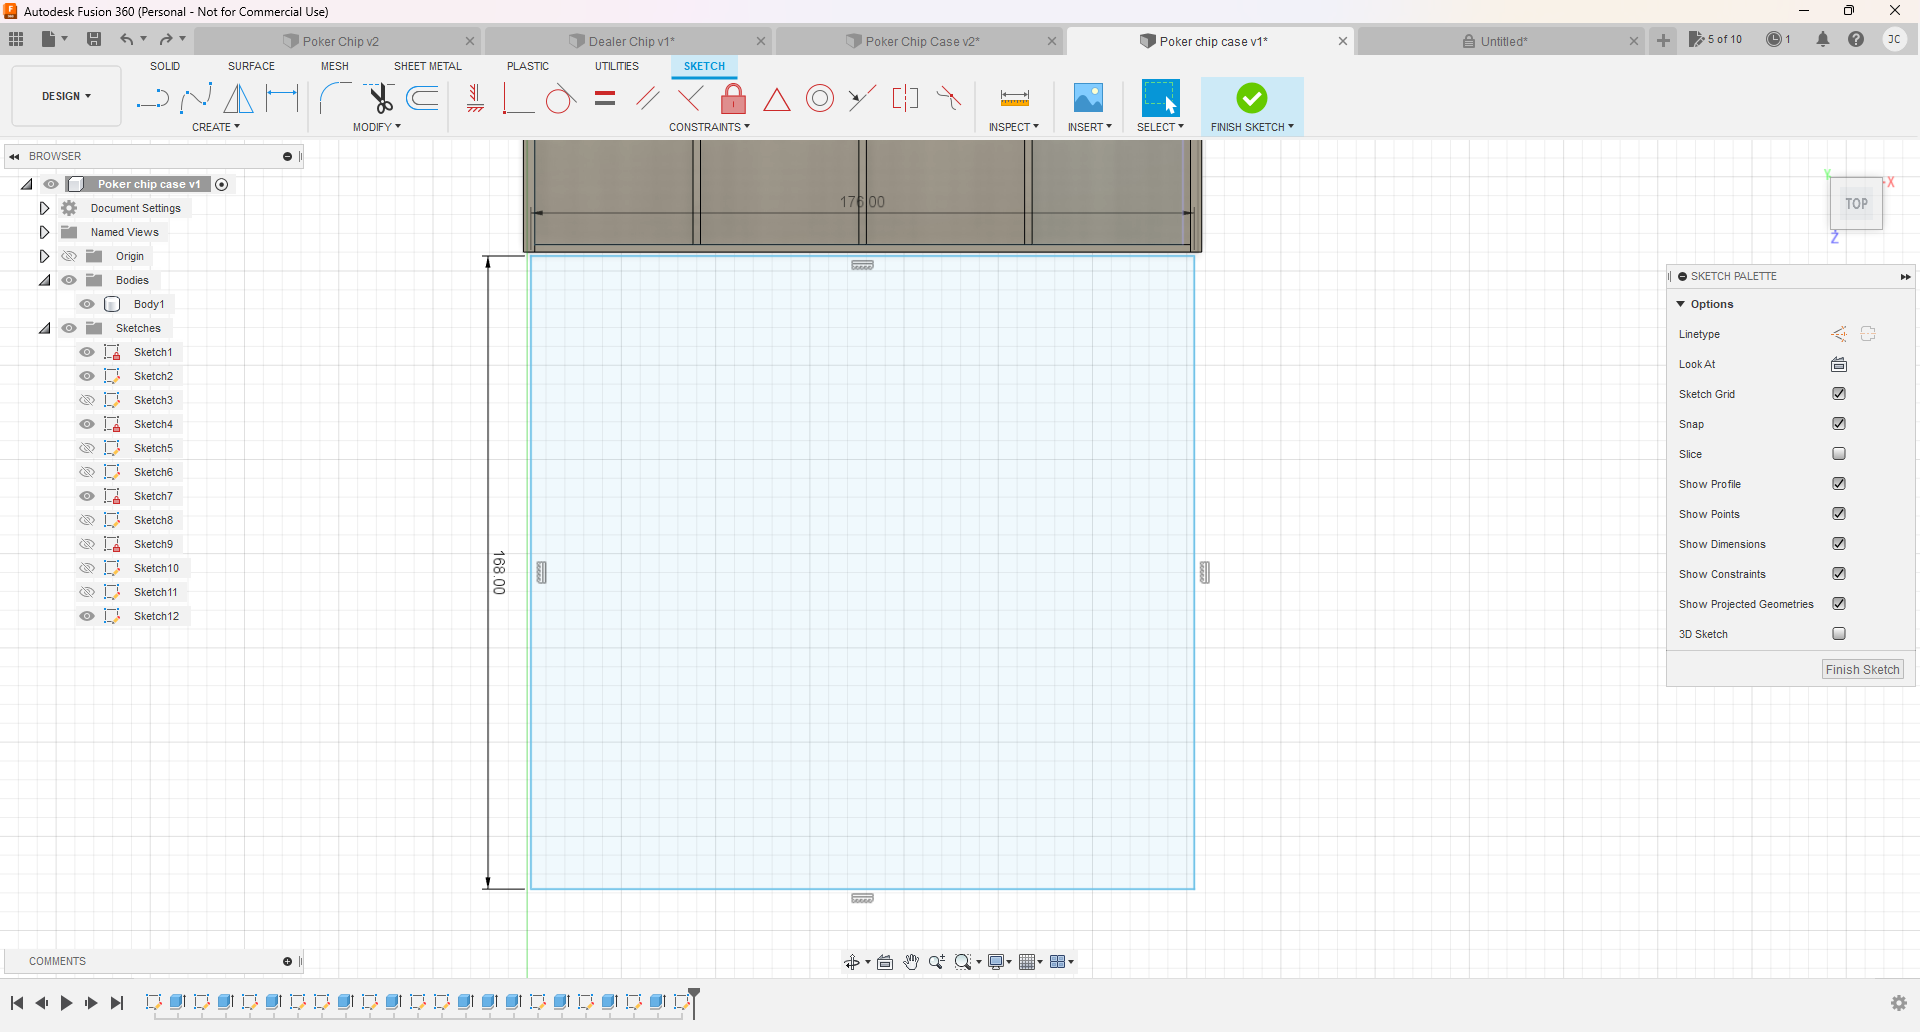
Create a new sketch on teh top plane. (For the Lid). Make a rectangle that is 176mm by 168mm. Click finish sketch and extrude to 1.9mm. Create a sketch on the lid and create a rectangle 1mm in from the left and right side. Extend down to the end. Extrude it to 0.9mm. In top view, click insert SVG. Insert it from your computer. Click on the top of the lid and size it up. Select and extrude to -0.25mm. You are finished!!!!!