Tessellating Shapes
by TomSturtevant in Design > Digital Graphics
2508 Views, 15 Favorites, 0 Comments
Tessellating Shapes
This is a tutorial on generating some forms of tessellating shapes. I will mostly use pictures and as few words as possible (so, google “tessellating shapes” because I’m not going to define it here).
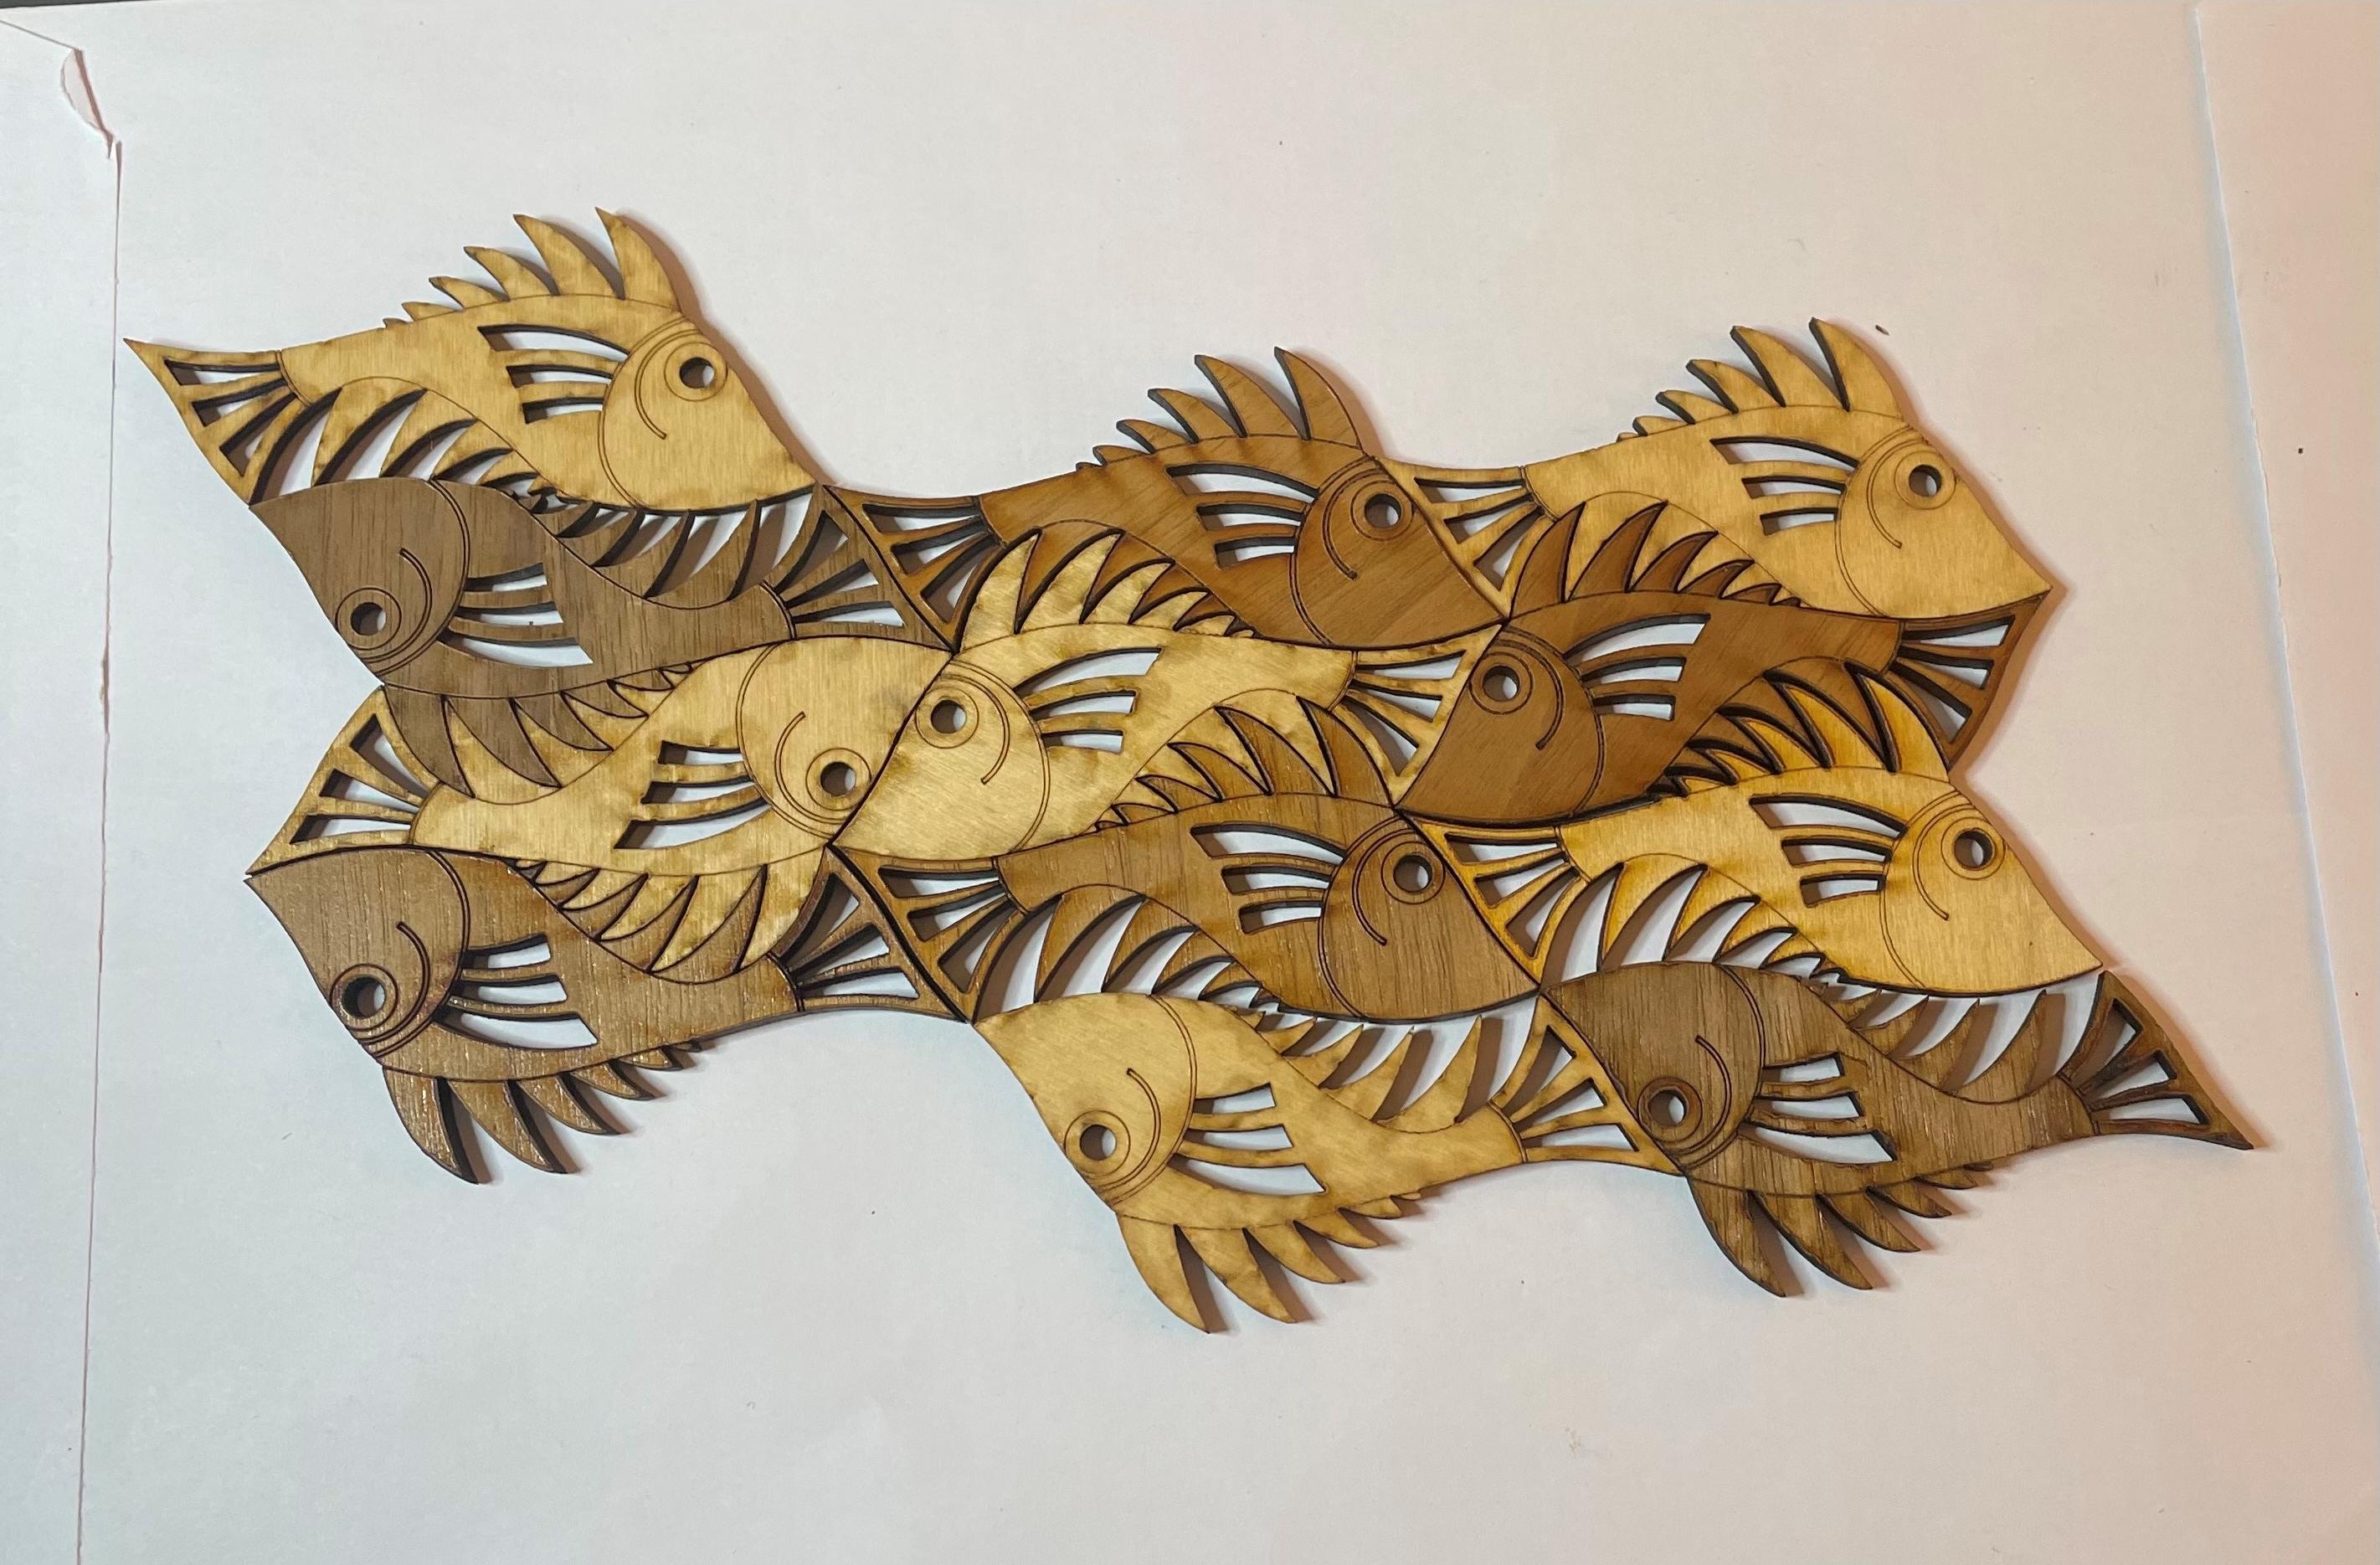
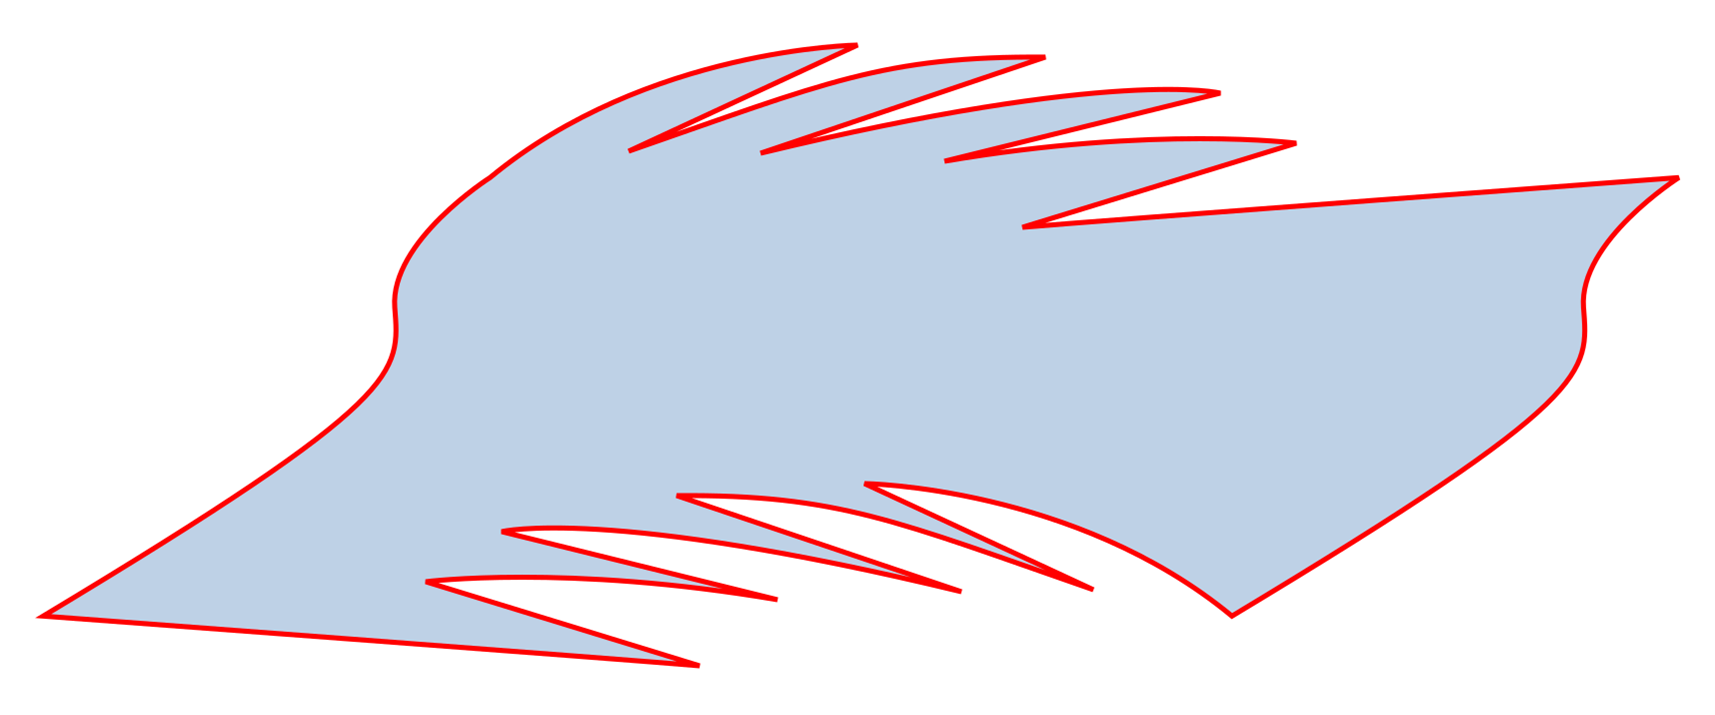
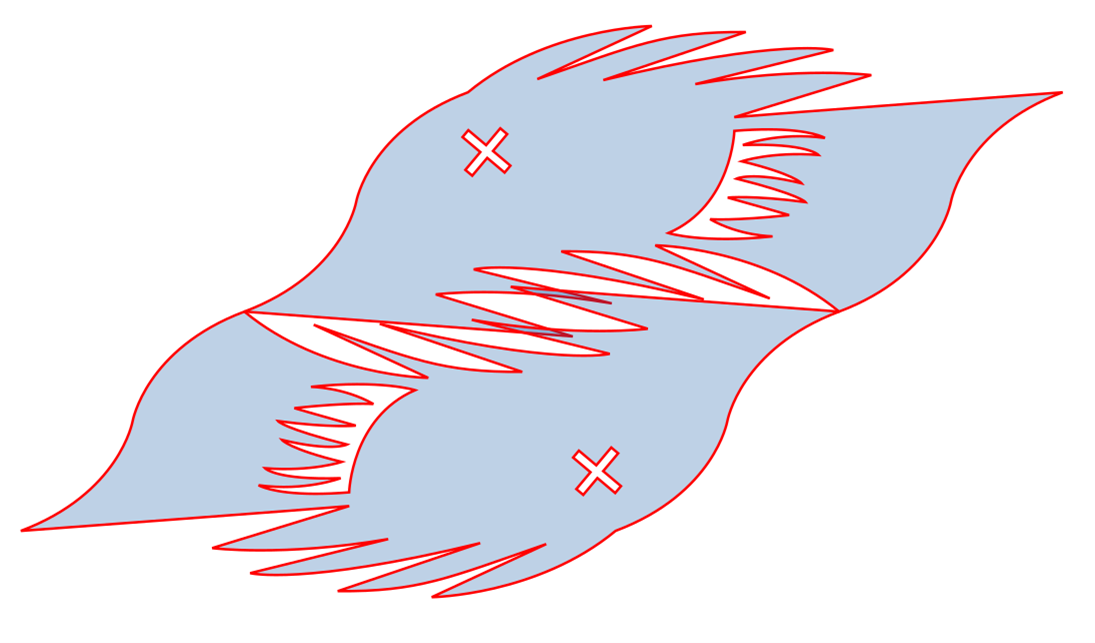
I used inkscape for this tutorial but the techniques can apply to any geometry creation method - you could even get this to work with paper/pencil/ruler/scissors. (I modeled the Escher-esque fish pictured above in Autodesk Inventor.)
This is NOT:
- A comprehensive guide to all forms of tessellation.
- An inkscape tutorial.
Hope you enjoy it!!
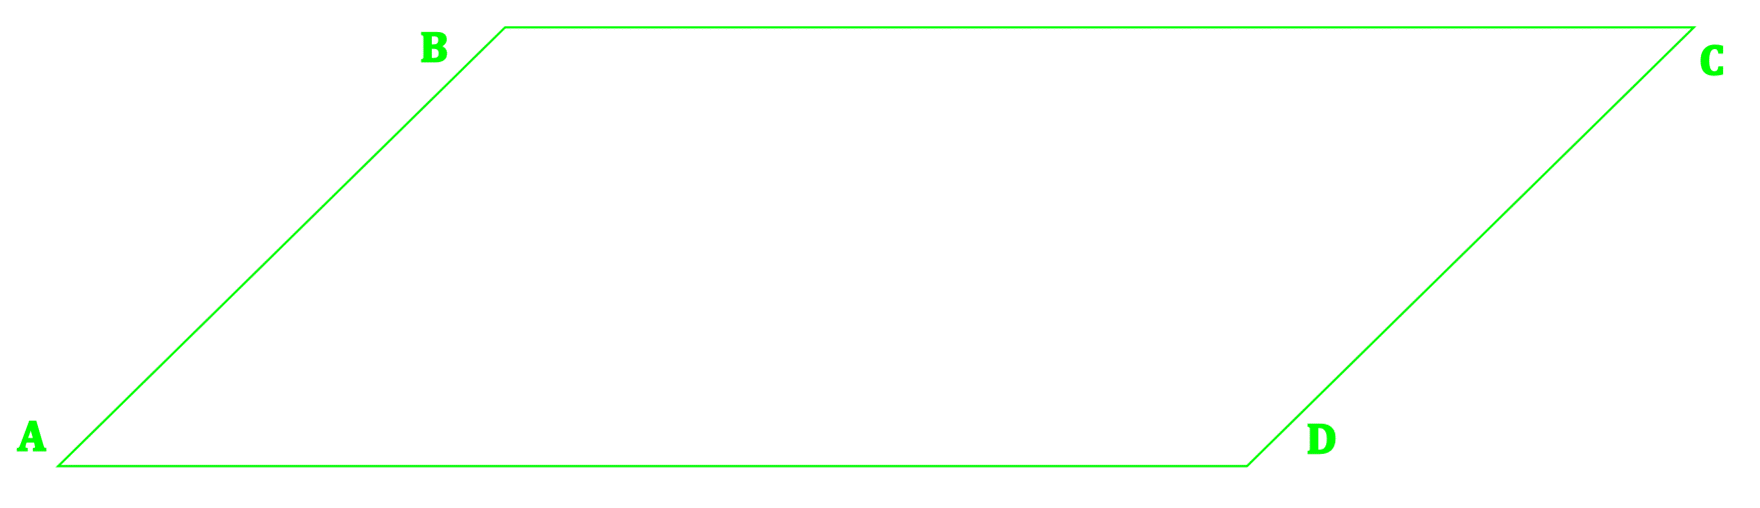
Create a parallelogram as a Guide. I’ve labeled the guide vertices A, B, C, and D. (Hexagonal and triangular shapes can also tesselate, but this is a parallelogram example.)
Actually, a parallelogram is a tessellating shape… You can stop here if you’re satisfied with that!
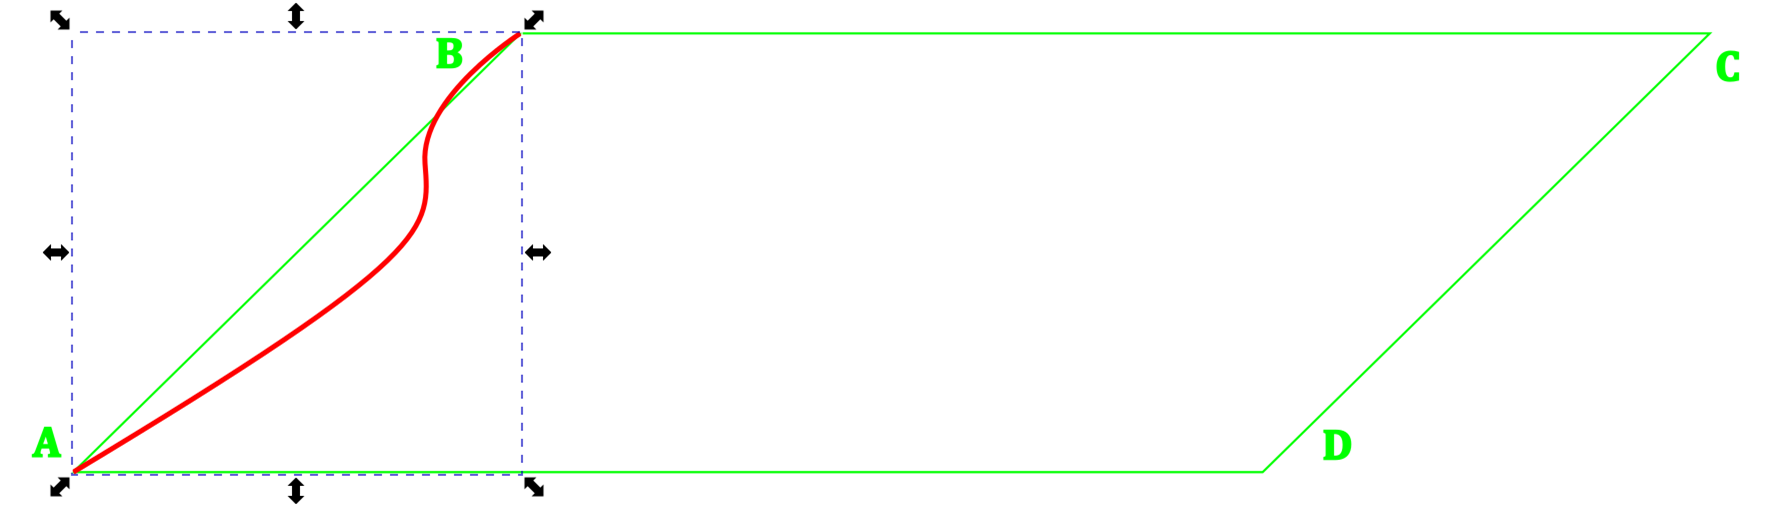
Create a curve (or curves) connecting A and B.
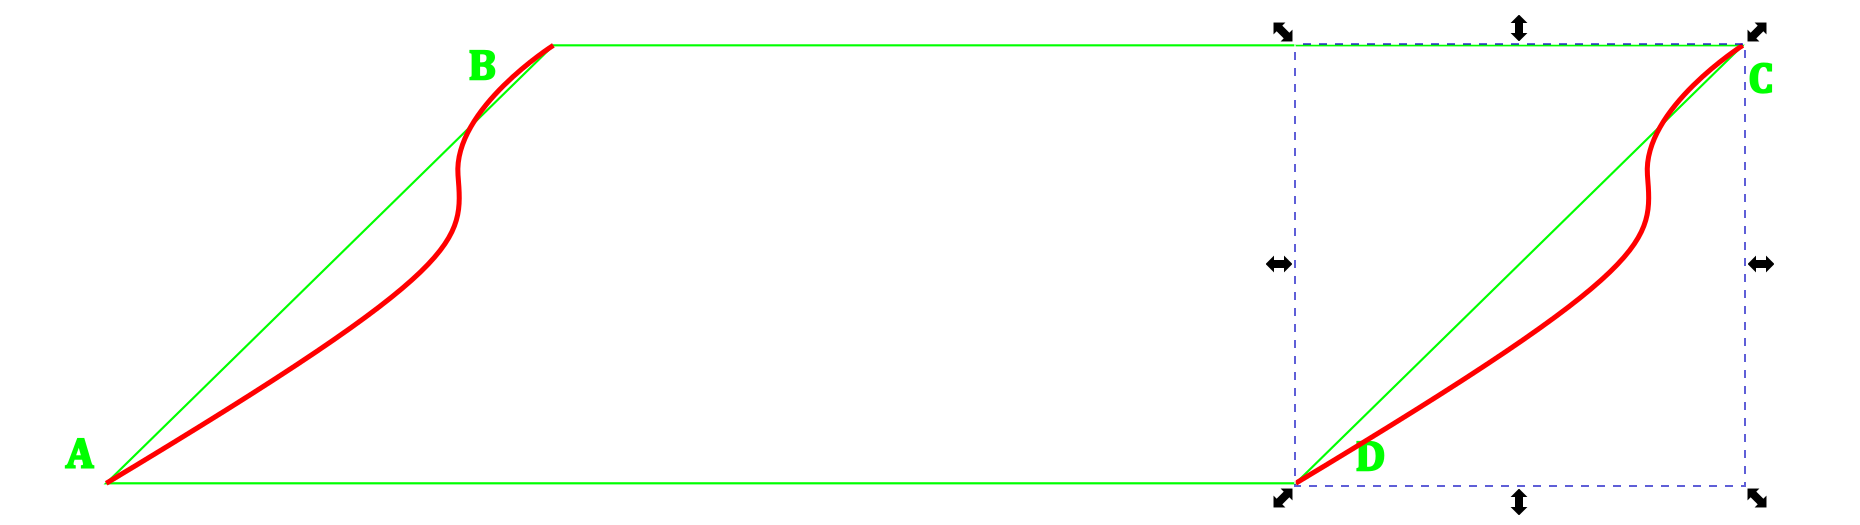
Copy this curve and snap it to connect D and C.
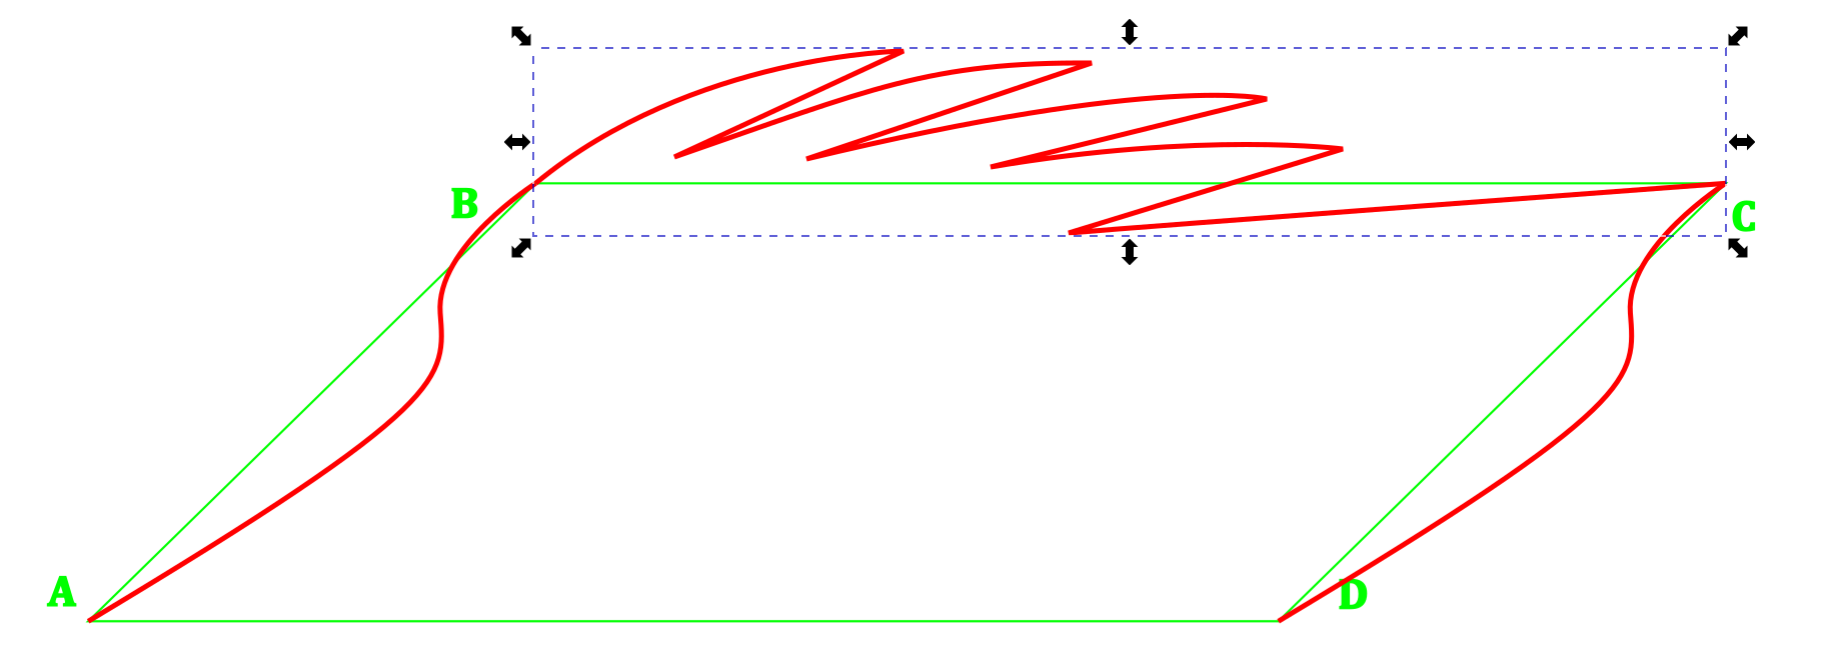
Create a curve (or curves) connecting B and C.
Copy this curve and Mirror it.
Snap the mirrored copy to connect A and D.
DONE! This is a tessellating shape!
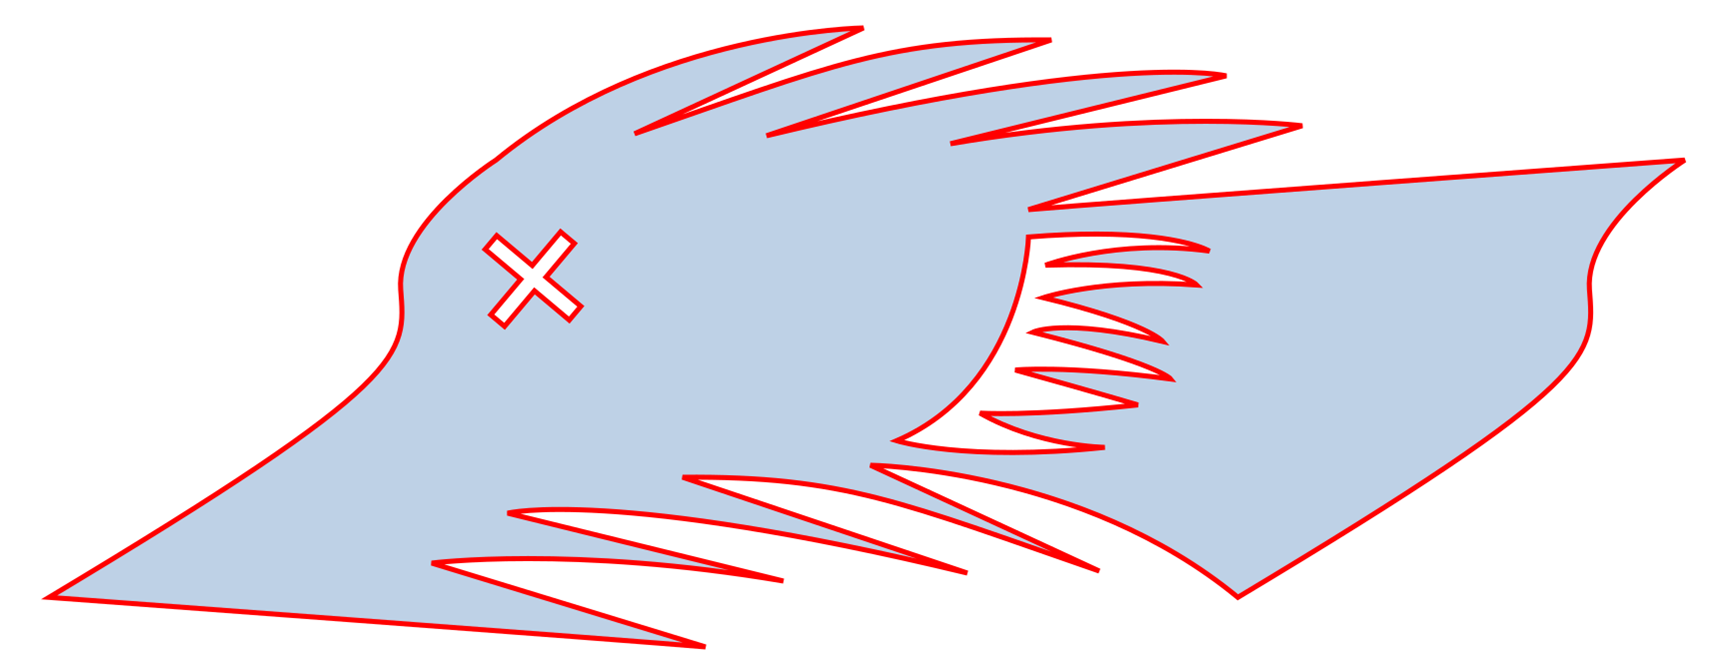
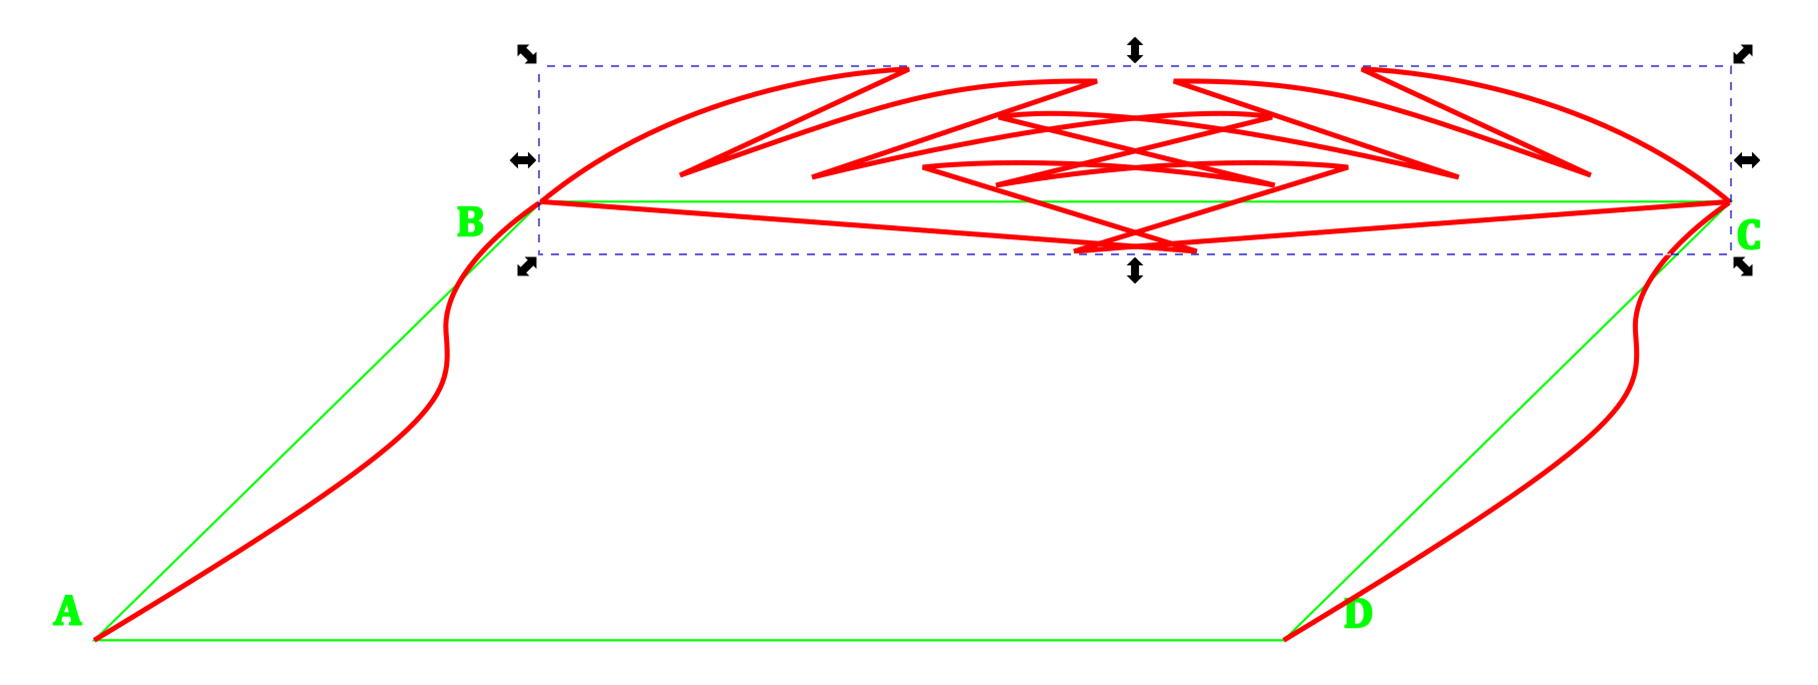
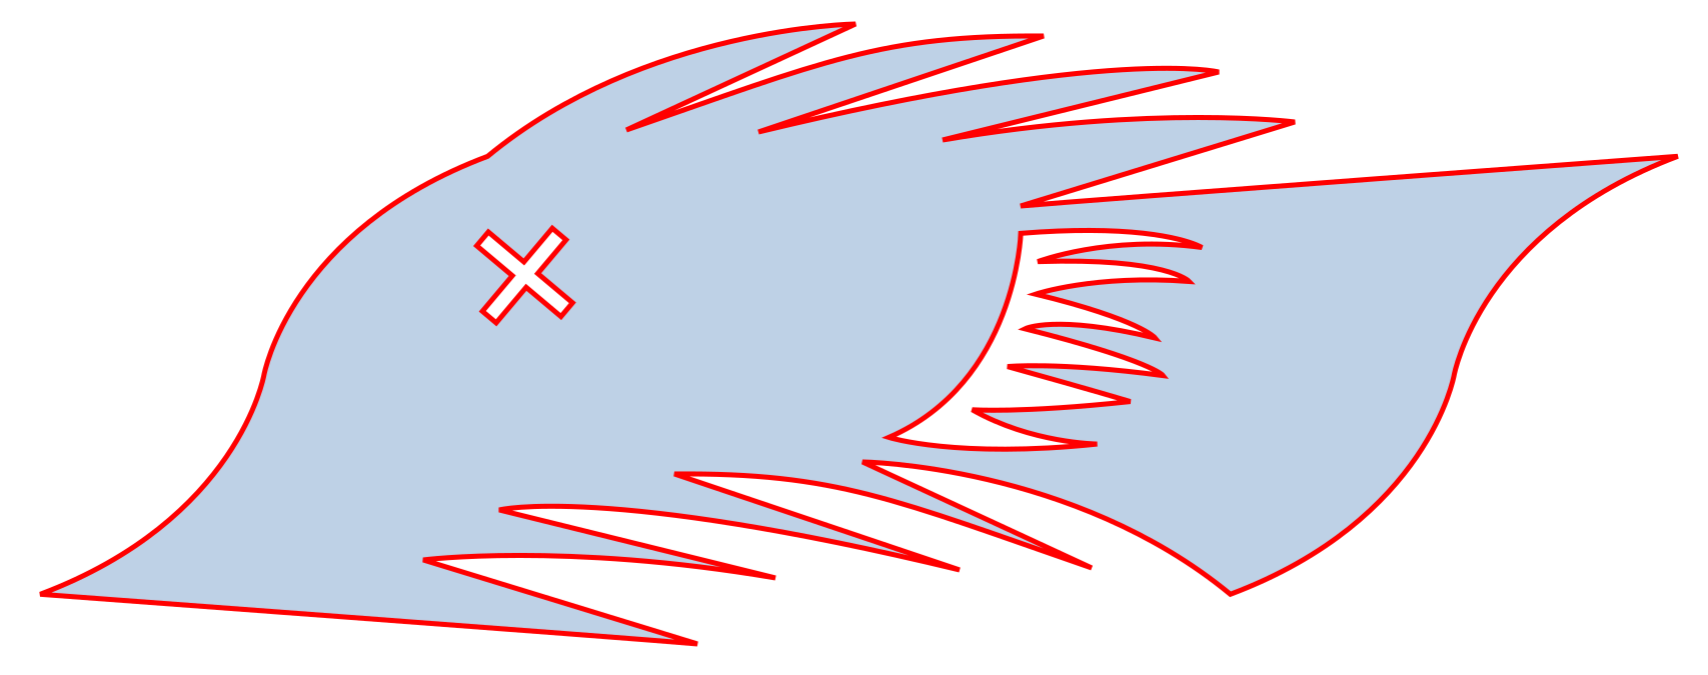
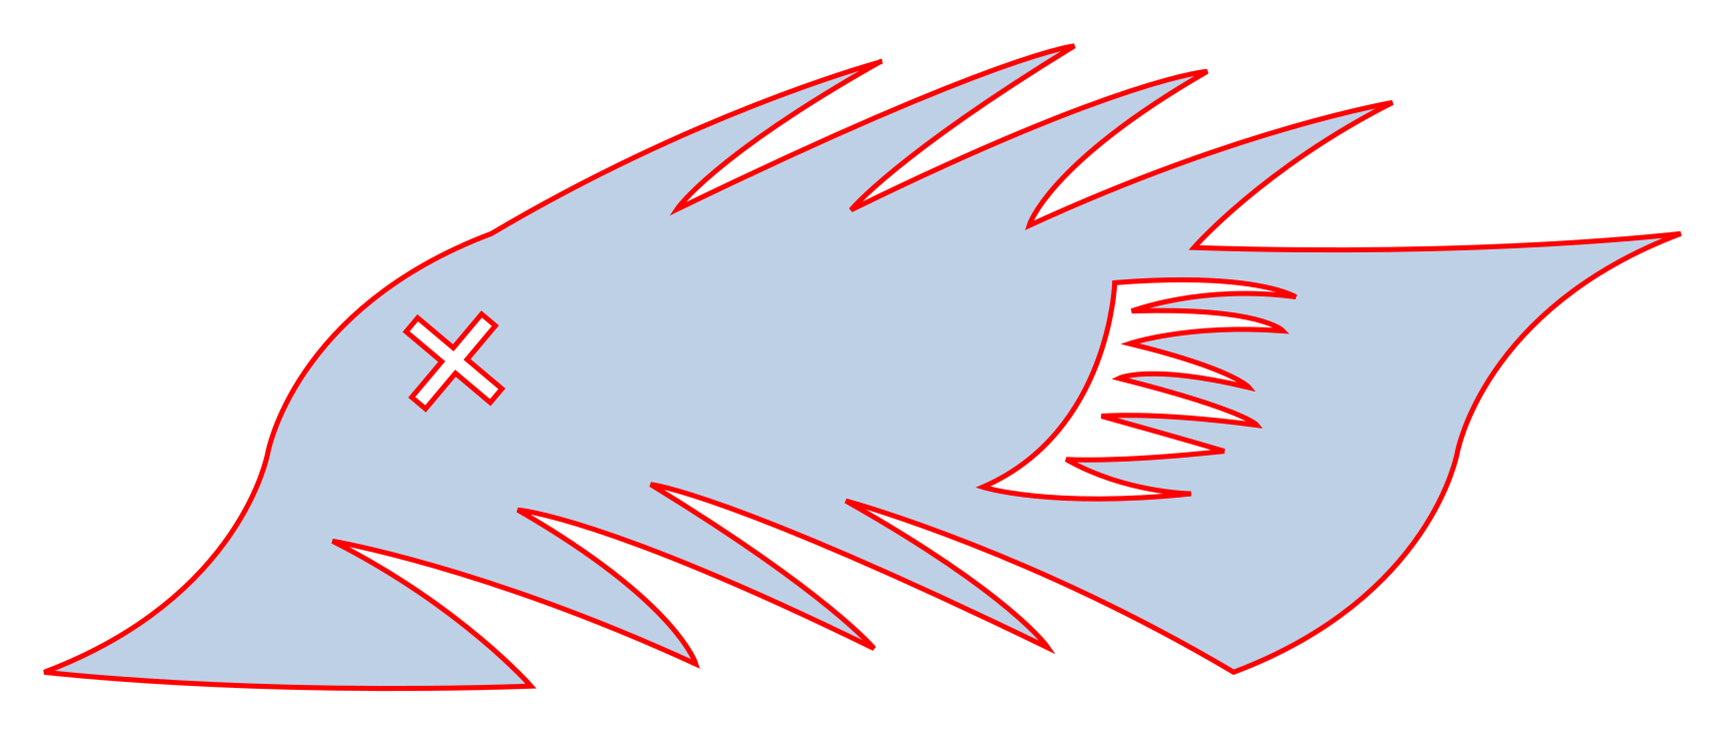
I added some internal details. (Clearly I’m NOT an artist!)
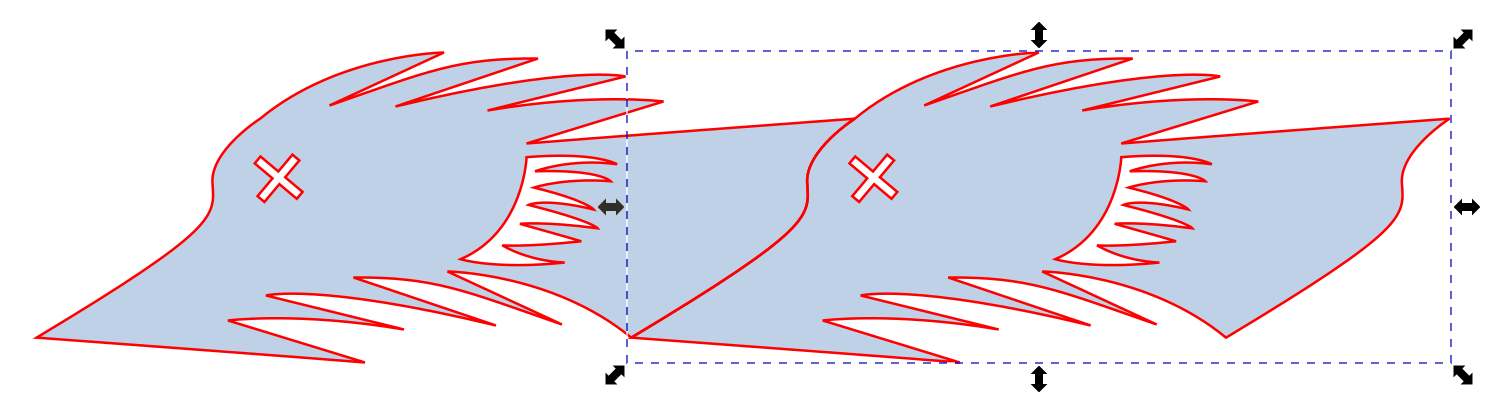
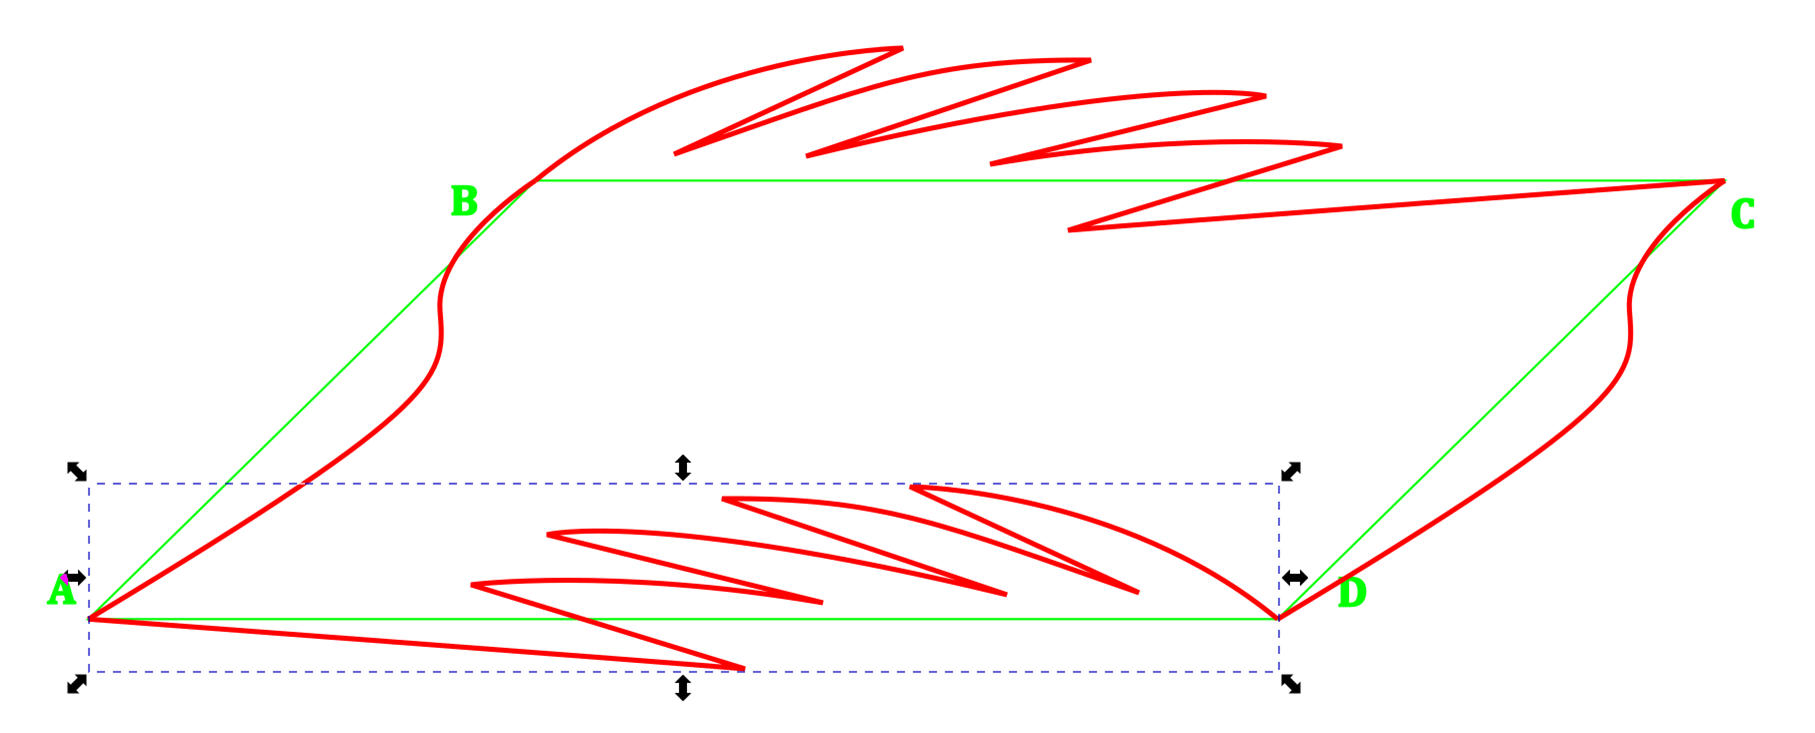
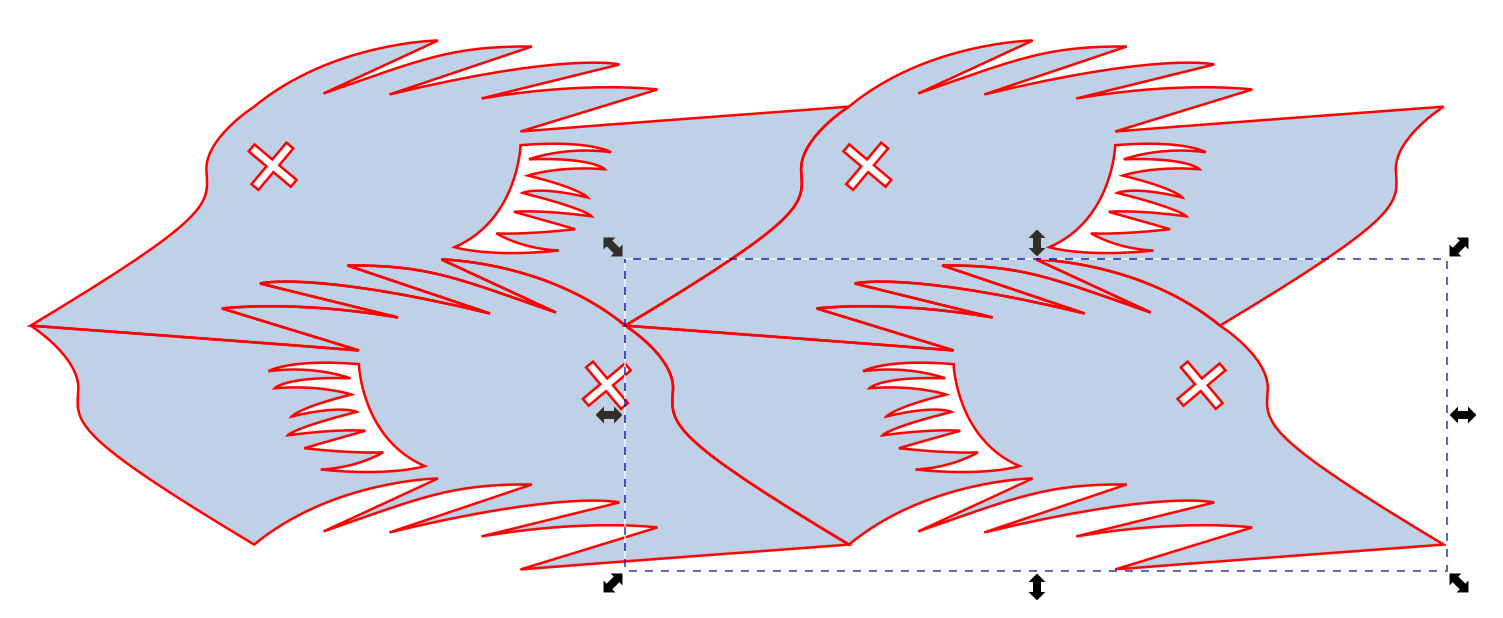
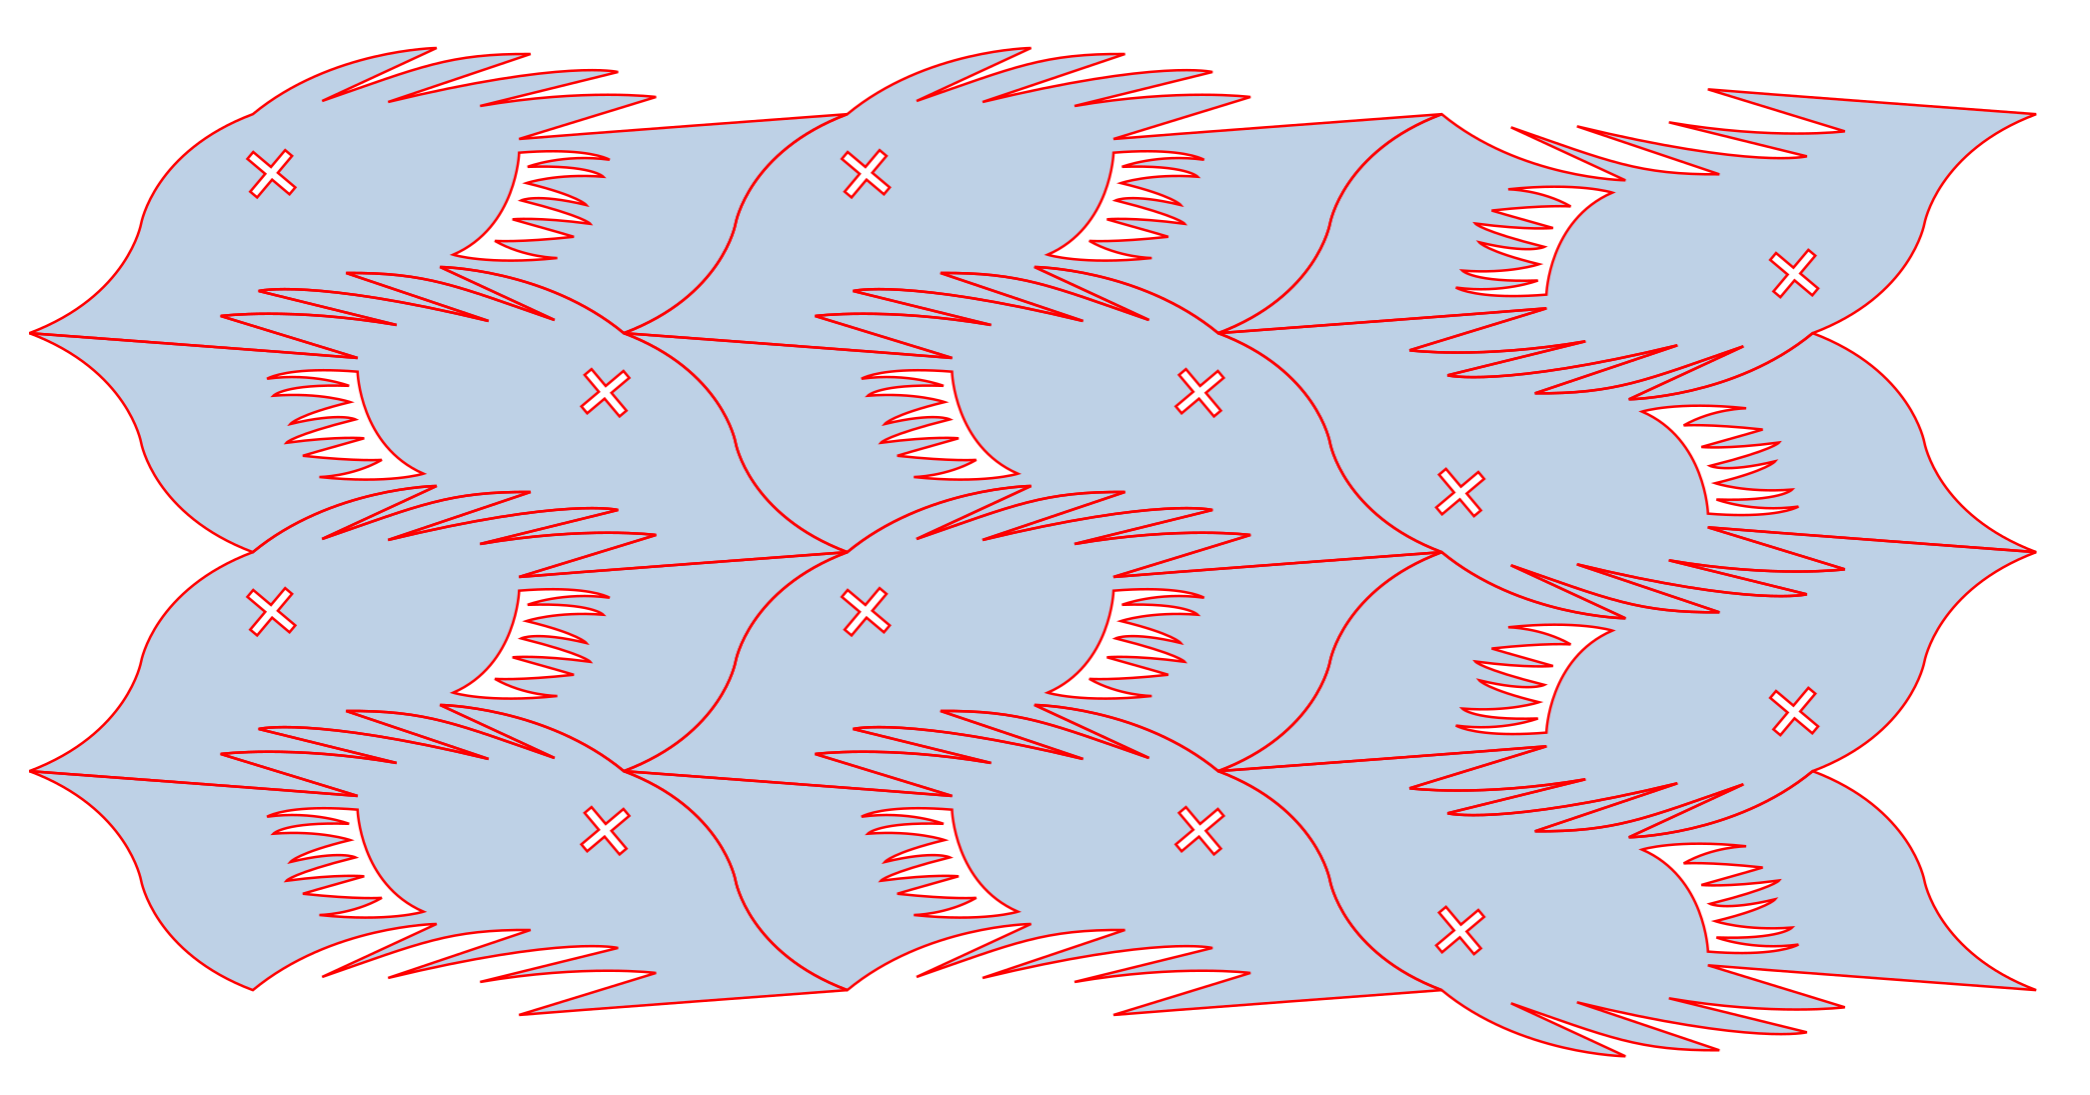
OK – let’s tesselate… Copy the shape and translate it horizontally. Note that this works because the D-C edge was copied and translated from the A-B edge.
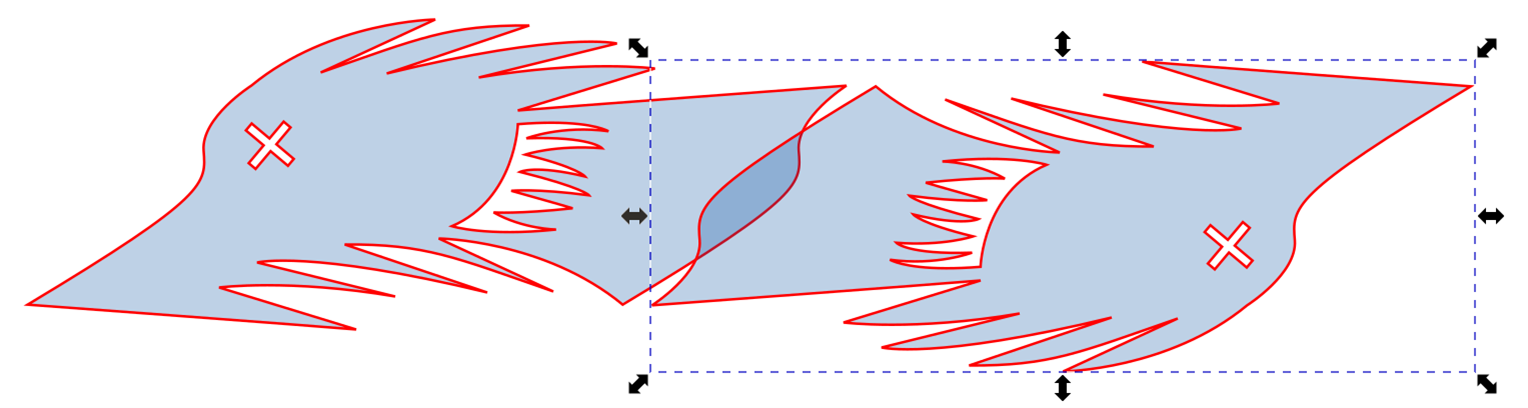
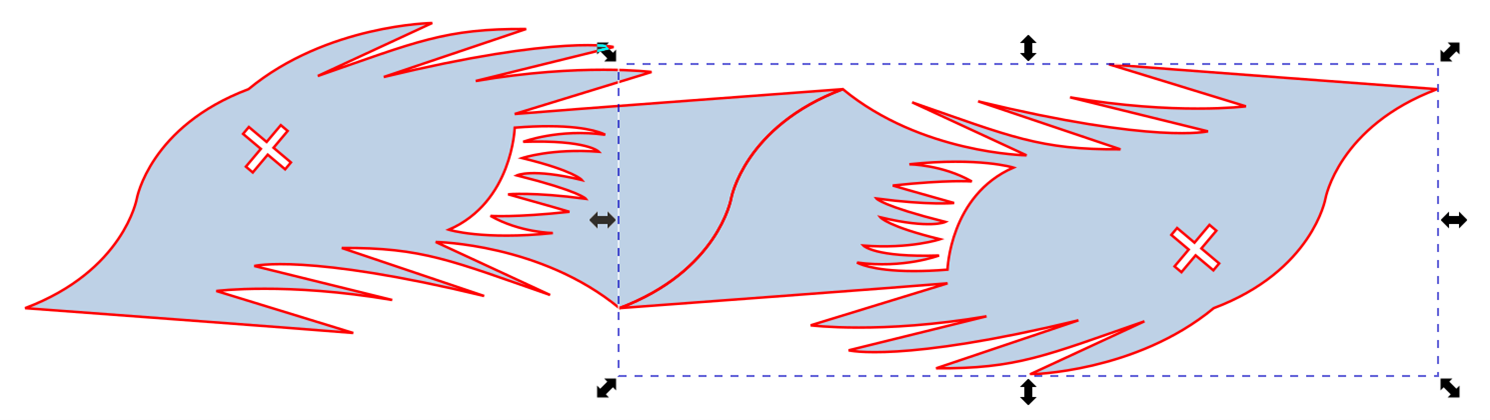
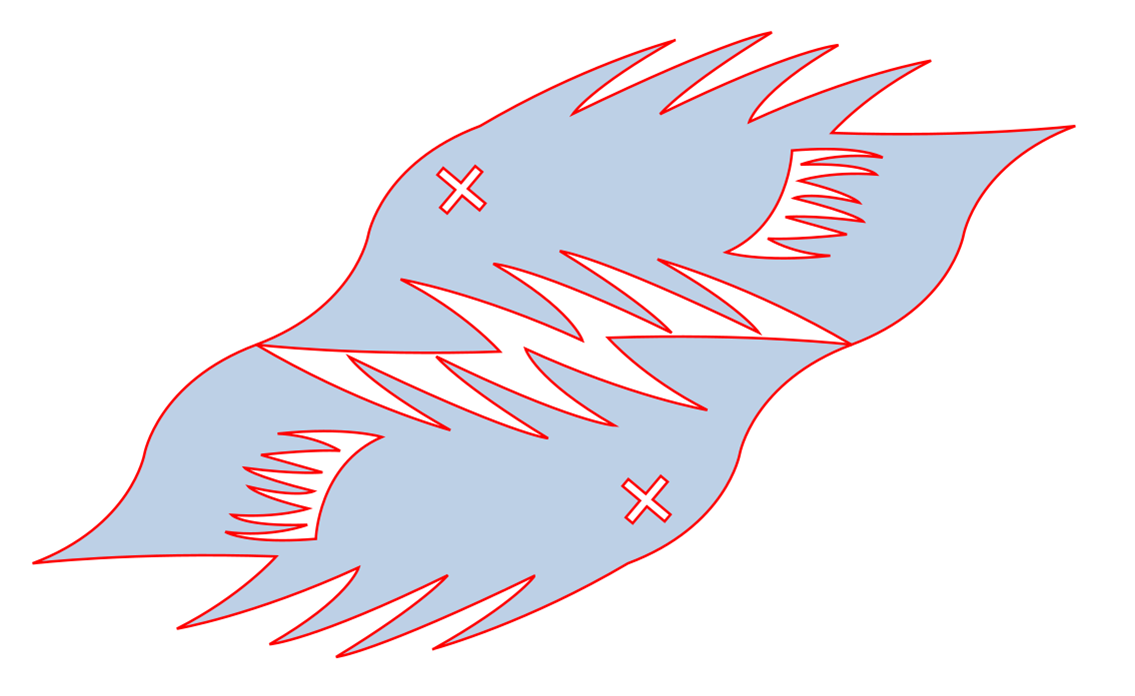
Copy the shape, and mirror it.
Translate the mirrored copy. Note that this works because the A-D edge was copied, mirrored, and translated from the B-C edge.
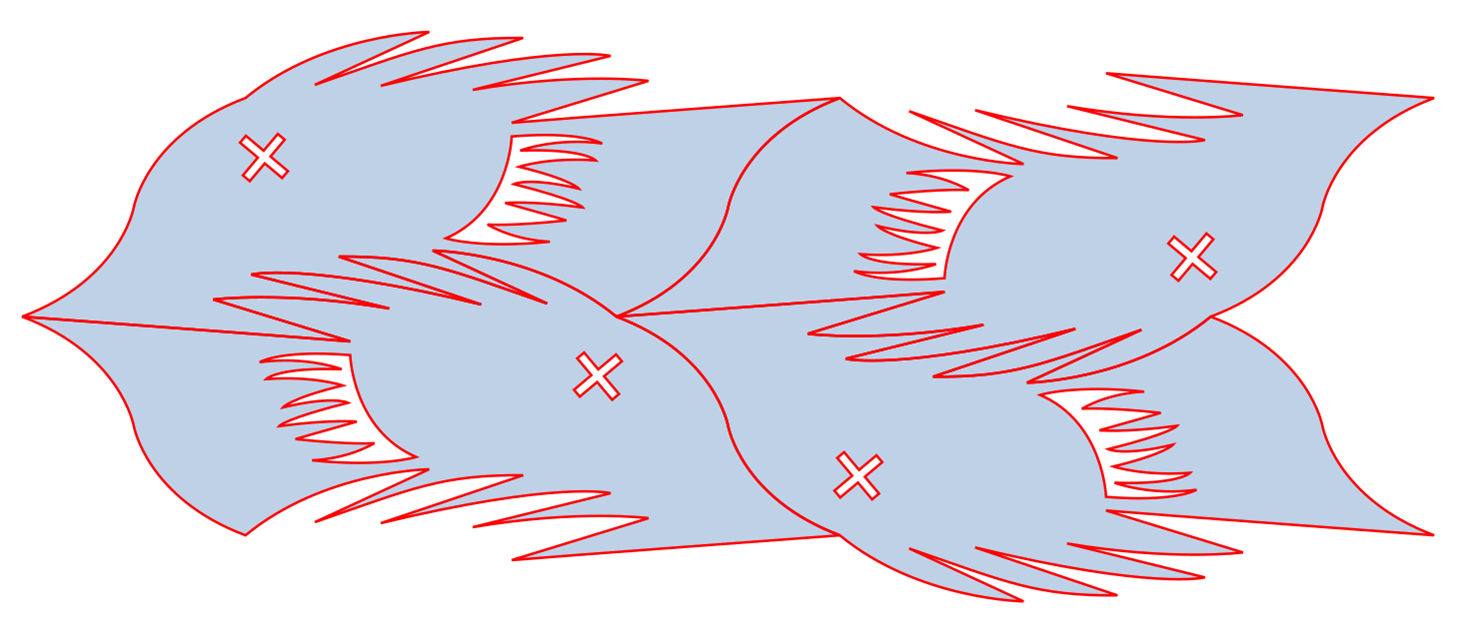
Here’s more. You can make as many as you want.
You can absolutely be done here, or read on for some more options…
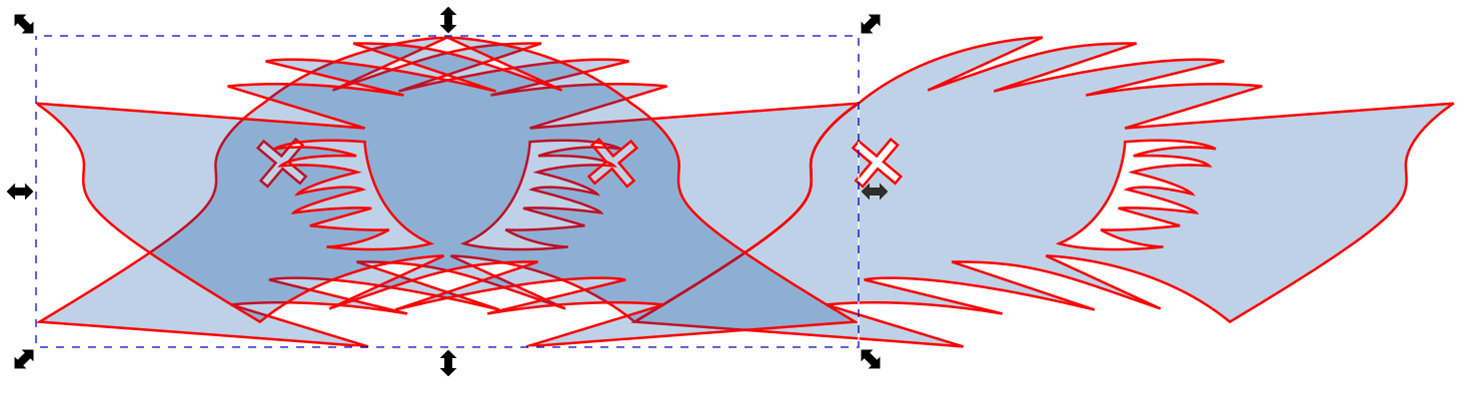
OK – what if I copy, rotate by 180, then translate horizontally? Does that work? No. But… we can make it work.
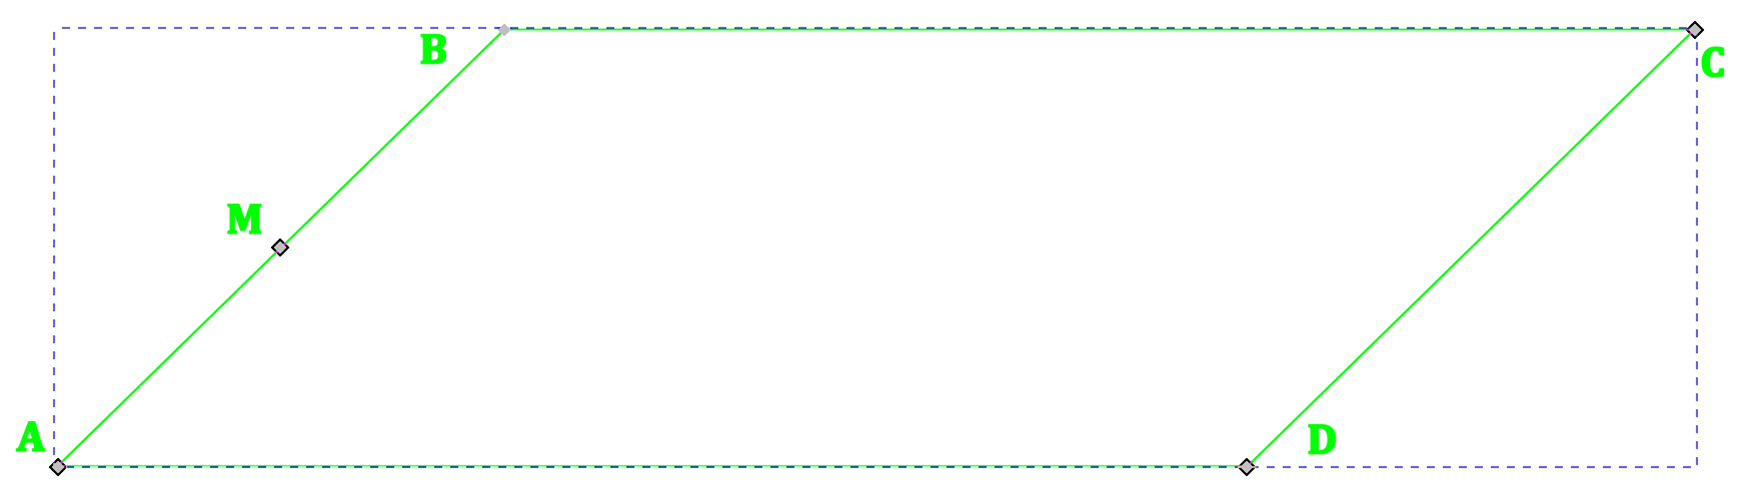
Back to the original parallelogram guide. Add a mid-point M between A and B.
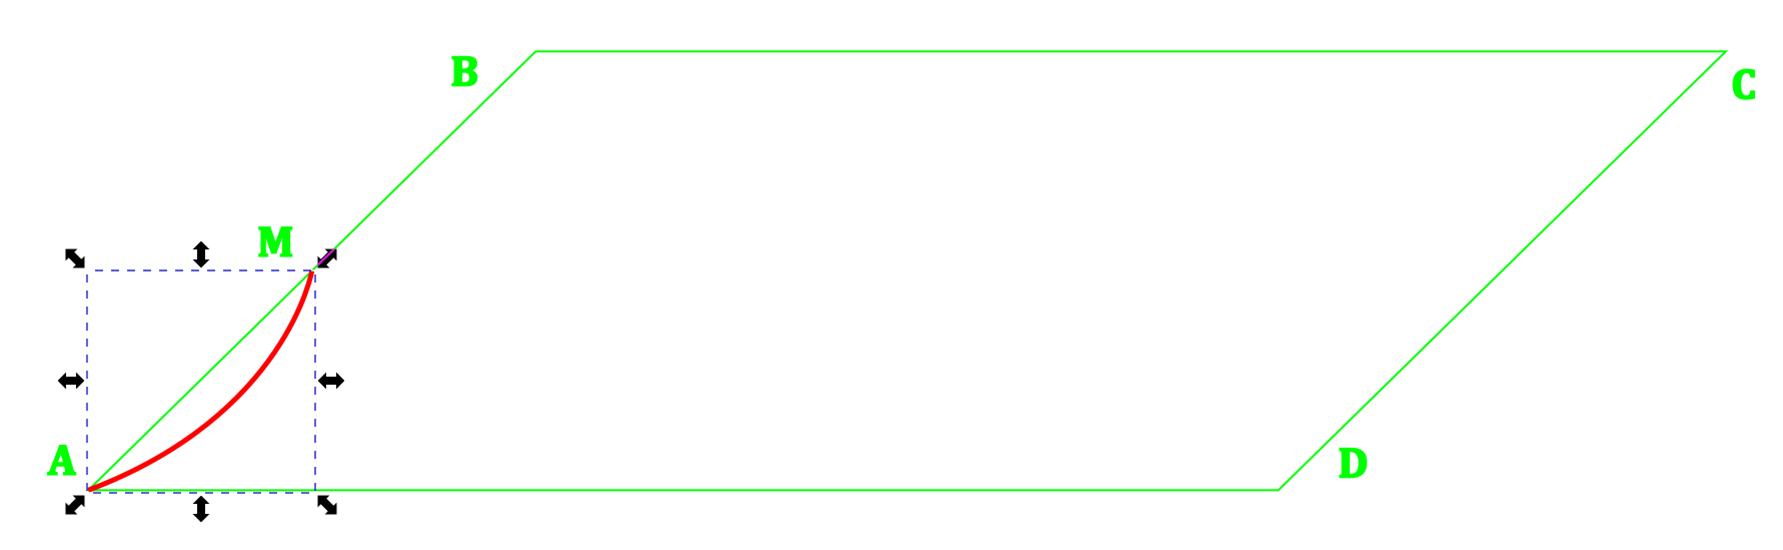
Now create a curve between A and M.
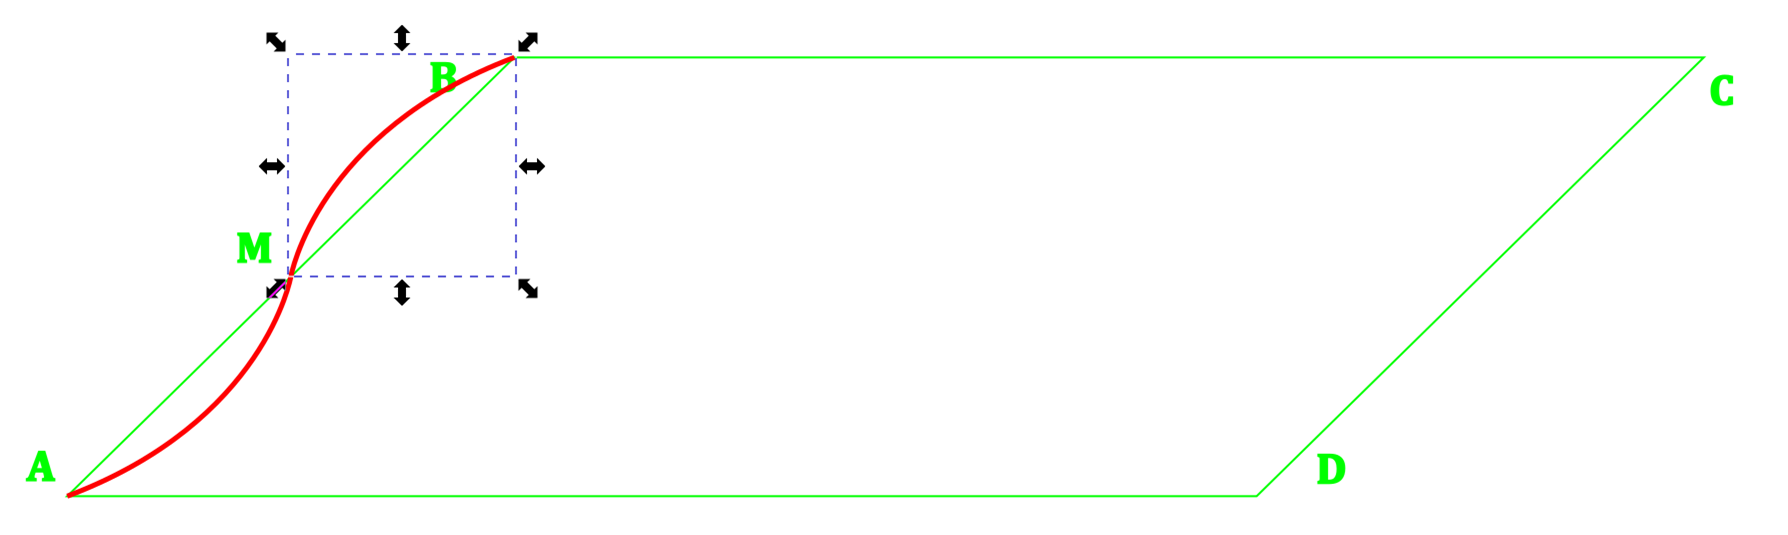
Copy this curve, rotate it 180 degrees, and snap it to connect M and B.
Copy the A-M-B edge, and translate it to connect D and C. Create the B-C and A-D edges the same as before.
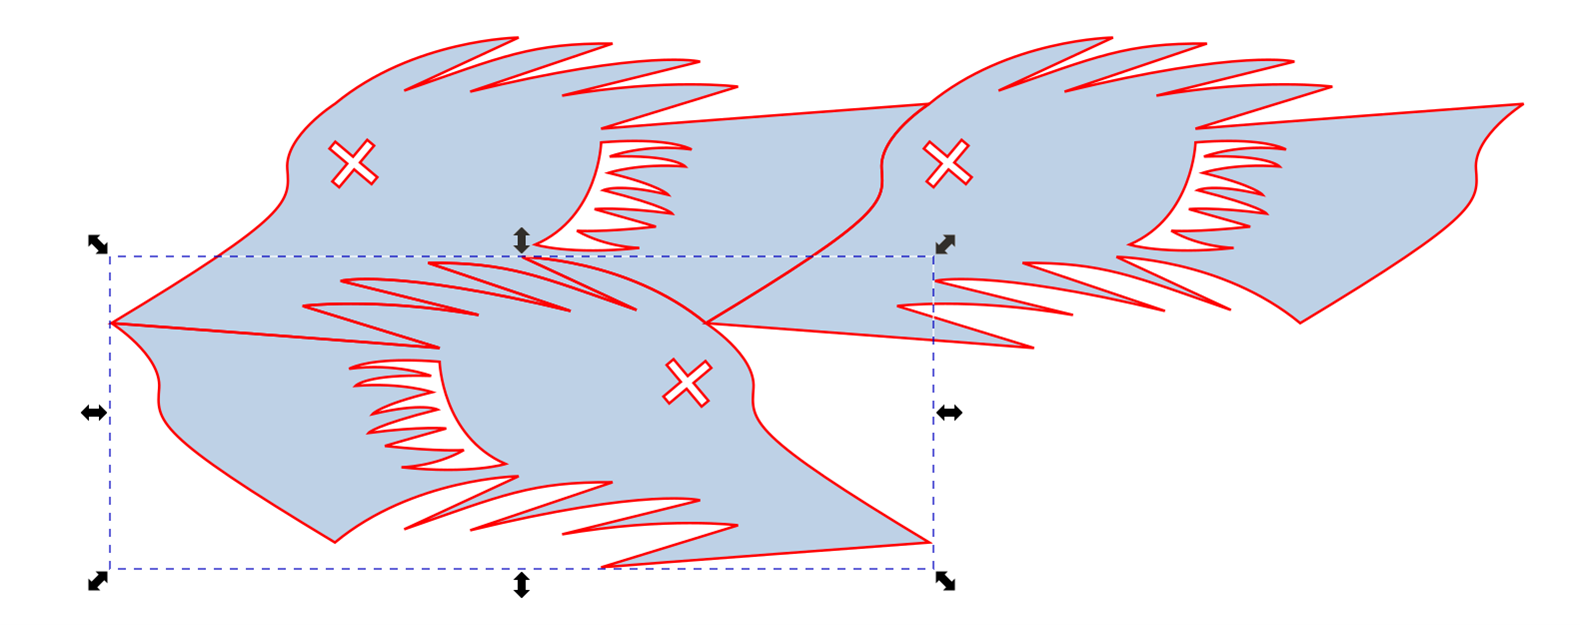
This shape will now tesselate if you rotate it 180 degrees and translate horizontally.
(Note: If you had kept your original A-B edge and copied, rotated, and translated it to be the C-D edge then a copy+rotate+translate tessellation will work, but not the simple copy+translate tessellation we had before.)
And it still tessellates if you copy+mirror+translate.
You can translate. You can rotate 180+translate. You can mirror+translate. Wow.
OK – what if I copy, rotate by 180, then translate vertically diagonally? Does that work? No. But… we can (sort of) make it work.
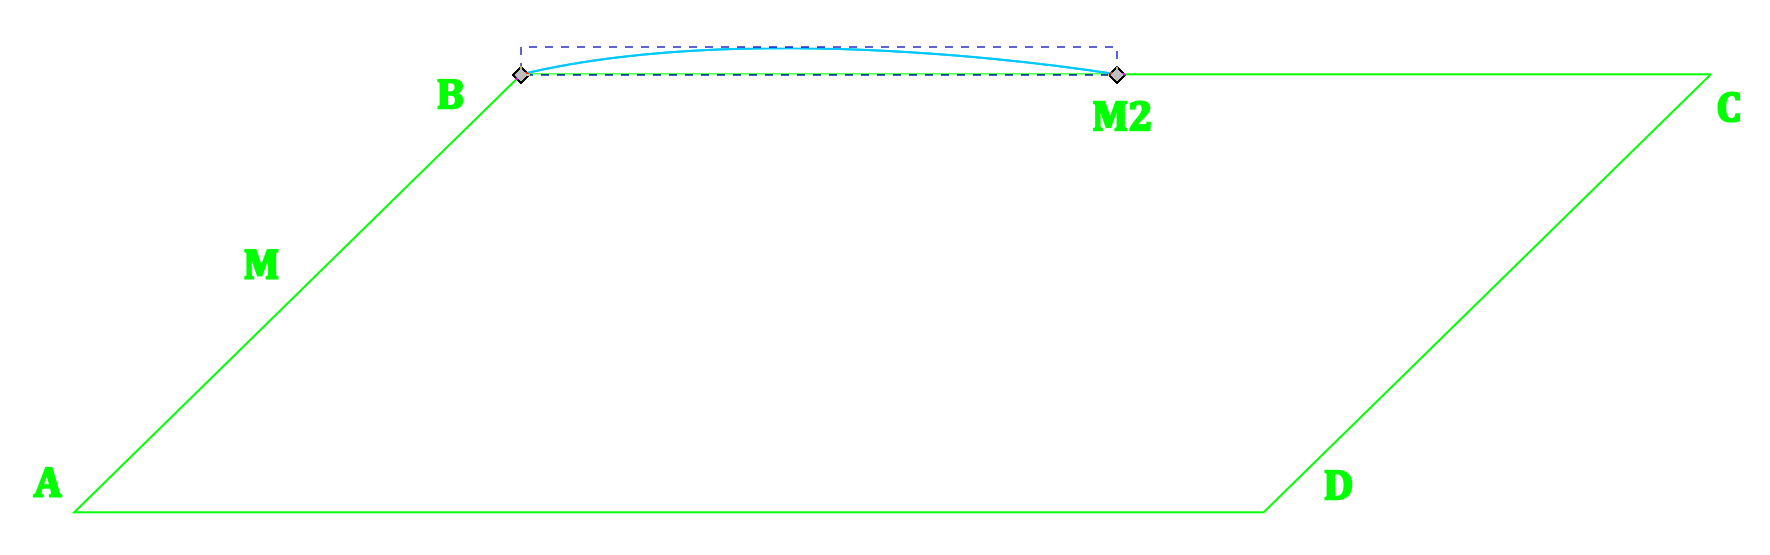
Back again to the parallelogram guide. Add a mid-point M2 between B and C. Create a curve connecting B and M2.
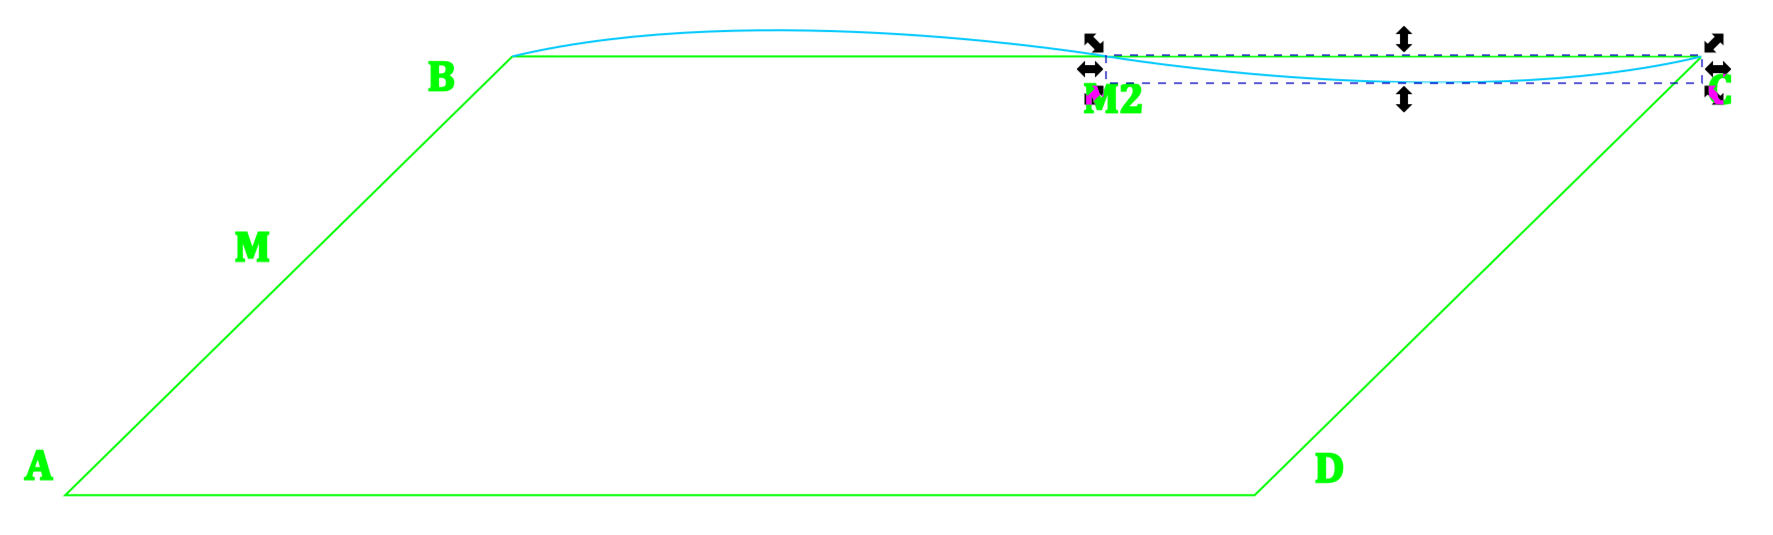
Copy this curve, rotate the copy 180 degrees, and snap it to connect M2 and C.
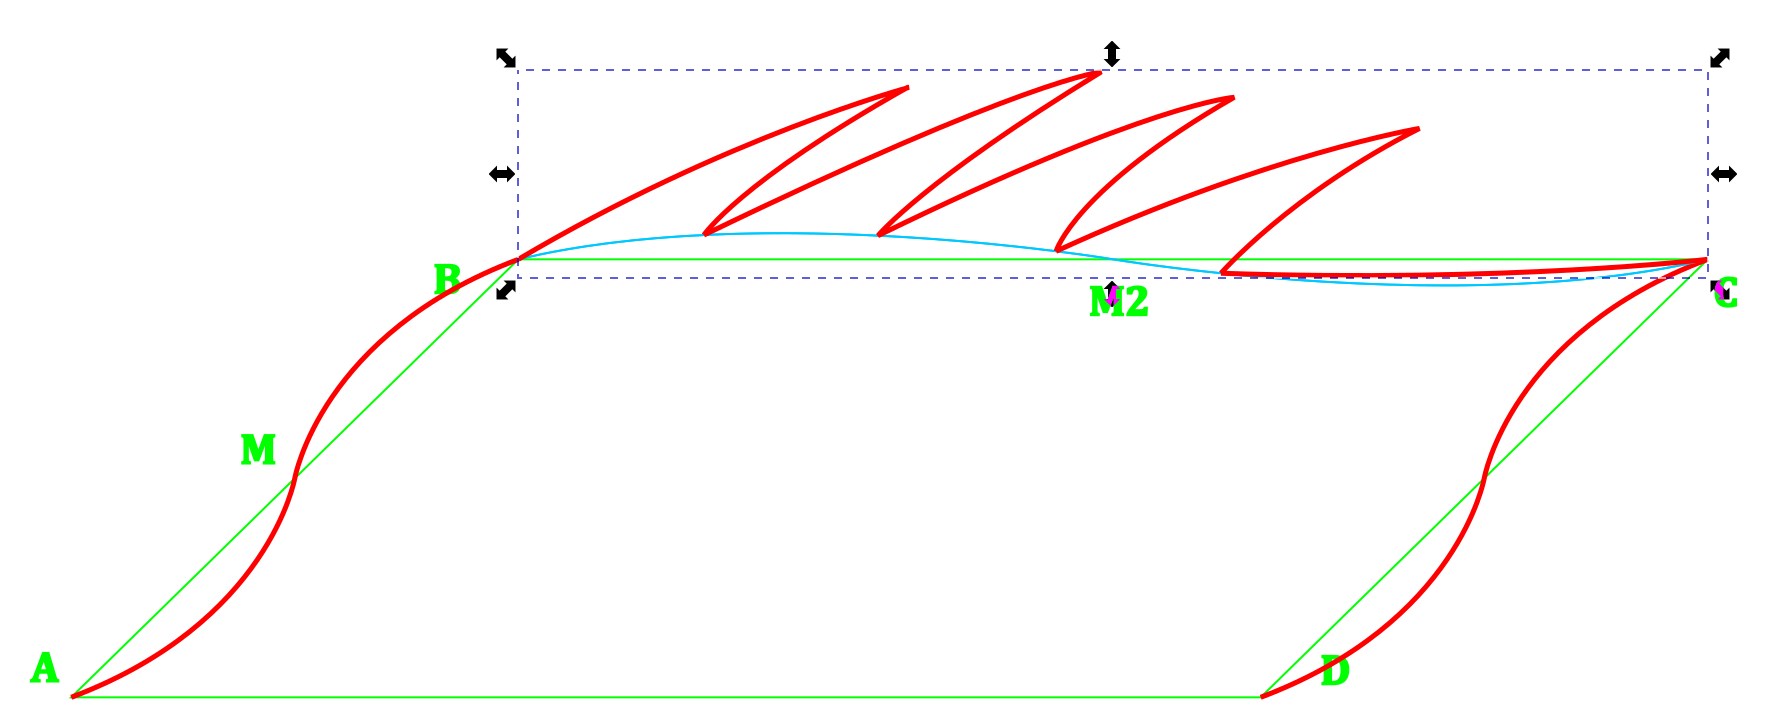
Now create curves connecting B and C with the lower curve points snapping to this B-M2-C curve.
Finish the shape as before by copying, mirroring, and snapping to form your A-D edge.
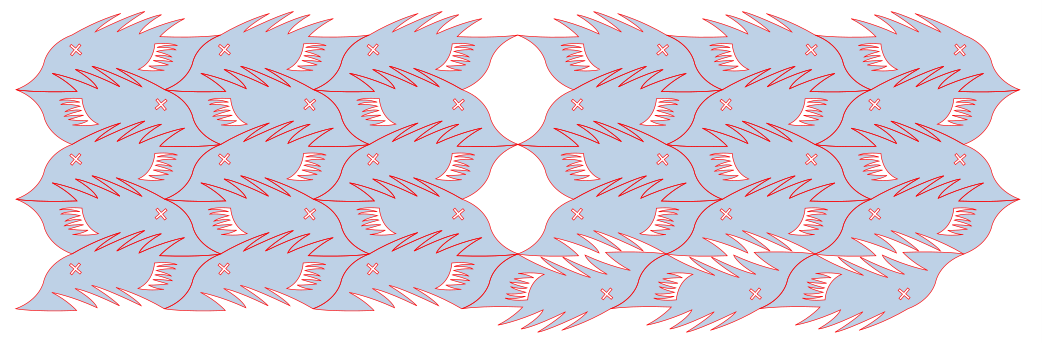
Now you can copy+rotate+translate and the shapes will mate nicely like this. This is NOT a tessellation because there are gaps between the shapes. But it can be used to create some interesting patterns.
Have fun with it!