TerraDome : Mini Tropical Greenhouse With Arduino
by MagicManu in Circuits > Arduino
25521 Views, 240 Favorites, 0 Comments
TerraDome : Mini Tropical Greenhouse With Arduino


TerraDome is an indoor greenhouse for plants and tropical flowers shaped octagonal dome.
It is driven by an Arduino Mega that regulates temperature and lighting through different sensors and an LCD display. It also has doors to the Jurassic Park (or Jurassic World) that opens when the temperature is too high in the greenhouse.
Dimensions: 50 x 50 x 45 cms
Time spent: 35H (out of study)
Tools: Circular saw, ripper, drill press, miter saw, jigsaw, Dremel, hand tools ...
Electronic Material :
- Arduino Mega 2560
- LED lighting for plants TRU-PL-WR
- Time programmer Renkforce 1289404
- Fayalab light sensor 801 NU0014
- Velleman VMA311 DHT11 temperature and humidity sensor
- Constant current LED power supply TRU-NETZTEIL-8W 700mA
- Velleman VMA203 LCD Module and Keyboard (Arduino Shield)
- 2 Analog Mini Servo Modelcraft Y-3009
- AC / DC Power Supply 230V 5V 3A Mean Well RS-15-5
- Velleman VMA414 40-pin Patch Cable
- 2 relay board 5 V SMTRELAY02
- 2 Velleman VMA307 RGB Led Module
- 2 Standard LEDs (Orange / Blue) - 2 LEDs 10 mm TRU COMPONENTS
Other:
- MDF (Medium) 19 and 10mm
- 2.5 mm transparent polystyrene (Plexi)
- PC 80mm Power Supply Fan
- Heating mat for reptile 220V 7W ChenRui
- Painting, hardware ...
Plan of the greenhouse, electronic diagram and Arduino code to download in ZIP:
Downloads
Tinkercad 3D Model


I drew the Terradome in 3D using Tinkercad
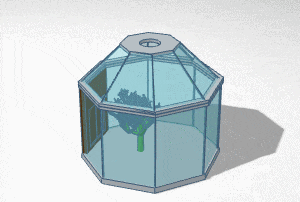
For the octagon I used an 8-sided polygon, I added a smaller one in piercing mode and I merged the 2 to keep only the edges. Windows are "boxes" in transparent color.
Woodworking


I used 19mm MDF for the base and 10mm for the rest.
To have an octagon with 8 equal sides, I used a website where I just entered the radius of the circle (25 cms). Which gives me sides of 20.71 cms.
I cut out the contours with the circular saw, and the internal cuts with the jigsaw.
I also made a hole of a diameter of 8 cms with a hole saw for the fan.
Grooves for Windows


I created grooves on half the thickness of the wood to fit the windows. For that I used a Dremel with its router accessory (335).
For the roof, the windows being sloping, I used a triangle cutter with my router.
I finish with the rounding of all the edges with my router fixed under the workbench.
Paint

.jpg)

I applied one layer of wood primer and 2 coats of gray paint spay.
Cutting Windows


For the windows I used transparent polystyrene 2.5 mm thick. More resistant than glass and easy to work, it offers a beautiful transparency.
I cut it with my Dremel DSM20 which makes a clean cut without shards.
I measured the distance between the blade and the edge of the sole, I draw 2 lines on the wooden board, and I use it as a guide to cut all windows.
Base


The windows are glued with transparent silicone, which seals at the same time.
Roof

.jpg)


For the roof of the dome, I started by gluing the bottom of the windows, I held them between them with tape, and I added the top.
I then grouted all the edges and smoothed the joints with water and soap.
Ventilation


I recovered the fan on an out of service computer power supply.
I tested it under 5V instead of 12V, the speed is low but sufficient for this use.
I soldered fine white wires that will be hidden in the window seals. The fan is then screwed onto the dome with its protective grille.
Miscellaneous


To facilitate the opening (when watering plants for example), I installed 2 hinges at the back.
I drilled 4 holes on 10 mm deep and I cut 4 plastic tubes that will serve as feet.
Doors


The doors are inspired by Jurassic World (or Parc).
I created a base that contains the 2 servomotors and 2 LEDs with wood chips and cleats.
The doors are made of 5 mm plywood glued to wood glue. They are operated by their axes from 0 to 90 degrees.
The orange and blue Indicators mimic those of the Jurassic Parc fence.
Electronic: Main Unit


For the main unit I used a recovery box that I cut out to fit the display.
Of course an Arduino Mega is oversized for this project but I used what I had on hand. An Arduino Uno is enough.
The Arduino is directly powered by 5V so be sure of your power because we do not go through the regulator in this case!
For the display is easy because as it is a shield, it connects directly to the Arduino without any wiring.
Electronic: Tic Tac Unit


For the Tic Tac module I used a test platinum drop where I welded the components (the temperature / humidity sensor, the light sensor and the 2 RGB LEDs). The power supplies are thus grouped together and this limits the number of wires.
Everything takes place in a box of candy TicTac, pierced below at the temperature sensor. It is connected to the main unit by a ply of wires with pins for the Arduino.
Electronic: Power Section


The power section (under the greenhouse) includes:
- A 230V -> 5V DC 3A power supply that supplies all low voltage components
- 700mA constant current power supply for special LED plant lighting (as required in the doc).
- A 2 relays board to control heating and light (220 V)
Arduino Code


I used 4 libraries (in ZIP):
- LiquidCrystal.h: to manage the LCD display
- RGBLED.h: for the 2 RGB LEDs
- Servo.h: for the 2 servomotors
- PID_v1.h: for PID temperature control
The display shows continuously the temperature, the humidity level and the light level (1 to 10)
The + and - buttons (up and down) adjust the temperature
The < and > buttons (left and right) adjust the brightness threshold to trigger lighting
The lights can only be turned on / off every 60 seconds to prevent nuisance tripping.
The heating / ventilation and doors group is controlled by the same code part:
If the temperature exceeds the set point + 2 ° C (ex 30/27° C):
- LEDs turn blue
- The heating goes out
- Doors open (indicated by orange / blue LEDs)
- The fan turns
If the temperature falls below the setpoint - 2 ° C (ex 24/27° C):
- LEDs light up red
- The heating starts
- Doors close (indicated by orange / blue LEDs)
- The fan stops
In other cases (ex 28/27° C):
- LEDs light green
- Heating stays on standby
- The doors remain closed
- The fan remains stopped
Electronic: Heating and Lighting


The LED headband accelerates the growth of plants. Thanks to the high proportion of red and blue lights needed for photosynthesis, the entire light spectrum is covered, which promotes plant growth.
For heating I used a special reptile 7W heating mat that radiates gentle heat. As I'm going to regulate the temperature through electronics, I remove the rheostat.
To shut down the system at night, I used a simple time programmer.
Plants and Decorations


I ordered 4 tropical plants on the Internet:
- Cryptanthus Bivittatus - The earth star
- Fittonia verschaffeltii - Pink and green
- Hoya Kerrii - Heart plant
- Begonia bowerae Tiger
For the moment they are small, there is more than to wait that it grow!
I added white gravel and pine bark for decoration. And of course, a dinosaur and Jurassic Park Jeep to stay in the theme!
The End


Done! Tell me what you think and ask me your questions, I will answer with pleasure!
Just for Fun ;)

The first dinosaur incubator with Arduino! ;)