Tensegrity Structure - "Gravity-Defying"
by CoryHall in Living > Decorating
1407 Views, 7 Favorites, 0 Comments
Tensegrity Structure - "Gravity-Defying"
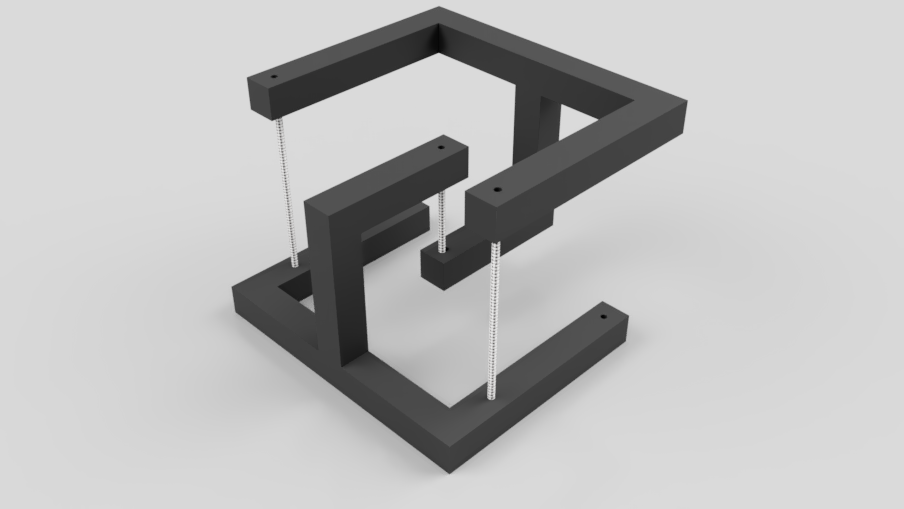
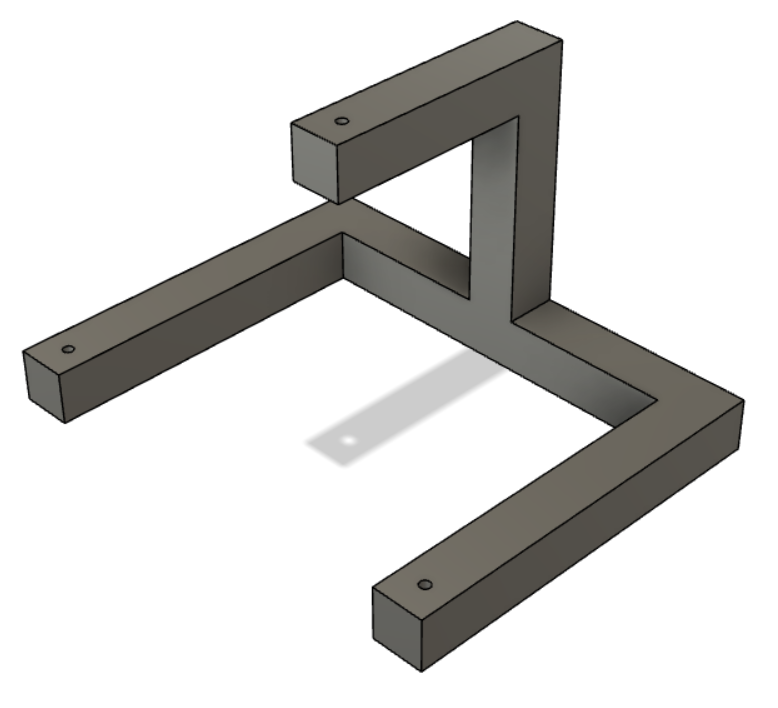
This is a tensegrity structure created with Autodesk Fusion 360.
A tensegrity structure is constantly under both tension and compression, which balance out and keeps the structure together.
When printed, the holes can be tied with wire/string to connect the two identical pieces, and then they can be lifted up to create the structure.
This Instructable has been entered into the First Time Author contest.
Supplies
Download Fusion 360 File (Optional)
Download the Fusion 360 file attached. Alternatively, use the next few steps to design your own.
To download, simply download the .f3d file attached to this step. Once you have done this, import it into Fusion 360.
Downloads
Create the Base
SKIP THIS STEP IF YOU DOWNLOAD THE FILE
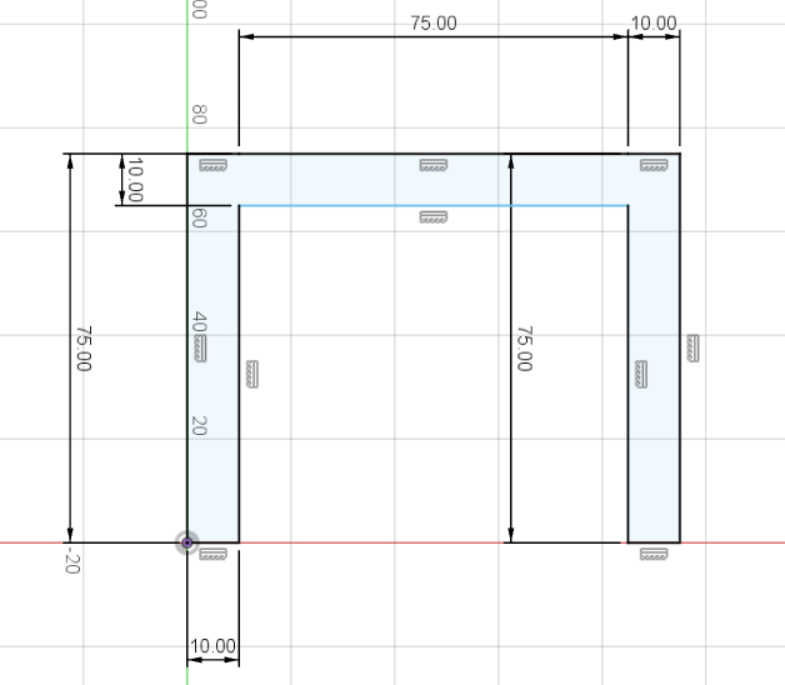
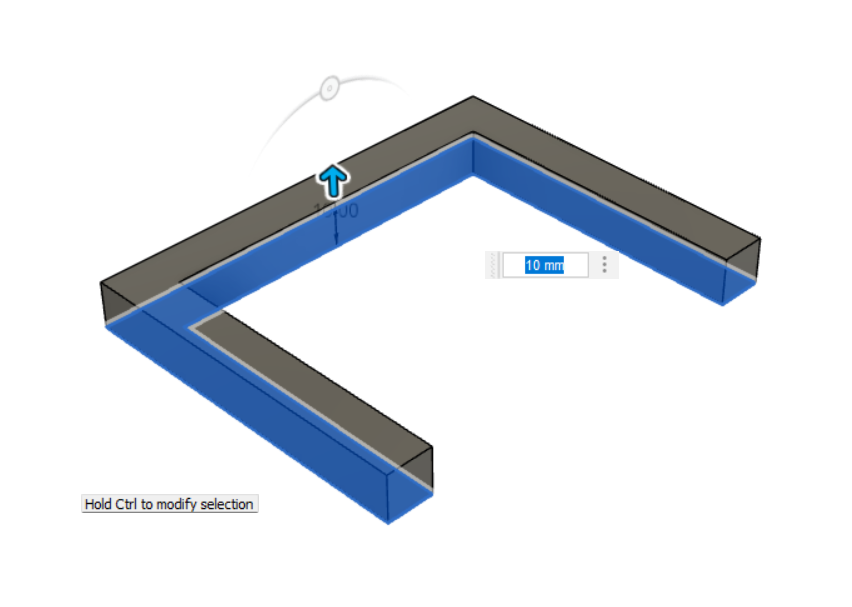
Create a new sketch, and copy the shape in the first image. When completed, extrude the shape by 10mm (0.4 inches)
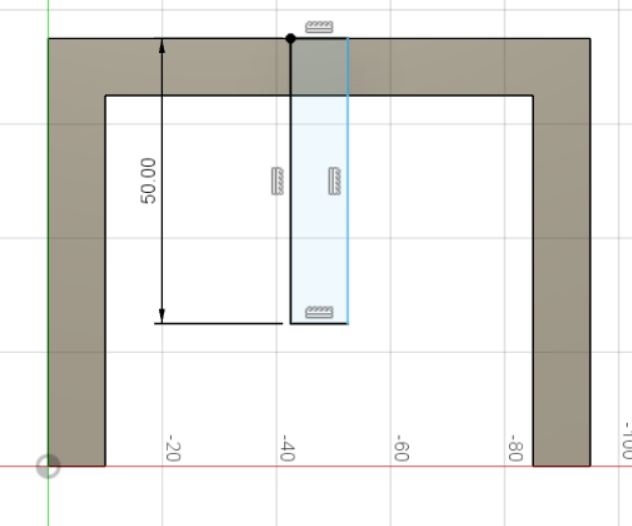
Create the Hook Base
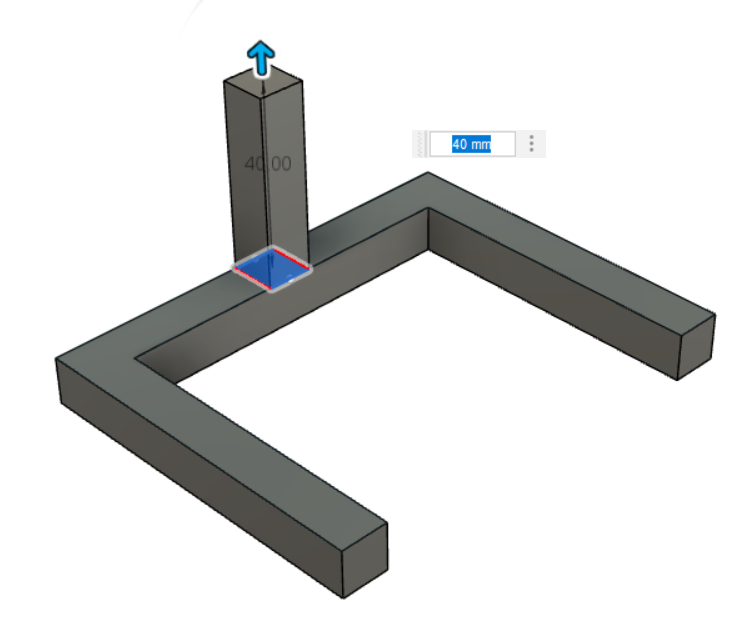
SKIP THIS STEP IF YOU DOWNLOAD THE FILE
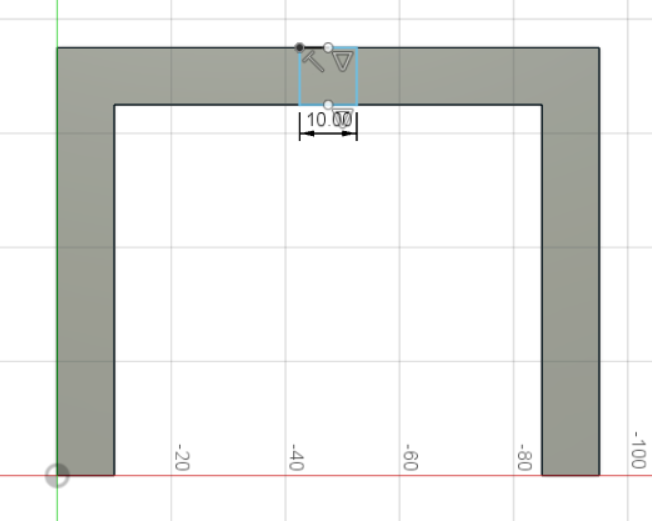
Create a new sketch on top of the base. Create a 10x10mm square in the centre of the back beam, and extrude it by 40mm (1.6 inches)
Finish the Hook
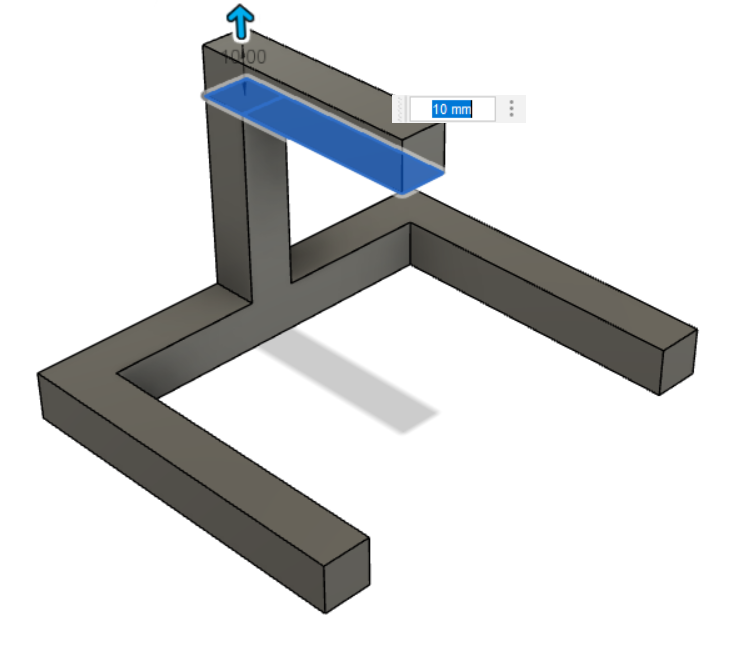
SKIP THIS STEP IF YOU DOWNLOAD THE FILE
Create a new sketch on top of the hook base, and draw a 10x40 rectangle. Extrude this by 10mm (0.4 inches)
Create the Holes
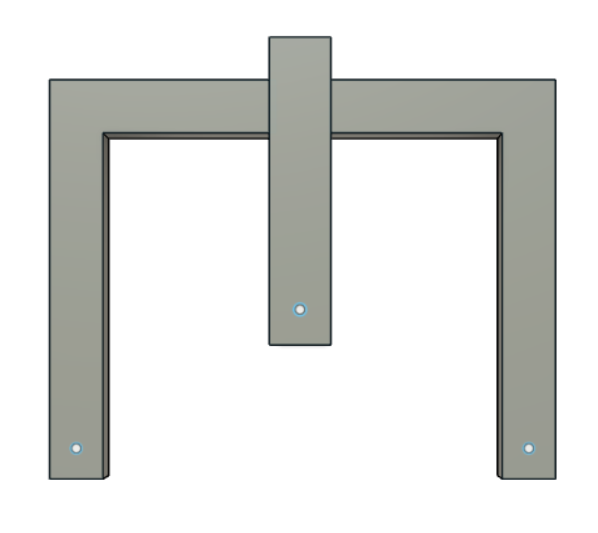
SKIP THIS STEP IF YOU DOWNLOAD THE FILE
Create a 2mm circle on all 3 beams, and then cut them from the body. These holes will be used to tie the string/wire to the structure after printing.
Export As a .stl File
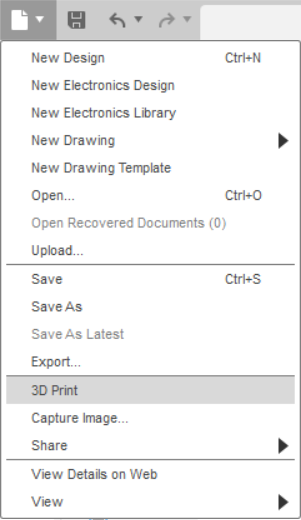
Go to file -> 3D print, and then click the body and press OK. Save the .stl file to a location of your choice.
Load the .stl File to a 3D Printing Program
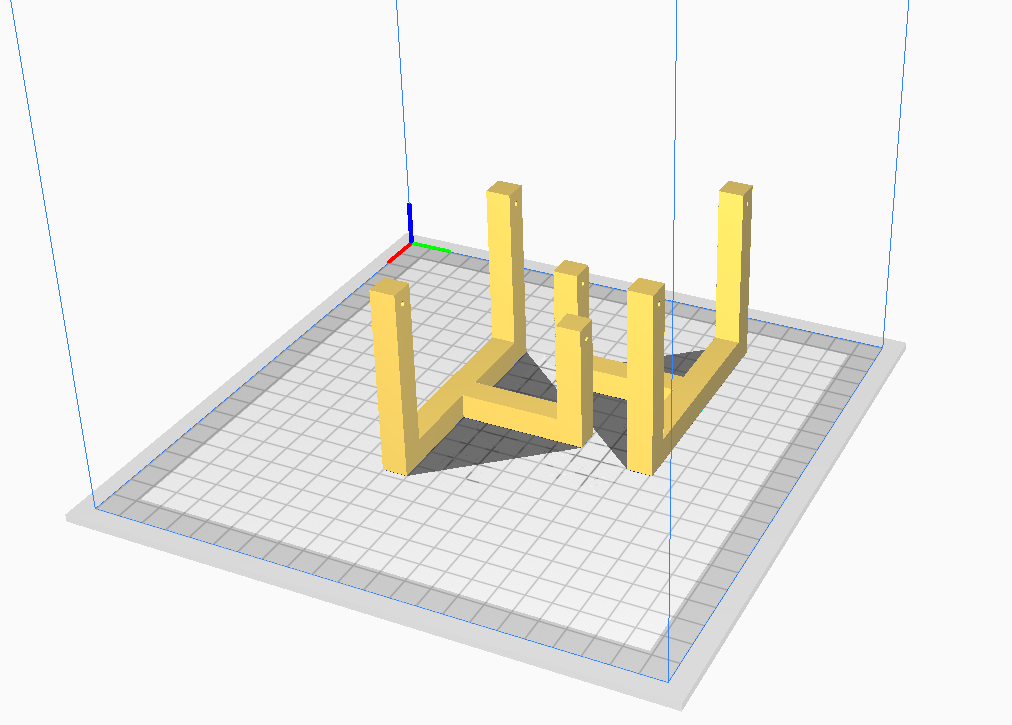
Open the 3D printing software you are going to use, and import 2 instances of the .stl file you created. Apply the settings of your choice, and export the file to your 3D printer.
Print the Structure
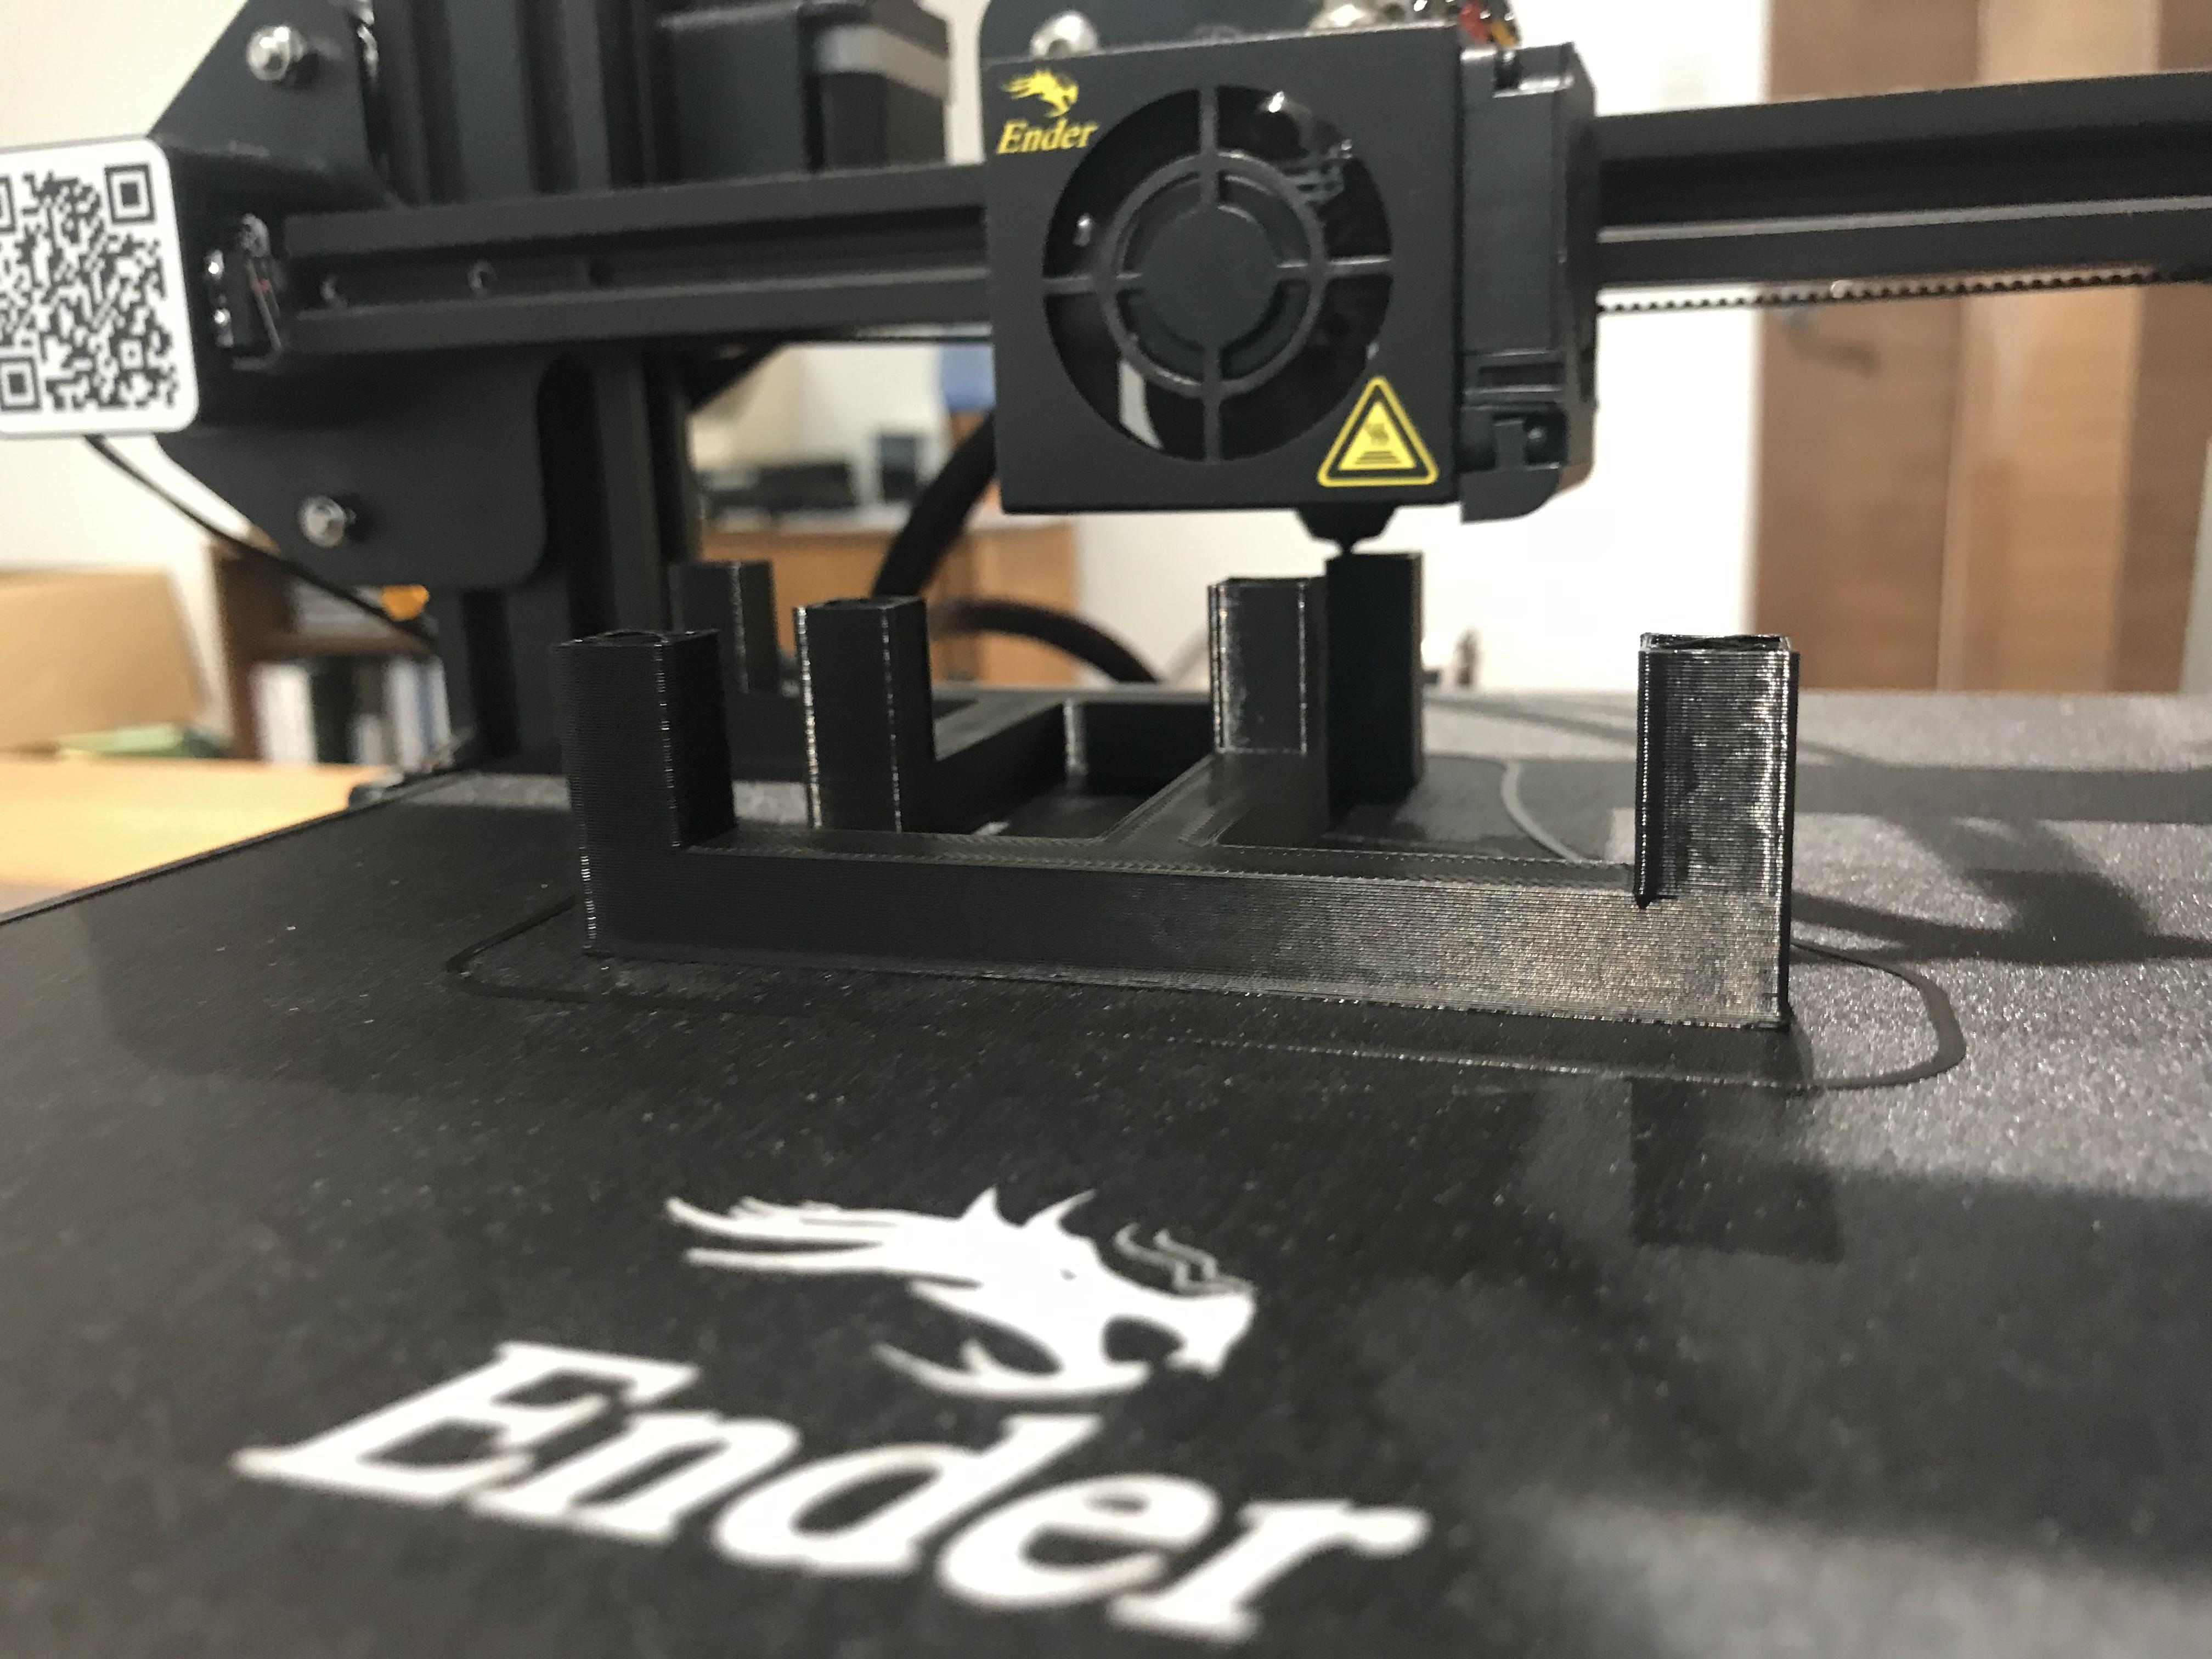
Send the model to your 3D printer and begin the print. This will take a while, so sit back, relax, and enjoy a film on Netflix.
For the purpose of getting the print completed quicker, I have used the lowest print settings I can. With these settings, it is taking approximately 2 hours and 50 minutes.
Connect the Parts
Use your string/wire of choice to connect all the parts to each other. I would recommend using fishing line, as it is both thin and transparent, making it hard to see. This will give the illusion of the top part floating.
Done!
Congratulations! You have just created a tensegrity structure. When it is in action, the structure should be able to hold a bit of weight before collapsing. Enjoy your creation, and use it to blow some minds!