@TechShop MP: How to Design Helical Cut Gears in Autodesk Inventor
by TSTricky in Workshop > 3D Printing
8891 Views, 11 Favorites, 0 Comments
@TechShop MP: How to Design Helical Cut Gears in Autodesk Inventor
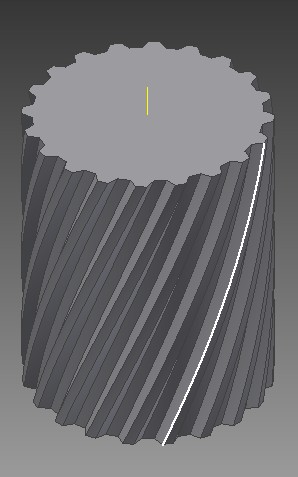
People often need to design helical gears and Autodesk Inventor makes it easy to do. What I like most about this is you don't need to make gears, you can twist all kinds of shapes.
Create a New Sketch in Inventor
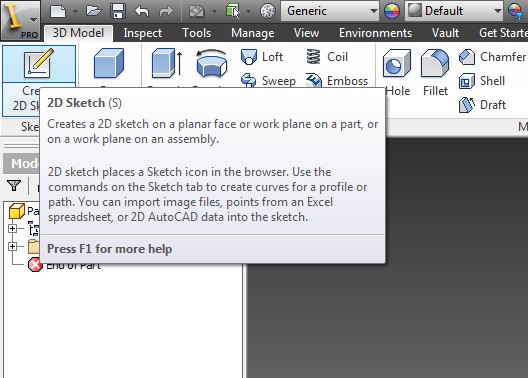
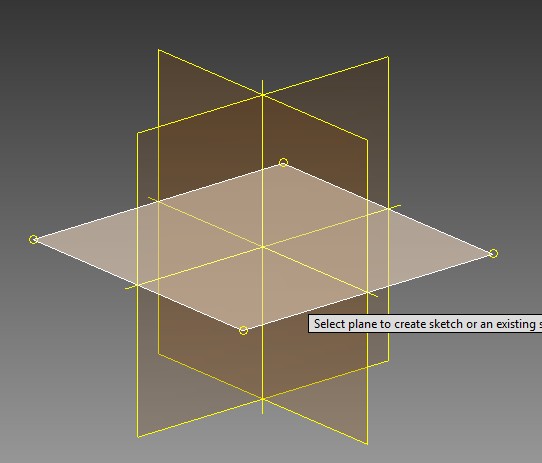
Select Create New 2D Sketch and select a plane to sketch on
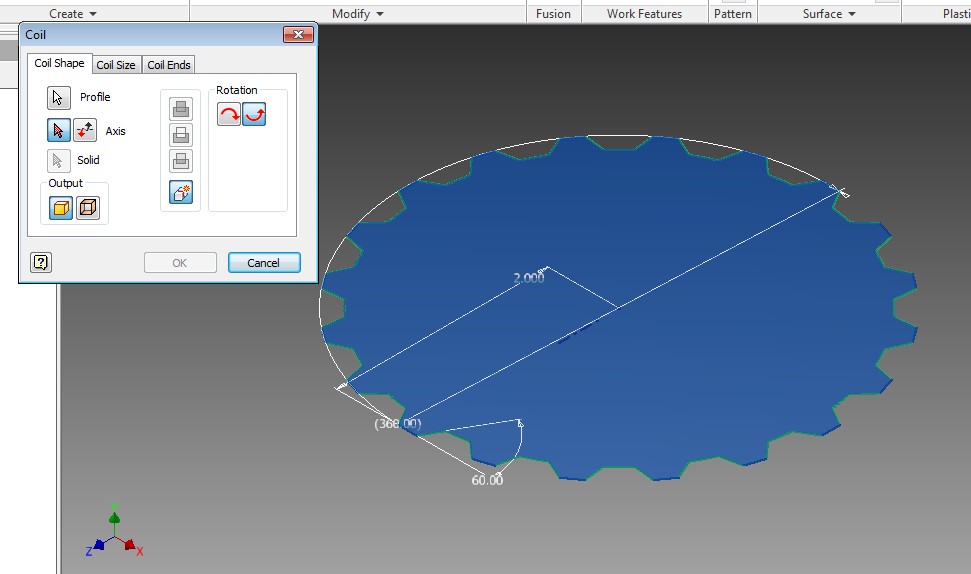
Draw the Shape That You Want

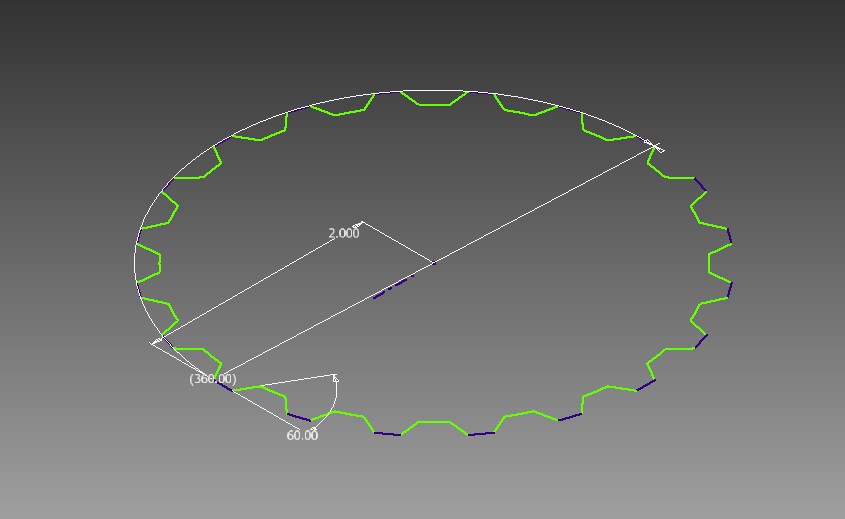
For this example I made a gear. In designing my gear I used a Centerline in the middle and then made the object symmetrical across the Centerline.
Next I used the Circular Pattern to make the teeth of my gear.
Last I drew a circle to connect all the teeth and used Trim to remove the part of the circle inside each tooth.
Next I used the Circular Pattern to make the teeth of my gear.
Last I drew a circle to connect all the teeth and used Trim to remove the part of the circle inside each tooth.
Turn on or Draw an Axis Point
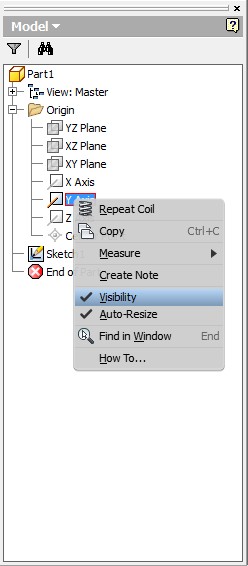
Since I used the origin as the center of my gear I want to use it as the axis for my gear. If your gear was drawn off center from the origin you can draw an axis line on a perpendicular plane as well. I simply made my axis visible.
Use Coil to Make the Gear
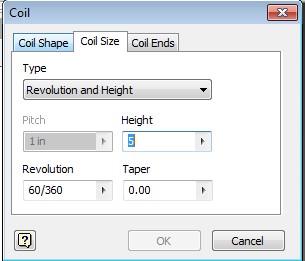

use the coil feature to define and extrude your helical gear. I used Height and Revolution to make my gear 5" tall with a 60 degree twist.
Click OK and voila! Helical cut gears!
Click OK and voila! Helical cut gears!
Extras
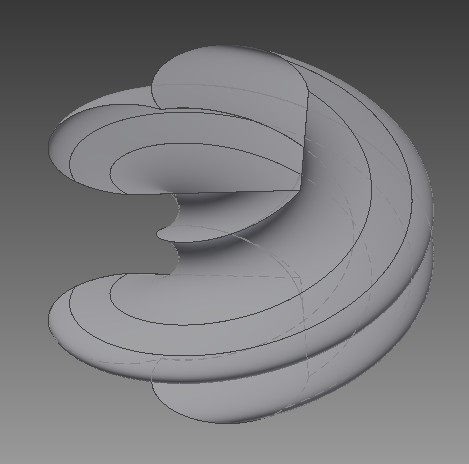

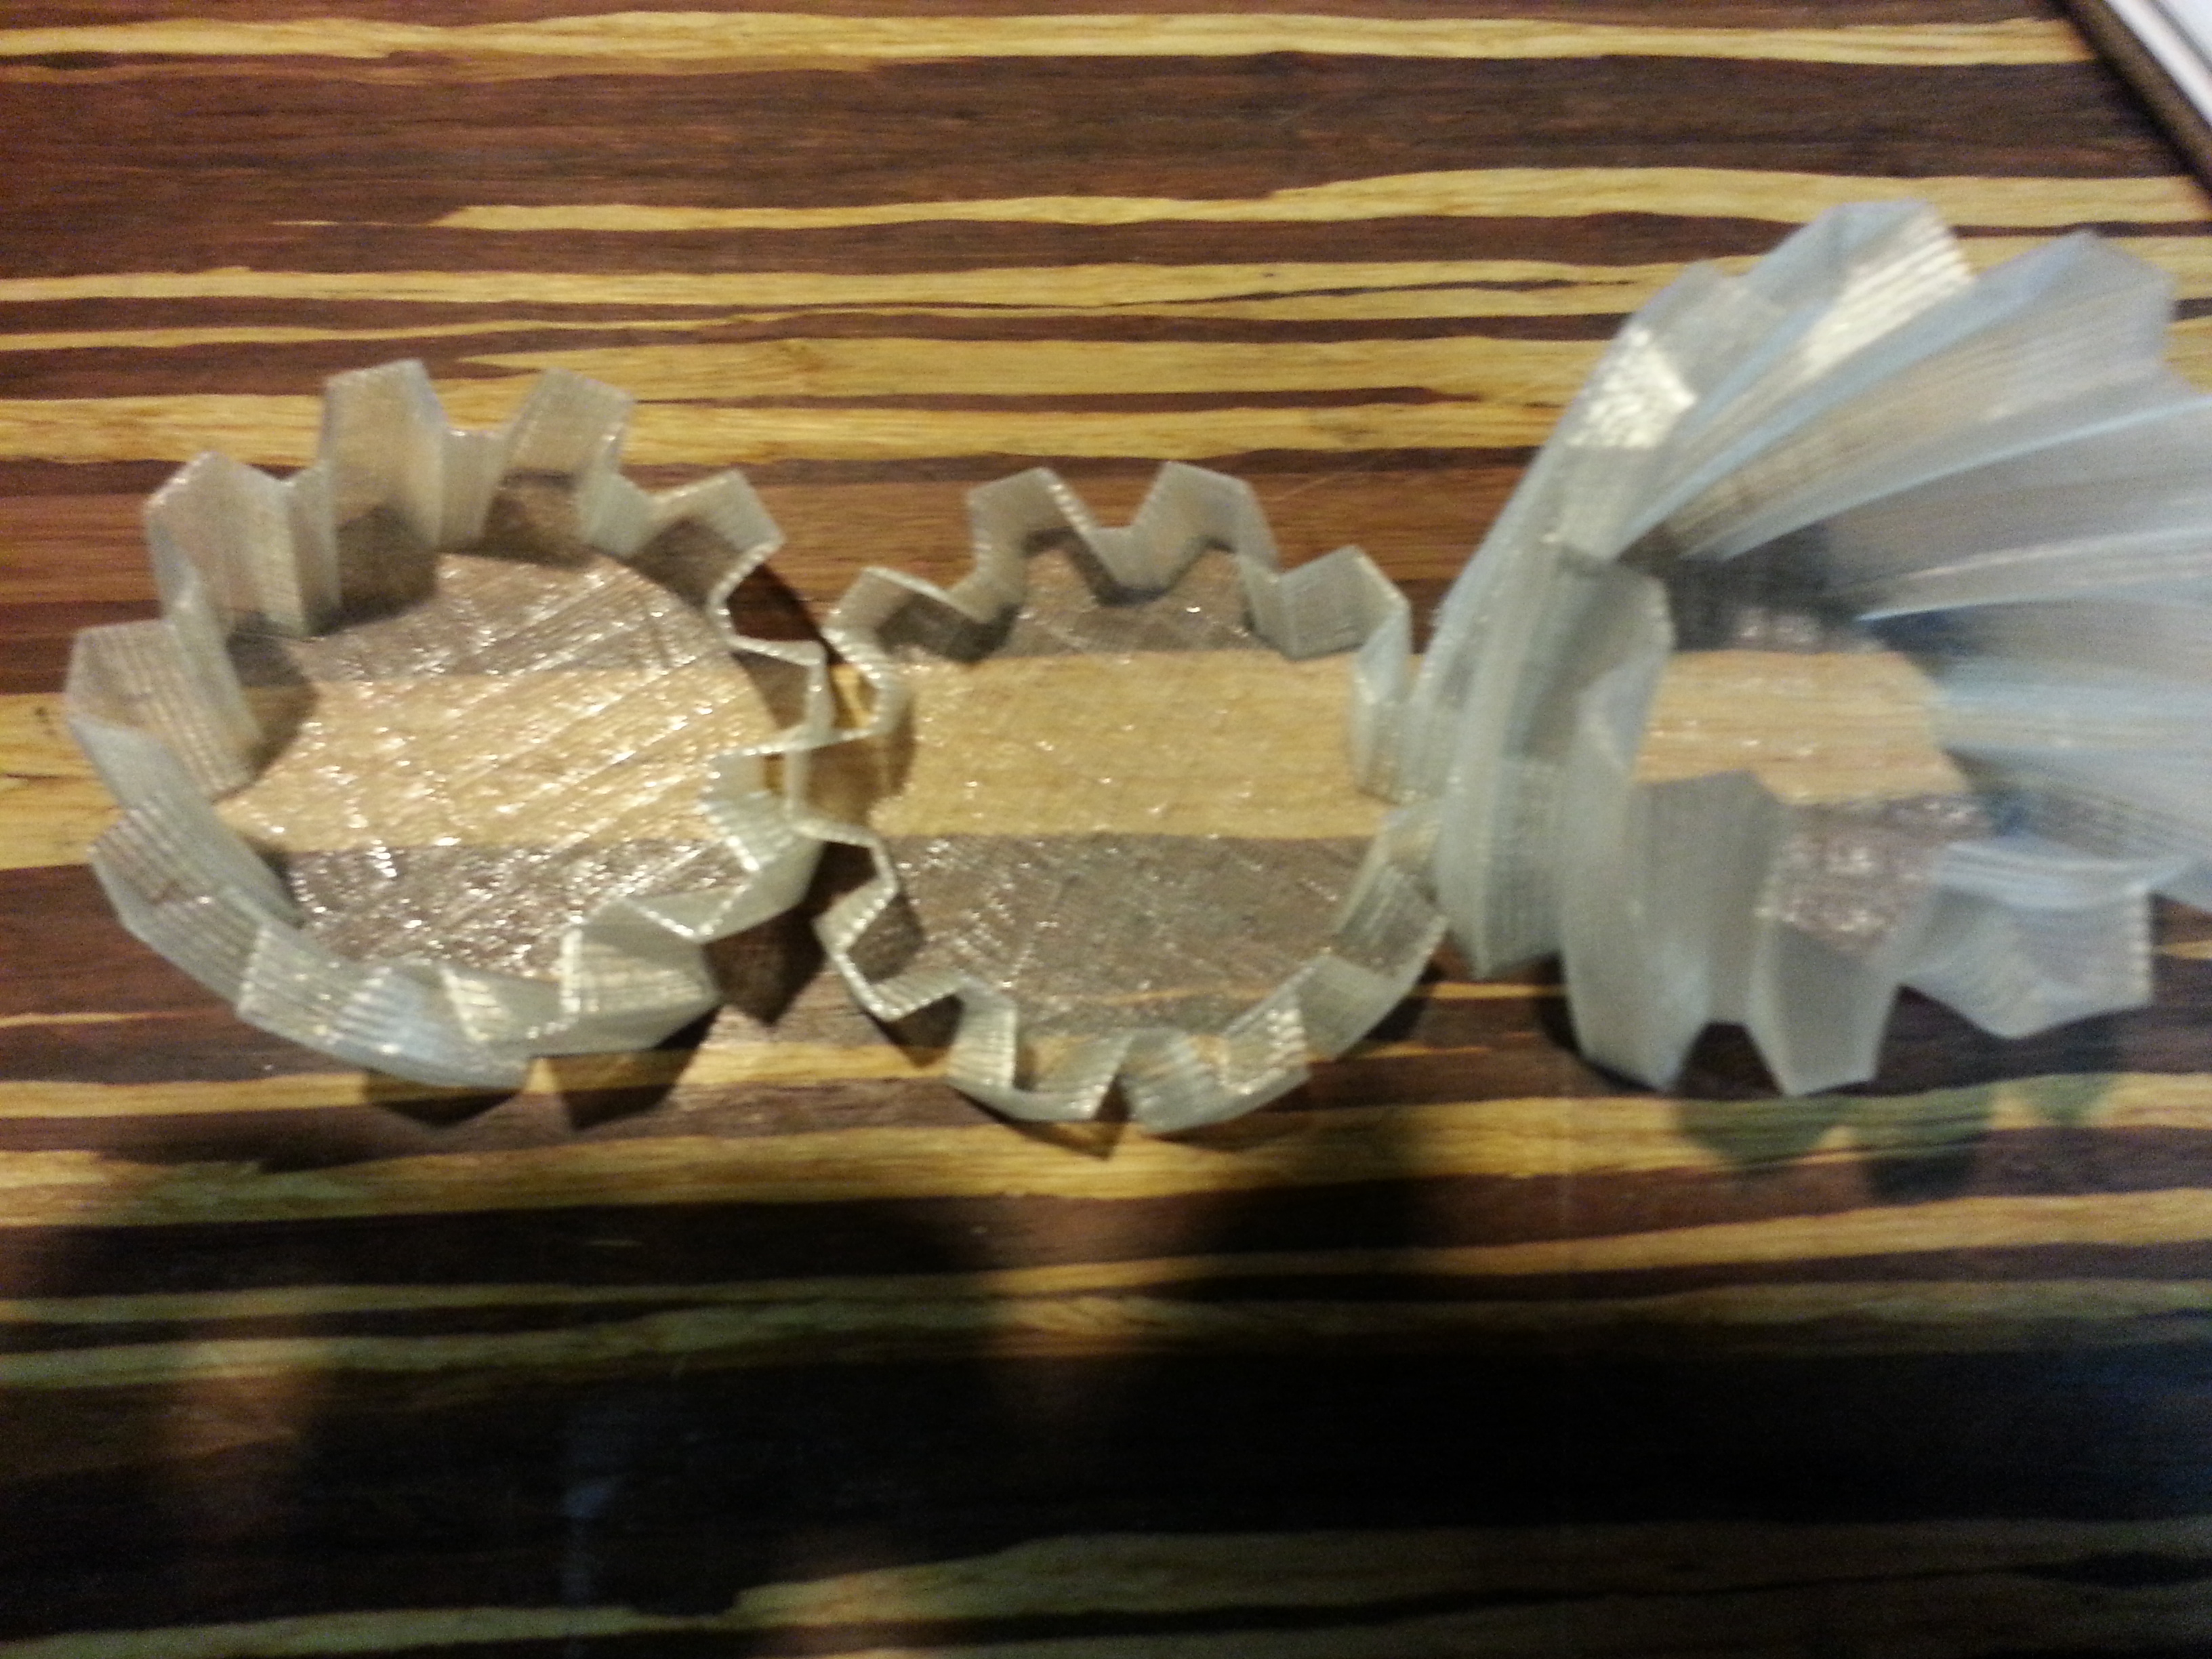
I did a crazy heart just to show other shapes using the same function. Also some samples that I printed on the Makerbot Replicator 2 at TechShop Menlo Park